Leaderboard


Popular Content
Showing content with the highest reputation on 08/25/2023 in all areas
-
I have no idea what, if anything, is growing in your water system but I seriously doubt it's slime mold. Slime mold is commonly found in the forest on hardwood mulch, especially in shaded locations. However, it can also appear on grass or other plants in a yard. In addition to the more common yellow and orange colors, slime mold may also be gray or black. While slime mold is pretty harmless, it still is unsightly and likely not something you want to keep around. Despite its unpleasant appearance, and equally unpleasant name, slime mold isn’t anything to be too concerned about. There are more than 700 different varieties of slime mold that are most commonly found in warm and moist climates. Slime mold, such as the aptly named dog vomit slime mold (Fuligo septica), doesn’t harm plants or the environment. It’s also not actually mold; nor is it a fungus. Rather, slime mold is a primitive type of organism that survives by feeding on decaying or dead organic matter. My guess is you're probably seeing some strain of algae. Algae can grow in stagnant water inside your RV tanks. RV drinking water tastes bad as a result. Expect to clean and sanitize RV water tanks regularly if you don’t empty them after each trip. 1 - Add 3/4 cup of bleach for every 15 gallons of water. Dilute the bleach with water, first. 2 - Allow bleach water to soak for at least two hours. Then flush water lines to the shower and sinks. 3 - Fill with clean water. Flush again to remove the bleach. Repeat until bleach smell is gone. 4 - Routinely clean and sanitize RV water tanks to prevent algae regrowth. Some people believe that vinegar is great for cleaning bacteria from water tanks. But vinegar is not for cleaning and sanitizing RV water tanks. And it won’t remove algae in RV water tanks either. As for apple cider vinegar, it’s recently gained a lot of publicity for losing weight, reducing diabetes, and lowering cholesterol. But it will not kill bacteria or algae in RV water tanks either.6 points
-
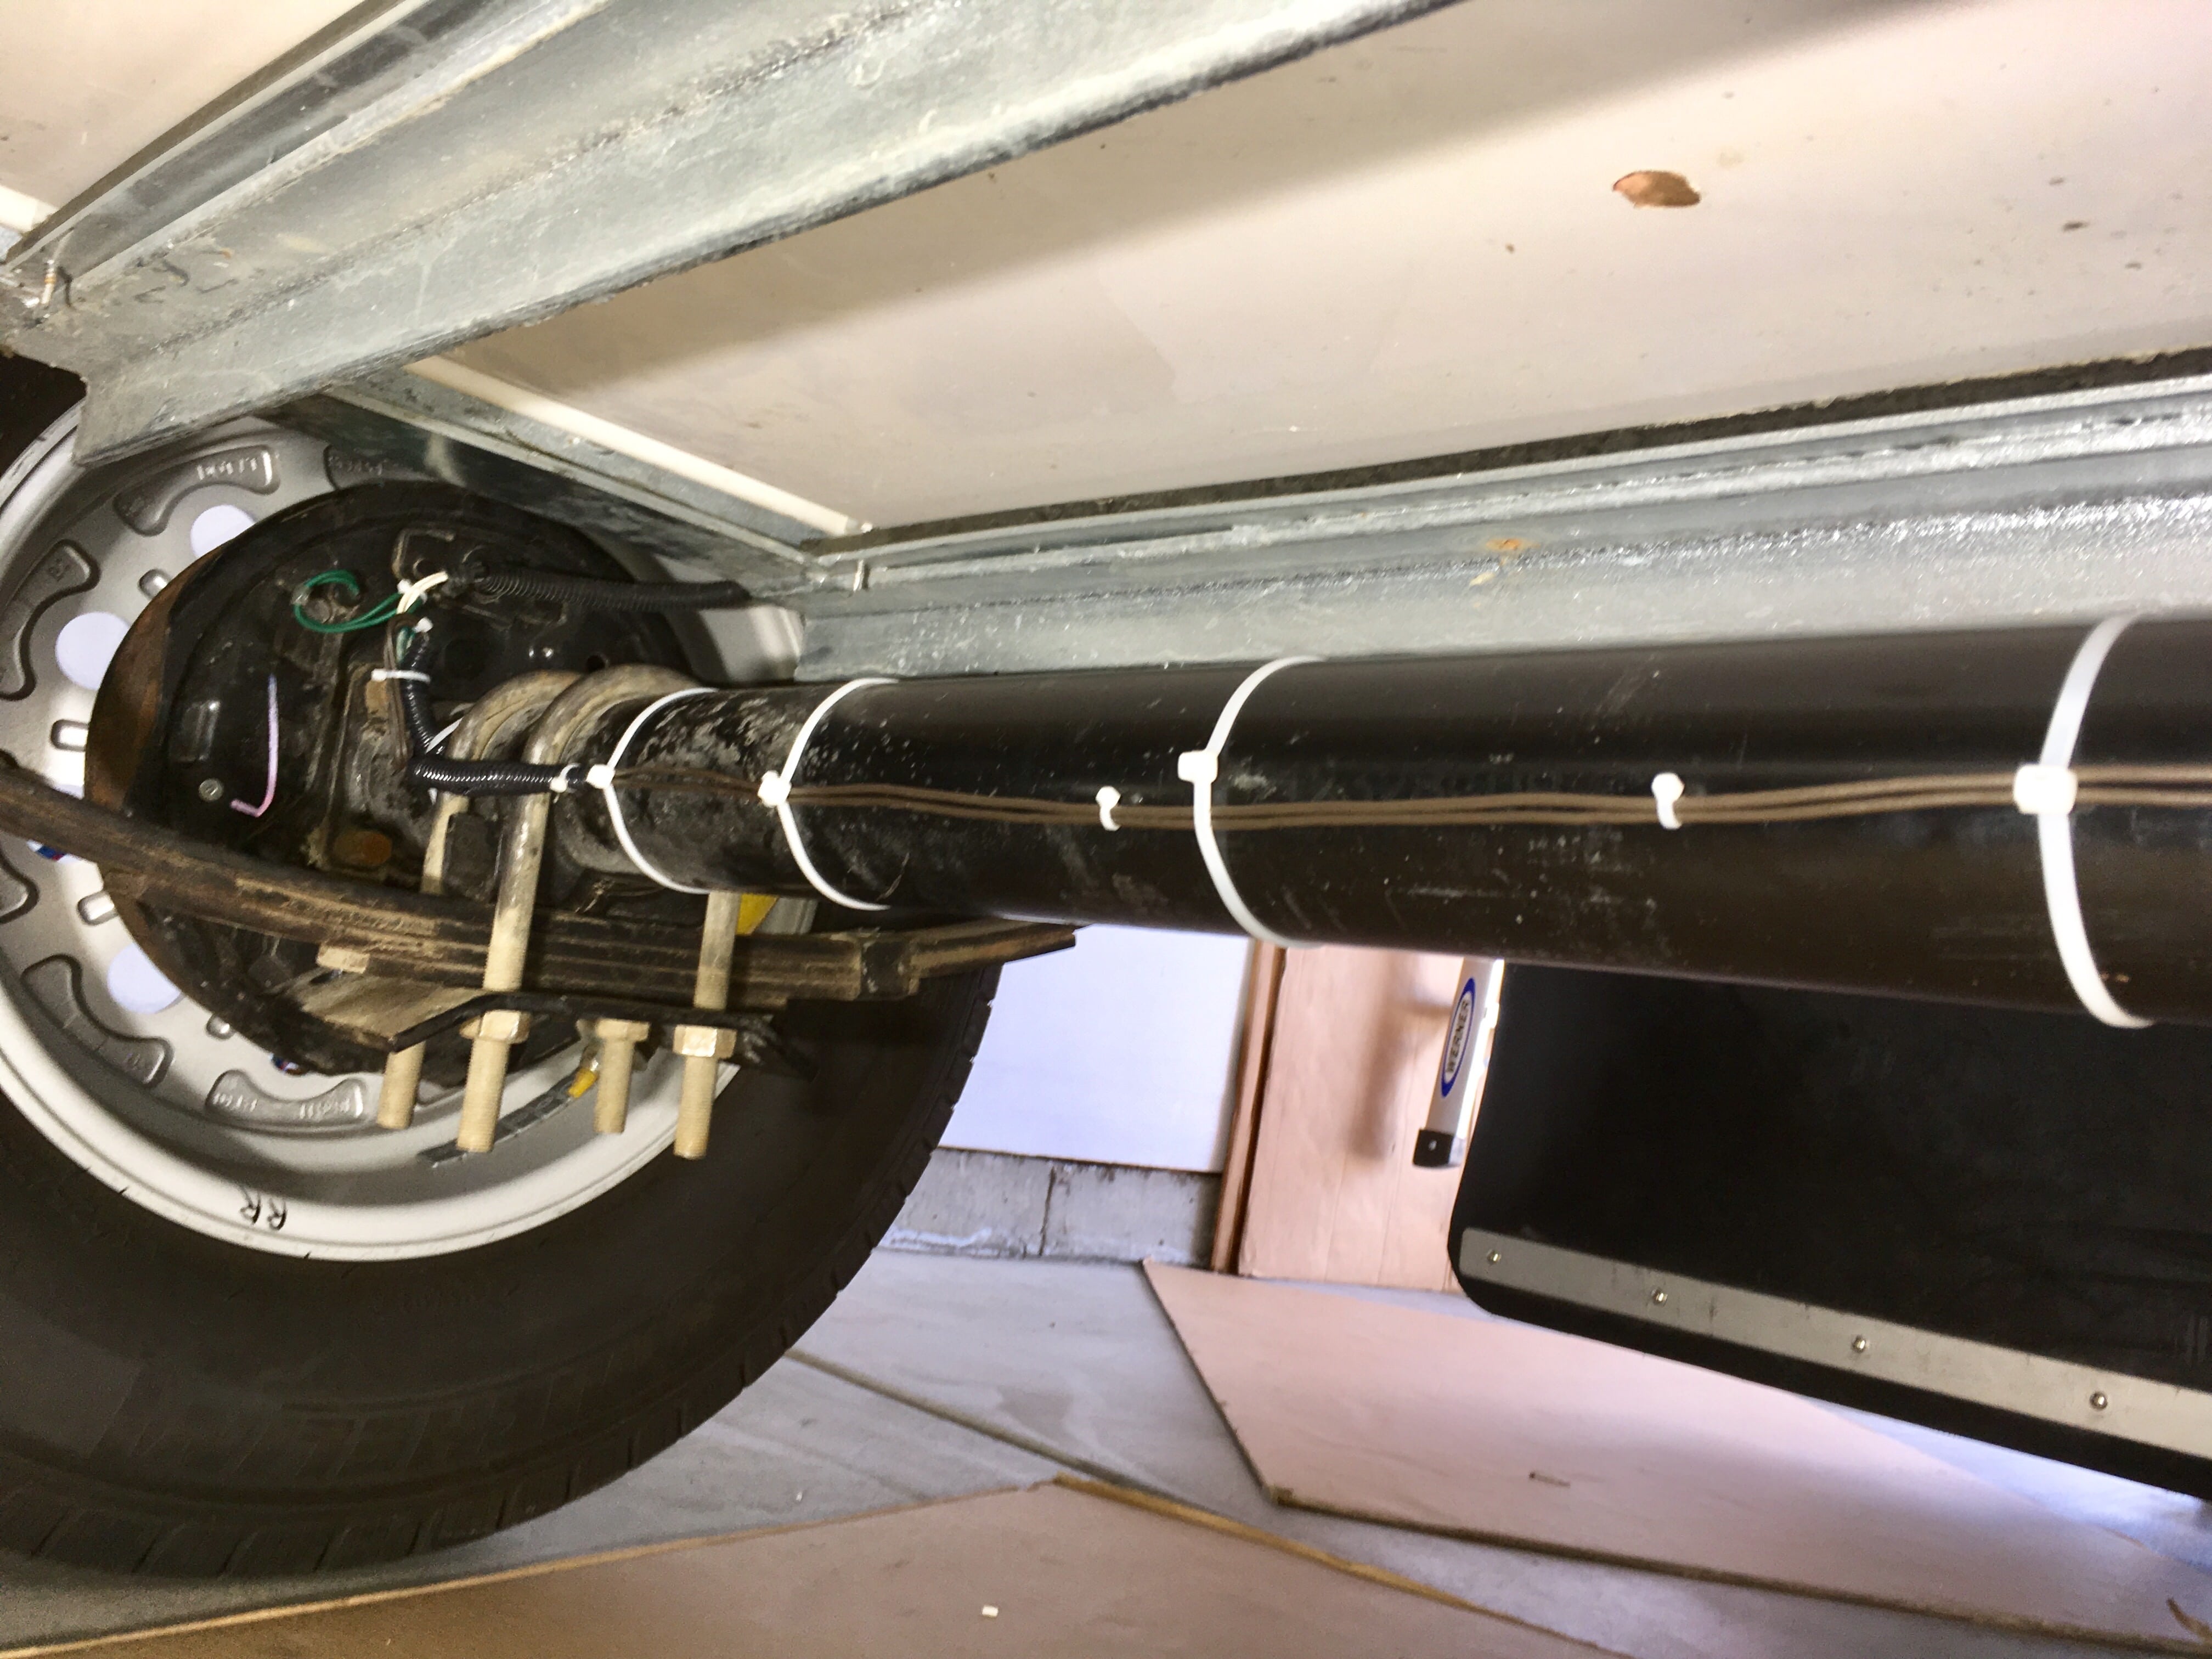
We got our LE2 with the bike rack mount and realized we will probably always carry our folding Ebikes in the back of the truck under cover. With that understanding we decided to add a cargo tray and locking box for general items needed for setup, and camp site necessities. Obviously weight is a critical factor so with the tray, box and gear inside we are shooting for less than 200# total. I'm sure we have succeeded after adding up the weigh of all items. The most difficult part is making the extended rails for the tray to mount on. I used the same T6061 aluminum that Oliver uses on their frame members. It's available in small sizes at local metal supply houses such as Metal Supermarket. The aluminum tubing drills and cuts easily with carbide woodworking tools. Use a little lite oil on the blade to keep the aluminum from fowling the blade. You must use good eye protection when cutting. I copied the way the bike rack rails were machined. Here's the results of the project: We have pulled the camper a couple times for local camp outs and the weight of the addition is completely unnoticeable while towing. The box is well made but light weight with locking double latch system. It has a double layer of aluminum in the lid and is foam filled to keep the contents from heating up too much in direct sun. The whole thing is very sturdy and at 220 pounds I can stand on the box lid to see the top of the camper with no effect to the box lid. Good traction and very solid. The softener tank is mounted with a tank wall mount and strap and is set up with quick connects and the standard hoses hook up in just a minute. The softener comes with a regeneration kit and it takes about an hour to perform a regeneration using a box of table salt. It will last up to 2000 gallons of water depending on the mineral content. No need to remove the tank for regeneration, just connect the kit to the external QD fittings and run the process. When done, you are good to go for a few more camping trips. No more hard water scale or rust on pluming fixtures. Remove the tank for winter storage inside the garage. I'm very pleased with the overall project. The box can be removed just as the bike mount is removed for spare tire access. You can actually access the spare without completely removing the tray assembly, Just slide it out about 6-8 inches and the cover and tire are removeable. I bought a self lit license frame and mounted to the back of the tray. I added a plug connection to the license light wire to power the new license plate light. I wanted a removable connection for obvious reasons. The connection is mounted on the lower part of the spare tire cover under the original license bracket. The old license plate bracket is still useable if the tray and box are removed. Tray: https://www.amazon.com/gp/product/B0017H9N4E/ref=ppx_yo_dt_b_asin_title_o02_s00?ie=UTF8&psc=1 Box: https://www.amazon.com/gp/product/B000MK4F68/ref=ppx_yo_dt_b_asin_title_o02_s01?ie=UTF8&psc=1 License Bracket: https://www.amazon.com/Car-License-Plate-Light-Chrome/dp/B00S1Y5TSK?pd_rd_w=jpDah&content-id=amzn1.sym.e8faeee7-63c9-4cb3-96e0-e50a41f3b35b&pf_rd_p=e8faeee7-63c9-4cb3-96e0-e50a41f3b35b&pf_rd_r=018MZ7KVYFFMGM0WSKBV&pd_rd_wg=mdsBW&pd_rd_r=eff79229-c9bb-45a5-8656-400649d9a361&pd_rd_i=B00S1Y5TSK&psc=1&ref_=pd_bap_d_grid_rp_0_1_ec_t Softener: https://www.amazon.com/gp/product/B09Y2KNFFL/ref=ppx_yo_dt_b_asin_title_o06_s00?ie=UTF8&th=1 Tank Bracket: https://www.amazon.com/gp/product/B00208DY76/ref=ppx_yo_dt_b_asin_title_o04_s00?ie=UTF8&psc=1
 4 points
 -
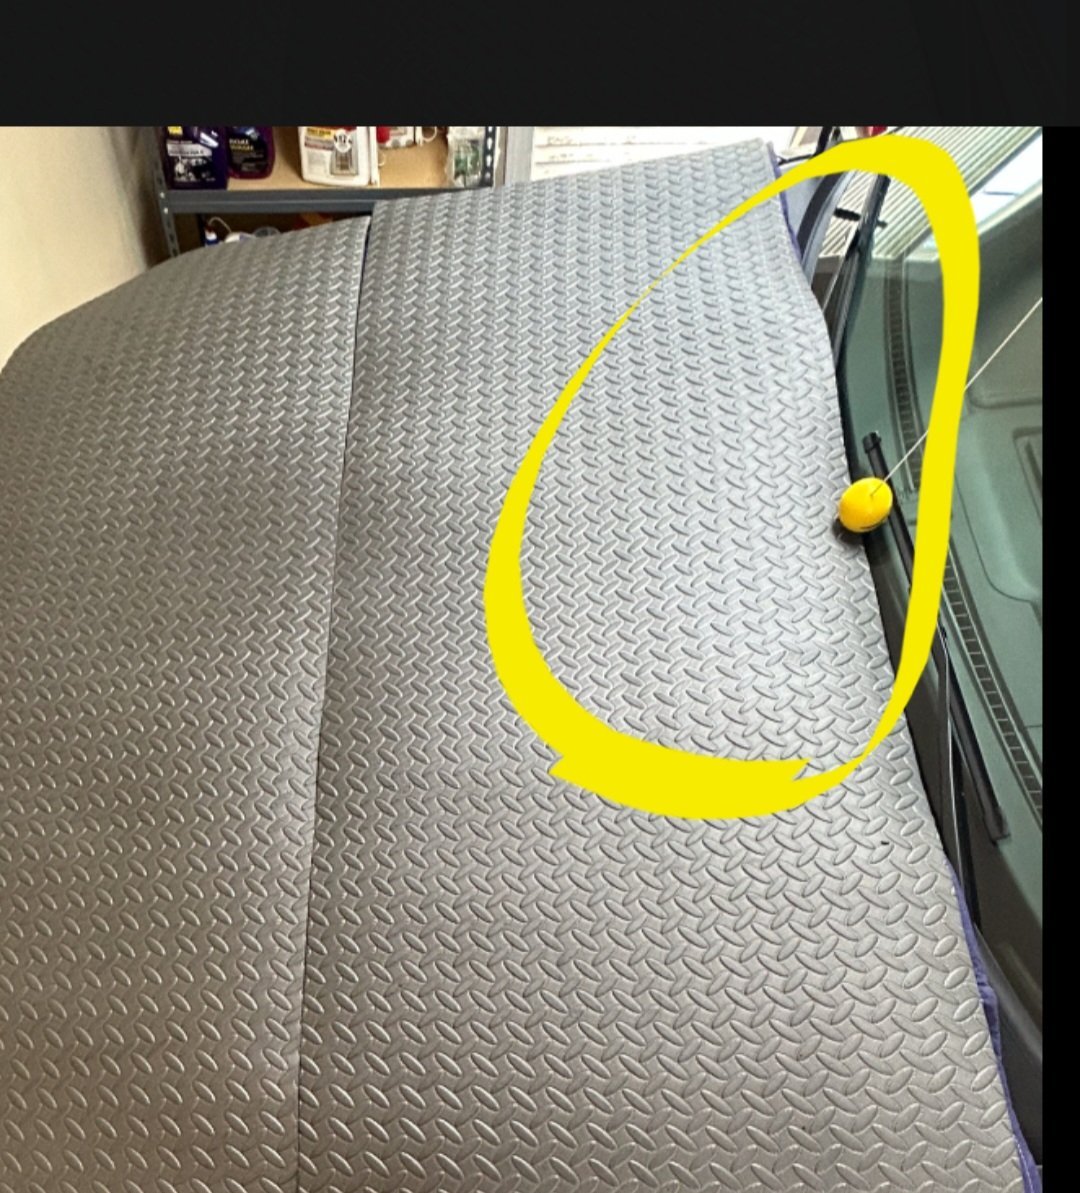
After a recent 18-day trip, we were under numerous thunderstorm and hail warnings while camped. I decided to try and come up with a reasonable, low cost way to at least try and mitigate hail damage to our TV while parked during a bad hail storm. After giving it some thought, I went over to our local HF and purchased a few HF 72x80” large moving blankets and a few rolls of the HF fatigue mats. The fatigue mats will completely cover the hood and roof/moonroof of our TV. These mats can be secured with gaffers tape if we need it. The mats are super lightweight and can easily be trimmed to pattern your WS, hood or roof top. They roll up and store easily. Naturally, I hope we never have to use these mats or blankets. It certainly beats nothing at all. Generally speaking, we feel like the Oliver will fair well in a hail storm with exception of the solar panels. We do carry extra moving blankets for the solar panels should we need them. This is not perfect solution, but it’s quick, lightweight and workable. It beats having to leave our TV at a dent removal shop for several weeks. I would be interested in anyones else’s contingency plan to mitigate hail damage to their TV. These HF materials came to $80. This is still a work in progress. Here is a $500 option 😳 - https://hailprotector.com/products/suv3-hail-protector-portable-suv-truck-and-van-protection-system-between-234-and-270-in-length Patriot🇺🇸 A few photos- I will pattern an entire foam cover for the WS. The rear fiberglass topper will hopefully withstand small hail.
4 points
-
In case anyone is interested and has a Harbor Freight nearby - Both the mats and the moving blankets are on sale through this Sunday. Bill4 points
-
Wonderful photos! Thank you for posting. This is a magnificent area. I have been in the Wind Rivers on horseback, but not yet in the Ollie. I know what you mean about that road. It takes patience. Also, be prepared for snow at virtually any time of year. We had a snowstorm on July 4 one time when we were in that area. As a friend from Wyoming put it about that neck of the woods, if summer falls on a weekend, let's have a picnic.4 points
-
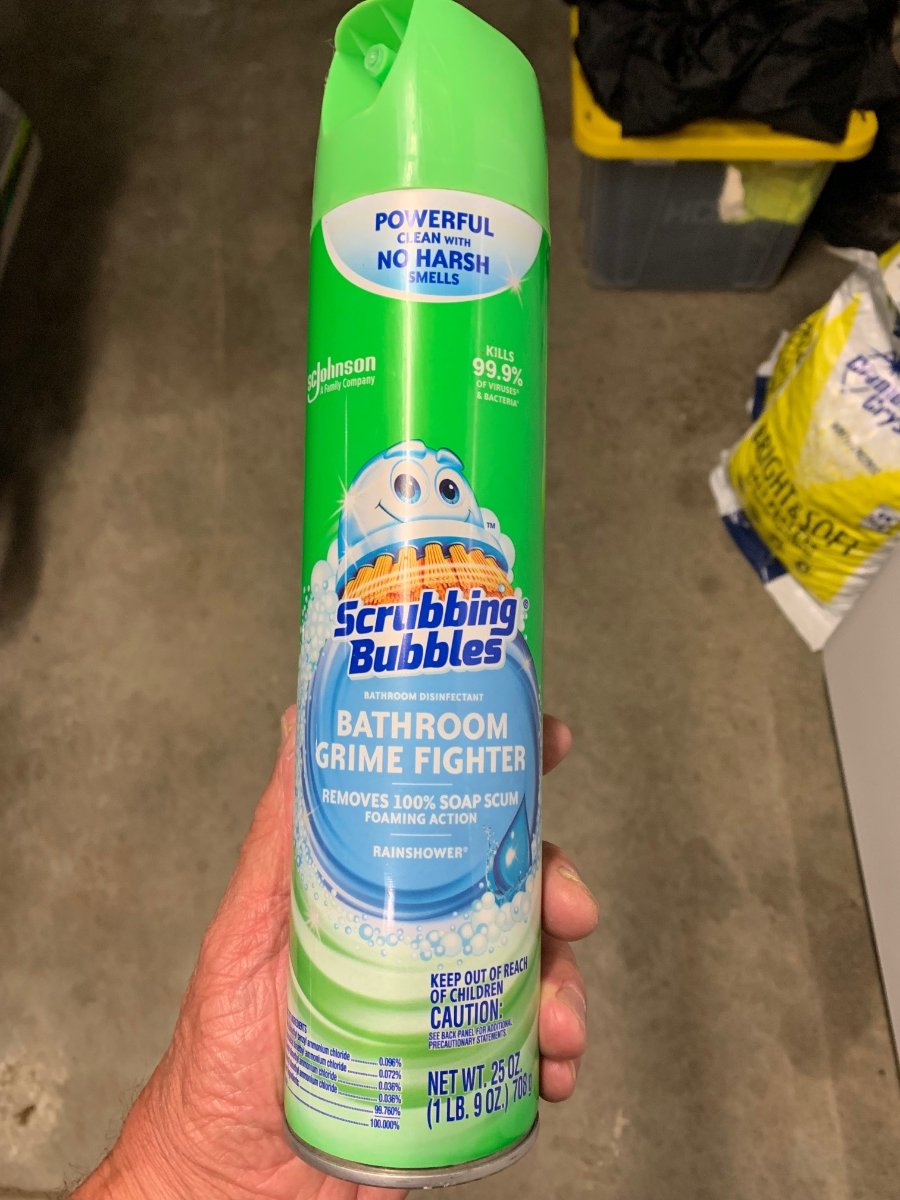
Old thread pulled forward with another suggestion. “Scrubbing Bubbles” by SC Johnson is made for cleaning grimy fiberglass tubs and showers. It was formerly known as Dow Bathroom Cleaner before the consumer brands division was spun off. Our Oliver has been outside continuously for around 16 weeks and had built up a considerable amount of black grunge on the roof and streaks down the sides. Needless to say just washing with soap and water does nothing to remove the black stains. Digging through my tote full of cleaners the Scrubbing bubbles caught my eye and my little light bulb instantly lit up. “Bathroom cleaner, fiberglass shower stalls for the past 30 years, fiberglass campers, Oliver makes both!” It had to be worth a try. Needless to say it worked fabulously and fast. Even cleaned the weather tripping around the inside of the window frames and the impossible to clean caulking all over the camper like new. Now our Ollie-Haus looks better than the day we picked her up. This doesn’t reduce the need for regular waxing, but it makes the cleaning part of maintenance much less labor intensive. one can did the whole camper.
3 points
-
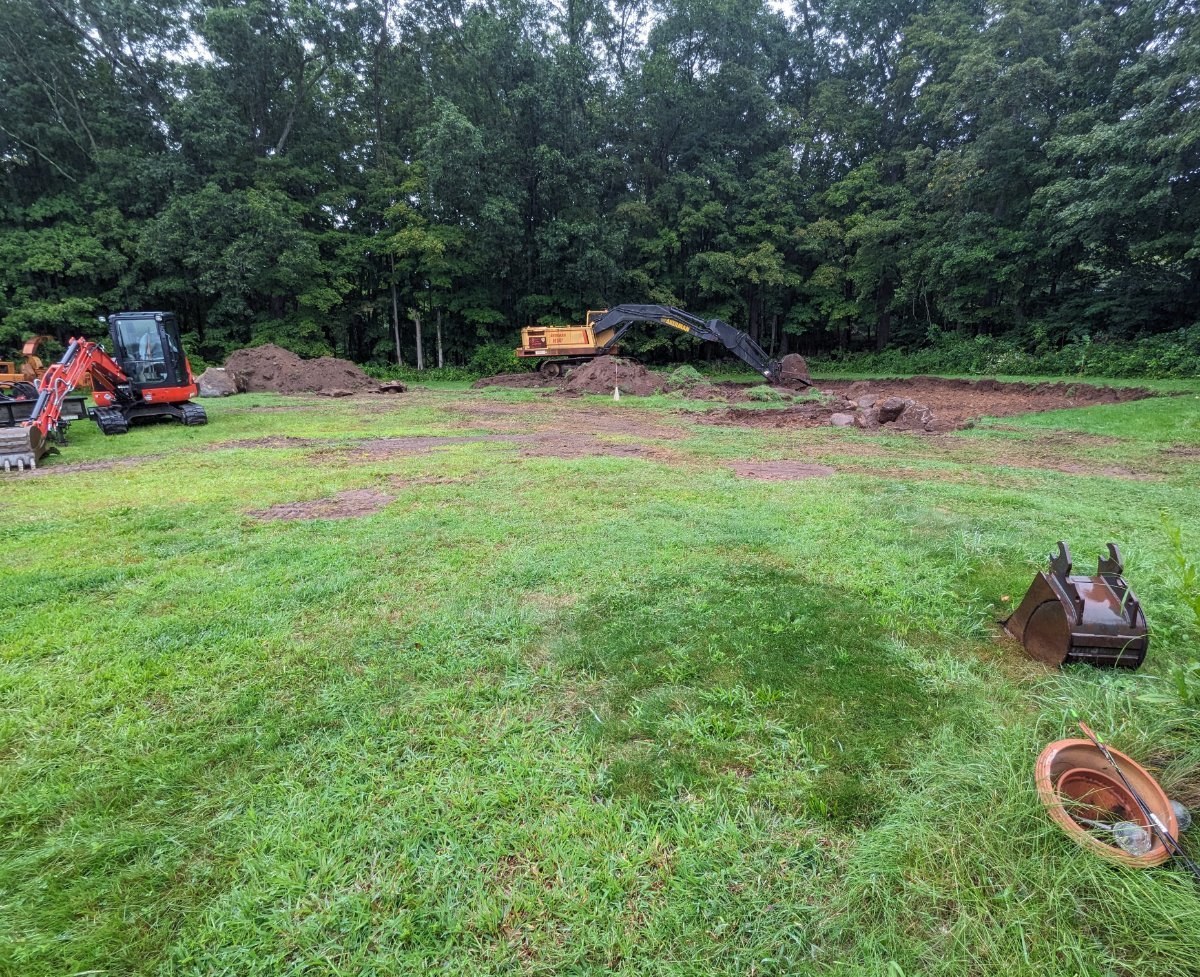
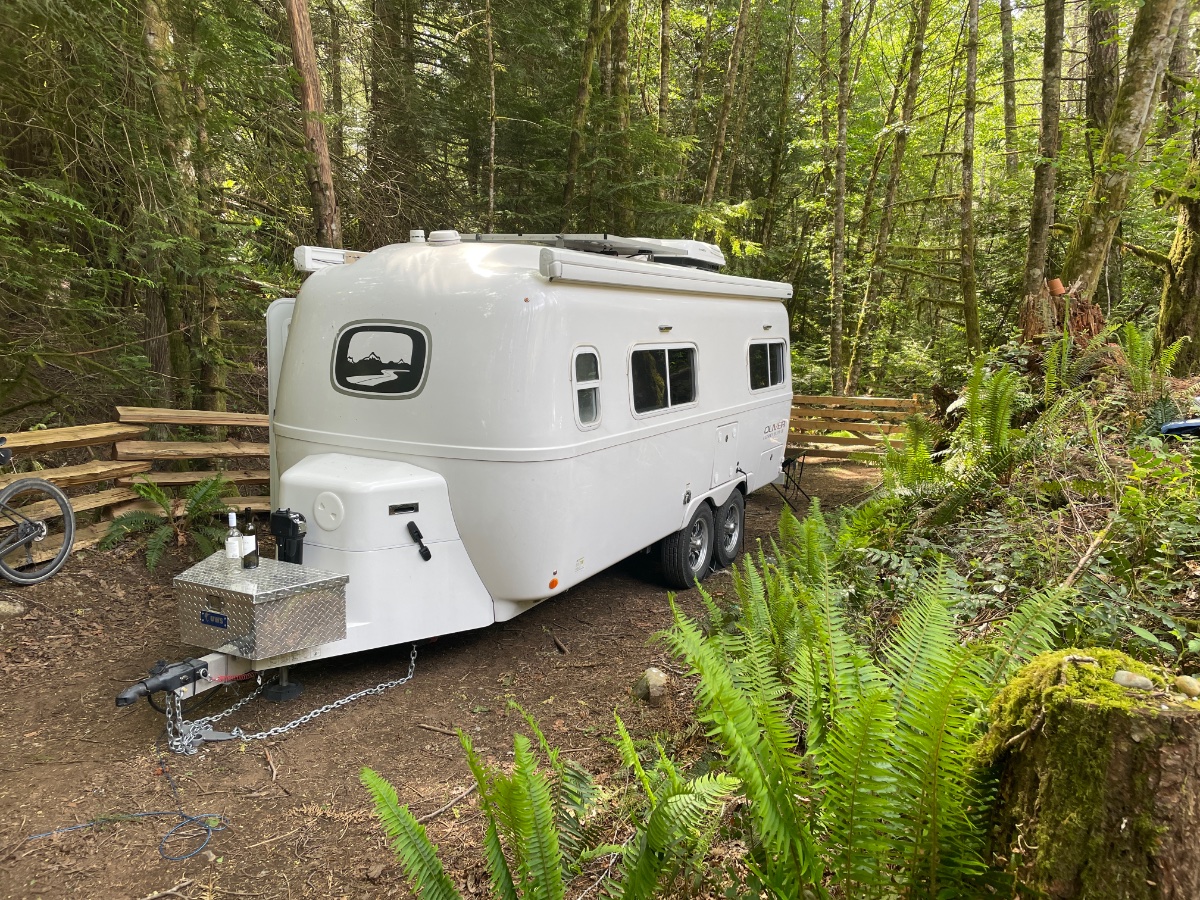
Well, construction has finally started on our 30x30' garage. Unfortunately those excavators are blocking access to our yard so "Eggcelsior" is homeless for the moment and living in a campground nearby. Cement work is supposed to be next week. After that Eggcelsior can come home again.
3 points
-
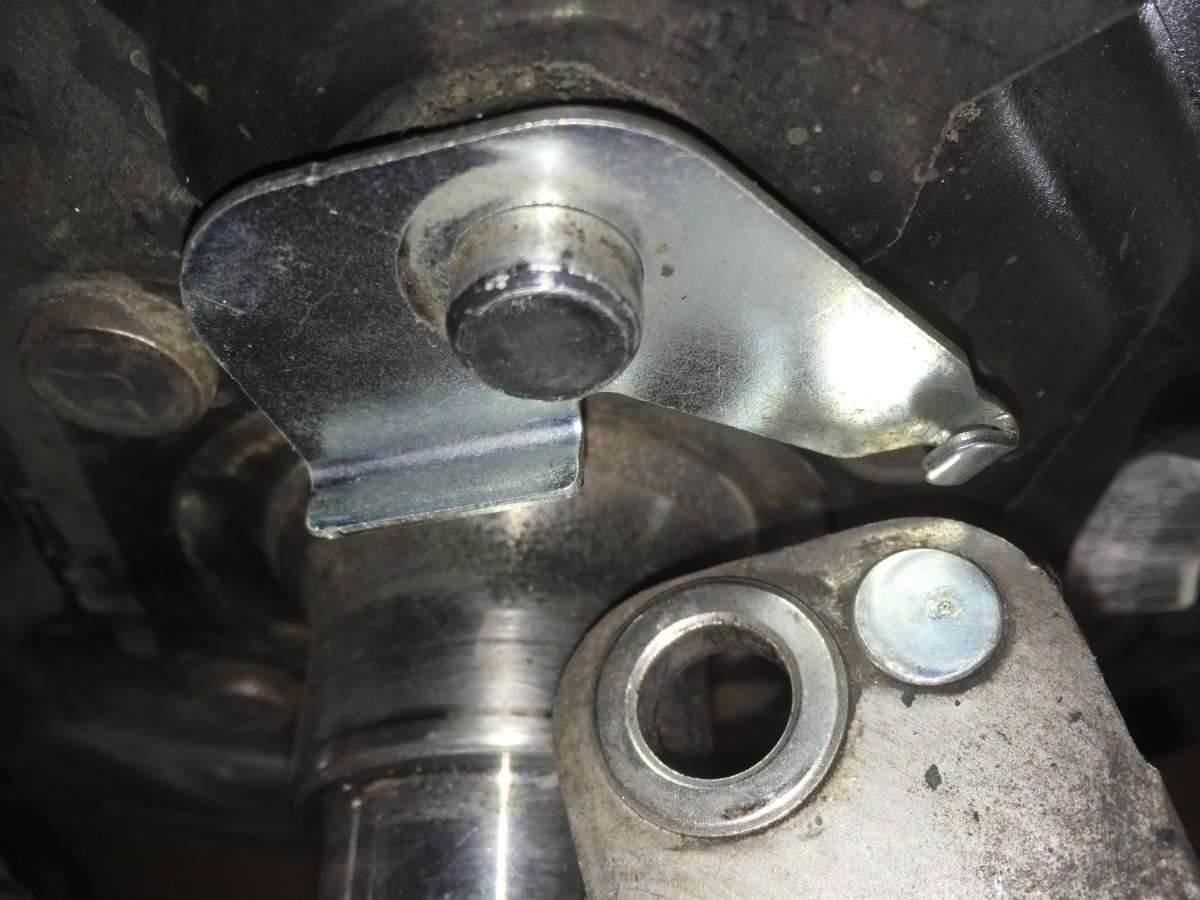
You can back off on the Auto Adjust brake adjuster arms, you inset a long thin screwdriver into the oval opening and lift the arm up, then adjust the star wheel.with a brake adjuster tool or flat blade screwdriver. I do NOT recommend this !! The steel cable that attaches to the arm can possibly lift off of the pulley groove , since there is no retainer to keep it in place. If the cable gets off the pulley the adjuster will no longer operate, and there could be weird dragging noises. I am not saying this is your problem, but it is a very good possibility, especially if a tech did it in an attempt to fix it. These brakes come with no lubricant in the adjuster pulley shaft or the upper attach point, they can and will bind! https://olivertraveltrailers.com/forums/topic/2778-brakes-auto-adjust-vs-manual-adjust-what-are-the-differences/ There are soooo many bad design flaws in these brakes, the only solution is to put manual ones on, adjust them to about 6 or 8 clicks from binding, and check them every 3000 miles. Or install disk brakes. John Davies Spokane WA
3 points
-
Thanks, glad you enjoyed them. It truly is beautiful area, and that road keeps it from ever becoming over crowded or loved to death. Love the quote. Up in our neck of the woods I laugh and call it all both days of summer.3 points
-
When younger and working, "estimated time" needed for a potential project always seemed to creep into the equation. But now, my "time factor" is different, I don't really care/stress how long it takes for a project, especially an Ollie one - just want it done right the first time. That's the goal at least. The peace of mind achieved by a correctly executed DIY OTT project is worth so much more than having to pay someone else do it for us, IMO. This is the case for major systems maintenance and upgrades efforts, such as running gear, AC/DC electrical, solar, plumbing systems, etc., as well as for the smaller upgrades. Having this peace of mind gives us a higher level of confidence in our trailer when out on the open road or boondocking in an isolated US FS camping area, knowing exactly the status of these key systems, because we did the work. More to the point of the thread, maintaining the proper condition of wheel bearings and Dexter EZ flex suspension components at the recommended service intervals is part of the Oliver owner experience for us... Yeah, it takes longer for us to complete the servicing of these important parts than taking the rig to Les Schwab's, but we also get to fix and clean-up a lot of ancillary items that LS will not consider attending to. Pride of ownership, perhaps. ...we just like doing the projects!3 points
-
Btw, I use that same tennis ball on a string marker method, in our garage, so i dont get too close to my husband's vintage "college car". The hf mats are great. I've actually toyed with the idea of using them in the Ollie alley, vs, rugs. Easy to sweep and vacuum, cushy underfoot, in the garage and workshop. I suspect they'd deflect a lot of energy/damage.
3 points
-
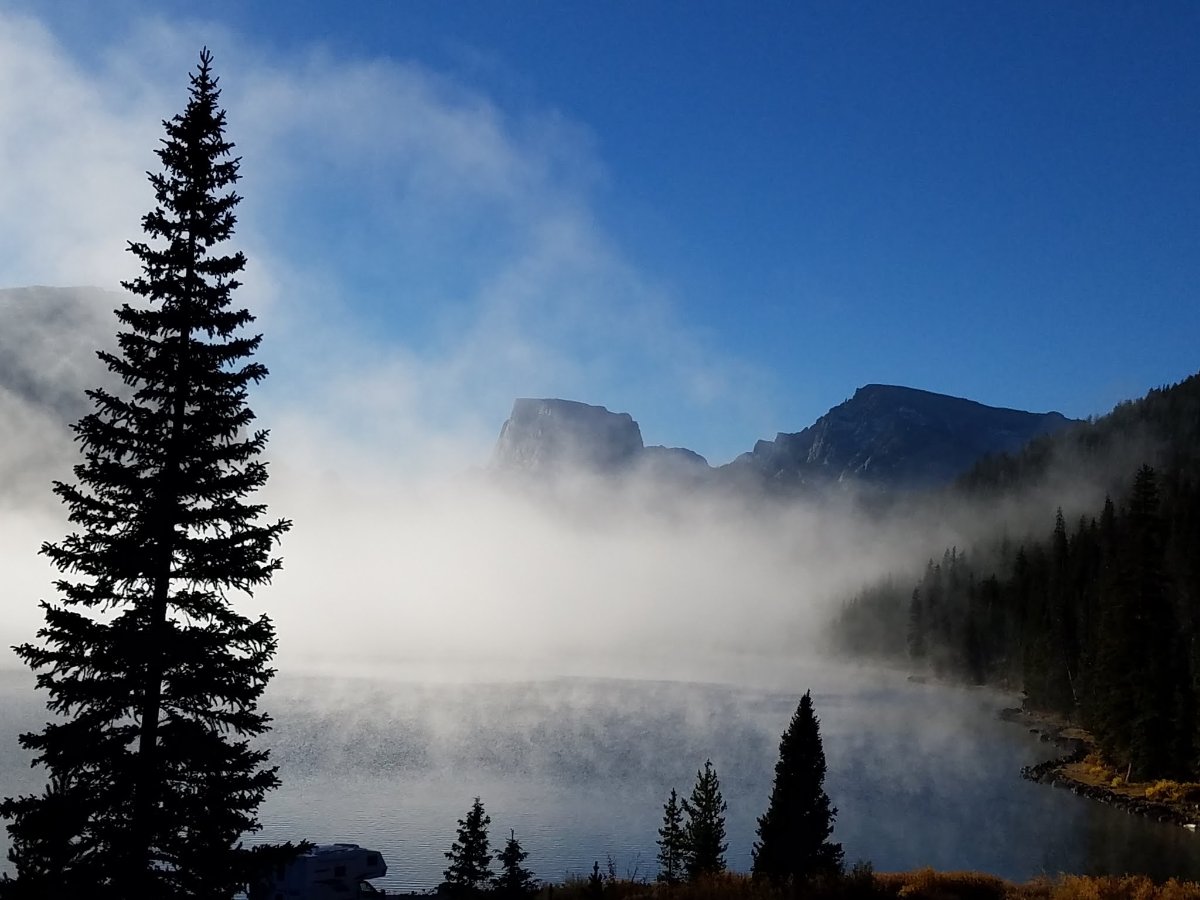
Square Top never disappoints. Back in 2016 with early morning fog.
3 points
-
I really wanted to maintain the OEM look. With the diamond plate on the bumper assembly and the use of the bike rack style mounting bracket I think we got it.2 points
-
That's some impressive craftsmanship! Nice work.2 points
-
I would be lying if I didn’t say I am so jealous, a 30x30 garage! Good luck2 points
-
You are 100% correct. The controller feeds power to a just single wire and ground circuit. Here is the front wire: And a single brake wire: John Davies Spokane WA
2 points
-
I'd give them a shot of grease - the recommended interval for those is 3 to 5 thousand miles. As far as type of grease - that is covered on page two of this thread. Bill2 points
-
After 4K miles, I would use Mystik bearing grease (the same stuff Oliver uses), before you leave home. You will need to either buy your own grease gun and follow the instructions in this thread, or pay a service center to do it (maybe Les Schwab?). It is too far from Portland to Hohenwald to just rely on Oliver's Service Department to keep your suspension maintained.2 points
-
Is it mold or is it algae? Sadly water quality has declined in much of the US over the years for many reasons. But having worked in industry for many years and knowing the conditions that exist in municipal water systems, I wouldn't get overly concerned about the formation of what is likely algae on the inside of the water system. Yes chlorine will get rid of it but it will likely come back. If you knew what the inside of the pipes of every municipal water system look like, you would never drink water from those sources again if a little algae bothers you. Here's an example. Most of what you see is mineral build up, but when that pipe was cut open, the surfaces you see were quite slippery or slimy to the touch when wet. That doesn't mean the water was unfit or unsafe to drink, but the condition of the inside of the pipes would make one wonder. As mentioned by someone earlier, the source of your problem is probably in your water source. It doesn't mean the water source is unsafe to drink, but if it contains algae spores, it will grow algae in the system if conditions are right.2 points
-
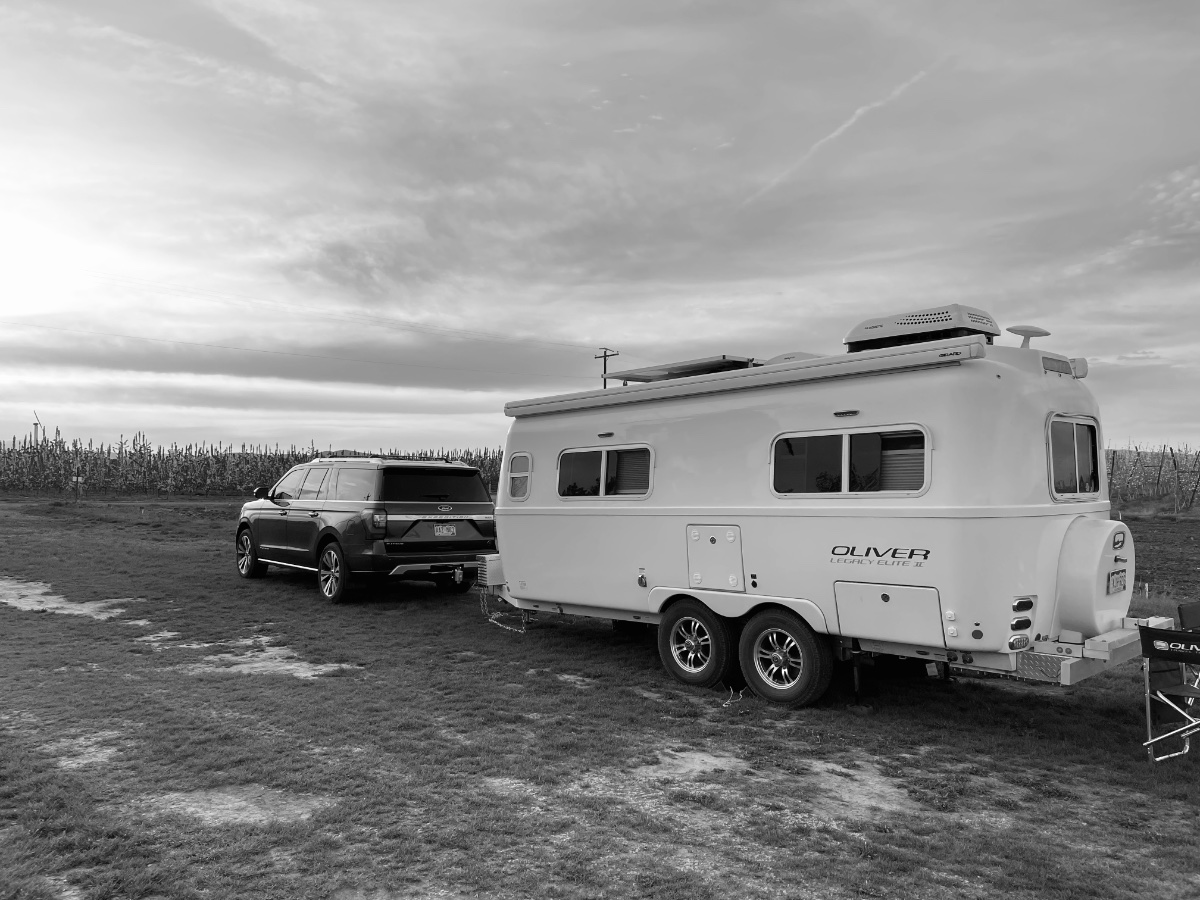
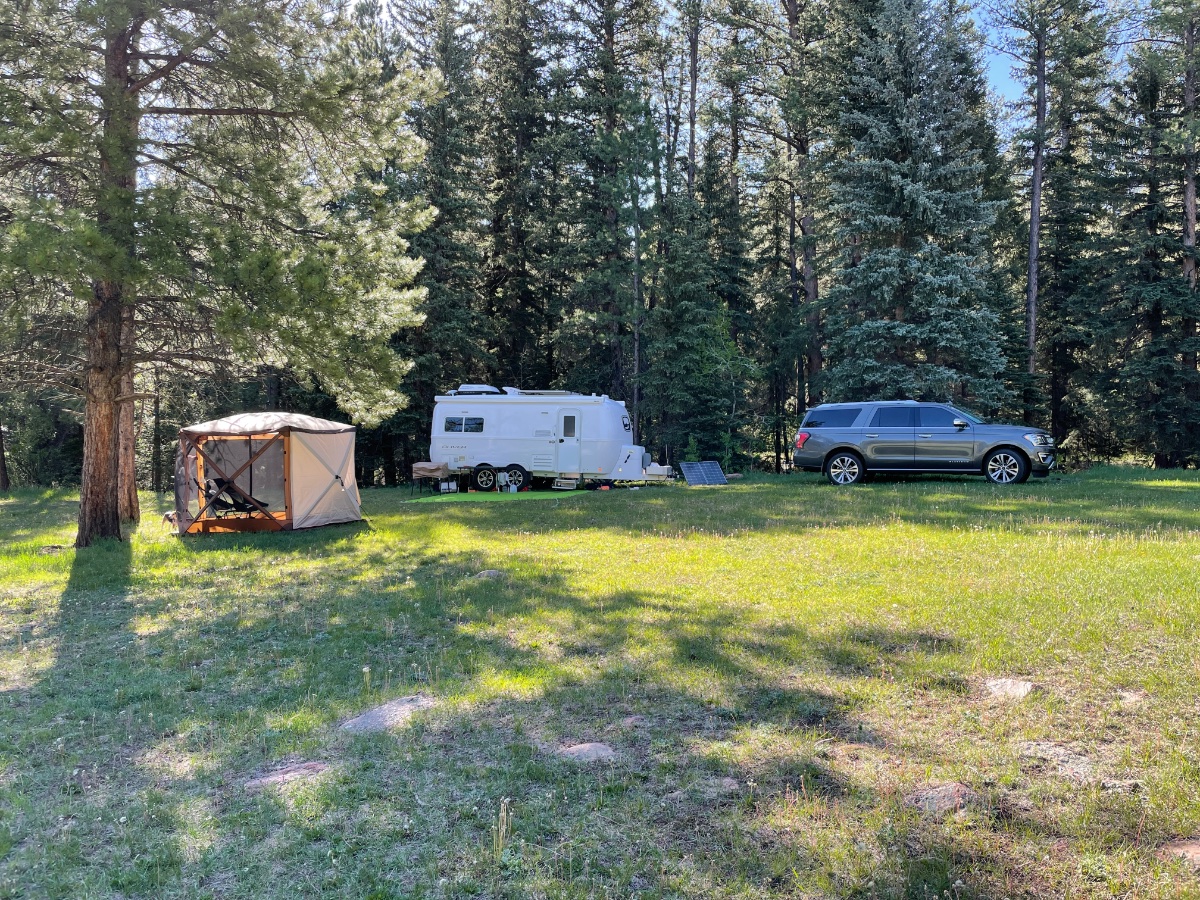
I’ll update with some Ollie boondocking pics, since when I last posted, we didn’t have VellOllie yet! 1. somewhere near Victoria, Vancouver Island 2. somewhere off of I-80 in Wyoming 3. Meadows Group Campground in Buffalo Creek, CO
2 points
-
Yes Green River Lakes. Link to what? Be glad to just not certain what you are referring to in this case for a link. FYI the area is located north of Pinedale, WY and while not that far via miles it is a slow go due to two hours of dirt road driving towing. Beartooth Publishing here in Bozeman produces an excellent weather proof GPS map of the "Winds" well worth the money. I'm sure you could purchase via them directly or probably Amazon. Gaia and Alltrails are also very good resources.2 points
-
Gonna add just a few more photos from this recent trip. These from a hike on the Continental Divide Trail, heading north toward Gunsight Pass. Wildflowers were abundant in the area.
2 points
-
Nice thing is, if you have axle capacity and keep every thing correct, this will offset a little bit of tongue weight. You could theoretically add something like this, add a tongue mounted bike rack as others have done and end up with a net zero in added tongue weight to the tow vehicle. With this basket, I'm using the Oliver tongue basket for heavy items, such as fire wood. I have a WeighSafe hitch so I always monitor my tongue weight when loading. I prefer to be a little on the heavy side up front.1 point
-
that's very nice and motivating for sure. Always thinking about how to carry more stuff especially with an at-capacity truck. Now you've got me thinking about a(smaller) truck box for the rear bumper / bike add-on for our LE I1 point
-
Thanks, John, I was hoping you'd see this. I've pretty much convinced myself this is a problem with that auto-adjust brake. I don't think a tech slipped the cable because they took the drum off for service each time rather than trying to adjust from the back and they were only supposed to inspect for damage. None of them mentioned adjusting the mechanism. In fact, one of them told me you can't adjust them because they'll just go right back to where they started, based on the cable length. So, based on the premise that the brake is dragging that leaves 3 questions: 1. Why isn't it running hot? Theory #1: it's only dragging very lightly. Theory #2: it's intermittent. 2. Why is it intermittent? Theory: it only happens after the auto-adjuster increments the star wheel a notch. 3. Why does it stop quickly and suddenly? This one's a little more confusing to me. Theory: after it happens, subsequent brake use retensions the adjuster cable or mechanism enough to clear the shoes off the drum surface. If those theories are correct I will consider this more of a chronic problem than a crisis and go on with my next trip. Will look for excessive shoe wear on my next inspection and consider future brake replacement. What a pain...1 point
-
That's the quickest and easiest way to do it.1 point
-
Good idea! Thank you for sharing.1 point
-
@John Welte there is a great deal of information just above; I tacked on questions to a previous thread, to get more specific information on the grease type and tools and I've ordered mine. I appreciate the gentle warning on time required to 'do the job' @topgun2 . I started cleaning them yesterday.1 point
-
Dexter runs the wires through the steel axle, so they will eventually wear through the insulation and and short out, a fix is to run new ones thusly on the BACK side of the tubes (for stone protection): https://olivertraveltrailers.com/forums/topic/2685-how-to-brake-wiring-is-undersized-some-answers-and-partial-solution/ These Auto Adjust brakes are cr@p, if you do have to replace them , consider installing the cheaper and way more reliable manual adjust version. https://olivertraveltrailers.com/forums/topic/2778-brakes-auto-adjust-vs-manual-adjust-what-are-the-differences/ John Davies Spokane WA
1 point
-
Do NOT use a mechanical thermostat, they are horrible and you will hate it! Unreliable, big dead zone, hard to return to a setting you like. They use points like a 1950 Buick!!!, once the contacts get a little dirty, they arc and eventually quit. Buy this one and put a new battery in it annually. Emerson 1E78-140 Non-Programmable Heat Only Thermostat for Single-Stage Systems John Davies Spokane WA1 point
-
I'm certainly NOT taking that bet. I spend more time collecting the tools and prepping for the job than actually doing the job. While the zerk caps help a bunch, I still spend a fair amount of time cleaning off the old grease - bring plenty of paper towels/rags to the job. Bill1 point
-
It's very tempting! And I agree about the best views being out the rear window. I wish my floor plan had been reversed for this very reason. Airstream no longer sells my model (23D but later called 23CB) and I suspect it is because of the narrow 48" fixed bed in the corner. It's a bugger to make, for sure. I lived in it by myself for a little over 2 years while having a house built and didn't go all Jack-Nicholson-The-Shining-Crazy during that time. Adding a 2nd person for that length of time would no doubt have pushed me over the edge. I can also say during that time I was able to confirm what I suspected: the insulation is fantastically awful. From some remarks in this thread, it appears Oliver does a much better job with this. I imagine the Houghton would perform nicely on an Oliver. So tell me. . . do the Olivers that came with factory Dometic ACs operate via a wall thermostat that also controls the gas furnace? My Airstream did and the "brains" of that operation that allowed the furnace, AC/Heat Pump, and thermostat to all play nicely together was in the AC unit -- which is now out of the picture. I'm going full low-tech on my gas furnace solution with an inexpensive 2-wire mechanical thermostat mounted in the same location as the original Dometic CCC2 (comfort control center?) thermostat. I've yet to run that wiring but I don't expect it to be difficult given their respective locations. Just waiting for a nice crisp autumn Saturday morning to do it. I do, however, still have the phone cable that ran from the thermostat location to the 14" roof opening where the AC unit is. That's the wire I have in mind to use and extend/relocate the thermistor for a better ambient reading if the wire gauge is the same or better. Just need to get my brother here with his soldering iron to give it a go. Of course, if/when that happens there will be a full write up to share!1 point
-
When I installed the EZ Flex system on our Ollie, the plastic bushings were destroyed after the original owner towed Ollie 6000 miles. The wet pins are an improvement, but agree, it could be a better system. Decided to find the easiest way to grease & maintain the EZ Flex system we have. Here’s the Dexter spring wet pin and bronze bushing used in the EZ Flex system. The bronze bushing wall thickness is .07”, have to admit I damaged one or two 😬during installation because bronze is much softer than steel. Glad I purchased extra bronze bushings. Helped a friend install wet pins and bronze bushings on his Legacy Elite.
1 point
-
Certainly TRUE! All Oliver trailers built prior to 2017 or 2018 didn't have the EZ-Flex suspension and thus didn't have the wet bolts which have (I believe) brass bushings. The old suspension did have those "nylon" bushings and were only good for something like 12,000 miles. So, many of us that have the older Olivers switched to the "new" EZ-Flex when it became available or when the old bushings hit that 10,000 to 12,0000 mile mark. Its much better to give those zerks a shot of grease every few thousand miles versus having to replace the bushings. Bill1 point
-
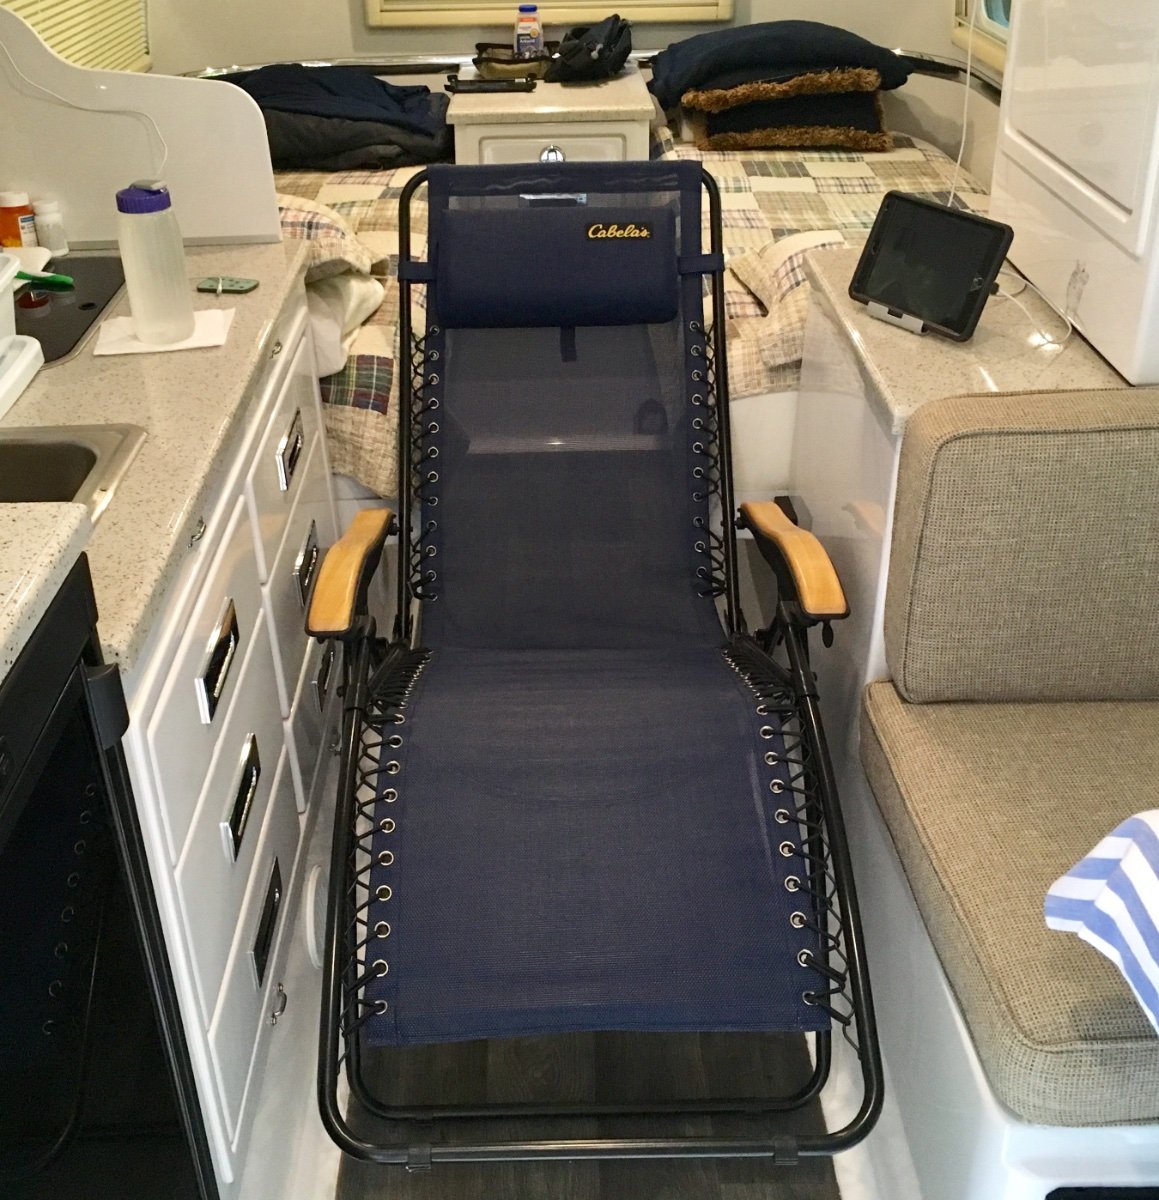
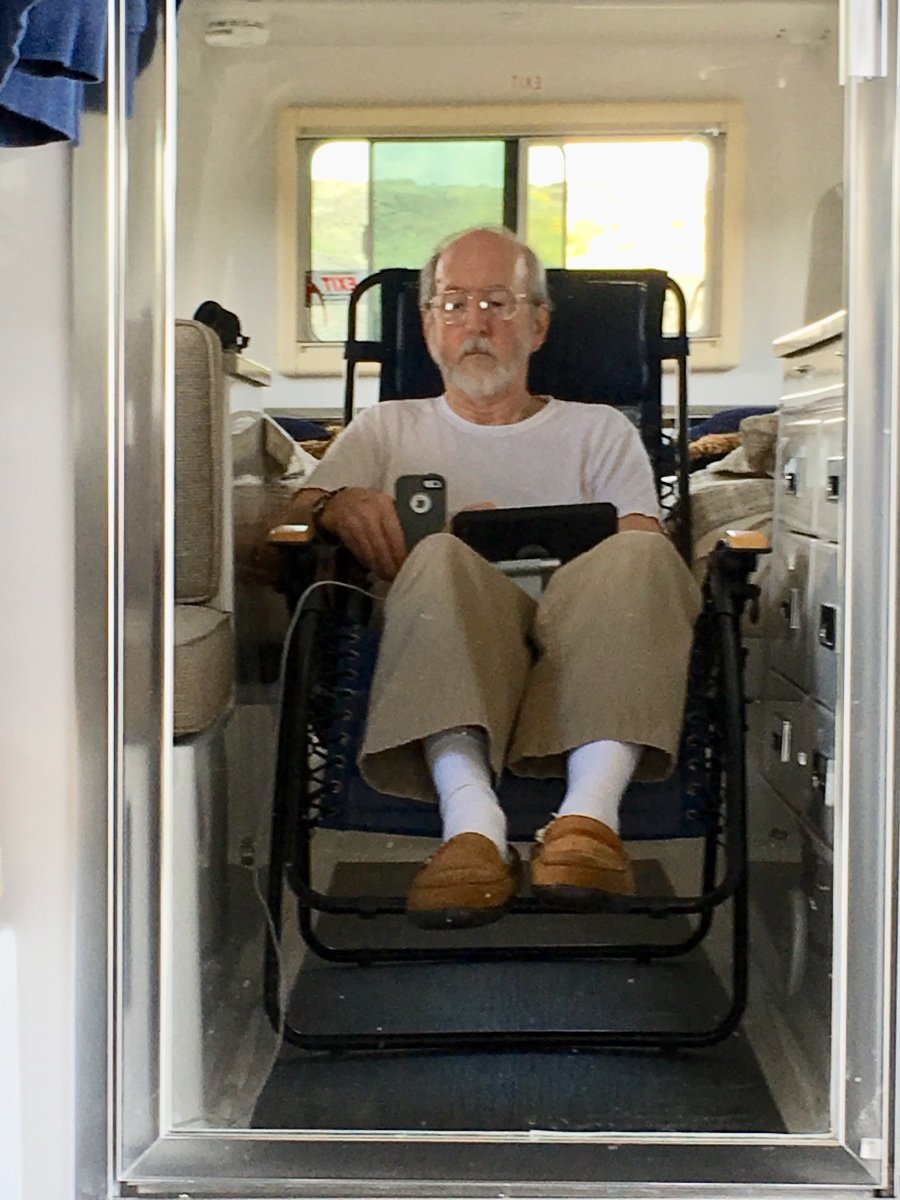
No need to miss the recliner: John Davies Spokane WA
1 point
-
Another tool that saves lots of time when greasing multiple zerks is this Lock N Lube grease gun coupler: https://www.amazon.com/LockNLube-fittings-best-selling-Long-lasting-rebuildable/dp/B00H7LPKKU/ref=sr_1_5_pp?hvadid=177565028286&hvdev=c&hvlocphy=9029558&hvnetw=g&hvqmt=e&hvrand=17231719377028863953&hvtargid=kwd-117864911294&hydadcr=7540_9880937&keywords=lock+n+lube+grease+gun+coupler&qid=1692803808&sr=8-5 Expensive, but well worth the cost to me. I have one of these couplers on each of the 3 grease guns I own. They clip onto the zerk with a spring-loaded clamp, so you don't have to thread a standard coupler onto each zerk, then unthread each time. That process gets tedious when greasing 16 zerks.1 point
-
OTT uses Mystik grease, so that is what I bought to lube our Elite II. Link on Amazon below: https://www.amazon.com/Mystik-665005002901-Hi-Temp-Multi-Purpose-Grease/dp/B0B85SSQQ9/ref=asc_df_B0B85SSQQ9/?tag=hyprod-20&linkCode=df0&hvadid=647244483985&hvpos=&hvnetw=g&hvrand=15993320974279103773&hvpone=&hvptwo=&hvqmt=&hvdev=c&hvdvcmdl=&hvlocint=&hvlocphy=9029558&hvtargid=pla-2021192446527&gclid=Cj0KCQjw3JanBhCPARIsAJpXTx59ct93dWx1KWfsWLBv0kzc9PndE_zIIDuTevC6mlJE4YoOtfyZ1f4aAvUnEALw_wcB&th=1 Using the same grease Oliver uses, I run no risk of incompatibility. Amazon sells it in 2-packs, so you will have enough should one tube not quite be enough. I have a dedicated grease gun filled with Mystik grease just for use on the Oliver. I use a separate grease gun, with different grease, for my tractor.1 point
-
Many European and Australian sold units use a variable speed compressor. Eventually, we'll get it here.1 point
-
This is a topic that is discussed on multiple forums and also YouTube regarding the inability to control humidity with RV AC units that run the fan continually. Unfortunately the design principal of having the temperature control sensor mounted in the plenum air stream for the purpose of cycling the compressor relegates the owner to a life of cycling humidity levels in exchange for constant air circulation. I know it would likely add considerable cost to the AC system but wouldn't it be nice of they would design the units with a variable speed fan that ramps up and down to control temperatures in the cabin and thus allow the compressor to run longer and eliminate the short on/off cycles that result in humidity spikes.1 point
-
I'm from Florida and have well water at home. I also believe that we have worst water available anywhere excluding industrial, manufacturing or agricultural locations that have been polluting groundwater for decades. I can dig a 36" deep hole in my yard and hit water most of the year. So I often refer to my well water as coming from a mud puddle. The point of this is to say that I use swimming pool bleach or sometimes hydrogen peroxide to sanitize my water system. We do not drink or cook or ingest our home water, ever. And I don’t know anything about the water I put into the fresh water tank from any other source after we leave home, so the water use statement above also holds true of the fresh water in our Ollie. And more to the point, if you sanitize you fresh water tank and shortly there after you still have bad water coming out, I would suspect the water source. To my comment above about ground water pollution, my parents were from Ottawa, IL. and Ottawa was the location of one of three factories in the United States that was operated by the United States Radium Corporation . If you don’t know the story of the "Radium Girls" and are curious about why I bring it up, click the link above. It is a story about industrial pollution that had a terrible effect on the people of these three community’s. Mossey1 point
-
In Oregon, veterans with a service connected disability are eligible for free entrance and camping at State Parks, additionally we can have one vehicle license that is permanent. The one time fee for the license is $100. Ours is on our Ollie, as RVs are more expensive to title and register. Semper Fi1 point
-
Thank you Everyone for your replies and recommendations. User error on our part for not properly cleaning all tanks … black, grey, fresh. Cleaned our fresh water supply as directed, flushed the grey 3 or more times. It took a while for all the gasses to leave. Now we are diligently using Grey water TST. Black tank never an issue, but using proper treatment for that as well. I also scrape and wipe every food particle from dishes before washing. Something, as a former State Park employee, had to explain to every incoming camper. It was to minimize crow and ravens’ attraction to the park i.e. protect other birds from their predatory nature. I should know better. Also, the vent under counter on the right side was not properly aligned which was allowing gases to escape into the cabin. My husband fixed it, thank you Oliver and Mr Davies for pointing him in the right direction.1 point
-
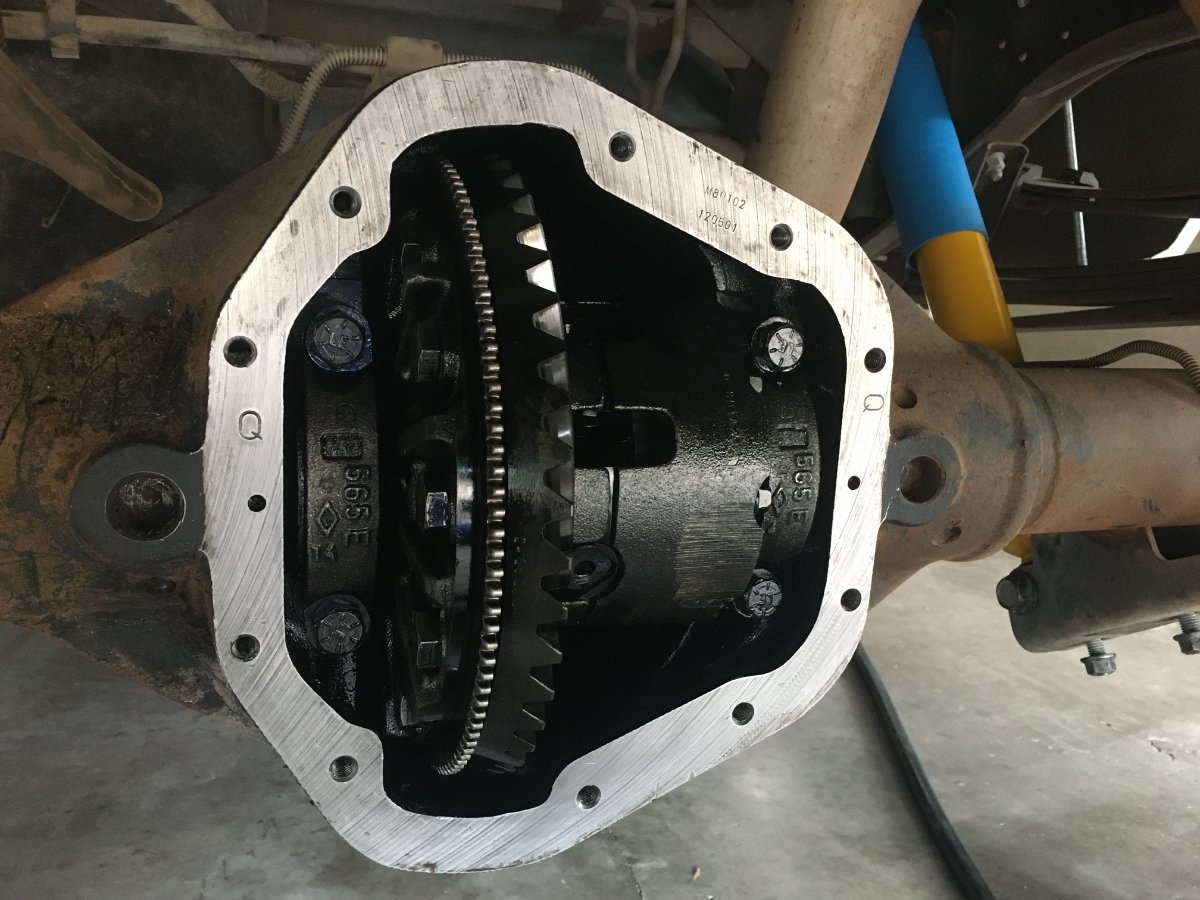
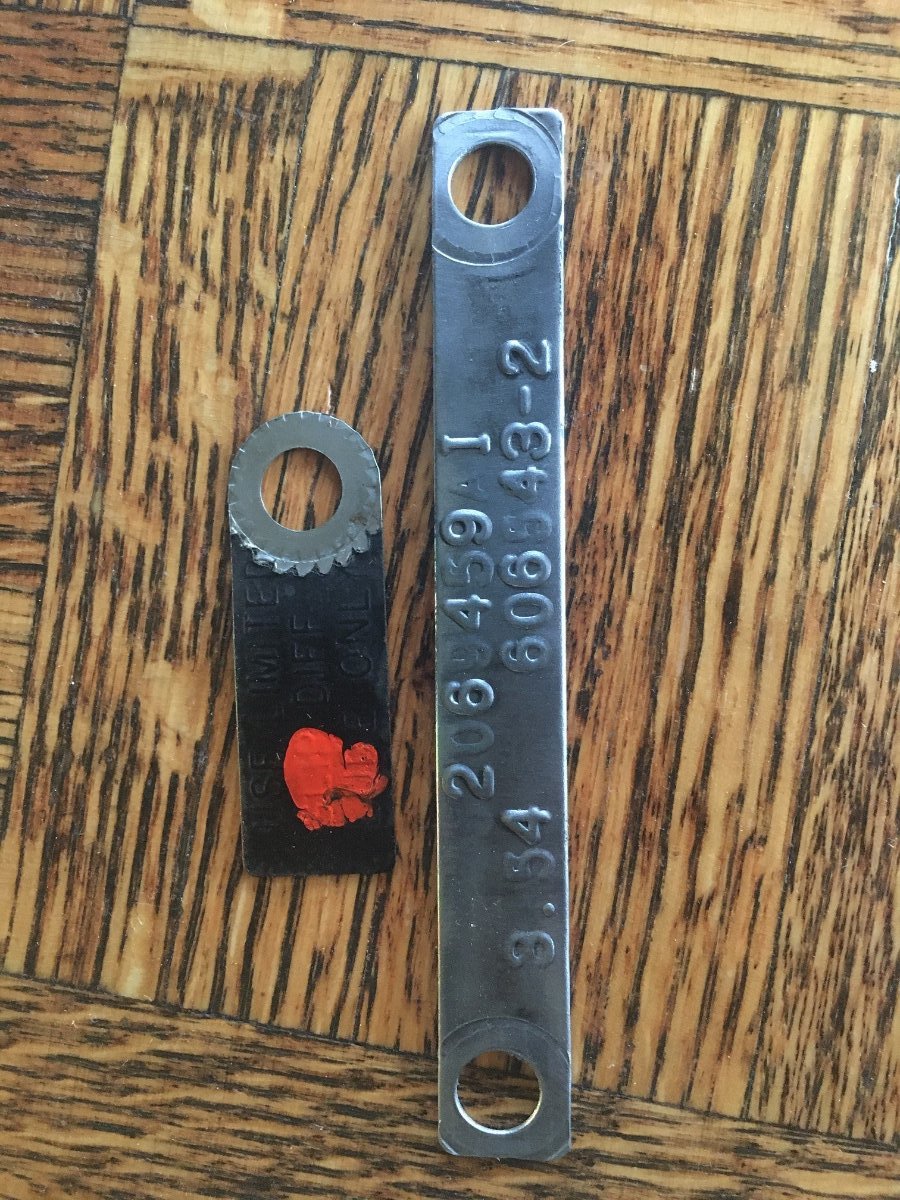
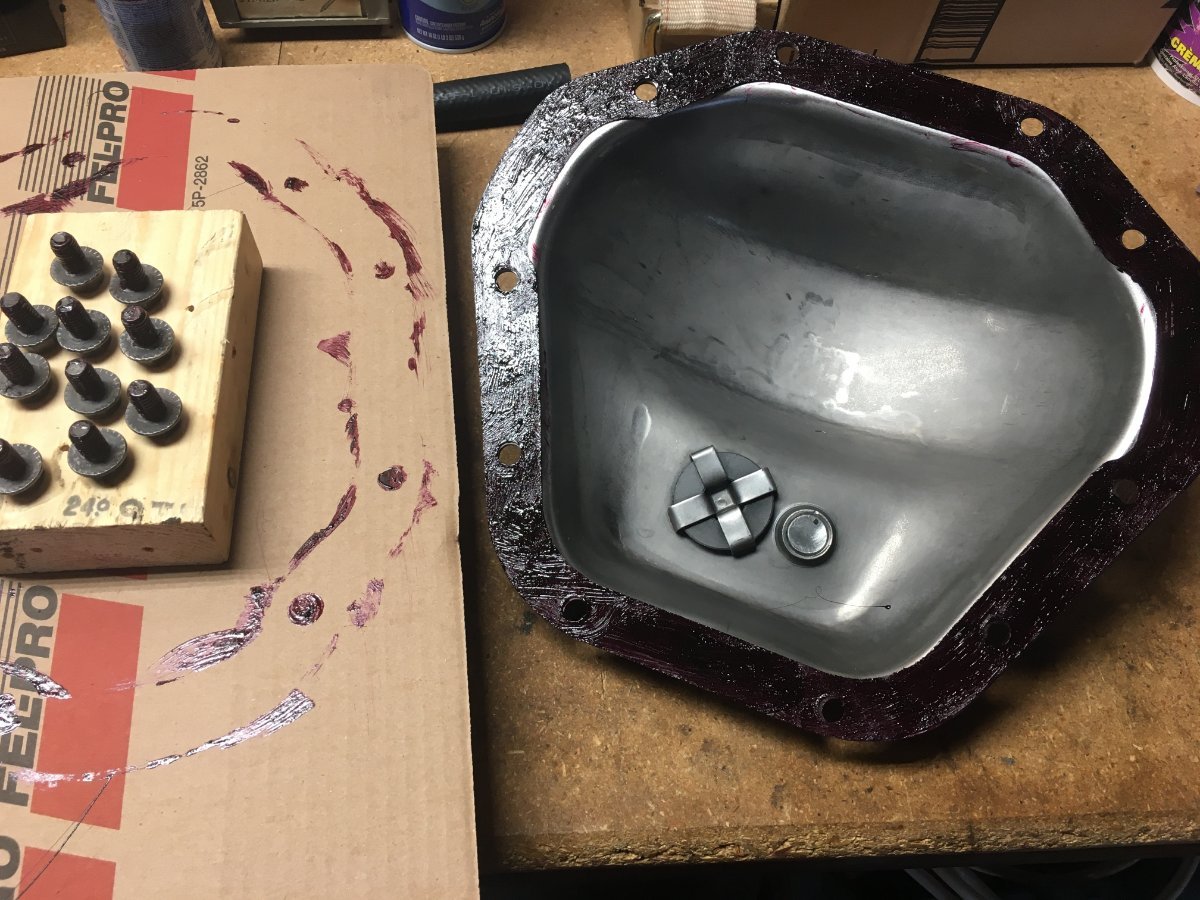
Decided to work on the rear end today, as I didn't feel ambitious enough to clean up the front end. Worked on three tasks on the rear; install new shocks, replace rear sway bar bushings and links, and changing the differential gear oil. The oil in the rear was BLACK, with black sticking to the back cover (maybe limited slip additive). Wondering if this had ever been changed. It had no gasket, just gray RTV, looking like factory original. I pulled and cleaned the tags to see I have a 3.54 limited slip diff, nice! Installed the shocks too and waiting on special aftermarket HD rear sway bar links. Rear end all clean and back together. I purchased a Fel-Pro gasket, as I cannot stand RTV in any color! I use Permatex High Tack Sealant on the gasket. Since the gear oil and cover were so black (magnet not too bad, nice), I'm going to drain and fill again soon. With this gasket and sealer, I will be able to loosen the nuts to drain and then just torque down again. The Permatex will stay tacky and seal again. I've bought Triax lubricants before and I'm going with this gear oil: https://www.amazon.com/gp/product/B07QPPTG5N/ref=ppx_yo_dt_b_search_asin_title?ie=UTF8&psc=1
1 point
-
The allure of RV living is the open roads, endless skies, and the joy of discovering new places. A rising trend in the past few years is an increasing number of people trading their stick-built homes for life on wheels. Whether you’re a weekend warrior, a full-time traveler, or simply curious about the RV lifestyle, there’s plenty to gain from delving into RV living through some of the top travel trailer blogs. This nomadic lifestyle has been gaining popularity as an alternative to traditional fixed domestic cohabitation. People of all ages, including retirees who have long envisioned this form of living, millennials seeking the digital nomad lifestyle, or families wanting to explore the world’s natural beauty, are now embracing RV living. In this blog post, we will explore some of the top RV travel trailer blogs that provide insights, tips, travel ideas, and more to help you navigate the exciting world of RV living. Gone With The Wynns – Run by Jason and Nikki Wynn, who swapped their everyday life for an RV in 2010, this blog is filled with their fascinating adventures and challenges on the road. Their blog posts include tips on RV maintenance, environmental issues, and stunning wildlife photography. Gone With The Wynns is more than just an RV blog; it’s a vivid account of a life well-traveled, brimming with engaging stories, practical tips, and captivating photography. Jason and Nikki Wynn share a candid portrayal of their RV lifestyle while taking the readers on an exhilarating journey. They address various topics that stretch beyond the usual RV maintenance tips. Readers can learn about sustainable living practices while on the road, eco-friendly products, and how to minimize their environmental footprint, reflecting the Wynns’ commitment to preserving the beautiful landscapes they explore. Further enriching the blog is the stunning wildlife photography in their posts, capturing the diverse creatures encountered during their travels. This blending of practical advice, environmental consciousness, and a genuine love for nature and wildlife sets Gone With The Wynns apart. Whether you’re an experienced RVer or just dreaming about hitting the road, their blog is an inspiring and informative guide. RV Love: This blog is run by Marc and Julie Bennett, full-time RVers since 2014. They provide comprehensive guides on RV living, including choosing the right RV for your needs, finding free places to camp, and maintaining your RV. RV Love embodies the essence of the RV lifestyle with a mix of personal experiences, practical guides, and community-building efforts. Marc and Julie Bennett, the seasoned RVers behind this blog, have crafted a comprehensive guide for anyone considering RV living. Their detailed and well-researched posts guide readers through choosing the right RV, from considering sizes and layouts to understanding the different types and assessing personal needs. The Bennetts also share their secrets for finding free and cheap campsites, a resource any RVer will appreciate. RV maintenance, a crucial aspect of RV life, is another topic they tackle efficiently, offering advice that can add years to your vehicle’s life and save you from costly repairs. RV Love’s approachable yet thorough style makes the blog a one-stop shop for budding and seasoned RV enthusiasts. Whether planning a short-term adventure or considering full-time RV living, Marc and Julie’s dedication to sharing their experiences and knowledge can ease your journey into the exciting world of RVing. Keep Your Daydream – KYD: Marc and Tricia left their traditional life for a nomadic one on the road. Their blog covers everything from RV park reviews, advice on how to deal with life on the road, and inspiration for your next big adventure. Marc and Tricia’s decision to leave their conventional lifestyle wasn’t made on a whim. It was a well-thought-out choice, fueled by an unquenchable thirst for travel, adventure, and exploration. They traded their static life for a dynamic one, swapping the four walls of their home for the infinite expanse of the open road. Their blog, Keep Your Daydream – KYD, reflects their adventurous spirit and unique lifestyle. It provides a wealth of information about living life on the road, from practicalities like comprehensive reviews of RV parks to inspirational content that motivates readers to consider embarking on their own adventures. Marc and Tricia’s narratives are woven with practical tips, relevant insights, and compelling storytelling, making their blog an absolute go-to resource for aspiring and veteran nomads. Technomadia: Technomadia is run by Chris Dunphy and Cherie Ve Ard, a tech-savvy couple who started RVing in 2006. Their blog offers a wealth of information on using technology on the road, staying connected, solar power for RVs, and more. Technomadia is about embracing the digital nomad lifestyle while traveling in an RV. Chris and Cherie have successfully merged their passion for technology with a nomadic lifestyle creating a unique niche in the travel blogging world. They dive deep into how to make technology work for you while living and working on the road. Their expert advice ranges from setting up mobile internet, boosting cell signals for remote work, and implementing solar power systems in RVs. They also cover various other topics like choosing the right gadgets, navigating legal and logistical concerns, and even handling taxes while on the go. With insightful how-to guides, reviews of essential gear, and personal anecdotes, Technomadia is a must-read blog for anyone considering or already experiencing the RV lifestyle. The blog is precious for those who want to maintain a strong internet connection for work or leisure or for those who aim to live as sustainably as possible while on the road. Do It Yourself RV (DIYRV): Do It Yourself RV, commonly known as DIYRV, is a paradise for those who love to roll up their sleeves and take on projects themselves. The platform brims with step-by-step guides on everything from basic RV repairs, installing new appliances, to full-scale RV renovations. DIYRV is not just about practical advice, it’s a community where you can share your experiences, learn from others, and get inspired to undertake your unique customization projects. The primary goal of the platform is to empower RV enthusiasts to take charge of their RV’s upkeep and enhancements, saving money in the process, and imparting a sense of personal satisfaction that comes with DIY. Whether you’re searching for ways to maximize your small living space, want to make your RV more eco-friendly, or are on the lookout for design hacks to make your RV feel more like home, DIYRV is a valuable resource. Moreover, the blog features before and after photos of real remodels that readers have undertaken, providing a wealth of inspiration for your own DIY projects. Wheeling It: Run by Paul and Nina, this blog is well-known in the RV community. They extensively covered their 8 years of full-time RV life, providing in-depth campground reviews, budget information, and much more. Paul and Nina’s Wheeling It blog is a rich and comprehensive online resource heralded in the RV community. Having experienced an 8-year-long full-time RV life, they share invaluable insights and experiences rarely found elsewhere. The detailed campground reviews featured on their blog are a boon for those charting their RV trails, enabling readers to decide where to stop, rest, and camp. Furthermore, they’re candid about their budgeting strategies, offering practical and accessible financial guidance for those seeking to embark on or sustain a full-time RV lifestyle. The wealth of information they provide, born from first-hand experience and genuine passion for RV living, makes Wheeling It a must-follow blog for newbies and seasoned RV nomads. RV Lifestyle – Mike and Jennifer Wendland: The Wendlands have been active RVers since 2012, touring North America and sharing their experiences. The blog offers tips, travel ideas, resources, and guides on the RV lifestyle. Since 2012, Mike and Jennifer Wendland have explored North America living the ultimate RV lifestyle. Their blog, RV Lifestyle, is an expansive chronicle of their journeys and experiences, becoming an invaluable resource for veteran RVers and newcomers alike. The Wendlands’ genuine passion for traveling and adaptability to a mobile way of living resonates throughout their blog, transforming them into virtual mentors for aspiring RV adventurers. Their practical tips, innovative travel ideas, and comprehensive guides provide readers with the knowledge and inspiration they need to successfully navigate the RV lifestyle. With their rich content, the Wendlands offer more than mere advice—they offer a window into the joys, challenges, and fulfillment of life on the road. Whether you’re a seasoned RVer or just starting your journey, these top travel trailer blogs will fuel your wanderlust, providing the crucial tips, guidance, and inspiration you need. Each blog offers a distinct perspective, unified by a shared passion for the open road and the liberating lifestyle offered by RV living. These blogs are teeming with actionable advice, inspiring narratives, and valuable insights into the vibrant world of RV travel. So, whether you’re seeking practical tips, RV park reviews, or uplifting adventures, you can find it all in these blogs. Now, fasten your seatbelts and embark on a journey of exploration and discovery in RV living! The post The Rising Trend of RV Living: Top Travel Trailer Blogs appeared first on Oliver Travel Trailers. Read the Full Article1 point
-
Ouch! 😳 That is expensive! Lessons I’ve learned from our recent purchase of new home and shop are keep the doors as wide and tall as you can. The truck camper clears the 12’ tall door with about an inch to spare, and the old trailer had about 6” clearance on each side. Both had my pucker factor at high alert due to uneven terrain. It’s so much easier with the Ollie!1 point
-
No question - covered storage is the best! Having that kind of storage at your home has to be absolutely wonderful. Unfortunately, I've got neither close to me. However, several years ago I found a place 10 miles from the house with fenced storage and 24 hour camera for $200 per year! The CalMark I bought for the Ollie 8 years ago is still going strong. Can't complain too much. Bill1 point
-
Where do you live, and how far a drive? That price is crazy cheap compared to major cities. That looks like a really nice facility. I assume it has security cameras? One reason we added an RV bay when we built our house seven years ago was the cost of secure INSIDE storage. It is $350+ here. I figured the bay paid for itself already, it was a $30k option, but that charge included fully sheet rocked walls there (and in the garage at no extra cost.) Add the cost of fuel and lost time in traffic for going to a storage place, those factors can really hurt. Thanks, John Davies Spokane WA1 point
-
We store ours in an old warehouse, converted to RV and boat storage. Paid $90/mo in 2022 and $100 for 2023. Just had it washed and coated with Magiar's ceramic coating. I can plug in to keep the batteries full, and the battery warmer on in the winter. No room to build and strict HOA rules
1 point
-
Each time I grease our EZ Flex, at least one zerk makes me use the stabilizer jack to take pressure off that side1 point
-
Zerk fitting caps. Available on Amazon. LockNLube Grease Fitting Caps (50 Count) (Yellow) https://a.co/d/1SYGqmF
1 point


-
Recent Achievements
-


")


")


")

