Leaderboard


Popular Content
Showing content with the highest reputation on 09/09/2023 in all areas
-
Here’s a nice video on the last 100 years of Texas State Parks. I’m sure most states have a similar history. We’ve stayed at state parks across the nation and appreciate what they provide. BTW, H-E-B is a Texas supermarket chain headquartered here in San Antonio. https://youtu.be/1rHgTkBGv_w?si=qCcsBz99Cxvy1hmU6 points
-
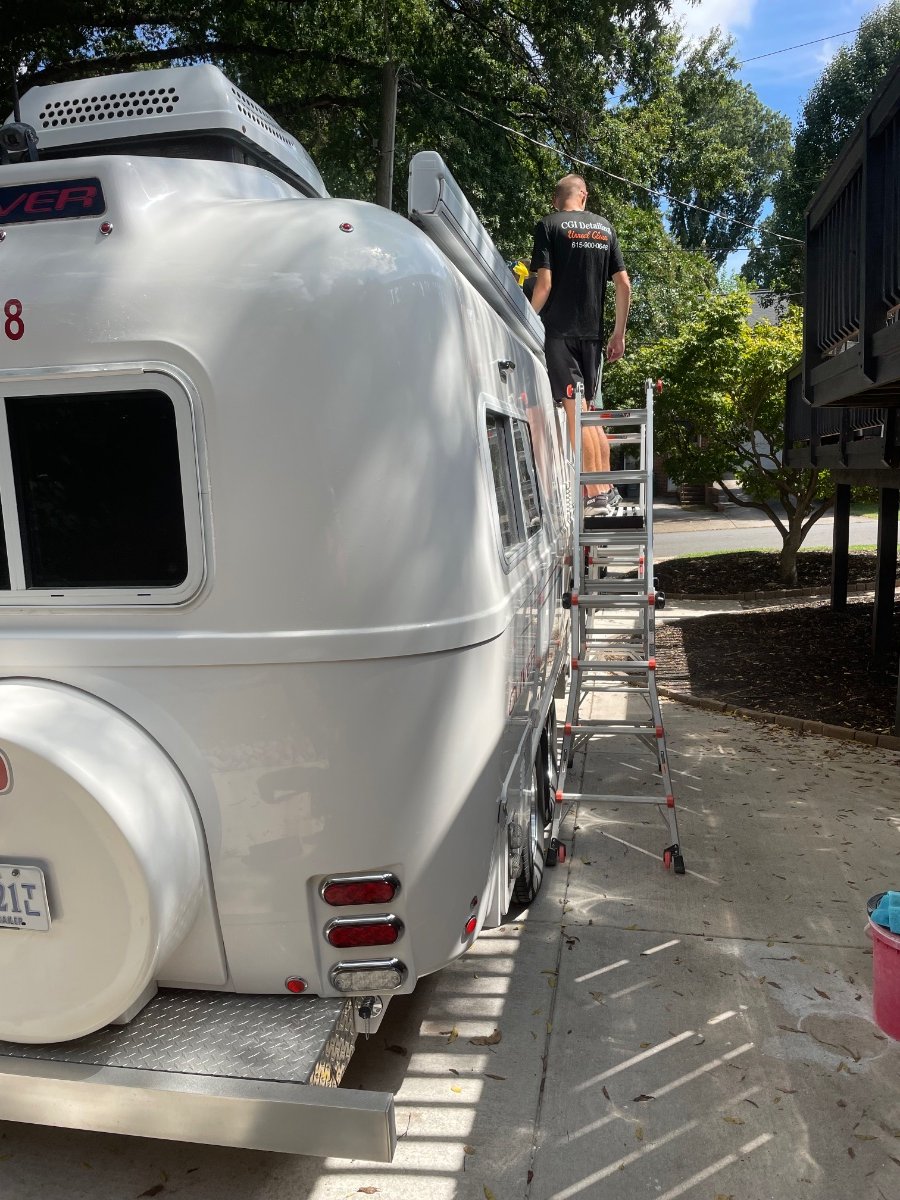
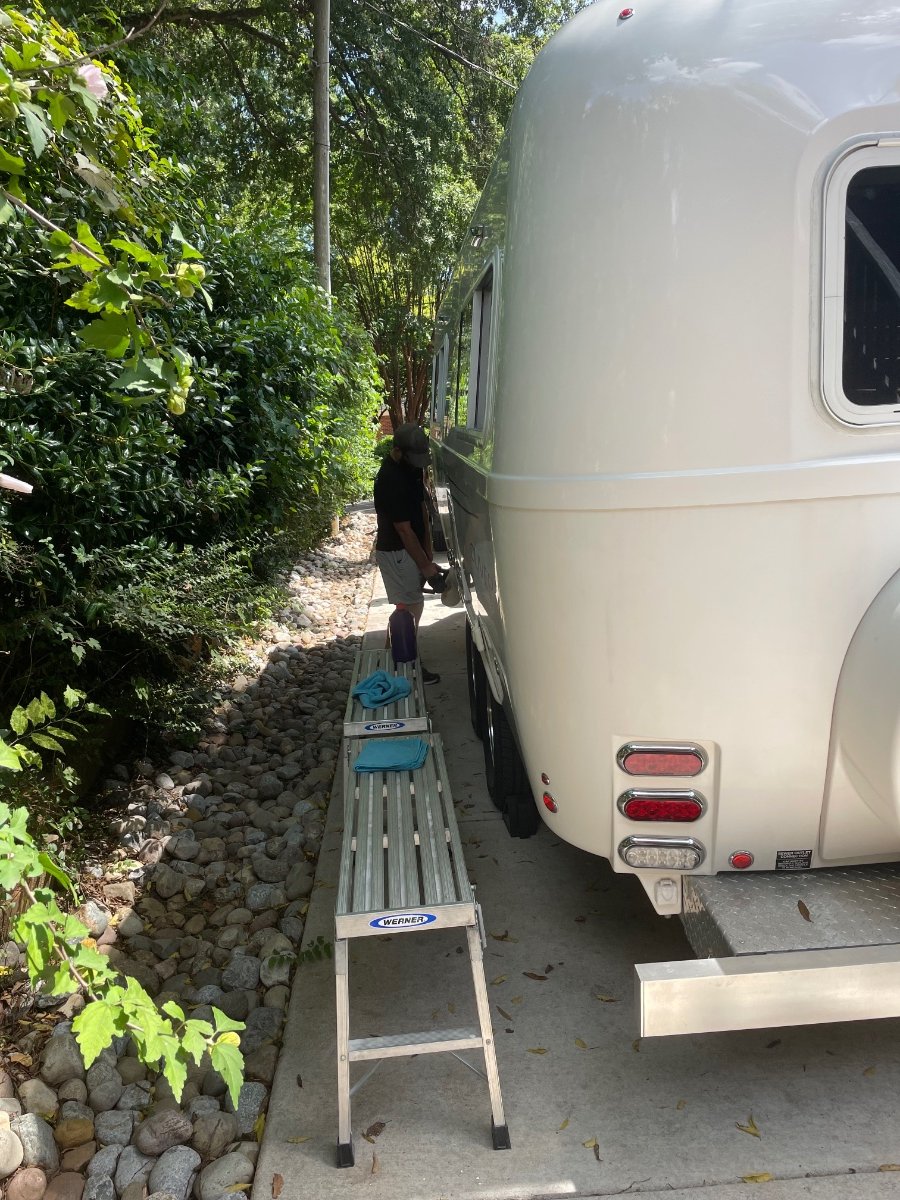
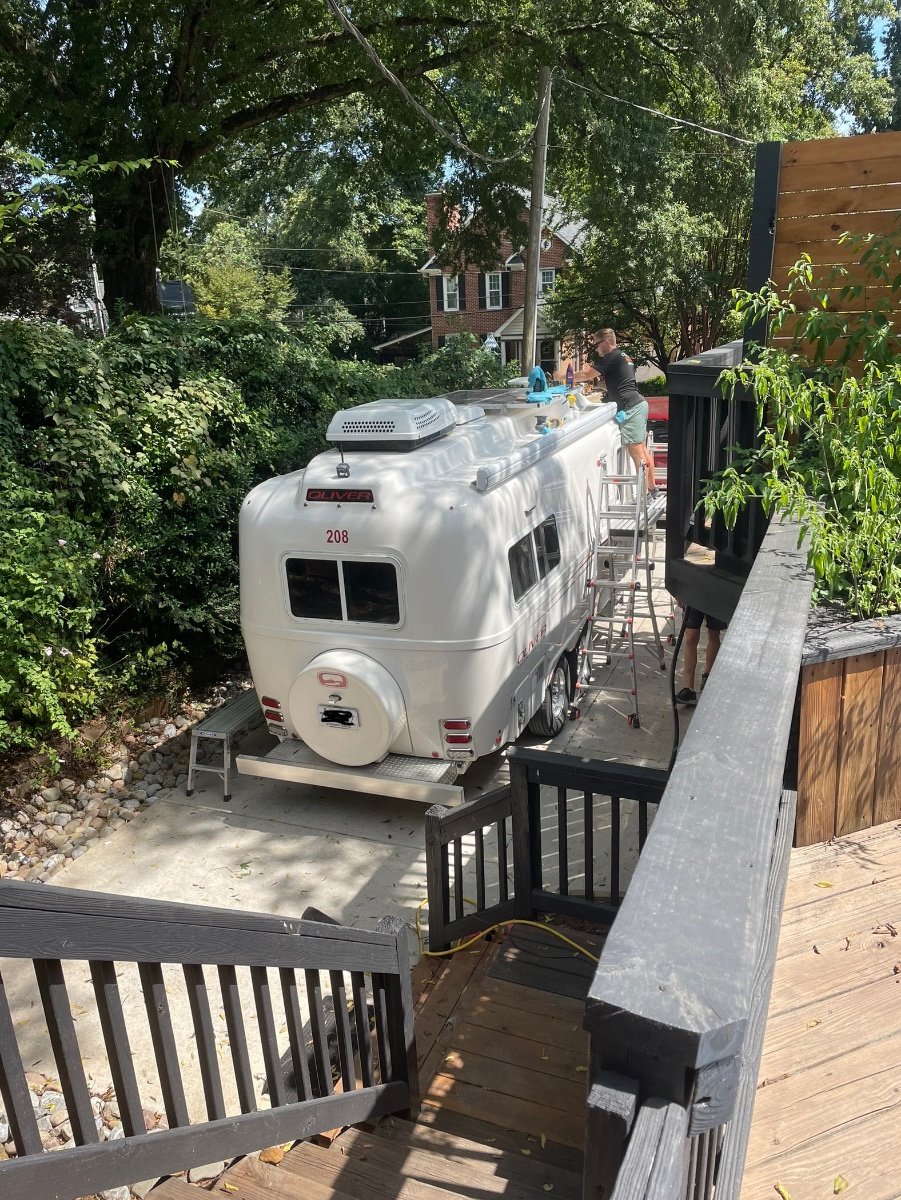
We just got home from meeting the CGI guys in Charlotte, NC to coat our trailer. We met them at an air b&b and they did the whole job in the driveway. They certainly are the nicest bunch of guys! I can’t believe how hard they work at the whole process and what a difference between before and after! After six plus years outside 24/7/365 it really needed some help. Now knowing that the gel coat will be protected, looks better than new, and having a little easier cleanup routine really means a lot.
 5 points
 -
That’s us, from Missouri ❤️ First time to South Dakota and first time boon-docking. So nice to run into you the other day.5 points
-
That is a nice video. This article reflects the other side of that shiny coin: https://tex.org/why-federal-and-state-owned-land-is-so-rare-in-texas/ The bottom line started when the early Country of, then the State of Texas, essentially used land as a resource to sell to keep the government operating. I am glad they are playing catch-up. John Davies Spokane WA
5 points
-
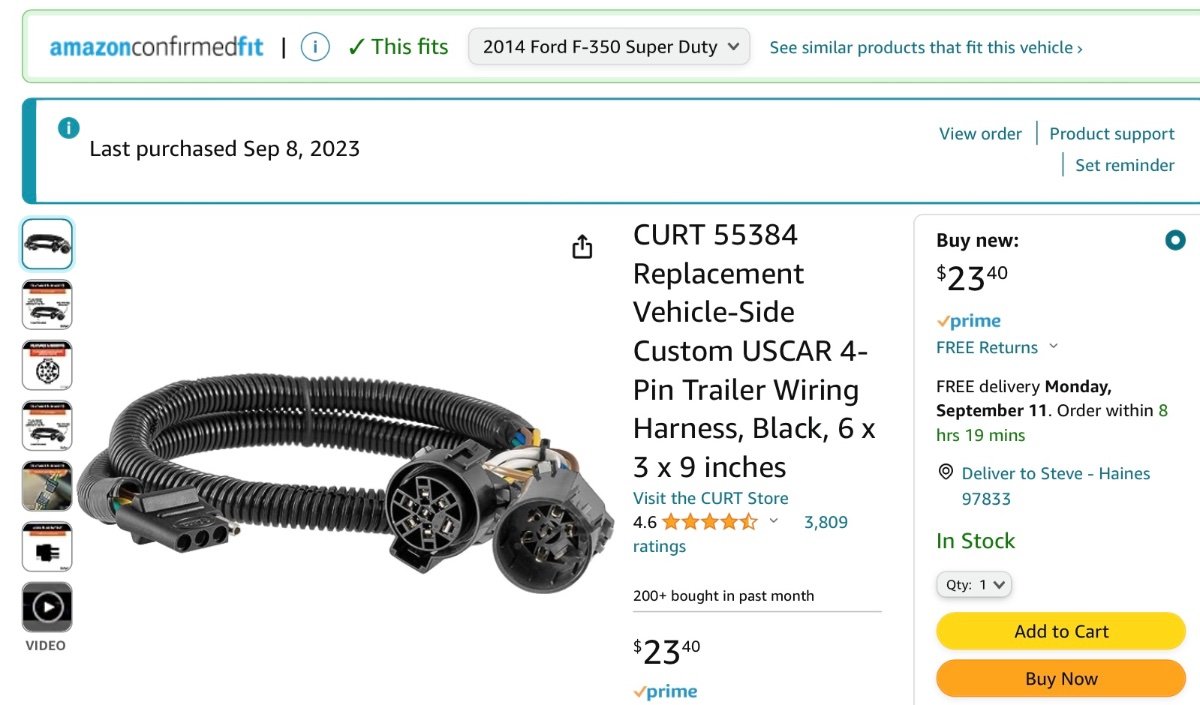
It took a bit of chasing, but I did find the inline T harness to 4 pin that @Mountainman198 mentioned. This appears to be a much better solution when compared to poking a hole through the protective cover of the factory connector.
4 points
-
Thank you, it was great to see another Oliver owner!3 points
-
Both you and the Ollie are going to love it! Bill3 points
-
Ron, Great idea, thanks for sharing. 👍🏻👍🏻 Patriot🇺🇸3 points
-
@dewdev and @rangered, I am using the existing cover inside. So nothing was changed out except the rooftop unit. And my understanding was they did use two gaskets when installing. I know I am using the existing condensation lines because I can see it going out them.3 points
-
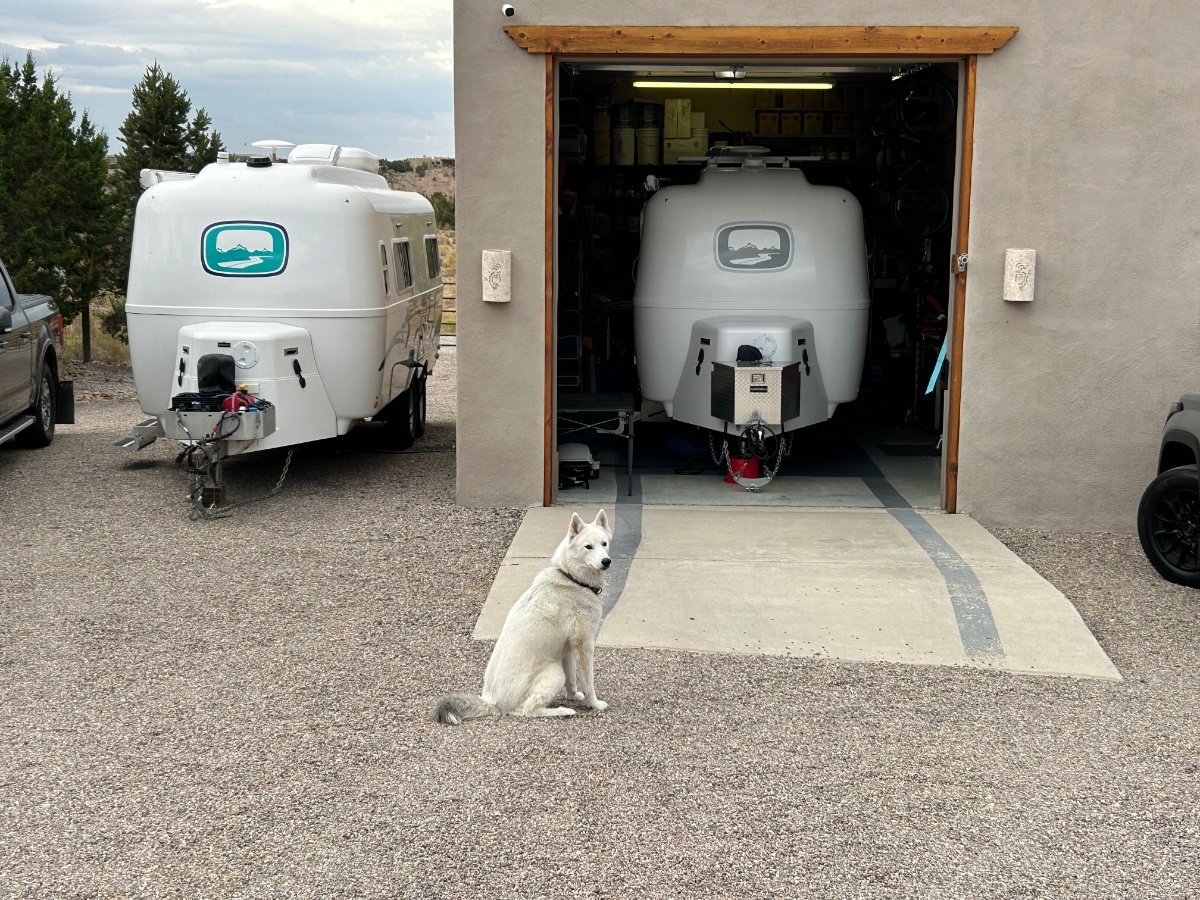
We have an older model parkit 360 (xl, I think), and I've mentioned a number of times how difficult it is to move our smaller and lighter Elite with it. The Superhandy looks more stable, for sure, but only rated to 7500 pounds. It will be interesting to hear your review after more uses. Btw, I believe that's an Elite I in the company website photo. (Smaller solar array, position of max air, etc.) As a matter if fact, it looks a different cropping of this photo from the Oliver website, quite possibly photoshopped. (Look at the positioning of chains and cord, the trees in the background, etc.) I'm unaware of any Oliver testing or endorsement of their product, but we could ask....
3 points
-
My best guess is that those wires would power/operate the optional Barker electric dump valves. Mossey
3 points
-
I purchased a Parkit360 10k force for an Elite II, to tow my Oliver into my side yard. I’ve used it three times and the device failed twice (circuit board, then battery on a less than year old unit) where it was 100% non functional. Just a friendly message to those looking for this solution. I just received my purchase of a SuperHandy dolly because I need a reliable option, so far that came with way more sturdy options and design than the Canadian company at a lower cost, while the jury is out on both, I recommend extensive research for those looking for this solution. I should have researched more sadly. Note the SuperHandy site demo utilizes an Oliver Elite II (non branded) in their own web pics…. Hope this helps others.2 points
-
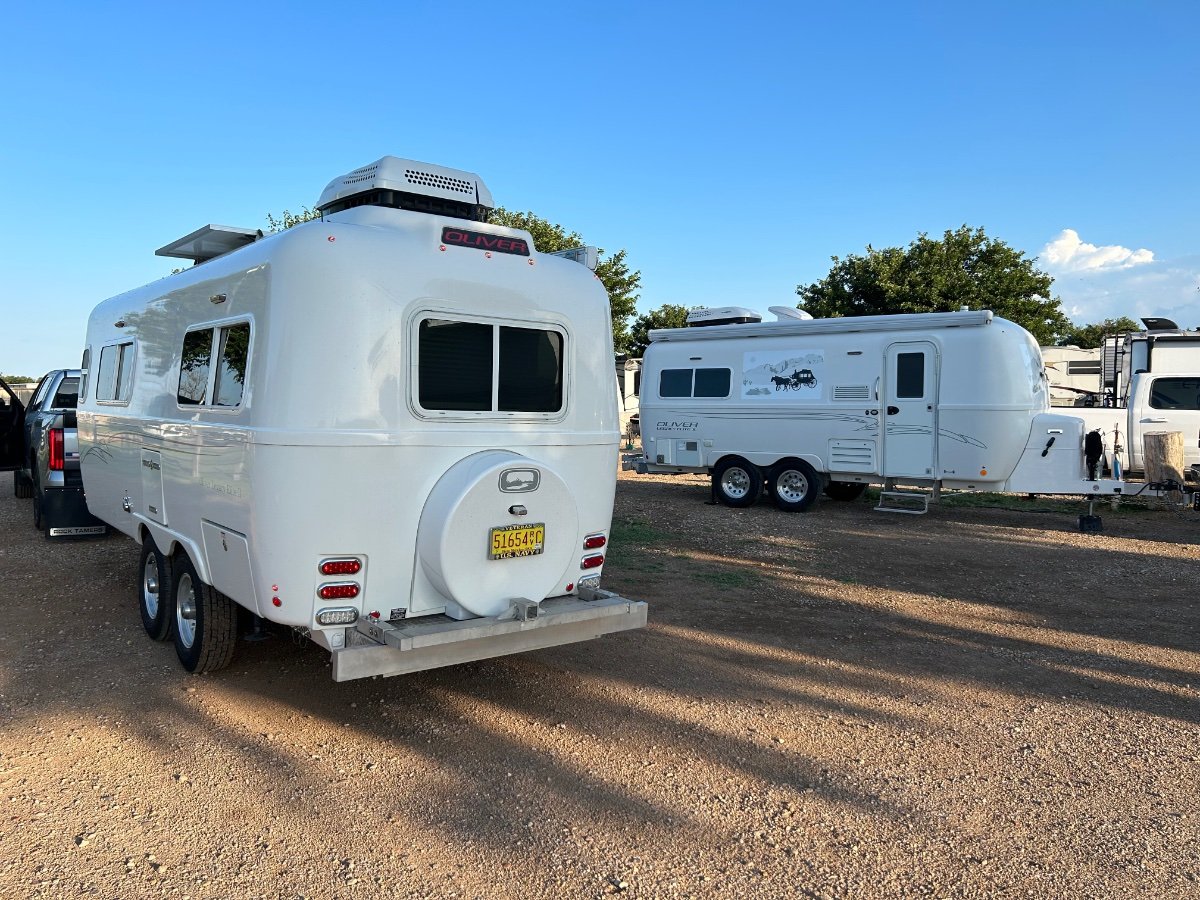
A brand new Oliver Elite 2 from Missouri - with a gray and silver front logo like mine!
2 points
-
We've had a couple random and "not-so" random Oliver sighting this year - and we don't know why, but we get all excited whenever it happens... We actually had a silver (same as our's) Tundra/Oliver rig pass us northbound on I-25 in CO a couple months ago - I woke up D and said, "Hey, Baby, that's what we look like rolling down the interstate!". She laughed and went back to sleep. Never really had that feeling in the AS community - know what I mean? Cheers and "Ravel-On!", y'all
2 points
-
Absolutely wonderful! This is one of the few times that a "spotted Ollie" has been recognized and confirmed. Congrats to both of you!2 points
-
@dewdev I decided to not connect the two external condensate lines from the AC to the internal (Oliver) drain line. I did not want to compromise the weather seal between the new FreshJet AC and the roof of the Oliver. To connect the two condensate lines to the internal line it appears you would need an extra roof gasket. The two condensate lines run (sandwiched) between two roof gaskets. For the time being, I have capped off the internal drain line that leads between the hulls. I may change my mind and reconnect the lines at a later date. I was able to use the existing thermostat control box from the old unit. Note: You may not be able to use your existing inner ceiling cover from the old Penguin AC, the four main mounting bolt holes on the FreshJet are spaced further apart. I replaced my ceiling cover a couple years ago with one that was more flush with the ceiling, thus allowing me to have more head room in the Oliver, being 6’5” tall I needed the extra space. It is a more universal fitting and I was able to use this replacement cover without any problem. You may want to check with Mary (RoadLotus) on the type of cover she is using.2 points
-
I have the BedRug bed liner and travel with a Dometic CFX 75DZ, really heavy when fully loaded. To ease moving it out to the tailgate for better access, when necessary, I installed large furniture slides for carpet at each corner and attached them with Velcro.2 points
-
@dewdev, I had mine installed by an RV shop. According to them, no modification was needed on the entry hole and the condensation lines are the same. I did not relocate anything as far as the temperature box. I am using the existing dometic thermostat. @rangered did his own installation and can provide more details on that. He also got a lower db reading than me. I was using my phone to measure, and it looks like he has an actual db meter. I hope that’s helpful 🙂2 points
-
How cool is that, right?2 points
-
We had the same issues with our black tank valve a few years ago. Poured Thetford drain valve lubricant in the black tank, but still continued to have the problems. Lubricated the push/pull cables and did not correct the valve bypass issue, but cable worked easier. Going from memory. Used valve lubricant on the valve during reassembly. Also used 1/4" drive set with long extension, and tape on my finger to hold one nut during reassembly. I cannot speak to the wires. It was a few years ago, but kept photos of the job. Black tank valve still working without issues. Believe I had to loosen the hose clamps and slid pipe back a little while removing & installing new valve.2 points
-
Absolutely - YES! I've tried flashing high beams, waving out the window, and yelling (like that would do any good at 65 mph on the interstate with the other Ollie traveling in the opposite direction). All this and still getting disappointed when there isn't any (or doesn't seem to be any) waving back. I'm sure that I've missed a couple of Ollies in my travels because and I apologize if I didn't see you. Bill p.s. kind of difficult to miss that one sitting outside your garage.😁1 point
-
Found our trailer outside of Seattle - a 2019 Elite II with the full bed option - which we wanted - in the classified section of the Forums. More expensive but very clean - no rust - housed inside - the owner (a mechanic) seemed very methodical - thanks for everyone's help! 🙂1 point
-
All lights associated with 7pin work as they should. (verified earlier today)1 point
-
The interpretive Ranger-led presentation is well worth the time before you take the loop. Enjoy!1 point
-
I have installed this 4 four pin accessory connector in-line and just before the 7pin socket. I don't have a part number but I bought it at a local trailer supply. It is unplug, plug and play. This modification gives you a additional flat 4 pin connector on a pigtail which can be used when the 7pin socket is occupied (since the use of the 7pin often blocks the access to the integrated 4pin socket). As I recall it was less than $30
1 point
-
Thank you very much Sherry. I am going to use someone in Gunterville, Ala. I was hoping to do it at the last rally, but my ankle got in the way and I have not been able to camp at all. They are holding the Houghton for me. The problem I was asking about was from someone that owns an Oliver and just changed the ac out to a Houghton. They are not able to get the furnace to work so I told them I would put it on the forum for them...I bought a Heat only thermostat that I will replace the existing one with when I am able to get the ac changed out. Thanks again!1 point
-
We got the same deal on the C44 at the Truma booth at Overland Expo West this past weekend. Just a bit bigger than the C36 but still fits under the truck cover.1 point
-
I've been living in my trailer the last several days and it hasn't gotten cold enough to trigger my Xtreme heater (I've got it mounted in the same place as Pete), but here are a few interesting observations: Channel 2 temp sensor is mounted just under the water pump on the aluminum keel beam. Channel 3 is atached to the side of the outside shower housing between the hulls. Neither temp sensor is touching the outer hull. Temps are recorded during the coldest part of the day, typically about dawn. All interior compartments and doors have been kept closed and no hot water has been flowing for several hours before the readings were taken. The curbside area is several degrees warmer than the streetside area because of the use of heat, but the difference is more pronounced when using the furnace instead of the heat strip. I hope to get more meaningful data next week when the cabin and water are not being heated and perhaps the Xtreme heater gets triggered. Aubrey P.S. Something to watch out for: While testing my Xtreme heater and running a 1500w cube heater at the same time, the hose reel circuit breaker popped. Twice. Apparently too much load?1 point
-
Aubrey, I zip tied the Xtreme heater to a 10 X 12 inch flexible, non skid, rubber mat and inserted it into the hold under the aft dinette seat. It rests just aft of the smart charger and blows the warm air back between the external shower box and the inner fiberglass shell. This helps protect that weak point Mountainborn spoke about earlier, where the short threads are on those two hoses. This morning it dipped down to 30 degrees. After my first Cup-of-JO, I went out to take some temperature readings using the infrared thermometer that I have for checking tire and hub temps. Here's what I got as I pointed the "red dot" around between the two egg shells. Shower box - 55 degrees. Back wall of trailer on street side - 55 degrees Back wall on curb side - 42 degrees (shows the air circulates around between the shells) Water lines near water pump - 41 degrees I ran a ceramic heater inside the trailer on a very low setting. The inside temp was 45 degrees. The Xtreme heater is plugged into a new a/c outlet in the fusebox using the same circuit as the refrigerator. It has 15 amps of protection which is more than enough. Thanks for suggesting this great addition to our trailers, Aubrey!1 point
-
Probably not much of a test in the twenties. We've not had any problems in temps in that range, boondocking. I wonder if running the gas furnace helps heat the area between the hulls. We rarely have hookups, and in the coldest weather we've camped in (I think the thermometer said low temp 13 degrees), we had to use the furnace, not electric heat.1 point
-
Both the tape and the Xtreme Heater are great ideas ! Now, its decisions, decisions..... Went through a couple of week long low 20 degree weather last year and early this year and was worried but the PhunnyPharm came thru with no damage but........ Part of pondering will include getting Honda 2000 mounted and if the Honda will/can handle the Xtreme heater. Tape shouldn't be a problem. Thanks for all the info, I think !!!!!!!1 point
-
Since it is in the up position when open, that little hatch will often times slide shut on it's own. We have tried putting something in place to keep it open but that reduces the hot air flow into the space where it is needed. Once we discovered that the door and it's frame snap into place and is held there by two sided tape, we simply removed it, increasing our hot air flow into the area signifigantly. I think that a simple solution might be to place a 25' heat tape on the water pipes that run from the bathroom down the highway side of the Oliver. Then run it under the rear, and over to the curb side, taking care to get the heat tape around the water pump, then come out of the hatch that gives access to the curb side electric jack. That would allow the heat tape to stay in place all of the time, yet be out of the way until needed. Then, when needed, open the hatch, pull out the cord and plug it in by the sink. A switch and indicator light might make it a more permanent install. The tape has an indicator light on it and comes on when the temperature gets down to 38 degrees. This might be considered by the factory as an option for EXTENDED COLD WEATHER CAMPING. In the past we have stayed overnight in a parking lot at 11 degrees, but last night's 8 degrees and the extreme wind chill factor really amplified the problem. Our insulation may be different from other Olivers since it is among the oldest that are out here. We have the 1/2" thinsulate insulation package and no other insulation options. Under all circumstances before this that has been more than adequate. Other ideas and input appreciated on this ! Chris, Cherie, Betty & I, are kind of out there in uncharted waters on this situation, and would like to hear ideas others may have about this.1 point
-
Technomadia - Our 4Runner also had the factory installed tow package and since our Oliver worked fine with our old Explorer, I thought it might be the new electric brakes we had installed. They were not the problem. I thought it might be the alternator since the battery would discharge when driving and the refrigerator didn't keep cool. The alternator checked out fine. I thought the trailer connection was screwed up somehow? The output from the vehicle trailer connection checked out fine. It was not the vehicle. Sorry I didn't get the location on the short/loose connection. I wasn't present when they fixed it. It was inside the trailer. I had the four seat covers off so they could try and find the problem. It was somewhere between the line under the front single seat to the back distribution point for the various lights, etc. Once the short/loose connection was solved, everything worked fine, turn signals, brake lights, battery charging, refrigerator keeping cool, etc. No problems since. We do not need any adapter to plug the Oliver 7pin into the Toyota factory connection to make it work correctly. I would guess the 4Runner factory installed trailer connection is the same as the Tundra? Good Luck! OB11 point
-
The Toyota uses a seperate bulb for each light function. The Oliver uses a common bulb for more than one function. Here is a web link for one type of adapter: http://hitches4less.com/vehwitcombul.html1 point
-
If you know another trailer owner in the area, you might try hooking their trailer to your Tundra to verify that the cable and plug from the Tundra works properly. As I mentioned, I had the Tundra at a trailer supply place today (getting the new ball mount), and they used a circuit tester to confirm that the truck was working properly. I haven't tried another trailer yet, but I will if I have a chance. But I doubt the issue is in the Tundra. - Chris1 point
-
http://www.internationalgassprings.com has a form that can be FAXed in with dimensions, weights, etc. They run the data thru their computer and tell you exactly what is needed and where to attach the mounting hardware. Takes a lotta guesswork out of it.1 point
-
I don't have solar panels so I'm just taking a WAG here, but would it be possible to use gas struts (like the ones used on hatchbacks) to lift the panels? They come in all sorts of sizes, strokes, and weight ratings. With the right ones the problem would then be one of holding them DOWN instead of UP. That is a great idea! I think it has promise. I would think Oliver could find a pair of struts to permanently install on the roof, once on each end of the array. I don't think it would allow any adjustments of the tilting, but it would provide for much higher amperage charging than we can get from leaving the panels flat. It would make the tilting arms that we have to install on the array and on the bracket that holds the array unnecessary. Just climb the ladder, disconnect one side of the array, lift the panels lightly, and one side of the panels rise to the fully extended height, designed to approximate the proper tilt for maximizing battery charging. I will talk to Robert to see what he thinks.1 point
-
Good suggestion and I thought the same, but did not check. Will do the next the temps drop, but might be a while now. Either way I am happy with the solution since it protected the contents. In the past we had paper goods and clothing in the rear cabinet get significantly wet. The problem mostly arose on damp days where we had trouble getting the camper dried out during the day. Also, boiling eggs and pasta on such a day even with the vent and a window open makes controling moisture a challenge. I'll update the post over time as I see how well this works.1 point
-
DCKiefer, As has been mentioned before, your mods are always creative and well executed. Did you have an opportunity after a long, cold night to peel back the bubble wrap from the outer fiberglass wall to confirm condensation had not simply become trapped between the two? How was your ventilation set up when you noticed the former dampness? Thanks again, for all your mod postings.1 point
-
Being a sometime woodworker I thought I'd try this. I had some scrap purpleheart hanging around looking for a purpose, so I made a plug with a cutout for the power cord. Why purpleheart? Because: (1) I'm cheap. (2) Purpleheart is cheap. (3) Purpleheart has many of the same properties as teak, but at about the same cost as walnut. See item 1 above. The green cord is there to assist removal in case the wood swells and the other end of it is attached to a block of foam stuffed into the cap to keep it from rattling around in the breeze. The whole works fits in the battery compartment while underway.1 point
-
Hi there noneoftheabove! Got our RockTamers after I got a 1 1/2" chunk out of the front of my hitch platform. Luckily, SeaDawg had "outgrown" theirs (went to a beautiful Dodge Hemi 4x4) from their now lucky daughters Chevy. They seem to keep front of the Phunny Pharm MUCH cleaner and no more chips. We've been giving some thought to the 22'er Oliver.......but haven't seen one yet. Love our 17'er!! Chuck n Geri1 point
-
Great new accessory for factory to offer. They really do listen to their customers!! Hope we meet up soon, Chuck1 point
-
Steve, We recently replaced our anode, getting ready for the Spring Campout and Jug Fishing Extravaganza at Lake Greeson. All of your observations are correct: The anode only needs to be there, suspended in the tank's water, to do it's job. The threads are tapered so that they will "swedge fit" tightly. Teflon tape or "pipe dope" facilitate sealing so far as no leak is concerned, but keep the threads from seizing up, making the next change out of the anode easier. Looks like you "gotter' done" ! Just check to verify that there is no leak when you fill the water system and you are "ready to roll' !1 point
-
Side by side comparison of the 120 lumen LED and the Halogen bulbs. We think that the halogen light is more of a spot beam and the leds light is more of a wide area light and brighter, though using much less energy. Betty thinks the led light is a easier light to work in the kitchen with. Because our Summer workcamper job will be for several months at a site with no electricity, I wanted to test the lights side by side when the battery was down somewhat, like at the end of a day, before the solar panels had a chance to restore the charge in them. Here is a link to the video, click to play: Like DCKiefer, we just love them. We also will replace the most frequently used bulbs, which for us is the sink and the small dinette areas, four bulbs. This will result in a daily savings of about thirty four watts. Not bad for just replacing four bulbs ! Tumbleweed did this and passed on to us a extra halogen bulb that he had left over, for us to carry as a spare in the event of a burnt out or damaged bulb, we make the same offer to fellow Ollie owners. If you would like to have a spare bulb for an emergency replacement, send a PM and i'll mail it out to you. We will have five to give out, counting the one from Chuck. Future replacements as they go bad, will be LEDs.1 point
-
Very cool.. seems like a much better solution than what Oliver was using for their LED upgrade package (which we bought on our own at their recommendation to save costs): http://www.ledlight.com/g4-ultra-bright ... ac-dc.aspx .. which are 9 LEDs, 110 Lumens and burn 3.3 watts for $18/piece. Great find!1 point
-
Yes Herm, I'm going to ask Robert to do that for me, to see what the extra cost would be. Has your contact with Robert been mostly over the phone or the internet? I have spoken with him once, yesterday afternoon, when we reviewed all my e-mails about the options I wanted. I don't know if e-mails are best or if the telephone is the best. I expect he is pretty busy these days, after being off ill for several days. I haven't received a priced out invoice yet, but I expect one any time now, based on yesterday's phone conversation. Where do you stand? Have you received an invoice to sign and send back to him?1 point
-
These 12V batteries are not true deep cycle batteries, however. Only 3V and 6V batteries are true deep cycle batteries, according to my understanding. They have much heavier plates than the stock batteries. There are a lot of cheaper 12V batteries that are marketed as "deep cycle" that really aren't. But 12V batteries can be built with thicker lead plates, making them "true" deep cycle batteries. The LifeLine GPL-31 and Trojan T-1275 are both examples of very credible deep cycle 12V batteries. One good way to tell is by weight. All other things being equal, a heavier battery indicates more lead inside, and thus thicker lead plates and a better deep cycle capability. You'll notice that cheaper batteries tend to be significantly lighter. There is a reason for that... - Chris1 point
-
Another question: How do you think we can best protect our solar panels from any possible hail damage? That may be a tough one to figure out. Maybe with duct tape and two closed cell foam sleeping pads, cut to size? Most of the solar panels on earth are permanently mounted year round, and they are thus designed to withstand all sorts of weather. If you ever encounter hail large enough to damage your solar panels, that damage will likely be the least of your worries. There are "thin film" solar technologies that use a flexible material and no glass that are essentially indestructible, but they only but out half the power per square foot, so I don't recommend them. - Chris1 point
-
Doug - A lot depends on the style of camping you anticipate doing, how often and the time you anticipate being off grid. The decisions that Chris and I make for ourselves will be different as we plan to be entirely off grid as much as possible, living out of our Oliver full-time. That said, having a sufficient charger that can maximize your sun exposure to charge up the batteries is a good idea - keeping in mind there's only a few hours in the day that you'll have opportunity to get full exposure to take advantage of those glorious 200 watts. Perhaps Chris can follow on with a more technical review of your set up. I'm also curious.. are you going with the standard satellite receiver that Oliver installs? We had to drop that option in order to fit the dual solar panels. (Not a big deal for us at all.) - Cherie PS. There's a good chance we'll actually be in your neck of the woods, as my brother is a skydiver instructor out in Lexington We occasionally get out there and jump with him.1 point
-
I run Odyssey batteries in all my rigs and have had perfect reliability from them. Yes, the Odysseys are good batteries - I've always heard positive things. Unfortunately when it came time to outfit my current rig there wasn't a dealer nearby that carried them so I went with the Trojans. They seem to have a stocking dealer in just about every town due to their commanding share of the golf cart market, so I figured that if anything ever went wrong I'd be able to easily get service or replacement as needed. Of course this is all a moot point if the batteries never fail, but you never know!1 point


-
Recent Achievements
-
")


")


")

