Leaderboard


Popular Content
Showing content with the highest reputation on 09/12/2023 in all areas
-
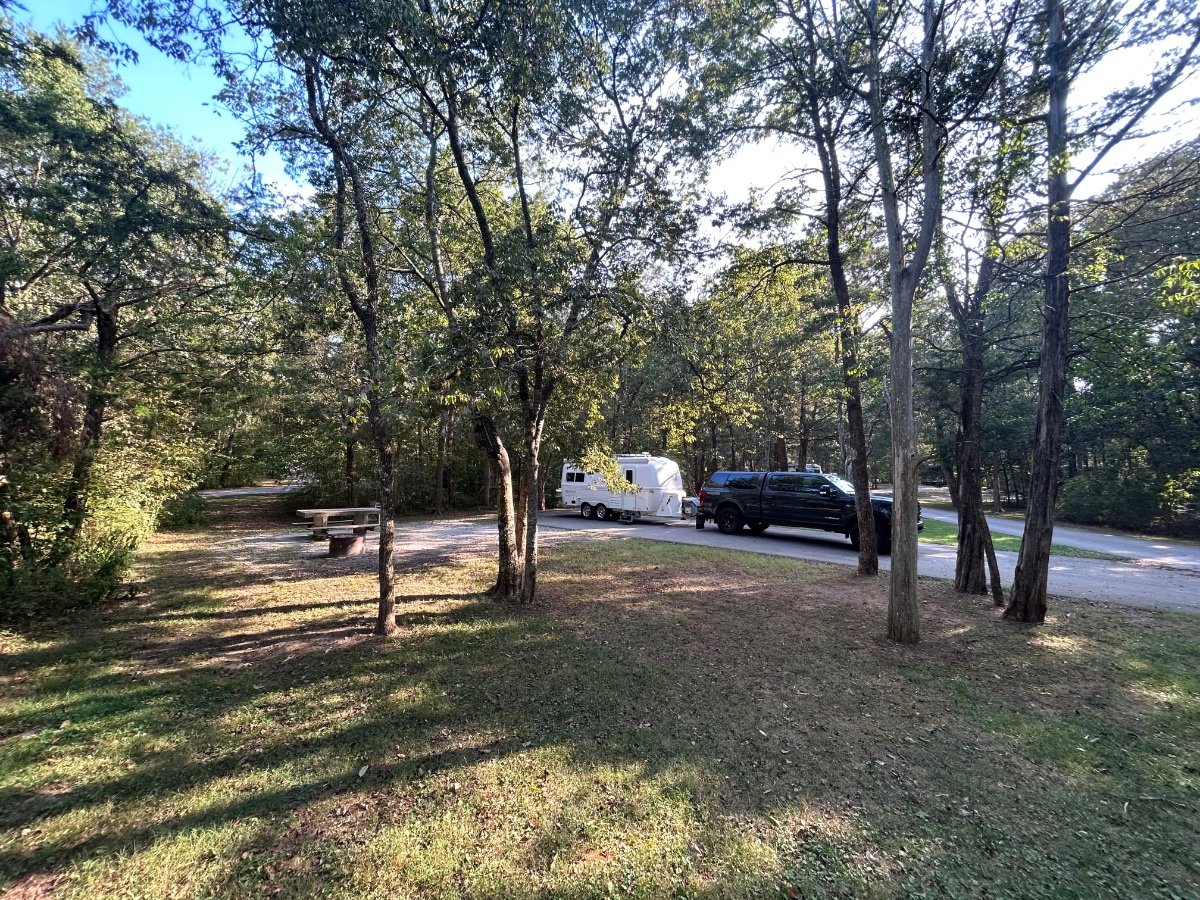
Last night we night we stayed at Washington State recreation area. https://dnr.illinois.gov/parks/camp/park.washingtoncounty.html A really nice CG @$20 per night elec only and a dump station. Super quiet, concrete pads, super clean rest rooms/showers, and really nice camp hosts. The park had plenty of availability when we arrived and is only 8-9 miles off I64. @rideandfly yes sir, we will be crossing the Mississippi today. 😊 Onward!
 4 points
 -
I originally towed my 17’ Casita with a 1997 80 Series LX. Foot to the floor to move its 3500lbs. Got the 2007 100 series LX and it was much nicer, but still heavy pedal for any incline. Got a 2013 200 Series LX and it was like having a diesel when pulling the Casita. Then got the Oliver II, felt like it was the 100 series and the Casita again. I love the 200 for what it can do when not hooked up and it handles the mountains fine, just have to be happy to be in 4th at 3000 rpm much of that time. So, at 5000lbs you can use the 100 series. But you will be constrained. Now the Elite 1 and the 200 series, my perfect combination. 🙂4 points
-
That is scary wiring that the tech removed, BTW the wires should be run along the back side of the axle tubes, not the top or front. That way errant stones won’t cut or crush your pretty new wires. I personally would install split loom over them, but that is a personal choice. I bet the brakes work great now. John Davies Spokane WA3 points
-
If the fuse is inconvenient to get to, just move it to someplace that is convenient. Or install a switch someplace handy. I also have smoke/CO detector under attic in the rear of my Ollie, so I would still have some protection if I powered down the CO/Propane detector under the dinette. I and many others have solved what could be considered a false alarm by replacing our CO/Propane detectors. I don’t know how to properly test the detector, but if replacing it fixes the problem for me, that’s a win for the good guy! Mossey3 points
-
I should have clarified my statement to say “pull off the road and activate emergency flashers” I didn’t mean to indicate you should remain in motion.3 points
-
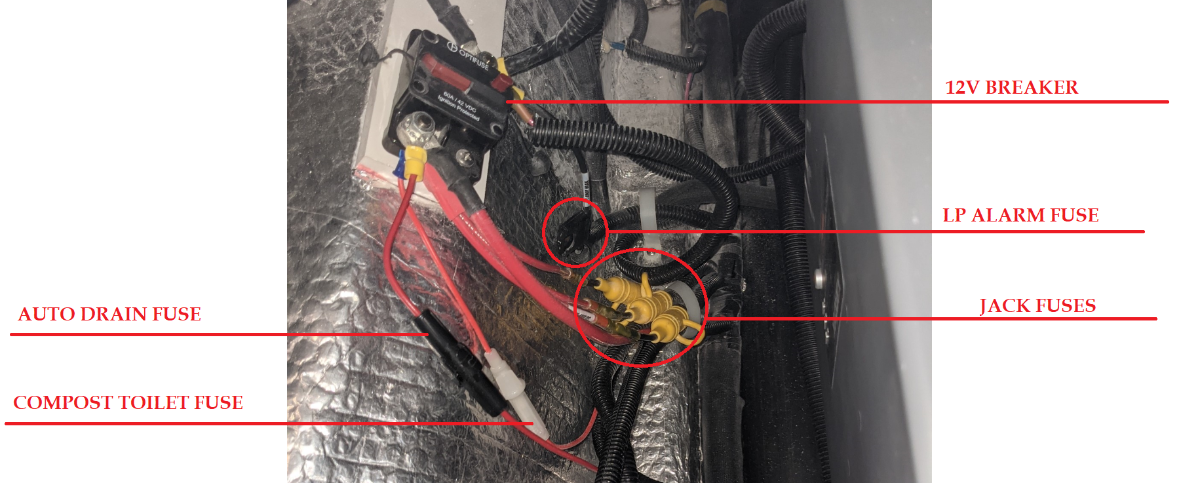
Thanks Mossemi. After I posted my above response, I checked what OTT had sent me. As you stated there is a fuse in line to the detector. Attached is a picture that OTT sent me (for the Elite II), which is under the drivers side (bed) access panel.
3 points
-
We've had the Battery Box on our radar screen since we purchased Casablanca back in March from its PO in TX. One of the Hull #226 selling points for us was that the PO had recently replaced the AGMs with 3 Battle Borns and added a Victron Smart Shunt. However, upon learning from the forum, the BB install by the PO was less than optimum - or at least to our understanding at the time. We were surprised that there wasn't a battery master "shut-off" switch. This fact was the main driver for this project - after looking into what we "really" had on our hands, the pervasive project "scope creep" showed its ugly head! Full Disclosure: Although we've had several RVs over the decades, never have we owned Lithiums. Thanks to these forums, learning about the nuances and particulars of LiFePOs, specifically, Battle Borns - and even more specifically, their application with the Oliver, has taken some time to digest. We didn't want to delve into the "fray" of "cleaning up" what was previously installed until our understanding of this particular system was at a high enough level not to screw something up. So, thanks to the forums, many of y'all's posts regarding the subject, and special thanks go out to @Geronimo John for his patience and guidance with what ended up being a fairly large scale re-design of Casablanca's DC distribution system. Initial Configuration and Issues: 1. A key indicator that there was an issue somewhere within the "DC system" was that the charge controller would never reach 14.4 volts; 13.6 was the max ever observed/measured. 2. The BBs were stacked in an unusual configuration on the battery tray. The rear two batts were aligned side-by-side facing left/right and the third "outer" BB was aligned 90 degrees off facing fore/aft. Several cables were too short not allowing full battery tray extension. Clearly not a neat/tidy or logical configuration. 3. The battery bank was not strapped down. 4. Although likely large enough for intended current, the three BB's parallel connections were made with 1/0 cables versus the 4/0 cables distributing the current into the trailer. 5. Several positive and negative connections were made directly to the battery bank without the use of any sort of terminal post or terminal bar even though the Smart Shunt was in place. These connections were bypassing the SS, not good - thus contributing to phantom current within the DC distribution system and not allowing the Victron App to capture all DC power activity. 6. One cable, a yellow 4 AWG, ran from a negative BB terminal to the wrong side of the Victron SS; this cable essentially paralleled the 4/0 cable from the same terminal to the shunt. This made absolutely no sense. 7. As stated above, no battery master switch. We've always had a master switch in previous campers - handy for longer term storage and eliminating phantom current. In case of fire, we wanted a "safety switch" located outside the camper and inside the battery box to quickly secure DC power after quickly exiting the rig. SUMMARY OF WORK PERFORMED: The closer we looked at the DC set-up the more questions and issues surfaced. There were other ancillary DC system "gripes" but the above list really paints the picture of what we were dealing with... After quite a bit of forum research, thought, and informative and lively discussions with Geronimo John; a clearer project plan developed. 1. We made an assumption that the PO didn't upgrade the "lead-acid" charge controller circuit board as part of the BB installation. This rationale would explain why we never observed more than 13.6 volts on shore power with the controller energized. Sure enough, after pulling the board, it was clear that the board was doing exactly what it was intended to do - charge lead-acid batteries; as it didn't have the Lithium micro-switch option. So, we ordered a replacement 45-Amp board from Amazon with the Lithium option - enter "project scope creep." Above pic shows replacing the LA charge controller with a Li-capable board. The lead-acid board is 100% functional and will be posted for sale on the forums. The new Li-board cranked right up and the BBs finally received the charge intended for a Lithium battery bank: 2. Disconnected and removed the 1/0 cables connecting the 3 BBs, labeled and stacked them sequentially from back to front. Sized cables to allow full extension of the battery tray and added nylon tie-down straps from Rangley. Cut, crimped, heat shrunk, and installed new 4/0 color-coded cables in parallel configuration: Made a terminal buss-bar from 3/16" x 1" solid copper for the Blue Sea Systems master switch (Amazon) which will be heat shrinked once it arrives. Contoured a poly board from an old cutting board to mount the switch, like many owners have done. Mounted a positive (+) terminal bar with the master switch to accommodate DC connections. In the new configuration, only 4/0 cables are connected to battery terminals - removed the various "added-on" connections and placed them appropriately between the (+) terminal bar and the Victron SS. Now, all DC (-) connections are made through the shunt so all DC power measurements are captured with the Victron Application. Peace of mind - priceless. While we were at it, we added an SAE solar input port for the 200W Renogy suitcase solar modules - more scope creep... HA! Not being an EE, I'm sure there's something left out, but in the end, we've got a clean set-up in the battery compartment, fully functional Victron SS, and the appropriate charge controller to manage the BBs. Time for a cold one. Cheers! A & D
2 points
-
Hull #1291 exhibits nearly identical flexibility up and down when someone is moving about the trailer. Such movement is particularly noticeable when someone is climbing the stairs to enter the trailer.2 points
-
There is no dampening built into the trailer. The hull sits directly on the frame separated only by quarter inch strips of rubber between them. The attachment bolts go through the hull, rubber, and frame from the inside.2 points
-
Very nice job! What brand of safety shoes are you sporting? Don’t think I’ve seen ‘em before! 😂🤣😂 Mossey2 points
-
Where about's in CO are y'all headed? Since you're on "our side" of the Mississippi now, you'll find that there's plenty of Buc-ee's as you traverse through TX! FYI: If your travels take you to southern CO, we're only a couple hours south of the border on I-25. Got an easy drive-through, flat site w/30amp H/U - all yours for a just a cold one! HA!2 points
-
I agree when parked off the road for higher visibility and especially insurance reasons. 👍🏻2 points
-
Olivers are built much like a boat, on wheels. They are meant to flex. Fiberglass flexes. Even steel flexes. Big ships flex. Determining how, when, and how much is the big engineering question. We rarely even use the rear jacks, if camped for a night or two. I guess maybe because we're used to boats, we're not bothered by the little movement. Perhaps I'm "desensitized", since I'm used to everything moving around on a sailboat. The slight movement we feel is not an issue, imo. More importantly, we've never experienced any separation or other issue, like some sob trailers , like airstream. (16 years in, 150k miles) It does, however, give us a little bit of understanding of what happens, going down the road. If the hull didn't "flex" a bit as necessary, something else more catastrophic might occur. Stationary, at a campsite, you can add extra jack supports, if it's disturbing, without harm to anything, except extendimg your setup and breakdown time. Me. I'm in the it "is what it is" category, and happy to not have to worry about a tent in the wind and rain.2 points
-
Thanks, Bill. It's passed all of the operational checks, so far so good - very happy with the performance of the new configuration. Played around with it a bit earlier today and remounted the (+) terminal bar and applied shrink wrap to the copper buss bar. Final Config: ...and newly installed location of the Renogy portable solar module input: Cheers!
2 points
-
Anyone else camping at Reno Stead Airport for the (alas, last) National Championship Air Races in Reno NV? We set up camp yesterday. We've been coming here for the past 15 years, but this is our first and last opportunity to camp out for the event in our OE2. If you're attending and would like to connect, we're in the RV West Lot. We're here in support of our team "Cruze Missle" race #10 and owner/pilot Tim Slater who's flying a Glassair SH-312 in the sport class.
1 point
-
Hello from Amanda, Brent, Claire, and Sarah. We recently purchased hull #976 and can’t wait to put it to use. This is our first “Travel Trailer” kind of as we also own a Turtleback Expedition we are selling. I consider the Turtleback to be an overlanding trailer and it definitely has a different set of instructions. We have been gleaning tons of information from the forum and Facebook group and really appreciate everyone’s efforts to document their upgrades, ideas, and solutions. We look forward to meeting some of you in our travels. -Brent1 point
-
Do this help anyone? The black "blob" circled in blue is the fuse.
1 point
-
For others that may experience this same problem, on my previous Chevrolet 1500 LT I was getting intermittent but often trailer brake disconnected warnings in the cab. Replaced the OEM brake controller. Never had the issue again. The issue has not resurfaced in my GMC 2500HD with about 3500 miles towing leading me to believe it was a faulty brake controller switch and not the trailer.1 point
-
My solution enabling me to lift the topper off my truck bed by myself is the My Lifter system. It is much more expensive, but the lift, with canopy, stays suspended below the ceiling of my garage, leaving the entire garage bay usable with the canopy off the truck. https://www.smarterhome.com/products/truck-top-lifter The Rapid Lift/Rapid Stand combo costs less, but occupies storage space when the canopy is off the truck.1 point
-
OK, just back from the RV repair shop, again. They pulled the brake wires from inside the axles and attached new wires, zip tied to the outside of the axle. They gave me the old wires. One was about 11’ long, the other about 9’. The excess was stuffed into the axle. One had a spot where the insulation was rubbed through showing bare wires. The other had about 6” of electrical tape wrapped around the end where it connected to the brake. When I took the tape off I found a weird situation that makes no sense to me. This appears to be the same issue SNY SD UP was experiencing (his photos above). First, here’s the rub: (brown insulation worn to the red then to the copper. Then here’s the end that was taped. The tape extended from the end of the wires to where my fingers are, making it look as though it was one set of wires. The ends of the brown pair on top were completely covered with tape and the left end of the bottom brown and white pair was also covered, leaving only the ends of the brown and white pair showing. So, it appears they were not connected to anything? The tech simply cut the wires off when he was replacing them which are the brown/white pair. The top pair has one wire stripped and one is a few inches shorter than the other. I’m not sure what this was all about. They zip tied the new wires to the axle. I will add a few more to what they used. I had no “trailer brake disconnected” messages on the way home. We leave tomorrow for our fall trip for some cooler weather and fall leaves. Hopefully the problem is solved. I will close out my ticket with Oliver service. Their only offering was that when they’ve encountered this issue it’s almost always the tow vehicle. Not in this case.
1 point
-
This article is in the latest edition of Camper Report & was an eye opener for me. Living in muggy Florida my entire life, & fortunately during all our travels, I have never experienced a true dust storm. A few other subtropical friends were also unaware of some of the tips in this article so I thought it worthy of sharing. Many of the tips are common sense but this one surprised me: "The National Weather Service has a protocol for people who are on the road when a dust storm arrives. They advise drivers to, “pull your vehicle off the pavement as far as possible, stop, turn off lights, set the emergency brake, take your foot off of the brake pedal to be sure the tail lights are not illuminated.” It might sound counterintuitive to turn off your lights because usually, you want people to know where you are. But in a low-visibility situation, it’s best to turn off your lights once you pull off the road. This prevents other drivers from seeing your lights and veering off the road to follow you." That led me to research other low/zero visibility situations on the NWS website. They recommend doing the same in zero visibility fog with the exception to leave hazard lights on. "If there is no parking lot or driveway to pull into, pull your vehicle off to the side of the road as far as possible. Once you come to a stop, turn off all lights except your hazard flashing lights, set the emergency brake, and take your foot off of the brake pedal to be sure the tail lights are not illuminated so that other drivers don't mistakenly run into you." My instinct would be, if the locals are getting off the road, I will too; otherwise, I'll keep going--slowly. I'd love to get feedback from you desert creatures who have experienced dust storms. Thanks! Chris1 point
-
100%. ...and for general safety of occupants and passersby. 😅1 point
-
I doubt it.1 point
-
1 point
-
Maybe I should have called a technical foul.🤣 Mossey1 point
-
What "misinformation"? Perhaps his fuse wasn't located under the rear dinette seat (where mine is) but you did say to follow that positive wire until you find the fuse.1 point
-
One should never be interrupted while dumping. 🤪1 point
-
I agree, but only if your flashing lights are amber. I simple will not follow a driver with flashing red lights because every flash makes me think that they are applying their brakes and I automatically put on my brakes. Mossey1 point
-
I'll take a stab at Mike's question: This section of I-10 in western NM is a "mandatory lights ON" stretch of the interstate during all conditions, especially with known dusty conditions in this area. So, in low-viz dusty conditions those vehicles with lights ON are the ones presumably driving in one of the lanes and not pulled over. If one would pull over leaving lights ON, an approaching driver (remember "low-viz") may assume the pulled-over vehicle is moving forward in one of the lanes. With rate of closure difficult to assess in these conditions - it could lead to a rear-ender. NM does not allow vehicles to activate flashers when the vehicle is motion, no good really comes out of driving with flashers on - we see this happen here all the time. But this is not the case in other states where emergency flashers are allowed for moving vehicles. It may be a stretch, but can't really figure any other logical reason for the state requirement to turn "OFF" all lights when pulled over in these low-viz driving conditions.1 point
-
If I’m under 50% I usually fill the black tank to 75 or 80% before dumping. I then close the valve and fill it up again to 60 or 70%. Then one more time, usually only about 50% and that dump is usually clear. I’m usually outside and Carol is inside letting me know where we’re at. If I do it by myself, I’m inside watching the level before going out and opening the valve. Mike1 point
-
I think leaving the emergency flashers on is the best idea.1 point
-
I could not find which fuse under the dinnette was for the CO/Propnae detector so I contact OTT. I was told by OTT that the CO/Propane detector is connected to the LP fuse in my 2018 Ollie.1 point
-
Nice photos! Looking forward to seeing trip photos! Will you cross the Mississippi River today?1 point
-
Making our way to out Colorado yesterday we stopped at Buc-ee’s in Knoxville, Tenn. It was our very first time. The barbecue brisket and pork sandwiches “Texas style” were ⭐️⭐️⭐️⭐️⭐️ amazing. Just like we remember when we lived in Texas. And just a warning Buc-ee’s Cheddar cheese NUG-EE’S are addicting. Don’t buy a bag you won’t like them 😝. We continued on I40 west to Cedars of Lebanon SP for a nice restful nights sleep. A really nice SP about 7 mi off of I40. Large spacious sites, a nice staff and great place to layover. A few FH sites, mostly W/E sites and a dump station and fairly modern bath houses. We would stay here again.👍🏻 Onward! 😳😋😋😂
1 point
-
@ScubaRx, et alia: Watch video. Disregard cicadas and dog panting. Note movement of body relative to frame. It is not a “distance from wheel skirt to lens vs. frame to lens” optical illusion. Check your Oliver and tell me what you see. I’ve seen it on John Roemer’s hull 92 and my hull 313. I bet they all do it. You’re chasing your tail trying to make it “non wobbly”. IMG_2653.mov1 point
-
In summary, the fiberglass body is not a rigid structure and the attachment of the body to the frame is not a rigid connection. I struck up a conversation with John Roemer, aka Raspy on this forum, at the 2019 Rally regarding the degree of movement felt inside the Oliver. We were sitting beside his Oliver and he was showing me the modified jack stand that he used in an attempt to reduce wobble by reducing the extension of the rear jacks when his wife, a very petite lady, entered their Oliver. While watching the frame area and the right rear jack atop the modified jack stand we noted how much the fiberglass body moved. We asked her to exit and re-enter and to move around inside the cabin and noted that even though the frame was stationary there was considerable movement in the body. I have used x-chocks between the tires and jack stands under the front corners and even though I can reduce the wobble I cannot eliminate it due to the inherent movement of the non-rigid fiberglass structure and its method of attachment to the aluminum frame. We have become accustomed to the movement and now set up with as little extra gear as possible.1 point
-
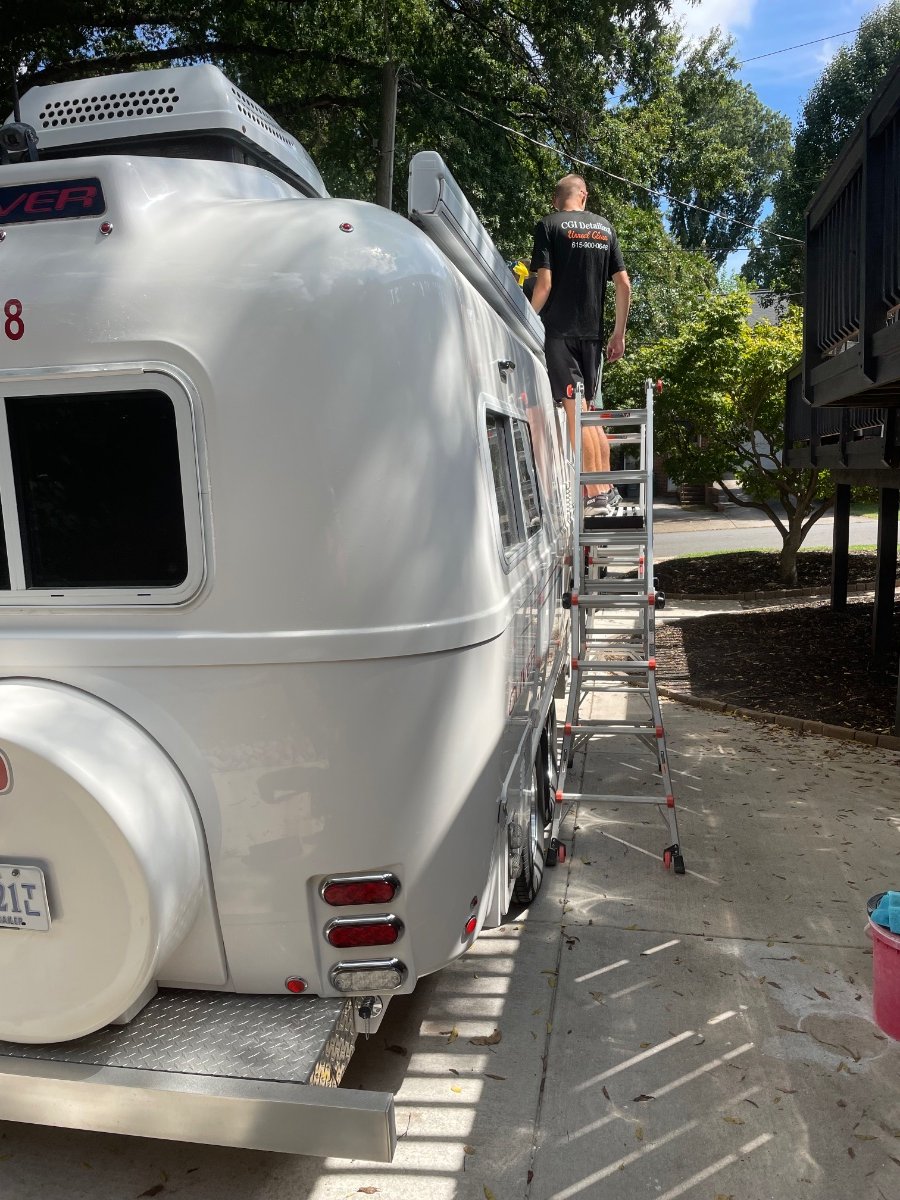
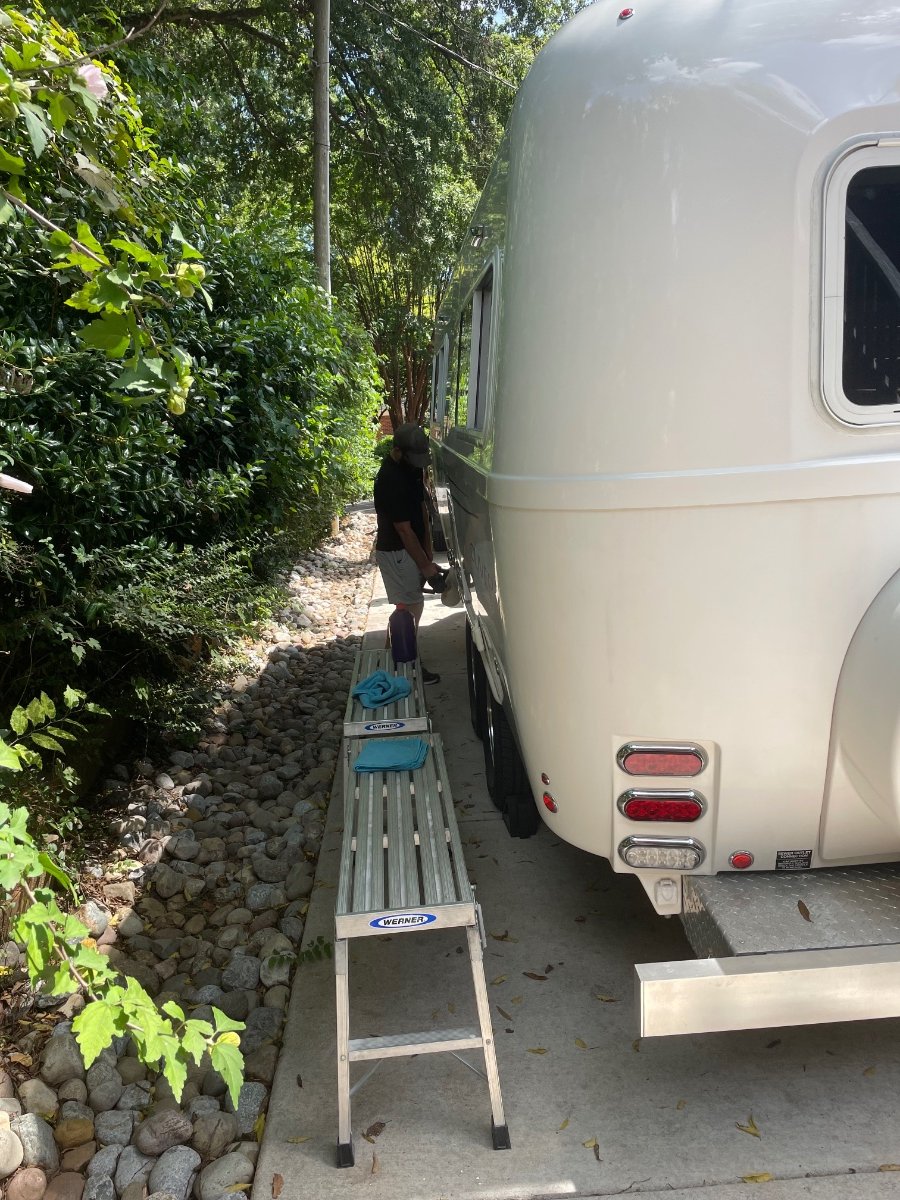
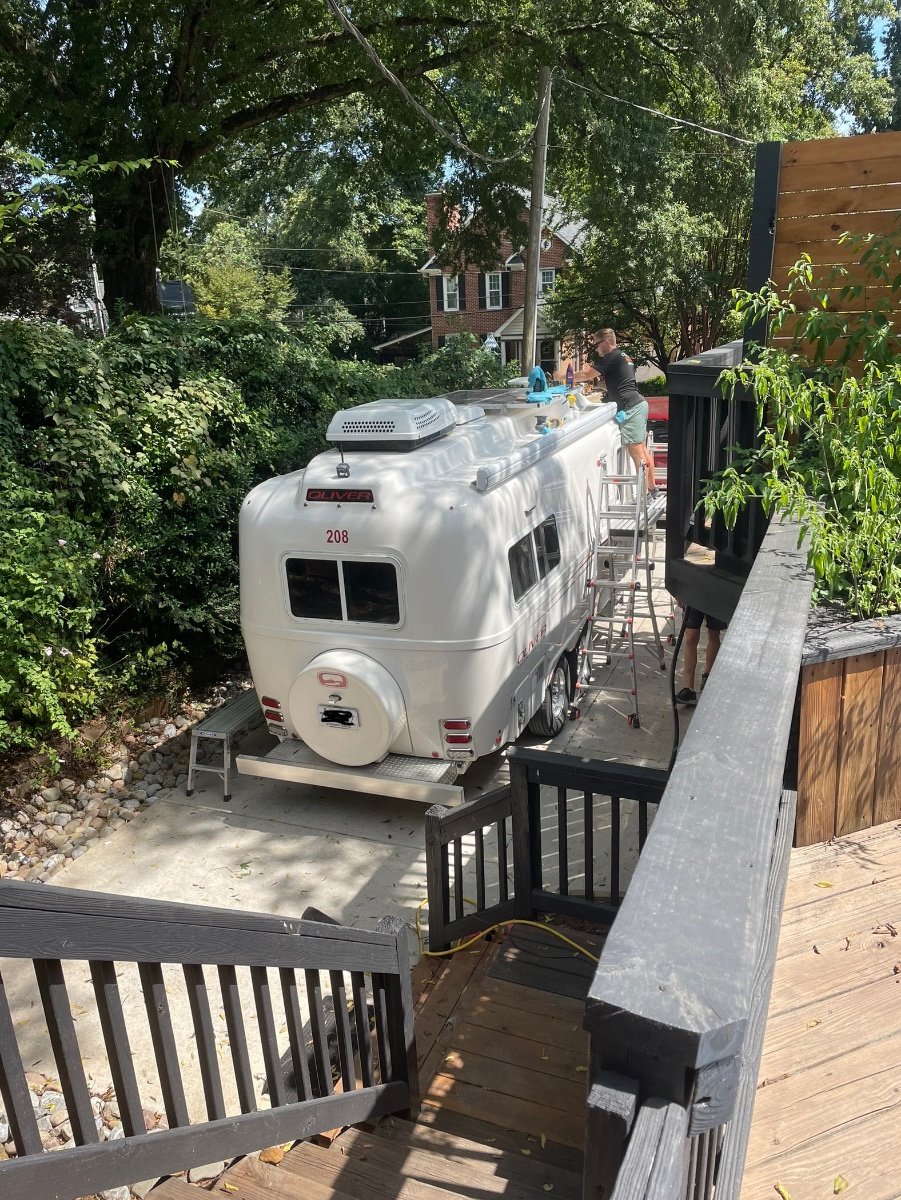
We just got home from meeting the CGI guys in Charlotte, NC to coat our trailer. We met them at an air b&b and they did the whole job in the driveway. They certainly are the nicest bunch of guys! I can’t believe how hard they work at the whole process and what a difference between before and after! After six plus years outside 24/7/365 it really needed some help. Now knowing that the gel coat will be protected, looks better than new, and having a little easier cleanup routine really means a lot.
1 point
-
We’ve been using a TMobile sim card in our cradle point for about a year. No problem. I picked the sim up from the t-mobile store, popped it into the cradle point, and voila! It was a piece of cake.1 point
-
HERE is some neat chain/cable covering that helps keep both the tow and Andersen chain looking good. Installation is simple using black zip ties at each end. Bill p.s. Credit for the chain covering goes to Foy. p.p.s. Nice anti rattle hitch vise too. See it HERE. Mossemi put me onto this one.1 point
-
Your shackles aren’t flipped. All of your photos show the shackles in the correct normal orientation.1 point
-
I really look forward to the day (not that far in the future) that both my Jeep Grand Cherokee Trailhawk and Ford F-150 will be replaced by EVs. We are in the early stages of the development of this technology and as others in the past. Remember slide rulers and dial party landline telephones...?1 point
-
On I-10 in AZ and NM they post what to do in a dust storm, same as above.1 point
-
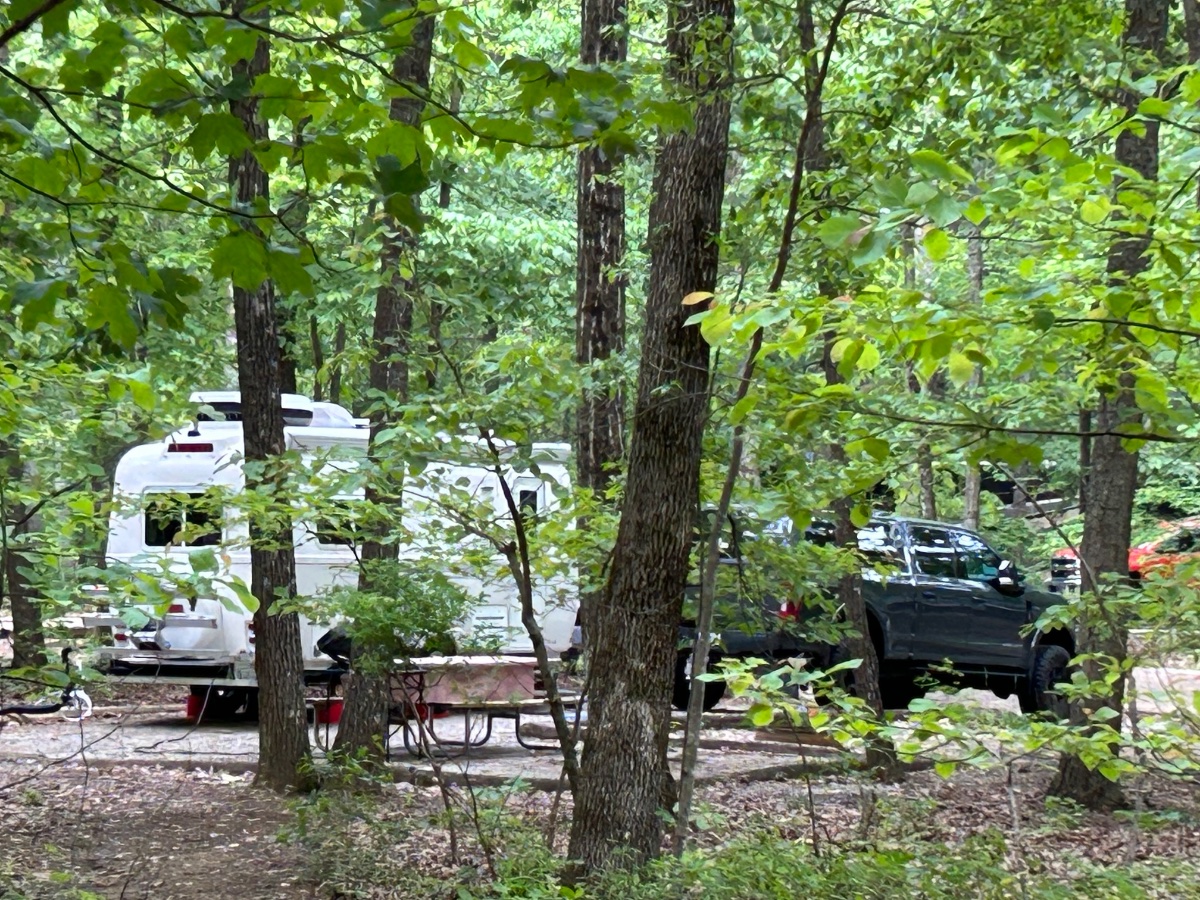
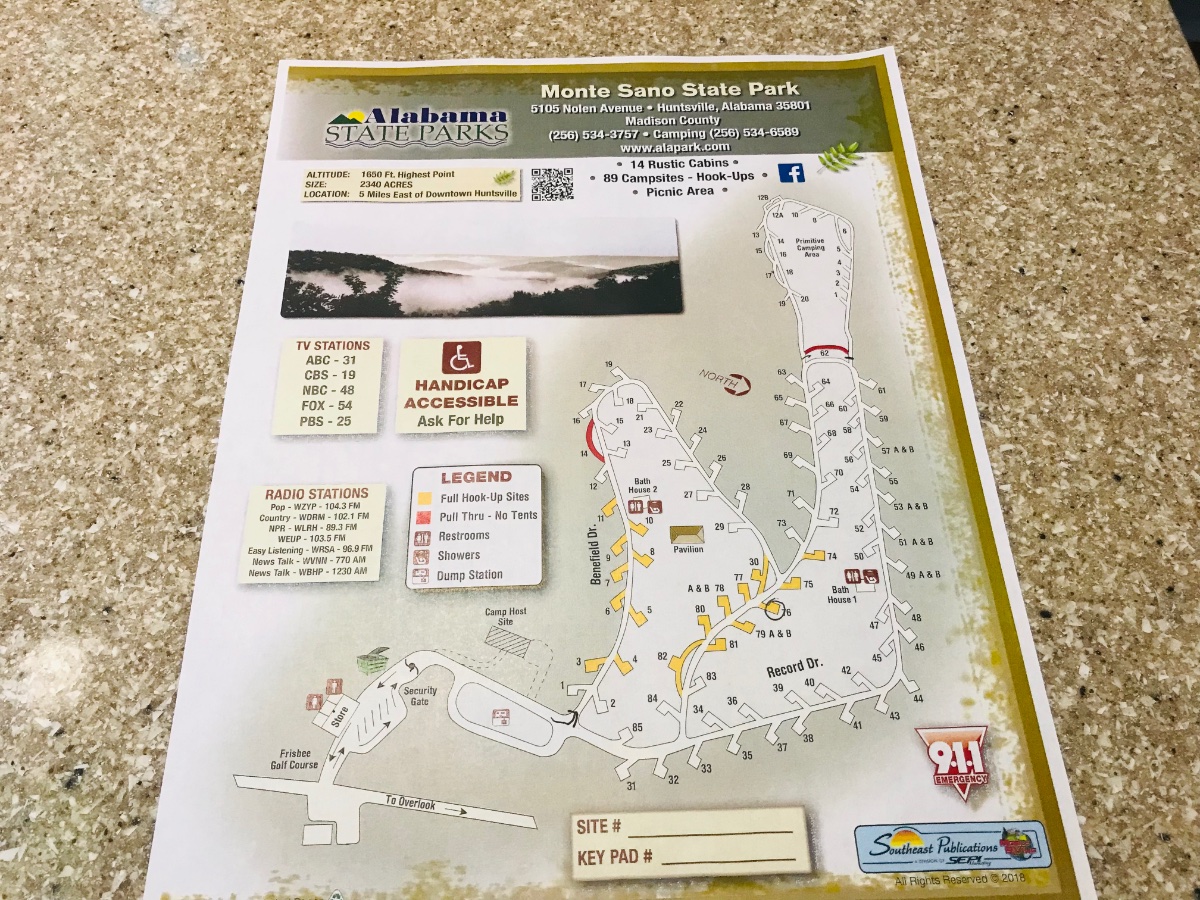
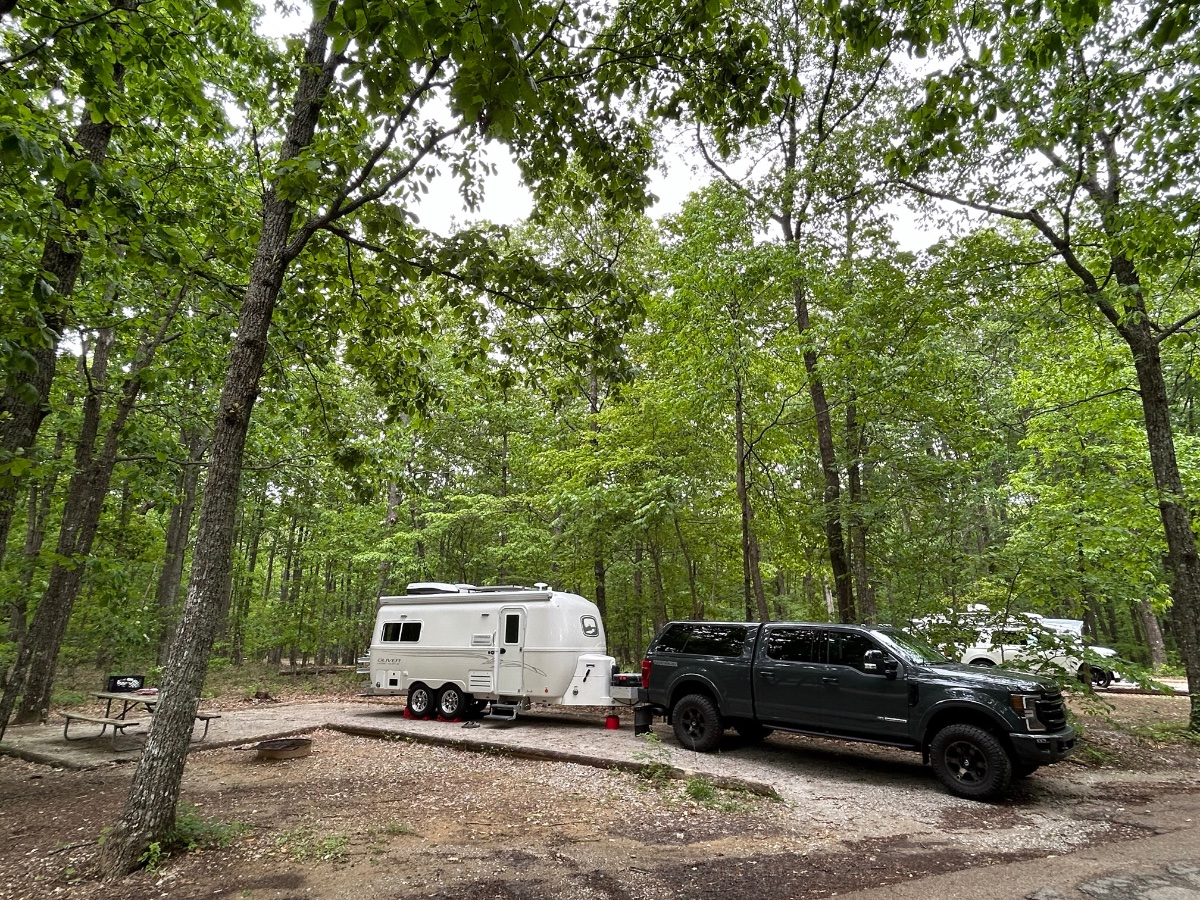
Ollie in the Wild! After a very successful service visit and Truma retrofit/install we left the Oliver Mothership and are now camped at Monte Sano SP near Huntsville, Ala. It’s a reeeeally nice SP and we highly recommend it! Nice large sites with full HP. Only 55 miles from the LGSP Oliver Rally. A nice place to chill until we head out to the Rally. Even a little Bluegrass music under the Pavilion this evening. Happy Camping! Patriot🇺🇸
1 point
-
Hey Max, You could list it here and see what gives? 👍🏻https://olivertraveltrailers.com/forums/33-general-camping-gear-and-accessories-for-sale/ Patriot🇺🇸1 point
-
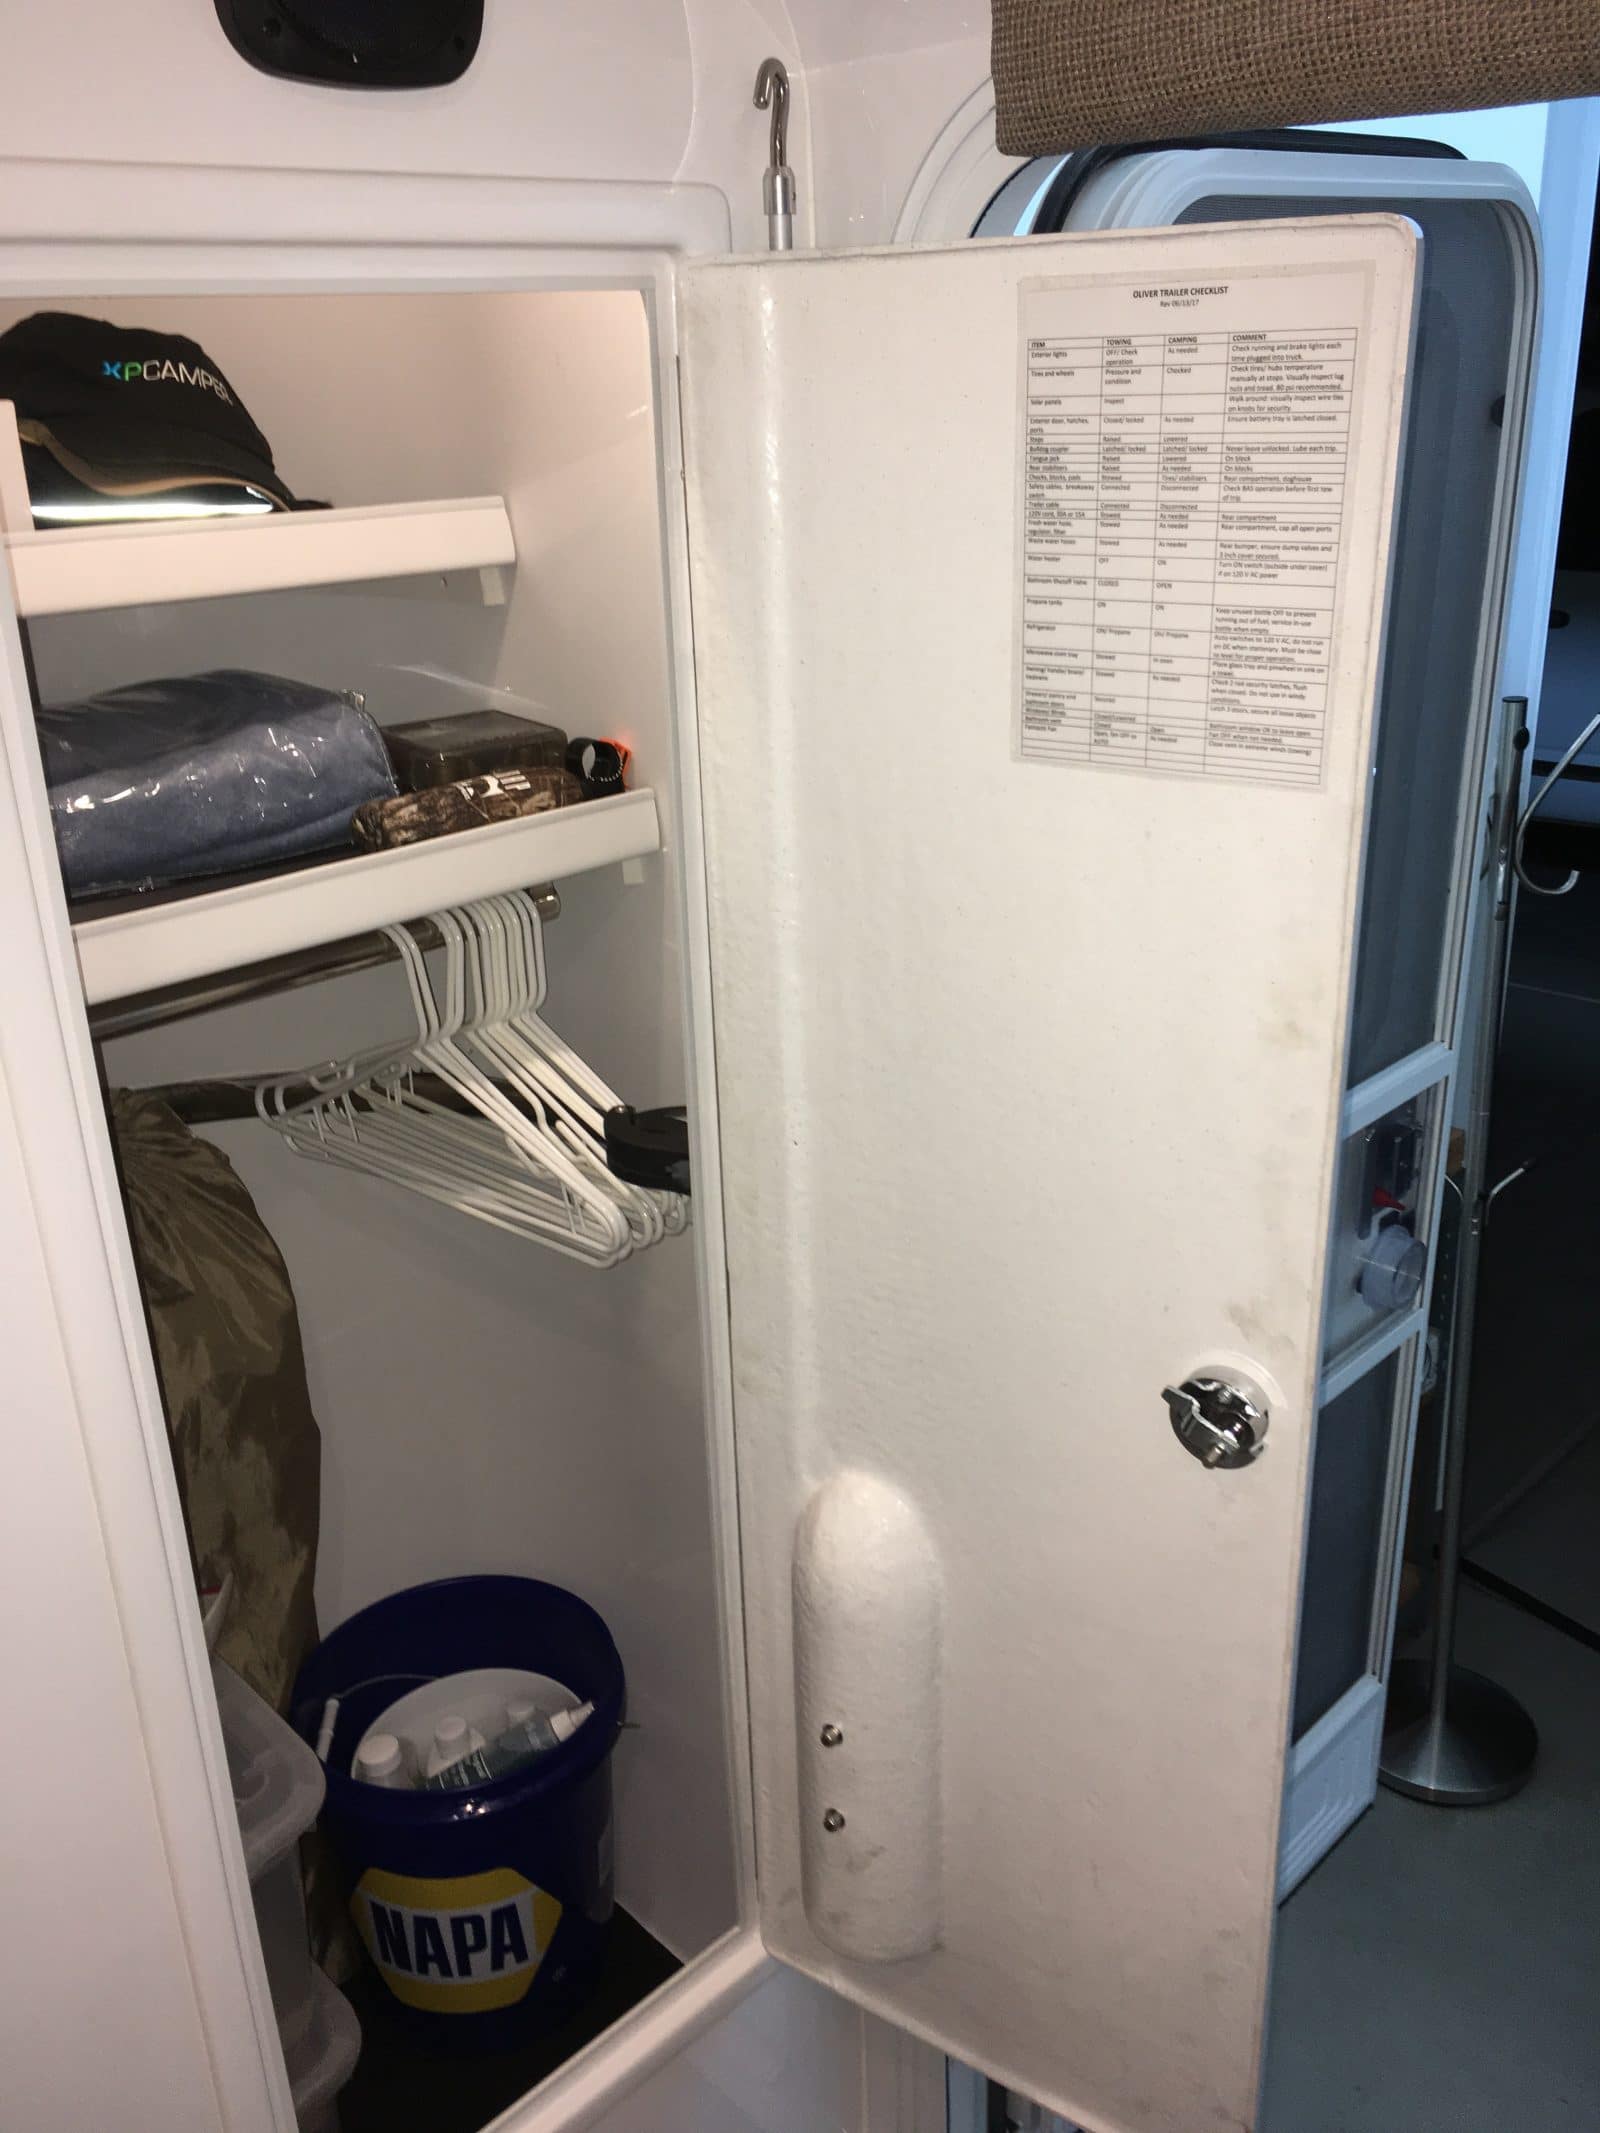
I made this because the Owners Manual towing and camping lists are simply lame. This one is set up like an aircraft preflight checklist. Feel free to edit and change as needed, some items may not apply or you may just want to do it differently. Mine is laminated and posted inside the closet door: Click the attachment at the bottom to download the Word file. John Davies Spokane WA OLIVER-TRAILER-CHECKLIST-–.docx
1 point


-
Recent Achievements
-
")


")


")


