Leaderboard


Popular Content
Showing content with the highest reputation on 02/20/2024 in all areas
-
I just completed installation of a Victron Smart Orion 30 amp isolated DC to DC charger after reading all the great information provided in this forum by MAX Burner, and others. I really appreciated all their groundwork and details, so I wanted to share some of my experiences in the hope that others will find it useful. I used #4 AWG wire for ease of installation and for better termination options. BatteryCablesUSA recommended their “Jumper Cable” wire and it was the best deal I found at $197 for 55’ x 2. It consists of a black and red cable joined together like zip cord, and it’s flexible enough to lay flat under it’s own weight. Their lugs and heat shrink were also reasonably priced. I sheathed the full length of the cable with 3/4” braided cable sheath for extra protection and good looks (Amazon Keko 100’ roll for $21.) I seized the ends with Amazon XFasten fabric Wire Harness Tape (5 rolls for $14.) BatteryCablesUSA also recommended Anderson SB50 connectors, instead of the larger #4 AWG rated SB120 connectors that I originally planned. They said that #4 AWG wire would fit in the SB50 #6 AWG contact pins, which it did. I used Trailer Vision covers for the Anderson SB50 connectors. A TV-201426-50 surface mount receptacle with hinged cover plate was installed under the truck bumper. It has a red LED power indicator that I discourage from connecting because it’s on all the time and annoyingly bright. They also offer a flush panel style mounting. The sheathed cord on the trailer side got the Trailer Vision TV-328993-50 plug cover. It has a protrusion that catches on the mating receptacle’s hinged cover to stop it from pulling out. It’s similar to how the 7-pin connector ports hold the plug in. It also has a LED power indicator that’s more useful because it’s only on when connected. It uses a compression gland for the cable that I filled with black RTV. Powerwerx company sells Trailer Vision parts, Anderson connectors, and other accessories for reasonable prices. Get at least 4 extra #6 Anderson pins for connecting to the Victron compression terminals as explained later. Powerwerx also sells the “PanelpodSB,” which is a surface panel mount Anderson SB50 housing for $11.99. I mounted one on the Oliver’s cargo box for “parking” the Anderson connector when it’s not plugged into the truck. It keeps with my existing theme of parking places for the 7-pin cable and RAM rear view camera cable. They also sell a tethered cap to keep it clean when traveling. The engine compartment wiring was straight forward. I connected the cable’s red wire to a 60 amp terminal post fuse on the battery positive. The black wire terminated to the battery negative. The trailer half of the sheathed cable went through a penetration behind the LP tanks. A hole was drilled through the trailer wall next to the existing penetrations with a 1-1/8” step bit. The sheathed cable passed though an Amazon PA66 1” nylon cable gland ($7.99 for two.) I used a short piece of heat shrink over the sheathing where it passed through the gland and filled the gaps with black RTV. The shelf under the bathroom sink has to be removed for access to the inside cable penetrations. From there the cable can be simply pushed under the floor to the rear dinette seat where the Victron was mounted. The Victron has some great safety features that will automatically reduce, or shutdown, the output if it gets too hot or the input voltage drops too low. It’s important to take this into consideration because it would likely happen while driving, and you wouldn’t know it without constant monitoring. Voltage drop especially comes into play with the new smart alternators that lower voltage output to save energy. The Victron’s default voltage settings account for this. However, due to the longer run of cable needed with travel trailer installations, the cable resistance can cause enough voltage drop where it can go below the default settings and cause the Victron to derate it’s output. I calculated the voltage drop for different wire gauges at 35 amps (nominal input current) and a cable distance of 53’ x 2. The results don’t include the connector and termination losses: 1.46 volt drop for #6 AWG 0.92 volt drop for #4 AWG 0.58 volt drop for #2 AWG Per Victron’s instructions, a 0.6 voltage drop can cause a “Voltage Lockout” with the default settings. There are many factors that can affect this, and fortunately the Victron defaults can be adjusted. To account for my voltage drop, I decreased the “Start Voltage” from 14 to 13 volts, and the “Shutdown Voltage” from 13.1 to 12.8 volts. These setting were recommended by “Offgrid Power Solutions,” on a You Tube video called “Victron Orion-Tr Smart DC-DC Charger settings.” Cooling is also an important consideration for the Victron because they create a lot of heat, and they derate charging current 3% for every degree above 1040 F. That’s almost 50% performance loss at only 1200. Maximum operating temperature is 1310, where I believe it shuts down completely. This is why I installed cooling fans (but also for the fun of it.) Amazon’s ”Sound Original” low profile blower fans (two for $9.99) were the right size, they had bearings, brushless motors, and a good mounting configuration for this application. The Victron was mounted on 1/4” standoffs to keep its cooling fins off the mounting surface, and it also helps the fans to distribute air more evenly. I used a Normally Open, 1040, 5 amp, thermostat switch to control the fans (Amazon Uxcell KSD9700 (2 for $5.49). The fans get power from the input terminals on the Victron so they can only come on if the truck is connected, and the temperature is over 1040. The thermostat switch resets at 860. The Victron was mounted on a painted plywood board that was attached to the forward battery compartment wall. It’s an easy to reach, out of the way location. I used 4 rubber well nuts that stay in place by themselves, but regular nuts and bolts could be used. The sheathed #4 cable was terminated to the Victron’s input compression terminals, with the fans power leads. I struggled at first with the Victron’s compression terminations, the wire wouldn’t fit, and I couldn’t find #4 square ferrels. So I was pretty pleased to discover that Anderson pins can be filed down to fit perfectly. Just be sure to cover the exposed barrels with heat shrink. The negative output of the Victron went to the main chassis ground post under the rear dinette seat where there is a 2/0 cable going directly to the battery negative. The positive output was connected to the line side of a Blue Seas 60 amp fuse block, from there it went to the line side of the existing inverter’s DC circuit breaker, which is jumpered to the battery positive with a 2/0 cable. With the TV at idle and the lithium batteries around 60%, the Victron output was 35.8 amps as measured by a clamp-on amp meter. The TV input was 42.5 amps. This calculated to 84% efficiency, which is close to Victron’s 87% claim, which I assume is under perfect conditions. I really liked the looks of the sheathed cable and Trailer Vision plug and receptacle,. The hinged receptacle cover will keep the dirt out when not towing. The plug and receptacle are locked together more securely with the Trailer Vision covers, otherwise the Anderson connectors can be fairly easily pulled apart and they might not stay together on a bumpy road. Cheers, Geoff
 10 points
 -
Batteries arrived today! (2) 12V 300AH -V2's - upgraded version that includes Victron Comms (though I'll NOT be using the Victron components/functionality at this time). They were delivered at approx. 35% charged, so I've put them on a charger in the garage to bring them up to full before install. I expect to work on the swap on Weds & will provide updates thereafter ... cheers!6 points
-
Handy little item, there! I just ordered four. We keep the Jerrycan in the passenger footwell of the truck when at camp, and in the bathroom next to the toilet when travelling. This looks like a better option. Have you travelled with the Jerrycan full, or do you empty it? That's a lot of weight if full. I'll put the second pair on the wall under the dinette table to secure things that we stick under there while on the road. (The last trip was a box of wine and booze. I wedged it in with an empty duffle and towels. Gotta protect that precious cargo!)5 points
-
There really hasn't been that much difference in our use of the Ollie wet bath compared to the dry bath in our fifth wheel - except height. At 6', I have to bend over to wash my hair in the Ollie, which I didn't have to do in the fifth wheel, but that isn't specifically because it's a wet bath. We have the OTT-supplied shower curtain to keep the commode area dry while showering. We used to wipe down the walls of the shower enclosure in the fifth wheel just like we wipe down the shower walls in the Ollie now. Not really all that different. (The one thing I really miss was specific to our last fifth wheel. The bathroom was right next to the furnace and there was a floor heat register in the bathroom just outside the shower enclosure. You'd step out of the shower and stand right over that heat vent on cold days. Wonderful.)4 points
-
When it comes to the inductive loads, there shouldn't be any difference in the load on the campground since the watt draw at the pedestal is the same with or without an autoformer. This would change if everyone was running their electric water heaters or other resistive loads at the same time. By how much and to what effect is highly variable and would depend on the campgrounds electrical system. In the end, the same amount of watt hours would be used by each camper had the power been at the correct voltage to begin with. Also, the autoformer shuts down at 104 volts so they won't be drawing power at all if the campground system dropped that low. I'm guessing a campground's grid would probably be more protected if everyone was using an autoformer than if nobody was. You'd have more angry people though since the power would be cutting off inside their campers instead of continuing to operate at that dangerously low voltage. In that situation I'd certainly rather loose power completely than destroy my ac or refrigerator.4 points
-
Regarding the wet bath/dry bath perspective, we quickly came to the same conclusion as others have. And It's the first thing I bring up when someone says, "I won't have a wet bath". I point out that I don't camp out in the bath, or use it for a library. Ninety-nine percent of our day is spent someplace other than the bathroom. The fact that it's called a wet bath really doesn't change much about the way I use it compared to a similar dry bath. For us it was a non-conversation, just something to be aware of. On the note of how much RV real estate is valued at, I think Oliver knocked it out of the park with how efficiently they met all the needs in such a compact camper. Like someone pointed out, everything has trade-offs, and I think the design of the Oliver campers makes the most gain possible for the trade-offs they chose to work with.3 points
-
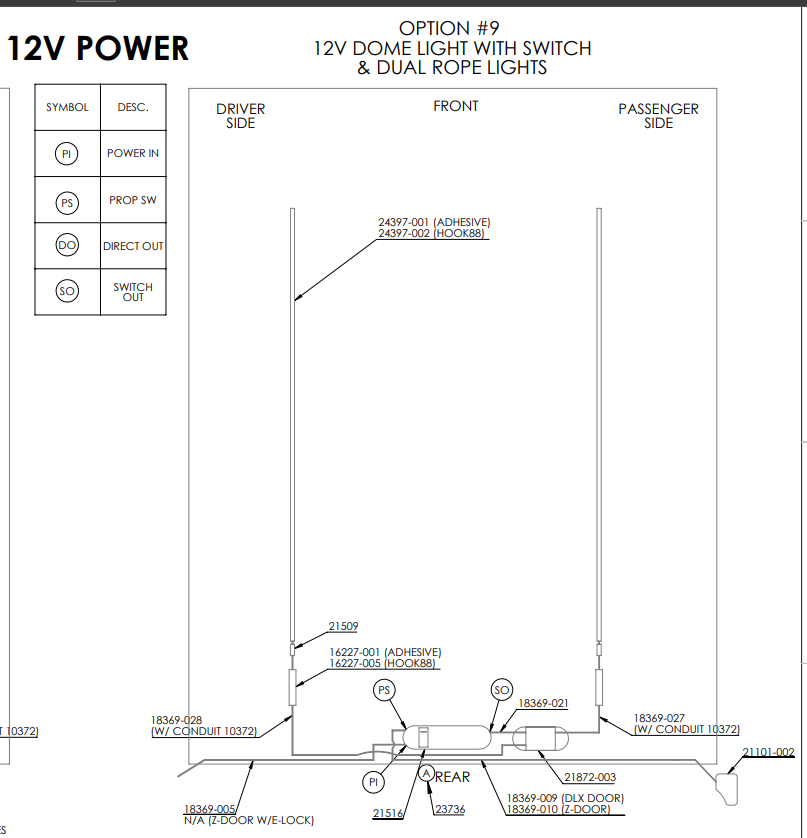
I’ve recently had an issue with the wiring on my ARE Canopy. It took a lot of emails and time with ARE to share the wiring diagram for the lights. Thought I would share here just in case any Oliver owner needs the info. ARE directs buyers through the dealer network for parts and info like this. Each dealer is pot luck on support and trying to attain a simple diagram was a major feat, especially while traveling. To get a response, I had to share the SN of the canopy, show receipts of part orders from a dealer before ARE sent the diagram. The replacement parts are not shipped with any instructions or indication as what connects to what and caused me 3 weeks of delay. I appreciate Oliver support more each day.
3 points
-
Although the Litho's are pretty much "Maintenance Free", having the battery tray sure is handy. Especially if you mount a master switch, shunt, load terminal blocks and tie down straps in the battery bay as many of us have done. Hope it works out well for you. GJ3 points
-
There are times when purchasing a quality item just doesn't make any sense. Several years ago I was talking to a friend of mine about buying one of his sets of "Snap-On" tools from him. He said that given the amount of time that I would use this combined with the type of work that I do (hobby and repair) my purchase simply would not make any economic sense - his recommendation was to just buy the same set in a Craftsman or Kobalt or Ridgid/Huskey brand instead and pocket the extra money. However, there are certainly other times when plunking down that extra money makes perfect economic sense. And, can actually save money over the longer term. Having said this - in the case of RV's, hopefully buyers get a good handle on what their camping needs and wants are prior to buying anything. This is easier said than done though. It sure is awful nice to have all that room of a big 5th wheel until you find out that it is a big PITA to travel with let alone get into and out of many camping spots in more remote places. Knowing now that I really could sell my Oliver for (at least) what I paid for it 8 years ago pales in comparison to the joy I get when people can't believe that it is going into its 9th year and still looks new. Add this to the enjoyment I've had with Twist over the 8 years, I'm absolutely certain that this was the correct choice for me. But, if I only wanted to go to the local RV park for the weekend or had a bunch of kids, I understand that my decision could have been different. Bill3 points
-
An alternative, especially for inside use, would be this self-adhesive hook cleat. The adhesive pad is clear and very strong; placed one on each side of my LifeSaver Jerrycan.
3 points
-
That works great, if you have both: (1) a 30A female to 15A male adapter and (2) a 15A receptacle on the pedestal.3 points
-
I experimented with these on a scrape of OTT fiberglass for a mod I had in mind. I used a long bolt a couple of nuts and a pair of wrenches to crush them. I believe they are a worthy product for an anchor/mounting point in or outside of an Ollie. I still haven’t completed it, but it’s still on the list Mossey
3 points
-
Here is an interesting video which gives a pretty straight forward way to disable the speaker on an Apple Air Tag. Removal of the speaker eliminates the continuous audible chirp after 72 hrs. Removal of the speaker will not allow a bad actor to hear the chirp, then find and disable the AT by removing the battery after he/she locates it. For example an AT hidden in a car under the seat or in the trunk. Or in a piece expensive camping equipment say a portable generator or even an Oliver TT. The bad actor will eventually figure out there is an AT on the stolen item tracking them if they have an iPhone. Without the speaker chirping it will be more just a bit a lot more difficult to find. A common misconception - the map location is not the location of the air tag, it’s the map location for your truck or campers air tag that would have been the location of the persons phone who parked or walked or drove by close enough for their phone to hear the air tags broadcast. Patriot🇺🇸2 points
-
I am aware that some owners use the Hughes Autoformers, even in combo with one of their Power Watchdog surge protectors. Although designed for easy use outside at the shore power post, they can be installed inside an RV which is what I decided to do. Without going into much detail, the Autoformers (available in 30A and 50A models) boost voltage when drops occur, as well as provide surge/spike protection. Surprisingly enough, a ‘search’ of this Forum did not show many results for these Autoformers. As a cost saving measure and matter of convenience, I passed on their Internal Hardwire Mounting Kit and simply made use of a new 10’ 30A RV extension cord. I did however, opt for their Mounting Bracket due to space limitations and ease of removal for service needs. Upon disconnecting all power sources, I proceeded with removal of the exterior street side Furrion 30A Twist Lock male plug. Although I never experienced any problems in the past, I did find the ‘white’ neutral wire connection loose, probably from vibration. You’ve heard it before and now again, routinely check your wiring connections! I then opened up the Automatic Transfer Relay and disconnected the individual wire ends of the stock 10 AWG Boat Cable. I was pleased to find my unit had the Wago Lever-Nuts wire connectors! The clamp connector was loosened and cable removed, all 24” of it. Note: I opted for the front 30A convenience plug for generator use, thus the stated ‘relay’. The female plug end of the aforementioned 30A RV extension cord was cut off, measuring ~35” of cable length below the red plug and subsequently connected it to the Furrion Twist Lock plug. I used the removed cable to gauge how far to strip back the outer cable cover and individual wire ends. Again, pleased to find that the individual wire inserts on the Furrion were color-coded to ensure proper wiring. If you forget to position the neoprene gasket prior to connecting the wires, just know it can be ‘gently’ fitted over the Furrion’s cap and base. The mounting screws were then aligned with the gasket and hull holes for reattachment. The installed female plug extension was laid out and connected to the remaining length of the male plug extension; the end of which was then fed into the relay to mark where to make another cut. For clarification, the cable right of the red plugs is the whip on the Autoformer, the left is the excess length to be trimmed. As before, the former cable was used to gauge necessary wire stripping. The cut length measured ~38” of cable below the red plug and subsequently attached to respective Wago connectors/ground. The cable clamp was then tightened and lid placed back on the relay. By connecting the two red plug ends, the circuit loop is restored to the original configuration, but now longer and modular. The connected cables can now to tucked away when bypassing the Autoformer. Note: the final position and orientation of the Autoformer will differ from this pic. The plug ends can now be disconnected from each other and connected to the Autoformer, as necessary, to bring it into play. These pics show the final position and orientation. Note: the ‘yellow’ light on the Autoformer indicates it is boosting, I have known for some time my storage facility voltage fluctuates and just another reason for this install. The above two pics shows a mockup of the Autoformer, which still needs to be properly mounted. I will update this post when undertaking that task.
2 points
-
Will Prowse has some great videos on his YouTube channel on the Epochs. This, from a week ago, compares features, and costs, of LiTime and Epoch. I think I've posted this one before in another thread, but it's an interesting teardown of the Epoch 460. He's been very impressed with the case and components. Good luck with your install. That's a whopping amount of amphours!2 points
-
I fill the LifeSaver Jerrycan and the Oliver’s freshwater tank with ‘home’ water prior to a trip departure; LSJ for consumption, freshwater tank for everything else. When the LSJ runs low it is refilled from the freshwater tank. This current system replaced having to bring a 3-gallon spout container of filtered water for initial countertop use, and the Travel Berkey for refilling, which is time consuming and cumbersome! In doing so, the footprint/stowage of the water management system is greatly reduced with an increase in onboard water supply. I too do not like change, unless for the betterment, all part of my Oliver Evolution!2 points
-
Thanks! From previous posts I knew that's where you kept it for everyday use. I was mostly concerned if the attachments held the 45 pounds snugly while travelling. That's where I'll mount ours for travelling, then! That will be a lot more convenient getting it in and out than in the head. For actual use, we don't use the Jerrycan daily. We leave the house with four square plastic 1-gallon jugs of filtered water (from our home Berkey) and then refill them from the Jerrycan on the road as needed. These in turn are stored in the closet and get dumped into a pitcher we keep on the counter for everyday use. This is a carryover from how we used it in our Hiker square back trailer, with its extremely limited storage.2 points
-
I replaced the vanity towel bar/access cover with a marine hatch as several others have done. I used screws and nylon insert lock nuts to mount my hatch. If you follow @Frank C's installation and reuse the original vanity towel bar/access cover, I don't think you can beat his use of U nuts. I wish he had completed his version before I did mine, because I prefer his method! Mossey2 points
-
You are correct as Mossemi appears to be using them as an anchor point! And it would apply. For the Bathroom cubby it would be a waste of fender washers as they are not high load or vibration applications.2 points
-
@CRM, what is the effect on the larger grid? I can't imagine everyone could run autoformers without some measurable increased load on the grid or we'd all have them in our houses. When using one, aren't you further reducing the amount of power available to others on the grid? I'm not saying a single RV would make much difference, but there has to be a cost somewhere.2 points
-
When running any inductive loads with motors such as AC or compressor fridge, you will be using the same amount of watts as someone who isn't using an autoformer whether it's in a low voltage situation or not. When running resistive loads such as a water heater you *will* draw more watts but you will be doing so for a shorter amount of time than someone who is using the same water heater in a low voltage situation. In the end you'll both consume the same amount of watt hours to heat the water and not be costing the campground any additional money. What you will be doing by using an autoformer if the campgrounds voltage is low is protecting those inductive appliances from premature failure due to running them at a lower voltage and higher amperage than they were designed for.2 points
-
This is explained well here: https://changinglanesrv.com/hughes-autoformer/ (Electricians feel free to correct my interpretation here...) Volts: electrical potential (think water stored in a tank). Amps: flow of electrical current (think water pushed through a pipe under pressure). Watts: work done by the electricity (think a water wheel at the end of the pipe). You need both volts and amps to do any work. Volts X Amps = Watts. Low voltage in the campground means you have to use more amps to do the same work, but amps generate heat in the wiring so they're limited by circuit breakers for safety. (Our Olivers are limited to pulling a maximum of 30 amps from the campground grid.) Even with an autoformer, you will never be able to pull amps (current) from the campground grid faster than the campground's pedestal circuit breaker will allow, so in that way you're no different than any other camper. However, in a low voltage situation, you will be able to get more usable power (watts) from that pedestal by jacking up the voltage in your trailer, so now you are potentially using more power than your non-autoformer neighbors. The power company bills the campground for the number of watts consumed per hour, so someone using an autoformer in a low voltage situation is costing the campground more power per hour than someone who isn't. However, you're still only using the amount of power (watts) you would have used if the campground grid was operating properly at the correct voltage, so you're not "stealing" anything. (A bigger question is, how does this affect the larger power grid? Is the campground voltage low because the utility company has less capacity than normal? If lots of campers in the campground are using autoformers could they overwhelm the entire campground grid and cause it to fail because they are using more watts than the grid is capable of supplying at that time? I assume there's a limit, correct?)2 points
-
If they don't like them, it's because they don't know how they work. Some are under the impression that they "steal" power but what they really do is convert amperage into higher voltage in low voltage situations. If it's mounted inside there's no way they could know that you're using one anyway.2 points
-
GI NOTE: For the Bathroom Cubby install, the below does not apply to this install. For the anchor point install it would apply. For applications where you can somehow get to the back side here are two considerations: For high load applications, or ones that will be subject to strong vibrations, insert the Petal nut, then place a fender washer on the uncrushed nut. Then crush it. Doing so will greatly reduce fiberglass cracking and strength of the attachment. If you will be needing to unbolt the attachment, add a dab of adhesive to the crush zones of the Petal nut. Once crushed and cured, the bolt can be removed and you'll not lose the Petal Nut in the back space. GI Edit: The pedal nut will not fall out so edited the use of adhesive. Obvious brain fart!
2 points
-
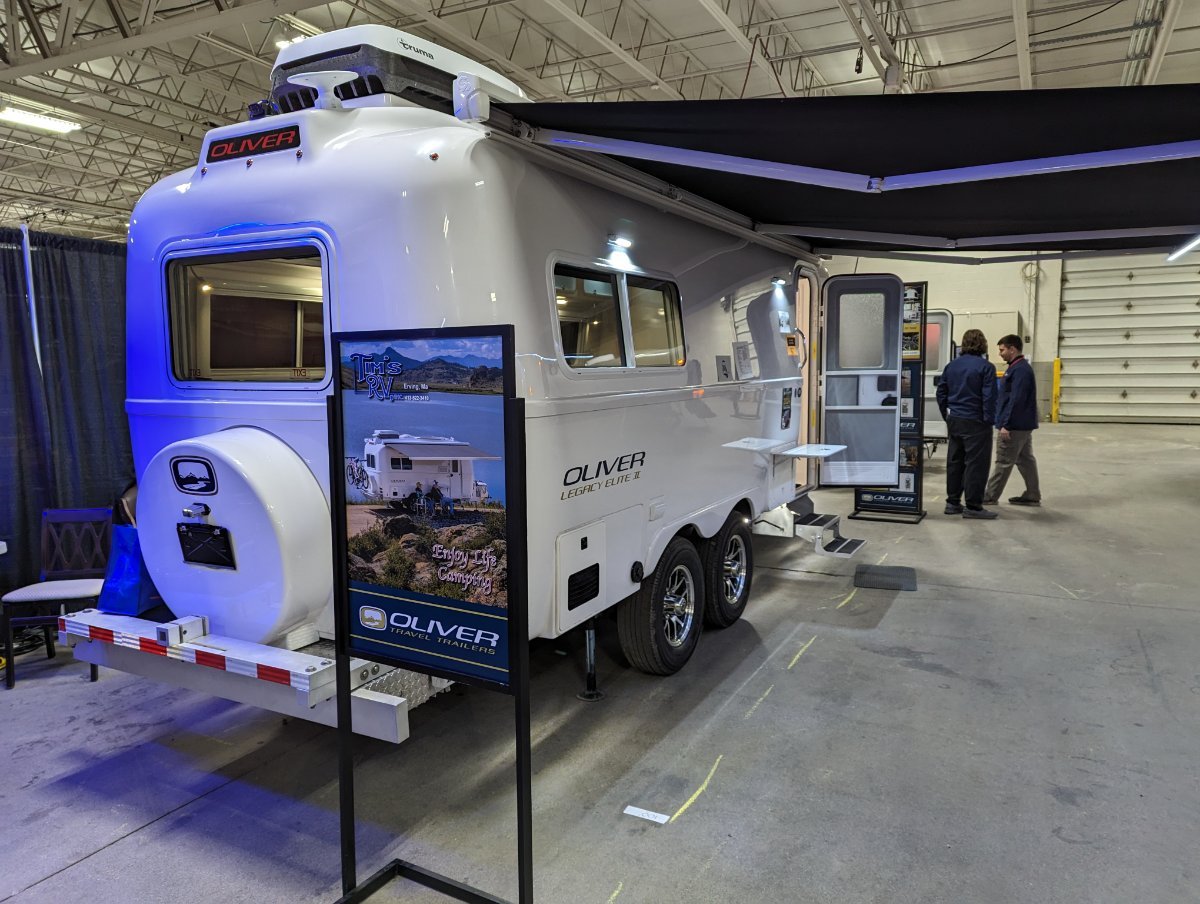
We did see the Oliver trailers in Springfield, both an LE1 and an LE2. The Olivers were displayed next to several Intek Sol trailers (which seem like decent campers). Asking price for the LE2 was slightly over $100K. Saw a couple glance at the LE2 price tag and say, "Are they crazy," so we engaged them and told them about the superior construction of the Olivers. Chatted a bit with one of the sales reps but I think we were more excited about the Olivers than he was. No Oliver family present at this show. While we were there, we did see a couple go inside the LE2 and sit down, a good sign. It was really good to see OTT represented, for sure.
2 points
-
Amazon has scores of surge protectors to choose from. And as apparent from the above posts, each owner has their concerns in mind for their use. So, for a pedestal power pole used as a supplemental protection, my concern is spikes and RF noise. Not sustained voltages beyond standard as MountainOliver sadly experienced. For the purpose of voltage noise and spikes, having a plug-in type with lots of joules capacity is the goal. Keeping it light, simple and inexpensive is the idea from my minimalist perspective. If those are your goals, then this one seems to fit bill and costs a LOT less than most others at the 8,000+ joules rating:
2 points
-
Yes, I read your post about this. Interesting, but l’m still trying to figure out the ideal location in my trailer. The location that you chose is absolutely the best location and using plugs for the wiring connections is exactly what I was thinking about as well. I currently use that location for some storage so need to move that elsewhere. I would like to have an extra level of incoming power filtering. I may have mentioned it in my previous post that even with the Oliver surge protection a series of power surges (not spikes) damaged a control board. Incoming power was rising to almost 200 volts and remaining at that level for several seconds. The surge protector would block it but the surge would happen several times in a row. Anyway, your installation is very well done. Thanks for posting the details.2 points
-
Given the few times that I've ever needed the extra length, I purchased a 12 gauged 50 foot extension cord. Sure, the two times in 8 years that I've needed it I could only use one electric device at a time (i.e. you can only use the air conditioner OR the microwave but NOT both at the same time). This cord is lighter, smaller and a bunch less expensive. Presently Harbor Freight has one on sale for $30. Bill2 points
-
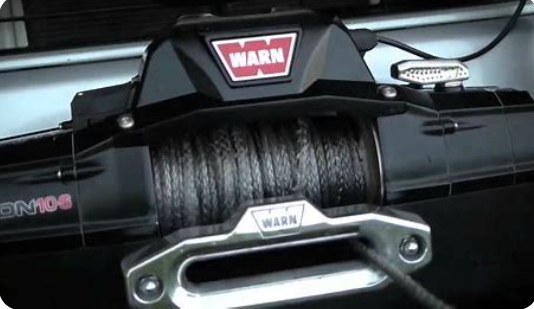
I carry every tool imaginable, but still find a nut every now and then that refuses to move. Been there, done that many times. I keep my tires aired up fully on the highway and air down on rough roads. The truck has a compressor and I have two spare jacks. My TV has two batteries, but if they both die, I have 390 amps of juicy stuff in my trailer, plus a generator that can run my battery charger. Tooth Fairy: And Santa Claus: I'm the kind of human "Bean" that likes the road less travelled, so I'm with you on all of this.
2 points
-
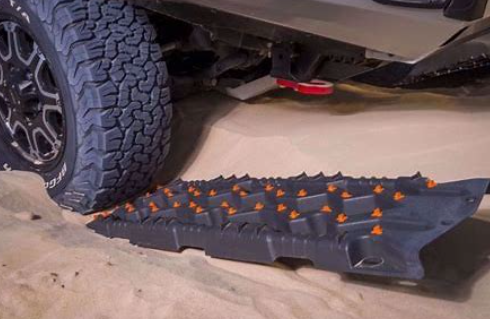
What ifs... When away from home and towing, you may need to repair something that requires tools. I carry lots of tools to fix the mechanical travel problems that can happen when least expected. The further off the road, the more important it is to be prepared... for anything with a variety of tools. If you have a wheel bearing go bad while traveling, an Oliver Elite and the Oliver Elite II have different options. A double axle can travel slowly with three tires on the ground. A single axle, not. If your tire pressures were minimal, the one tire with a good wheel bearing, would require a higher PSI to carry the load by itself on that side. A double axle travel trailer has options a single axle travel trailer do not. Flat tire. What PSI do you maintain when traveling? Do you check your spare tire pressure when beginning a trip. Are you a high PSI or a low PSI traveler with the idea of one is better for the Oliver? There is a check list of essentials like Propane Tanks topped off, water tank flushed and fresh, battery condition, tire pressures. Have you checked the bolts that attach the Leaf Springs? If your Tow Vehicle battery dies while Off the Grid, do you have some idea of how to find a solution with what you have? These are some What Ifs. Those who are RV Park campers and travel busy roads are less likely to be stranded without cell service or potential help. Those who travel Remote Locations and camp Off the Grid do not have those luxuries of the Urban Camper and RV Parks. Long handled Clippers. Shovel or two. Plastic Buckets. Two Wheel or Four Wheel Drive Tow Vehicle. Are your Maps adequate for the area you plan to explore? Have lots of experience Backing UP and Out of a bad spot in the road? Some prepare and learn from previous mistakes. Being prepared for the What Ifs that others have had occur. If nothing happens to yourself for an entire lifetime, no problem. Once you are stuck in a muddy stretch of road... without a shovel or two... and have no backing out of a situation experience... good luck. Start your... list. Take photographs for the memories of figuring it out yourself. The 'Tooth Fairy' was not real, either. Nor Big Foot. Boy Scouts "Be Prepared" was smart and wise. The 'What If' situations can occur anywhere, any time and when least prepared. Anyone who is confused about any of this, you are just fine doing what you are doing. Great. Those travel trailer owners, like ourselves that go to places to get peace and quiet in remote locations need to be prepared. Human Beans are not on the top of the Food Chain in the Rocky Mountains and prefer to be at a Parking Lot at Costco. We can do either, if necessary. You can as well.
2 points
-
As far as Oliver being able to build one, as HDRider originally asked, I don't see any reason other than cost vs. benefit. As it sits, the LE2 is 208.5 lbs per linear foot. At 30 foot as mentioned, that would increase the dry weight from 4,900 lbs to 6,255 lbs. That is a substantial increase. Keeping with the current 30% allowance for cargo and water, the GVWR would increase from 7,000 lbs to approximately 9,000 lbs. I'm not an engineer but spanning that extra distance with fiberglass makes me wonder if they would have to build it up some more to keep the rigidity. That might add another 500 lbs. A 10,000 lbs Oliver doesn't sound too appealing to me. Then they would have to consider the extra 6.5 feet per trailer in their warehouse. For every 3.5 30-footers, they lose one 23.5 trailer on their floor. Not only would the molds need to be replaced, but the infrastructure would have to be increased. If they were to shut down production of one of their models to accommodate the space, it might not be so bad as long as the sales price compensated, but there are a lot of people that still want the LE1 and LE2, so the LE3 (30-footer) would need its own space.2 points
-
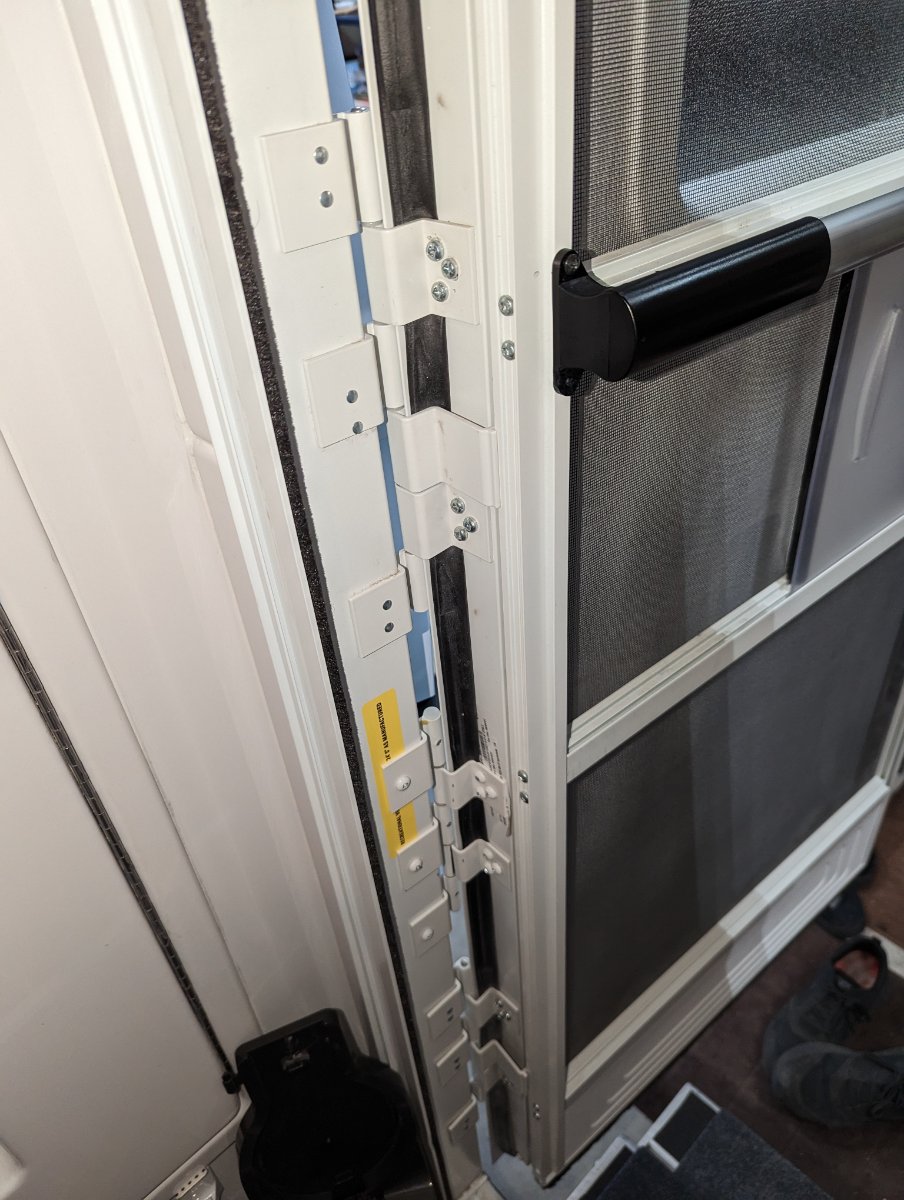
Added friction hinges on doors added over the weekend. Predrilled holes and simply added 2nd hinge set - along with Handle. Yes there is a door holder on back side but have had kids around yank them off in past. (Little weary of someone not being careful)
1 point
-
Another winter project with help of good friend with "SKILLS" in welding aluminum. Added Bumper box. Thanks to all who contributed on the subjet. I did get endcaps put on and license plate bracket . Before picture. Picture was taken . Will update with better pictures later when snow clears.
1 point
-
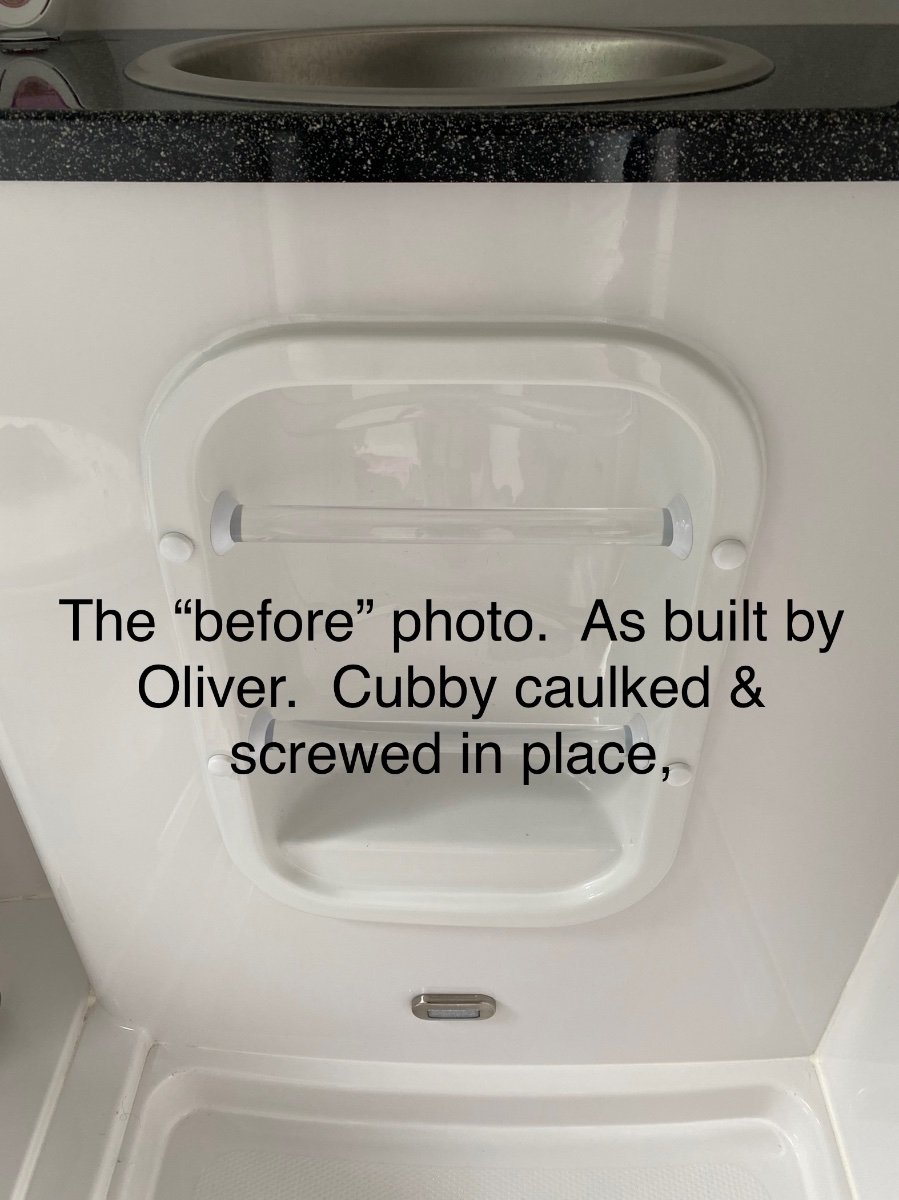
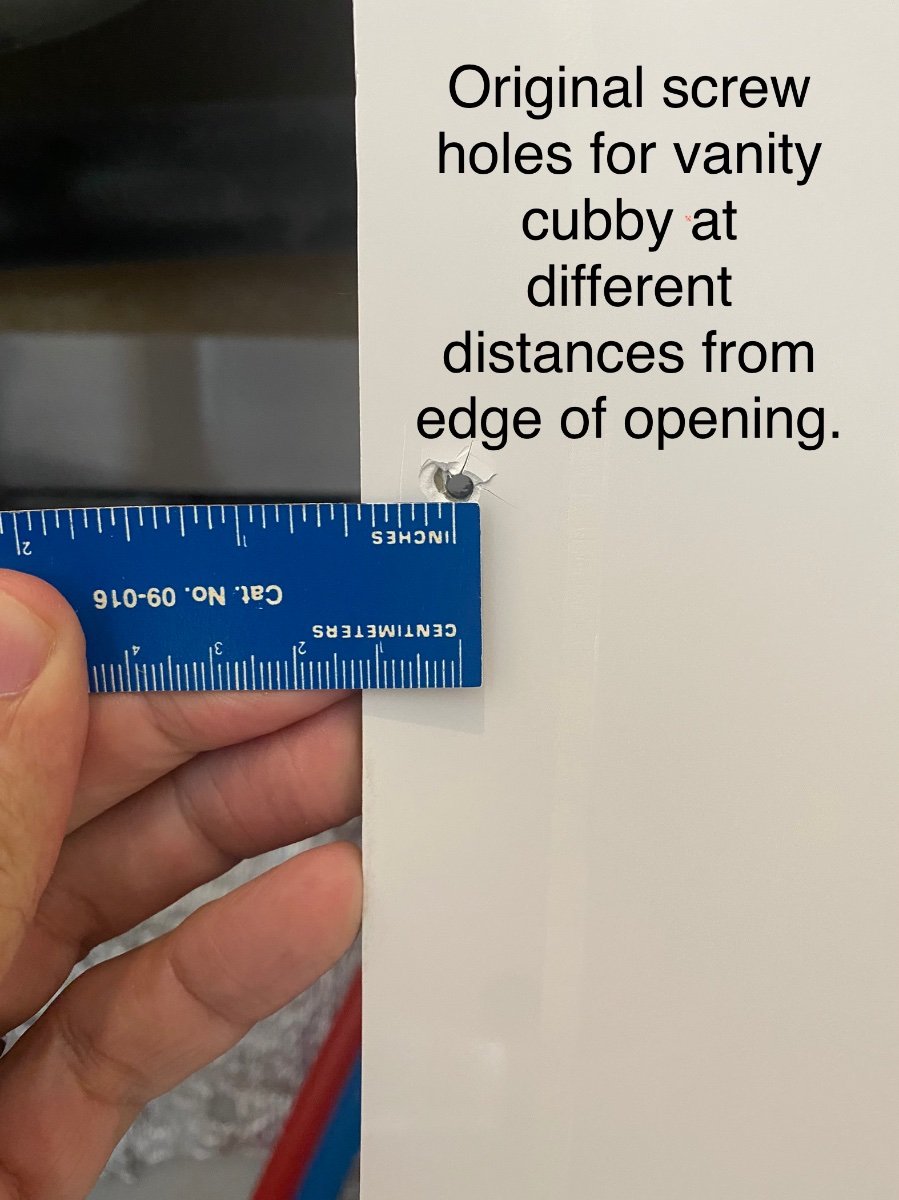
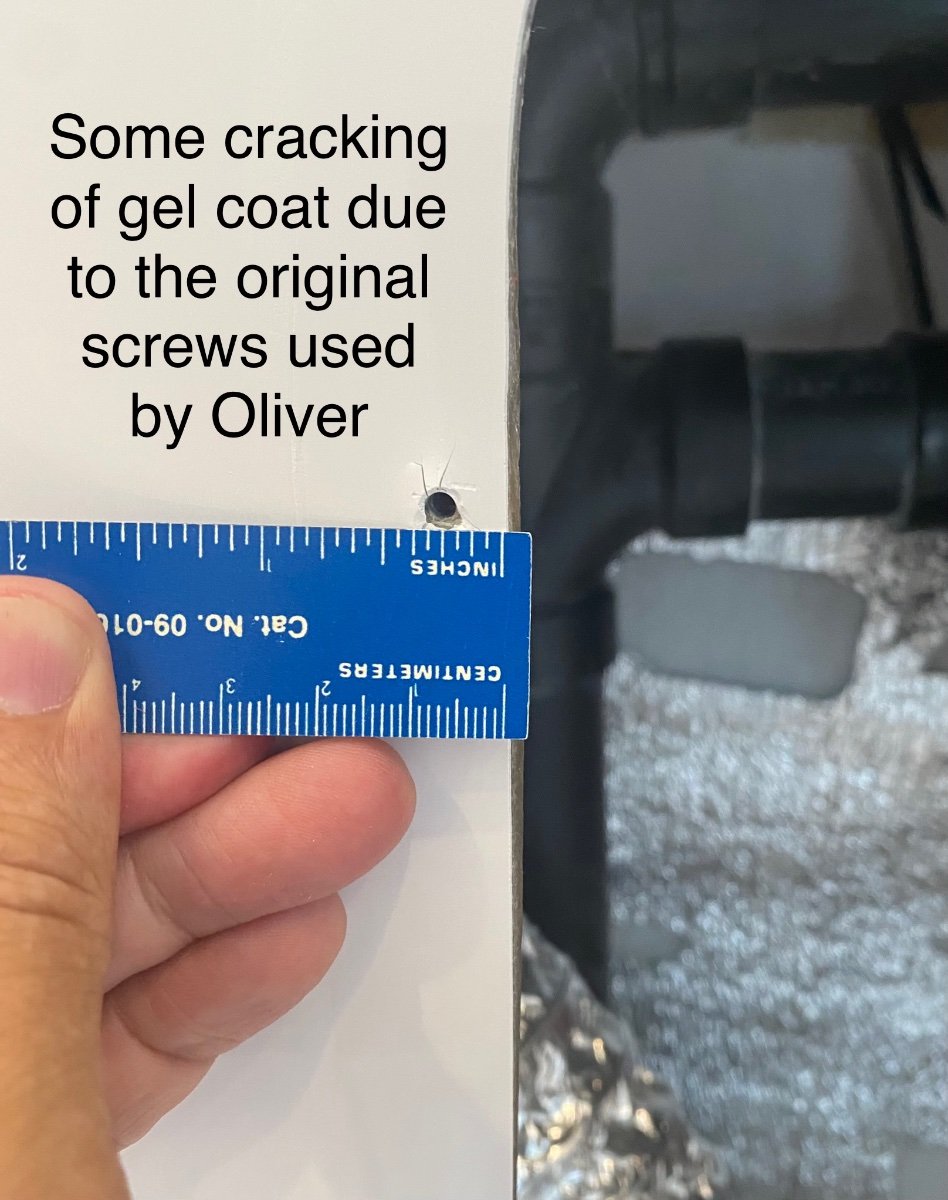
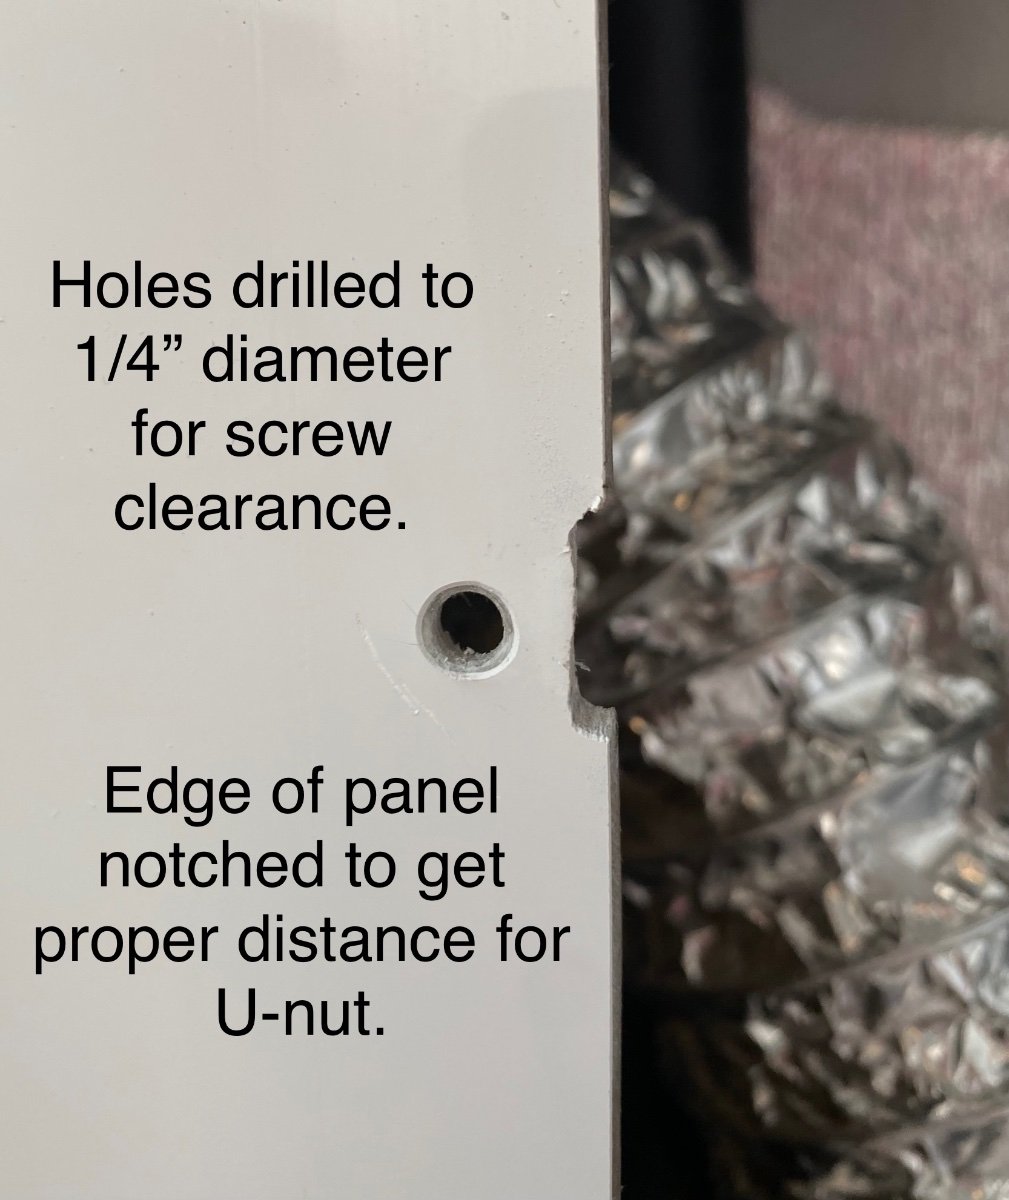
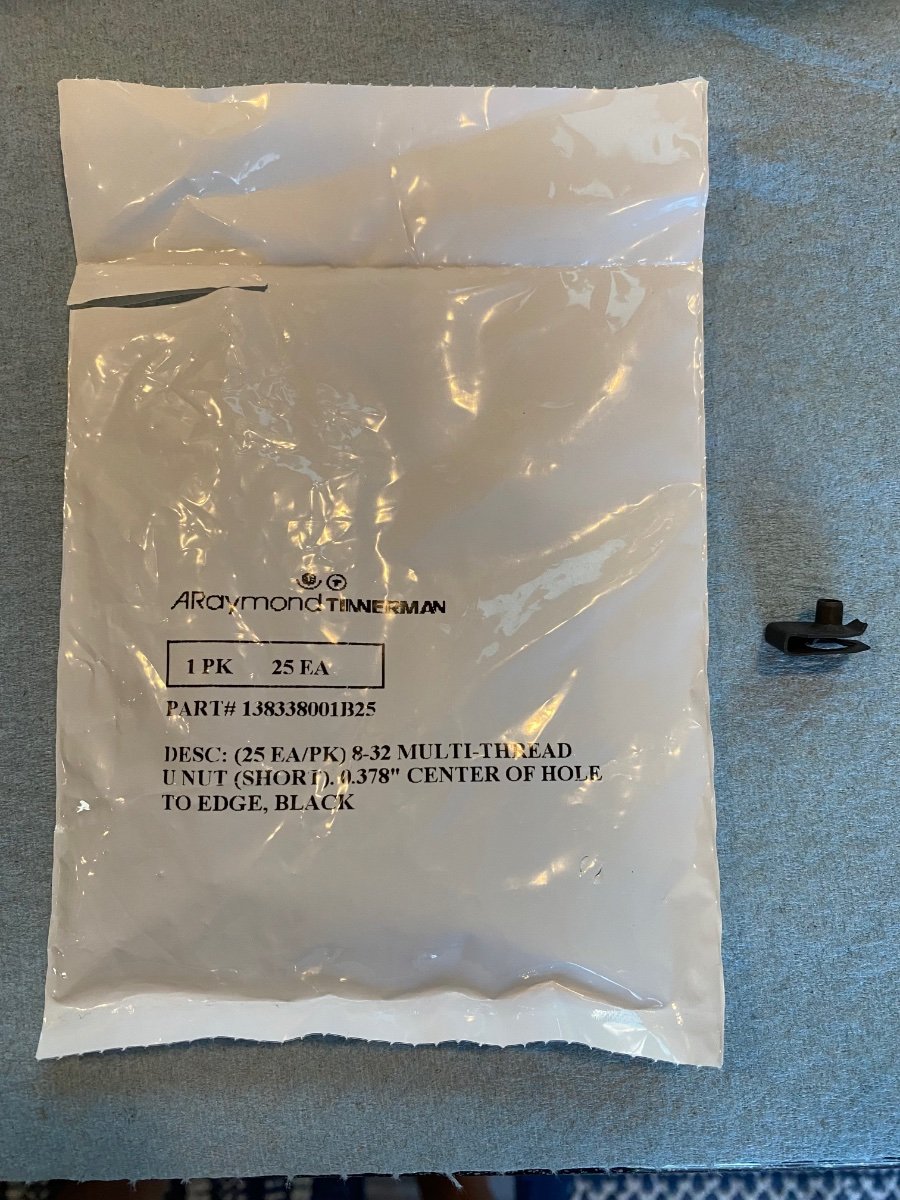
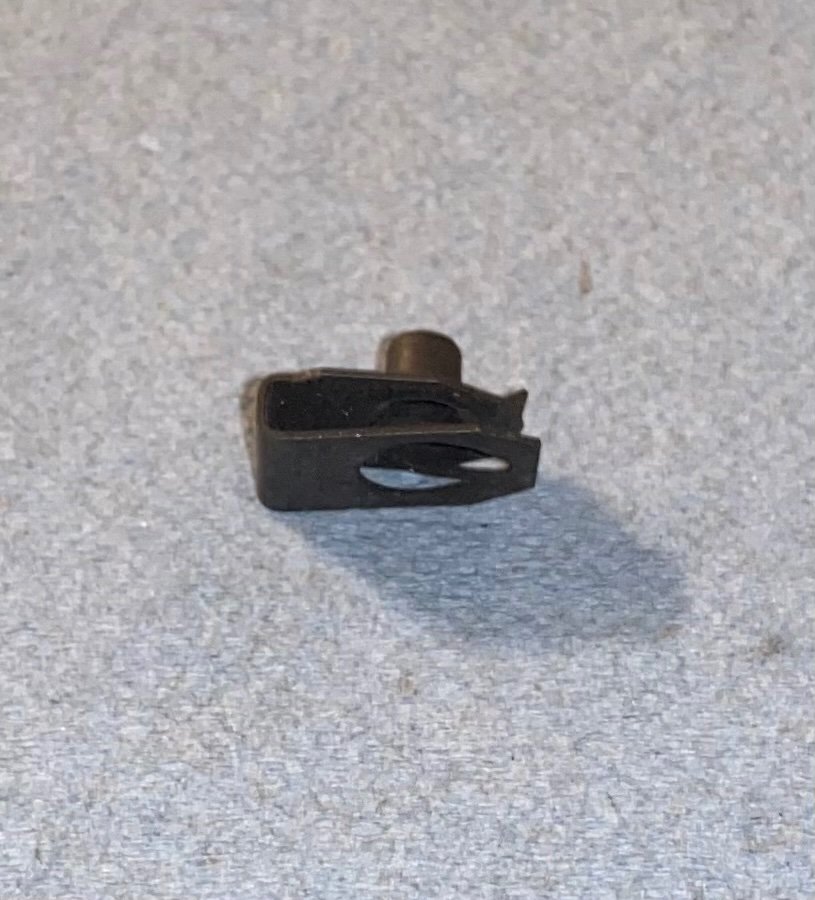
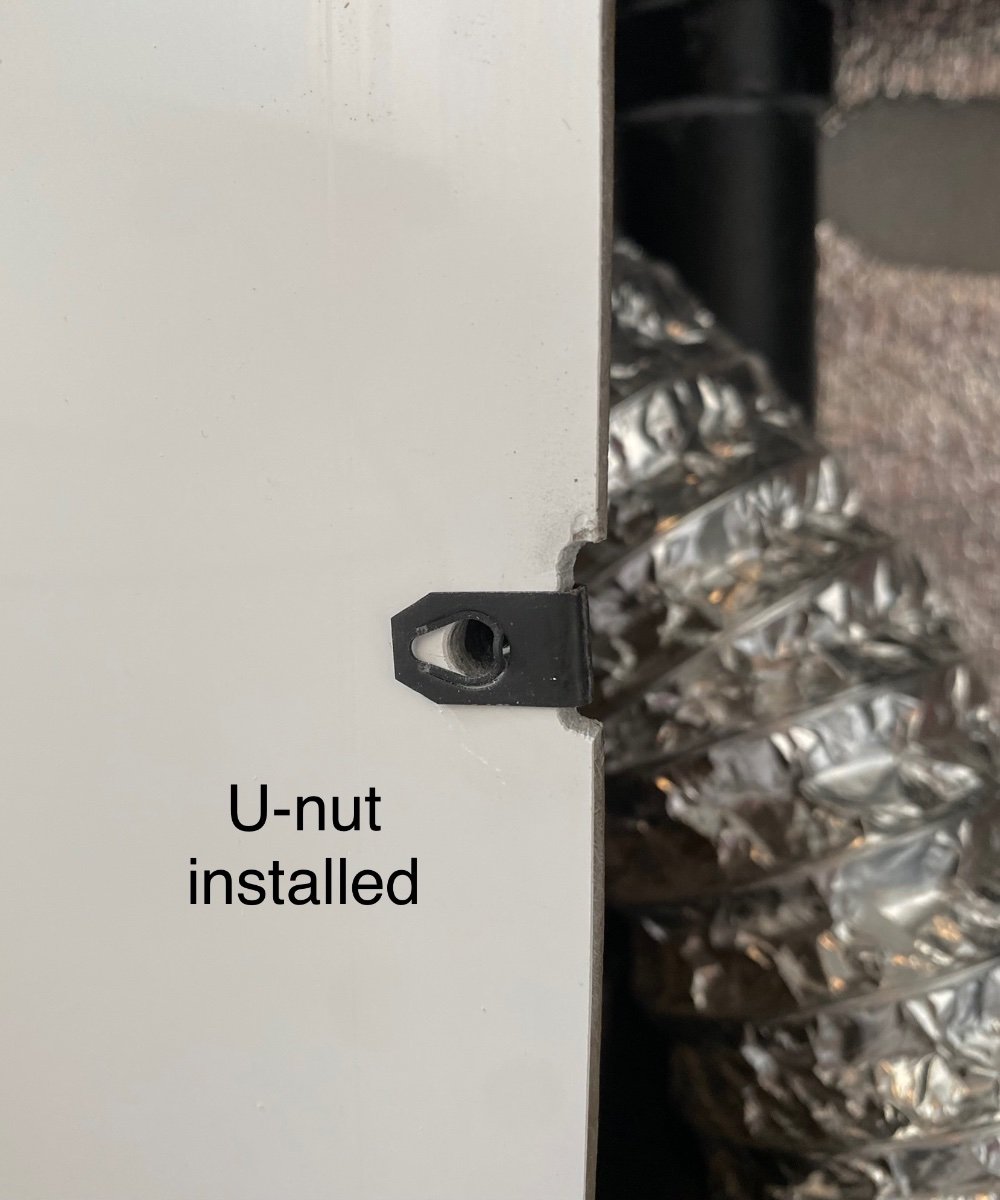
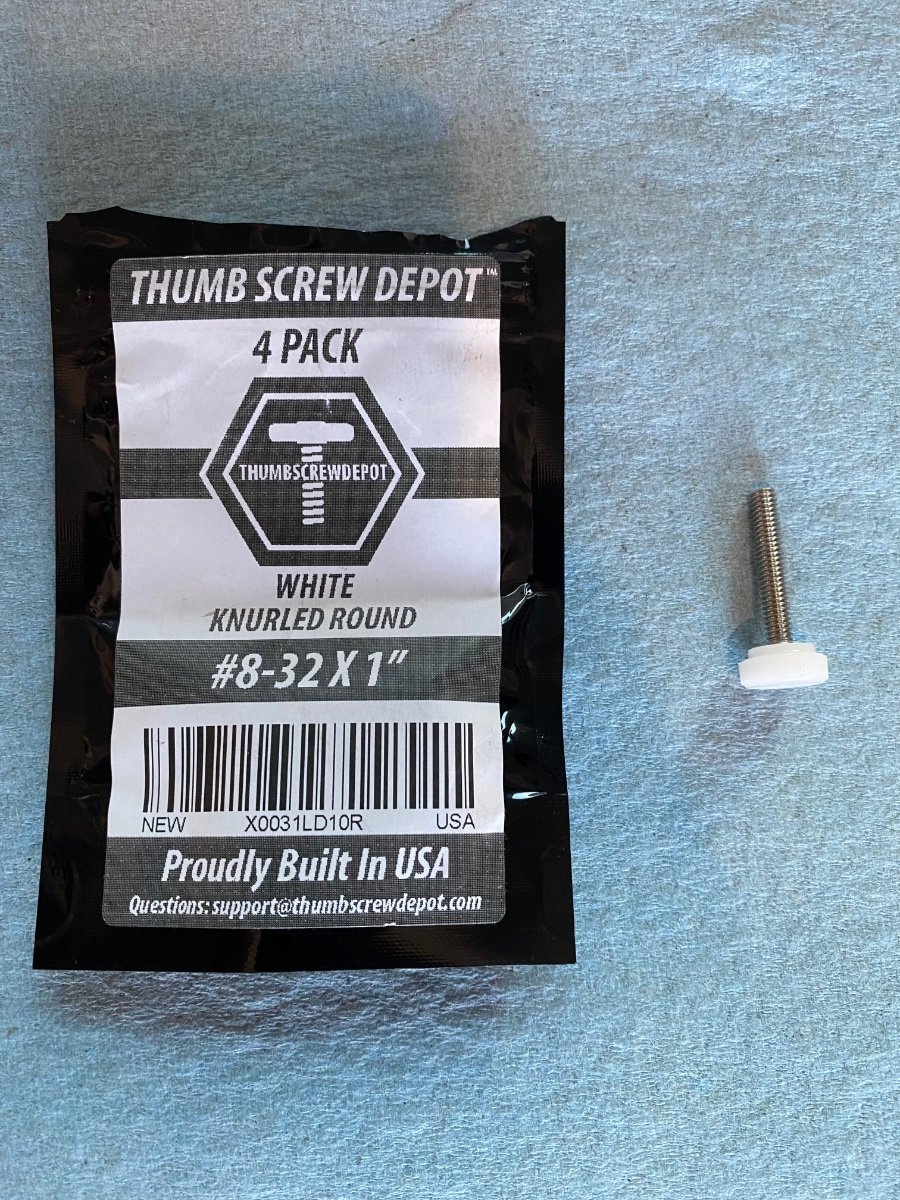
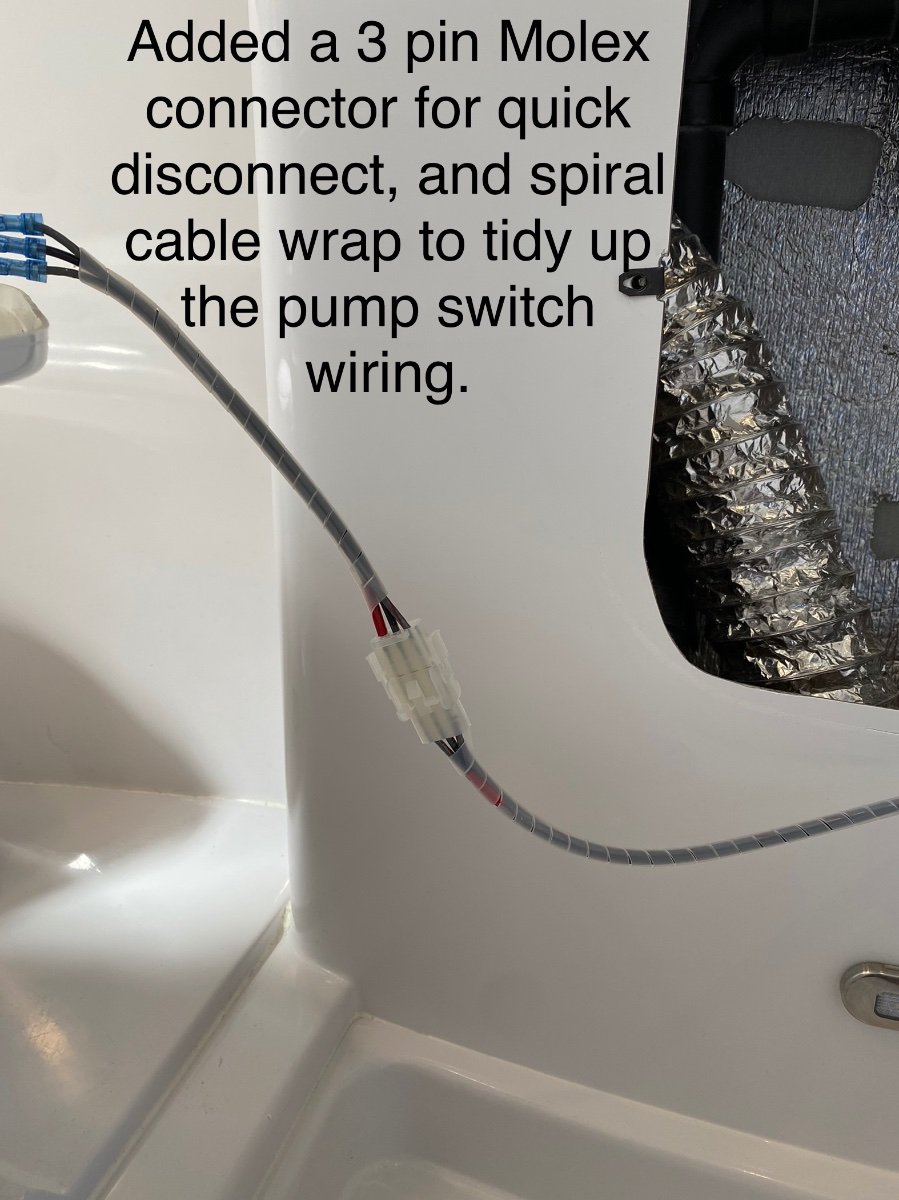
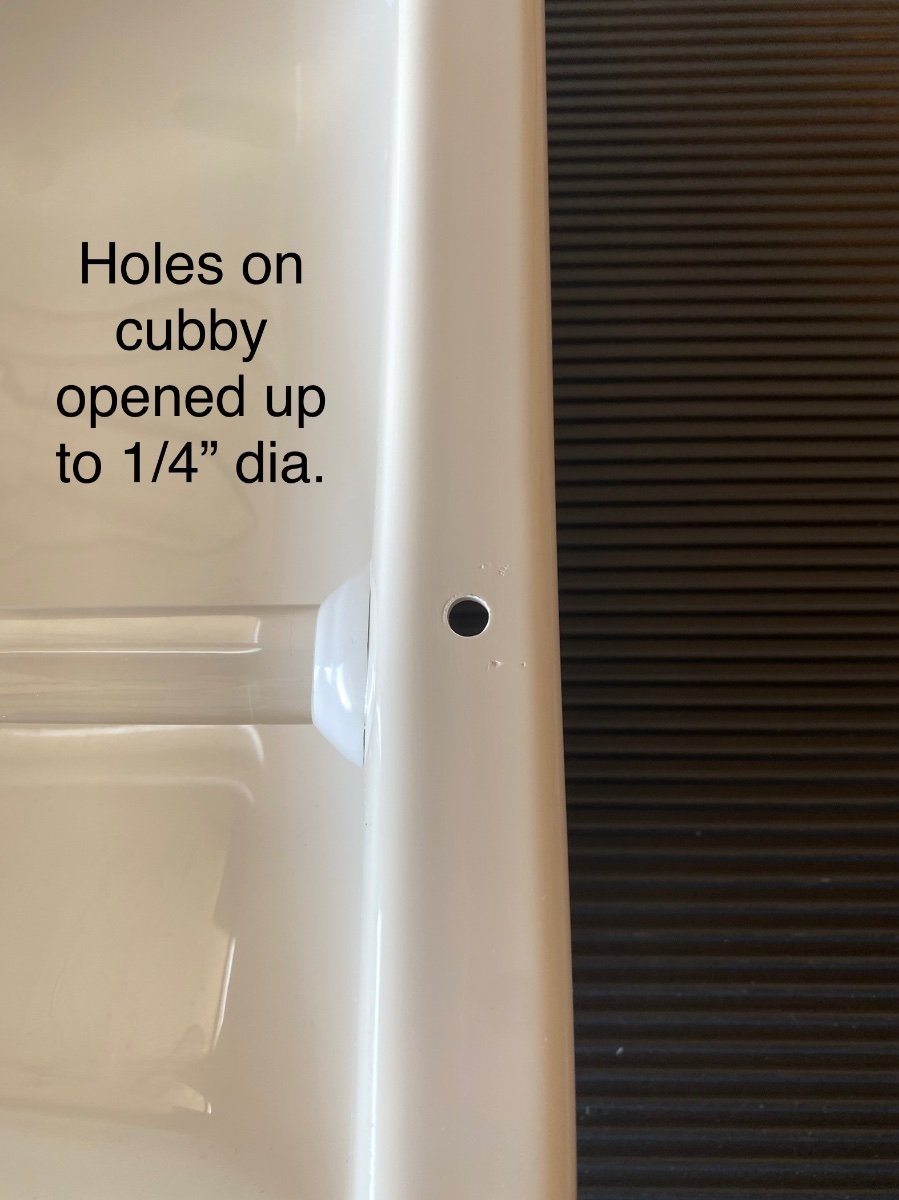
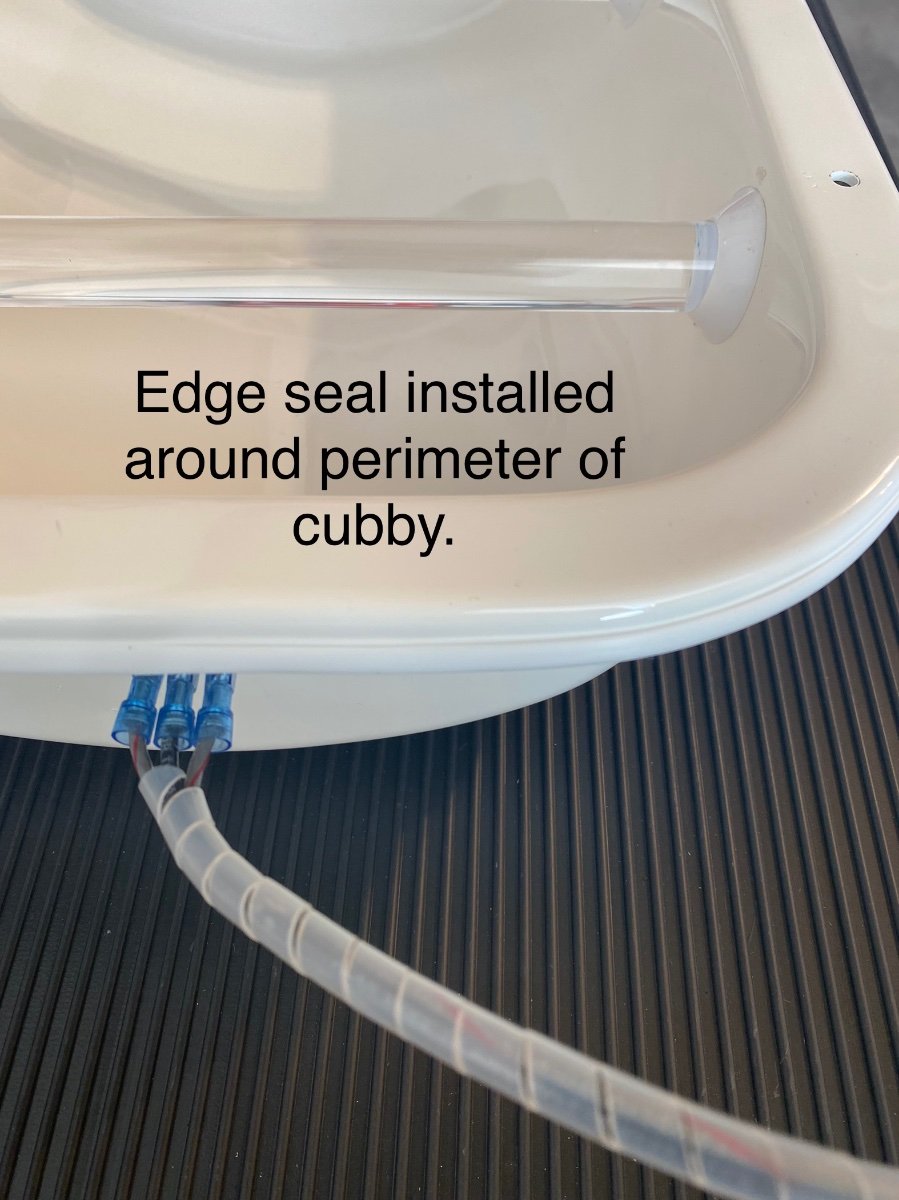
One of the great features of the Oliver trailer design is the fast and easy (no tools needed) access to ALMOST all of the plumbing, heating, and electrical systems through the hatches under the dinette seats and the beds, or by removing the kitchen cabinet drawers. One area that’s NOT readily accessible is the area under the bathroom vanity, even though there is plumbing, electrical, and furnace ductwork all tucked inside the vanity. The storage cubby in the front of the vanity is screwed AND CAULKED in place by Oliver at the factory, so access is a bit more complicated than the other areas. I recently needed to get into that vanity area for some inspection and maintenance, and after completing that I wanted to make future access easier (no tools needed and no caulking). I know some owners have replaced the storage cubby with a hinged marine access panel, but I didn’t want to lose the cubby storage. So here’s a detailed description of a simple modification I did, along with links to the parts used. Access is now fast and easy. No-Slip Clip-On Barrel Nut, for 0.025" to 0.15" Panel Thickness, 8-32 Thread Size https://www.mcmaster.com/94850A111 #8-32 x 1" Thumb Screw Stainless... https://www.amazon.com/dp/B09FZVLZKD?ref=ppx_pop_mob_ap_share uxcell Edge Trim U Seal Extrusion, Silicone White U Channel Edge Protector Sheet Fits 0.5-2.5mm Edge 3Meters/9.84Ft Length https://a.co/d/1uWUZB3 Molex -3 Match Set - (3-Pin) w/14-20 AWG, Wire Connector - 2.13mm D, Latch Lock, MLX https://a.co/d/gapvioi
1 point
-
Here's an article about some big fiberglass trailers from the past, including a 38' fifth wheel prototype (which looks very cool): https://www.theautopian.com/this-prototype-fiberglass-camper-is-a-38-foot-beast-filled-with-brilliant-ideas-that-never-made-it/1 point
-
Art: Some may ponder too long on this one. Suggest add an "en" on Tight and a value. GJ
1 point
-
Uninstalled, it does take a bit of a push to move one leaf 90 to the other on the hinge by hand. When mounted the door moves firmly and nicely. Can't imagine taking it off for not liking it. That guy now has 30 holes in his door and jamb!1 point
-
Yes, gotta remove those speakers. 👍🏻1 point
-
That is correct! Mossey1 point
-
Wow, what a great use of space, very elegantly done, you've set quite a high bar for me to duplicate. I hope mine looks a nice as that when I get around to doing it. I'm thinking I'll add some shelving as well. That will really help tidy up the bathroom stuff/ cleaning supplies, a whole bunch of potential things can be stored in there. Thanks for sharing the mod!! albert1 point
-
Those are nice suspenders. But will they hold your britches up?1 point
-
And other critters too.
1 point
-
Those things are notoriously bad tempered. Glad you got away with it.1 point
-
Yep, free-roaming buffalo!
1 point
-
‘What if’ the local residents disapprove of your site selection!
1 point
-
LOL! Come on guys it's obviously the base mount for an "entertainment pole"! 🙂 GJ1 point
-
UPDATE: Well, after about 8 months and 5,800+ miles of testing the Lippert hinges in various windy conditions - they all but make the outside "door hook/latch" obsolete. We no longer use it to prop the door open anymore, FYI. As @Patriot might opine... a "sano mod"! HA! Cheers, All!1 point
-
Very helpful. Thanks. John1 point
-
I too was not happy with the "wet bath". It was probably Anita, but early on someone mentioned to me just how "expensive" RV real estate is. They went on to explain by asking me just how much actual time I spent in the bath each day versus virtually any other part of the trailer. Good point I thought and then they mentioned the virtual "automatic cleaning" of the bath that occurs each time I used it for a shower. As it turns out - I was concerned over basically nothing - it really isn't any big deal and certainly I do use the other real estate more than I would use that same square footage in a dry bath. Another related thought - Oliver could (fairly easily) actually make a dry bath in the Elite II. Simply eliminate the closet and then extend the bath area into that "old" closet area - easy. I'm not giving up that closet space though! Bill1 point
-
Dear "Debbie", Decisions, decisions! Most (if not all) of us have made changes to our Olivers - some big, some small. It's a great canvas that allows this sort of thing. My take on the whole "solar thing with the large battery capacity" is that Oliver was trying to address the need of some customers to have air conditioning available for use for relatively short periods of time without the need of being plugged into shore power. Obviously a limiting factor for the solar array is the space available on the roof - yes, there is still more room for additional panels on the roof but at what price point? For me, the decision would be fairly simple - do I really NEED to have the air conditioner run off the batteries? In the six plus years I've owned my Oliver there have only been two times that it would have been nice to have this feature - I can virtually always find a campground where I can plug in if necessary and I can do that a bunch of times for that $ you are talking about. The whole MPPT controller story is discussed here on this Forum multiple times. Yes the MPPT is a bit more efficient but the change to the current controller was done (at least partially) to make the whole solar process easier for owners. In most situations it seems that this current controller works as intended. The black tank conversion has also been discussed at length here. But, given the seemingly limited number of owners that have actually done something in this regard it would appear that it is either still a "work in progress", too difficult to do the conversion for the resultant benefit, or simply a "nice to have someday project" versus something that really impacts current camping utility and enjoyment. Finally, the running of the fridge on 12volt versus propane has also been discussed here on multiple occasions. As MM198 says above, the fridge is really efficient running on propane. If you are nervous keeping your propane lines "open" while traveling, there is a product called "GasStop" that should alleviate that worry. If you are still nervous then you should know that a number of people simply do not open the fridge door while traveling and unless it is very hot or the travel day is exceedingly long, the interior of the fridge stays cold enough until you are stopped once again. Unless you are planning on doing a fair amount of winter/cold weather camping, the 20 lb propane tanks should be enough for the reasons Mike & Carol cite above. Finally, WELCOME! You'll find that many of us here came from a motorcycle background. Right now you are in what I believe is the "hard part" of owning an Ollie. Trying to make all of the decisions on options, trying to come to grips with the money spent on a relatively small camper, trying to get working knowledge on the Oliver systems. Please know that all of this is really not that difficult. And you still have plenty of time to get comfortable with this Family. Bill1 point


.thumb.jpg.e34bf01ef7f7d5e99ad31856d45afbeb.jpg)


-
Recent Achievements
-


")


")


