Leaderboard
Popular Content
Showing content with the highest reputation on 09/21/2024 in all areas
-
Did I say ordered? I did! That is incorrect. We put down money on one of the showroom demos. We are/will be owners of #1550. And going back to lessons learned: We were insured with Safeco for replacement cost. But, we only get the replacement cost IF we purchase a NEW "similar" unit. And that money goes straight to the dealer. If we never buy, we only get the valuation. That's why the valuation was so important. I believe another consideration for everyone is that with ~ 2000 units out there and with more on the market, a good first cut valuation is much easier for the insurance companies. Finally - on the long 6 hour drive home after the accident, the traumatic events settled on us and became real. We had lost a central part of our retirement plan in just a few seconds! The "what next?" question finally came up. I won't lie - we talked about the options of more room or a fridge that you can access without sitting on the floor. We quickly came to our senses and realized that if we were ever in a similar situation again - we wanted to be in an Oliver. By the time we got half way home we were dreaming of the quiet Truma A/C!10 points
-
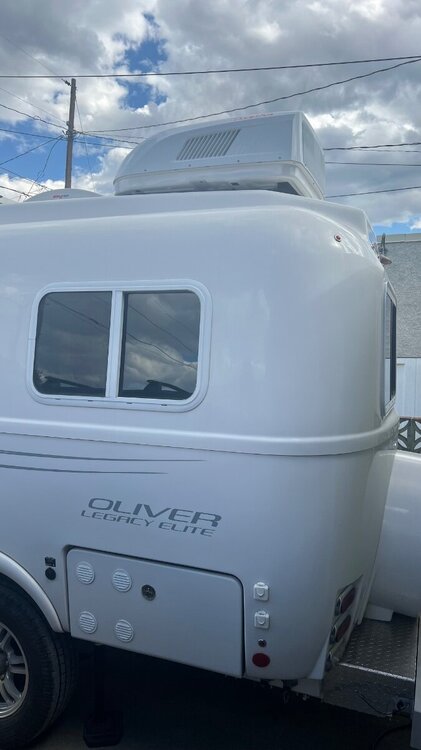
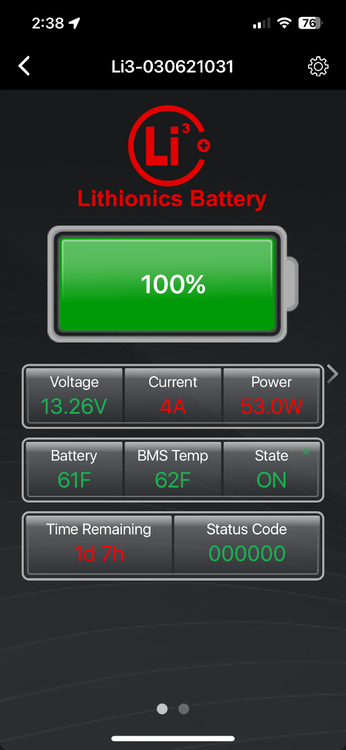
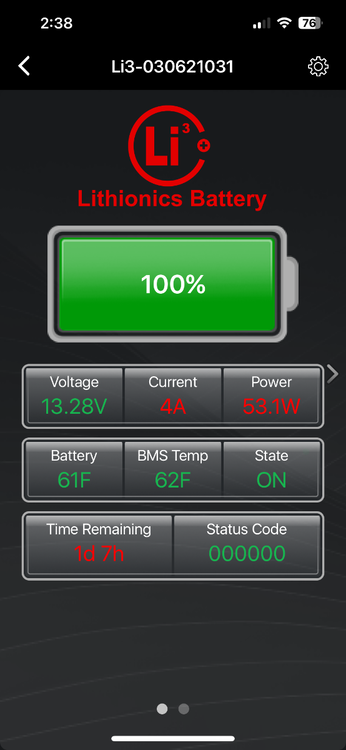
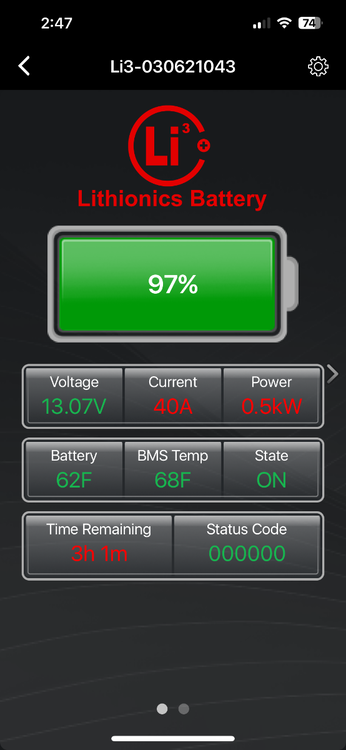
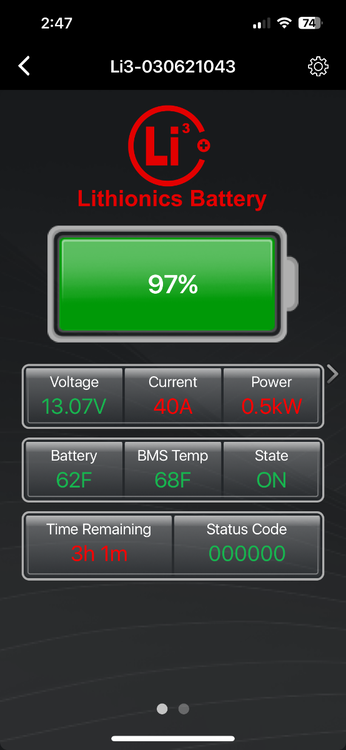
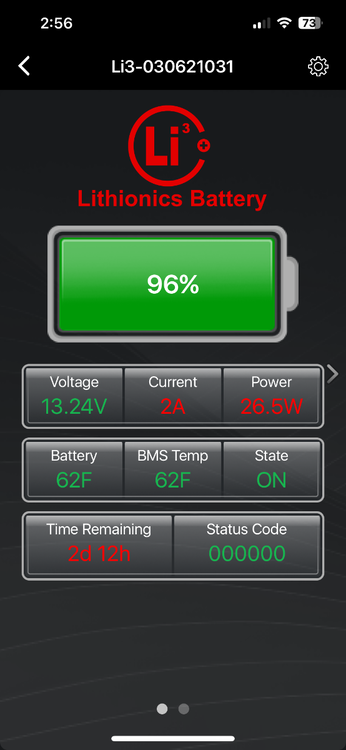
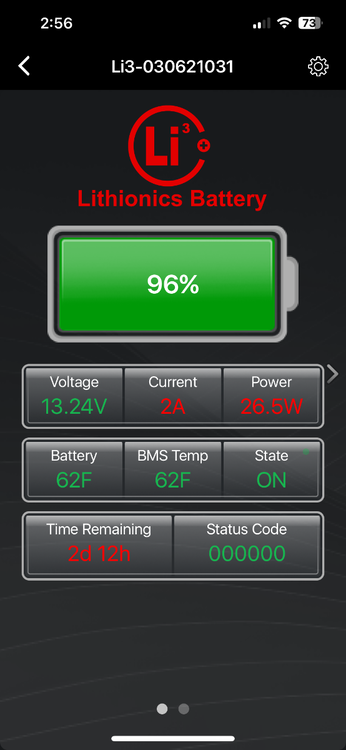
we just had our Dometic ac replaced with the atmos 4.4 unit and we are so happy so much Quieter now I am using the lithium batteries and I will attach a few pics. At least when boondocking we can cool down for a couple hours on a hot afternoon. for us it is a huge improvenent over the Dometic our Olliver Elite came with when th compressor cycles on each battery is showing 37 amp burn After 1 hour battery level down to 96 % IMG_1675.mov4 points
-
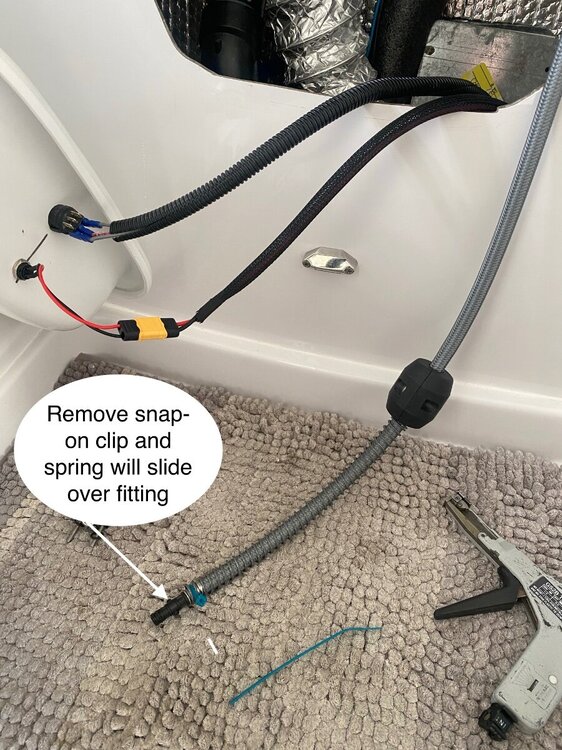
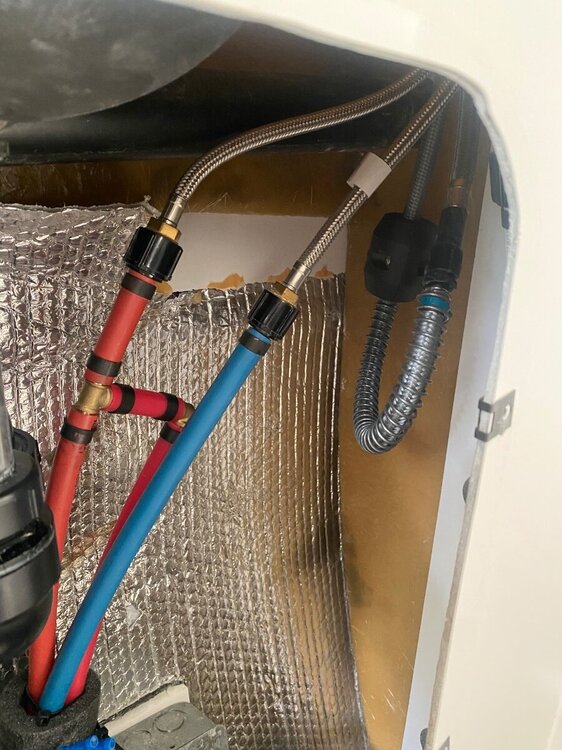
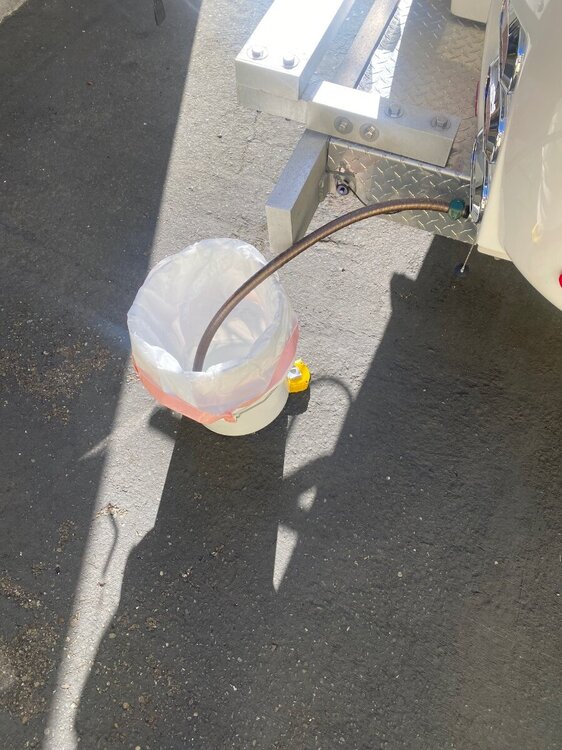
Last year while messing around under the bathroom sink, I adjusted the weight on the “pull-down” faucet hose so that it would pull out far enough to rinse the toilet. That worked for awhile, then the hose started kinking when it was pulled all the way out. Rats! So while preparing for the next trip, I decided to try another approach. I found a 1/2” x 10” spring at the local Ace that fits snuggly over the hose (when little snap-on clip is removed.) The spring was tie-wrapped in place and it allows the hose to bend tightly without kinks. Now the hose easily reaches the toilet for better rinsing. This is a quick and easy mod, particularly if you have done the “Bathroom Vanity Cubby Modification” by Frank C. It allows cubby to be quickly removed without having to re-caulk every time. I was also adding a little water freshener today, so thought I’d share another idea that's probably not new. We always carry a 5 gallon bucket and tall kitchen bags to use as an outdoor trash can. If we want to fill the fresh water tank from the Boondocking inlet, we use the bucket with a new trash bag as a clean liner. We also carry a short piece of garden house for this purpose. Saved us a few times. Cheers! Geoff4 points
-
Our beloved 686, one of the last 2020's and one of the first with solar+lithium, was involved in an accident 3 weeks ago. It was deemed a total loss. First, we are very thankful that no one was injured. Second, I'm posting this to as a reminder to review your current insurance position! And, so others can learn from our experiences. The needed facts: our Oliver was struck on the curb side then rolled to the street side. The TV was a F250 and suffered a bruised hitch and a hole in the tailgate. Things we learned: Be acutely aware that your lives can change in a matter of seconds. Keep digital copies of insurance info in your phone wallet or shared drive. Go download their app now and make sure you can login! Even at the accident scene, we were naive enough to think "we will just step inside and get it from the cabinet". That's just not going to happen in a roll over. Know and understand your coverage. Go way beyond the declarations and read the policy. We had "Replacement cost" but there were caveats and rules that we did not know! Know if you can use a repair facility of your choice. If you can, are there penalties for going over on parts or labor? Our accident occurred 6 hours from our home. After grabbing a few things, we drove straight home. Then 4 days later, accepting the reality that it might be totaled, we drove the 12 hour round trip to gather and salvage anything we could. None of that trip was covered on our insurance! I had always assumed the things inside were covered; on our policy they were not! Get a dashcam! Understand and know that in today's insurance world, no one is coming to appraise, touch, or review your damage. You are going to use an app and take 9 pictures (one being the odometer. Yep, they will want you to photo your odometer on your trailer). You will probably not have an advocate. We purchased our insurance through Roamly (listed as our agent). They had a message that said "call your insurance company, not us". That being said, OTT was our ONLY advocate. On our return trip to the impoundment lot, we took over 170 detailed, labeled and scaled pictures and shared those with Mike in service. In less than 2 hours we had an estimate of the damage from him ($77,000). Oddly enough, after about 6 days, we got a repair estimate (from the 9 pictures) from the insurance company that was $1000 more. Keep a record of every penny you spend on the Oliver from the original bill of sale down to the rug in front of the door and the command hooks on the wall. With the help of Oliver and our own record keeping, we raised our valuation by $10,000 from the original insurance valuation. Take lots of pictures. First at the accident scene and then of the damage. Get every angle and multiple zoom levels. Again, please set aside some time and review your insurance! Over all, our story ends well - we have ordered a new Oliver!4 points
-
Thank you for sharing your story -- and this important reminder. I am so glad you and yours weren't injured. Having survived a head-on (that totaled a Volvo) I will say that the experience will probably always be with you. It's wonderful that you've taken steps to get back in the saddle. Best wishes!4 points
-
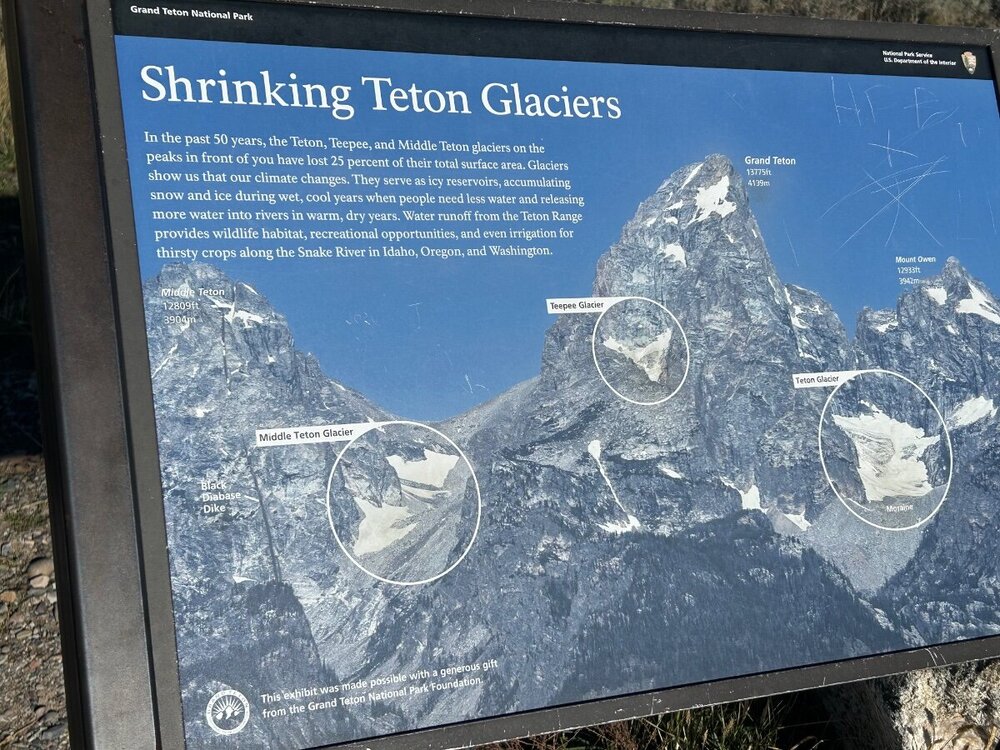
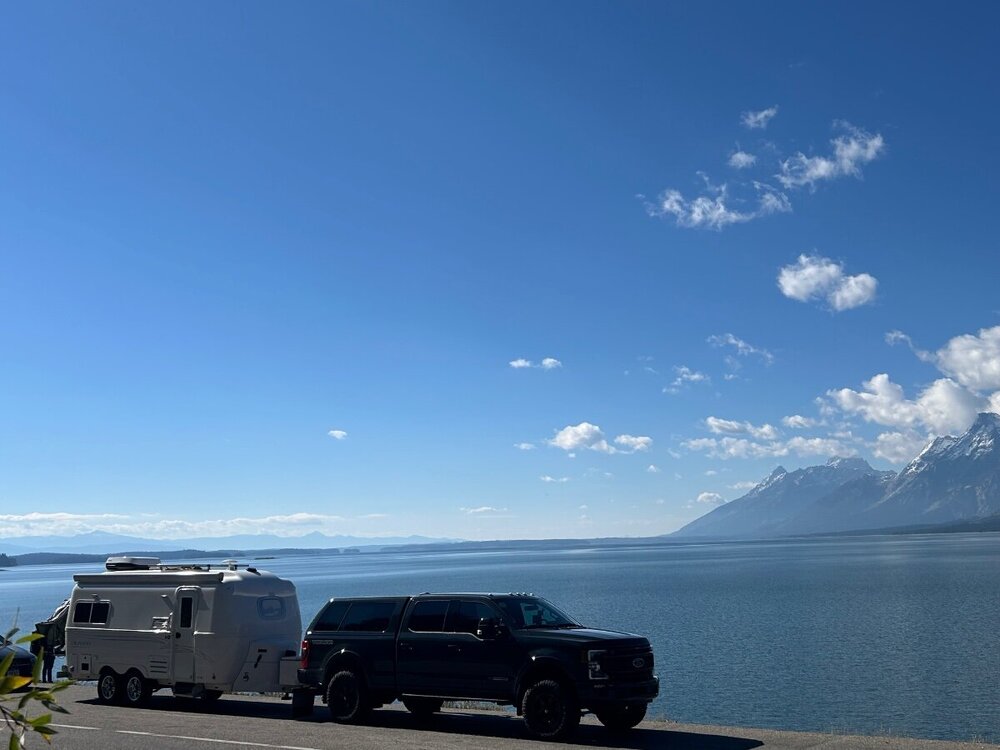
We bid Teton Valley Resort in Victor Idaho, and the Grand Tetons a fairwell today as we headed to Yellowstone NP. We managed to land a nice 20X60’ concrete pad with FHs which we will enjoy for 5 nights inside Yellowstone NP at Fishing Bridge. Loops A, B, C, and D appear to older much tighter/cozy less desirable sites. Loop E is fairly new freshly paved, and very well laid out. It will make a great base camp for us to rest and enjoy the park. The cooler weather camping and hiking just works for us! Happy Travels from Hull #634 XPLOR My bride and awesome navigator. 😍 So long Tetons! A little interesting info about the glaciers. We had to pull over and admire Lake Jackson on our way to YS…wow factor. No complaints with regard to our 20X60’ concrete pad site with FHs! This is much more than we expected inside a NP. Happy Base Camp!4 points
-
How sad, seeing your Ollie 'laying down'. It's like a family member being wounded. Glad no human or pet was injured. Thanks for posting this for all to learn from.4 points
-
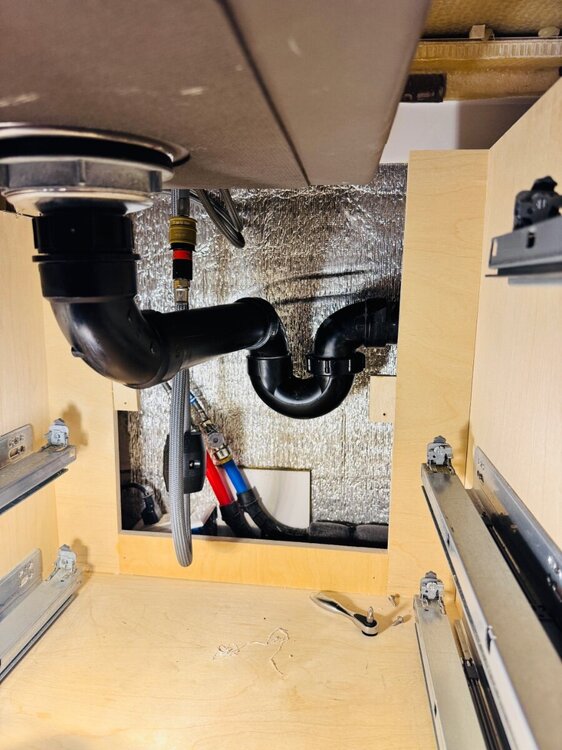
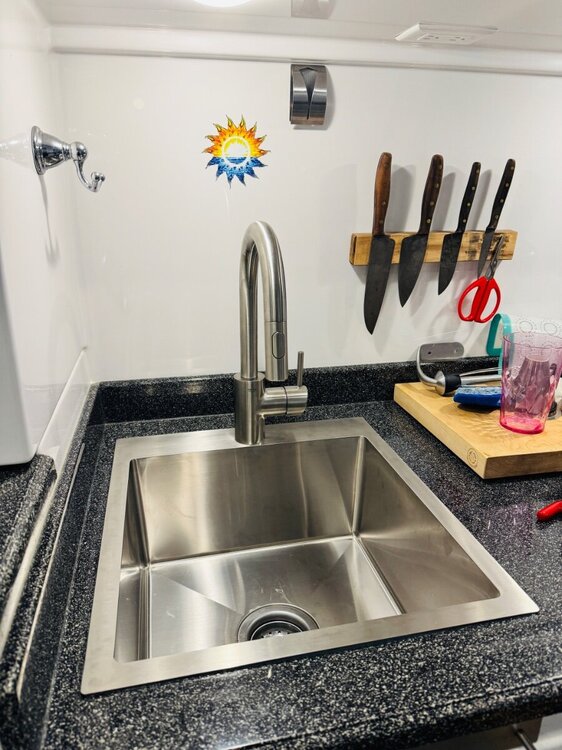
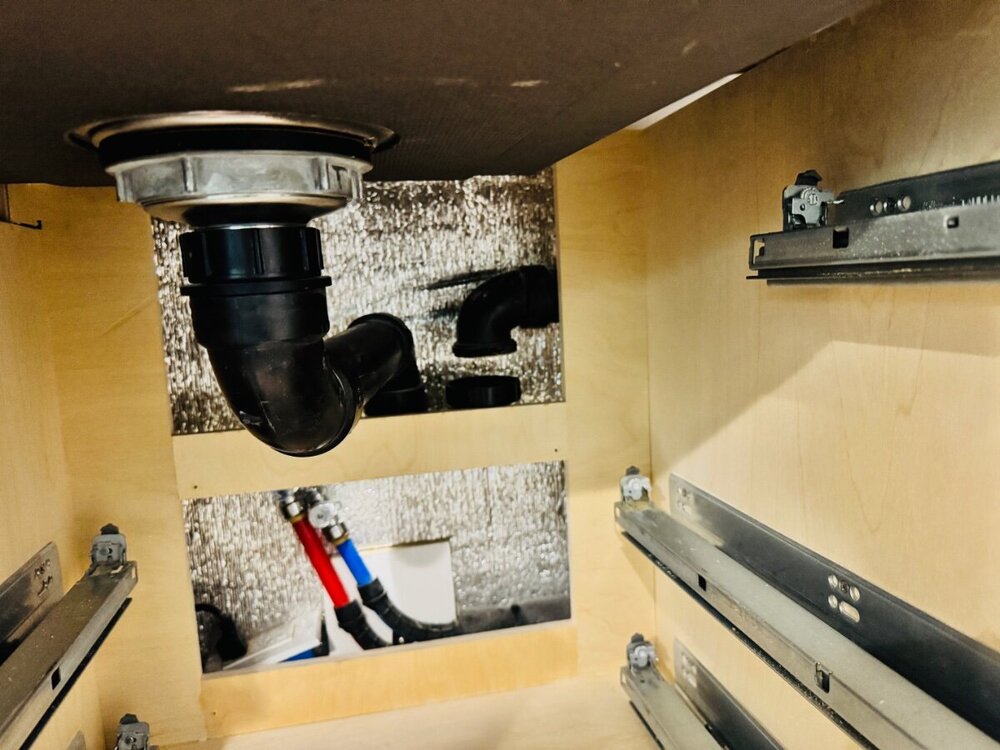
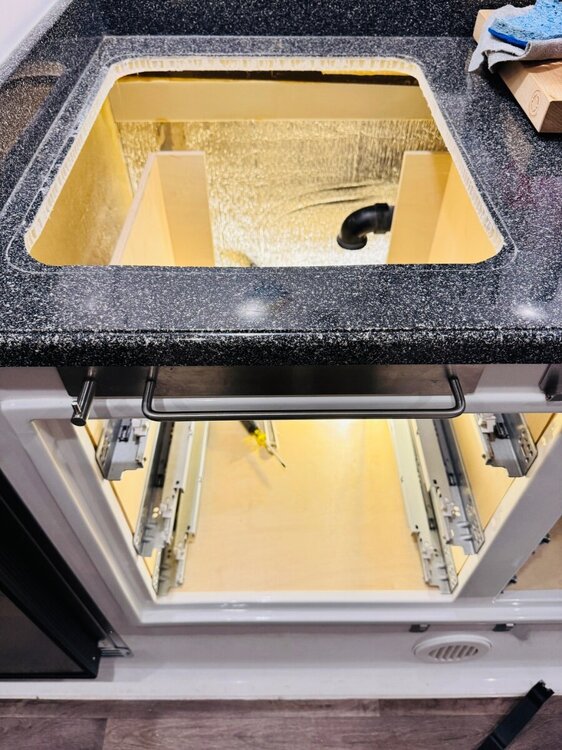
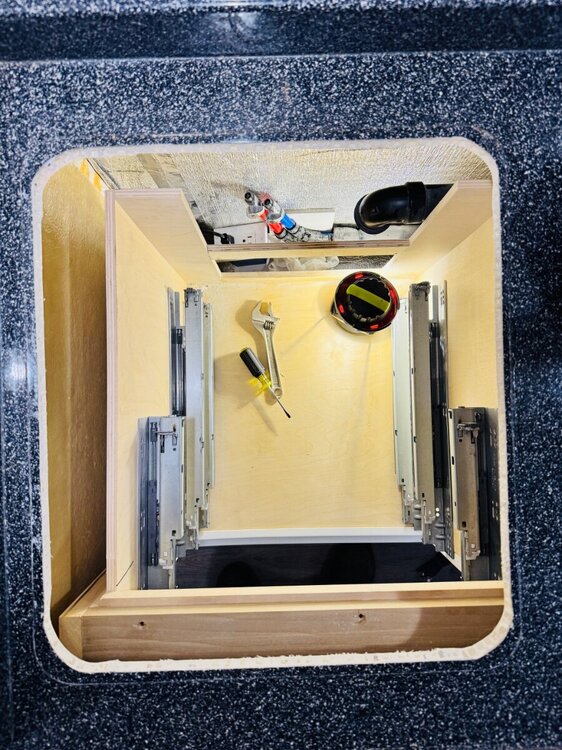
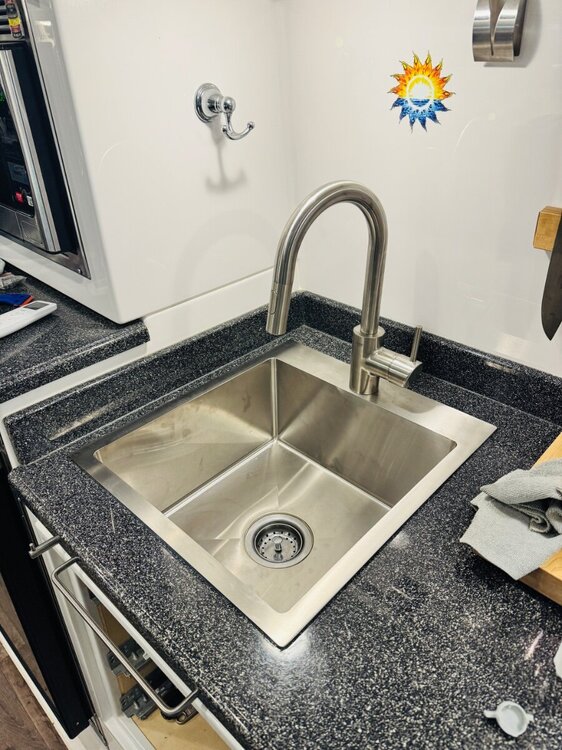
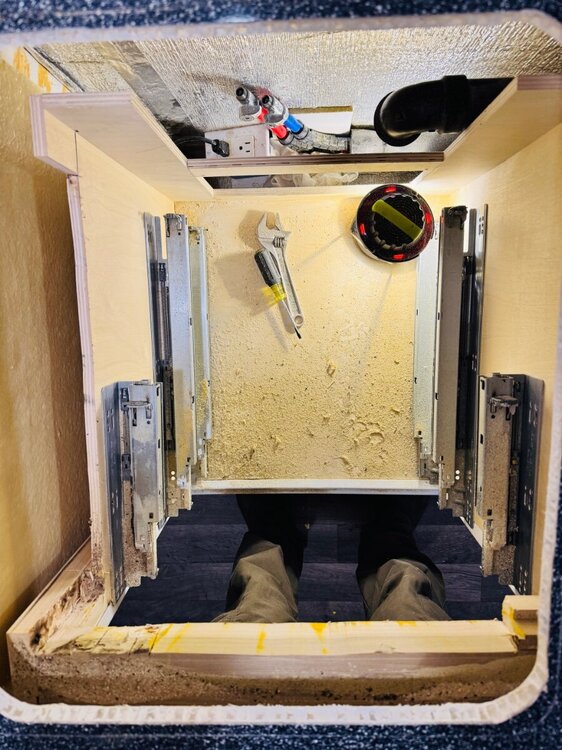
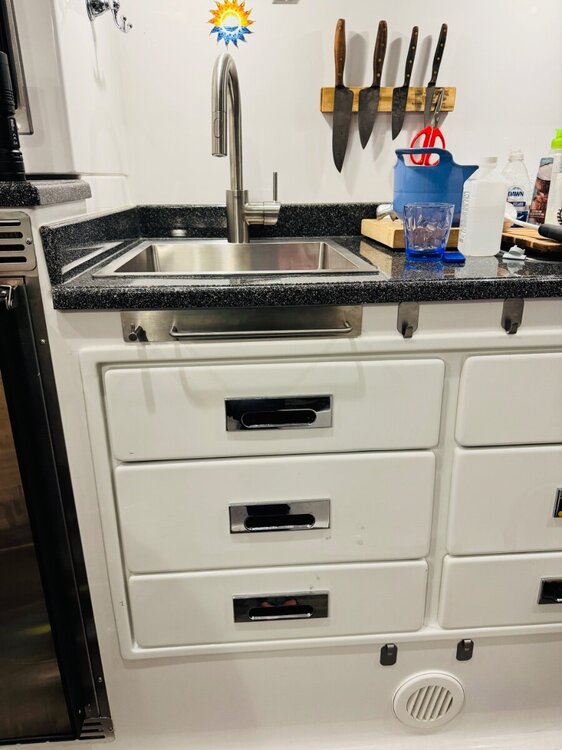
Another copy of @Snowball‘s mod just used different but almost the same components. Took a few pics. I was able to save about 2/3 of the upper front maple crossbar. Real trick since the sink is 2 in deeper was maintaining drainage grade. Had to remove metal tube securement (screwed to the back of the cabinet) and was able to reuse the 1 1/2 in ABS but may end up cutting it under road side bed to shorten a bit to get more of a grade. But seems to be draining ok… we shall see. Love the sink and faucet. SO much more useful. Just have to close up top left drawer with faceboard some how. Oh, I did shim the middle between the middle maple cabinet support and counter, the counter had small bow in it. Easily corrected, then was able to silicone the sink to the counter top. Amazon Links: Brushed SS Sink 17x19x9 18g sink, 11g sink rim https://a.co/d/ I wasn’t able to use the deep drain basket that came with it due to limited space. Grohe Bar faucet https://a.co/d/hK5IcRy Best, Mike3 points
-
The people at OTT are some of the nicest, down to earth people. It would be easy to lose the kindness with a big business and I have known several who have, but they remain good folks.3 points
-
People don't usually approach me with questions. My wife says I scare people because I look grumpy. They talk to her all the time, so I just stand off to the side with my resting cranky face.3 points
-
I am so glad no one was hurt, at least physically. The emotional trauma will last for a while yet. I have seen so many accidents in my life that they don't even get my heart rate up anymore, but for most people, they are exceptionally stress inducing. I can't wait to see pictures of your new OTT in the wild.3 points
-
3 points
-
@BlueHighways The absolute most important thing is no one was hurt. I could not agree with you more on knowing your insurance policy 💯 and also having a dashcam. We have a Garmin Mini and it records everything in front of us. Like others, I am not surprised by the assistance provided to you by OTT, a really great group of folks. Glad to hear that you are placing an order for a new Oliver!3 points
-
I'm so sorry that you have had to go through this ordeal but I'm glad to hear that no human was hurt in the accident. Its also nice to hear (but not surprising) that Oliver was a great help to you. I keep telling people that I've never dealt with a finer group of people/company. For me, they are really what makes the Oliver Travel Trailer so special. From your picture above, it appears as though the Oliver basically remained in tact. Were there any cracks in the exterior or other signs or major structural damage - of course I'm assuming that the exterior was roughed up a bit and I noticed the odd angle of that axle. Additional pictures would be of interest if you can share them since there have been relatively few Ollies involved in major accidents. Bill3 points
-
Camping at the Dinosaur National Monument, at the Green River campground, and couldn't eat on time because of the people wandering by saying "Is that an Oliver?" or "What kind of trailer is that?" I think most folks had already eaten and were doing their after dinner walkabout, but I got back late after hiking in the desert. Of course I'm not going to blow them off because I LOVE talking about my trailer. I had hoped to eat outside and watch the sunset but nope, by the time all the interested parties were gone, it was dark and I'm eating inside. I might have part of the blame for this.2 points
-
So, lucky you! Two great young assistant engineers. Your Ollie is full of great smiles! Great mod. Great look.2 points
-
So sorry for the loss but happy there was a good ending.2 points
-
@Rivernerd I had a very similar experience. Just like you, legendary reliability was one of the main reasons that I bought the Toyota. Having already read comments on the Tundras.com forum, I was aware of this potential issue. So soon after I bought the new Tundra, I did some testing and confirmed elevated transmission temperatures while towing upgrade. I purchased a complete installation kit from GenuineCoolingSystems.com and had a local transmission shop install the auxiliary cooler. The true test came when we drove N on I-17 from Phoenix towards Flagstaff on a hot day in June. There is a steady and steep (4-5%) grade for about 7 miles starting near Black Canyon City, exit 244. A sign along the way states “AVOID OVERHEATING TURN OFF AIR CONDITIONER NEXT 5 MILES”. With the ambient temperature at 100 degrees, we passed several overheated trucks and cars while towing our fully loaded trailer at 55 mph with the AC ON. The transmission temperature never exceeded 206. So I am obviously very pleased with that modification to my truck.2 points
-
2 points
-
She is definitely smarter than her dad! LoL. This morning she was complaining about the healthy cereal and I told her that her mom and I were trying to teach her to eat healthy. I said that things with a lot of sugar can cause obesity and diabetes, etc. She grinned and said “Have you been eating a lot sugar while looking at my belly!?”2 points
-
Fishing Bridge was closed for a fair amount of time while they improved the facilities there. Glad that they seem to have completed a nice job. Enjoy what I believe to be one of the most special places on this planet! There is too much to see in only 5 days. When you do Old Faithful, don't miss the lodge and the boardwalk that extends out past Old Faithful. Also, to get a better view of Grand Prismatic, park at the Indian Trail trailhead (about a mile south of the main parking area for Grand Prismatic). Walk up Indian Trail less than 1/2 mile and look to your right for a great view. Less people and you look down versus trying to see it at a flat angle. Bill2 points
-
So, who is truly the brains of the operation? 🤣 I’m thinking we give you way too much credit! GREAT upgrade, Mike. Ty2 points
-
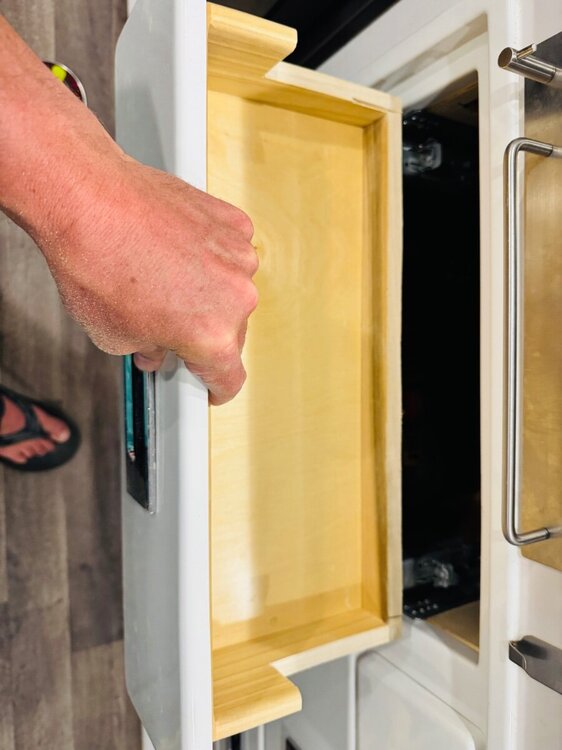
Finished the top drawer mod. Keep the wood blocks on the end, they hook into to the end connectors for soft close assembly. You do have to trim them down like the rest of the drawer to make it fit under the sink. Happy that I got to keep the drawer for small things. Turned out better than expected. Had a little helper too!2 points
-
2 points
-
Yes - in tact it was. The stairs were broken off but, they took the brunt impact. This pic shows the impact point. The right-front axle was sheared off the frame from the impact and the right-front rim bent. Major structural damage? All 4 pieces of the hull where damaged somewhat so I would say damage was more extensive rather than severe except at the impact point. The interior dividing walls were toast (bathroom and closet). I went around the mid-joint of the exterior hull and found 1 small place where they looked separated. To the naked eye, I could not see any issue to the frame even at the point of impact. But, based on other clues, it wouldn't surprise me. But, everything shifted - the second pic is a fork wedged under the pantry. It was in the top drawer on the other side of the trailer. In one amusing exchange, the sheriff radioed his dispatch for a rollback to haul the Oliver. Dispatch called back saying the towing company was bringing a dump truck and looking for someone with a skid steer. When they finally arrived the tow company apologized for the delay - in their experience, an RV rollover ALWAYS required a skid steer and a dump truck!2 points
-
Wow. Sorry this happened to you. It's a shame. Thank you for taking the time to offer such sound advice. I look forward to hearing about your new Ollie in a year or so.2 points
-
Glad to hear everyone is okay and thanks for sharing your lessons learned! Mike2 points
-
This modification was a break-out from an old and long thread that Mossemi started: “Only one switch to operate streetwise and curbside lights . . .” It concerned a common complaint that the curb side porch lights can’t always be used because the street side lights also come on and they can annoy the neighbors. Mossey posted a new photo of the main switch panel wiring yesterday, and it showed a ground wire labeled “porch light”.” I hadn’t noticed it before, so I tried my circuit signal probe again and finally found where the circuit crosses over to feed the street side porch lights. It was in a sheathed wire bundle behind the attic side board, deep along the right bottom corner. It can’t be reached through the attic without disturbing the insulation, but it can be reached through the right rear speaker hole. The duct tape dust cover will have to cut open then re-taped afterwards. The wire bundle has enough slack to splice it though the speaker hole. I pulled the positive “red” wire out of the “split-sheath” wrap and verified it was the right one with a clamp-on amp meter. It read something like 0.9 amps with the lights on. I cut the wire, capped the end coming from the old switch, and spliced a new blue wire to the lights end. A Wago connector was easier than trying to crimp a butt splice in the tight space. The new wire was sheathed for extra protection and routed to the main switch panel. It was tie-wrapped to an existing wire bundle on the forward edge of the attic ceiling. With the left attic side board also removed (they are held by two small lag bolts), the wire can be passed into the left side upper cabinet. A short stiff wire will help fish it through. The upper cabinets have thin laminate floors fastened with a few Phillips screws. Remove them to expose a channel that the new wire can lay in all the way to the main switch panel. I also removed the microwave outlet for more room to feed the wire into the switch panel area; just snap off the cover plate, loosen the two mounting screws slightly so the wings fold in, and it will come right out. I had a round rocker switch in my stash, and they are also available from Amazon. I installed it in the blanked hole for the “Street Awning” switch, and blacked out the word Awning with a felt marker. The switch just says “Street” now, for the street porch light. Very unprofessional, but I hope someone will had a better solution. If you don’t have a blanked spare switch hole, then a switch can be mounted on the other side of the switch panel, on the inside cabinet wall. The switch was wired with the new blue wire going to the middle terminal, the red hot +12Vdc to the bottom, and the yellow ground to the top (needed for the blue neon indicator.) The other ends of the hot and ground wires went to existing six-port push-in terminals that feed other switches. There were some unused ports. This is easier than it sounds, but it’s good to have a clamp-on amp meter and/or circuit tracer to help find the street porch light wire. I included a photo and list of the tools I used. The inexpensive brands work well enough, and I’d recommend owning them for other electrical projects, troubleshooting and repair work: Digital clamp-on ac/dc amp meter, also a multimeter, can check your shunts and loads too! Circuit tracer for finding wires, shorts, and breaks Metal fish tape, I cut short pieces off the end for these kind of jobs Cable tie gun, you will wonder how you ever got by without one Auto wire stripper, just makes it easier Thomas and Betts crimpers, 50 years old and still my favorite go-to Inspection mirror Fluke multimeter, when accuracy counts Cheers, Geoff1 point
-
As promised - below are some pics of Mr. Oliver's "Beast". I assume that the name derived from the fact that it is estimated that this Oliver weighs in at something at or near 10,000 pounds. Partially this is due to the interior counters being made of Corian - not fibergranite - the addition of the under carriage storage areas, the bed risers, etc. Shape eyes will note things like the lack of a rear window (no emergency exit), the location of the front and rear under carriage storage, the location of the water heater, the design of the reading lights and "coat" hooks and bath faucet, single entry step, etc. Enjoy this classic! Bill1 point
-
I tried to find one of my old threads complaining about leaking connections with those hand tight Oliver fittings. Regularly, on our EII, one of them would loosen up and I would hear the pump running or see water leaking out of one of the weep holes. Recently I tried something that actually seems to have stopped the problem. Kind of counterintuitive. I put food grade, silicone lube (typical use- servicing water filtration systems) on the threads and retightened. A couple of trips with no weeping holes and maybe a solution 🙂1 point
-
Just to follow up on this post... I finally scraped away the caulking from the towel bar in front of the bath vanity to investigate whether I had a detached vent pipe. It wasn't nearly as much a chore as I anticipated...took all of 15 minutes! To my dismay there isn't any loose pipes or fittings. There is a faint black tank smell in that area but I was unaware that the space around the black tank is contiguous with the space under the dinette seat...so any smell I have there would also be inside the vanity. I'm still perplexed as to why there is a smell at all but I'm assuming my sniffer is just overly sensitive. I'm happy that I tackled this as I'm going to use a gasket around the towel bar (thanks Steve Morris) to prevent water intrusion and keep it accessible for the future in case I purchase a new faucet. I'm just going to use the original screws and snap caps to secure it down since I don't anticipate going in there very often.1 point
-
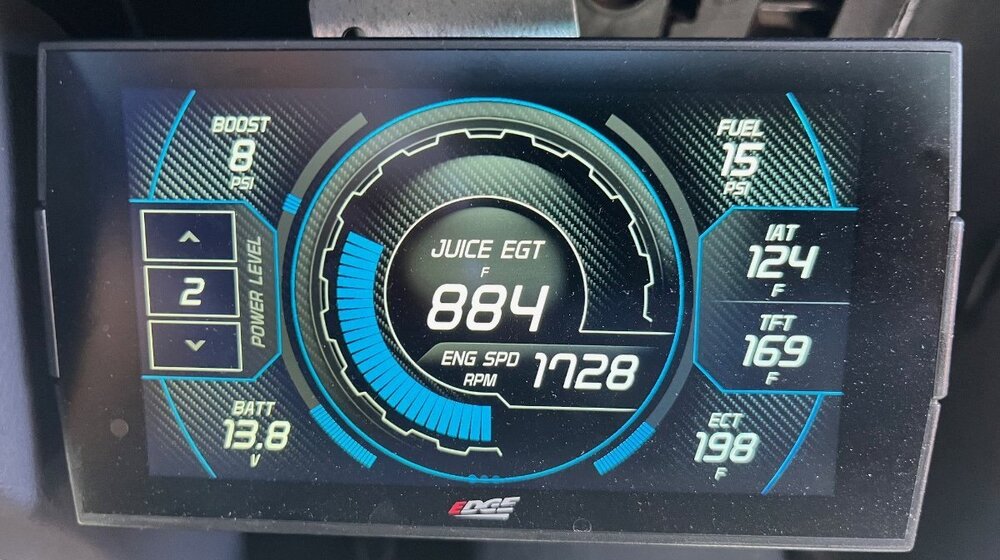
I would think the Tundra 5.7L would be a very capable TV for a 7K LB trailer. It's easy enough to add a trans cooler. Adam and I added one to his '97 T100. Our Lexus GX has one OEM. When I replaced the trans fluid there was a procedure to get to trans up to "temp" to fill the fluid to the right level. I thought it was 180F but not sure of the number. Keep in mind this was running the trans in neutral, certainly not towing. You have to imagine that I'm familiar with this stretch of road. Driven it some 100 times in the last 20 years. The Ford E450 Class-C 6.8 v10 we used to have would groan or downshift and scream, barely get to 40 MPH up this stretch! It appears you found a great cooling mod and love you gauges. I was never into gauges on vehicles past but went full route on our Ram which already had a trans cooler. I wanted to keep eye on all relevant temps while towing. Also, the 2nd gen Ram 5.9 Cummins in OEM form is quite detuned, so I also added a tuner for more power. Program #1 adds MPG efficiency when around town. Program #2 adds power for towing (amazing climb on this mountain road), and programs 3-5 are for the crazies that run at tractor pulls (I never use the extreme programs). The Edge Juice w/ Attitude included the tuner and all the gauges and a quality 7" display. TFT stands for Trans Fluid Temp, IAT is Intake Air Temp, ECT is Engine Coolant Temp, and EGT is Exhaust Temp (important to be <1200F when running hard or on tune programs). First need on a Cummins Diesel is to maintain 14 PSI in fuel pressure. Love this setup for towing power and monitoring vitals. This picture was captured towing our Oliver (I asked Chris while I was driving), a mild climb just south of Hoover Dam on N Hwy 93. It was high 90s outside and at 1728 RPM, I was likely driving about 65 MPH in OD. I have never seen numbers over 200F. Obviously, these are different designs in transmissions. The highest temp I've seen was 193F. Not while towing but due to the climb from Parowan UT up to Cedar Breaks NP, a 4000+ FT climb in 20 minutes.1 point
-
This is very interesting data. I made a similar comparison before and after I had the hitch put on at the factory and found a similar result. I am surprised at how little weight "re-distribution" this "WDH" provides. I don't have the data, but my guess is that a hitch using spring bars would do much more than that.1 point
-
I love diesels but I do not love what the EPA is doing to them. I have a 2014 Cummins that gets about 25 on the highway, 18 in the city and about 13 towing. This includes stopping, idling and everything in between. Mine is not EPA compliant, however. Personally, if I needed a new TV, I would buy a Ram 2500 with the Hemi. It gets decent fuel mileage and doesn't suffer the ill effects of emission equipment.1 point
-
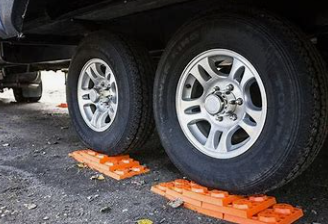
I have used my "stabilizers" to level my trailer since I have owned it. They work great and get the job done. However, they are not built for it. If you are in a fairly level place, they will be fine, but once you start hanging the suspension with tires off the ground, you lose stability. In most scenarios, those won't hurt anything. Where it becomes an issue is with lateral trailer movement. At full extension, the stabilizers create tons of leverage which can damage the frame, mounts and even the tubes. I use two types of wheel levelers when I plan on extended stays. Both have their advantages and disadvantages, mostly as inconvenient. The first set are easy to lay down and include a lock wedge to keep your wheels in place but they are big. The second set stack when not in used and assemble to whatever height you want. Once I get leveled, I drop the stabilizers onto a hard block with rubber pad.1 point
-
Congrats on your install and getting rid of your “Demonic penguin”. You’re going to love being able to talk on the phone, not use ear plugs to sleep, watch a little tele or listen to some music. Great mod! What BTU is the Atmos? Where you able to use the original condensate inner hull OEM Olive drain lines? Just as an FYI I sold my Demonic to a guy who needed an AC unit for his food truck. I put it on FB market place and it sold in 3 hrs for $600.00.1 point
-
Maybe then your Oliver did you a favor, now is the time to upgrade. Linked my upgrade thread below. I reused the microwave bezel but your looks integrated to the MW. This should be the model I had. The dimensions were a good fit. I would try the "Like New" one for $104! If it's not just right, return it: Amazon.com: Emeril Lagasse Everyday 360 Stainless Steel Air Fryer, 360° Quick Cook Technology, XL capacity, 9-in-1, 12 Pre-Set Cooking Functions including Bake, Rotisserie, Broil, Pizza, Slow Cook, Toaster : Home & Kitchen1 point
-
Trying to imagine how this happened on the curbside. Somebody driving on the wrong side of the road? Was it cross traffic, somebody did not see you or not stop?1 point
-
Add Wilwood front (6 piston) and rear (4 piston) brakes, OME suspension and a Magnuson supercharger and it's even closer! 😉1 point
-
You bet John. We are well prepared for the cool weather with a little goose down and LP tanks topped off. Ha! We will take the cool temps over heat any day! 😊 Talk Soon! Yesterday I saw a front headed for Colorado but I didn't see how far north it extended. Even if you get the snow that is forecast for Colorado, at this time of year you should only need to hunker down for a day or two. In any case - be careful on the roads. Bill1 point
-
How in the world did you find that wire way back there? Geoff, you're my new hero! Love your older quality tools too. Best wishes, JD1 point
-
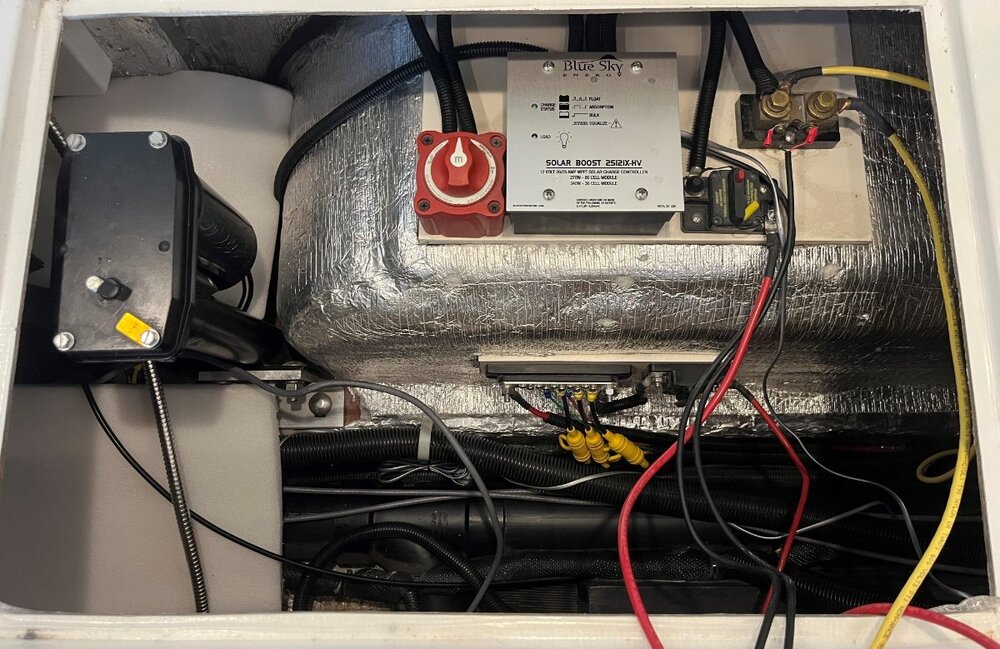
@DavePhelps, I have a new idea after considering what @Snackchaser added. Yeah, it would be great to be neighbors! 🤣 If the charger (AC-DC converter) fails, it would generally blow the 120VAC circuit breaker. If it produces too much DC amperage, the directional wiring I suggested would protect the circuit. If the charger somehow created a dead short on the DC side, without blowing the AC breaker, then you would want it wired as Geoff suggested. Btw, the breaker being close to the battery vs. charger is negligible since it's only 2-4 feet of cable in either direction. New idea: Keep your original drawing as-is but instead of the 50A breaker, install an ANL fuse. Geoff also mentioned using a fuse. Fuses are NOT directional as DC breakers. BTW, 50A is not enough for the 45A charger (45A x 1.25 = 56A, so go up to 60A). Purchase ideas: Amazon.com: Blue Sea Systems 5123 ANL Fuse, 60A : Blue Sea Systems: Automotive Amazon.com: Blue Sea Systems 5005 ANL Fuse Block with Insulating Cover, 35-300 Amp, 32V DC : Blue Sea Systems: Tools & Home Improvement Have you removed your original battery cables yet? Check to see if OTT installed an inline ANL fuse. Mine had one, but our hull also has an inverter. The OEM 12VDC wiring in our hull was reversed from what's shown in your drawing. Switch the bus and breaker in your drawing and that's how ours was installed. OTT also wired both the 40A breaker from (not to) the bus and from the solar breaker in reverse direction. Originally, I thought OTT wired the breaker in the wrong direction, but they did so because the converter is wired directly to the bus (see red 6 AWG cable in wire loom left side of bus in picture). The picture was taken during my recent upgrade to new batteries, inverter and buses. The two red 6 AWG wires you see loose come from the AUX side of the breakers and were run directly to the batteries. So, OTT reversed the direction as I had suggested and appears to be standard from what I found online. Anyway, the ANL fuse will provide better overall protection. Be sure to buy an extra fuse!1 point
-
You bet John. We are well prepared for the cool weather with a little goose down and LP tanks topped off. Ha! We will take the cool temps over heat any day! 😊 Talk Soon!1 point
-
Thanks for the updates :) Enjoy Yellowstone...hope you brought sweaters :) Happy Trails, Us1 point
-
You might also be interested in getting one of THESE hitch pins from Tractor Supply or Harbor Freight. The "handle" makes them much easier to grab. Bill1 point
-
Be sure to look at every YouTube vid you can find in order to learn ALL the ways you can get the Andersens attached - there are several. Once you are familiar with a variety of ways then you will have a better idea of which to use in virtually any circumstance you find. Bill p.s. I do like your "gauge" but a half a thread one way or the other really isn't going to make that much difference.1 point
-
@Snackchaser Your persistence paid off handsomely. Thank you for the documentation! Mossey1 point
-
I've attached a simplified electrical schematic for my 2021 Oliver Legacy Elite II. This schematic will be "basically correct" for most Oliver models. The numbering and amperage ratings shown for the breakers and fuses matches the numbering scheme in my Oliver Owner's Manual. I made this diagram because my Zamp solar charge controller stopped charging the house battery, and I couldn't find a good electrical diagram online, and the Oliver Owner's Manual didn't provide a decent line drawing. So, I made this one. (my specific Zamp issue turned out to be caused by a badly corroded terminal on breaker B1 ... which by the way, any auto parts store will have a replacement for this thermal-type breaker). I also realized I didn't understand how the AC and DC systems work together, so I made a single diagram showing both systems. Often a simple diagram can be used to trace a myriad of symptoms back to a common component such as a breaker, fuse, or even the house battery. Or, to answer a simple question like "why does the inverter run when I'm connected to shore power"? (the answer is, it has to because the inverter is supplying power to the 25A sub-main that feeds all your AC loads except the refrigerator! And the inverter gets its power either from the house battery, or from shore power, or from the aux (generator) input). I hope people find this schematic to be helpful. OliverSimpleElectricalv2.pdf1 point
-
The Beech Lane and Anderson brands of levelers look to be the same in appearance and design other than in color, black and red, respectively. Although there is a diverse selection of levelers available, this tear drop ramp-type leveler pairs well with OTTs, especially when used in conjunction with a cell phone app leveling systems as @Patriot and @jd1923 refer. Reason being these systems will indicate if leveling adjustment needs to occur side-to-side, then the leveling ramp(s) can be positioned on the side to be raised and vehicle driven onto them until level according to the app. Set the TV emergency brake, position the wedge(s) of these setups, detach trailer, complete front-to-back leveling per the app utilizing the forward stabilizing jack.1 point
-
It is a DOT requirement to not fuse the wire leading to the break away switch.1 point
-
Recent Achievements


