Leaderboard


Popular Content
Showing content with the highest reputation on 10/16/2024 in all areas
-
I am currently acting as the Service Director overseeing the service department & technical support. Jason B. & Mike will be handling more of the daily activities while I will be putting a bit more time in traveling to our dealer partners assisting with Sales & Service training. I would say 75% of the time I will still be here onsite working with Rodney in sales & Jason B & Mike in service.6 points
-
Since this is not my first, second OR third try... I'll be really good at it so line up ten or so Ollies and I'll simply do them all!! LOL5 points
-
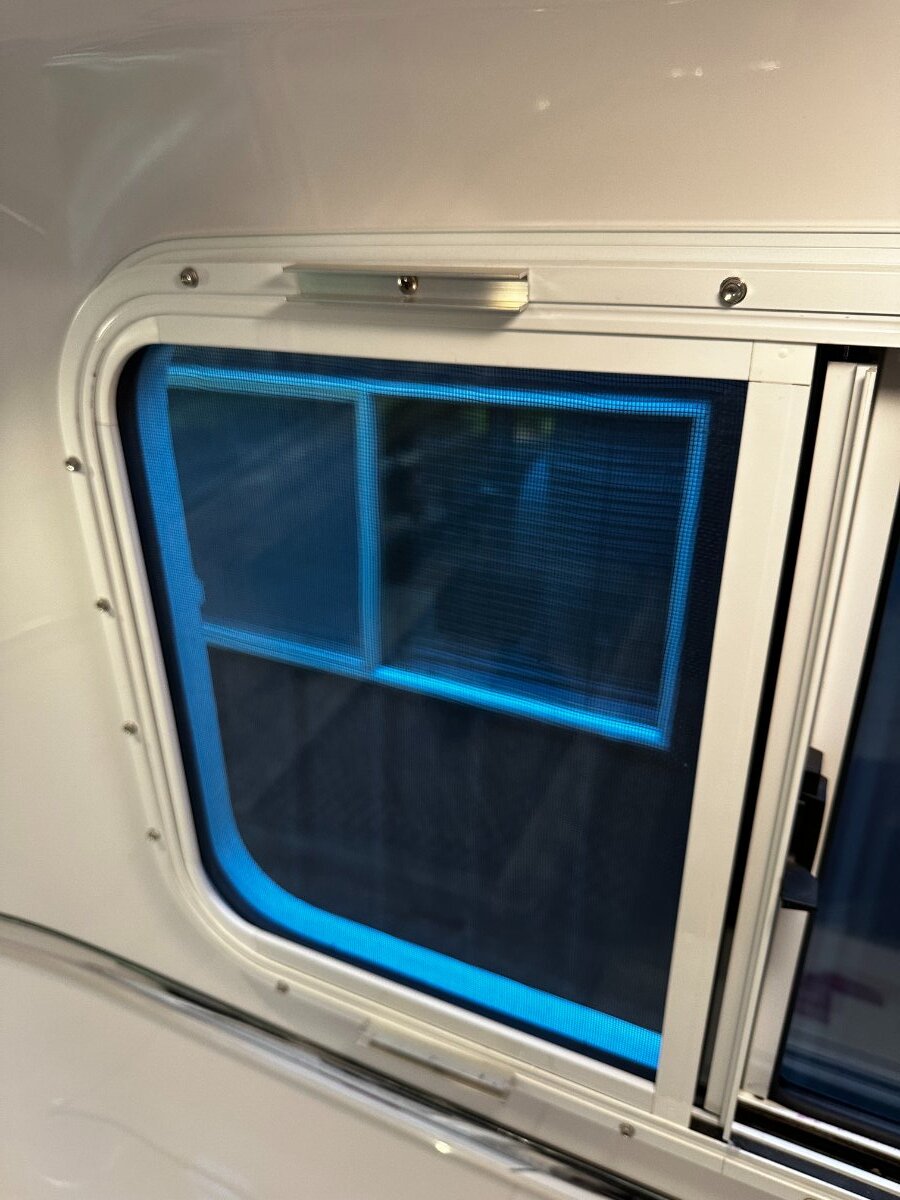
Just a heads up, I recently had to replace the window rain gutter trim around my windows because the original trim was never brought down far enough along the edge of the window and they were starting to peel and come off exposing the 3M tape and simply not doing the job intended and leaving longer black streaks than I like. DO NOT PURCHASE THIS PRODUCT FOR YOUR OLIVER: https://www.amazon.com/dp/B0D98165TN?ref=ppx_yo2ov_dt_b_fed_asin_title&th=1 It's horrible. It was purely my decision to go ahead with the install even though the color was a bit off and not nearly the quality of the original gutter. The tape is crap and even though I installed on an 85 degree day and let it sit for days, the rounded corners lifted on the first rain and it looks awful. Again, I knew that there was a chance that I'd have to peel it all off and start over..but I took the gamble. Just know, it's an inferior product. The lower price point should have tipped me off... I'm hoping this product is superior at more than twice the price: https://recpro.com/rv-rain-gutter-trim-with-adhesive-backing/?srsltid=AfmBOopQirOHpRVjMz9qYBNAXXOuiSK1bDn8mqsrwrVR8CRQd1liPtrE Let me know if you have had better luck with RecPro. My research suggests the original product was made by Essential Products called EZE RV Windshield Gutter, but I can't find it anywhere. Live and Learn, Sigh, Claudia3 points
-
As our business continues to flourish we strive to grow our staffing so we can continue to meet your needs. At this time we would like to welcome and introduce Jason Balentine, our new Service Manager. Jason will be running the daily operations of the in-house service department. Mike Sharpe will continue in his role as our head technical support supervisor. We have separated our phone system out where you can select Technical Support or Service & Parts. Technical Support is for external support, general questions or help locating a service center or dealer near you. Service & Parts will be directed to Jason in Service and he will assist with scheduling appointments for our in-house service department and help with parts requests. And to answer everyone's question, Yes, evidently your name has to be Jason to work here.
 3 points
 -
Quartzsite is a good place to try your hand at dry camping. It was our first real boondocking experience back in Jan 2017. It’s easy enough to go into town if you need to dump or refill water. Winter weather in Q can be quite pleasant if you’re coming from colder areas. It’s been fun to meet other Oliver owners there over the years but it has also been a nice stop over all by ourselves for trips to/from California. Plus, the price is right. Joshua Tree NP isn’t far from Q and is worth a visit as is Death Valley NP. Mike3 points
-
We have camped in ambient temps as low as 9 degrees F with the furnace running on propane (nearly full time to keep up). We pulled the outside shower head inside the hull by twisting it off, then putting it back on inside. Our remote thermometers in the belly of Hull #1291 reported temps down to 33 degrees F, but not below. No freeze damage. Whew! That said, I do not recommend camping in an Elite II in temps below 15 degrees F, to be safe. With lows in the 20s F, you should be o.k. with the furnace running. Towing an Elite II in sub-freezing temps is a different issue, as it is potentially dangerous to run the furnace on propane while on the road. And, your water heater is at risk unless you have a Truma with the antifreeze adapter. On the trip mentioned above, we did our travel mid-day, when temps were above 32 F, because we choose not to run the propane furnace unless we are parked.3 points
-
Search on this on Amazon. They sell 25' lengths. I put the trim lok site link in my reply because it was the company site. If memory serves you can do one LE2 with a 25' length, but you have to be careful. Scotty Trim-Lok Drip Rail, White – 1/2” Height, 25’ Length – PVC Plastic Rain Gutter for Cars, Vans, and RVs, Easy to Install Flexible Drip Rail Molding to Control Water Runoff, Durable 3M Tape Included3 points
-
You want the Trim Lok Drip Rail with the 3M backing tape. https://www.trimlok.com/plastic-extrusion/drip-rail The 3M adhesive is awesome. Put it on #145 in 2016 and still doing the job. I would actually be afraid to take it off now for any reason. It's part of the trailer. Good Luck Scotty3 points
-
We’ve camped with overnight temps in the teens and had no problems. We also camped when the temperature never got above freezing for several days and had no issues. Especially if the daytime weather warms to above freezing the Oliver does great. We don’t enjoy very cold camping just like we don’t enjoy endless rain days. Even though the fire pit can warm up the Clam pretty quickly we try to avoid very cold weather. Mike2 points
-
@rich.dev - Very clean install, brother! How do you like the performance of the entire new system?2 points
-
For the 7 pin I have always just looped in around the tongue so that it hangs straight down. Never had the dreaded ghost lights or problems with moisture. Tire covers... Prefer the type that covers both wheels. Couldn't tell you what brand because I bought them so long ago. The double ones fit well and have a bungee like chord to attach them which I never use... they aren't going anywhere. Important to use them to keep the sun off the tires. Good Luck and Happy Camping! Scotty2 points
-
Seriously, Claudia knows what she's doing. She's trying to help others. The warning is out there. She posted a specific link to the defective product. Not ez rv gutter, not trim loc, so take it for what it's worth. Her sage advice after a big fail.2 points
-
We are planning to come also. since we are two green gourds with our first ever Camper trailer ,we will be following this thread it will be our first long trip in new to us hull 1218 Robert and Ying Perdido Beach, AlaBama2 points
-
I have read so many posts about clogged weep holes and how important it is to keep them clean to avoid horrendous leaks. The trim lok's were just about the first thing I did to my trailer. When I do check the window channels and weep holes they are always free of debris. Maybe some dust but that's about it. I think the trim lok's prevent a LOT of problems. Gregg2 points
-
September 10, 2024 Hello fellow Oliver Elite owners! I am letting everyone know that the Highsierra company has made a handheld bathroom faucet with adapter (chrome or brushed nickel) that fits the original Oliver hand held bathroom sink faucet plus hose and I LOVE this design! This way you no longer have to replace the whole faucet housing while looking great and you'll only need to replace the handheld part by screwing on the adapter to both the original hose (will only connect to the hose with the female threads) and Highsierra handheld shower head. Due to this handheld design and being metal not plastic, I noticed when I showered that my hot water lasted longer during cold weather and the force of the water was stronger than the original hand held. If interested, below is the link to the handheld faucet and you can call if you have any questions. I hope this helps! Highsierra Shower Heads Company # 1-888-445-1941 https://www.highsierrashowerheads.com/shop/rv-handheld-olivtrailers/F1 point
-
Chris, On our LEII, 2019, there was a yellow ground wire from the negative post on one of the 6V batteries that ran back to a bus bar that was grounded to the frame. I discontinued this yellow wire in favor of an additional bus bar that I connected to the Oliver ground bus bar to allow grounding of the inverter and the shunt. This means that our batteries are grounded by the 4/0 inverter negative wire that runs from the new bus bar to the battery negative post on the first 6V battery.1 point
-
Yeah, and you’re close to the annual OTT National Rally! Pulling the Oliver, heavy decline grade on winding roads, a rest stop, it will be 3 1/2 hours. When I was young driving a sports car, I would always beat these estimated times. Not these days. This year, let’s communicate on your Quartzsite thread when Oliver Owners will be there and we will drive down to meet you!1 point
-
Thanks so much friends. Your experience is worth so much to a greenhorn like us. 6-8 inches is a rough estimate for the curb. It rises up at a pretty mild slope and did ok with my boat before I sold it. It just struck me as I looked at some photos of campers that it could be a potential problem. Thanks again for your input. 😃 We hope to become owners soon and will be asking more questions in the near future.1 point
-
Tank size needs to be a decision based on how you camp and your physical capabilities. We have the 30lb tanks. 20lb tanks are easier to handle but we enjoy the extra capacity. I can still lift the larger tanks so we’ll stay with them until I can’t. We’ve never had an issue with running out of propane while on the road. I usually carry a 20lb tank for our fire pit. Between campgrounds with propane, Tractor Supply’s and other locations refilling hasn’t been an issue. Mike1 point
-
Thanks JD! That makes good sense to me now. I do have at least two negs going to the batteries directly. And everything you said about the 6 AWG yellow wire is correct. I tried to note that in the overlayed pic. I'll see what I can do about moving those wires.1 point
-
Thanks Art. The peplink router and antenna works well. I haven’t done much with it, just tested the antenna where my trailer is stored and a difference of approx. 100gb download speed vs regular cell reception IN THAT AREA, could be different in other areas and I know if no cell reception the antenna means buggerall, hence the Starlink for boondocking spots with no cell reception. The Starlink is paused until we will need it so hopefully the 12V conversion and other mods I made for it will work, I’ll know in about a month when we will be down in Arizona.😊1 point
-
We have a 2023 Elite (the 'baby' Oliver) and we sometimes carry a generator depending on where we will be staying. We use a Firman 3242 dual fuel invertor generator that we bought at Costco about a year before we bought our Oliver. It has supplied the power necessary to run the entire trailer with no issues at all. It is a bit heavy though & runs a bit loud for my tastes but so far, we haven't had to use it too often.1 point
-
We've got the Renogy 200W suitcase w/built in SC - works so well for our style of boondocking that the Honda EU2000i is no longer part of our standard pack-out kit. We've also invested in another portable solar module with a sun tracking feature that we saw at the OTT Owner's Rally last MAY --- we're planning to perform an OPS Check on the "tracker" during our Q-site trip in JAN and will report thereafter....FYI1 point
-
We have dual 30# LP tanks and I agree it was a worth the upgrade at least for us and to swap out to 30# tanks after our first year based on our camping needs. In our recent 7400 mile 48 day trip we were really glad to have the larger tanks. We only had to top off one of our 30# tanks 3 times during this entire trip. Many CGs out west if not all, have LP available or will tell you where you can easily purchase it. Everyone needs it at some point. If you don’t have adequate pay load capacity with your TV, or are concerned about tongue weight, or physically cannot lift a full 30# LP tank then keeping the 20# tanks is probably the right thing to do. Honestly I am not even sure an E1 will accommodate 30# tanks.1 point
-
Hmmmm..... A trim lok installation business..... I'll look forward to your presentation at the 2025 rally! Scotty1 point
-
Also, make sure your spare tires are good. There is so much debris on the roads. Daughter had a flat last week. Screw in tire.1 point
-
Depends. Keep the belly warm. In our older ollie, we were good to teens, if it warmed above freezing daytime. 2008 doesn't have your insulation. We open accesses to the belly, and run heat. Me, if i know temps will be freezing/cold, I winterize, to avoid stress.1 point
-
Do you have other grounds connected to your batteries? If so disconnect them from your batteries and connect them to source side of the SmartShunt. Between the shunt and batteries should only be the single 4/0 battery cable. In fact, I see a 6 AWG Yellow wire, from the ground/neutral bus heading to the rear of your trailer. This is likely connected to the batteries ground. ALL trailer grounds must go through the SmartShunt. The way it looks as wired, your SmartShunt will only monitor DC current used by the inverter, only when the inverter is running.1 point
-
I'm aware of the posts and did in fact do my install on a hot day with tape. It sat for three days in warm weather... My Casita had drip rail as well so it's not my first attempt...Just wanted to help new owners be aware of the bad product.1 point
-
High Risk Low Reward. It takes 10-15 to winterize and maybe 10 minutes to dewinterize. You can carry a couple of small jugs of water and RV Anti-freeze to use in the toilet. We live in Indianapolis and can expect 0° - 20° for extended periods. We get South where it might get to 35° at night and dewinterize. We keep our Truma Aqua-Go closed and the filter stored until we are in wark weather My question is why would you even risk doing what you have posted. When pipes in your Oliver freeze and crack, many times it is in hard to get to places, resulting in added expense and major stress. It simply isn't worth the risk, when it only takes 10 minutes to dewinterize.1 point
-
Costco, wawa, and Thornton in our county have had consistent deliveries, and lines. Other stations are opening as power , internet, and incoming trucks are getting better. Gadbuddy had a special "availability " in their app, but it's honestly not very good here. I95 is possibly a better bet. Check out Google maps for slowdowns. And waze. Friends in the south counties have reported things "normalizing," at least a bit. Carry fuel in the back of your truck, just in case, and stay at least somewhere between 1/3 and 1/2 , if you can. Lines are not as long here today in North and central Pinellas county, as many people have had power restored, so generators can be shut down. And, more stations are getting deliveries. I'd ask your neighbors at home what the fuel situation is like there.1 point
-
I-75 South is congested especially north and south of Atlanta. I drove up from Gainesville Friday and it was bumper to bumper and backed up for many miles. I was driving north of course and it took me over three hours just to get through Atlanta. I know nothing about I-95 or I-65 but it would have to be better. Gasoline is no longer a problem anywhere I’ve been.1 point
-
@Blain, I purchased a Champion 2500 Watt Dual Fuel Generator in late 2021, prior to our delivery of our LEII, Hull 990 in February, 2022. See: https://www.amazon.com/Champion-Power-Equipment-2500-Watt-Technology/dp/B0CRLWJSSX/ref=dp_fod_sccl_1/134-9963084-0325038?pd_rd_w=Z6nsM&content-id=amzn1.sym.783fbbc9-65f4-4105-bb20-37dc32815d16&pf_rd_p=783fbbc9-65f4-4105-bb20-37dc32815d16&pf_rd_r=C3KWVM2SBJ484K0Q57BW&pd_rd_wg=GJSmQ&pd_rd_r=3b8f7d10-4b53-41bc-b17e-e7792cfe7baa&pd_rd_i=B0CRLWJSSX&th=1 I have been very pleased with the operation of this generator, which I have operated only on propane. We carry it in a rear mounted cargo carrier on the LEII. I have actually used the generator more often at our residence in Dallas, TX when we have experienced extended power outages. It easily powers a large chest freezer and a 20+ cubic foot refrigerator/freezer. This generator will run 12-14 hours on one 20 pound tank of propane when supporting these appliances. On gasoline, this generator will operate for about 6 hours, depending upon load. This generator can also be paired with another similar Champion generator OR a larger model for additional capacity. I have no found the need purchase a second generator. Not having to haul gasoline onboard is a major advantage. I adapted the fuel hose on the Champion generator to connect to the low pressure connections on our LEII. The Champion 2500 Watt Dual Fuel Generator powers our Dometic Penguin air conditioner on the LEII. We purchased a Micro-Air EasyStart for the A/C unit as an option on our LEII. The generator will NOT power the Dometic Penguin A/C unit without the Micro-Air EasyStart. I did quite a bit of research prior to purchasing this generator. It costs approximately that of a gas only Honda generator and has produces about the same level of noise as the Honda. I also looked at propane conversions kits for the Honda generators and found these were an additional $250 to $300, AND installing them voided the Honda warranty. I would not hesitate to make the same purchase again, if needed. I see no downside to purchasing from Champion. Regards, Don1 point
-
This is a very good point! I did the same with a recent Atmos 4.4 install when replacing the DPll, the extra precaution taken with almost double the airflow of the new unit.1 point
-
I finally got around to giving this mod a try today. I took care to cut and shape the foam to smooth out the airflow as much as possible. I found that the foam cut very well with a tabletop bandsaw, and was shaped into rounded corners easily with a wood rasp. I applied a generous covering of silver metallic tape to hold it all in place. Unfortunately, I didn't get the reduction in noise. 74dB on low and 84dB on cool after the mod, same as before, using my iPhone. I think it did eliminate a little bit of crackling that was caused by the flex duct vibrating. Maybe it had to do with the thickness of the foam, where mine was generally thinner that what is shown in this post. I took advantage of the opportunity to seal up the edges of the return airway as much as possible since it was fully exposed to the rough cut through the hull, and all the dust that comes with that. Overall it was a good experience and I don't regret the time spent, even though I didn't get the hoped-for noise reduction. It was worthwhile to clean up the return air path.1 point
-
@FloraFauna I strongly agree with the above comments. I live in Maine and we have some cold snaps in the witner, like you. With the tanks empty, the worry is really freezing of the water lines, particularily the plastic fittings and backflow preventors. That type of damage is a real pain to fix. The backflow preventors and some of the water lines are difficult to access. Play it safe and winterize. You do not have to have water in the lines to camp in the winter; just bring bottle water to drink. If going south, then dewinterize when you get below the freezing zone.1 point
-
For the last few hours members of our "family" have started to feel the effects of this hurricane. This is only the beginning of a 12 to 16 hour period that is forecast to bring up to 20 inches of rain and a record storm surge. Hopefully everyone will make it through this storm safely and the damage that it is sure to cause will be somewhat limited. God speed to all of those in the storm's path. Bill1 point
-
Winterize. It's not that hard to dewinterize when you get south. We had a freak winter storm in late October in nc. I hadn't winterized. We lost the outdoor shower. Even if you just drain and blow out the plumbing, you're better than nothing. I buy rv antifreeze as soon as it's on rhe shelf, and keep a few gallons extra through summer. If nothing else, makes a great door stop. Where you live (and I grew up near there), I'd winterize after last fall trip. That's what we did in "tropical" southern Minnesota. (You know, the pineapple belt....:) You don't have to "de-winter" to do a weekend trip. Just carry water in jugs, and a portapotty, or use a wag bag in the toilet, if you don't want to de-winter.1 point
-
Sorry to hear about the water problems, sometimes very difficult to locate the source. We had water dripping out of of three windows on three occasions so far, but the windows were not the problem in each case for us. We keep the window weep holes clear. One time the porch light over the window was allowing water in above the window allowing water between the hulls resulting in water dripping out of the window, fix was to remove the light and reseal (old style light). One time the Oliver sign on the rear of Ollie (many here had this problem) allowing water in between the hulls dripping out of the window, removed the sign and resealed to fix. One time during the winter when running electric heater for a few days in Ollie without using dehumidifier water dripped out of the curbside window, found heavy condensation collecting between the hulls in the rear of Ollie to be the issue, using two small dehumidifiers cured the problem for us. Checked where we had access between the hulls at other locations and found very little condensation between the hulls except for the rear of Ollie. Just wanted to share some of our experiences.1 point
-
Max BR1 Pro 5G1 point
-
Looks great and those wounds will heal.😁 Which model of Peplink router did you go with?1 point
-
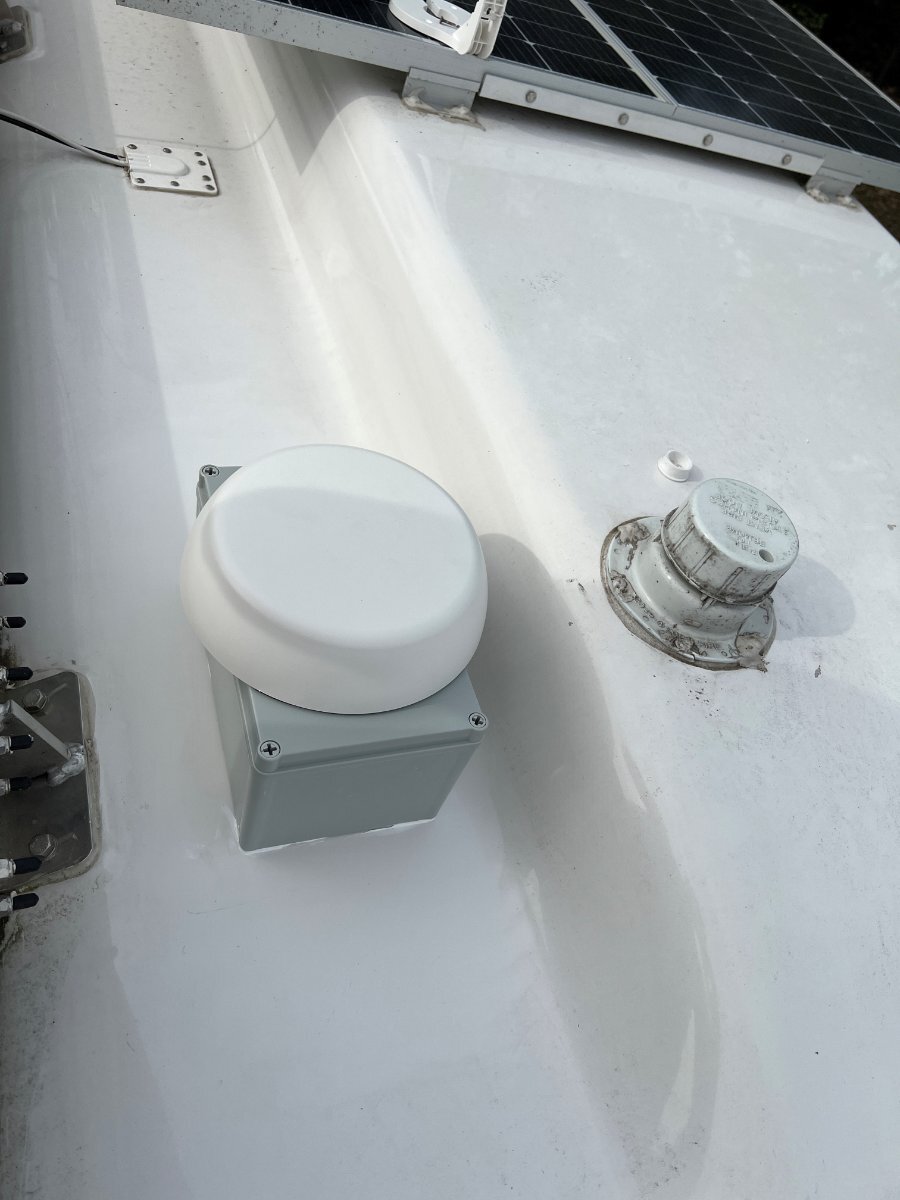
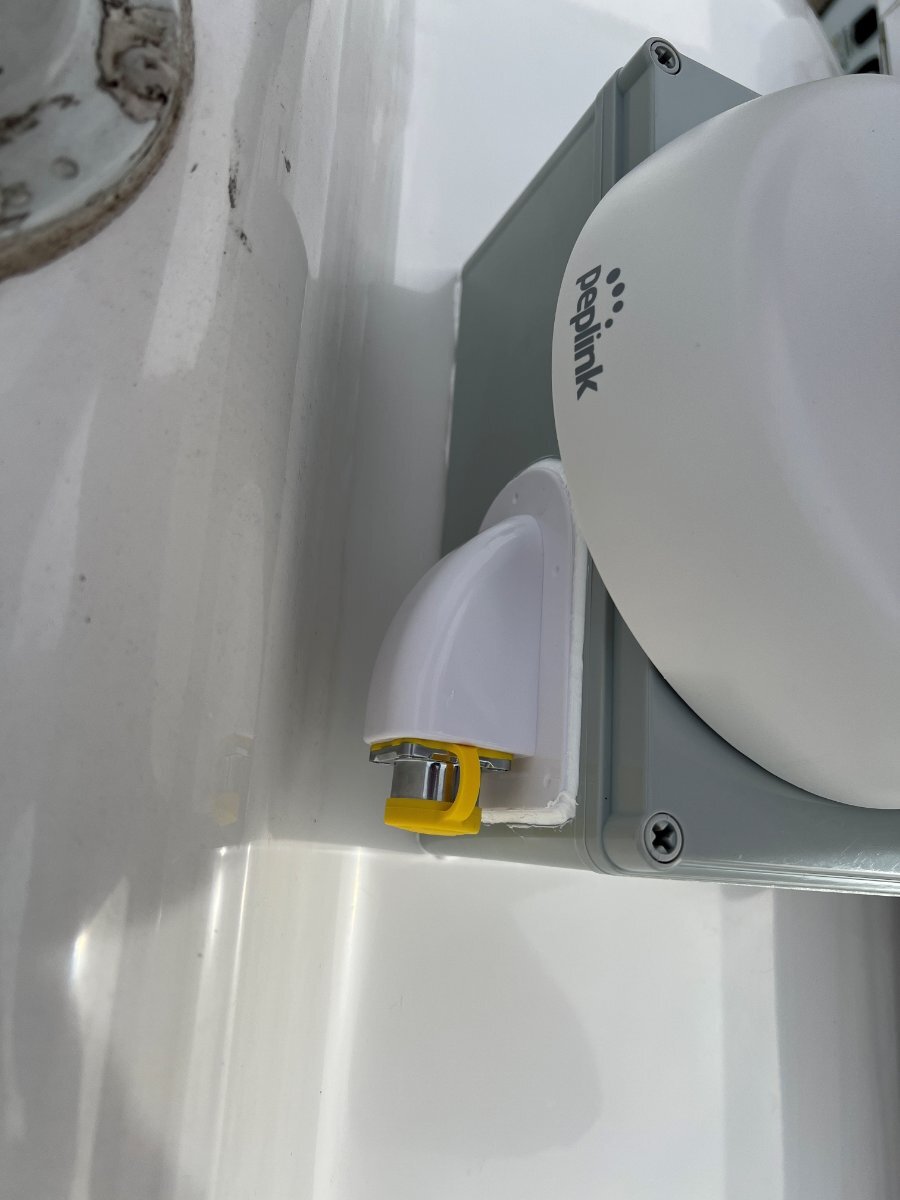
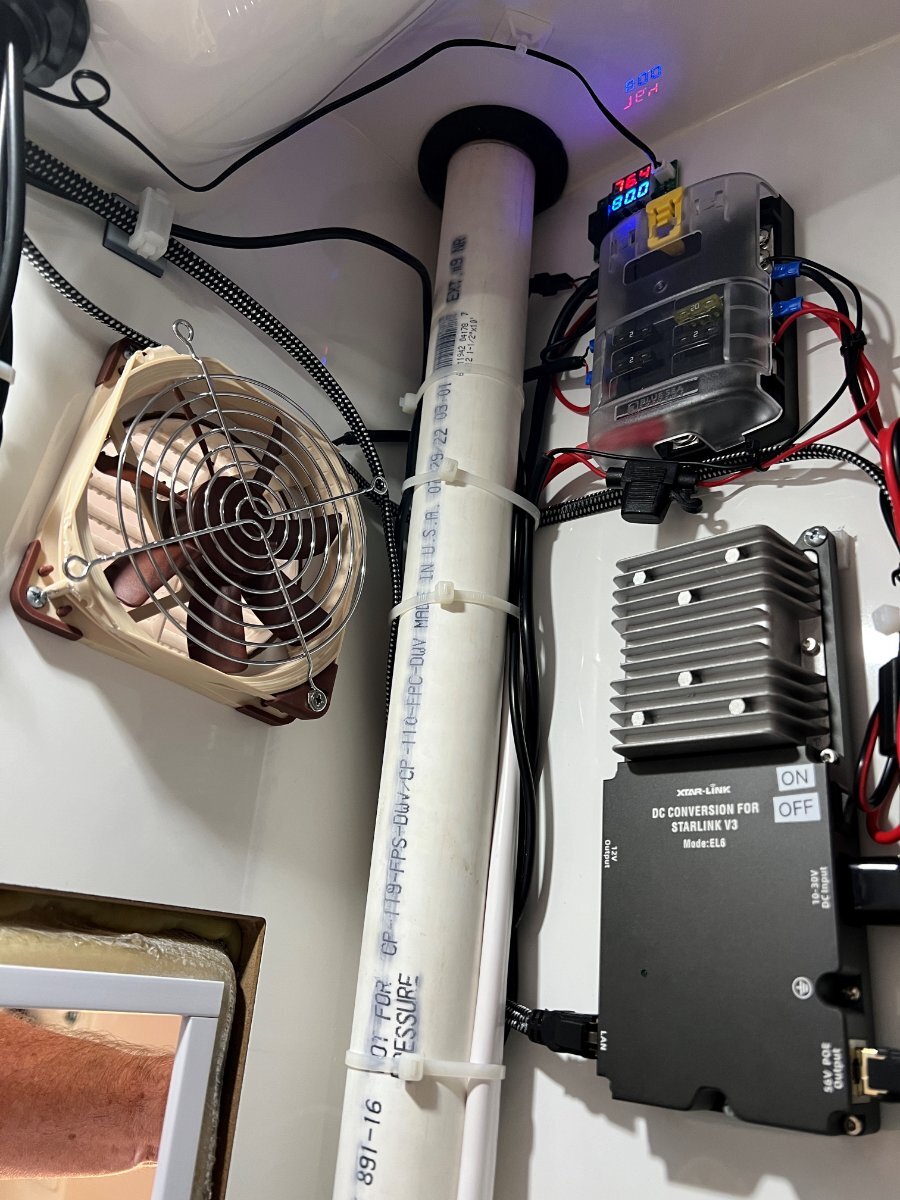
Well my install is done, following the advise of @jd1923 and install by @MAX Burner, I installed the Peplink router, Starlink 12V conversion and just for sh*ts and giggles a 12V fan in the closet. Also, I initially installed the Peplink 42 antenna to the awning with the included L bracket, but that only lasted about 130miles, the one hole in the plastic L bracket broke out and the bracket was only held on by the other screw! Anyway, that was before I decided to add an entry point for the Starlink to the roof for a later flatmount project. I currently have a pole mount and the idea was to add a Blue Seas Cable Clam hull penetration adjacent to the 7-pin cable like @MAX Burner did with his dc/dc install. After the Peplink L brack issue, I decided to go with a box on top of the roof with the Peplink antenna sitting on top, and an RJ45 waterproof connector on the side of the box for the Starlink cable quick connect, either for the roof mount, pole mount, or using the 25' cable on the ground. Here's the box on the roof, I used a Lifegard Aquatics R270577 1" slip bulkhead fitting to feed the 7 antenna cables and RJ45 cable through to inside the closet. Not pretty, and probably should've gone with a slighly lower profile box! ..and the RJ45 waterproof connector on the side of the box for the Starlink cable quick connect, either for the roof mount, pole mount, or using the 25' cable on the ground.. Peplink Router, Fan, 12v thermostat, Blue Sea Systems 5025 ST Blade Fuse Block and EL6 DC/12V conversion kit for Starlink Gen 3 This install (inside the closet) took way longer than I was hoping for, it's a very tight space, and unless you have the shape/flexibility of a spaghetti, you will end up with scrapes and bruises in places you didn't know existed! If I had to do it all over again, I would attach/mount all the wires to the thermostat before mounting it to the wall like I did, and to make things worse, the Blue Sea Systems 5025 ST Blade Fuse Block was mounted before the thermostat, so I had to basically go in blind to mount the wires to the bottom of the thermostat (not shown in my pictures, bottom of the thremostat is obscured by the top of the Blue Sea Systems 5025 ST Blade Fuse Block), but this is what the thermostat looks like at the bottom, I had to get 18AWG wires into that blue connectors, it was literally a pain in the arse!
1 point
-
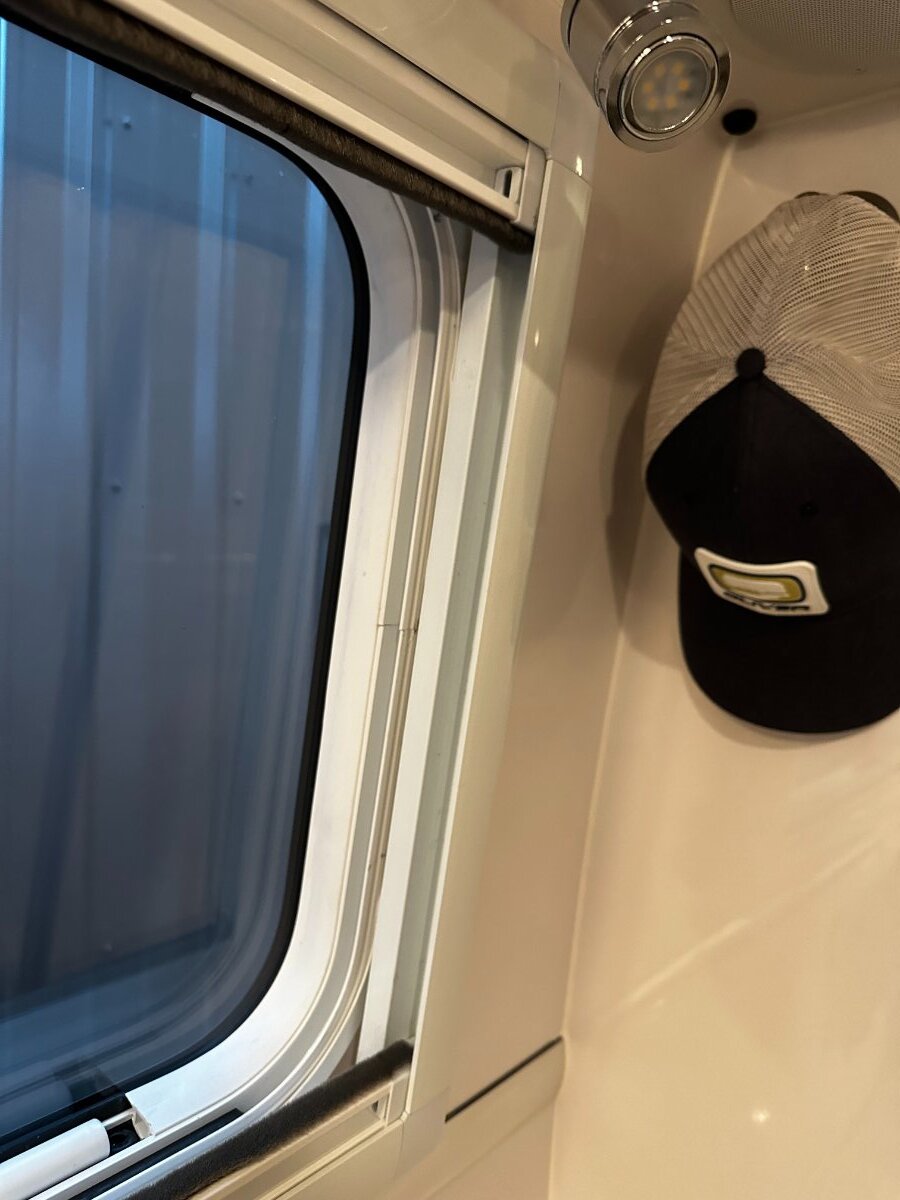
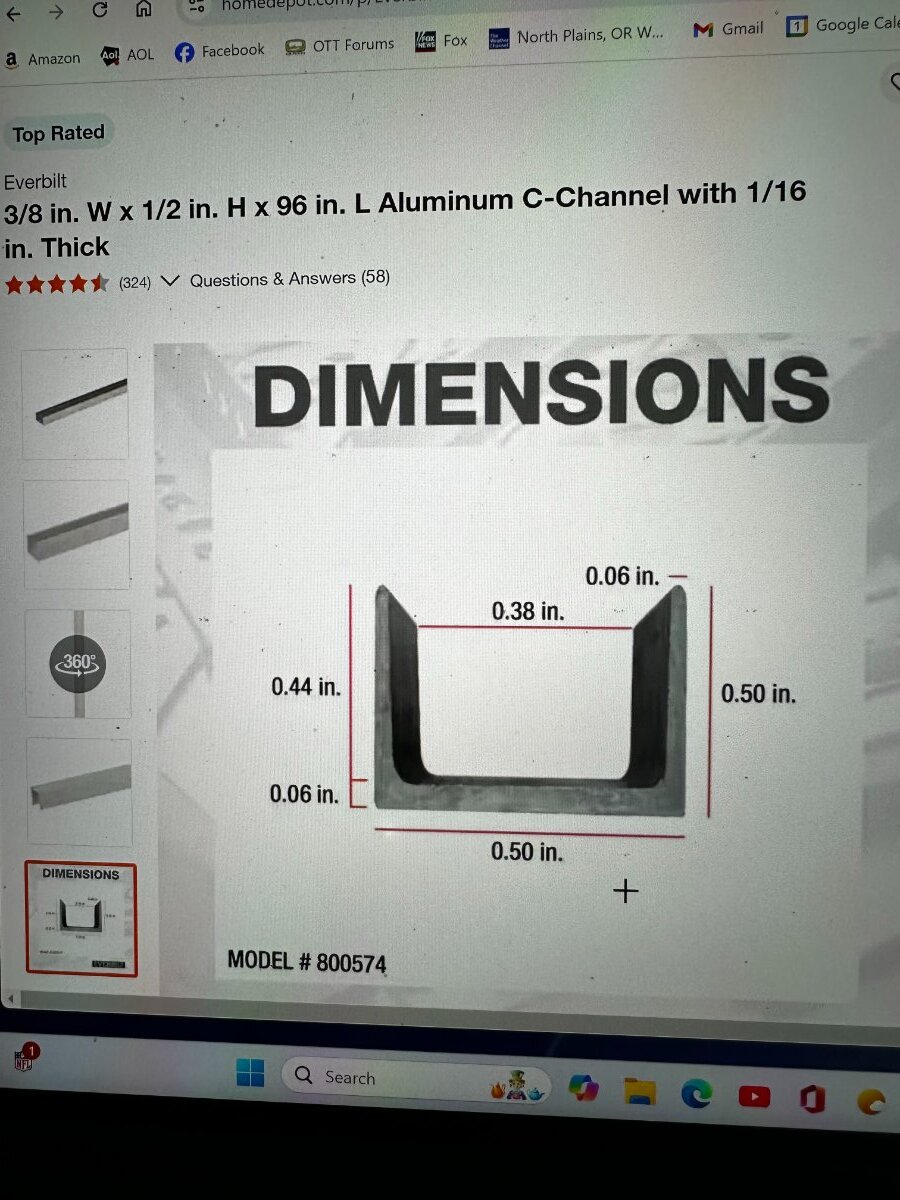
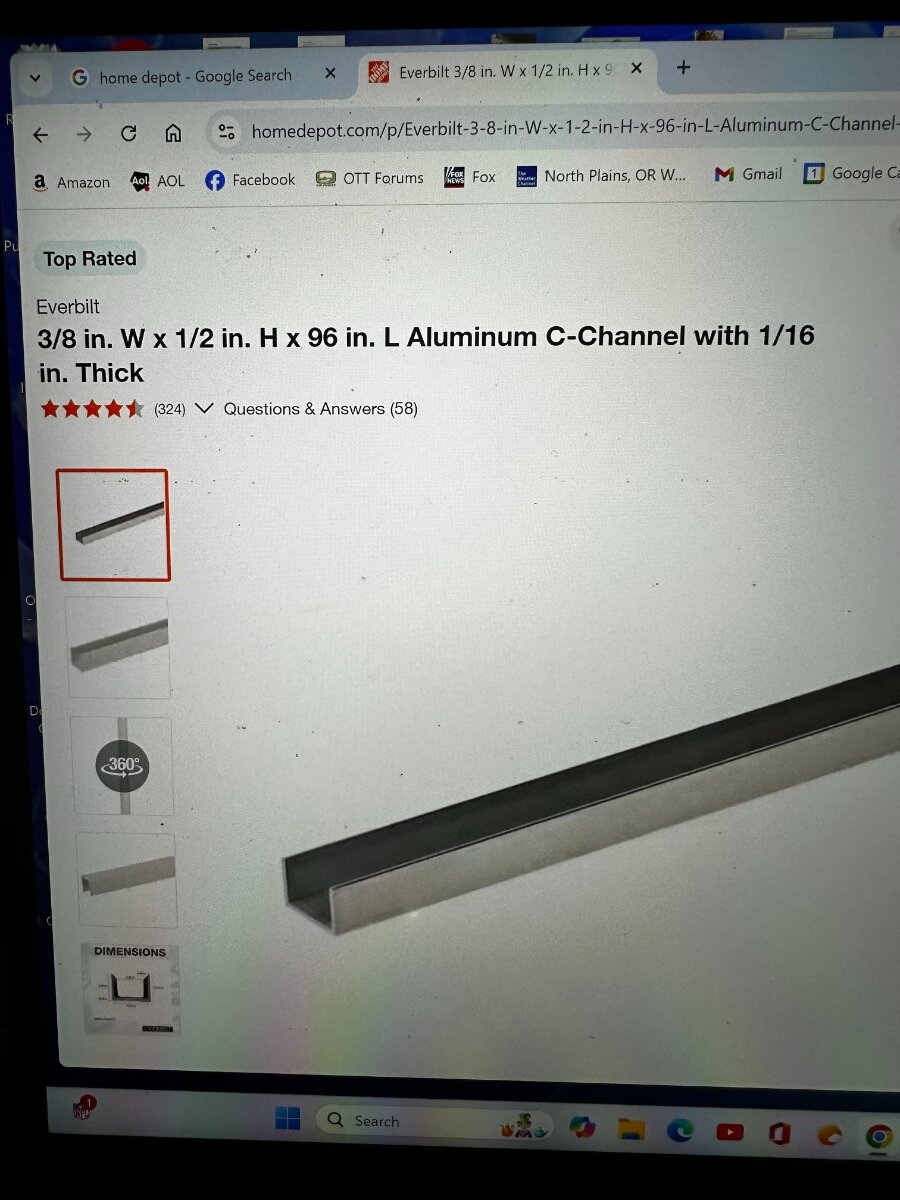
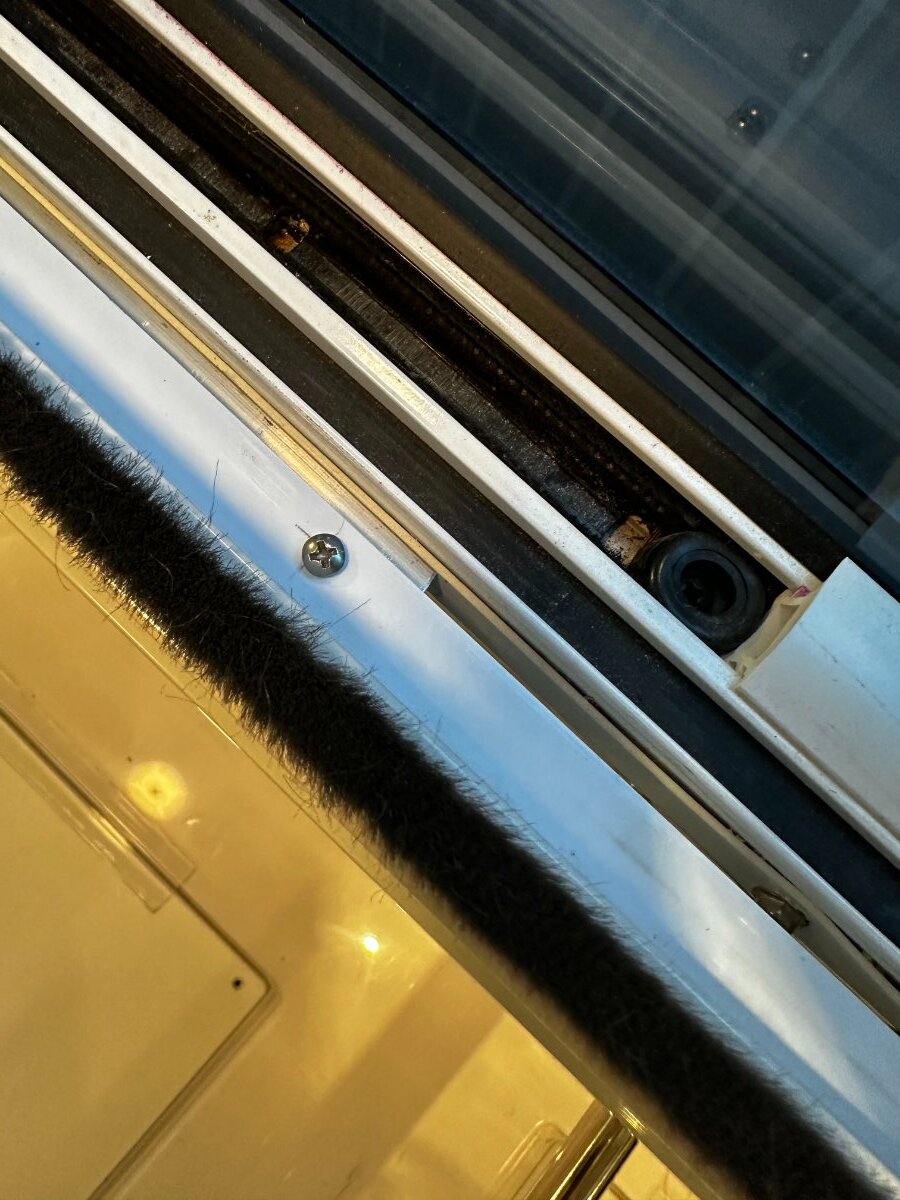
Fix for falling shade frames. I tried replacing the clips and applied silicone to help hold. Nope. The large shade frame fell off again on the last trip so I was determined to do something different. The shade frames will never fall off again. I removed all of the clips and their spacers. Cut and installed 4" long sections of aluminum c-channel purchased from Home Depot using original screws along with blue Loctite. Then placed the frames back on, drilled and attached the shade frames with #6 stainless steel screws. Fitment is perfect. Hope this helps others. Photos attached.
1 point
-
I am guessing that picture below is the one you are referring to. This link will take you to the website for 'LET'S GO AERO' the company that make the bike rack in the picture. Mossey
1 point
-
I believe the Zamp port is rated for 20A and can purpose any suitcase, given you install a Solar Controller (SC) internal to your Oliver. When the SC is built-in to the suitcase or installed externally, the 20A port will be insufficient. Solar panels are high Voltage and low Amperage, but SCs convert to 12V at higher amperage. We went with the Renogy 400W since I felt less would not be worth the time. The 400W is pretty big and 30 LBS. Many go with this model and BTW Amazon used is what I got. It had a scuff on the handles is all saving $80! These are only 16 LBS: Amazon.com: Renogy 220W Lightweight Portable Solar Suitcase, Foldable Solar Panel with Kickstands for RV, Camping, Blackout, Off Grid System : Clothing, Shoes & Jewelry Even the 400W Renogy runs at 10A with 11A being the short circuit current (max current at point of failure, see picture). The highest I've seen on a sunny Arizona day is 366W and often we get 20-23A charging. This means 20AH when that is your hourly average and we get 10+A from the rooftop solar. With 600AH batteries at 50% SOC, an average or 30A charge will take 10 hours to recoup. This is why I went with the max 400W suitcase. Info on my installation here: Renogy 400W Suitcase Victron MPPT with Custom Solar Port Installation - Ollie Modifications - Oliver Owner Forums (olivertraveltrailers.com)
1 point
-
The other version of a 7-Pin holder widely used. Regardless of the type holder, it is good practice to use dielectric grease to further protect the plug contacts from moisture and dust intrusion.
1 point
-
Another option that is also protected from rain: stuff the 7-pin up between the fiberglass housing and the aluminum a-frame. See photos below.
1 point
-
A follow-up to the above. I just called to return my adapter, and was told a new one is in the works for newer trailers, and should be ready by the end of the month. I’ll be getting one as soon as they ship.1 point
-
The black tank valve gate is under the dinette seat closest to the bath. I’ve replaced mine. You should be able to lift the gate from the top to open it. Check to ensure the cable is still firmly attached. I can’t imagine a blockage big enough to stop all flow. It’s also a good idea to remove the cable from the trailer to clean and lube it. It’s held in place by one set screw on top of the valve. Just loosen and pull it out at the basement location. After you get it clean and lubed just insert it back in and push it up to the valve under the dinette. Mike1 point
-
I put a REMOVE BEFORE FLIGHT keychain on the bathroom faucet handle when I close the valve before travel. Too many wet socks... 1x Remove Before Flight Red Key Chain by Apex Imports(1 Pack) https://a.co/d/2OxwnZE1 point


-
Recent Achievements
-


")


")


")


