Leaderboard



Popular Content
Showing content with the highest reputation on 09/11/2026 in all areas
-
Just to circle back, I got to field-test my design on my trip, and I’m super happy with how it worked! So much so that it even survived a random weather microburst and the suction cups remained planted! 😂 Not only was I able to camp in extremely hot weather and use the shower often, but after eleven days I still had 25% capacity left in the gray tank. There’s honestly nothing I would change, except possibly adding a wooden bath mat to keep my feet clean. I used one of those inexpensive folding stools to keep my shampoo and soap at an easy-to-reach height, and added another suction hook for my towel. I also attached a tarp clip to a suction cup on the side of ILOVHER to keep the shower curtain pulled in and prevent any unwanted exposure. 😉 I’m really happy with how it turned out. It’s compact, works extremely well, and will travel with me for future camping where gray-water discharge is allowed!3 points
-
After a lot use of our Starlink Mini, our normal method of deployment is to use the outside plug on the side of the trailer to plug in the power supply and then set the dish on the tongue box if we’re facing north-ish or on the bed cover of the truck if we’re not. That’s it. No mount, no tripod. The back of the dish has the right angle if it is on a level surface. I do have the router and we used it once when we were camping in Washington state under a heavy canopy that required the dish to be a little too far from the trailer for good bandwidth. If the dish is on the trailer tongue box we get plenty of bandwidth. Even on the back of the truck it’s no problem. I did have one mishap one evening in New Mexico when a thunderstorm popped up out of nowhere and blew the dish off of the box. It still works fine after its flight and hard landing. Just a scrape on one corner. Mike2 points
-
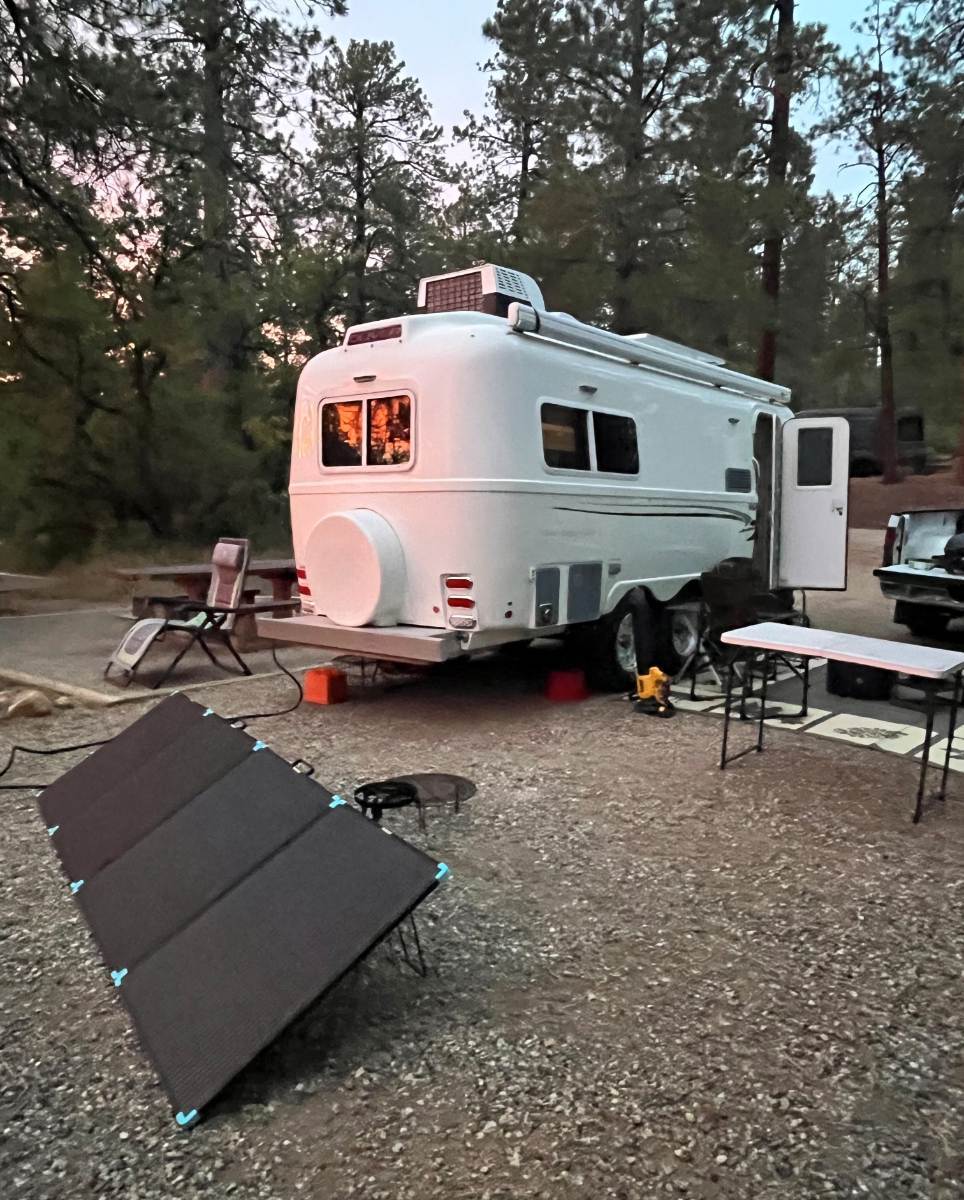
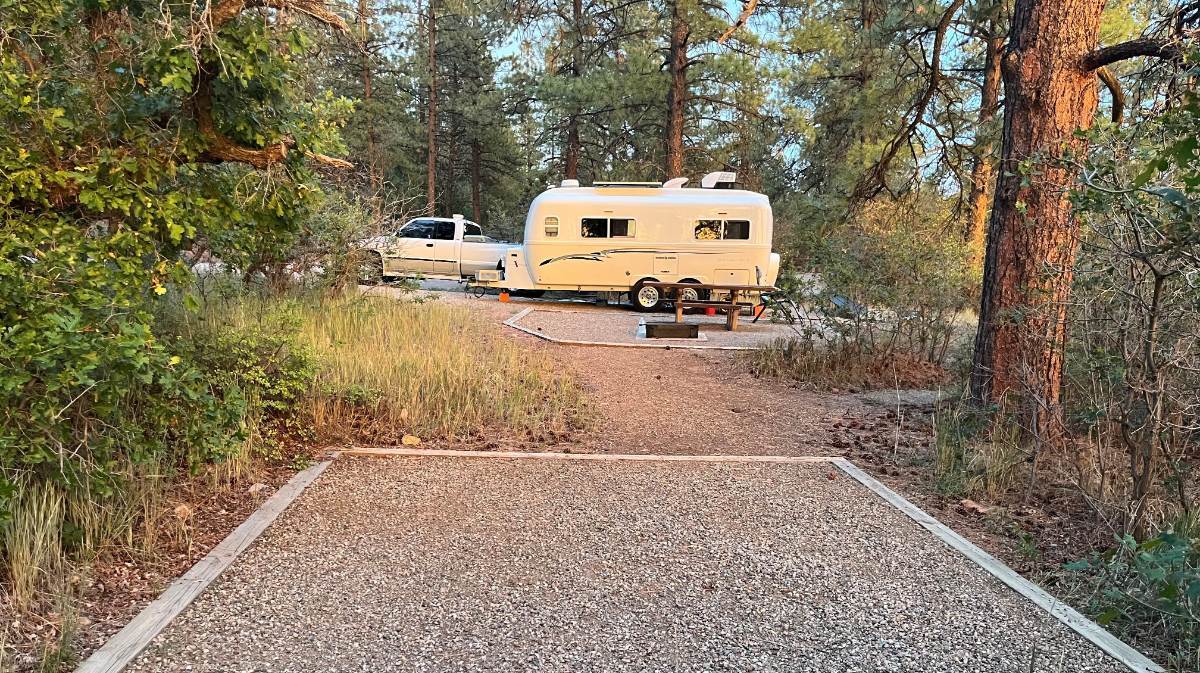
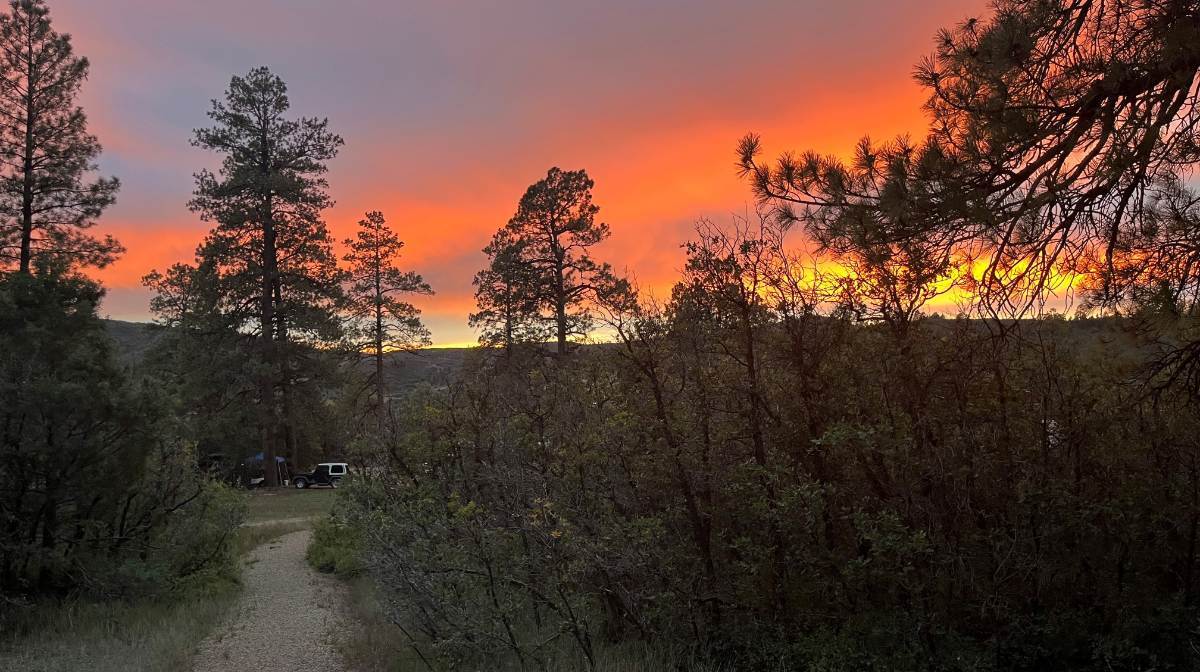
Not bad for $12/night! I think going forward, besides boondocking we'll focus on National Forest Service or Army Corps of Engineers sites that give half off with the senior pass. But kind of a bummer that now on recreation.gov the next 4 nights cannot be reserved online. But you can go online to see what is reserved or FF (first come-first serve). Our campsite #7 is shown, all sites no hookups, some pit toilets, water spigots in 5 spots around the campgrounds but without hose connections. All the campsites inside of the loop are setup in the wrong direction (curbside away from picnic table). A little road noise being right off US Hwy-160 but always quiet in an Oliver! Just east of Mancos CO, Target Tree is within a half hour of Cortez to the west and Durango to the east, with Dolores nearby and Mesa Verde NP. Beautiful roads with beautiful mountain views, forest service access trails everywhere! 🤠
 2 points
 -
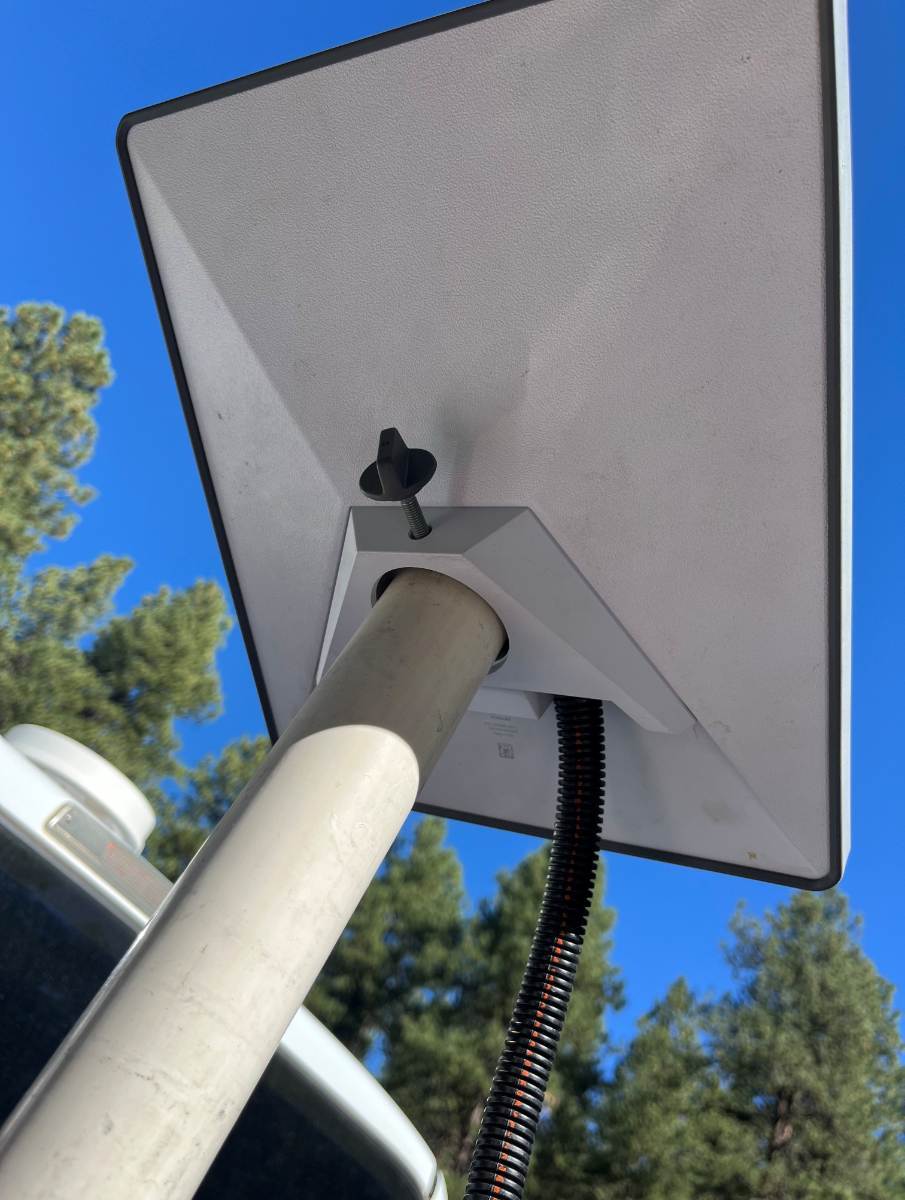
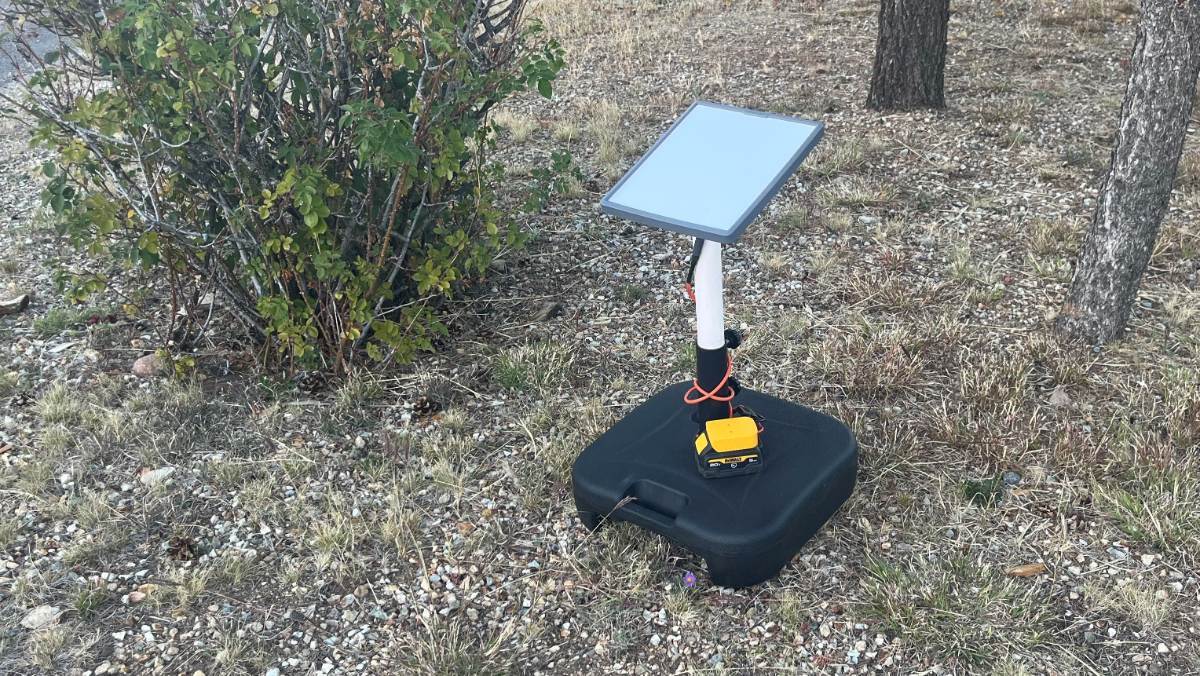
Hello again Bob, and thanks! I merely purchased a 4 ft piece of 1 1/2" PVC (2" OD) and a coupler from Lowes. Sawed the PVC in two 2 ft sections and the coupler will join the two only in the truck installation (pic1). The lower 2 ft section is permanently mounted to our extra fresh water tank. This works in an open bed but the lower section could be bumper mounted or to the side of a truck cap or the Oliver front basket. For the "umbrella stand" option the set screws from the stand fit into the drill holes. There is also a 3rd drill hole up top (cannot be seen in pic) to hold the Starlink set screw. Half fill the umbrella stand with water and it's not going anywhere! Good sale price on this today at $27! https://www.lowes.com/pd/Patio-Premier-Patio-Premier-Square-Blow-Mold-Umbrella-Base-Black/1002629278 Starlink includes two mounts. Mike mentioned he would merely lay the Mini on a flat surface. He's using the simple base mount that has a kickstand to produce the correct angle. I started the same way but found often in the woods finding a flat spot to support the dish is difficult. Starlink includes a second mounting plate (pic2) which comes with the 2" mounting hole with set screw. Notice the two drill holes in the upper post. If I'm using the umbrella stand, these line up with those set screws. I love the 1 1/2" PVC mount and would not stray from this. If I was to buy a stand again, instead of the umbrella stand which is large to store, a folding tripod would be OK, if I could find one that would hold the 2" pipe. I wouldn't want to get into camera stands, 1/4-20 screw mounts with adapters. IMHO, a soft 1/4" screw should not be the only thing holding the dish, not in heavy weather. No skinny stands, no long poles, no suction cups, nothing fancy for me. Just open your compass phone app, mount the dish pointed north, check alignment on the Starlink app, just a one minute installation required with this setup! 😎 Sorry, acronym from eBay sales, means "New in Box."
1 point
-
does your OE2 have the progressive dynamics converter (charger)? if so you can charge it with a single Honda 2000 or 2200 eu inverter charger. No need to parallel two of them. those generators will also run your a/c, but not much else. you need to be sure to turn OFF the electrical switch on your hot water heater and not be on AC or DC for your refer if it is a three way. GJ1 point
-
That stand looks pretty cool. What parts did you use to make it work. Also the battery looks like a Dewalt 20V battery. How did you wire into the battery. I like the idea of not using cables if possible and if I use a cable I only what to use one. Either RJ45 or Power. I have a tonneau cover so placing it on the cover when needed would be great, when not possible I would like the stand instead of just sitting it on the ground, and the stand had weight in the base it would be even more stable on the Tonneau. Thanks for letting me know that you arrived at your current setup through a process. I liked to know that. I know your setup is more complex than I want now, though it works great for your needs and you arrived at that over testing and growth. Sorry but what is NIB"🤔 I have a question for you and @Todd B how can you mount the mini on a pole or a tripod, Most tripods are 1/4-20 threads and I have know idea what the pole size @jd1923 uses. Special Addapters or does the mini come with all of those mounting options? Sorry for basic questions, When I was a machinist/ automated equipment tech, and then IT, I usually tried to wrap my head around a situation before I would implement. I am kind of anal retentive at times. I like seeing things from different angles before I purchase something. I do not mind fabricating/ buy adapters to make things work, but it nice to have an idea which way I will move before I purchase something. Sometimes it works and sometimes it is working through a problem/situation to come up with a solution. If someone else has a good solution that works, I do not mind leveraging those solutions. Why reinvent the wheel if someone else has already done it. (Off topic) I built a 42' x 16' free standing awning off the back porch with plastic corrugated roof special ordered from the east coast( my wife's idea), I want a plywood with metal roof. The awning roof cantilevers over the roof on the house . Living in Oregon in with many trees and 90+ humidity in the winter I needed a way to clean the awning roof, because of the debris, moss and lichen growth. When I first tried to do this I made a 3 nozzle sprayer on rollers to hook to my pressure washer. It failed miserably. I ended up recruiting my son, and we both stood on our metal roof, one sprayed the roof with water as the other used a micro fiber mop head on a 16 ft paint roller pole to clean the roof. This worked but it was very labor intensive. I found an old high end pressure washer at an estate sale this year. My son and I made the base so I could tow it with the mower and put a removable hose real on the base. I went over every part of the sprayer. It looks like brand new accept for the dented Honda gas tank. It took a 3 iterations with the old 3 nozzle sprayer, but I got it working great, and at half throttle. Had some fun at full throttle where the sprayer was floating 4ft above the roof because of the spray pressure. When I got it dialed in it took 1.5hrs by my self without getting any over spray on the metal roof, as compared to 4hrs for 2 people and both of us getting wet on a metal roof. The point of the story I may be slow and with limited resources, but I never gave up on finding a solution.1 point
-
JD beat me to it on this one. I traveled a couple hundred miles in Wisconsin hill country today. The steep downhills would have had me braking frequently to stay close to the speed limit. Instead i flipped on the exhaust brake and didnt need to touch the brakes even once and i wasnt even towing this time. When towing the benefit is even much more. I cant overstate how valuable this feature is in the hills and mountains.1 point
-
These lists can get really long and temping to buy all the things when you get started. We are in our third year and recently switched over to these for leveling and love them. Put these down and turn on level-mate pro and getting level is easy. Way easier then pulling on and off different sets of blocks.1 point
-
I have really liked our Starlink mini when traveling. I have used it for basic keep in touch stuff all the way to video calls for work. We have even held two wifi based phone calls over Starlink mini while on the standby plan! My setup is still pretty basic. I have a tri-pod I mount it on so I can move it to the best spot and plug it into the side of Ollie. Speed and reliability have been great! As @jd1923 mentioned the ability to switch plans is great. Sometimes I have paid $15 for 50GB of data for the 4 days I needed it (just got lucky with how it hit my billing window).1 point
-
PS - again thanks from Blain, Karen, and golden doodle Martha out of Edmond, OK.1 point
-
Hey Bob, there is much experience here. Mine is just one input for you... I purchased the extra router when Geoff posted this (impulse purchase because of the $40 sale): https://olivertraveltrailers.com/forums/topic/10918-the-new-starlink-mini-router-for-what-ails-you/ Turns out a year later, I've never used it (still have it NIB somewhere)! I just last week integrated our Mini to the Pepwave router which is pretty cool, but our installation is far beyond what you expressed you want. https://olivertraveltrailers.com/forums/topic/9933-pepwave-cellular-router-and-not-the-common-install/#findComment-126971 You really don't need anything but a simple way to mount the Mini. At first, I just sit it on an upside-down milk crate. I was using battery packs so not to string wire, but the Mini comes with a 120VAC power supply (inverter ON required) with produces 30VDC with a 50' cord. We're always 50 ft within view of the northern sky and I would not want the hardware sitting much further out of sight. The simple stand pictured, better than my old milk crate, is what we use when our truck cannot be parked in the right spot. I have a camping rule to minimize setup which in turn reduces all the work to setup and tear down and we move a lot (as you will going all the way to Alaska)! No poles and suction cups for me. As far as service, there is the monthly $10 cost for stand-by service which includes enough bandwidth to setup, download updates, configure and test the installation. You can also slowly load a web page or send an email, again very slowly but the connection is there. When you upgrade service (Starlink must be positioned and phone setup must first be connected to Starlink W-Fi when there's no cell service), they prorate the first month. Our billing date is the 4th of the month, so for example, if I start service on the 20th of the month, given my billing date I will be charged about half the plan cost. I can immediately change the next month plan to return to Stand-by $10/month, so I don't forget. On such a trip to Alaska, you may just need it ON for 2-3 months. This is good to know, but more so for us where we have the cellular antenna and router and T-Mobile 5G SIM card which costs $30/month on my business plan. If we're getting cell which is about 80% of the days we travel then I'm paying for Starlink only when necessary. But when you activate, you're charged on that date through your billing date.
1 point
-
Thanks to all the contributors to this thread. After a summer of brutal heat and a refrigerator that wasn't able to keep up, I was despondent. But I found this old thread, got hopeful for a solution, was able to order the parts and install some fans. I'm excited that they are working and quiet. The real test will be when I drive home to Texas, but I actually had to turn down the refrigerator temperature setting because it seems so much more efficient.1 point
-
And nothing like the diesel engine with exhaust brake! 😎 I use it always, even around town, towing or not. Somebody cuts in front of you and you're slowing down as soon as you let your foot off the gas. Drove recently Prescott to Phoenix to pickup Chris at the airport. It's a 4300 ft drop in elevation and I made it down the mountain without pressing the truck brake pedal once. Without it, I'd be on the brakes most of the way down. Towing the Oliver down I-17 does require braking a few times where the drop is 6-8%. For sure! Note a couple Forum members recently posted they prefer when the TV weighs more than the TT. It provides balance which boosts confidence when towing in less than ideal conditions. Our truck loaded and hitched (with tongue weight) is 8K LBS with 8,800 GVWR, and the Oliver loaded is 6,400 LBS. Never will the tail wag our dog. Given you're buying new, it's the right time to make it your last and best TV purchase. We're not getting any younger! 🤣1 point
-
What you need is one of these But, be a bit careful in that there are some of these water stations that have a sign stating something like "the filling of RV tanks is prohibited". Bill1 point
-
Charlie, Based on your measured values, I’d first look at the battery cable to battery post connection(s): 1. If the 12.7 volt measurement was taken directly from the battery posts, then the battery is not dead. 2. The solar directly feeds the battery via the Zamp controller. It does not pass through the inverter or the main battery breaker. So the 11.7 voltage read from the Zamp controller is more likely a voltage drop through the battery post connection(s), not the main breaker. 3. The inverter also shows 11.7 volts, with no load, so it could also be reading a voltage drop through the battery post connection(s). That’s a reasonable analysis, and battery post corrosion is a common problem with AGM batteries. Sometimes the lead battery posts become oxidized. Although they appear fine, oxidization is a poor conductor. Having said all that, you possibly have a different setup or a poor main ground connection. Some simple voltage tests at various connection points would quickly isolate the problem if cleaning the battery posts does not fix the issue. Hope that helps. Cheers, Geoff1 point
-
There are only (3) rules of plumbing: 1. **** flows downhill 2. Payday is on Friday 3. Don’t bite your fingernails Bill 3131 point
-
If that were the case then Glacier would not be full either. They got a bunch of those furry creatures up there - at least everywhere we went both inside and outside the Park. Bill p.s. enjoy the heck out of that area - it's special1 point
-
The new Apex X23 model comes with a Houghton 48 volt AC / heat pump..1 point
-
I'd do a wrap, if i did anything. Maintaining paint, as a secondary solution, just doesn't appeal to me. We've done several coats of paint on our 40+ years old fiberglass dinghy, over the decades. It's a pita.1 point
-
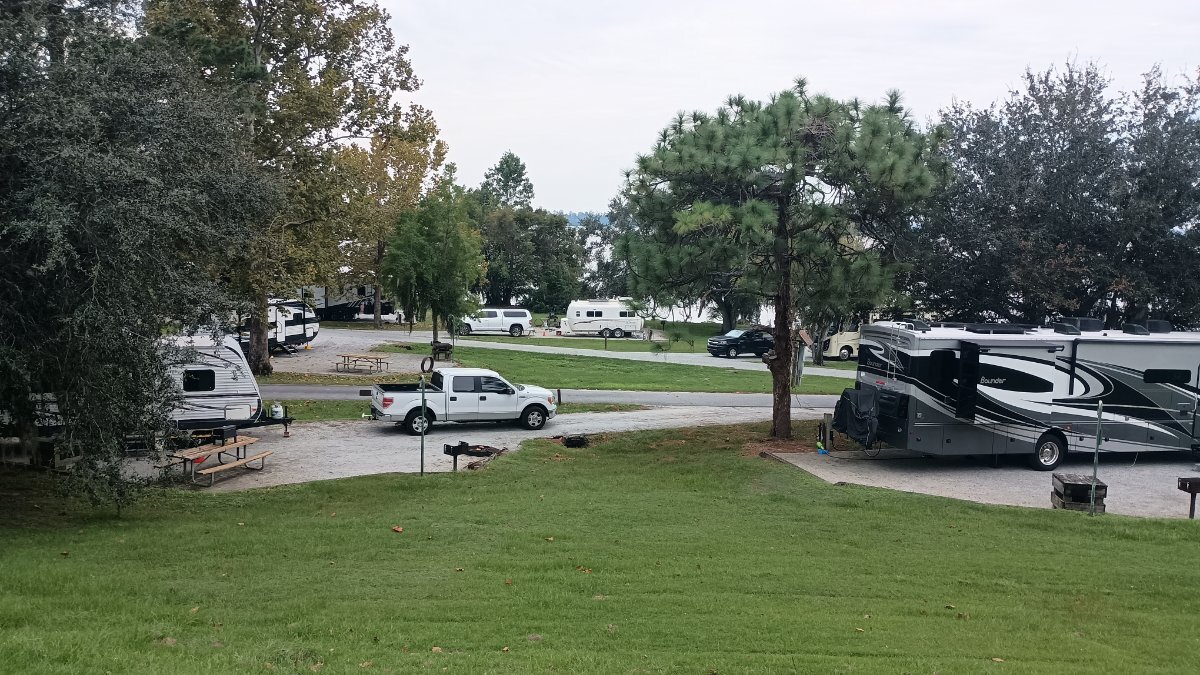
During our recent rescue Oli from the hurricane trip #3 or 4, I'm loosing count, I noticed how dingy it looks. The TV is "polar white" and they used to match pretty well. Maybe all the tannin from oak and hickory tree detritus has taken its toll. I would like to paint wrap ours white, or maybe add yellow, red and blue dots and nickname it Wonder Loaf. COE East Bank Campground on Seminole Lake, near Chattahoochee, FL.
1 point
-
Any good boatyard can paint fiberglass. Many types of paint for fiberglass still require waxing and care. Others don't. Awlgrip paint warns against wax, and most boat owners report 5 to 10 years of a beautiful finish, some even many more, with proper care. (Keep it clean, use non abrasive cleaners as recommended, etc.) If you decide to paint, have a long conversation about pros and cons of various available coatings. Paint is often much harder to repair than gelcoat. A wrap is honestly probably less expensive, and easier maintenance. Proper paint job on a fiberglass hull is many hours of arduous work. And, attention to detail. Many beautiful boats are painted hulls, but, they don't face rock chips. They do deal with abrasion from dock lines and docks, but not highway and gravel Serious consideration here. I wouldn't paint mine, honestly.1 point
-
Just a quick comment on this proceeded by "it would need to be measured.", and I believe it's likely that a white Oliver would be cooler than one that was painted or had a darker color...but... The term used to describe the absorbtion or radiation of energy is emissivity. The highest (perfect) absorber or radiator has an emissivity of 1.000.. A perfect reflector has an emissivity of 0.... Close to 40% of the sun's radiated energy is in the visible area of the spectrum, but nearly 50% of the energy is in the infrared. So, while the white is reflective to our eyes, most plastics and normal paints are very dark in the infrared. You'd like a lower emissivity number to both keep heating from the sun to be low and to lose less heat at night. The ideal direction would be something like highly polished aluminum (but not anodized). Shiny white and clean fiberglass is much easier to maintain, and probably much lower cost. And white of the same material would likely have a lower emissivity compared to a color - particularly a darker one.1 point
-
Fiberglass can be painted beautifully. Look at the last 70 years of Corvettes. I’d have it professionally done. All three of the colored shells shown above were painted. Oliver never used a colored gel coat.1 point
-
Another option, and one that I prefer to traditional saw toothed hole saws, are diamond grit hole saws. The hole is much cleaner and smoother, there is no chipping of the gelcoat, you have much more control with the cut, and no drama of worrying about the holesaw catching an edge and torquing your hand off or marring your work piece...especially on the larger holes. 5/8" will not be a worry with that here. 5/8" is pretty small, these probably won't have a pilot drill, but you can still use them effectively with the proper technique, or using a template as a guide. If you are set up to use Lenox hole saws and have the mandrel for it (and 7/8" isn't too big) I'd consider this: https://www.amazon.com/DG-HOLESAW-14DG-22-2MM-PK/dp/B002QMK8VQ/?_encoding=UTF8&pd_rd_w=Ou7U8&content-id=amzn1.sym.a725c7b8-b047-4210-9584-5391d2d91b93%3Aamzn1.symc.d10b1e54-47e4-4b2a-b42d-92fe6ebbe579&pf_rd_p=a725c7b8-b047-4210-9584-5391d2d91b93&pf_rd_r=EGJYD83A35XQGWK1X3ST&pd_rd_wg=HMKiX&pd_rd_r=ea23425b-78dc-49b7-9ce2-921c2afd6922&ref_=pd_hp_d_atf_ci_mcx_mr_hp_atf_m&th=1 Otherwise, I'd still get a 5/8" diamond grit (Bosch makes great smaller bits) without the pilot bit. Use water from a spritzer when drilling! Dave1 point
-
Should have got the black Parsec Husky! 🤣 I understand given our black GX470, but then I tried towing our EII with it and for me the platform was not stable of strong enough in mountain terrains, so we bought the white Dodge Ram 2500 Cummins. If I was to install one in this SUV. I'd likely run the antenna cable by cutting into the rear spoiler where there is a harness already for the rear center brake light, with lots of room for the router behind the side panel in the RR quarter panel (I was back there last year running rear camera wires for a new Kenwood head). These can be too pretty for an antenna, but the roof rack would hide most of it. We're on the road this week and the Pepwave router is working great. It sends a strong Wi-Fi 5GHz signal throughout the Oliver, even 20 feet behind it, and everywhere around the campsite! Good thing we don't own AS trailers. I understand inside those tin cans you need to run a wired Wi-Fi Access Point since a roof-mounted antenna broadcasted Wi-Fi signal will not penetrate the metal hull.
1 point
-
That's the big question that we can't answer right now - Lithiums are too new. So the way I'm looking at it is this... had OTT offered me an option to have an "air conditioned" battery box for $150 or so, would I have done it? Heck yes - considering I'm spending so much on these Lithiums. So like you RB, I wonder too whether it's worth it - but I have this vision of Dirty Harry looking at me and saying "Do you feel lucky, punk". 😃 At some point, the cost does not outweigh the potential benefit of course. My guess is that as Lithiums become status quo in travel trailers / RVs they will be located in air conditioned spaces as opposed to vented outdoor boxes used today.1 point
-
The temperature data I've been collecting strongly suggest that I need to figure something out with the battery box like you did. My target is to keep the box in a sweet spot of 60F - 80F if possible. Given this limited range, I'm convinced that leaving the battery box door sealed and insulated is mandatory. These Lithiums are just like humans when it comes to temperature I guess! 🙂 Here's my preliminary design: Conditioned air intake: A 4" duct vent under the street side bed and another 4" duct vent in the battery box right above the street side wheel well. There's plenty of room for 3.75" holes in both places to install the ducts. Between the vents I'm planning on using a 4" duct paired with an inline smart fan (yes, I like smart fans!) to pull conditioned air from the cabin and push it into the battery box. The smart fan will fit nicely right on top of the wheel well and can run anywhere from 28 cfm to 280 cfm. It also has a thermostat to provide some automation. Battery box exhaust: I am not planning on exhausting the battery box directly back into the cabin. I have another 6" smart fan under my forward dinette seat to move air slowly or rapidly between the entire basement and the cabin if necessary. Additionally, if I leave the fan pushing conditioned air into the box running long enough it will be pushing conditioned air into that basement area and surrounding electronics. I'm also thinking of using a bunch of smaller holes in the battery box to exhaust the air rather than just one or two bigger holes. For example, a 3.75" diameter input is ~11 square inches of area, so if I use 1.5" diameter holes (1.75 sq. in. area), I would need ~6 holes to provide adequate exhaust area. So I was thinking of drilling the 6 smaller holes in somewhat random places on the front and back sides of the battery box, hoping that would give some good cool air mixing in there. I'm wide open to suggestions, constructive criticism, or any other things to consider that I missed. Especially @John E Davies since you have already thought through and executed on your design. Thanks!1 point
-
John, excellent mod. You continue to show how quality work needs to be done. Unfortunately i dont have the skills nor the equipment to do the work but your detailed photos can allow a qualified individual to do the work1 point
-
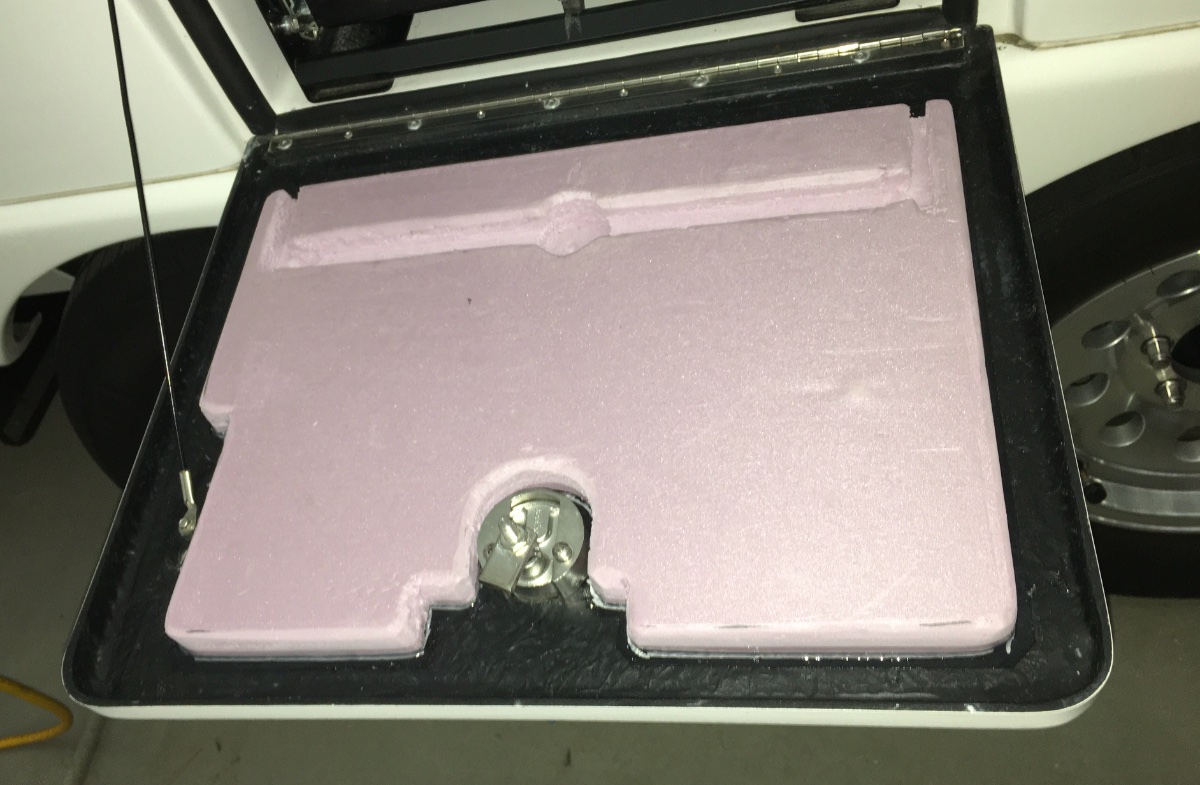
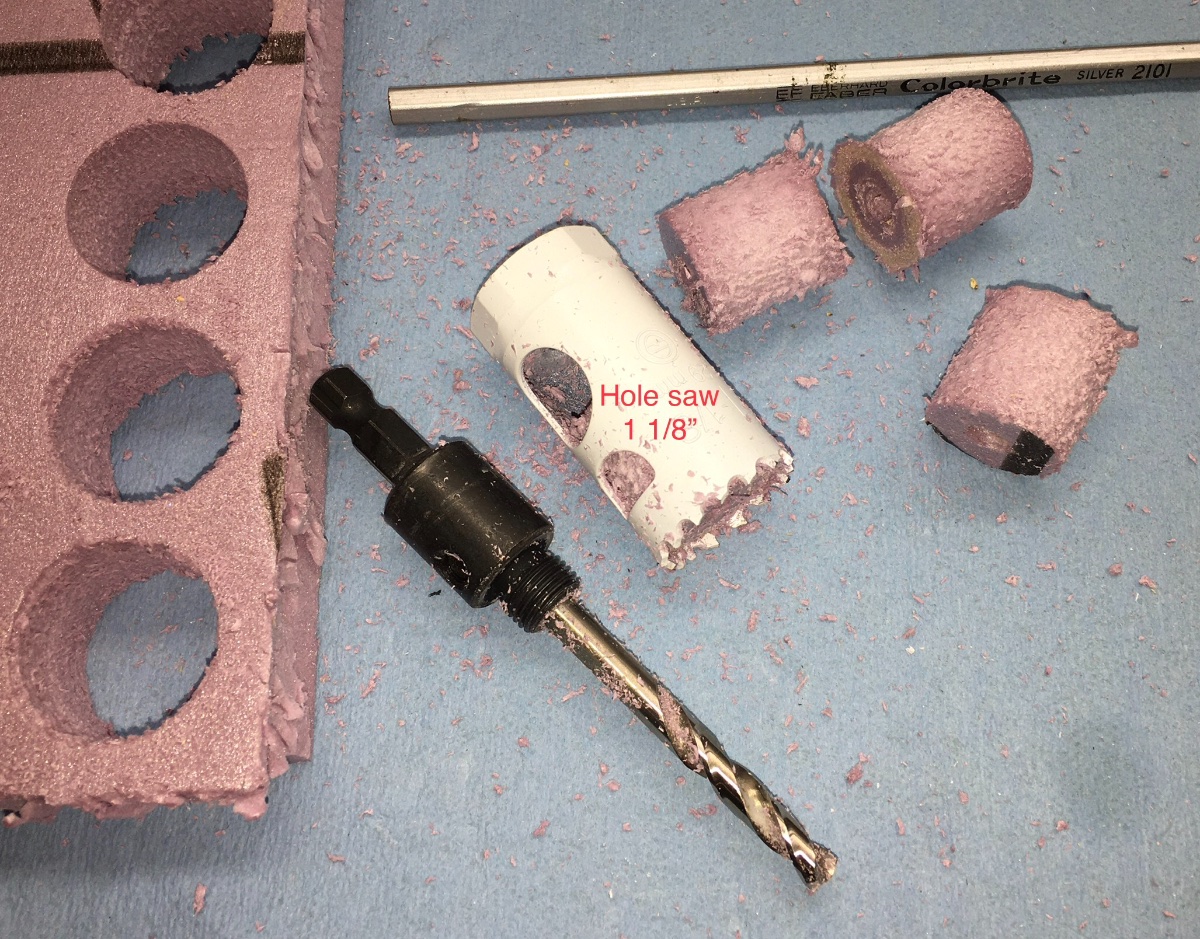
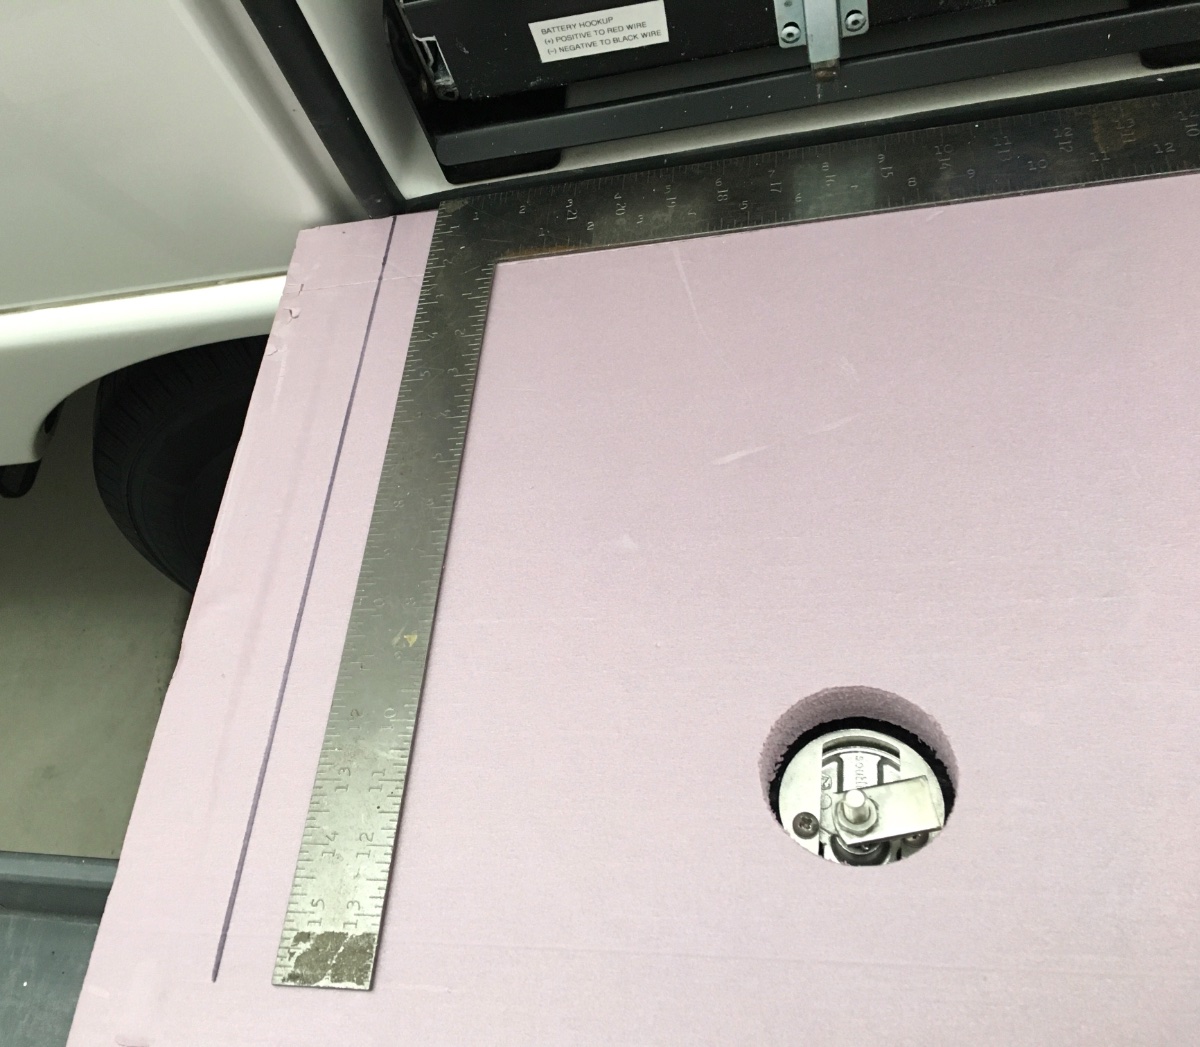
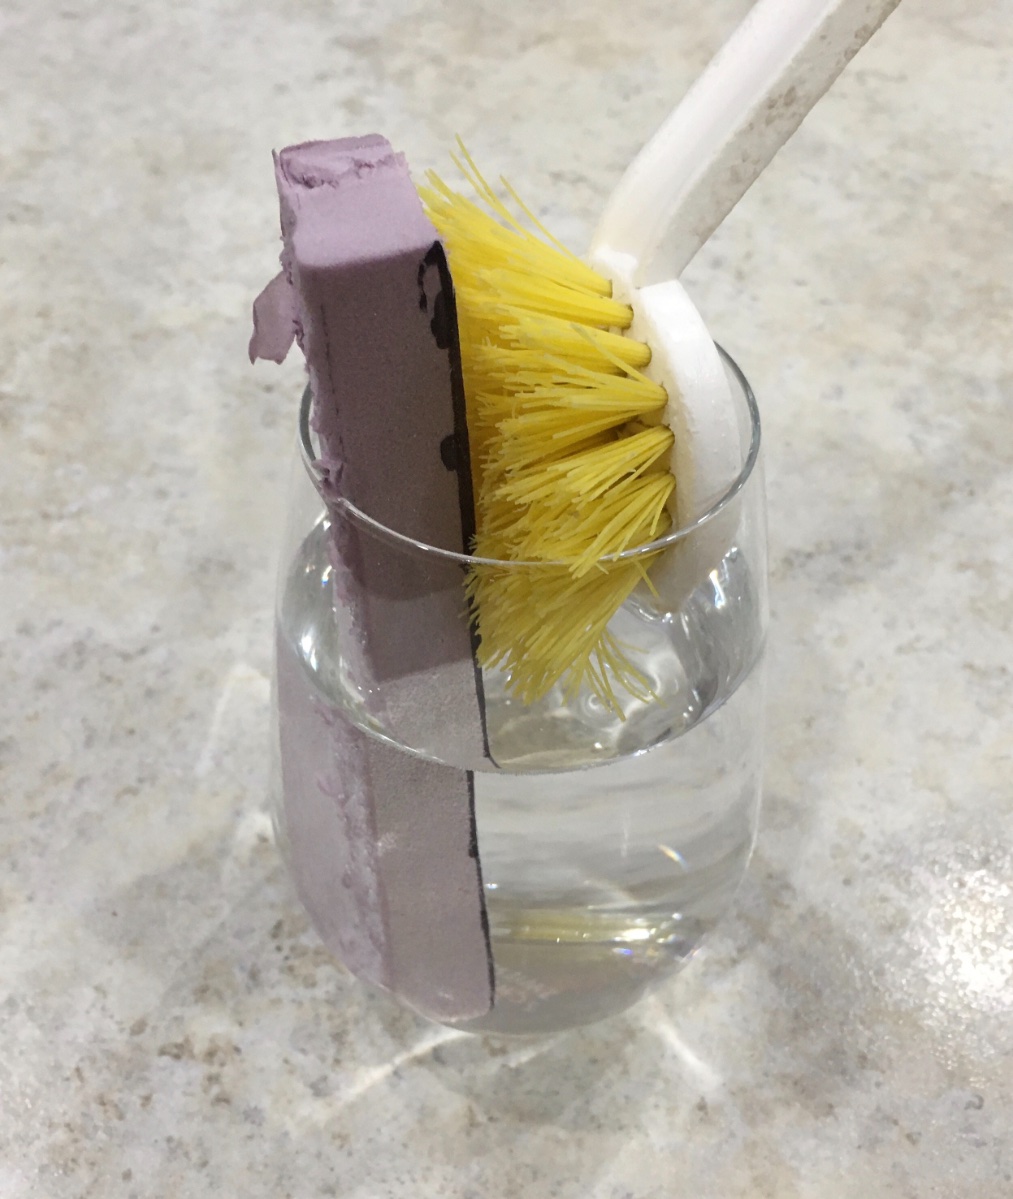
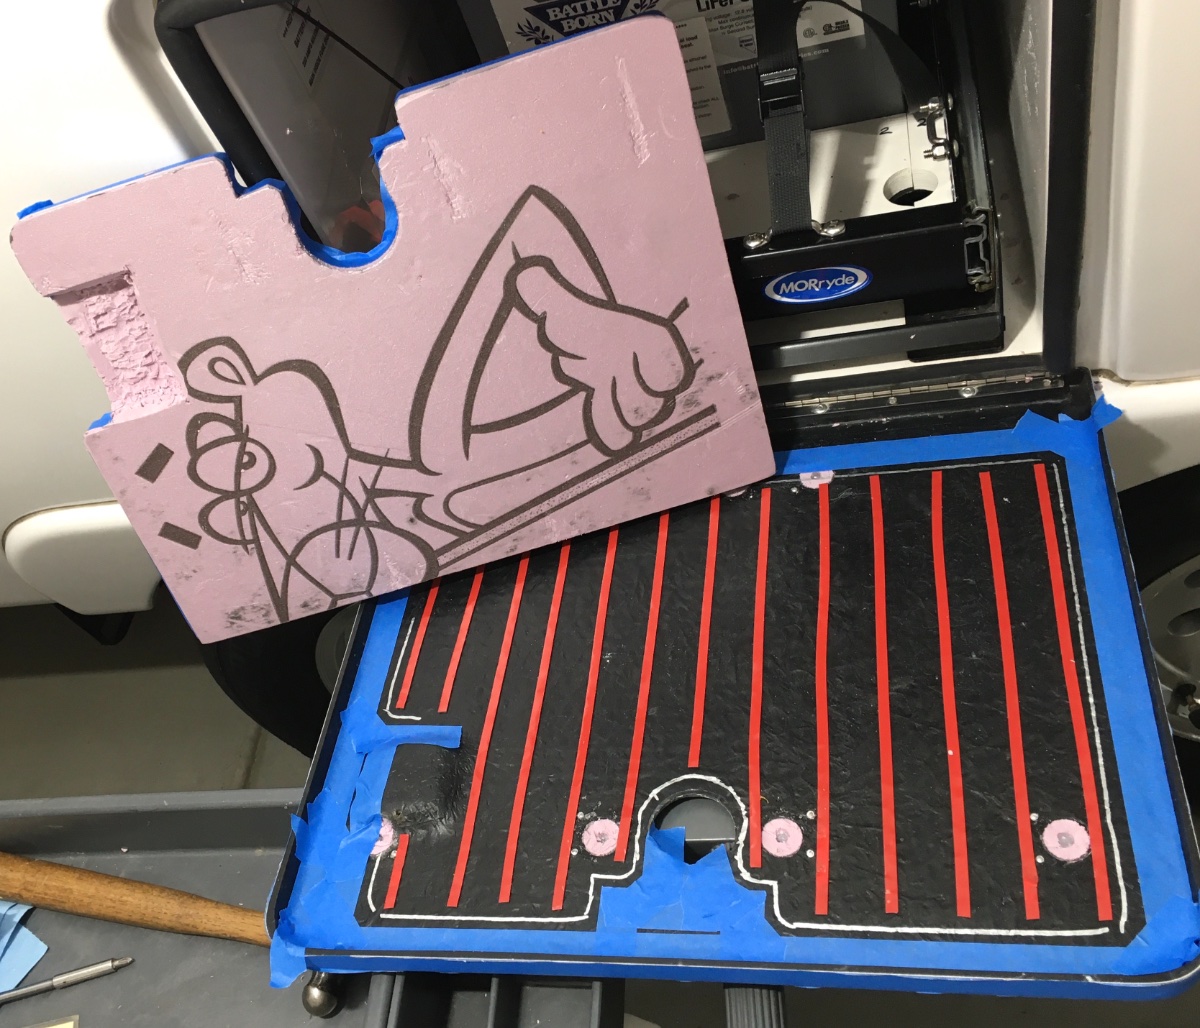
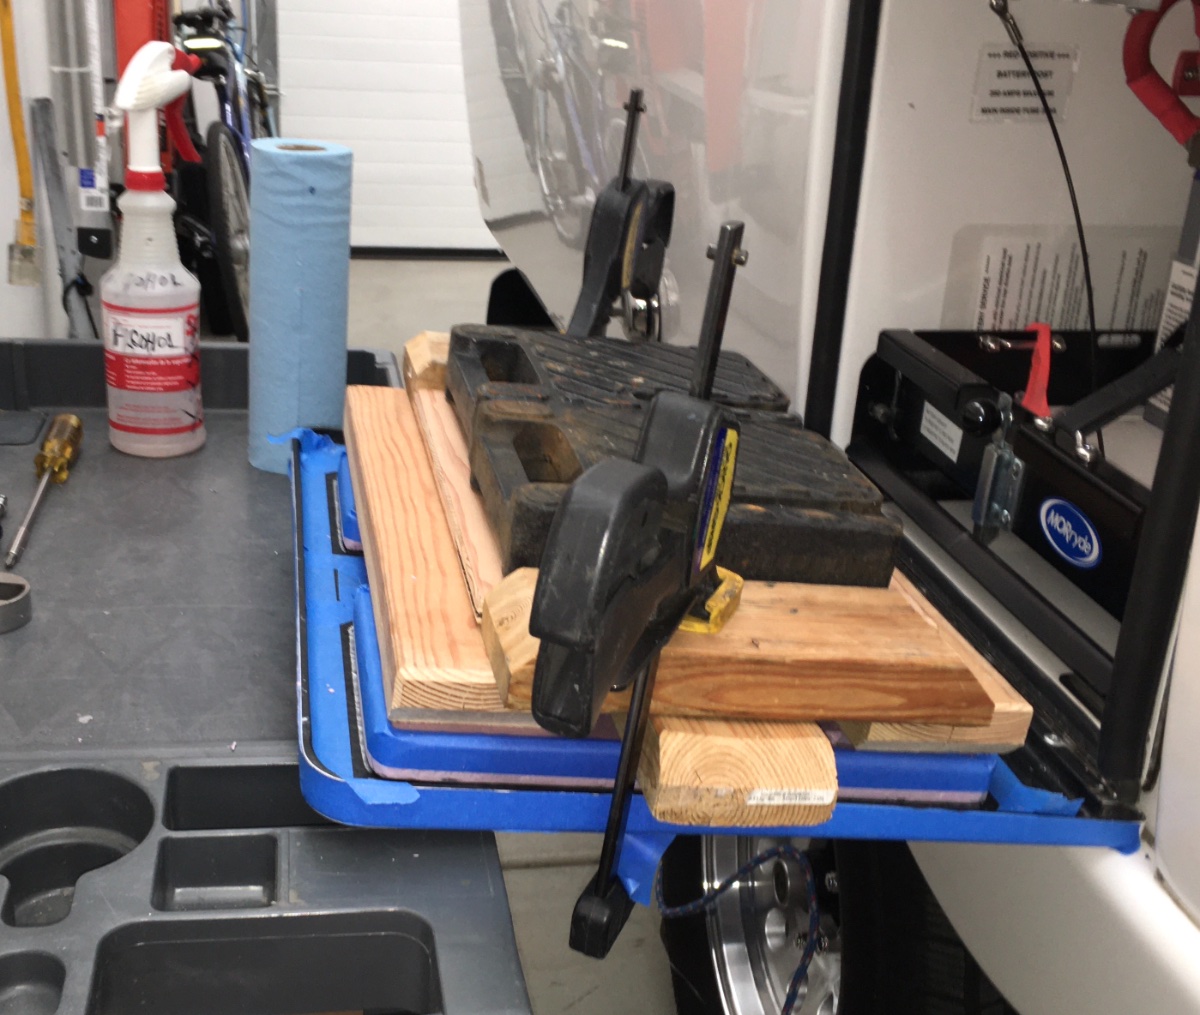
Battery door - plug holes and add insulation. This did not work out well, I am not very satisfied with the results, but I will post pics anyway. Maybe somebody can suggest a better solution. 1/2" foam board would be much easier to fit, but the insulation value is not so good. The material is Dow Corning rigid foam board, 1 inch thick, which weighs essentially zero pounds. This stuff is incredibly light. $20 for a 4' x 8 ' sheet at Home Depot. It is fire retardant, which is important. For comparison, this is R-5 (insulating value) whereas a typical foil/ air bubble sheet, which is used extensively in an Ollie, is R-1. https://www.homedepot.com/p/Owens-Corning-FOAMULAR-150-1-in-x-4-ft-x-8-ft-R-5-Scored-Square-Edge-Rigid-Foam-Board-Insulation-Sheathing-20WE/207179253 It can be cut easily with a VERY sharp razor knife, and rough edges can be rapidly sanded smooth and contoured with a bench top belt sander and coarse 80 gr belt. WEAR A MASK. BTW it is indeed completely waterproof, I soaked a piece for 12 hours to make sure. I had to wedge it in place, it pops out like a cork otherwise: Cut four hole plugs to seal off the existing openings. (My door has 8 holes, yours may vary.) Cut them in half: Glue them into the holes with clear RTV sealant, some will squirt out through the front Perko vents. Remove that excess with alcohol and paper towels: Wait at least a full day and then trim off the excess foam and sealant flush with a razor blade: SUPPORT the door with something, a 30 inch high rolling work table fit perfectly, and it gave me a nice place to put tools and materials... Remove the support cable. Cut the foam. This is pure trial and error, because it has to fit past the rubber seals, and also have extra material removed to clear the battery tray and knob, and the support cable, and the lumps and bumps on the door itself. Take your time, trim a little, test the fit, trim some more. It should fit as closely as possible, for maximum insulation value, yet allow the door to close easily without stressing it. I used a router bit in a drill press to carefully carve out areas that needed clearance. Be sure to allow some room for rivet tails! When you are satisfied with the fit, clean and smooth the parts and use 3 M VHB tape to secure it to the door. I used 1/4" wide tape placed vertically, so any water leaking past the rubber seal will drain straight down. Add some weight and go take a long break: Remove any weights or clamps. Seal the edges with clear RTV sealant. Use tape as shown to leave clean lines. Reattach the support cable. BTW when trimmed as shown in the top pic, the airflow from the fan underneath the tray is not blocked. EDIT: Leave several small gaps in the sealant at the inside (bottom edge when closed) so moisture can drain out. John Davies Spokane WA
1 point
-
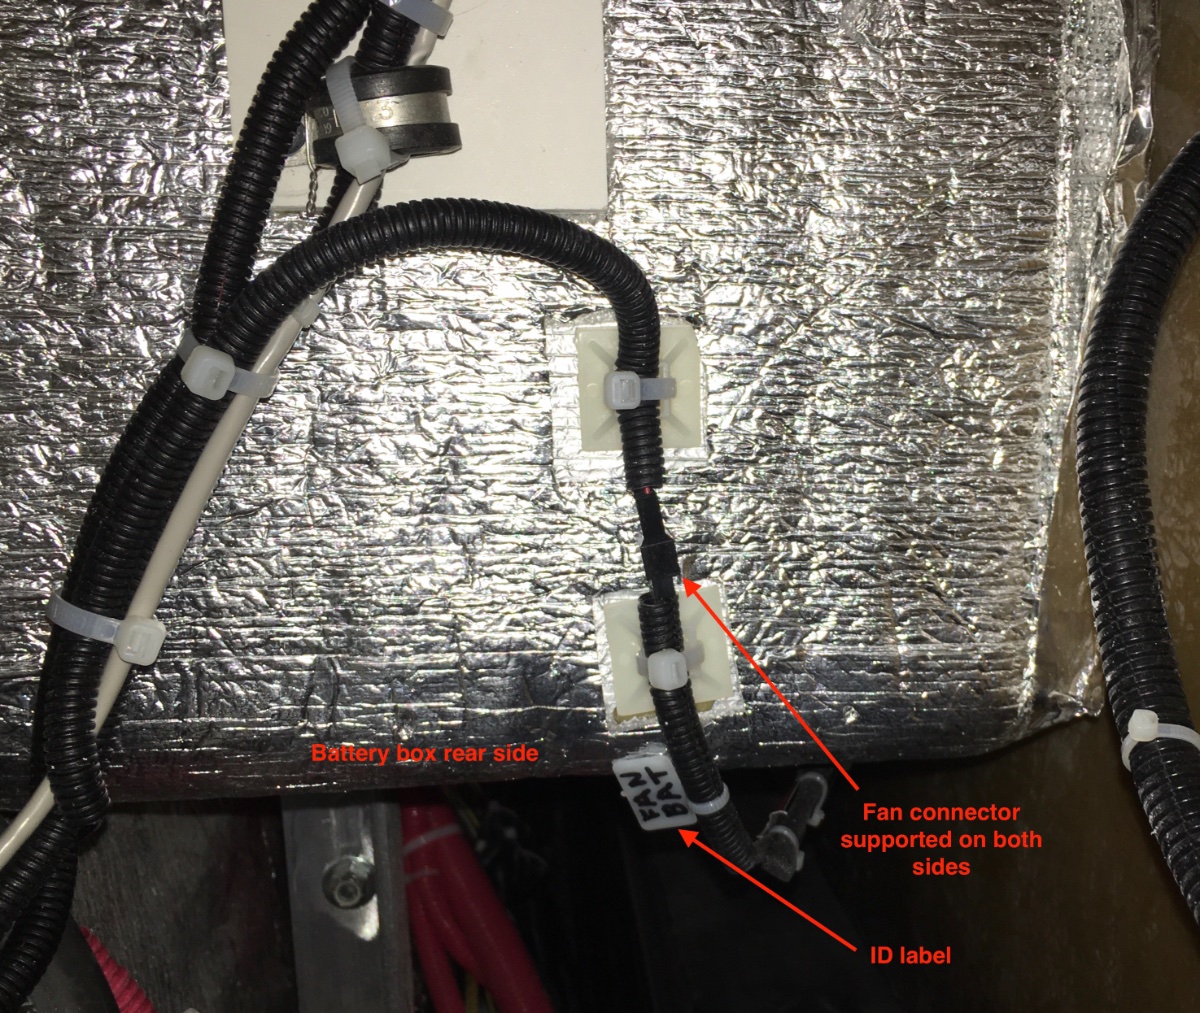
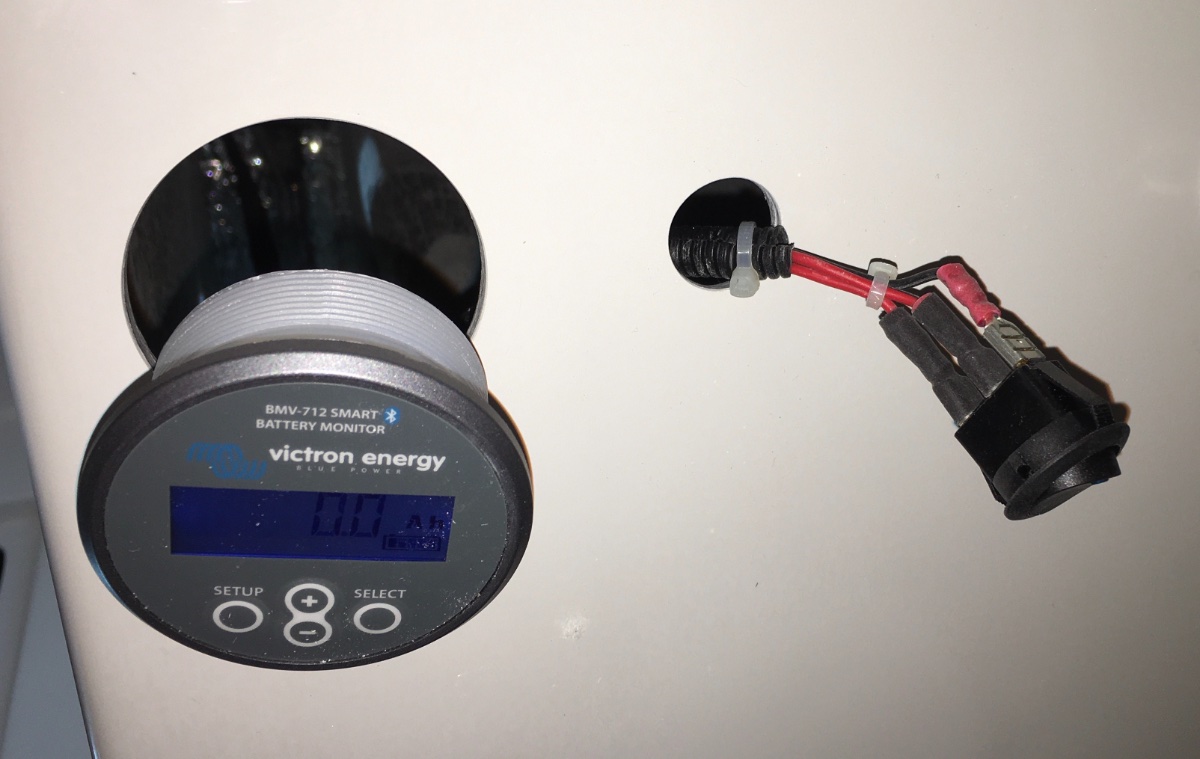
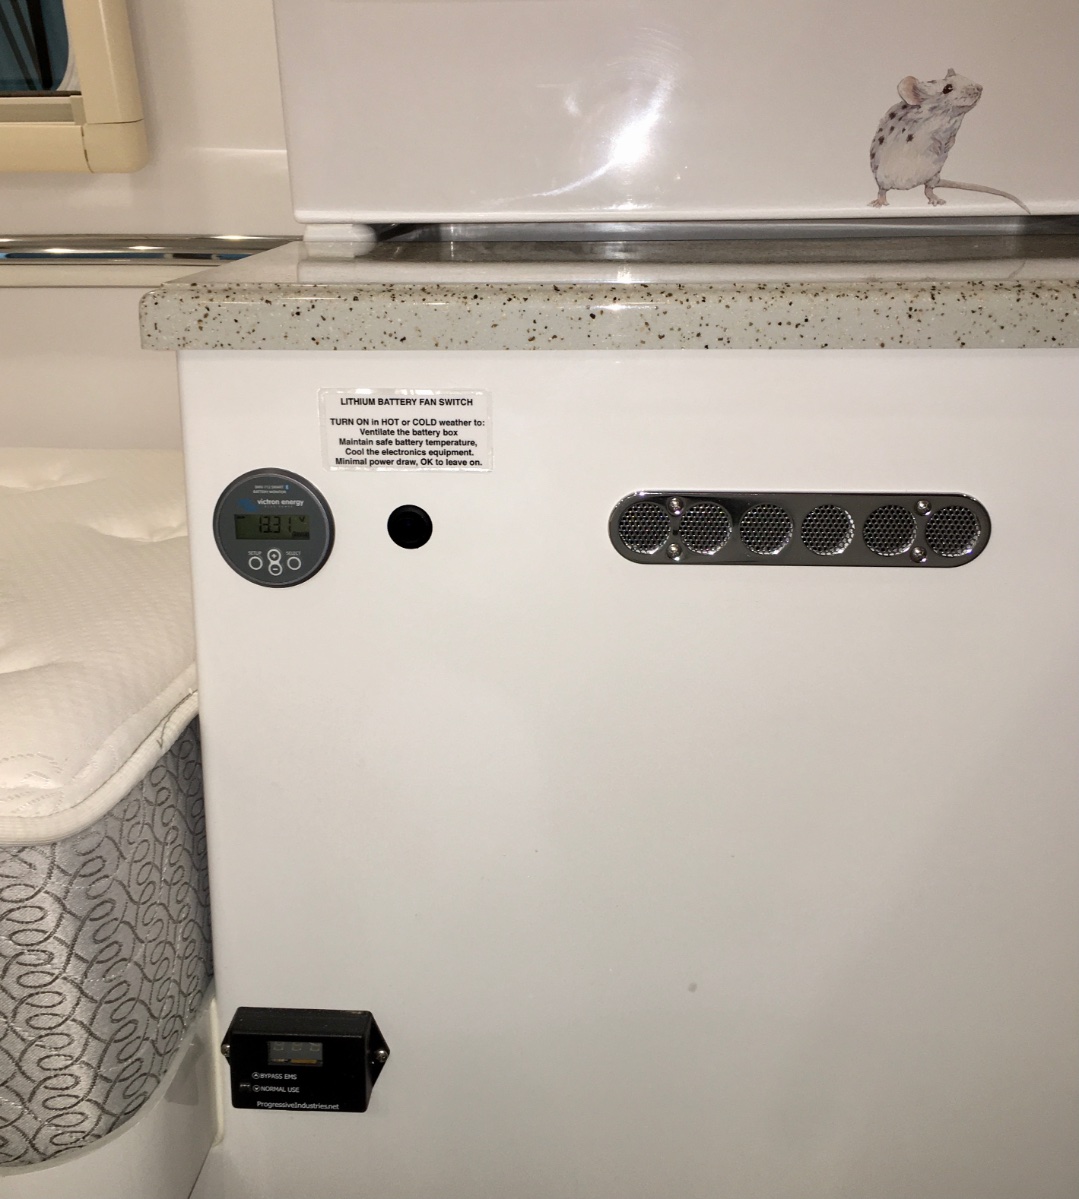
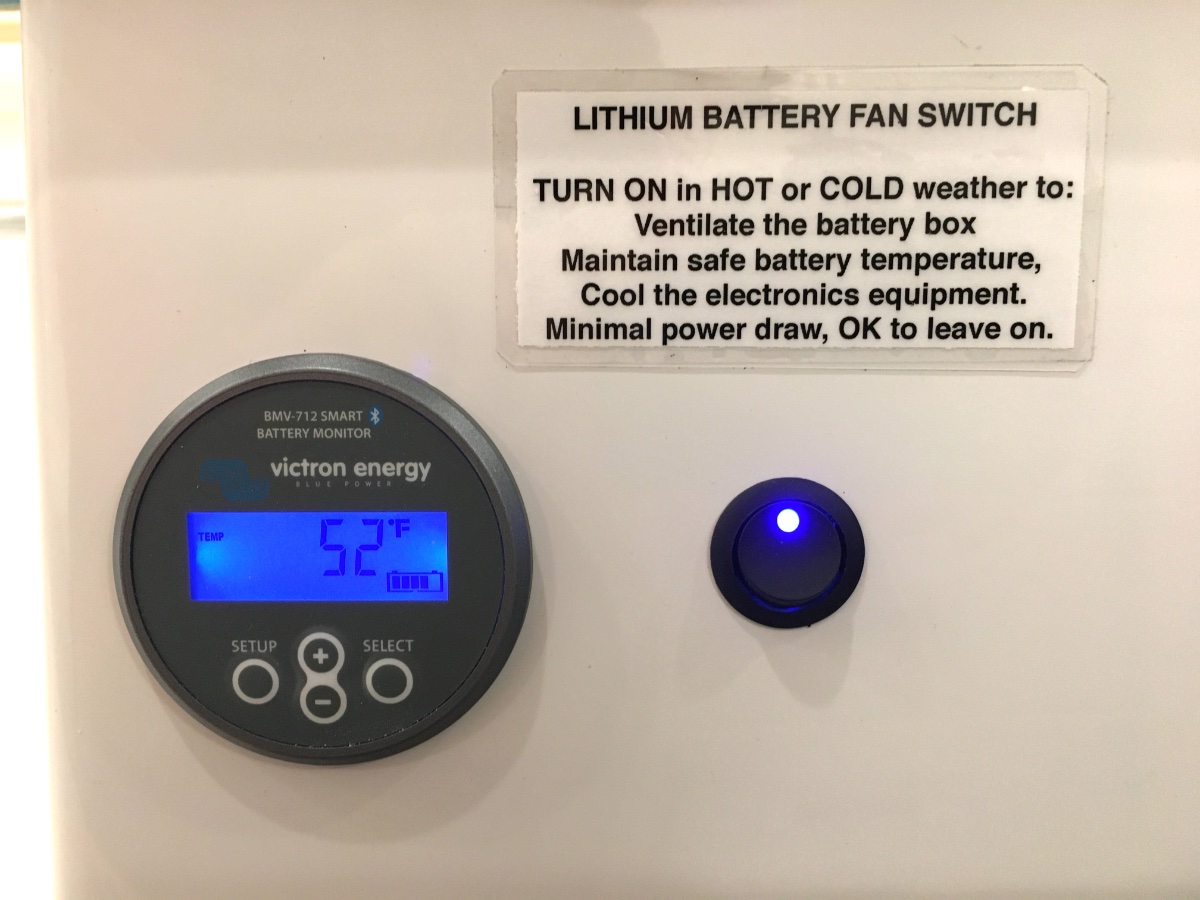
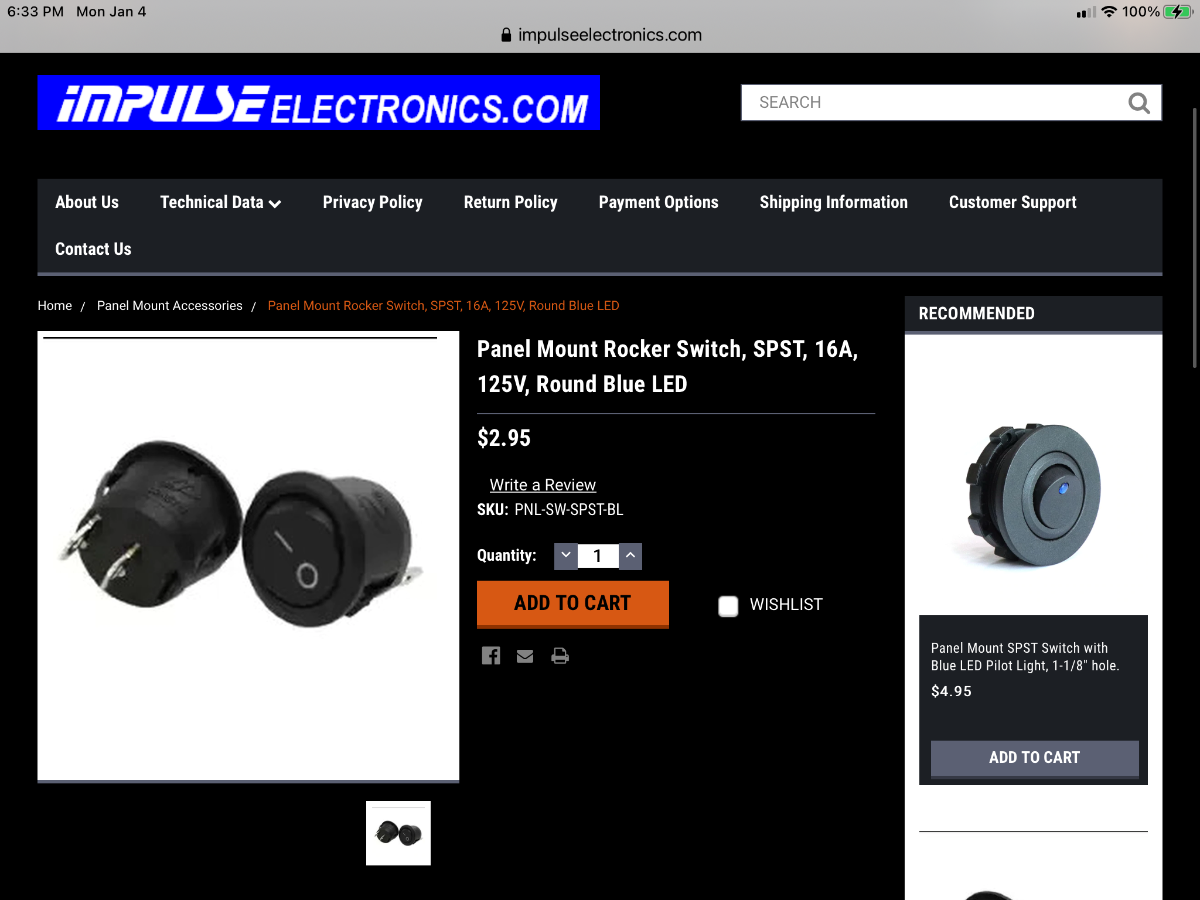
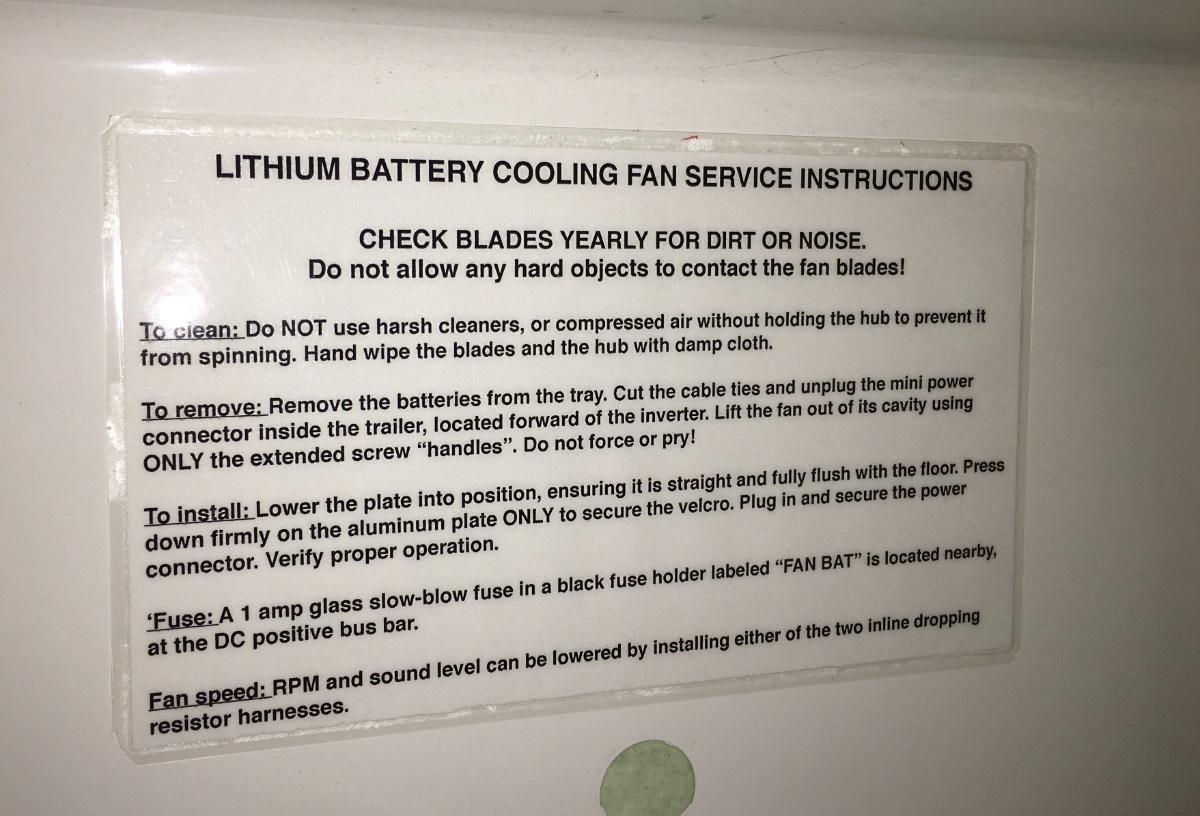
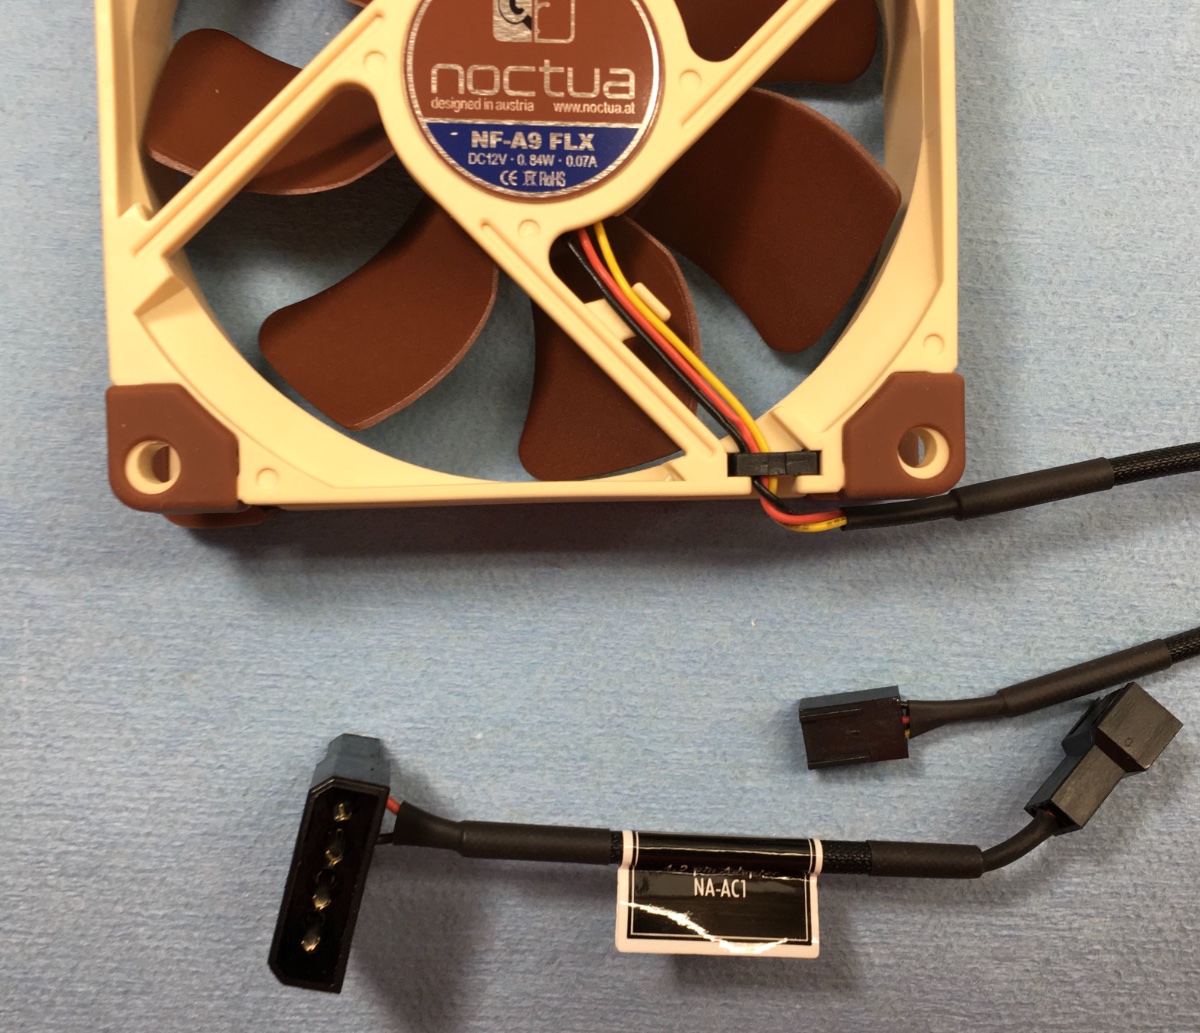
Battery fan wiring and switch. I used the supplied adapter cable and simply cut its 3 pin connector off and butt spliced the wires to a new 18 AWG red/ black wire pair. I secured the connector at the bottom of the battery compartment wall, forward of the inverter: Power comes via a 1 amp inline fuse connected to the rear DC bus. I mounted a switch next to my Victron BMV-712 Smart battery monitor display, below the pantry counter top. An additional ground wire is needed if the switch has an LED (this one is blue, to match the Victron backlighting): Finally, an instruction placard for a future owner or an RV service tech. This is laminated and taped on the rear wall of the battery compartment, and a copy is in the Owners Manual: John Davies Spokane WA
1 point
-
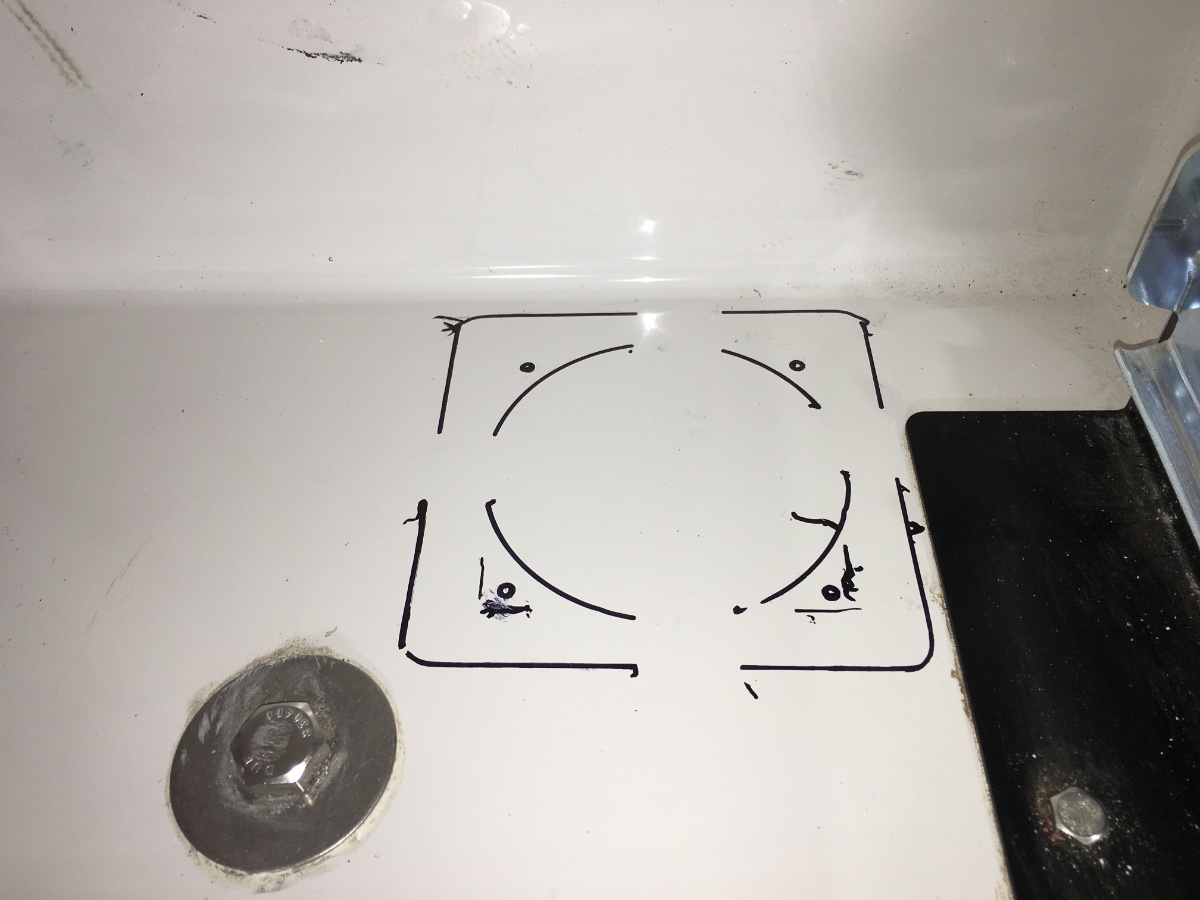
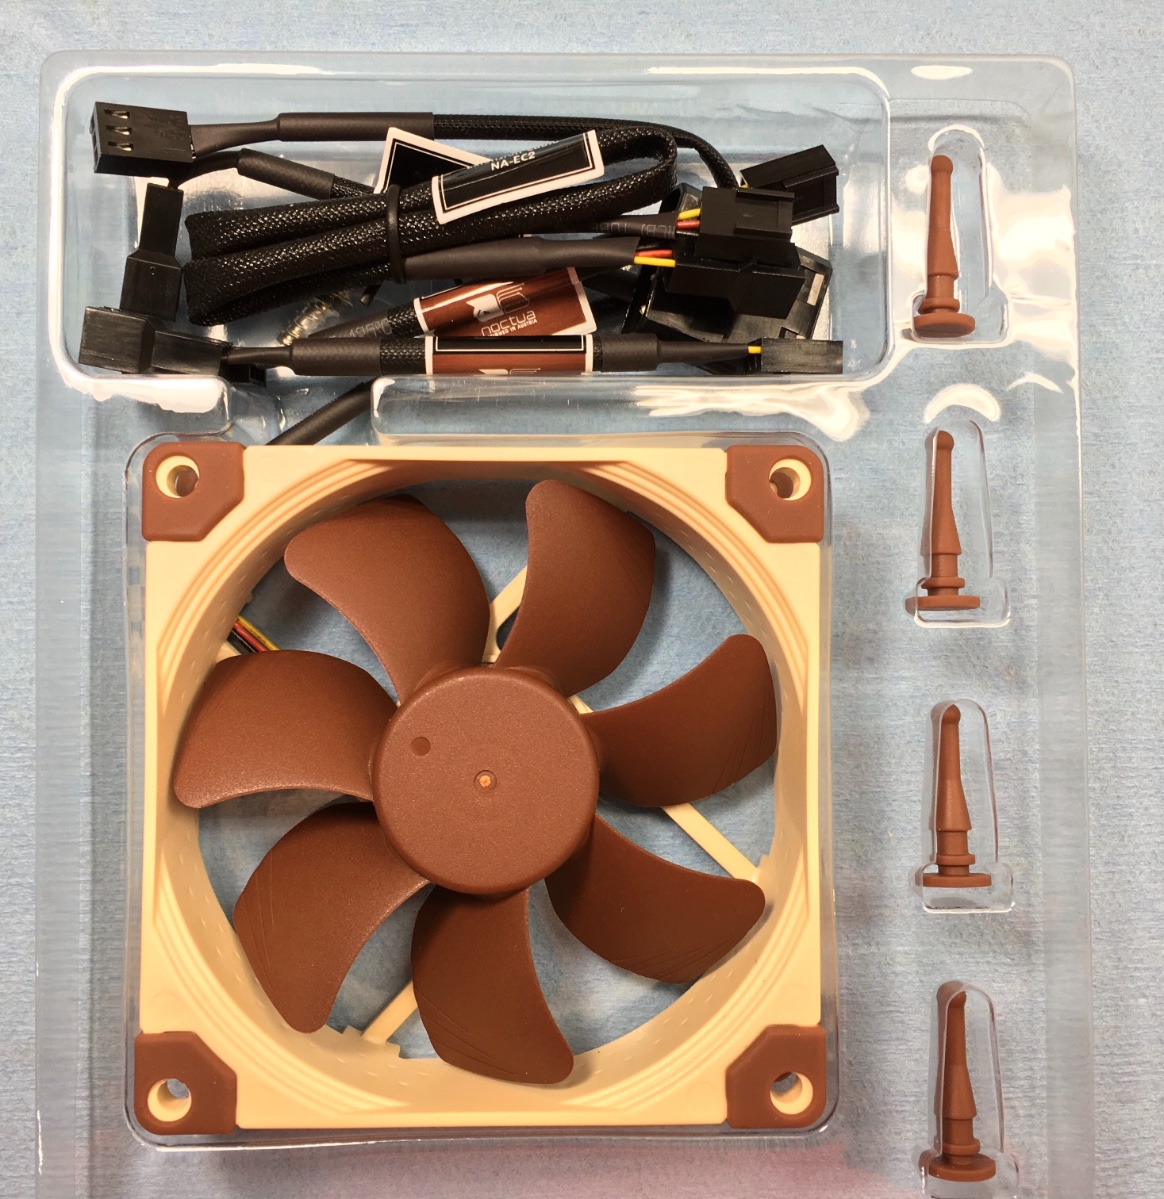
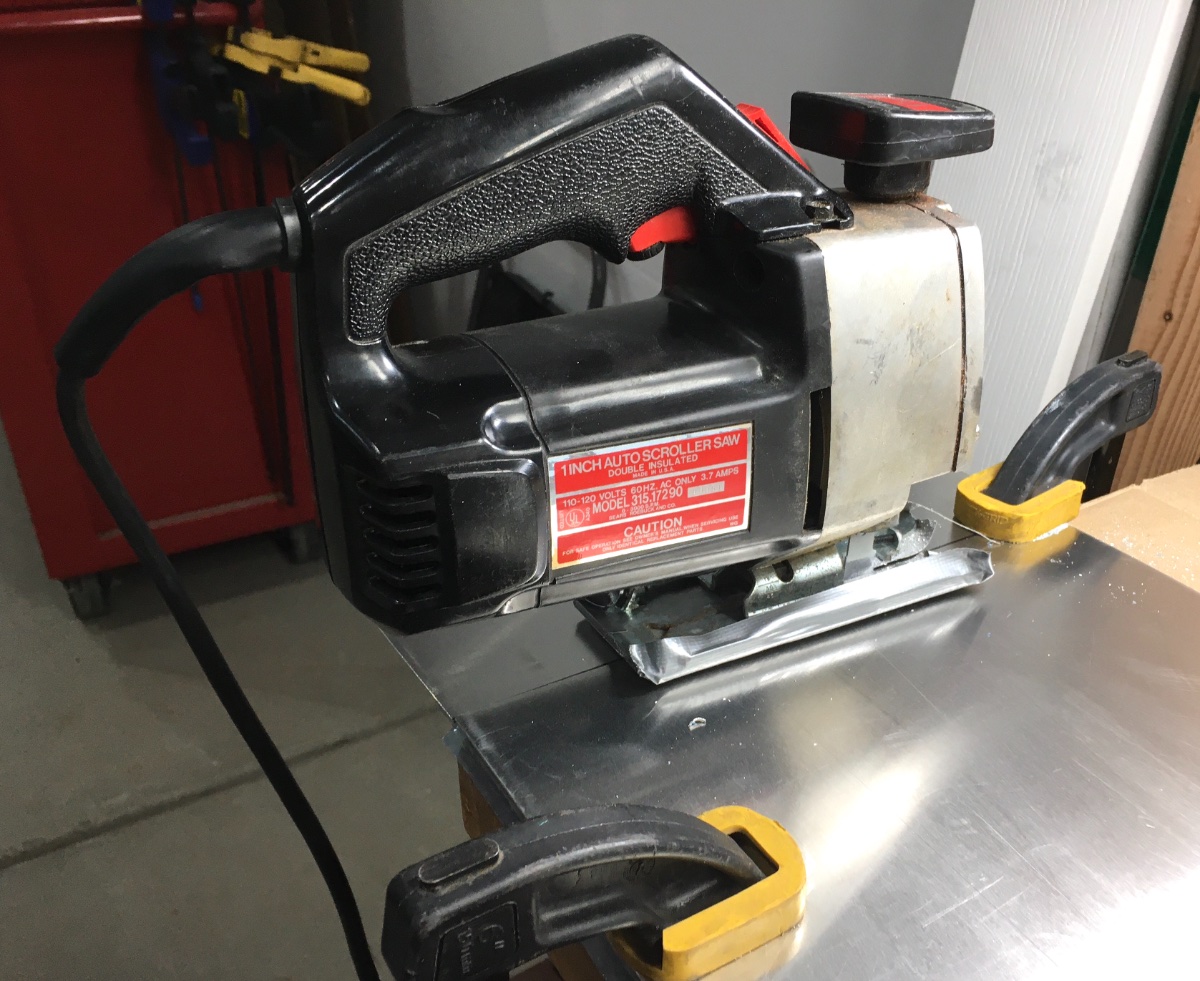
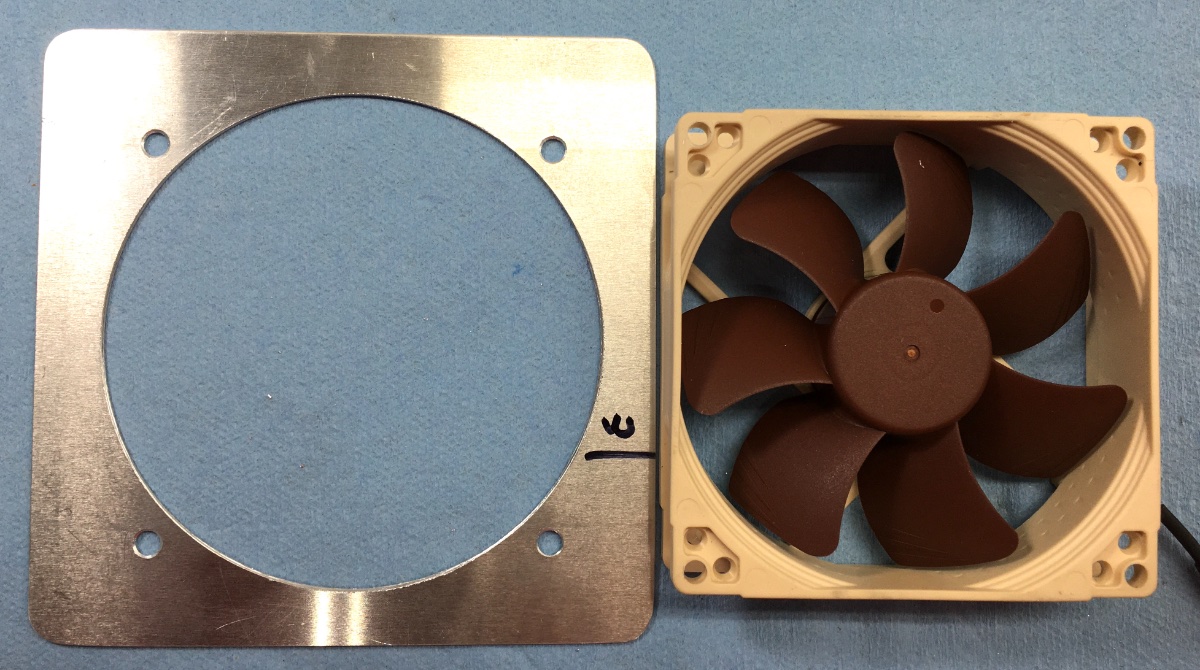
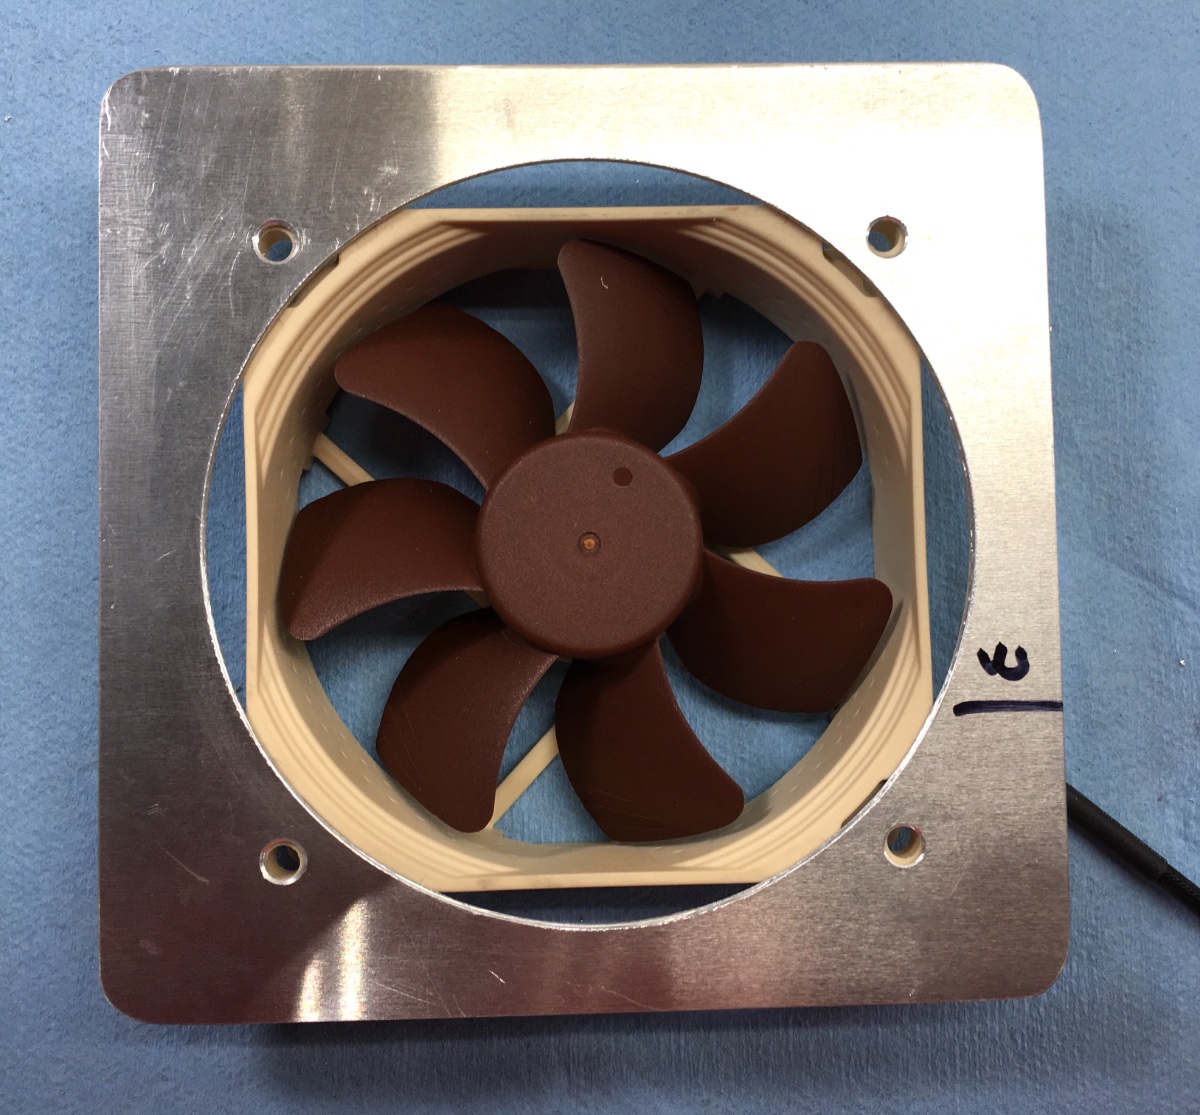
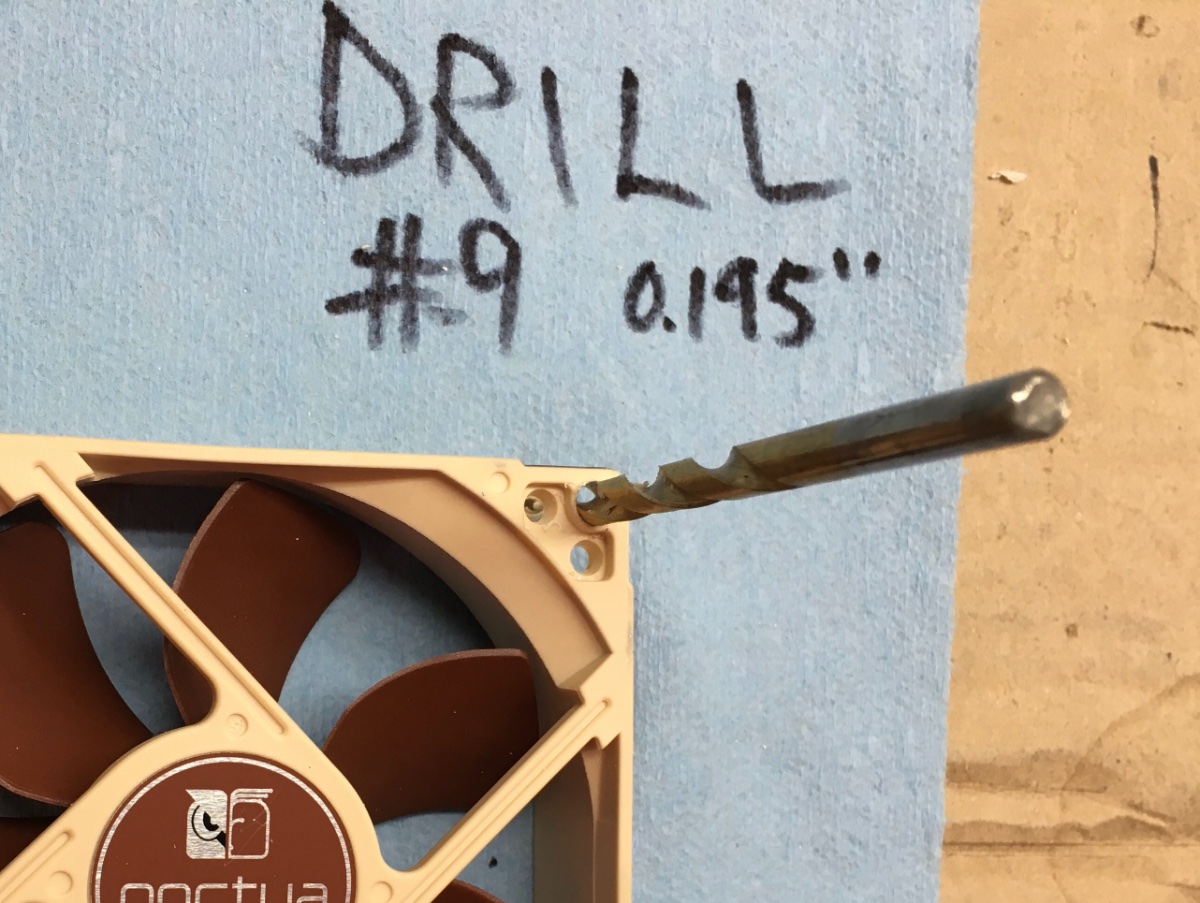
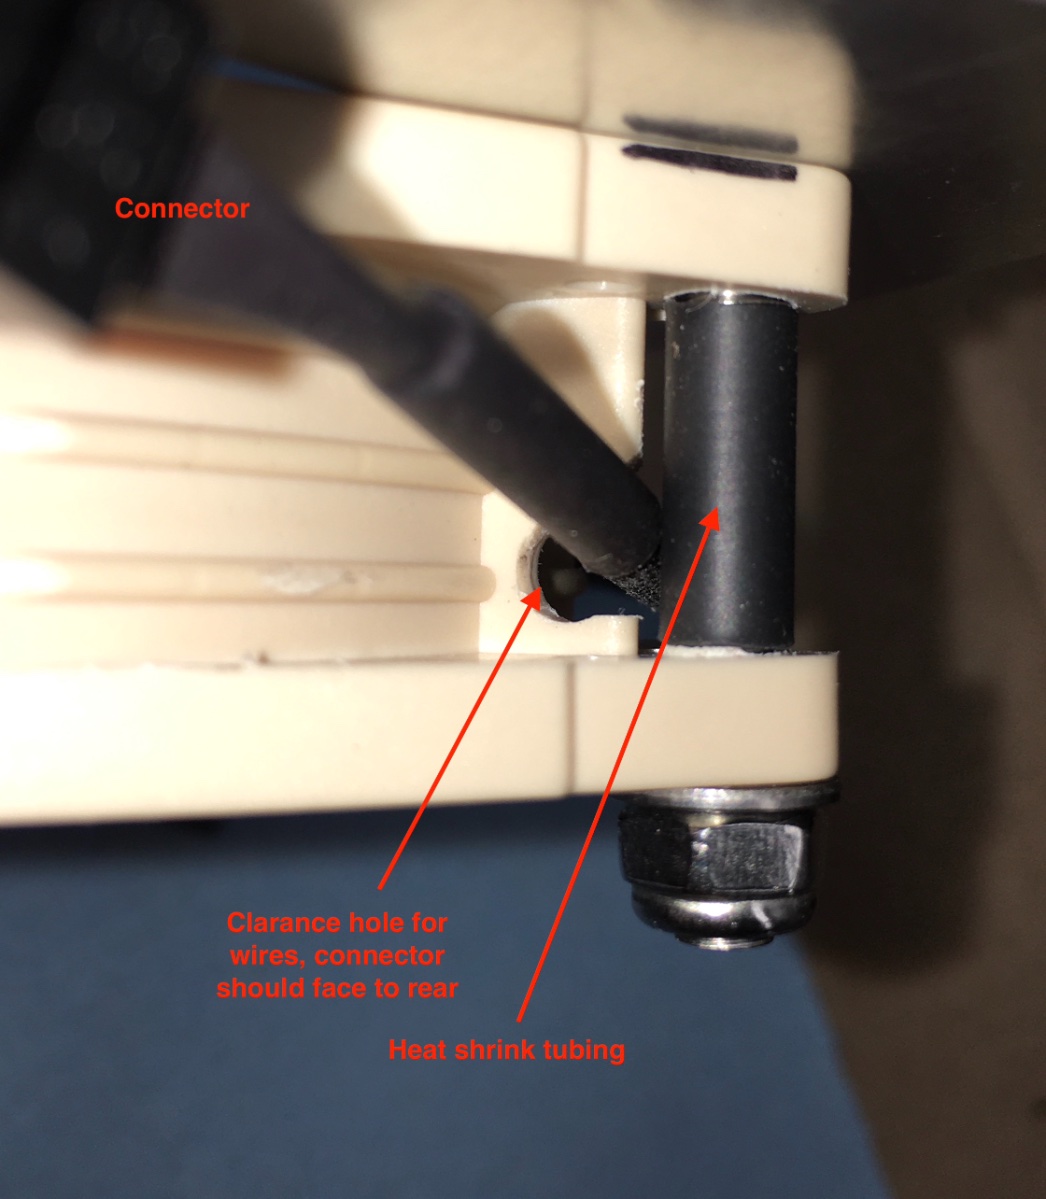
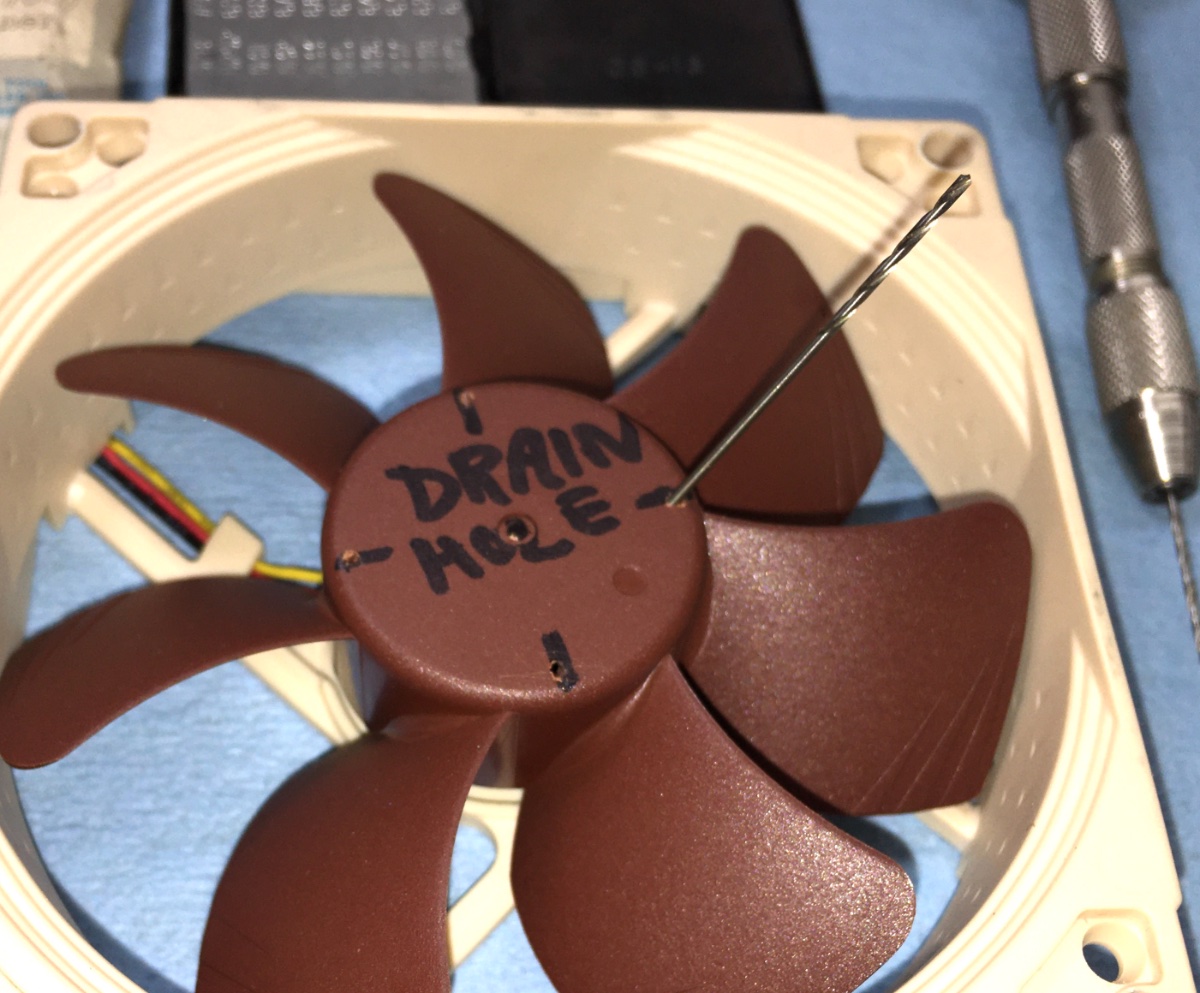
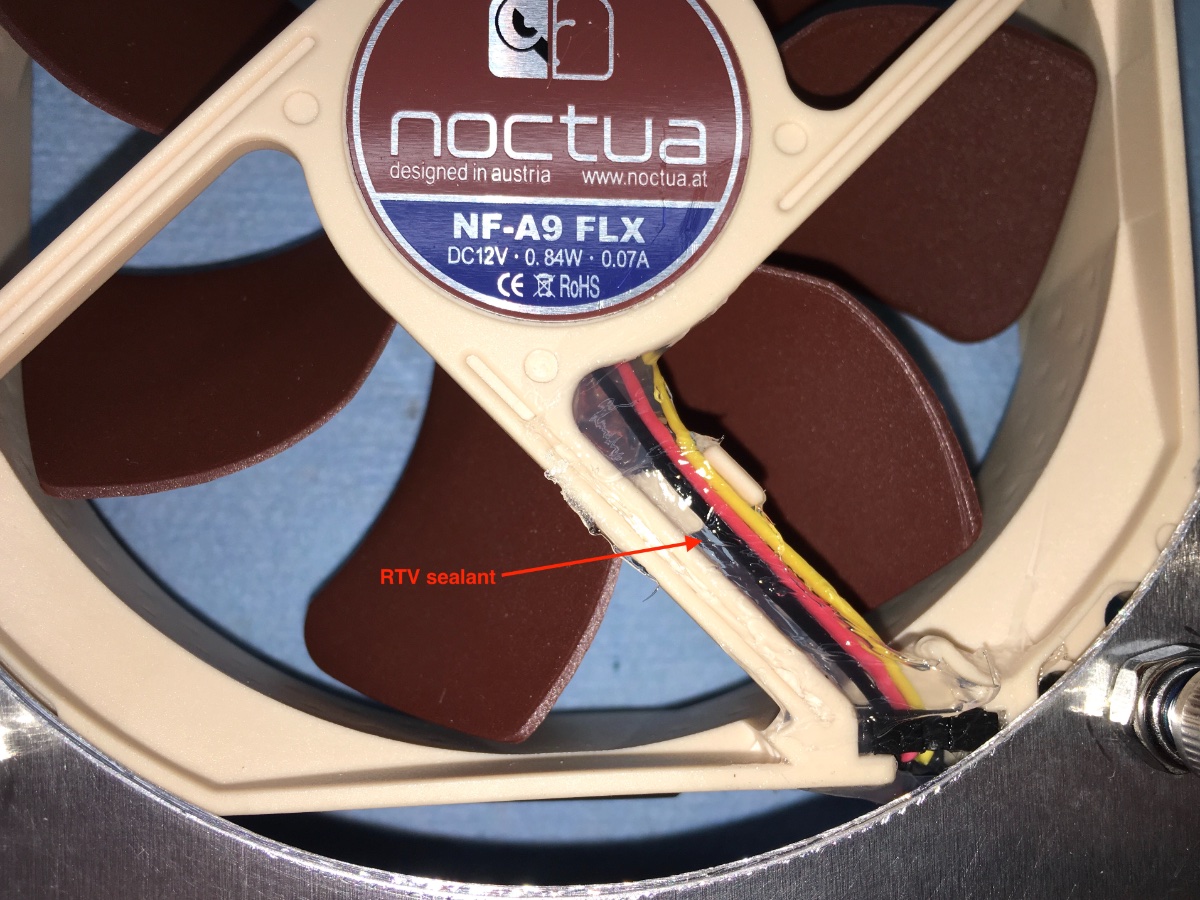
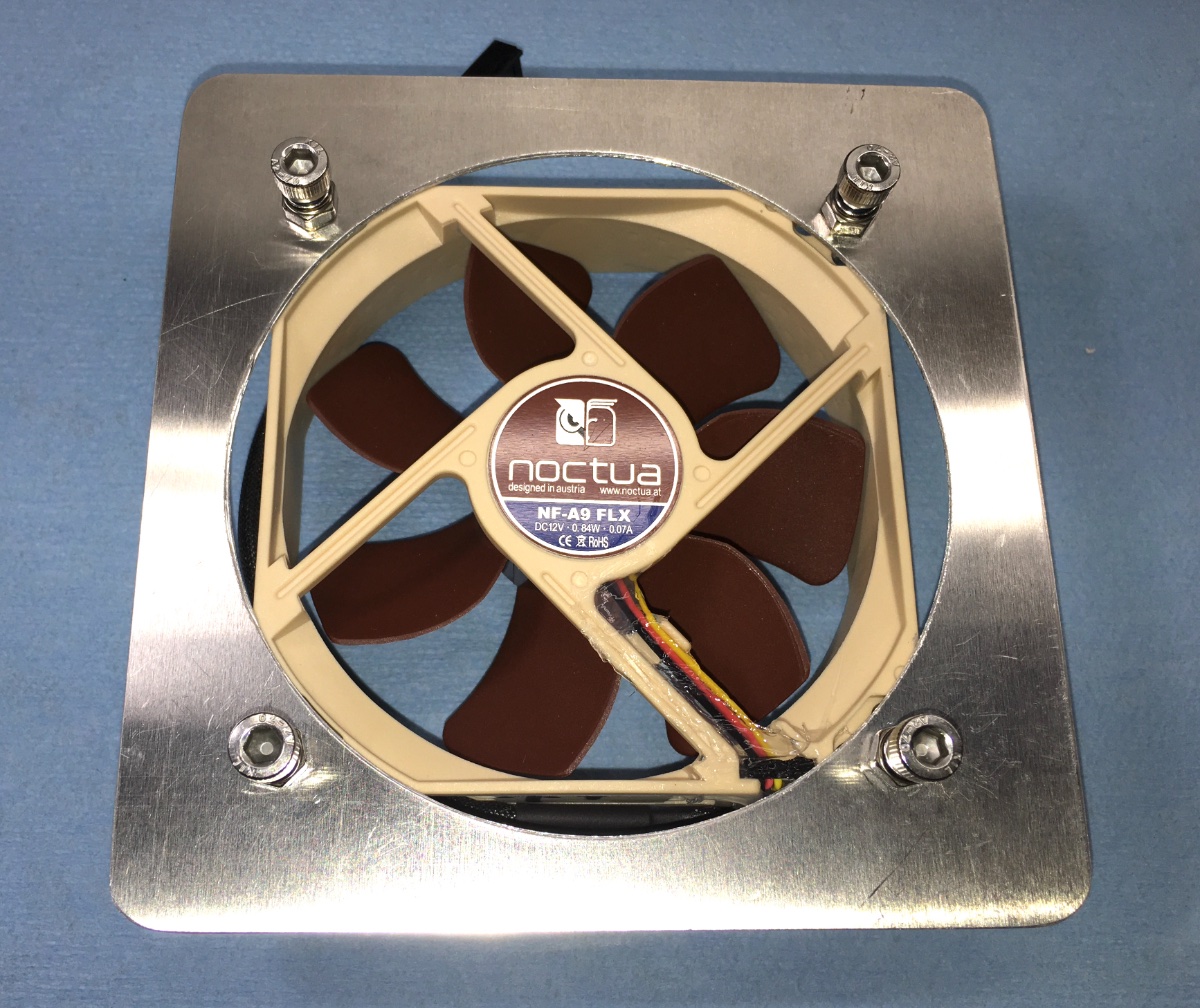
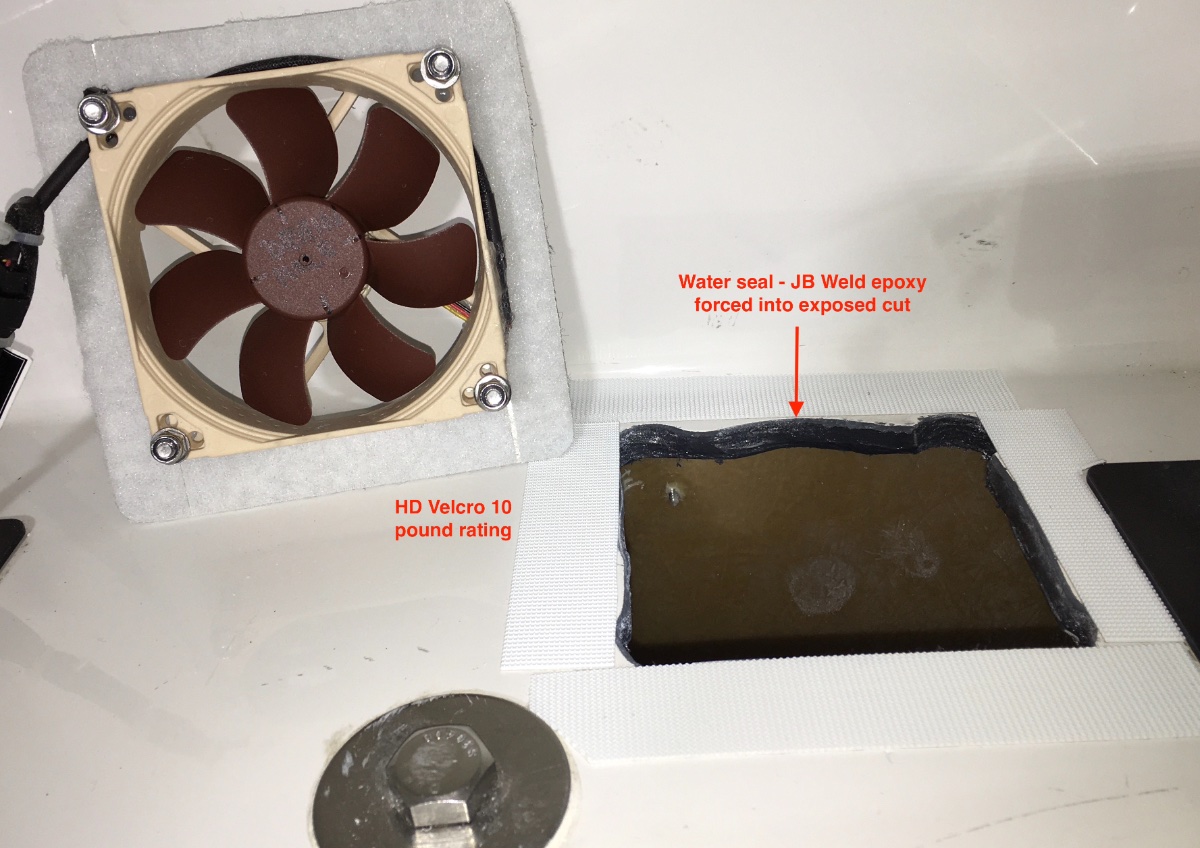
Battery box cooling fan. This one is high quality and well regarded. It has sealed ball bearings and uses just 70 milliamps (0.07 amps), so it can run as long as needed. Flow rate is 38 cfm on high, they supply two dropping resistor harnesses if you want to slow it down to reduce the sound level. It is pretty quiet, though a light sleeper on that side of the trailer might want to turn it off at night. But it is “white noise” which sometimes you do want..... Noctua Fan I really wanted the fan to go in the bottom at the rear wall, so it was centered between the two electronics compartments. The problem is that the floor of the box is not fiberglass honeycomb as I thought, rather it has a hard (6061?) 1/8" aluminum diamond plate bonded in the center! So cutting a large opening was a challenge. If you have access to a scroll saw (pivoting head) it is easy enough. Otherwise, choose to locate the fan at the bottom edge of the rear wall instead! That is thin (1/'8") fiberglass. Screws are 5mm, and are double nutted so that the heads will stick up enough to use as "grab handles", for servicing: John Davies Spokane WA
1 point
-
I realized that you remove the antifreeze version of the filter by pulling down further on the lever. I removed the heater/screen filter and saw that the o-rings were fine and nothing was distorted. I put it back in carefully and that part no longer leaked. I can't see any obvious crack in the mixer, but the rear wall has obviously been sprayed. I guess it could be a leaky hose or the the mixer itself. It leaks about 5 ounces a minute - the pump runs, then turns off, then 20 seconds later it runs again for a few seconds, etc. Kind of interesting - the fellow who checked us out at Oliver on delivery day only said you "could" put the yellow plug in the flue when driving. It also says you can't use it below -4 °F. It must be winterized. The instructions are clear: you must put the yellow plug in.0 points












.thumb.jpg.e34bf01ef7f7d5e99ad31856d45afbeb.jpg)













-
Recent Achievements
-