Leaderboard
Popular Content
Showing content with the highest reputation since 04/19/2024 in Posts
-
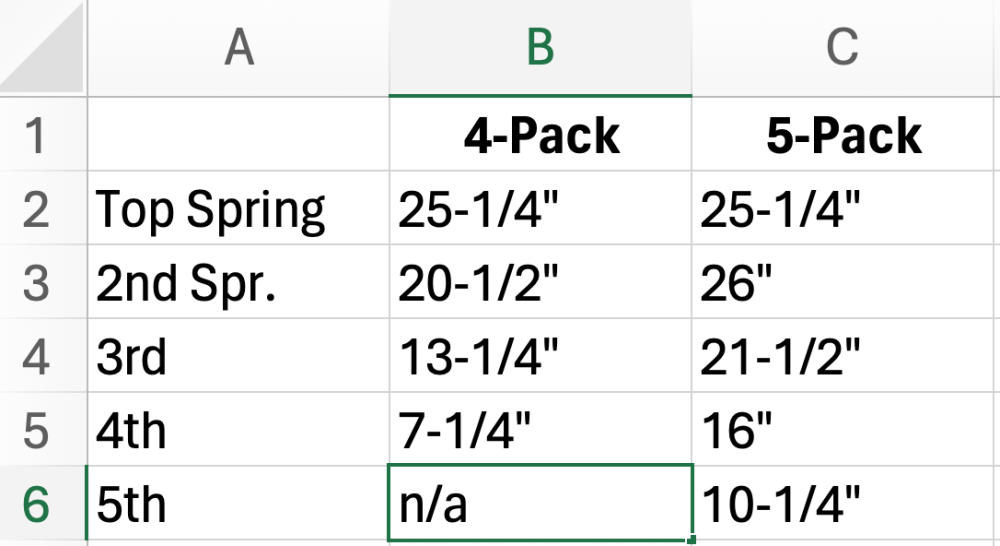
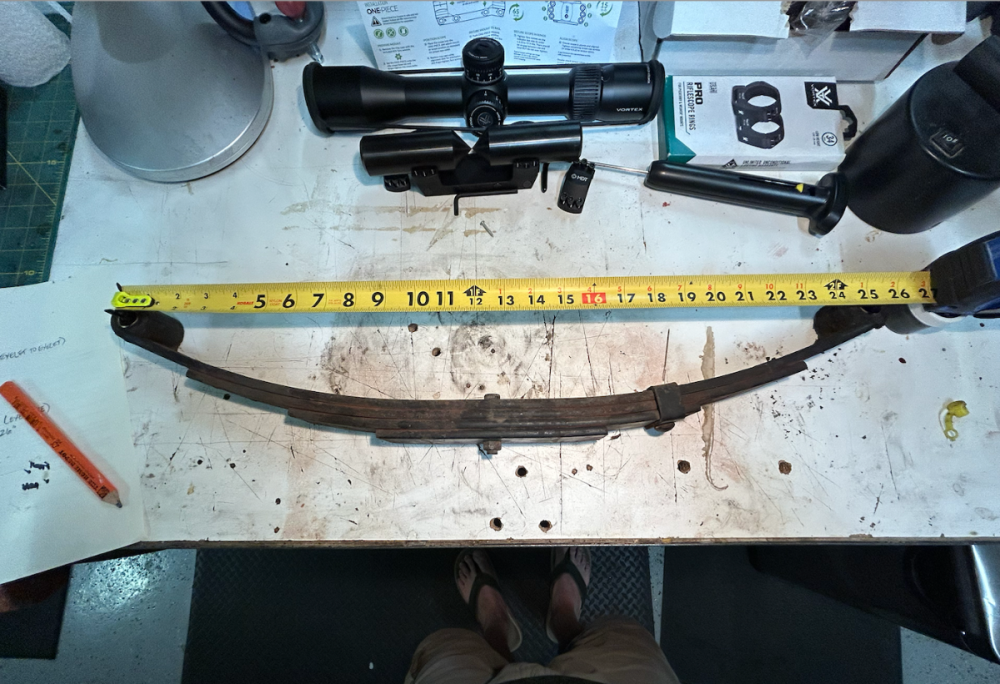
Hey, John: There's at least 4 or 5 "reported" broken springs from reading these forums. Obviously, no clue how many haven't been reported here. But I've learned that there are some good reasons for switching out the 4-packs to higher rated 5-pack springs. Let me summarize: 1. Spring Rating: There's evidence that the Chinese-made "AxleTek" 4-packs, although rated at 1,750# may actually less than that rating. Mike at Alcan informed me of this. The 5-packs are rated in the 2,250# range. So, the 5-packs have somewhere in the range of 500# more weight rating. Can an owner "feel" the difference? I tried. My wife drove me around our country road neighborhood for several miles before and after swapping out springs. FWIW: I couldn't "feel" any difference. 2. Weak Area Near Eyelets: Of the reported broken springs - the break occurs within a couple inches from the eyelet on the top spring - this break is near the end of the second spring which is about 4.5" from the eyelet. On the 5-packs, the second spring extends beyond the center of the eyelet about 7/16" on either side - doubling the spring material where reported ones break. To experience a broken 5-pack spring - the break would have to take-out the two top springs. That's likely why there's never been a reported 5-pack break. 3. Bushings: The bronze bushings in the Chinese-made spring eyelets are measured at 1/16" thickness on my springs - the replacement Alcan spring bushings are right at 1/4" thick - 4x the material, which will take much longer to wear out. Also, to get that 1/4" thick bushing into that eyelet the outside diameter of the eyelet must be made larger. The OD of the AxleTek eyelet is 1.34" while the Alcan eyelet is 1.53", giving the 5-pack eyelets a more robust configuration. 4. Steel Composition: The Chinese steel is of unknown pedigree - unless someone wants to pay for an NDA test (which I'm not interested in) we'll only know subjectively that their steel sucks compared to the recognized high-quality of US-made steel. 5. Comparative Weight: OK, the 5-packs have one extra leaf, right? How much more do you think that extra leaf weighs? I weighed both - the Chinese AxleTek is right at 10#; where the Alcan comes in at 18#. Here's why: The total length of spring material in the 4-packs is 66-1/4" versus 99" for the 5-packs, or 49% more material in the 5-packs. 10# versus 18# = an 80% increased weight for the 5-packs. Above shows the eyelet-to-eyelet measurement of the 4-pack top spring. Each subsequent spring length was measured straight across from end to end. Notice the "flattening" of the arc of the 4-pack. The other 4-packs were flattened like this one. JFTR: We never even come close to the 7k# GVWR of the OTT on any of our excursions. 6. Price Point: New 5-packs/U-bolt kit will cost owners approximately $800 plus shipping from Grand Junction, CO. I'm in NM and shipping was $110. FYI: No tax if purchased outside of CO. For us it was a no-brainer. One of the last issues we want to handle is a broken leaf spring in the middle of a boon docking location in the middle of EBF somewhere. Cheers!12 points
-
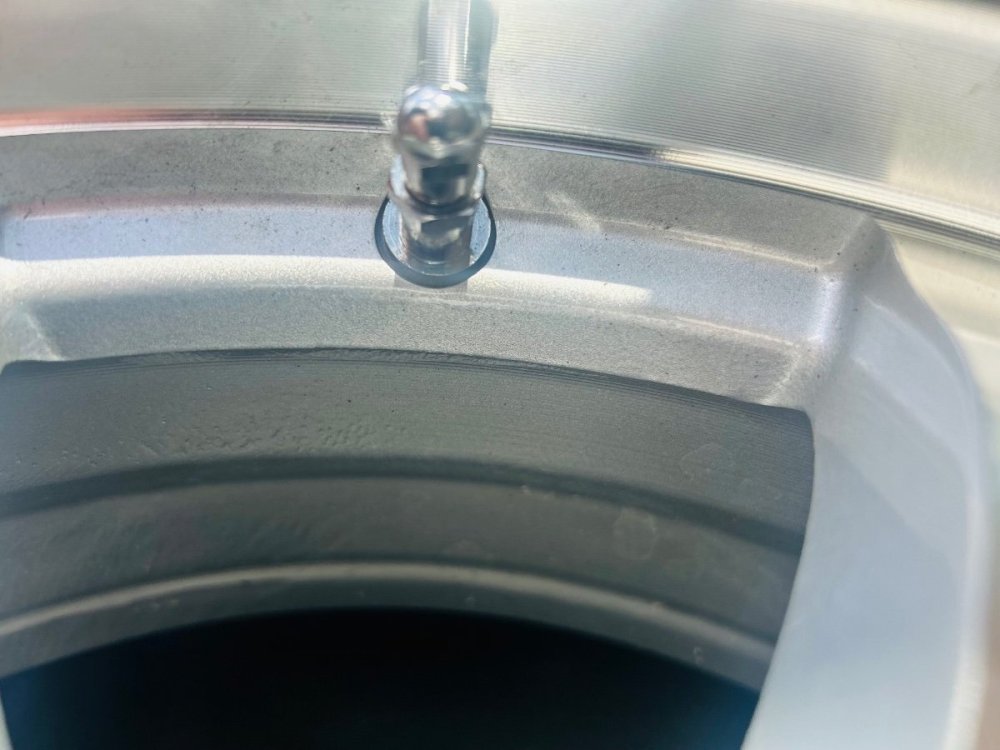
I've been meaning to write this for some time and it's primarily directed for us very few Elite I (one axle) owners. I was preparing, last summer, to take my 2022 Elite I Hull #1209 to Hohenwald just shy of it's one year anniversary. My primary issue was a fiberglass defect I discovered on the roof that several of you on this Forum suggested I get repaired. A week prior, I decided to install mudflaps inside the wheel wells on the Ollie. This required that I jack it up and remove and each tire to access the frame in the wheel well where I mounted an L bracket on which to mount the mud flap. I used a 4 ton bottle jack on the front jack point and once jacked up, a 4 ton jack stand under the rear jack point for safety. I carry both on all trips. Earlier I had installed a carrier and storage box on the rear bumper receiver hitch and posted it here May 13, 2023. At that time, I developed my technique of removing the spare by just partially sliding out the rear bumper receiver hitch assembly just enough to remove the cover and spare. The carrier and box stayed filled and connected to the hitch. I was about 90 miles SE of Hohenwald on a Sunday afternoon on a two lane highway when my EEZ RV Tire Pressure Monitor alarm sounded. My curbside tire pressure was dropping. I started looking for a place to pull over as I was in a long stretch of road with a railing and no shoulder. I saw an adequate shoulder about 0.4 miles ahead. I watched the pressure fall from 60 when the alarm sounded to 8 lbs as I got to the shoulder. There was no cell service so no AAA. My TV is a Subaru Ascent SUV. I've learned to travel lighter on each trip, but I had to dig for the jack and jack stand. Since then, it's easily accessible. It was inconvenient, but I was so thankful that I had just gone through the process of jacking up the Ollie and removing the spare. I tried first pumping the tire back up, but heard air coming from the base of the valve stem. At the tire store in Hohenwald the next day, it was the valve stem that had cracked and caused the incident. My purpose in posting is to strongly urge, especially Elite I owners, to at least practice and prepare for this scenario and I can't recommend enough using a tire pressure monitor system! Safe travels and I hope to meet more of you at Lake Guntersville next month. (We'll be in site E25) Ron10 points
-
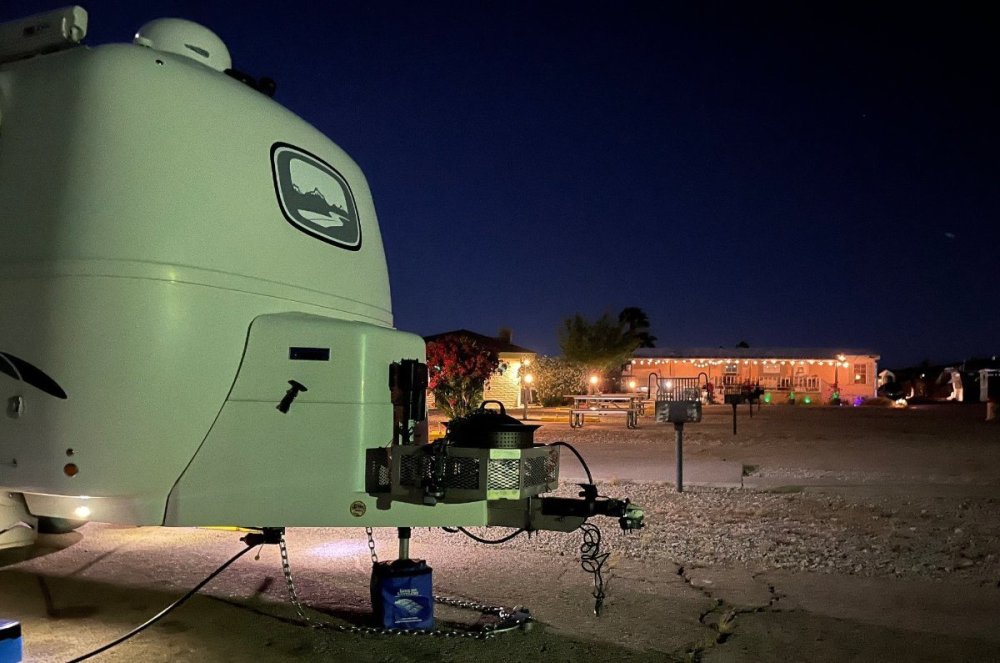
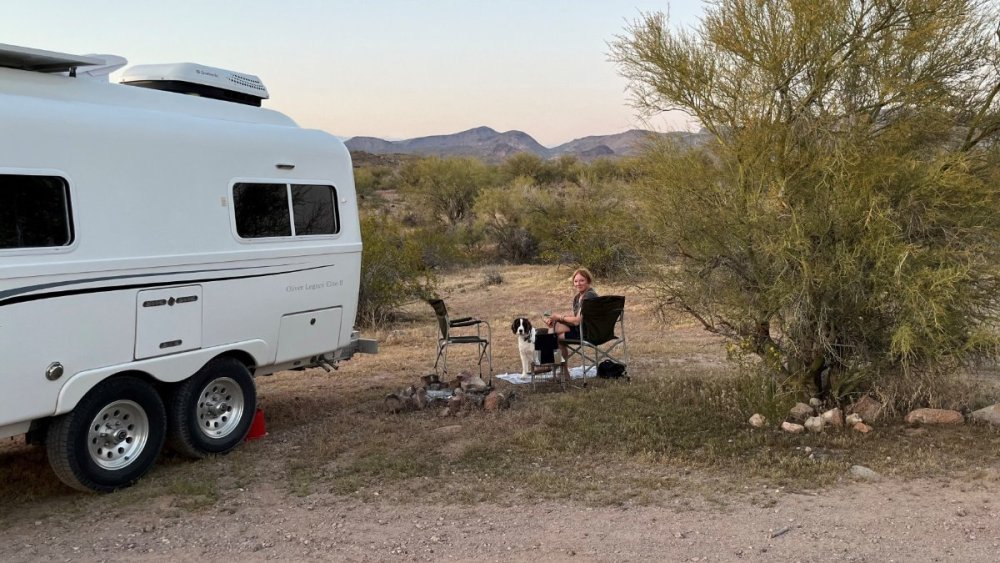
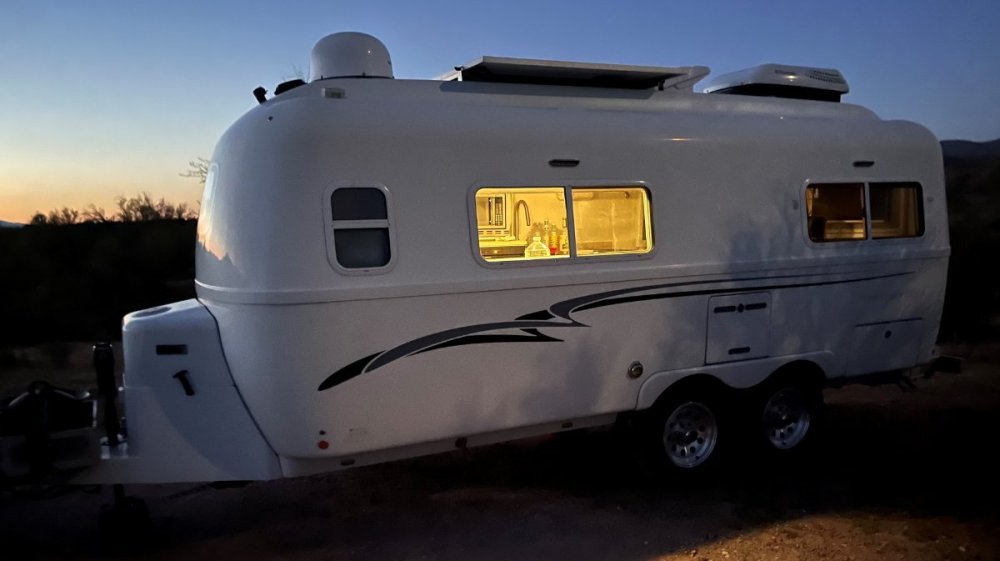
Chris and I met playing tennis in 1991, and 3 years ago we transitioned to Pickleball for the community and it's also a little easier on our older bodies! Chris has competed in a bunch of tournaments with her Ladies partner, and we have played a few mixed doubles together. Loved our visit to St George for this tournament last year and we are playing it again this week: Selkirk Red Rock Open in St. George, Utah | PPA Tour So, it had the makings of a great Oliver trip. Thought we would boondock a first night just 2 hours from home, then 2 nights at Valley of Fire Nevada on the way. Starting tomorrow, we will spend 3 nights at a St George RV park right in town to be close to the tournament. This was our first night, off Signal Rd in Wikieup AZ (pics below).9 points
-
Well, so it begins. I've read lots of others posts, put a lot of thought into it, put down some cash, and have started building the Ollie Shack. Living in northern Minnesota, I wanted to keep my LEII and TV out of the MN winters and in my building where I can tinker with all of my mountain bikes throughout the year and a place I can also do some different how-to videos for my YouTube channel. We have an attached garage now for our two daily drivers so this will be an add on. 30x40 with a 12' ceiling. I was going to build it myself but would rather be camping and biking in the summer and the wife doesn't want me up on a roof that high. Go figure! Should be done over the next month, weather permitting. So looking forward to the extra space!9 points
-
There has been some unintentional misinformation posted in this thread about the 5-leaf Alcan Spring that is being sold to Oliver owners for retrofittiing. That being the weight rating of the spring packs. I've seen ratings posted varying from 2000 to 2400 pounds. During multiple conversations with Alcan Spring in Colorado, the owner Lew Weldon, has stated that the correct weight rating is 2750 pounds per spring for a total of 11,000 pounds. They supply exactly the same spring for both the 3500 pound and the 5200 pound axles, the only difference being the U-Bolts provided which is based on the diameter of the axle itself. The GVWR of both the Oliver Elite's is calculated using the weight ratings of the axles and the spring packs. The final rating is based on the weaker of the two. For those owners that have the 3500 pound axles, the installation of these heavier springs will not affect your GVWR of 7000 pounds. For those owners that either already have or have switched to the 5200 pound Nev-R-Lube axles you would now effectively have a GVWR of 10,400 pounds upon the installation of these heavier springs.9 points
-
@jd1923 Our Blueberry Hill - is a small ridge where we built our home in the foothills of Western North Carolina. We have been growing (pesticide free) blueberries now on a small scale for 15 years. We deep freeze, enjoy, and eat a lot of blueberries and always share with family and friends. Our best year we harvested 43 gallons. We irrigate with a drip system for plump berries. A good mornings pick of berry treasure.8 points
-
7 points
-
Wholly agree with this observation When my spring broke I was 250 miles from home. I bought the only pair of springs that would fit and were geographically close to where I broke down. they were 4 leaf, 2,400 lb springs as GJ describes above. While they did fit, I chose later not to replace the other two springs with 2,400 lb 4 leaf springs as the amount of stuff in my trailer which had stayed put during my prior 4,000 miles of travel on the stock springs had suddenly found its way to the floor during the 250 mile drive home (with only two 2,400 lb springs). My E2 now sports 5 leaf, 2,000 lb Alcans 2,000 lb, 5 leaf springs will be more flexible and have better travel thru their range than 2,400 lb springs with only 4 leafs (less jarring ride).7 points
-
I'm with ya.. and one less motor is one less thing to go wrong. If using a manual awning ever becomes too taxing for me I probably shouldn't be out camping any more..7 points
-
I'm starting to feel sorry for that horse. Yes, I do know he's allegedly already dead.6 points
-
6 points
-
6 points
-
I can personally attest to the fact that Blueberry Hill exists and that the blueberries taste as good as they look. I'm not the biggest fan of these things, but, you can just taste the work and love that go into the berries from the hill. Added to the attraction is the fact that this lovely garden is right next to the house and still doesn't even look like a farmer's garden and/or detract in any way from the residential "feel" of the area. Bill6 points
-
Been there, done that, "got the T-shirt." I learned that my ability to accurately determine which way the campsite slopes is limited. So, I the started carrying chocks for both the front and back of each set of wheels. Before disconnecting the coupler, I ensure that the wheels are chocked both front and back, and rubber-hammered into place. So far, this has prevented unwanted movement.6 points
-
We camp on many campsites that are not level. Always put the level blocks under wheels on low side leveling Ollie (we use Camco Level Blocks) and chock the wheels on the opposite side. Then before jacking Ollie's hitch off of the ball, place the tow vehicle in neutral letting the trailer settle on the level blocks and chocks, next place TV in park and jack hitch off of ball without much movement.6 points
-
John Dorrer: The same thing happened to me once on my relatively flat driveway. It scared the bee-jeebies out of me for a moment. In my scenario there was a slight decline to the right of the Oliver. Afterwards I investigated and believe that the problem was the way I placed the chocks. I placed the chocks behind each of the Olivers back wheels. Then as the tongue came up and off of my truck there was nothing to keep the Ollie wheels from coming forward. The tongue came up and then moved about 10" suddenly to the right (towards the Ollie's right). I believe that my Oliver "pivoted" on the right rear chock and because there wasn't anything on the left side to keep it from going forward.... it did. Since then, I have put my 4 chocks front and back on each side. It keeps both sides of the Oliver planted in place. I also think that because I was on my concrete driveway...and maybe the hard plastic chocks didn't "grip" on my concrete well ... it was a scenario that allowed the Oliver to move even quicker than it might have on a gravel camp-site.6 points
-
Hello Everyone, We will move the Oliver Travel Trailer's website and Oliver Owners' forums to a new website host this Saturday evening, 4/27/2024. We will try to get this done through the night to minimize activity times. This migration is a necessary step to improve our website's performance. This migration is an enormous undertaking, and we are still determining an estimated completion time. We understand that this may cause some inconvenience, but we assure you that we are working diligently to make the transition as smooth as possible. During this period, the website and forums may experience intermittent downtime, and you may encounter difficulties accessing certain features. We sincerely appreciate your patience and understanding as we strive to complete this migration. Thank you for your continued support. We look forward to providing you with an improved online experience on our new website host. Best regards, Oliver Travel Trailers5 points
-
I'm unclear why you would think that. Your wheels have you at 7.8K pounds, well above the stated 7K GVWR. Which tires, axles and spring packs are riding under your Hull #045? How much does your trailer weigh full of water, gear and ready to camp for a 3 month long foray? The wheels and tires under my Hull #050 have a load rating of just over 13K pounds. The Axles are rated at 10.4K pounds. The Alcan springs can support 11K pounds. The Outlaw Oliver has always weighed well over 7000 pounds in its natural habitat. And, it has traveled over 100K miles, most of it with the tires sitting at 80psi all without a single issue. I'll be forever grateful for Jim Oliver's guidance and assistance in designing the most over built Oliver rolling down the road. But, there are those here that think I tend to over-engineer everything.5 points
-
Thank you. It sure started that way until we ran into some unexpected weather. Last year, the tournament was early vs. late April. We drove into St George on April 5, 2023, and the temps were in the 40s with snow flurries. We had a friend playing Womens Doubles that day. We grabbed coats and hats and watched for a while. Our matches were the next day and it got up to the high 60s and the rest of the week was perfect! This year is a much different story, OMG! Getting ready the week before we noticed the forecast would be in the 80s for the tournament. But it got worse, and Chris is not a summer person at all. Driving out on Sunday, as we dropped 3500 FT leaving the elevation of the Prescott NF, it got hot and was in the high 90s the remainder of the drive. Yes, the pictures look nice, but what you can't see is Chris and Charley were hiding in the shade of the Oliver as the sun had just set. It was 91 degrees in the Oliver, when we parked, and it stayed hot until 9 PM. We were in the Sonoran Desert at 2000 FT, so lows got down to the 60s and we slept well. Right now, I can remember @Patriot writing, "I like options" when he was referring to carrying a generator, that I was not wanting to do. Living SW, we don't summer camp and weren't thinking of high 90s in April. The real issue was the next two nights, where we had booked 2 nights "no utilities" at Valley of Fire. How fitting is that name, when the forecast is 99 degrees? We wasted our reservation there and looked for a place with hookups to run the A/C! Ended up a bit short of our planned stay, two nights at Callville Bay RV Village Park, which we would not recommend. It's a park of rundown singlewides for weekend boating types, with 5-6 RV pads (picture taken Monday night). Today we head to St George. Looks like a great route, driving by Pinto Valley and Jimbilnan Wilderness Areas on the way to Valley of Fire. We will at least drive into the valley to take a look. Then Moapa Valley, Mesquite NV and on to St. George tonight.5 points
-
This is unfortunate as many of us were quoted weight rating of 2k. Mine are installed so I am running them as I do not want to go back to the cake that Dexter installs on their axles. I know of at least two E2 owners who have towed with these springs (one for 5k miles and another for 1.5k miles with good results. I head out Thurs on a 1.5k mile trip with the Alcans. Thanks for posting this after speaking to Lew, Steve. I guess at this point it is tow forward and observe. Stay tuned.5 points
-
I'll take my piece hot with a large scoop of vanilla ice cream on top.5 points
-
@Gliddenwoods I fixed the orientation of your pictures, and see below for a possible fix to your leak. Pretty sure you have 1/2" pex B piping in your rig, that's what we have in our 2023 LEII. I doubt you have the proper tools to crimp a joint to fix that leak, so the easiest way probably is.... 1) Shut off the water supply 2) Cut your pipe squarely and ensure both end are free of debris 3) Join the 2 end with a push to connect coupling like this You can buy these from Home Depot, Amazon etc. HERE's a link for Home Depot5 points
-
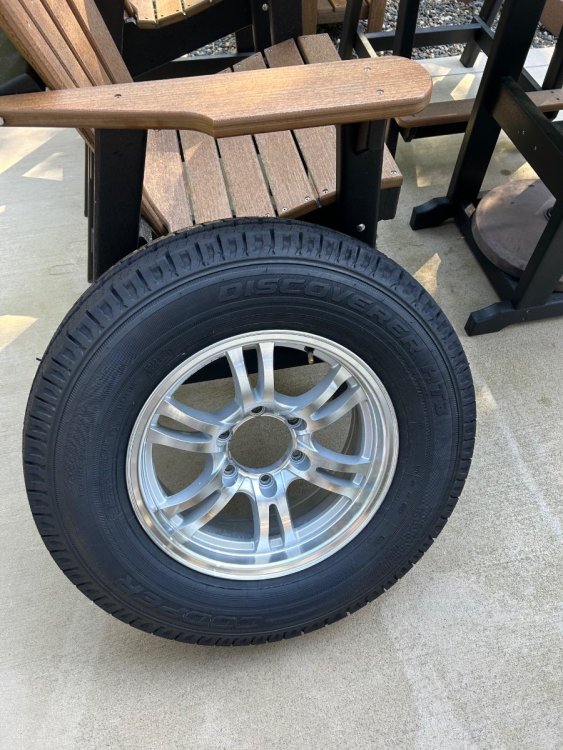
A short follow up: I dropped off my (spare) tire/wheel today just to be sure that my local DCT had the metal stem I needed in stock. I have an appt Wednesday morning to have all 4 tires rotated, balanced and the remaining 4 new metal stems installed. They just could not squeeze me in today. Not a big deal, and fair enough as they were pretty slammed. They were kind enough to at least get my spare swapped out. No charge of course. I returned home, remounted the spare on the back of XPLOR. This precludes me having to remove the bike rack etc at DCT this Wednesday when I get the rest of the wheels done. This metal stem seems to be a bit lower profile or shorter than the OEM rubber stems which suits me fine. I am thinking it will keep the TST TPMS cap TPMS transmitter a little closer to the inside of the wheel away from road rockets. I am really liking the Cooper tires and as they appear to be wearing really well. I will replace them with a new this set next year. Very happy to have 16” rims as well. Cheers! Roll On!!5 points
-
Issue resolved, after testing grounds, switches, etc. turn out that the issue was with the fuse… although it was burned the Led indicator beside the fuse was not lighted, the light indicator only turn on if when one of the reading lamp was turned on and the fuse removed. Furthermore there is still some power circulating in the system with the fuse removed. Pretty awkward, but with the fuse replaced all returned to normal and was able to install new lights to replace the original touch light. Thanks again for the guidance and assistance. Safe travel. Serge5 points
-
5 points
-
They will install them in Grand Junction. Shop rate = $125/hr. About two hours.5 points
-
Family should always come first! Hope everything turns out fine. Mossey5 points
-
We've had 5 travel trailers, the Ollie is the first with electric awning, I'm not sure what type manual awning the older Ollies have, but I definitely prefer a manual awning with support legs, more rigid in my opinion. But, don't tell my wife, she loves the lectric awning! And as @CRM mentioned, one less piece of electronics/motor to deal with that can go wrong.5 points
-
Ya might as well plan now for the day when you replace those lights with regular "switchable" ones. If you are coming to the Rally, be sure to look up Patriot. He can give you the details on the ...... switch. Bill5 points
-
There are times when the simplest solution is far better than the elegant solution, and I think this is one of them. Nothing wrong with being a retro grouch in the dark ages. My only frustration with the manual awnings is when I don’t pay attention to which way the support leg guide goes when stowing the leg back in the cover.5 points
-
If you add any additional awning supports be sure and turn off the automatic wind detection/retraction sensor on the awning. 😎5 points
-
@connor77 we recently replaced our leaf springs with ALCAN's 5 leaf pack and had a couple of the wet bolts that were spinning (operator error on my part) so we ordered a couple wet bolt kit from e trailer and replaced them all. The kit is made by MORryde instead of Dexter but was an exact fit. The kit contained the 6 smaller bolts for the hangers welded to the trailer frame (leaving you 2 spares) and 8 larger bolts that already pressed into the shackles for both sides that fit into the ez flex equalizer. Below is the website link for the part we ordered, listed in it is the bolt sizes you were looking for. Hope this helps. Make sure to confirm these bolt sizes with your mechanic before ordering. https://www.etrailer.com/Trailer-Leaf-Spring-Suspension/MORryde/MR46ZR.html Features: Leaf spring mounting hardware upgrades your leaf spring suspension system Thick shackle straps, wet bolts, and bronze bushings are long-lasting and minimize intensive trailer maintenance Heavy-duty shackle straps replace your factory shackle straps 1/2" Thick shackles are more durable and twice as thick as most stock shackles Wet bolts with built-in grease fittings are long-lasting and ease maintenance Bronze bushings are more durable and last longer than the plastic bushings found on most factory suspensions Work with wet bolts to ensure a well-lubricated setup Quick, simple installation Shackle straps replace your trailer's factory straps Included bolts, nuts, and bushings replace your existing suspension hardware Includes: 8 Shackle straps 8 Wet bolts (for attaching the springs to your equalizers) 6 Wet bolts (for suspending your equalizers and springs from the hangers) 14 Bronze bushings (for spring eyes and equalizer bolt holes) 14 Locknuts Made in the USA Specs: Application: tandem-axle trailers with double-eye leaf springs Shackle strap length (from center of hole to center of hole): 2-1/4" Bolt hole diameter: 9/16" Wet bolt dimensions: 9/16" Diameter x 3-3/8" usable length 9/16" Diameter x 2-7/8" usable length Bushing dimensions: Outer diameter: 11/16" Inner diameter: 9/16" Length: 1-3/4" 1-Year limited warranty5 points
-
Understood, everyone has their priorities and responsibilities; you definitely have a full plate! I know from reading your posts of the time and effort spent modifying your Oliver and upgrading your TV. I would think getting away with both while spending time with the family to be very therapeutic, as well.5 points
-
I think you mean amps, correct? In the past, some owners have solved some pump issues by closing the outside shower valves that were inadvertently left open. Mossey5 points
-
Do this from the inside. Remove shades. Slide screen to middle of window frame. Grasp lower left and lower right corners of screen frame. Lift the lower corners at the same time so that the bottom of the screen frame clears the track. Pivot the lower edge of the screen frame towards you and drop the top edge of the screen frame out of the top track. The rear screen is different. It has 2 clips on the bottom and 2 clips on the top. If trailer is not on fire, gently pull on the bottom frame until clips release then the top of the frame will fall free. The rear screen does not fit in a track so note the positions of the clips before removing the screen. If trailer is on fire, grab the red trapezoidal shaped tab, yank the screen out, fling it to the side, then dive head first out the window.5 points
-
Thanks for the reminders! Like you, I have a box on the back that needs to slide out to access the spare, and my Michelins are now 6 years old. It’s time for new shoes.4 points
-
I'd unhook from the water there until the plumber is long gone. You don't want contaminated water from where they worked on the lines to get into your system. Another reason to use from your own water tank when the other choices are questionable.4 points
-
Correct, IMO. But in the original scenario with the 3.5k# Dexters and "under-rated" 4-pack springs from China -- those springs will always be the weakest link in the running gear. Poor design - specifically regarding the short "2nd" leaf spring and questionable quality (at best) of steel will be a critical path to failure and breaking of the 1st leaf near the eyelet. Jim Oliver, lead OTT designer, had it right. He likely knew of this shortcoming since he insisted on configuring his personal rigs with the 5.2k# axles and higher rated (2,750#) spring packs. AND, the "Jim Oliver" configuration has yet to report broken spring packs. Owners having chosen to upgrade their rigs with Alcans or similar designed/rated spring packs are clearly on the right path and making an informed decision leading to significantly lowering the probability of spring failure, IMO. Do not second-guess your decision to toss the Chinese packs and upgrade your running gear to a more robust/safer configuration. For us, the 5.2k# Nev-R-Lube Dexter's with our new Alcans are close-in on our radar screen.4 points
-
Use a wood toothpick and a bit of Tightbond glue in the hole. Don't over tighten it. Replace the other screw and they will match.4 points
-
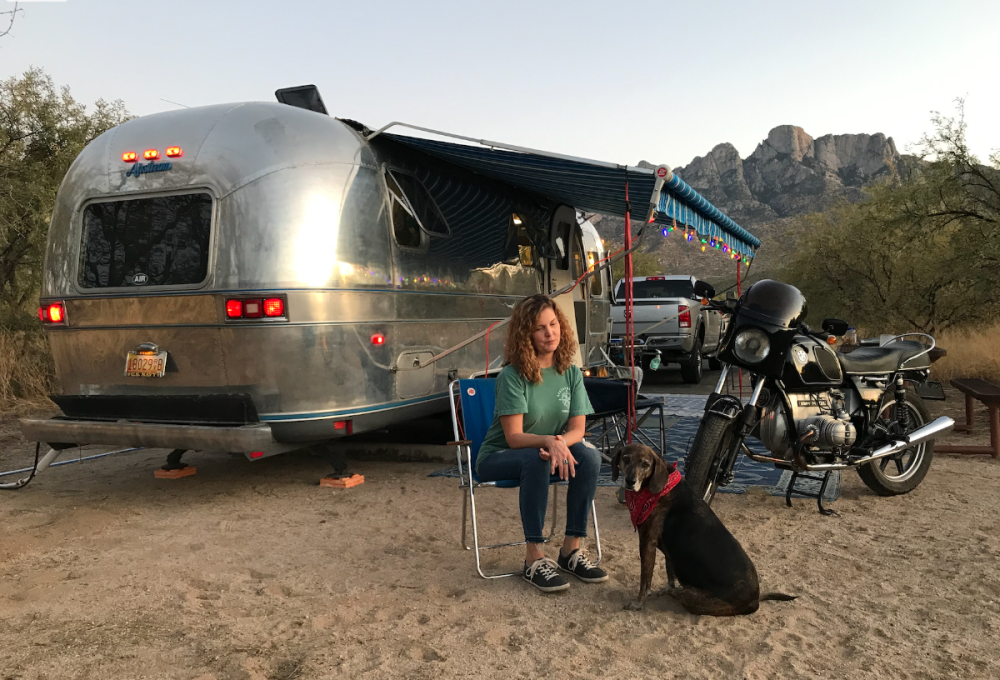
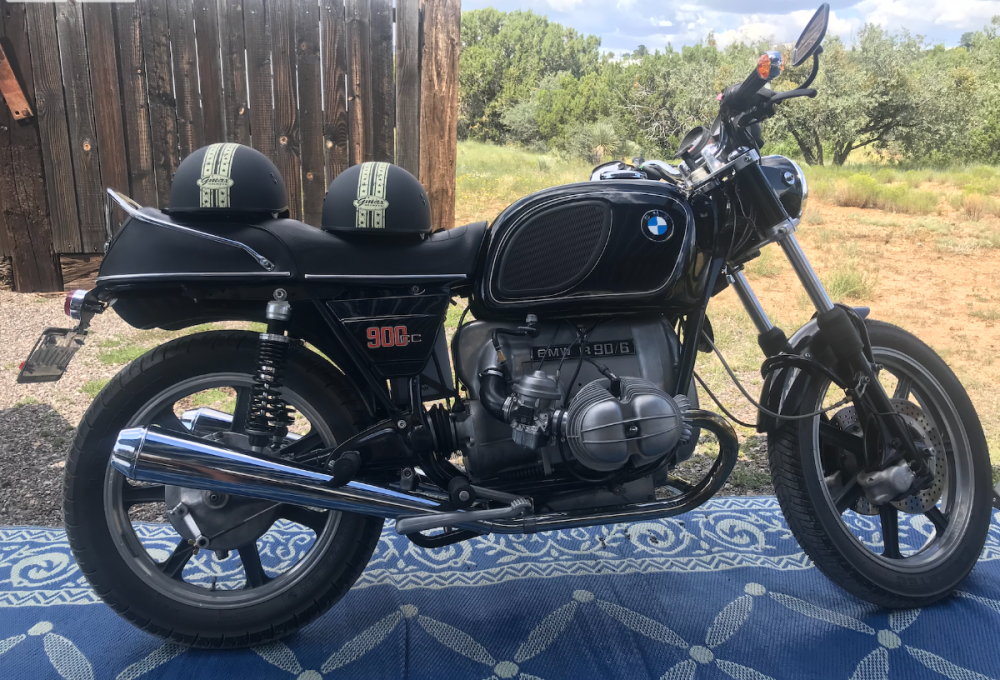
So, we built a ramp for the R90 to get it into the bed of the "War Wagon" and would routinely take it on camping trips to have a fun mode of transport whilst boon docking with the "'Ol Rivet Smasher"! Sadly, we can't manage that option anymore with the TUNDRA, but we still have the ramp. This pic was taken pre-Magnus at Catalina SP near Tucson - D with our sweet "Willa"... Kinda miss those days, but Magnus and Oscar are making up for it! HA! Ya'll keep the shiny side up!4 points
-
My ALCAN springs arrive tomorrow. Oliver service will install them when I have them do the shocks, bearings and brakes in two weeks. New information is always good.4 points
-
I don’t think @Geronimo John is factoring in the intermittent beer drinking!4 points
-
This is what I like about forums, inspected our chock leveling system and the components are showing a lot of wear. Decided to replace them with Rophor leveling system, like the looks of this system! Just ordered a set today. Our chocks have use expiration dates, too, already replaced them once, going to replace them next with the HF chocks from the local store later this week! Appreciate the information!4 points
-
@John Dorrer posted this on FB this past Friday and I responded to it soon afterward. My advice to everyone...buy yourself four real chocks. After parking, put one behind each rear tire and one in front of each front tire OR on both sides of the single axle tires. Kick them hard into place, up snugly against the tires. DO NOT ever place them only on one side. Raise the hitch off the ball BEFORE unhooking the safety chains. Unless you've accidentally parked on a sixty degree slope, the trailer should not move at all. Finish unhooking trailer and move the tow vehicle. Level front to rear with the 3000 pound capacity front jack. After placing at least six inches of blocking under each, level side to side with either of the 3000 pound capacity rear jacks. Your trailer will not move with these chocks. Yeah, I know they're from HF and they spell like a tire factory, but they're inexpensive, they work and I challenge you to be able to make that trailer move with these chocks properly set. Don't believe me? Try driving off after forgetting to remove them. I do not care for the Andersen Levelers. They're too expensive for what they do, they're useless (and never intended to be used) as chocks and they will skid around on concrete.4 points
-
Just to be fair: I too have metal stems and have never had a problem. However, I never had a problem with rubber stems either. I think that metal stems usually make sense for those of us that have stem mounted TPMS primarily due to the reason John mentions above. But, if you tend to take your Ollie into really "wild" places where the stems are likely to be hit with rocks, deep ruts, brush, etc. then the rubber stems can be a bit more "forgiving" than the metal stems. Bill4 points
-
Chances are pretty good that you have a loose ground wire somewhere in your system. I'd start at one end and tighten every ground wire I could find. If that doesn't do it then I'd recheck all connections - also paying particular attention to the negative/ground side of things but, since you are there, you might as well check the positive side at the same time. Good luck! Bill4 points
-
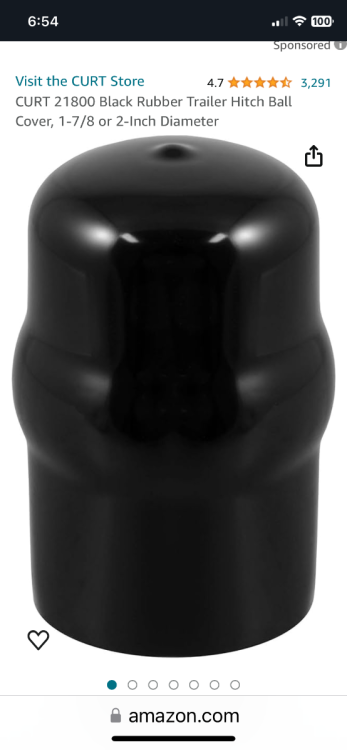
I found this product a few year ago and really like it, been using their dielectric grease for 7 or 8 years, as well. It took a couple trips to work all of the old grease off of the Bulldog after initially wiping clean with paper towels, perhaps a thorough cleaning with a solvent would have been a better approach. Most of all, since it is clear/opaque there is no soiling of self or clothes. I also use a hitch ball cover when unhooked to help keep the ball free of dust and debris, as well as a clean hand when handling the hitch.4 points
-
One last tip that I could add is that I always leave my safety chains (or cables if you have those) attached until the very end of setting up. After a long drive, potential bad weather, and road weariness has set in, things can go sideways in a hurry! Lots of great tips above. Never put my van in neutral before but will start doing that. And always chock both sides of your wheels.👍 Dave4 points
-
Really like using the orbital buffer on Ollie and our other vehicles. Never had time to do a good detailing job on our vehicles, until buying the buffer. Just finished waxing Ollie’s tow vehicle yesterday. I’m still in the weekend warrior category, but slowly learning about detailing. 🙂4 points
-
Same here - but D calls it a "sickness"....4 points
-
Recent Achievements






.thumb.jpg.e34bf01ef7f7d5e99ad31856d45afbeb.jpg)


