Leaderboard


Popular Content
Showing content with the highest reputation on 09/05/2021 in all areas
-
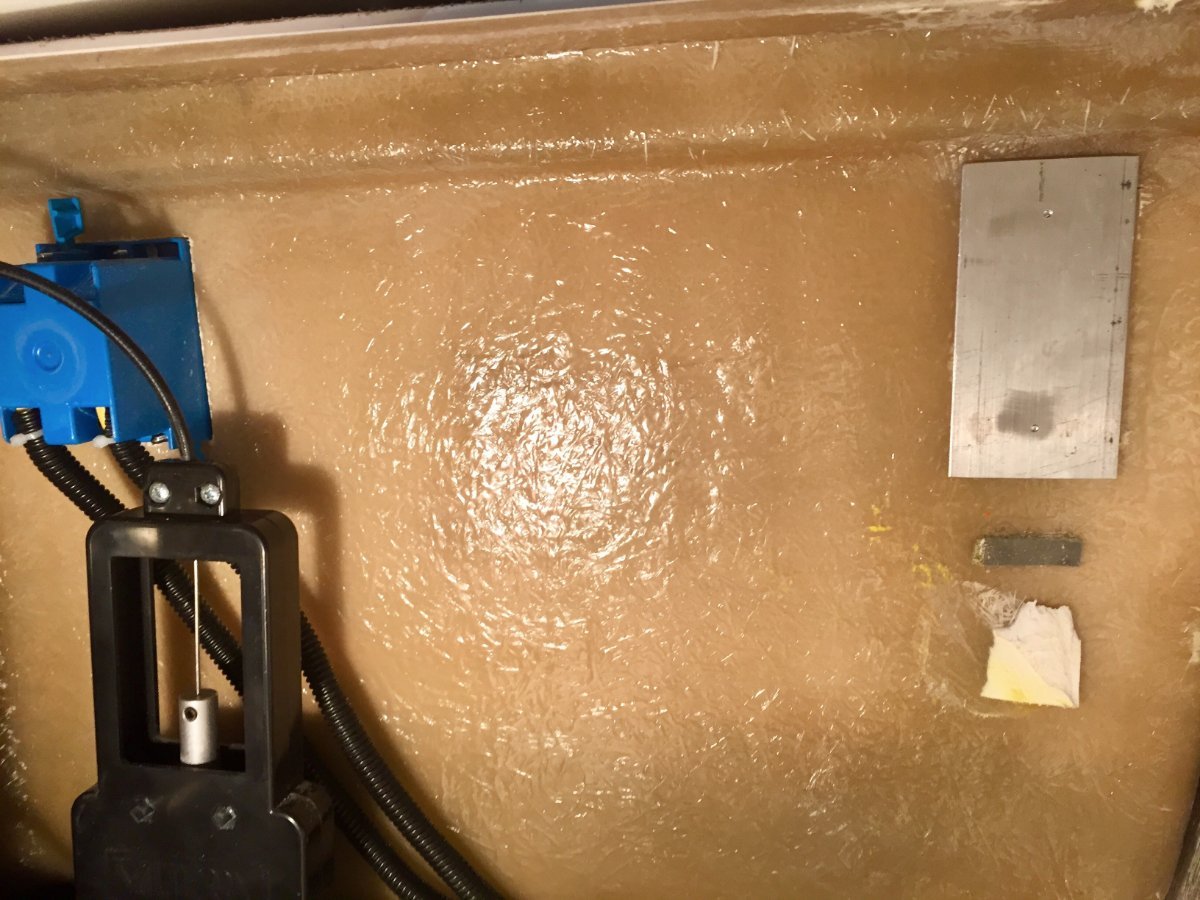
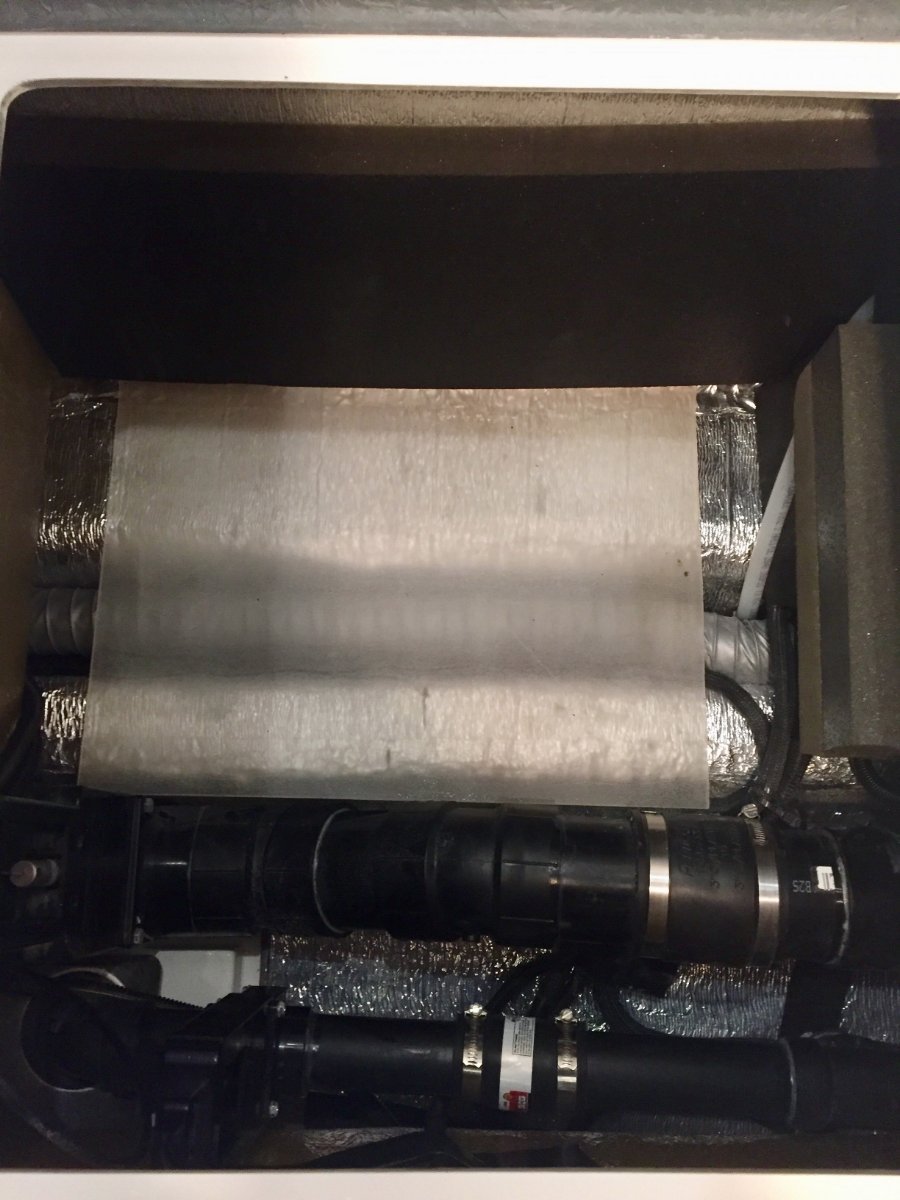
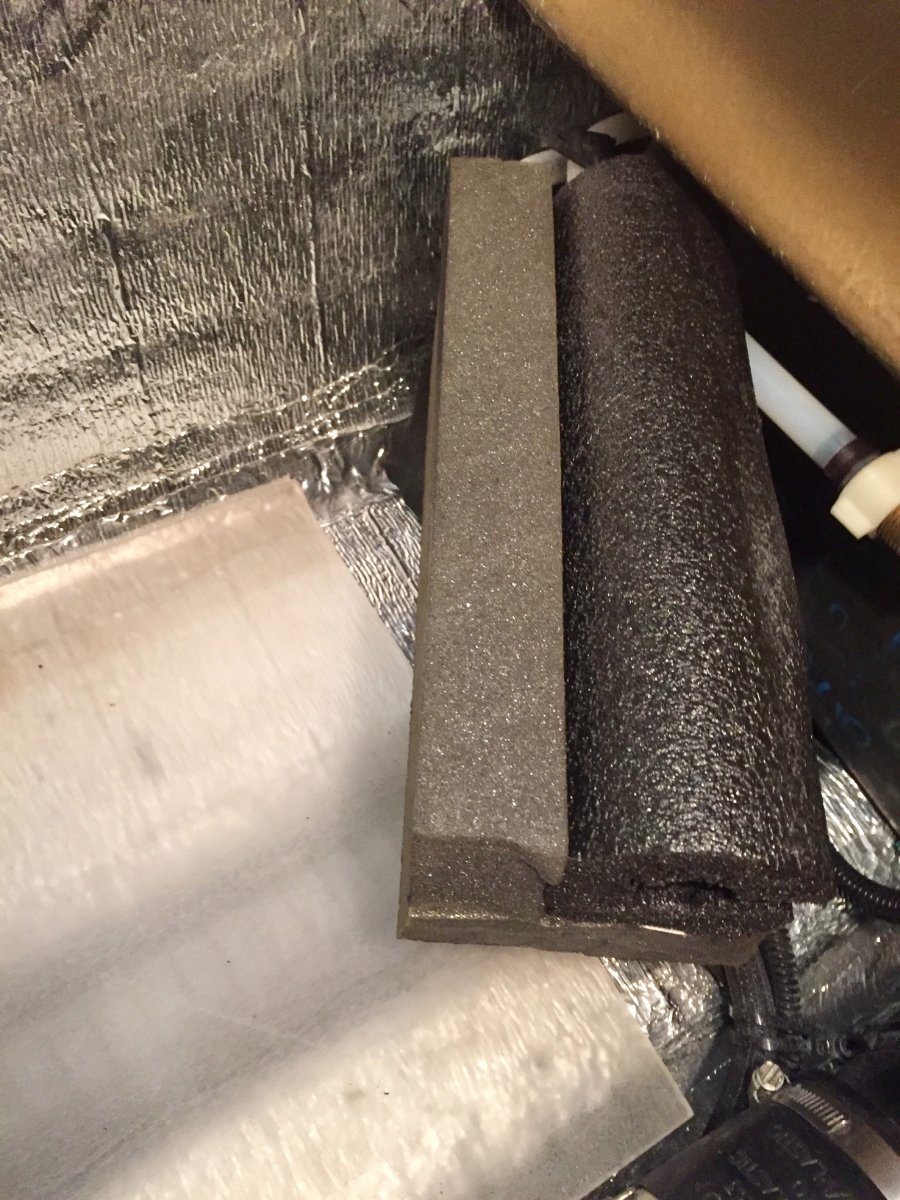
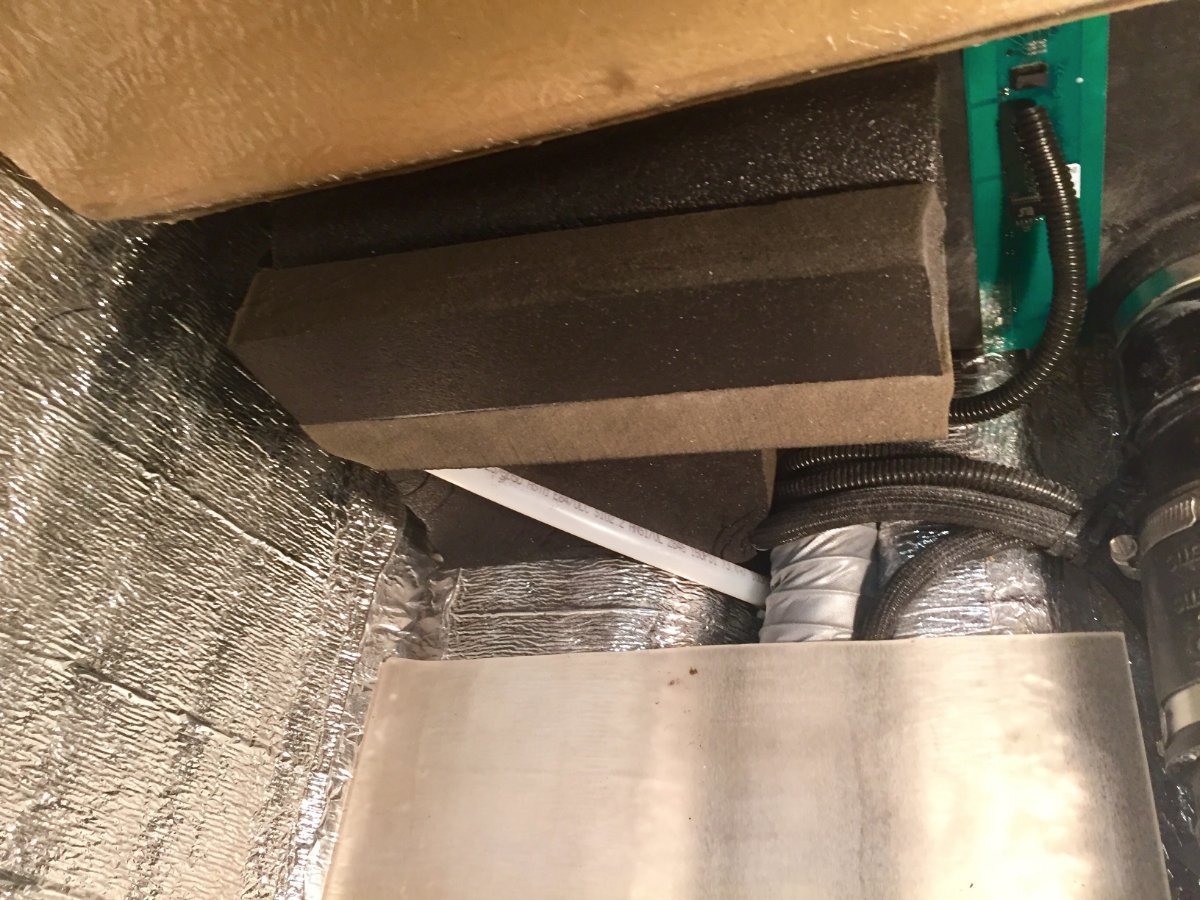
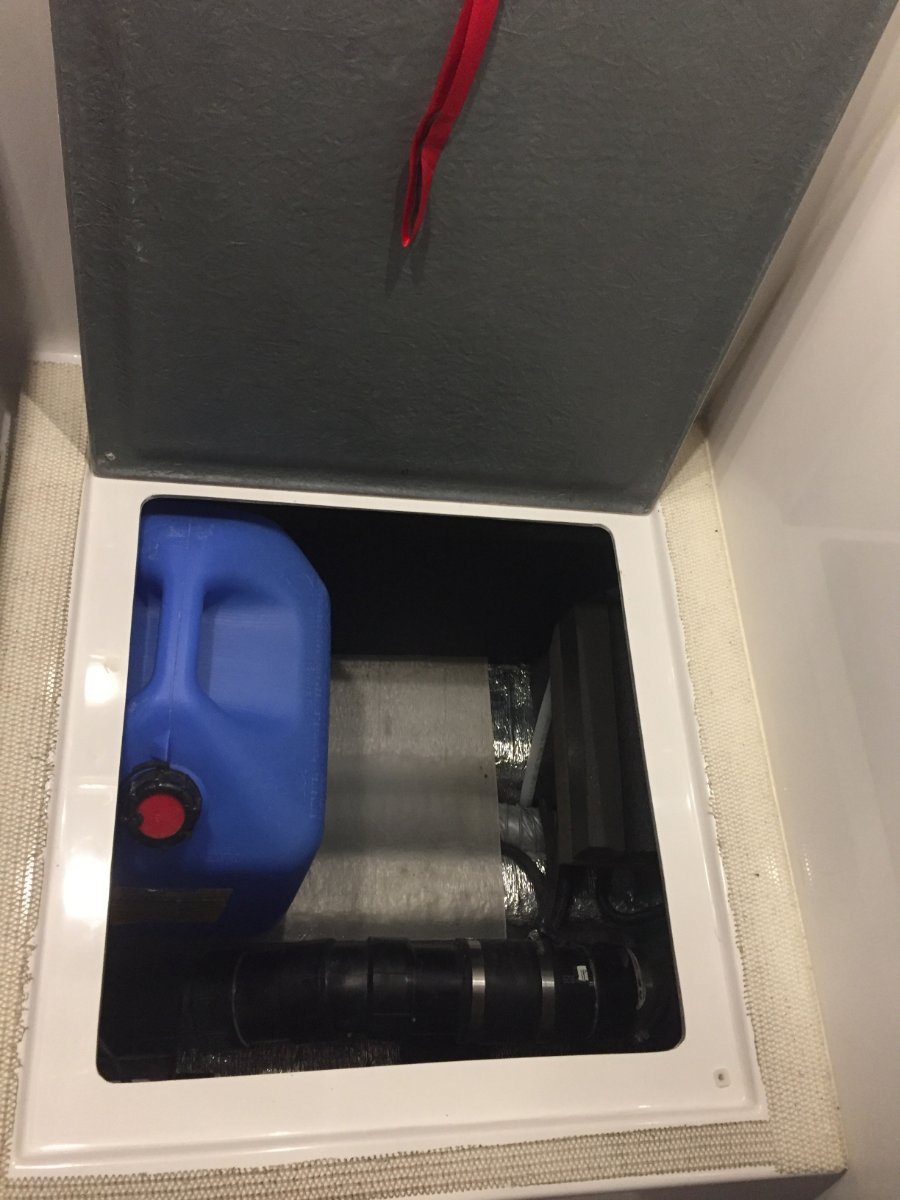
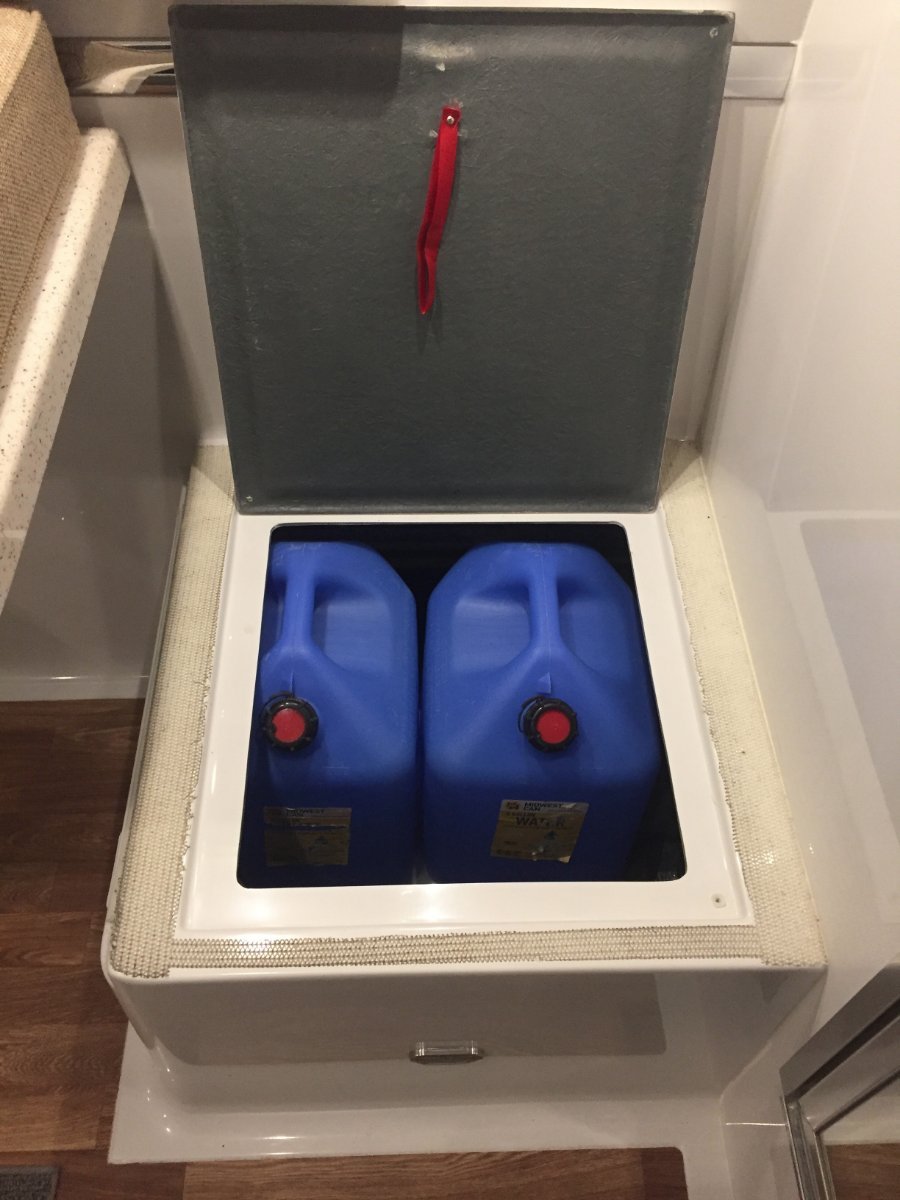
We prefer to bring our water from home which is filtered through ceramic filter. We use 6 gallon jugs to bring a supply of water with and then have smaller glass containers for our daily use, one is kept in the refrigerator for drinking water the other on the table for coffee or cooking. So to free up some space in the closet I decided to utilize the space under the dinette seating. To be able to accommodate two jugs I would drop the first one in the opening and slide it towards the foot well and then have the room in the opening to drop in the second one in. To accomplish this I had to remove the obstacle which was a receptacle box for the ground fault outlet. I relocated it to the opposite side on the same wall. By the way this was the first time that I cut any fiberglass on my trailer. It wasn't as bad as I thought it would be. I then made a aluminum backer plate so I could use a blank cover on the front to fill the hole that was left. My next concern was to protect the insulation on the floor of the compartment, so I decided to fit a piece of quarter inch plexiglass that I had on hand The last step of the project was to make a bookend to stop the water jugs from sliding forward. Here I used a short piece of 3/4" foam water pipe insulation and added some pieces of adhesive backed one inch foam to form the back stop, this is slipped over the black tank back flush pipe and butts up against the black water tank. There was one other obstacle, there were a series of wiring harnesses that came up out of the trough and were tethered with tie straps and screwed to the floor and then went off to various locations I had to undo the tie straps and gather enough slack to move the harnesses back far enough to clear the area where the plexiglass was laid. What am I going to do with all the extra space in the closet? Paul
 4 points
 -
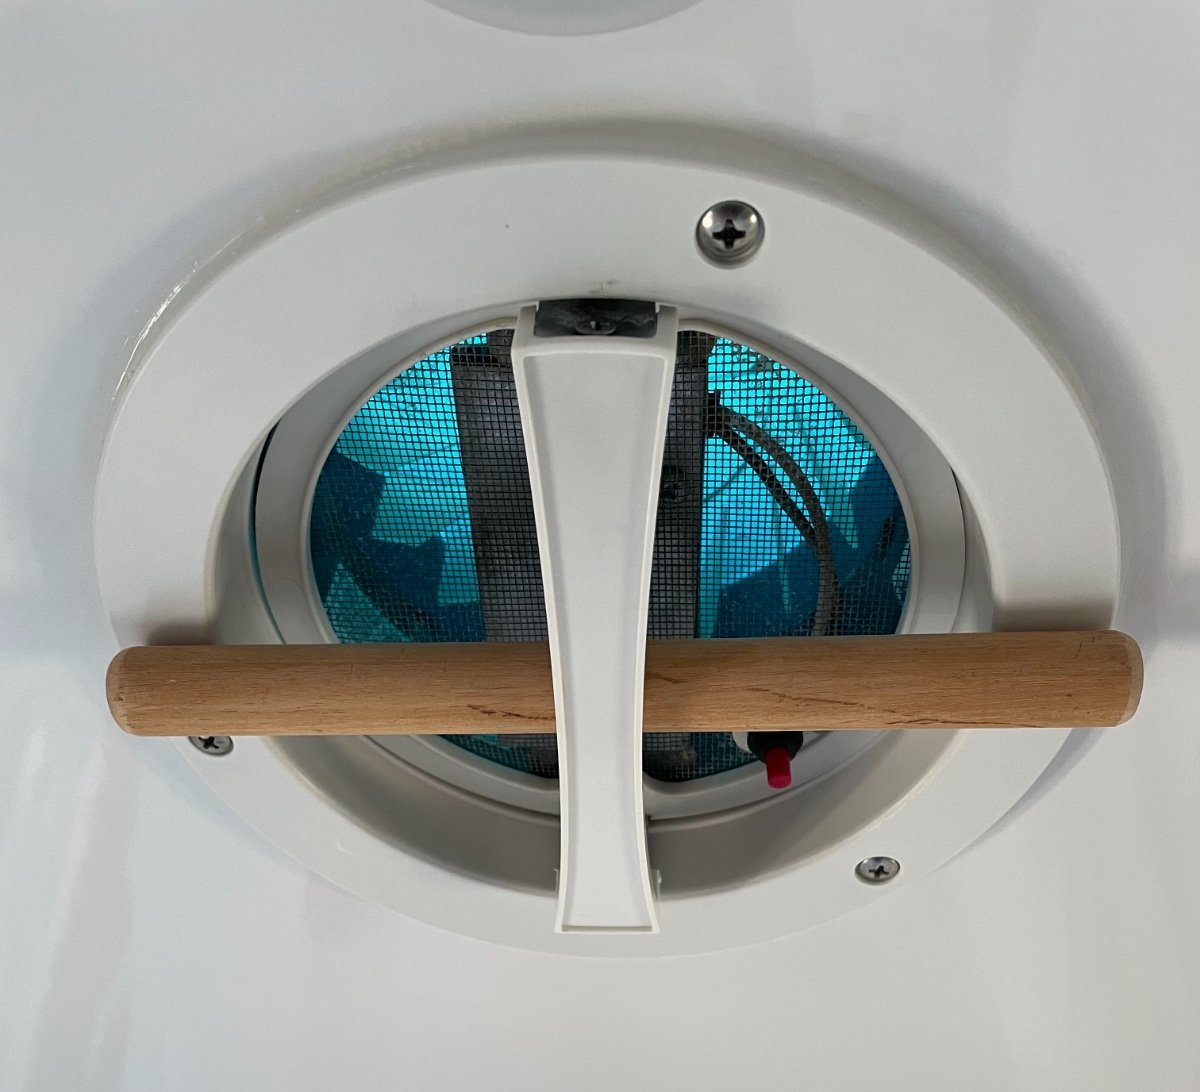
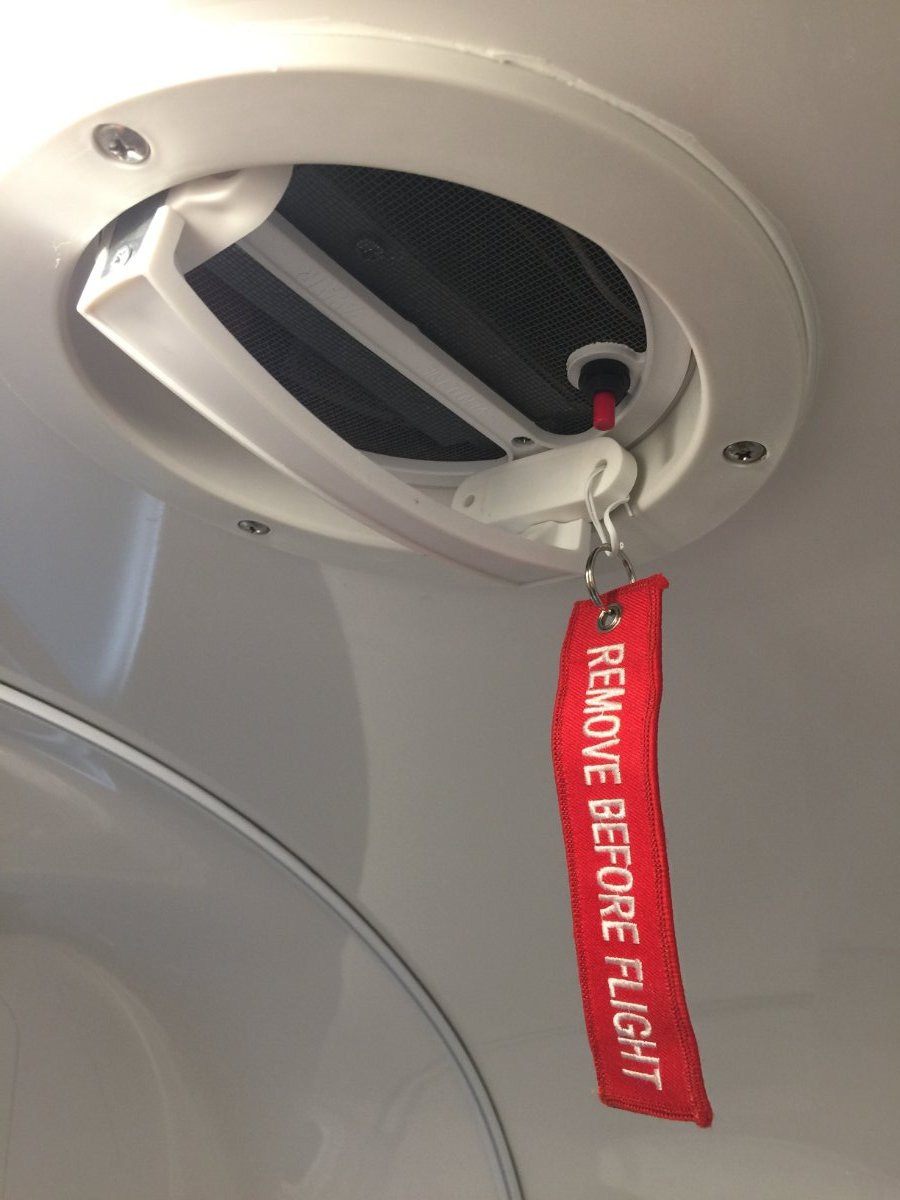
I noticed this happening on our last trip. My temporary fix was obviously to stuff a sock in it. When we were back home I found that the plastic hood was deformed around the screw that mounted it to the inside handle. So this caused a small air gap around the plastic hood where it made contact to the frame. This resulted in wind getting underneath and lifting it open. The remedy was to use a heat gun and warm the plastic around the screw hole and then form it flat again. Once the plastic cooled off it stayed flat. I then added a flat piece of stainless steel as a back up plate. I did use some silicone sealant between the hood and the plate. So far it has cured the problem.
3 points
-
Two weeks ago, we had 12 inches of rain in 28 hours. No issues with the weepholes, perhaps because a few weeks before we a had had a brief rainstorm, a clogged weep wept a little into the side wall, and I cleaned them all. For the second time this season. Imo, This isn't really an Oliver issue. It's an rv window manufacturer issue, and not a huge one, just a pesky maintenance issue. I wouldn't enlarge the weepholes. I'd definitely add the vinyl gutter over the windows, as many of us have done.3 points
-
Indeed, if you are talking about the window weep holes - simply keep those window tracks clean (easy to do but also easy to forget about) and try to keep your Ollie as level as possible. We get in excess of 70 inches of rain per year and I've never had a problem. The other "weep holes" on an Oliver are the "scupper holes" on the bottom of the trailer which allow moisture to escape from between the two shells. I do not recall of ever hearing of an issue with these. Bill3 points
-
We have a microfiber towel hanging in the bath that we use to wipe down after showering. When we travel, we roll it and put it in the handle to keep it closed when driving. It works well. Mike3 points
-
Oli - The only additional thing I would have done (and maybe you did it but it is hidden under the SS plate) would be to apply a bit of sealant around that screw just to make sure that it would not leak. Great solution and nice work! Bill p.s. I also liked the sock and stick as temporary fixes.3 points
-
Taylor.coyote, That was us! We are on a two week trip in the Redwoods. - San Luis Rey SP, Henry Woods SP, Grizzly Redwoods SP, Humboldt Redwoods SP, Del Norte Redwoods SP and Sonoma Coast SP! Having a great time. It is always great to see an Oliver in the West. There aren’t that many of us. Safe travels! Andrew, Carianne and Buffy2 points
-
Yes, I installed a complete Victron system at delivery - in my case using the color control GX but that was before the Cerbo GX/touch display were out. I’d certainly go that route if I were doing it today. I believe there is one, maybe two other full Victron Ollies out there now, and quite a few more with bits and pieces. Individual Victron components are nice on their own, but the kit really shines if you have the Multi/GX at the core. It’s the best system by a long shot, IMO. There are rumors that Oliver might offer it, but I wouldn’t hold your breath just yet on that one. It would be nice though, and I think they should. The biggest issue with the Multi is just running wires there and back. You’ve got two options that I know of for placement - Multi in the front dinette seat and batteries in the battery box, or vice versa. Either way, I’d opt for the compost toilet so that you can remove the drain to give you room for cabling. You can make it work with the pipe in place (I did originally) but it will be heaps easier for you without it. You can see photos of my install here - https://olivertraveltrailers.com/forums/topic/2571-snowball-pt-ii/?do=findComment&comment=34346&_rid=6342 points
-
I have always used a cover. The early Ollies had a white jack but that nice white turned to a poor yellow due to the sun exposure. The black takes longer to show signs of sun damage but virtually any plastic will "age" faster with sun exposure (kind of like us). Like Mike I too got mine from Amazon. Of the two that I've used I like the one that does not have stitching at the top center. This design seems to shed water better and the thread holding it together doesn't dry rot as fast. As Mike pointed out - get one that has some kind of fastener at the bottom so it doesn't blow off going down the road. I never take mine off and have never had a problem remembering exactly where the up/down switch is located. My jack now looks exactly like it did the day I took delivery. Bill2 points
-
Usually in the truck I'm towing the Ollie. However, certainly there are those that claim I tend to look a bit deranged even walking down the street.2 points
-
I’m assuming you’re talking about the window weep holes. Ours drain fine. We just spent the last couple of months in the north east and had plenty of rain, no issues. It’s important to keep them clean, something I do after every trip. Some put pipe cleaners in theirs with part of the cleaner hanging out to provide a wicking effect. I haven’t had the need to try that. I wouldn’t consider it a big issue. Mike2 points
-
I was told during delivery that best practice to use anything that works on propane in the trailer is to turn the tank on and then enter the trailer and purge the air in the lines by lighting to stove first. Sometimes there is a fair amount of air. I run the lit burners a few minutes then shut the stove off. After that the water heater, furnace and fridge generally light on their first try.2 points
-
Hi John, we also looked at the R-Pod and the Minnie Winnie but then my boyfriend decided he wanted to take the trip to the Oliver factory. Luckily it's just a state away from us so it was easy even during these times. The tour was fabulous and seeing their manufacturing process sold us on how well built this travel trailer is. We toured the E I and E II in the showroom, where I told him I was concerned about the small galley area. Well as we sat down to get a price quote I made a run to the bathroom and came back to witness him signing the paperwork and making the down payment. Although I was thrilled to know that we were finally making a move toward our retirement dreams I was wondering how was I ever going to cook in that kitchen. Our pick up date is June of 2022 which has given me lots of time to practice in my kitchen at home. That's exactly what I'm doing now. At first I set up a small area to prep that represented the dimensions of the counter space in the Ollie, including the dinette table. It really is doable. I've since bought a pot and pan that are much smaller than what I use at home, which will fit perfectly on the stove top in the Ollie and I've been cooking with them. I'm also playing with our at home convection oven which I had never used before. I think if you look at the dimensions of the counter space you'll find in the owner's section, let your wife set up a little prep area and cook area up, she'll find it's more than doable, it can even be fun. Being that she likes to cook, she'll be great a pre-prepping at home which will save her on a lot of the prep space needed while traveling. Well that's my 2 cents worth and so far practicing is helpful for me. Good luck.2 points
-
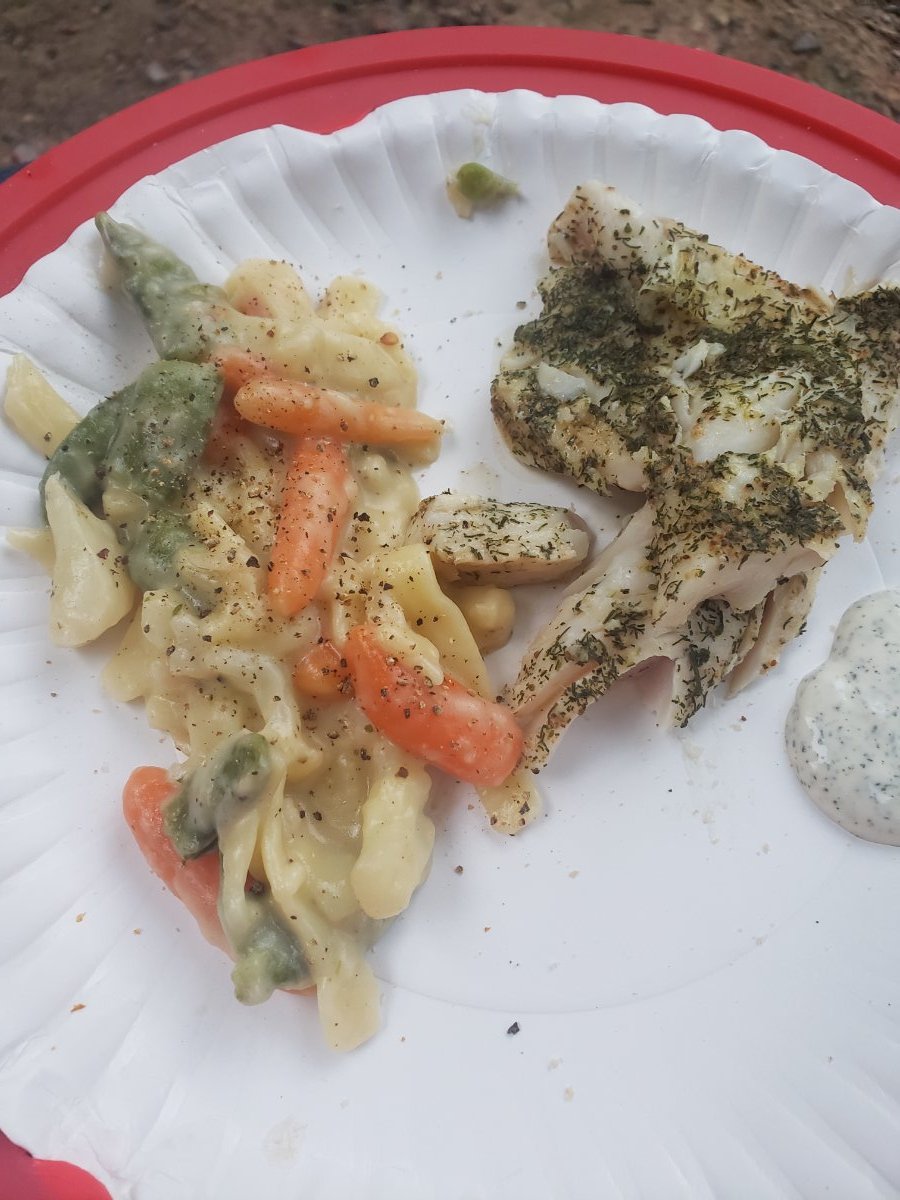
Again, this year. Becoming a traditional Labor Day thing, for us. Smith's dogs for lunch, walleye dinner. Life doesn't get a lot better. Shore dinner, in the mountains.
2 points
-
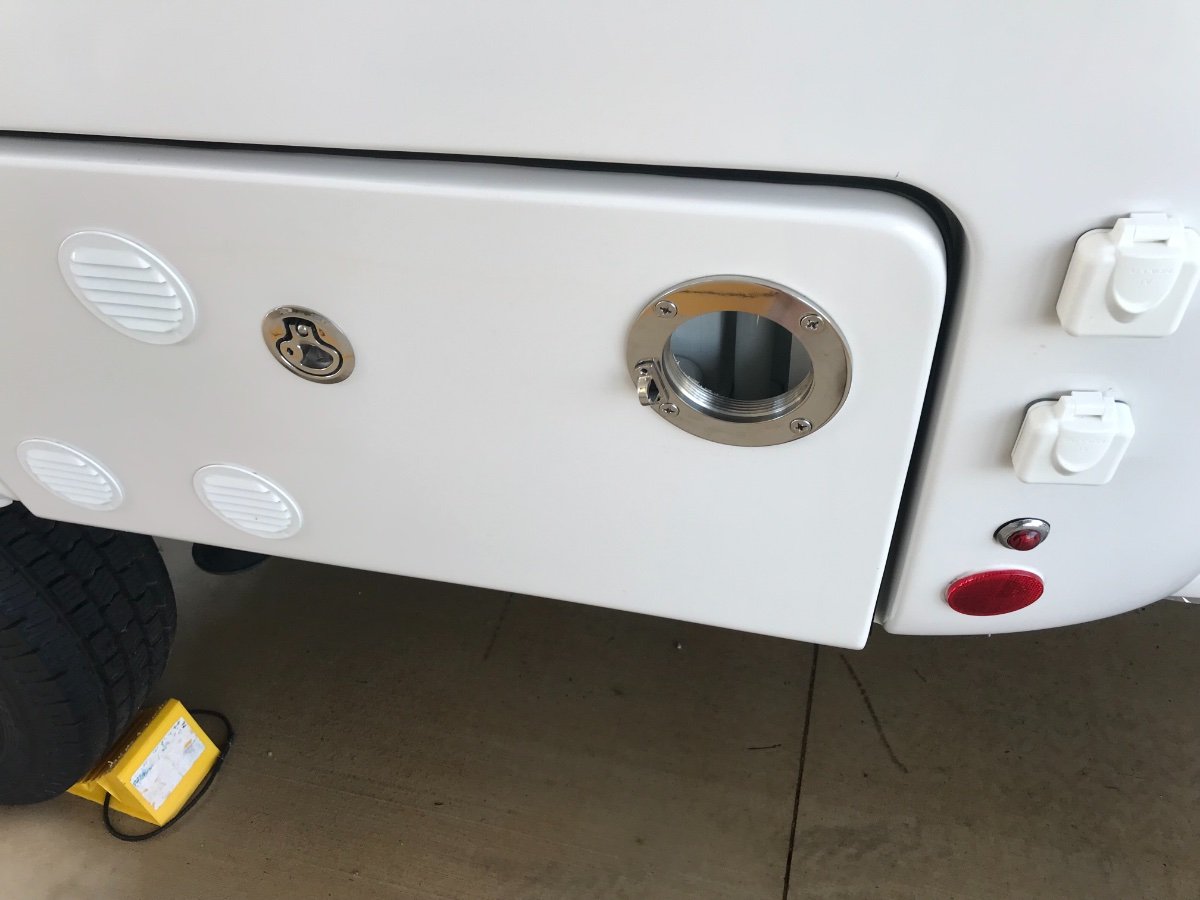
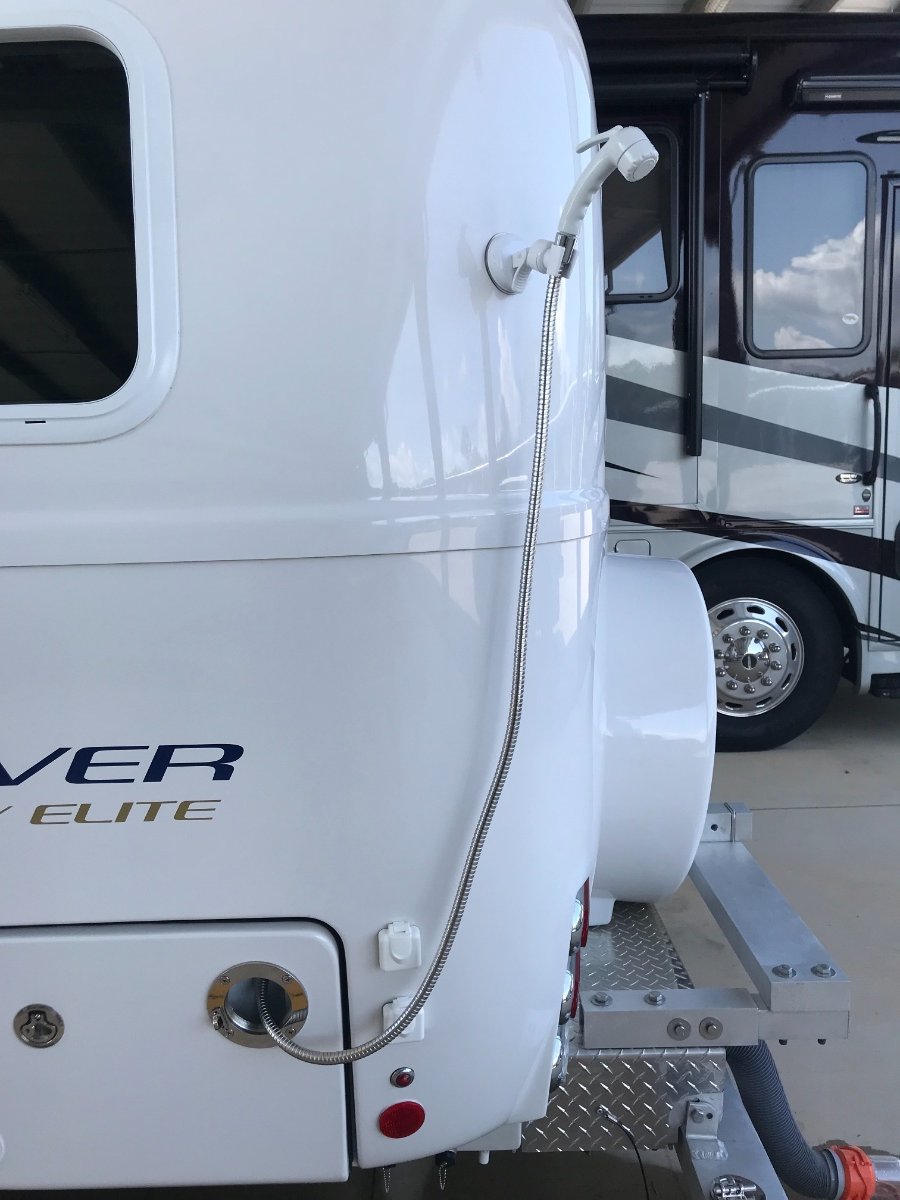
Thought I’d share a recent mod I completed on the outside battery/shower compartment door. We use the outside shower quite a bit and do not like the fact that the battery compartment door has to remain open in order to utilize the outside shower. So I installed a small marine grade access hatch through which I can feed the shower head through and close the door. Works beautifully!
2 points
-
2 points
-
I find the cook stove the hardest to light after the gas has been turned off, just like the gas water heater it may try to start 3-4 times before the gas can get to it, or air has cleared the lines. I've had several RV's and all pretty much work the same, it's just the nature of the beast. I have found just because one gas appliance works and has gas doesn't mean all will work, especially on first light up after being shut off. Air in line is probably 99% of your problem. I'd say pretty common problem till all appliances have been used and gas is in the line to that appliance. trainman2 points
-
We store spare toilet paper and paper towels there….boring. I bet a compact wine rack might be better. Lift the seat, get a drink! Mike1 point
-
I second the vote for vinyl gutters. They do help. Mike1 point
-
I'd admit that light rain may be a bigger issue with surface tension. That's where the inobtrusive gutters keep you very dry. Or, pipe cleaners...1 point
-
Sounds like more space for wine, to me.1 point
-
Your tongue weight just dropped.😃 you'll find something to store there. We always do. Looks very nice.1 point
-
Very helpful, thanks! If I do decide to order a new trailer I might go basic with the thought of adding victron equipment later on. What I don’t want is holes in the fiberglass left from controllers I no longer need. I wonder if the factory/service department would mount the solar brackets and pull the wires for me…1 point
-
Thanks for the update, Ray and Susan. We elected to go with AGMs and the 2k inverter. OTT had one trailer setup in their showroom as well as one with the big lithiums and the 3k inverter. Every time I visited the showroom, 4 times now, I couldn't get comfortable with the fan noise coming from the 3k. The AGM setup with the 2k inverter was quiet so we elected to go with AGM. To be fair the lithiums were in bulk mode and the 2k was in float so the 2k may very well make as much noise in bulk mode. I'm hoping for quiet as the 2k charges with less amps, 100 vs 150 I believe. We finalize the order next week and pick up in January so I'll post back with my experiences. John1 point
-
We didn’t use one for the first couple of years. We’ve had a couple over the last few years. I left one laying on the tongue and drove off, I’m sure someone found it somewhere. Over time I think the sun will fade the plastic parts of the jack. I also like to keep it dry. Ours is one we found on Amazon, it’s fairly thick and has an elastic draw string and a Velcro strap to make sure it stays on. I also have a 7 pin cord holder zip tied on the jack and the cover goes over it as well keeping it dry when we’re camping. Haven‘ had any issues with moisture forming under the cover. Mike1 point
-
I do as Naegele suggests, especially if the trailer has been sitting a while. Sometimes it takes 3 or 4 tries. I am no expert but have also learned that turning on the propane valve slowly helps. Not sure why. I definitely get the stove running before turning on the furnace. I am not saying you can't turn the furnace on first. This is just my routine. Sorry you're having issues, it can be frustrating. Good luck.1 point
-
You wouldn’t look as deranged flashing the lights in your truck? 🤣1 point
-
I would look at a half ton pickup (1500, F150 etc.) Personally, I prefer the crew cabs but there are other options. Make sure it has the best tow package the manufacturer offers. Towing capacities of any of the Big 3 will be more than adequate for an Elite. Payload capacity is always a concern, but you now know how to determine that. Most all late model trucks will have a factory installed brake controller. You have made a wise decision and I promise you that you will not regret it. Others will chime in with their ideas. Consider them all and ask about anything you’re not comfortable or unsure with.1 point
-
Thanks Teri. That's quite innovative to practice like that. Your boyfriend is much more decisive than my wife. I am more like him. She mulls things over much more than me. I was hoping to order it very soon as there's about a ten to eleven month wait after placing an order as you probably know. Thanks for writing with your two cents worth which was more like at least two dollars worth if good advice. Congratulations on your purchase.1 point
-
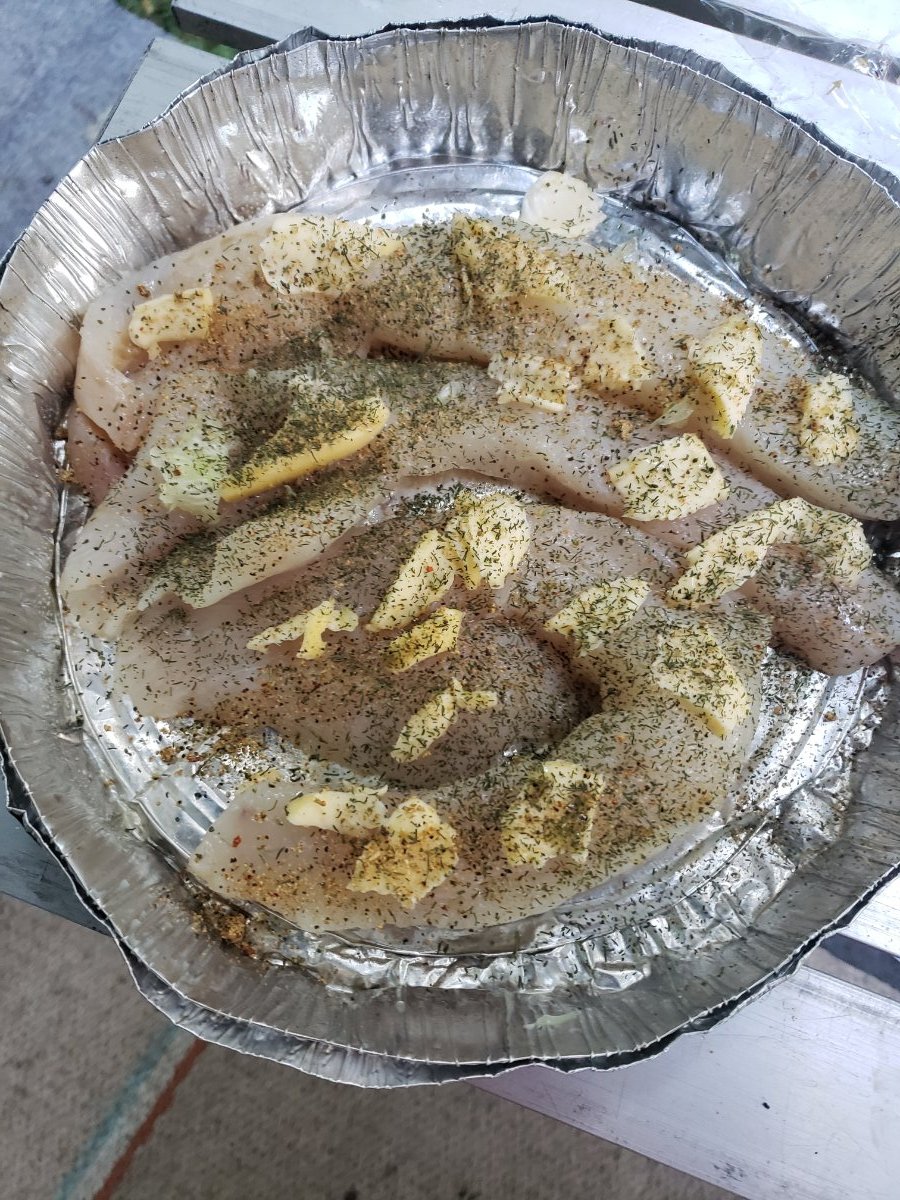
We're in North Carolina, but our friend brought Lake Erie Walleye down from PA. Omg. Best dinner in a really long time. Walleye is truly the king of white flakey fish. Cooked it in a foil packet, like shore lunch.
1 point
-
Thanks to everyone’s kind words. The two stacked covers are the satellite and cable tv coax connections. Below are the links to the hatch and suction cup shower head holder. I also added a stainless sliding latch to cover to prevent it from unscrewing while in transit. Probably overkill, but gives me peace of mind. http://keehui Marine 316 Stainless Steel http://OUO Suction Cup Shower Head... https://www.amazon.com/dp/B07Y1WB59Q?ref=ppx_pop_mob_ap_share1 point
-
I still think this is caused by air pressure from the forward facing drain hole. My interim solution is a pair of the ever popular RV magnetic catches. Fit perfectly.
1 point
-
I'd love to hang out with you, and cook together. I'm not much of a baker, and I'm sure I could learn a lot from you.1 point
-
I was incorrect, sorry to lead with bad information about turning the remote off. We will test out different ways to keep the Xantrex fan off during our next couple trips when we have shore power and a load. Pam1 point
-
Yeah our van has a 2000W Xantrex inverter (2004 era) and a separate charging unit. That charger can get a little annoying when plugged in and it's doing bulk charging but this one in our Oliver is very much "next level." I'm not wildly concerned about it overheating! 😉1 point
-
One other note here is I usually start off with my hot water on gas just to make sure it working and then switch to electric somewhere down the line. If you start off on electric and want to switch to gas the gas will not fire up until the water temputures are down enough to let the gas kick on. This may result in you not being there to check it to see it the system is working correctly and remember if there is air in the lime it may take several tries to light. trainman1 point
-
Both switches on one panel would be nice, I think the $500,000 diesel pusher they work that way. My only problem is that sometimes I leave the campsite and forget to turn off the electric switch and when I get home I plug the trailer into shore power and forget to turnoff the electric water heater switch off, yes I have found I have hot water and week or so later.1 point
-
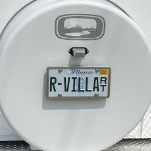
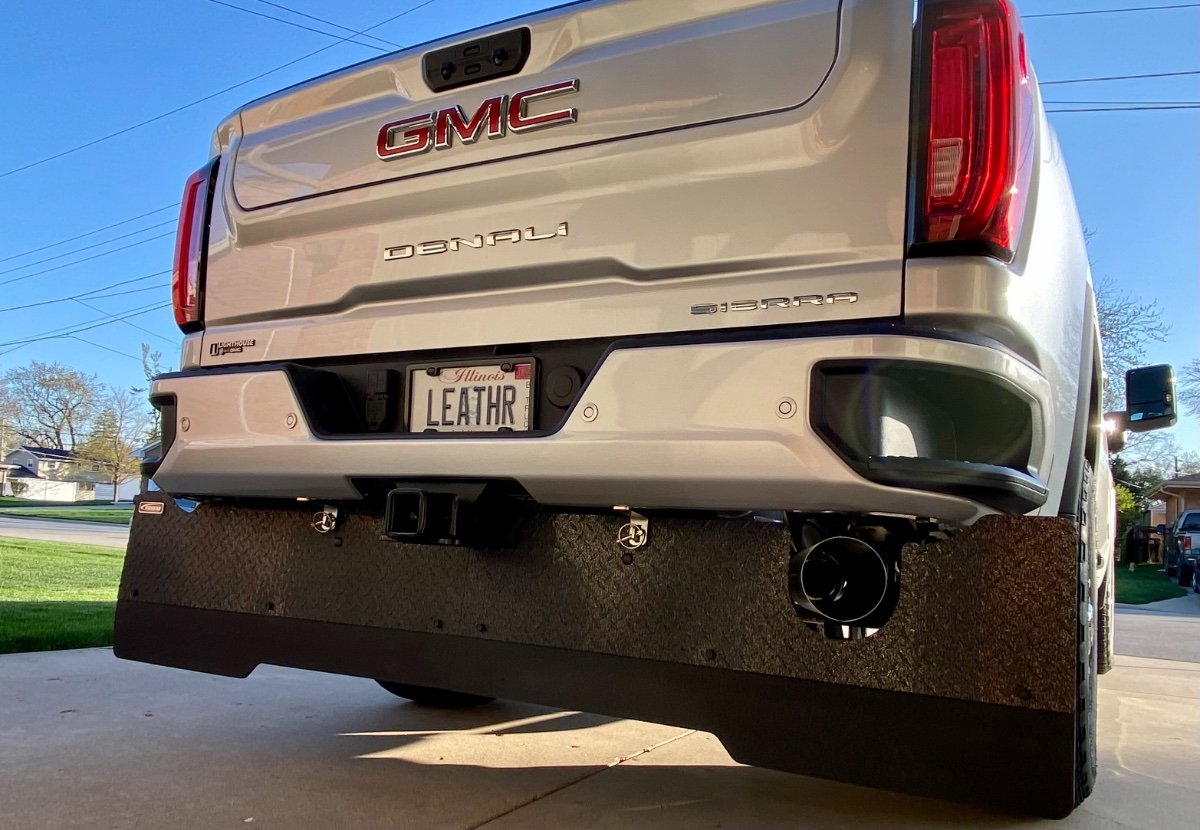
Nice flaps, Patriot! It is always good to see what accessories others are using. This was a major concern for us, too, before we took delivery of our Oliver. After we placed our order it took some time to find what was right for us to protect our investment. We ordered and installed this "Rockstar Full Width Tow Flap" prior to delivery of R-Villa on May 17 this year. Now, after towing with it for 4,500 miles, we are thoroughly satisfied and would purchase this flap again. The fact that it affords protection across the full width of the truck is a big plus for us. The ease with which it can be mounted and dismounted cannot be overstated. The most difficult part of the job is getting down on my 71 year-old knees! Seriously, it takes about 30 seconds to remove the flap by removing the two lynchpins (on either side of the receiver) and lifting the flap slightly up and rearward off the mounting brackets. The flap will fit in the bed of my truck with one end low and one end high; we now have an ARE truck cap installed which is not shown in the photo. (The flap is about one inch too long to lay flat in the bed!) If we are camping with the trailer parked for awhile, I can easily remove this flap to save fuel mileage while we are exploring. When we are ready to hit the road with the Ollie, it is a snap to put it back on. Available at: www.agricover.com
1 point
-
Sweet ride!1 point
-
The answer to your questions depends on how your wife perceives meal prep when camping. Does she have visions of "like at home" meal prep or is she willing to make concessions? That being said, at home I am an avid cook/baker. Our kitchen is spacious and outfitted with all the "necessary" tools that make meal prep and baking easier and more enjoyable. It would be disconcerting, to me, if I were to compare it to the Oliver kitchen. I am happy to shift my mind-set, when camping, and have found the smaller Oliver galley to be well organized, as efficient as prior larger RV kitchens (such as our 5th wheel), and an improvement over the like sized galley in our Leisure Travel Van. One trick I employ: We have a wooden bread board (a recycled pull-out board from my HS Home Ec Dept). My husband installed rubber feet on the bottom so it fits snuggly over the stove top. We actually made this for previous RVs and were able to reposition the feet to fit the Oliver. It protects it glass top of the stove, when not in use, extending counter space. When using the stove, I place the board on the bed next to the galley and use it to set things out of the way, until needed (if that makes sense). I also use the small counters (pantry and microwave cabinet areas) extensively during meal prep; the dinette table, not so much. We do not have the microwave, but rather carry a small toaster oven for cooking. I use the nightstand for it. Regarding meal prep outdoors: I do very little outside. I like being in the kitchen, where everything is handy and I don't have to carry a lot in and out of the trailer. Also, at certain times of the year, bees/yellowjackets/hornets can be very annoying when preparing food, and eating too, outdoors. Cooking outdoors is too much like tent camping; we have a great indoor kitchen and choose to use it. When downsizing from a larger RV (30ft 5th-wheel) I quickly learned a valuable lesson: in the smaller space, it is important for everything to have a place and keep things put away. This makes any task more manageable and reduces stress. I pack things so items oft used are easy to get to (without having to empty the contents of a cabinet/drawer to get them. We utilize the tow vehicle to store items not often needed to conserve interior storage. Just a few ideas . . . . . hope this helps.1 point
-
After driving 2,500+ miles from Oregon, we are in Linden tonight . . . . picking up #699 - "Pearl" in the morning. Stay tuned for photos!1 point
-
It might be hit and miss on the fan noise, if Xantrex quality control isn't excellent. When we saw our first Ollie at the factory, one of the trailers had an inverter that made an awful high pitched squeal, which our tour guide couldn't hear, but would have driven me crazy in no time. But I've since read similar complaints about Victron inverters, so I really do think that just some units make noise and some don't. Thankfully, ours doesn't, and even at full tilt, I have to be paying attention to hear even the fan.1 point
-
Thank you, SeaDawg. I did open a ticket about 2 weeks ago; Jason said he would explore the noisy fan with Xantrex. I'm just wondering if this is an isolated problem, or if others (especially those with the lithium package and 3000W inverters) experience excess noise. Just checked the periodic maintenance-charging noise level (i.e., periodic charging when batteries are full and the fan kicks on about every 15 minutes fo a minute): it's about 50 dB.1 point
-
Congrats! Looks shiny and new in the photo, I’m sure it will look more “experienced” by the time you get home! Mike1 point
-
Ray and Susan, Congrats on your beautiful new Ollie!!!!!!1 point
-
CONGRATS!! Pearl looks terrific.1 point
-
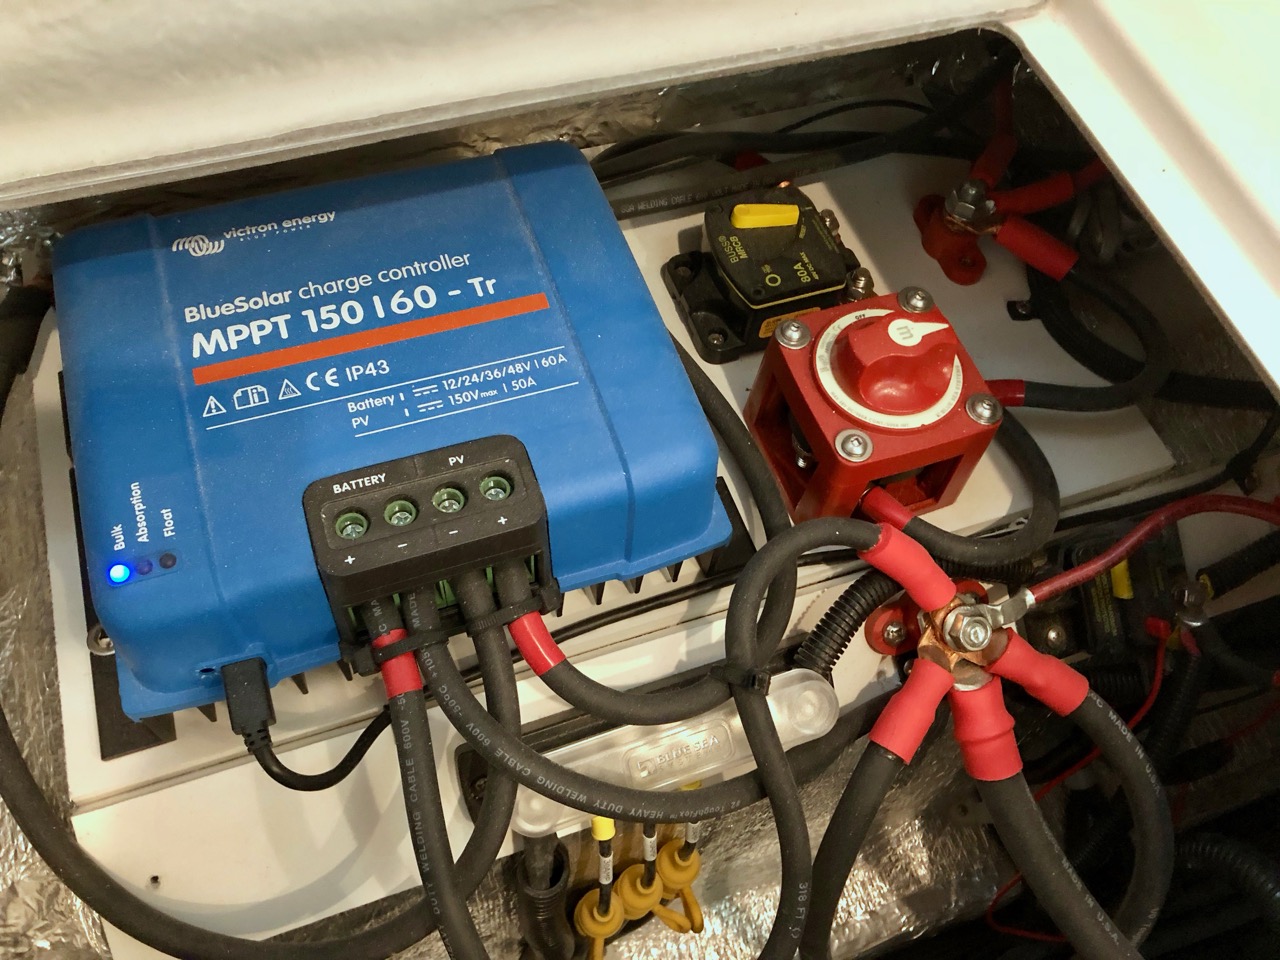
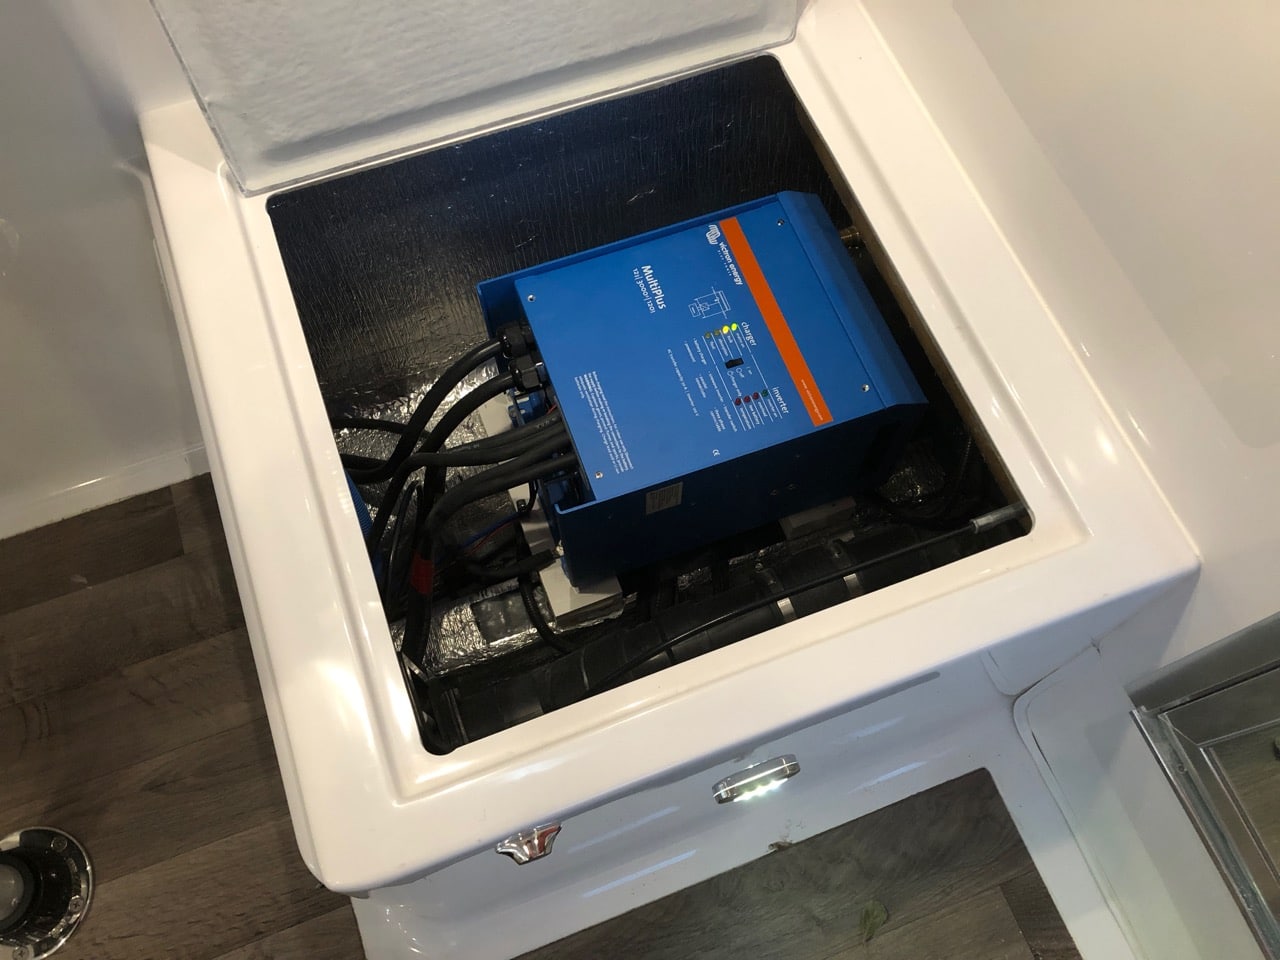
Starting a new thread since the other one seems flaky. This is mostly for Mike since I can't figure out how to send photos via PM. I'll do a big post on my electrical setup someday, after I've redone a few things and added a different hookup for my portable solar. Mike, this is the inverter itself, mounted under the dinette seat by the bath. You have to run pairs of + 12v, at least 1/0 AWG, in and out and also 120v both ways. And a ground strap to the case, so that's 7 large cables plus a coms cable and a temp sensor wire. I ran the 120v along the side and the 12v, ground and and coms through the trough under the dinette. I plan to pull the inverter and screw down a plywood base to secure it better, though it seems fine as it is, screwed into 2 layers of PVC. One thing I do want to do on this end is to install a manual transfer switch for the 120v, in case something ever happens with the charger. [attachment file=IMG_0078.jpg] The inverter has plenty of space for airflow in there. The only time I hear the fan is if I'm really loading it to the max, or if it's really quiet in the trailer when I just plug it in and it's bulk charging the batteries. This is the 12v + side, under the street side bed. Solar comes in at the top right, + goes to the combiner post, then to the cutoff, then though an 80a breaker, then snakes around into the charge controller. + out goes to the combiner post on the lower right, as does the twin + 1/0 from the inverter and the 4/0 + from the batteries, as well as Oliver's cable to their + bus. The bus bar and breaker on the small angled PVC panel are both Oliver's. I moved them a bit to get the post on there but otherwise, I tried not to touch anything on Oliver's side of the electrical. The battery + goes through a cutoff and a 400a fuse first, which are mounted out of sight on this side of the battery box. Solar negative goes around the back of the charge controller onto a combiner post that's hidden, then around the left side and in. Negative out goes down the open space in the hull to the terminal in the next photo. When I redo all of this, I'll add a much larger plywood base, swap the main combiner post for a bus bar, move the battery cutoff and fuse to the board for easier access and generally tie everything down better. Negative connections are kept away from the + on the dinette side of the battery box. Battery - goes into the shunt for the battery monitor, then I have the charge controller coming directly off the shunt and a short 4/0 jumper to a combiner post. Off that goes the twin 1/0 from the inverter, the ground from the inverter, and Oliver's - cable which goes into their distribution box. I removed the charger unit from their box so it's just a fuse and breaker box for me now. I'll redo this in plywood, swap out the combiner post for a bus bar and secure the wiring better.
1 point
-
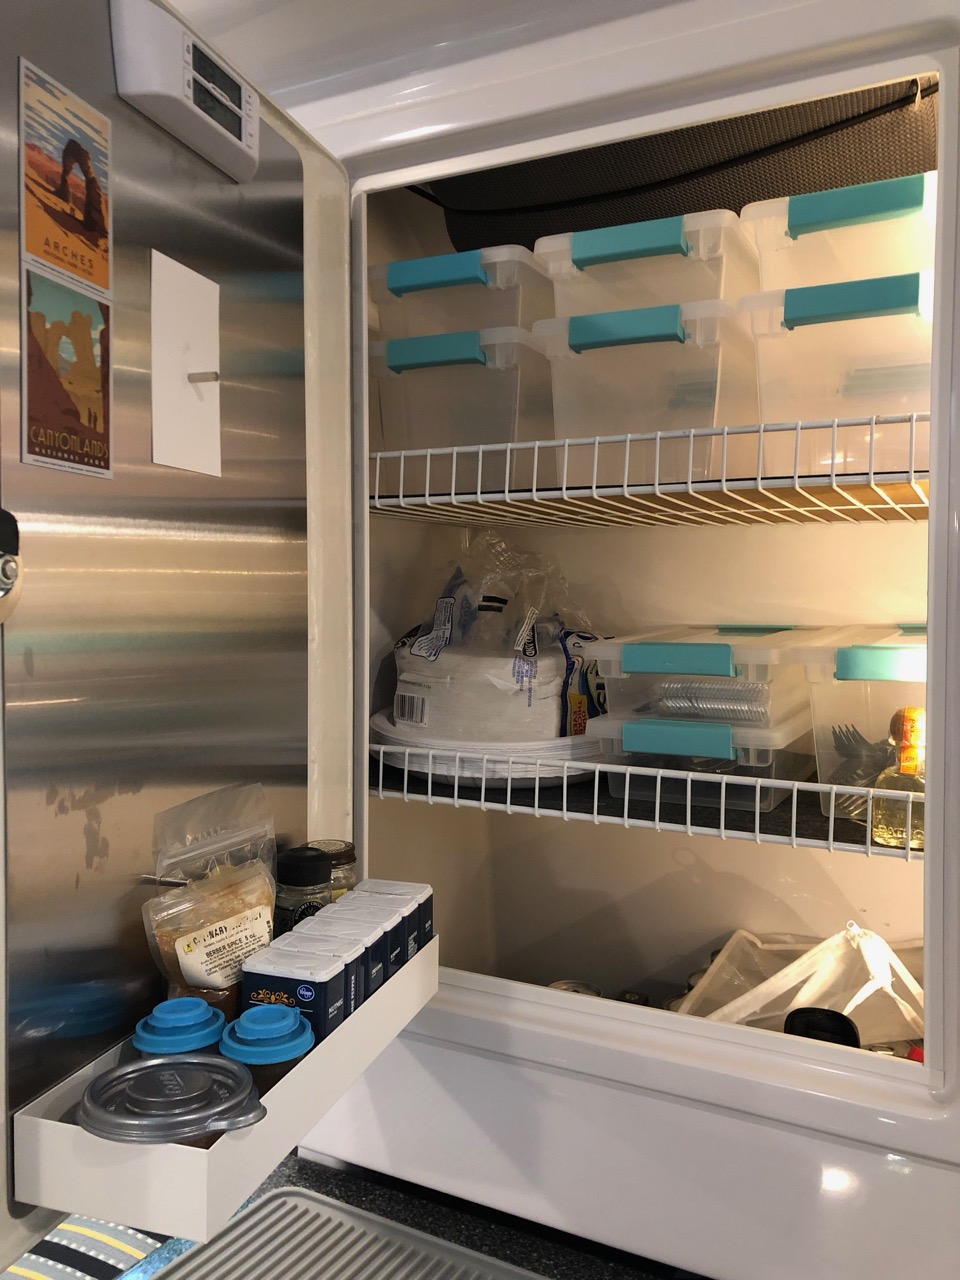
I reorganized the pantry earlier this year. Painted the back of the door to make it easier to clean and added a stainless sheet I got off amazon. Then attached a small box from Ikea as a spice rack. The boxes I found at Target and they really fit well - much better than the ones I had before. And I added a LED strip light to the side to make it easier to see. You can't really see it, but I ran a bungee across the top and it's a perfect spot to store one of those folding drying mats. Also, I had some plywood left over from the electrical, so I made a quick shelf to go over the toaster oven (in the microwave cabinet). I ordered a giant neoprene mouse pad off of amazon, and cut it to size to keep the dishes from bouncing around too much. The cabinet itself was just bare wood, and was starting to get dirty, so I sanded it and added a coat of poly to make it easier to wipe out. I couldn't get used to plastic dishes, so I bought a few plates and bowls at Ikea. They haven't broken yet is all I can say.
1 point
-
I can see how that could be the case. The weeps are certainly small enough for water to bridge if it can’t adhere to the surface. I guess the way to test is to fully strip the wax from one window and see what the effect is. You’d probably have to take the window apart again and clean inside the weeps since its about impossible to keep from getting wax in there. If the weeps do drain better afterwards, then it might be good advice to cover the weeps with some masking tape before waxing. I’d say that some anti fog spray might increase the weeping action, but I don’t think that stuff lasts long - I think it’s mostly soap. They do make some permanent hydrophilic coatings for the medical world, which I once wanted to try on my windshield until I found out it cost $50 an ounce.1 point
-
(Sigh) sometimes, I just think it's a result of a perfect storm. Just the right angle of the trailer, the slits all the windows have, and the type of rainstorm. I like the rv gutter to keep the heavy runoff out of the path of the weeps. If you decide to use it, get the bright white, not colonial. The bright white is an almost perfect match. Sherry1 point


.thumb.JPG.dd838cdb3df463dab6a16861fa23a319.JPG)


-
Recent Achievements
-


.thumb.png.fbbde3486e933f990ff511bff8d6bda0.png)


")


")


