Leaderboard


Popular Content
Showing content with the highest reputation on 04/23/2022 in all areas
-
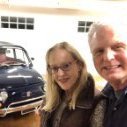
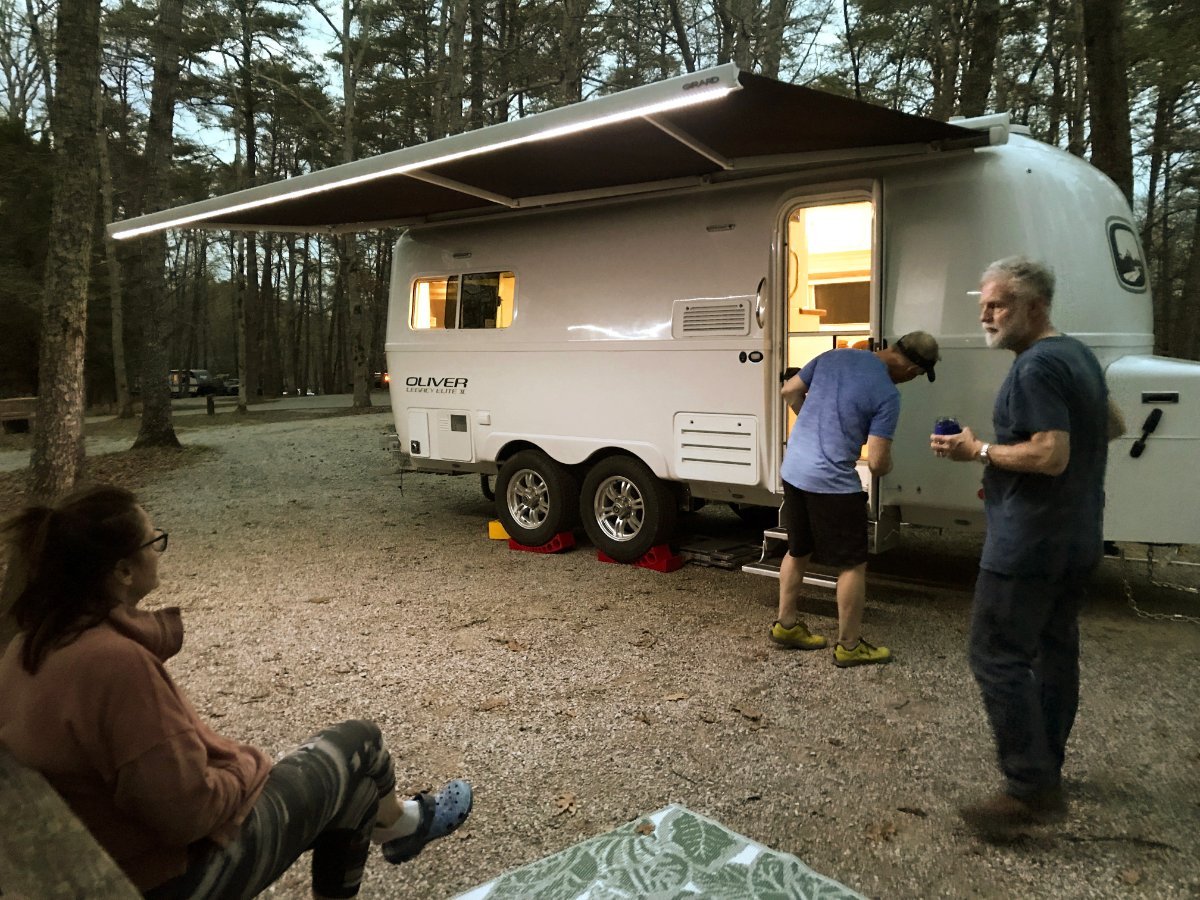
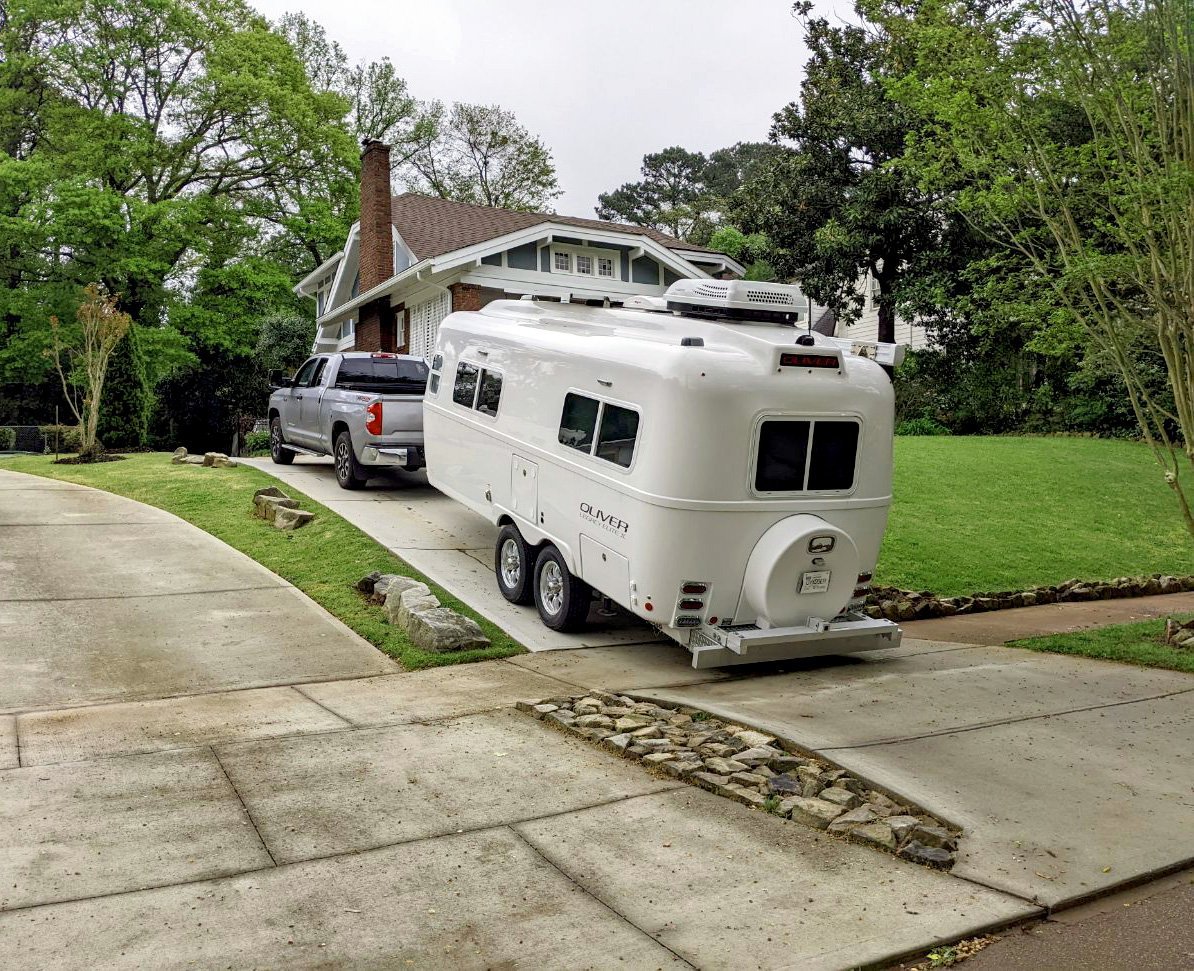
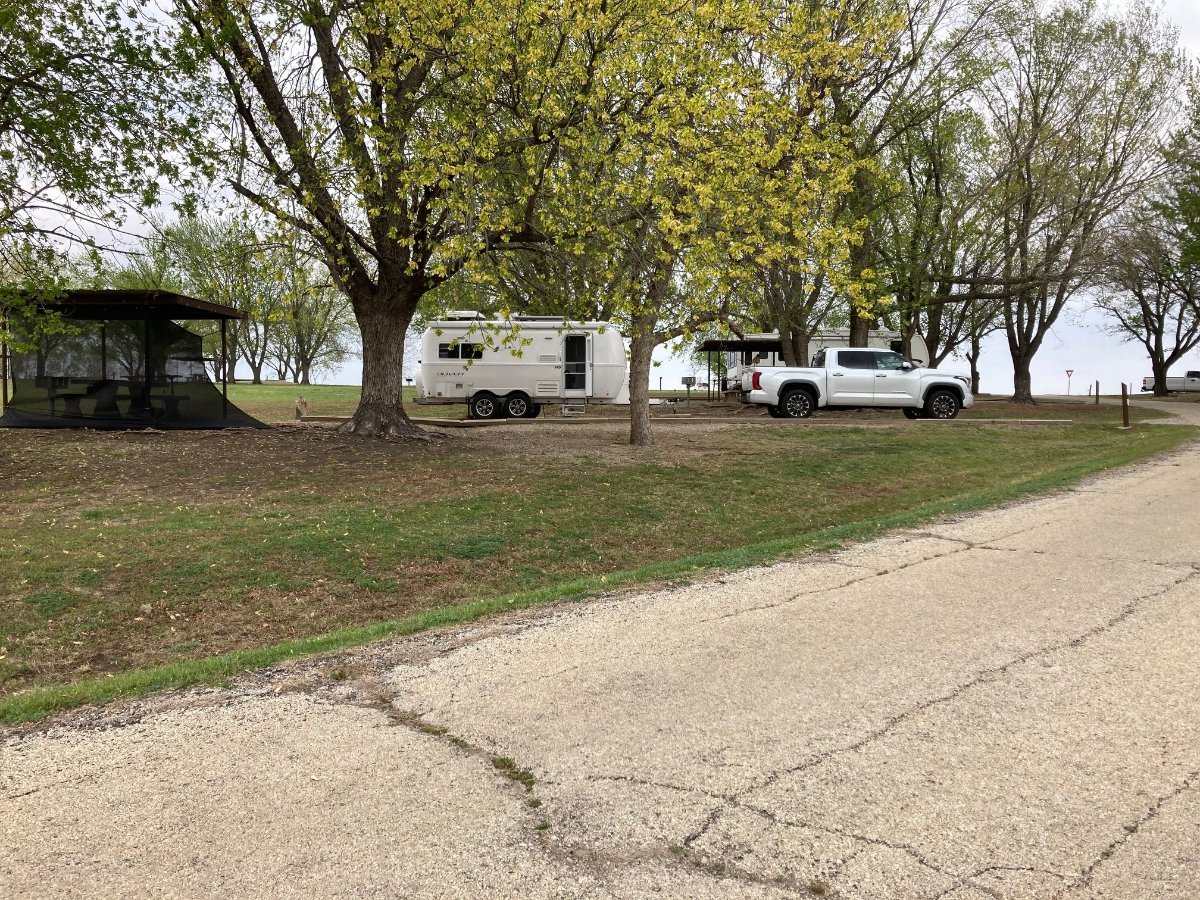
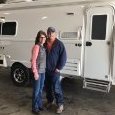
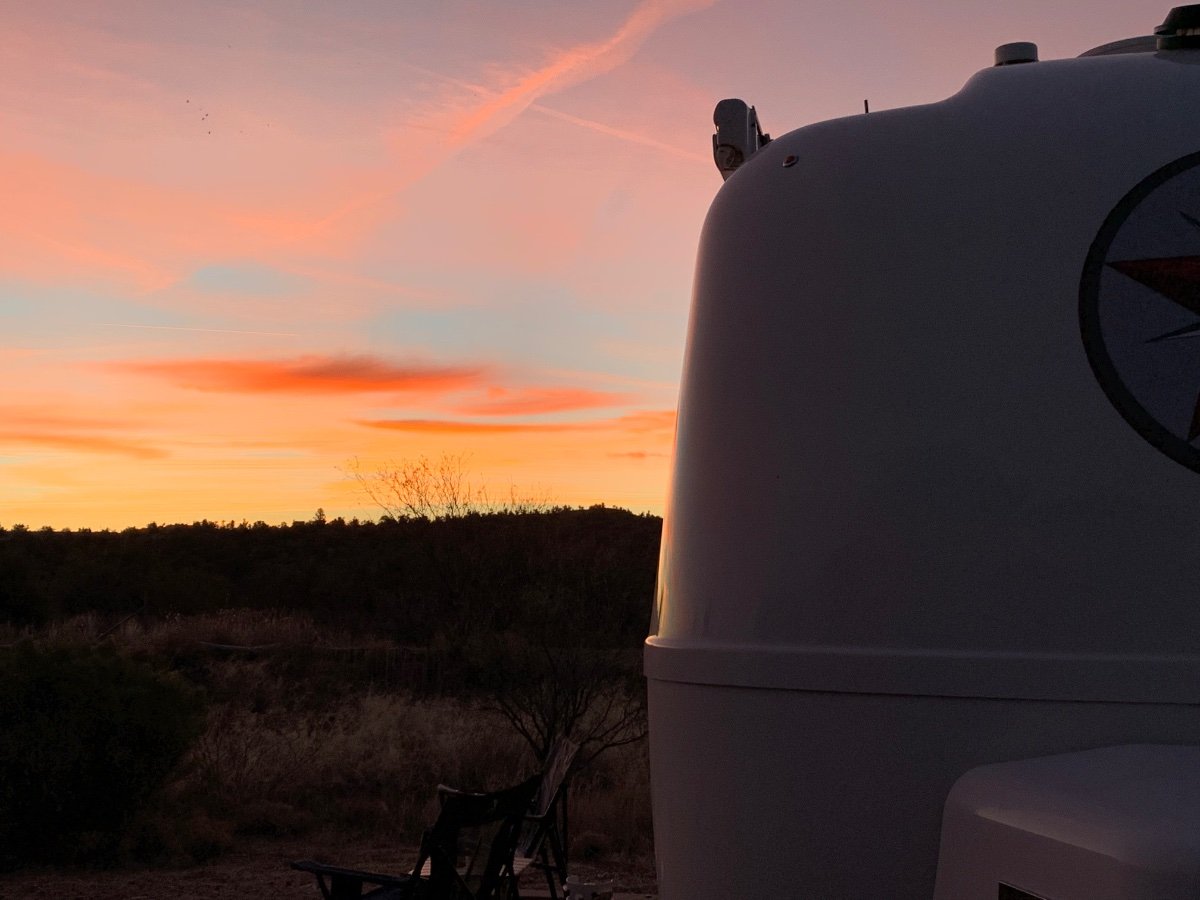
At last, we have taken delivery of #1071. Watson, the three-legged wonder dog, tagged along for the big adventure. After a night at the Oliver camp grounds, we made our way to Fall Creek Falls State park for a couple of days, then back to home in Atlanta. As total newbies, we're still amazed that we didn't blow up our rig. The best part was pulling the Ollie up our driveway without dragging the concrete.
 8 points
 -
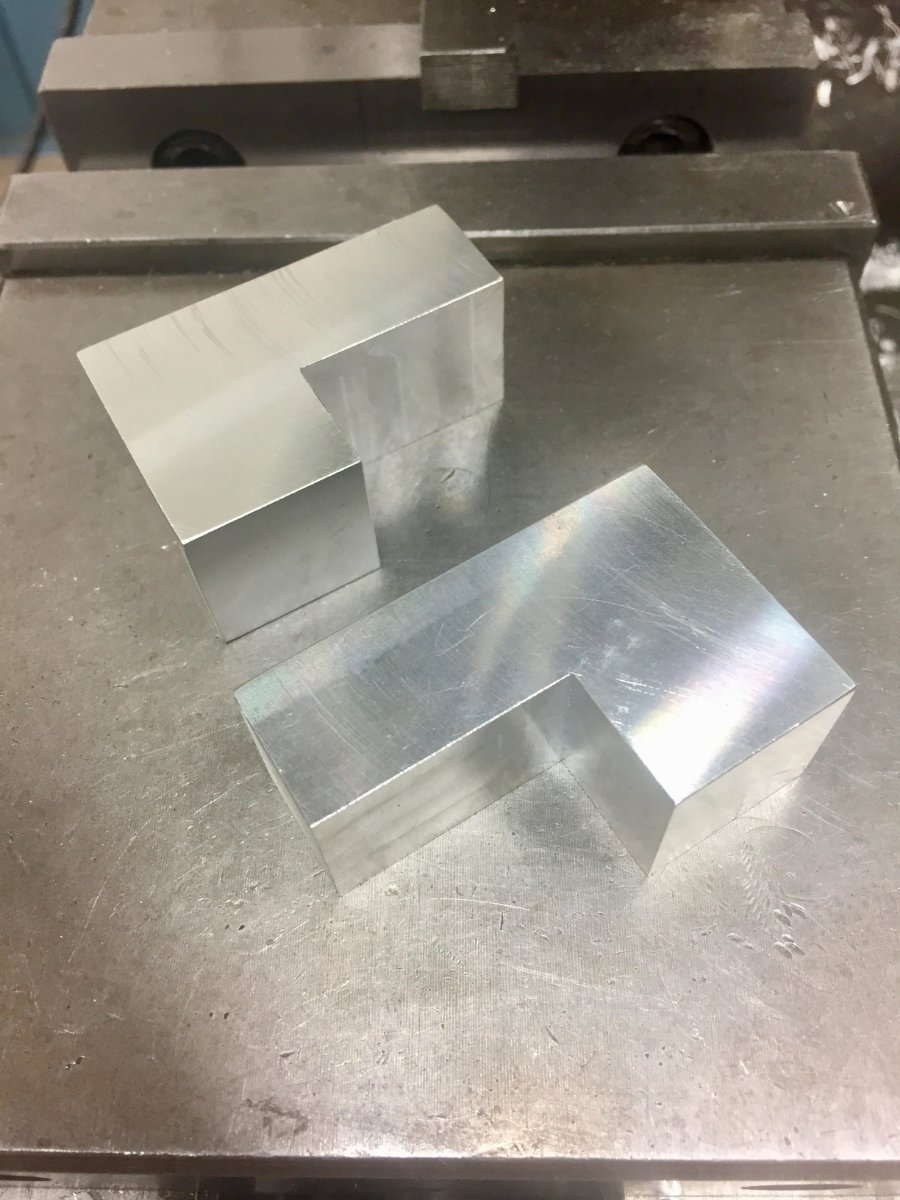
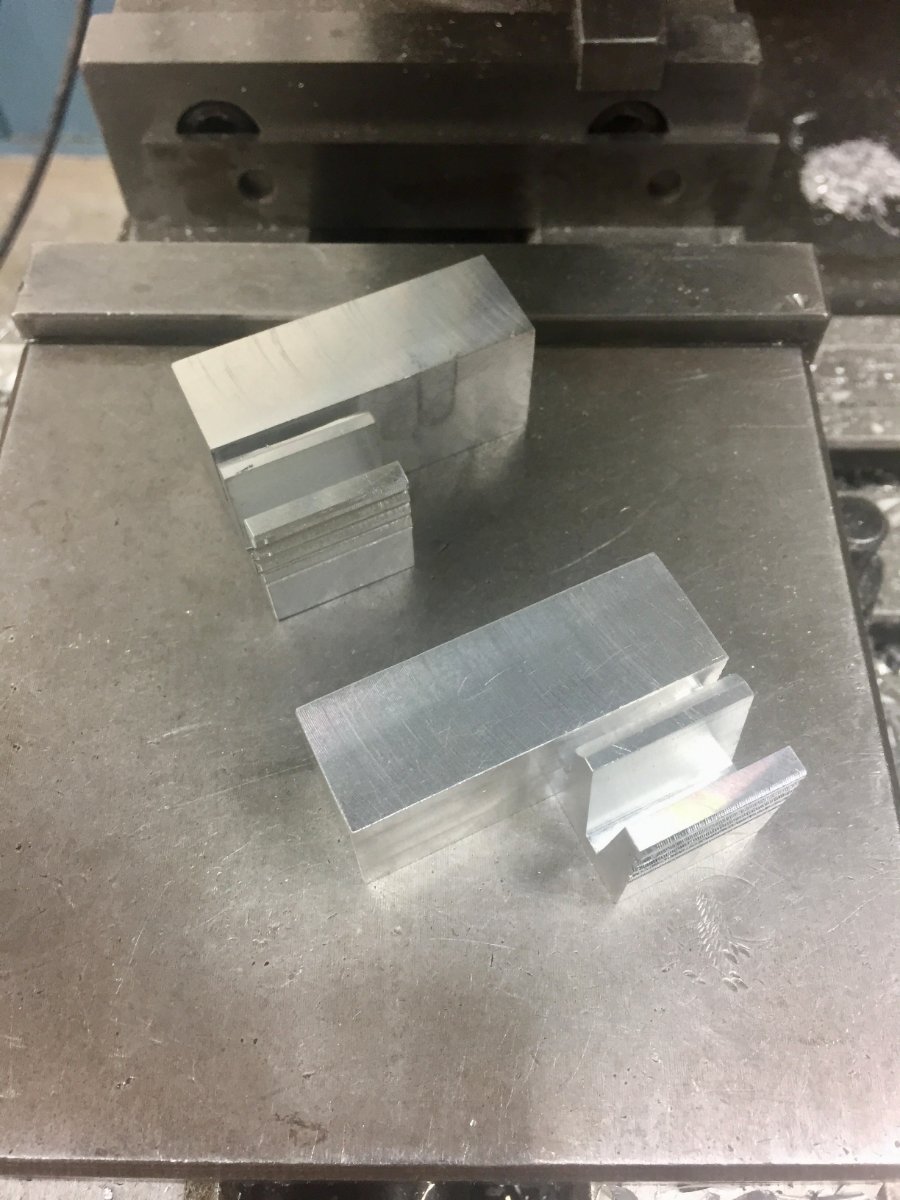
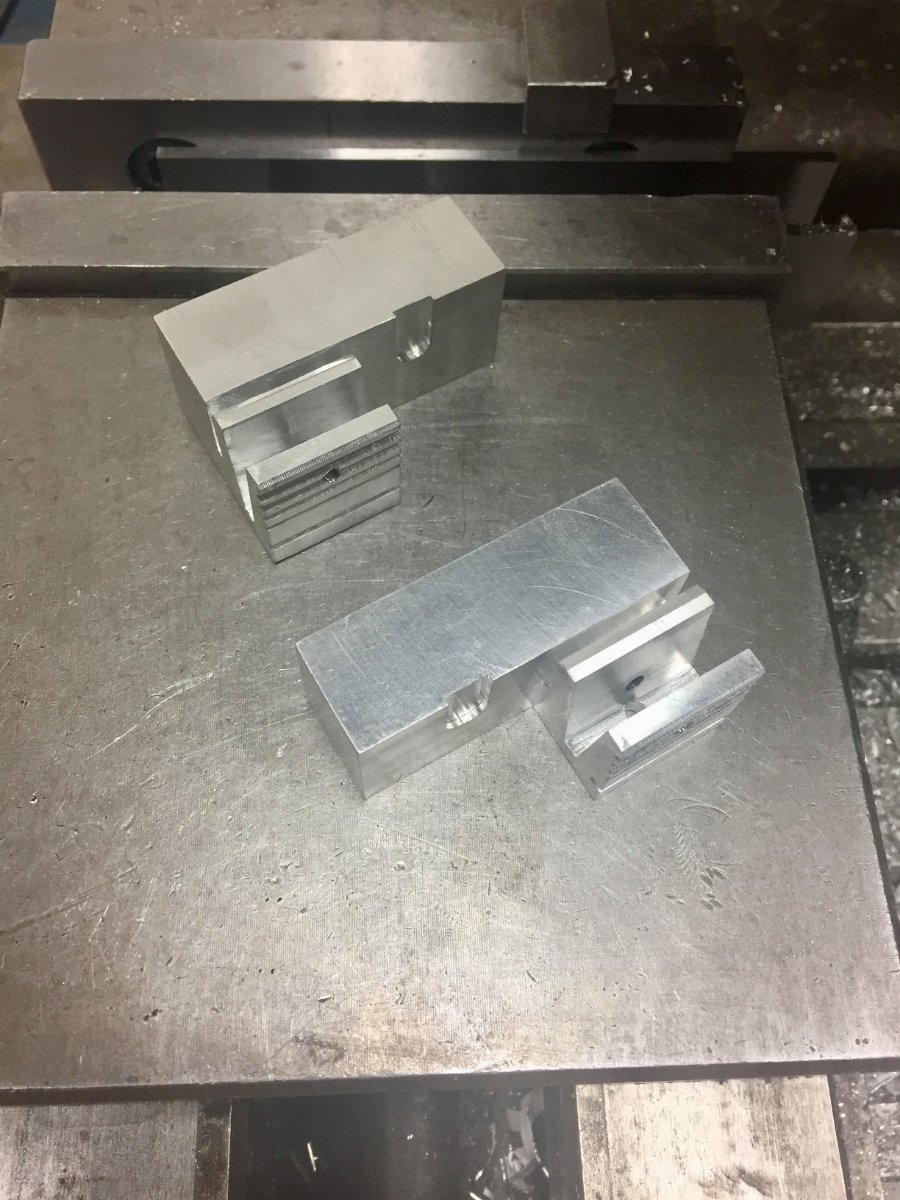
Eyebrow For Bathroom Window Well to finish off this project short of the testing, I had to design a eyebrow for the bathroom window. Since this window frame is mounted vertical it required a different approach. I thought it might interest some of the readers to see some pictures of the machining processes. Also I changed the finish on the mounts for all the eyebrows to a polished finish, I think its a better look.
6 points
-
I would cut out a slightly larger backing plate from 0.032” 6061 T6 aluminum, say an inch bigger all around, the same stuff Oliver uses everywhere. Remove the old plate, fill the holes with epoxy, and bond the new plate in place. Use a white product like Marine Tex (not my favorite JB Weld, because that is dark grey)…. Reinstall the bumper. I don’t think you need to do any actual fiberglass repair, as long as there isn’t any ugly sideways displacement, it looks like it just pushed it inwards, crushing the core a little. This mod won’t stop that kind of sudden, unexpected damage, but it will prevent the chrome hold open from breaking or pulling out of the hull. https://olivertraveltrailers.com/forums/topic/5788-how-to-cabin-door-bungee-hold-open-strap/ John Davies Spokane WA4 points
-
Me too. Sometimes there are a number of possible causes to a problem. If we all chime in with what we’ve experienced and the solution that worked for us then we’ve probably covered most all of the bases. It looks like that’s what happened here and like Mike says, teamwork works! Mike3 points
-
I am often in awe of this forum. The collective knowledge base is just amazing. And the kicker is that Galway Girl learned from their mistake and passed that knowledge on and solved another’s problem. I think that is an excellent example of the importance of teamwork. Thanks to all who contributed ideas to help solve this problem, especially Galway Girl! Mossey3 points
-
Galway girl you fixed the self induced problem I was fooling with the outside shower the other day and left the valves open and the wand handle valve closed thanks so much for your help on this make sure you post this where all can see Marc3 points
-
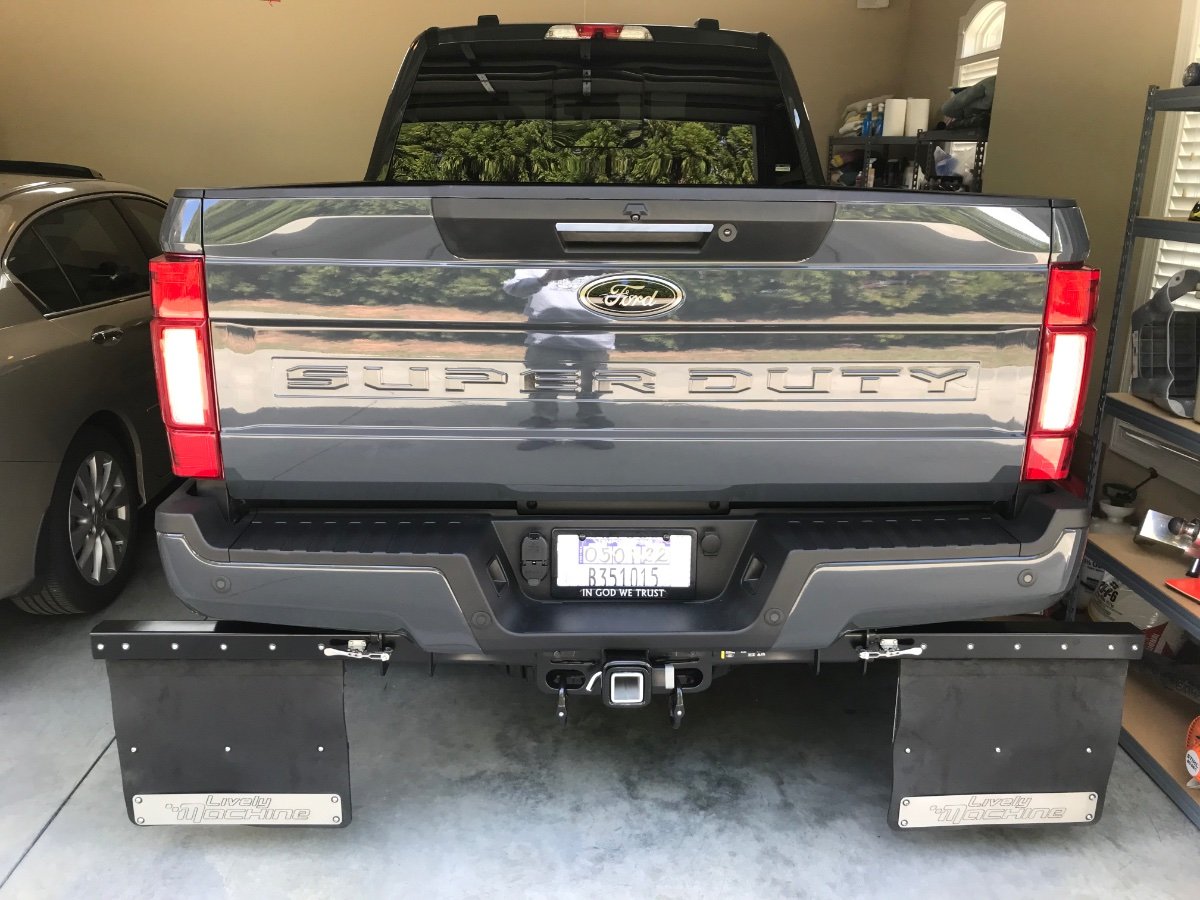
Bill, I am very happy with these “Rock Stoppers” they are made by Livelymachine.com and are designed Super Duty specific. I don’t know if they fabricate Rock Stoppers for other trucks. I can report they work excellent and protect the front of our Ollie and keep it clean. If anyone has questions PM me.
3 points
-
coon creek cove coe park just outside ponca city ok... spring is happening here...windy too!! headed for the black kettle national grasslands and practice some bookdocking.!?
2 points
-
You might try unplugging from shore power, turning off the batteries and resetting the inverter/charger as something may have went wonky in its little brain. I had a similar issue once that involved 12 volt lights not acting correctly and that complete "reset" fix it. Thinking similar to a "computer." Charlie.2 points
-
Got the Ollie, Got the Wife, Got the pup, Got the plants in the kitchen, Got the wine - life is certainly good! Congrats! Bill2 points
-
Nice work! Yours is becoming a most unique Oliver. Mike2 points
-
Yes - I didn't think about that being the door and not the body of the camper. There's not much behind that thin door fiberglass besides Styrofoam. JD's suggestion of filling and then simply placing a slightly bigger piece of aluminum there is a good fix that shouldn't cost too much in either time or money and will look OK. Good luck! Bill2 points
-
Ditto to John’s solution. If you try to just repair it as original it’ll still be a weak spot, and probably won’t look quite perfect. Adding a larger aluminum backing plate is less complicated than trying to do a perfect fiberglass repair job. A slightly larger aluminum plate will hide the original damaged edges/area and also give a larger area to support the rubber bumper in case it ever happens again in the future.2 points
-
Yup, my wife thought it was someone from the rally, but told her it was probably you. 🙂 I was trying not to rearrange the concrete construction dividers The Bluebonnet was OK, but the owner of the sole Elite 1 I wanted to see left Thursday before I found his site…well camouflaged by all the Casitas 🙂2 points
-
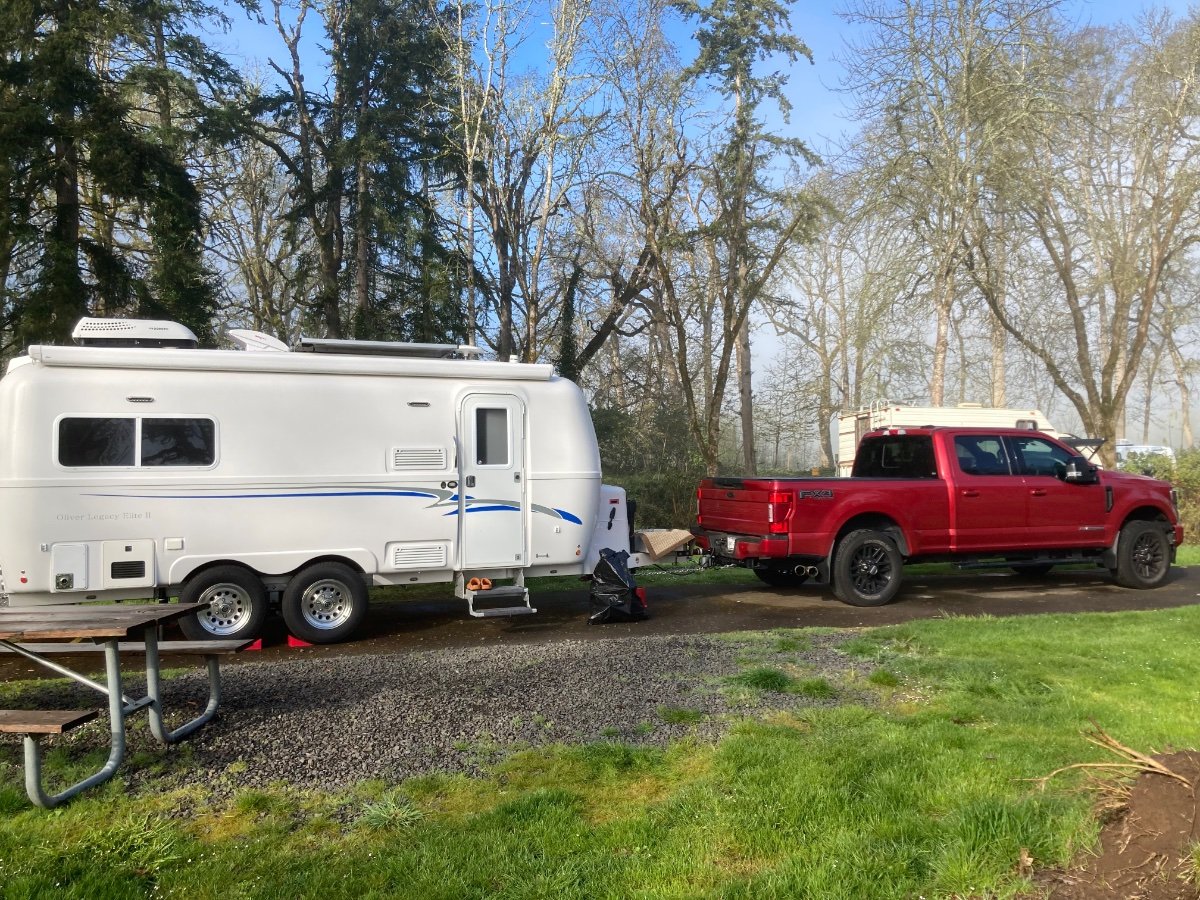
Just a quick follow up to let everyone know both Cyndi and I continue to do well with no hidden injuries from our rollover accident. In addition, we were successful in finding and purchasing a 2017 Oliver Legacy Elite II this past week and have just now returned to our home location after successfully making some of our originally planned stops from our interrupted vacation on Apr 2nd. It is truly amazing we were uninjured in the accident and able to get back on our feet with truck and trailer within the remaining two weeks of our scheduled vacation. Thanks again for all the support the Oliver community has given us these past few weeks. This alone should convince anyone on the fence about purchasing the best built travel trailer on the market. Mark and Cyndi
2 points
-
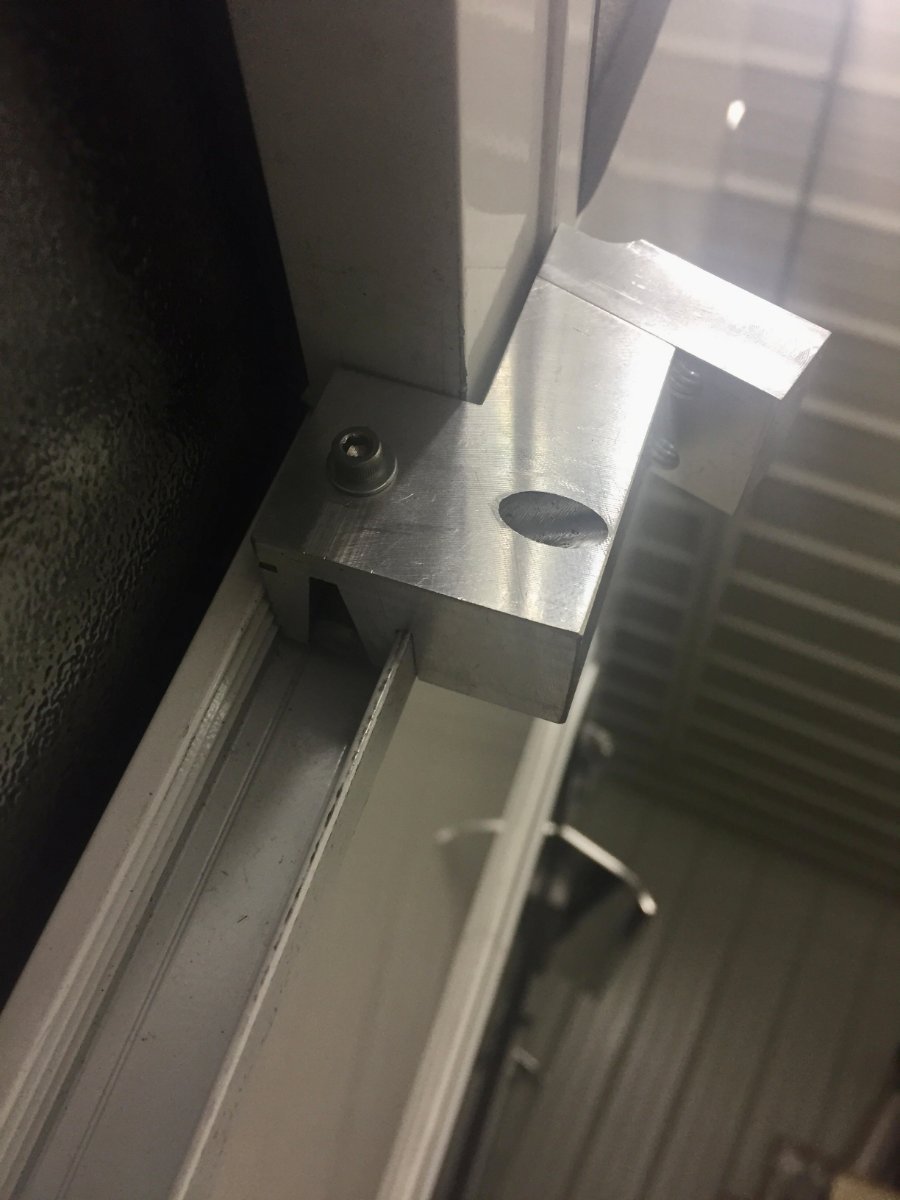
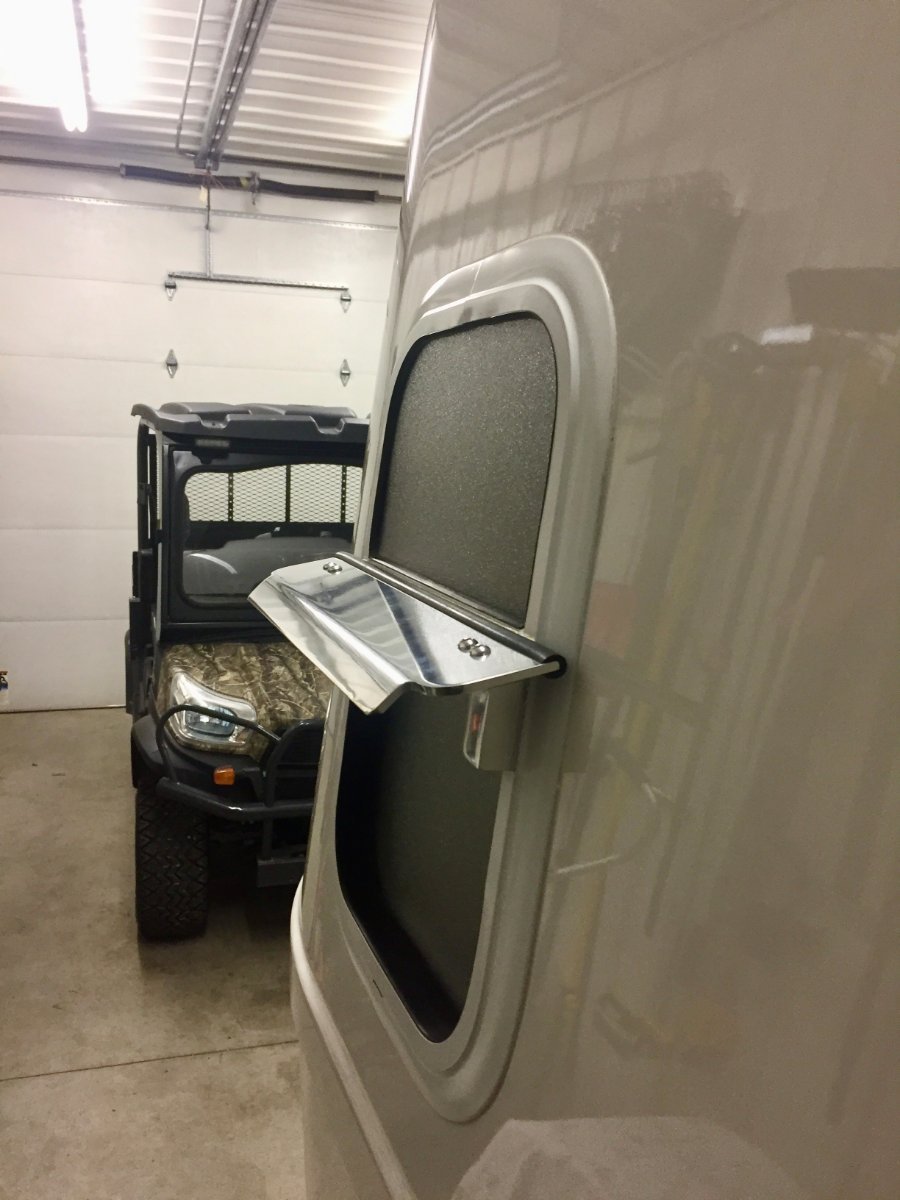
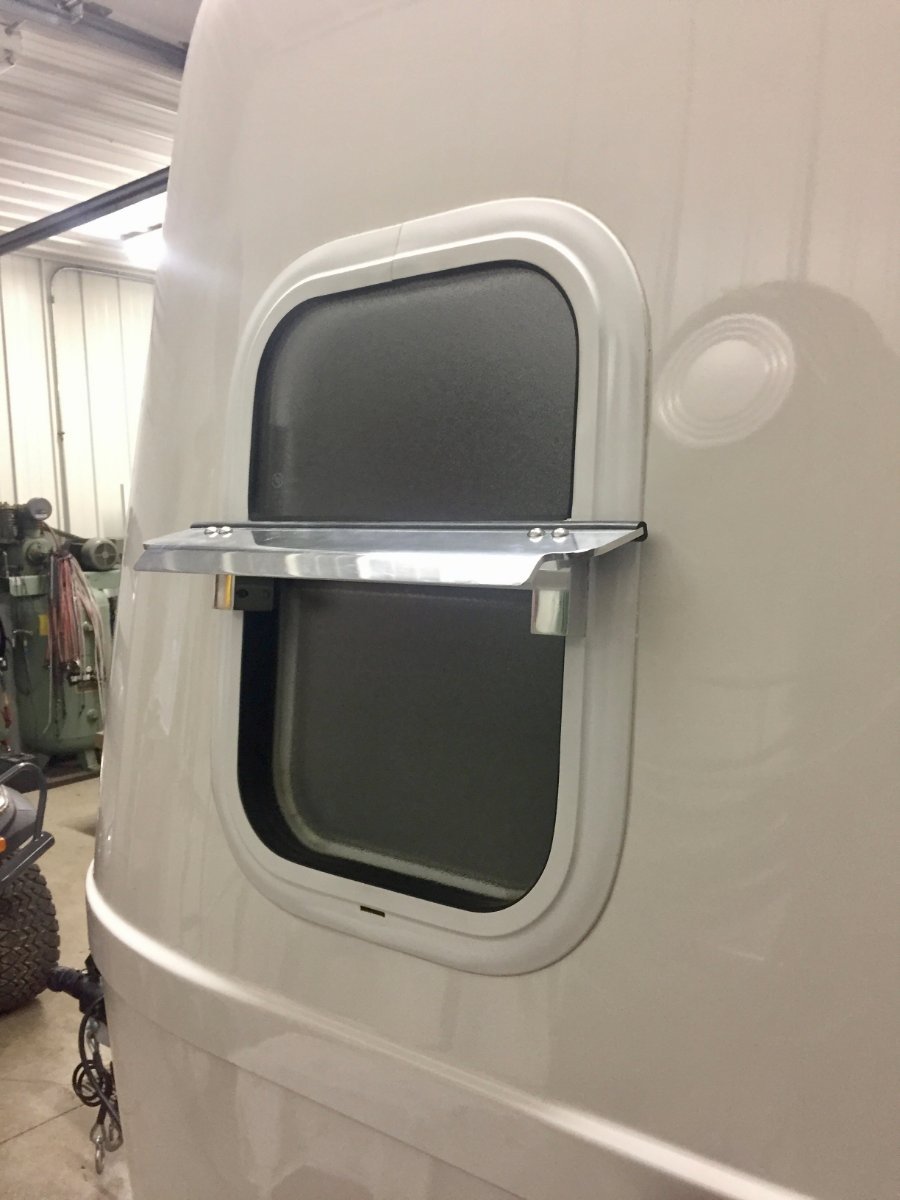
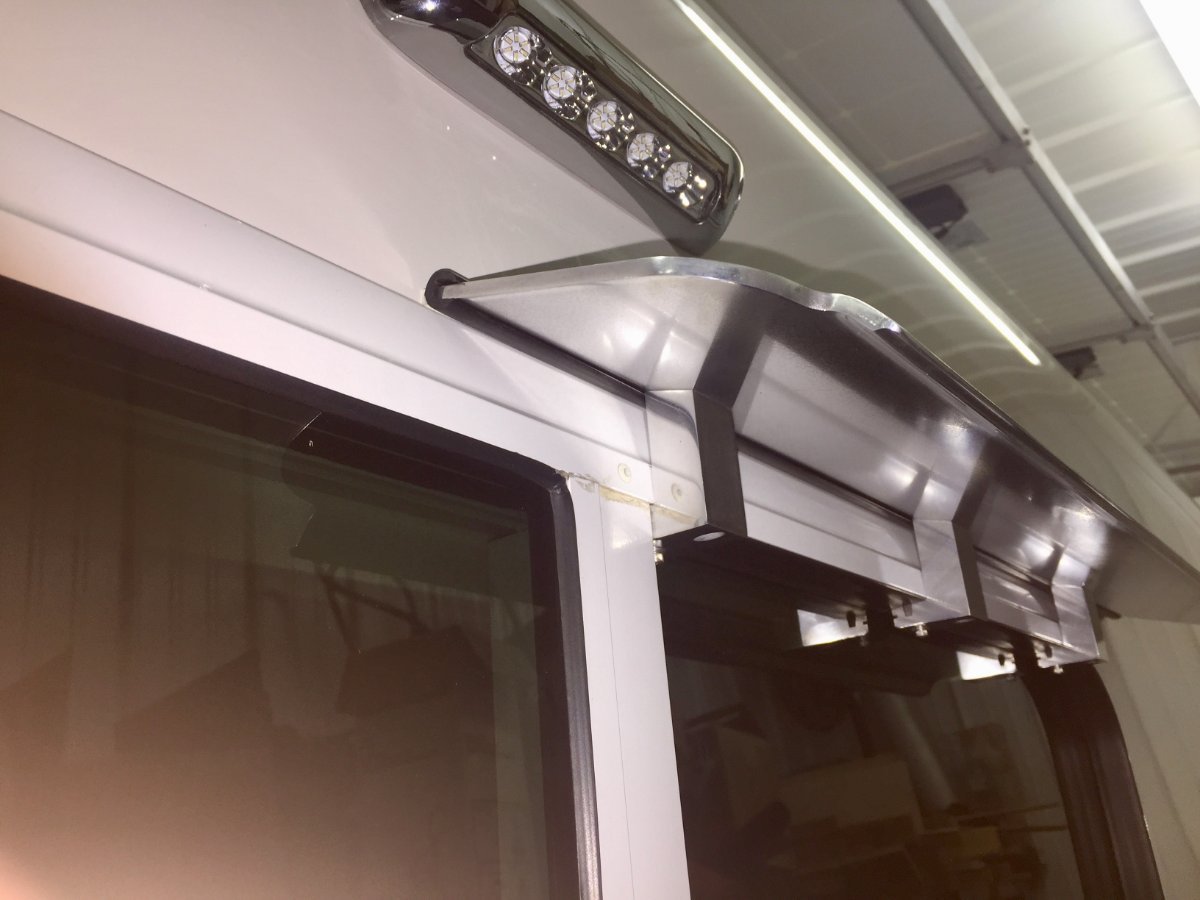
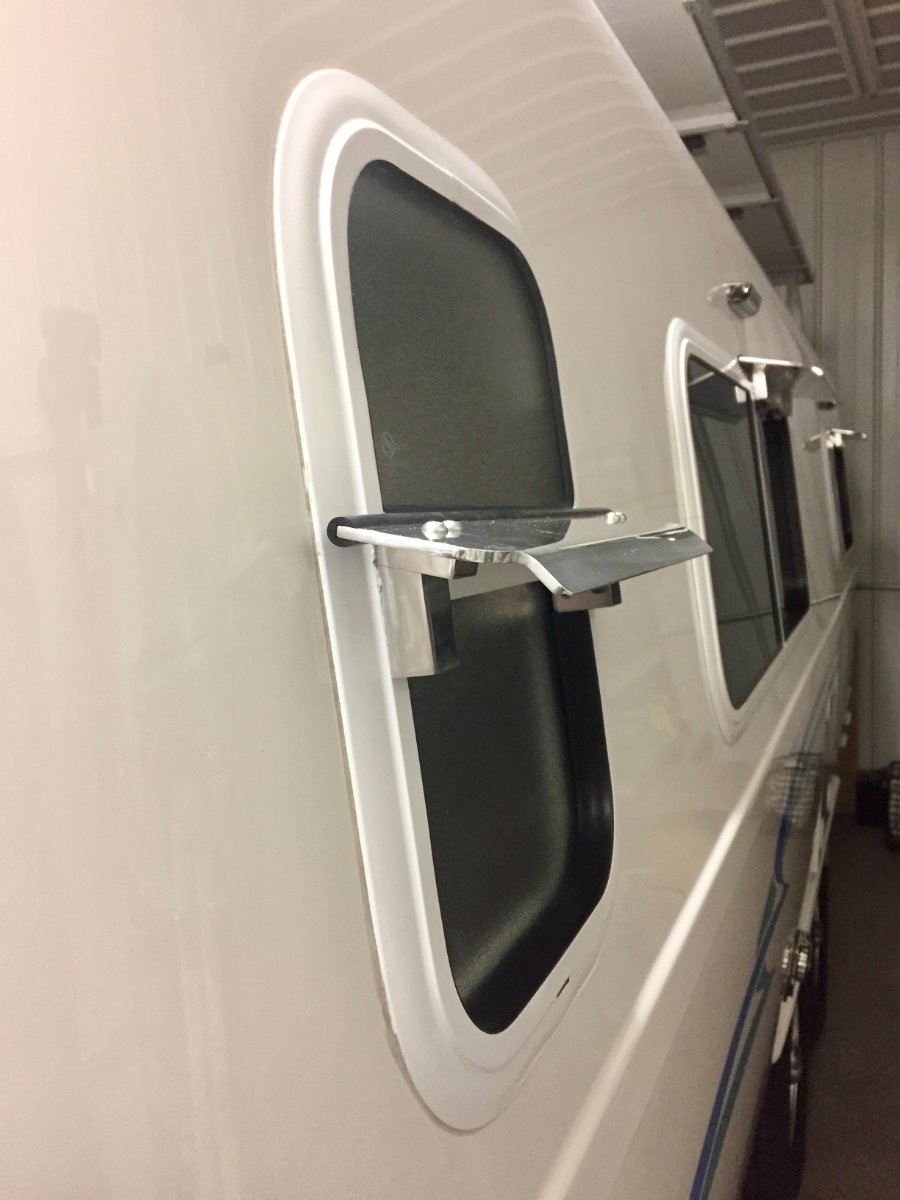
When I took my first camping trip with the new to me Oliver I was thrilled with the experience it gave me, and as I added more trips I started a mental list of things that I could tweak or add to the Oliver that would make that experience even greater. Today's post is addressing one of the items on that list concerning the windows and how they are limited to only being able to be open in fair weather conditions. Because they lean inward at the top of the window they can create problems in rainy conditions whether the window is opened or closed. When closed they have to deal with all the water that runs down from the roof and sidewalls, this can overload the drainage holes in the window frames which can result in getting the bedding wet. Many Oliver owners have installed rain gutters to help alleviate that problem, but there's still the problem of having the windows open while it's raining to mitigate high humidity or that closed in feeling. What I came up with for a solution I'm calling window eyebrows. I created a list of design parameters or considerations that I wanted to hit for this project. The first one was I did not want to alter the Oliver in anyway, that included the drilling of hole to mount the eyebrow to the windows, this really slowed my project down. I'm the type of guy that builds it in my mind before the prototype is built, I went through many different design ideas before I settled on this one. I designed a mount that clamps into the window frame and to spread the load out over a larger area I utilize three of these mount per window. The mounts are inserted into the window frame and the screw on the bottom is tighten which draws down the 5/16" diameter rod in the tapered slot which then spreads the mount to engage the ribs that are formed into the window frame that hold the rubber molding in place. I inserted a still picture in the following video showing that process. To remove the mount you have to take that screw out with the 5/16" rod and there is a hole on the bottom where that same screw is inserted and when tighten it releases the mount. The eyebrow itself is made of 3/16" thick x 5" wide x 29" long aluminum which has 3/4" of the outer edge turn down. I used a neoprene edging trim bought from McMaster-Carr along the length that mated with the Oliver, my hope was that it could be pushed tight enough to seal the water from coming between the eyebrow and the side of the Oliver making for a easy instillation. When I tested this in the rain it looked like it was going to work but after about ten minutes I noticed each window developed a drop of water by one of the mounts and it would fall and hit against the screen about every couple of minutes. So plan B I was forced to use a 1/4" wide weather strip tape between the neoprene edging and the fiberglass wall of the Oliver. There was one more problem, I had to incorporate a drip edge to the eyebrow to keep the water from following around the edge and falling towards the window. This eyebrow is fastened with two stainless steel 1/4-20 button head hex drive screws to each of the three mounts. This makes for a quick install or removal of the eyebrow, Here in Minnesota we had a warm up and it rained one day so that is all the testing I have been able to do, so time will tell if all is well with the design. As far as the rigidity of the eyebrow I'm extremely pleased you can literally grab onto them and push and pull with no flex of the eyebrow. EYEBROW.mp41 point
-
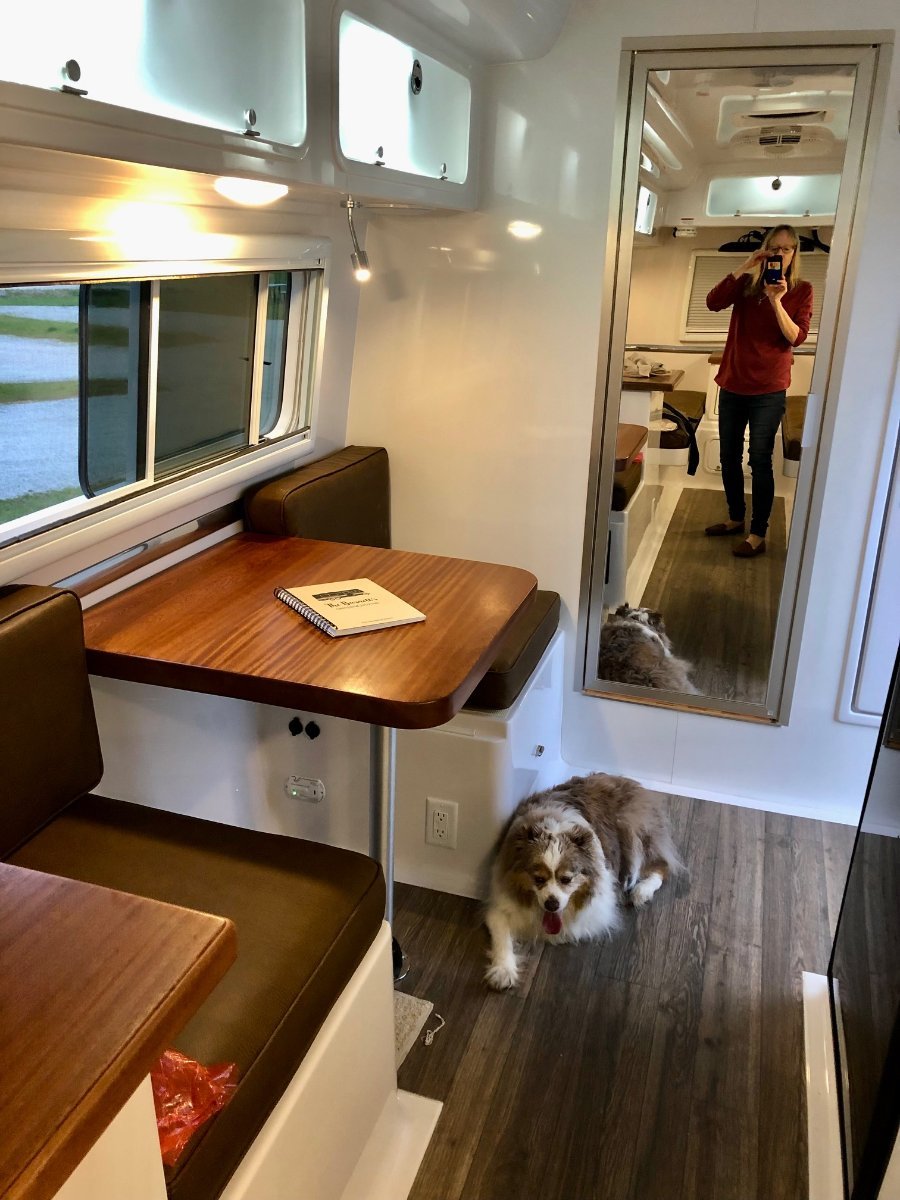
We trimmed out our Ollie with Foy Sperring's bodacious mahogany counters and the table top for the dinette. We also got a bunch of the drawer inserts. We ordered almost everything in his catalog. It makes a huge difference.
1 point
-
The doors come to the Oliver factory preassembled with the screen door, hinges and attached to their frames. They are simply installed into a hole cut in the hull. The color of the door is what comes from the door manufacturer. Just paint the repaired door white and put it back in the hole.1 point
-
Well, that's a bummer. I'd use white or clear duct tape for a temporary fix. Like many others, we carry rolls with us. Butyl tape is a sealant, not really a "tape." The door itself is damaged, right, not, the trailer hull? That is probably a Lippert made item. Your insurance may cover a new door. I'd open a ticket, and ask for Jason's advice.1 point
-
Oliver service will make that look as good as new. Just had my door latch repaired Wednesday. When they riveted it in during construction they missed the metal plate inside the hull behind the latch. The pressure from the rubber grommet was enough to pull the rivet through the fiberglass. They went in by cutting a hole in the closet and adding the metal support brackets. I thought they would put an access port there to cover the hole. To my surprise they re-fiber glassed everything. You cant tell anything was done. As far as keeping the rain out. Butyl tape will leave you a mess but will work. If it were me, I would just put a piece of the air-conditioning foil tape over it until I could get it fixed. Think it will come off easier than the the butyl tape.1 point
-
So happy to see you back on the road! What a great looking rig!1 point
-
Try this link. Mossey1 point
-
Although my TPMS sensors were marked at the time of the original installation, if I install them one at a time, the monitor shows the location of the sensor I just installed. Then I could mark them using dewdev’s labeling method or move them to the correct tire if they are already marked. Or you can clear the monitor memory and reprogram the system. Mossey1 point
-
GJ - I don't know the brand but I do know that Patriot bought something other than the Rock Tamers and has been very happy with them. Perhaps a PM to him might get you some details. Bill Also - I assume that you have previewed a number of posts here on the Forum concerning ways to protect the front of the Ollie during an Alaska trip. One that I liked had to do with using semi-permanent tape to hold on rubber padding. It seemed to do the job while at the same time it was relatively inexpensive and was easily removable.1 point
-
Mark and Cyndi, Sorry to hear about the accident, but happy to hear y'all are OK! Congrats on a new to you Ollie and TV! Best Regards, Bill and Debbie1 point
-
1 point
-
I numbered each sensor cap using a white paint stick. I numbered them in such a fashion that I would not forget where they go.1 point
-
There should be no crud in it, there should be a fine filter before the fan to catch all that. Check to see if one is installed, and clean it as needed. Remove the pipe and plop it into a five gallon bucket with hot soapy water. John Davies Spokane WA1 point
-
TST supplied little stickers and, like Bill, I have stickers on each monitor so I know which one goes where. Actually, I’ve never had them all off at once. If your TPMS is telling you that one tire is low, I would remove the sensor and check with a gauge then fill if necessary. I carry a small tire compressor I got at Lowes a few years ago. It doesn’t fill fast but is good for “top offs” when necessary. Mike1 point
-
I have placed a small number (1-5) on the inside of each of my tire sensors and then coated these numbers with clear nail polish so that the number stays put and does not wear off or come off. I then marked in my TPMS owner's manual which tire went with which numbered sensor. This way it is easy to get the right sensor back on the right tire in the event of removal. Bill p.s. if you'd like a picture of this just let me know.1 point
-
Since moving to NC I have liked the idea for states to have only a rear license plate. Until now. Very glad you survived this ordeal and wish you the best. And, like many others ... I hope they find this *******. He needs to pay.1 point
-
Glad you're ok, best of luck finding your next Oliver! John1 point
-
Hello Mark and Cyndi, I am glad that everyone (including the cat) made it through uninjured. I hope that they put out a warrant for this person! Best of luck in finding an Oliver replacement. Dale & Sara1 point
-
Holy cow, you are so very lucky to be alive. Good luck with your search for a new truck and a new Ollie. Stuff can be replaced, lives cannot. I installed a dash cam several years ago, I have recorded lots of stop sign and red light runners, but thankfully there hasn’t been a collision. Did the guy ever get arrested? I think your insurance companies will want a word or two with him. John Davies Spokane WA1 point
-
Great modification! After buying Ollie, we missed our previous (SOB) camper's Dometic Seitz type hinged windows that could be open while raining. Always wished Oliver would use this style of window. Keeping the windows open during the rain is a great benefit. Nice Job!1 point
-
Nicely done!1 point
-
Count us in as an interested party if you decide to sell these. We've been looking for something like this. Brilliant!1 point
-
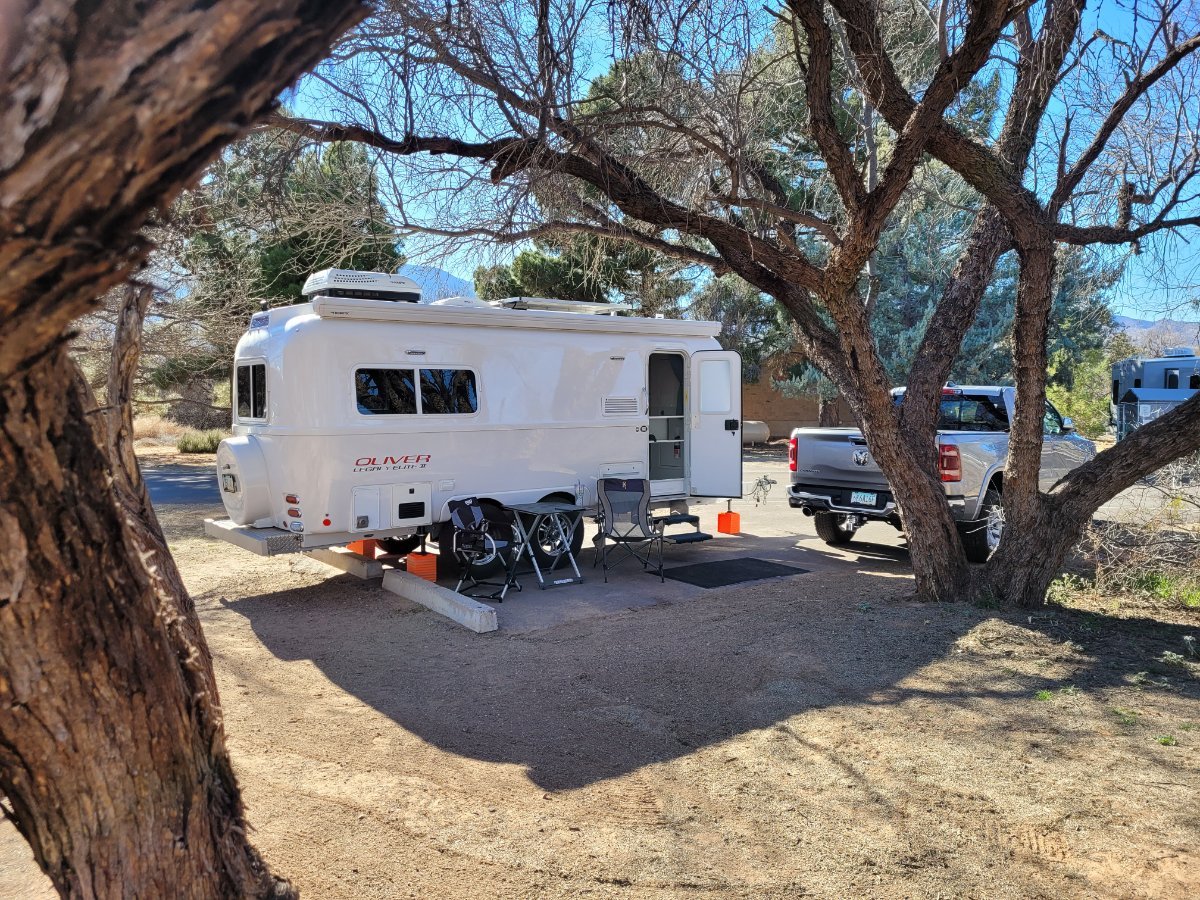
Boondocking in the only non-electric space in the Quail section of Dead Horse Ranch State Park (AZ). We just fit as the height restriction was 10' for RVs shorter than 30'. BTW, there was one more Ollie II staying in this section of the park - from Colorado.
1 point
-
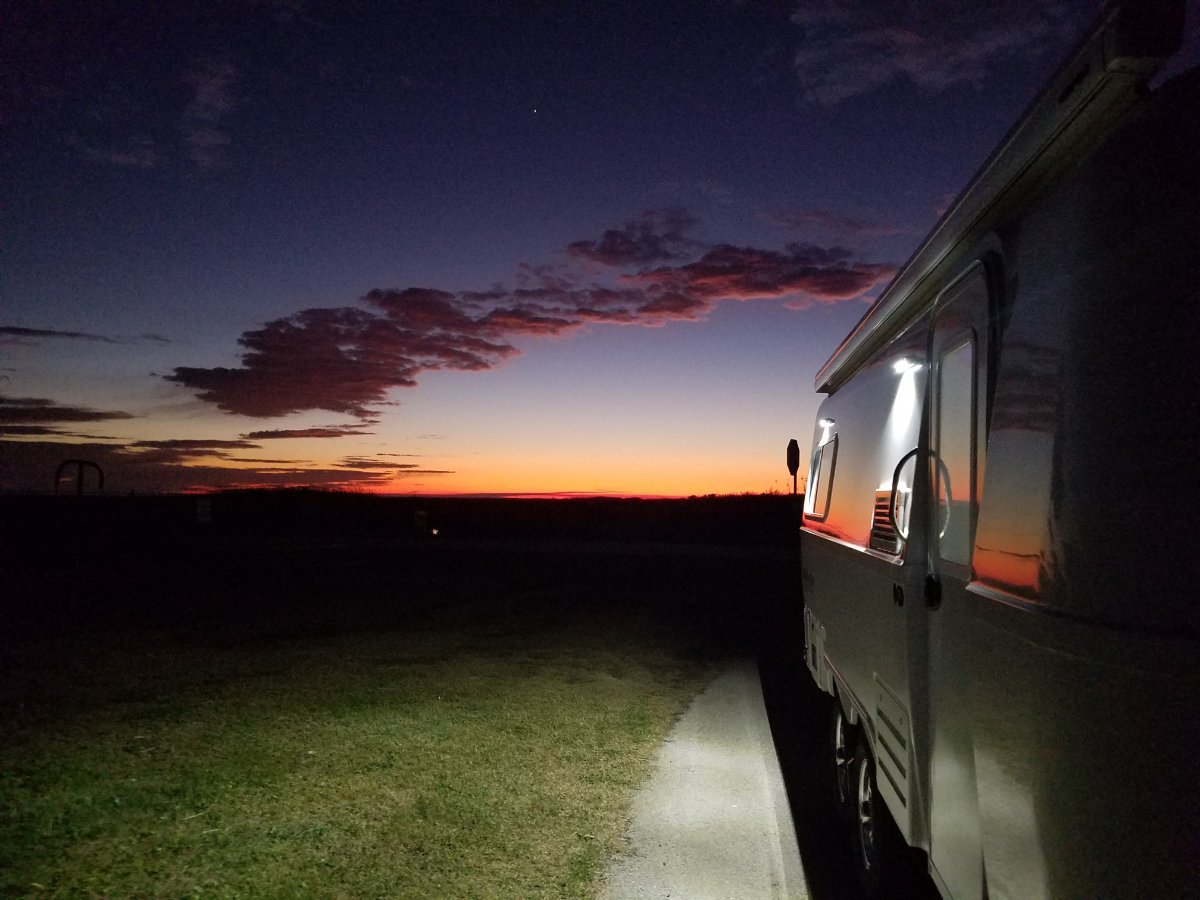
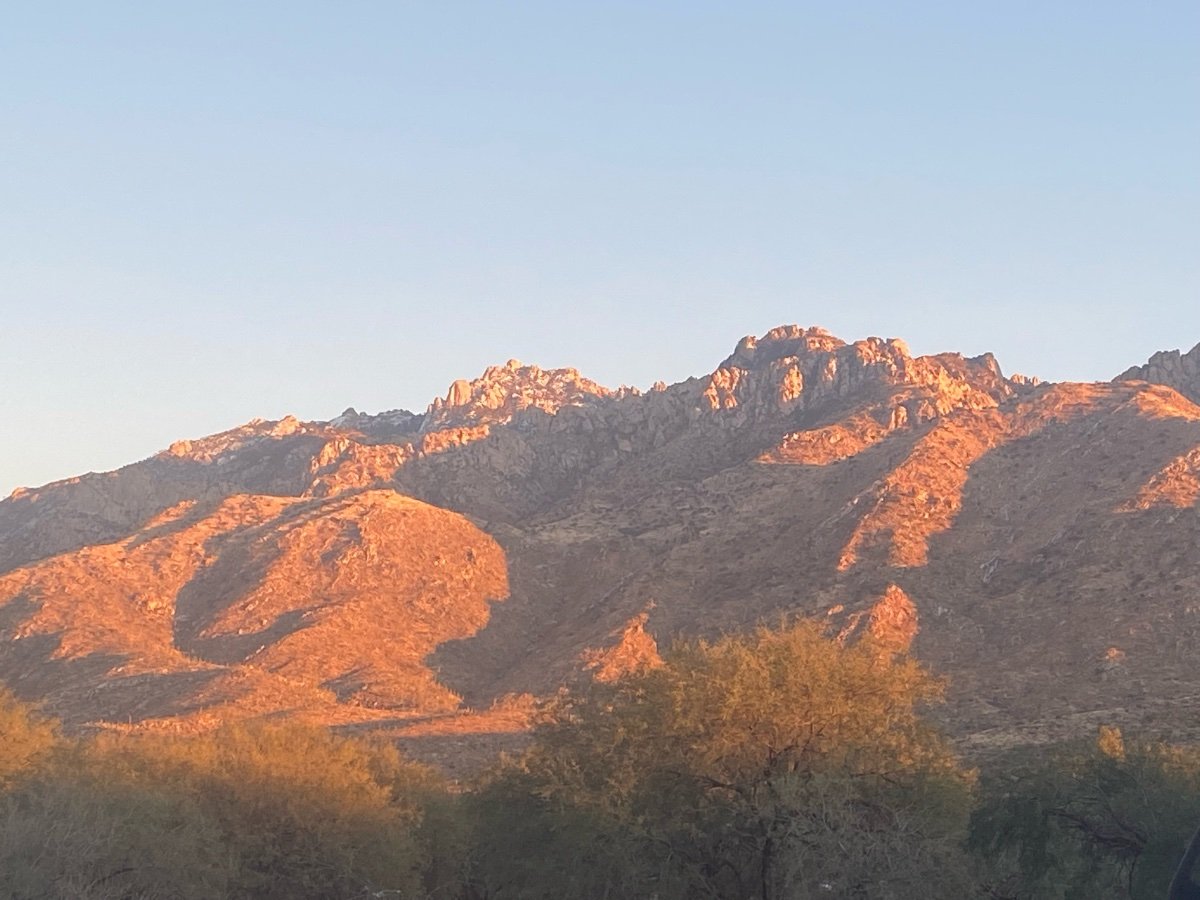
Sunrise on BLM land near Congress, AZ Charlie.
1 point
-
Sea Rim State Park, Texas this past weekend. The beach with lows in the high 20's - trying to learn how much propane we use to keep warm! Great facilities and rangers. Short walk to beach on which camping is also allowed (we're not there yet!).
1 point
-
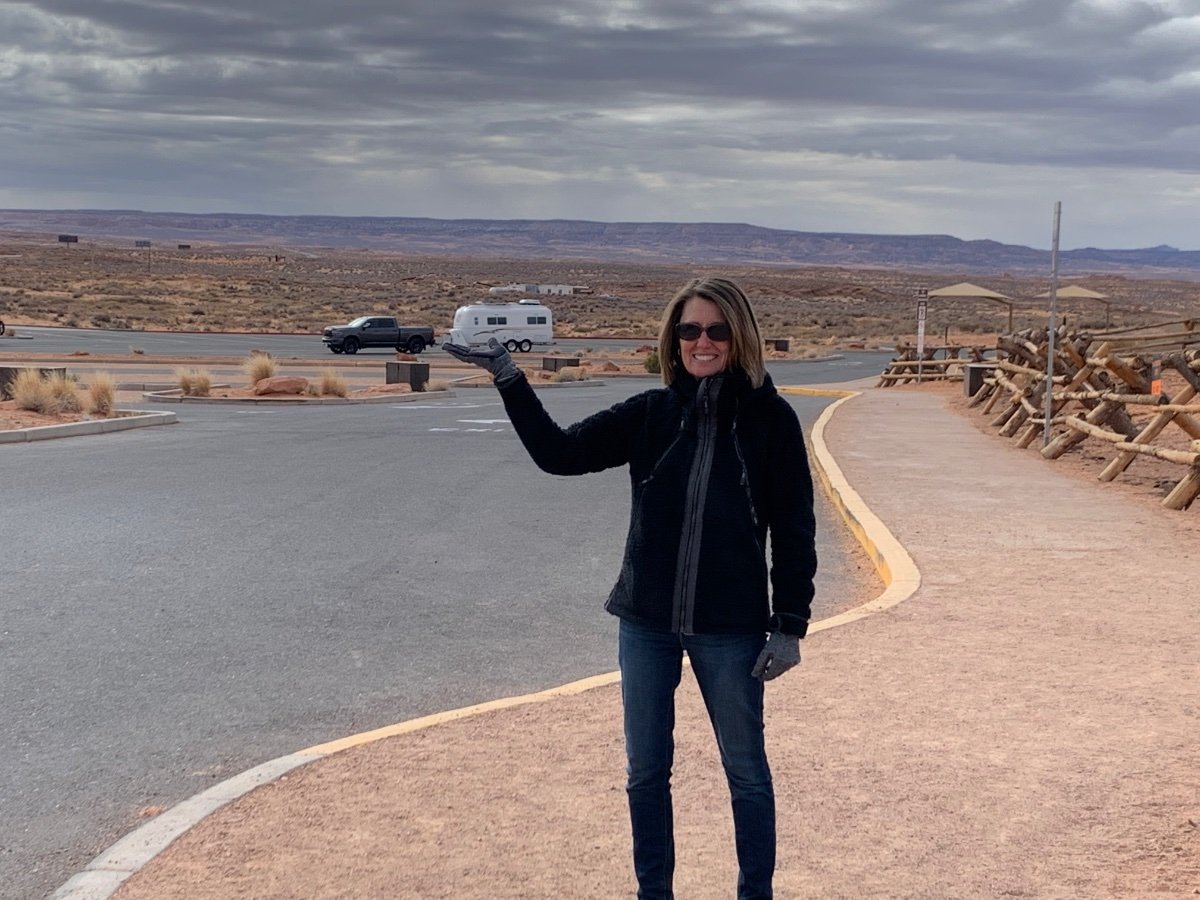
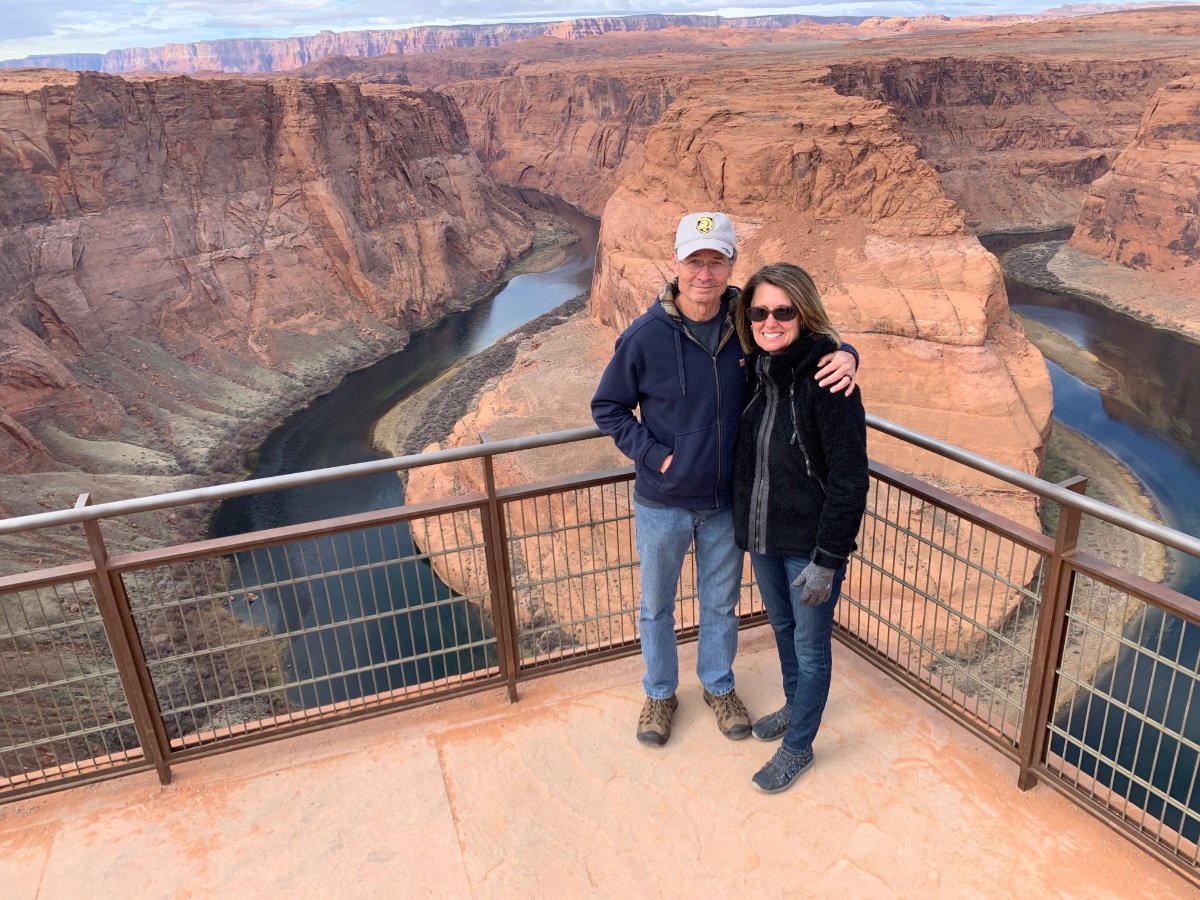
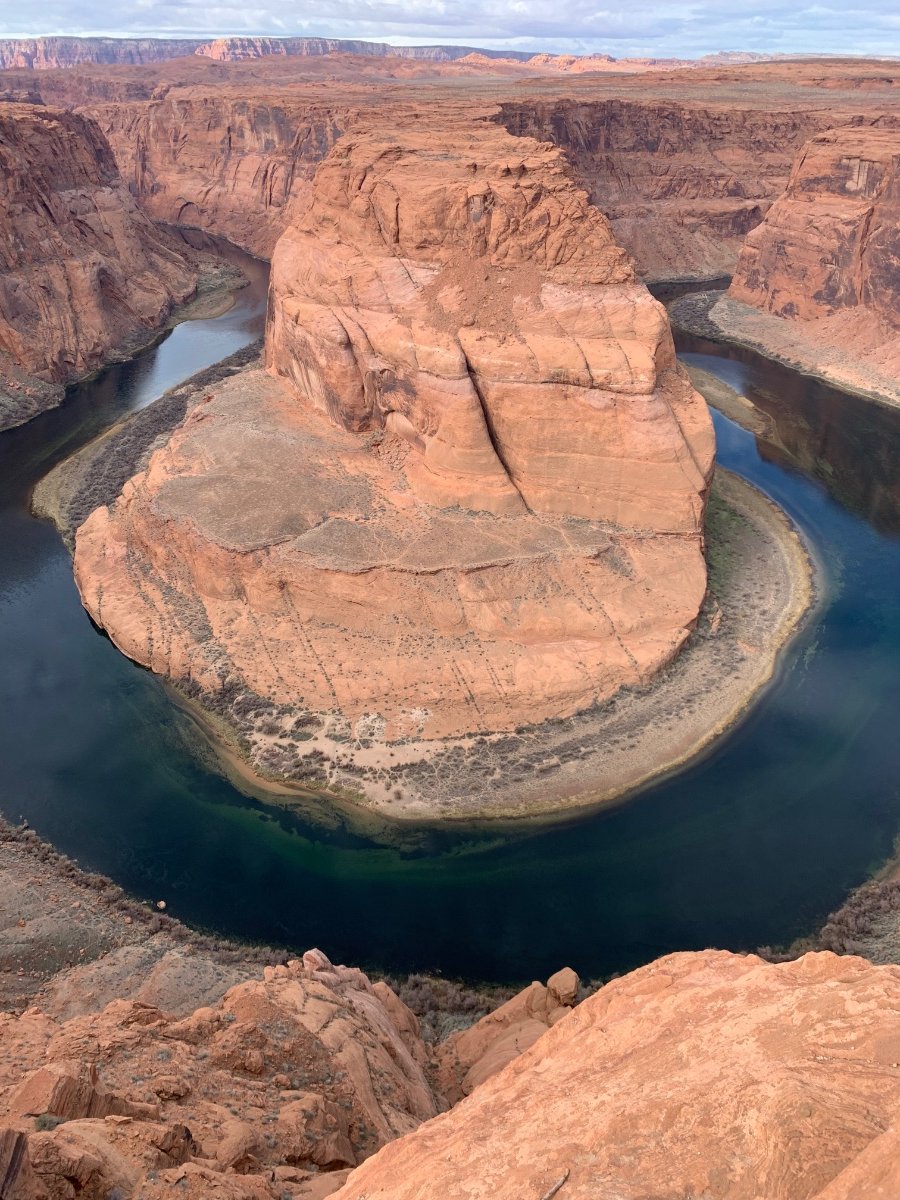
This is the parking lot for Horseshoe Bend just outside of Page, AZ. I have a collection of Carol holding our Oliver in the palm of her hand at various spots around the nation! A nice fellow tourist offered to take our picture. It’s worth the stop and 15 minute walk to see this. It was a bit cool but pretty spectacular.
1 point
-
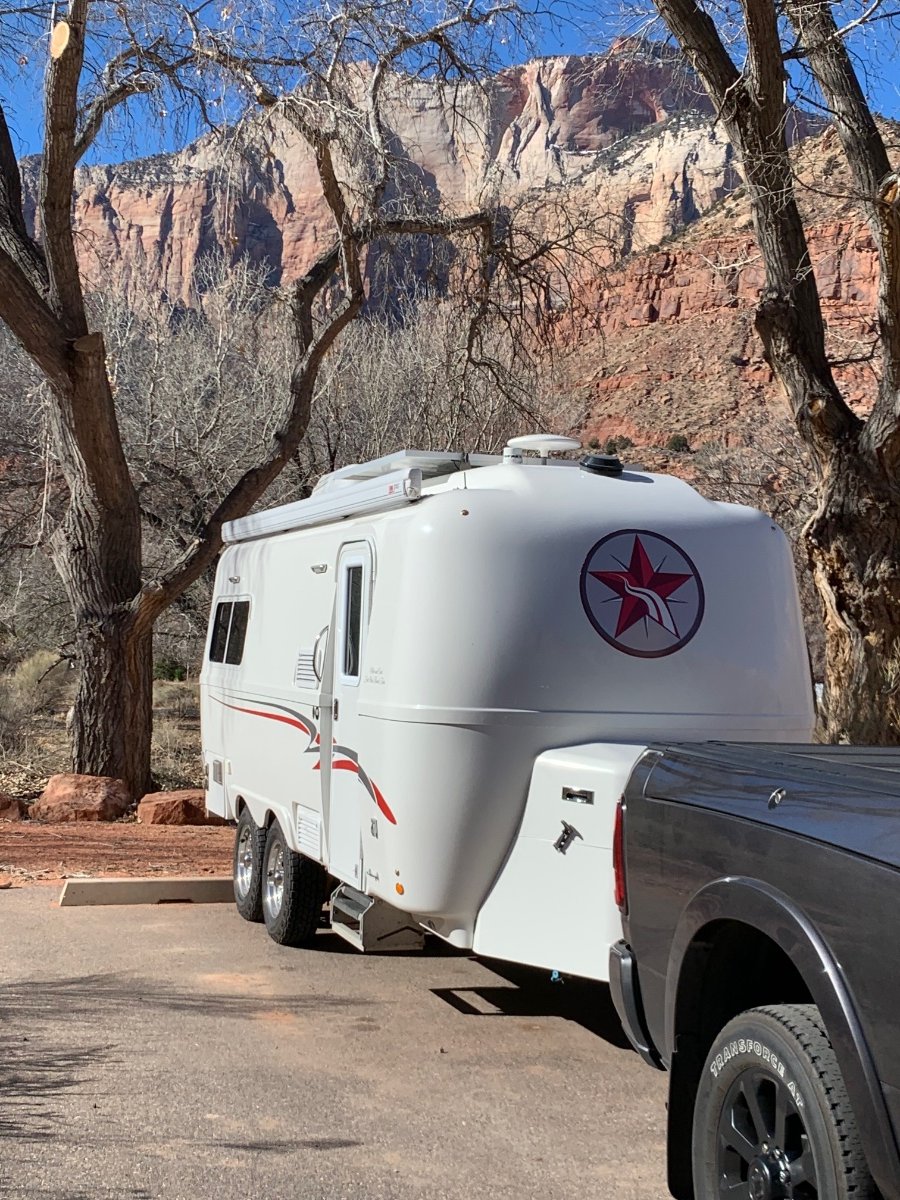
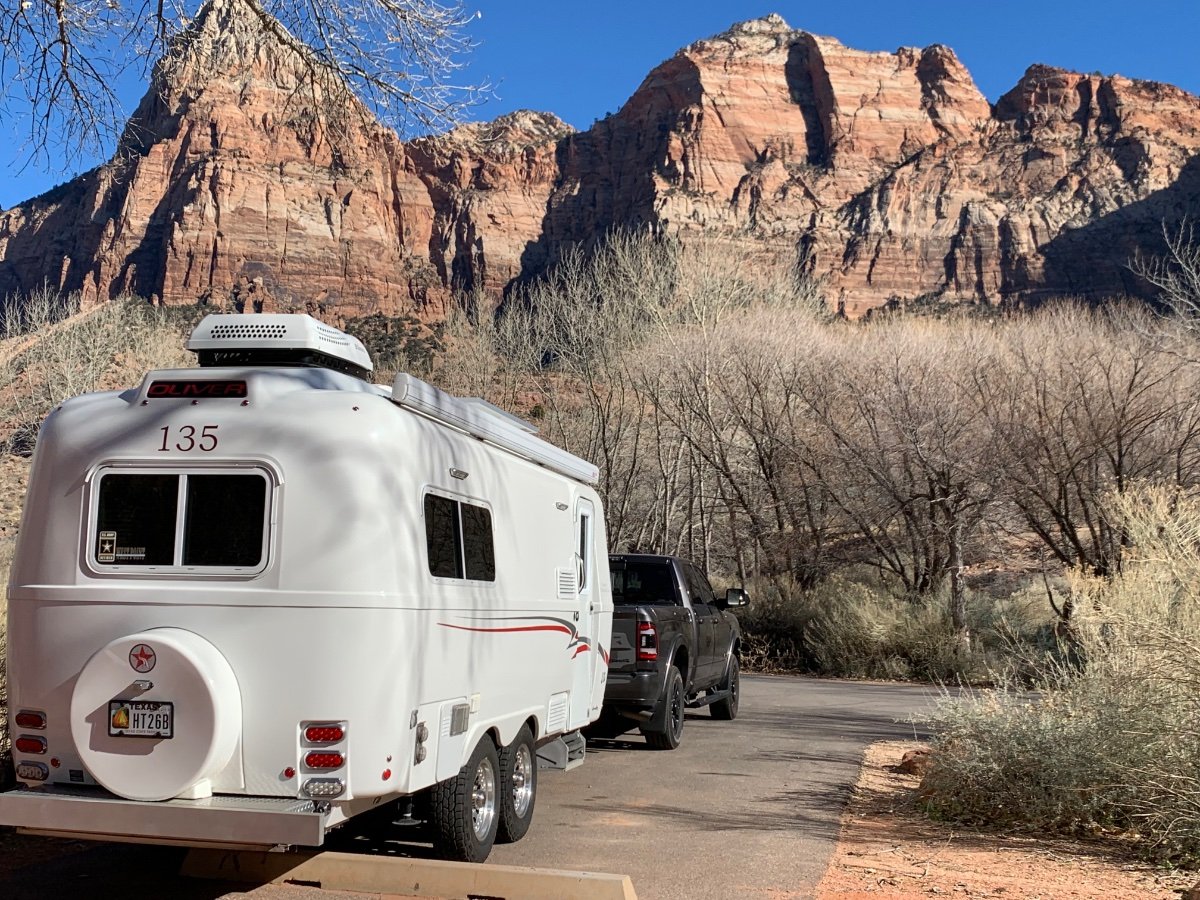
Winter camping at Zion National Park. No crowds. It was about 60 degrees this afternoon, short sleeves in the sun. Scenery is spectacular. We’re at Watchman campground.
1 point
-
Sunrise at Dead Horse Ranch State Park just south of Sedona in the town of Cottonwood. Just 20 minutes from Sedona. This is Red Rock State Park a few miles north of Dead Horse Ranch State Park. No camping here but some nice hiking. We hiked to the top of the “hill” behind me for some great views. Dead Horse Ranch State Park.
1 point
-
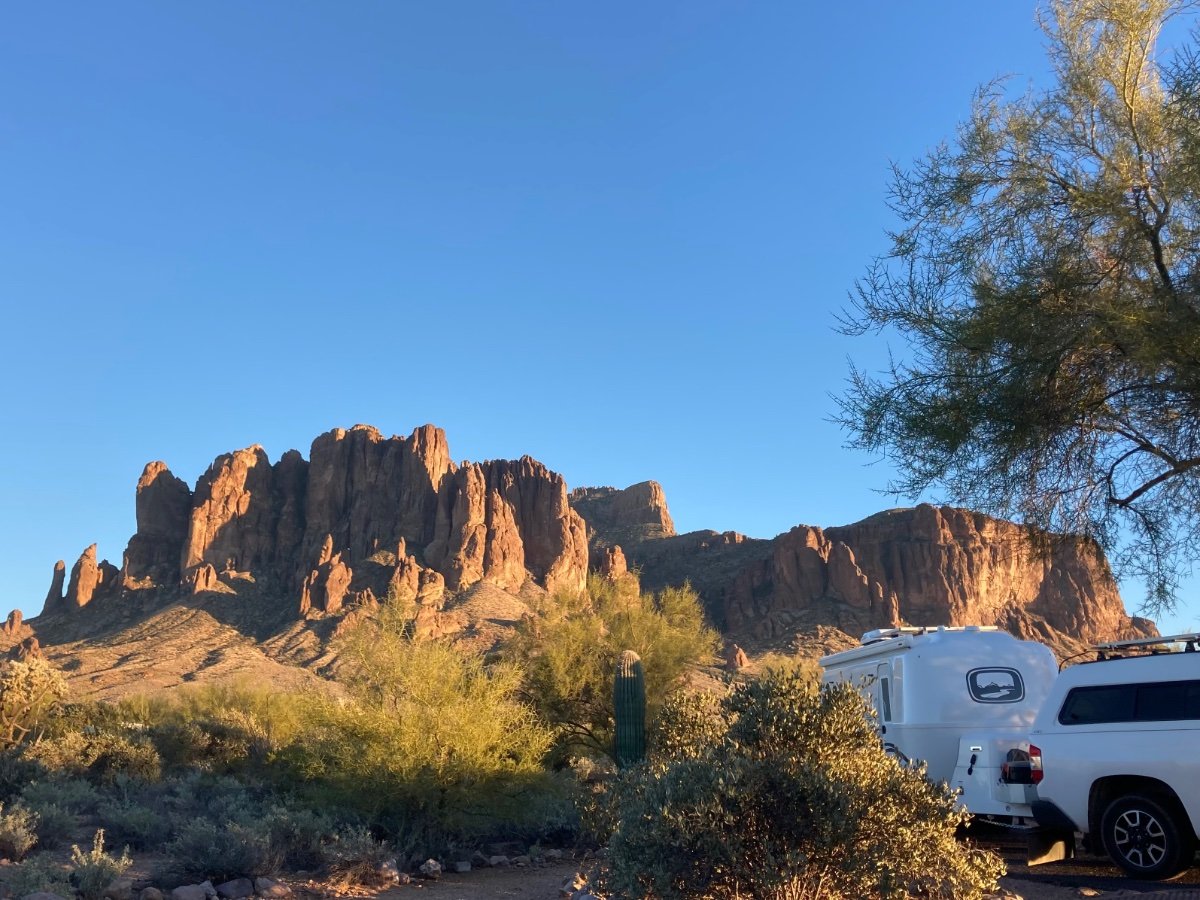
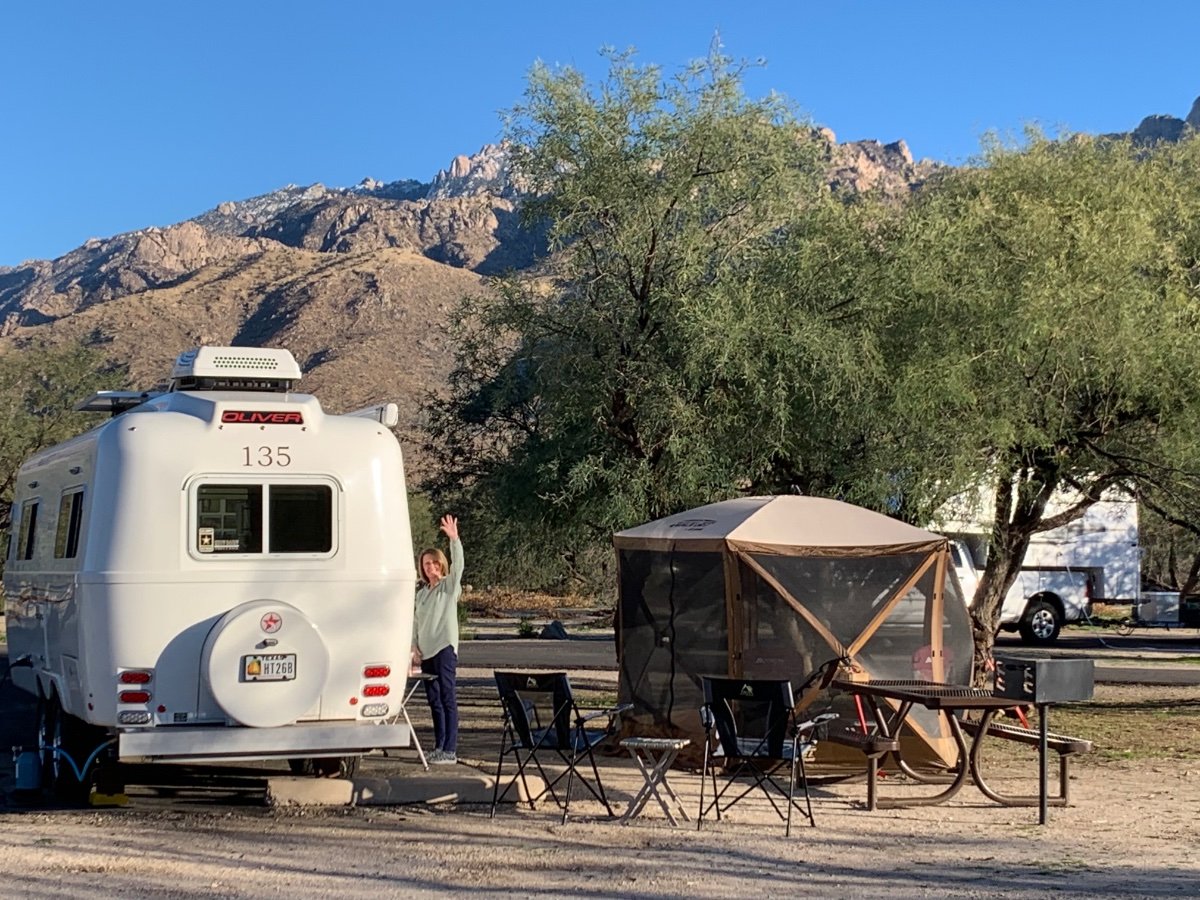
Lost Dutchman State Park, AZ. What a beautiful park
1 point
-
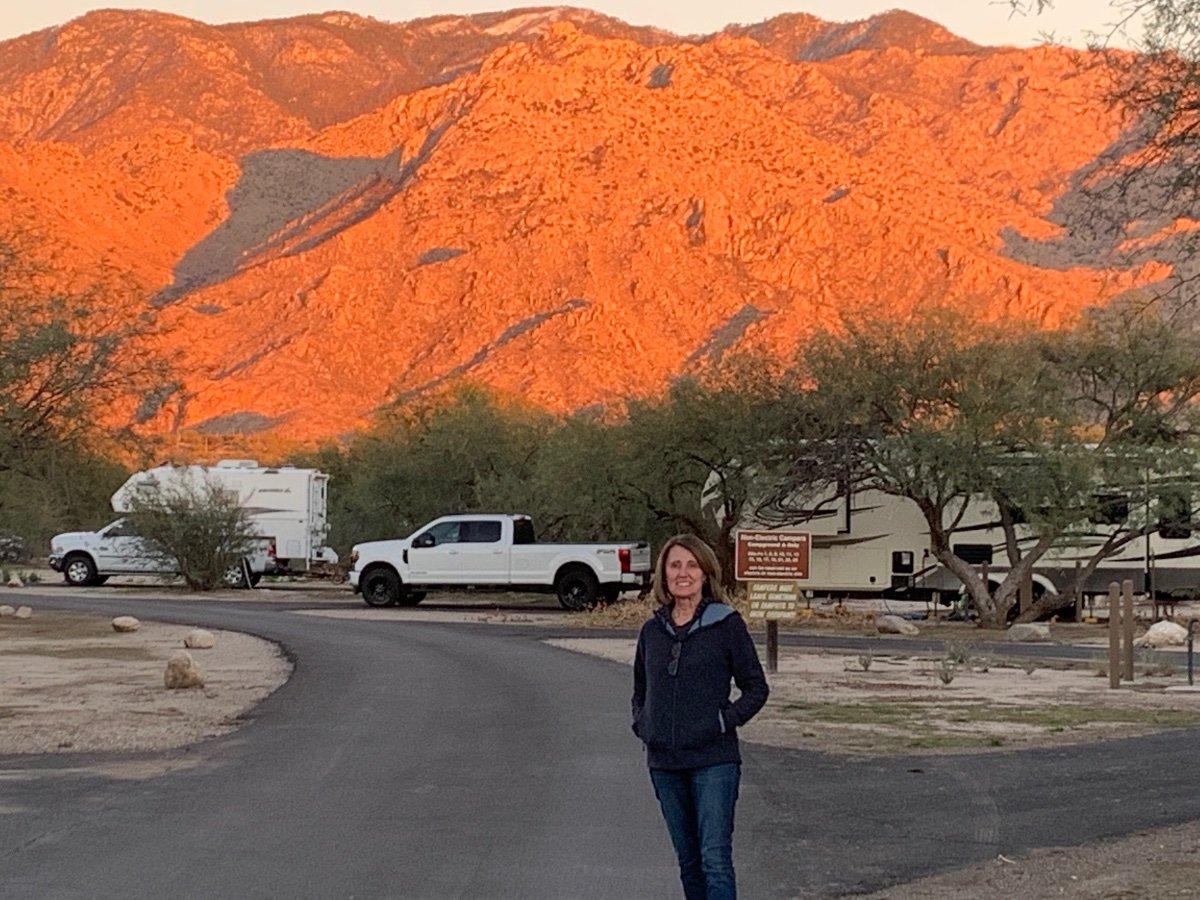
Sunset tonight at Catalina State Park!
1 point
-
What a surprise to find four other Ollies at our favorite AZ State Park the day after we arrived. Great to meet new Ollie owners and reconnect with some we met last year, before we had our Ollie. Ollie owners are really nice people.
1 point
-
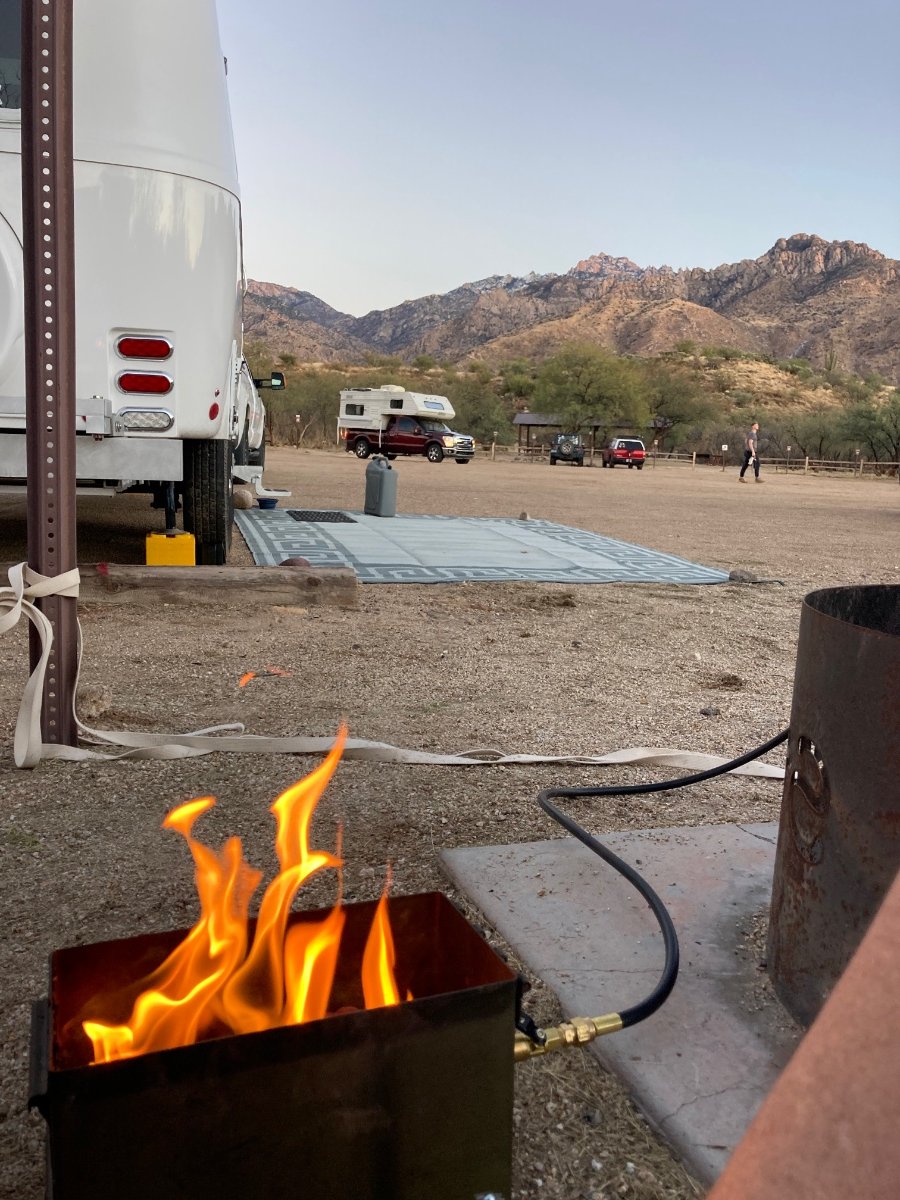
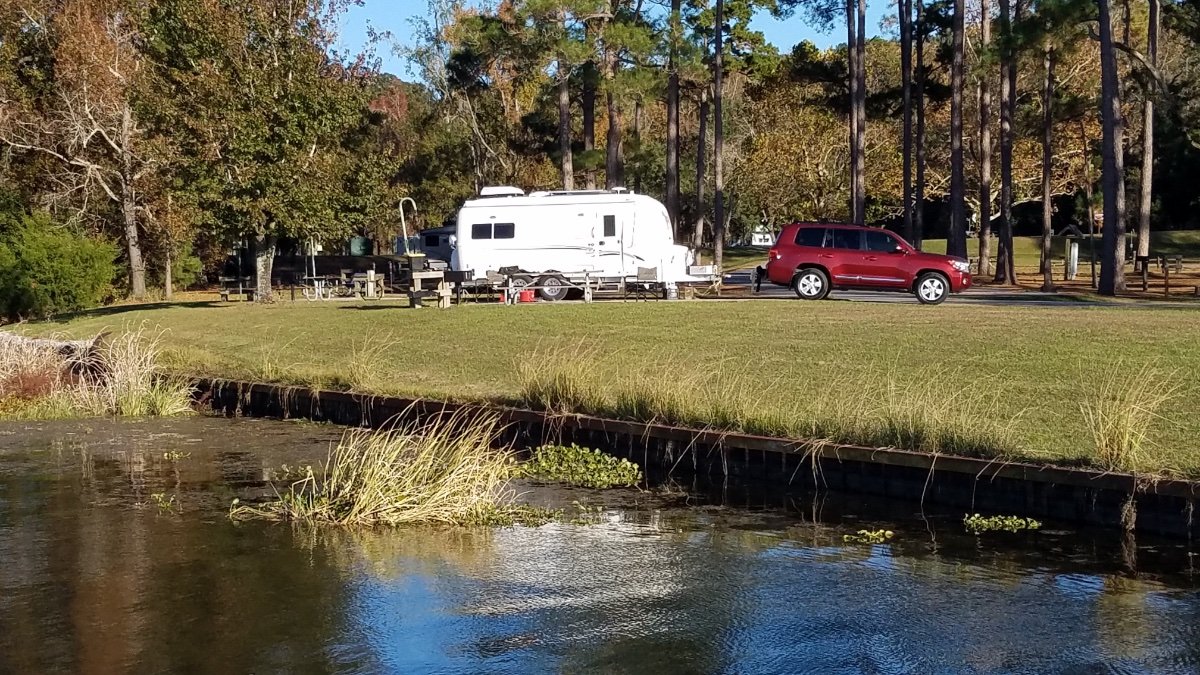
We’re camped in Catalina State Park just north of Tucson. It’s a popular park, so reservations need to be made well in advance. There are 4 other Olivers here, two of them that we’ve camped with many times before.
1 point
-
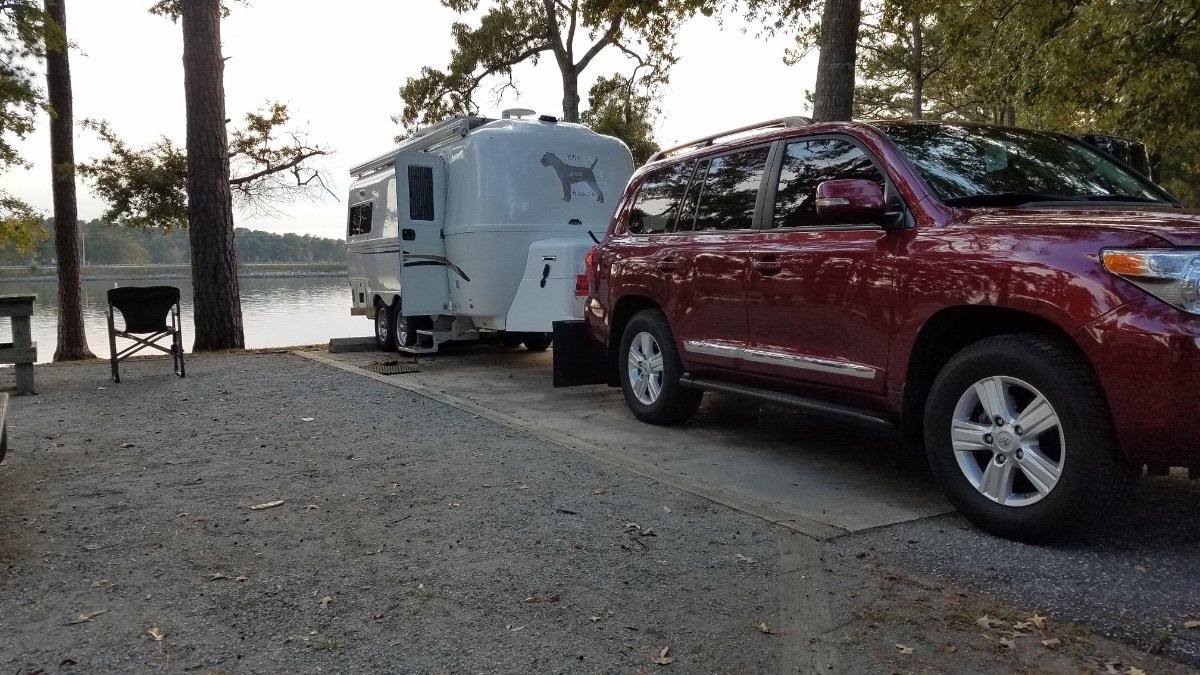
11-27 to 11-30, 2021 Eastbank COE campground near Bainbridge, GA. Very nice campground with clean facilities and grounds. And the heated shower house was a bonus as the low temps were 50, 34 and 37 our 3 mornings there. Mossey
1 point
-
11-10-2021 Overnight stop while traveling. White Oak Creek COE campground near Eufaula, AL. Very typical for COE campgrounds. It is clean, waterfront and cheap for old people. And they even had the heat on in the shower building. Sweet. Mossey
1 point
-
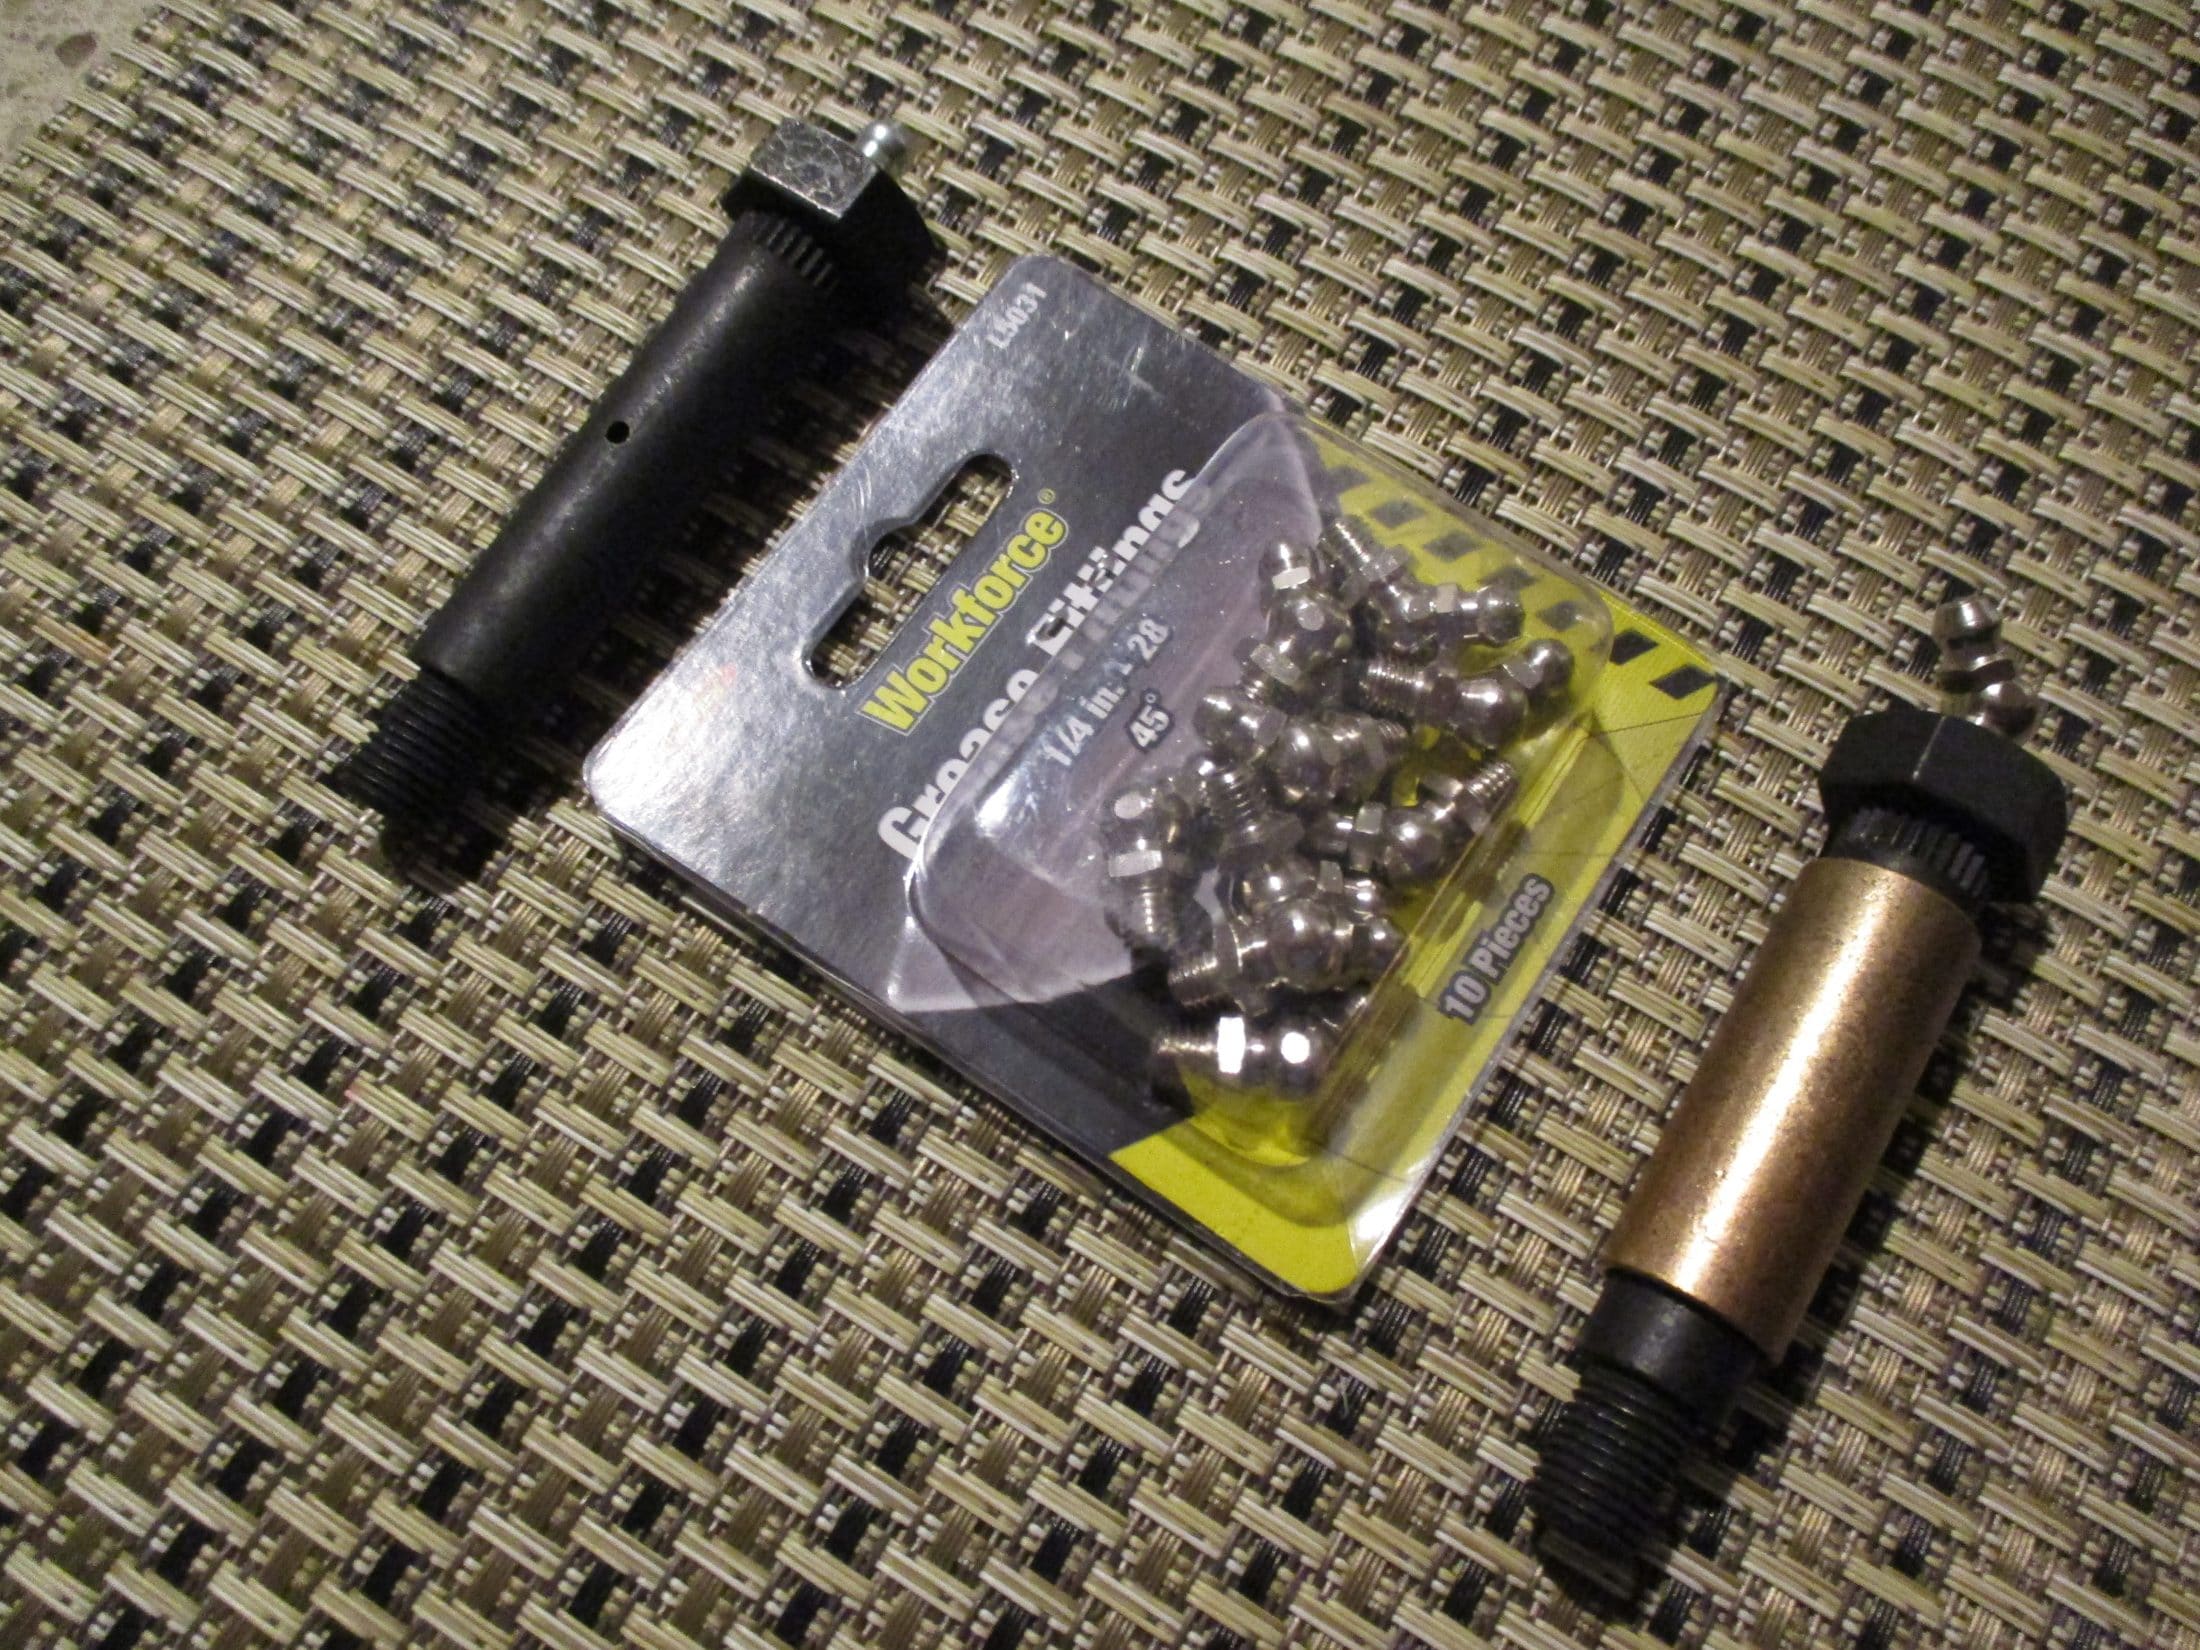
Choied, Have some Dexter pins, Dexter bushings and 45 degree fittings on the shelf to look at. The Dexter pin takes 1/4"-28 thread grease fitting. Ours came with straight fittings, but 45s could be used, too. Hope this helps.
1 point


-
Recent Achievements
-


")


")


")
