Leaderboard


Popular Content
Showing content with the highest reputation on 04/08/2023 in all areas
-
Maybe Jason could talk about the new Truma air conditioner retro fit and how this is working out for Oliver owners? Pros and Cons? Suggested talking points: what all is involved with the installation of the new Truma Aventa with regard to the added roof wedge modifications, pricing and installation time? It is fairly well known that Truma retro fit owners are not really overly happy/excited about having a Dometic manual thermostat to operate the Dometic furnace. Will there be a fix to having a more modern looking digital thermostat vs the out dated older style mechanical thermostat controlling the heat only on the Dometic furnace? For the substantial cost of the Truma Aventa install I would like to see a more modern looking digital thermostat included in the price of installation. Edit - 4/12 An optional digital thermostat to control the Dometic furnace has been recently approved by Oliver. This will be an option for owners who wish to upgrade from the mechanical Tstat to the digital. An additional talking point could be the optional upgrade hard wired Truma panel which allows for temperature control of the Truma AC in the event the Truma remote fails. This new Truma control panel as I understand it replaces the existing Truma hot water heater panel and integrates both the Truma AC and hot water controls into the new panel. Patriot 🇺🇸6 points
-
Almost done, this is the same Isotherm Cruise 130 that Oliver is now using. I have some paint touchup to do, and some sealing after the paint is fully cured. I will do a new thread when it is finished. It is remarkable how silent it is…. John Davies Spokane WA
 5 points
 -
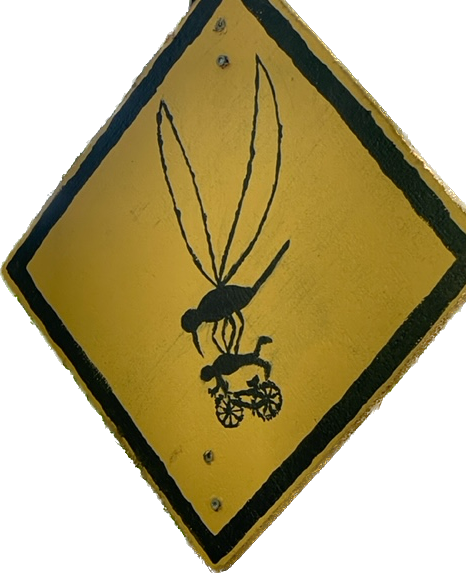
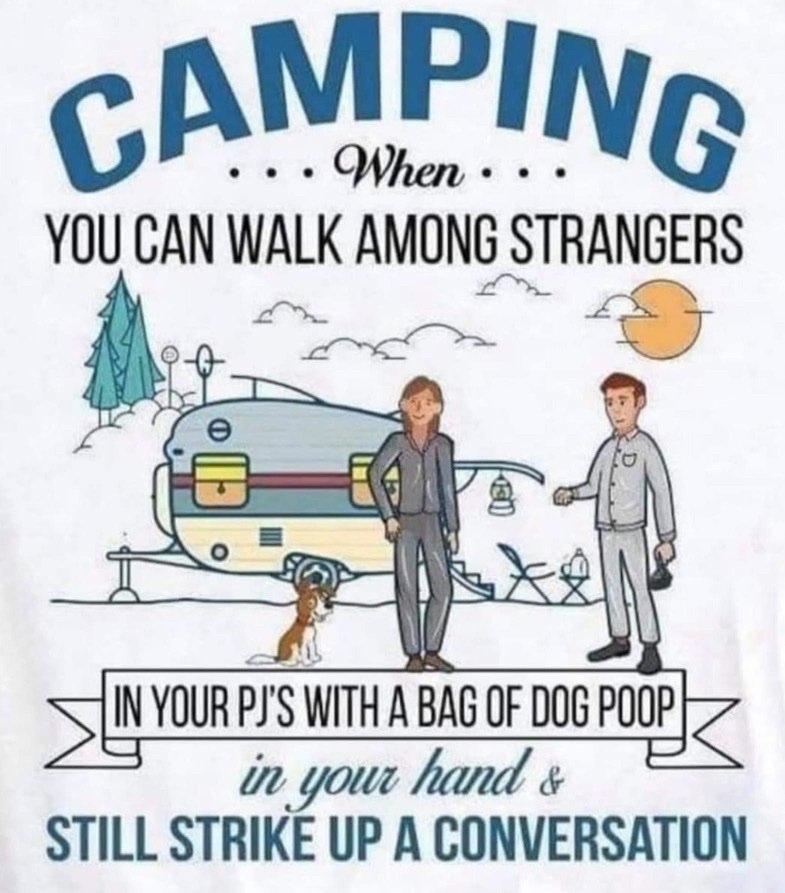
This is a little off subject, but I have certainly felt this way when camping. The pic is from the bike park at Virginia Key in Miami.
4 points
-
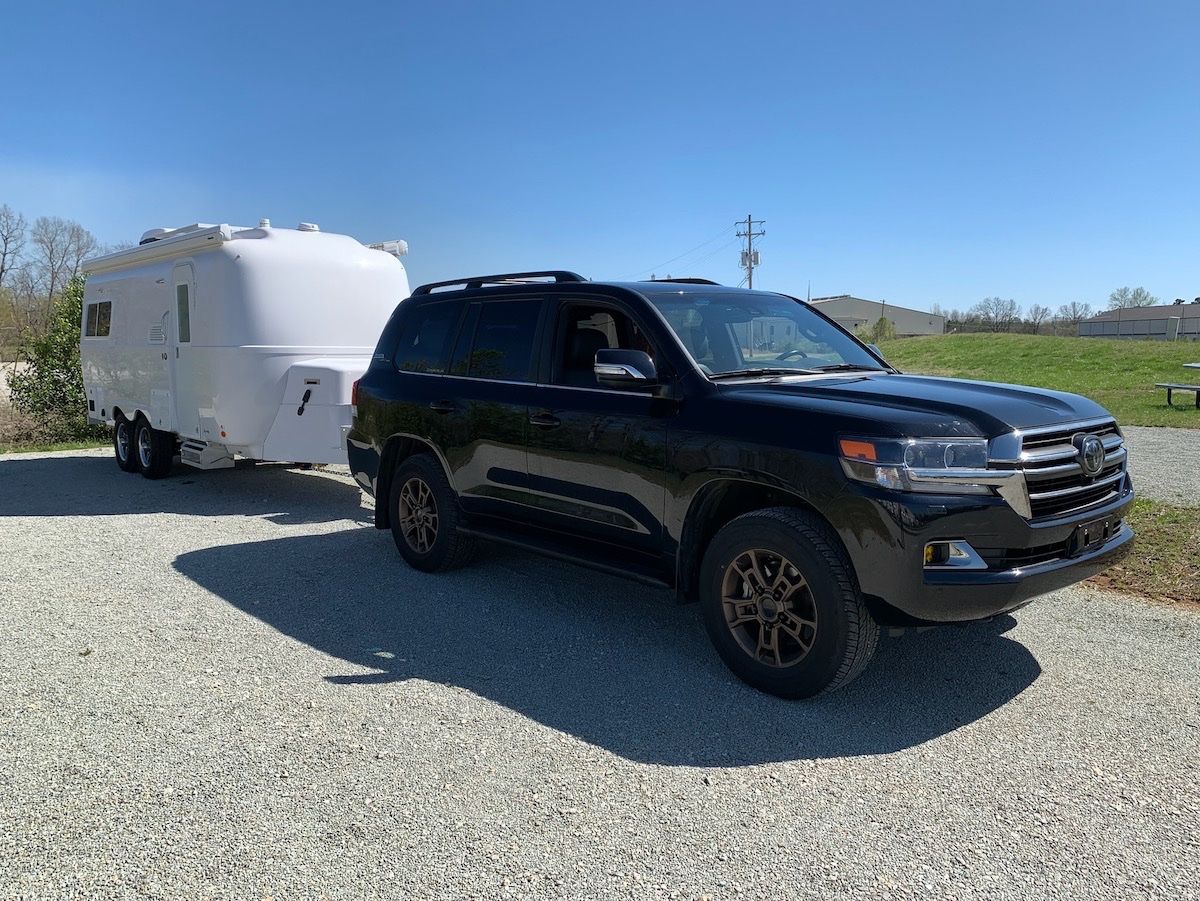
We arrived back home in northern Ohio late on Thursday. Traffic was miserable on I-75 and I-71! Totals were 691 miles (16.7 MPG) on our way south, and 1160 miles (10.6 MPG) towing to Pine Mountain, Georgia and then home, for a total of 1851 miles. What a fantastic trip! I'm ready to head out again!! 😃 Including the five nights so far, we have 31 nights scheduled for this year (plus the Egg rally in Florida in January) and another two tentative. Plus whenever I can drag Deb away from her gardens to go somewhere. Now, to do all things to personalize our trailer and make it even more comfortable, and all the tinkering I plan. I'll eventually create another thread not in the "Delivery Photos" sub-forum. A huge than you to all of you for your help, encouragement, and support. We honestly would not be here with a new trailer without you. YOU make the experience fantastic! Steve & Deb (yes, I have a cheap extension cord going in the bathroom window for a ceramic heater. I have every dogbone imaginable except 30A female to 15A male. Amazon is delivering today...)
4 points
-
Looking forward to your new thread, including your usual helpful narrative, when you are finished.4 points
-
Jason Essary asked me to please poll the group here to see if there are any particular topics we might want him to specifically focus on for his presentation at the rally. Please name a topic such as "Bearing Care and Lubrication" or "leveling the trailer in quicksand", anything that you're curious about and might be of general interest to the group attending. Be specific, I will send him the link to this thread and he can pick from your suggestions.3 points
-
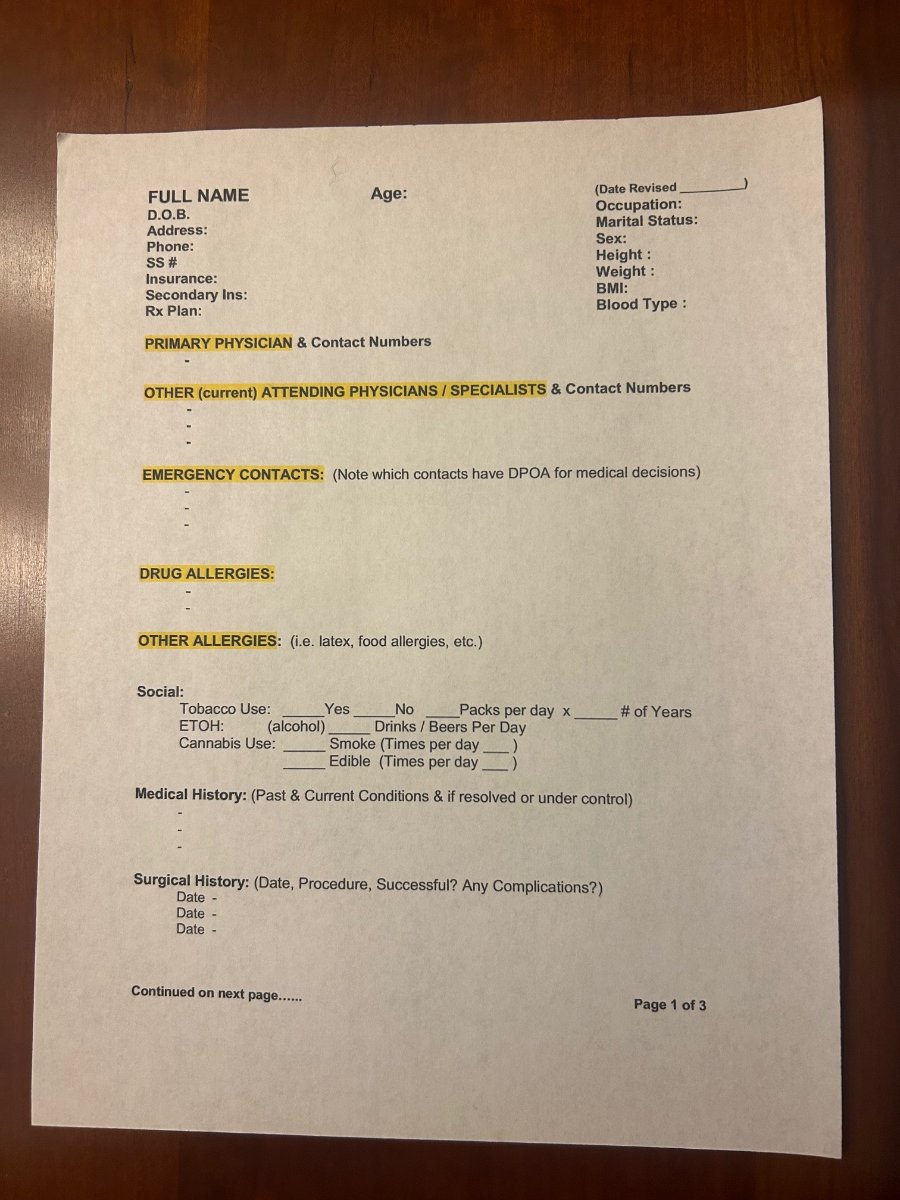
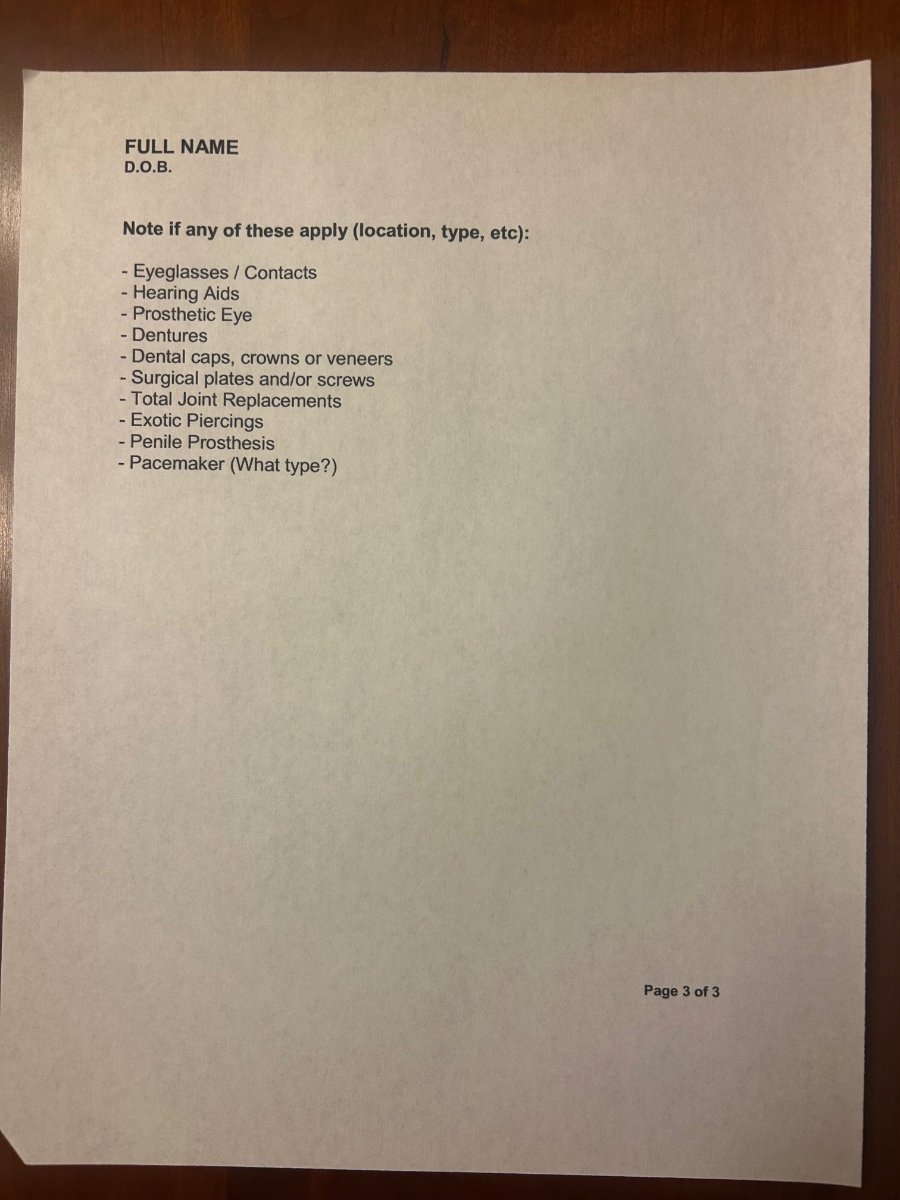
Back on January 17th of 2020, we had an appointment to meet @topgun2 to show us his Oliver LEll aka “Twist”. We throughly enjoyed the 4 hr visit and all the extremely helpful information shared by Bill. And after a factory tour on Jan 21st, and we ordered our Oliver on January 31st!! I mention Bill; as we are not taking any credit for the below checklist. I know we all have checklists for our Oliver, however this is one that you need to have but hopefully will never have to use. We actually carry this checklist with us every time we travel whether pulling the Oliver or not. We don’t have a blank checklist to share in a word doc as ours has our personal info already on it. You should find it fairly easy to personalize your own from the info on the attached pics. So consider taking a few minutes and create a medical checklist that hopefully you will never need. In the event you do it’s invaluable. A special thank you to Bill aka @topgun2for suggesting one of the most important checklists we will always carry and hope we never need. Safe Travels Oliver Family! Patriot🇺🇸
3 points
-
Being new to all this, I have recognized that folks with older models do have upgrades installed occasionally. Perhaps Jason could speak to the process of upgrading items on the camper as newer appliances or systems become standard. Also maybe tie in how a buyer's decisions when having their camper built effect the ability and or cost of future upgrades.3 points
-
We travel with two (formerly three) dogs. One, a 104 pound Doberman Pincher and two, a 10 pound mix. Reacher (104 pounder) sleeps on the dinette bed which must be made down for him on demand. Rocky, at 10 pounds sleeps wherever he wants to, usually with one of us. We keep their water dish in the bathroom (Reacher will drink a quart of water at a time and make a big mess in the process.) We usually carry a forty pound sack of dog food in the closet. Everybody loves their dogs and many folks travel with them. You make it work because you can't imagine traveling without them with you. Ours have been to every state, lots of Canada and Alaska. "Wanna go for a ride?" "Wanna get in the truck?" "Wanna go camping?"3 points
-
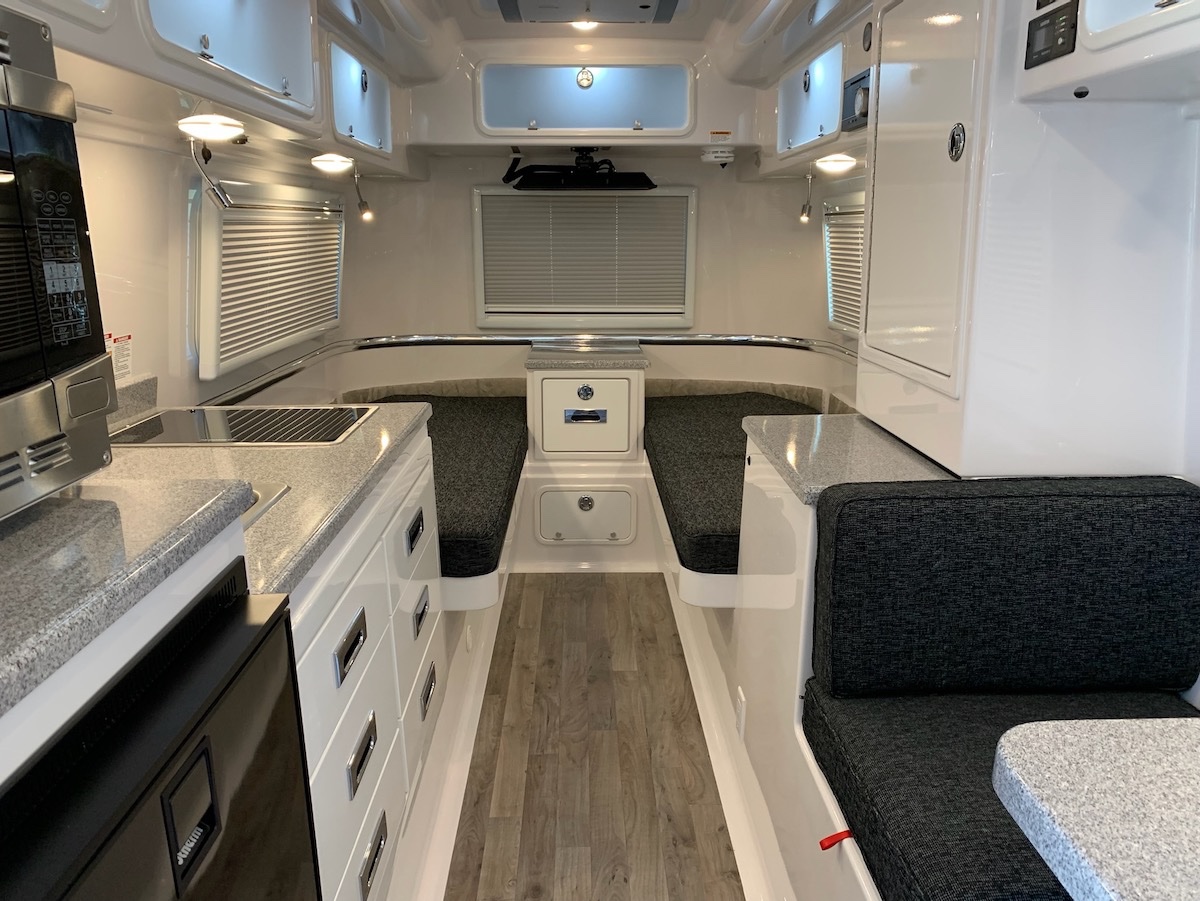
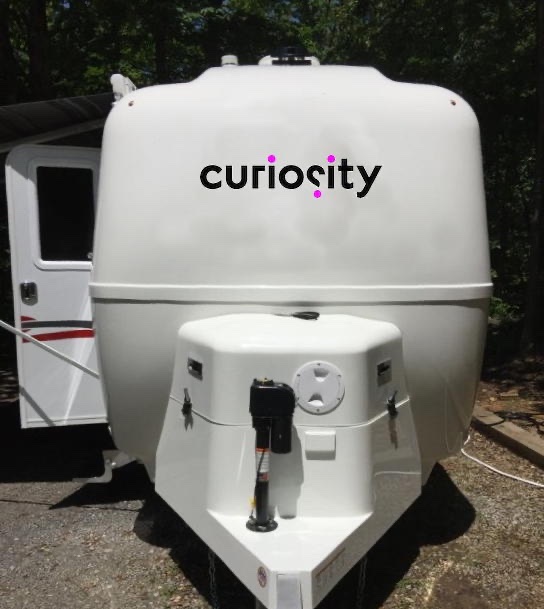
Here's what we ordered: - 2023 Oliver Legacy Elite II Twin Bed - Standard Mattresses (KTT mattresses after receipt) - Standard Fabric - Midnight - Hypervent - Omnidirectional Antenna (local weather etc. if we don't have cell service) - Street Side Awning - Frosted Cabinet Doors - Convection Microwave - 20 Gallon Propane (to keep tongue weight down) - Front/Rear Propane Quick-Connects - Standard Toilet (with possible AirHead composting replacement) - Full Truma Package AC, Furnace, Water Heater and Antifreeze kit - Lithium Platinum Package - Backup Camera - Rear Bumper Receiver (to be converted to 2" after receipt) - Anderson Hitch - Aluminum Storage Basket - Basement Door - No Graphics Delivery Date: Wednesday, March 29, 2023 Status: Thrilled beyond belief!! A huge thank you to everyone here who has helped us through the entire process over the past ten months! Your support cannot be understate. I can't wait meet all of you! Steve and @DebM Mock-up of the graphics that are on order from Robin at Banana Banners (using one of the images from this forum for a background - thanks to whomever I stole it from) "curiosity" logo used with the kind permission and encouragement of Curiosity Software Ireland
2 points
-
Thanks Patriot for the kind words and I'm glad that you have found this list helpful. However, I don't deserve credit (other than passing it along) in that it came from a presentation that was done by a former Oliver owner and his wife (both medical professionals) at an Oliver Owner's Rally a few years ago. This list of medical details and relevant information is to be used in the event that you can't speak for yourself and/or when a medical emergency happens and people are running around in the confusion that many times happens during situations like that, there is one place where all necessary medical information can be easily found. I keep a copy of this in both my tow vehicle and in the Oliver. Both copies have a medical alert drawing (like the one below) on the front of a bright yellow folder. Bill
2 points
-
Are you guys planning on coming to the OTTOR in May? Edit: Sorry, I remembered just now that you're the keeper of the list.2 points
-
All good ideas Chris however paint protection install really requires a learned highly skilled technician. Then Oliver would likely have to warranty the install. The only PPF I use is 10 mil XPEL and I have had our both our Ollie corners, dog house and bottom quarter panels done. It’s expensive but it does protect the gelcoat. I would be surprised if Oliver would begin installing PPF. Having had most if not all of our vehicles professionally covered with XPEL.com my guess is Oliver would leave that up to the owners to have it installed. Your idea of mud flaps seems plausible! I would like to see this offered as an option. Naturally these options would further drive a new Oliver to an even higher price tag. I could go on, but I do not want to derail the thread. All this said, it never hurts to ask! 😊 Patriot🇺🇸2 points
-
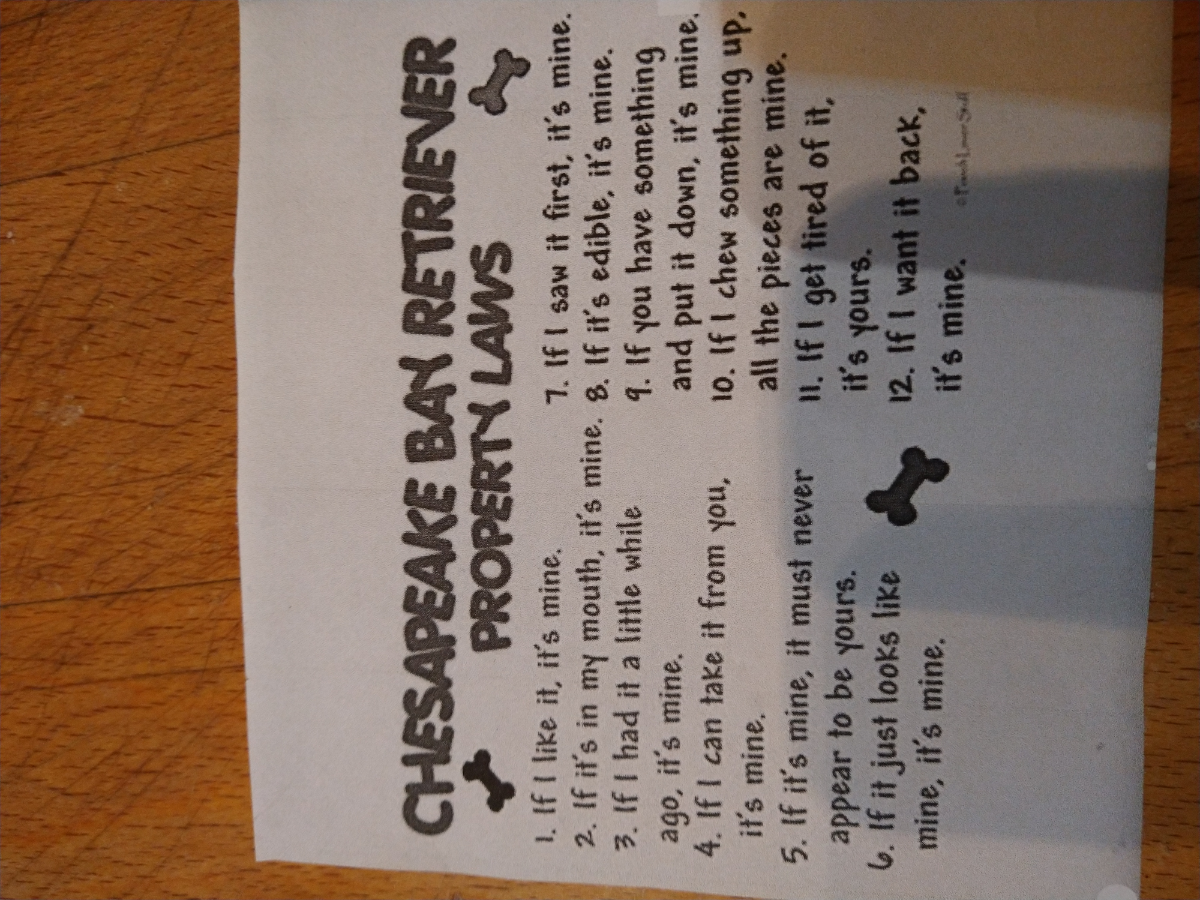
We travel with one 80 lbs Chesapeake Bay Retriever. She does not stand that tall but is very thick through the chest. She sleeps on the floor on a thin dog bed that is exactly the width of the floor between our twin beds. When the furnace is on, we move her bed forward so it fits between the two heater vents. If we get up during the night, we turn on the floor lights and have to step over her. She is very mellow and hardly knows of the activity. When cooking inside we have her lay down on the entry carpet in front of the door. The water bowl goes in the bath. It's cosy with us and pooch during winter travel. Travel during warm months, we are mostly outside except for sleeping or fighting bugs. We love our pup and consider this as only a small inconvenience to have her travel with us. We have chosen to be one dog family because two is more than we want to manage. I can't speak to two large dogs inside, seems viable but very cozy if you love them and are use to dealing/living with two dogs under feet. d image
2 points
-
Two possible tongue in cheek answers: With my hearing that is a moot question! 🙂 My vision is far superior to my hearing. 🙂2 points
-
Sure - but how will you know that the grease cap is off the hub if you can't hear it rattling around inside that "hubcap"?😁2 points
-
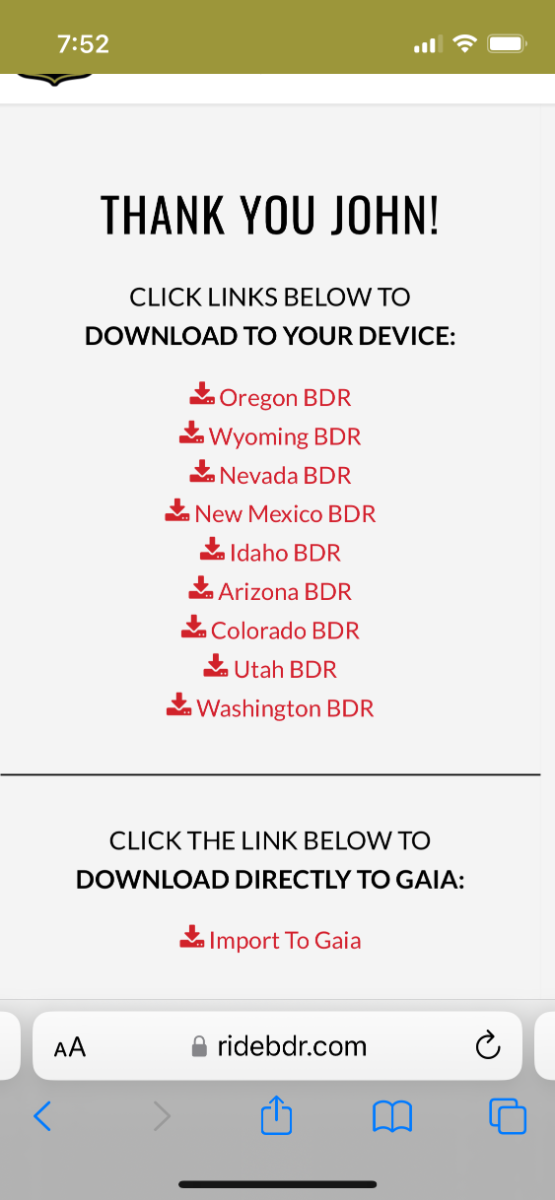
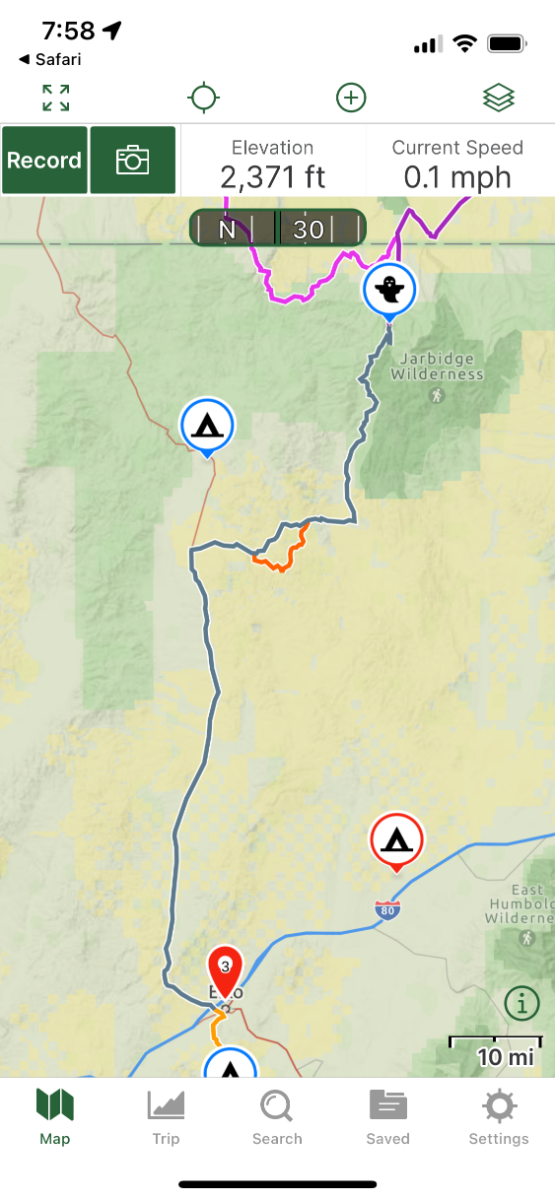
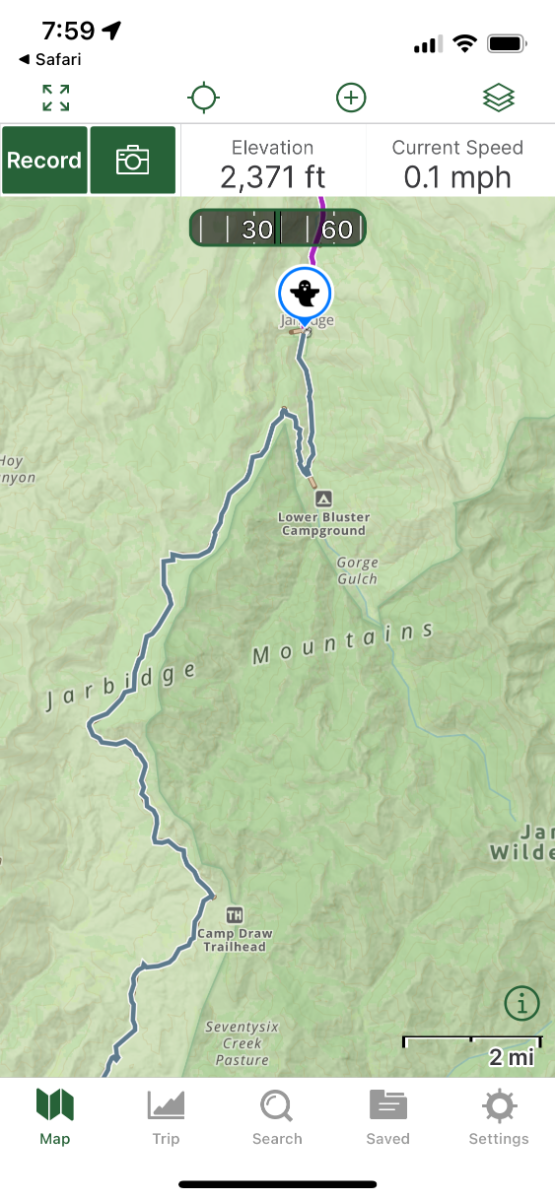
Woohoo, this is great…. 12 Routes and counting (one new Route each year). “Sometimes, it’s a relief—even a delight—to follow a trusted off-pavement route you know will go. Especially when you know it will go past breathtaking views, across challenging terrain, and to memorable watering holes. That’s why we’ve partnered with Backcountry Discovery Routes to bring you premier long-distance off-pavement routes with a leading navigation experience. Thanks to this new partnership, you can take any Backcountry Discovery Route (BDR) offline in the Gaia GPS app with just one click. We’re also honored to promote BDR’s mission of promoting responsible travel and fostering sustainable adventuring and economic growth.” Backcountry Discovery Routes Now Integrated with Gaia GPS: Get the Best Off-Pavement Routes with the Leading Navigation Experience This was super easy, following is part of the Nevada Route, I have driven this in my Land Cruiser, any vehicle can do the gravel USFS road sections, it is the back door route into Jarbidge ghost town, a way cool destination. The scenery is spectacular. The north “shaded” part of the route isn’t cleared of snow until about July 4. The waypoints are my own, you can choose to display your own info in the layers menu. John Davies Spokane wA
2 points
-
Don't know if you two are insulting me or embarrassing me - either way, please don't stop!😅2 points
-
Compare what you watched him do to these steps: 1- After the hub has been replaced and the spindle nut is started, spin the hub with one hand while tightening the nut with the other. 2- When the nut is hand tight, the hub will still turn but with possibly some resistance. 3- Using a socket of the appropriate size, tighten the nut until the hub can no longer be turned by hand. This process is to properly seat the bearings into their races. 4- Back the nut off with the socket until you can once again turn it by hand. DO NOT allow the hub to spin during this step. If it does, retighten with the socket. 5- Tighten the nut by hand until it stops. BACK OFF the nut to where you can insert the cotter pin. This could be up 1/8 turn. 6- Spin the hub to make sure it’s not too tight. Install the cotter pin. Note: Some Dexter spindle/nut combinations do not use a cotter pin but rather a spindle nut retainer which I much prefer. Same steps apply.2 points
-
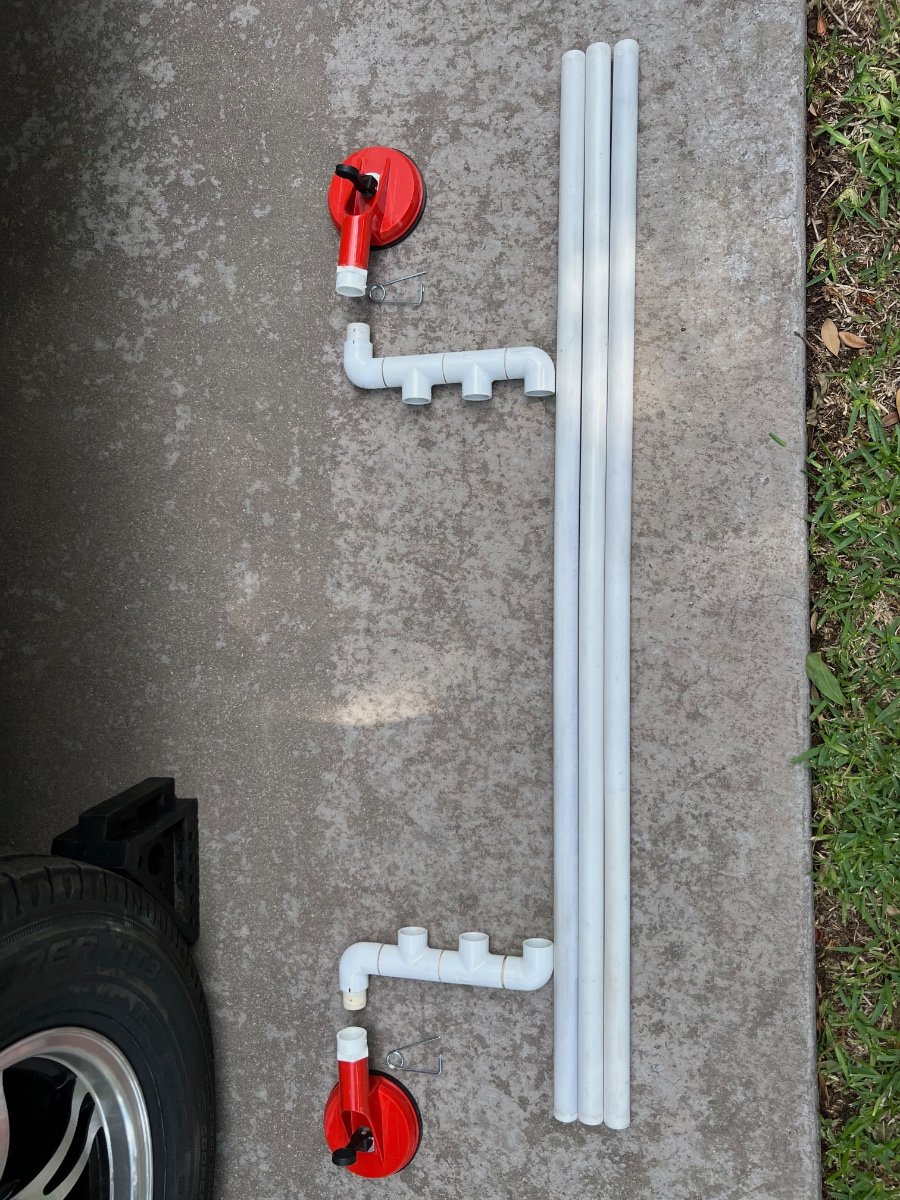
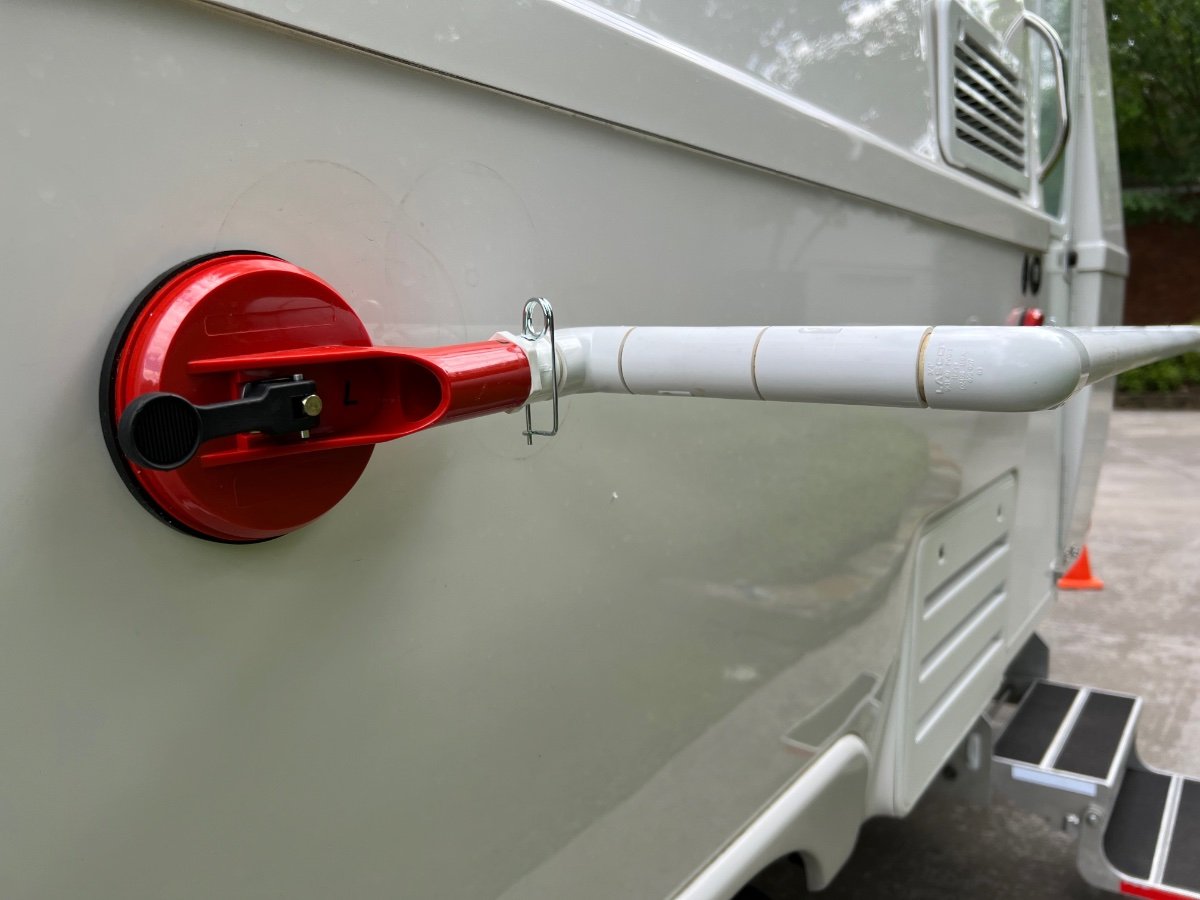
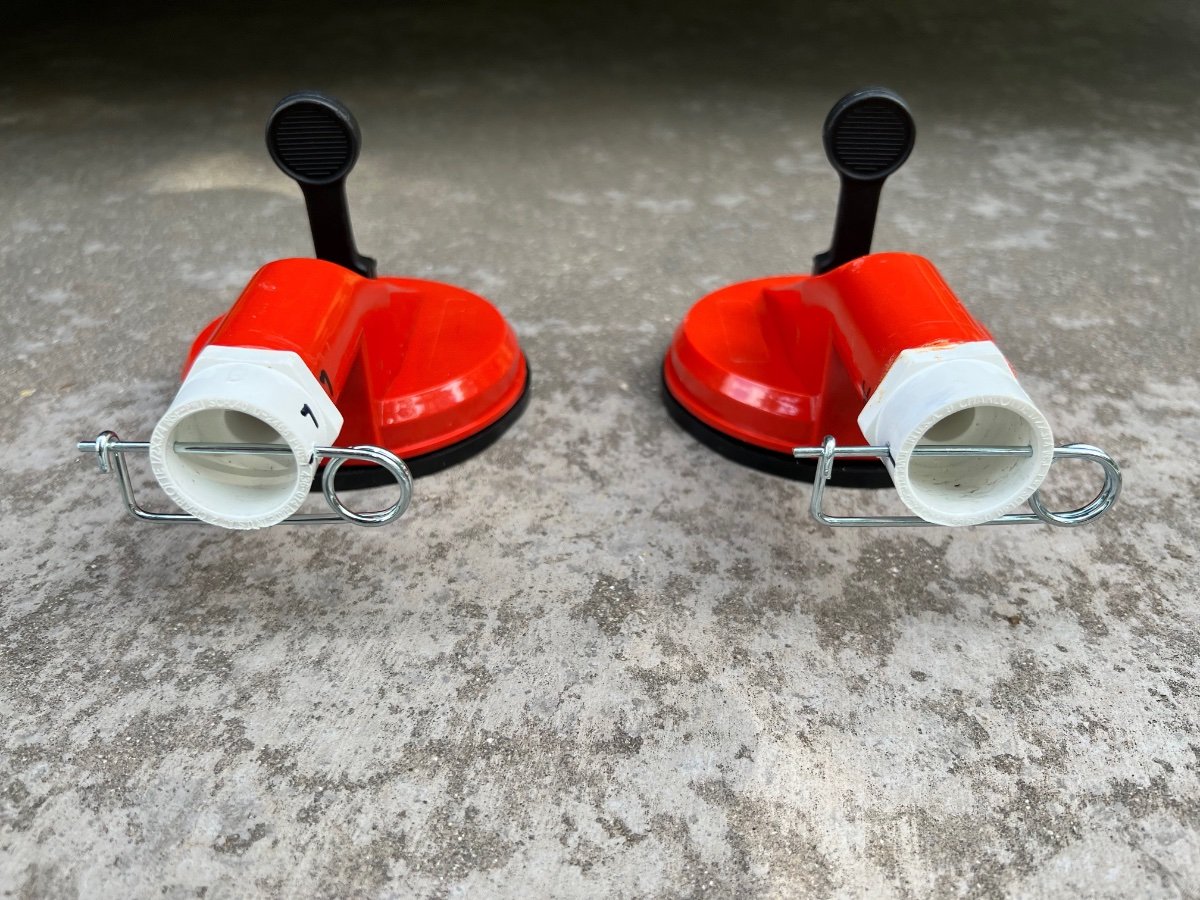
I had seen the posting on 4/22/21 by @Calypso showing an externally mounted towel bar on the side of Hull #520. The towel bar was made from a suction cup lifter and a piece of ¾" PVC tubing. I thought this a great idea and made one for our LEII picked up on 2/17/22. Due to nearly constant downpours in central TN the week we picked up Hull #990, we had immediate need for an external towel bar. We recently returned from a two week trip during which we also encountered several downpours. We used the towel bar nearly every day, often not having enough space to hang damp items. Upon our return I was about to make a second towel bar. I was thinking of adding an improvement to offset the bar/tube further from the hull of our LEII, to avoid having towels in contact with dirt on the hull. After mulling over a design for several days, I had an Aha! moment. I could modify my existing PVC towel bar assembly and add additional tubes for greater capacity, while also moving the tubes further away from the hull. Below are photos and a description of the result. Materials (Quantity, Description, Source, Cost, URL) 1- 4-2/3 In., 125 Lb. Dual Suction Cup Lifter (Harbor Freight, $8.99, https://www.harborfreight.com/4-23-in-125-lb-dual-suction-cup-lifter-57501.html?_br_psugg_q=suction+cup+lifters) 2- 3/4 in. PVC Schedule 40 MPT x S Male Adapter (Home Depot,$0.71/each, https://www.homedepot.com/p/Charlotte-Pipe-3-4-in-PVC-Schedule-40-MPT-x-S-Male-Adapter-PVC021090800HD/203811638 4- 3/4 in. PVC Schedule. 40 90° S x S Elbow Fitting (Home Depot, $0.75/each, https://www.homedepot.com/p/Charlotte-Pipe-3-4-in-PVC-Schedule-40-90-S-x-S-Elbow-Fitting-PVC023000800HD/203812123) 4- 3/4 in. Schedule 40 S x S x S Tee (Home Depot. $0.85, https://www.homedepot.com/p/Charlotte-Pipe-3-4-in-Schedule-40-S-x-S-x-S-Tee-PVC024000800HD/203812197) 2- 3/4 in. x 10 ft. PVC Schedule 40 Plain-End Pipe (Home Depot, $6.98/each, https://www.homedepot.com/p/Charlotte-Pipe-3-4-in-x-10-ft-PVC-Schedule-40-Plain-End-Pipe-PVC-04007-0600/100348472) 1- 0.091 in. x 2-3/4 in. Zinc-Plated Safety Pin (2-Piece) (Home Depot, $2.31, https://www.homedepot.com/p/Everbilt-0-091-in-x-2-3-4-in-Zinc-Plated-Safety-Pin-2-Piece-815408/204276312#overlay) The finished towel bar/drying rack shown in place below. The disassembled parts are shown below: I chose NOT to cement the entire assembly, since it would be much harder to store when in transit. Construction Cut the handle of the HF Dual Suction Cup Lifter in half transversely. A hack saw or bandsaw is recommended. File/sand the cut edges to remove burrs. Use PVC primer and cement to fasten the threaded end of each 3/4 in. PVC Schedule 40 MPT x S Male Adapters to each of the cut ends of the handles of the Dual Suction Cup Lifter. Cut the ¾" PVC tubing for the hanging tubes I chose to make 3 hanging tubes, each 45" long. This length easily fits in our rear cargo carrier and sags very little Adjust length to suit yourself. Cut 8 pieces of ¾" PVC tube to 1-½" in length. These short pieces serve to couple the elbows, tees and adapter together. Using a belt sander I slightly beveled the cut ends of the hanging tubes and the connector tubes so they would more easily slide into the tee and elbow sockets. Assemble the two "manifolds" as shown above, each having: 2 elbows, 2 tees and 4 of the 1-½" connector tubes. Use PVC primer and regular PVC cement to assemble one joint at a time. Be sure to align the open sockets of the tees and elbows. Hold each joint until cement prevents movement of components. The manifolds should be identical. NOTE: do not put PVC primer or cement on the short connector tubes which will be inserted into the adapters cemented onto each handle of the Dual Suction Cup Lifter. When the manifolds are assembled insert the hanging tubes into the three open sockets on each manifold. Again, I chose not to glue the hanging tubes to the manifolds for ease of storage. Insert the connector tube on each manifold into the adapters cemented to each half of the Dual Suction Cup handle. Again, do not use PVC primer or glue. With all components assembled, do a test fitting on the hull of your Oliver. Slightly dampening the suction cups significantly improves their grip on the hull. The hanging tubes and manifolds assembled should largely support themselves horizontally. I had leveled my trailer and used a level to also level the towel bar/rack. When the towel bar/rack is level drill a 7/64" hole vertically through the adapter coupling joining each half of the Dual Suction Cup Lifter to the short connector tube of each manifold. The purpose of the hole is to permit insertion of the zinc plated safety pin which will prevent the towel bar/rack from sagging, while still permitting the rack to be disassembled. Insert the zinc plated safety pins through the holes drilled into the adapter couplings to maintain the towel bar/rack in a horizontal position extending from the hull. I marked the suction cups and manifolds Left and Right to avoid difficulty later inserting the pins through the connectors. I also put an index mark on the adapters and manifold connectors for easier alignment. I have not yet tested this assembly in the field, but am confident it is strong enough to hold as many towels and clothes as will fit. I expect it could also support wet shoes or hiking boots. I hope this is useful to other owners. I welcome suggestions for improvements. As a final note, update your departure checklists to include removing and stowing the towel bar/rack.
1 point
-
1 point
-
Hello to the Oliver Community! We are Diana and Steve Parsons, currently Airstream owners (2012 Flying Cloud 25 FB), but have been wanting an Oliver since we learned of them via Air Forums. One of the things we need to figure out is living in a smaller trailer with to large German Wirehair Pointers. If anyone has tips on how to make it work, we’d love to hear from you. Kind Regards to all, Steve1 point
-
James some question for understanding: When you look at the rolled up canopy, is it cleanly stacked or is it "barber poling". (I.E. not cleanly stacked by walking up/down the roller as it retracts?) When rolled up, is the canopy evenly rolled on the roll? I.E. the roller is longer than the width of the canopy. There should be some unused roller space as a result and it should be equally split on each end of the roller. Do you have a way to check the amp draw and voltage at the Motor? How does this compare with the O&M specifications? About how many times have you used the canopy? Did it work well each of those times? Are each of the arm bolts secure and not slipping? One end will have adjustment and if that bolt on one of the arms is slipping, it could prevent the canopy from keeping "Square" and bind the effort to extend. This would not be a problem on retract though. GJ1 point
-
The Highlander is VERY marginal in stressful country - high, hot, or headwinds. For local travel in the East it would be OK. You would have to buy the non-Hybrid, which is a shame, because the Hybrid Highlander and RAV-4 get superb fuel economy…. https://tractionlife.com/toyota-highlander-towing-capacity-specs-up-close/ John Davies Spokane WA1 point
-
It's also interesting that Thor's Airstream brand is installing Battleborn Gamechanger 3.0 and Victron products in some of their offerings. The RV/Boat energy market is getting more and more competitive. Charlie.1 point
-
We've found Florida mosquitoes to be small , slower, and annoying, but nothing like the larger and faster Minnesota state bird... (I'm from Minnesota. )
1 point
-
I think there has been plenty threads about lubricants & caulking… Ask Jason to put a list together of what they use at the factory and service department … exact brands.. etc.. Thanks1 point
-
Any thoughts that he can share on what Oliver has in store for us in the future?1 point
-
You might want to send a Private Message to Shallowgal. They have spent several months on the road in their Ollie in the company of two good sized doodles. And/or - as JD recommends above - go see an Ollie in person. Good luck! Bill1 point
-
Bravo, some people don’t like looking at nasty messes. I do caution that it will mess up a driveway, so it should be done over gravel. And always relube immediately after! High pressure water directed at the joints will drive out the grease and replace it with water….. AKA the “universal solvent”. I clean mine by hand with lots of old rags, brake cleaner, goggles and gloves. Yuck. John Davies Spokane WA1 point
-
Welcome, how big are your dogs? Ollies are very cosy; there is very little room to maneuver. Have you actually been inside one? That is the first step. As an owner of two 40 pound low energy doodles, I suspect that your dogs may be too much of a distraction. After a couple of seasons we decided it was just best to leave ours at home. Your AS has vastly more interior space than an LE2. John Davies Spokane WA
1 point
-
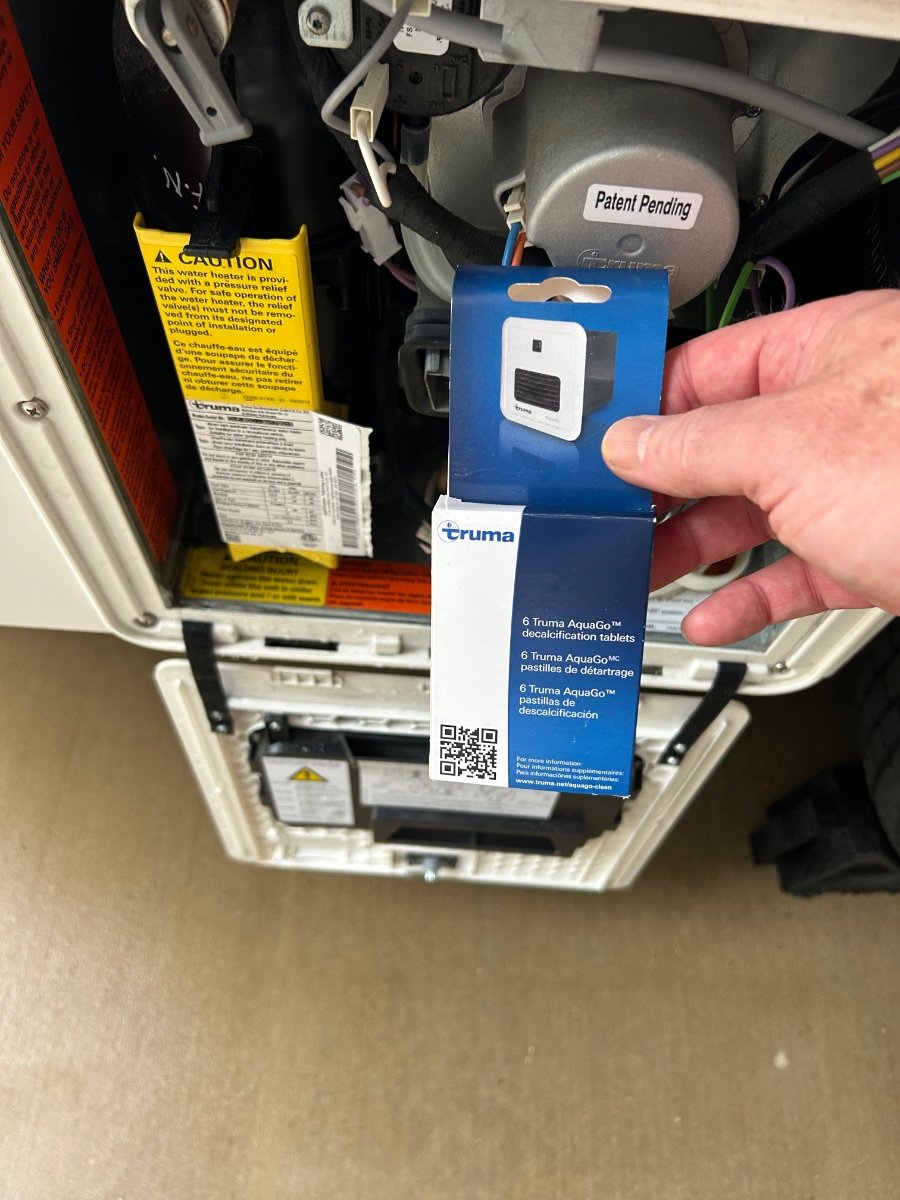
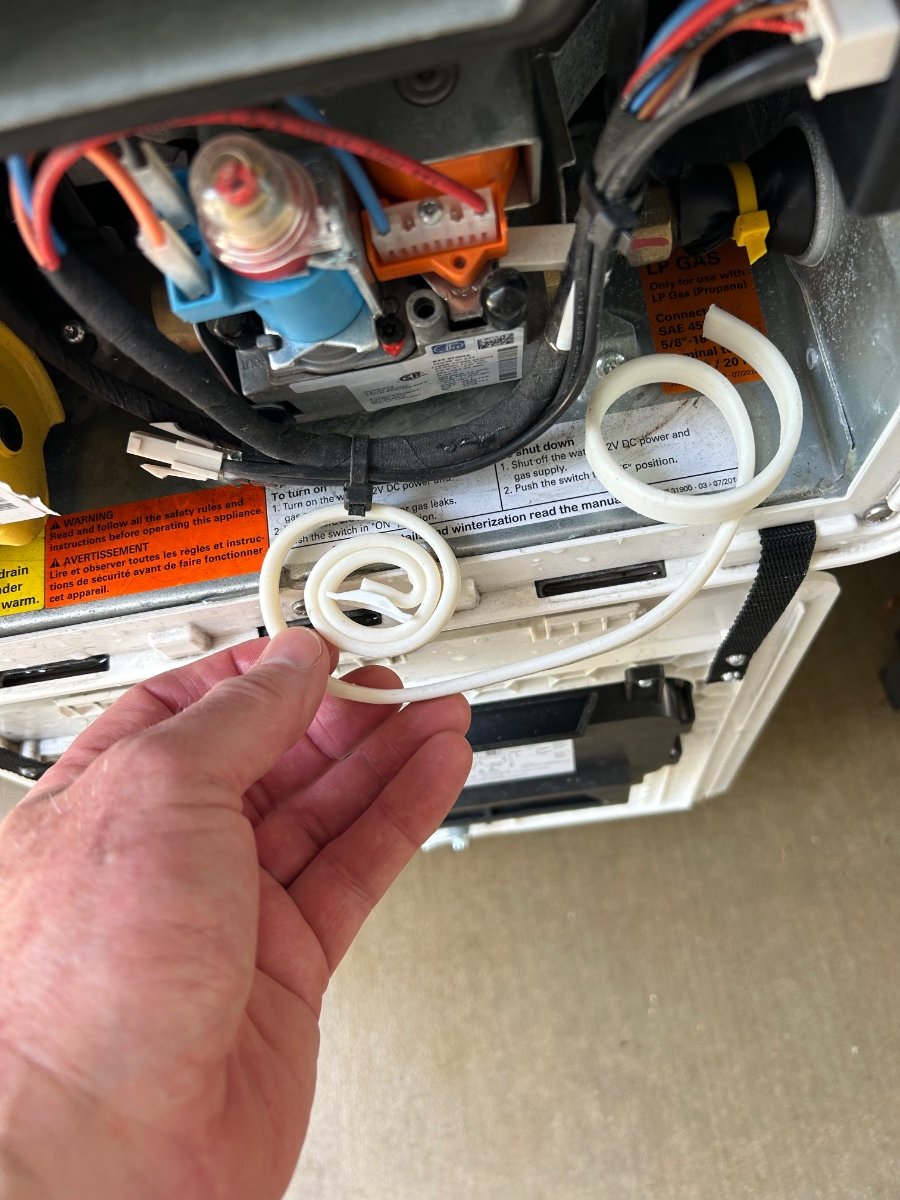
Camping Prep reminders! Hull #634 is offically dewinterized. Woot! 😄I think it took my wife and I about 15 minutes to dewinterize our OLEll. A special thanks to Service Manager Jason Essary for his excellent video tutorials. It really makes this task seamlessly easy. We also did the annual decalcification process of our Truma which takes approx 2:15 hrs after installing the decalcification tablets. Super easy with the Truma. Pro tip - 😎 we place a dog flea collar in the Truma (pic) and refrigerator compartments. Along with screens this mod really does help keep unwanted insects out of these areas. We will soon sanitize our fresh tank, go though all of our systems checklists check all fasteners and get ready to roll! Happy Camping Oliver family! The white coiled up plastic strip is a flea collar. Along with mesh screens It has proven to keep spiders 🕷️ 🐜 and other flying insects out of our Truma and frig compartments. Happy Trails! Patriot🇺🇸
1 point
-
Awesome thread,y'all - informative. I inspected my wheel bearings, brakes/wiring, drums, shocks, rear jacks, and torque settings on the Dexter running gear yesterday in preparations for our 2nd "shake-down" cruise with our "new-to-us" Ollie - leaving later today. No major issues discovered other than running gear had not been kept clean enough to provide accurate visual inspection of linkages and general running gear, so I broke out the pressure washer to remove old grease build-up and generally clean up a 5+ year old mess. ABOVE: Before... Pic #2: After... I found 2 leaky shocks and mounting bracket nuts for rear jacks were about a half-turn less than properly torqued. Although the wheel bearing grease appeared serviceable all the way around repacked with fresh, since I was there anyway. - I Getting ready to button up curbside after cleaning, inspection, and repack operations. Headed to El Caballo Lake around noon for a long weekend of fishing, good company, and maybe a beer or 3.... HA!
1 point
-
They sell motion activated 12v lights. Just swap out the light fixture.1 point
-
I learn from the best! 😄1 point
-
We’re camping at Cracker Barrel in Corbin, Kentucky tonight! Storms rolled in, so we stopped. So another first for us. Over two hours to get 6 miles in Atlanta, then probably a half hour or more delay each in Chattanooga and Knoxville. Half the vehicles in the country must be on I-75! We will get home in northern Ohio late tomorrow, and then we’ll really get organizing. Plus swapping out the OEM cushions for the KTT mattresses waiting at home. (Although theses are really comfortable! Maybe we should have waited to try them before getting KTT mattresses.)
1 point
-
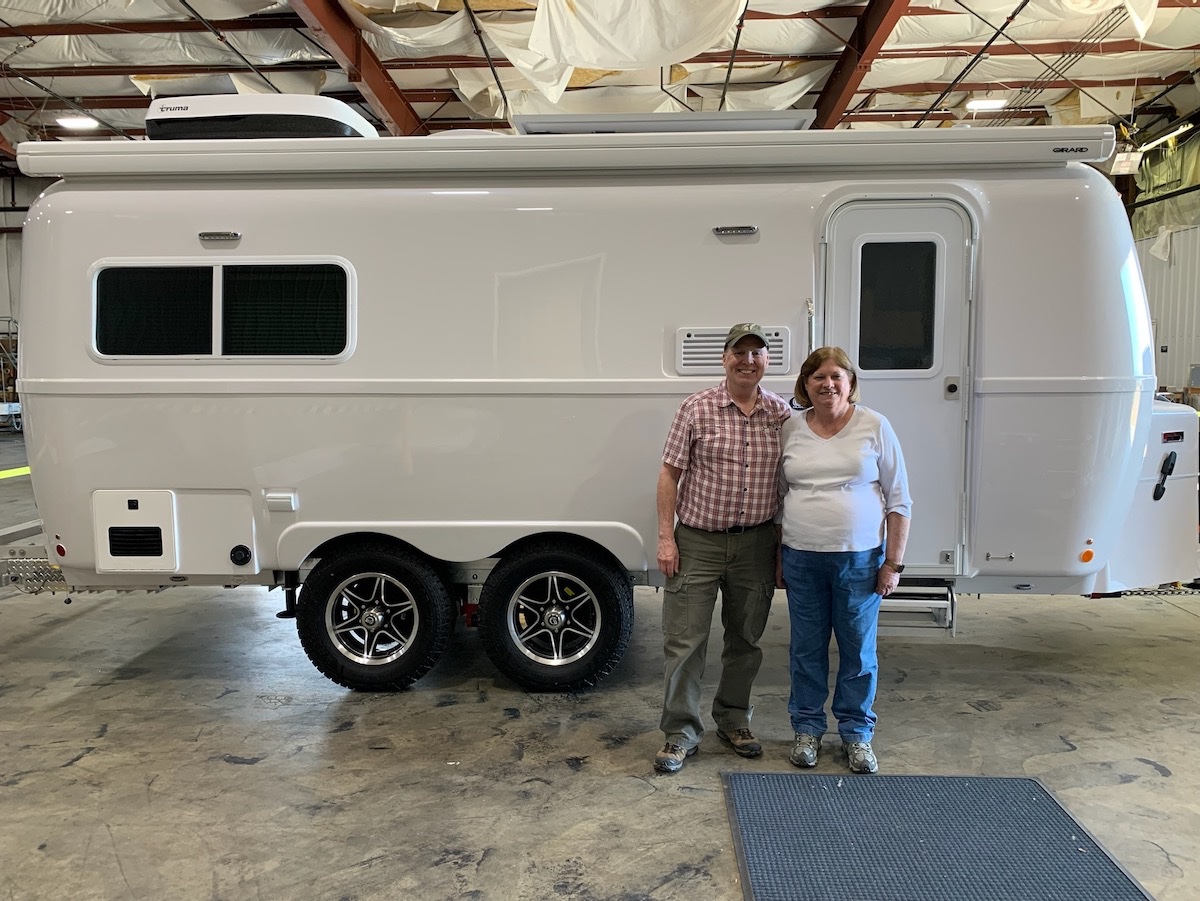
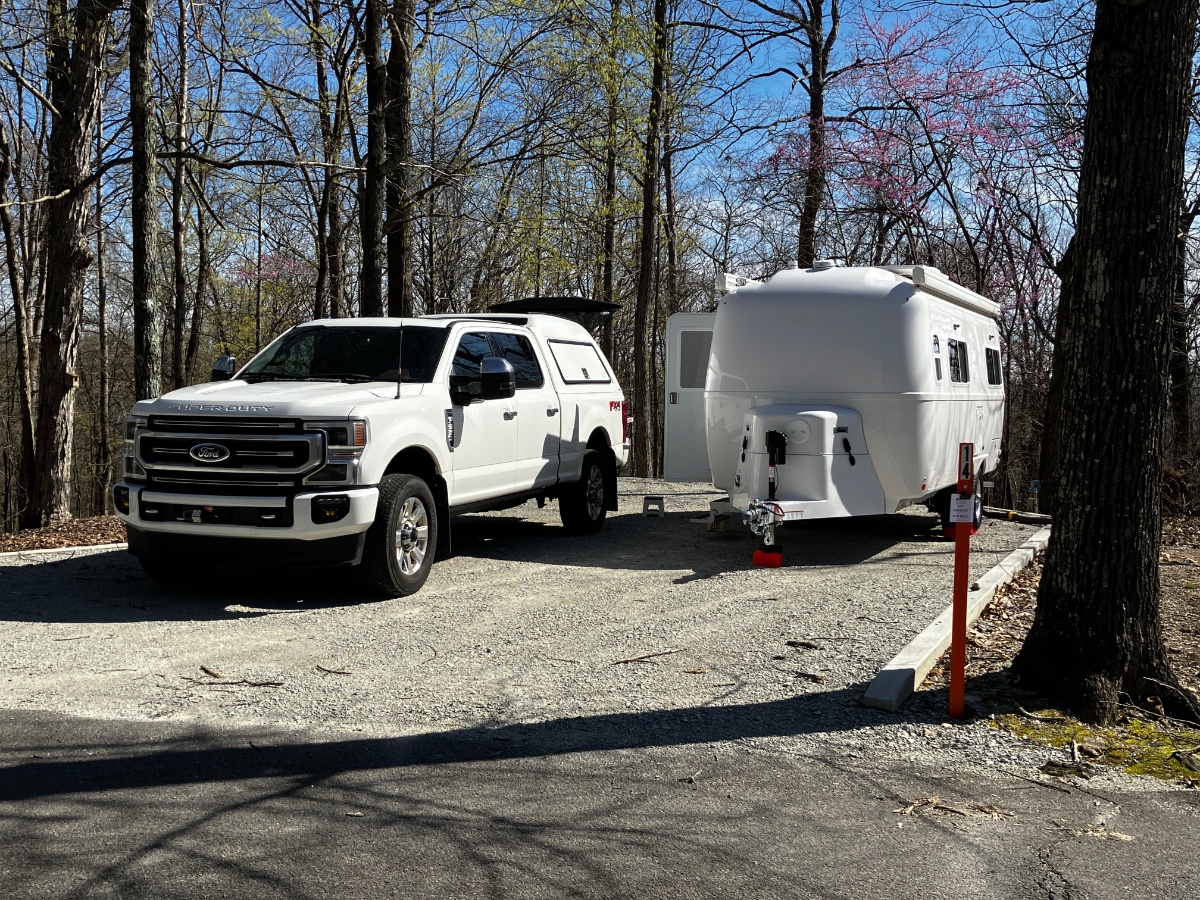
After a long wait, the day finally came last week. We picked up our LE II and could not be happier. We camped in it for two night on electric and water and then two nights dry camping. Temps were between 30 and 50 and we could not have been more comfortable. We have been on the forums for quite some time now so I won't introduce myself. Looking forward to meeting new people and putting some faces to forum names at the Owner's Rally in May. This is a picture of our campsite at Mousetail Landing State Park about an hour from Hoenwald, TN. Cheers, Brian & Brandelyne
1 point
-
I've only been towing an Ollie for 5 years so more experienced owners may want to chime in, but in my opinion the answer seems to be "it depends". I'll explain... The Oliver is a smooth, nicely rounded trailer and is *generally* very well behaved on the highway... *assuming* a bunch of things like: properly sized & inflated tires, no excessive speeds, properly sized and equipped tow vehicle, load-leveling Anderson hitch (if indicated by your tow vehicle/trailer combination), neither trailer or tow vehicle are overloaded or excessively top-heavy, etc. That said, heavy traffic, bad weather, rough or slippery road conditions or cross-winds require more caution. Heavy cross-winds or extremely gusty winds can be dangerous on their own, and even more so if a large truck passing from either direction either adds to the "gust velocity" that the tow vehicle or trailer are exposed to, or temporarily shields you from the gusty winds and then you become rapidly "exposed" again after they pass. Slow down, stay focused on your surroundings and maintain a good grip on the wheel. If it gets too bad, find a safe spot to pull over until its safe to continue.1 point
-
Camping season in Michigan is coming soon and so are the mosquitos. Off spray, keeps mosquitos off! Not. 😂 I’ll stick to Thermacell.
1 point
-
That’s what I’m talking about.1 point
-
FYI, you haven’t mentioned how knowledgeable you are about the tech aspect. https://olivertraveltrailers.com/forums/topic/2778-brakes-auto-adjust-vs-manual-adjust-what-are-the-differences/ In your shoes (brake pun intended) if there are problems with both right ones, which is what I suspect, I would install four new manual adjust assemblies. You must change them in pairs on each axle. Good luck, I loathe drum brakes on any kind of vehicle. Mine have been mostly trouble free since I trashed the auto adjust ones. They just don’t function well in normal towing conditions and they fade away completely on wet highways. FYI Toyota Tacomas STILL come with rear drums. The fix is to install aftermarket disk brakes. That is what our Ollies need. Complain to Oliver! …. https://tacoma3g.com/threads/drum-brakes-worst-decision-toyota-made.11900/ John Davies Spokane WA1 point
-
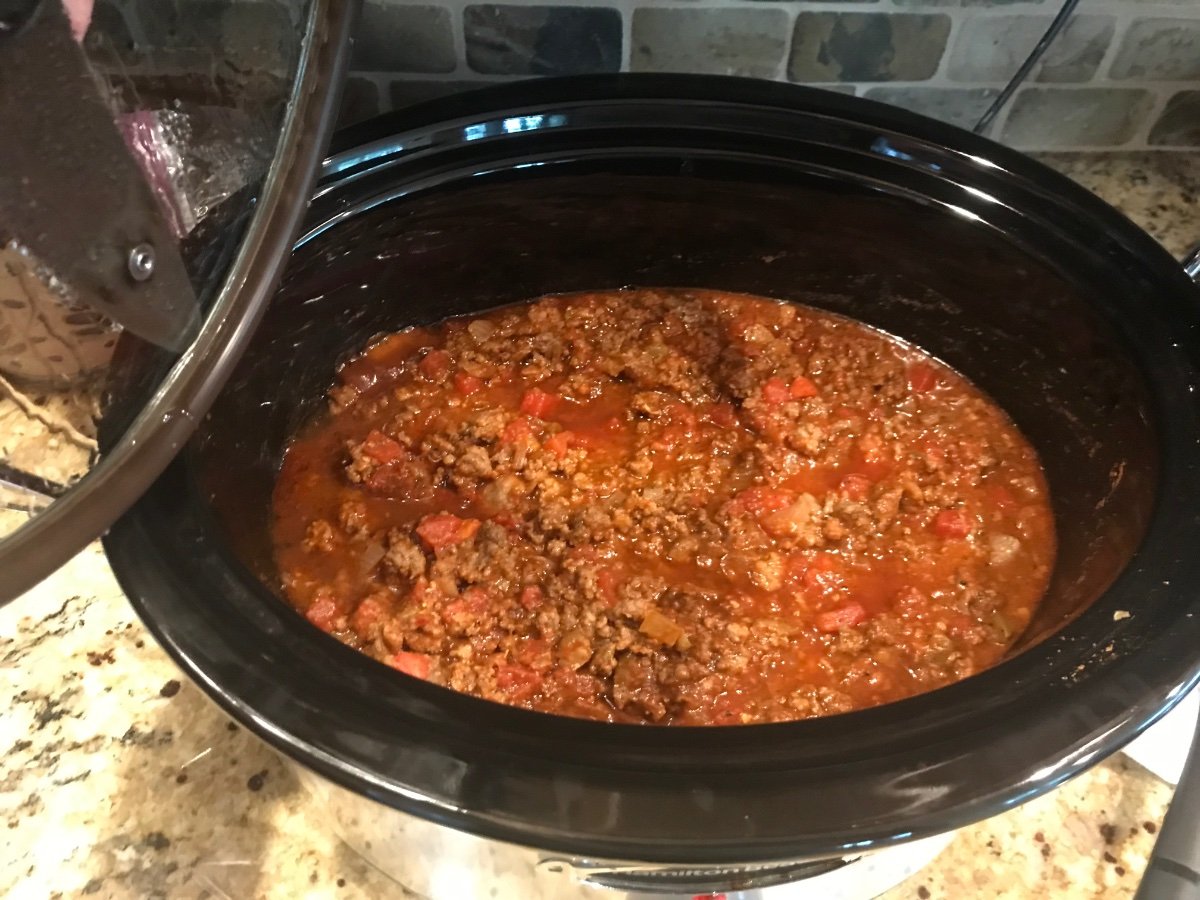
We have just the solution for deer and it’s the best homemade chili we have ever enjoyed. Blessed with an amazing season last year with a total of (5) in the deep freeze. That is our deer 🦌 story and we are sticking to it. 😄
1 point
-
Let me preface this story by making it clear that I am NOT a hunter but I do now understand why we SHOOT deer in the wild... I never liked the taste of venison, too gamey or too wild or too something. So, I had this idea ...that I could rope a deer, put it in a stall, feed it up on corn for a couple of weeks, then kill it and eat it. The first step in this adventure was getting a deer. I figured that, since they congregate at my cattle feeder and do not seem to have much fear of me when we are there (a bold one will sometimes come right up and sniff at the bags of feed while I am in the back of the truck not 4 feet away), it should not be difficult to rope one, get up to it and toss a bag over its head (to calm it down) then hog tie it and transport it home. I filled the cattle feeder then hid down at the end with my rope. The cattle, having seen the roping thing before, stayed well back. They were not having any of it. After about 20 minutes, my deer showed up-- 3 of them. I picked out a likely looking one, stepped out from the end of the feeder, and threw my rope. The deer just stood there and stared at me. I wrapped the rope around my waist and twisted the end so I would have a good hold. The deer still just stood and stared at me, but you could tell it was mildly concerned about the whole rope situation. I took a step towards it, it took a step away. I put a little tension on the rope, and then received an education. The first thing that I learned is that, while a deer may just stand there looking at you funny while you rope it, they are spurred to action when you start pulling on that rope. That deer EXPLODED. The second thing I learned is that pound for pound, a deer is a LOT stronger than a cow or a colt. A cow or a colt in that weight range I could fight down with a rope and with some dignity. A deer-- NO Chance. That thing ran and bucked and twisted and pulled. There was no controlling it and certainly no getting close to it. As it jerked me off my feet and started dragging me across the ground, it occurred to me that having a deer on a rope was not nearly as good an idea as I had originally imagined. The only upside is that they do not have as much stamina as many other animals. A brief 10 minutes later, it was tired and not nearly as quick to jerk me off my feet and drag me when I managed to get up. It took me a few minutes to realize this, since I was mostly blinded by the blood flowing out of the big gash in my head. At that point, I had lost my taste for corn-fed venison. I just wanted to get that devil creature off the end of that rope. At the time, there was no love at all between me and that deer, but I figured if I just let it go with the rope hanging around its neck, it would likely die slow and painfully somewhere. At that moment, I hated the thing, and I would venture a guess that the feeling was mutual. Despite the gash in my head and the several large knots where I had cleverly arrested the deer's momentum by bracing my head against various large rocks as it dragged me across the ground, I could still think clearly enough to recognize that there was a small chance that I shared some tiny amount of responsibility for the situation we were in. I didn't want the deer to have to suffer a slow death, so I managed to get it lined back up in between my truck and the feeder - a little trap I had set before hand...kind of like a squeeze chute. I got it to back in there and I started moving up so I could get my rope back. Did you know that deer bite? They do! I never in a million years would have thought that a deer would bite somebody, so I was very surprised when ..... I reached up there to grab that rope and the deer grabbed hold of my wrist. Now, when a deer bites you, it is not like being bit by a horse where they just bite you and slide off to then let go. A deer bites you and shakes its head--almost like a pit bull. They bite HARD and it hurts. The proper thing to do when a deer bites you is probably to freeze and draw back slowly. I tried screaming and shaking instead. My method was ineffective. It seems like the deer was biting and shaking for several minutes, but it was likely only several seconds. I, being smarter than a deer (though you may be questioning that claim by now), tricked it. While I kept it busy tearing the tendons out of my right arm, I reached up with my left hand and pulled that rope loose. That was when I got my final lesson in deer behavior for the day. Deer will strike at you with their front feet. They rear right up on their back feet and strike right about head and shoulder level, and their hooves are surprisingly sharp... I learned a long time ago that, when an animal -like a horse --strikes at you with their hooves and you can't get away easily, the best thing to do is try to make a loud noise and make an aggressive move towards the animal. This will usually cause them to back down a bit so you can escape. This was not a horse. This was a deer, so obviously, such trickery would not work. In the course of a millisecond, I devised a different strategy. I screamed like a woman and tried to turn and run. The reason I had always been told NOT to try to turn and run from a horse that paws at you is that there is a good chance that it will hit you in the back of the head. Deer may not be so different from horses after all, besides being twice as strong and 3 times as evil, because the second I turned to run, it hit me right in the back of the head and knocked me down. Now, when a deer paws at you and knocks you down, it does not immediately leave. I suspect it does not recognize that the danger has passed. What they do instead is paw your back and jump up and down on you while you are laying there crying like a little girl and covering your head. I finally managed to crawl under the truck and the deer went away. So now I know why when people go deer hunting they bring a rifle with a scope......to sort of even the odds!! All these events are true, so help me God...An Educated Farmer1 point
-
NPS put this out on social media, in a humorous attempt to make more people aware of the dangers. Every year, we see reports of folks trying to interact or take selfies with wildlife, with disastrous and sometimes fatal results . None of us, I'm sure.
1 point
-
1 point
-
So true.
1 point
-
Camp pillows that tickled my funny bone...
1 point
-
1 point
-
The storms that hit Middle TN last night meant our power was out and we had to get back home to mind the generators and cancel our camping plans, but we picked up our beautiful trailer today and got it back home to Nashville TN. Everything is top notch so far and we couldn't be happier. Also today having some A/C is a blessing. Bonus driveway storm damage we had to clear just to get the trailer parked at home.1 point
-
If anyone wants to make the block I made, here's the list of pieces you'd need to order: #3075 Extrusion, 24" #4303 Bracket, 4 pieces #4302 Bracket, 2 pieces #3320 Bolt Assembly, 14 pieces You'll also need some stainless ¼" or 5/16" bolts to fix the block to the hull. I think most can be 1" or 1.25" long but you'll need two 3" bolts for the two vertical ones that go through the bed extension. I used lock nuts and large fender washers to spread the load against the fiberglass. I also cut off all the bolt ends around the bed side with a dremel and cutoff disk and filed them smooth so not to damage the mattress or cushions.1 point


-
Recent Achievements
-


")


