Leaderboard


Popular Content
Showing content with the highest reputation on 07/25/2024 in all areas
-
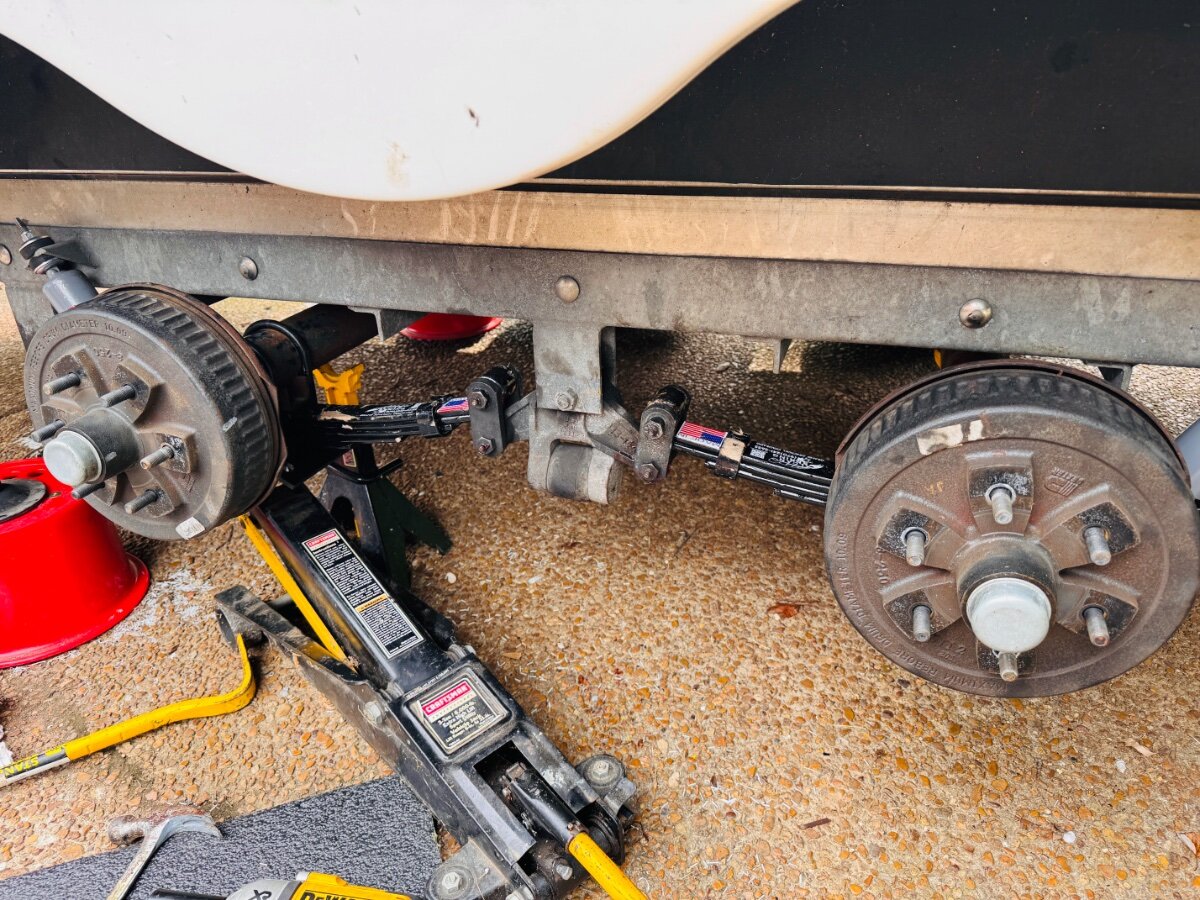
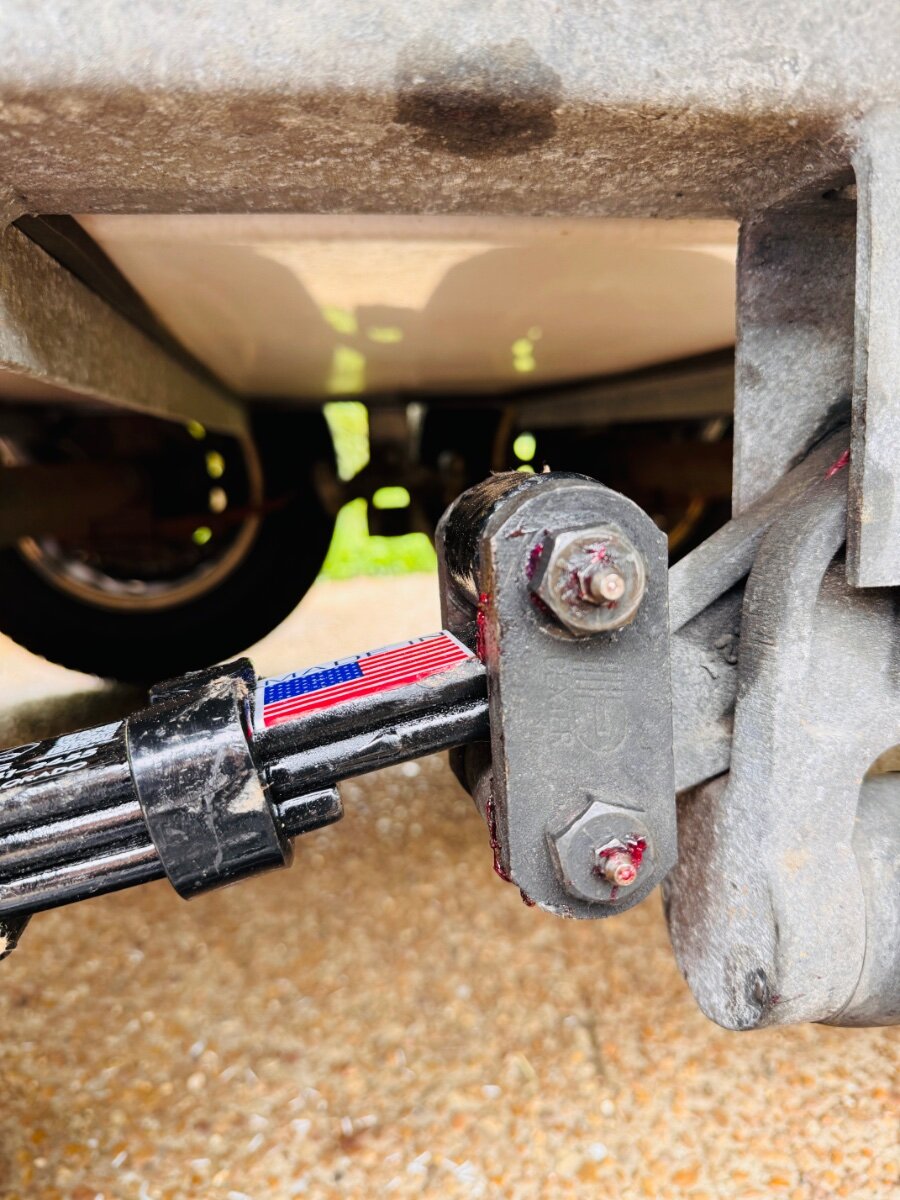
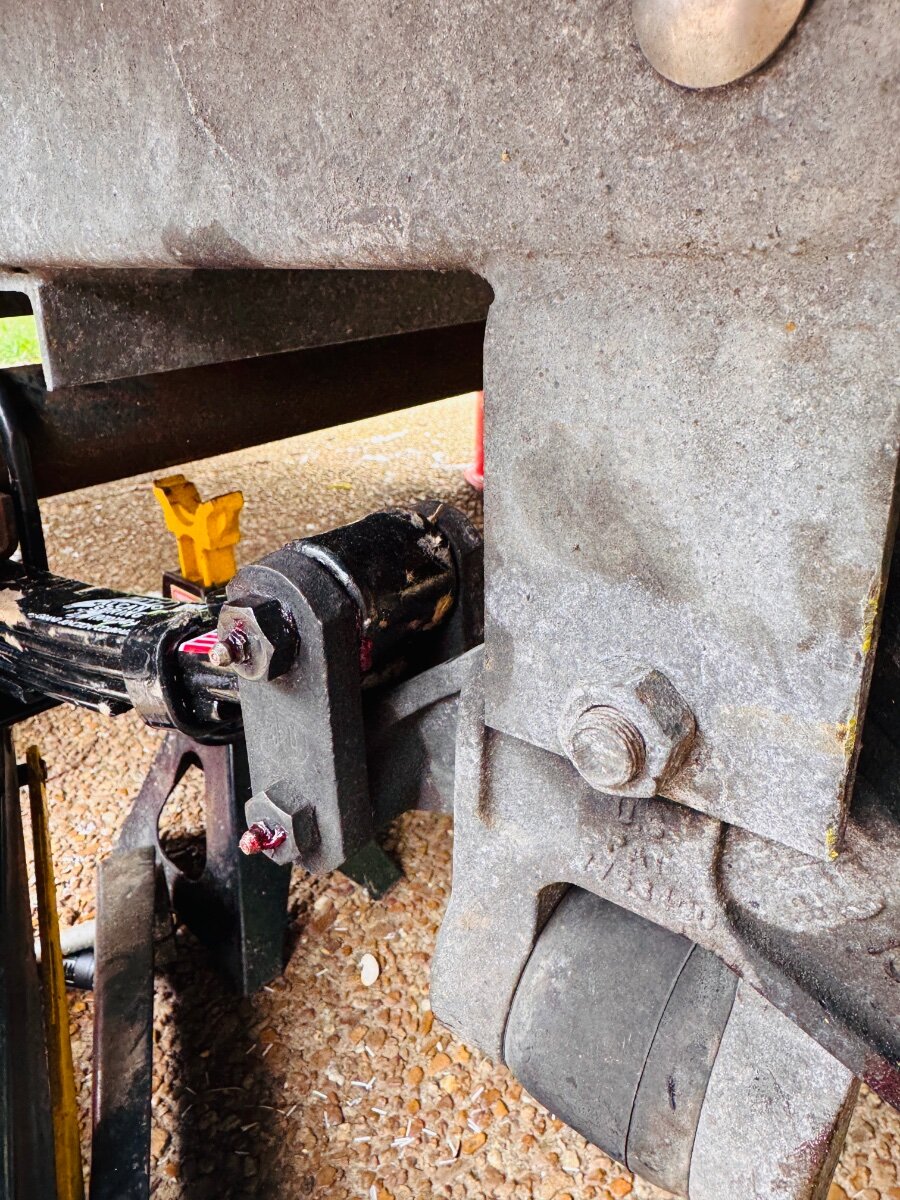
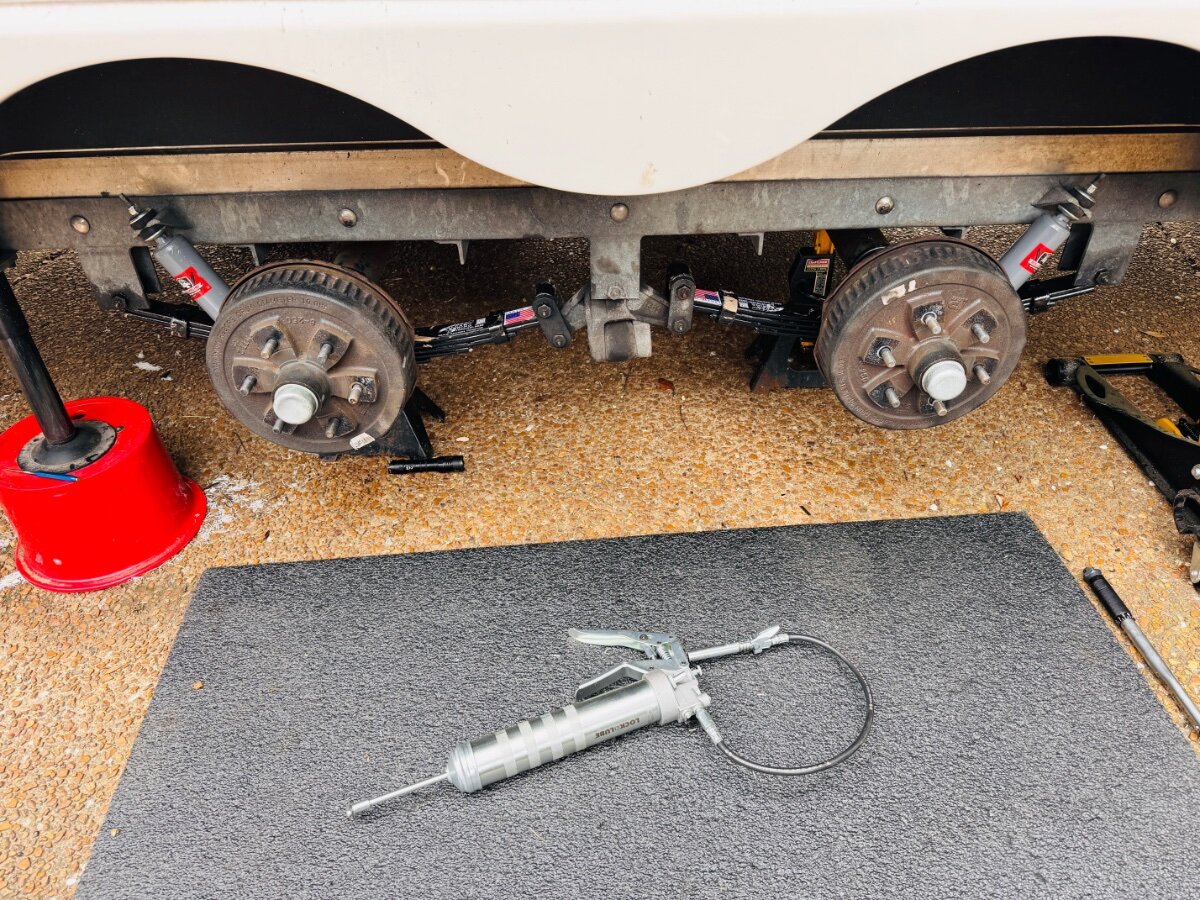
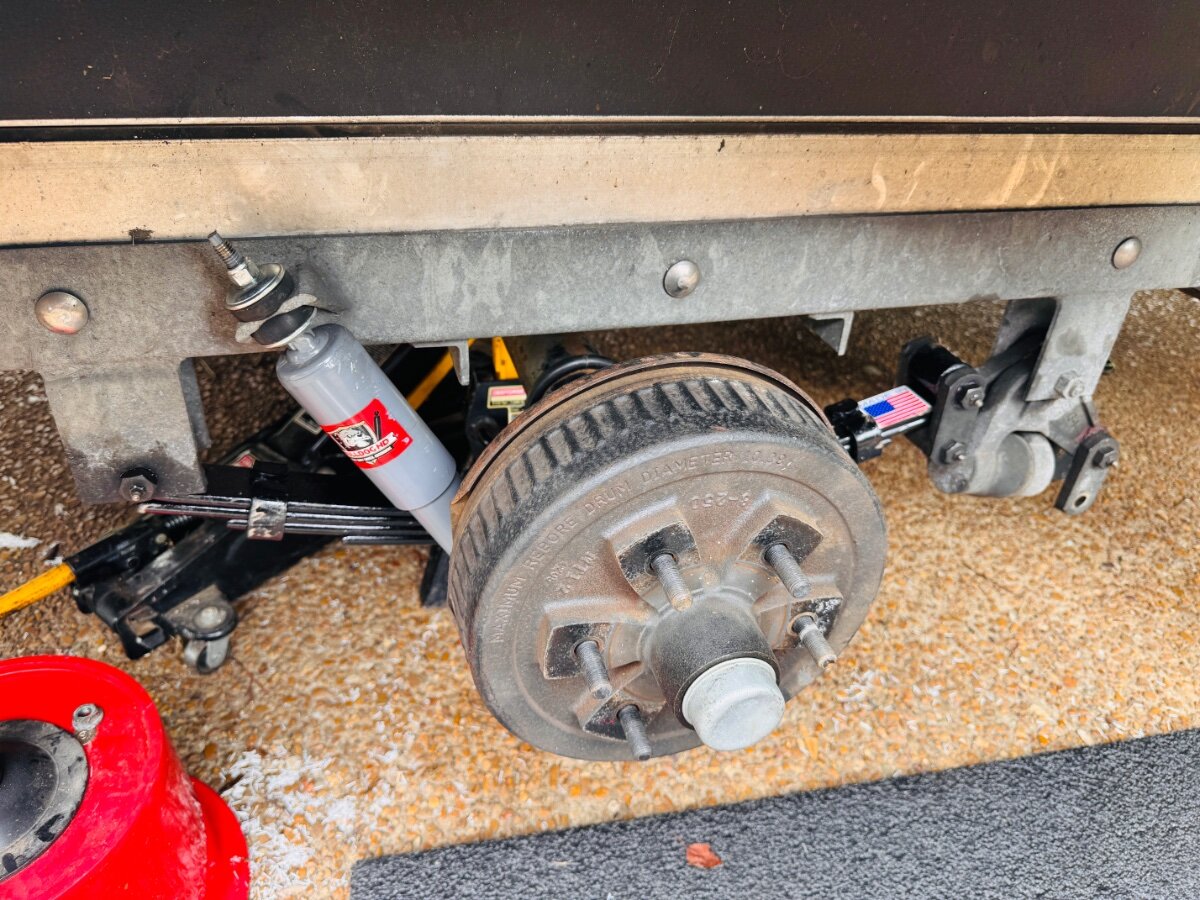
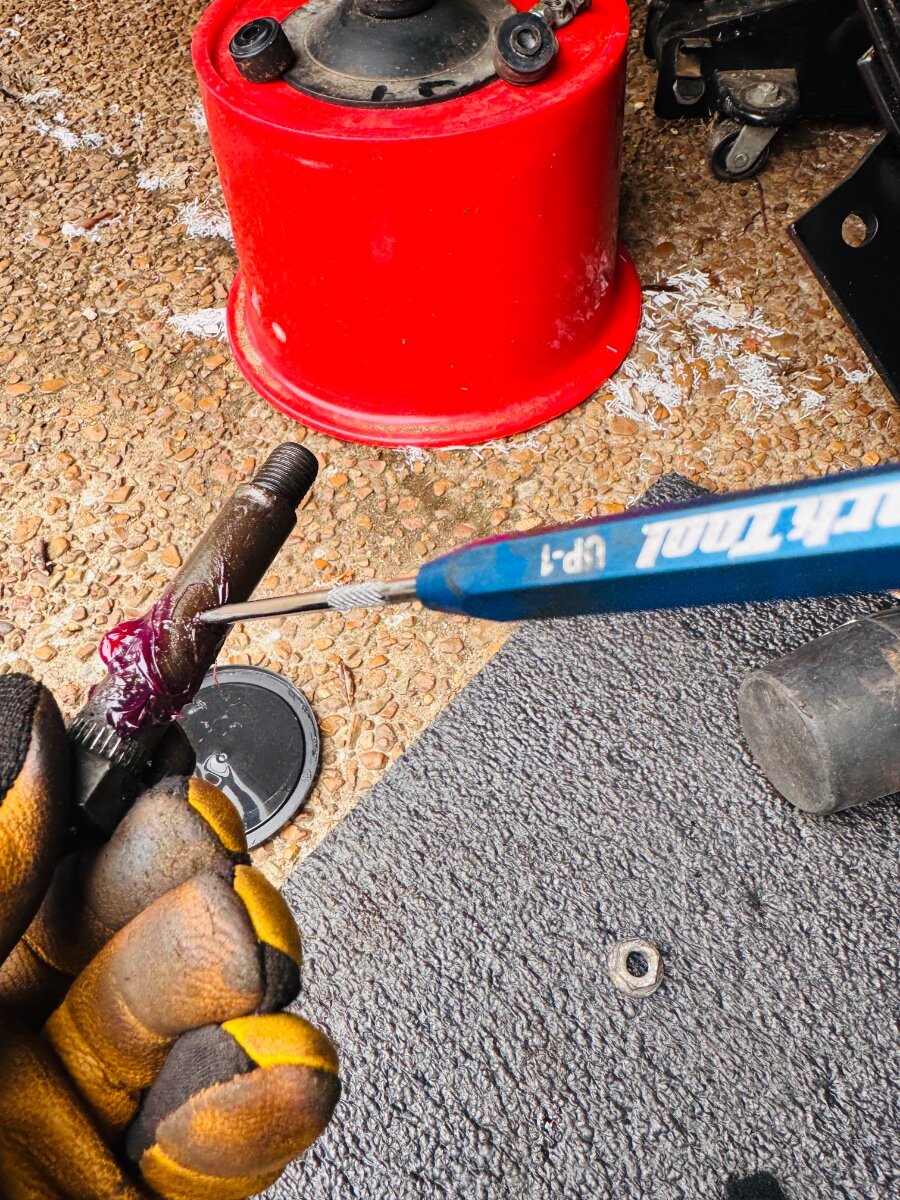
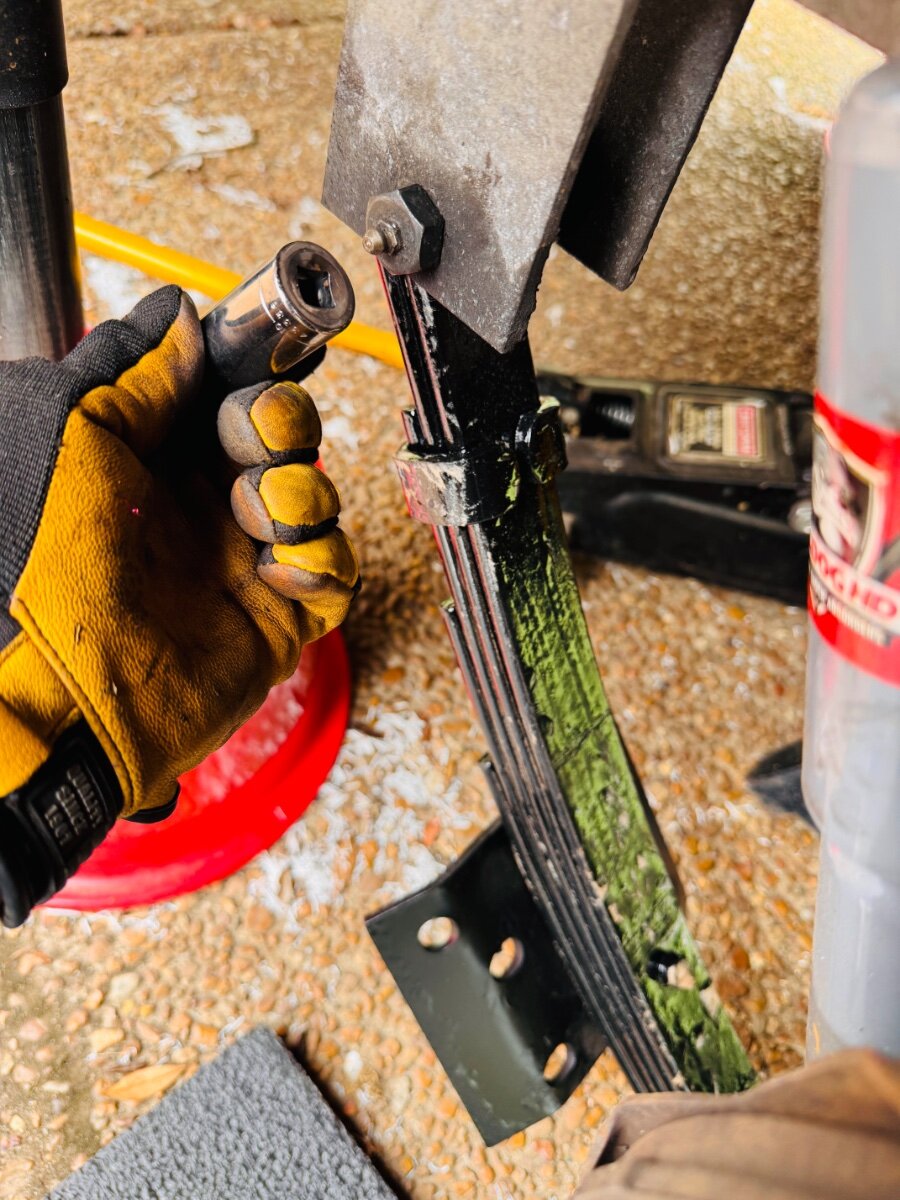
So got the new U-bolts from ALCAN and put the new leaf springs on only to find out the HD 1/2 in. OEM shackles were too short. They are the HD 1/2 in width but 2 in long measured zerk to zerk. The 2nd leaf rides on the suspension arm. Talked with Lew, figured out the problem and he is sending out new 2 1/4in HD shackles to resolve the problem. Confirmed Key points: 3500 lb axles use 4 bolts on the backside of the hub and 1/2 in. U-bolts. They can have tube diameters of 2 1/2 or 3 in. Make sure to measure. 5200 lb axles use 5 bolts on the backside of the hub and 9/16 in U-bolts. They typically have tube diameters of 3 in. Make sure to measure. If you don't upgrade to the shackles Lew sells, make sure even if you have upgraded HD 1/2 in. shackles to measure the length. If it is 2 in they will not work, must be 2 1/4 in. Make sure to measure. Lew was great to deal with as always. @ScubaRx I did confirm that he does not want his 2/12 in U-bolts back. Hopefully, this adds to the conversation since both of these issues came up for me. Cheers, Mike
 6 points
 -
Thanks to @MAX Burner and others who shared their installation. I was able to install the upgrade today in a reasonable time without rushing. My tip after having done the install with simple connections.. "Do a dry fit to see where the wires are going to land and build a simple wiring harness." The Light and the Fan each have their own white and black wires, it would be nice if the fan company provided a pre wired header to plug those in to the light shroud with a long bare white and black out of the harness to connect to the trailer leads. If I were to do it over, I would make my own header and tuck it up inside before securing down the fan. I think the trickiest part was measuring to cut the extension tube because of the Oliver's slightly curved ceiling. Craig4 points
-
I'm assuming (looking briefly at the website) that it requires a different hardware purchase, but the benefit being $50/mo in lieu of $150/mo -- am I reading that correctly? That would make a huge difference for me, as I don't stream very much at all.3 points
-
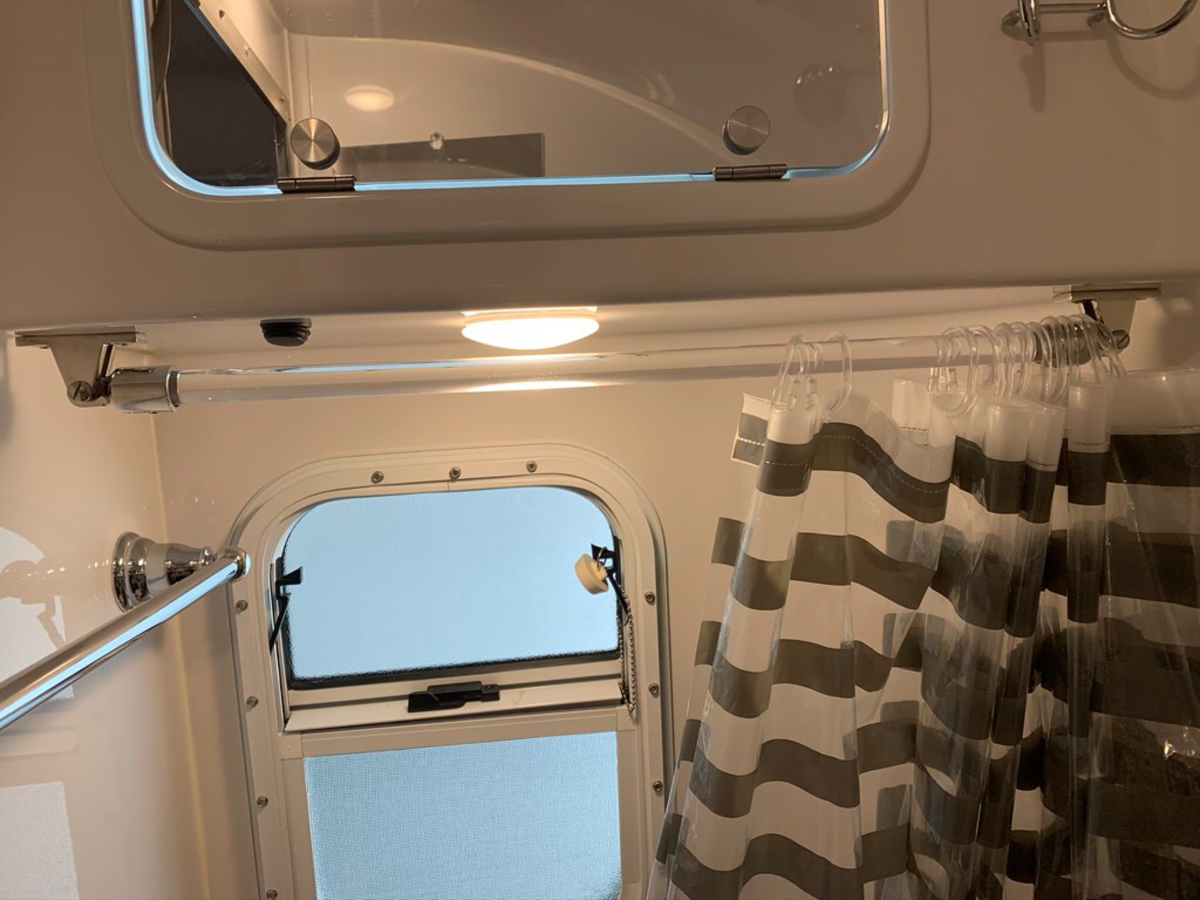
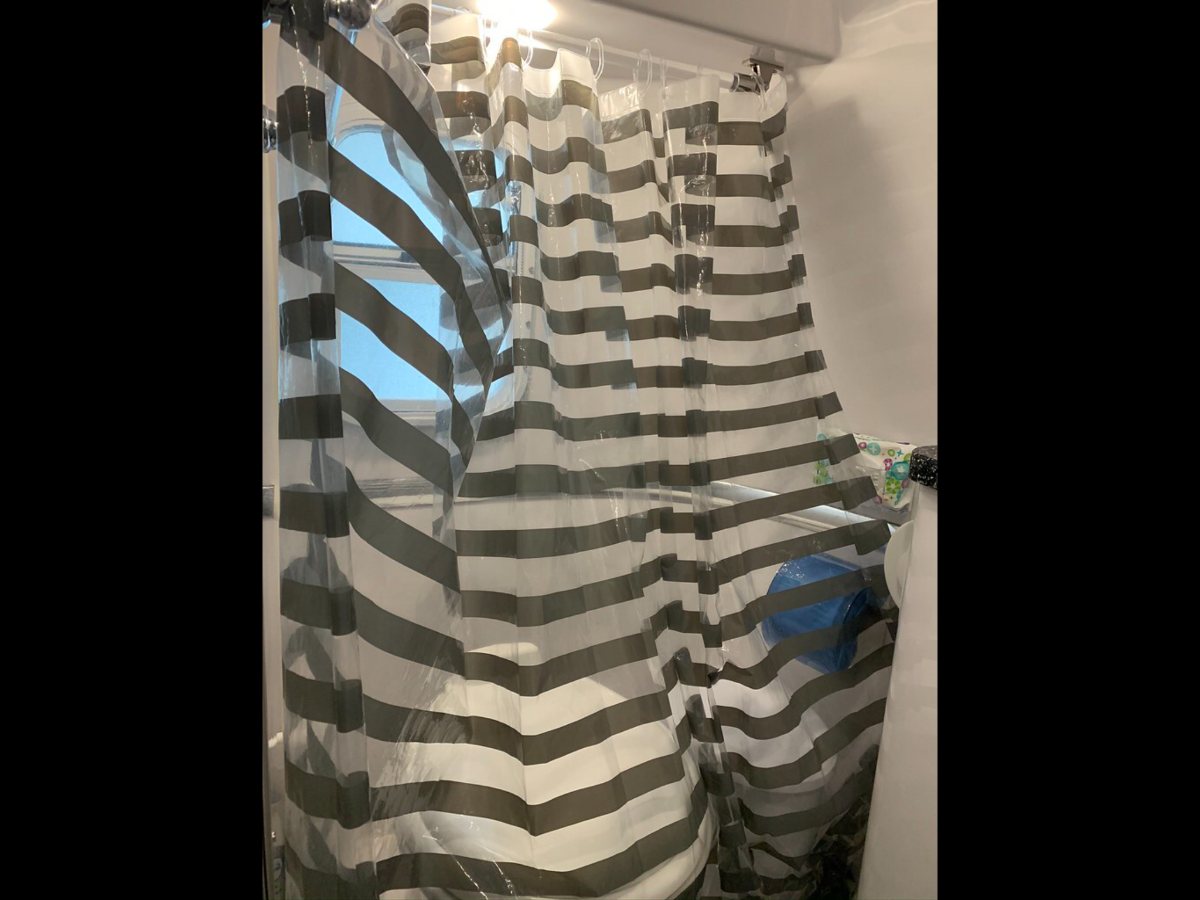
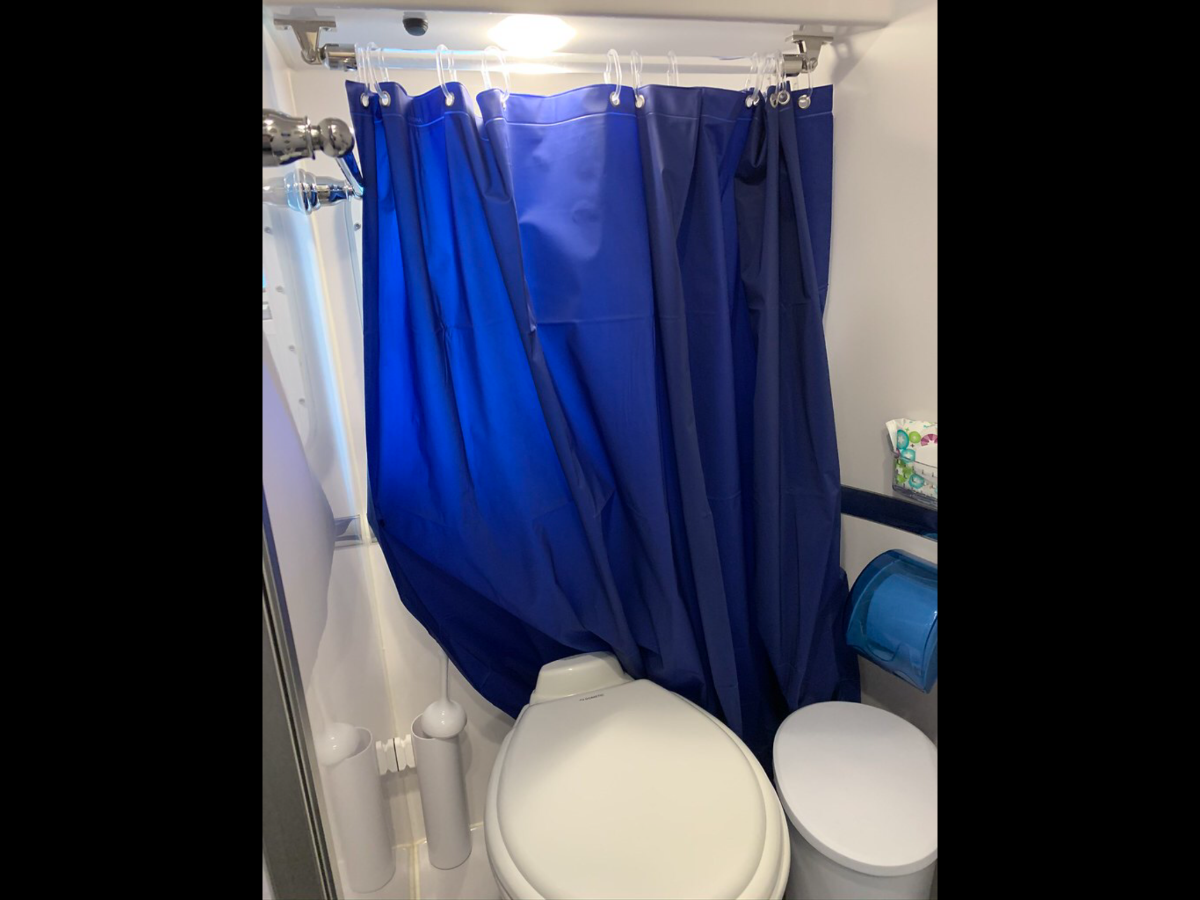
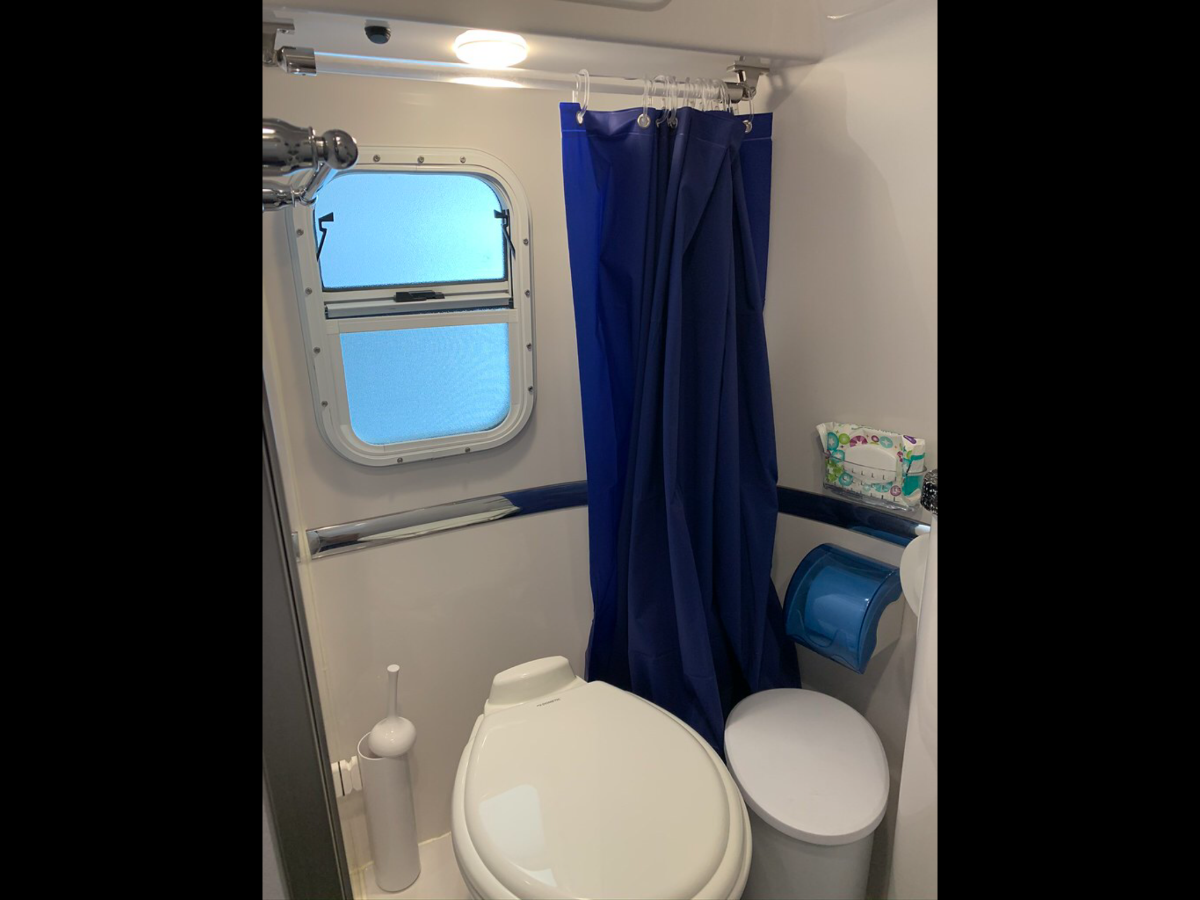
If your shower track idea doesn’t pan out, alternatively many have installed a shower rod under the cabinet. My install did require some drilling, but much less conspicuous than in the ceiling. A standard curtain is best cut to length for optimum fitment and functionality. The shower curtain can be stowed in the curved corner, used to shade the window, covers the head and towel rack when in use, and provides more space when showering.
3 points
-
"Some sway" can go to fishtailing shockingly fast in the right conditions. Had a similar experience with our first rig, a trailer behind a V8 Ford Explorer. We had a Hensley hitch, but the dealer installed it incorrectly and we suddenly got strong sway while crossing a big bridge. i was able to maintain control but it was scary.3 points
-
We have stayed at Dead Horse SP a number of times and agree that it provides good access to all the local sites to see. Sedona is an easy drive. We camped on Zion for a week. If you are there over a weekend I recommend you stay on the park. Traffic getting into the park on the weekend was ridiculous, backed up for miles. We were there in Janyary and in the off season you can drive anywhere on the park that is open. During the high season you have to take a bus to most sites. Not sure what off season dates are. There’s a nice USFS campground near Bryce, Red Canyon campground. No reservations. We arrived around noon and had a choice of campsites, all pretty nice. No hookups but a very well maintained campground with great views. There’s a nice BLM campground in between Canyonlands and Arches, Horsethief CG. It’s closer to Canyonlands but easy access to Moab and Arches too. Good luck! Mike3 points
-
Or even easier, once you get the ball under the hitch, back up an additional 1 to 1-1/2". Then slip on the whale tail, pull forward to take out the slack, and drop the hitch onto the ball. Much quicker, and probably less strain on the jack. There are/were nine of us towing with a Toyota 200 Series. I think yours was the only LX, but I'm not positive.
3 points
-
For sure Bill. I am thinking it over and have not pulled the trigger yet. Lots of strong reviews in the tuber world. I maaaay let the dust settle and see if the price drops after this initial roll out.2 points
-
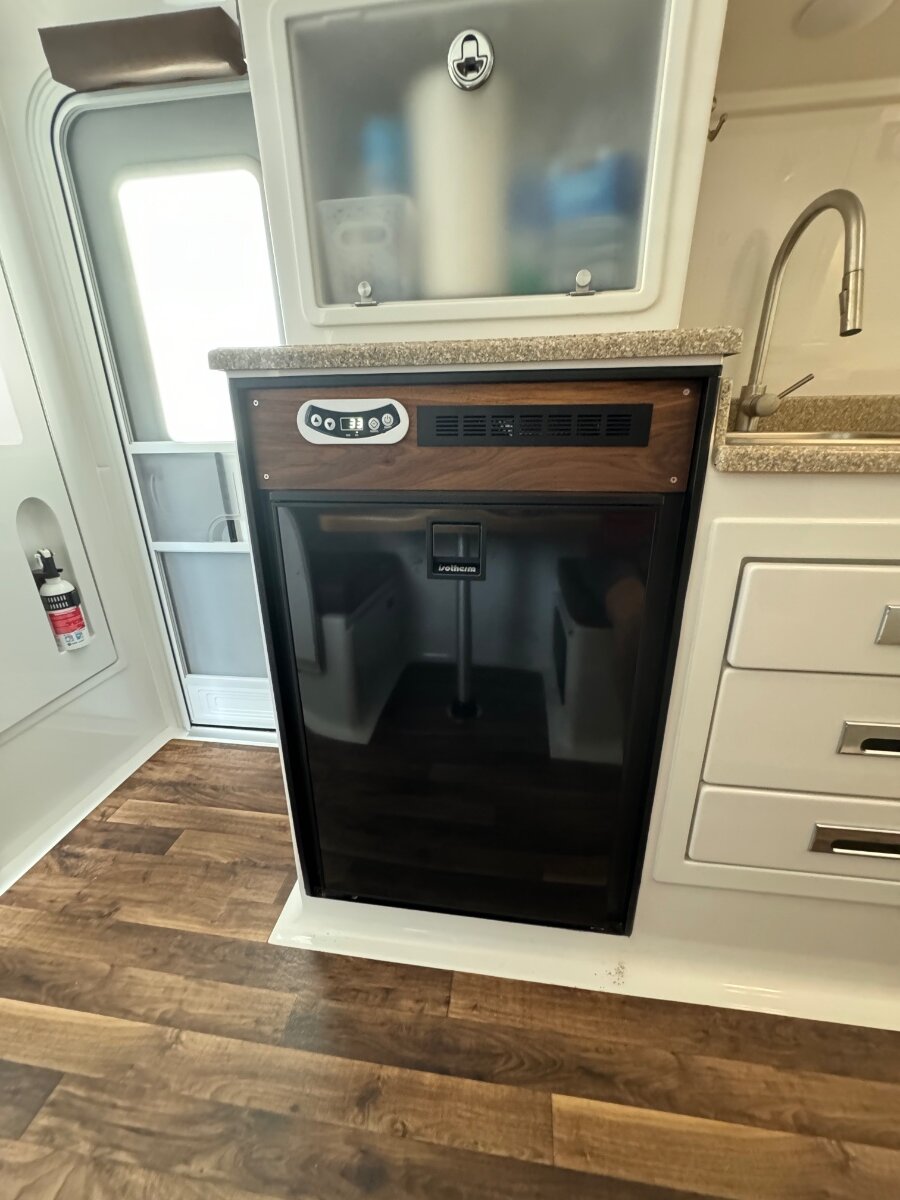
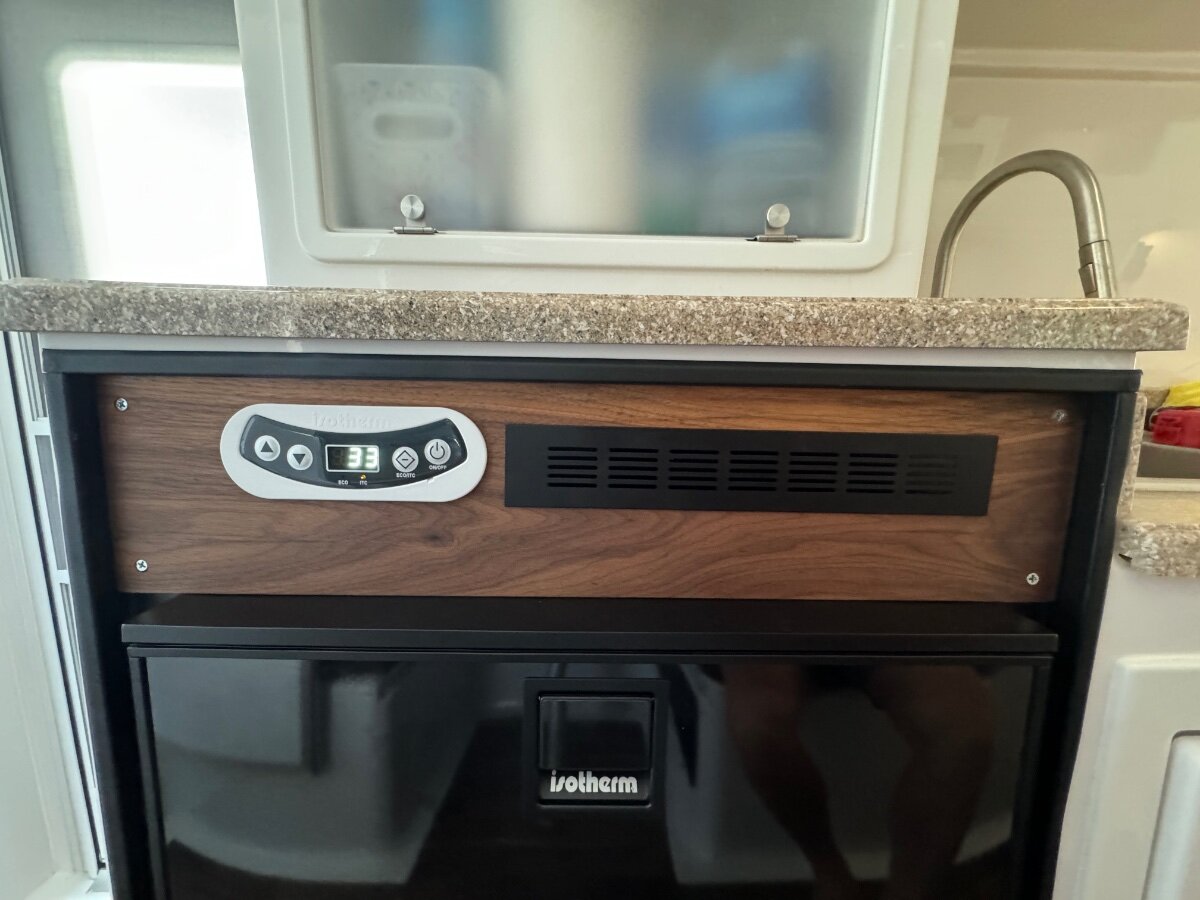
It’s been awhile but here is how the final install turned out. The fridge fit perfectly into the old surround that I scavenged from the norcold. I planed down a piece of walnut to cover the hole, install the digital display and add a vent. Overall turned out great.
2 points
-
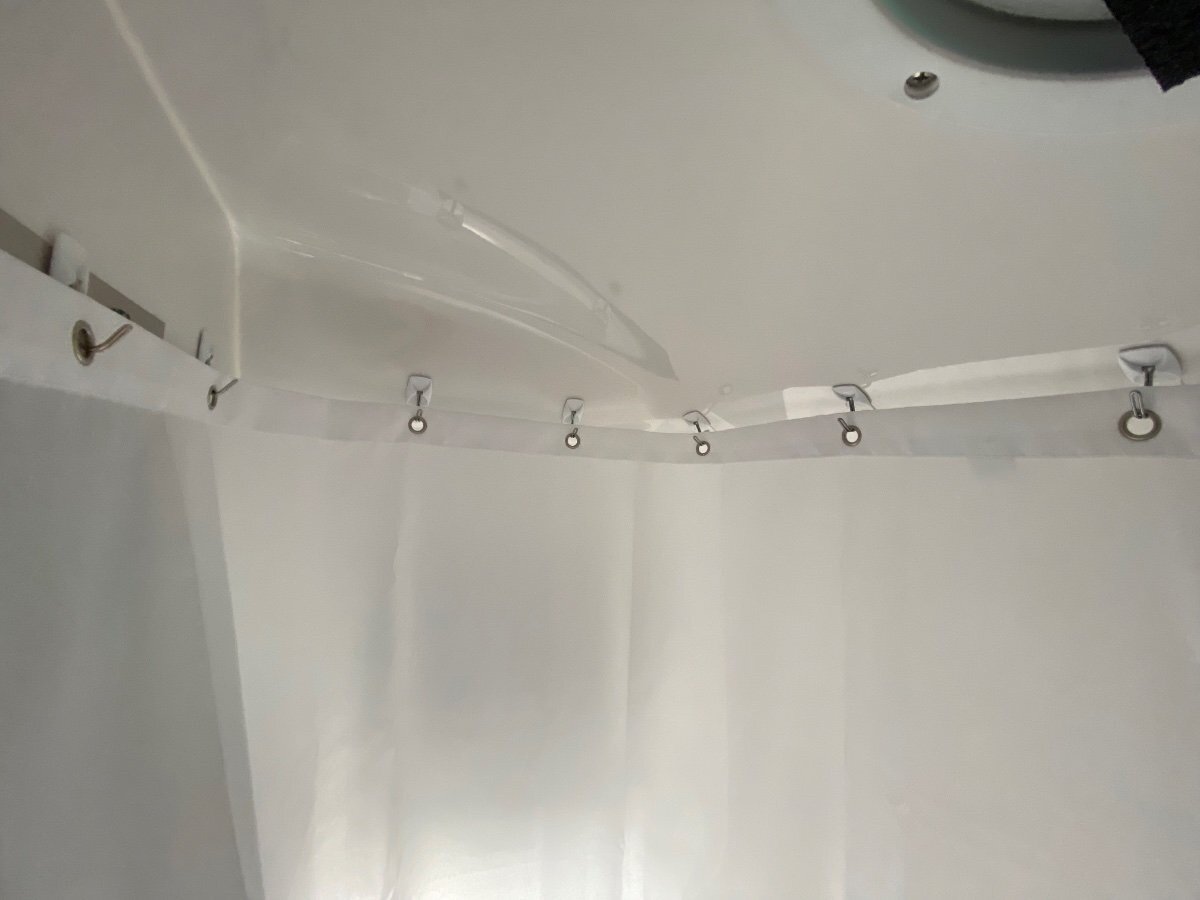
We didn’t get the Oliver shower curtain track with our Elite II. The curtain track is an odd design, seems a bit expensive, and some owners have had issues with the track detaching from the inner hull ceiling because of a poor riveting job. But we wanted a shower curtain though, so I attached the small Command hooks all around on the bathroom ceiling directly above the perimeter of the shower pan in the floor, and then hung a standard shower curtain on those hooks to take our showers, and easy to quickly remove the curtain to let it dry outside the trailer when done. It was a cheap and effective solution to keeping the toilet area dry. And easy to remove it all completely if ever needed. Command strips/hooks are a great accessory for attaching lot of things on the Ollie interior.
2 points
-
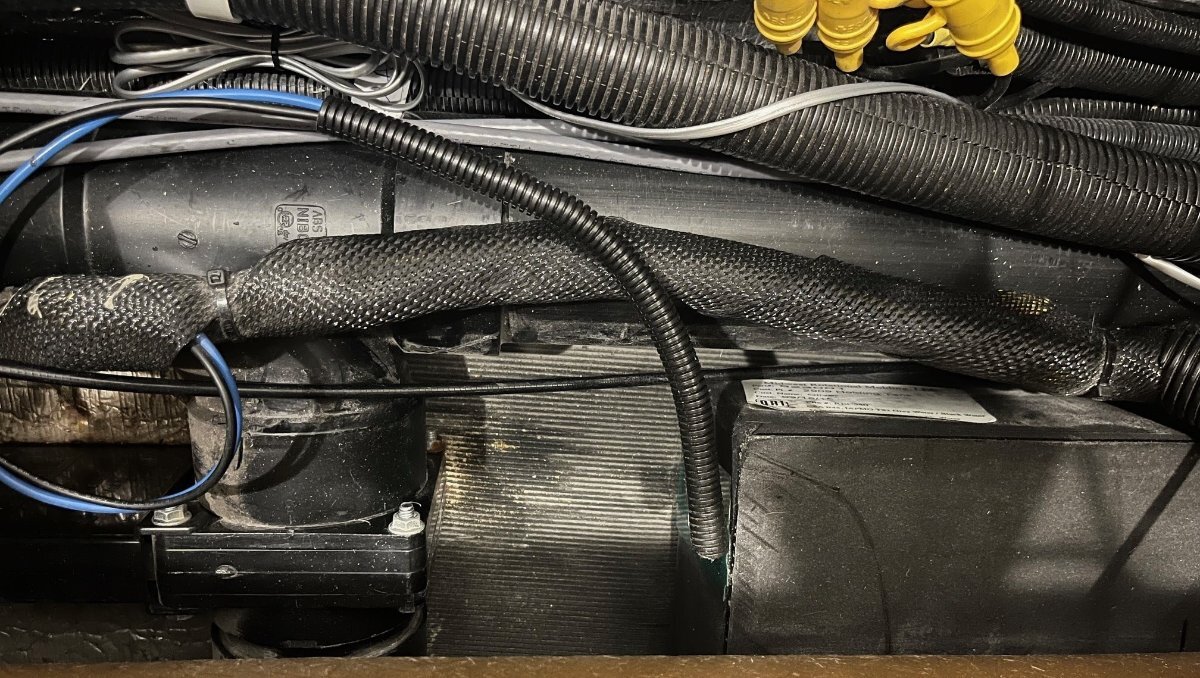
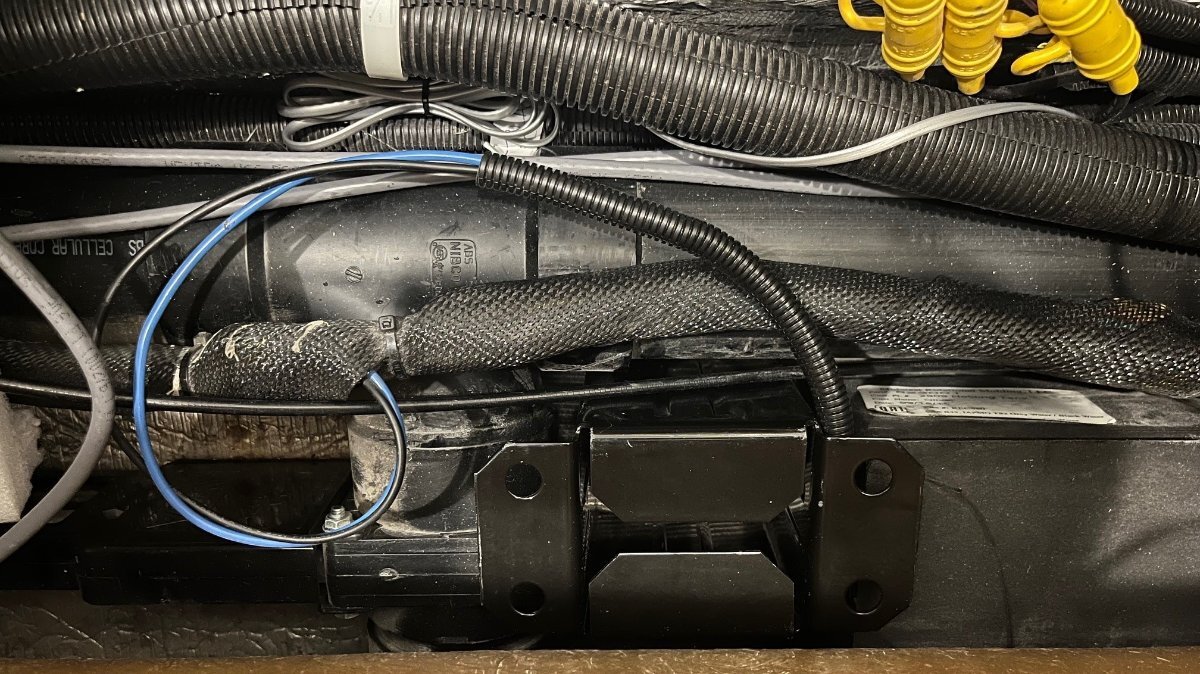
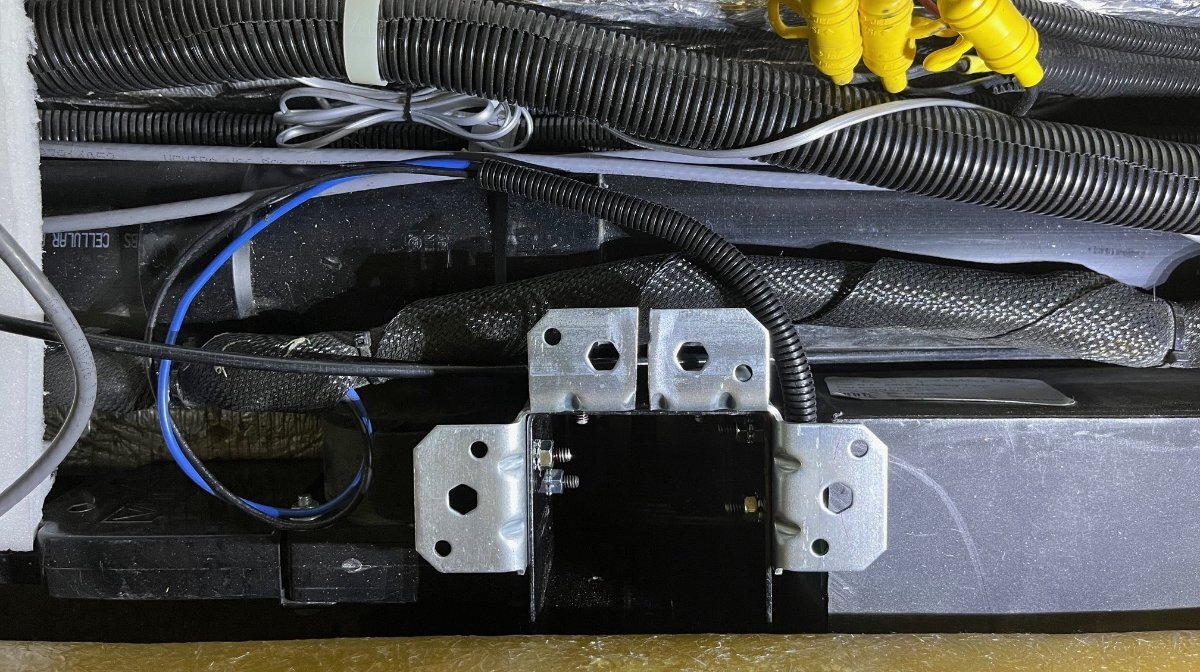
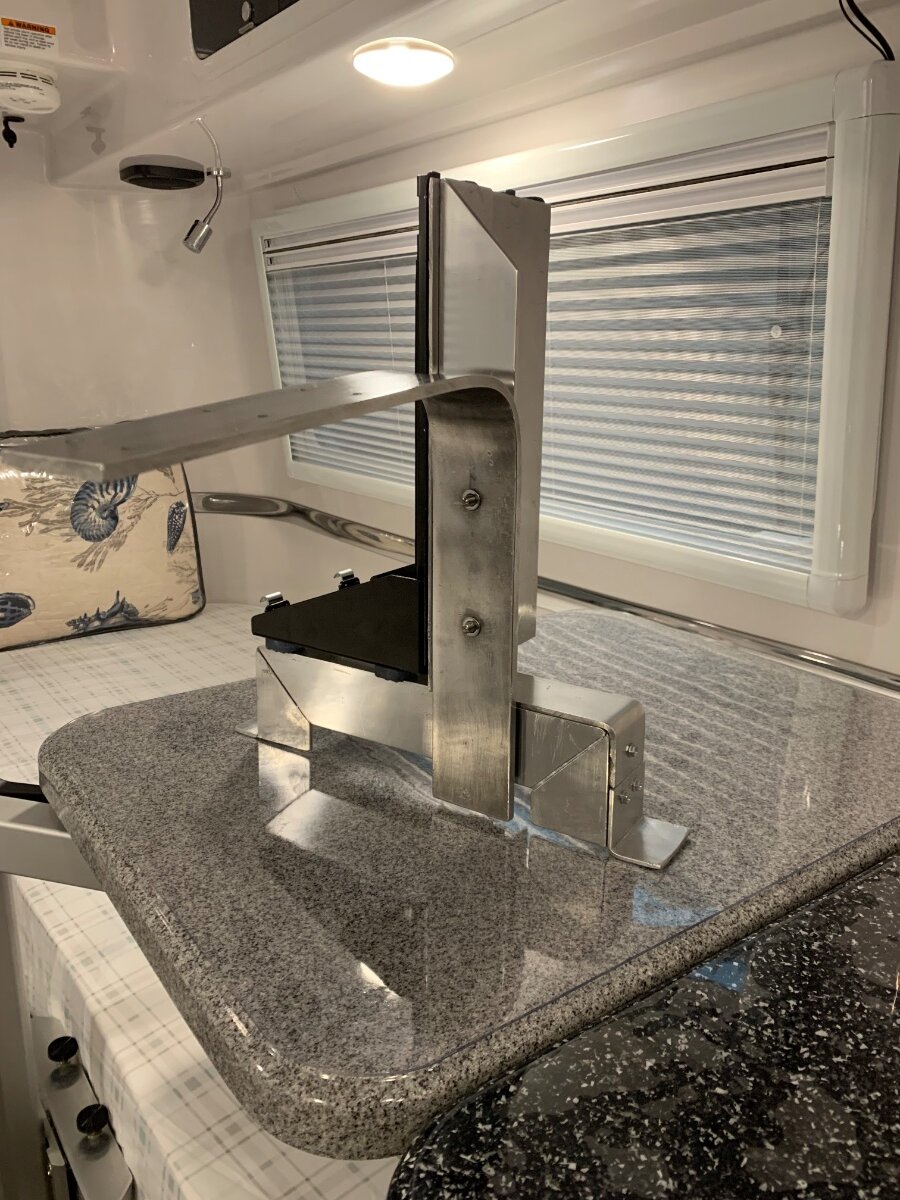
I want to thank all that provided good feedback here! Always helpful. Want to show you my first step with a platform for the Victron Multiplus-II (see pics). More on this in a couple of weeks as I will start a new build thread. I'm waiting on the MP2. The Florida company Inverter Supply must receive shipment from the manufacturer and then ship to me. Thought I would get it this week, but it will be another week. I'm getting installation parts here and there. Love how this first step turned out. I had to put a steel cutting blade in my power miter saw. One mounting ear had to be cut back to slip it under and the two mounting brackets had to be cut to fit side-by-side. This base will hold the weight of the MP2 and I will build a 6x24" platform above it. It will just sit on the floor since I will not drill into the bottom/outer hull. The MP2 will also be strapped above. Much more later in mod post! 😂
2 points
-
I've looked at a number of conversations on the mini, on Reddit and other spots. Sweet. Runs on 12v, with mods to the cord. 50gb limit is fine if you just surf the web, do email, etc. Don't count on several movies a night. Download ahead of time. Nice addition to the starlink stable.2 points
-
Totally doable. And, you'll see a lot. At the risk of offending everyone from the regions in between, just drive til you get to Arizona, as long a day's drive as you can tolerate. You can easily make it in less than a week, though Texas seems to never end... It's just so huge. 20 years ago, we did an rv trip from Orlando via Houston to Las Vegas, with two teen girls. Sedona was our very favorite stop. Actually, the teen girls were ready to mutiny, after the late May/early June heat of Texas and the Arizona desert. Sedona was a welcome two night reprieve. Went to Sliding Rock. Then, we went to lake Powell, and rented a boat. Got temporarily lost. Made it out fine. 😀 Zion is beautiful. So is Bryce. Don't know if I'd be up for a week at each. We went to the Arches on another trip. Magnificent. Don't try to go on a holiday weekend, as we did. We wound up "camping" at a Walmart a distance away, overnight. Everything was booked. Bear in mind, my husband is the rock/desert guy. I'm more in love with trees/green/water. In Sedona, we stayed at an rv park a few miles from Sliding Rock. Probably Rancho Sedona. It was cool, shaded, and a creek. It was heaven, after days in the hot desert. And, I think you are wise to avoid the summer crush.2 points
-
So after unloading from our trip I decided to play with the settings a bit. Remote is easy now that I dedicated some time to learning it. Also, so far the AUTO mode is starting to make sense. In FULL AUTO mode today, ambient outside temperature is 81 degrees F. Time: 12PM As soon as I put it in auto mode it showed AUTO cool with the number 77 showing. The inside ambient temperature was 72. The fan continued to run for a few minutes then the entire unit turned off including fan. Then the display showed AUTO Heat 68 degrees F. So I am assuming it will not turn on again unless the temperature drops below 68 or the Auto cool kicks in. But what temperature that is still unknown since you cannot set it manually. Strange that you can’t manually set temps, but the AUTO setting (68-77) may end up working great for certain situations like when the unit is plugged into shore power in my driveway. I will update as I follow how the unit reacts to outside ambient temperature throughout the day and night. Time: 1pm. Went into camper, AUTO mode display had switched from HEAT to COOL 77, Fan only running no compressor. Inside cabin temp 75 degrees. Ambient outside temp 83 degrees. TIme: 1:25pm. Unit off. AUTO mode heat 68 displayed again. Ambient inside temp 71. Interesting, seems like this setting may be great for when the Ollie is parked plugged in at home. It would save the fan motor from constant use. But would never work for me in use because I am hot natured and would need lower settings. Time: 1:50pm. Once cabin temp reached 76 degrees fan only turned on. At least, I can’t hear compressor. Pulling around 300 watts. Again, I believe this mode will work great while stored/parked. I like to keep my camper plugged in and connected to WiFi. @Ronbrink I believe the 15k BTU unit will be great for the Ollie because for one it is more efficient than other 13.5 BTU units and second the mode settings and unit design allow for the better management of humidity. But agree, more actual use is needed to confirm. Best, Mike
2 points
-
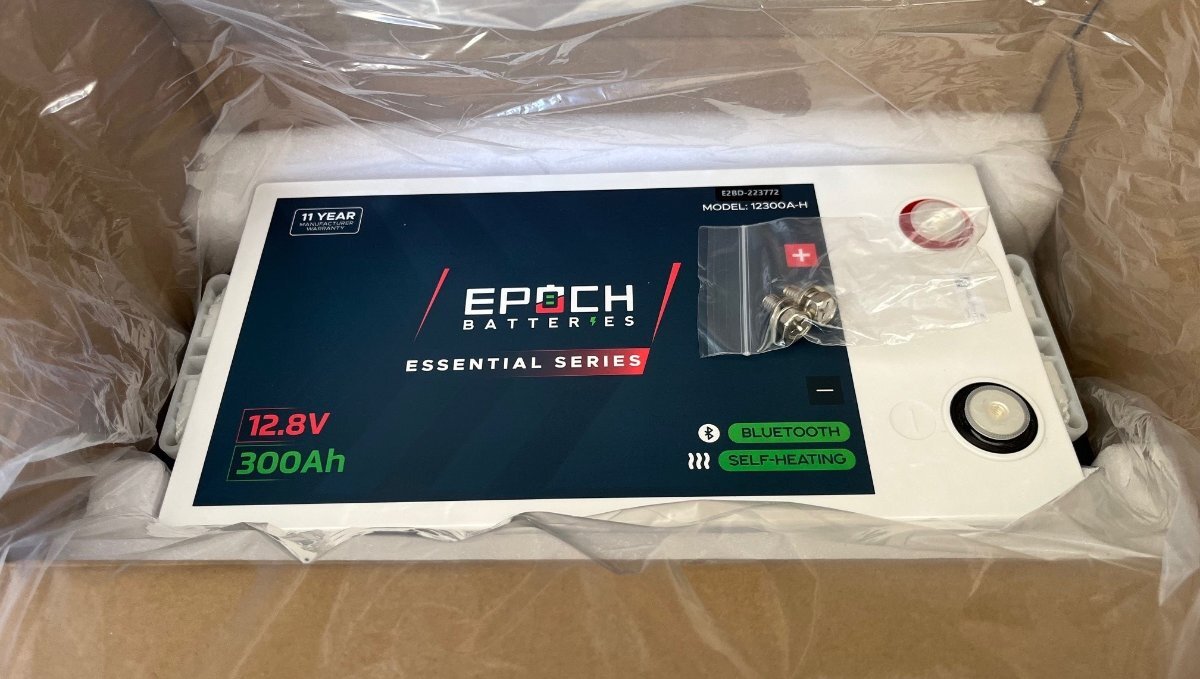
Santa came today, Christmas in July! Never received such beautiful batteries 600AH total. They came just before I started teaching my class today, got the FedEx guy to get them in my garage. On a break, I had to open one! Measures 13.12V in the box. Got to buy my new inverter ASAP. Love it!
2 points
-
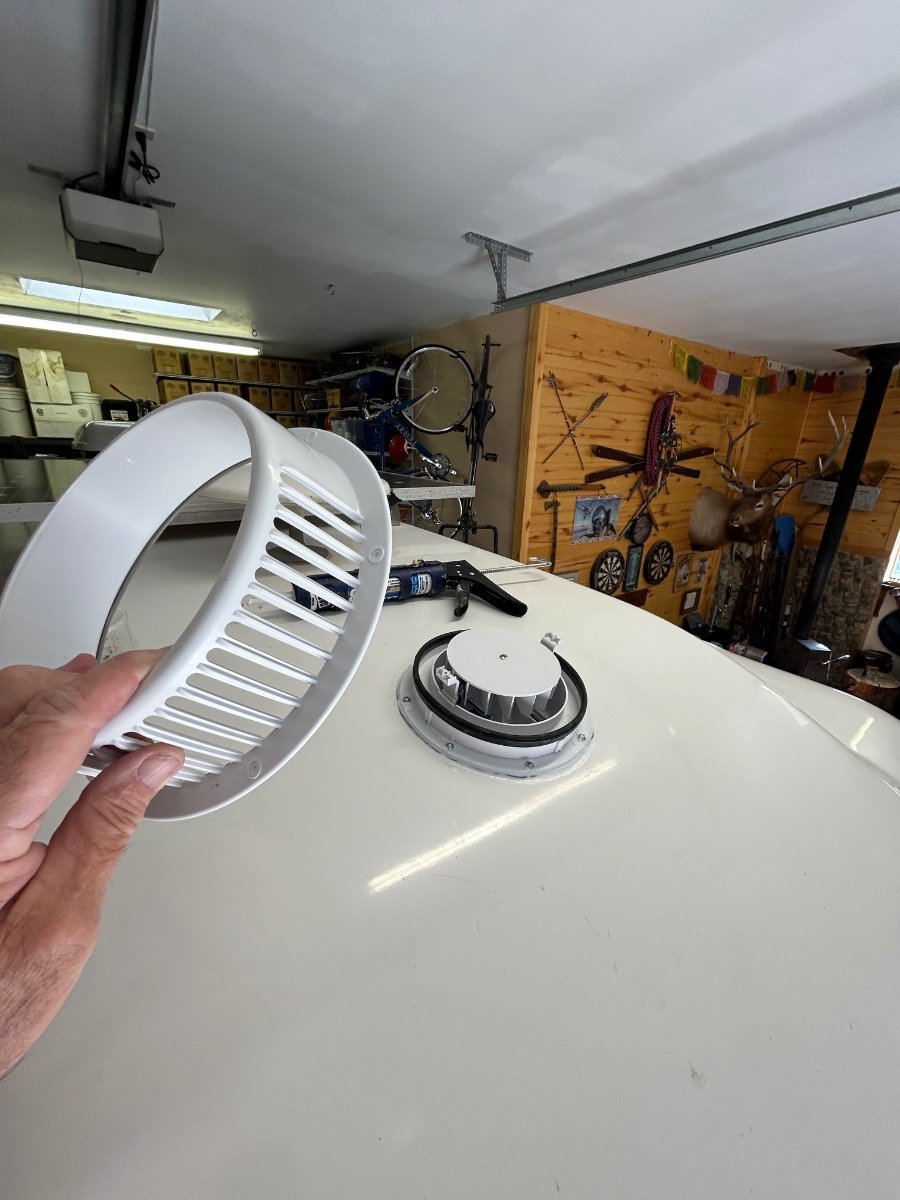
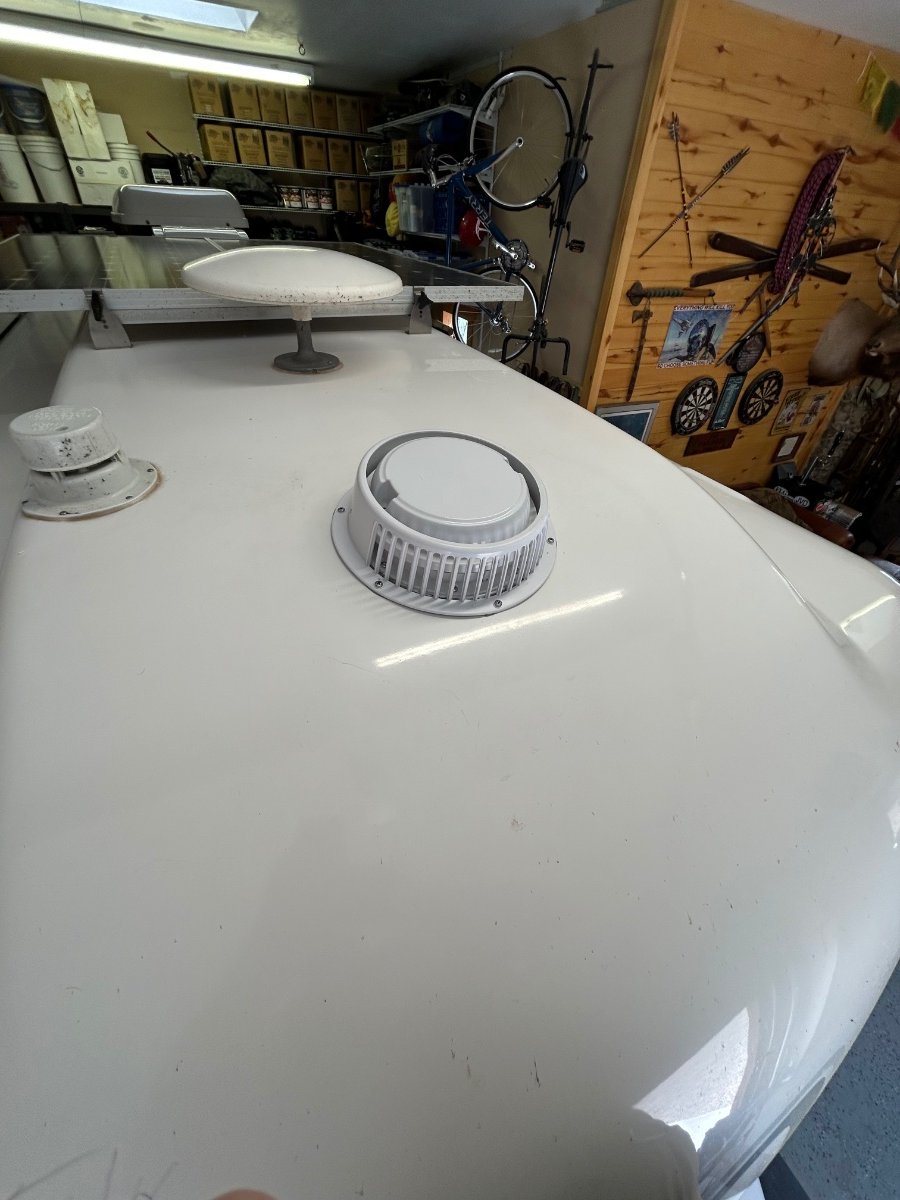
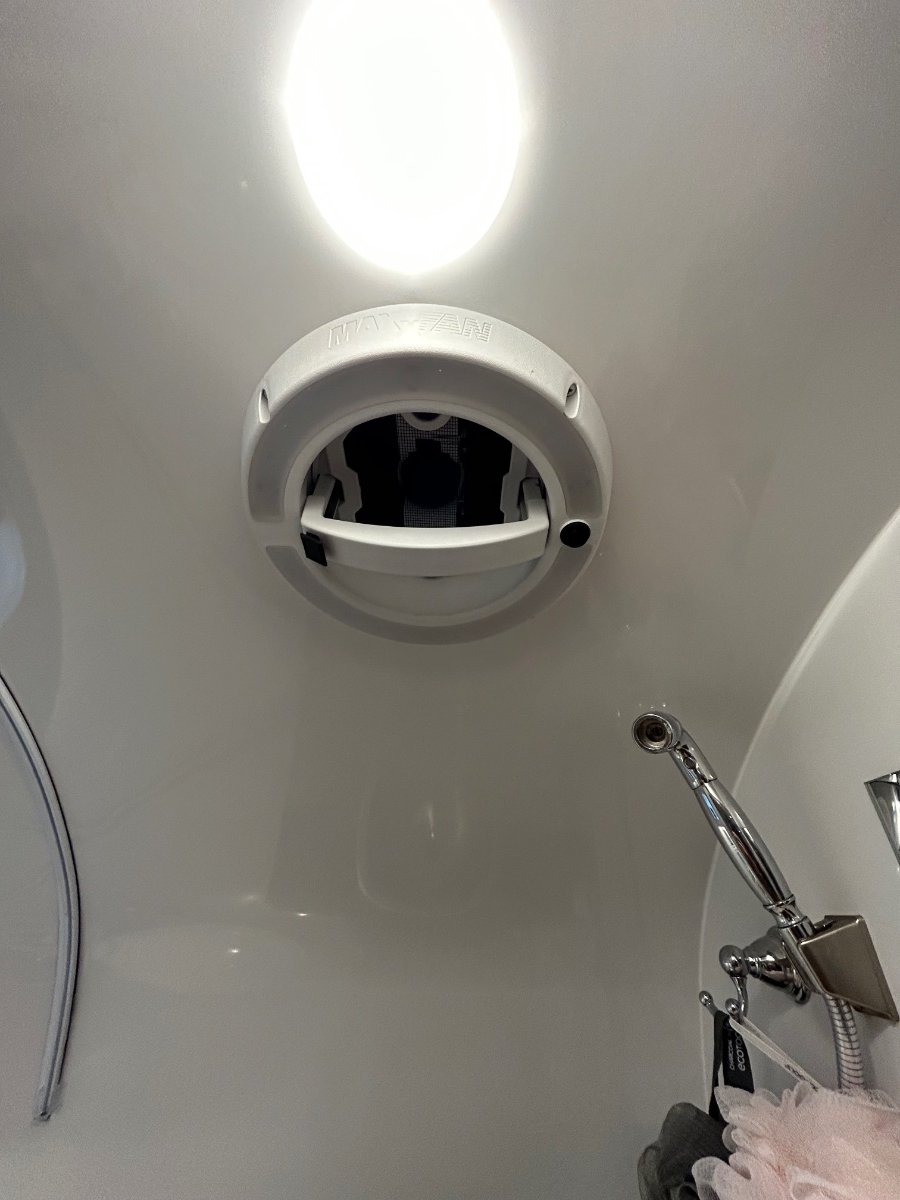
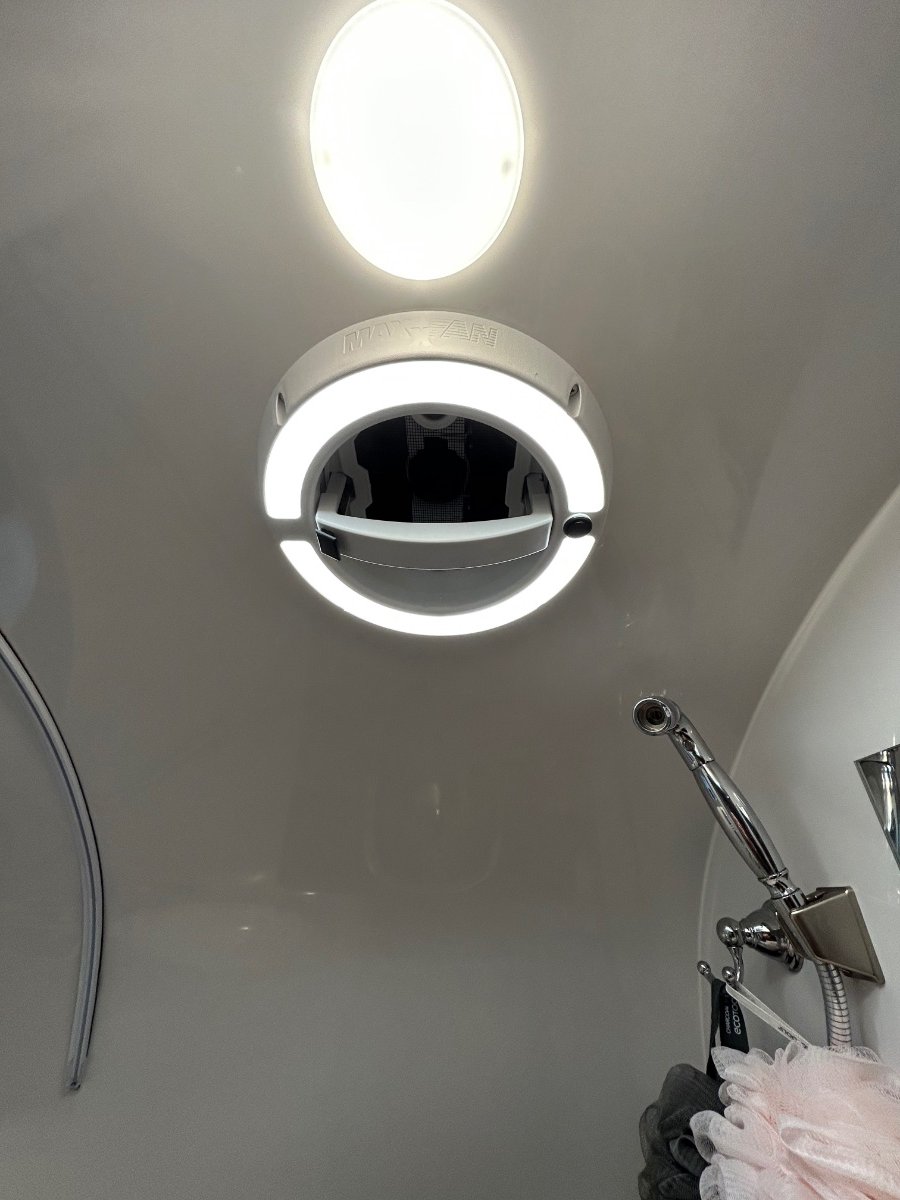
Ok... I love these forums! Nothing like great ideas shared by a group of common minded OTT owners. I'm thinking I stole this one from a comment that @SeaDawg mentioned a while back regarding his "LED-lit" Shower Fan. Well, Diane read his post and thought it would be a good upgrade - so, the new MAXXAIR w/LED unit arrived yesterday via Amazon (Happy Wife - Happy Life category). This would be the short story of its installation... First off, the original VANAIR Ventline fan assembly operated perfectly - no leaks, no bearing wobble, smooth actuation, but alas, no LED. It's the exact unit we had in our previous SOBs. BTW: Its up for grabs - a "freebee", I'll cover any CONUS shipping costs for anyone needing a Ventline. There was major brain cramping involved to plot-out a list of instructions for the R&R drill, especially the Removal phase. The first "R" was straight forward - using a plastic "razor" scrapper to remove the butyl tape from the gelcoat. Cleaned gelcoat with a fresh microfiber cloth doused with an ounce of rubbing alcohol. 2. Filled original mounting holes with clear silicone, they will be further sealed with the butyl tape attached to the new fan housing. 3. Cut-to-fit the included plastic sleeve that fits between the top flange and bottom (shower side) trim piece. Applied clear silicone around circumference of plastic sleeve and upper gelcoat. BTW - the OTT factory fan hole was exactly the correct diameter - no additional cutting was needed (WHEW!). 4. Mounted new assembly up top, carefully pre-drilled/chamfered 8 new holes in exterior gelcoat. Lightly torqued-in stainless screws enough to "push" butyl tape out from flange. Trimmed tape and applied clear silicone around perimeter of flange. 5. Rain guard: The new unit included a "rain-guard" which may be helpful if operating the fan in a heavy downpour. Applied butyl tape on the RG flange and carefully pre-drilled/chamfered 6 new holes for the RG. Trimmed tape after torquing screws in and then applied clear silicone around perimeter of RG. Attached fan cap with the provided 2 white screws. 6. Applied clear silicone to the trim piece groove where plastic sleeve seats. Carefully pre-drilled/chamfered 4 new holes for the trim. Connected 12vDC power to fan motor and LED - used solder and heat-shrink for connections. Tucked wires inside trim piece and mounted it with 4 screws. 7. Unlike the Ventline unit, the MAXXAIR has a locking mechanism when depressed allows the fan lid to open/raise. Its raises/lowers smoothly. Fan and LED each have separate switches. And as, I believe, @Patriot has recently said, "Let there be light!" One and done... Happy Wife.
1 point
-
Your input caused me to pull the trigger on a Fresh Jet 3. I am having mine installed at Highway Trailer Sales in Salem, Oregon next week. Everything is in their hands except for the needed extra roof seal that lets the condensate drains flow through the Olly drain. Despite it appearing in a Dometic advertisement, they have NOT produced a Fresh Jet 3 "non manual" ADB. I think their universal ADB woulld be a bad idea since it was not designed specifically for the Fresh Jet 3. I would have liked to have had a non-manual ADB so that I could use the Olly thermostat. I went with the ADB with manual controls. I guess I can always change out the ADB if Dometic ever gets around to actually producing a Non-manual Fresh Jet 3 version. I will post again after the install...1 point
-
Yep, you were editing. I'm on this site too much! I need to get out, work on the Oliver and get some yard work done today. Lunch break is over! Now that you have the highly capable Victron charger, if it were me, I would bypass the Xantrex charger if at all possible. Use its inverter function only. As you wrote, "soon after showed erratic output." This could be caused by the Victron charger sensing amperage supplied by the Xantrex charger.1 point
-
Don't know Kodachrome. Loved out visit to Dead Horse and wish we would have camped there. Do that for sure! I agree with @SeaDawg, where she wrote, "Zion is beautiful. So is Bryce. Don't know if I'd be up for a week at each." I would spend a week in St George area, so many things to do and we've made it an annual trip for us. You are a close commute to Zion. April is better than later, as it will get more and more crowded. The shuttle system gets full and you can wait at some stops for a while. For me 2 days at Zion is enough due to the crowds. Separately I suggest camping somewhere up between Bryce and Capital Reef NP, weather permitting. This is all 8000+ FT elevation. Leaving Zion you can drive Hwy 9 east, the Mount Carmel Highway for more great views. Then take Hwy 89 N to Bryce. So many options!1 point
-
If you would go back and reread my last, I may have been editing it as you were sending this. But then maybe not!1 point
-
@rideadeuce: Looks great, Mike! OBTW: we love your ship's clock and humidity(?)/barometric(?) gauges on the rear bulkhead - nice touch!1 point
-
David, You have me looking at this, too. If you buy one, want to see how your system works!1 point
-
I’m sure you’ve heard that necessity is the mother of invention. Nice solution to your challenge. Mossey1 point
-
Forgot to add the picture
1 point
-
Jucy's is OK. A much better burger can be found at Bubba's Fat Burgers in Gilmer, TX. My local go to.1 point
-
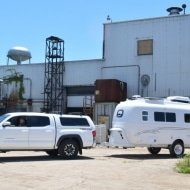
Life on the road sometimes requires stopping to do laundry! Here in Cody, WY the best laundry is the Cody Laundromat. Now that this chore is done and restocking at Walmart is done the regularly scheduled activity of fishing at a higher altitude is to be resumed. A special hello to the Ollie II that was headed east towards Cody last week after they left Yellowstone National. Bill
1 point
-
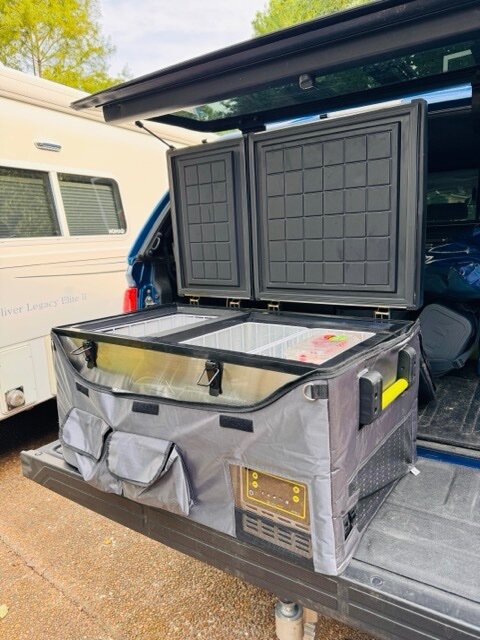
This new freezer/fridge combo by GZ proved to be more efficient and better in every way than my old reliable ARB fridge. Bluetooth connectivity in cab monitoring was perfect every time. Temps in the unit were always within a degree or two even in the heat wave we experienced in D.C. It was nice to have a true partition for refrigerator items vs freezer items. Dual side plugs for power. Ran perfect off DC outlet in bed of truck or via GZ LiFePO4 solar generator. Not always needed on our week longs trips but for longer trips it is perfect for extra meat, milk, OJ, etc. Overloading the Dometic 3-way fridge just makes it not work effectively. LG compressor brought the temperature down quickly on initial startup. The only downside is the size, takes up a good bit of room but for us when needed is worth the trade-off. They do make a smaller version that is a single zone. .
1 point
-
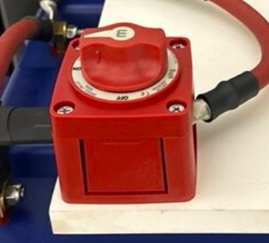
I ended up buying the Blue Sea Systems 6006-BSS 300 Amp switch since the main fuse in mine is 300 amps:
1 point
-
I was really disappointed that Oliver began installing 11,000 btu units in my model year. However, it has been okay other than the inherent noise of these Dometics. Additionally, there have been a few times when the inside humidity seemed apparent, but an issue seldom discussed for a Penguin ll.1 point
-
When the time comes, I too will remove the stock mounting board and fashion an aluminum footing similar to the one made to support the Hughes Autoformer recently installed. 4”x4”x1/4” L-shaped aluminum should suffice; only difference, weld rather than heat bend this thicker metal.
1 point
-
Just decided on the MP2 for the sole reason is its dimensions. Wow, the 2x120V version is amazing for those with 50A RV systems but we only need a single 120VAC input and output. There are grid capabilities in the MP2 for home use that doesn't matter for RV usage. The original MP is actually smaller in volume, 2 LBS lighter, but the 8.6" depth vs. 6" is the real difference. Also, the MP has an aluminum casing vs. thin steel which may be better in some climates. Under the streetside bed as Mike @rideadeuce installed will be my choice too. I will figure out a footing and strapping for the MP2 without the heavy HDPE and epoxy. The MP2 is 23" long, almost 9" longer but there is a lot of length under the bed. I just added the Beech Lane dual fan for fridge cooling and if needed this would be a great addition to add it the wall to the rear going to the trunk area. I did not hear from any of the 3 or more Oliver owners with in an installed Multiplus re inverter or fan noise. Sure hope it is not noisy as it will be under my bed! Hoping the MP2 has dual battery terminals. It looks like Mikes does in the pics. I see pics from Victron, some show single screw terminal and most show a built-in terminal/bus with dual screw terminals. I have no interest in Victron Lynx buses or any additional bus for that matter. The Oliver already has DC buses installed. One terminal on the MP2 will of course connect directly to the batteries and I will use the second terminal to run 12VDC to the Oliver buses. There will only be the 4/0 cables in the battery bay. Still working on best price and will place an order Monday latest. I'm getting the Victron VE.Bus Smart dongle to program the MP2 and read status via the Victron app. This would be in place of any wall-mounted display accessories. I read I may also need a Victron Current Transformer for the Power Assist to work effectively. These are relatively inexpensive parts. Yesterday, I removed the lead-acid batteries. Today I'm pulling the 2KW Xantrex inverter, the Xantrex ATS and junction box. This is a complete OTT installed working system if anybody needs one. Put the LA batteries on Craigs, who knows. Will oen up the EMS and the 120V AC panel to ready the wiring. Building the MP2 platform will take some thinking! 😂1 point
-
Everything has been said, great info here from many members. It's a long 17-page read! 🤣1 point
-
I'll have to admit that I have never wished that the "Head Bumper" was not there.1 point
-
Haha, reminds me of what my brother-in-law said he learned in the marines about assume - it makes an ASS out of U and ME. I hate to admit that the older I get, the more I am reminded of that quote!1 point
-
Another caution: Different hulls have different dimensions, trays, and batteries, Hence one pic may not work for all as our stack heights vary. On my 2018 with 100 AH batteries I could not use such a thick cutting board. Check yours before purchase is a good plan. GJ
1 point
-
@jd1923, it's easy, and you will make your wife very happy, imo.1 point
-
Congrats! How do y'all like the LED in there? Got some pix of your new mod? Just curious, Mike... Cheers!1 point
-
I got my new fan installed today. Checked this thread a couple of times just for sanity checks! I think it’s a worthwhile upgrade. Mike1 point
-
HA! No worries! Just hope it helps them out - there's quite some hesitation by many to drill into the fiberglass and gelcoat. Totally get that - but with correct procedures and thoughtfulness, it's usually a DIY procedure, IMO...1 point
-
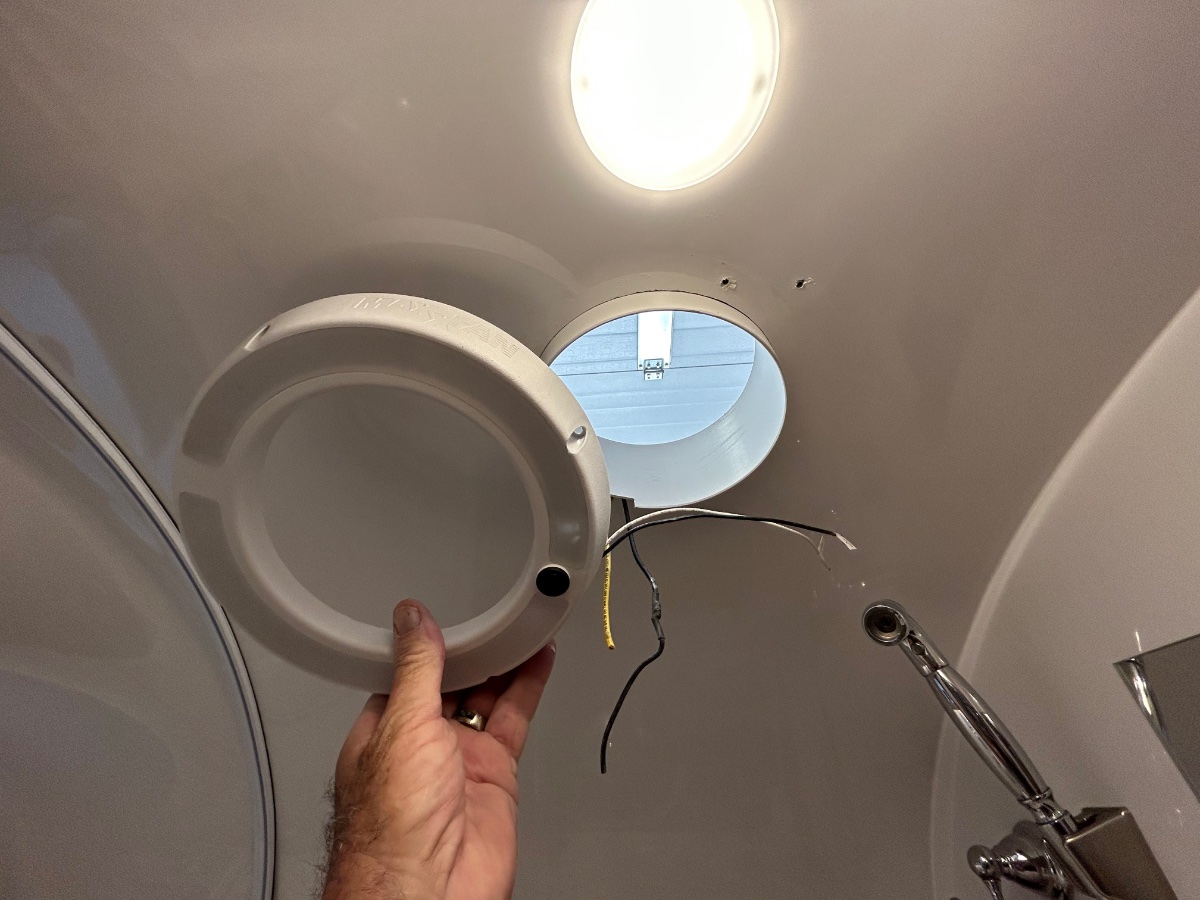
We replace our Ventline bath fan with the Maxxair/LED model as described above. Expecting that the holes weren't going to line up (because of the two different manufacturers) either with the exterior assembly or the interior trim piece, we prepared ourselves to fill the existing holes and make new ones in the gelcoat to make this install happen. It wasn't a big deal drilling into the gelcoat and fiberglass material beneath - we applied blue painter's tape, marked/spring-punched the hole locations, and used the proper bit to drill them. FYI: We definitely used modern gray-colored butyl tape between the exterior pieces and the hull, just as @SeaDawgdescribes. It's a very straight forward mod and gives you a nice additional LED in the head which D really loves a lot... HWHL! Above pic with vent closed/light on. ...vent open/light on. Exterior view of the vent and vent guard. @Steve and Cindy: If you've got any specific questions, you can PM us anytime and we'll try to answer any questions you may have. In any case, good luck with your mod! Best regards, A & D
1 point
-
AND - 7 - the most important of all - make Mom happy! 😄1 point
-
Bill, thanks for that info about the possible recall/warranty. I wanted to switch to the Maxxfan Dome w/LED even before the gasket malfunction, hoping 1) the fan would be quieter than the Ventline, and because of 2) the locking handle, 3) the easily removed screen for cleaning up there 4) the easy to get to quick-blow fuse, 5) that cool LED light and 6) to test my roof sealing and caulking abilities for the first time ever... gulp!1 point
-
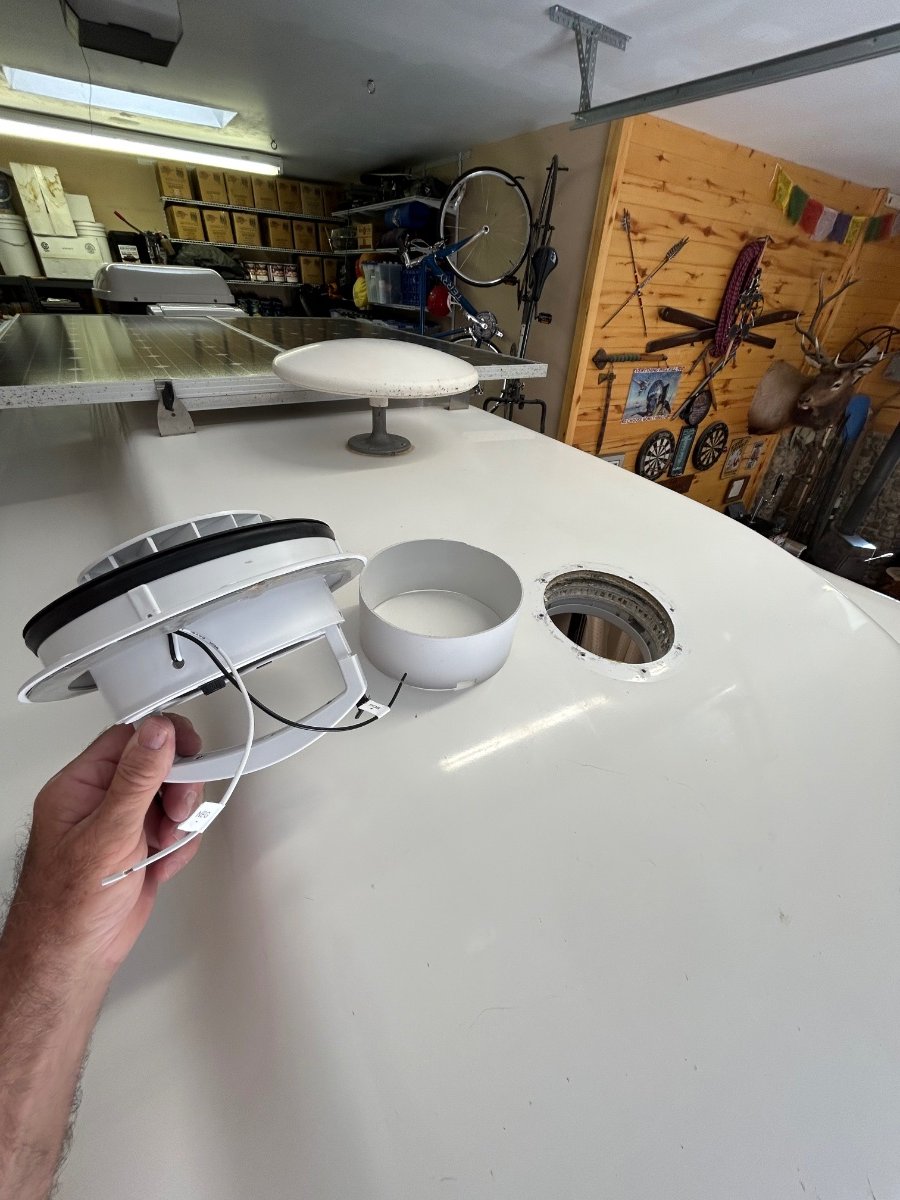
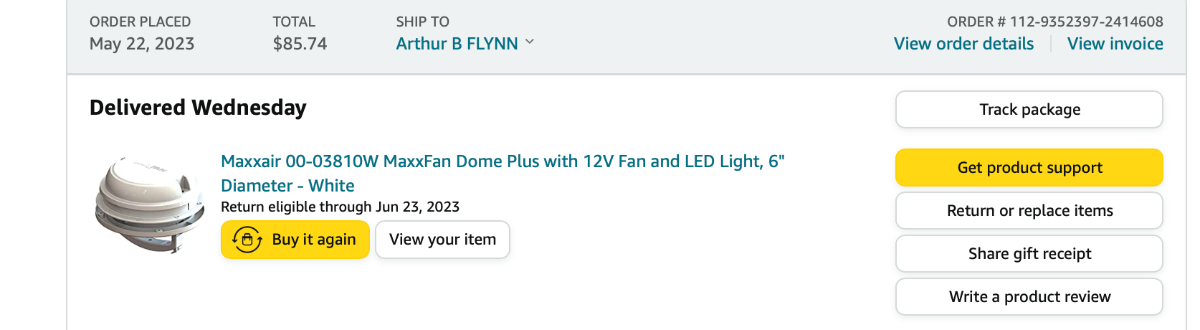
Here's the model number from our Amazon order receipt: The unit comes with a 6" extension sleeve. You will need to trim the sleeve to your roof thickness. Our OTT roof thickness at the 6" diameter vent hole is 2 1/4". We placed the 6" sleeve inside the hole, allowed 3/4" to protrude inside for the trim piece/LED housing, and marked the exact thickness so as to determine how much needed to be trimmed. The length of the sleeve needed was 2 7/8". We used clear silicone around the upper sleeve circumference and roof vent hole for additional waterproofing. Fitment was good - especially considering that the fan hole location is not flat, being slightly curved - be very careful when torquing both the upper housing screws and the decorative trim piece/LED housing screws because one could (IMO) crack the housings if over-torqued. The housings will "bend" slightly to match the interior concave curvature of the ceiling and the exterior convex curvature of the roof. We washed Casablanca after the install and heavily watered the area around the new vent for several minutes - no leaks detected/dry as a bone in the head. Hope this helps, brother! Cheers... PS: 1. The old Ventline unit is spoken for by another member and will be shipped today. 2. This model MAXXAIR has the conveniently accessible inline fuse that @SeaDawg mentioned above, FYI.
1 point
-
MAX Burner I checked out the fan on-line and see that it comes with different height extensions. What extension did you use? Did you find the model number from the box?1 point
-
@MAX Burner Sano Install, I like it! Let there be light! Patriot🇺🇸1 point
-
The fuse is accessible without disassembling, which is another nice feature in ours. Less than $100, on etrailer. https://www.etrailer.com/RV-Vents-and-Fans/MAXXAIR/MA00-03810W.html?feed=npn&utm_source=google&utm_medium=cpc&utm_campaign=Google | Shop - RV Vents and Fans&adgroupid=81219729010&campaignid=417623777&creative=404001548849&device=m&devicemodel=&feeditemid=&keyword=&loc_interest_ms=&loc_physical_ms=1026083&matchtype=&network=g&placement=&position=&gclid=Cj0KCQjwmtGjBhDhARIsAEqfDEeBTUCRhW2dwZMF-AYYM2dLpNLgnV17aD5HcsrVq-qdF5xP-juVaNIaAirSEALw_wcB1 point
-
The LED is surprisingly bright - 50 to 60 watt equivalent? I'll check the box it came in for the model number.... MAXXFAN Dome Plus w/LED - WHITE. Cheers!1 point
-
Nice install! How bright is the LED? Which model did you order, I see several maxxair vent fans that are similar. Thanks! Mike1 point
-
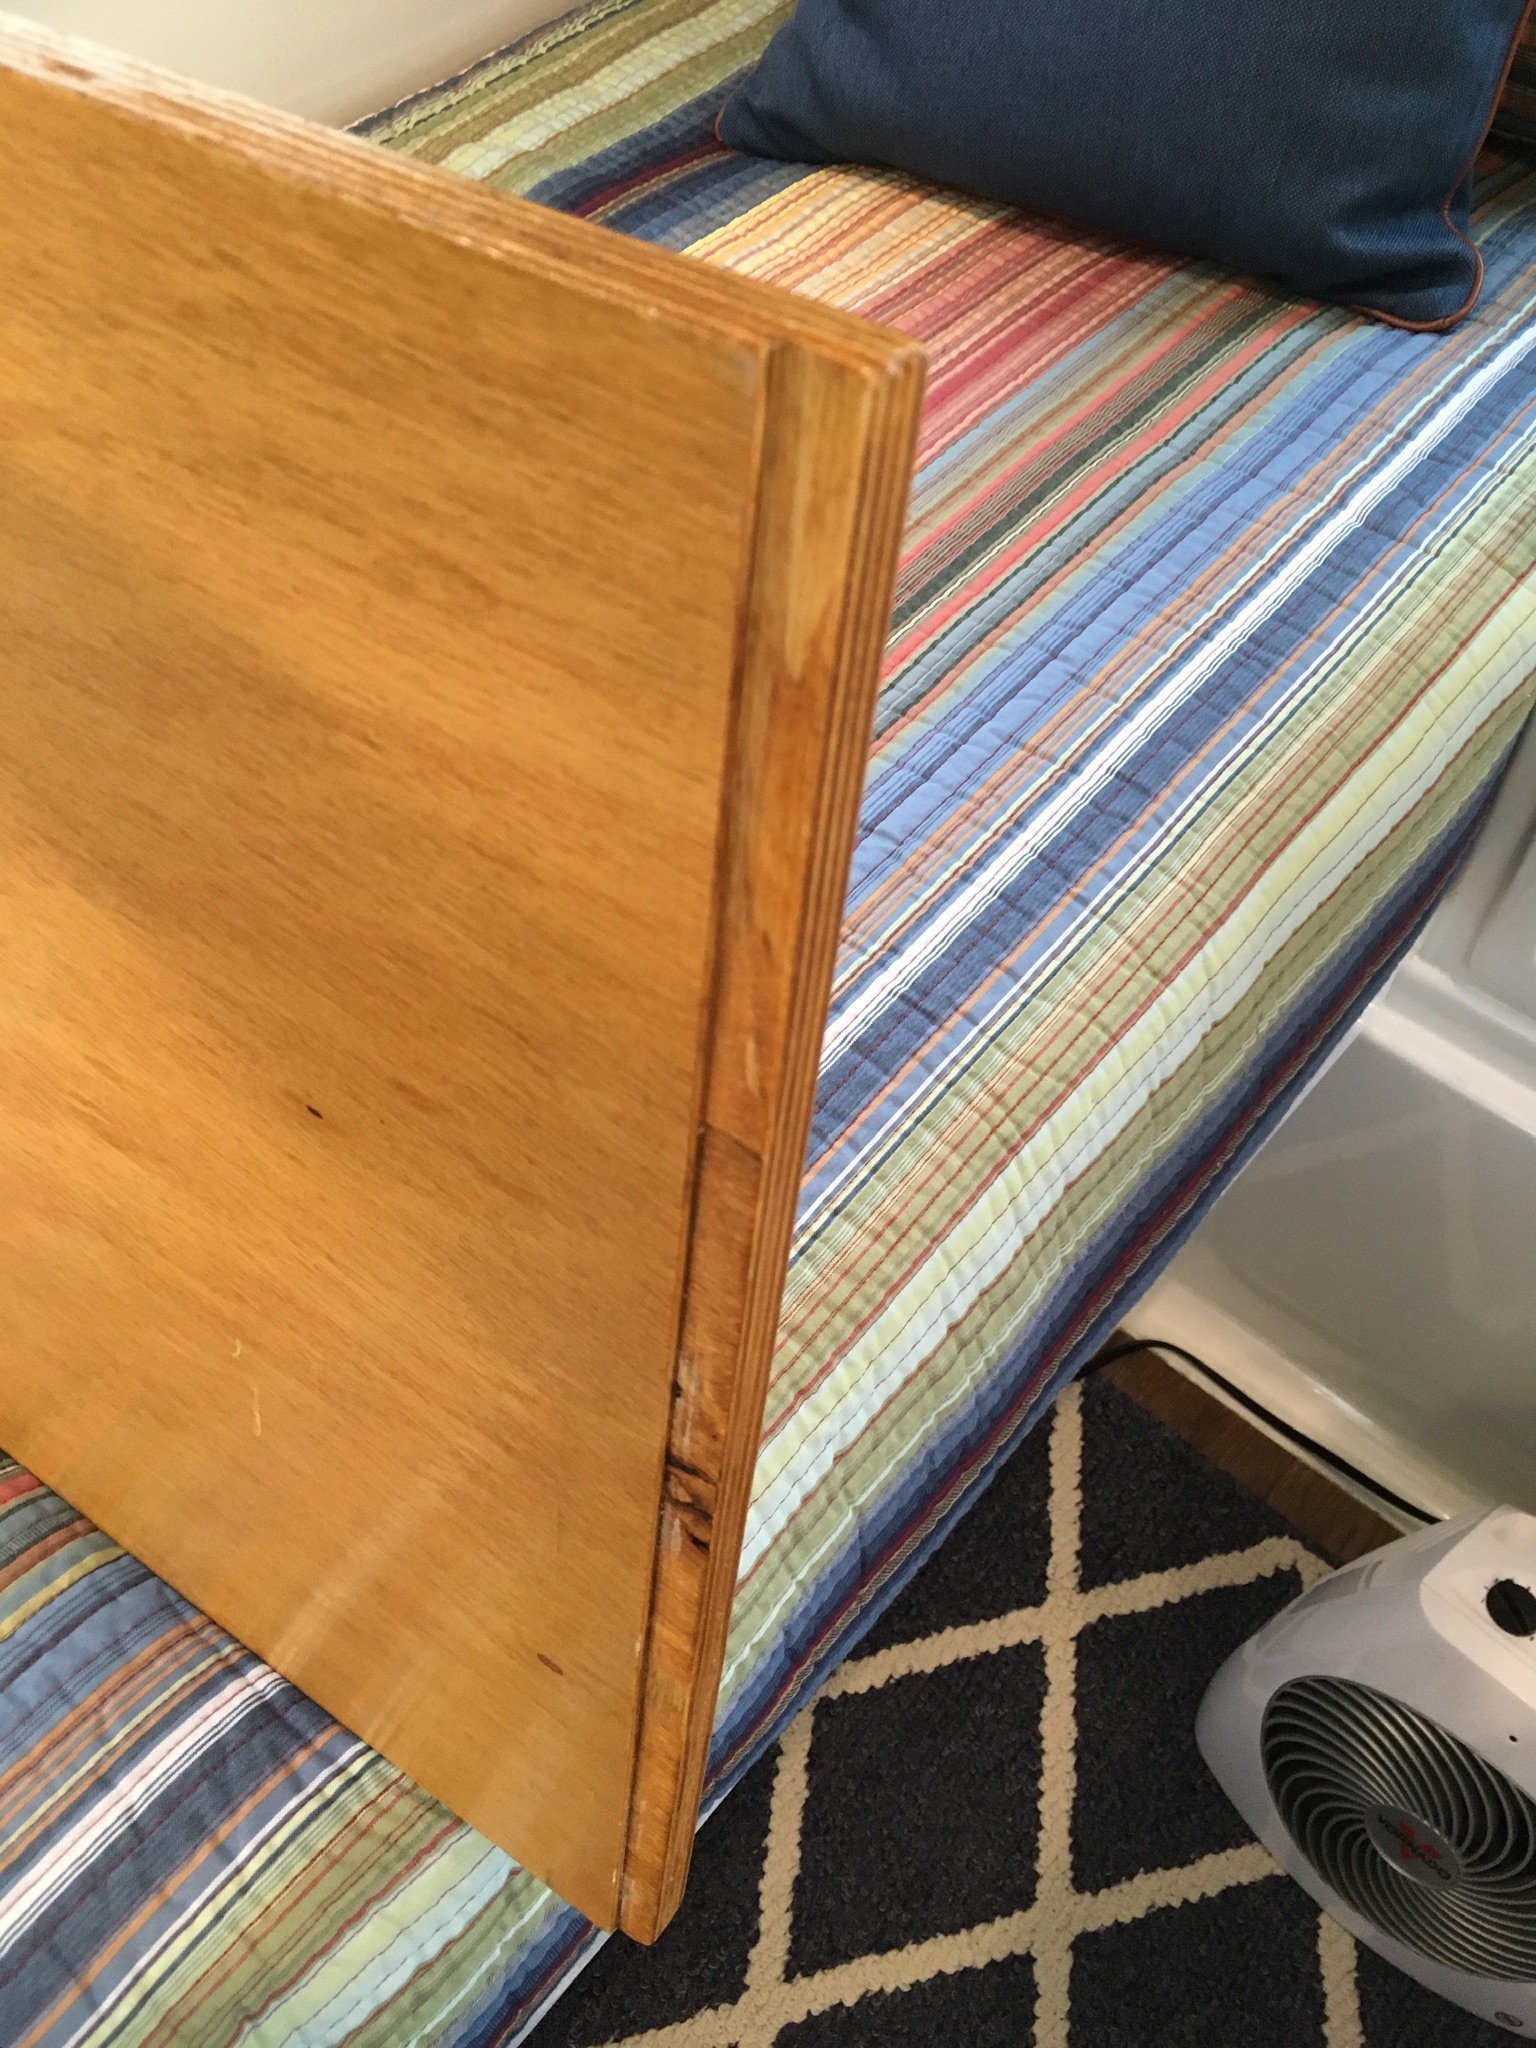
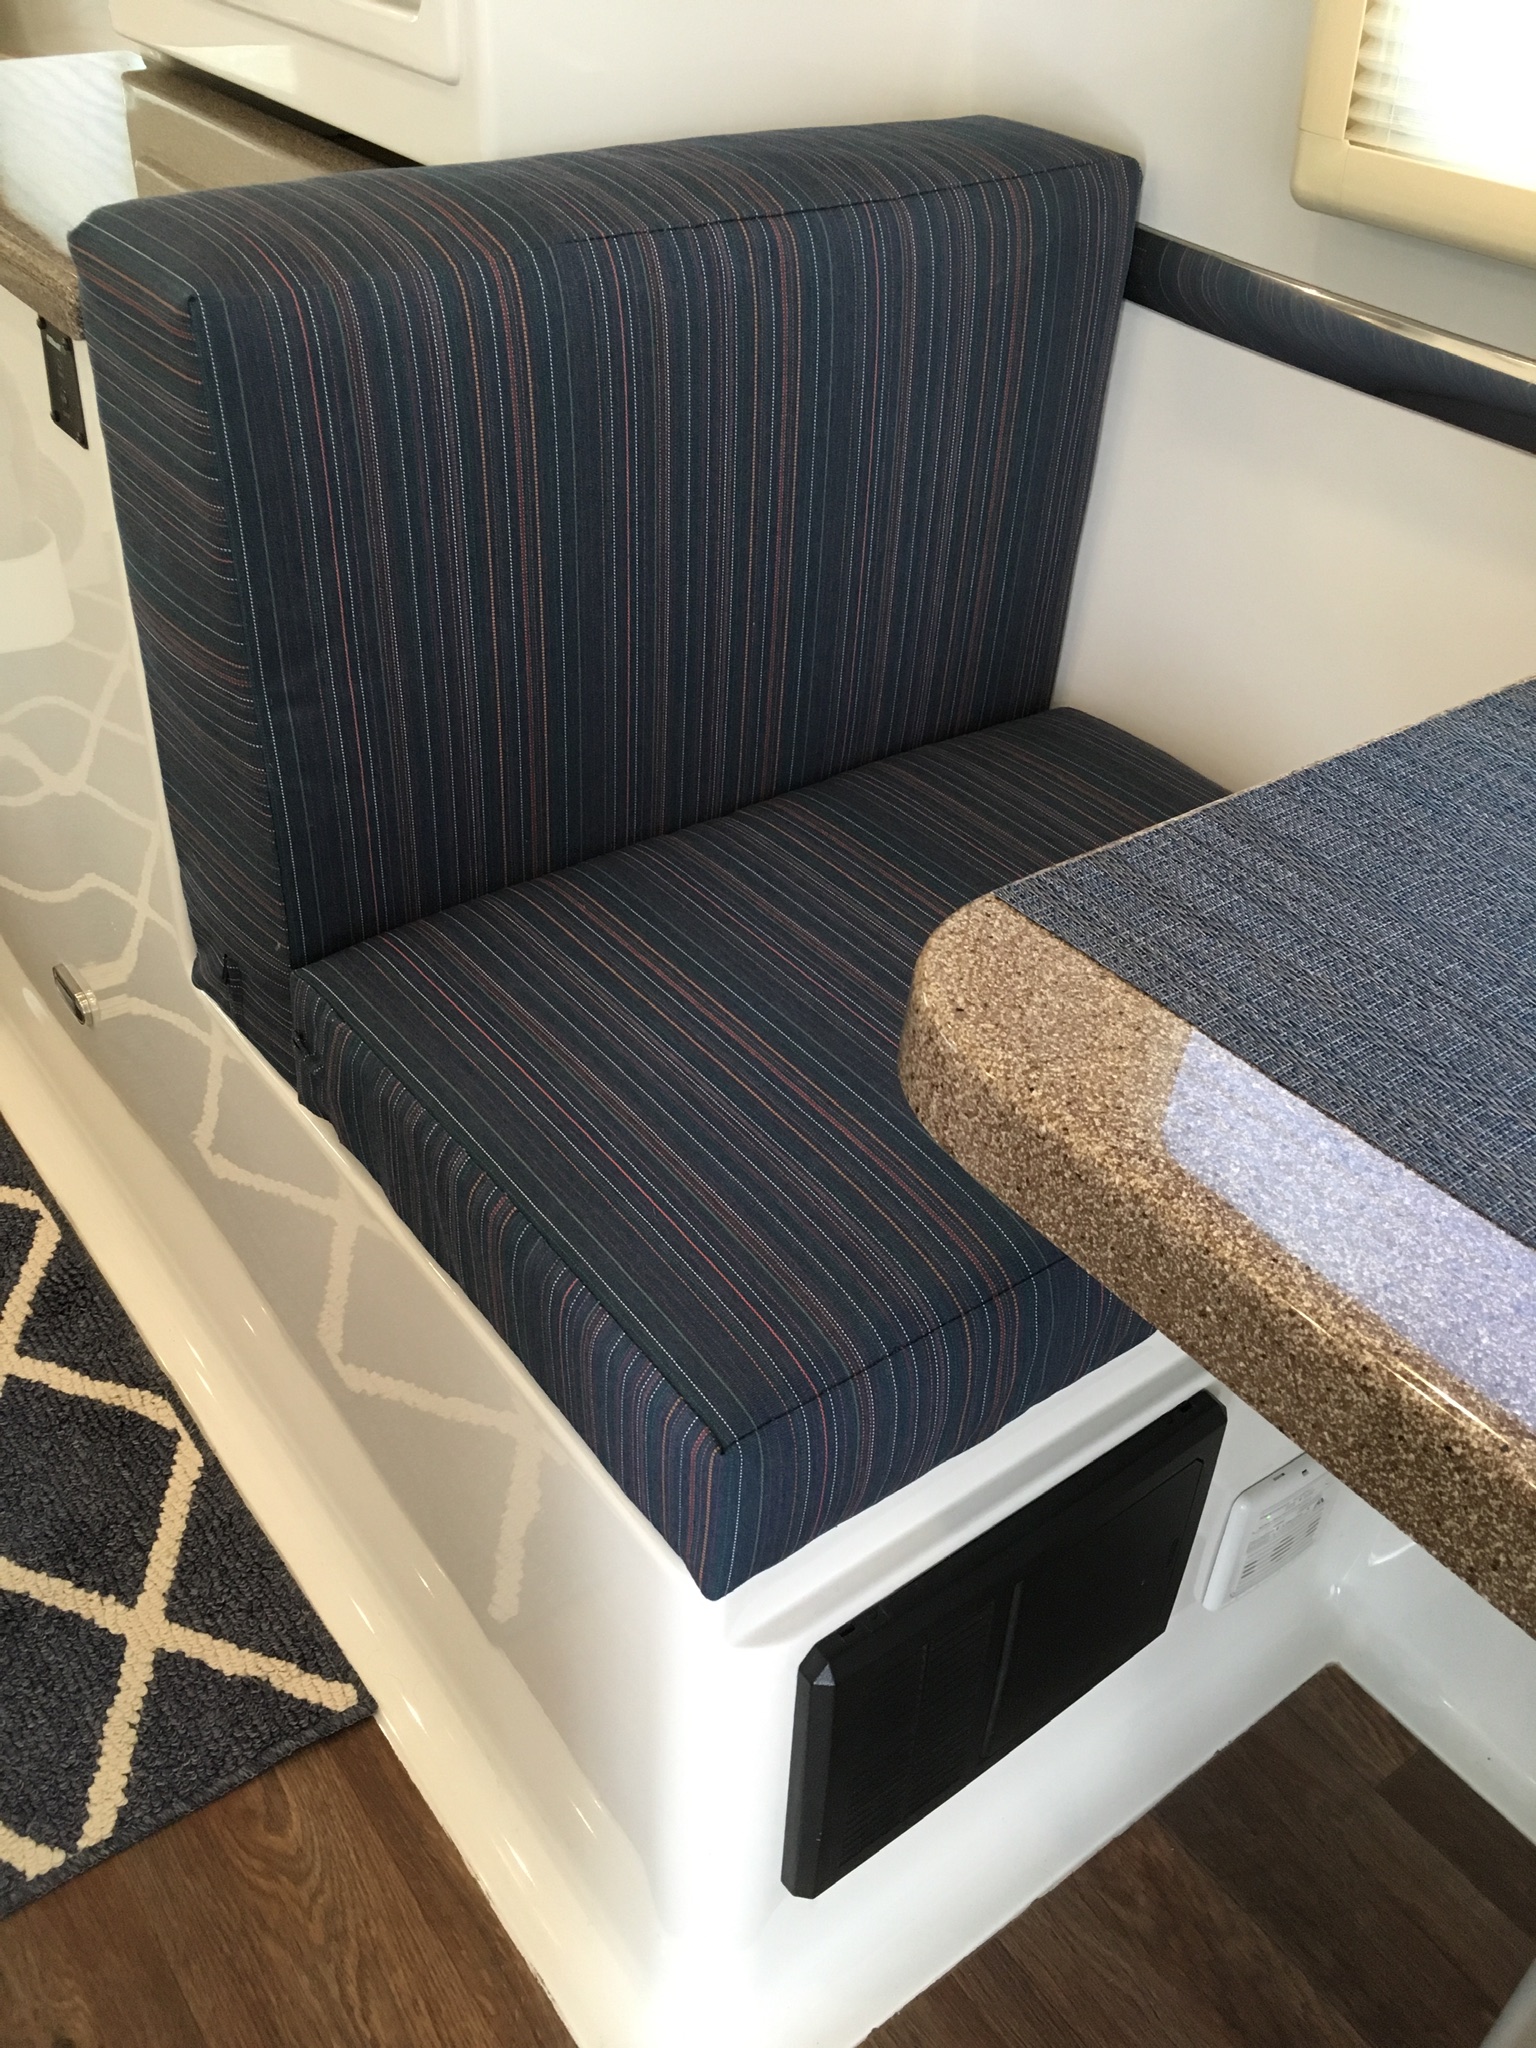
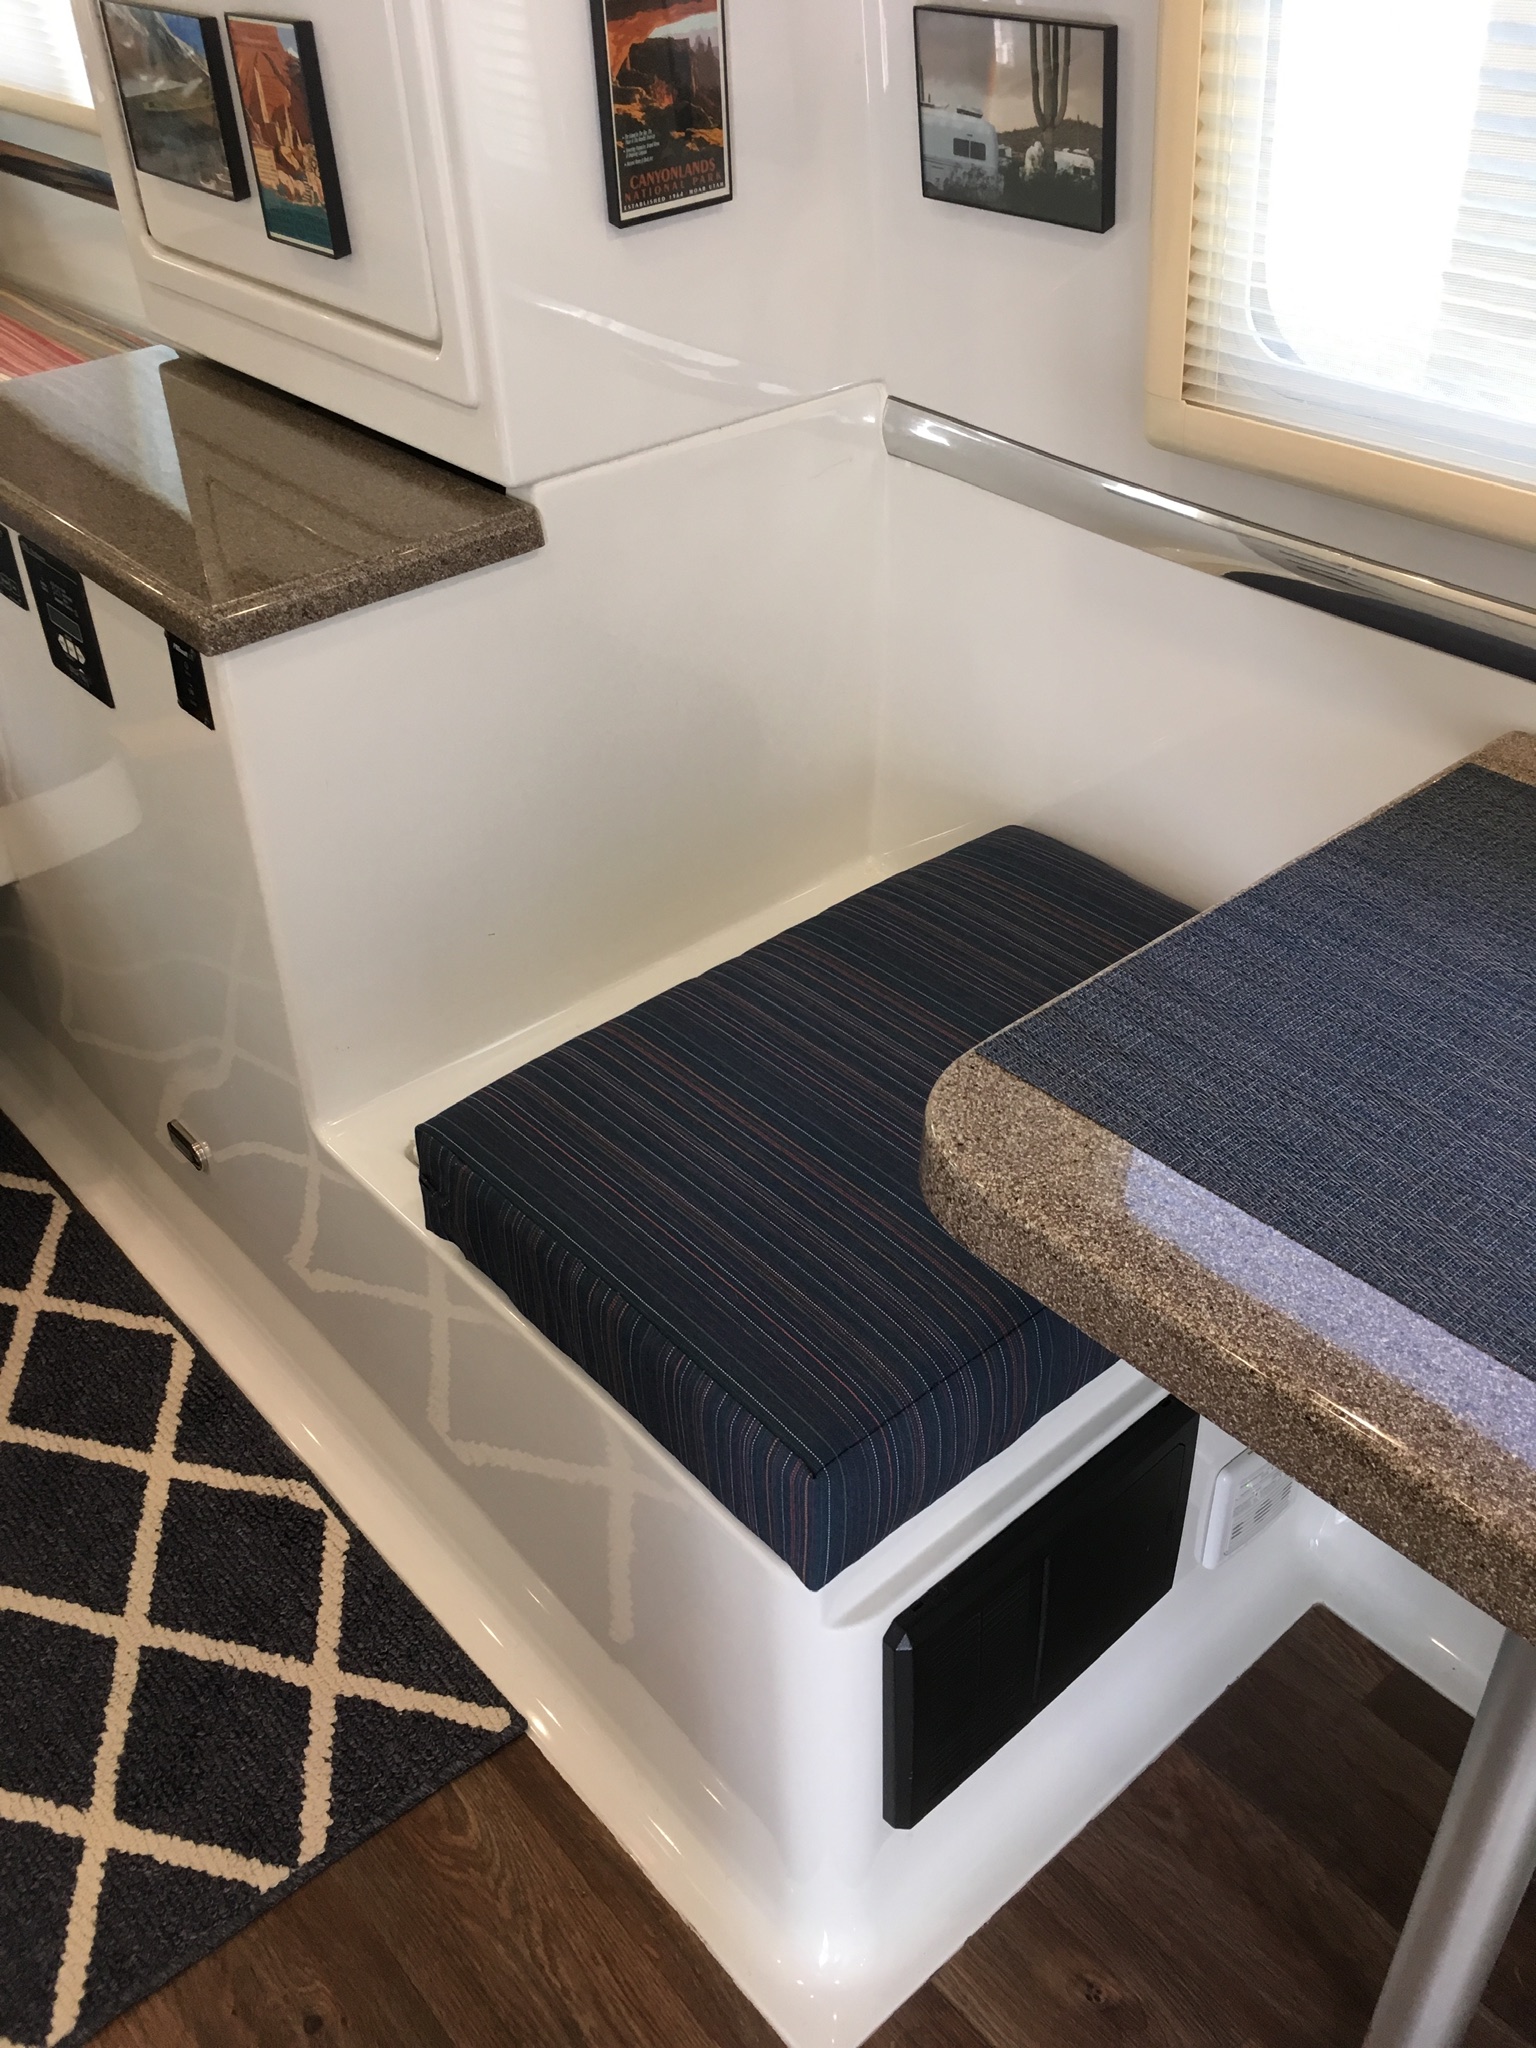
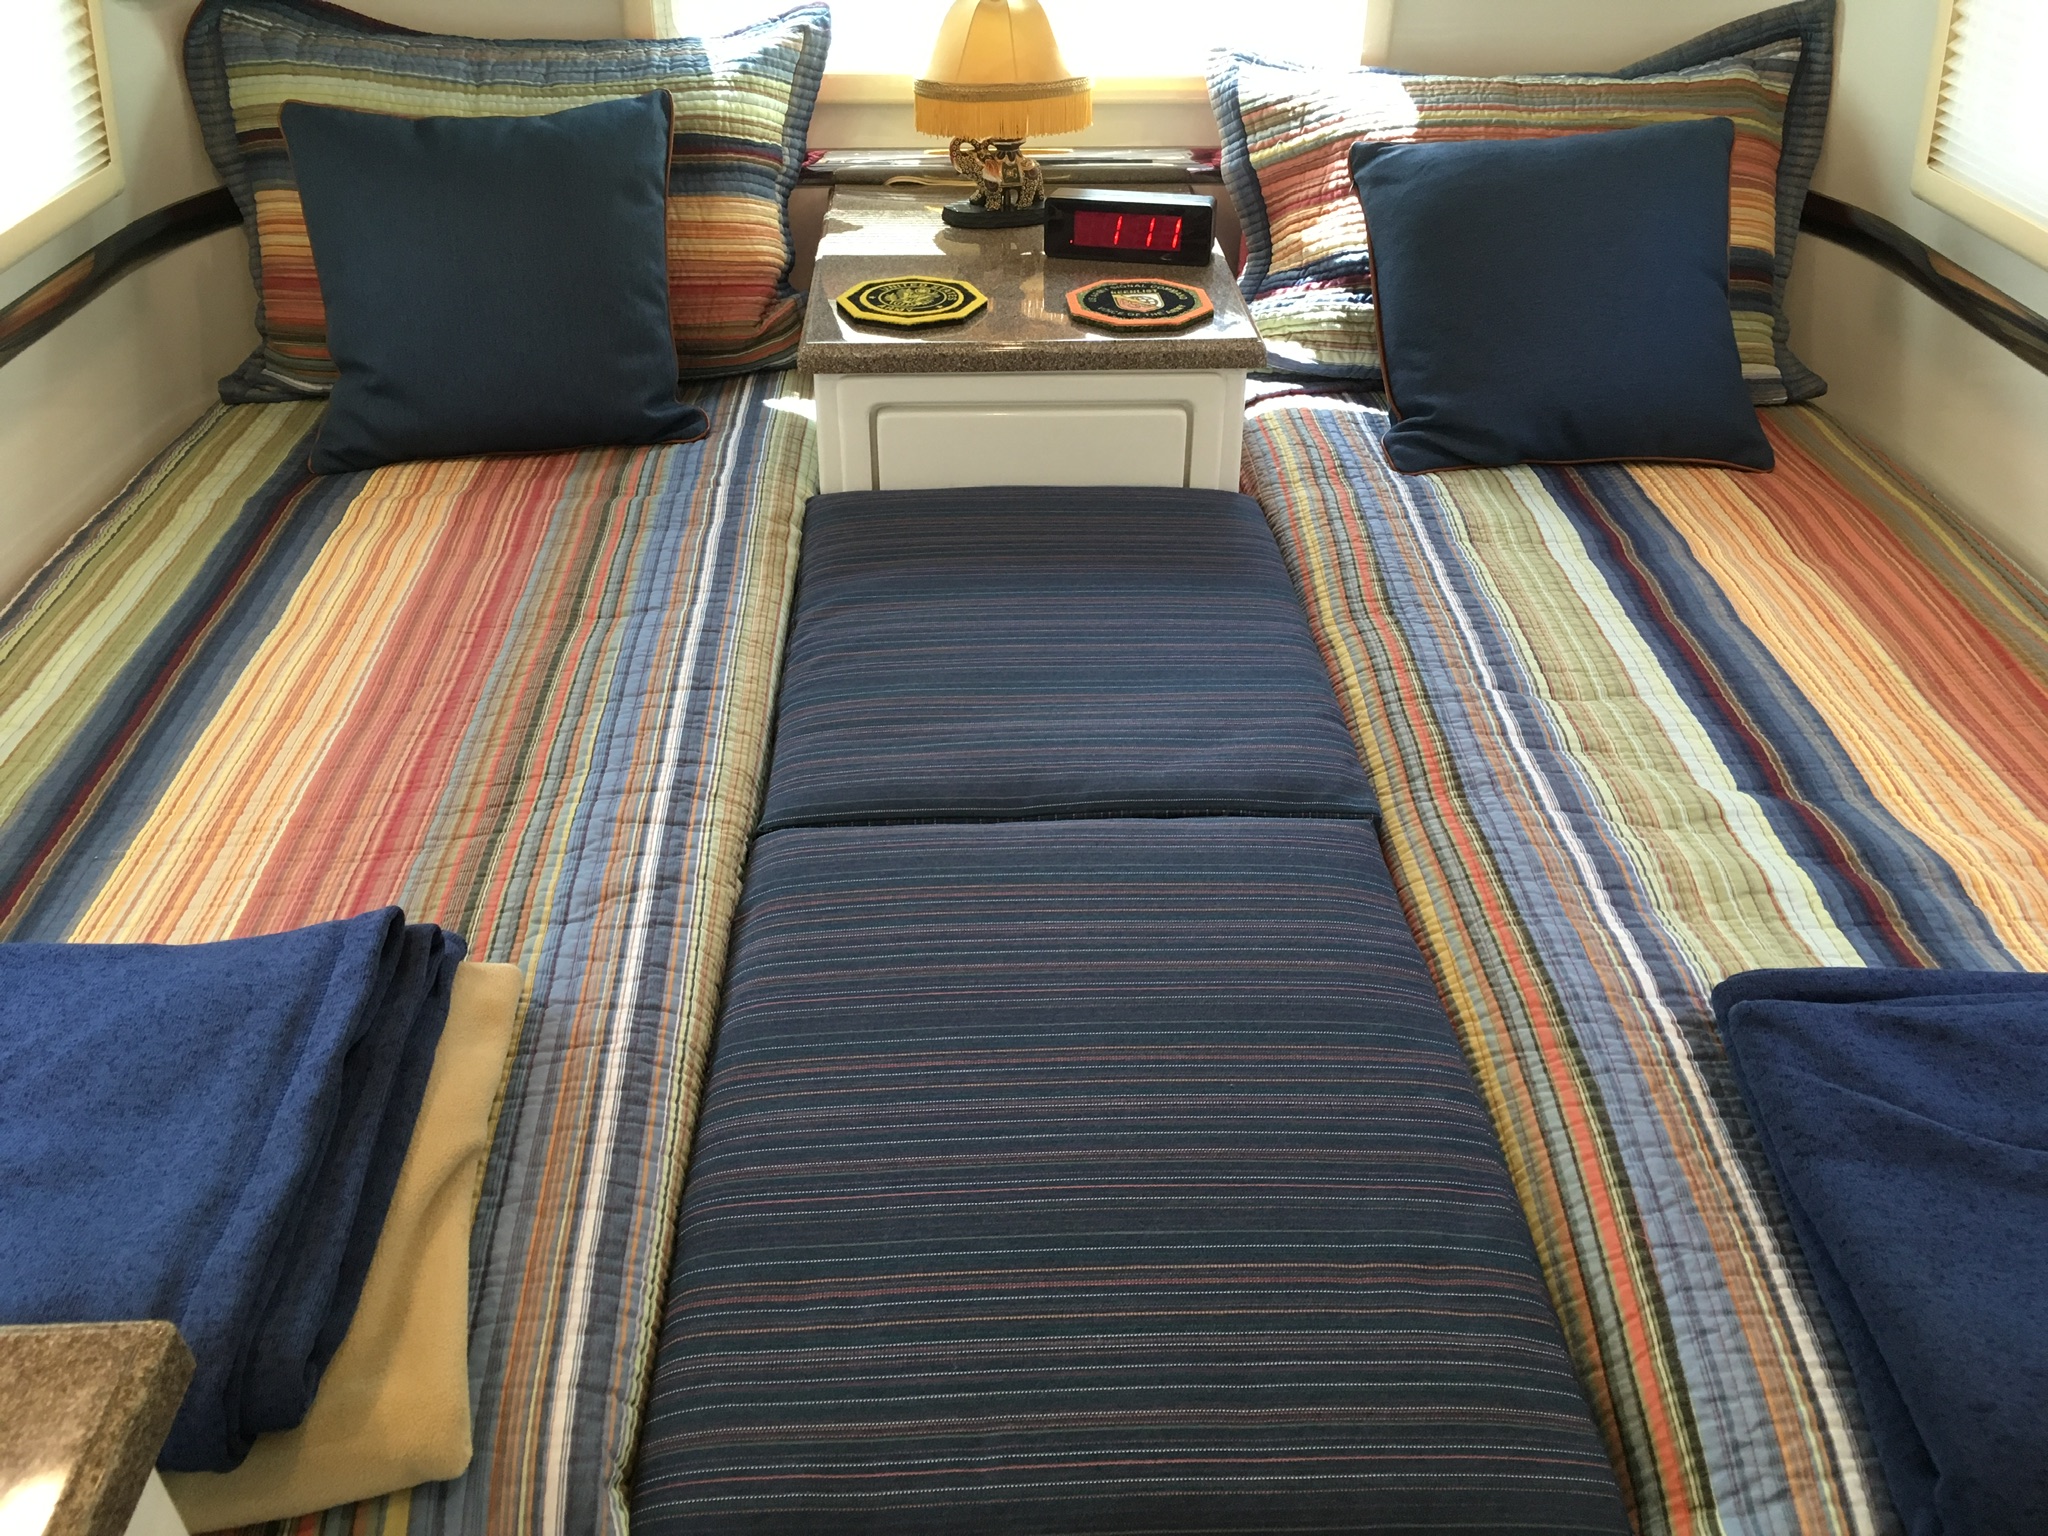
We have the twin bed version of the LEII. After the first year we realized that we were so used to sleeping together that it would be nice to be able to occasionally convert the twin beds to a double bed. I made some plywood pieces to span the gap between the twin beds and we bought some foam to sit on the plywood and create a double bed. We went with this for a year+. The problem was storing the foam when we were in the twin bed mode. So, we measured and discussed and this is what we came up with to eliminate the extra foam. We are leaving tomorrow for a month or so to go up to South Dakota so we’ll see how it works. Here is the gap between the twin beds. It measures 18” X 51”. It’s actually 50” from the nightstand to where the curve starts on the bed frames. Here is the same gap with the plywood. There are three pieces measuring 19” X 17”. It’s 3/4” plywood. The plywood stores easily under the mattresses when not in use. I cut a 1/2” X 1/8” recess on the short side of the plywood so that when placed on the fiberglass mattress frame is locks in place and won’t slide. In order to eliminate the extra foam that required a place to store we reconfigured the dinette cushions. We had new cushions made that included a larger back cushion that measures 25” X 19” and is 6” thick. In the dinette it sits on the fiberglass, not the bottom cushion. The new bottom cushion is smaller, 25” X 17” and butts up against the back cushion. The larger back cushions sit on the plywood when in double bed mode. Here are the new dinette cushions. Notice the back cushion does not sit on the bottom cushion. Here’s a shot with the cushion removed to make the double bed. Here are the cushions on the plywood. We were a little concerned that the dinette seats wouldn’t be as comfortable with the thicker back, but sitting in the driveway the last few days it seems okay. Also, we wondered if the bottom cushion would stay put without the back cushion sitting on top of it. We’ll see how it works out this next month on the road. Mike
1 point
-
Excellent solution and execution. It’s funny because I always thought we would order a standard bed when the time came. I didn’t think my better half would go for the twin bed version. Low and behold, we found a 6 month old 2017 standard bed and used the big bed for 1 trip. We did not like devoting 40% of the space to a bed and did not like converting it to booth table each morning. So we tried different sleeping arrangements and settled on the dinette for Krunch and the back bench for me and the dogs stay on either side bench. And then over Labor Day week the factory converted it to the twin bed configuration. We bought mattresses from Southern Mattress and they shipped then to Hohenwald. Next week is our first trip as a twin bed and I am hoping for the best.1 point


-
Recent Achievements
-
")


")


")


