Leaderboard


Popular Content
Showing content with the highest reputation on 11/07/2024 in Posts
-
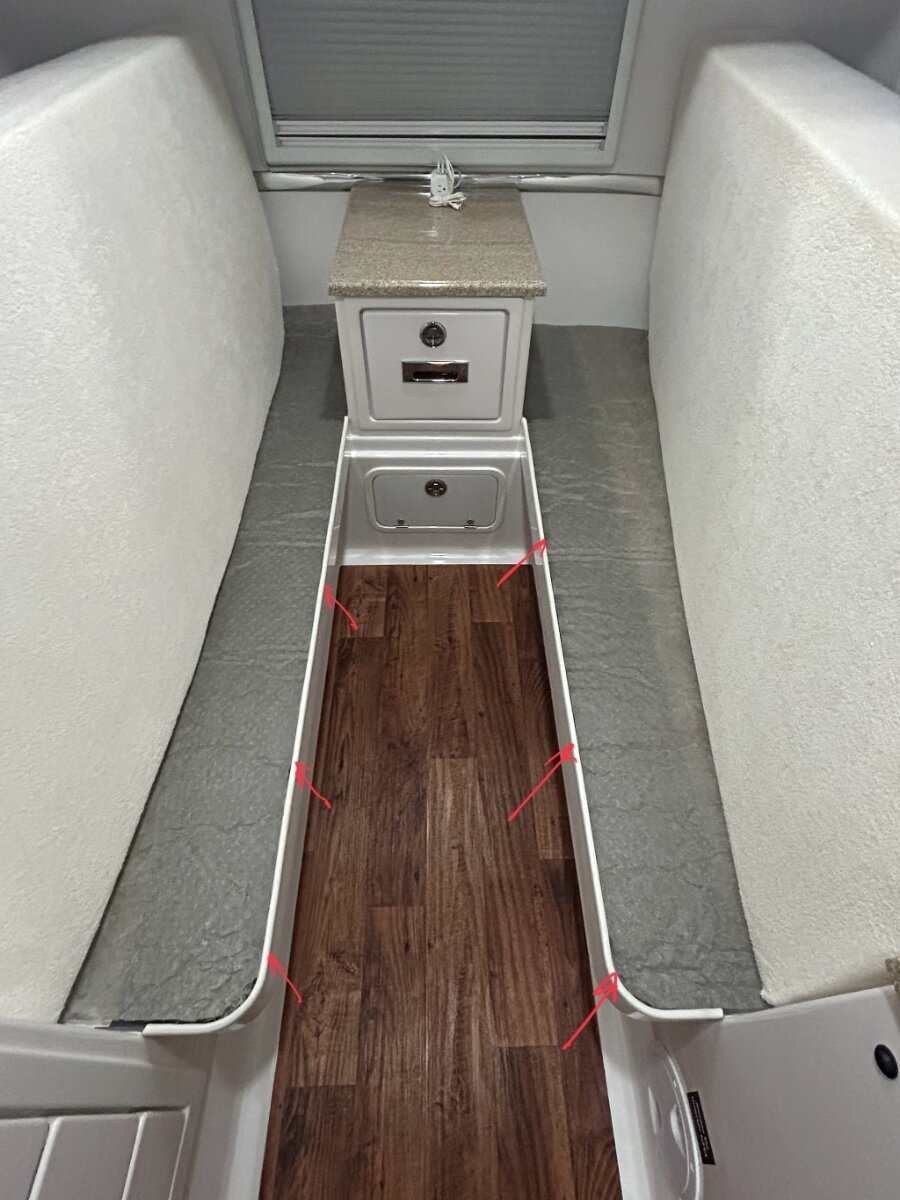
@Dave Mazone If you order this for your LP tank lid and base - https://www.amazon.com/dp/B00QAJJJ3Y?ref=ppx_yo2ov_dt_b_fed_asin_title&th=1 and you have a twin bed configuration, consider ordering enough material to run two strips along the rough edges of the bed rails if you have a twin bed model. Let’s just say it really takes the edge off. 😊
 2 points
 -
Feel free to pm me. We drove to Newfoundland from Sarasota the past two summers.2 points
-
I got mine from OTT. Out of curiosity, did yours pull loose in the middle? Our first seal came loose in the middle and would be sticking out when we got to our destination. I assumed it wasn't properly adhered at the factory and I replaced it after careful prep. The second one started doing the same thing. I think it's caused by airflow from underneath the propane cover while traveling. I removed the center section that had come loose, creating a small air gap, and it may have stopped the problem.2 points
-
When I was ordering my Elite II, and knew I wanted to boondock a lot, I considered ordering the 30# tanks -- but once I understood how much they weigh when full, the decision was easy. I use 20# tanks and I carry 3 of them (2 in the dog house and one in the bed of the truck). I have never run out of propane, though I have allowed 2 of the tanks to be out (once). I have learned to be mindful of where I can REFILL my tanks and also to keep a watchful eye on tank levels (watching for the sensor to show it has switched over to the second tank) -- so I know as soon as one runs out. Remember that if you are boondocked somewhere, you might need to be able to lift the tank into the bed of your truck (unless you want to tow your Oliver every time you refill) -- so it's not just lifting to get into the doghouse, but also in and out of the bed of your TV.2 points
-
My wife and I did New Foundling and the same port you are going to stayed at Conroy's just up the road. many roads have no swalls and deep drainage ditches to hold snow in the winter but the roads would not hold me back , did Alaska twice and there you really have the frost heaves but marked slow down and all is good. Plan your trip, great people and sights do all the fingers even take the ferry north of Gros Morne and go over to Labrador for a couple days well worth the time and cheap ferry ride short enjoy.2 points
-
For those into DiY guides, here is my preliminary one for Trailer Braking Performance Test and IR Sensor. It also includes the Klein IR meter at a far more reasonable cost than I had anticipated. One of the two is a Most Sold and the other the Amazon Choice. I would be interested in getting IR reading suggestions from others for TV Disk brakes and OTT LE2 Drum brakes. What do you consider OK, Warning, and Danger temperatures? I'll be sure to use them in my update down the road. DIY - Trailer Braking Performance Test and IR Sensor.docx Also to be added is the de-rate (Decreasing) controller settings for gravel roads and increasing controller settings for steep descents concepts. GJ2 points
-
Wow. Glad you are a safe and experienced driver. As others have mentioned, I too adjust my controller settings when on the fly. This is even more important for the many owners using well equipped half ton trucks. This demands that we be even more cautious of velocity under tow and how hard we are working our brakes. This past summer we were way back in the Custer Mountain State Park and I sensed that my brakes were being overworked despite my using gears 1 and 2 of our ten speed tranny. I pulled over and my IR sensor indicated 350 to 400 on the TV and only 125 on the trailer tires. I bumped up the Ford OEM brake controller to 9 of 10 while on the steep parts of that afternoon. In retrospect, for our rig, our truck and Ollie both are just shy of 6,000 pounds. I have for years use a seat of my pants check of controller setting. It requires two tests: TEST A: On a safe lightly traveled road, get up to say 45 MPH. With the trailer brake controller set to zero (OFF) and your trailer connected, apply your truck brakes for a firm stop. Sense the travel distance and de-acceleration your truck brakes provided. TEST B: Repeat the above test, this time with your brake controller set at it's normal reading. Now manually apply the trailer brakes using only your lever on the brake controller. Sense the travel distance and de-accelerating your trailer brakes provide. The truck brakes generally will provide superior stopping power than the trailer brakes. However you should definitely feel the power of just the trailer brakes as they try to stop a 12,000 pound load. If not, adjust to a higher controller setting and repeat the process after everything has cooled down. I highly recommend and have used for 3 years the JD suggested thermal sensor pictured below. Cost was appreciably a bit less than the far superior Kline suggested above. But it gets the job done just fine. When doing the above tests, if you have an IR Gun, your readings should be about the same for the axle being tested. I.E. the disk brakes on our truck temp's should be in the same ball park. The drum brakes on our trailer should be as well. If you see a significant lower temperature on one brake as compared to its peers, it likely is not performing well and needs further investigation. Finally when really working your brakes on a long downhill run, it is a great idea to pull over at a safety stop and check temp's. Look for outlier readings. GJ
2 points
-
One more moab pic. Kane Creek Road. Last full moon.
2 points
-
@Blain, I purchased a Champion 2500 Watt Dual Fuel Generator in late 2021, prior to our delivery of our LEII, Hull 990 in February, 2022. See: https://www.amazon.com/Champion-Power-Equipment-2500-Watt-Technology/dp/B0CRLWJSSX/ref=dp_fod_sccl_1/134-9963084-0325038?pd_rd_w=Z6nsM&content-id=amzn1.sym.783fbbc9-65f4-4105-bb20-37dc32815d16&pf_rd_p=783fbbc9-65f4-4105-bb20-37dc32815d16&pf_rd_r=C3KWVM2SBJ484K0Q57BW&pd_rd_wg=GJSmQ&pd_rd_r=3b8f7d10-4b53-41bc-b17e-e7792cfe7baa&pd_rd_i=B0CRLWJSSX&th=1 I have been very pleased with the operation of this generator, which I have operated only on propane. We carry it in a rear mounted cargo carrier on the LEII. I have actually used the generator more often at our residence in Dallas, TX when we have experienced extended power outages. It easily powers a large chest freezer and a 20+ cubic foot refrigerator/freezer. This generator will run 12-14 hours on one 20 pound tank of propane when supporting these appliances. On gasoline, this generator will operate for about 6 hours, depending upon load. This generator can also be paired with another similar Champion generator OR a larger model for additional capacity. I have no found the need purchase a second generator. Not having to haul gasoline onboard is a major advantage. I adapted the fuel hose on the Champion generator to connect to the low pressure connections on our LEII. The Champion 2500 Watt Dual Fuel Generator powers our Dometic Penguin air conditioner on the LEII. We purchased a Micro-Air EasyStart for the A/C unit as an option on our LEII. The generator will NOT power the Dometic Penguin A/C unit without the Micro-Air EasyStart. I did quite a bit of research prior to purchasing this generator. It costs approximately that of a gas only Honda generator and has produces about the same level of noise as the Honda. I also looked at propane conversions kits for the Honda generators and found these were an additional $250 to $300, AND installing them voided the Honda warranty. I would not hesitate to make the same purchase again, if needed. I see no downside to purchasing from Champion. Regards, Don2 points
-
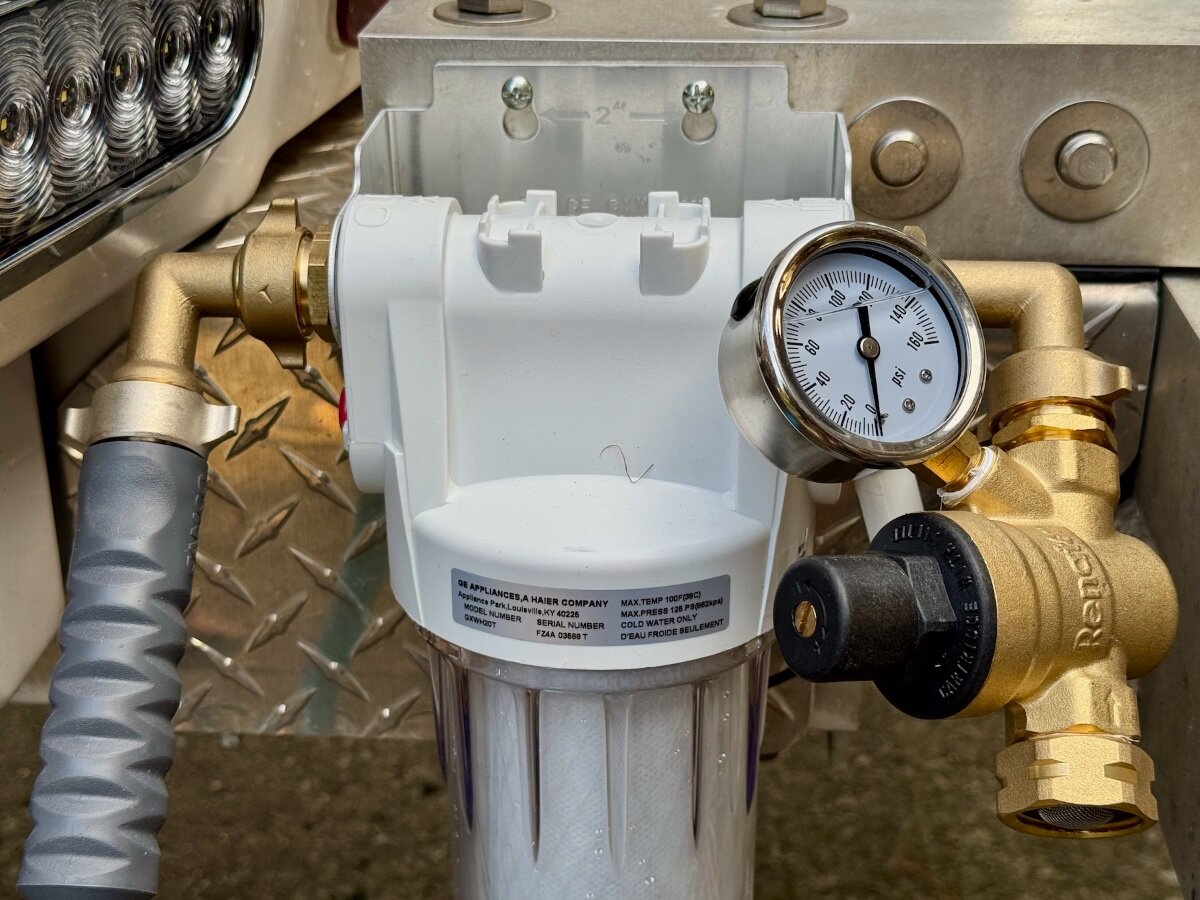
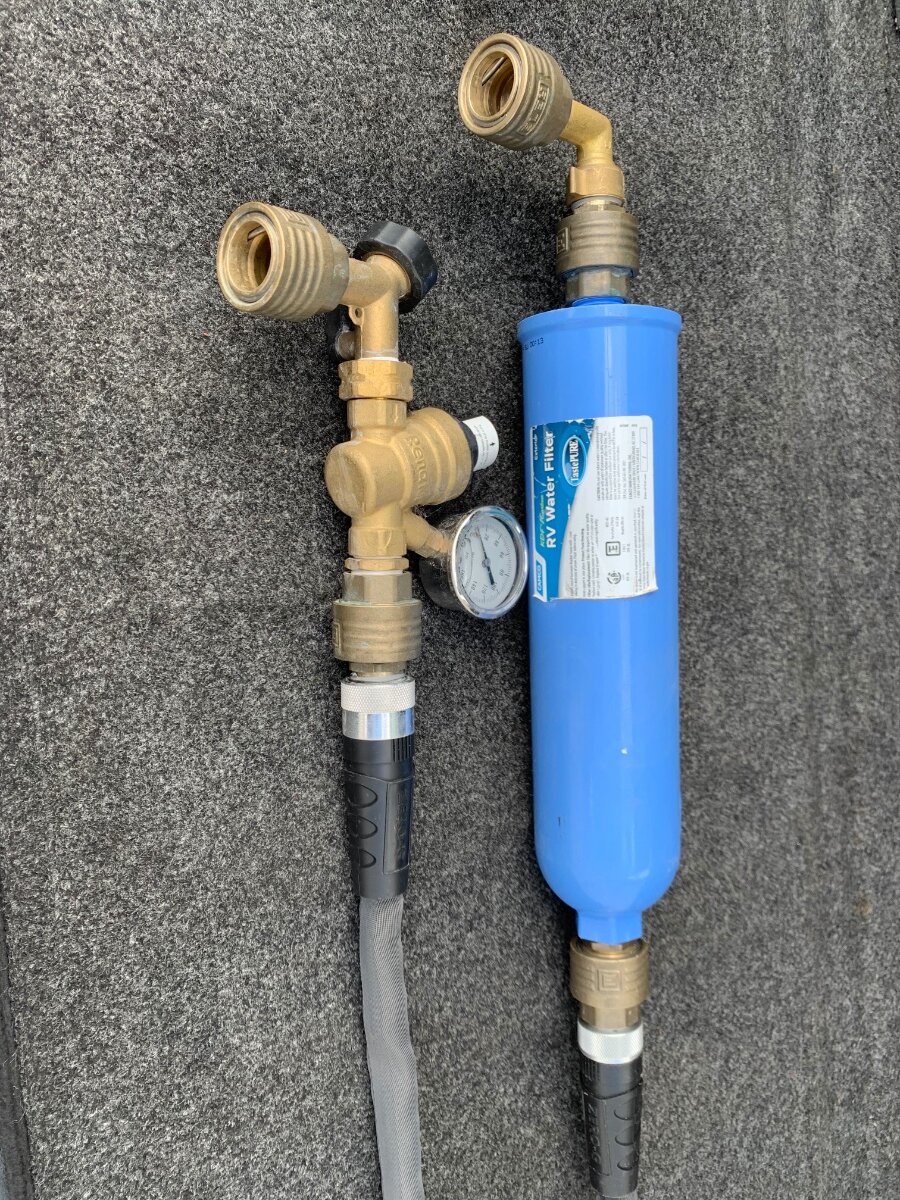
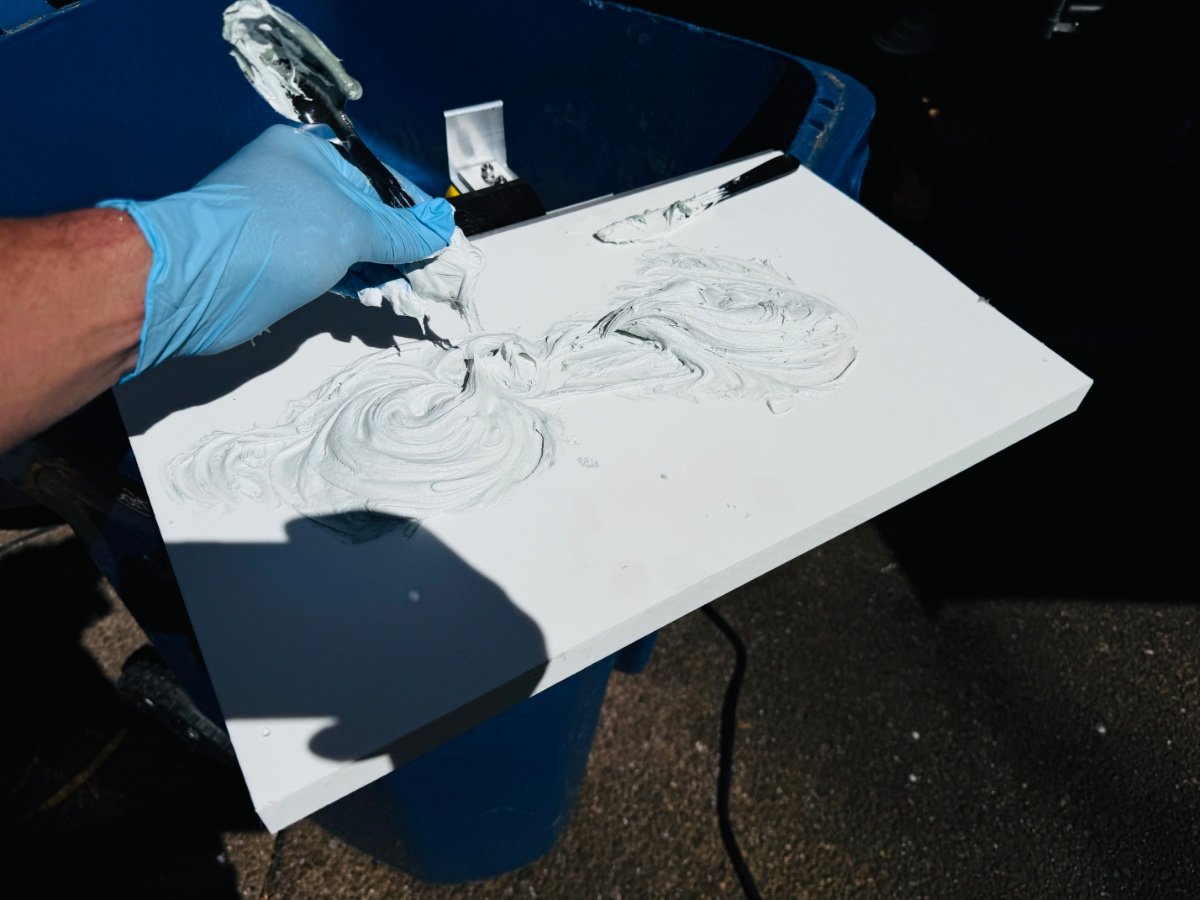
I've seen similar filter and water softener additions. Here's mine. I recently saw that James at FitRV released a single 2.5" X 10" water filter element to replace the standard 3-stage system. I've considered one of the smaller 3-stage systems as an upgrade, so I thought I'd give this a try as a less expensive alternative. Of course using one 3-stage filter instead of three separate filters is going to mean a shorter interval between replacement. But the cost difference should be negligible, and I won't have to find a place to store a 3-stage system. Here's the FitRV video and article: YouTube: https://youtu.be/t_SQNVapBEw?si=FfufAl7n4p_80Eys Web article: https://www.thefitrv.com/rv-tech/our-new-rv-water-filter-the-fit-rv-3-in-1-filter/ I bought a cheap filter canister from Amazon, that arrived with horribly oversized 3/4" NPT pipe threads, and enough slop that the filter moved over 1/8" up and down. That's not going to work at all, so back it went and a GE housing was ordered. Much better! I assembled with a 3/4" NPT to 3/4" GHT (garden hose thread) on each end; one male-to-male, and the other male-to-female. Then I gave it a test fit on Curiosity's rear bumper. Dummy! The hoses would interfere with the trailer body and the drop down sewers cover. :facepalm: Back to Amazon for a pair of 90° 3/4" GHT male-to-female connectors. In hindsight, I should have used a 90° 3/4 NPT to 3/4 GHT set, but looking today, I couldn't find that combination. This also allowed me some flexibility in the angle of the input and output. Back when I ordered the Oliver, and spent those agonizing months waiting for delivery day, I accumulated a bunch of bits and pieces to get ready to go. (Didn't we all?) One was an adjustable water pressure regulator. I didn't realize that Oliver would supply a fixed 40 PSI inline regulator, and the inline unit was convenient to store with the Camco inline water filters I've been using. So now's the opportunity to get it off the garage shelf and put it to use! I drilled and tapped two threads into the side of the bumper support, and screwed and LocTited in two stainless screws. These are used to hang the whole contraption while in use. It'll be stored in my bucket during transport. I hope this is helpful for anyone wanting to upgrade from an inline water filter. List of components: GE Filter Housing: https://a.co/d/7cbaS28 FitRV 3-in-one filter: https://a.co/d/b0NzDt8 Camco 4' Potable Water Hose: https://a.co/d/eVeV4BJ 3/4" NPT to 3/4" GHT fitting: male-to-male (2-pack): https://a.co/d/5MopLFL 3/4" NPT to 3/4" GHT fitting: male-to-female 2-pack): https://a.co/d/dE1gWDC 90° 3/4" GHT Elbow: male-to-female (2-pack): https://a.co/d/24kw8xO Teflon tape for NPT threads Total cost: $133 plus tax Question: The fixed pressure regulator that came with the Oliver is 40 PSI. I've set the adjustable water pressure regulator to the same 40 PSI. What pressure do those of you with adjustable regulators use?
1 point
-
Removed: Old Xantrex inverter, transfer switch including ac legs IN/OUT, charger from PD4000, Trojan batteries, Battery tray Mods: Wired Outlet and microwave circuit directly to breaker, mounted pos and neg bus bars using Star board (heavy), Pulled all wires from battery compartment except 4/0 pos and neg, ran wires for Epoch battery remote battery on/off switch and external battery level indicator, COM port from battery to MP2, Re-used all electrical wire (Used some new lugs and heat shrink), removed 10/3 main shore AC from EMS to PD4000Installed: POS and Neg bus bar, (2) Epoch 460 ah batteries, battery wire zip tie holders Waiting on MP2 stand to give lateral support since it will be mounted horizontally. May still bond starboard to fiberglass wall to fixate MP2 but it weighs 49lbs so I want the extra support from stand. We shall see if it fits with some modified aluminum support for feet.
1 point
-
Epoch is getting a lot of traction on YouTube.1 point
-
FEDERAL INCOME TAX CREDIT FOR QUALIFIED SOLAR ELECTRIC EXPENDITURES The Residential Clean Energy Credit (“CEC”) provides taxpayers with a credit in an amount equal to 30% of the costs of new, qualified clean energy property installed anytime from 2022 through 2032.1 The CEC applies to costs towards the purchase of property which which uses solar energy to generate electricity for use in a dwelling unit located in the United States and used as a primary or secondary residence.2 As relevant to the CEC, a “dwelling unit” generally includes mobile homes having basic living accommodations such as sleeping space, toilet, and cooking facilities (as are included with each Oliver Travel Trailers model).3 Property eligible for the CEC includes new solar panels, qualifying batteries having a capacity of at least 3 kilowatt hours, and related storage components (e.g., inverters, wiring, and monitoring equipment). If applicable, the CEC will reduce, on a dollar-for-dollar basis, the consumer’s federal income tax liability in the year of purchase. Excess unused credits can be forward to future years. ILLUSTRATIVE TAX BENEFITS Solar Package Lithium Pro Lithium Platinum Legacy Elite $5,330 N/A Tax Credit (At 30%) $1,599 N/A Legacy Elite II $7,120 $12,425 Tax Credit (At 30%) $2,136 $3,728 CLAIMING THE CREDIT After purchasing your Oliver Travel Trailers camper with solar package, keep your receipts for the total price paid to document your eligibility for the CEC. Include Form 5695, Residential Energy Credits, with your tax return to claim the credit. When filing, include the tax credit calculated on Form 5695 onto your IRS Form 1040 and file your tax return with the IRS to receive the credit. Depending on your state of residence, additional state tax credits may be available. The information contained in this summary is informational in nature, is not a warranty or certification as to applicability of any tax credits to the products described herein and should not be construed as tax advice to any specific individual or entity. Customers should consult with their own tax advisor with respect to your eligibility for the credit. 1 IRC § 25D(g)(3). 2 IRC §§ 25D(d)(2); 280A(f)(1)(A); IRS Notice 2013-70, 2013-47 I.R.B. 528 (11/1/2013). 3 Prop. Reg. 1.280A-1(c)(1) https://olivertraveltrailers.com/tax-credit-information/1 point
-
You are correct. I changed @JWalmsley numbers.1 point
-
I just checked the Apple App Store and it is no longer there. It is no longer supported or updated but still works. I guess I need to stop recommending it!! Here’s my RV folder. UC is first in the second row and UC Military is bottom right.
1 point
-
This summer I experienced my GM Silverado's engine braking -- it was the first time that I recognized what it was doing, and it is fantastic. I'm glad you had the tools to measure temperature and the knowledge to recognize what was happening, and what to do @jd19231 point
-
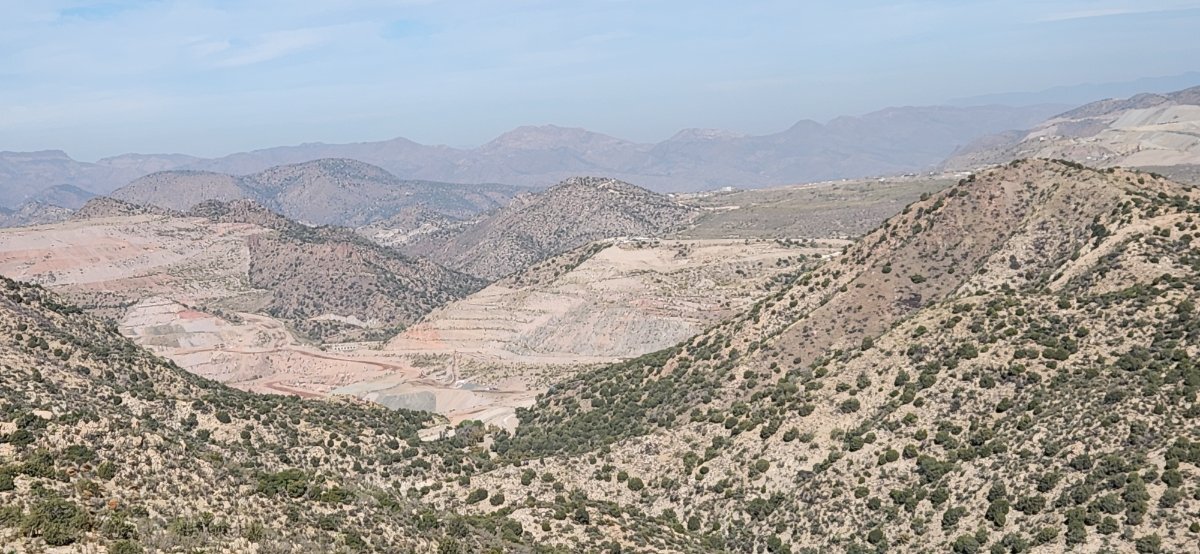
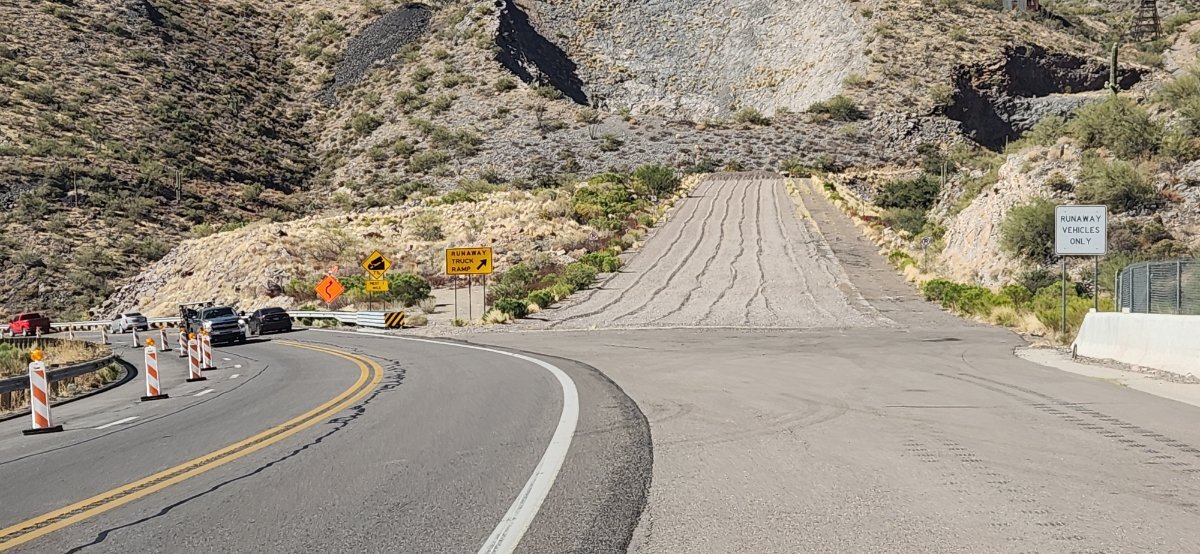
Pictures from "Top of the World." The first picture does not do it justice. This drop in person looked like if you were driving at 50 MPH right on the edge of the Grand Canyon, OMG my heart was pumping! Final pic is the truck runaway just prior to a tunnel through the mountain. US HWY 60 descending to Superior Arizona.
1 point
-
We didn't have to worry much in the rolling hills of Central Texas, elevation 1200-1800 FT max. The descent on AZ HWY 78 was over 3000 FT in about 15 miles. What caught me by surprise is that we had climbed to 9300 FT and descended the White Mountains of AZ and over 8000 in Lincoln Co NM, no issues. This drop in elevation in such a short length of road was extreme. Check out the sign in my first picture. Ever see a grade warning this steep? Twice we have wanted to visit Tonto Natural Bridge near Payson AZ. Both times I was towing. We did not realize the road to this park was so steep. This sign was at the exit of a turn-around area they had for us towing travel trailers! We passed on this visit not having time to disconnect and honestly, I did not want to attempt this descent even without the Oliver! Interstates and US highways have 6-8% grade max when speeds are >55 MPH. They did not have grade signs on AZ HWY 78 though I'm certain it was at least 10% in some stretches. Maybe Tonto Natural Bridge another time. It's only 2 hours from home.
1 point
-
As has been written many time here on the Forum - install these "gutters" on a very warm day and/or use a hair dryer or strong warm sun to warm both the area where the gutters will go and the gutters themselves, clean the area where they are to be applied VERY well, apply blue painters tape over the gutters to hold them securely in place for at least 24 hours. Due to the gutters wanting to stay straight and not bend around the curve of the windows, the more surface area that you give to be stuck to the side of the camper the better. If I had mine to do over again, I'd take the gutter down the sides of the windows just shy of 1/2 way - I only went down about 3 inches and that is not enough. Good luck! Bill1 point
-
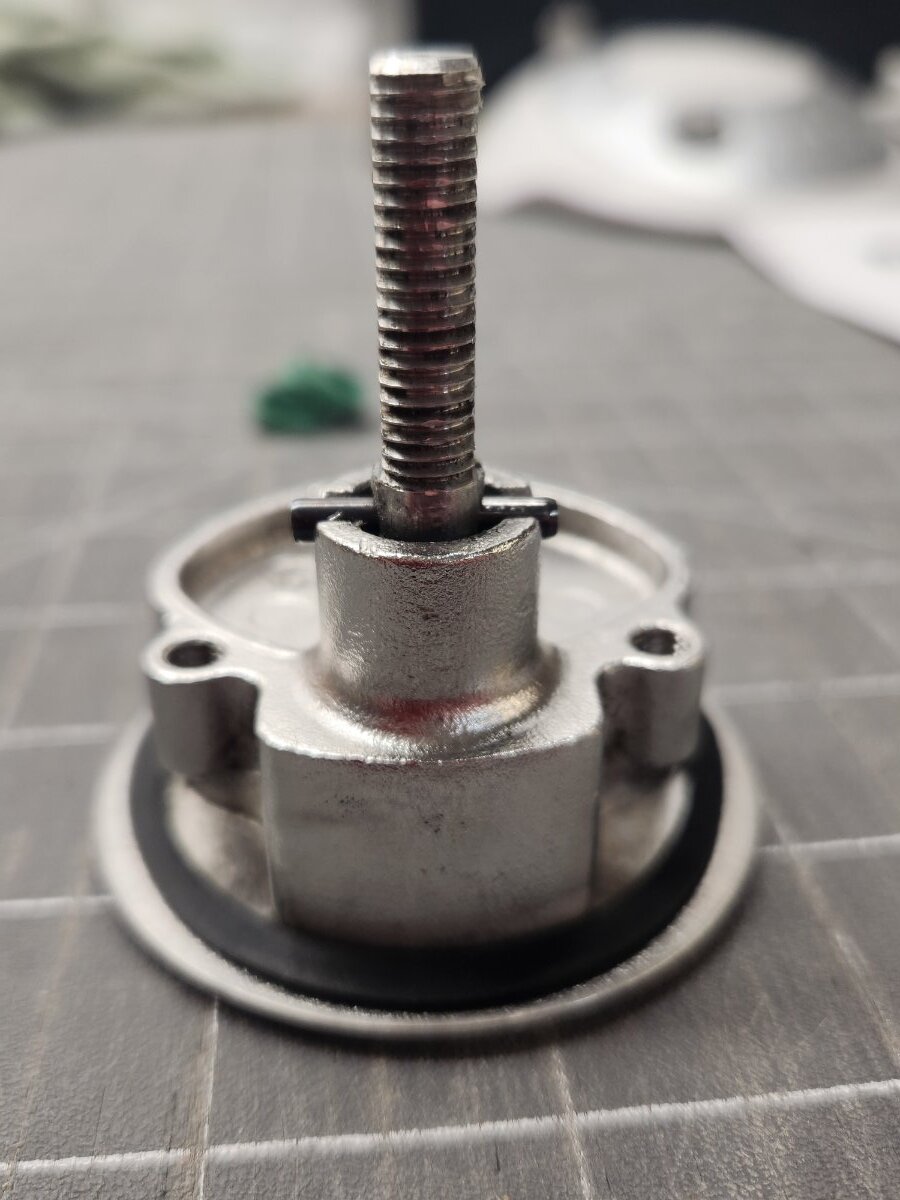
I went with red after drilling out the burner cover and installing bolt through the top with nuts below. But my threads were trashed so I redrilled the holes slightly larger and installed bolt with nut and red locktite...not caring if ever I can get back apart as I'll replace the whole stovetop with sob. I could cut the bolt head off if absolutely necessary. Thanks per SNY SD UP :)1 point
-
An update. I drilled the hole to 1/8" and hammered in the 1/8" roll pin sourced from the local hardware store (we are fortunate to have a reasonably well-equipped HW store nearby). The OEM roll pin was a little bit smaller in diameter, possibly a metric size (3 mm = 0.118"). That in turn suggests the latch was made overseas, like a lot of stuff these days. Sometimes the best fix is the simplest fix. Thanks for the support and encouragement! Tim
1 point
-
As per Jason ("I would just make sure the inverter is off and the shore power is disconnected. When you connect the wires make sure the breaker itself is tripped. Once all connections are good you can reset and verify it is working properly.") I installed/replaced the Optifuse breaker. After a few test discharge/recharges all appears to be working correctly...finally! I also worked with Xantrex and Lithionics call reps and made some small adjustments to the controls via the apps. Jason also added "We no longer use them (Optfuse breakers) as the system was changed in the '23 models with busbars and an ANL fuse & cutoff." Thanks for all the prior input & thoughts.1 point
-
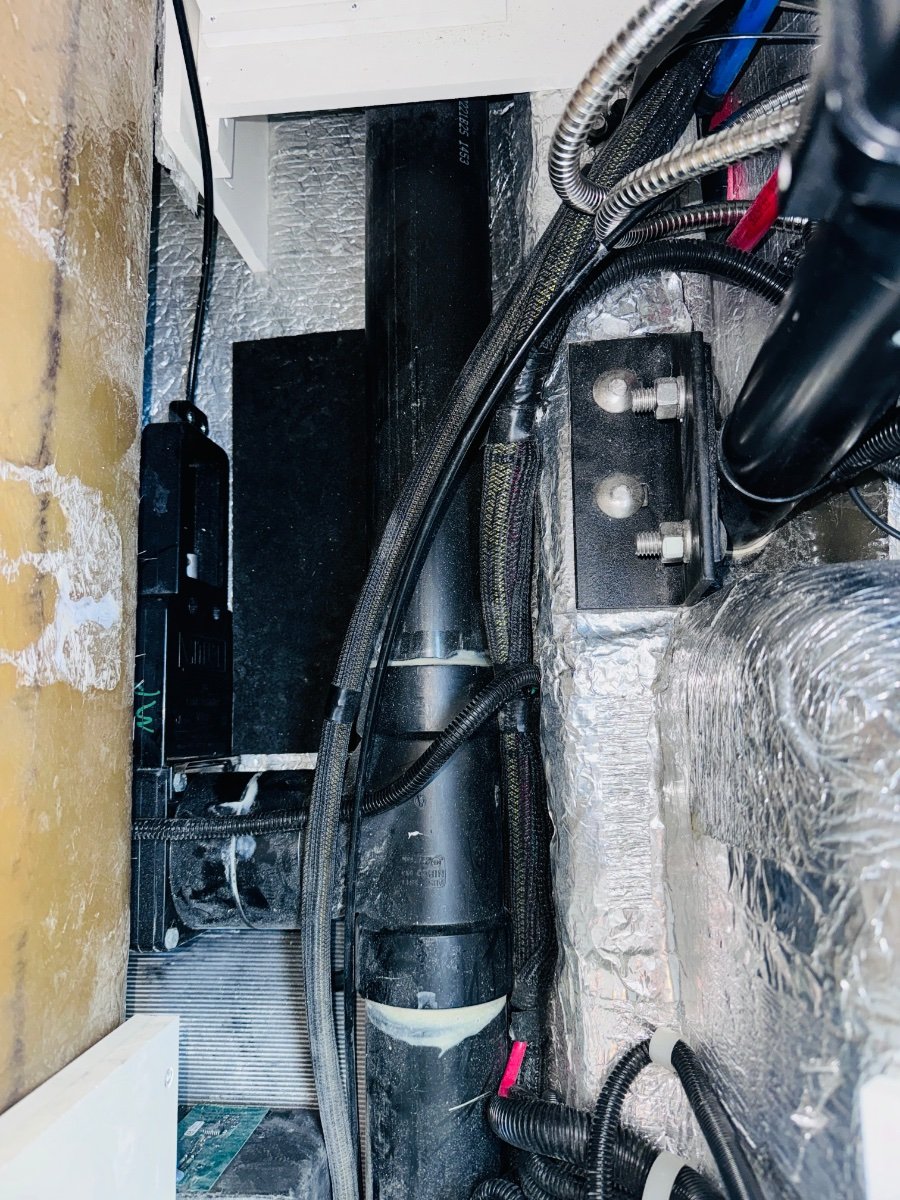
Yes. Same as your situation, Oliver sent me a new one under warranty for our 2022 Elite II. The center breaker in the attached photo is the new one I installed. I turned off the solar switch in the overhead compartment above the street side bed, ensured that shore power was disconnected, then turned off all of the batteries using the on/off switch on each battery. Wear a headlamp, and keep a long-handled magnet handy in case you drop one of the screws that mount the breaker to the white HDPE block. They can be hard to find down in the belly of the trailer! Don't ask me how I know....
1 point
-
I did the same couple years ago, easy one-hand operation and full hose flow to boot!
1 point
-
We drove to Truma in Indiana in September and had the soft-start installed. While there and in the presence of the technicians, I connected my Honda 2200i Companion generator with propane conversion and we tested it. Worked perfectly. The technicians were impressed. When we got home, I tried it again and ran the generator and air conditioner for several hours. I did this test three times. I am very happy with the set up now and confident going forward. Instead of running two generators I can now run one. The big test will be when we get some altitude to see if the generator can handle it - after changing the carb jetting of course. As a side note, I can now run the air conditioner off the 2000 watt inverter. We tested this too at Truma with success.1 point
-
Just curious, why would I want to run the air conditioning wide open then immediately run the heat wide open? If I did that with my home heat pump/air conditioner I think that the same thing would happen. I don’t think that I remember that the air conditioner was run then the heat pump. I can understand now why a huge amount of humidity is cycled into the trailer. Maybe that explains why the Atmos unit cooled down the trailer and reduced the humidity even though the fan was running continuously, it was allowed to run a normal air conditioning cycle. Thanks for the explanation, much appreciated.1 point
-
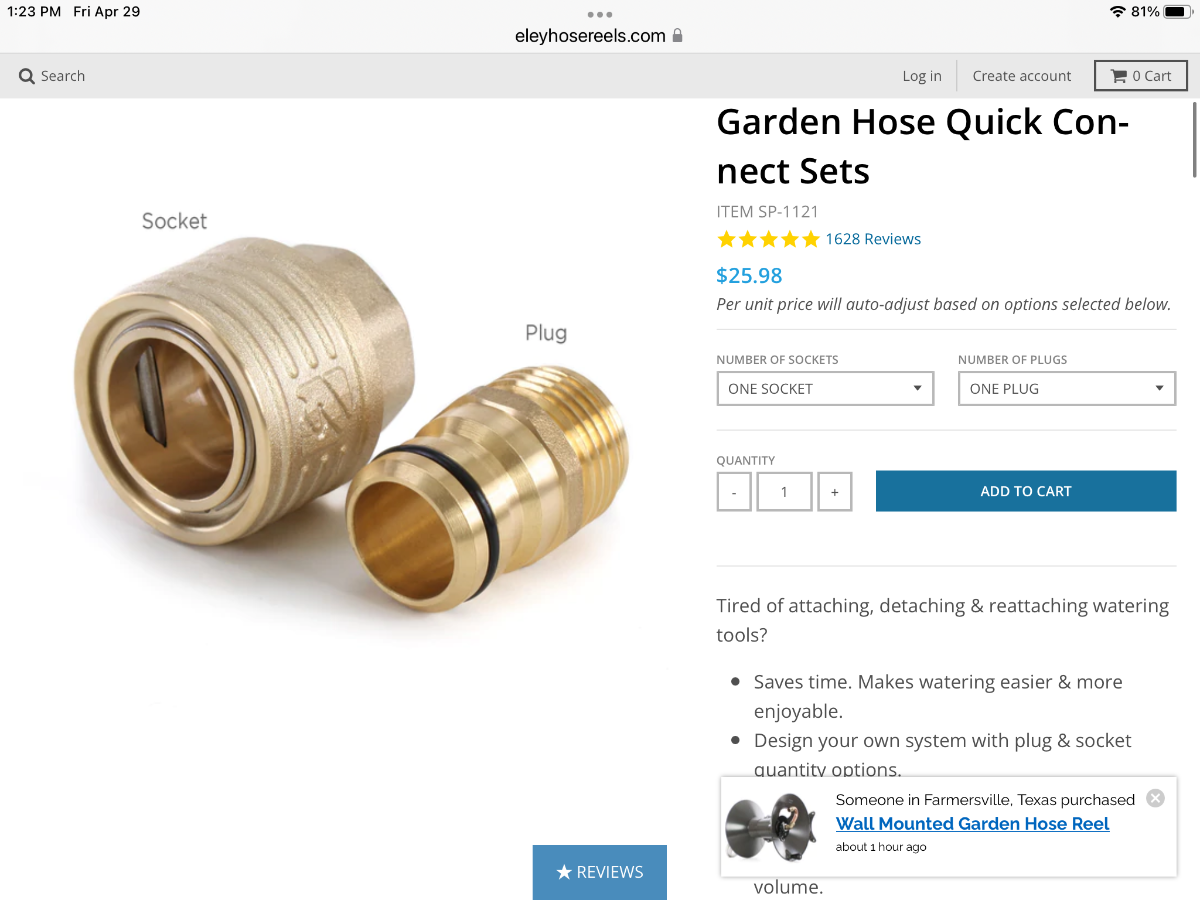
Unfortunately, not since 2006. 🤨 They list the couplings under "Watering Tools" Fabrication & Packaging United States - Garden Hose (Reno, NV) China - Hose Reels & Watering Tools That's an interesting idea! 45° or 60° would have been great. I'm not sure coming in from straight down would be beneficial.1 point
-
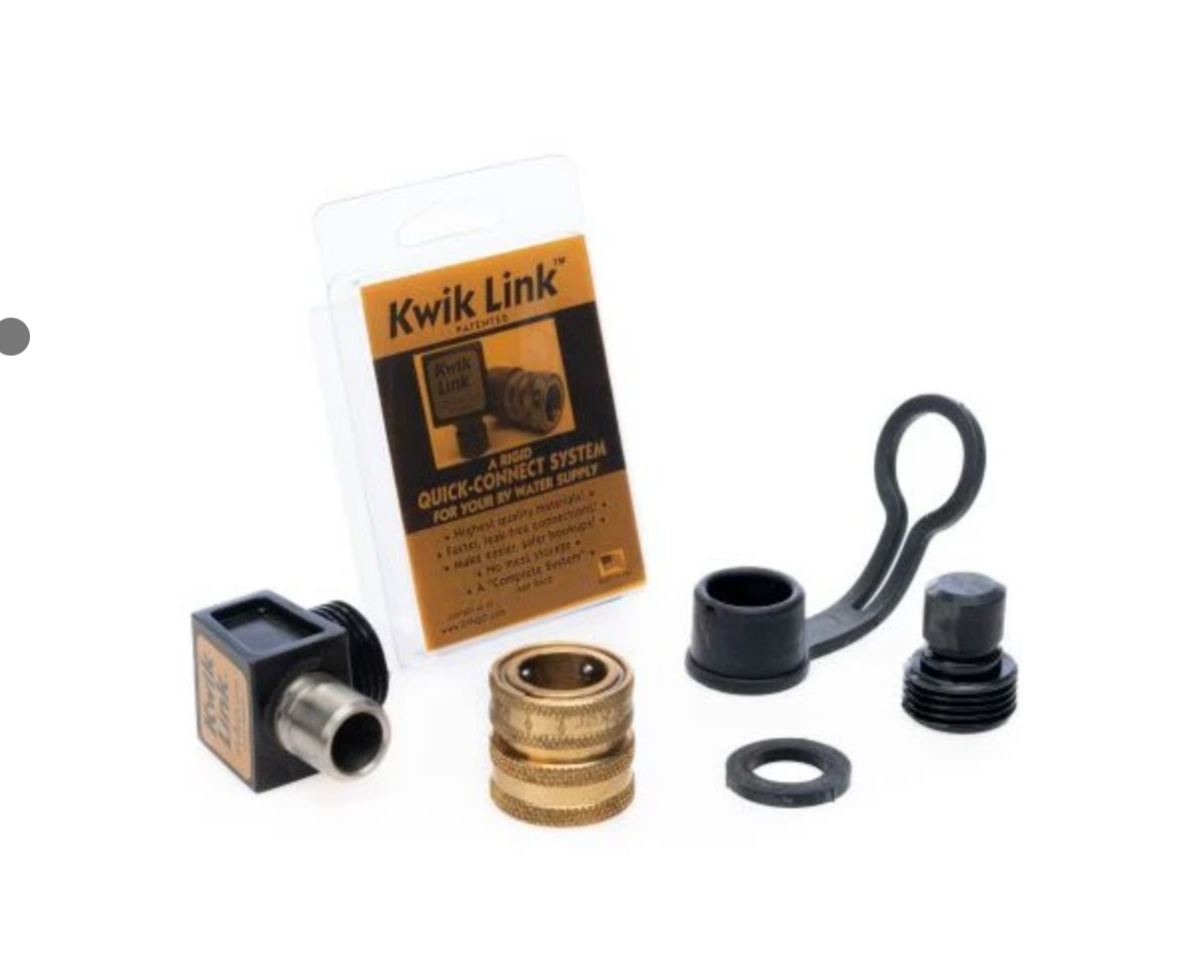
https://www.rvwaterfilterstore.com/products/kwik-link-connect-system-90?srsltid=AfmBOoqDmJNms7camHGuO4lzVh1ExSXi1dzYkfr0DoPzl1VMP0qVfYAE Similar quality to Eley products and they come with a cover. I have had them in use on all water connections for 6 years. Work great. They use to have one that was less than 90 degrees, worked great on the city and fresh water inlets. But I don’t see it now. I zip tied the OEM threaded cover to the rubber cover to keep it safe and out of the way. Leaving the QC on semi-permanently and then attaching QC to all your hoses makes setup and takedown much easier and quicker. 120 degree? 90 degree
1 point
-
Honestly, I just hooked it up for the photo, and didn’t look at which port I attached it to. 🤪 Usually, I fill up at home without a filter for trips under a week. I use the filter when on full hookups or when we need to refill on the road. Heading to Florida for two months this winter, any the timely release of this new FitRV 3-in-1 filter prompted this upgrade. I considered the proximity of the hanging location to the septic outlet. But we rarely use full hookups sites. The filter would be stored in my bucket at a dump station (which we also rarely use, as I use a macerator pump at home into my septic tank for trips under a week.) Hanging on the basement door would work and maybe be a more sanitary location. I’m in the basement frequently, so not ideal in full hookup settings. Both have compromises. It could be placed in a stand on the ground, too, and moved under the trailer. Lots of options. Thanks for your input!1 point
-
Steve, Very nice install. I purchased and installed these Ely quick connects on my city and fresh tank connectors a few years ago on XPLOR. They are a little pricey but 💯 brass and USA 🇺🇸 made not CCP 🇨🇳 junk. They really do make quick work of hooking up your water sources during take set up or take down of your base camp. One of my top smaller mods for sure. https://www.eleyhosereels.com/products/garden-hose-quick-connectors?_pos=1&_sid=dc579a2e3&_ss=r1 point
-
Steve, this is an excellent mod! I had not heard of a 3-stage in one filter and shorter filter life is fine for us who travel occasionally. I spent double building a dual filter system with Clearsource components an it’s heavy / bulky. Your build is perfect! Your water pump is likely 50 PSI or more. I installed a variable speed pump at 60 PSI. You can run anywhere in the 40-60 PSI range. PEX is rated at 100 PSI. Our older hull has built-in pressure restrictors, not regulators, which can be seen in this picture. The plumbing diagram only shows back flow preventers, but it has both inline devices on Fresh and City water inlets. They truly impede water flow and I will remove ours eventually and add an external adjustable regulator like yours. if we use the City water connection, the water flow rate is poor due to the restrictor. When we fill the Fresh Water tank, it fills slowly, but the onboard pump delivers much better pressure. Not sure if all Olivers have the internal restrictor but something to look into since whatever pressure you’re setting it reduces the flow rate (GPM) at the faucets.
1 point
-
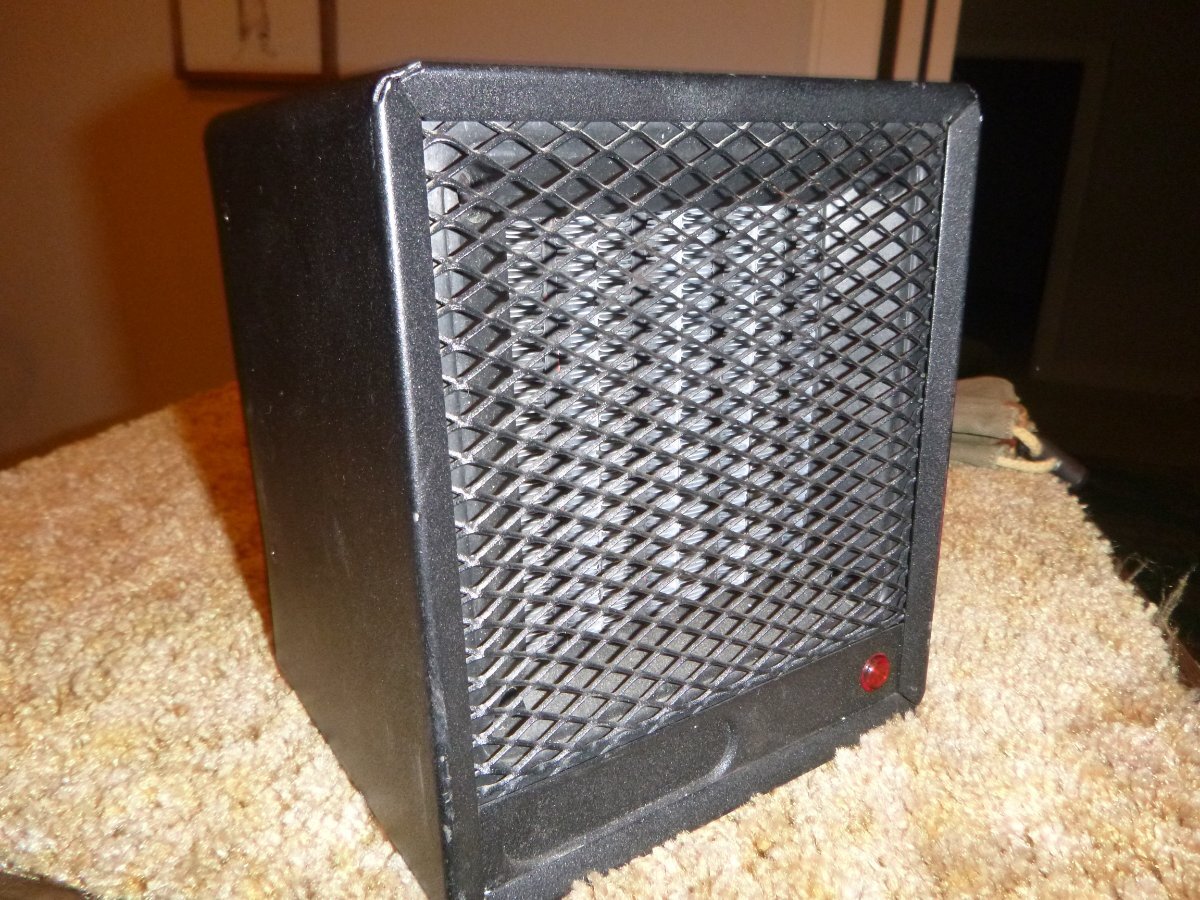
I found the little guy below at a garage sale for $5 about 12 years ago -it measures about 6x6x6 inches. It has a temp sensor, on/off switch and rotary switch where I can set the desired temp on the back of the unit. Like many of these electric space heaters its maximum wattage is 1500 and it can roast me out of the Ollie if I leave it on full blast for over 30 minutes without setting the adjustable control lower. However, I never leave it on overnight or while I'm not in the camper. Bill
1 point
-
@Dennis and Melissa PM Dave...Oliver forum name @Sully, if I remember correctly Dave and Kris spent 2 months in the Maritimes (Nova Scotia and Newfoundland) last year June/July. Here's a link of their trip to the Maritimes.1 point
-
Thank you @ScubaRx, that's worth a shot. Tim1 point
-
First off... Welcome to the family. And, welcome to the life of choices! So damn many choices! I would not get the 30 gallon tank upgrade. We did in 2016 and have now switched out for 20 pounders. I find the using the 20 lbs size makes things simple on the road. Stop at HD or Lowes or where ever you can switch out a tank and off you go. You can run one empty or near empty... switch to the other and then swap out when convenient. Lifting those 30 pounders gets old fast. Sorry JD. Also the 30 pounders add more WEIGHT. And speaking of weight as mentioned before. Tongue weight and payload weight in general will be something that occupies your mind. Start by checking the inside driver side door for your trucks payload number. Don't forget to subtract any additions you might have added to the truck like a cap, or slide, or fancy winch bumper. Then subtract the weight tongue weight of the LE1. (About 10% of total trailer weight so maybe about 500 lbs. guesstimate) THEN subtract weight of occupants and gear. (I put wife, me and dog together so no one gets singled out.... don't ask how big the dog is) Do you still have a positive number? If so, I guess it's ok to add the tongue basket and generator. But remember you won't really know how the numbers add up until you get it all together and run it over the scales. Like I said... choices. But you already made the best choice with the Oliver. Not only for a great camper but a great community to help you fret over all those damn choices. Good Luck and Happy Camping, Scotty1 point
-
We asked Oliver service about the Aventa Eco + Soft Start when Truma started advertising it a few months ago. It wasn't available through Oliver then, but maybe so in the future. The standard Aventa Eco requires a 3kw or greater generator, or an external soft start. The specs on the units equipped with a soft start are the same as without, except for the startup current of 30 amps vs 59 amps. The Truma retrofitting services web page has a link to SoftStartRV for an approved external soft start. You could probably use that with a 2.2kw generator to run your AC. We've had experience running our old Dometic Penguin equipped with soft start using an even older Honda EU2000i. The normally quiet Honda made annoying noise as it revved up every time the AC compressor kicked in. It worked as long as we had no other significant loads. We couldn't use the microwave or other appliances when running the AC (which can also be a problem when on shore power) and we dialed back the Xantrex battery recharge rate to 5 amps/hr. We now have a non-soft start Truma and an EU3200i generator. Both the AC and generator are much quieter both inside and outside the trailer than the Dometic + 2kw generator were. Though we won't need it since we'll have shore power, we'll bring the new generator to the Inks Lake Rally next week for anyone who's interested in evaluating its noise level while running the AC. Steve1 point
-
You really need to know the actual tongue weight allowance. Most of us with elites don't have tongue baskets. A friend who does just carries chocks and a bit of firewood up there. And, pay attention to your cargo capacity. With a small truck, you might be pushing the limits, already. We carry a Honda 1000 just to recharge batteries. We have a 2500 Westinghouse that probably doesn't weigh much more, that will run our 9500 houghton, but we've never carried it. Anything we carry like that is in the truck bed, not the tongue. We don't look to create problems, and, we chase the cooler weather. Make sure you have the soft start. I "think" truma made that standard this July, but it can be retrofitted. You definitely do not need 30 amps. You need 15, and an inverter generator with sufficient surge to handle startup of your account. Check with Oliver as to your specific unit1 point
-
Overkill and as stated already, would be too many LBS for LE1 (or LE2).The 20A+ models mentioned are enough and I would only carry gasoline from the station to home for yard tools. Get the 30 gallon LP tank upgrade and mod a connection LP line. Our old Dometic Penguin II runs on 15A. The new Atmos A/C runs on 10. If Truma requires more than 15, I would look at other choices. Get SoftStart on your A/C regardless of model choice as start-up amps can kick over 30.1 point
-
Hello @dewdev. When we put down our deposit, Josh White suggested the Predator 3500 generator from Harbor Freight. It has what I’m looking for, the 30 amp output and reasonable hours on a tank of gas. The issue is the size. It will fit in the front storage basket on a LE2 but not the storage basket on the LE1. I’m not sure when the Hull number is assigned but probably after the 15% down. We are waiting until April 2025 on delivery due to taxes. So I picked tax day April 15. Thank you so much for your response. Karen and I are looking forward to owning an Oliver. As is our pup Martha.1 point
-
@Blain Welcome to the Forum and welcome to being a Oliver owner. Since both of the responses above do not have the Truma AC unit, I would suggest you call the Oliver company, identify what hull number you have and what do they recommend for a generator size. The minimium size of generator will depend on if you have the Micro-Air EasyStart option connected to your A/C unit. This EasyStart allows a smaller generator to start the AC compressor, since it will allow less amperage to start the generator compressor.1 point
-
Honda 2000 EI or 2200 EI is used by many OTT owners.1 point
-
Many of the National Parks campgrounds are dry camping. Others, like around Moab are public campgrounds, COE and FS. I still use the Ultimate Campground app, even though it is no longer supported. You can sort sites so that you can find amenities that you want. Mike1 point
-
U.P. of Michigan. Great view of the Big Mac bridge.
1 point
-
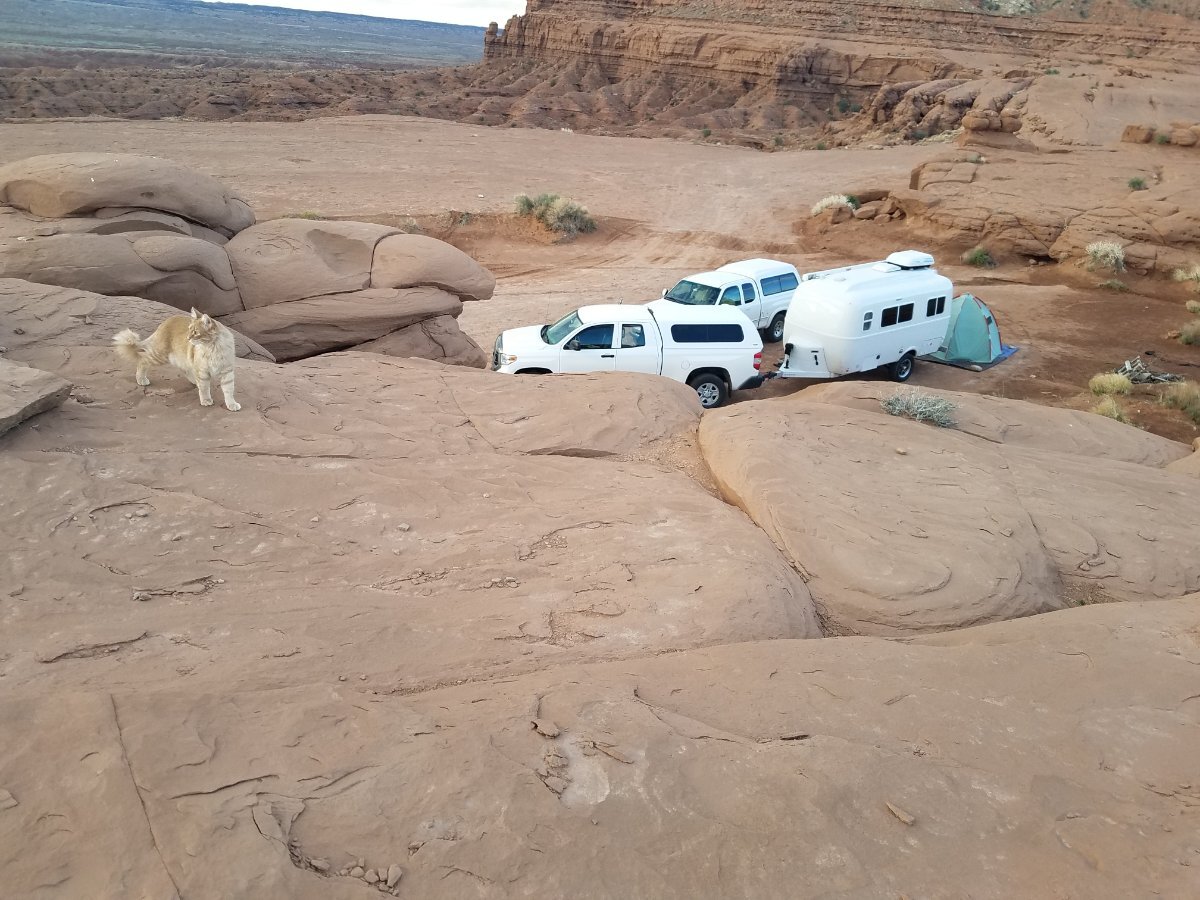
Boondocking in Utah. Unfortionatly we had a lot of rain at the biginning.
1 point
-
Flexibility is the key to indecision! (Lock, unlock, lock, etc.)1 point
-
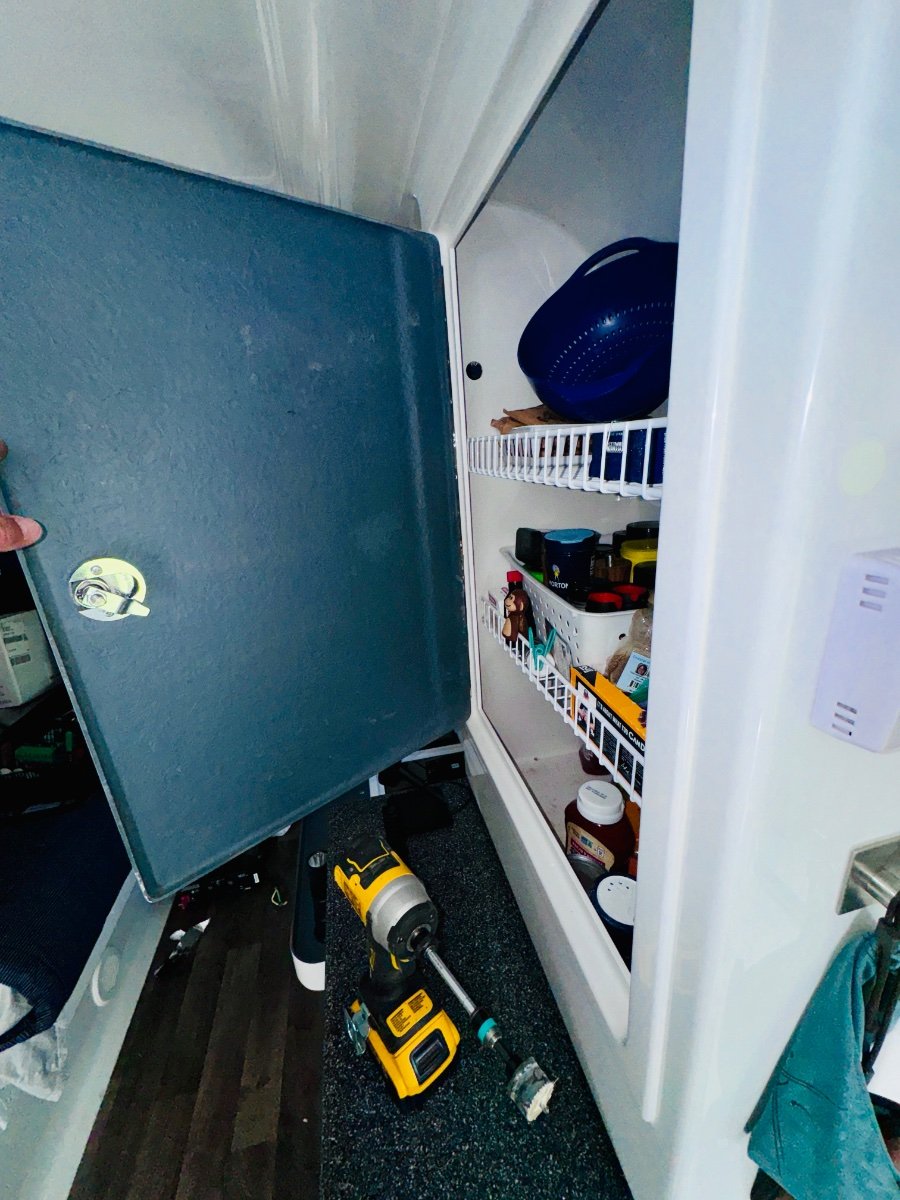
So problem solved regarding no power to cabin. I had left off the main neutral to the bus bar. I had tucked it out of the way and with all those wires I just kept missing it. It was so nice to see the MP2 fired up and everything working in OEM configuration. @Ronbrink, I think you may be right. I have reached out to OTT and support at the place where bought the MP2. I will get it done eventually. At least the bulk of the install is done and I am ready to power some A/C when I get it figured out. Some other small things like the Can BMS port was removed from the new Ekrano monitor so Epoch battery Victron coms won’t work without a cable to convert CAn-BMS to VE.can. Old Cerbo GX has CAN BMS port. Now just to tidy up everything. Made a big mess. SIDE NOTE: OTT did reimburse me for my coupler and hitch. Jason was very helpful. Still investigating but looks like a one-off still. Best, Mike1 point
-
DAY #2 Yes, it is. Costly and ended up not fitting very well for this application without a lot of customization. So it gave me the idea of making my own mount with the heavy duty star board I did not want to use. Turns it out came in very handy!
1 point
-
Very nice work Mike and I am talking about the write up and installation. Keep us posted with your progress. Is the stand for the MP2 a Victron product? I haven’t seen it before. Mossey1 point
-
Very good choice with Epoch batteries, I mean, if Will Prowse gives it a thumbs up it must be good!😊 HERE’S the Review by Will Prowse1 point
-
Almost every time I read a thread here on the Forum or watch a video about these locks I consider "upgrading" my old fashion key jobs. But, then I see a story such as this about being "locked out" or worse - the lock simply will not operate and I try to remind myself of why I like to keep things "simple". Simple seems to fit well with my brain!🤪 Even though I still do the key thing the old fashion way, I do keep a set of keys in both the tow vehicle and the Oliver. Plus I have a couple of extra sets in the event I need to give a key to someone else that is going in a different direction than I am. Bill1 point


-
Recent Achievements
-


")


")


")

