Leaderboard
Popular Content
Showing content with the highest reputation on 11/20/2024 in all areas
-
5 points
-
My Dexter leafs on the rear were flat towards the rear of the trailer. I ordered the Alcan springs. I had problems with Alcan’s shackles. The first set they sent me the holes were oversized and the knurls on the bolts just slid in. The second set were the right size, but they bent shackles when they punched the hole. The end of the bolts after being pressed in were about .230 out of alignment which makes assembly impossible. The Dexter shackles and bolts are .005 inch or less for alignment making assembly easy. Alcan said they would let me know when they figured out how to produce shackles that would work and that was on Oct 15th. I’m still waiting. I put the original Dexter shackles back on and set hummi back on the ground. The bottom of the second leaf to the ez-flex measures around .040 inch universally. Way too close to take her for a spin. I've gotten busy with a small remodel job on a wall into the kitchen. I need to get it done for the new fridge to fit. Once I get the stove and fridge set up, I will shift back to the shackles, if Alcan has not came up with a solution, I will buy the metal and make my own, I have a buddy with a vertical mill. If / when Alcan replies back to me I will update you. The 2000# Dexter leafs are starting to look a reasonable solution. I’m sure I will be happy when I get this back on the road. glad I haven’t retired yet I’d be a little pissed to not have the trailer available for a couple of months.4 points
-
I have what rich.dev showed above and has worked great. Otherwise zip ties as Mike and Carole suggested. Twisting chains to adjust length is not recommended and can dramatically reduce their strength. Best to cut them to the required length with no twist! Dave4 points
-
4 points
-
Quick update.... All the numbers previously posted were my best guesstimates. I went to the dump to get a quick weight on the truck after the cap and slide were added and found that they were pretty damn good guesstimates. A Cap (6.5' bed) and slide added about 450 pounds to the overall weight. We took off some weight by removing storage boxes and changing out the running boards. Total payload is about 1500 lbs with full fuel. After me, wife, dog, and tongue weight we have about 500 lbs for gear. All in all still pretty happy with the performance. We'll have a short trip south after the Holidaze so we can see how she handles all in. Scotty3 points
-
3 points
-
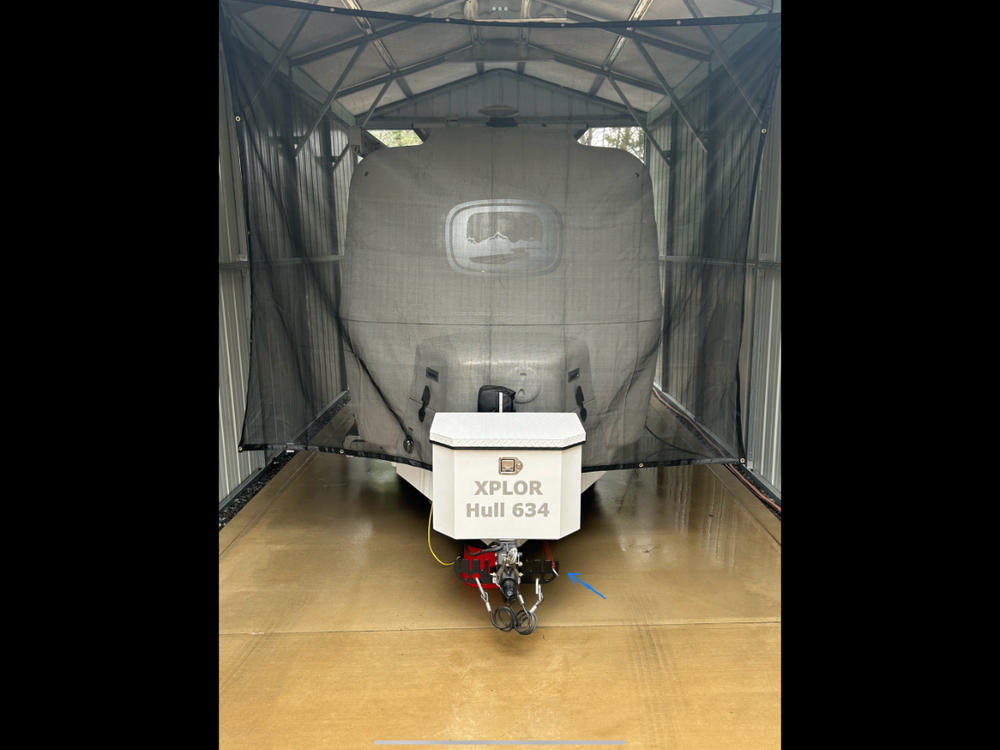
I route my cable over the whale tail of the Andersen. This keeps it far from the ground3 points
-
I always wondered if he ever figured out that weight and tension on that cable would inevitability pull that "simply caulked-in wall" down. I suppose that Updated Placard says it all. Just so everyone understands, the dividing wall between the coach and the bathroom/closet area in the Elite II is basically just held up with caulking around the edges.3 points
-
3 points
-
A very easy swap is to just use the PR4 Dexters. They are 2400 pound rated. Perfect fit replacement for the PR4B the lighter 1750 rated ones.2 points
-
2 points
-
They would sell really well here in CT because people here already drive like they have no windshield!2 points
-
Ah, yes, the Oliver Motorhome. They never sold well, possibly due to the lack of a windshield. You don't see them very often.2 points
-
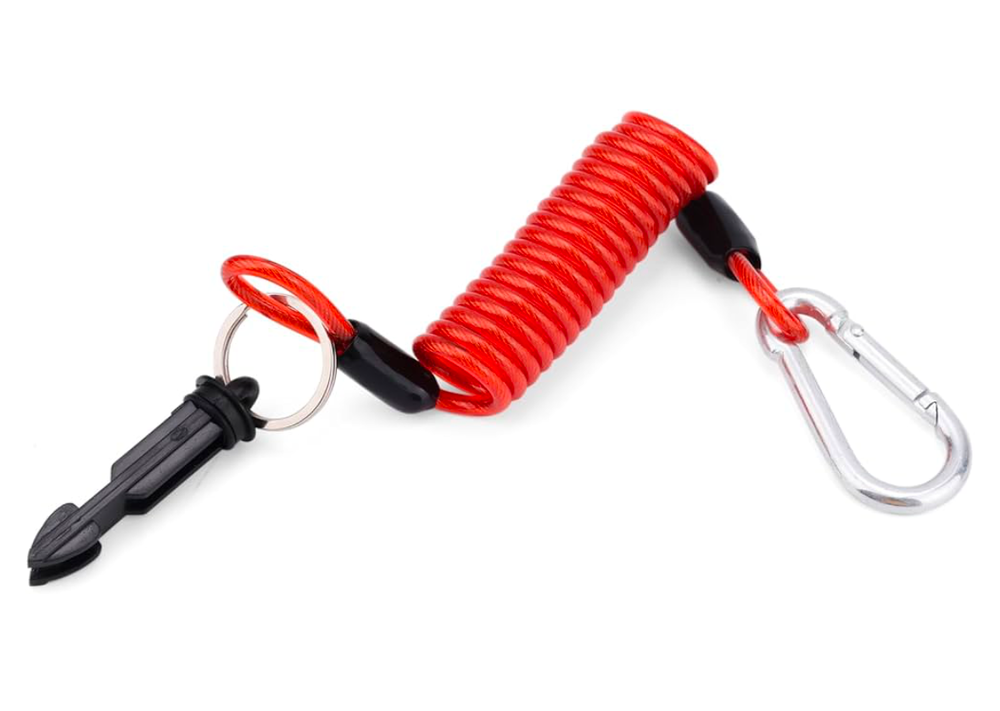
This has been bothering me for a while. When I connect the brake cable to the truck it hangs down to 2"-3" above the road. Can you run it up through the hitch pin with the 7-pin cord? What does everyone do? I'm concerned it is matter of time before it is hit by road debris. Having the trailer brakes activate at 60+ mph is a scary thought. Thanks,1 point
-
1 point
-
1 point
-
The only drying we do inside the Oliver is our bath towels, bath door closed and vent fan on. Same practice if we use the wet bath, but try to use park baths if found clean and well maintained.1 point
-
If you feel 460AH is enough for your camping lifestyle then yes. Glad we have the 600AH for less worry, though we would have been fine with 460 during our recent 3 1/2 week trip to Texas using more LP at times, less battery. When we upgrade our A/C to an efficient system and desire to run more hours A/C on inverter, I may add that good deal Epoch 460AH battery, installed under the pantry to get to 1060AH total!!! (Maybe 2026?)1 point
-
This has been my experience with the Duramax in my Silverado 2500. Quite honestly I thought it would be better but on the other hand the truck never feels overly stressed. Mileage is very speed dependent as stated.1 point
-
I find if I twist mine it makes it more taut and doesn't hang so low. Same for chains. I've always worried low hanging chains and brake cable could create a spark and possibly fire in dry conditions.1 point
-
Thanks John, yes I think the Epoch essential 460ah at $1299.00 (with likely 10% discount) is a no brainer. I am still hoping the 300ah come down a bit more so with 2 can go 600ah vs 460ah. If they do not will likely just go with the 460. Not sure the extra 140ah is worth the $700.00 price difference.1 point
-
1 point
-
We will probably swing by Imperial Dam for a month or so before coming back to Dome Rock for the rally in February, then Magnolia Beach before we start the trek back north to Nova Scotia along the east coast. But that’s the beauty of being a retire with time on your hands, take it day by day!😊1 point
-
Ah, you are entirely correct! That's a page I hadn't found searching their site. I'm sorry to confuse the issue. It looks like the Oliver kits are $10 more than the head alone, which is probably a better deal than buying just the head and my cost to ship the adaptor to you. I recommend one of the kits with the trickle valve, to keep your water temperature consistent. Enjoy!1 point
-
Live in the west and in mountains 6.7l f350 gets 12.7 mpg and on east coast flats 13.8 mpg. Overall 80k is 13.5 mpg towing EII.1 point
-
1 point
-
We really like our “Open Roads” card for all the reasons you mentioned and more. On our last 48 day trip out west we occasionally saved 65-70 cents per gallon on diesel. @QuestionMark you are totally on point about being able to safely fill up in the larger diesel commercial truck lanes, we are really spoiled. One of the other nice benefits of the O/R app is forecasting along your planned route and knowing where you can use it. Huge fans here of Open Roads! 👍🏻 🇺🇸🇺🇸 @Dave and Kimberly should you purchase a diesel beast here is the link to Open Roads. https://myopenroads.com/1 point
-
Thank you for following up on this. I consider this excellent service.1 point
-
1 point
-
FWIW, an update on this facility. I contacted the service manager, Adam, who said to bring it in. As chance would have it, I found myself in the area again this year, one year later, and dropped it off. Adam took care of everything and threw in a lube, all comped. Wow. I now again can fully recommend this RV service center.1 point
-
GJ, I would put you up against the Terminator, for attention to detail. Thank you for all you do. And @MAX Burner you are my recent favorite installer (after 45 years of me just pluggin' along). Great work in everything you do! I also love the fact that we purchased out OTTs within a few months of each other (you had a head start, not fair). GJ and I already have a plan. We're meeting at your place this summer. And If I get there first, I'm backing my Oliver into your garage first thing, Ah mechanics heaven. Sorry, GJ! God Bless you guys, God Bless America, and God Bless all y'alls on this wonderful Easter weekend. Not afraid to say it, just proud to be a hard-working American, the country that had allowed us to prosper and travel this great country in our little fiberglass traveling homes. 😂1 point
-
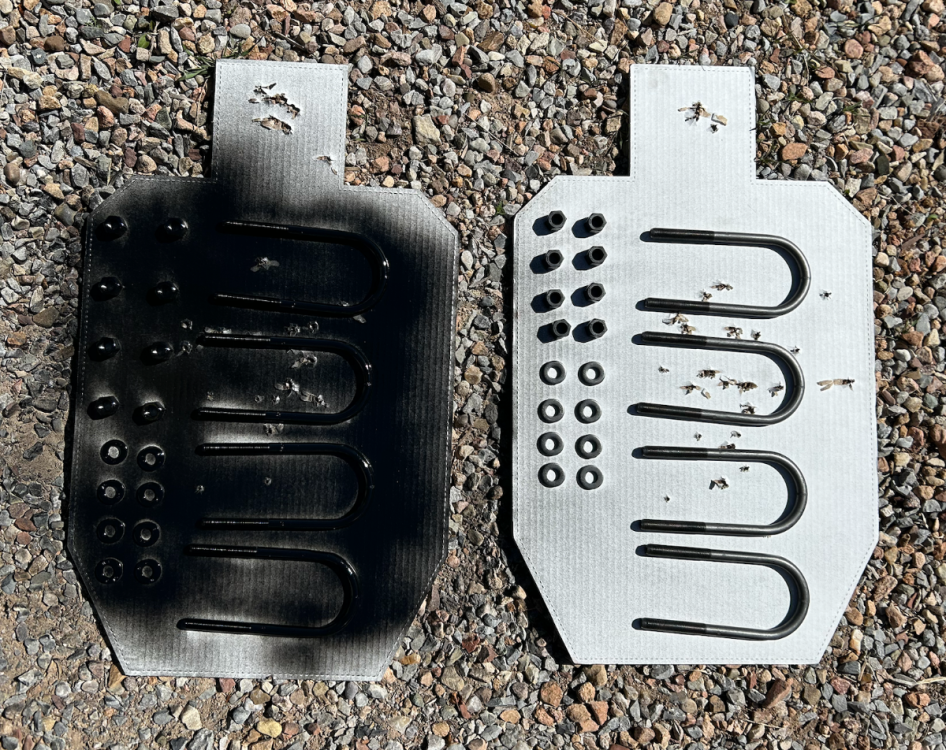
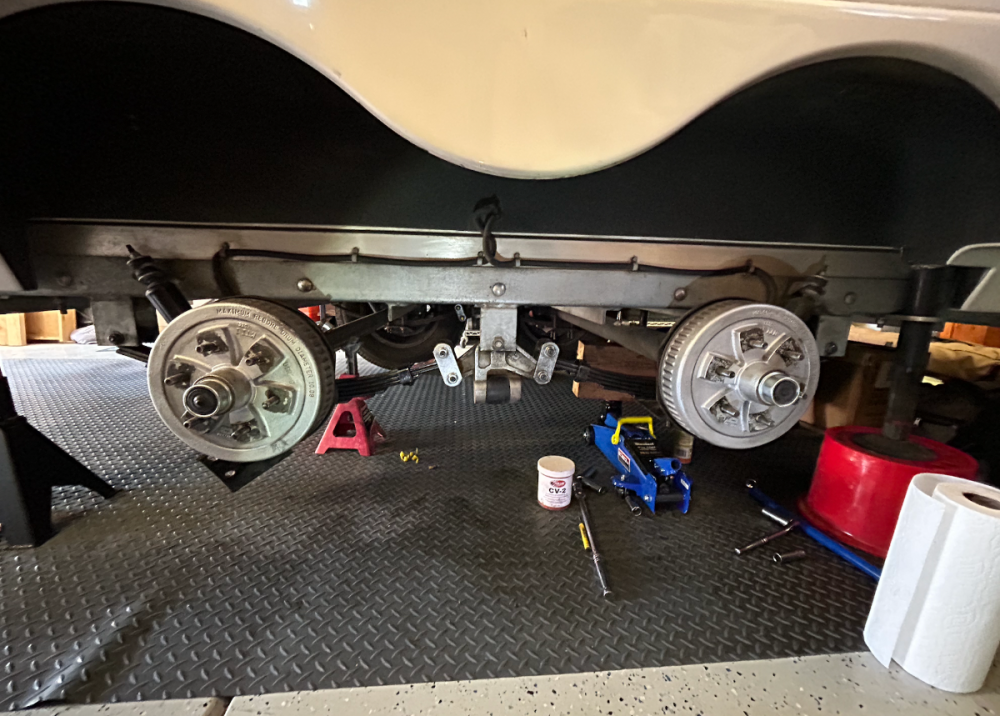
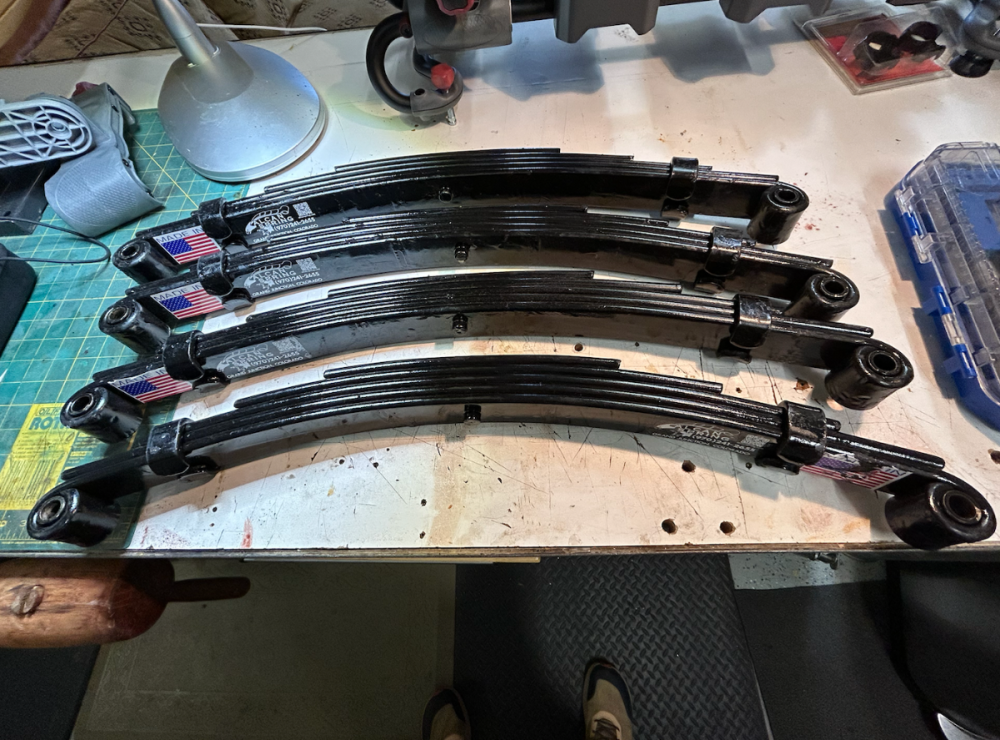
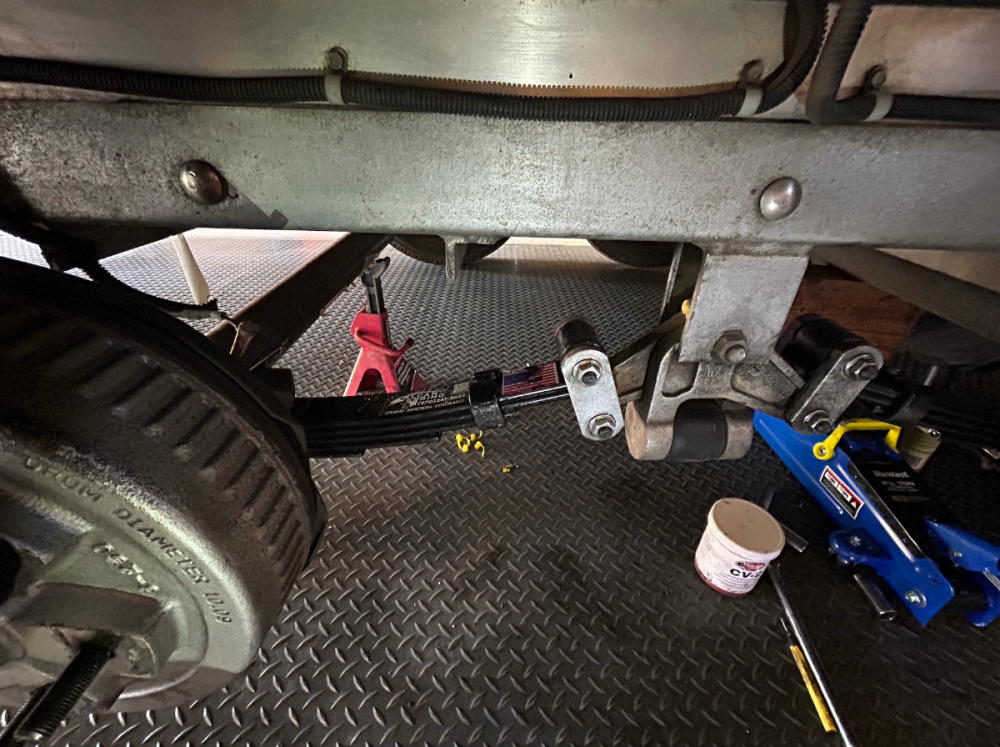
Good question, John. Due to prior commitments, the process is still underway, worked on it for a couple hours yesterday, plan to finish it up this morning. After speaking with Mike/Alcan, here's a high-level List of Instructions for the leaf spring R&R. 1. Break loose the wheel lug nuts on all wheels; 2. With the OTT connected to the the TV, raise enough that wheels are just high enough to spin and that 4 jack stands can be placed in front and to the rear of the running gear on the OTT frame; 3. Lower OTT onto the jack stands - wheels must still be able to spin; 4. Remove wheels; 5. Pick a side to start. Place a jack stand under front axle about 2 feet inboard of wheel assy. - use a floor jack under the spring plate to raise the axle just enough to adjust the jack stand under the axle, then lower the floor jack so the axle rests on the floor jack. There should be very little tension on the suspension at this point; 6. Remove the lower shock absorber nut and push the shock up and out of the mounting hole on the spring plate, use safety wire to hold lower shock outboard and away from spring plate - helps with aligning the spring plate later on; 7. Remove the 4 U-bolt nuts/washers; 8. Remove the spring plate (at this point - we wire brushed the plate, cleaned with acetone and rattle-canned it with RustOleum, set aside to dry for later); 9. Remove the forward wet bolt from the frame mount - this allows the spring pack to drop; 10. From the Dexter center shackle, remove the corresponding Dexter shackle nuts and the outboard connecting plate - the inboard connecting plate will be removed with the wet-bolts still "press fitted" into the plate. Keep as is and ChemKlean the shackle plates, wet bolts and nuts for later assembly; 11. Throw away the cheap-ass Chinese made spring pack. (OBTW: Our's weighed 10lbs even as compared to the Alcan 5-leaf spring pack of USA steel at 18lbs! We still have the fourth spring to replace today - but the three removed so far were definitely starting to flatten.) 12. Check the centering bolt head on the Alcan spring pack so it fits into the corresponding centering hole in the spring plate. We had to file the corners on a couple of the bolts to get the correct fitment. 13. Insert the "now cleaned" shackle components to the Dexter center shackle assy. Connect Alcan spring pack (this would be the rear-most spring pack bushing for the front axle), bolt on the outboard connecting plate. 14. Check the forward wet bolt after cleaning by connecting your Lock'nLube and squeezing grease through the journal (be sure to do this with all wet-bolts). Thoroughly grease the spring pack brass bushing and wet bolt. Ensure the wet bolt can fit through the brass bushing - tap in gently using a socket over the grease nipple. 15. Lift the forward end of the spring pack and place a floor jack under at mid-point (where the spring plate will be placed in a later step). Lift the Alcan spring pack up to the forward spring mount on the frame. Ensure the centering pin on top of the Alcan spring aligns with the centering hole on the axle's spring pad. 16. Insert the forward wet-bolt by raising/lowering the floor jack and tapping the center shackle fore/aft until the bushing aligns with the mounting holes. This is a step that takes some patience. We had to use an alignment bolt from the outboard side of the mount to get the wet-bolt through from the inboard side. (NOTE: The wet-bolts have splines near the head to keep them from spinning once tightened in the shackle plate - we oriented them so the grease hole on the wet-bolt faced "UP"). 17. Place your U-bolts in place over the axle (we painted ours just to keep the rust down to a minimum - plus it looks way cooler). Place the cleaned and freshly painted spring plate in place. Install new U-bolt washers and nuts - using an "X" pattern, tighten the U-bolt nuts slowly pulling the spring plate up and into position. Use a flashlight to check that the Alcan spring centering bolt is aligning with the centering hole in the spring plate. We tied the lower shock outboard and away to a wheel lug with safety wire to make this alignment easier. 18. Install lower shock to spring plate; 19. Torque all nuts to specs. 20. Move to same side rear assy. and repeat. 21. Move to opposite side and repeat front and rear like steps 1 thru 20 above. There's probably a few extra things I did (removed, inspected, and re-packed wheel bearing, for example) but these are the key steps. Very satisfying procedure. It's worth the peace of mind knowing your running gear is in order! More to report later after complete and test driven. Cheers!1 point
-
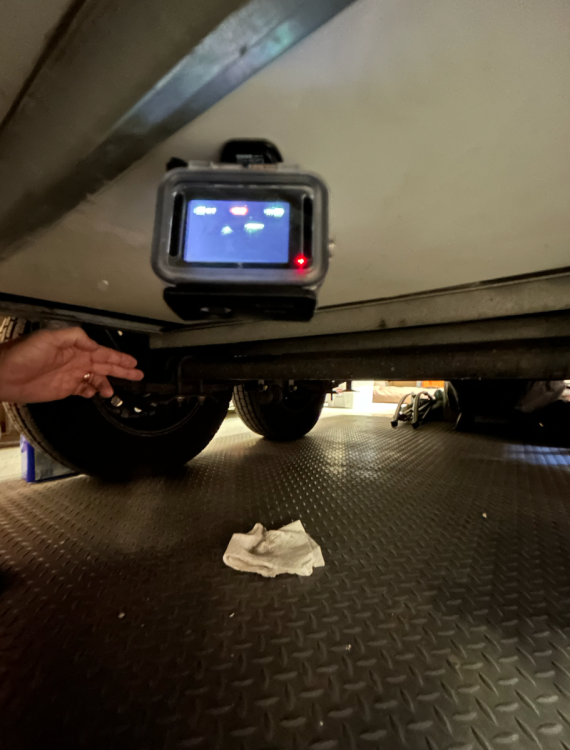
Well we got off to a rather late start - forgot I had a 9am PT session for the rotator cuff repair from a few months back. Anyhow, didn't get the shop opened until 1030-ish. Thinking about JD's old-school suggestion using clay - which seems brilliant, I came up with an alternative. Short of buying an accelerometer from Amazon and obtaining objective data of the suspension system - mounting my GoPro to the undercarriage amidship seemed to be a logical path forward costing $0. We do "cheap" and "free" like champions. So, instead of having D drive around the neighborhood with me in the back playing the "rock and roll rider" - went ahead and captured GoPro video of the curb-side forward wheel assembly while trying to hit every pothole in the area. The thought process is that traveling over the same route at the same speed with the 4-pack springs first, then the 5-pack after the install might show a different deflection of the suspension.... Not 100% objective but comparative for sure. Just need to upload two comparative vids of the before and after... Started off by degreasing and painting the new (one-use) U-bolts, nuts, and washers with a healthy coat of RustOleum to keep things tidy underneath. For the most part, this is a straight forward plug-and-play R&R effort. The new springs are several pounds heavier and definitely a bit higher drop than the Chinese-made 4-packs: So, the street-side springs are successfully replaced with the new 5-packs... The curb-side springs go in tomorrow - then we'll follow-up with a short before/after GoPro ride vid. ...but now, its time for a cold one! Cheers, ALL!1 point
-
Just FYI: Our Alcan springs arrived this afternoon - just from observation, definitely a big difference in quality between the Chinese-made Dexters and these new ones. Measured eye-to-eye dimension to verify 25.25" across the board w/3" drop - all good there. Planning to have D drive Casablanca around some of the rather "rutty" roads in the neighborhood with me in the back to (hopefully) get a feel for the "before and after" install ride inside. Spring R&R will begin in the AM - we'll for sure keep y'all posted on the effort... Cheers!1 point
-
Another broken spring to report Curb side 2021 hull 588 LE 2.We were able to find a replacement at Nothern Tools to get us home. All springs will be replaced before our next trip0 points
-
Recent Achievements






.thumb.jpg.e34bf01ef7f7d5e99ad31856d45afbeb.jpg)






.thumb.png.fbbde3486e933f990ff511bff8d6bda0.png)
