Leaderboard


Popular Content
Showing content with the highest reputation on 05/14/2025 in all areas
-
An example of disc brakes on an Oliver D52 NevRLube axles, 5000lb springs 12 in discs with 4 piston calipers Electric over hydraulic actuation
 5 points
 -
I agree with you. I never turn off the main 30 amp breaker prior to starting the generator. I can’t see any reason to do that as we don’t turn it off prior to plugging it into a power post. As far as misplacing or losing your bonding ground plug, I leave mine permanently in the generator. There’s no reason to remove it. If I were to remove mine, I wouldn’t be able to find it five minutes later much less on the next camping trip.4 points
-
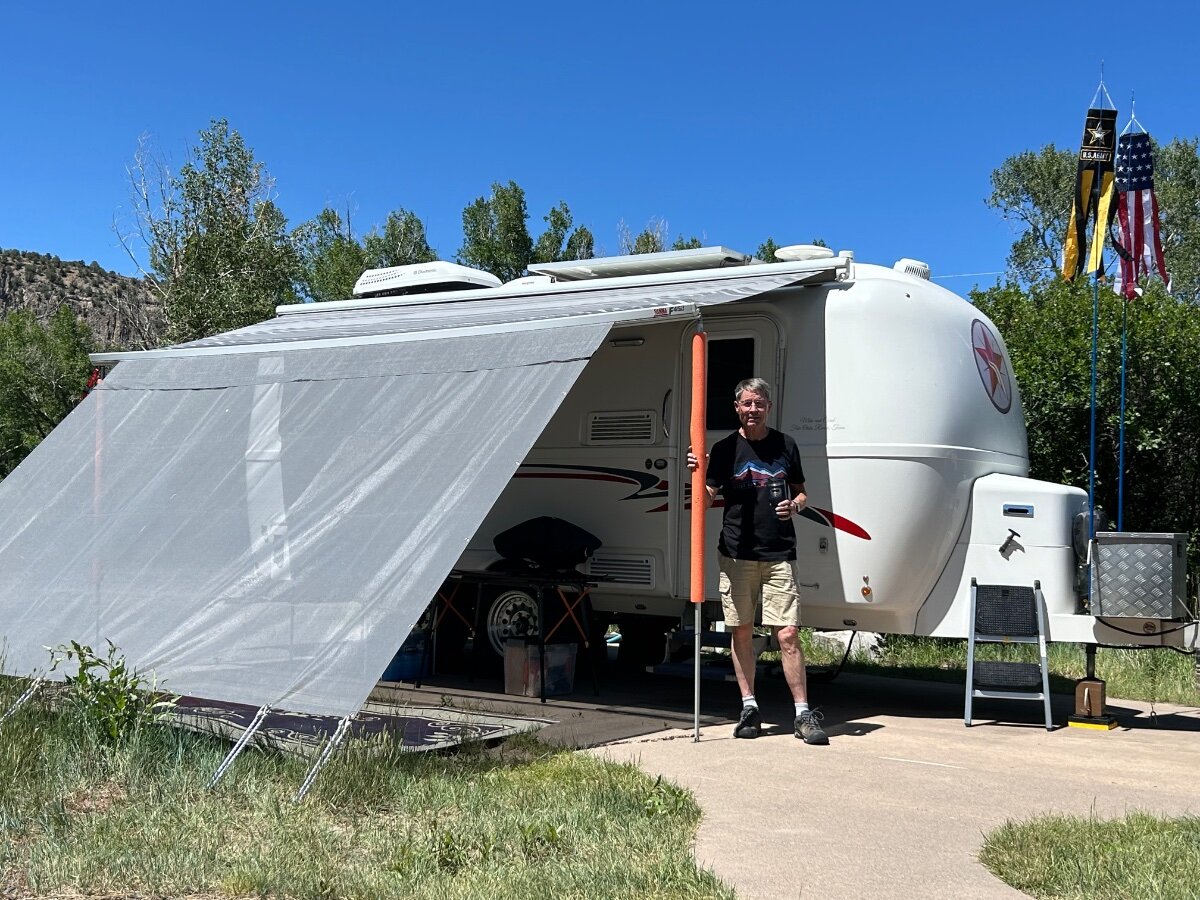
Yes, it does. They can sit in brackets on the side of the trailer or you can drop them straight down to the ground. You can also stake them to the ground which I have done. With our sunshade attached the awning can withstand some pretty windy conditions. It’s not as easy to deploy as the electrics, but is not really a hassle either. Mike
3 points
-
Some may recall my plans to add an Anderson Powerpole 12V DC outlet to the front of Curiosity. My plan was to drill through the front of the propane housing, low, behind the front basket. I started that project today. The plan was to tie into the front jack wiring to supply power. But then I thought it might be easier to run the positive wire down from the jack switch terminal, avoiding cutting into the jack’s feed wire. When I pulled off the jack cover, I discovered the is a lot of extra room inside the cover. So, instead of drilling through fiberglass, I drilled through an inexpensive replaceable part. Easy peasey! All that’s left is the wiring (along with wiring the two outlets I added under the flip-up table next to the door.) EDIT: Yes, I will add an inline fuse, and not rely on the jack’s 30A slo-blow fuse. 😉
2 points
-
I did and found some great tips in that video. They make a case for DC2DC charging as well. That video helped my wife better understand the value as well. Thanks!2 points
-
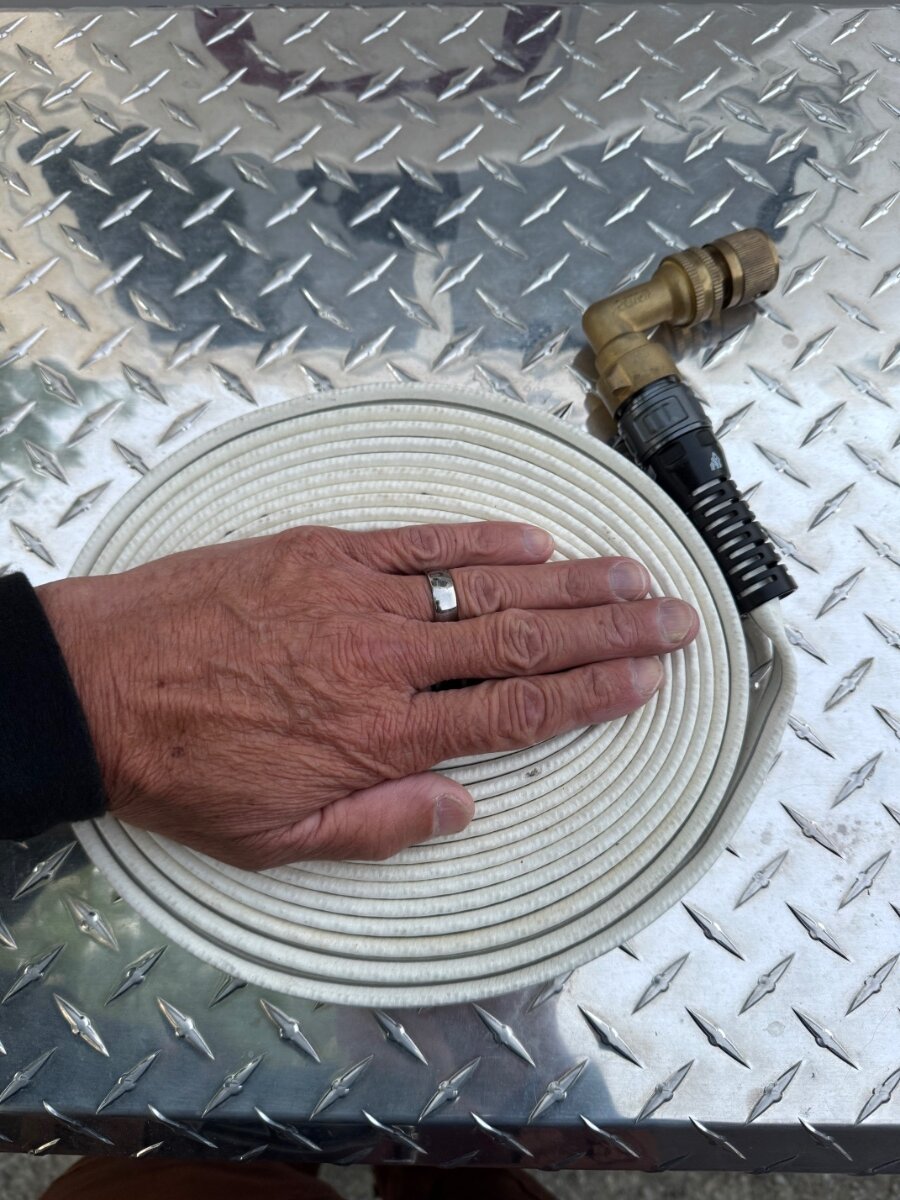
I will be the first to admit that I lean toward the lazy side of the street! This is my method for storing the Gorilla Marine and RV hose. Mossey
2 points
-
If you plan to replace your shocks with the OEM Monroe’s you should check with buying them at O’Reilly’s auto parts. They are a little bit more expensive than buying them from Amazon but then they warranty them for life and you don’t have to keep up with your receipt if you go online and open an account with them.2 points
-
I think the DC-DC charging may be there at some point in the future when I can find a local shop that can do a proper install. I have an understanding of the system but I am not an expert and would prefer anything with the truck be done professionally. I do agree that having redundant methods for charging (in addition to the stock solar) would be a nice situation in the long term. I do expect to be traveling for much longer periods after retirement.2 points
-
Reading through all the entire posts, it is quite evident that @DanielBoondock has really done a lot of research about which RV fits his needs. (It is what us engineers do). I think, Daniel, that you need to do similiar research on your tow vehicle as the EV's will have a lot less mileage range then advertised when towing the Ollie. You may not have the mileage range you need for your camping adventures. You will find some helpful information on this web site about EV towing an Ollie. I just wanted to draw your attention to this matter.2 points
-
I’m a zero-G guy, carry three for dedicated purposes; freshwater fill, black tank rinse and general wash hoses. I find them easy to roll up and stow; they are very flexible and durable. Each are setup with quick connects and accessories for their respective applications.2 points
-
We should recommend this to Scott Oliver as a "Heavy Duty" option for whatever he has on the drawing board for the next line of trailers... Or even better, scrap the Dexters and go with Curt Adventure Edition indipendent suspension (but with disc brakes):
2 points
-
I have had the same experience with Etrailer that jd1923 has had, received good service in the past, but I hate to see the troubles Galway Girl is having, too.2 points
-
Rob, don't think or use torque values for rubber mounts. I've seen some pictures here that look right and some showing over-tightened bushings. You want to tighten them enough for the rubber bushings to pillow nicely, not enough so that the rubber will mushroom beyond the mounting plate which will cause premature failure of the bushings. The nuts are Nylok locking nuts so they will stay put.2 points
-
Thank you! Yes, we have much confidence in both the gear AND in Alcan's products and installation. After having one of our original springs break, I'll no longer cringe in the future after we hit a major pothole or bump. I agree; Lewis and his crew get 2 thumbs up!2 points
-
To all of you gracious responders: thank you!! I should not have posted until we are back home with said bike rack and receiver. We are near Grand Junction, CO, where Alcan Spring installed our new 5-leaf springs and 5200# axles yesterday. ☺️ I will take photos and re-measure the receiver when we return. I have a feeling, however, that we sloppily measured the receiver, assuming it is a 2" one.🙄 We certainly want to keep the 1UP rack.... Anyway, I'll humbly update you all in several days. Barb2 points
-
Etrailer is saying I pay to ship bad parts back , they ship 4 new parts to me. I’m going to try and get them to be manual adjusting units so I’ll have spares.2 points
-
If it is still serviceable, I would put a new nut and rubber mount on it and roll on. Then replace it at my time of choosing. GJ2 points
-
Hello, I’ve been on the forum for some years and I’m closing into retirement and making my decision. Started with Ollie years ago, drifted over to the Escape, then Bigfoot camps as I thought the Ollie too expensive, small and overbuilt. Now with the tariffs I was forced to reconsider them as they are US based, and realized it was for me. Escape 23 is pretty expensive now for what you get. Bigfoot length/width was silently bothering me for handling, plus the old school decor isn’t great. I toured one, a big issue is interior height. My head brushes the ceiling and I barely fit in the bathroom. I’d have to crouch to shower. Plus I’d have to do a bunch of mods, they don’t even offer lithium, and the tongue weight pushes the limits on my TV. So with the Ollie I’ve got the interior height I want. The size is fine for a couples camper, plus an easy to tow and park size. Especially with the Black cushions it’s an elegant interior. Finally, I’m retiring from engineering and don’t really want to DIY. Done enough engineering projects in my time, once you start you’re never done 😅. The Ollie is the only one that comes exactly as I want. So I’ll be placing an order later summer Platinum twin Composting Street awning Platinum batteries (more than I need but might as well, plus I like the integrated heating) Now to make the horrific price easier I’m actually extending my retirement date. It’s free money if it’s past my nominal date, right? 😅 Only thing is I might actually buy sight unseen. No nearby dealers, nor LE II twin. Shouldn’t be a problem … Cheers1 point
-
So — where are you? A lot of us are mobile, and I’ve shown my Oliver many times while I’m on the road. If you post your general location here on the forum, you may find an owner within reach. (Maybe I missed it, in the thread here…?) Elite II, twin bed, Lithium Solar package with composting toilet and curb-side awning model Owner… heading West from Tennessee on Friday.1 point
-
You are golden! My old Ram had 130A OEM, I replaced with a HO 180A and I’ve gotten as high as 48A outputted from our Orion XS 50A charger.1 point
-
Yah I saw that video, mine is a 2023 and the outside caulking around the windows, Oliver sign and external lights above the windows are still good. Yes my 2023 has the wire/mesh inserts, I was covering the fresh water and AC drain tubes with copper steel wool, so I figured while I’m down there I might as well do the scuppers as well. We did see some moisture/condensation on the inside of the windows, but not much. I thought maybe because the windows are dual pane, ie better insulation, while the inner frame of the windows are metal and in between the hulls so more potential for condensation on them like in my picture, but I can be wrong! Anyway, I did add some butyl tape and silicone around the inner window frames so time will tell. I’m also thinking of spraying some foam type insulation around the inner window frames. Thoughts on that?1 point
-
Yep, I have had a good experiences dealing with them in the past, but that's what I like about this forum, we are hearing everyone's experience so folks here can make a well informed decision on who to buy from.1 point
-
If you’re not connected to shore power the AC will not show up on the cp plus screen unless you turn the inverter on, with the inverter on it will show the “heater” and “AC” option.1 point
-
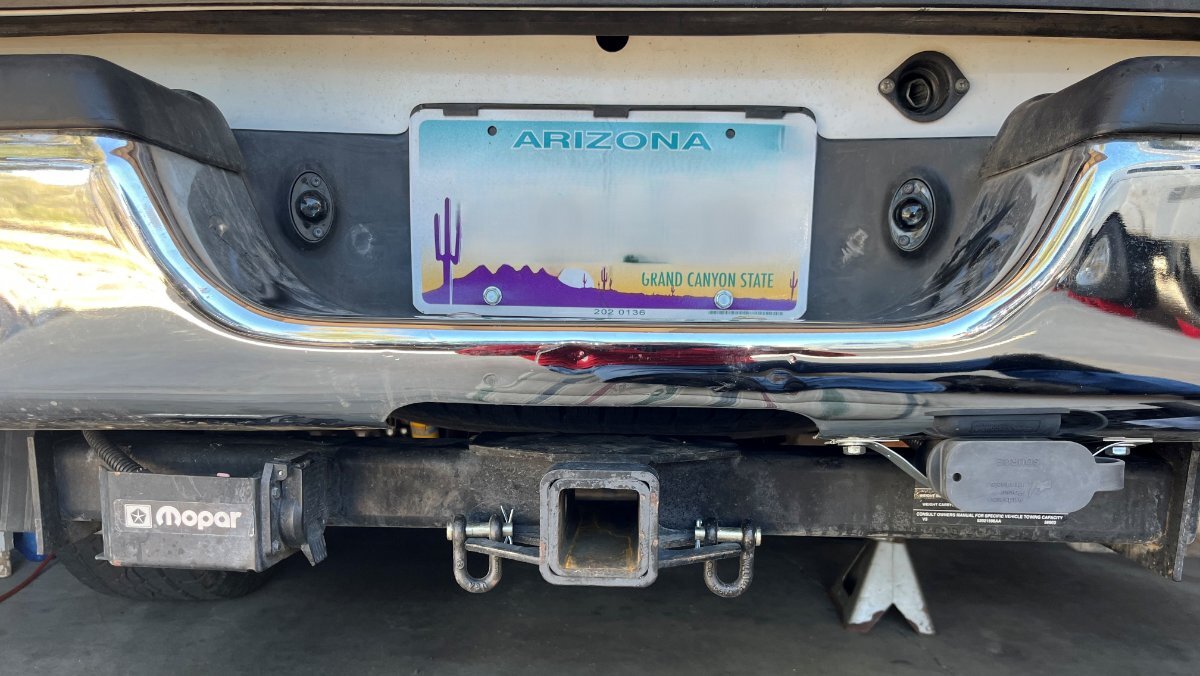
Bit confusing with all the images. I am using the Lexus hitch and installed as per the instructions with no issues.1 point
-
This is how then tech’s mounted mine
1 point
-
Carl - I assume that you have viewed THIS thread that has several relevant post to what you are doing/thinking. Specifically - the KYD install of a DC to DC system on their rig. Bill1 point
-
The 2020 Jeep Gladiator Rubecon has a 220 amp 'smart' alternator. From what I understand, that should be sufficient for DC charging. That is an important consideration.1 point
-
Glad for you that David @Coddiwomple reached out. I could not answer for an EI. Also check into the amperage capability of the alternator on your Jeep. Some of us have had to upgrade that to guarantee available amps.1 point
-
Thanks for the links! When I first began my research, I thought the 30A Orion would be the solution. Since then, with all the videos that I have watched, and what the lithium batteries are capable, it became clear that the 50A Orion was a much better solution. That is what is on my shopping list along with 4 gauge wire, etc. Your suggestion is yet another confirmation that the 50A is the right solution. Now if I can get past the worry of pulling all these wires properly and getting through the hull, I will pull the trigger on my shopping list. I can always find something to worry about! Carl1 point
-
Hey Carl, you can come over to see how I did mine in our Elite 1 if you like. I don't know if you remember me and Martha but you showed your Elite 1 to us on 9-3-22 when we were considering an Oliver. We are in North Plains.1 point
-
Nice! 👍🏻Options are always good! Strong reviews too. -https://www.amazon.com/Lightweight-Leakproof-OrangeBlack-10-FT/dp/B0DNM146J5/ref=sr_1 point
-
Many praise the addition of a DC to DC charger, more is better!1 point
-
I haven't looked inside that area with the mindset of correcting this problem, but why couldn't you use a plastic slip sheet, cut to length, fold it over to make a loose tube and rivet it together. The hose should nest inside of the tube and will keep it from catching on anything. Slip Sheets | Signode1 point
-
It is one of those things that I don't really care what the cost is if I need them. As it stands now, my drum brakes are working fine. If they fail, I will replace them with discs rather than new drums.1 point
-
Very nice.1 point
-
I weaved a large zip tie used for air conditioning ductwork through the top of the mesh bag to make a "mouth" in it that would keep it's shape. I then used two smaller zip ties to mount it to the dump valve cables that are on each side of where the shower hose is so the shower hose would always stay in the bag. My setup looks much different than yours from the back so I don't know if this method would work for you or not.1 point
-
I’ve got advance degrees in Physics so should have guessed 😅 Actually I did suspect Venturi, however I’d think you’d need a path for the airflow. Perhaps it goes in some and out the others - or something. Can’t help asking; whats the basis for this, direct observation, measurement or? Thanks! Yeah sounds great, I’m not worried about it Great tip thanks! I was wondering about a central location that would get both sides, that ‘attic’ would be one with that vent installation you did. So humidity is only a cold weather issue, not a hot weather one in a humid climate? This is really the only issue that bothers me. We restored a century old house and I learned much about building construction; moisture is the bane of any dwelling and must be avoided, even in a no/low wood design like the Oliver Thanks! I’ll check those out - Dan1 point
-
Congrats on your new running gear. We have the exact same set up and are very happy. Lew and his crew at Alcan are pros and really do a great job. Well worth the trip and time to have this install done right. 👍🏻1 point
-
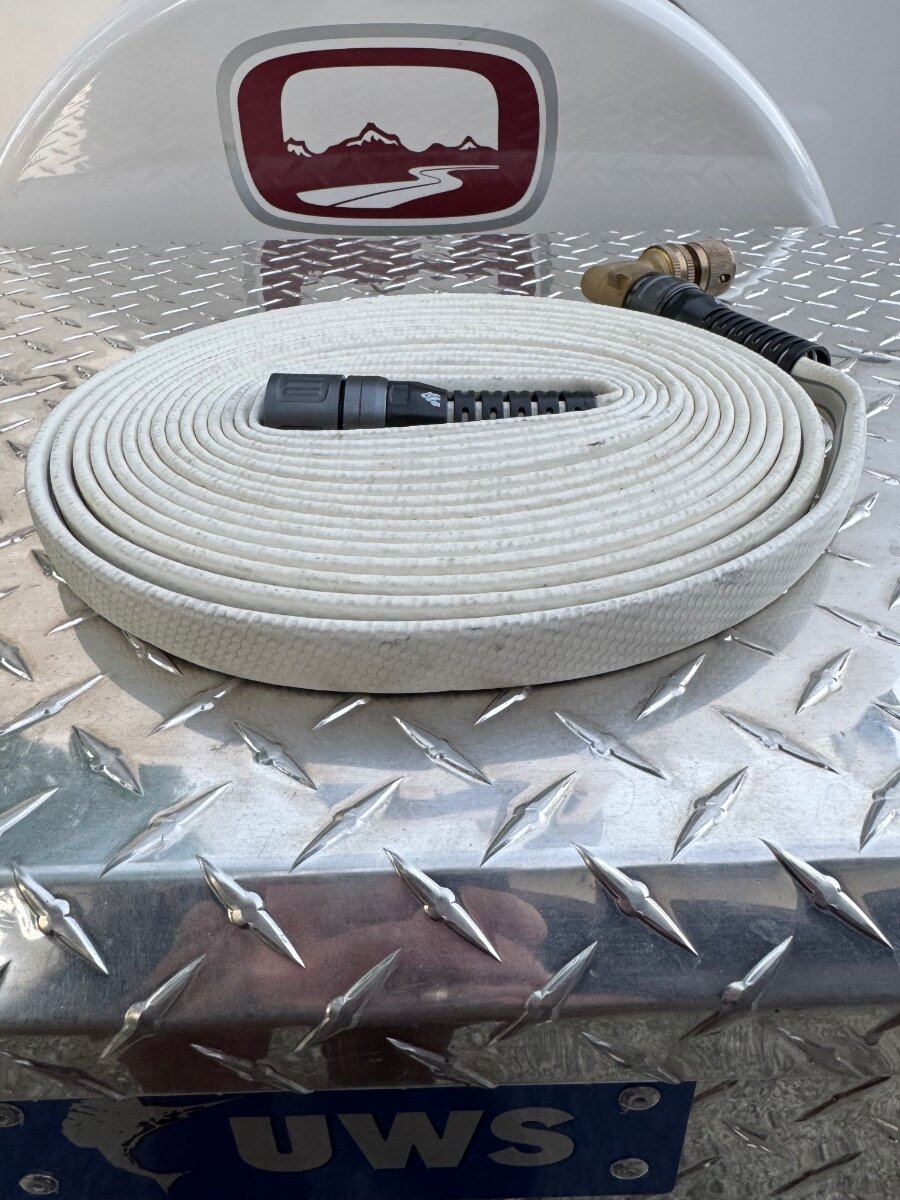
@Ollie-Haus: Many thanks for showing this hose to me, @Geronimo John, and @Patriot at the rally! Definitely a no-brainer "must have" item - especially for space saving feature. I'm tired of wrestling with that stiff white Camco hose when rolling it up. Headed to Home Dumbo today for 2 of these.... We'll do an OPS-check this weekend down south. 2 is 1 and 1 is none!1 point
-
Be safe!1 point
-
Headed to Old Mexico Thursday, we'll be walking the border crossing at Columbus over to La Paloma. Pancho Villa State Park is still having issues with their septic system so there's been no dumping allowed for almost a year now -- no biggie, as we'll only stay for 3 nights. Pix of the knuckleheads to follow, FYI...1 point
-
You may or may not like the cost involved. I believe @ScubaRx has disc brakes on his Oliver.1 point
-
I hate drum brakes. A disc upgrade would be nice.1 point
-
In the winter when heating with a portable heater we use 99% of the time, we find condensation between the hull in the rear section (in our experience), if a de-humidifier is not used. We use a small de-humidifier in the rear upper storage "Oliver Sign" area and another one on the kitchen stove top area to resolve this. Checked other areas between the hulls and did not find condensation present.1 point
-
The hose is soft and pliable even in cold temps. It rebounds to its original flat shape, self draining in the process. I roll mine up in a flat coil for storage. It’s specifically for potable water. When pressurized, if it gets a kink, just give the hose a flip and the kink pops out. We’re a year into this hose and won’t be going back to a “ regular” hose ever again. It comes with a very good warranty on top of all that. Home Depot is the source.
1 point
-
They are like fire hoses, they don’t shrink up just flatten out. Very easy to handle and use. We’ve been using these type hoses for years. I don’t have much patience for traditional hoses, especially in cold weather.1 point
-
Sorry, I must have missed your mentioning the scuppers in your post. They do act like drain holes in the event of a leak. However they also act like vent holes particularly when you are moving down the road - much like scupper holes in a boat. Using the Venturi effect a difference in air pressure is caused between the outside air and the air between the hulls. This, in turn, draws air through the area between the hulls and out the scuppers thus drying the area between the hulls. The faster you drive, the more air that is drawn out. Physics. Bill1 point
-
We enjoyed the beautiful drive up from Albuquerque, and had a great hike the next day to the edge of the park and then some into the Cibola NF. You can only see edges of the mountain range from the campground. Most of the campsites are difficult. We backed in first and found our entrance would be on the wrong side and steep downhill. Then I drove in head first, unhitched and lifted the tongue a foot high to get level. We didn’t want to drive the truck anyway. Tonight we’re at Hannagan Meadows south of Alpine AZ at 9130 ft. it’s cold up here, will be high if 42F by Monday! Stopped to visit with these bull elks on the way. Wow!
1 point
-
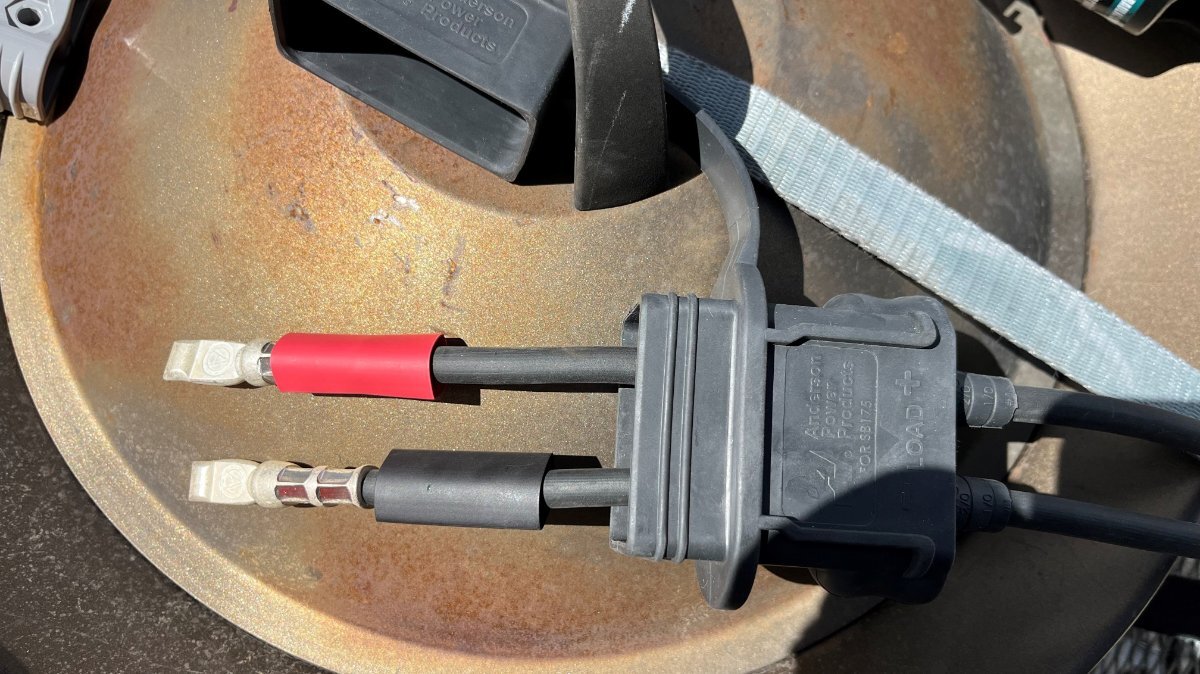
Next is the tow vehicle side installation. The Ram Cummins and most diesels have dual batteries. I chose to connect to the RHS battery since there are less connections, because its proximity to the alternator, and because I wanted a straight run down the frame to the RHS of the rear bumper. Looking ahead, last year I installed a custom Nations 180A HD alternator. OEM rating on our truck is 130A, thus gaining 50A for charging ampacity! Starting at the battery, I ran the B+ cable along the fender rail to keep it away from the heat of the exhaust manifold and entered the main frame member just behind the engine. Conveniently, there are two holes in the frame just behind the front wheel (pic1). The RH opening is where it comes from the engine and the LH is where it continues all the way to the rear wheel. I had 100’ of 1/2" automotive loom from a past project which made for a clean installation! I removed the RR wheel for ease of access in running the cable. It took a couple of wire ties to get up and over the rear wheel-well but mostly the 4 AWG cable just lies nicely inside the frame beam, very well protected. I decided it should come out below the rear bumper yet above the trailer hitch. The Anderson SB175 connectors are huge (pic2). A full inch or more of bare wire is required inside each pole connector, so I crimped each in two places. There are a series of holes across the bottom of the rear bumper. I used the two holes closest to the center, fabricated and simple bracket to hold the heavy environmental boot in place (pic3). This worked out great as you can push in and pull out the trailer side connection with one hand and it does not budge! So, I have the trailer harness connection on the left and the DC-DC cables on the right (pic4). It looks clean, nice and balanced. Many on this forum and elsewhere believe you need both B+ and B- 4 AWG (minimum) wire running all the way end-to-end! This is certainly true for the B+ cable. For the B- cable, I merely ran a 2 ft length from the Anderson coupler grounded to the rear frame. I believe an 8” section of steel frame will produce less electrical resistance than 4 AWG copper and testing showed this to be either true or “good enough!” I ran another short 4 AWG ground wire from the B- battery terminal to the front of the same frame member. Last step was to connect the B+ charger cable and reconnect the battery terminals. I used another 60A MRBF for the main run (pic5). I also ran short cable from the B+ terminal to the alternator (for redundancy, this connects the charger B+ to both the alternator and batteries with new 4 AWG copper). I’ve never seen anybody take these extra steps, but I believe it will provide better charging performance. You’re running 4 AWG everywhere else, but OEM cables from battery to alternator are usually only 6 or 8 AWG and solid grounds are often an automotive issue. BTW, OTT only installs one 6 AWG ground wire for everything running on DC! I added a second 6 AWG ground cable from the negative bus in line to the batteries in a previous upgrade. This should work great, I really liked how it turned out. I measured carefully and purchased only 65 ft of black 4 AWG wire (not bad for wiring an extended cab long bed pickup truck tow vehicle)! I used all of it, and every run has slack on both ends and the trailer side connector is 6” longer than the standard hitch coupler cable. I ran thorough testing today and I'm getting 40A charging output with the Cummins diesel running at idle! Yes, engine running at idle. I captured pictures of all the Victron Connect screens showing Orion and Smart Shunt data. I'm getting rather tired tonight, so to do this reporting justice I'll get all my data together and add another post tomorrow. As I opened my thread above, "this charger setup is awesome!"
1 point


.thumb.jpg.e34bf01ef7f7d5e99ad31856d45afbeb.jpg)


-
Recent Achievements
-


")


")


")

