Leaderboard


Popular Content
Showing content with the highest reputation on 07/25/2025 in Posts
-
I have been chasing down the solution to a Norcold refrigeration problem for 18 months. My fridge worked well on AC, so so on DC and inadequately on propane. The best it would do on gas was 7-10 degrees in the freezer and only 50 in the fridg section. We do a lot of boondocking and really wanted to keep the gas option. Here are the various steps I took one at a time without success: Pulled the fridge and cleaned the burner tube, changed the thermistor (3 times), changed the main board, checked the gas pressure, changed the thermostat and added a dual extra fan to the top, changed the DC board (one to the right of the main board), changed the eyebrow board, added venting, added insulation. All of these steps were recommended by techs who I paid. The last tech I hired told me that I needed to replace the cooling unit since I was wanting to keep the existing model. Unfortunately, Norcold no longer makes the N412.3 model and replacement cooling units are out of stock. I was advised to find a cooling unit from a 3rd party, order it and then pay the tech to install it. The first cooling unit manufacturer that I contacted did not make units for this smaller fridge model and recommended talking to a guy in Olive Branch MS who rebuilds cooling unit. When I spoke with this gentleman in MS on the phone, he was far more than helpful and told me that my cooling unit was not the problem. He told me to remove my burner and soak the orifice in a high percentage alcohol for a few hours, then blow it out with a compressor and reinstall. Now mind you that my flame looked fine and didn’t seem to be a problem to me or to the two professionals that previously looked at it. 80 year old Mr. David Force, owner of Cooling Unit Warehouse explained that there was a paraffin buildup in my orifice and that although my flame’s appearance didn’t visibly change after cleaning it, the temperature of the flame had been slightly below the necessary temperature. He said that a 10-degree flame difference can change everything. Bottom line, I followed David’s advice, the fridge has been working like a champ for 50 hours on propane so far. I wish I had known this before I spent 18 months and 7-800 dollars on un-needed parts. Nevertheless I am thankful that it works like it is supposed to so that we can head out next week for a month long trip. I'm posting this in hopes that someone can avoid a refrigerator adventure.11 points
-
Great question Jd. I opted to give AI a shot at this one 🤔and here is what I learned- AI Overview- Wax buildup, often appearing as a yellow, oily, or petroleum jelly-like substance, can occur in the LP gas lines of refrigerators (and other propane appliances) . This issue is primarily linked to impurities in the propane itself, specifically oily contaminants introduced during the filling of LP bottles. Causes of wax build-up Impurities in Propane: LP gas, while primarily gaseous, can contain small amounts of oil and other contaminants. These can be introduced during the filling process at the propane supplier. System Design: Certain parts of the LP system, like the SOV (solenoid operating valve) filter and the gas jet in Dometic or Norcold refrigerators, are particularly susceptible to clogging due to their small size and the nature of the oil contamination. Degrading Hoses: While less common, some buildup may originate from the gradual degradation of propane hoses over time. Risks and consequences Reduced Gas Flow: Wax buildup can restrict the flow of propane to the refrigerator's burner, impacting its ability to light or maintain a strong flame. Overheating: In the case of Dometic and Norcold refrigerators, restricted gas flow can lead to the cooling unit boiler overheating, potentially damaging the refrigerator. Soot Buildup: Incomplete combustion caused by inadequate gas flow can also lead to soot accumulation in the burner and flue, further hindering performance. Addressing the problem Cleaning the System: Disassembly and cleaning of the gas lines, including the burner, flue, and orifice, may be necessary to remove the wax buildup. David Force gave @carnivore very solid advice! 👍🏻 **** Cleaning Solutions: Isopropyl alcohol (91%) is recommended for flushing out the system, while acetone can also be used, but care must be taken to avoid contact with rubber or plastic parts.. Preventing future issues Using Clean Propane: Consider sourcing propane from reputable suppliers known for clean gas. Filter Maintenance: If the refrigerator has a filter in the SOV valve, regular inspection and replacement or cleaning can help prevent clogs. Bottle Draining: If oil contamination is suspected in an LP bottle, it can be drained and flushed when empty by removing the valve and turning the tank over. Regular Maintenance: Adhering to the manufacturer's recommendations for routine maintenance, such as cleaning the burner, flue, and burner orifice, can help ensure optimal performance and minimize the risk of buildup according to www.ezfreezerefrigerator.com.3 points
-
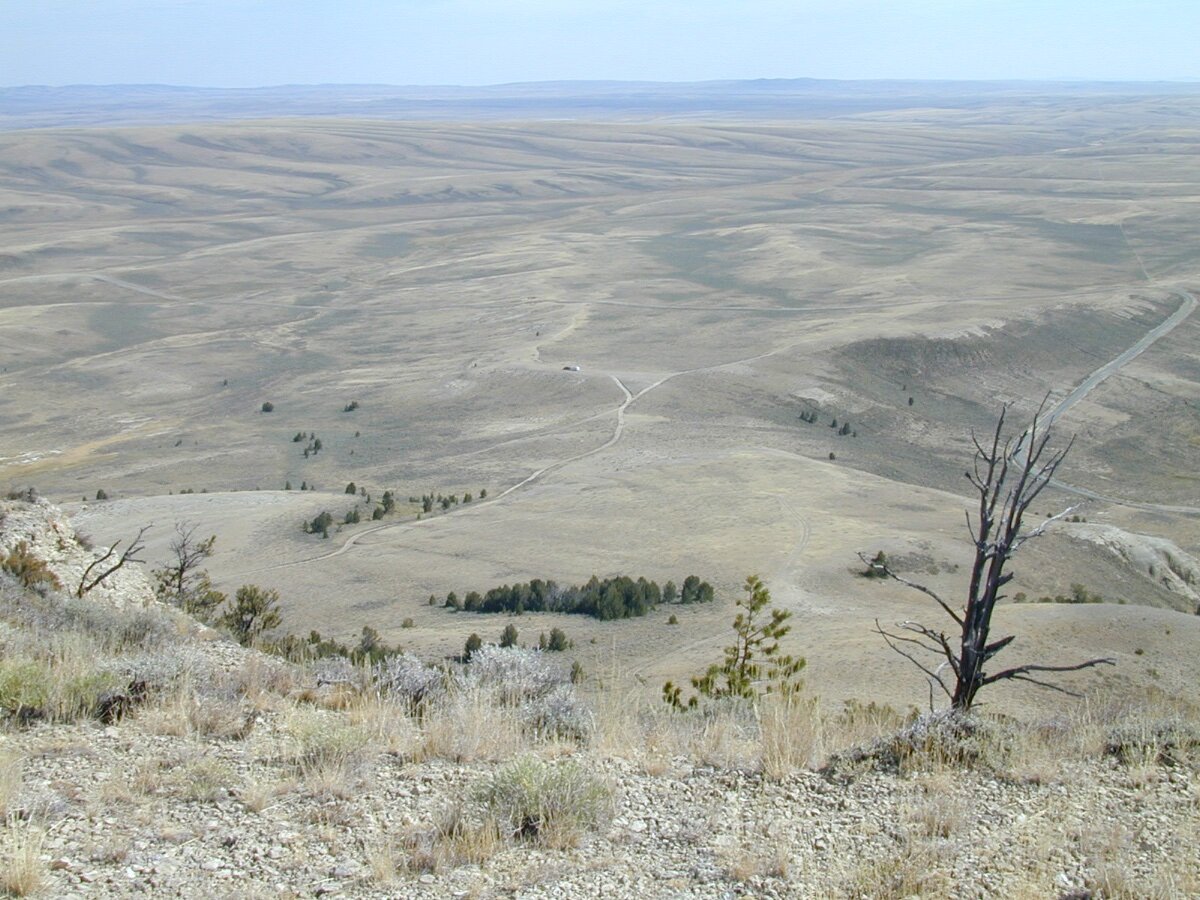
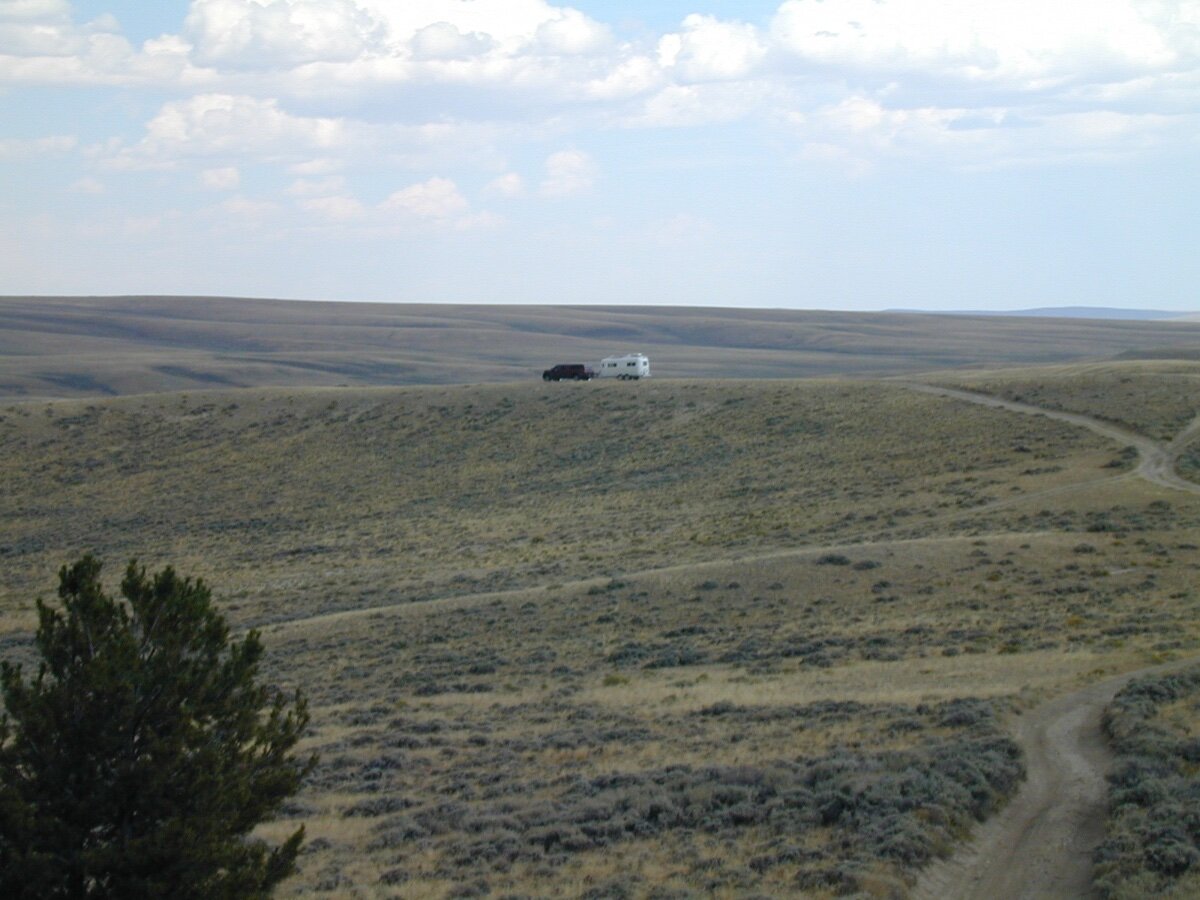
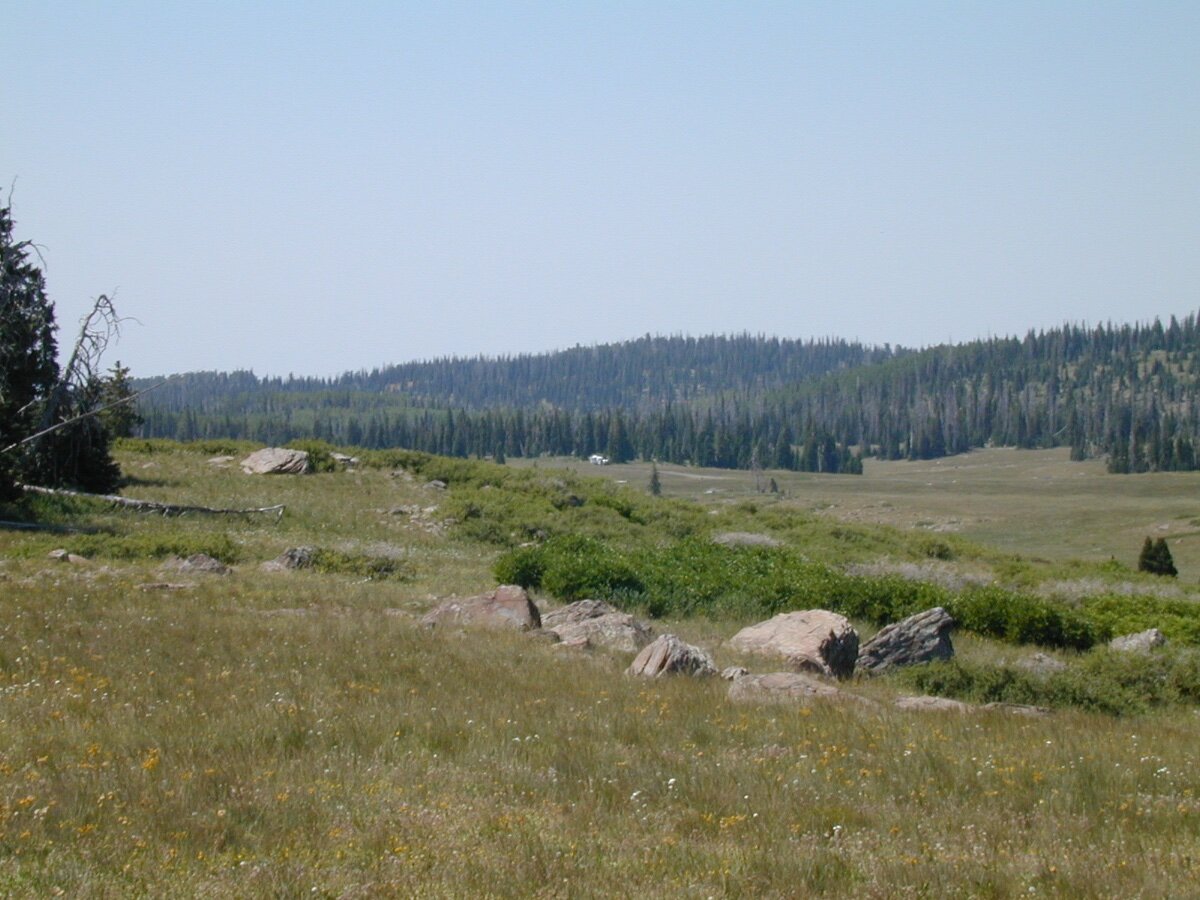
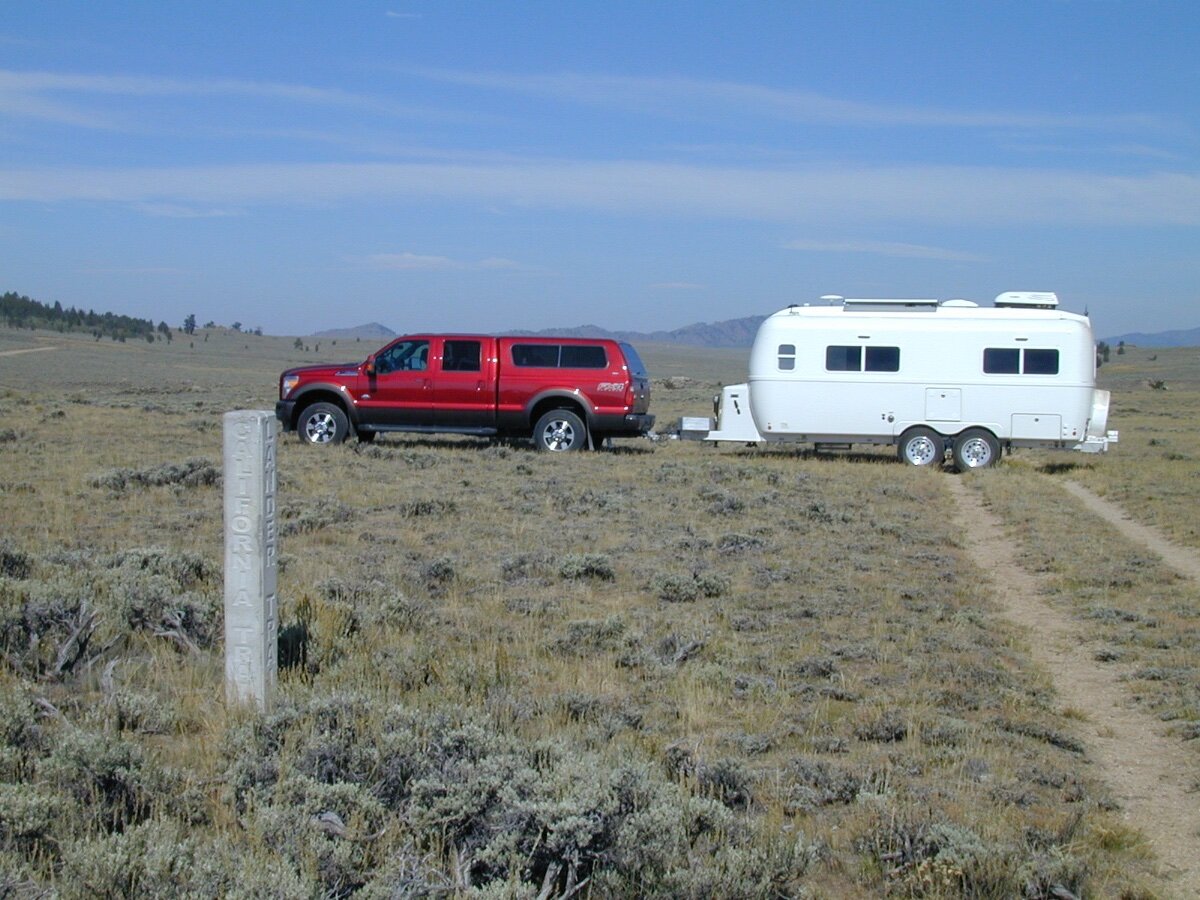
Boondocking Off the Grid require good maps, physical activity and curiosity, Utah and Wyoming.
 3 points
 -
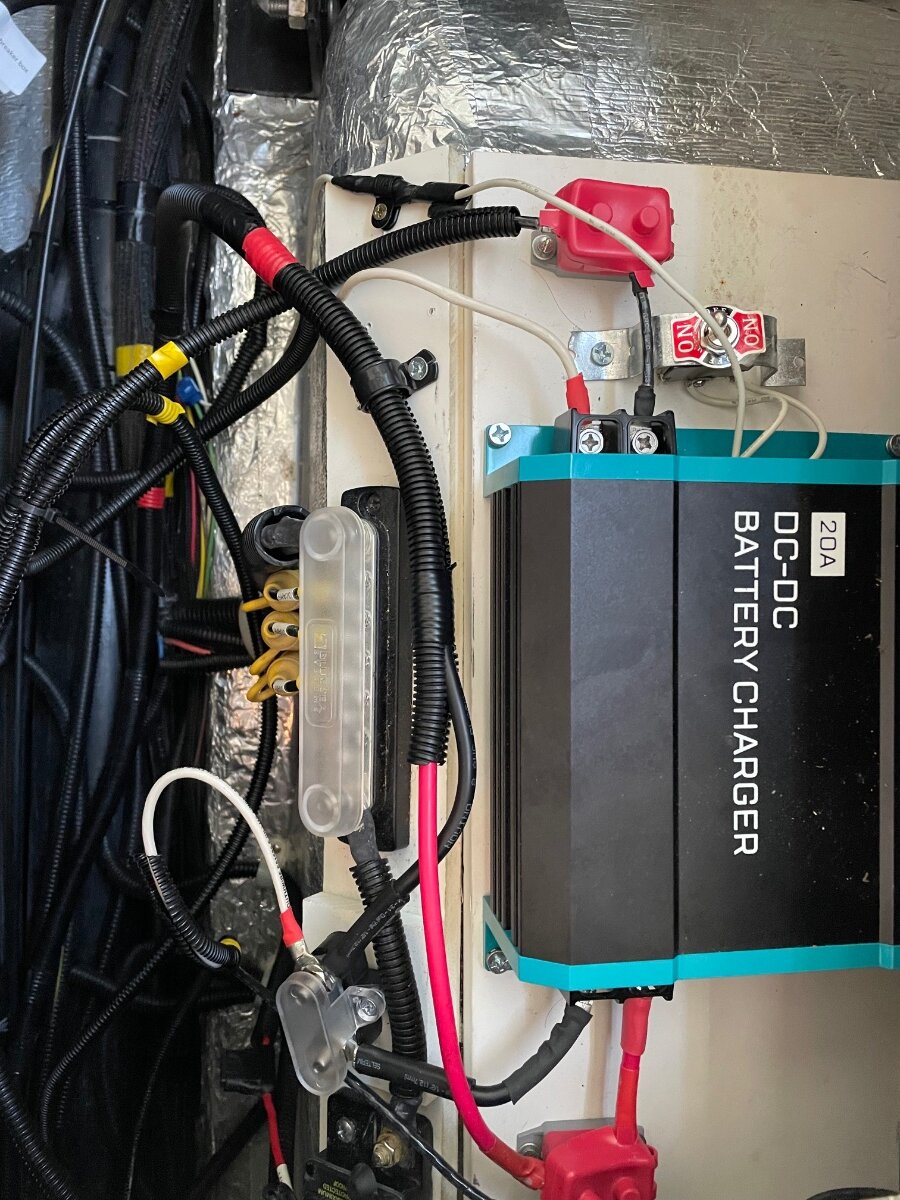
Goal: Eliminate house battery drain due to DC fridge while traveling to arrive at dry camping sites with a fully charged battery. Hybrid to refers to keeping existing charge wire when adding another charge line of heavier gage. After upgrading to a lithium battery (300 AH Epoch) I wanted to be able to negate the amp draw from our 3-way fridge (dometic RM2454) and other small loads that total about 16-17 amps. That fridge used a 100% or nearly duty cycle on DC. I purchased a Renogy 20 amp DC-DC charger. Initially I replaced the 14 awg gage wire Oliver spliced from the 12 awg pigtail power wire terminus to the charger with 10 awg. Why Oliver went to a smaller gage than the pigtail is beyond me although this was back in 2018. I also spliced a 10 gage wire to the pigtail common 10 gage that Oliver in its wisdom had also spliced to a smaller gage wire. This worked fine if I triggered the current limiting feature that reduce the charging current to half (10 amps) of the rated. When I tried to charge at 20 amps it only produced about 14 amps and resulted in a very warm pigtail plug as you might suspect. So I relented and decided to run 8awg wire through my pickup (2015 RAM 1500) and Oliver E2 - but with the intent of also using the pigtail charge wire to carry some amperage. Doing some calculations using the wire resistance of 10 and 8 awg and knowing that the voltage would be the same at the junction I planned near the charger input I figured about 2/3 of the amperage would be carried by the new 8 awg line but after installation found that it actually carried 3/4 of the amperage probably in part by neglecting the loss through the tiny 12 v wire pin in the 7-pin socket on the pickup. The ground pin has about 3x the surface area of all the other wire pins in the socket Fiberglass rods that I had were helpful in running wire and I only used a 2 or 3 foot ground leg to the chassis frame rail near the bumper so essential just ran the positive wire under the truck. I had to remove the front of the bathroom sink to pull site into the trailer. I have read that some have run wire without messing with the sink but they must be magicians! I tap into the trailer running light wire (green) to activate the charger. First results after an initial camping trip were good. When testing at idle I measure 25 amps in to get 20 out and a voltage drop of 1.1 volt from about 14.0 at the battery (I had calculated a 1 volt drop and I guess got lucky. So I wasn’t going after the big amps as my objective and figured I could run smaller gage wire in tandem with the existing pigtail to meet my needs. 30 amp fuse off positive battery terminal Andersen-type plug with t-handle above bumper entrance gland/strain relief (1/2 inch) behind propane tanks on left input on right (8awg after junction of 8 and 10 awg) and output on left (10 awg). I rummaged an old DPDT switch and used one side of it to activate the current limiting feature that should not be needed after running the 8 gage wire.
2 points
-
Not really. You need to peel the sealant off the eight screw heads. I assume it was dicor. Once those are off the shroud can be lifted off. There are two more screws holding the evaporator cover on. Once those are removed the evaporator cover can be removed. All screws are T25s To be honest once you are in there, there isn’t much to see. One thing I did learn is that the street side drain at the evaporator connects to the curbside drain under the back of the trailer and same with the other side. I had always assumed, street side evaporator drained to the under the trailer street side drain. I also learned my unit is slightly off level with street side being lower when the trailer is level. Of course that is the drain tube that is occluded. be sure to seal up the shroud screws when you put it all back together.2 points
-
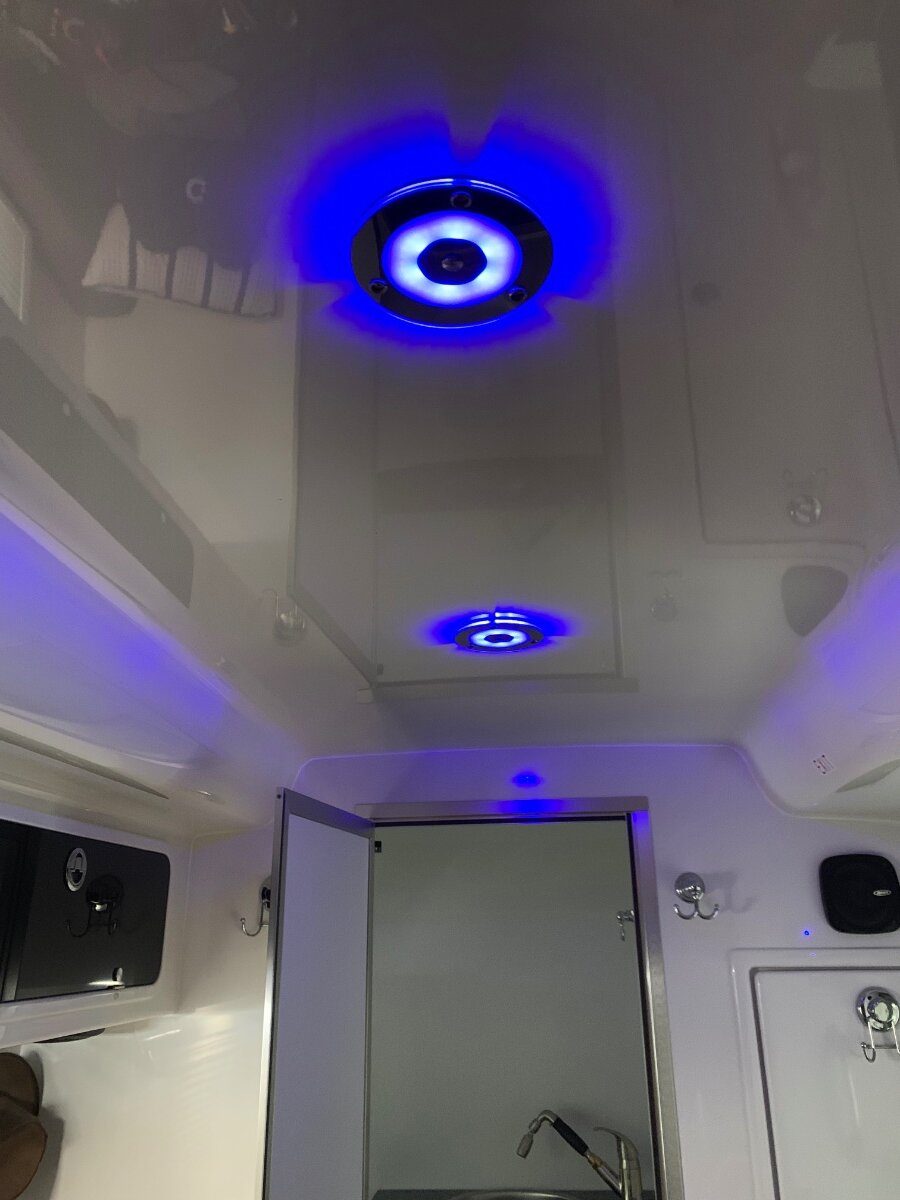
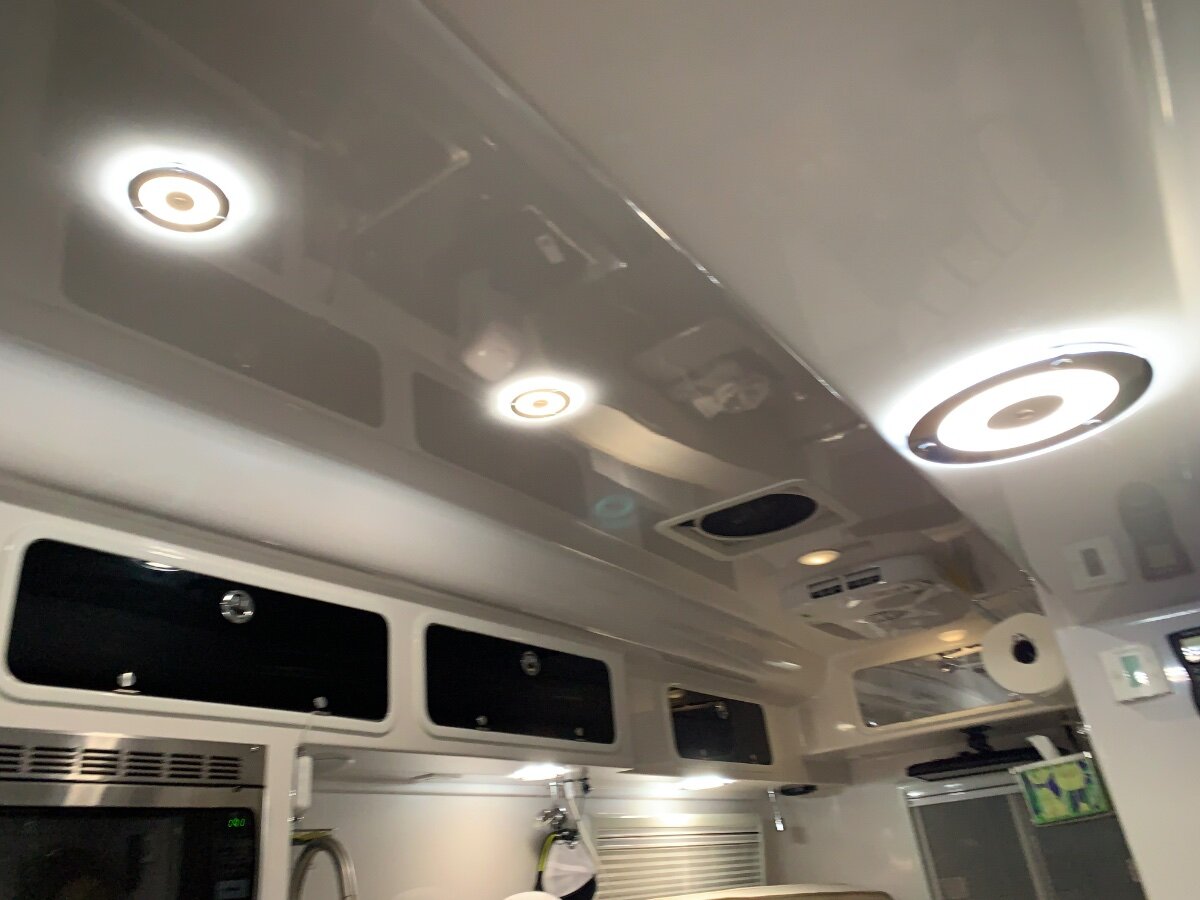
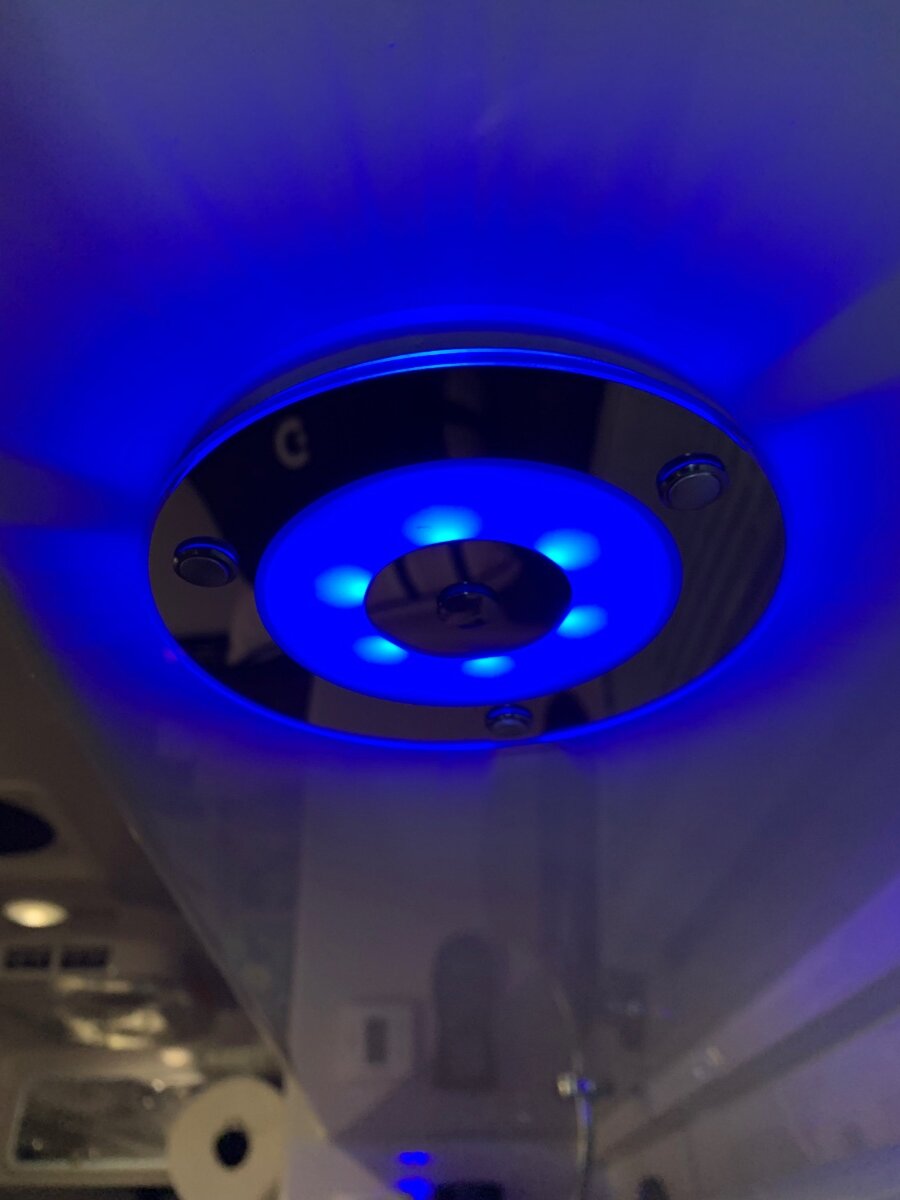
The fact that they turn on to their last setting may have sold me. I dislike that the master switch activates the touch lights. However, if they could adjust to a lower setting or turn on blue, that would be nice. I just don't like that when I don't want them on I have to go touch each one.2 points
-
Awesome write-up. Thanks for taking the time to share your story.😊2 points
-
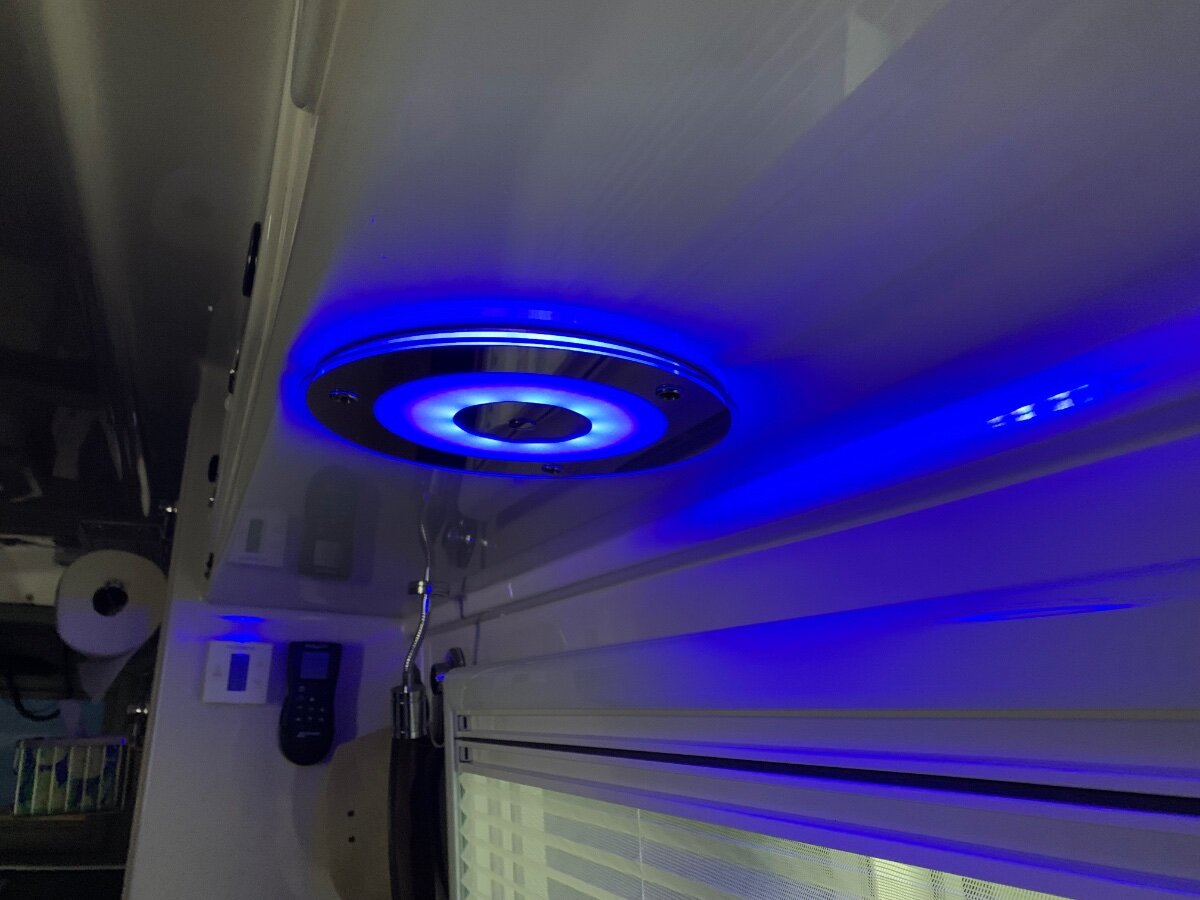
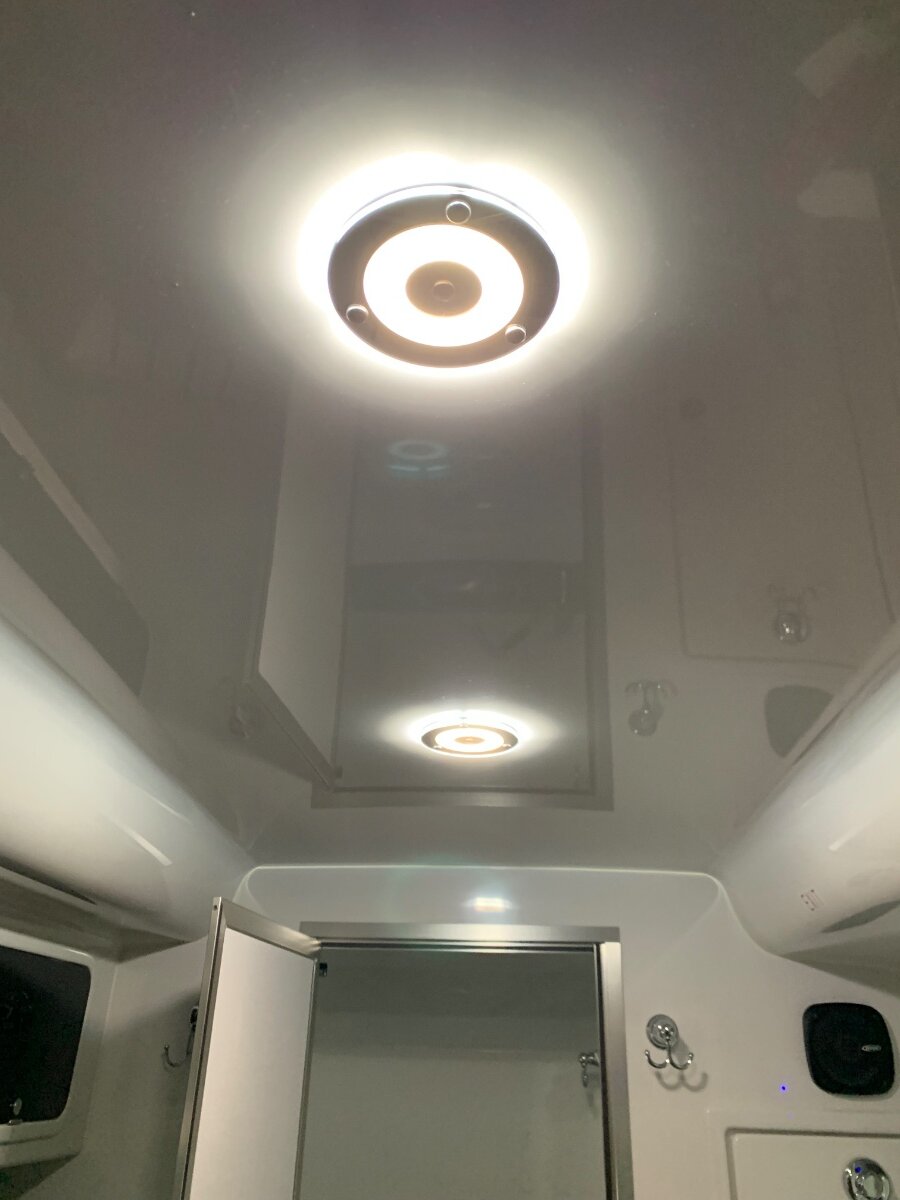
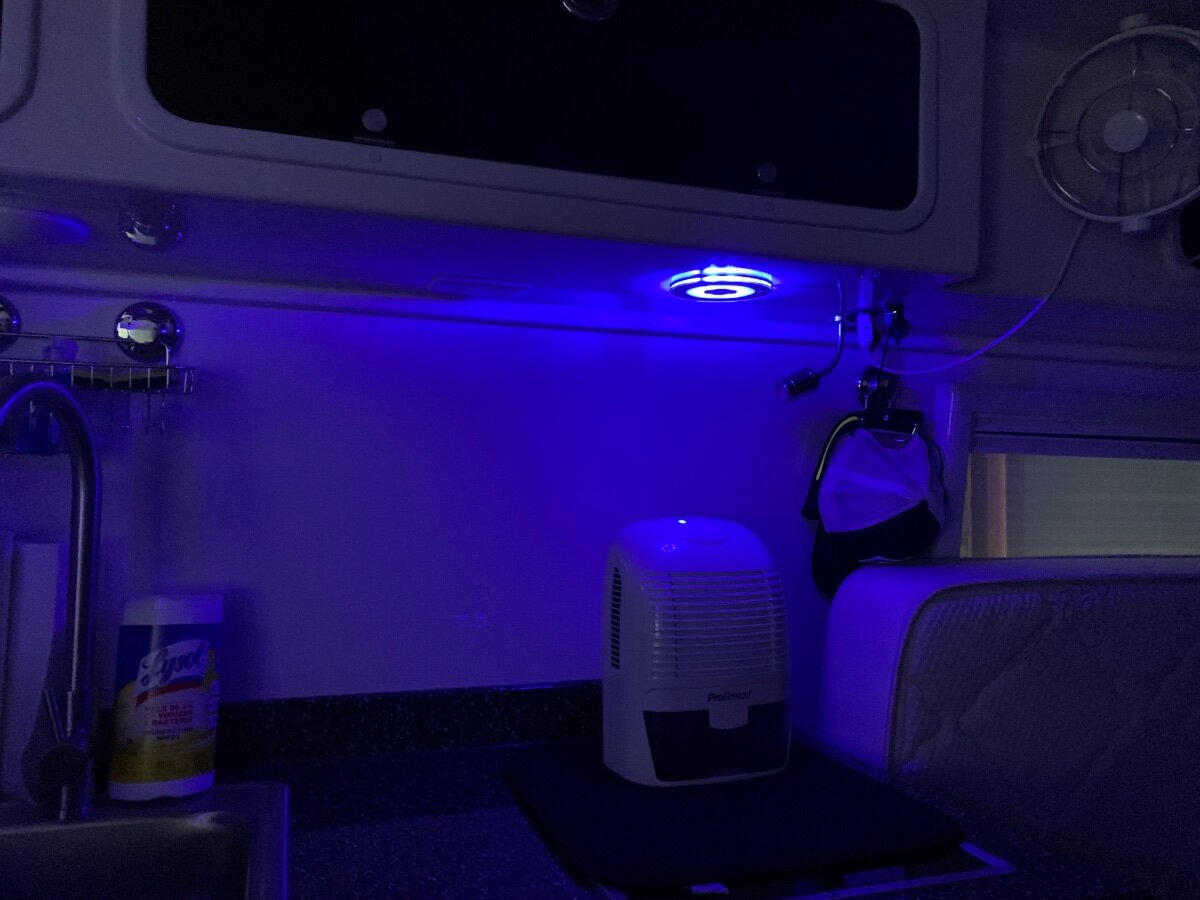
So the wifey thought the light installed over the dinette was too dim, even though its brightest setting was 400 lumens. To maintain harmony, it was upgraded to the larger in this line of fixtures, 720 lumens. I hate it when she’s right! I can easily dim this light to my liking when dining and have an abundance of light when need be. I have since installed the larger size over each twin bed and two of the smaller in the ceiling; of which two of the four stock lights started failing over a year ago. Today I plan to replace the remaining ceiling and sink fixtures using the smaller to complete this project. Let there be light! As before, the Ceiling switch controls the four lights in unison to their last settings; and the Master switch does the same for all of the lights. I remain undecided if the wet bath under cabinet light will be upgraded in like manner.
2 points
-
Steve, Thank you for sharing your experience and glad to hear about your final solution/fix. This info may really help anyone with a similar issue. Safe travels on your trip! -David2 points
-
We own same year hull 505. Started towing with 1/2 ton then upgraded. We share a ton of info on our blog here that may be useful as an owner of the same year. https://4-ever-hitched.com/ Craig & Rose hull 505 - Galway Girl2 points
-
@Teaney Hull 292 Gary, When all else fails….😄
2 points
-
You would be better off buying two 25’ hoses, most CG spigots are near the campsite. You can then connect the two if a longer length is needed. When storing my “drinking” hoses, I connect to ends to ensure cleanliness next use.2 points
-
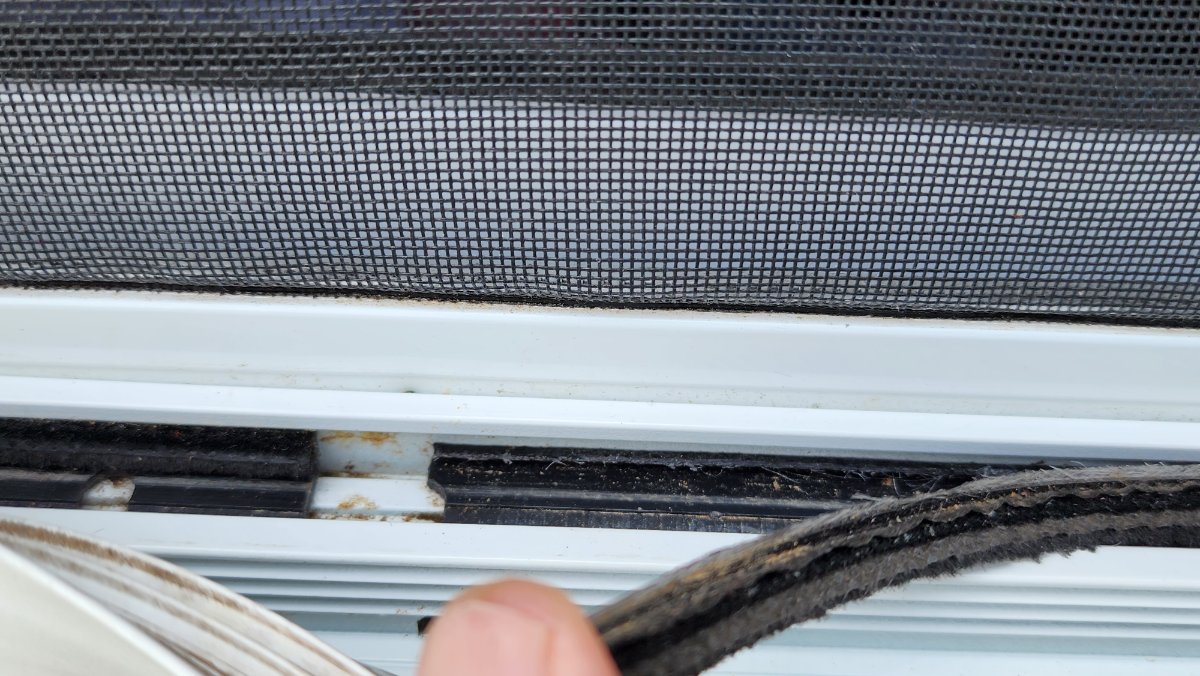
This is neither Mechanical nor Technical, but more maintenance. Not sure what other channel to place this. Hope it helps our new-comers. Someone on the Oliver Owners Facebook page saw my first video and asked me if I could video record actually how to clean the tracks under the windows. So, it was a beautiful day and I figured I'd see if I can clean and record at the same time. This is kind of new to me. https://youtu.be/-oEpon3iaPc1 point
-
I took your advice and bought 2 25 footers. Thanks Gary1 point
-
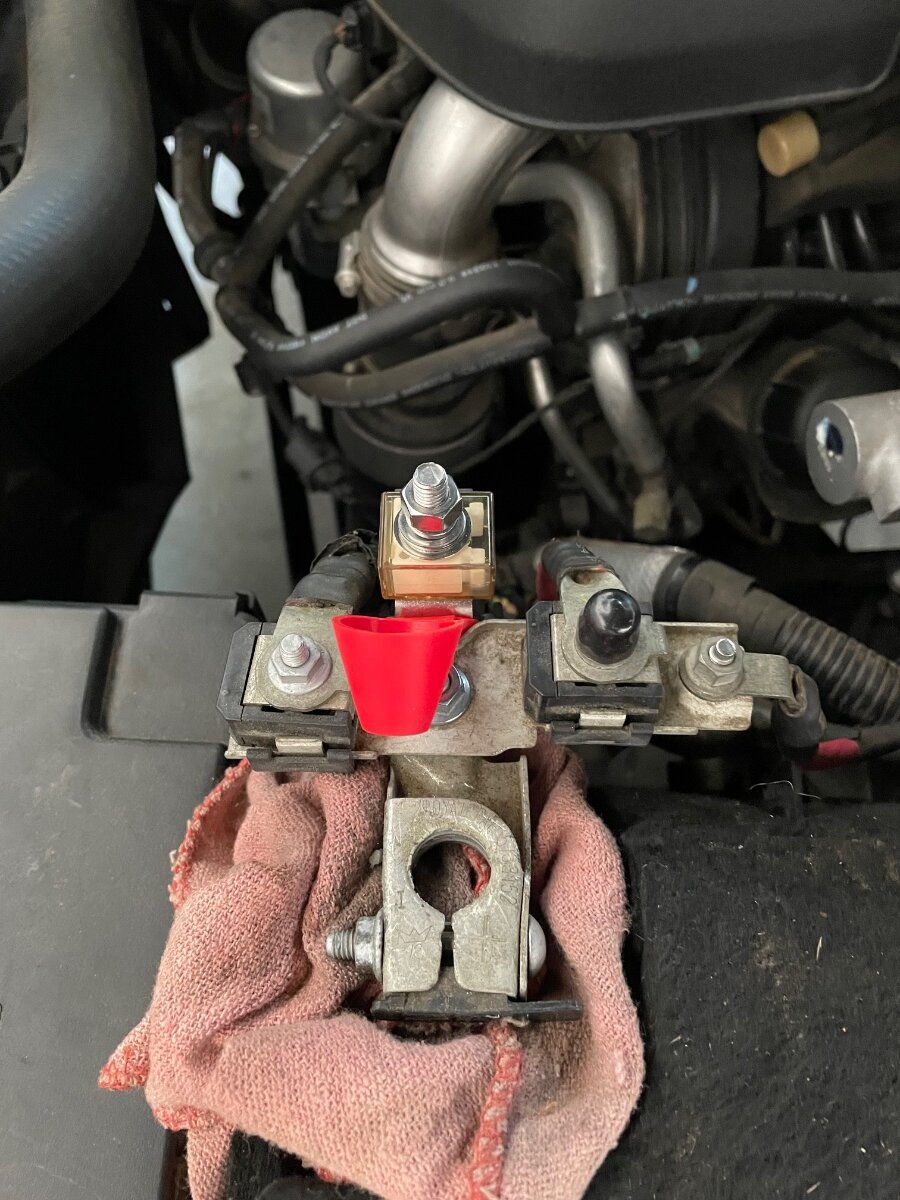
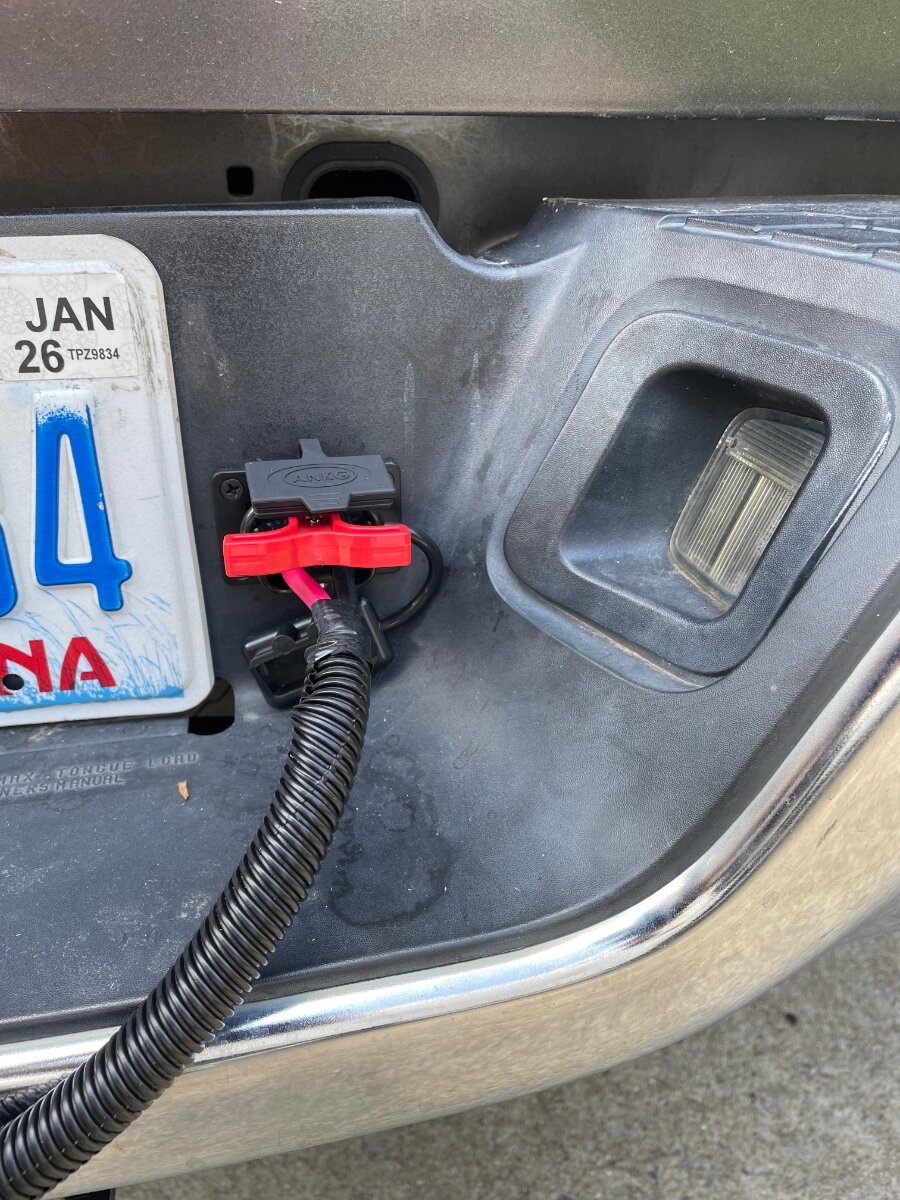
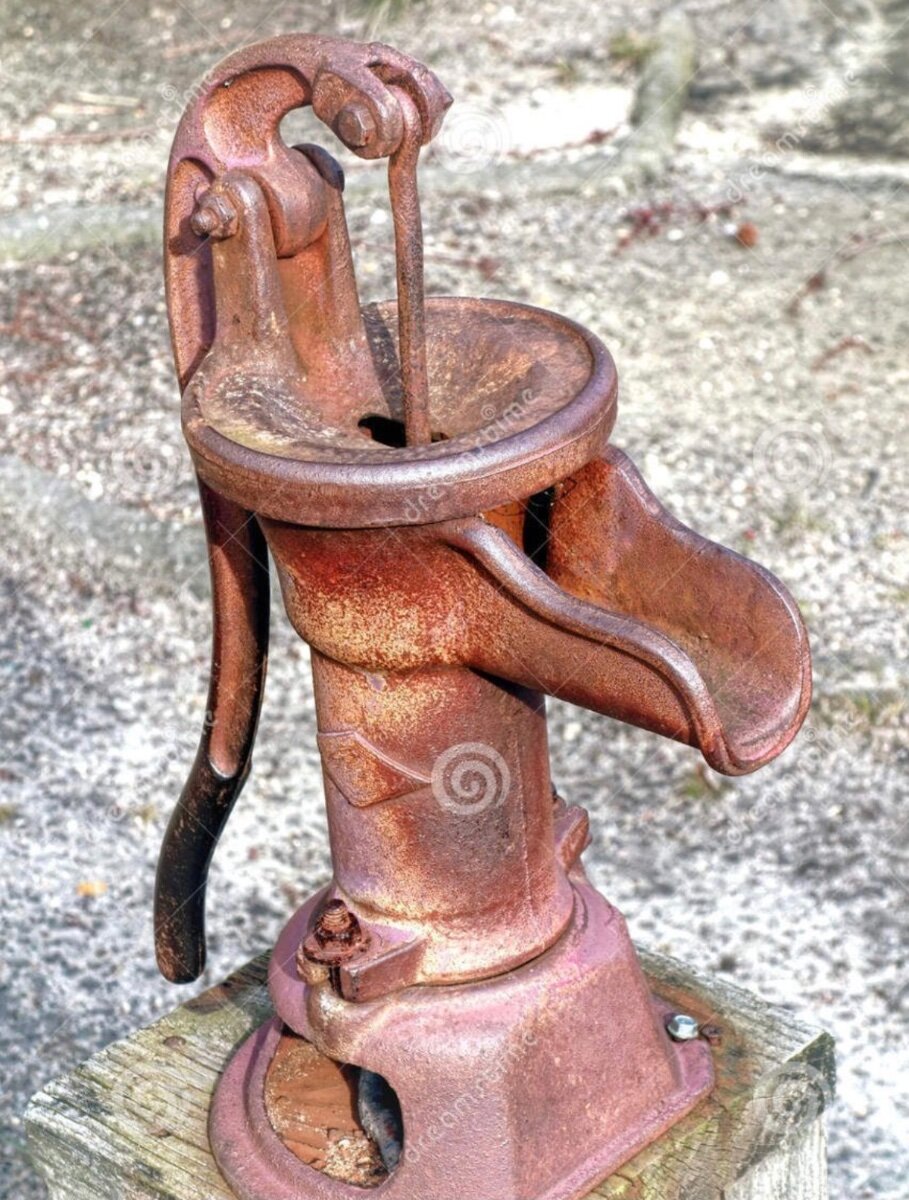
Unless you can engineer and build your water system with large-bore plumbing end-to-end, the 1/2” ID hose isn’t going to affect your water flow much - if at all. The typical “hose Bibb” all of us hook up to a campgrounds are usually of the style shown in the attached picture - with an internal restriction of about 1/3” - so using a half inch diameter hose isn’t gonna slow down you water flow. If you look at your household plumbing, you almost certainly have 1/4” supply lines to your sinks and toilets. It doesn’t matter if your PEX, PVC, Copper, or galvanized iron piping is 3/8”, 1/2”, or even 3/4” - it all goes through those 1/4” supply lines before it hits the faucet. Most aerators and shower heads have far smaller offices - like 1/8”. Back when we had the farm, I replaced all the hose bibs with 3/4” ball valves and GHT adapters. I wanted my irrigation systems to have maximum flow. For that matter, I also liked to be able to fill a 5 gallon bucket (which small farms are built around) in under a minute. In that case, a 1/2” hose would be the choke point. With RVs, we don’t wanna have a lot of flow. Our holding tanks are the limiting factor. Unless you’ve reworked your water system, I’m pretty sure the piping in the Oliver is all 1/2” PEX. So there’s your restriction. I suppose inquiring minds who just gotta know for themselves, try an experiment by timing how long it takes to fill a bucket with a 1/2” vs a 3/4” hose. Unless you’re attached to a spigot with a ball valve (and no choke points upstream) I’ll bet your fill times will be virtually the same regardless of your hose. The case FOR the 1/2” hose is that 50 feet of 1/2 hose is smaller and lighter than 50 feet of 3/4” hose. In the world of having to tote stuff with you - that’s a bigger deal than flow rate.
1 point
-
Any explanation of where the wax came from?1 point
-
Thanks for the input. Your post got me thinking and today I’m going to check behind the wall in the basement and see if I can see any kinks. Btw are you going on the Tremor forum truck plant tour in August? It would be great to meet you.1 point
-
Nice1 point
-
Welcome, Gene, you've come to the right place! Most problems you will encounter with your Oliver have been discussed throughout the years and you won't find a more friendly or helpful group than this forum. Newer trailers incorporate new problems to solve but this is one heck of a synergistic group to work with. Best of luck and hope to see you "out there" one day :) John1 point
-
No crowds!1 point
-
Welcome to the forum! Ask away with any questions we can help with. I initially began towing with a Platinum 5.7 Tundra 4x4 crew cab. A really solid and reliable truck. Soon after we sold the Tundra and purchased a 1 ton Super Duty due to it having a much higher cargo capacity. I think our Tundra had like 1460 lbs of cargo capacity which was not going to work for us. We are very happy with our present TV! Enjoy your Oliver! Patriot 🇺🇸1 point
-
1 point
-
@Patriot It looks like you had all of the latest technologies growing up! 😉 Mossey
1 point
-
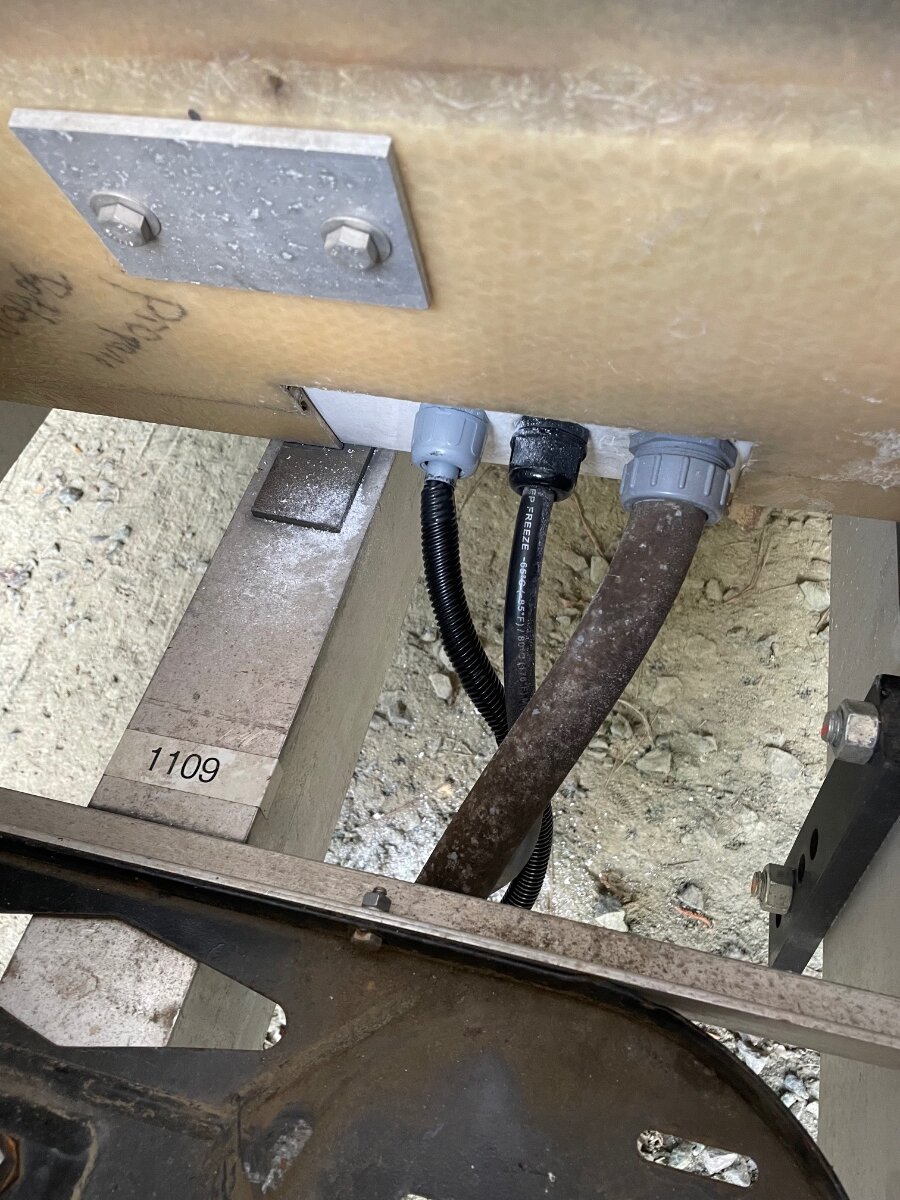
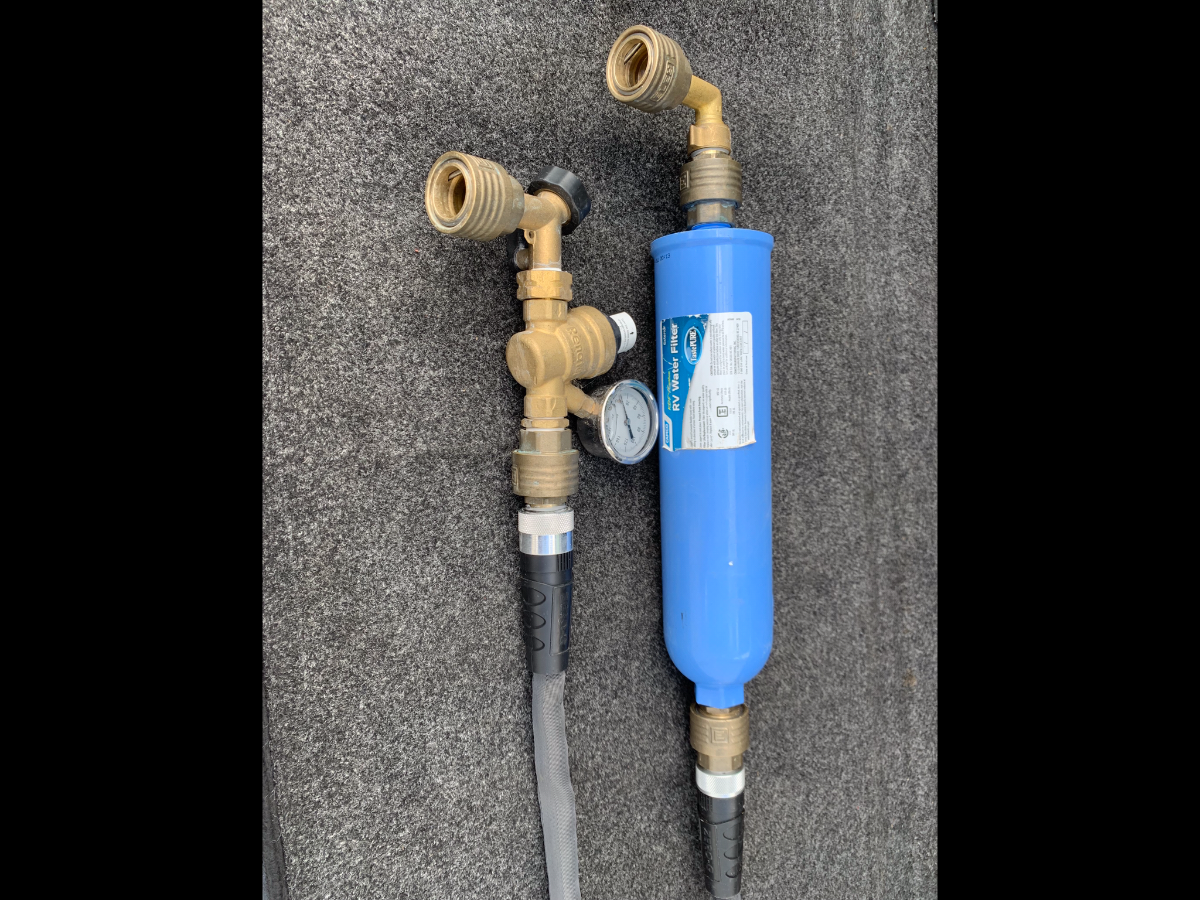
Since the 1/2” hose is only used for washing/cleaning, it is fitted with an adjustable spray nozzle which provides adequate stream volume for its purpose. To ensure max pressure, I have a ‘Y’ fitting at the spigot, thereby enabling full CG water pressure for this setup and use of a typical water pressure regulator valve for the Oliver’s water supply. You are correct however, in recommending the larger diameter hoses where max volume is of more benefit to the need. That said, it is important to use larger diameter fittings to prevent flow restrictions; ELEY commercial duty hose QC sets are 3/4” full-flow and designed for standard 3/4” GHT hoses, faucets and watering tools. Here’s a pic of my spigot and Oliver connections.
1 point
-
Ditto...1 point
-
Mine almost never go down the tubes. One side occasionally, the other not at all. I’ve run string trimmer line up from the bottom, but that doesn’t seem to do anything. I haven’t popped the cover, yet1 point
-
Just beware that the 20% discount applies for on line orders only. I was informed by an HD associate that if you are in the actual store and naturally want the 20% discount, order and pay for it on your phone. Then go to customer service with the product in hand, then show your on line receipt and you’re good to go. I learned this lesson today. 🤷♂️1 point
-
We are also big fans of the Gorilla Hose. We carry a short rigid hose for drawing water from an external container https://a.co/d/3D14tZS1 point
-
Here is a link to the Gorilla hose - https://www.homedepot.com/p/Gorilla-1-2-in-x-25-ft-Marine-and-RV-Hose-GMAR0025/3259903051 point
-
@jd1923, you're not likely to ever get full rated power from solar panels. The ratings are determined under standard testing conditions, carefully controlled, to have some sort of industry benchmark. Any honest panel reseller will tell you you are likely lucky to get 60 to 75 per cent of that rating, in real world conditions, even less if you park in the shade, or place portable panels where they may get shade. Why? Temperature affects production. The hotter the temperature, the less power produced. Pollution/smog. Clouds. Dirt on the panels themselves. Even partial shading of a few cells of a panel may severely reduce its output. When we built our house, we "oversized" the system a bit, with the help of our honest installer/privider. So in ten years, we've not had a power bill, other than the base grid connection fees. Those additional panels are long ago paid for. And my fuel cost for the ev is zero, when I charge at home. We don't have enough rooftop on an Elite to oversize a system, so some of us need and want portable systems when we are camped for a period of time, for the additional charging capability without having to set up a generator. Everyone has a different camping style and different needs. Glad the dc to dc charger is working well for your camping style.1 point
-
We've been using the Zero-G hoses for several years now. No issues to date. They are approved for drinking water and store easily. Also, since I am lazy and have a bad back, we use the stainless quick connect fittings on the trailer and all our hoses. Fast and easy! (The more expensive stainless fittings are much better than the brass ones - which tend to leak a bit.) Hope this helps!1 point
-
In the 4' wide x 6' long truckbed, with the tailgate down. Properly strapped and secured, I'd hope. Interestingly enough, many of the cybertrucks I see are driven by contractors or trades. Maybe for the battery power, or the attention. Idk. I see 2 or 3 cybertrucks every day, and as many rivians. The rivian is definitely more "trucklike."1 point
-
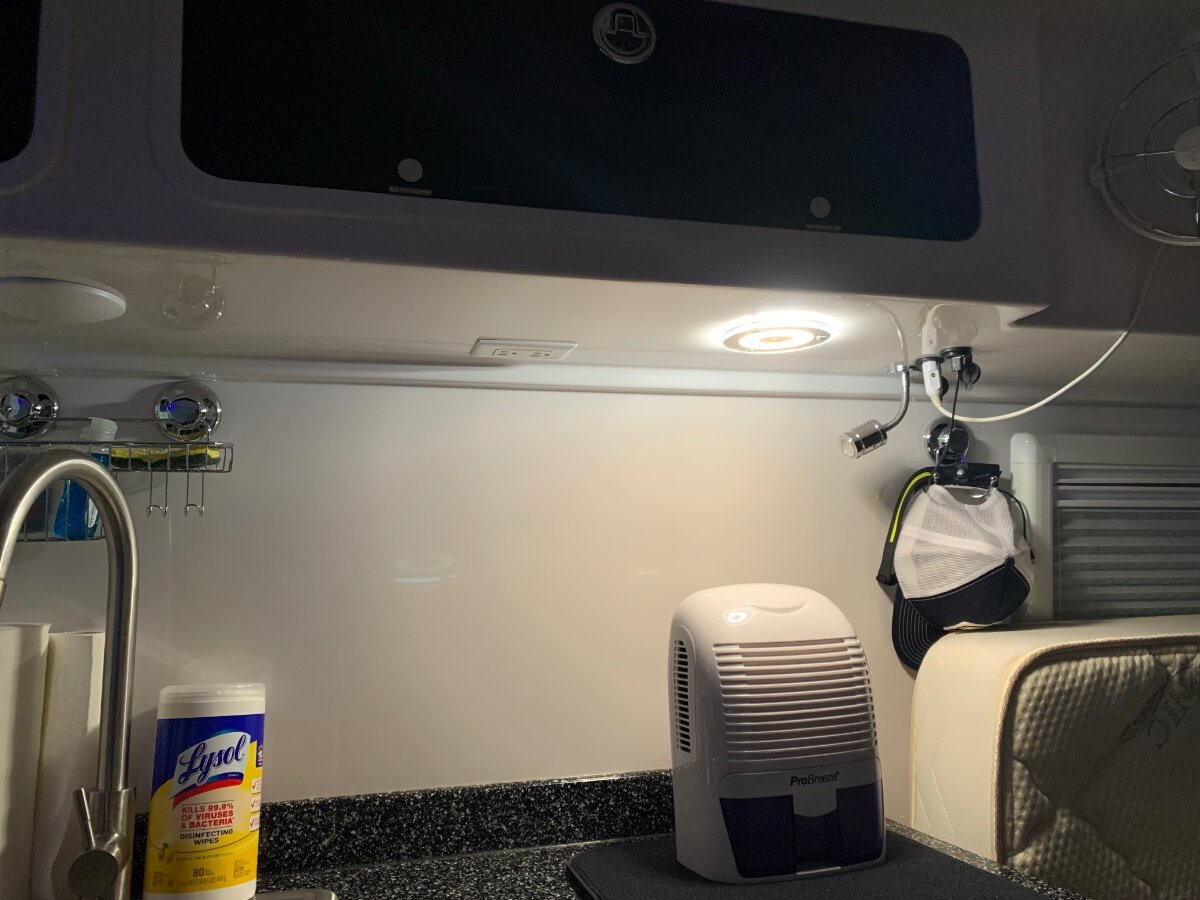
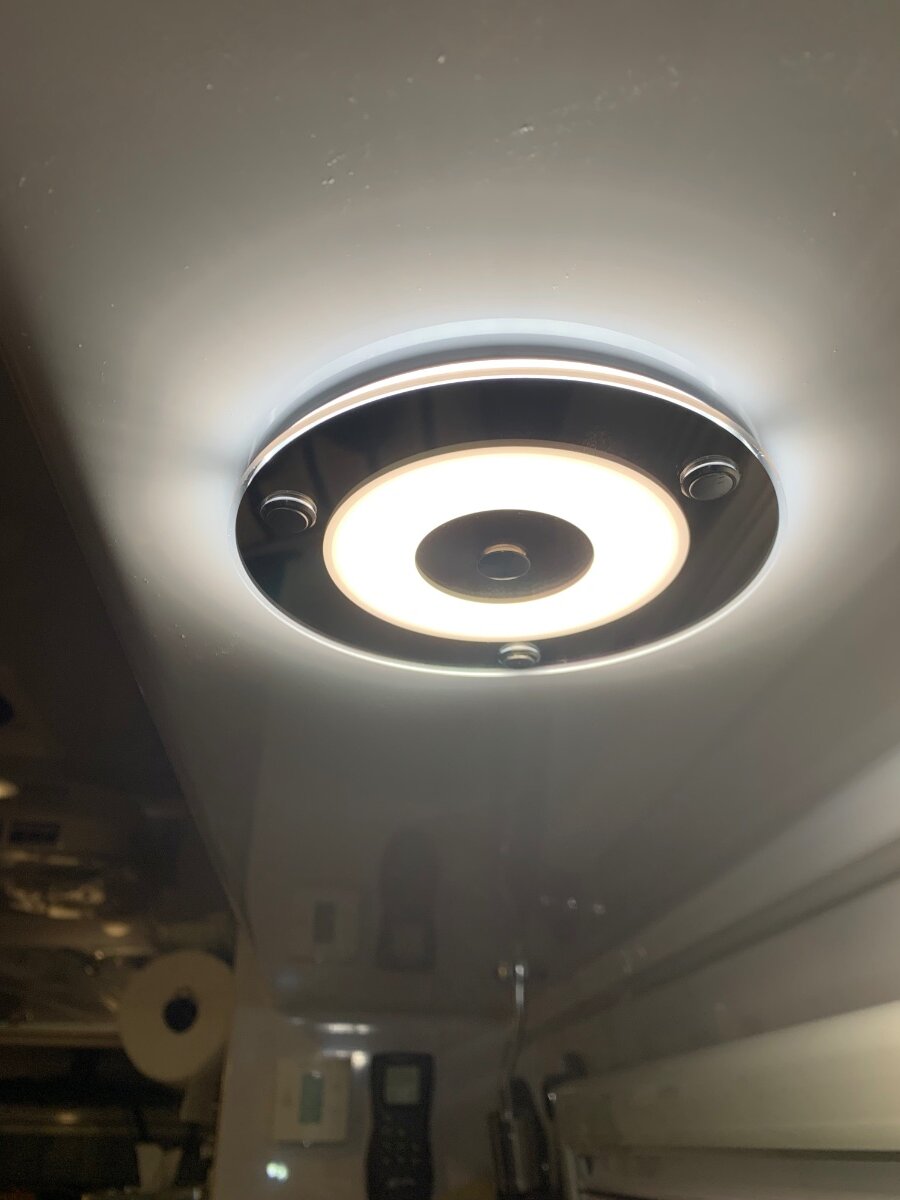
There is a touch sensitive control button in the center; touch to change colors, long touch to increase/decrease lighting. Can also be turned on/off by Master light switch to last setting(s). Simple install; a little larger diameter, but mounting holes were same. First install was above dinette, this second above the cooktop. I plan to install additional lights above each bed, over sink and maybe in wet bath under cabinet.
1 point
-
Those look great! How was the installation and do they have a mechanical on/off switch or are they touch activated?1 point
-
All this talk about touch lights and replacements made me reconsider making do with the stock fixtures. Currently installing two early arrivals and with one done, very pleased! I’ve always considered the lights to be too bright, especially over the dinette; sensitive eyes. Thinking that problem may be solved with these ones, dimmable cool white with a blue night light/ambiance feature. What think you?
1 point
-
Spent a lot of time at this refuge while collecting field data on the Northern Leopard Frog for a National contaminants study with the USFWS. Now that I’m retired from the Service, a return to camp there is on my bucket list!1 point
-
One more moab pic. Kane Creek Road. Last full moon.
1 point
-
I'm really glad that #49 found a great owner. "Buck" is in good hands.1 point
-
Unfortunately we are finding quite a few issues the previous owner lived with. No worries, "BUCK" will be good as new and ready for more adventures!1 point
-
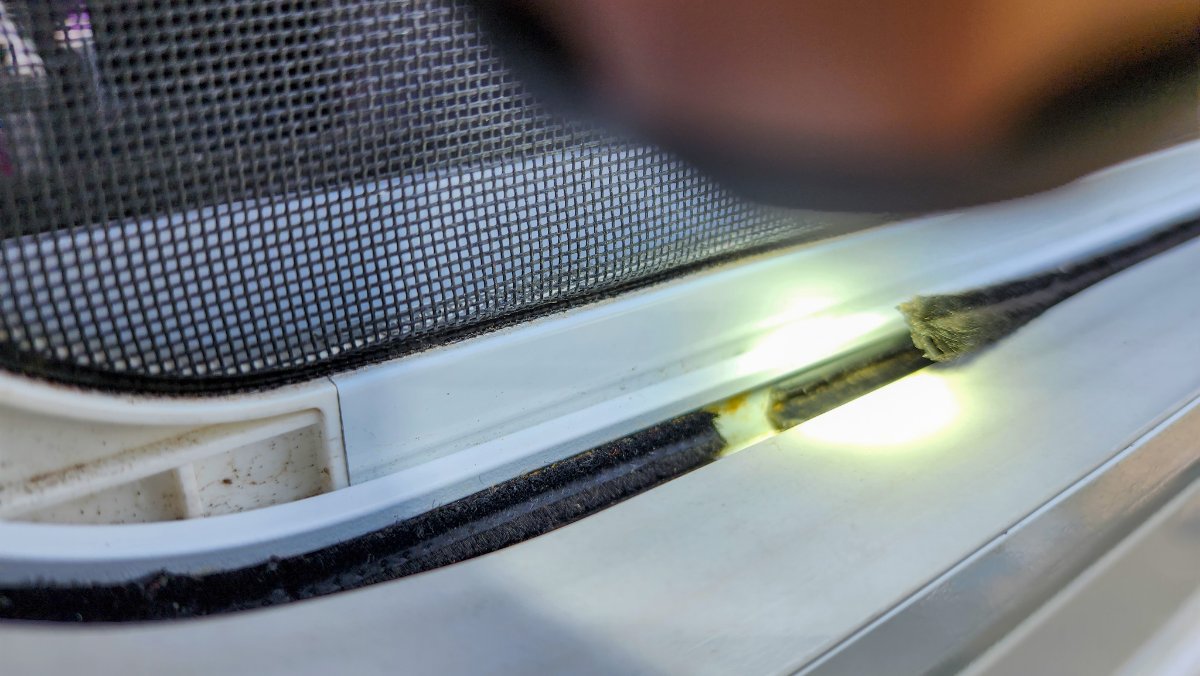
Just an FYI. We purchased hull #49 about a year ago and have constant issues with water in our dinette window. I did everything possible that the forum suggested to no avail. After more investigation I took a little pick and ran on the inside of the window tracks and the pick kept grabbing on something. Turns out the drains were stamped but not completely out. After some luck I was able to get all 4 drains clear. Not sure if this was an issue with earlier models or if we just got lucky! 😂 We have not had an issue since, knock on wood. Oops that's fiberglass.
1 point
-
Once the front frame was jacked up and placed on an automotive jack stand, I removed the leveling blocks to lower the jack to the bottom for cleaning. This is what is pictured. BTW, the jack pictured is close, but NOT even touching the ground! Now that the work is done, and always when the Oliver is parked, the jack is sitting on 6 or more leveling blocks, so that the jack does not overextend. Barker, the manufacturer of the VIP3000 power jack, has owner's instructions that includes maintenance instructions. Greasing the powerhead is described, with no mention of grease required on the post.1 point
-
My last addition is to follow. How can you get these parts so clean in just minutes? Fall of 2016, I had to pull the engine on my Goldwing, just to replace the stator. Poor design, but the bike stopped charging, and the repair meant pulling the engine - wow! After a long day pulling parts, I was thinking about how I would clean and recondition all of them. What a job it would be! As I was washing my hands with GoJo, it dawned on me. If GoJo could remove the grease, so easily from my black greasy hands, why wouldn't it do the same to my engine parts? Many spray Brakleen, use other degreasers and they are harsh, polluting and never do a complete job. So, I gave my idea a try on my Goldwing engine - the results were amazing! Rub on the GoJo (NOT the pumice kind), push it around, be patient until it breaks down All the grime. Then simply hose it off with a fine mist spray. That's it, and it works amazingly! It took me 10 minutes to setup and literally 5 minutes to clean the jack post as shown in the pics above. I strongly suggest you give this a try on any part, metal, plastic or whatever, that needs deep cleaning. Following are a few pics... First my restored 1984 Goldwing Standard (every part, from engine to driveshaft, wheels, brake calipers, etc. were cleaned with GoJo). Then the engine, just after cleaning with GoJo (the top was loaded with oil, grease, dried gasoline and antifreeze, and dirt). Use compressed air to blow dry after hosing. Next are the battery trays I just removed from my TV (see left vs. right tray, they were both just as dirty). Lastly is everything you need to do the job! GoJo or the Walmart brand ($2.47 plus tax), brushes and do save all your used toothbrushes for the tight spots. It really works well, just an idea I had, and I've never heard another mechanic or restoration specialist speak of it (most mechanics only clean surfaces that are required, and slap everything back together as dirty as it was). I wish I had come up with this idea 30+ years earlier in all my auto restoration work. It would have saved me hundreds of hours of time, delivering better results! Please let me know what you think, after trying it.
1 point
-
Thanks John, for your input. When this subject came up earlier in this thread, there were mixed feelings. I believe that if you are jacking up you trailer and the jack is bowing to the point that the center post is rubbing against the housing, you should stop and correct your leveling blocks. Where we camp, there is so much dust and dirt of all kinds and colors, a few miles down the road the grease collects dirt which is more abrasive than metal on metal. I'm going to go with mine dry for now, keeping your advice in mind and now that the metal is clean, I will quickly be able to see if the post gets marred.1 point
-
Monsoon rains came early today in the Arizona high country! Dropped the temp 25 degrees in minutes and I was able to get a lot done on Oliver and our TV! We're definitely going with a dry jack post. There is absolutely NO need to grease this post, and don't waste $10+ on WD-40 or any other Teflon spray! You only grease fittings with clearances like +/- .030" or less, and there is a good 1/8" difference between the post OD and the housing ID! Just clean her gently and you're done. Regarding the before and after pic above, the before was actually way dirtier (see the back side in the pic to follow) and the after was really way cleaner!
1 point
-
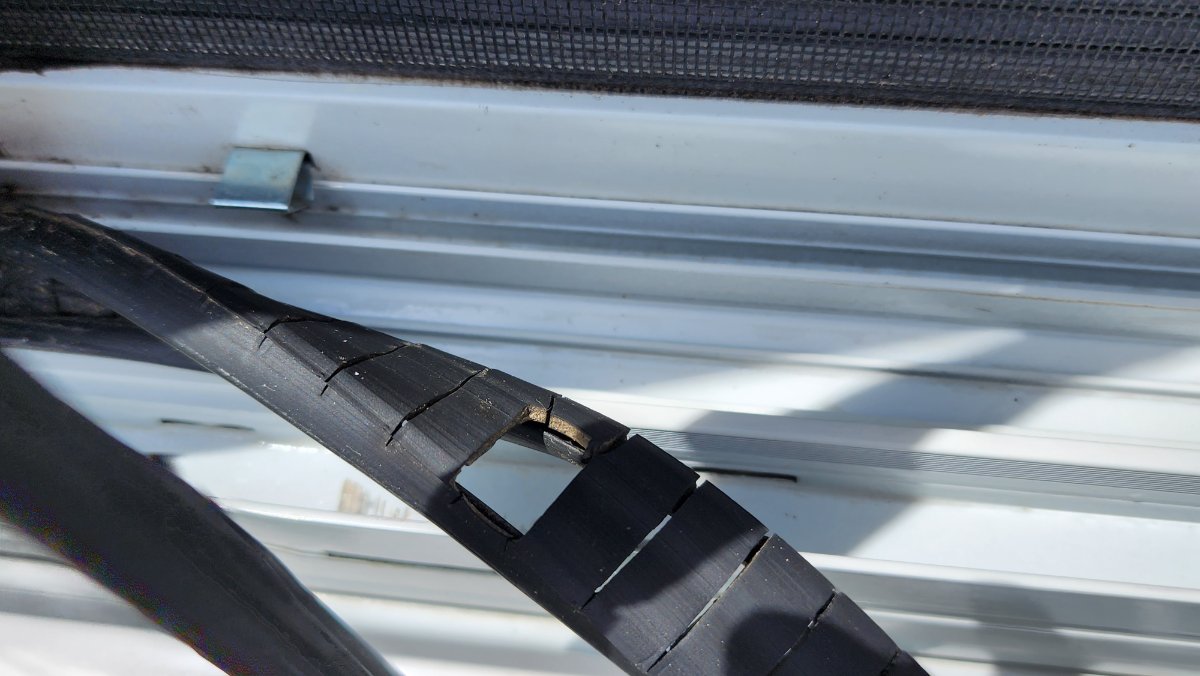
My rear window is as described by Chris and was pretty straight forward as he shows in the video. My side windows are not. The slotted rubber piece on each side have a felt rubbing strip on either side of the channel and prevent the rubber piece from being extracted, unless you use quite a bit of force. The felt strips are an H shape and fit over the edge of the rubber strip. I'm not sure if the pictures are of any help. I quit as RoadKingsofGa did and am unable to fit the H shape of the felt strip back over it edges. So I quit at that point and finished cleaning as best I could. I don't think it matters much if I don't get the felt strip back perfectly as the window still slides smoothly and none of the weep holes are blocked. I'll search out the window experts at the rally. BTW, there are 2 of those felt strips, 1either side of the rubber strip. I did not attempt removal of the outboard strip. John
1 point
-
I cleaned our window tracks today. Only the back window had a flexible rubber guide like in the video. The side windows were a harder rubber that I chose not to pull up.1 point
-
I thought that THIS was a secret. Just wait around for THAT knock on the door at zero dark thirty! It will normally be General ScubaRX doing the inspection - don't even think about giving him the ol' "side eye". And, yes, it is white glove! 😜1 point
-
I will be at the rally, yes! I'm looking forward to it. I was on the fence about it (maybe nervous), but then I took the Oliver out two weekends ago and had a great time, even with a 3.7% slope to park on. Ah, bring on the adventures. I'm trying to ensure my Ollie is not too embarrassing. I'm afraid there's a secret "barracks inspection" for all new-comers to the rally. So I'm basically doing a "GI party" on it (Army slang for deep clean). There are a few things I still need to do, like, as mentioned in the video, order new blinds, but also remove the walk-in door to reseal it, and replace an electrical plug by the bed. But other than that, everything was working out great while camping. * I just realized I failed to test the A/C while at the camp ground. Well, I know the heater works at least. LOL I better inspect the A/C unit for bird nests, even though I have magnets holding up a screen blocking the large openings.1 point
-
@Sak These pictures are so helpful! Thank you for the tips and photos.👍🏼1 point
-
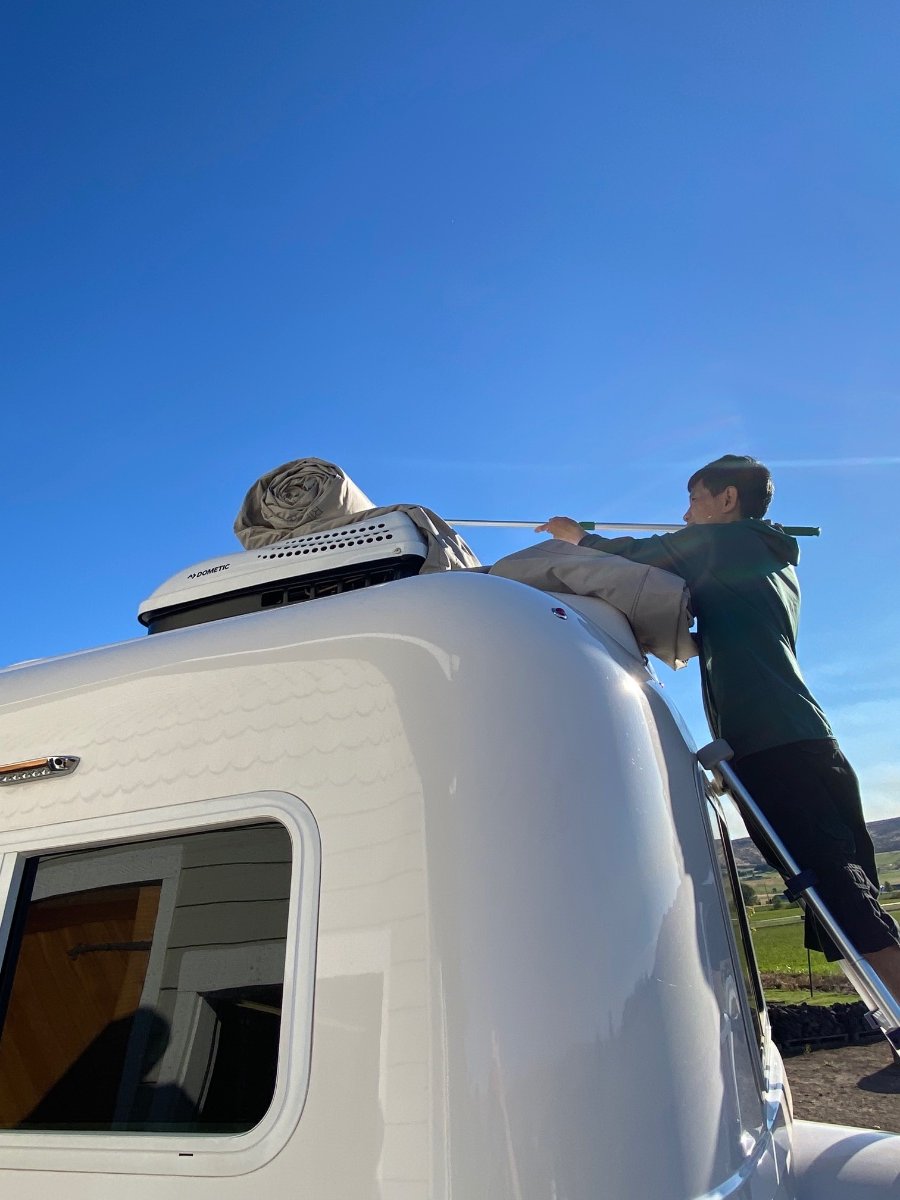
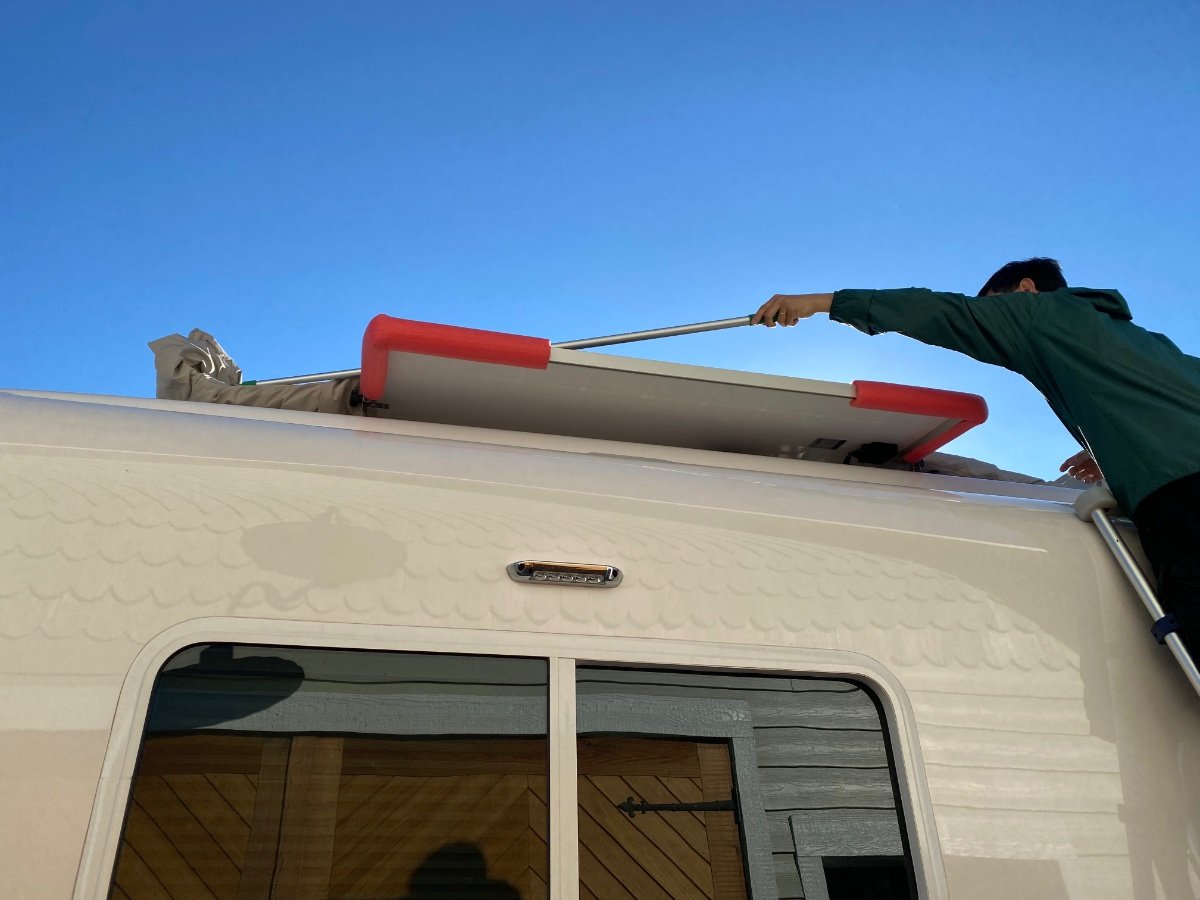
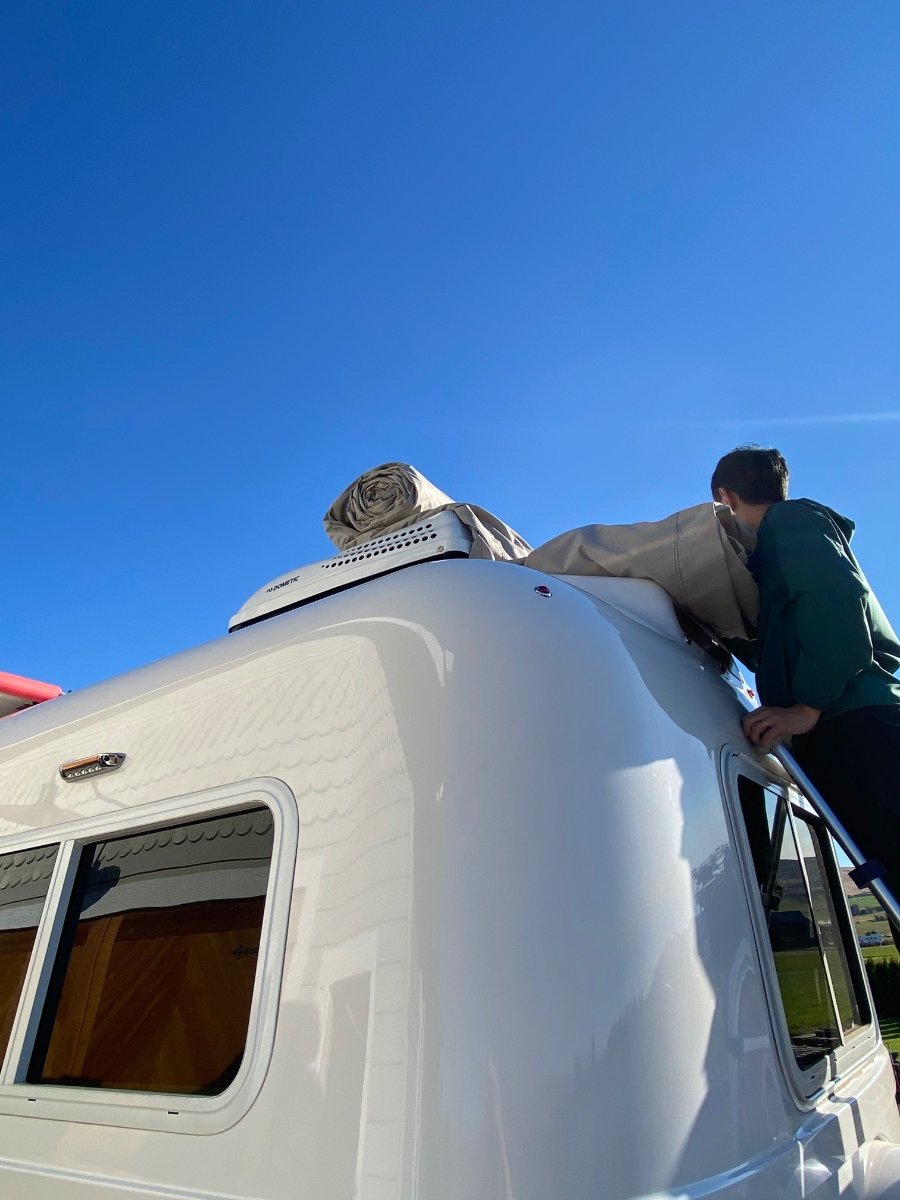
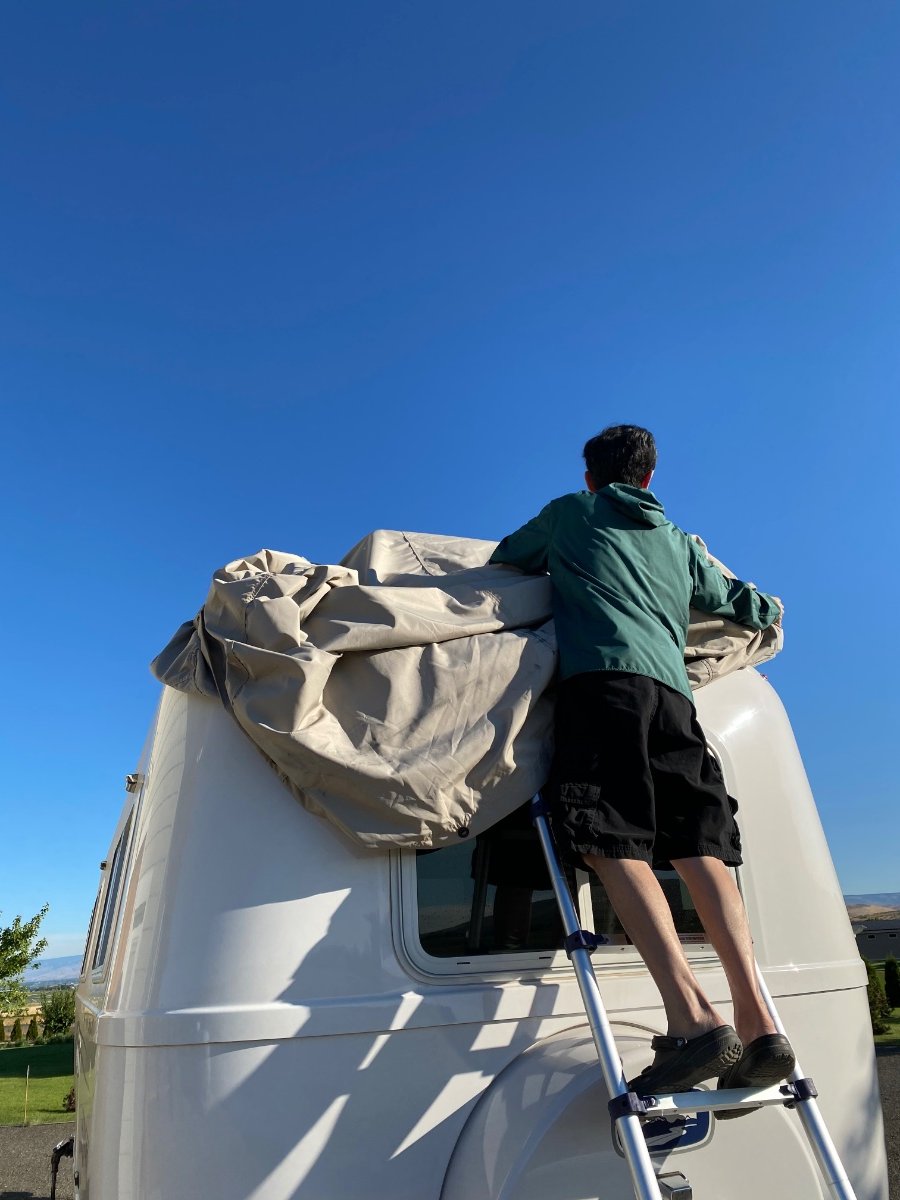
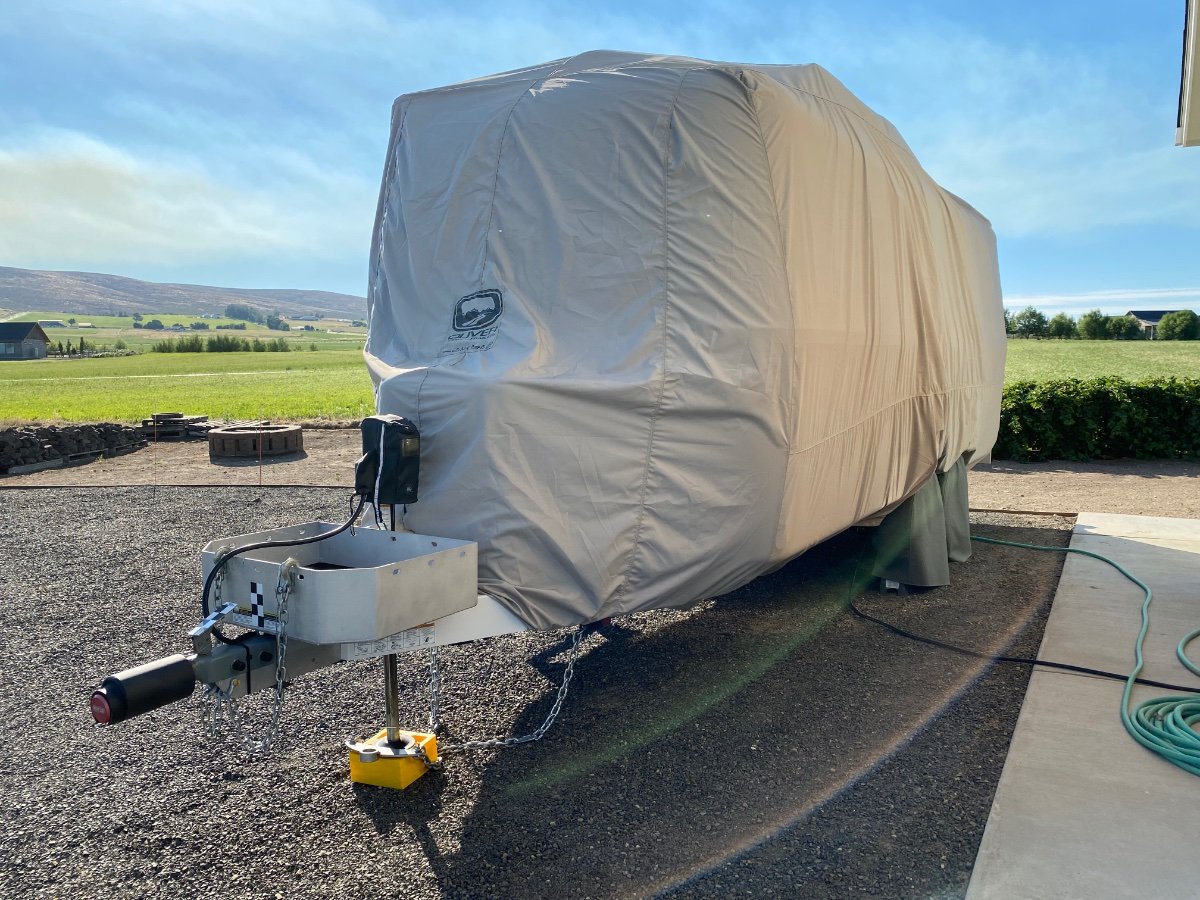
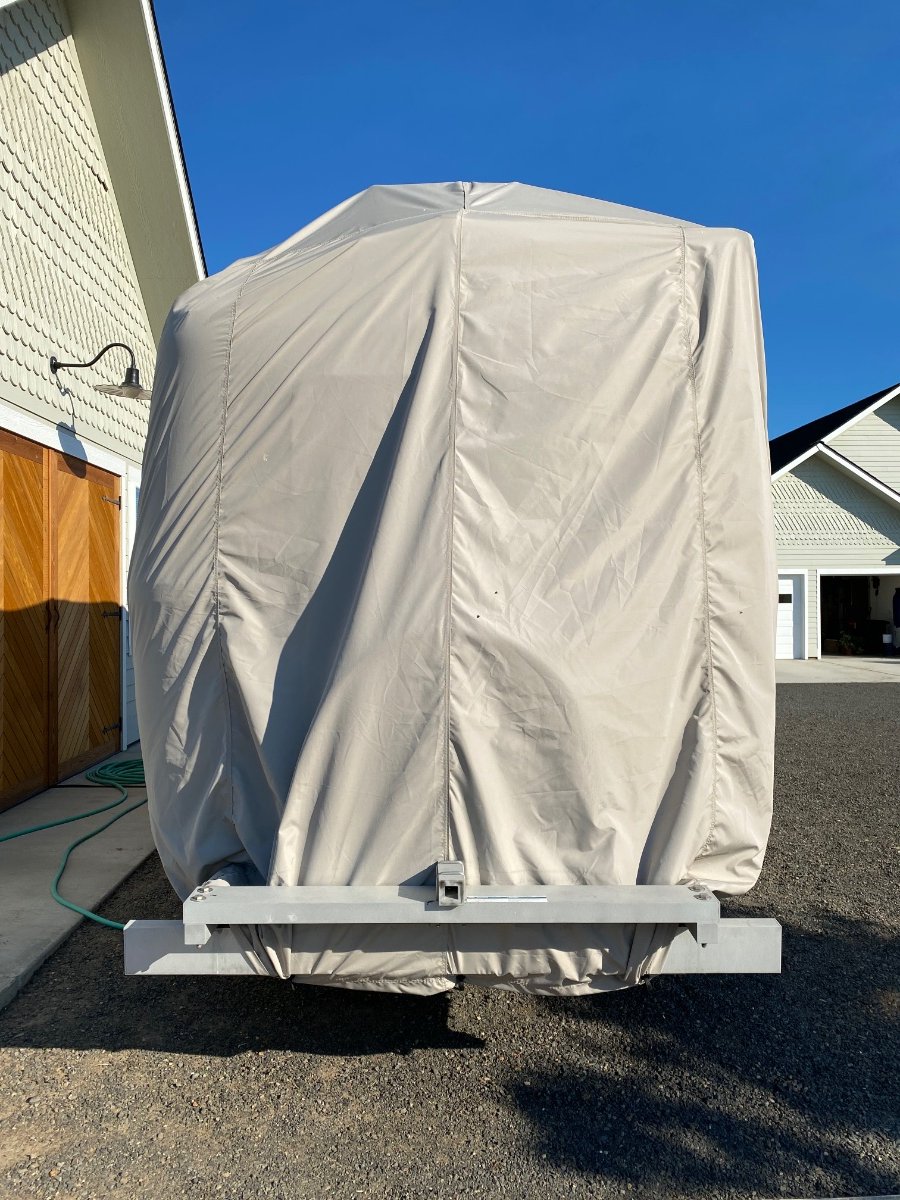
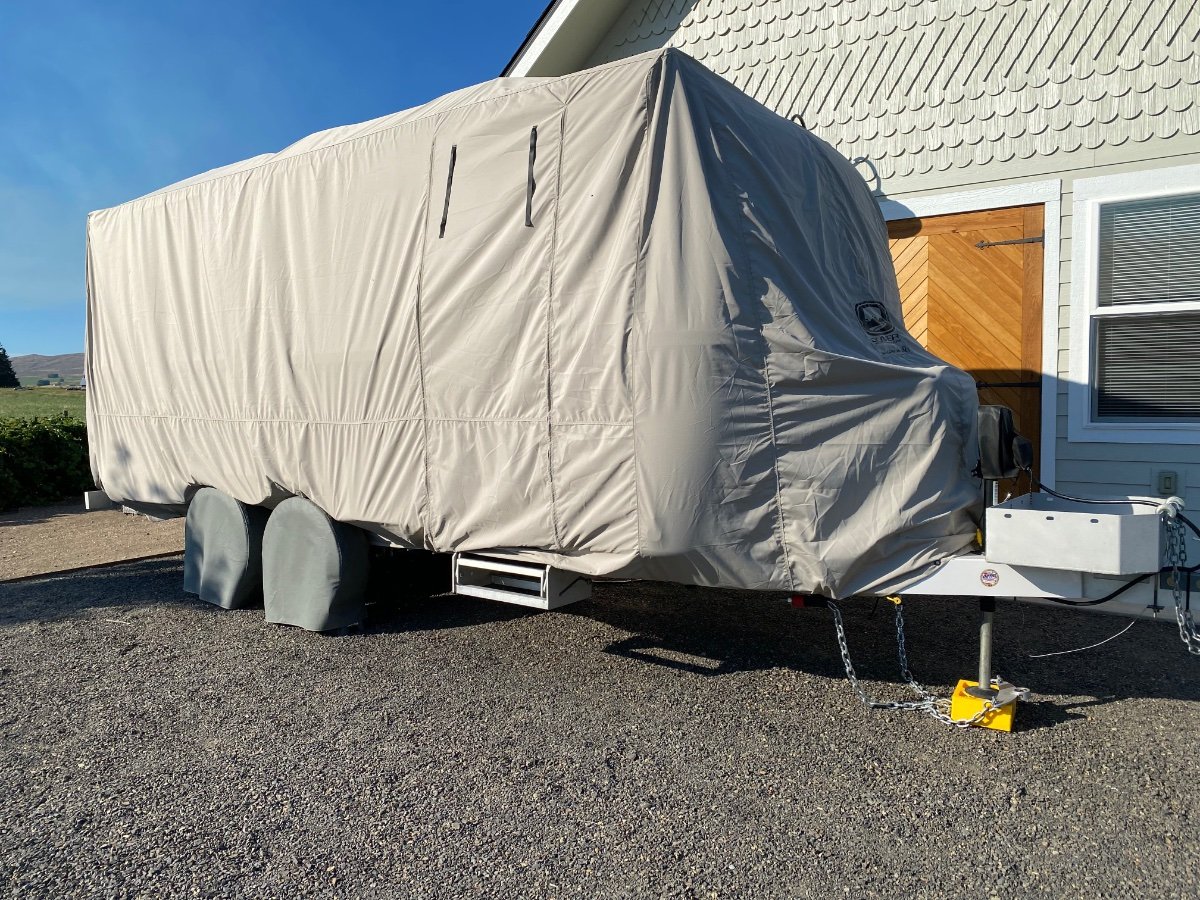
I'm using Calmark cover. It's very easy for me to put the cover on by myself. I usually start from the back to front. The key is to fold the cover into a very small roll so I can unroll easily from the back and spread to the sides. Here, starting from the back using a ladder, climb one hand and the roll of cover on the shoulder. Put the cover behind the AC, unroll it over to the front of the AC using a pole. I also use pool noodle to cover sharp edges of the solar panels. Once the cover is unrolled entirely, spread it on both sides starting from the back. Now the final product after using bungee cords to tie it snug. I don't used the ropes from Calmark. They only provide 4 ropes. I use 12-15 bungee cords and find that much easier to work with. I also don't cover the rear bumper. I can do this alone within 30 minutes if I really want to but I usually take my time and take special care around a ladder and end up being 45-60 minutes. Taking the cover down is much easier and much quicker. You just climb a ladder on one side and lift the cover to the roof then carefully pull on the opposite side. The key here is the roll the cover into a really small roll. I'd recommend taking pictures how it was rolled when you get the cover from Oliver. Hope this helps.
1 point


.JPG.5ef5fc4af553ff25473a5c7e608c6fdc.JPG)
.JPG.33bcee2382c19d4a9a76d175c728f789.JPG)

.JPG.d97a9084f204a60505c7e2b8985c1ac3.JPG)


-
Recent Achievements
-


")


")


")

")