Leaderboard


Popular Content
Showing content with the highest reputation on 08/31/2018 in all areas
-
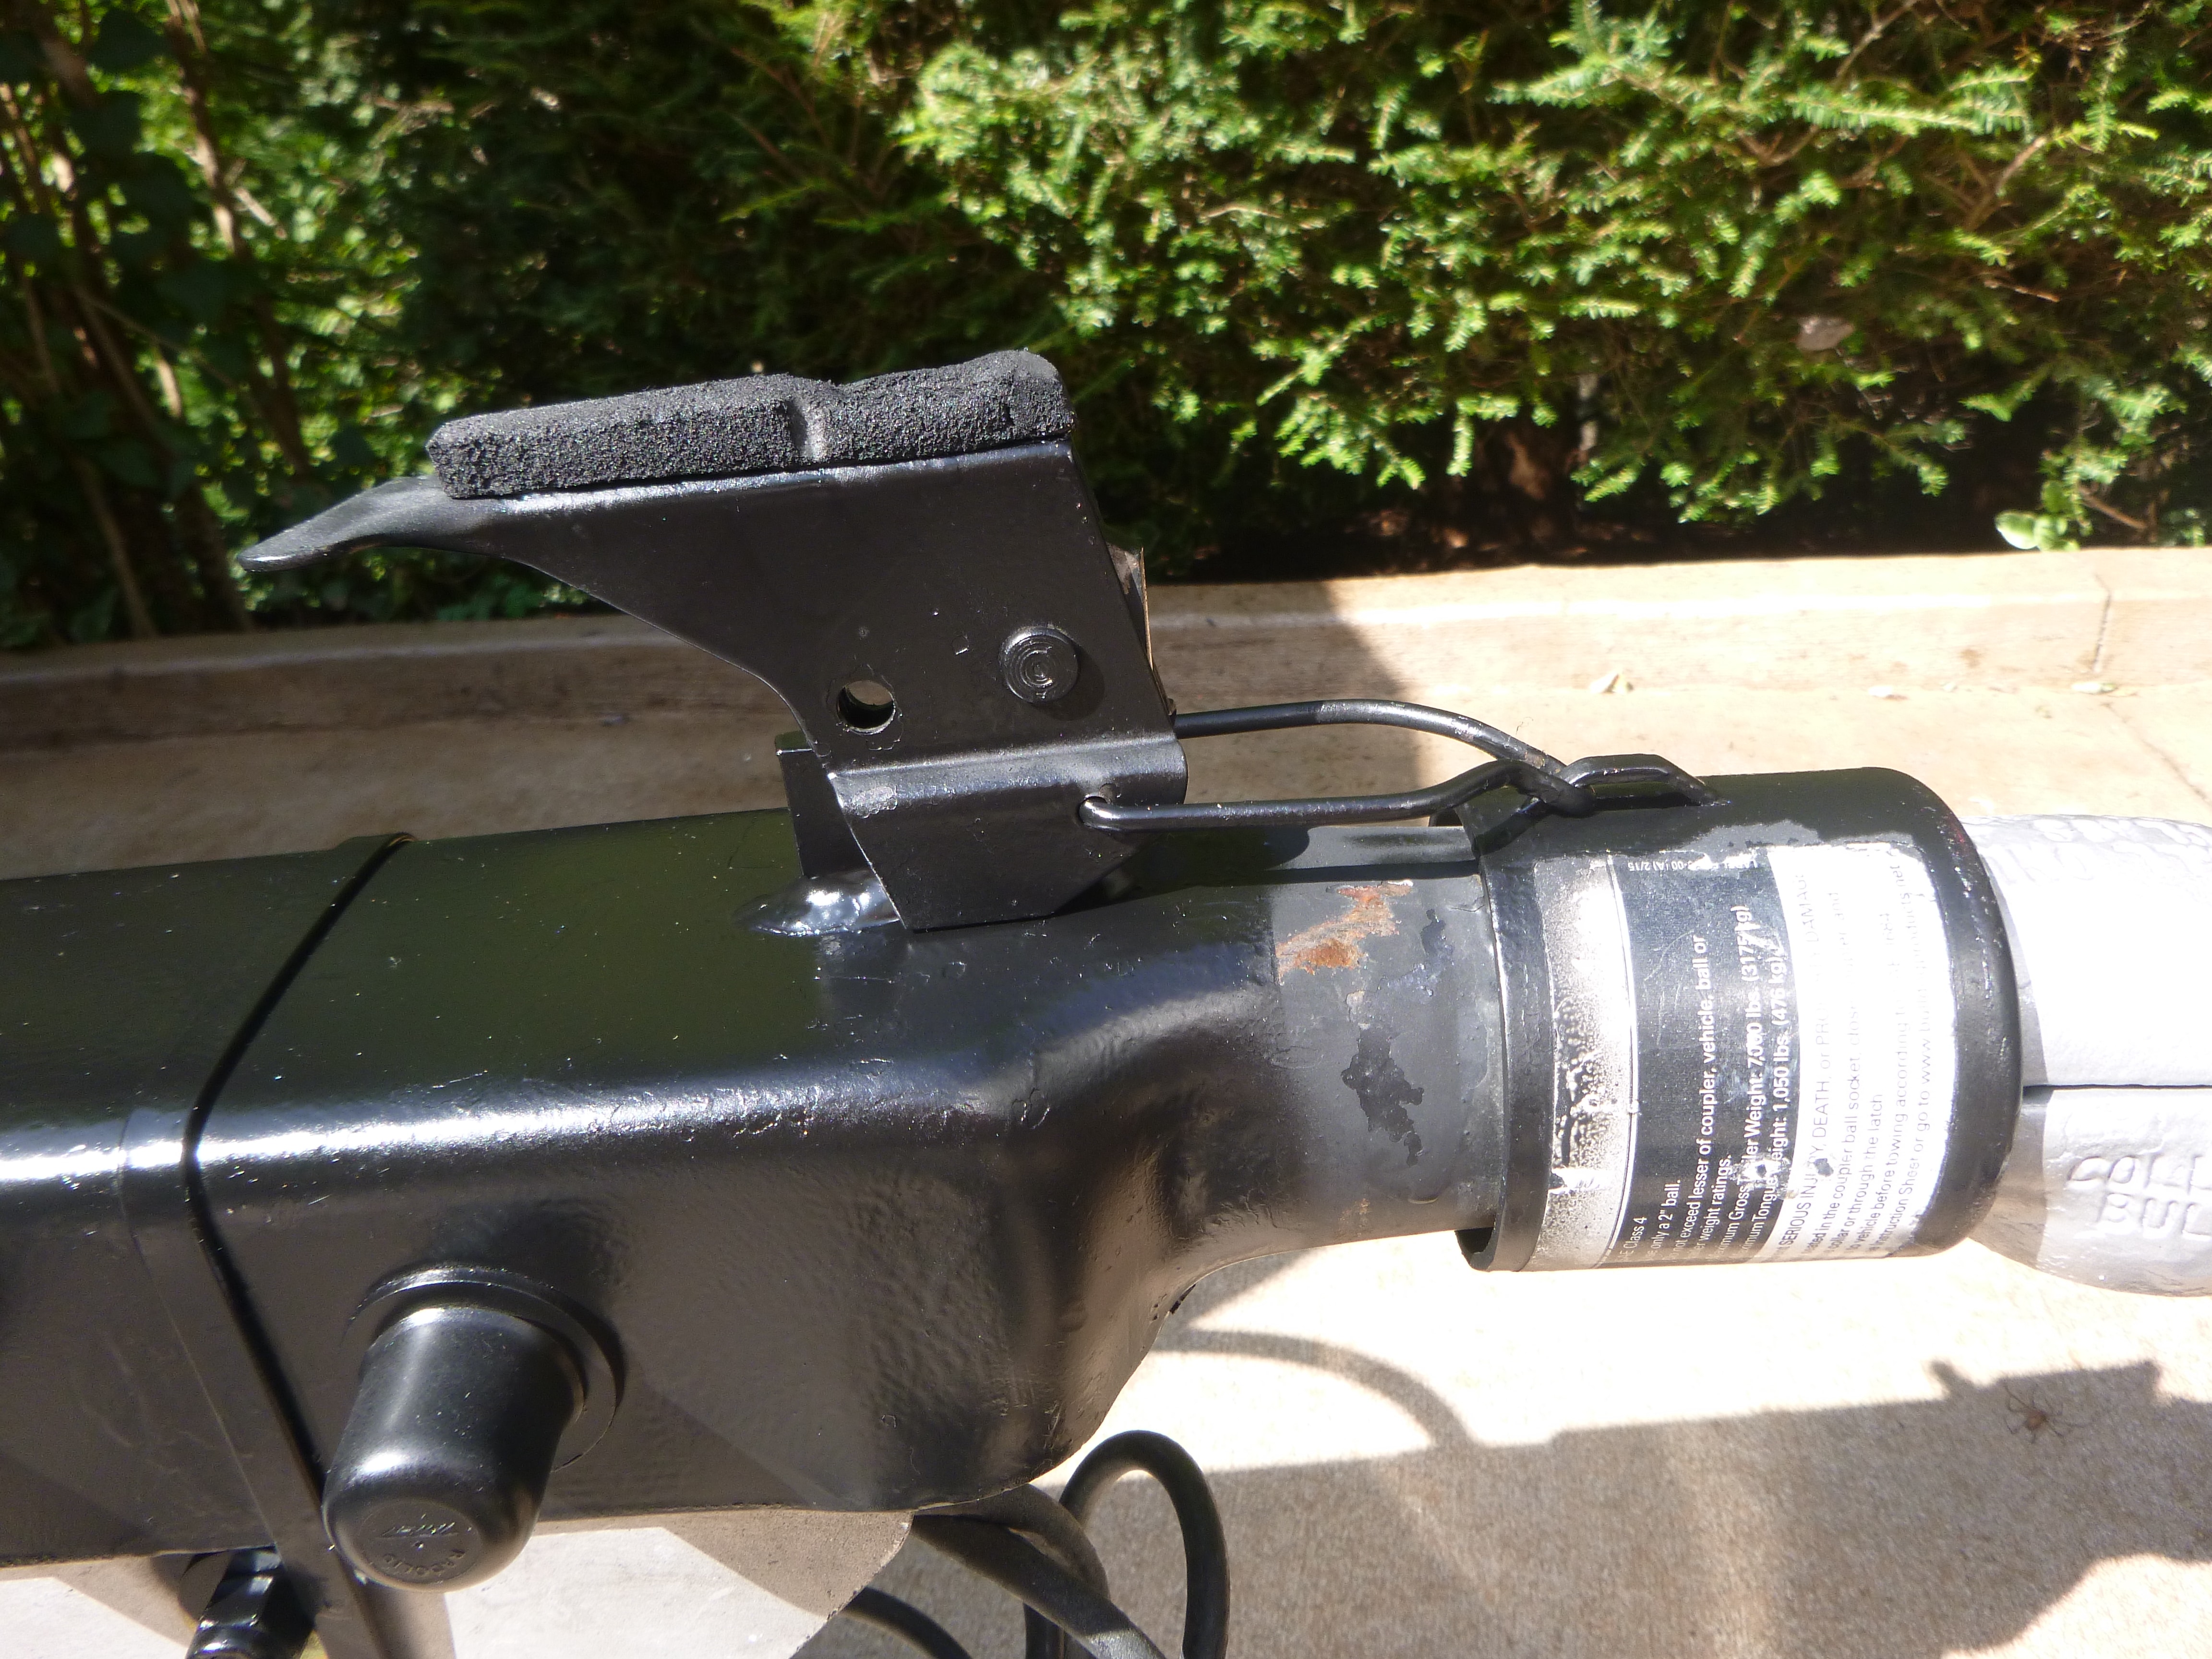
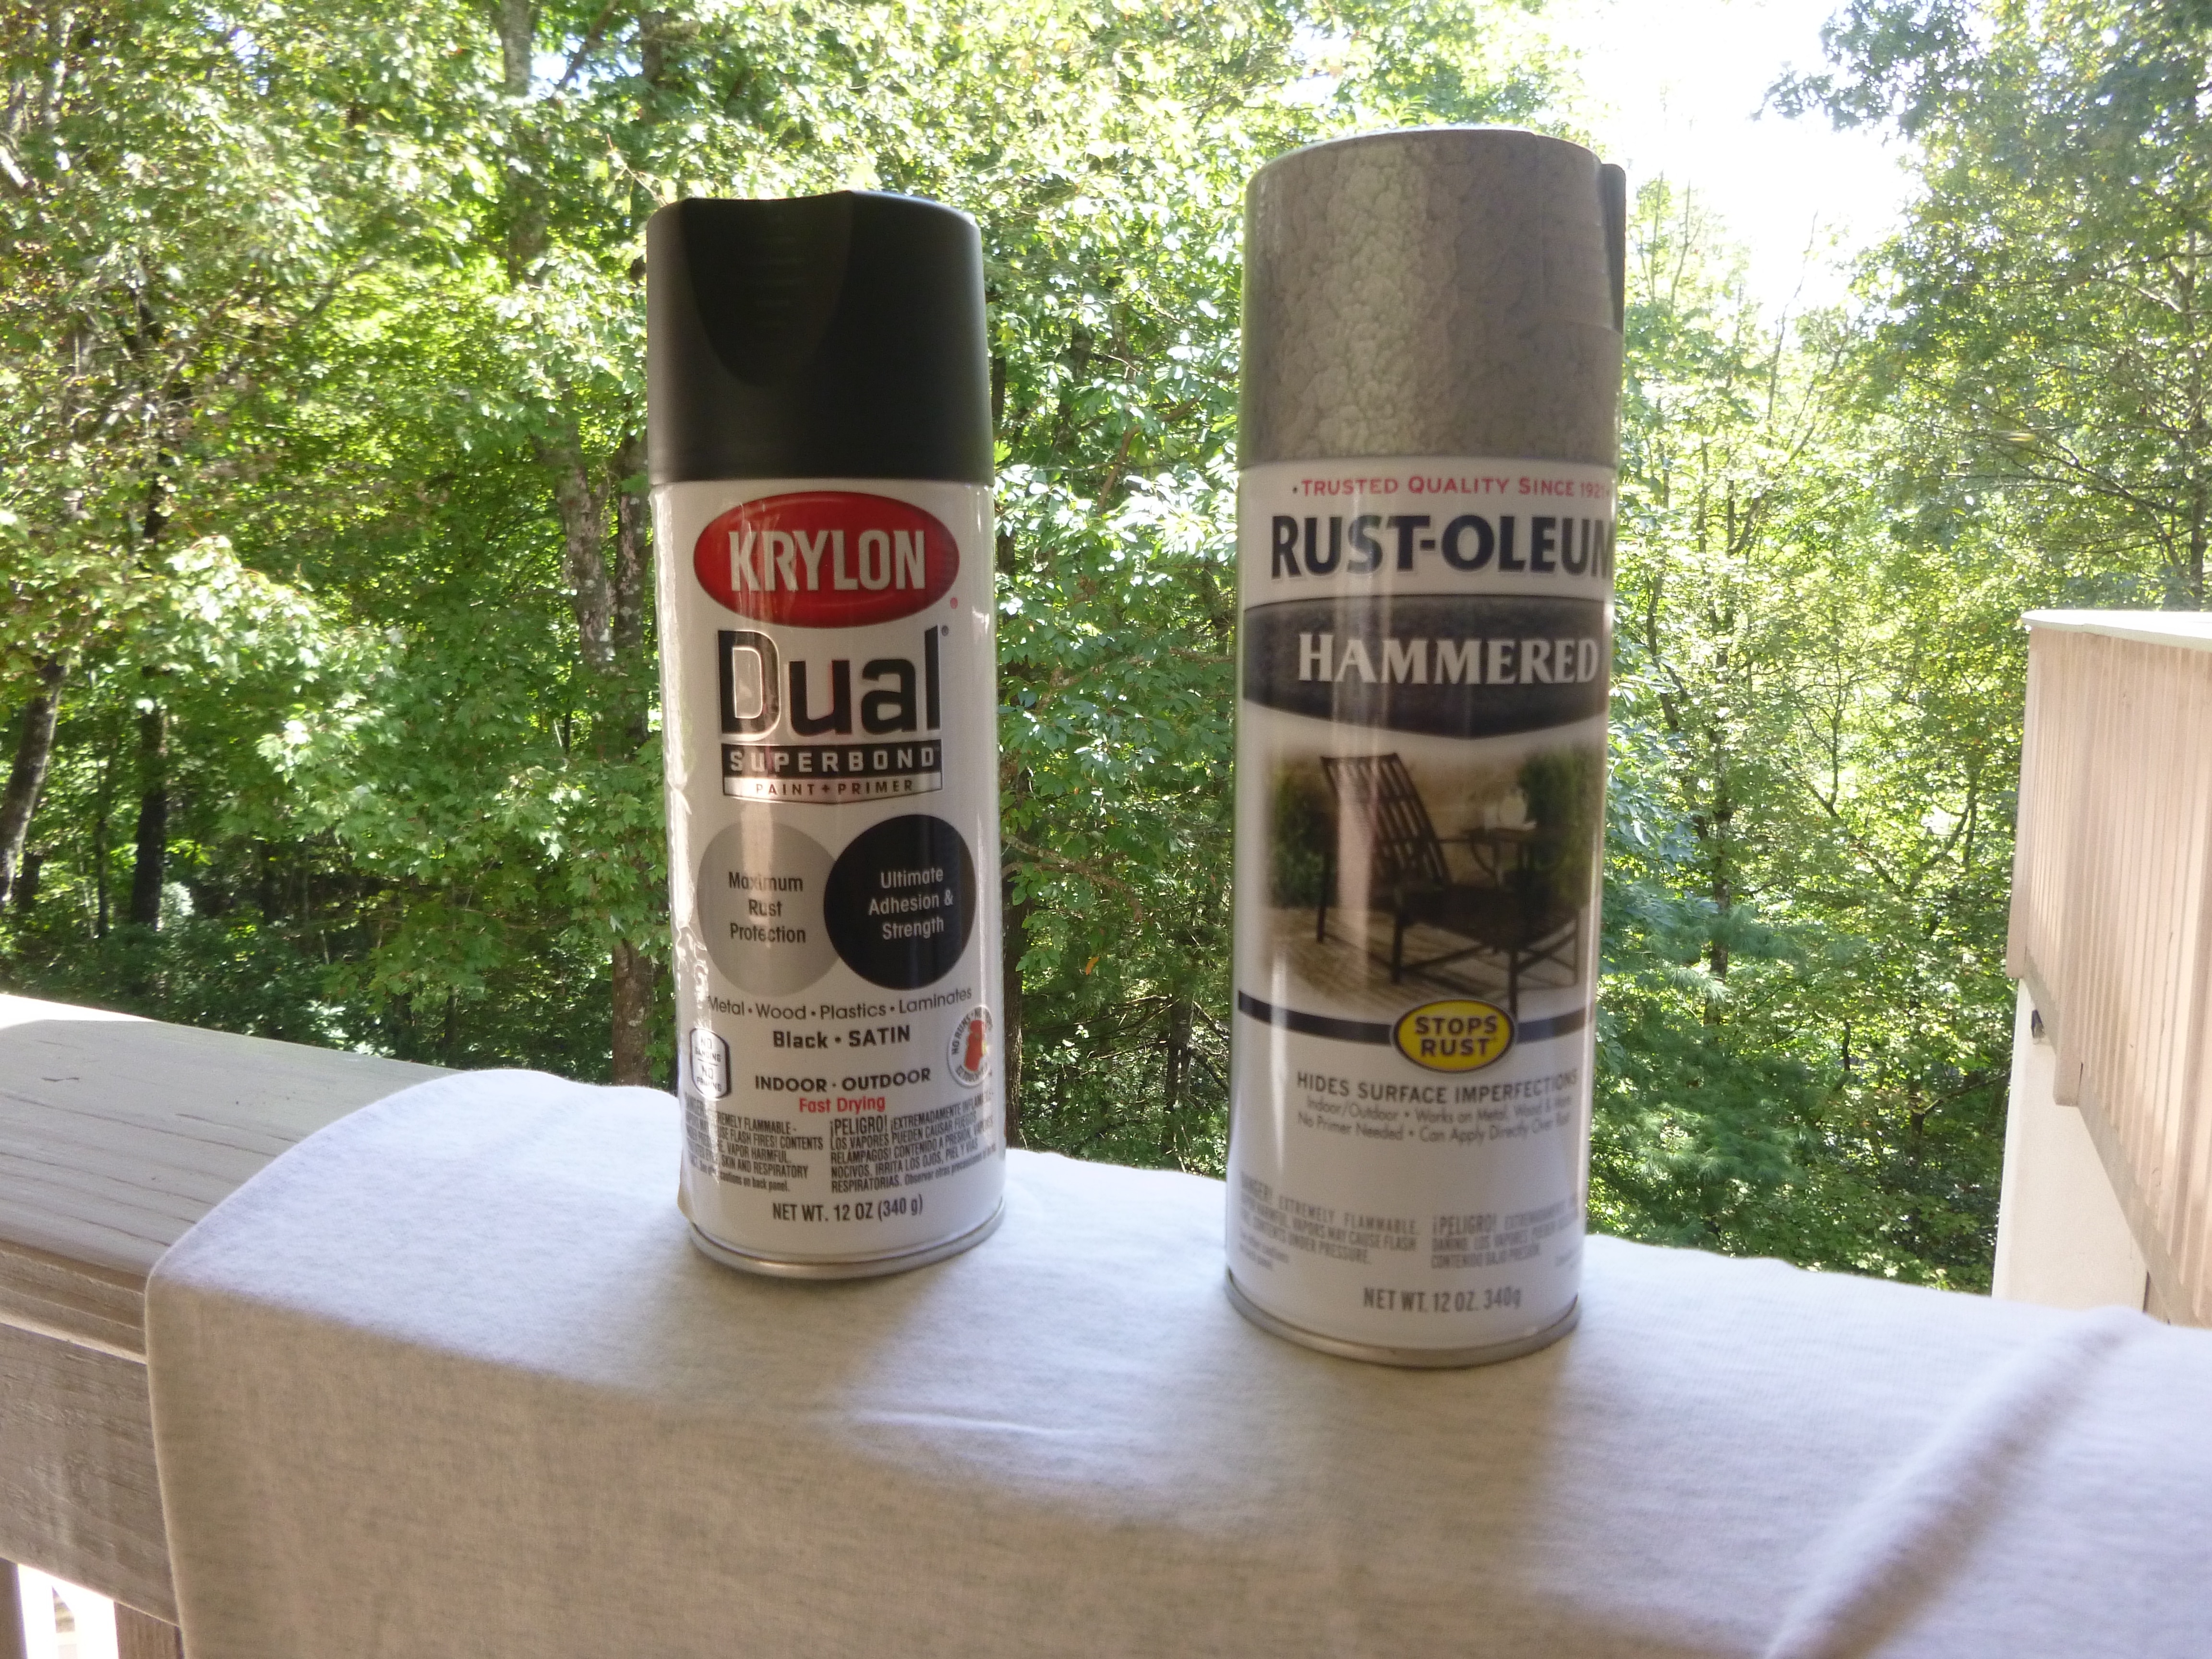
Three years ago (shortly after I took delivery of Twist) I found that I could not see the hitch on the Oliver very well when using the on-board camera in the truck. Buzzy (another Forum member) had the same problem and we both came up with a similar solution at about the same time. We painted the hitch florescent orange. Certainly this made it visible, but, that paint fades in a very short period of time. I tried repainting again and top coating with clear sealer, but, the end result was the same. Last year I again repainted the hitch but used "hammered" silver. This has worked much better, keeps the hitch looking new and is easily seen from the truck. While at it I also lightly sanded the areas on the rest of the hitch assembly that had rusted and gave then a couple of quick coats of Krylon Black Satin. This matches the original fairly closely. Finally, note in the one picture the small strip of closed cell foam that I glued to the top of the release handle on the hitch. This prevents the tailgate on my Ford F-150 from hitting that handle and scratching/denting either one. Temporally I left that one small area un-finished for comparison of before and after. The Krylon dries quickly (less than an hour) while the Rust-Oleum takes overnight to really dry.
 3 points
 -
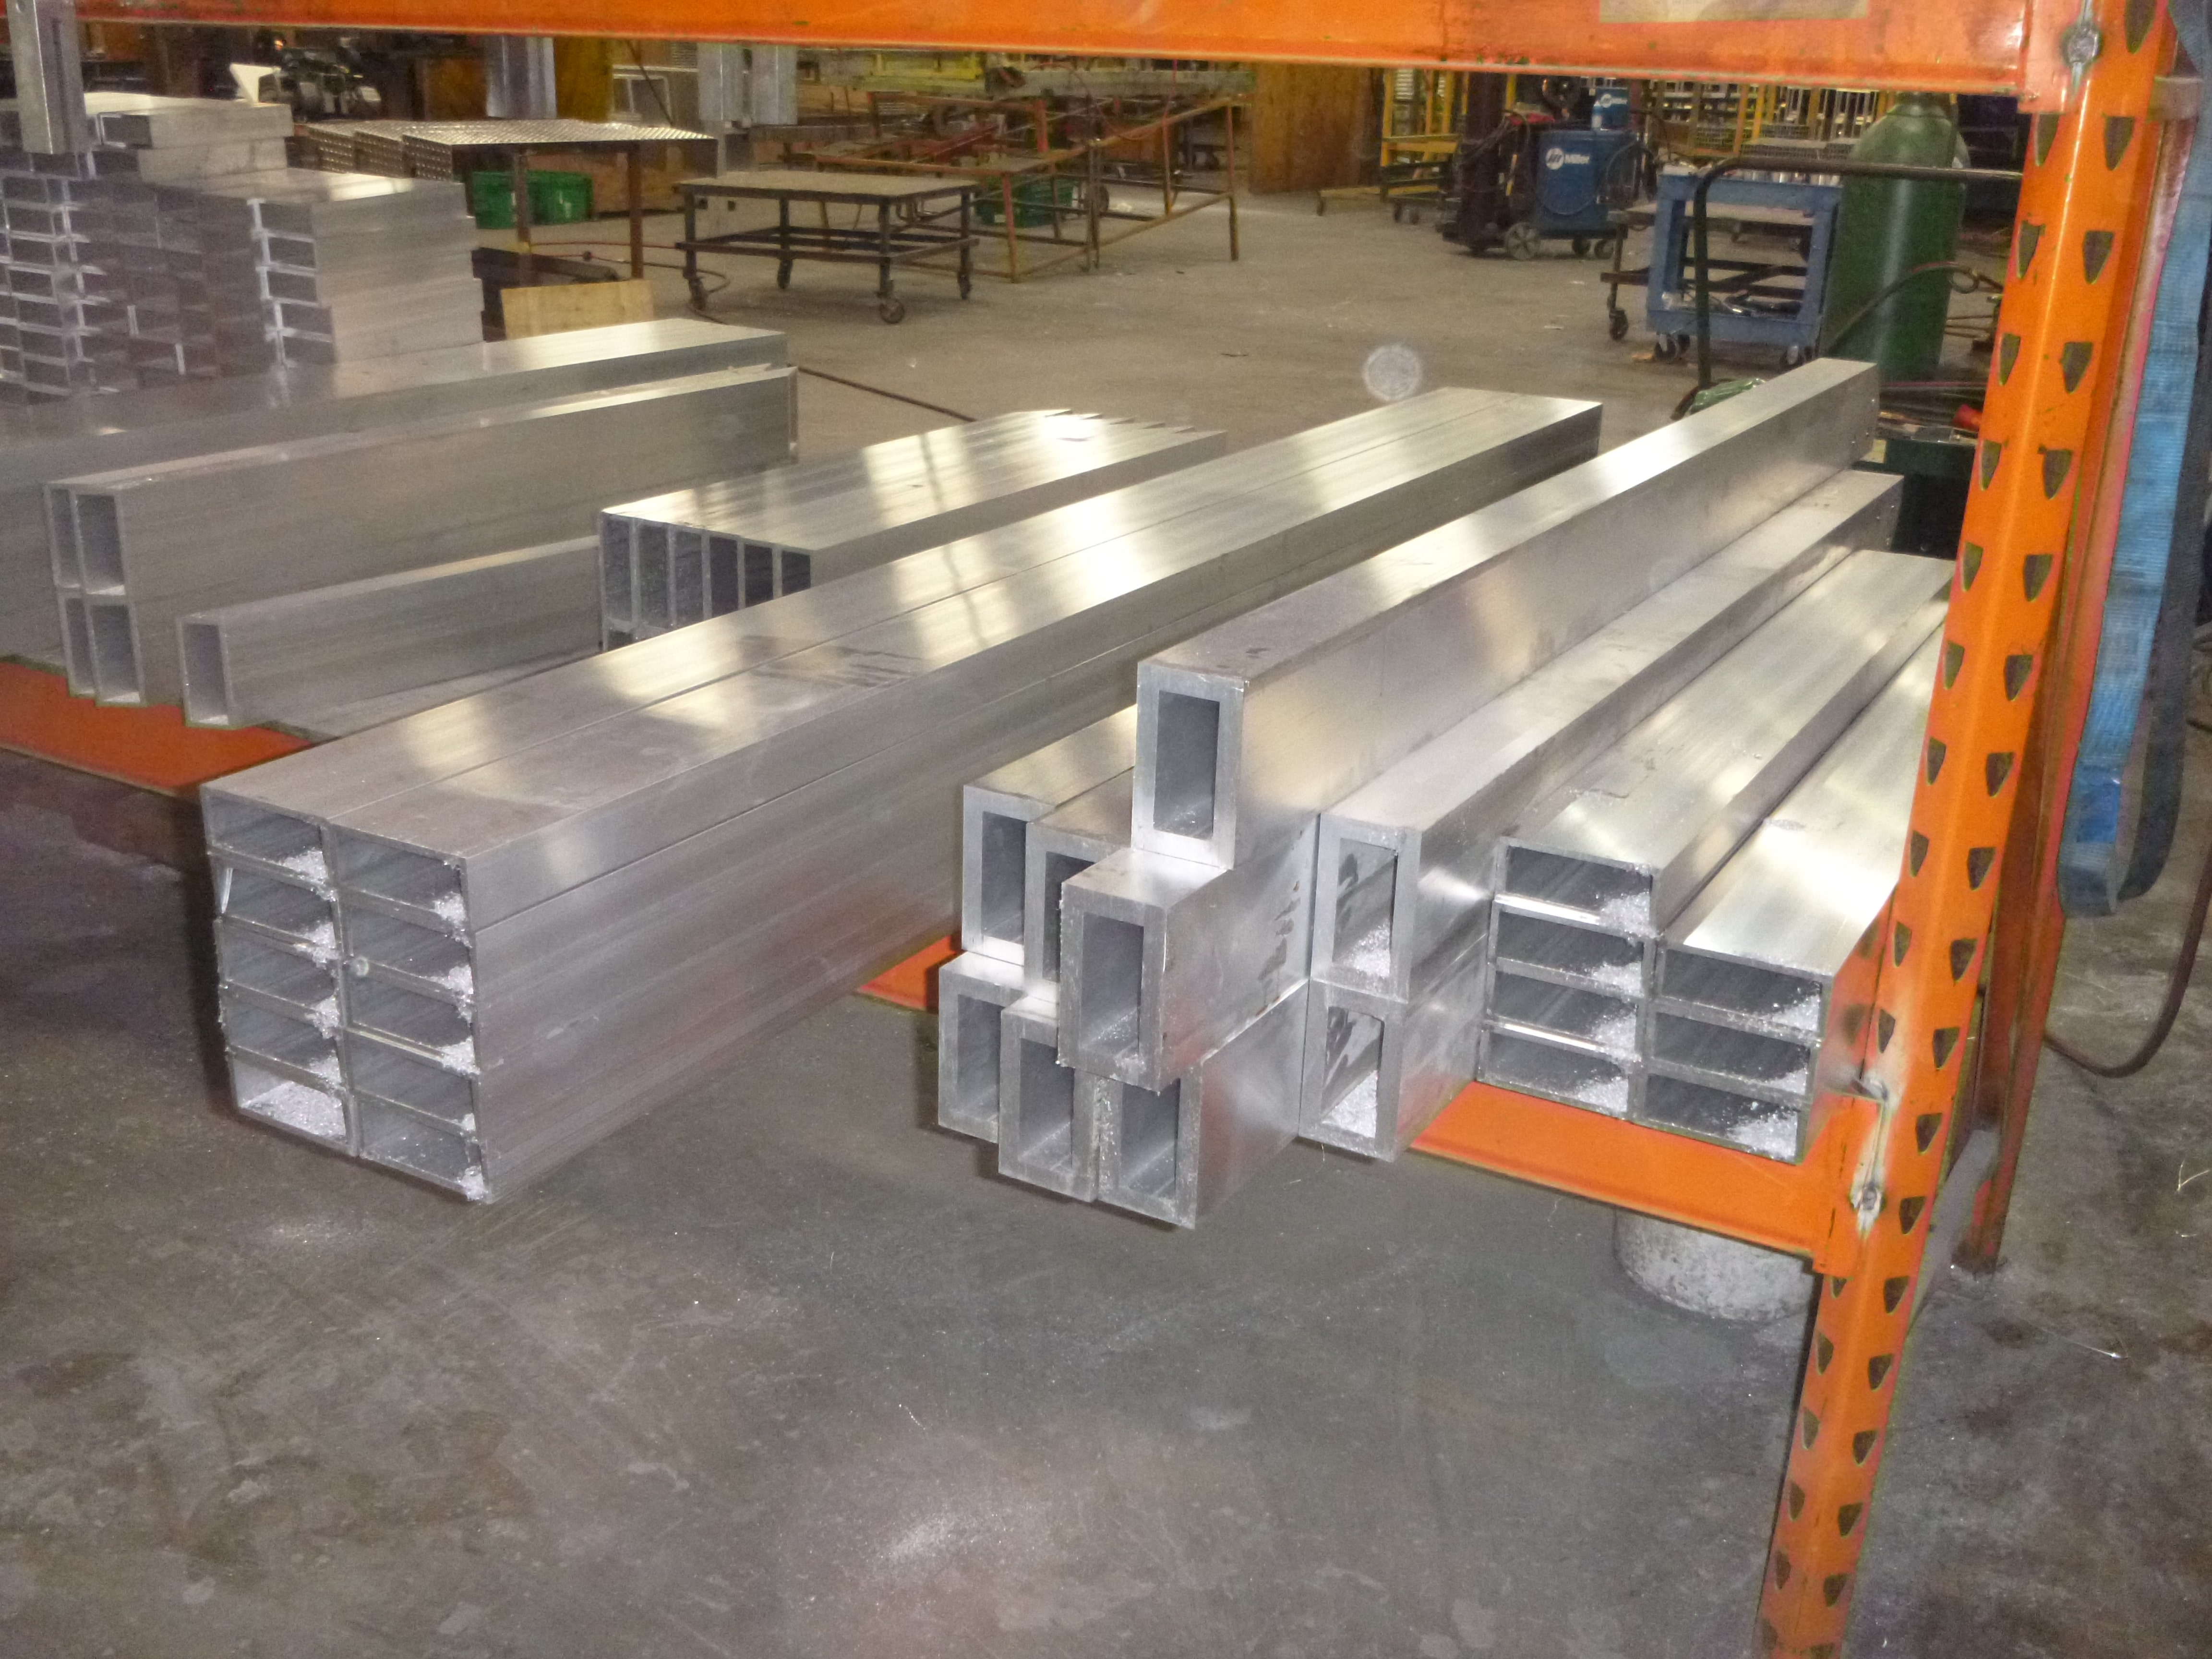
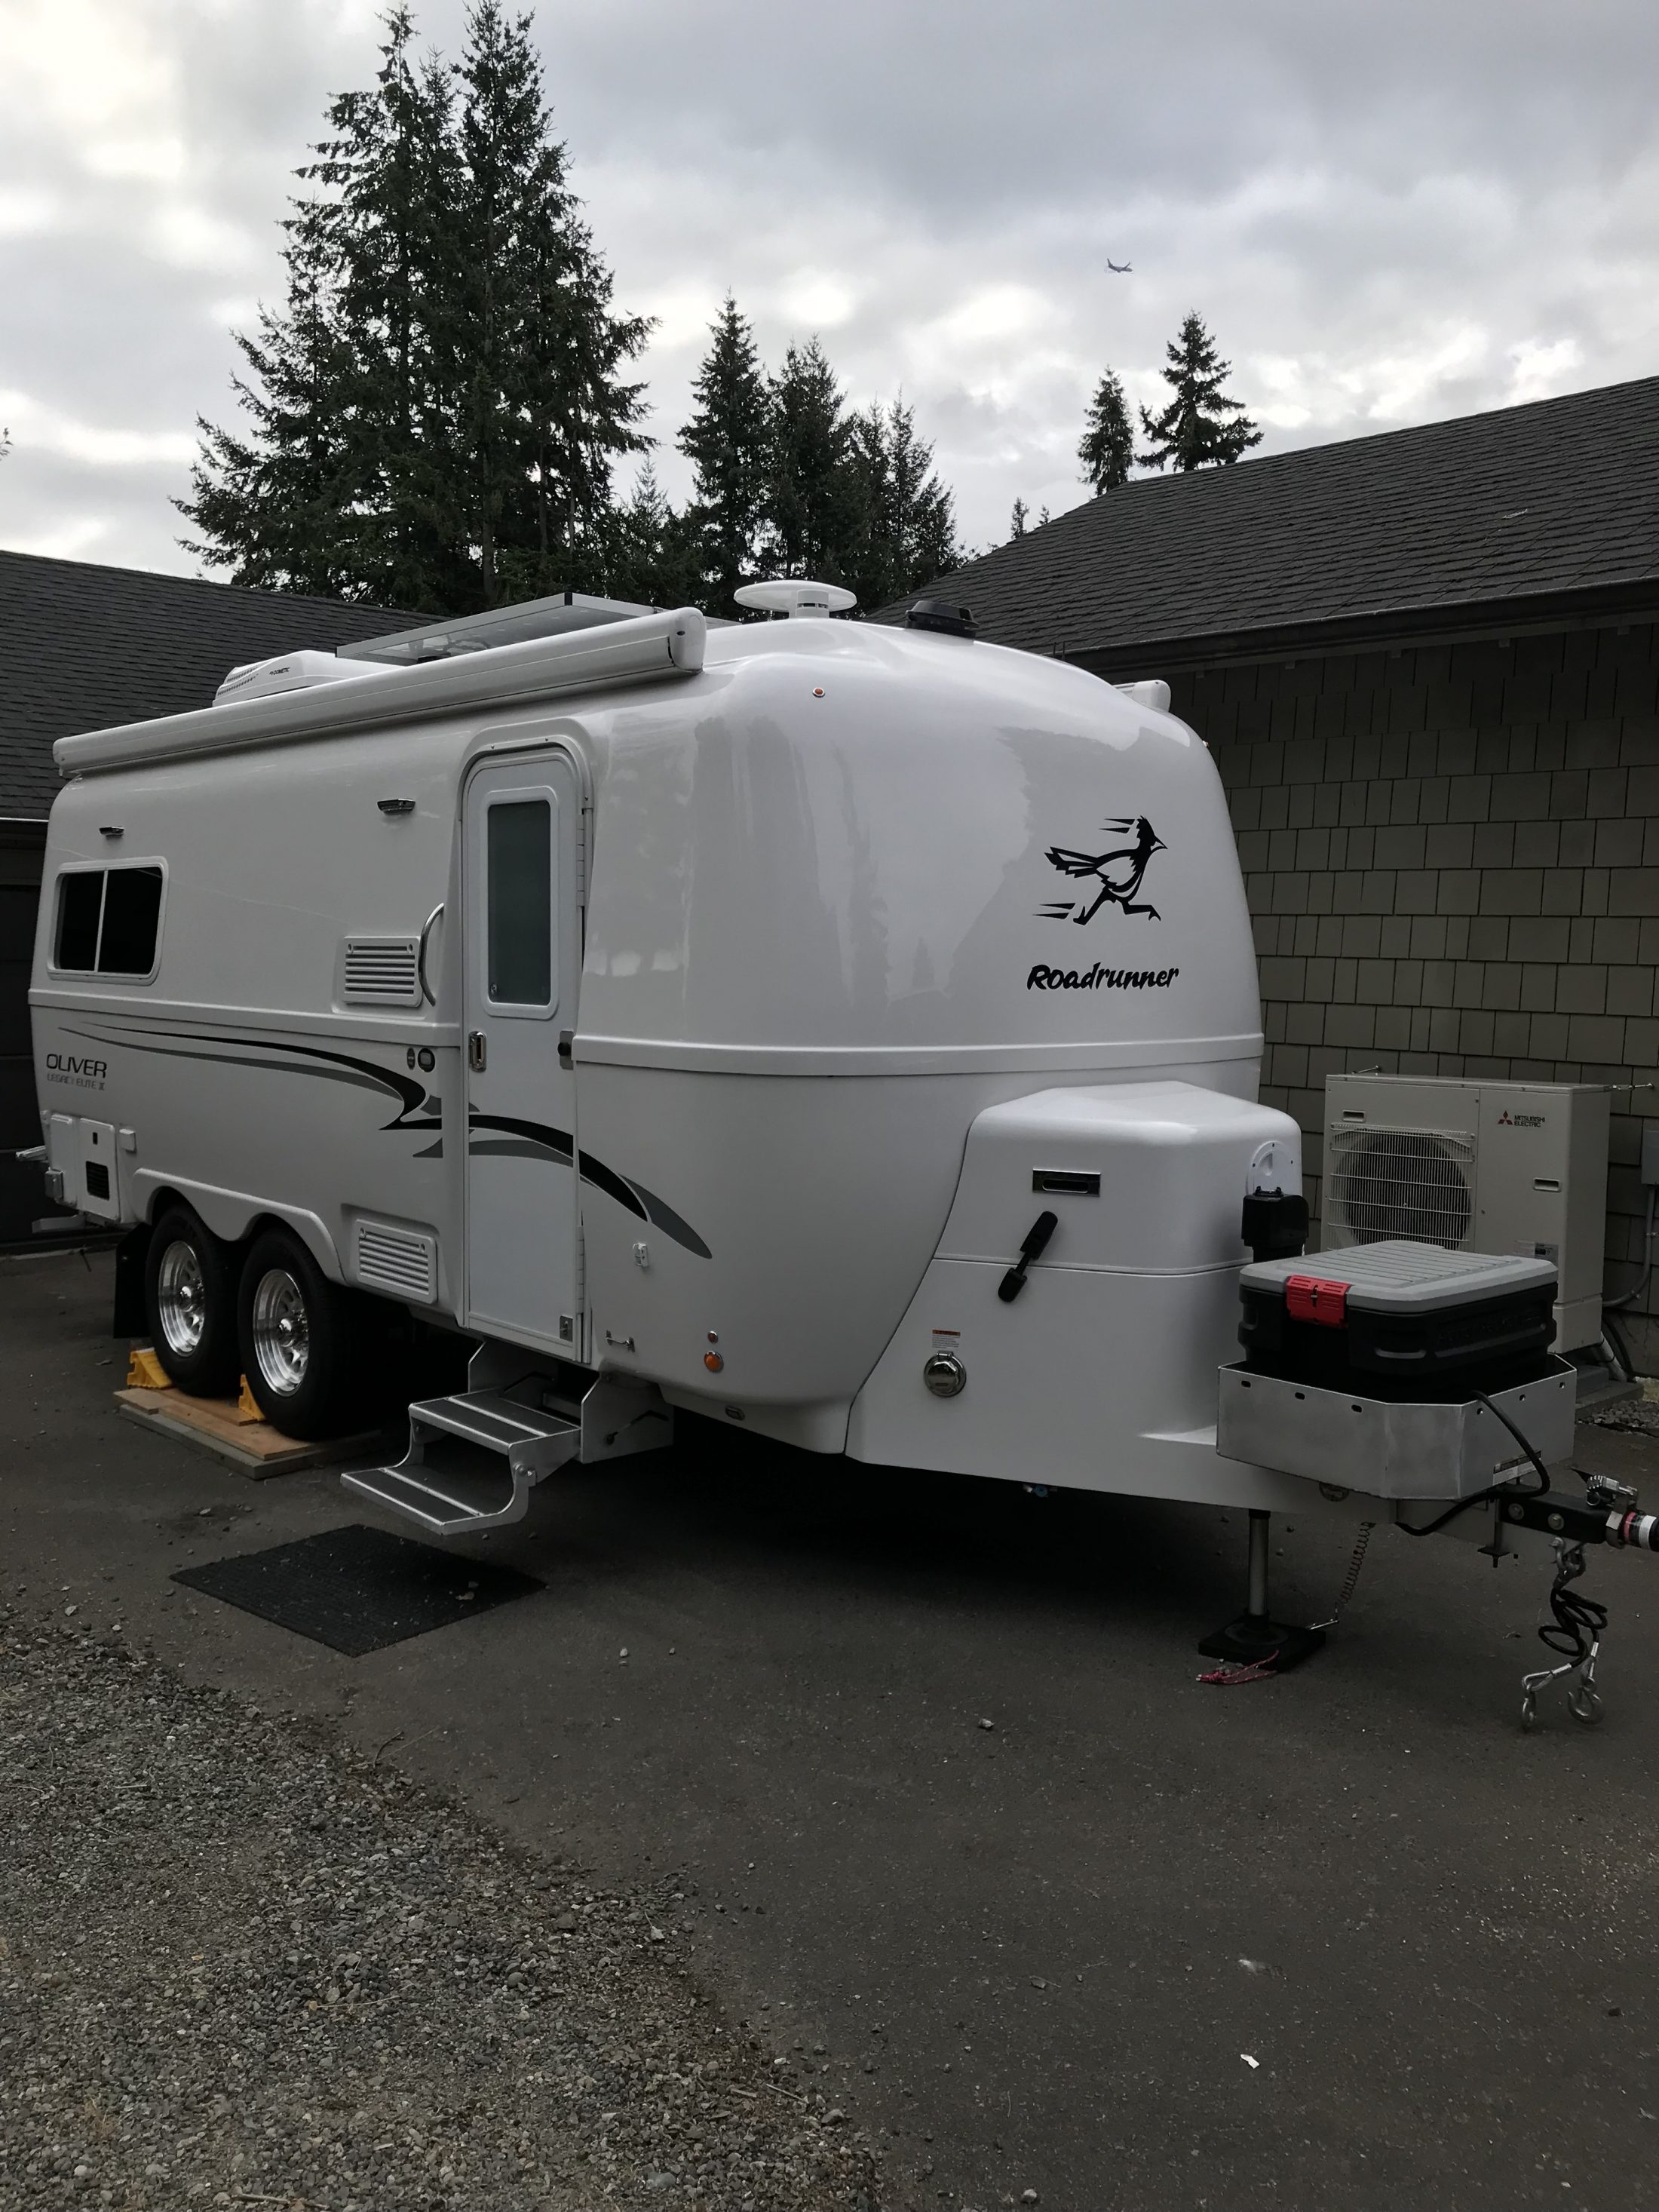
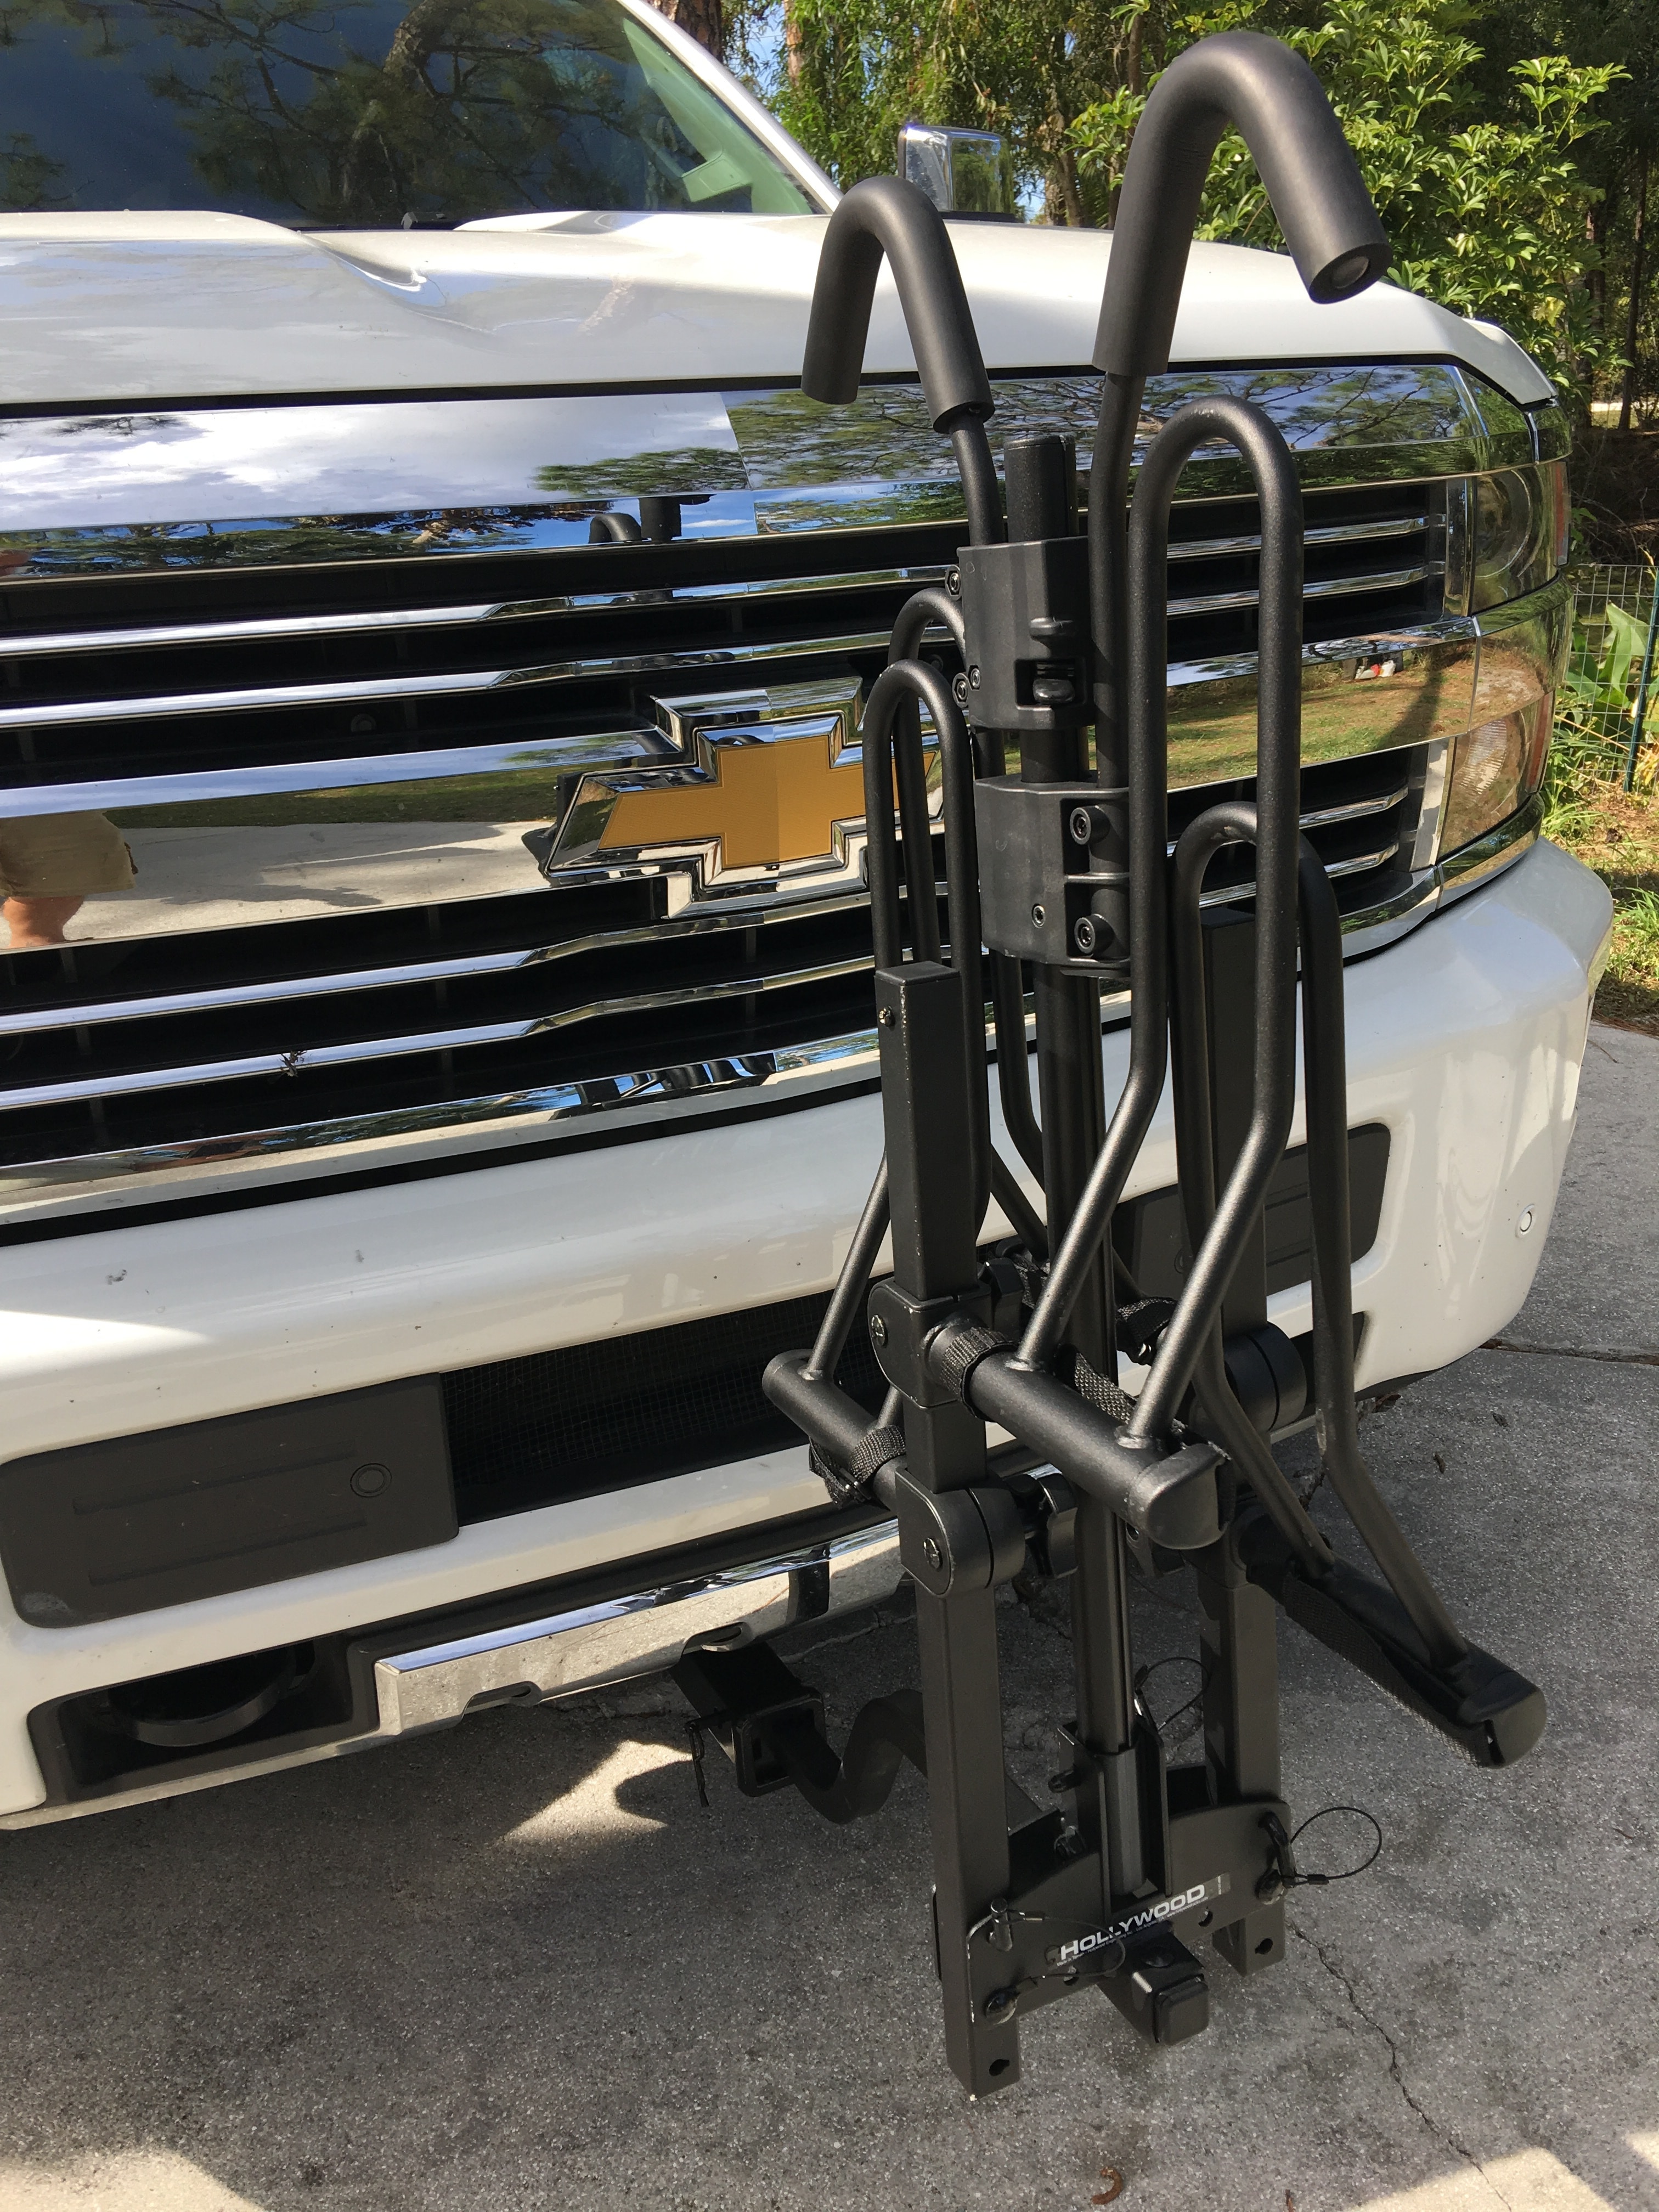
I'll get some pictures out shortly but in the interim to answer a few of the questions above. Home base for Sally and I is Normandy Park WA which is west of the Seattle airport SEATAC. We spend a lot of time in Sunriver Oregon as well. We are not full timing in the Oliver but think we might be out in it 1/3 of the time. We were doing weekends and vacations in our 2009 Airstream basecamp before purchasing the Oliver. Now that we are both retired we wanted something more comfortable and of good quality. Well we found it ! The bike rack has a good story about Oliver coming through for a customer . The bike rack was an option I ordered from Oliver back in October 2017 and had as part of my build until about February when I was on the phone with Anita making some changes to our order. She informed me that the bike rack was no longer offered and that there was no replacement as yet. When I had gone thru the initial option list in October I asked if I could get just the bike rack frame without the Yakima trays. I already had the One Up trays which attach to roof racks. Theses are very sturdy and attach with carriage 3/8 carriage bolts that are go in a T slot on the bottom of the tray. This makes the mounting width easily changed to the distance between your roof rack bars. I was told at the time that I could not get the frame only but had to order the whole thing and pay for the Yakima trays I did not need. Fast forward to February and now the rack is not offered. I inquired if I could get the parts and mount it myself. There was not a clear answer to this question so I waited a few weeks and asked again. Still no answer but a manger would be asked about it. No answer was forthcoming and I accepted I would have to work on a solution myself. When we got to Hoenwald the trailer was in the garage and ready to inspect and as I walked into the bay I noticed what looked like a bike rack frame leaning against the wall. I was then told that was my frame and if I still wanted it then I could purchase it on an invoice from the service dept. I got the frame and the four long 1/2 bolts. mounting blocks, quick disconnect pins and put it in the truck for later install. Turns out I got what I originally wanted and at 1/3 the cost of the full up bike rack. I installed the mounting blocks and took the frame to a local welder along with some short pieces of square 2x2x.25 6061 extrusion and had him weld three additional cross pieces in the frame. Without the additional cross pieces I would have likely had to drill 3/8 inch holes in the frame to mount the One up trays. Having the additional supports also would be handy in the event I wanted to mount a box on the rack in the future. So far no holes in the frame just the One Up mounting clamps that hold the trays. The One Up trays and bicycle bars that clap the wheels are very robust and I would not hesitate to put 100 lbs on each on the rack or a 200 lbs box with the trays removed.. My mountain bikes weigh approximately 32 lbs. I'll get you some pictures soon. Mark2 points
-
I purchased for my work four 2018 sprinter vans. Love them. But loaded with the turbo diesel they are certainly not "Over Powered". Be aware that starting with model year 2019, MB has shifted production from Germany to Argentina. My gut says that with any model year change, especially one involving a change of factory, and ESPECIALLY with a change of country..... delay a year or two to allow the bugs to be worked out. The sage advice of going with what is proven is also a key consideration.... especially at $150K. My three recommendations in no particular order would be: Used Toyota Land Cruiser (Big wink to John D.) Used Ford/Ram 250/2500 with diesel Used Nissan Titan with Cummings Diesel For those that would like a less expensive option, the Toyota Sequoia Gen II with the 5.7L would be my choice. You can get into a very nice used one for about $15K. Geronimo John2 points
-
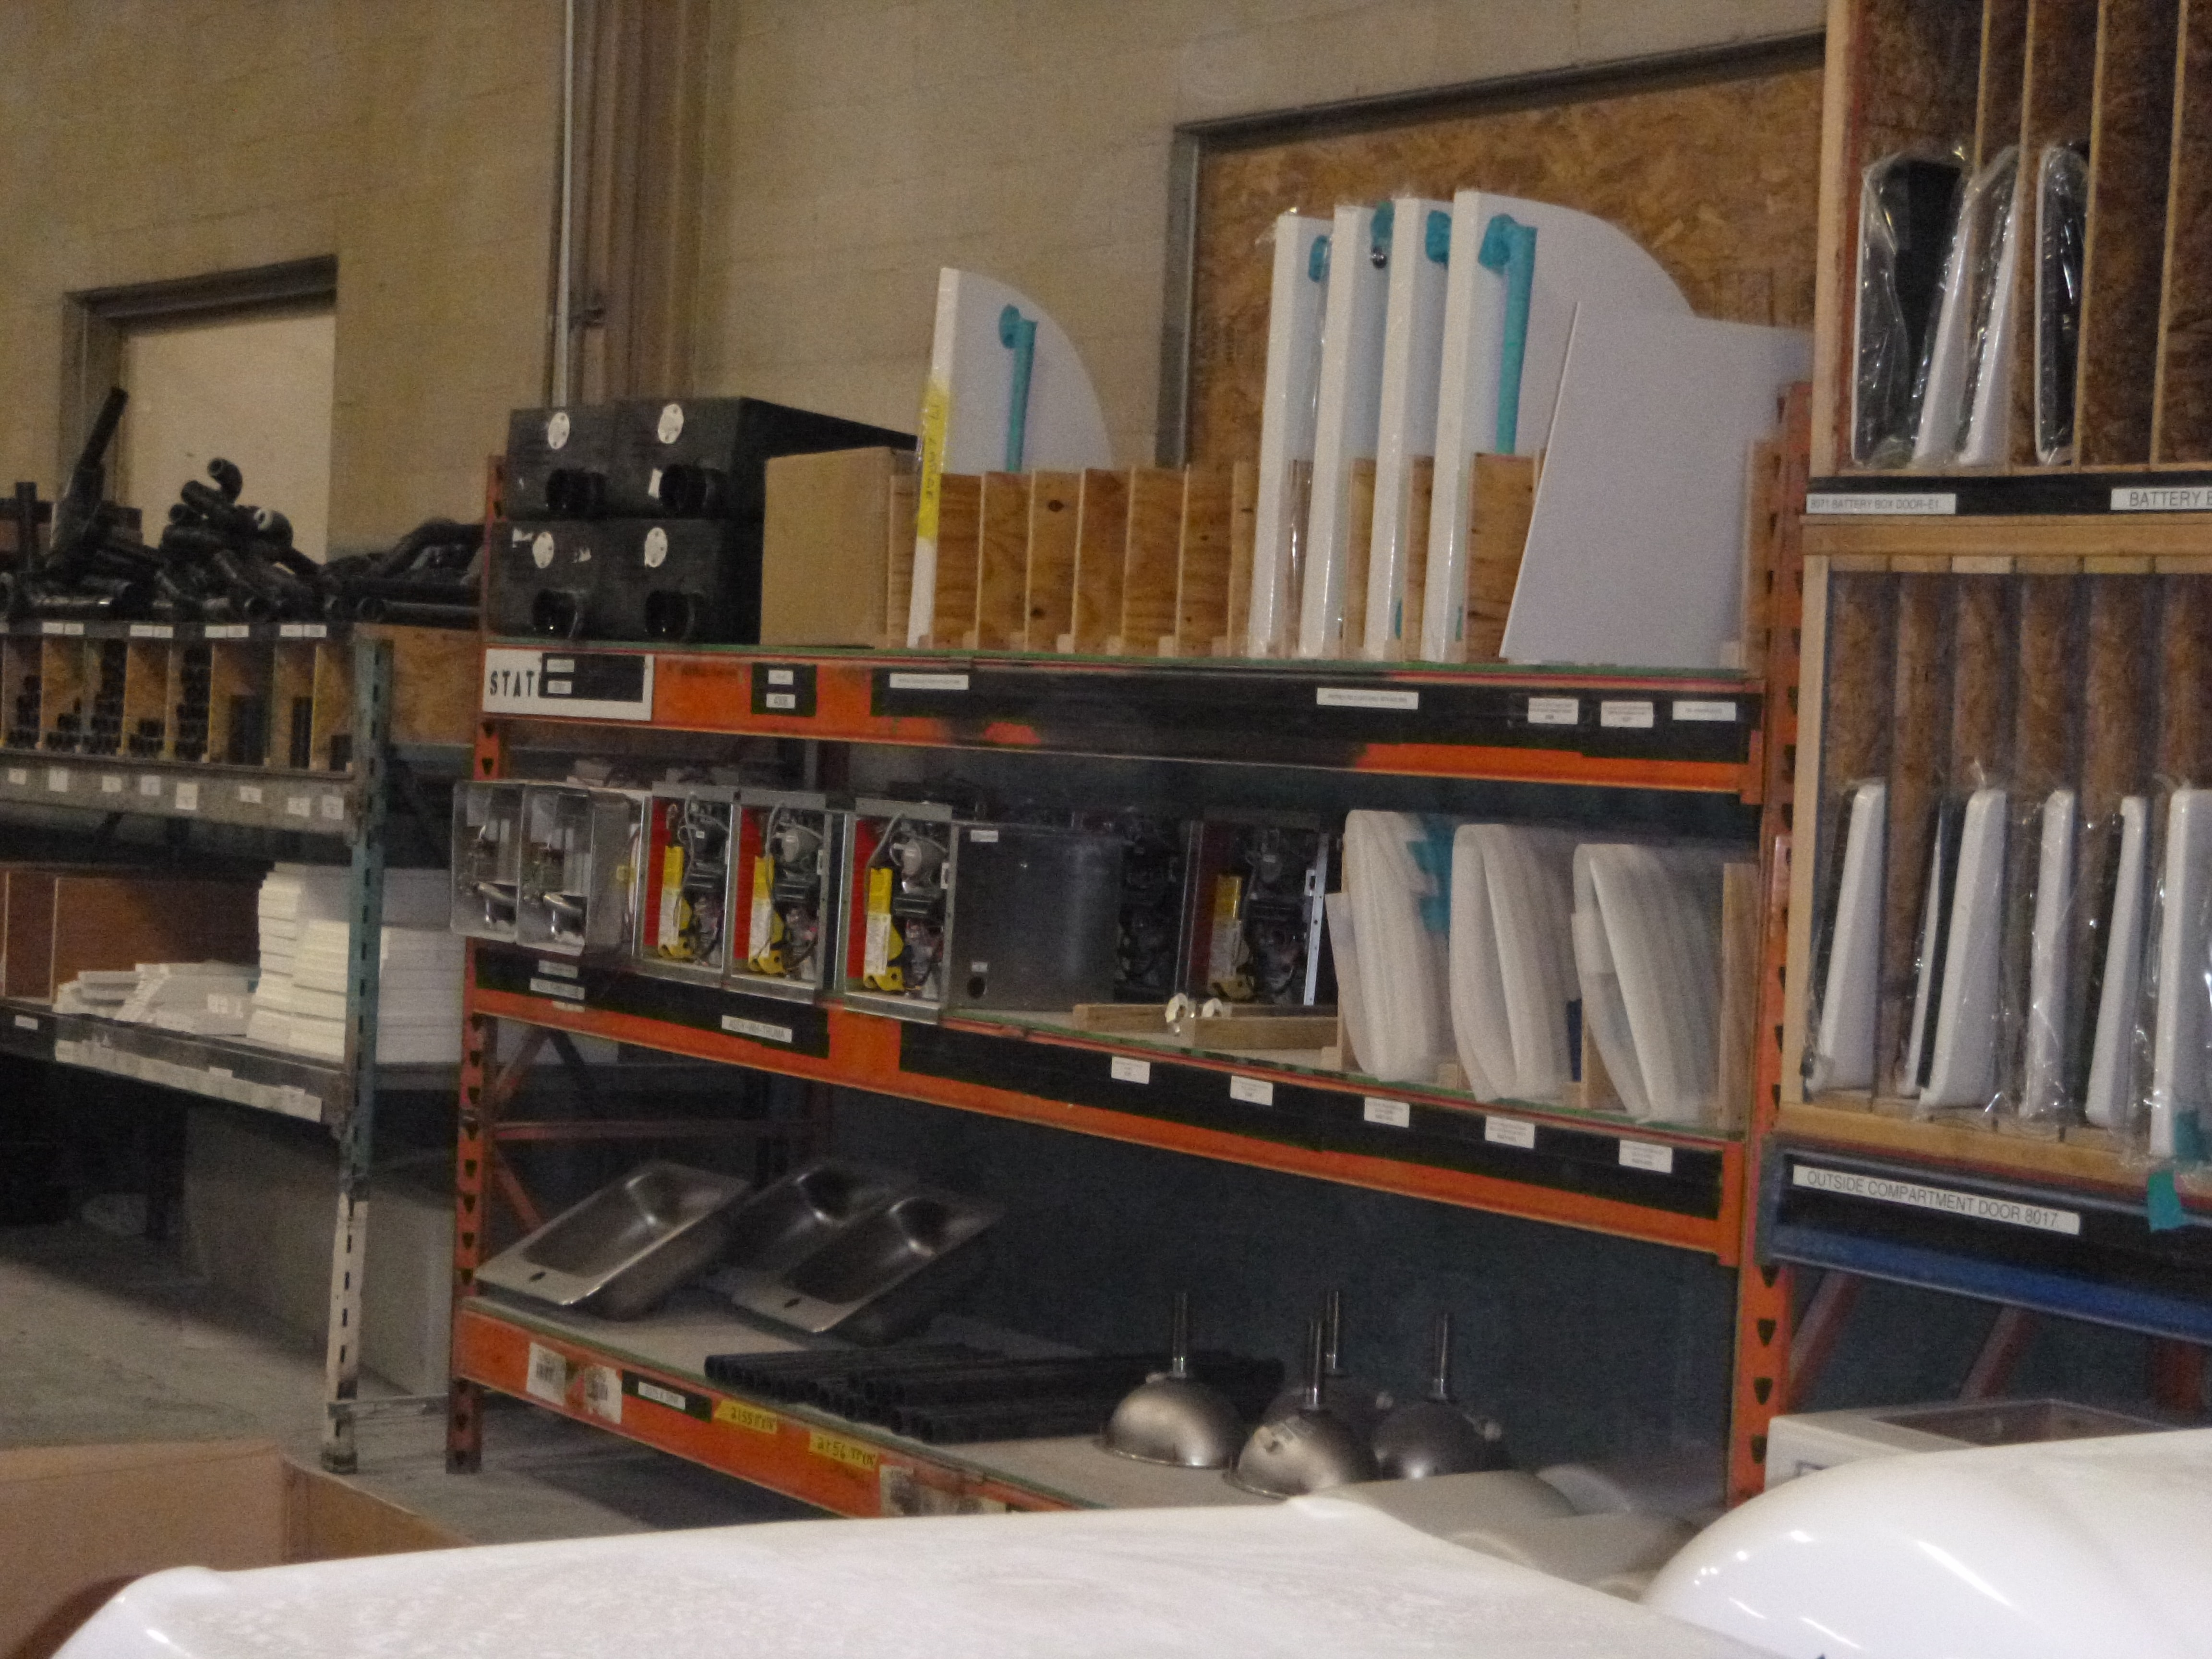
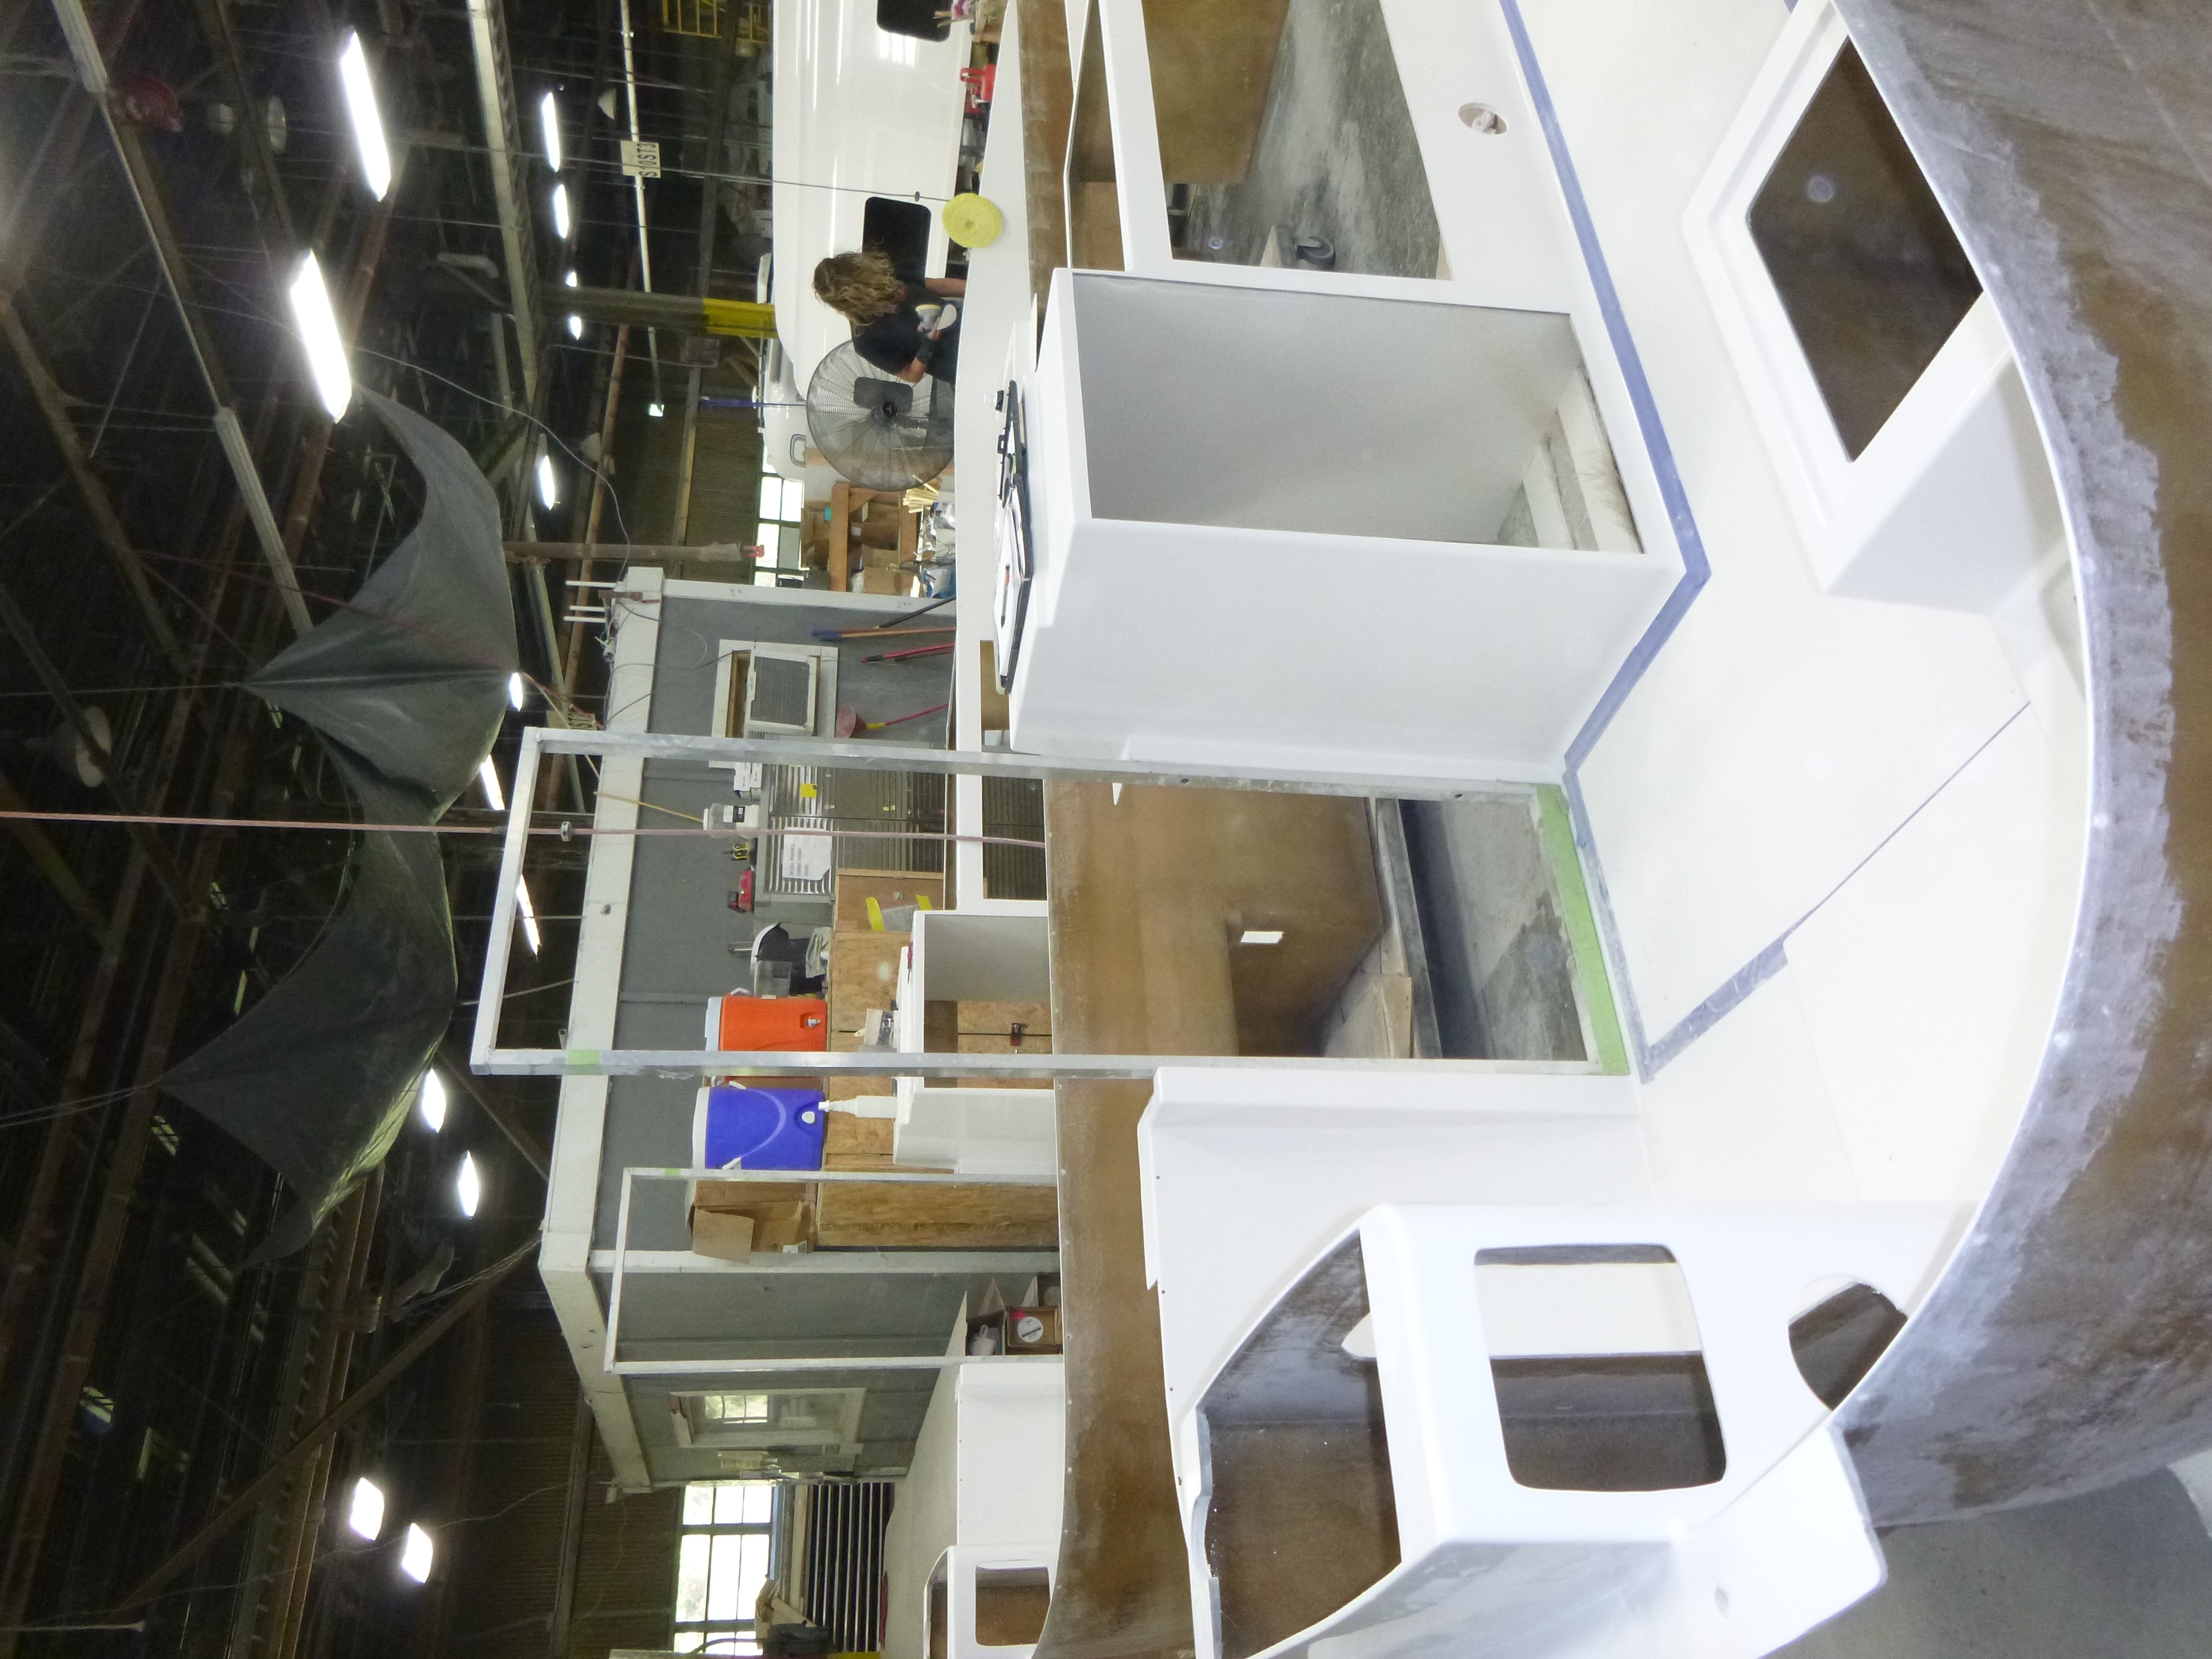
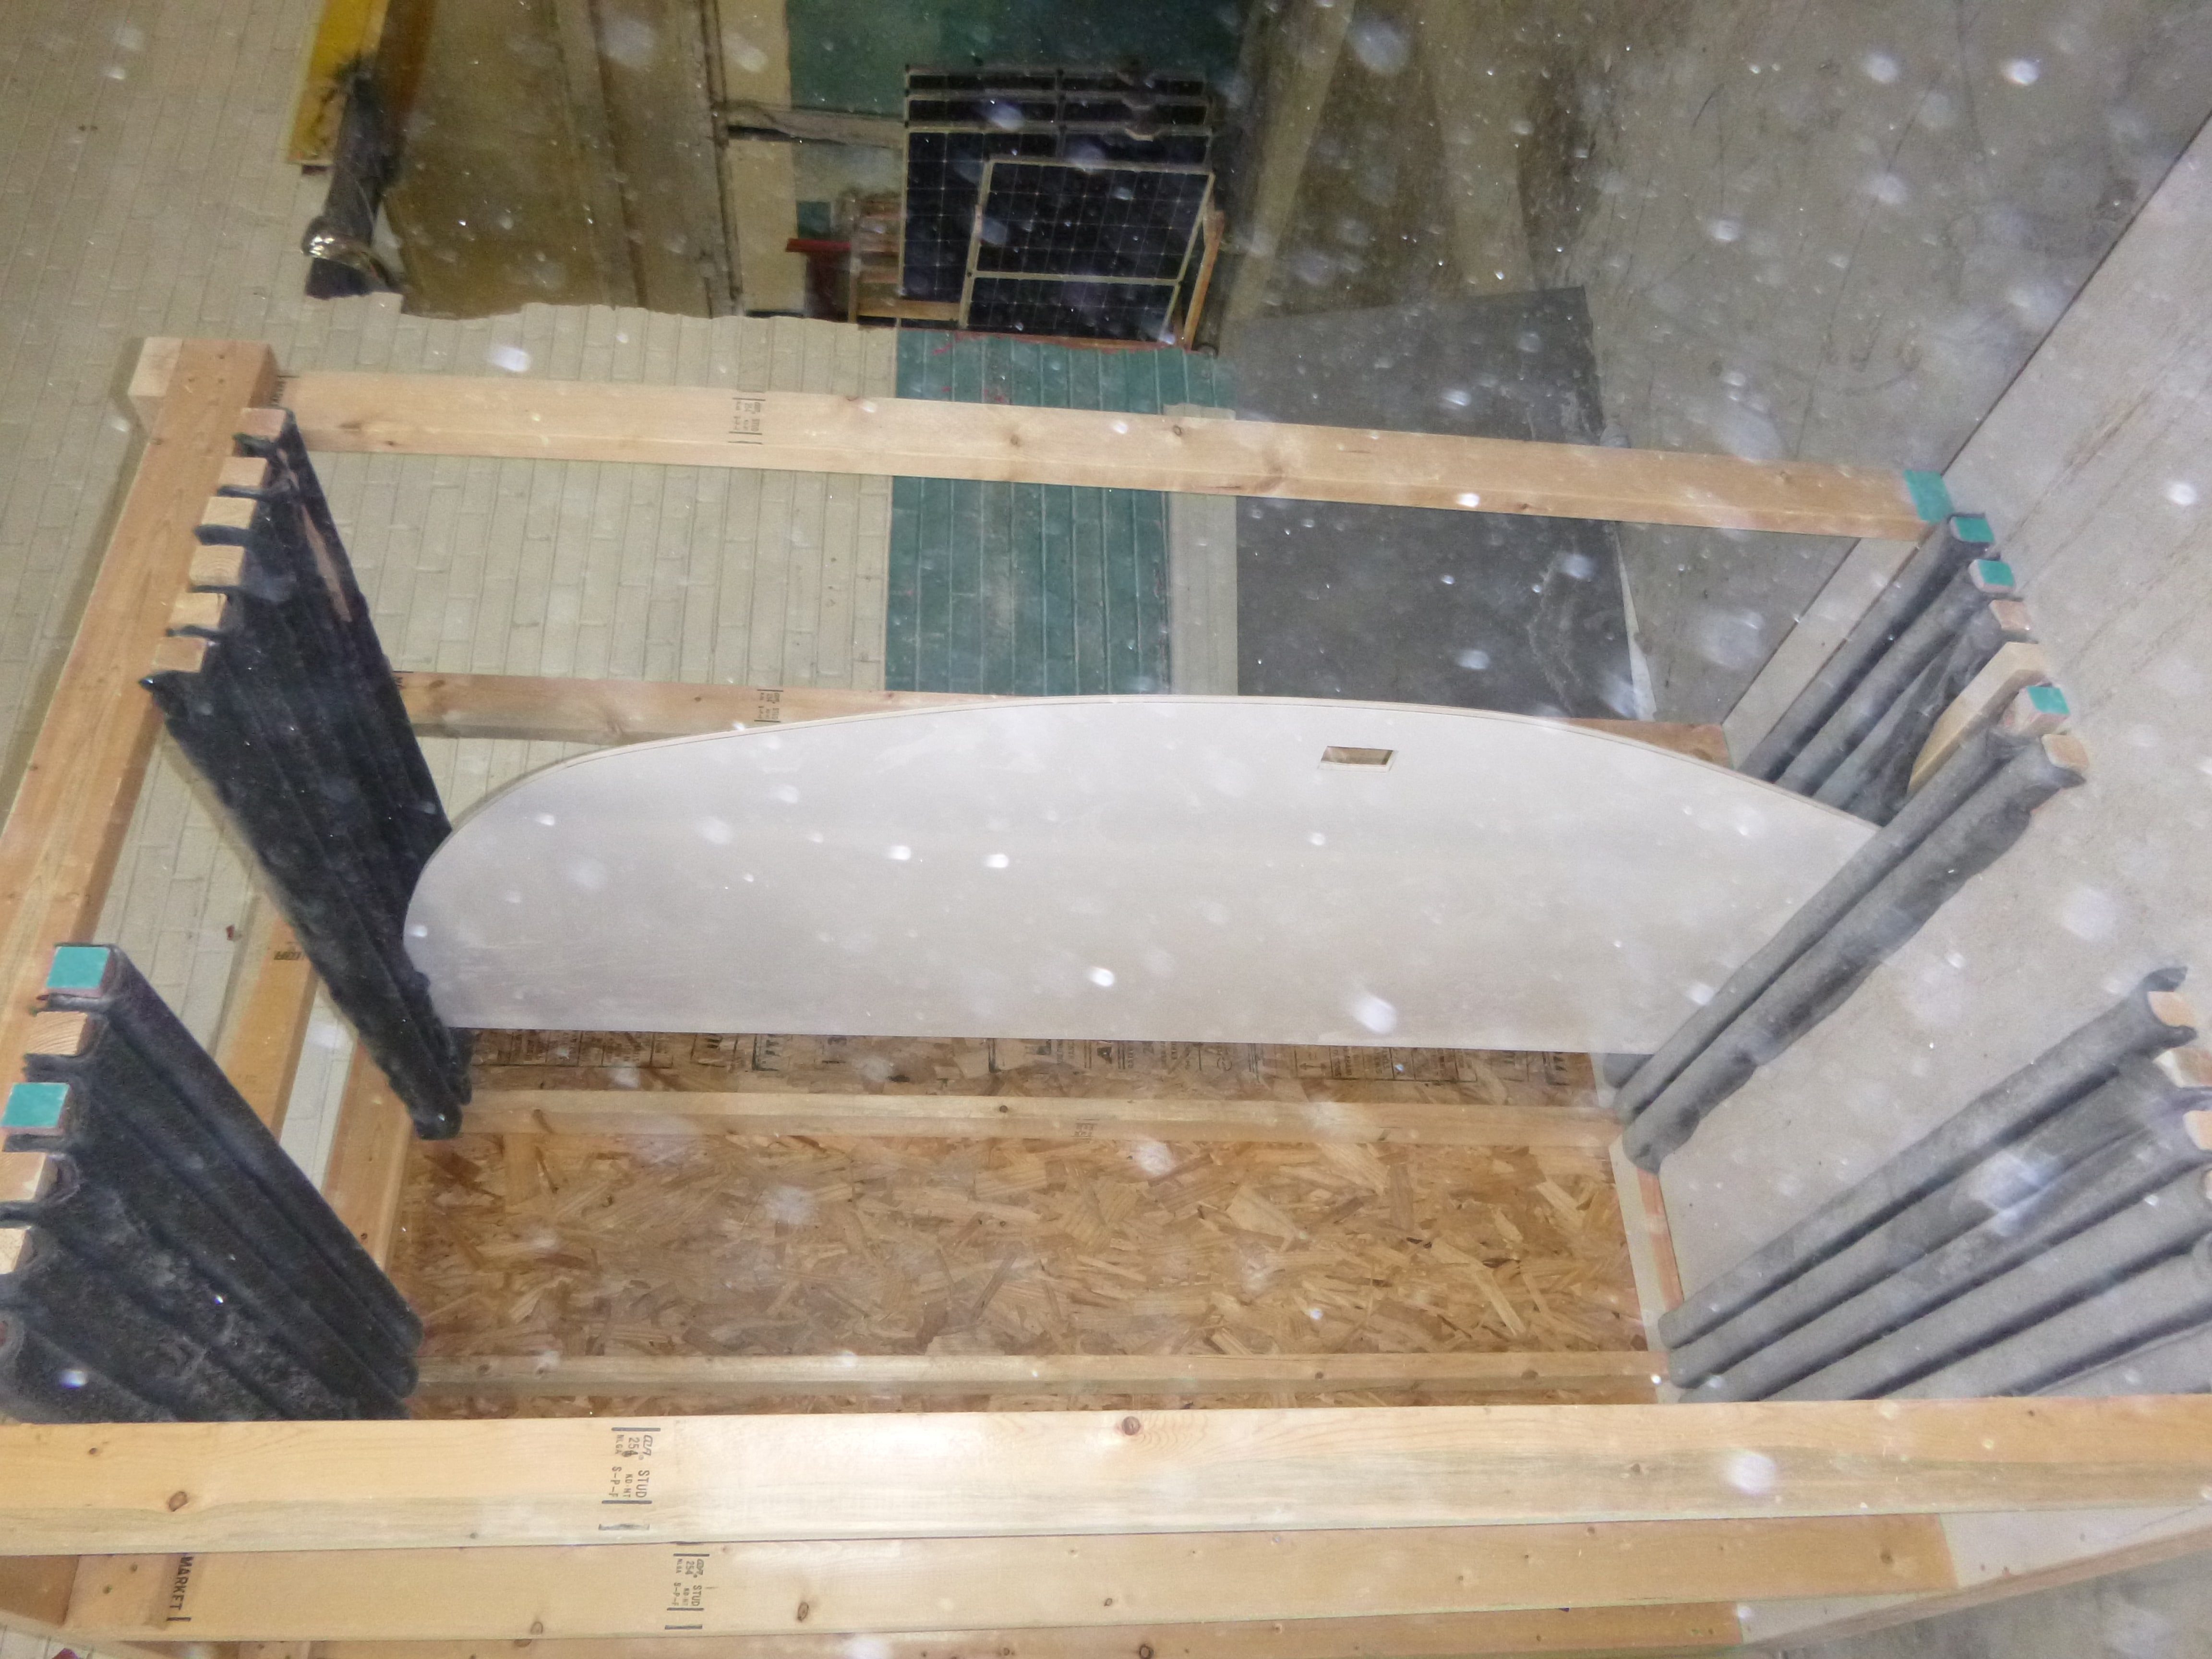
OK, for those that just can't get enough of this sort of stuff - upper inside shell before anything is cut out of it - fresh out of the mold. heaters, sinks, etc. all labeled and ready to go. Care for a cabinet door BEFORE it is cut out? Want to build your own frame? Note the thickness of the tongue parts. More parts looking for a home. Bill
2 points
-
If noticed some members on the forum have colored maps in their signatures. You may be asking yourself "How do you do that?". Start by visiting this website: http://visitedstatesmap.com Select the states you have visited and choose the size you wish and click DRAW MAP. *Please be considerate to others views on the forums by keeping the image around medium size* Next you will be taken to a new page and underneath the map where it says "Copy and Paste Image URL:" Copy the url, for example mine is: http://visitedstatesmap.com/image/xlg.jpg - this is not your map unless you have been to zero states. This is an example. Now go to your forum Signature to edit and put in the url: It should now look like: If you need help please discuss below. Credits: @SeaDawg, @KarenLukens
1 point
-
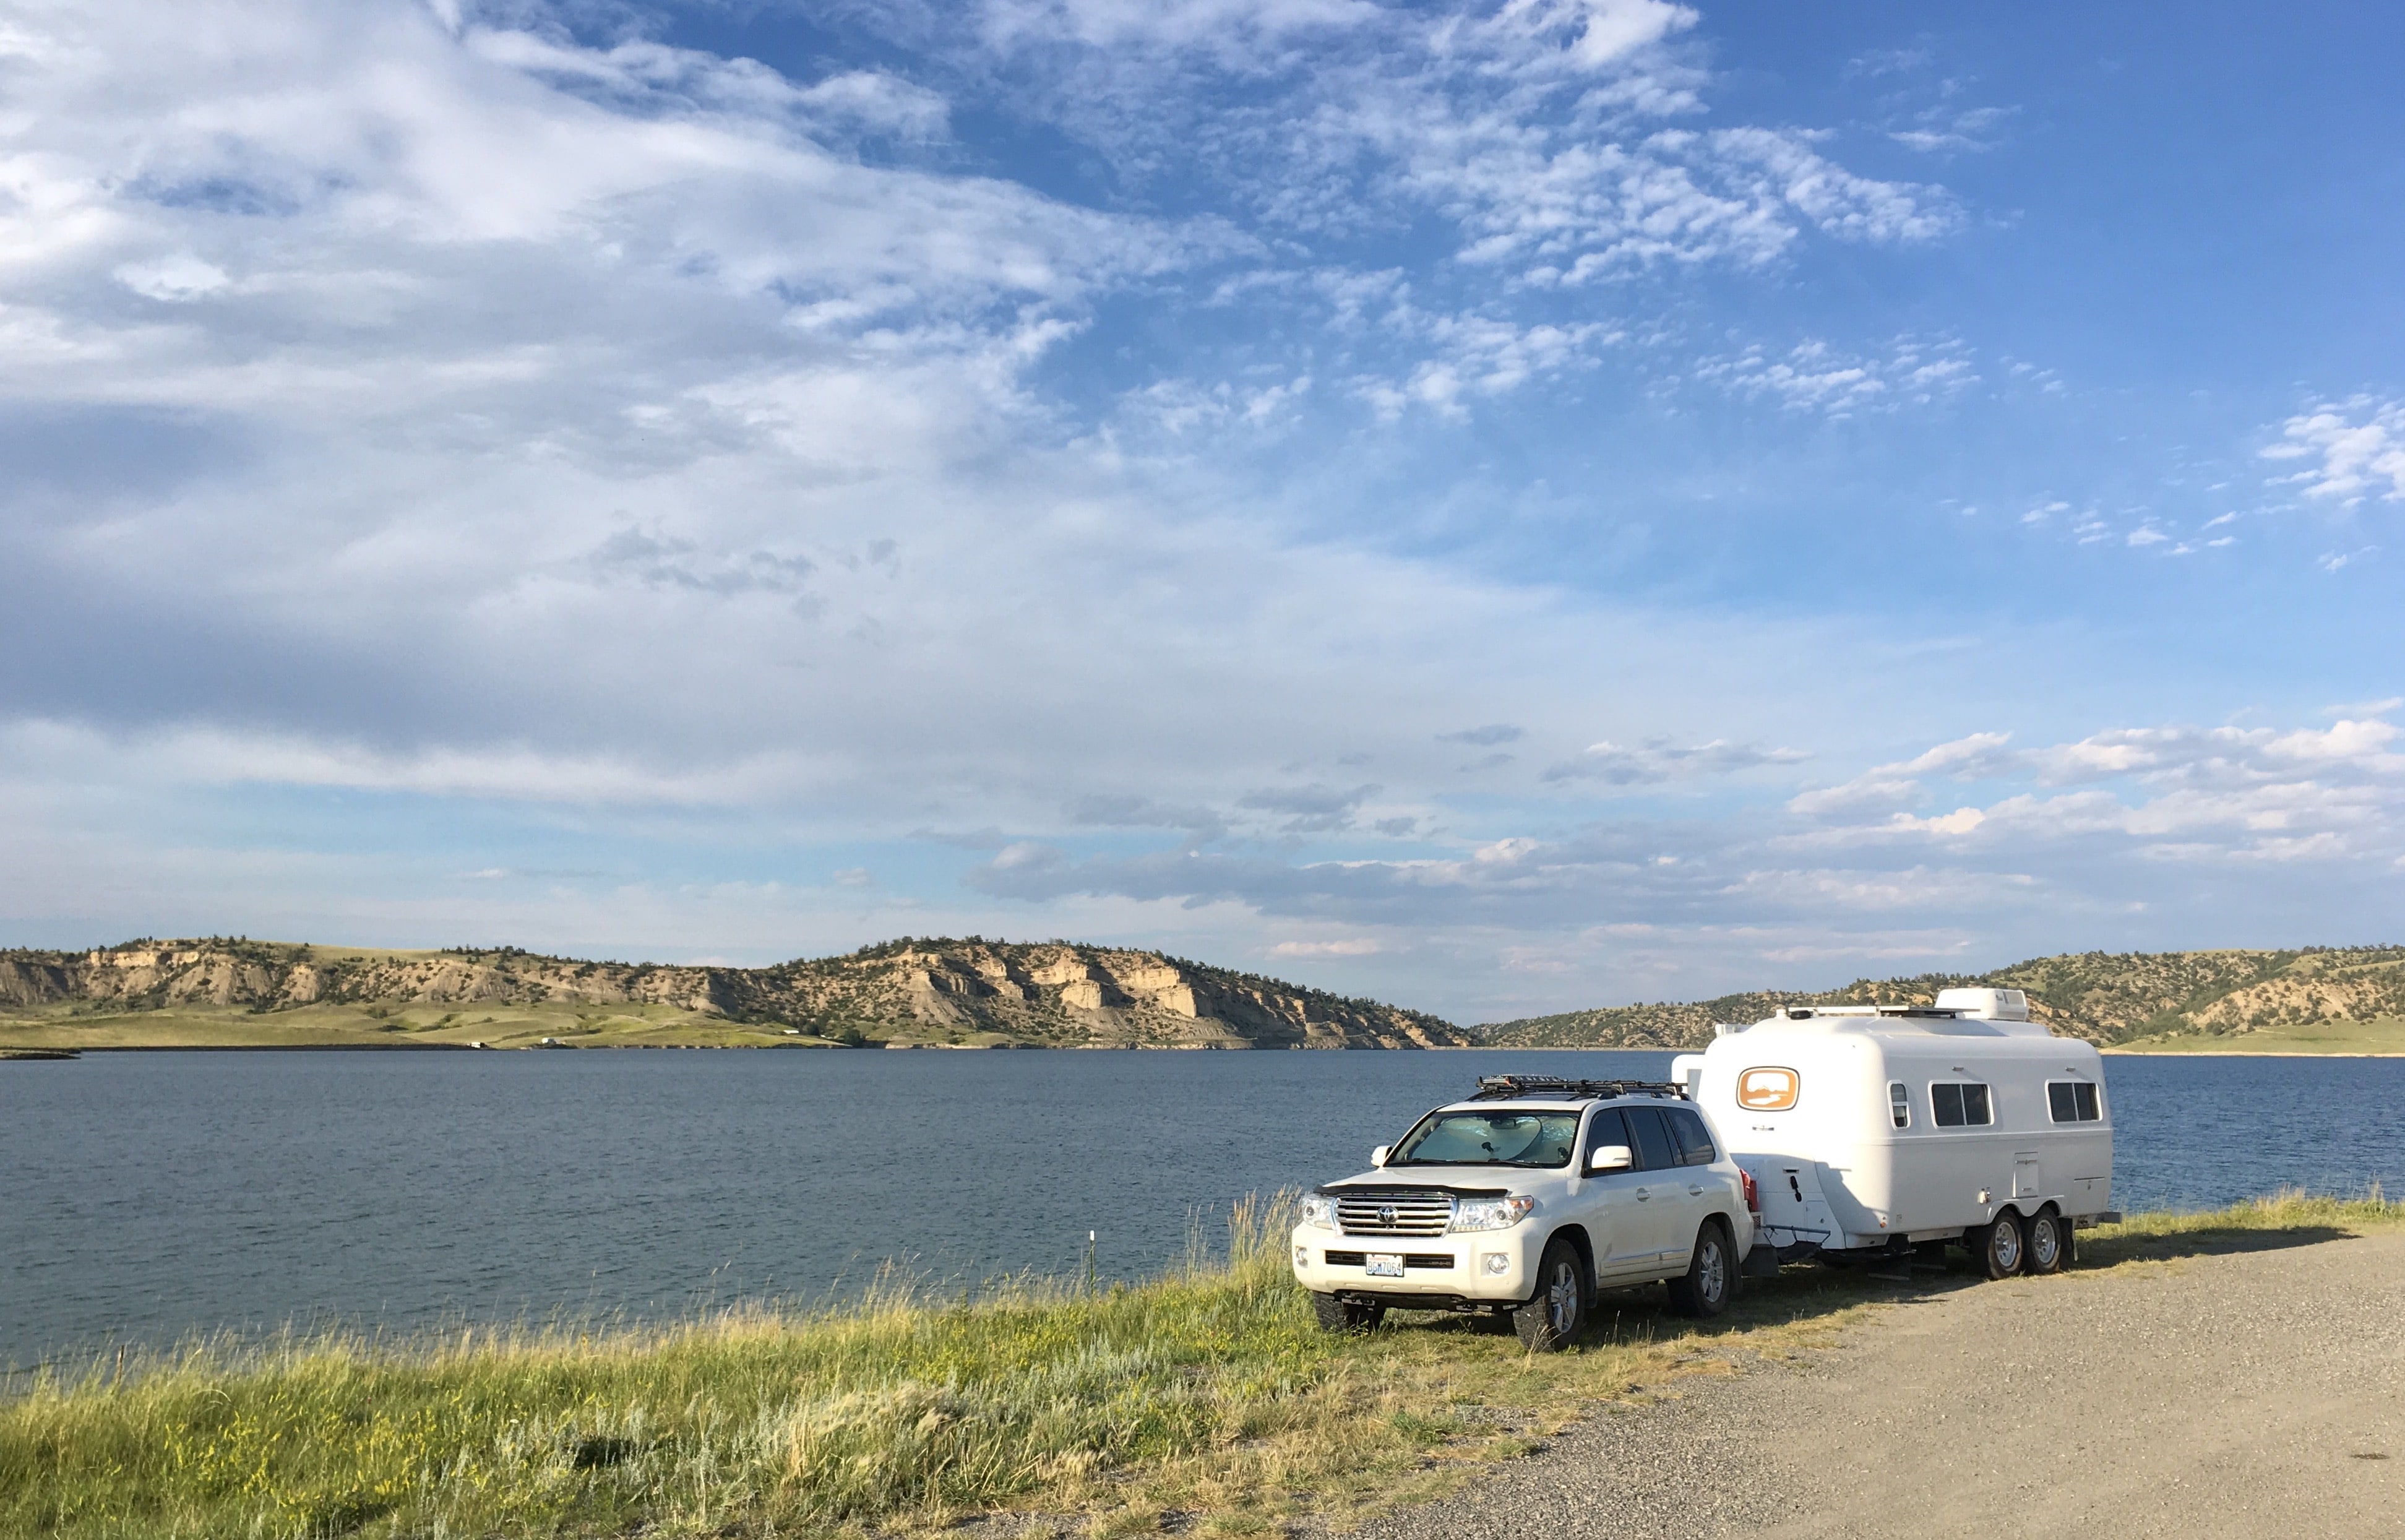
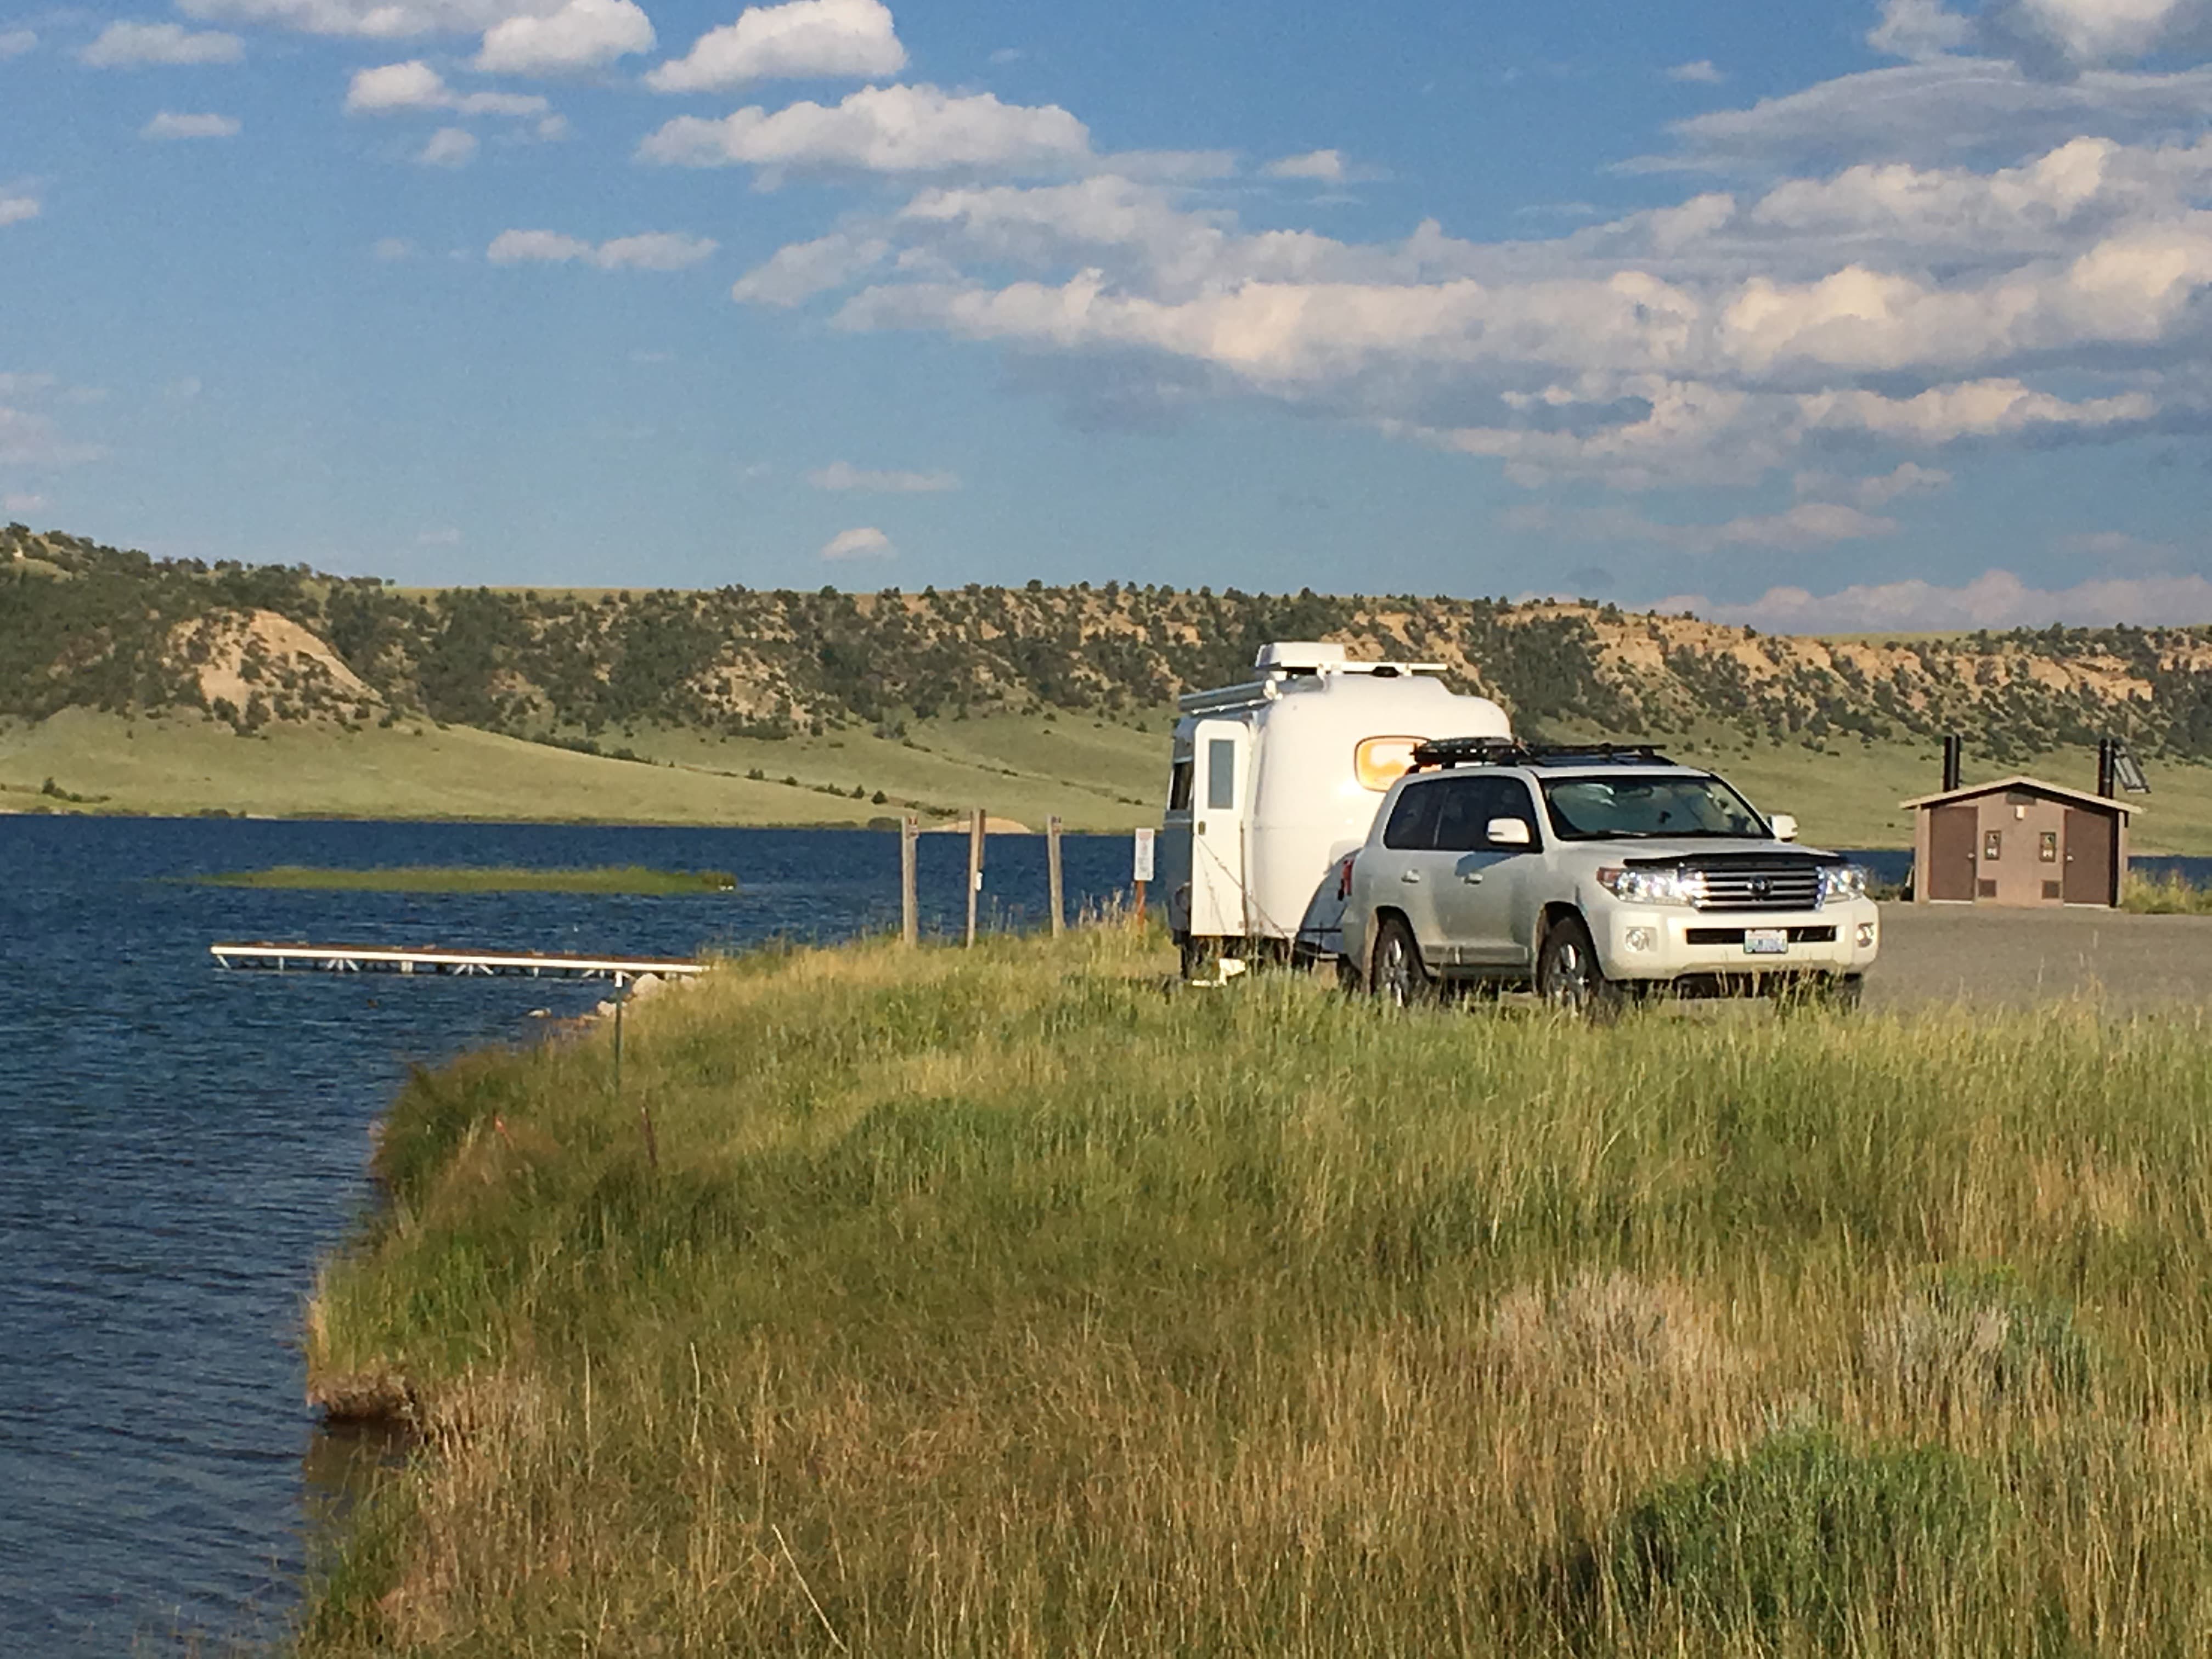
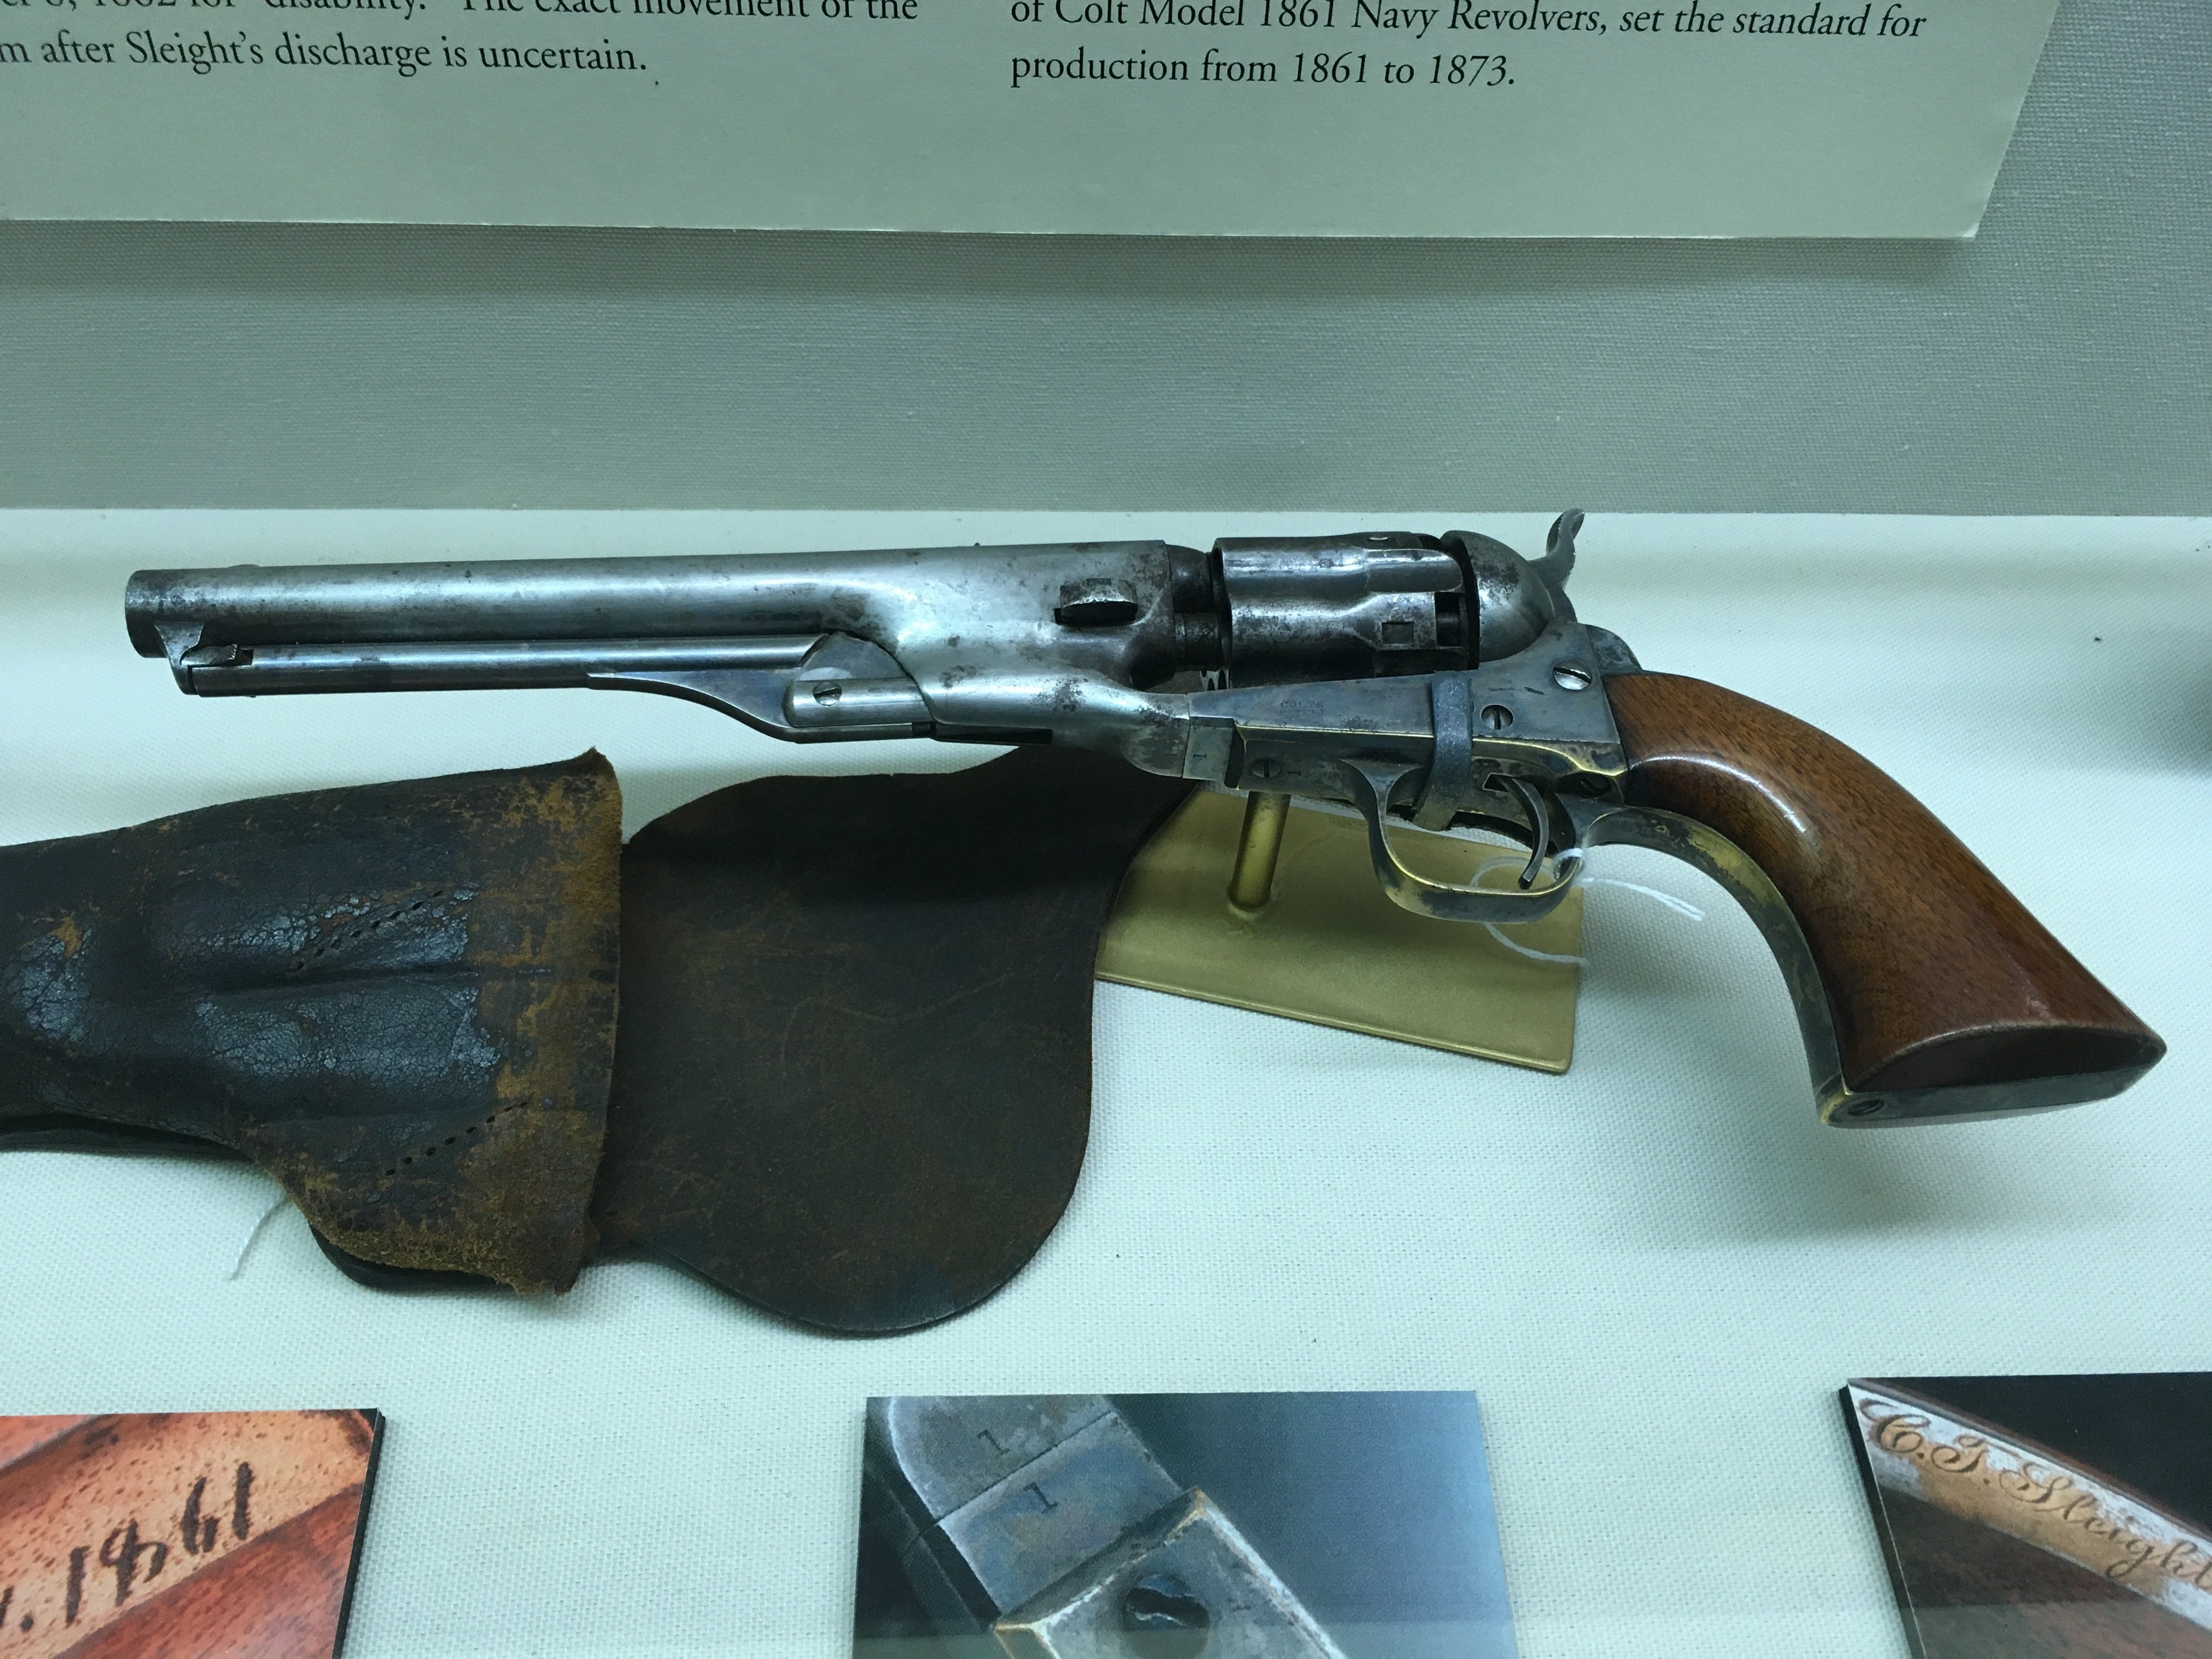
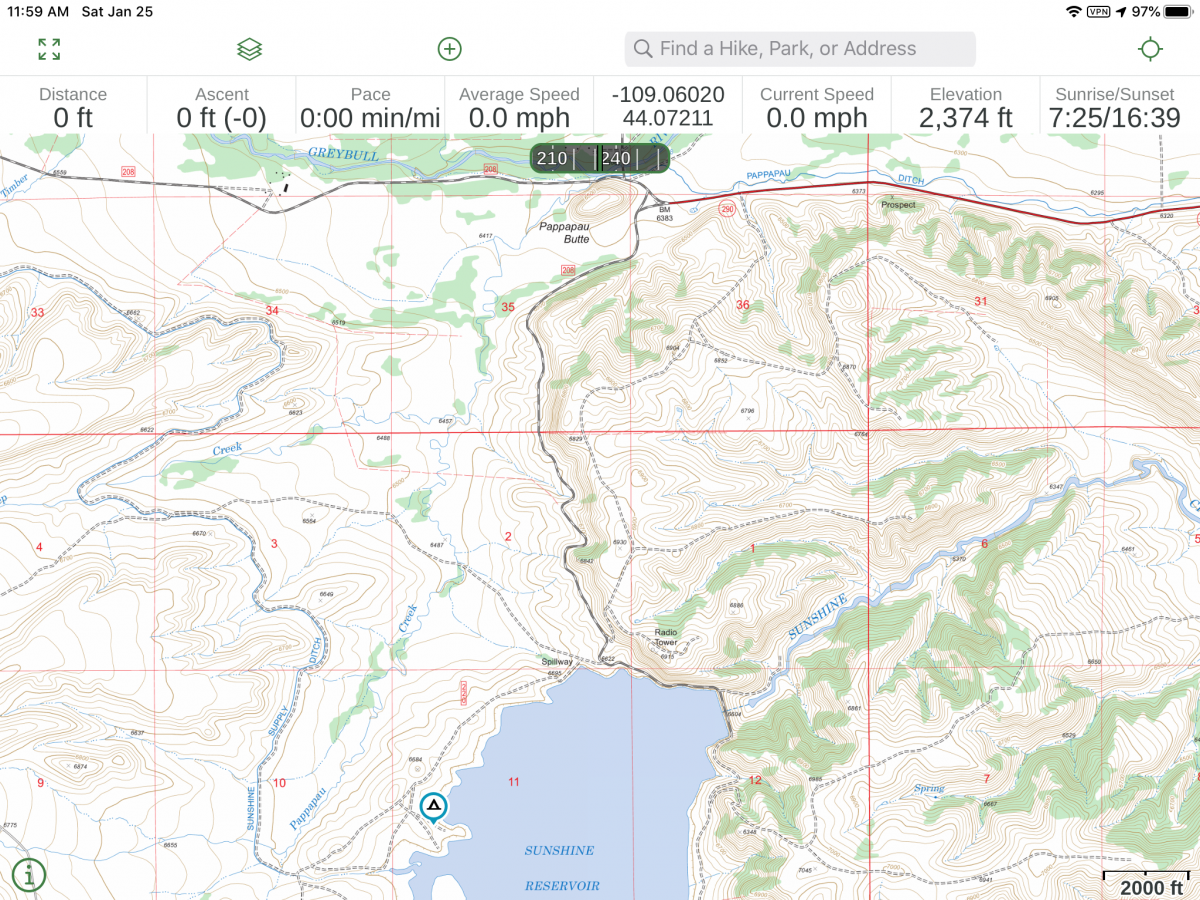
UPPER SUNSHINE RESERVOIR. The area around Cody is insanely busy in summer, and finding a place to stay that doesn't require a reservation and $50 per night is very hard, especially if you do not have a fixed arrival date. It is one of the main "feeder towns" that tourists go through on the way to Yellowstone and Tetons. We wanted to revisit the Buffalo Bill Center of the West, and avoid the Parks, but we could not find a place to camp. A little research turned up this gem.... About 30 miles south lies Meeteetse WY, and due west are a couple of irrigation reservoirs; while both offer camping and water access, the jewel is the Upper Sunshine Reservoir, the western-most one. It takes about half an hour to drive there from the town, along a stunning valley with views of the jagged glaciated mountains south of Yellowstone. Most of the access road is high speed WY highway. The last 4 miles are well maintained gravel and dirt (possibly very slick when wet, definitely dusty when not). Location map: https://www.google.com/maps/place/Upper+Sunshine+Reservoir/@43.968422,-109.1090158,11z/data=!4m5!3m4!1s0x534c5725b1e82ec9:0x278afb15aaf5ba06!8m2!3d44.0490298!4d-109.0627262 Run by the Wyoming Department of Fish and Wildlife, it is a well maintained area with lots of dispersed camping, a boat ramp, pit toilet and lots of fish. It is definitely brown bear country, and you must take appropriate food precautions, but all we saw were antelope and a little Jack Russell terrier that repeatedly weeweed on Mouse's wheel. It is very popular on weekends. Midweek, it is not crowded. Most of the day-fishermen pack up and leave by 400 pm. We elected to camp on the shoulder near the (non-busy) boat ramp because we were worried about thunderstorms. Some of the dispersed spots would be very greasy after a heavy rain and we needed to be gone by 700 AM to get to the Buffalo Bill museum by 800 am when it opened. Even in summer there were a lot of birds including some American Avocet, which has a cool "Doppler Shift" call and curved up bill, and we had never encountered any of those before. The sky was threatening and overcast, and we had a brief downpour at midnight, so we could not do any star gazing, but it should be a great location for that in better weather. Timelapse sunset: https://youtu.be/N8ejZg49EWQ Highly, HIGHLY RECOMMENDED if you are in the Cody area! Five stars, well maintained, isolated, free. Meeteetse is a pleasant, prosperous little community with a Conoco and a chocolatier, so it is a good spot to refuel the truck and the wife before heading to the Cody Mess. The highlight of the Cody Firearm Museum for me was: The Colt Navy 1861 revolver, serial number 1: [attachment file=IMG_6752.jpg] ...and the Longmire tv show display. Here is Walt's badge: ...and the entire display with his Winchester and 1911, and Vic's Glock and badge; I need to rewatch the series now..... John Davies Spokane WA
1 point
-
The optional 2000 watt onboard inverter is a great option to have if you like to get off-grid or even if you have a lengthy drive to get where you are going. The way the optional on-board inverter works is by taking battery (DC) power and converting it over to (AC) 110 power. It is tied to the campers 110 receptacles and microwave to provide power for use when a shore connection isn’t available. However, the inverter does depend on the battery power and it can only provide up to about 15 – 16 amps of power at a single time. This means that if the battery power is too low then some of the more high power consuming devices/appliances may not work properly or simply overload the inverter and cause it to shut down. There are many different appliances out on the market that range from low power consumption to high power consumption and this is important when purchasing these items for use with the inverter option. Hair dryers are a great example of an appliance that demands a lot of power, but also have a broad range of rating. They typically range from 800-1800 watts. While an 1800 watt hair dryer might be the best choice for your house, it will likely require more power than you might want in your camper, especially when running on the inverter. Another example of high power consumption is the microwave. It uses 12 amps, which is getting close to the 15-16 amp max for the inverter. Just keep this in mind when running the microwave as turning on another appliance at the same time might cause the inverter to shut down. What does the inverter need to work properly? The inverter is 100% dependent on the battery bank power, so be sure that the batteries are always charged up and ready for use if you plan to use the inverter. When purchasing the inverter option it is crucial that you also get the solar package or some form of charging solution so it can keep the batteries charged up and ready to go. The battery bank on the camper also needs to be able to hold enough power to supply the power demand from the inverter and appliances connected. The optional 6V AGM batteries can provide about 200-250 amp hours which is a substantial increase from the standard 12v batteries. The lower the battery voltage, the less likely the inverter will be able to sustain the power needs of the appliances in use. Also keep in mind that over time your batteries age and lose the ability to hold as much power as they did when they were new. This will also start to impact what you can run on the inverter as well as how long it will run on the inverter. The conversion rate from DC power to AC power is also important to know as this will change the rate at which the batteries can provide power to the inverter and the rest of the camper. If the microwave pulls 12 amps of AC power then it will use about 122 amps when using the inverter and battery bank. What this means is that it is draining your 200 useful battery bank amps rather quickly. However, most people don’t run their microwave but for short periods of time so this high power consumption shouldn’t create a problem. What might cause a problem would be running an appliance like a space heater on the inverter as you might leave it running over a longer period of time and it would eventually drain the battery bank down low enough where the inverter would shut down. The inverter is a great option to have if you think you will be camping off-grid with the solar panel package and without shore power or even if you just want to pull over for a quick break to heat up something in the microwave while traveling to your next camping destination!1 point
-
Cedarforks - This past May most of the attendees were located at sites nearer the lake, but, those seeking shade were more towards the top of the hill - closer to the registration building. A bicycle is helpful but not necessary since for even those camped all the way to the right (as you look at the lake) it is just a few hundred yards to get to the pavilion where breakfast is served, the vendors are located, and most of the presentations are held. In addition, there is plenty of parking at all sites where events are being held. Bill1 point
-
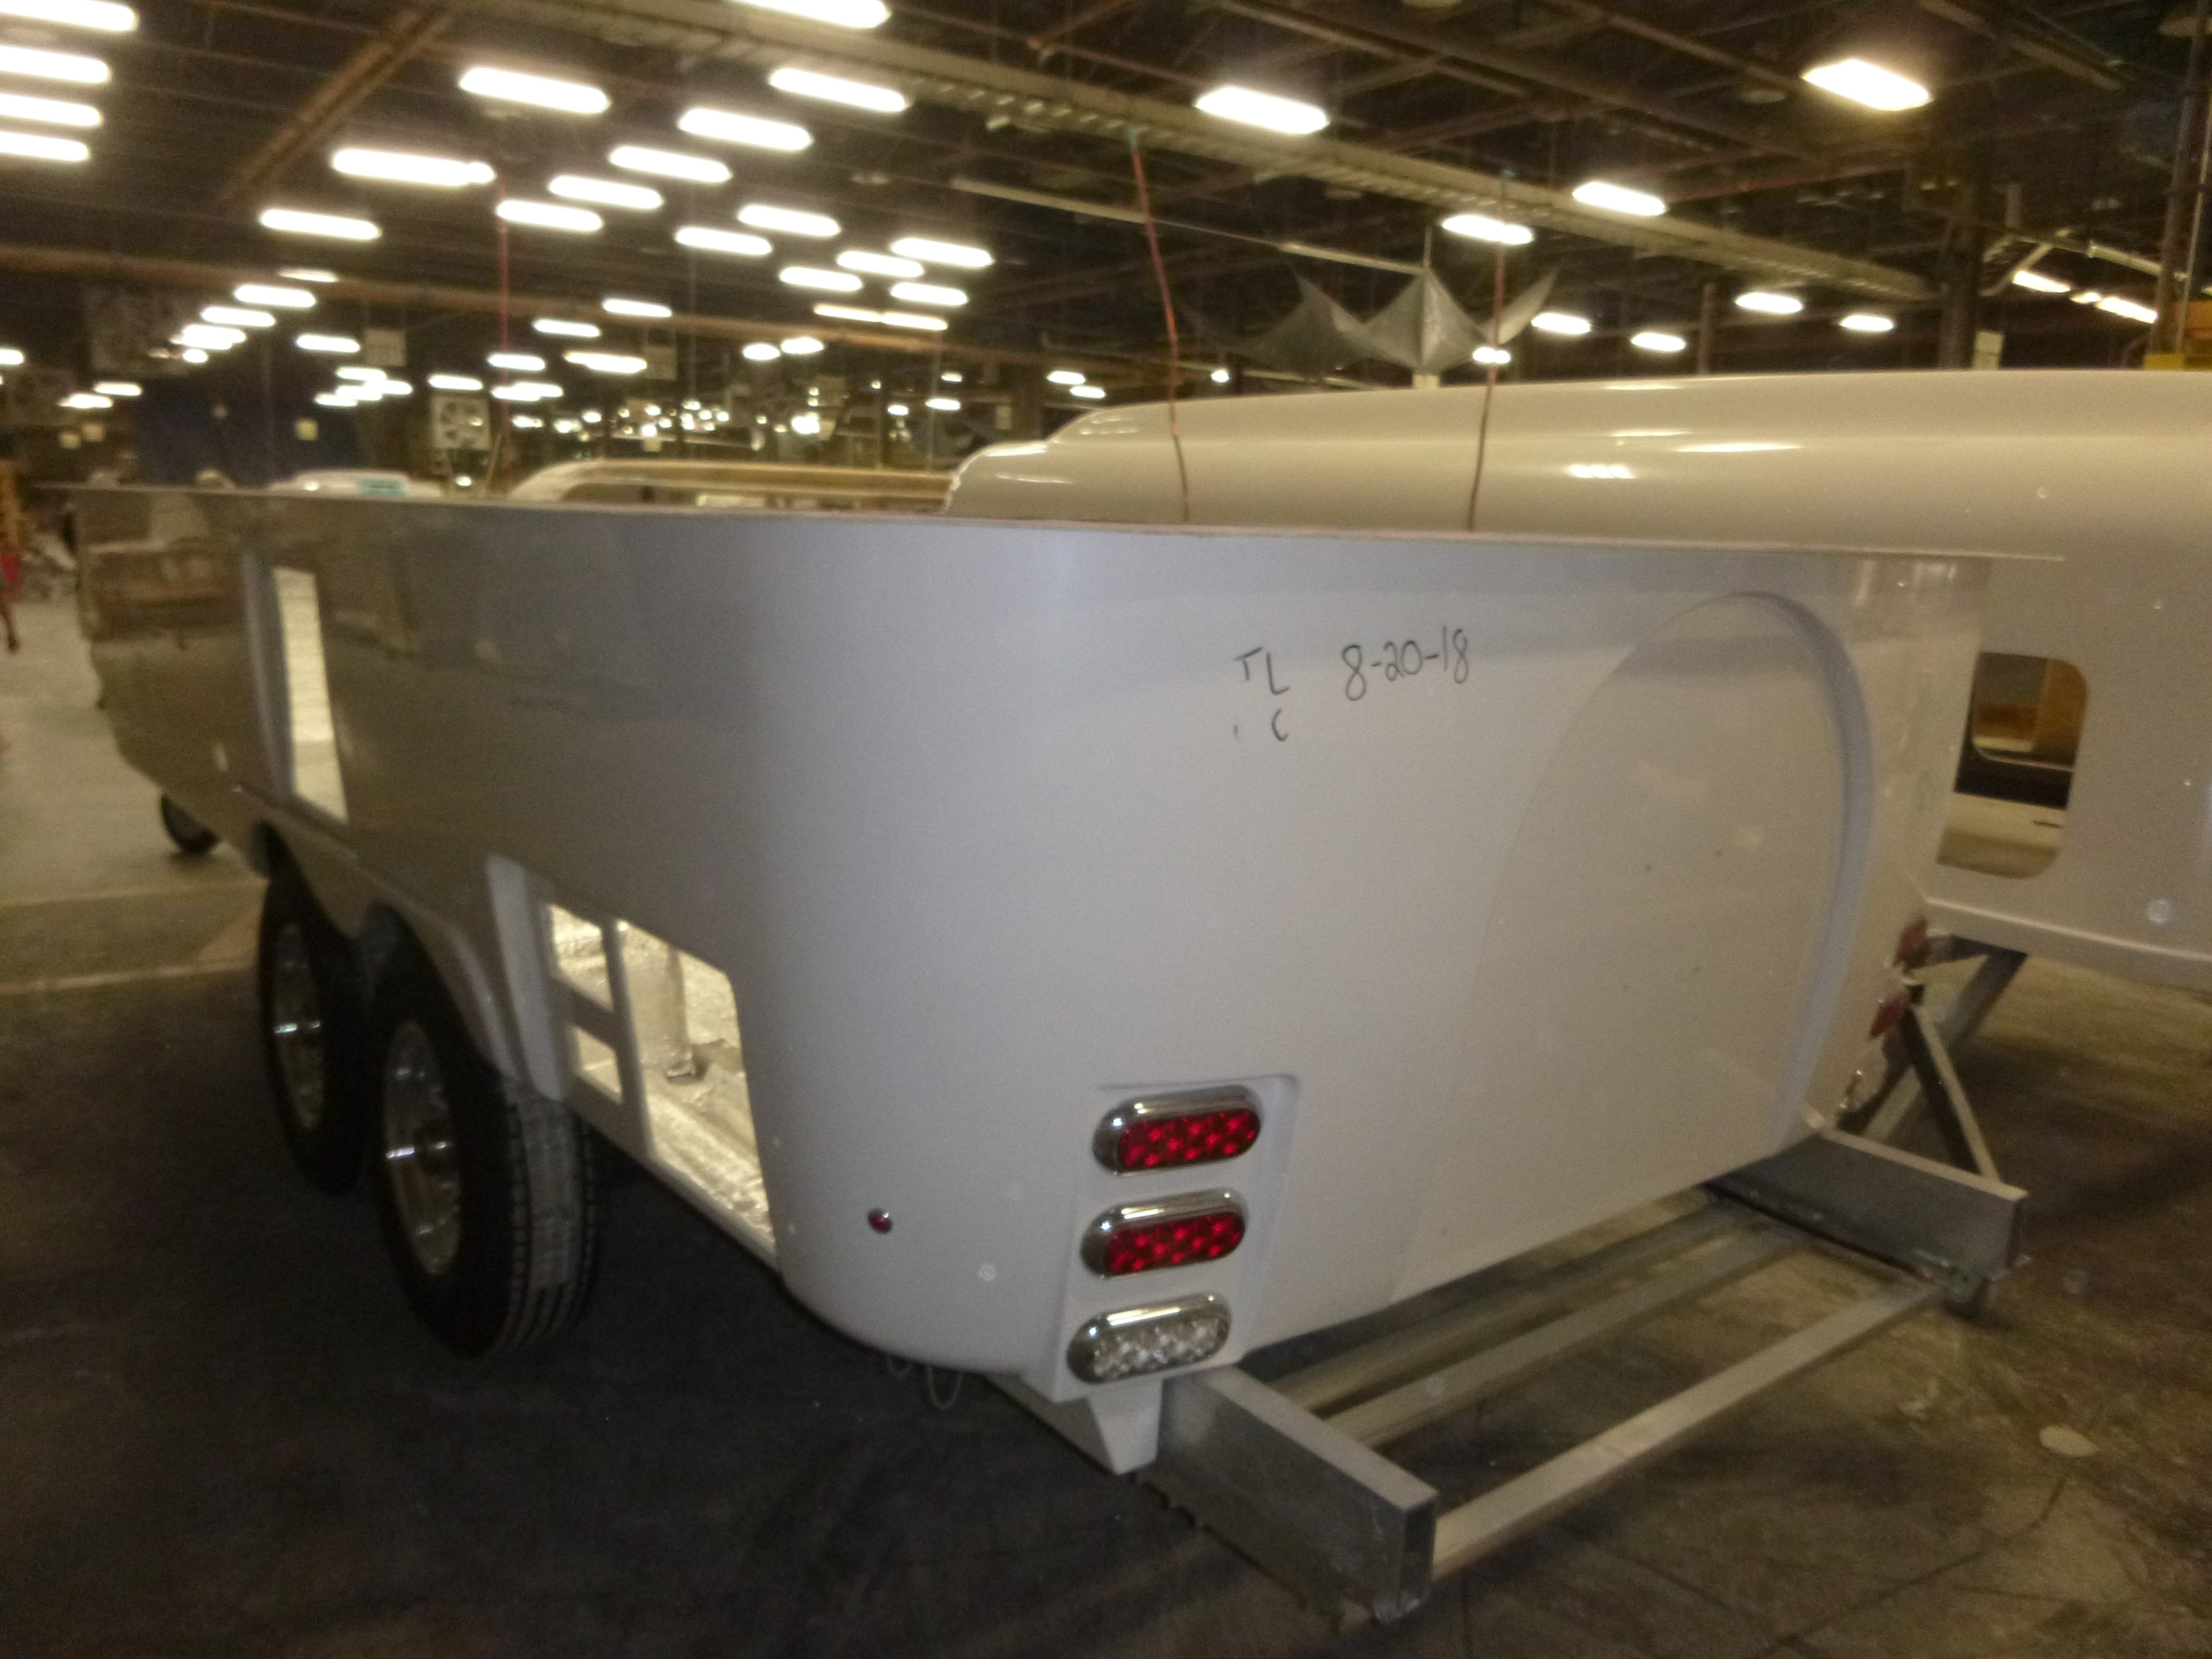
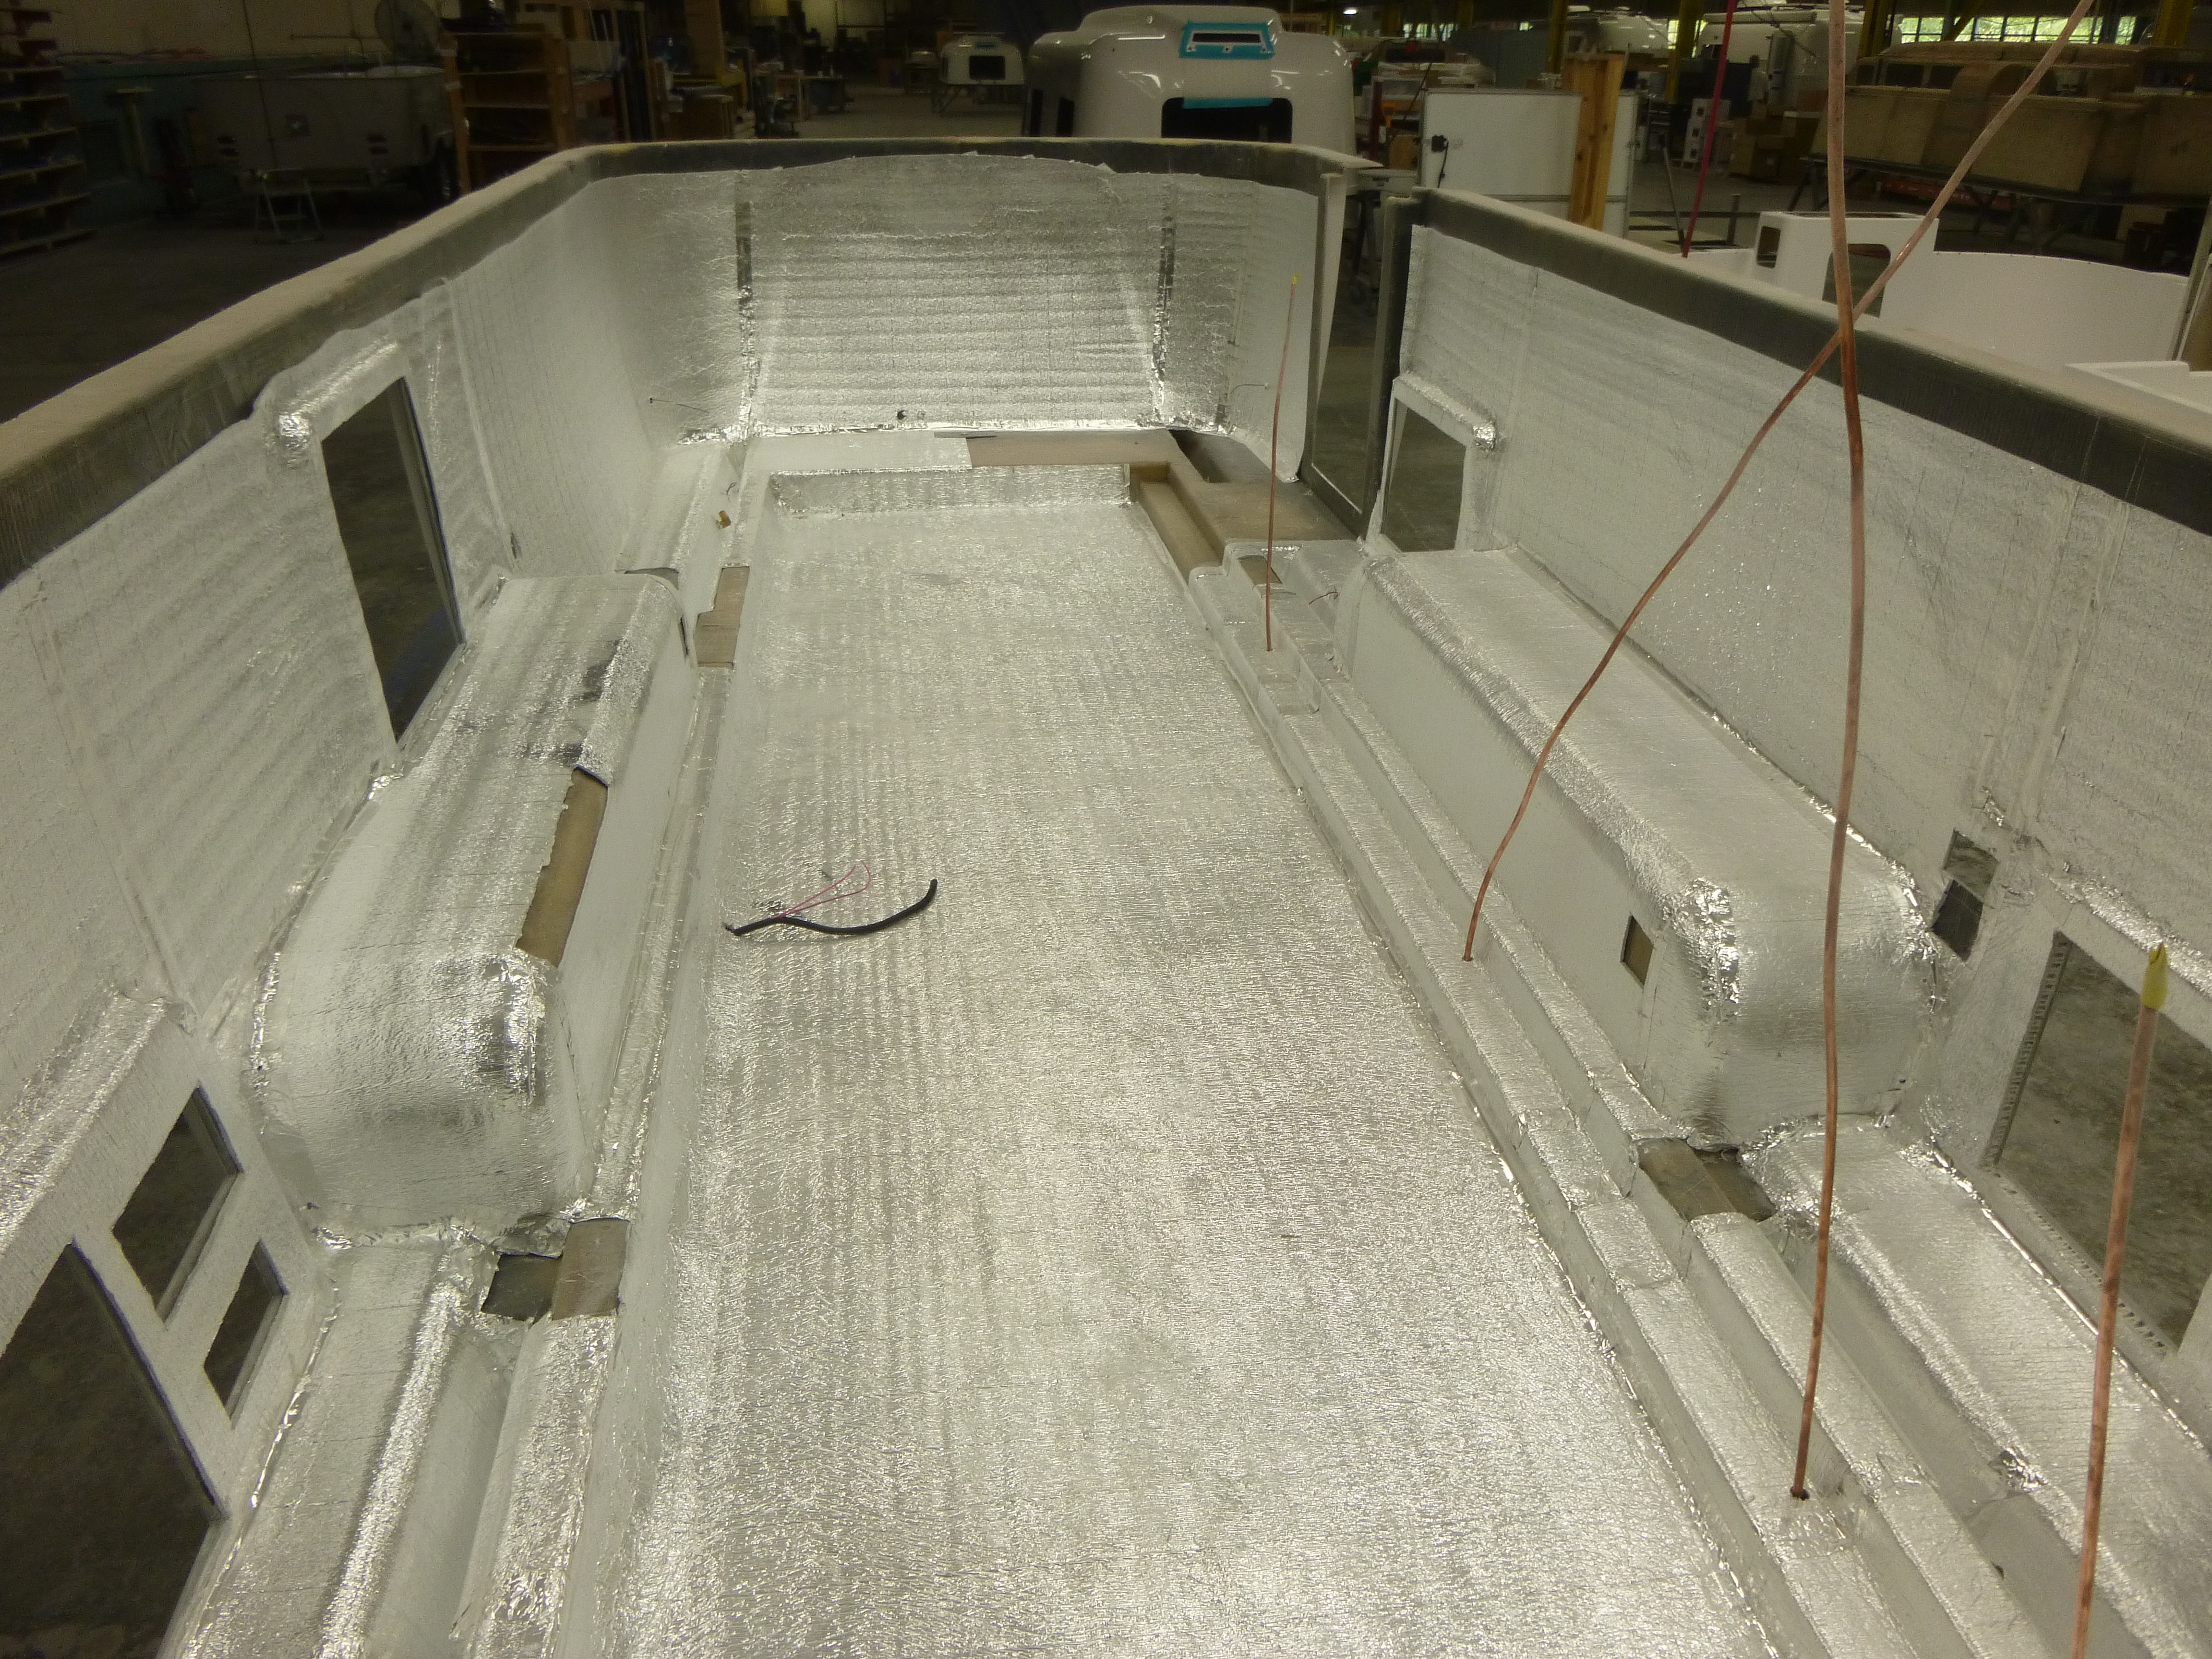
Picking up where we left off on the tour: backside of the cabinets - over 90% of the wood contained in an Elite II is right here. Bottom outside shell already on the frame. Quality control. Insulation is only the start of "stuff" going into the bottom. Getting there. lower bottom inside shell about to be placed inside the lower bottom outside shell.
1 point
-
I keep coming back to this thread because being a full timer, I just don't see the need for bigger. Sure I could have bought that Airstream 27fb or the 27' Bigfoot, but then the ease and mobility that we have now, is gone. Our friend that we travel with sometimes has the 27' Bigfoot, and it is nice, but he just can't go where we can with ours because that extra width and length really cut down on the places that he can boondock. Plus he has to have that larger 3/4 ton truck to pull his with, that we just don't need. The only thing that we would change is adding a 7cubic ft fridge option and that's it. For us, having the ice chest in the front to hold our drinks works just fine and with a different box in the front, one of the AC/DC ice chests is something that we have thought about. So, longer & wider? No thanks! Then we would need 2 trailers, one for the rare occasion that would sit in storage mostly and then the Olli that we live in daily :) Reed1 point
-
Bill, While I was at the "Mothership" last week I noticed that that bolt covers are now included on all new Olivers and said something to Jason and Richie about it. I guess that they felt sorry for me because when I got Twist back from some minor repairs, the covers were there. If you are interested, the bolt size (according to Richie) is 1/2 inch and the covers/caps are available at Lowe's and probably Ace and Home Depot too. Bill1 point
-
Were Sally and Mark from Washington State and picked up our Legacy II on 24 July Hull #364. Long trip back getting familiar with all the systems and operation of the Ollie. We ordered out trailer last October and selected the delivery date to coincide with Sally retiring and completing a house sale in Seattle before heading out East. We took several weeks to get home and like the trailer more each day. Since returning to the nest several modifications have been made. Thanks to all the Forum members that post their mods and advice. In the 9 months awaiting delivery we learned so much and had to chance to order the bits and pieces for the mods and that has made the experience even better. I've posted some pictures of a few things and I have done. Chime in if you recognize your intellectual property ! Thanks for all the great conversations on the forum and Sally and I hope to see on the road !
1 point
-
To keep from rehashing previously discussed info, please see this thread. I have bought and installed the Mopeka system and I can report that it works like a charm. I recommend it to anyone that wants another toy for their box.1 point
-
Hey Reed, Thought you fell off the planet. We were going to come looking for you after Bandon, but the smoke was so bad we decided to head home and then on to Redwood City where the air was clear. Glad your doing well. If you're back near home we could meet up in Tahoe.1 point
-
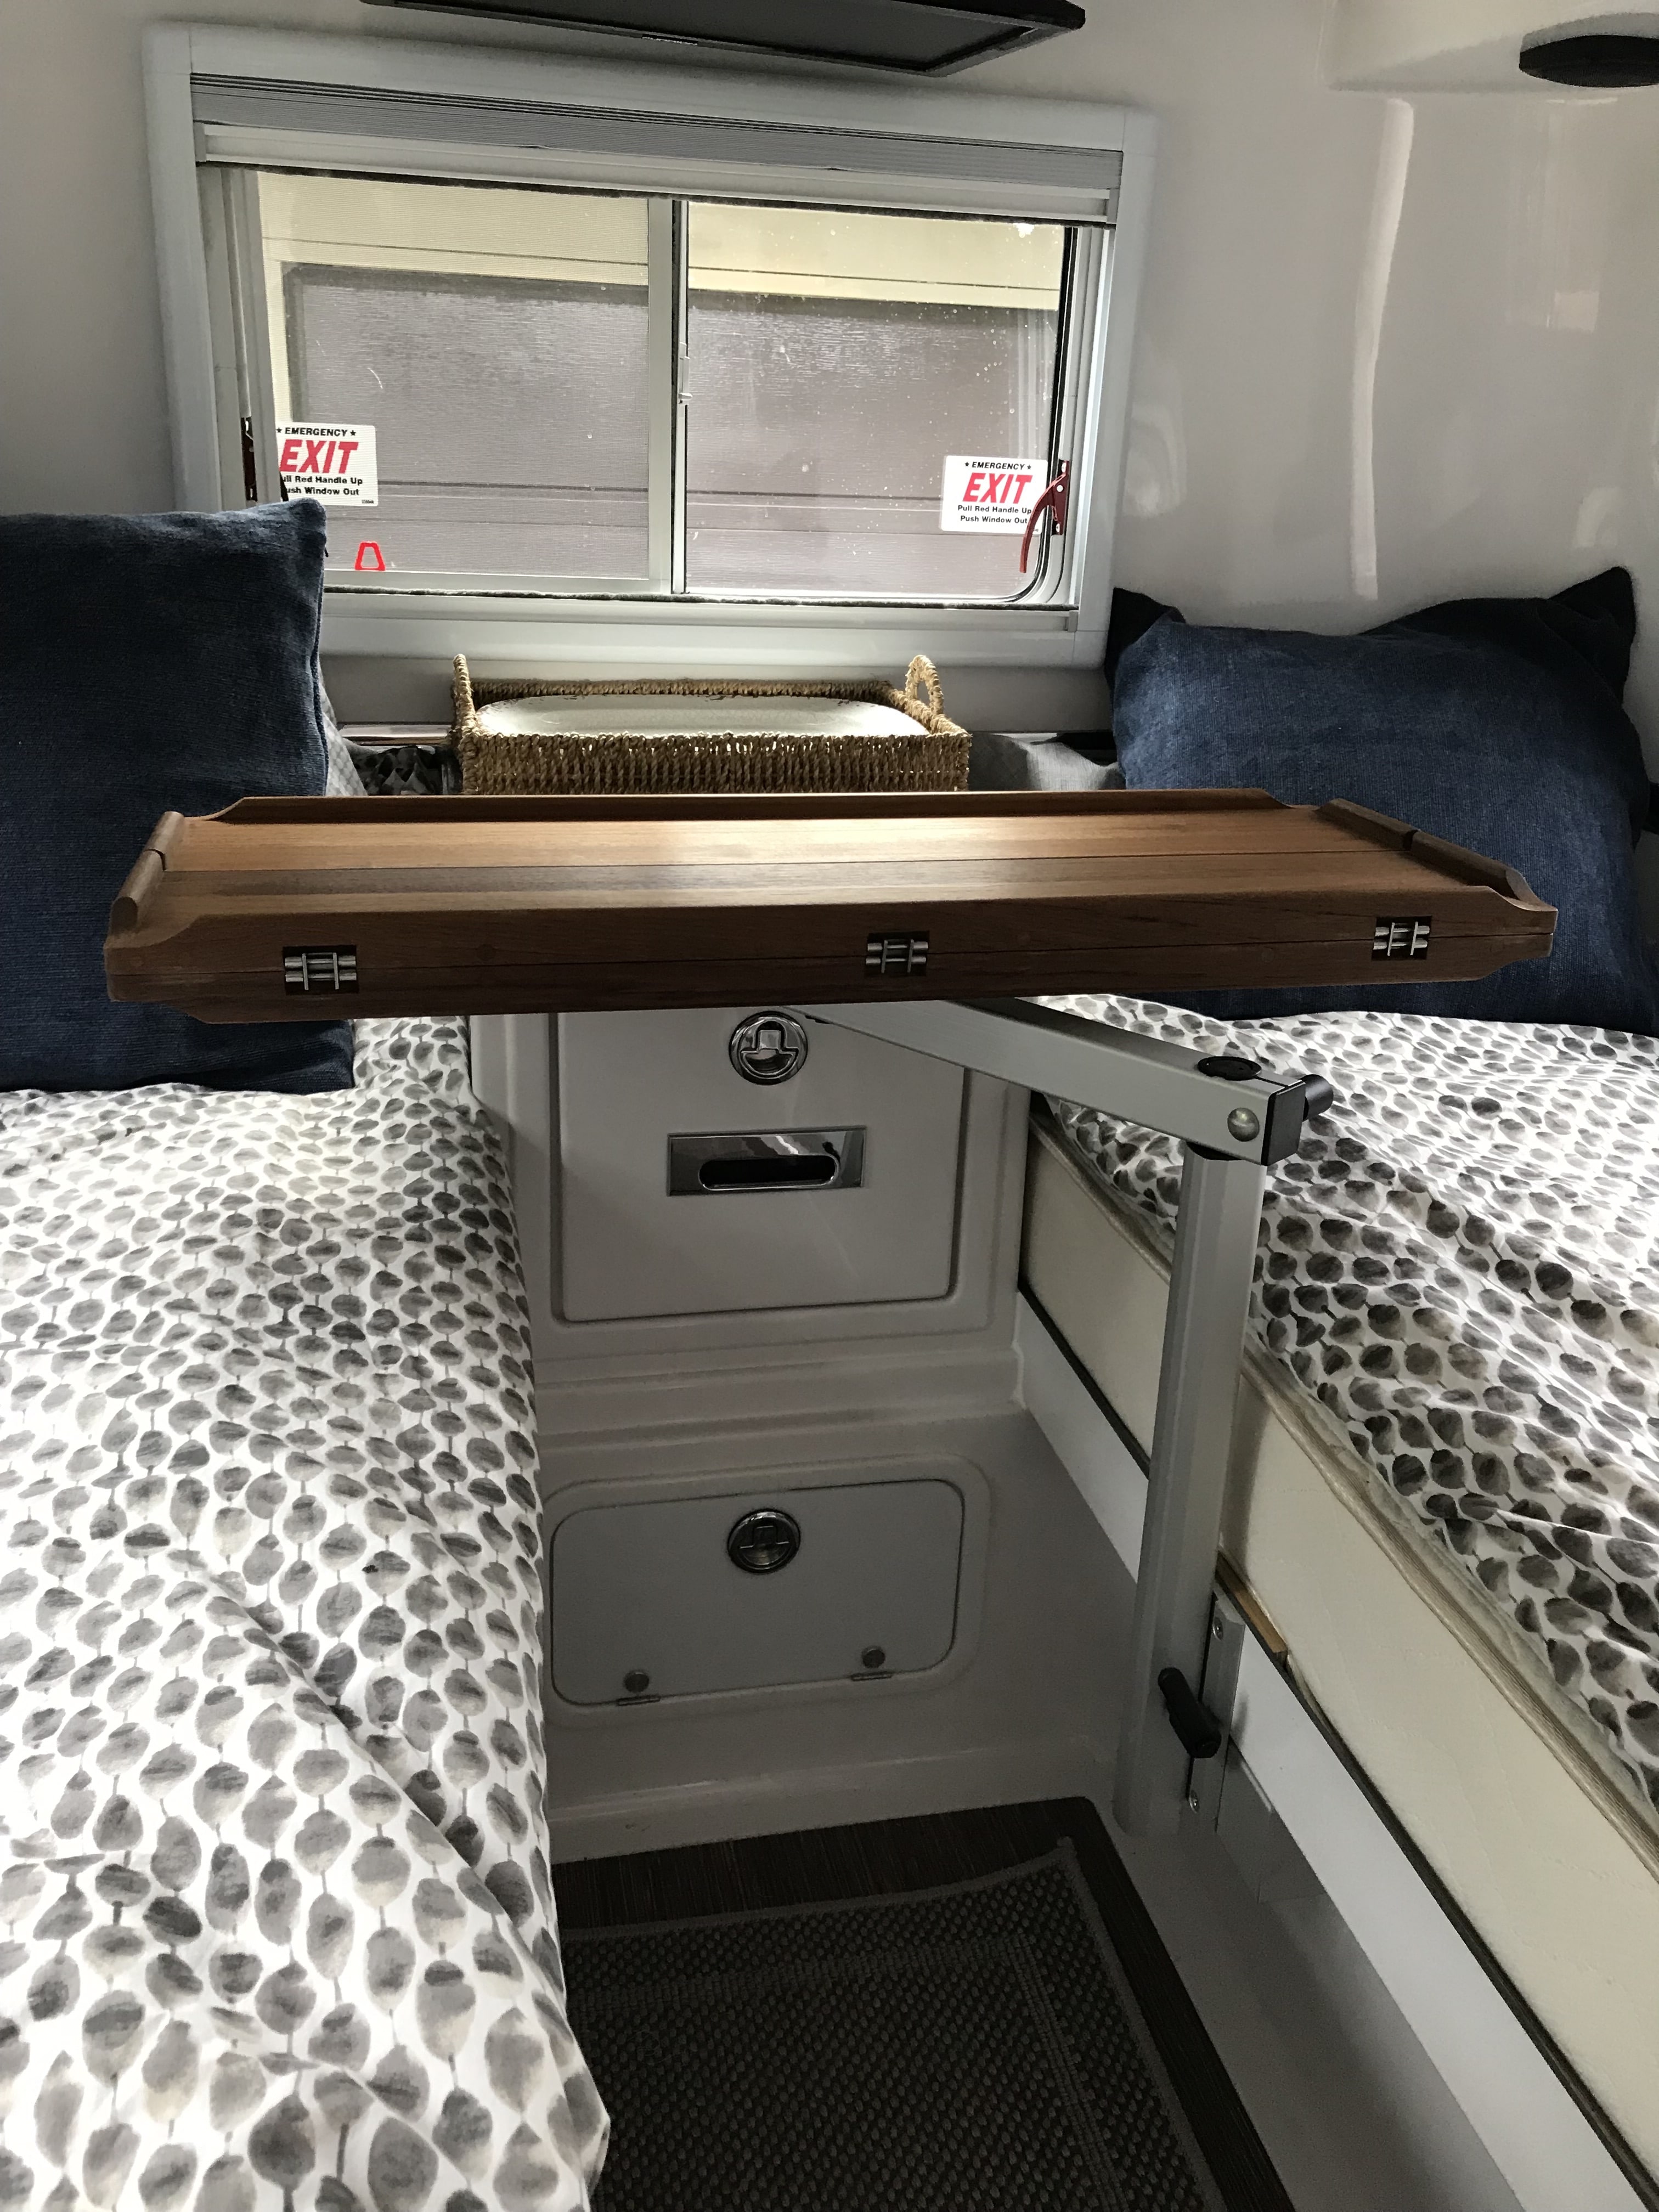
We also opted for the storage space instead of the microwave and we love it! It is so big and the wood does break up all the modern white/glass of the trailer. It is a great spot for large items like pots/pans, but I’ll admit we seem to use ours as the bar - it fits liquor and wine bottles great!1 point
-
Its just a propane leak detector mounted under the dinette. All campers have them. It does not monitor the propane tanks.1 point
-
Rumline - Exactly. I was mislead by the OEM websites and brochures on payloads. Seems they want you to think the trucks can do "this" but in reality they are individually rated at less than "that". You must reference the trucks load sticker on the cab frames, that Is the definitive source. Most 1/2 tons are inadequate when you figure in 7oolbs tongue weight. (Not going to quibble - round up!). Then add in two adults 330+/-, maybe a dog, 95 (mine), and sans any additional gear you are at 1125lbs +/-, oh, what about fuel, you get the point, the vast majority of 1/2 tons are very close to their legal limits. Make a mistake, and over load, head down the road, have an accident, doesn't matter who's at fault, the Lawyers check load limits, do some calcs, and there goes your retirement, and everything else. Funny thing, I was certain the Fords I desired had a payload limit far better than the GMC I wasn't considering, after checking 5 fords and two GMC 2500's I found out other wise. My GMC 2500 is rated 400 lbs. higher than a comparable Ford. Yet the glossy brochure showed a much different picture. I wanted a truck - because I love Trucks, and I intended to put a Leer shell on the back. By the way, I have driven almost every vehicle GM has made since 2000, (and the top comparable vehicles of most of the competition on "Track days"). I always preferred a truck, my choice. That was another time, another planet. The Ram popularity baffles me, but then again so does my wife, and she is always correct. It doesn't really matter if the truck has enough motor, you tap out at the payload limits, and then most likely GCWR, if not max tow weight. Ignore this legal conundrum at your peril. That is why I ended up going 3/4 ton, the rest, - motor, 4wd, etc., was just dessert. Ok - fun for all, I'm done discussing TV's , done, done done, , they are like Opinions and , well we all have them. If I had my choice. I would simply teleport my junk to where I wanted it, and show up, when I felt like it. But then, this isn't the Sci-Fi channel. Good Day!1 point
-
Mike, Was it the $129 total or was shipping extra? Thanks Reed Reed, it was $129 plus $15 S&H. Total $144. Mike1 point
-
Reed, Yes, Seals would have fixed the problem after cleaning valve. Debbie soaked lower valve portion with blade for a day in water & white vinegar before cleaning.1 point
-
And the tour continues: The wall between the bath and the dinette - has a thin wood core. The inside top shell is just about ready to be placed on top of that lower inside shell. A 2019 Demo unit in production. 2019's don't look much different! Note the mounting brackets for the awning in place on the roof. Let's fill it up with pretty "stuff". I do have more pics if anyone is interested in anything not shown on this tour - just PM me with your email address and I'd be happy to send them along. Special thanks go to Rod Lomax of the Oliver Sales Team for conducting a great tour! In fact, the tour was so good that couple that let me join them on their tour actually went back to the Sales Office and placed a deposit on a 2019 Oliver Legacy Elite II. Bill
1 point
-
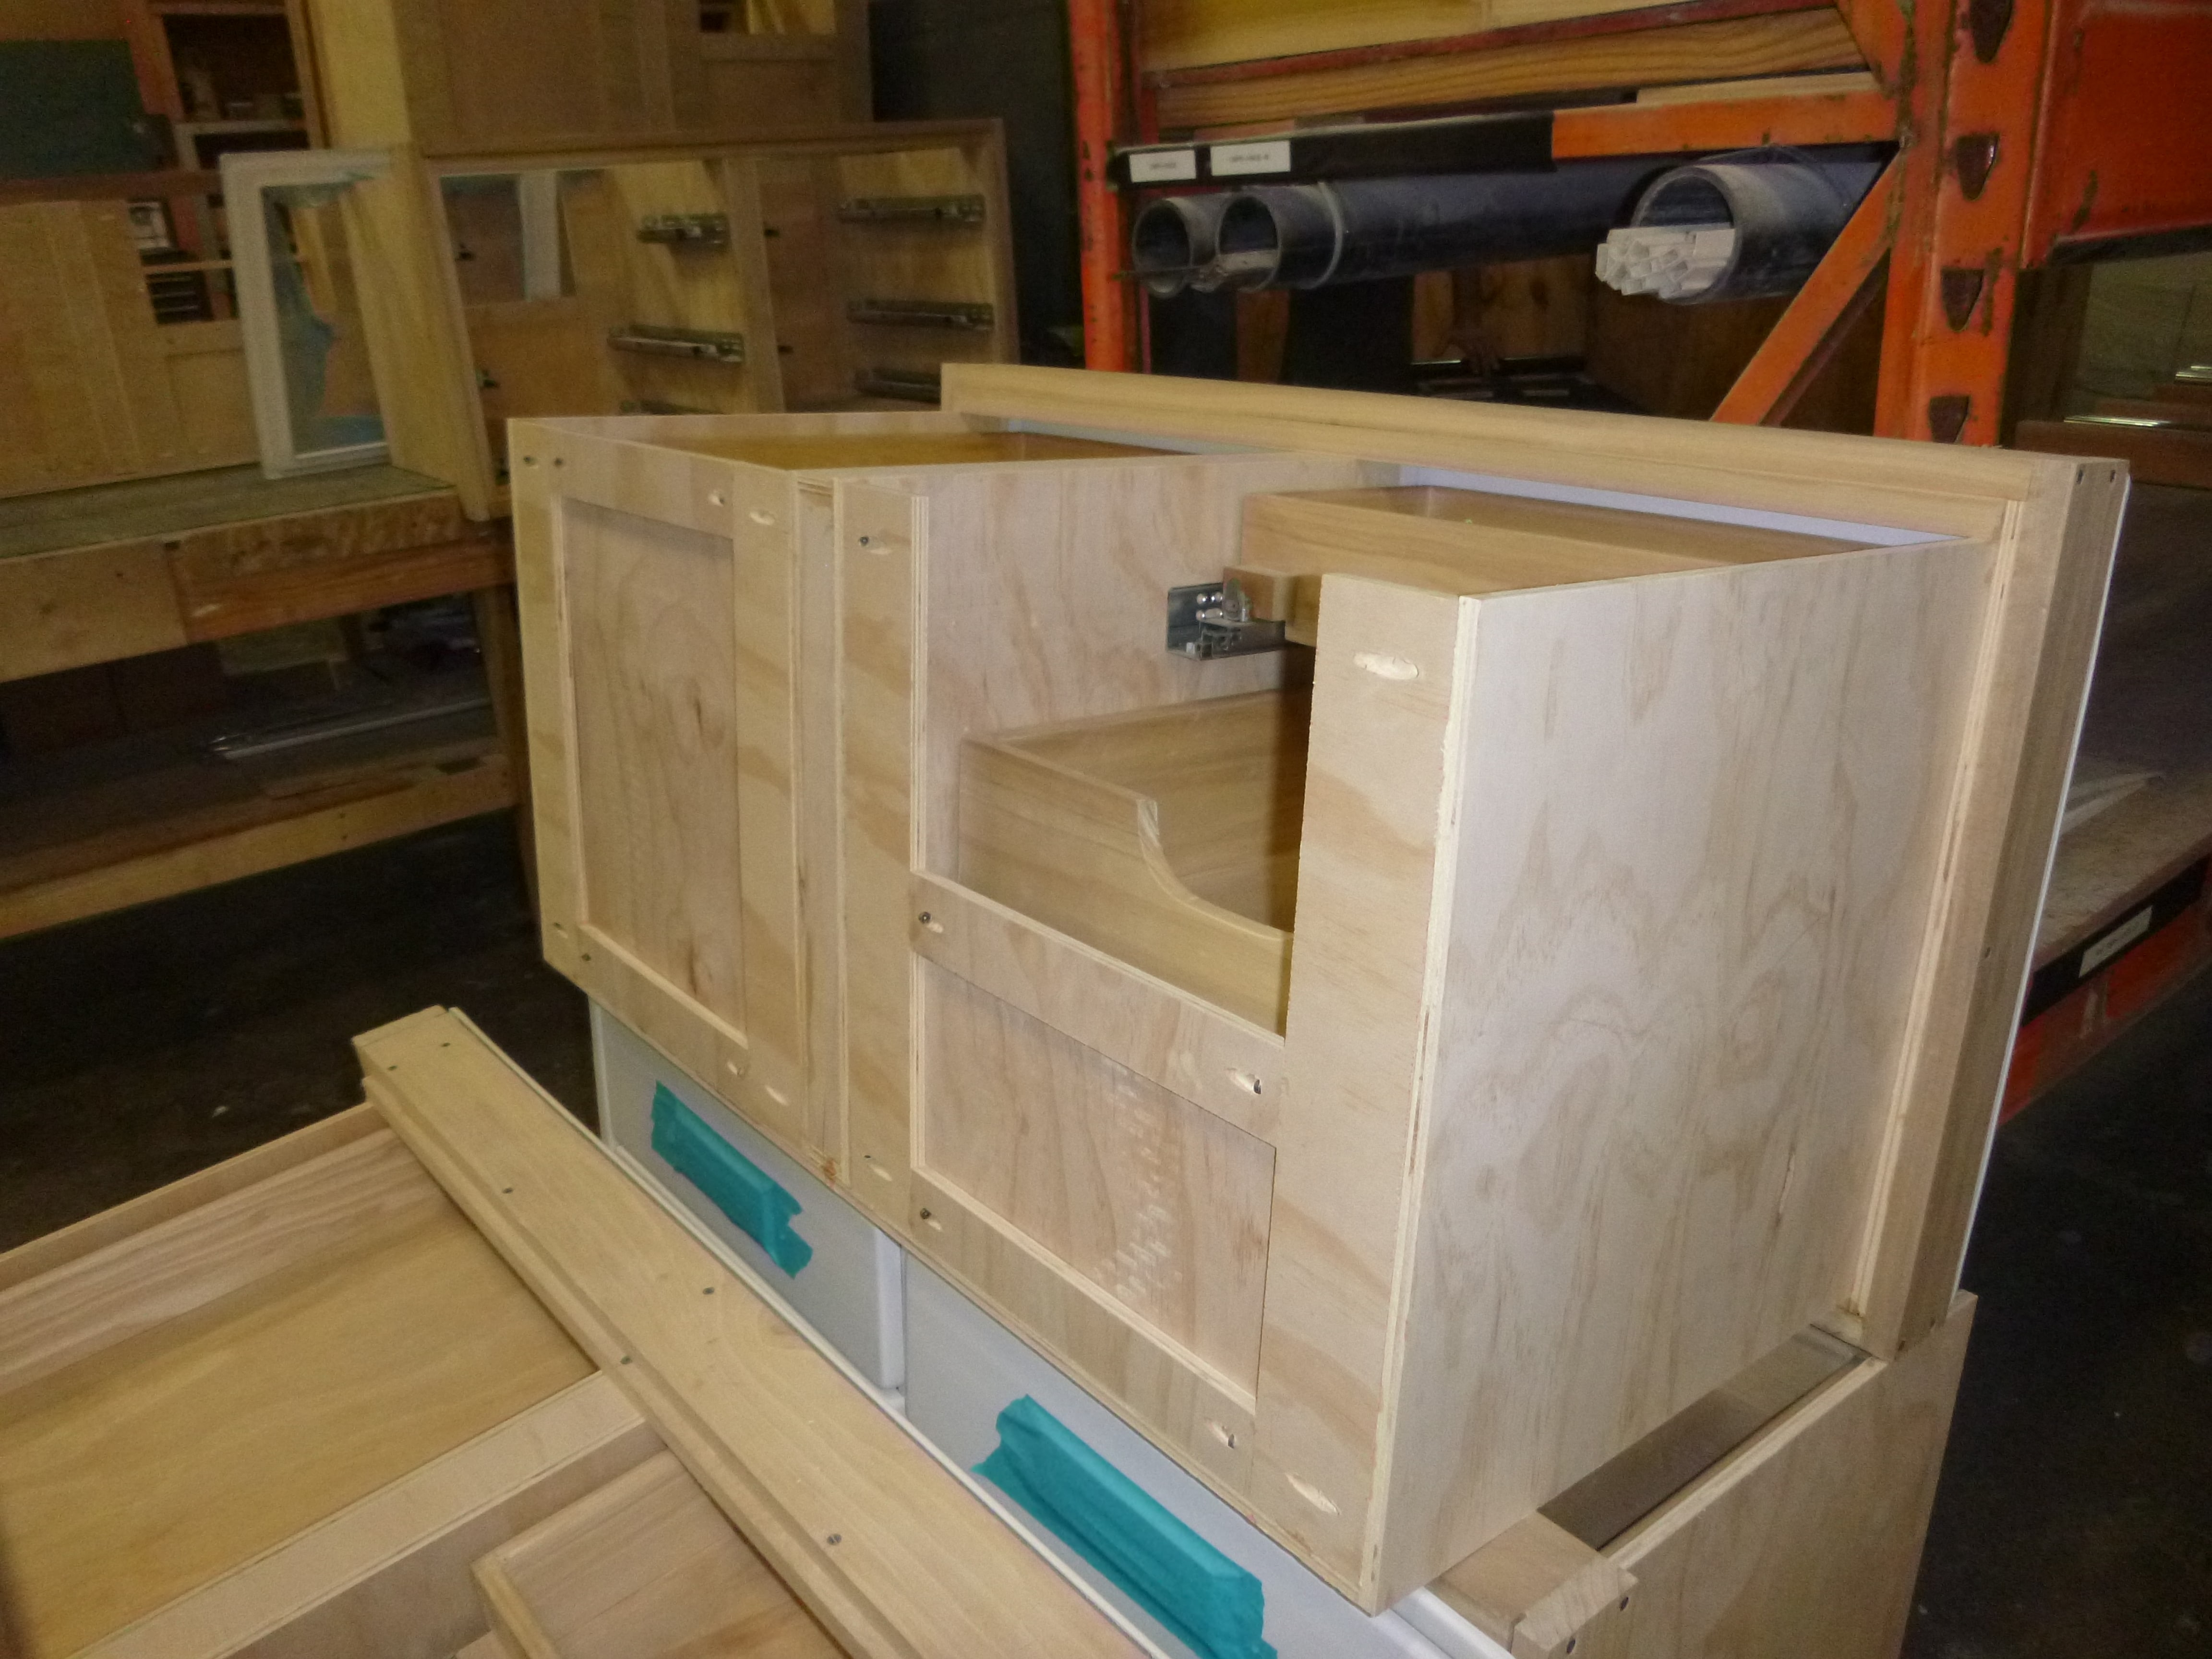
Whereas all the business of these trailers happens between hulls, while nowhere near as pretty, I actually prefer the old style build of the kitchen drawers where the back is almost completely open. With those new cabinets, if getting to the rear area is needed those Kreg screws will never come out, once the cabinet is installed. I would prefer that they had the cabinets made with the assembly hardware accessible from the inside. As an example, the propane line runs up the back wall behind the right side drawers, completely enclosed back panel, the water lines run along the floor behind the whole cabinet and the fridge outlet tends to sit on the floor on the left side. For structural integrity, I would much rather see 3- 2" strips, one at the bottom, top and middle and one across the top rear too. The only time anyone will ever see that back area is when they NEED to, and by the time they're done with it, pretty won't count anymore1 point
-
If you switch to a DC compressor fridge you will gain a lot of volume. The Novacool unit I am interested in is smaller in height by about three inches, with 50% more usable interior space. There are more advantages to a compressor fridge than just saving propane. John Davies Spokane WA1 point
-
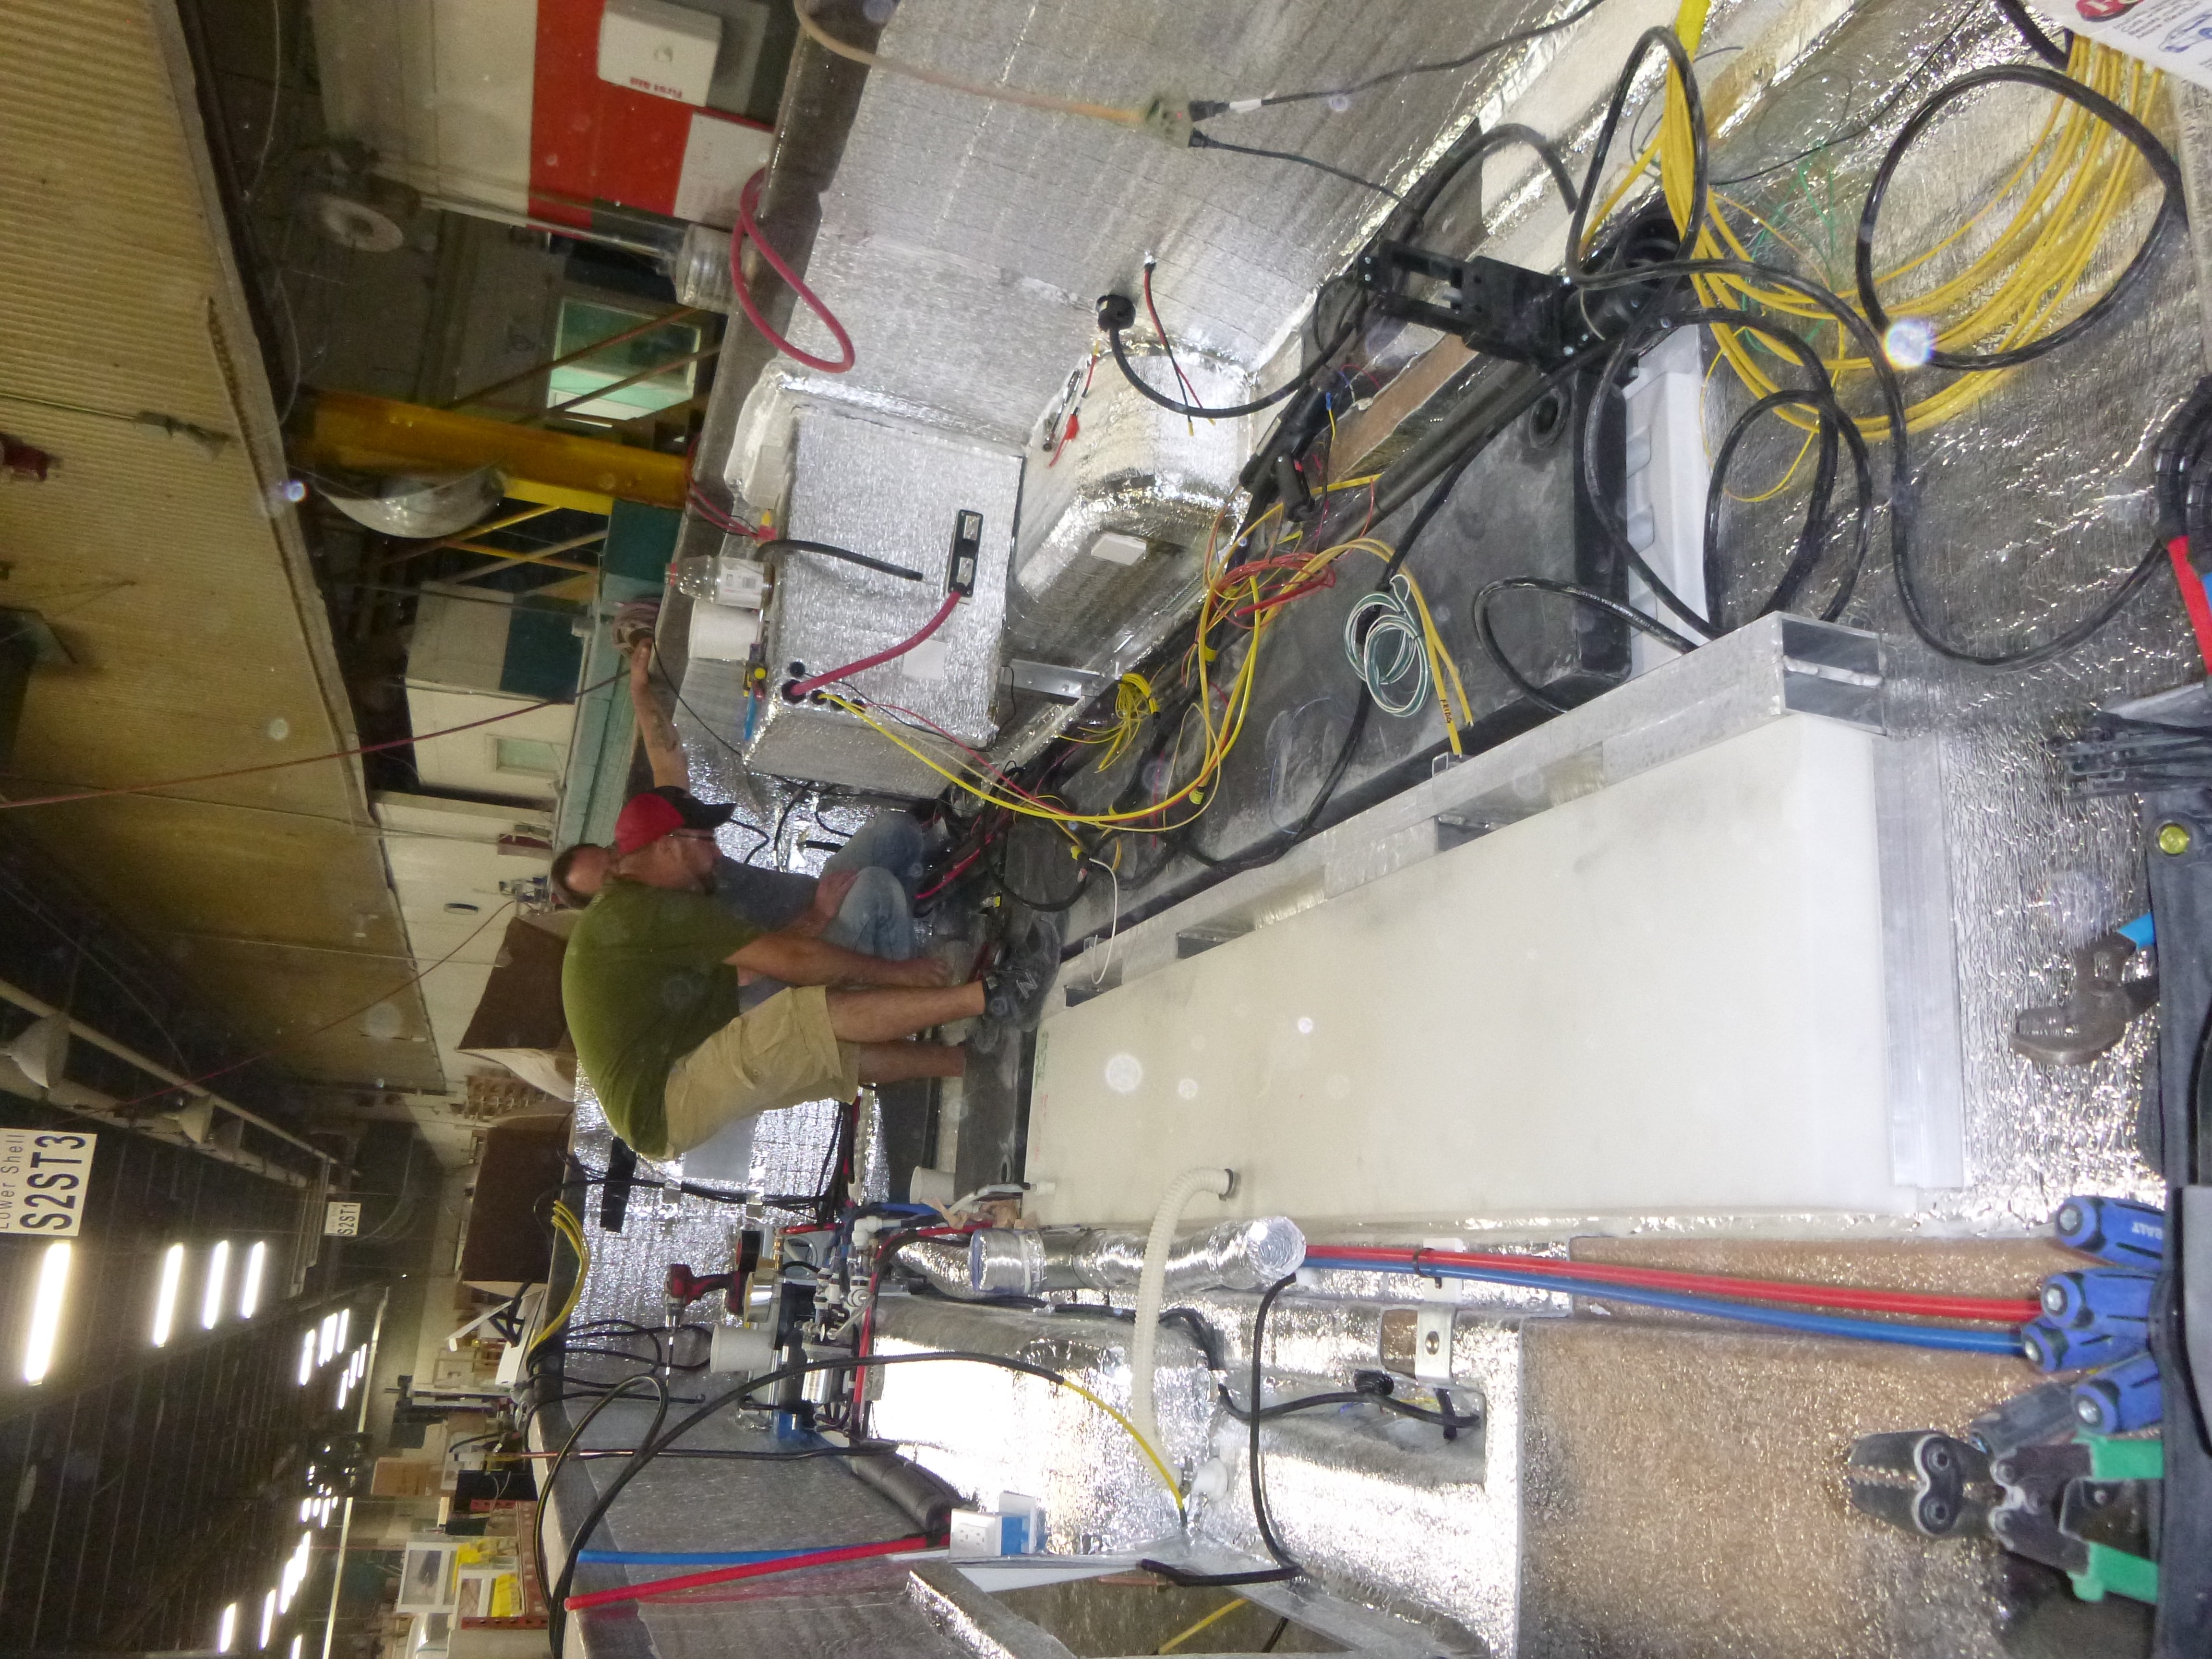
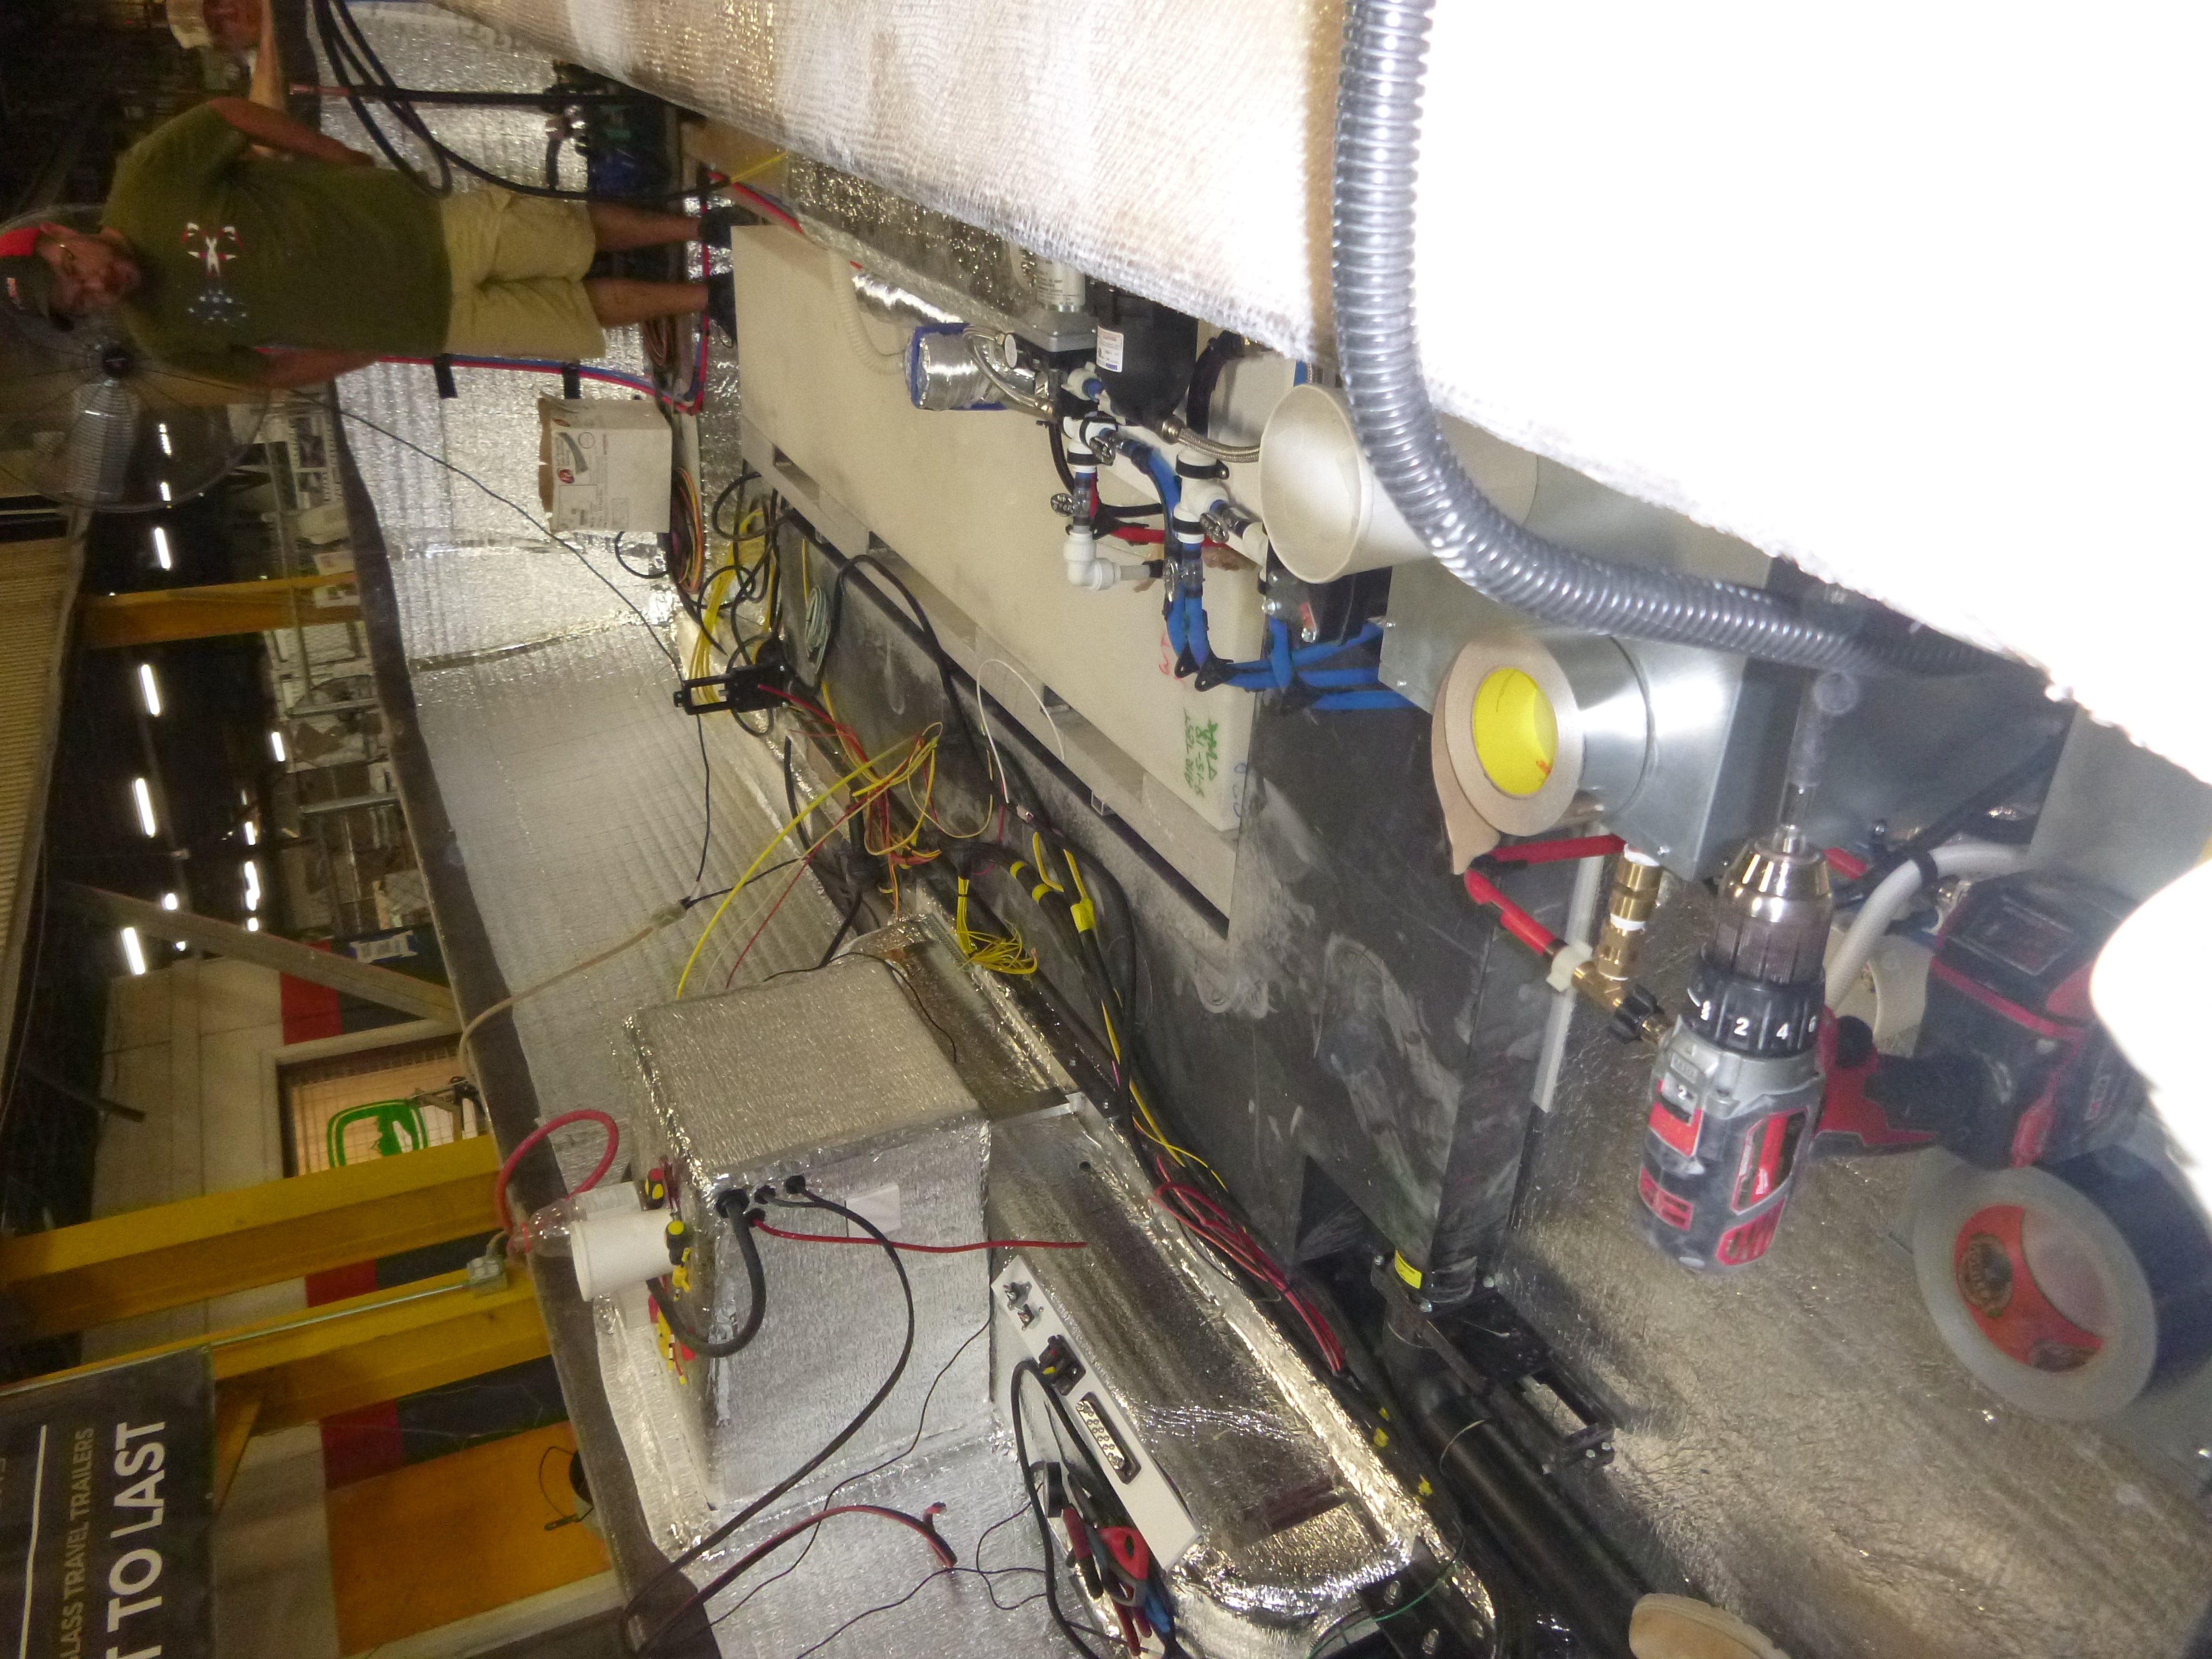
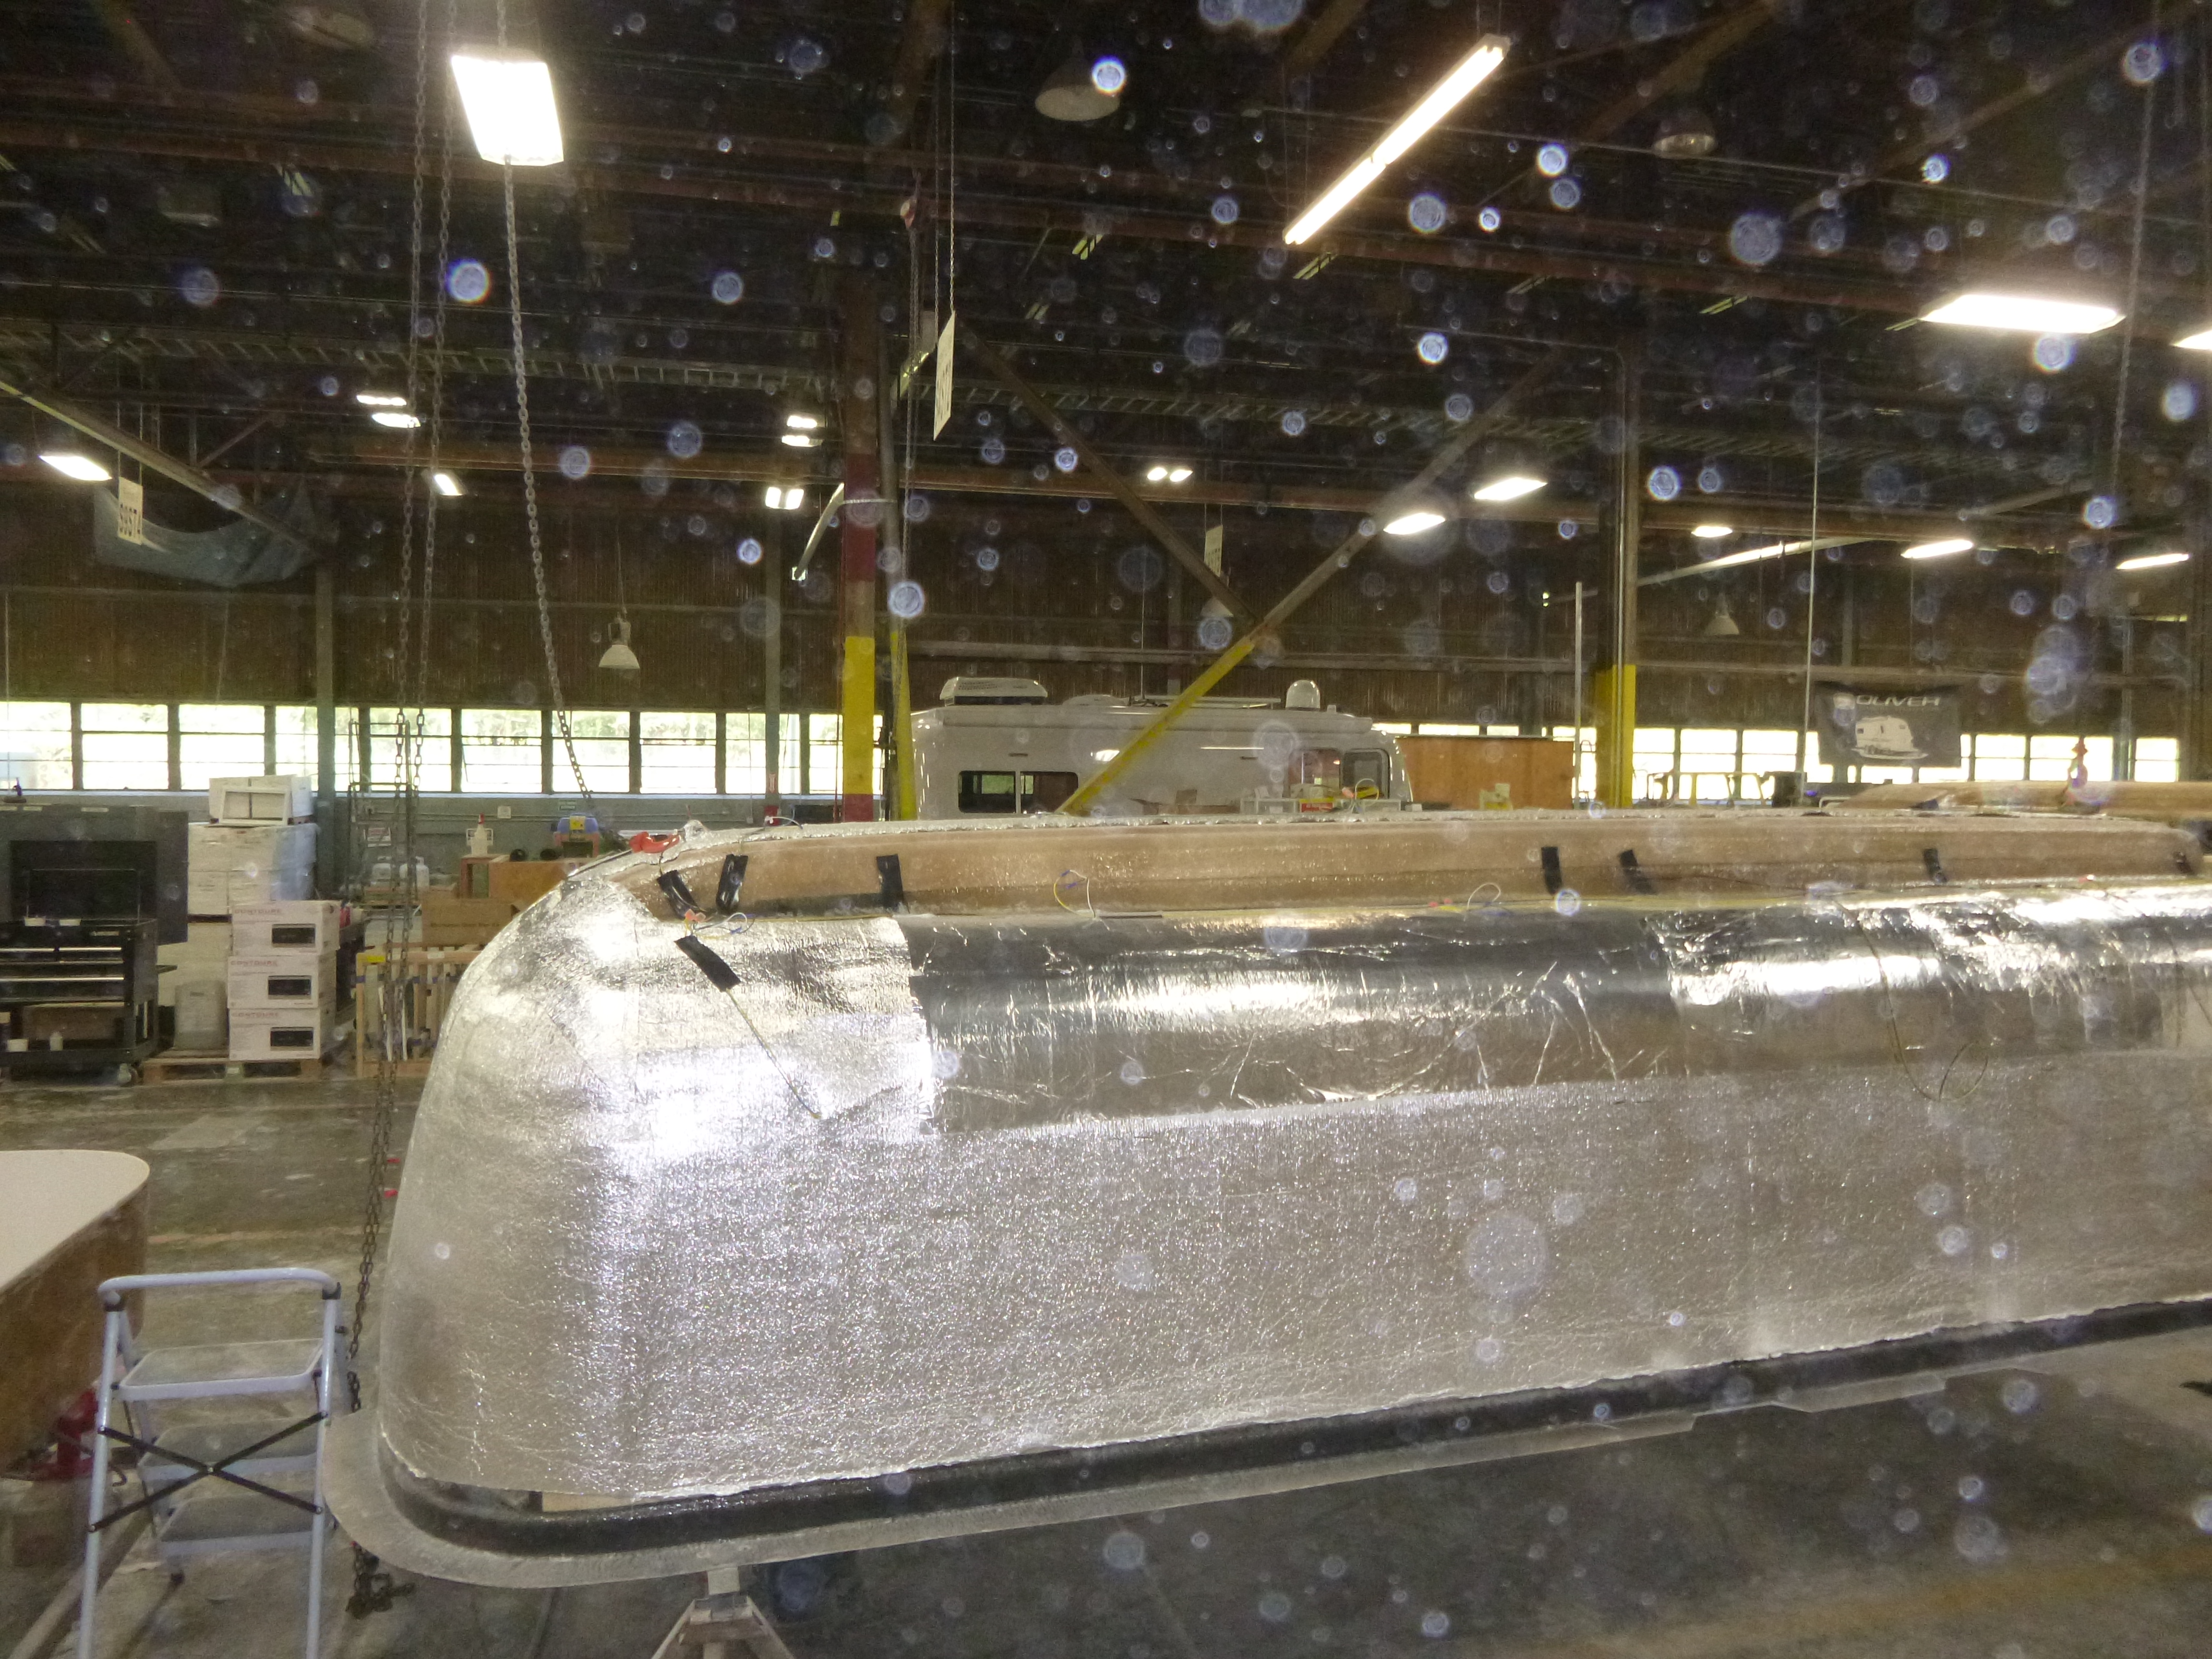
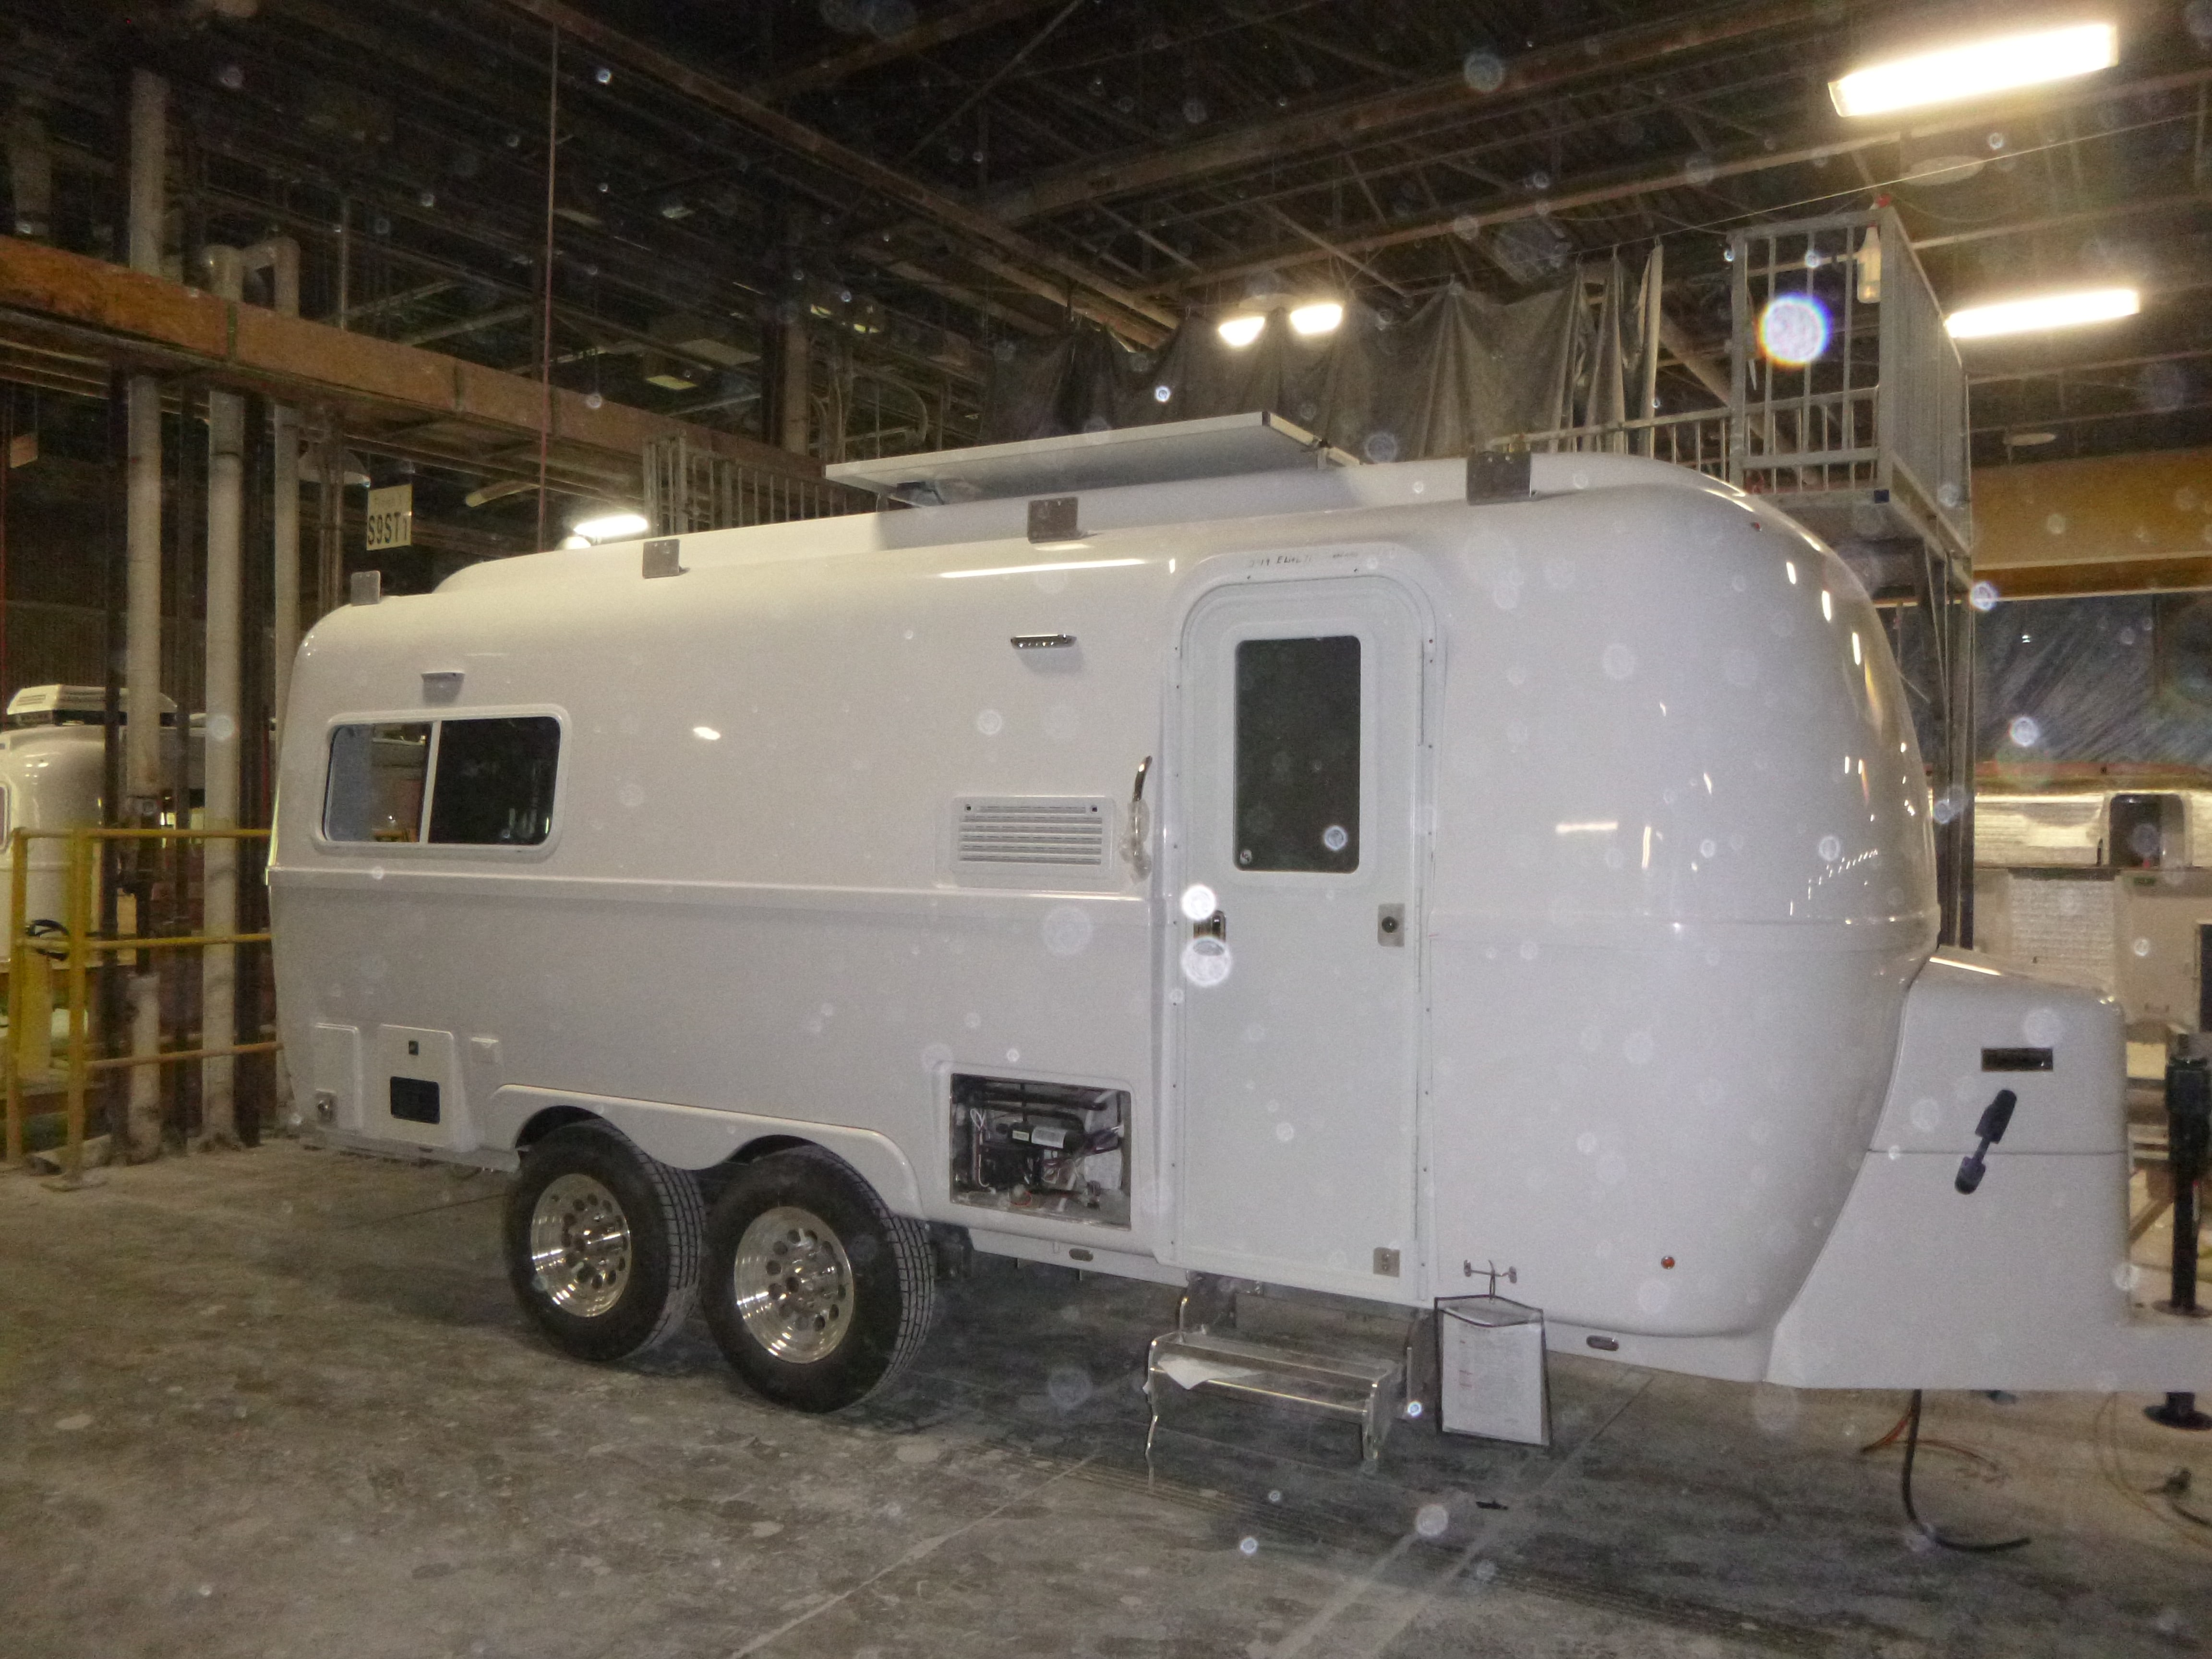
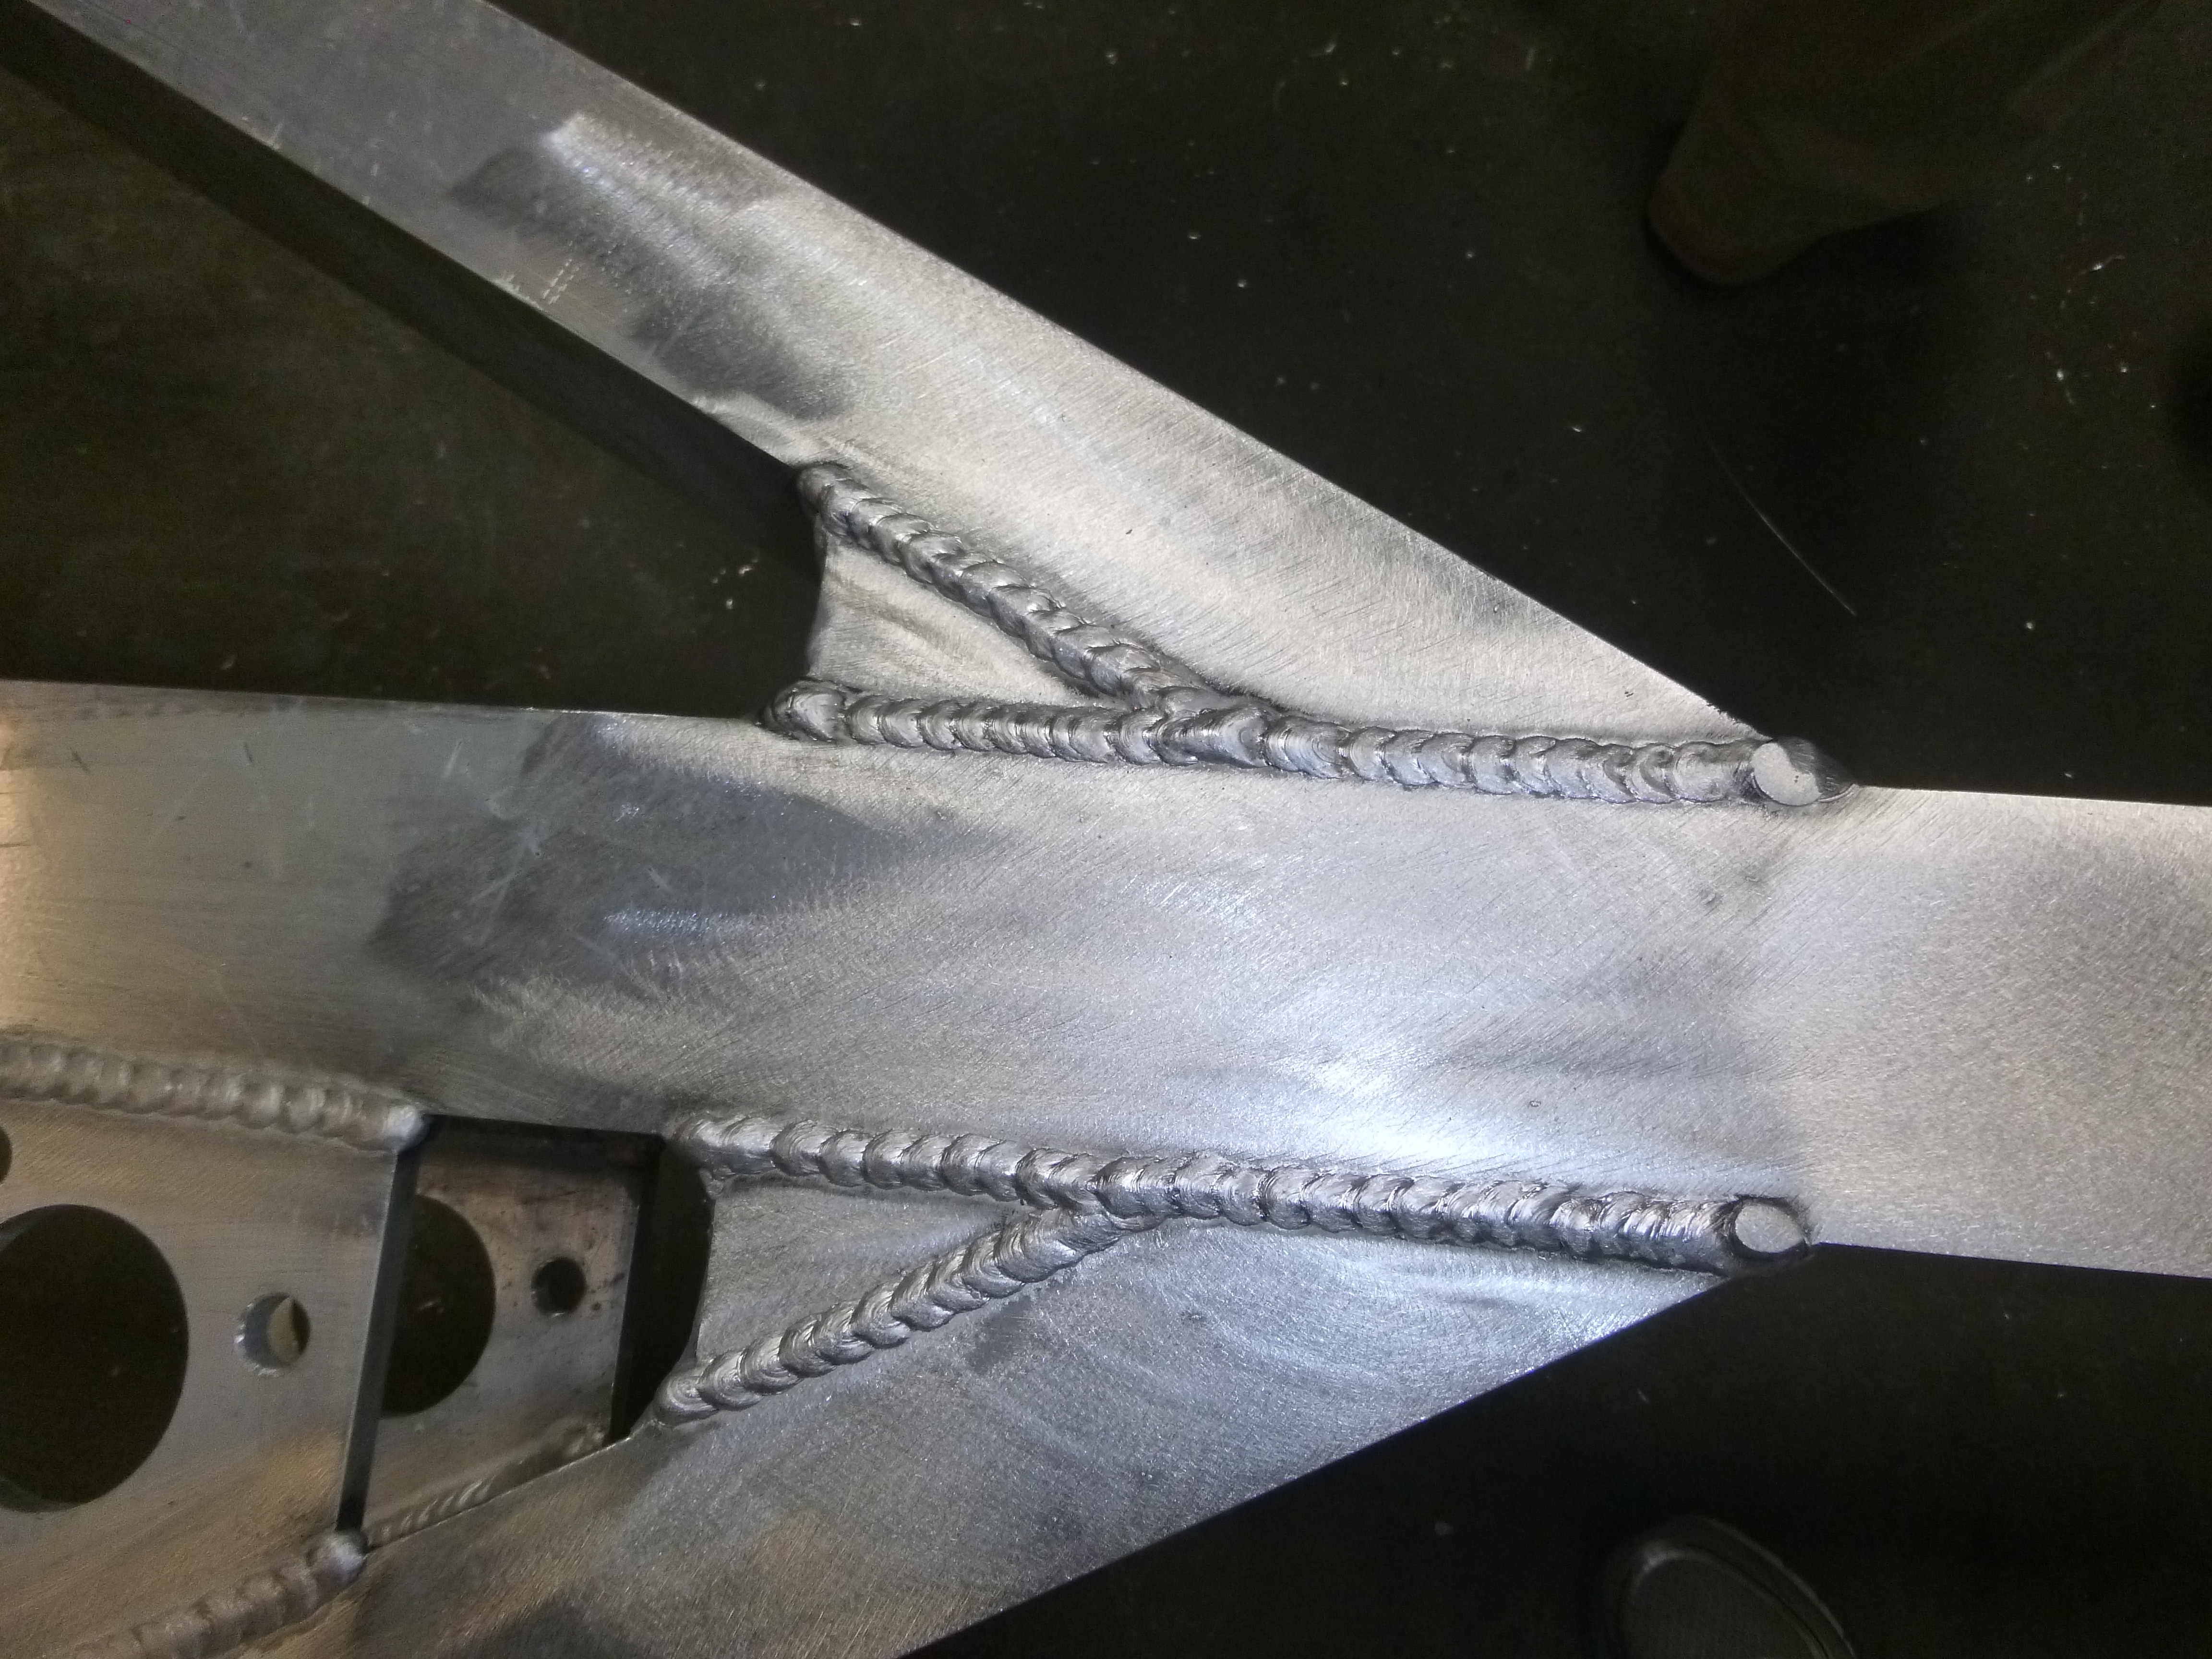
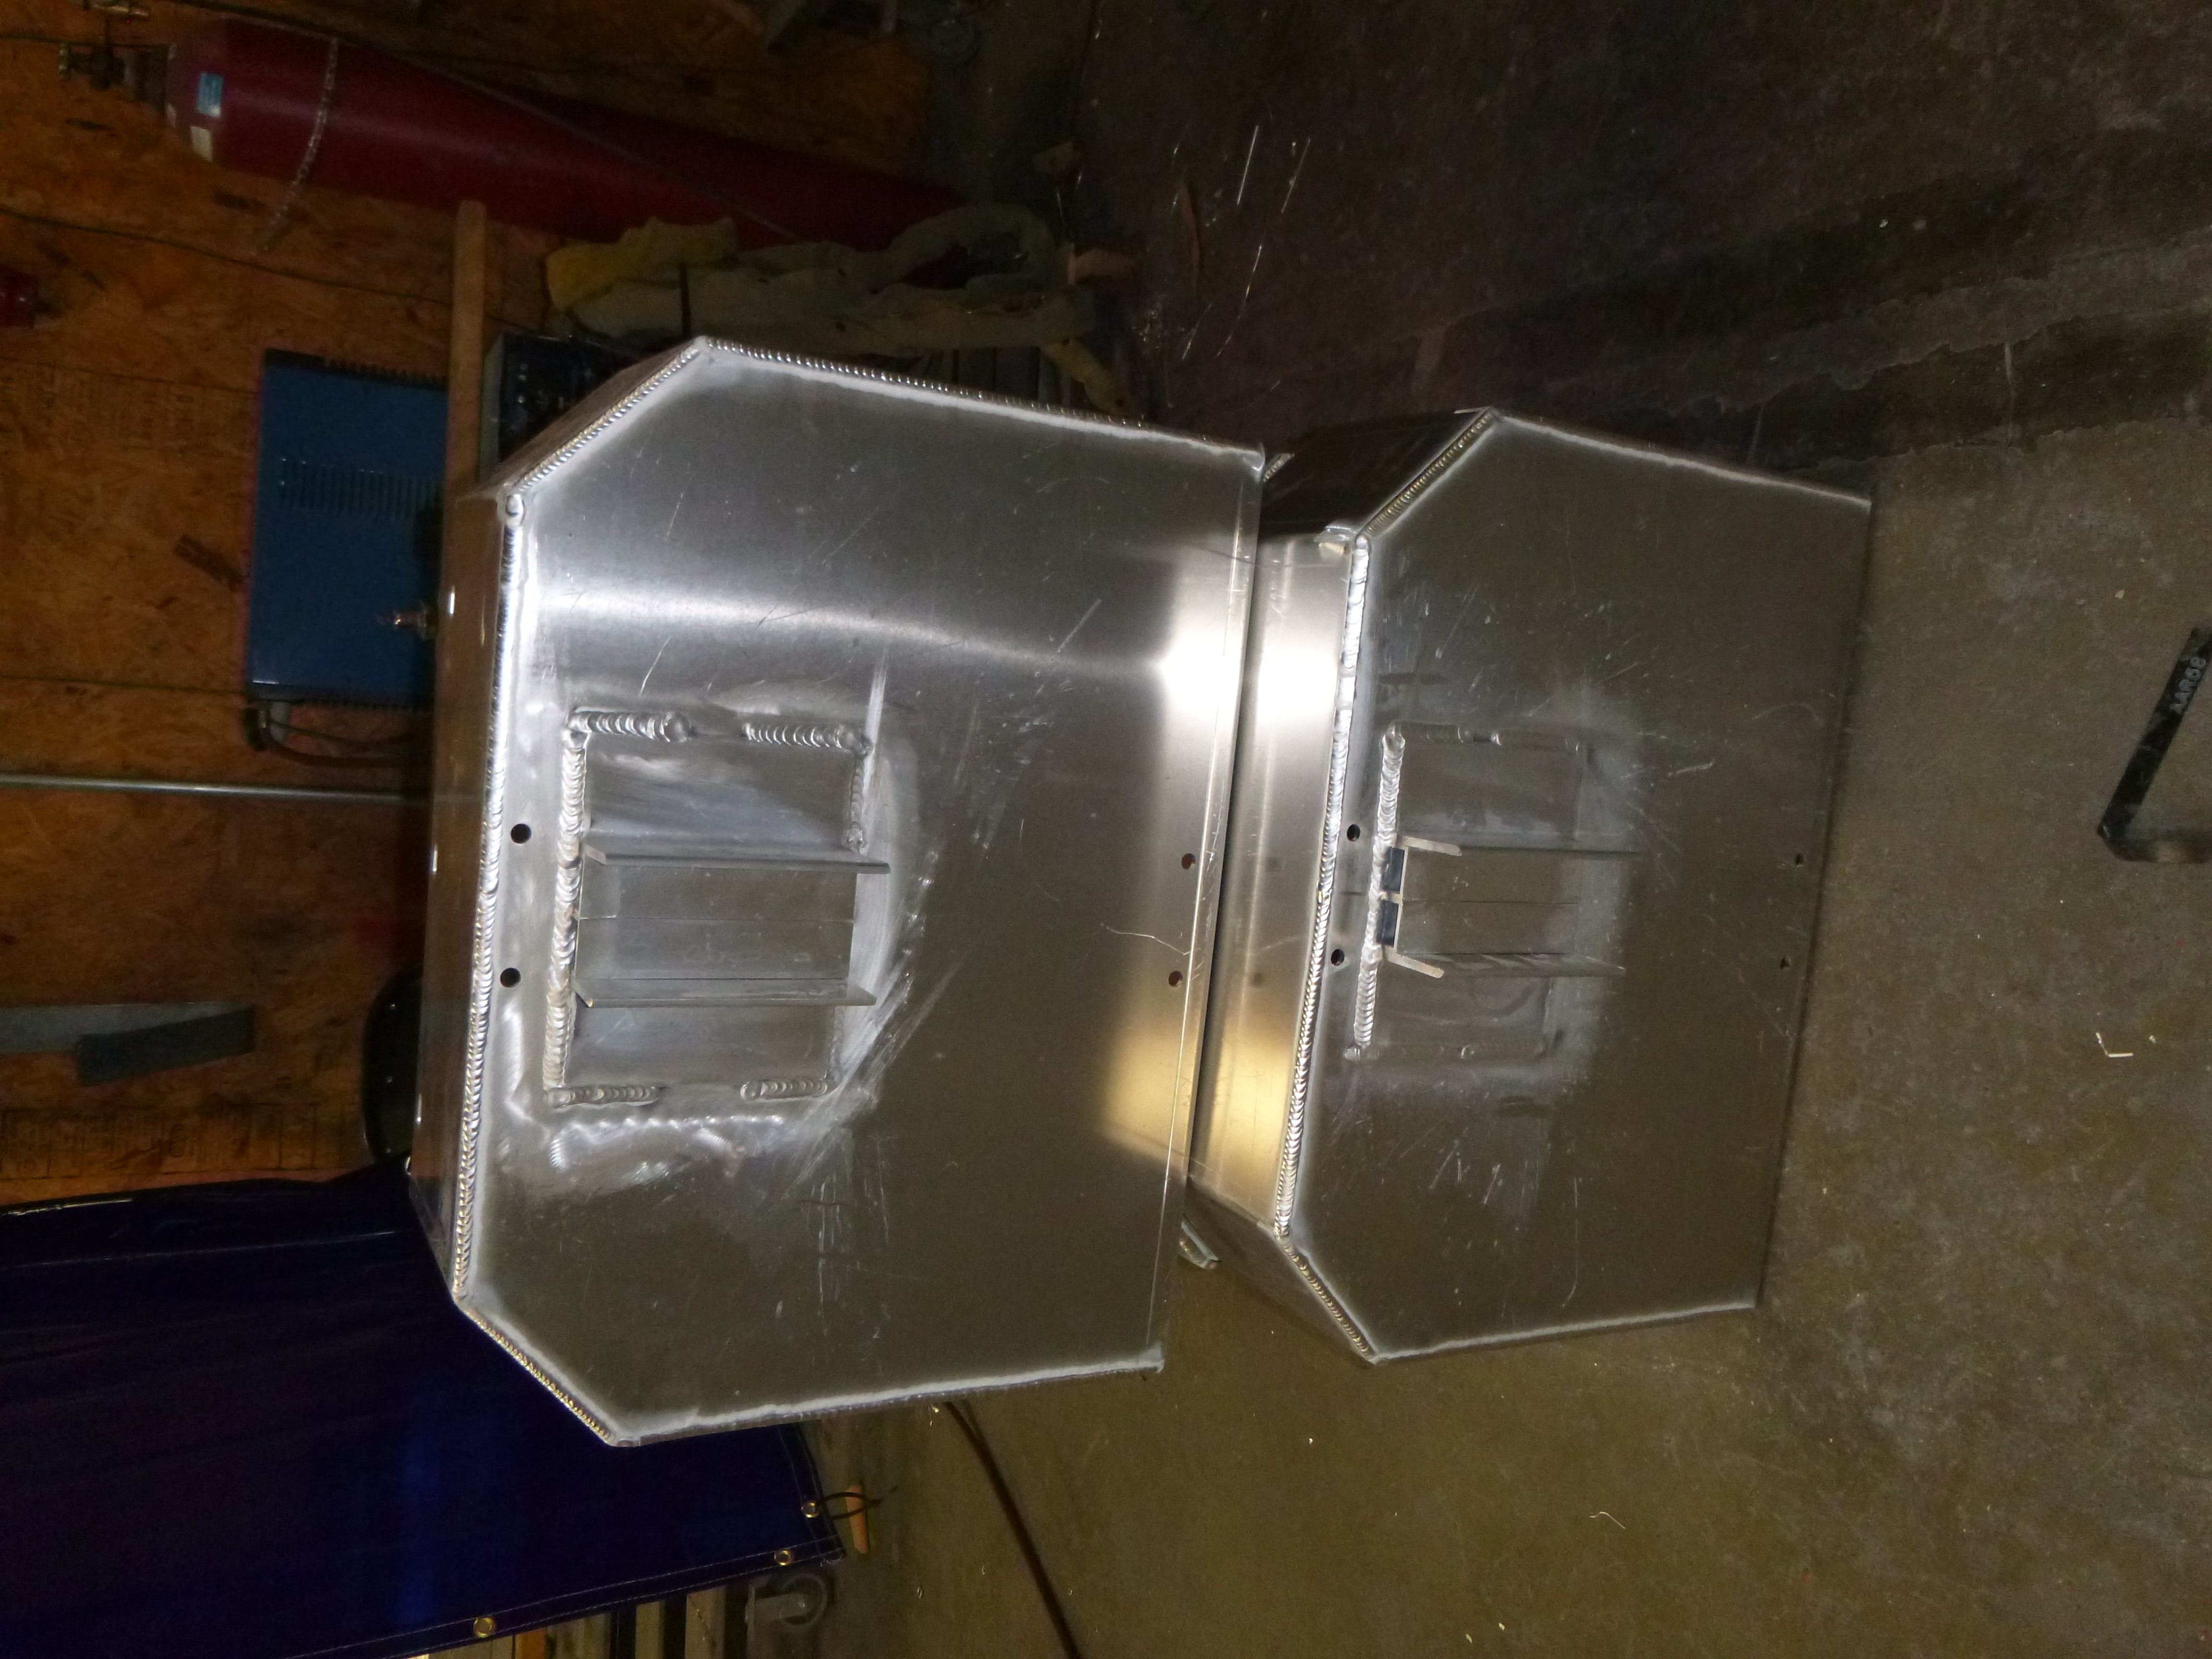
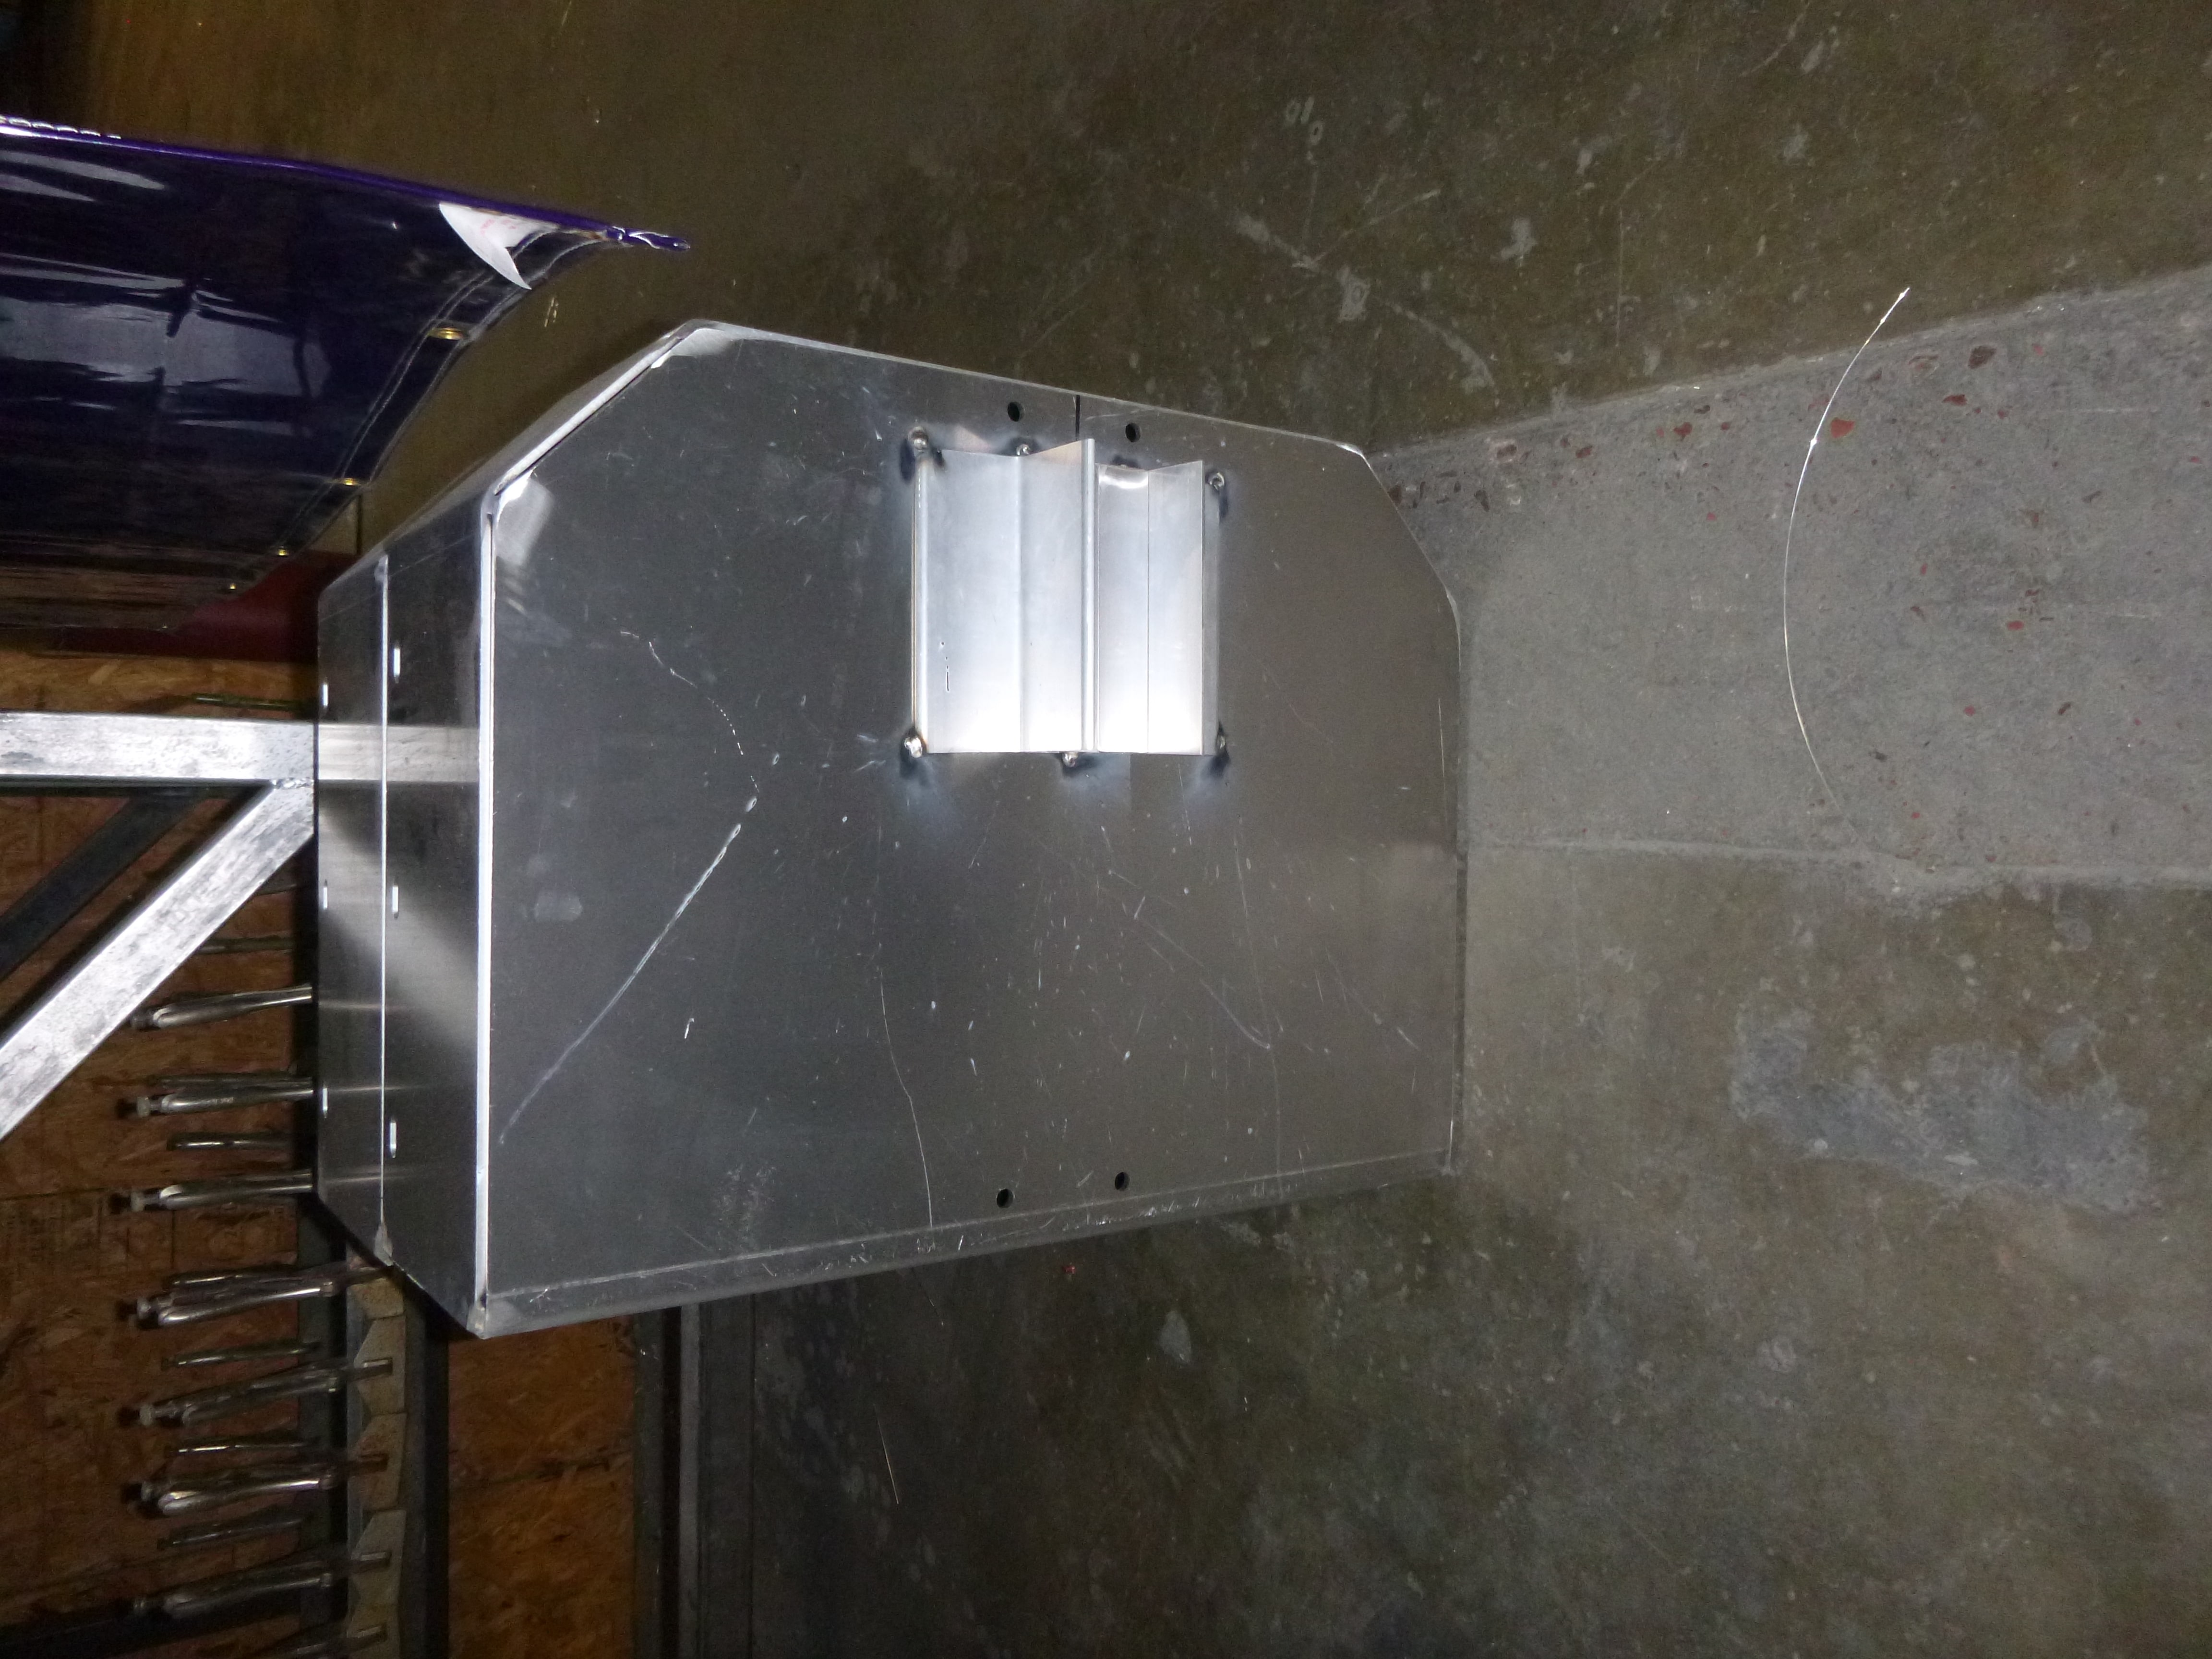
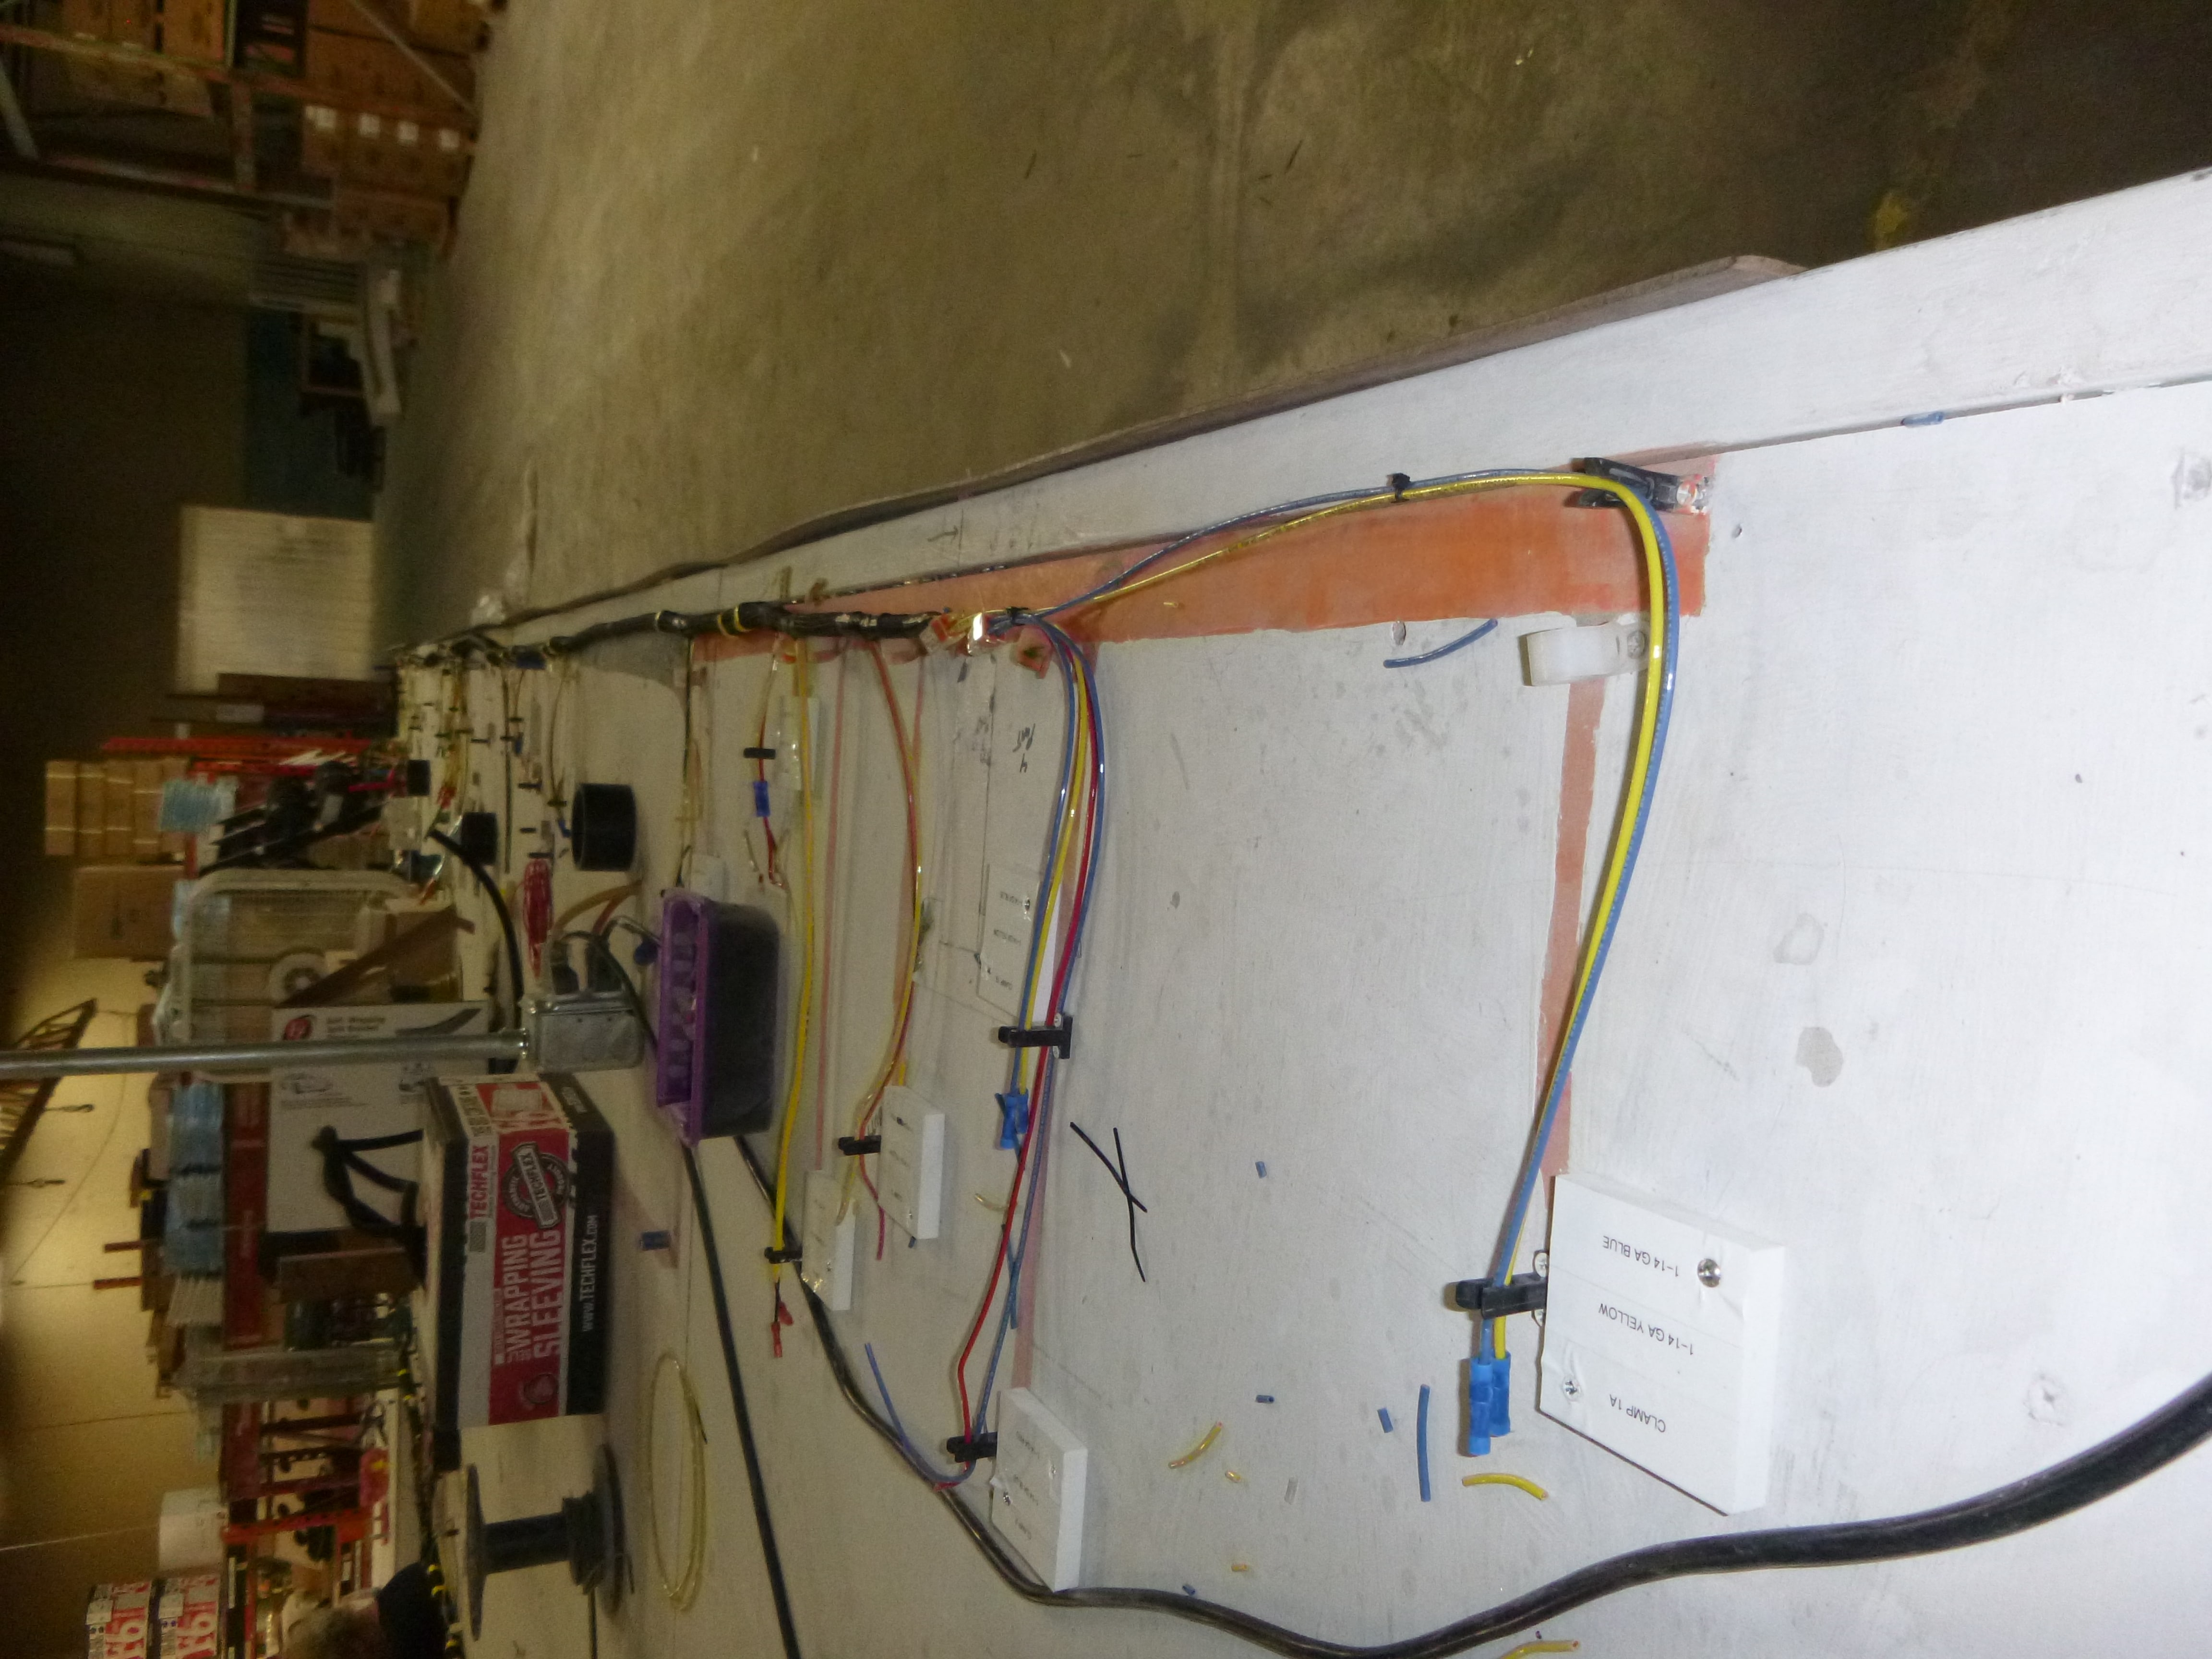
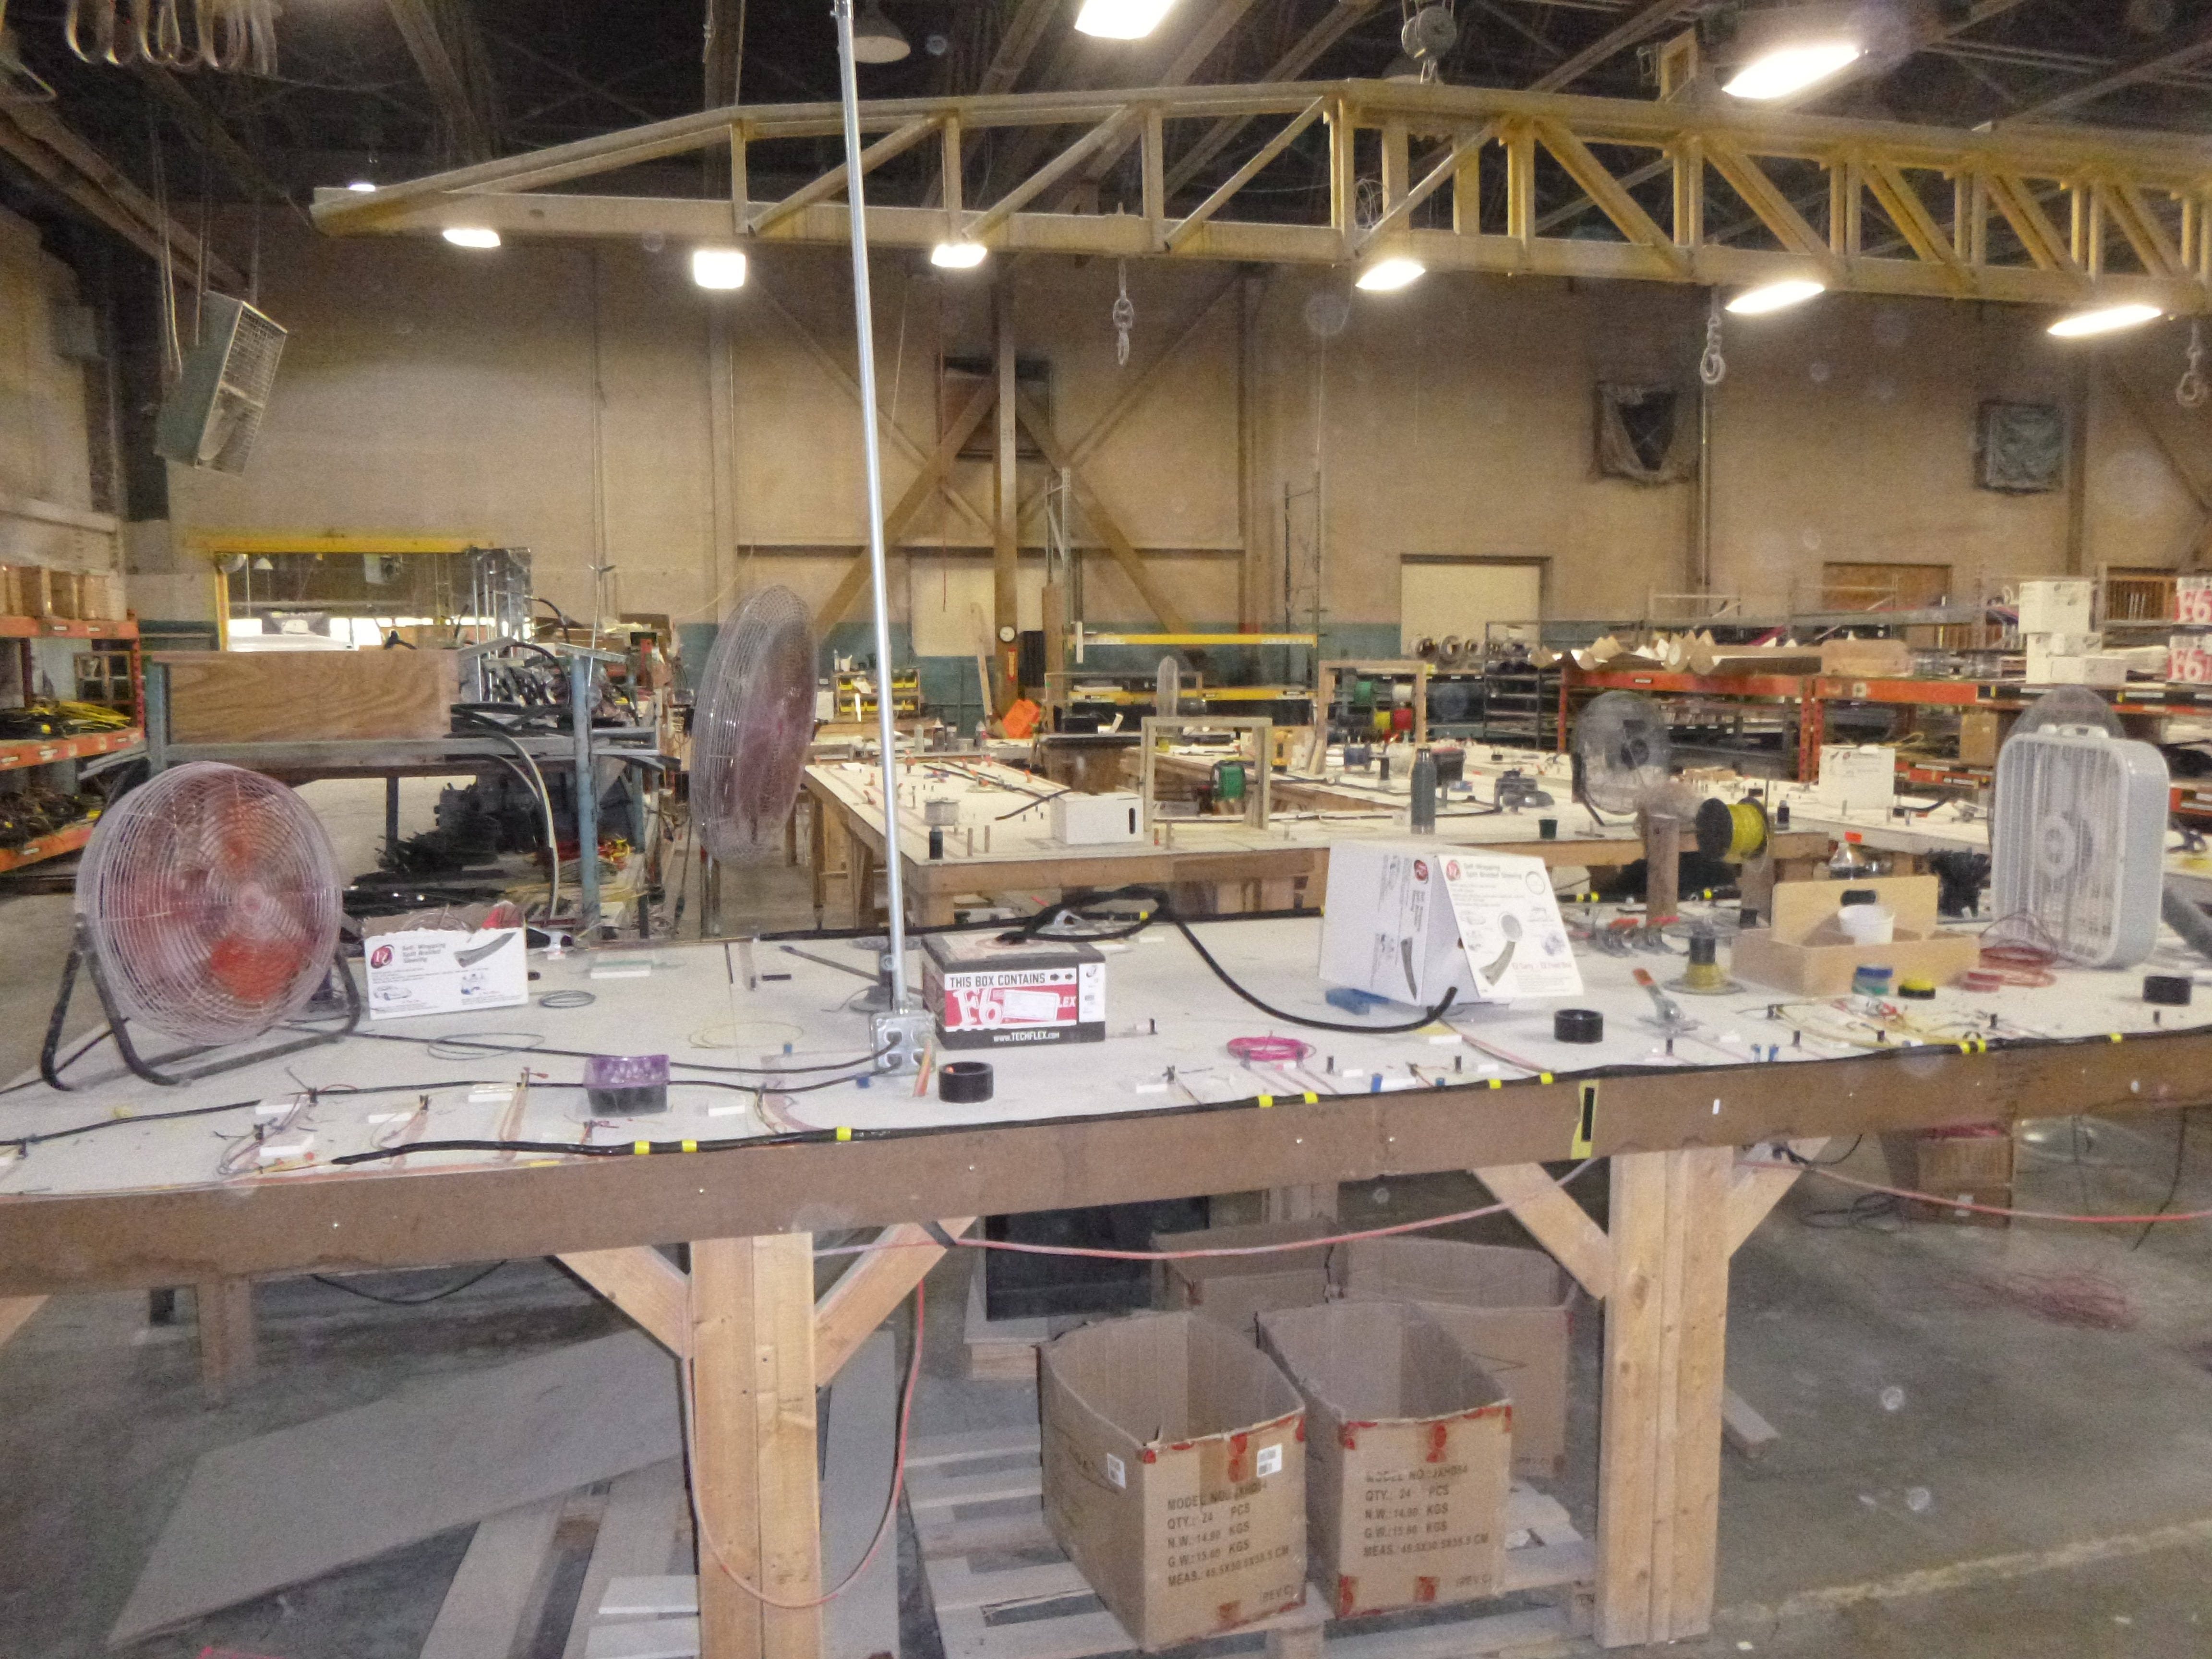
While at the "mothership" last week I was fortunate to be able to join a couple from Dayton, Ohio on their factory tour. Certainly much has changed since I last toured the plant over three years ago. Below are some of the pictures I took while there: hand rolling some of the fiberglass. Those frame welds are still beautiful. For those that have the front basket option - ever wonder what the bottom of the basket looks like? A "wiring harness" under construction. Each connection, length or wire and color of wire is labeled by a block on the table. Poo happens! Note the grey water tanks on the left and the fresh water tanks on the right. The "height" of the fresh and grey water tanks.
1 point
-
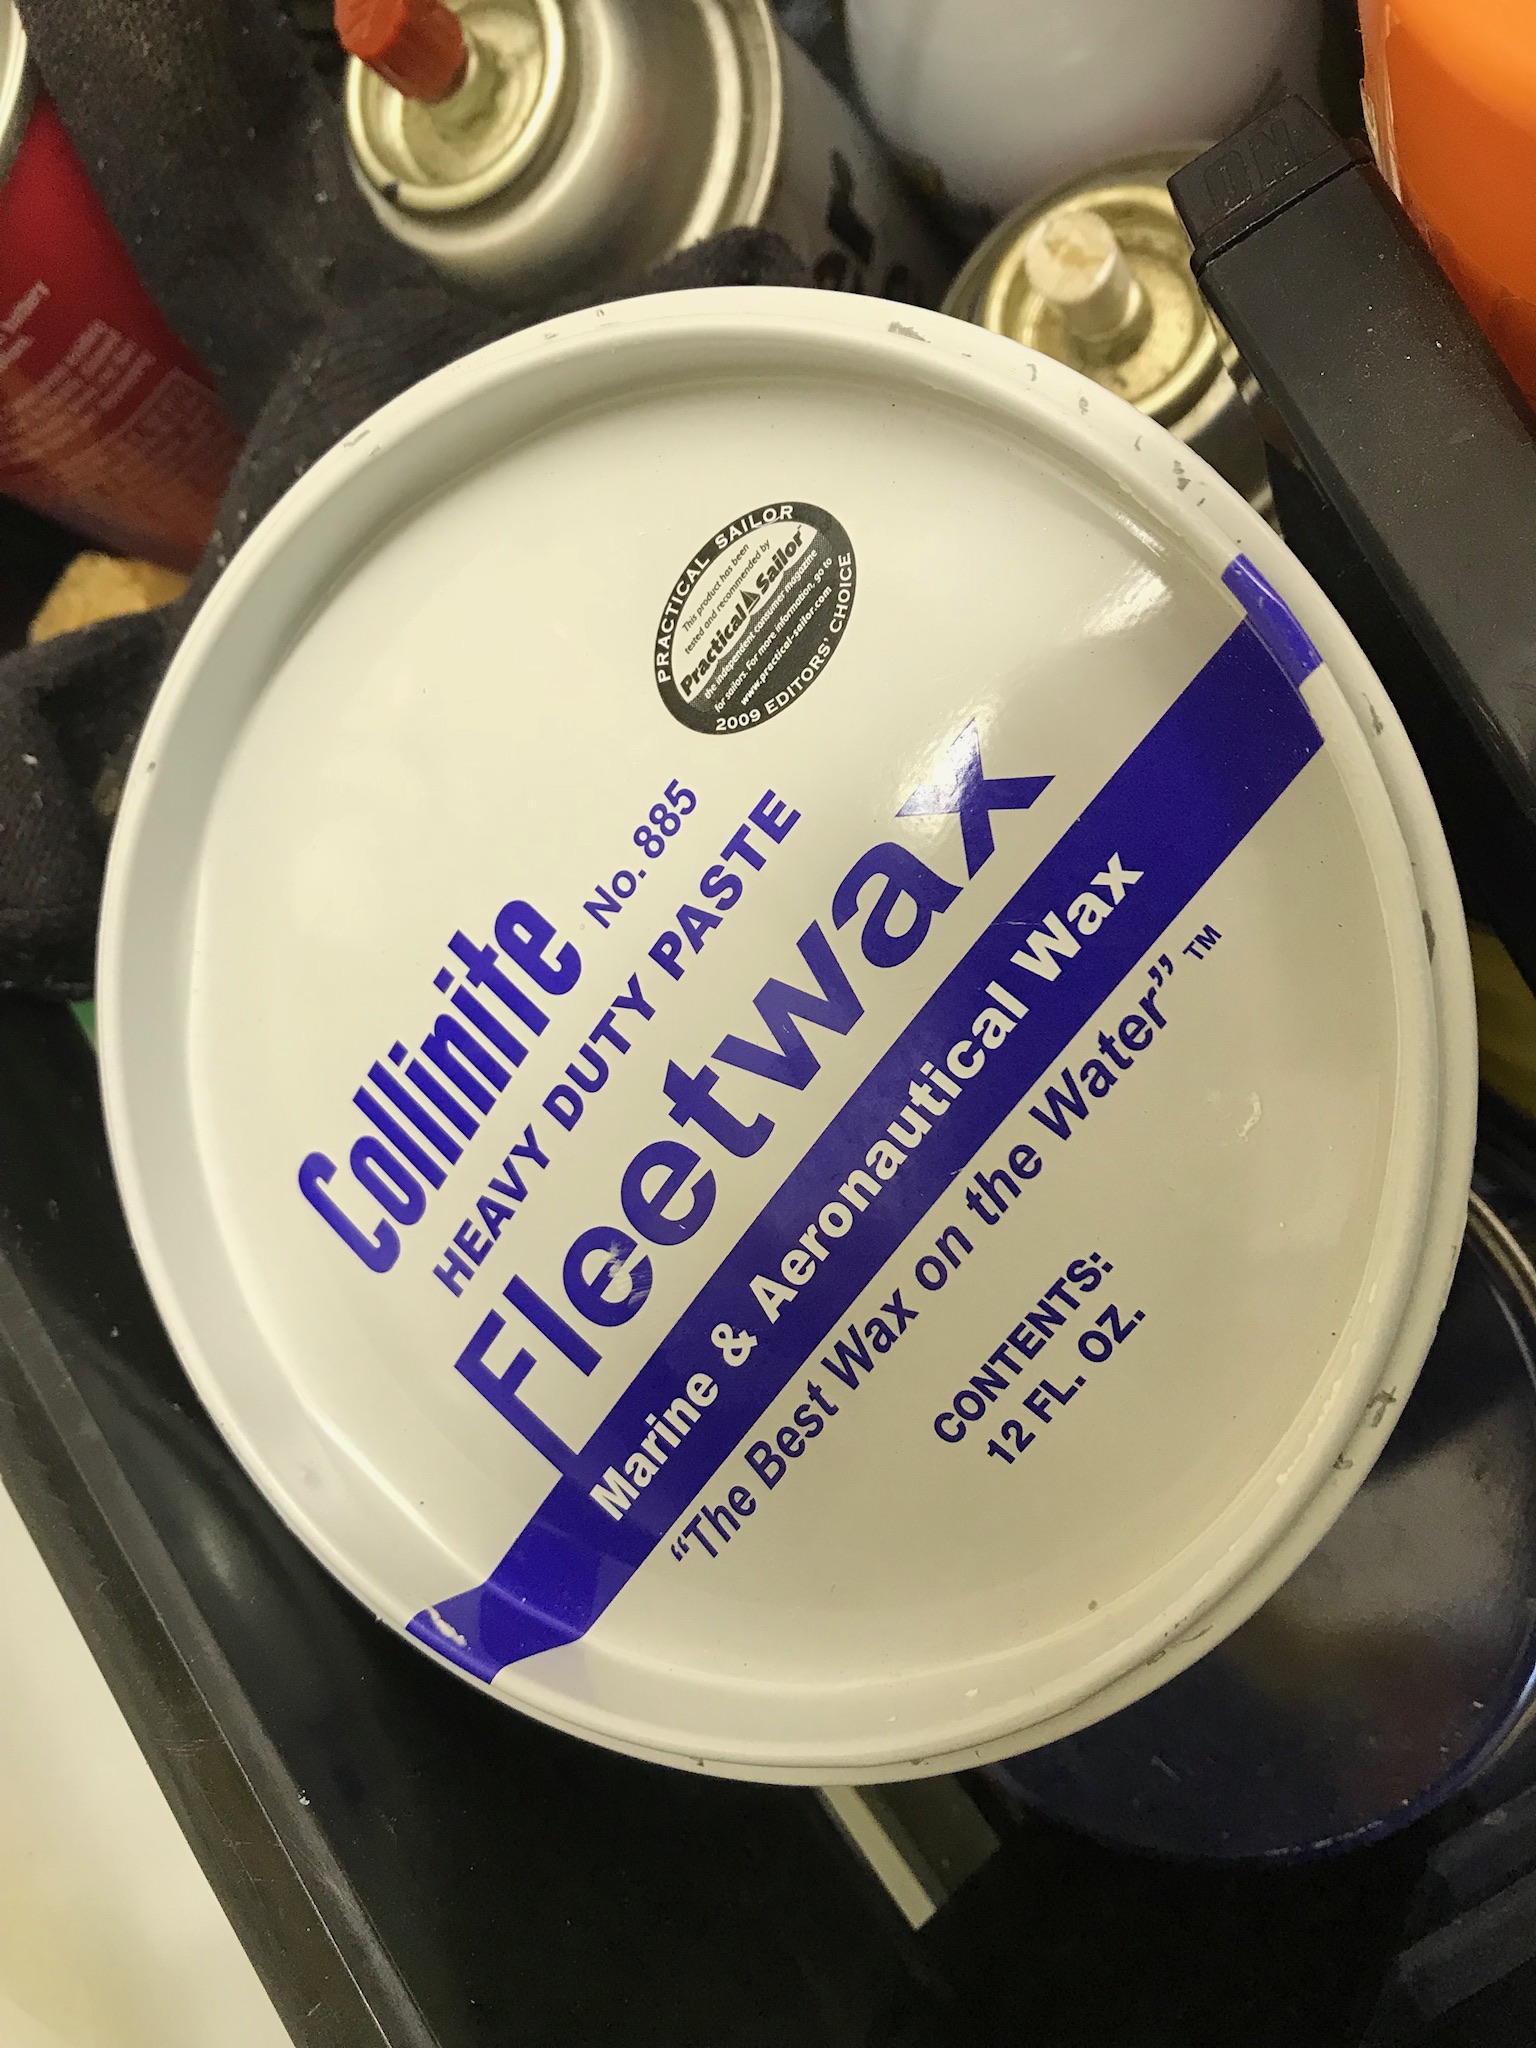
This wax is used on boats and corporate jets. Must be applied out of the sun and wiped with a micro towel. I am sure there are many good wax’s out there......yukon
1 point
-
I have used Meguiars Marine wax for over 10 years on Casita's, Escape's, and now the Oliver. I have tried several other products but have always gone back to the Meguiars. https://www.amazon.com/Meguiars-M6332-Flagship-Premium-Marine/dp/B0000AY60S?th=11 point
-
You cannot find a more satisfying product than Rejex. Read the reviews. It is amazing stuff, and a single coating will make your Ollie glow. Two coats will make your jaw drop. (Great for dark colored cars with paint in good condition.) https://www.amazon.com/Rejex-High-Gloss-Protective-Finish/dp/B00GM6NF0I You must remove all existing wax from the surfaces before applying. Dawn dish detergent will strip off wax, and a followup with a paint prep solvent like this ... https://www.amazon.com/3M-General-Purpose-Adhesive-Cleaner/dp/B00Y957GWC/ref=sr_1_2?s=industrial&ie=UTF8&qid=1534521368&sr=1-2&keywords=3M+adhesive+cleaner .... will remove tar, tree sap, etc etc. You can get it locally from an auto paint supply store for as little as $15 per quart (and no shipping). At NAPA it is close to $30. You need about half a quart to do an Elite II, including the roof, if it isn't too dirty/ spotty. I suggest that you buy two quarts to be safe, and for future use. Good stuff... use with gloves and adequate ventilation. It smells a little but it does not knock your head off like MEK or acetone. I use square cotton rags folded twice to apply, flipping when they start to turn black. That gives you eight clean sides to work with. I only need half a bottle of Rejex to do "Mouse". Dried three week old bug carcasses on the front wall do not "rinse off" but they do come off completely with absolutely minimal pressure. It is very satisfying compared to the old routine of multiple hard scrubbings, which is hard on you and also hard on the gelcoat. John Davies Spokane WA
1 point
-
The label on that device says “For A/C without heat strip option”. If you have a heat strip in your A/C you probably don’t have one of those. My A/C has a heat strip and the control board is built in according to the manual. Are you sure yours doesn’t have a heat strip also? Can you post a picture of your A/C data plate and a picture of your thermostat? Bill1 point
-
I wouldn’t trust the valve on the black tank to prevent it from being contaminated. I pulled the wrong valve on mine this summer, opening the black tank, and water came out. The only way it could have gotten in is when draining the grey tank.1 point
-
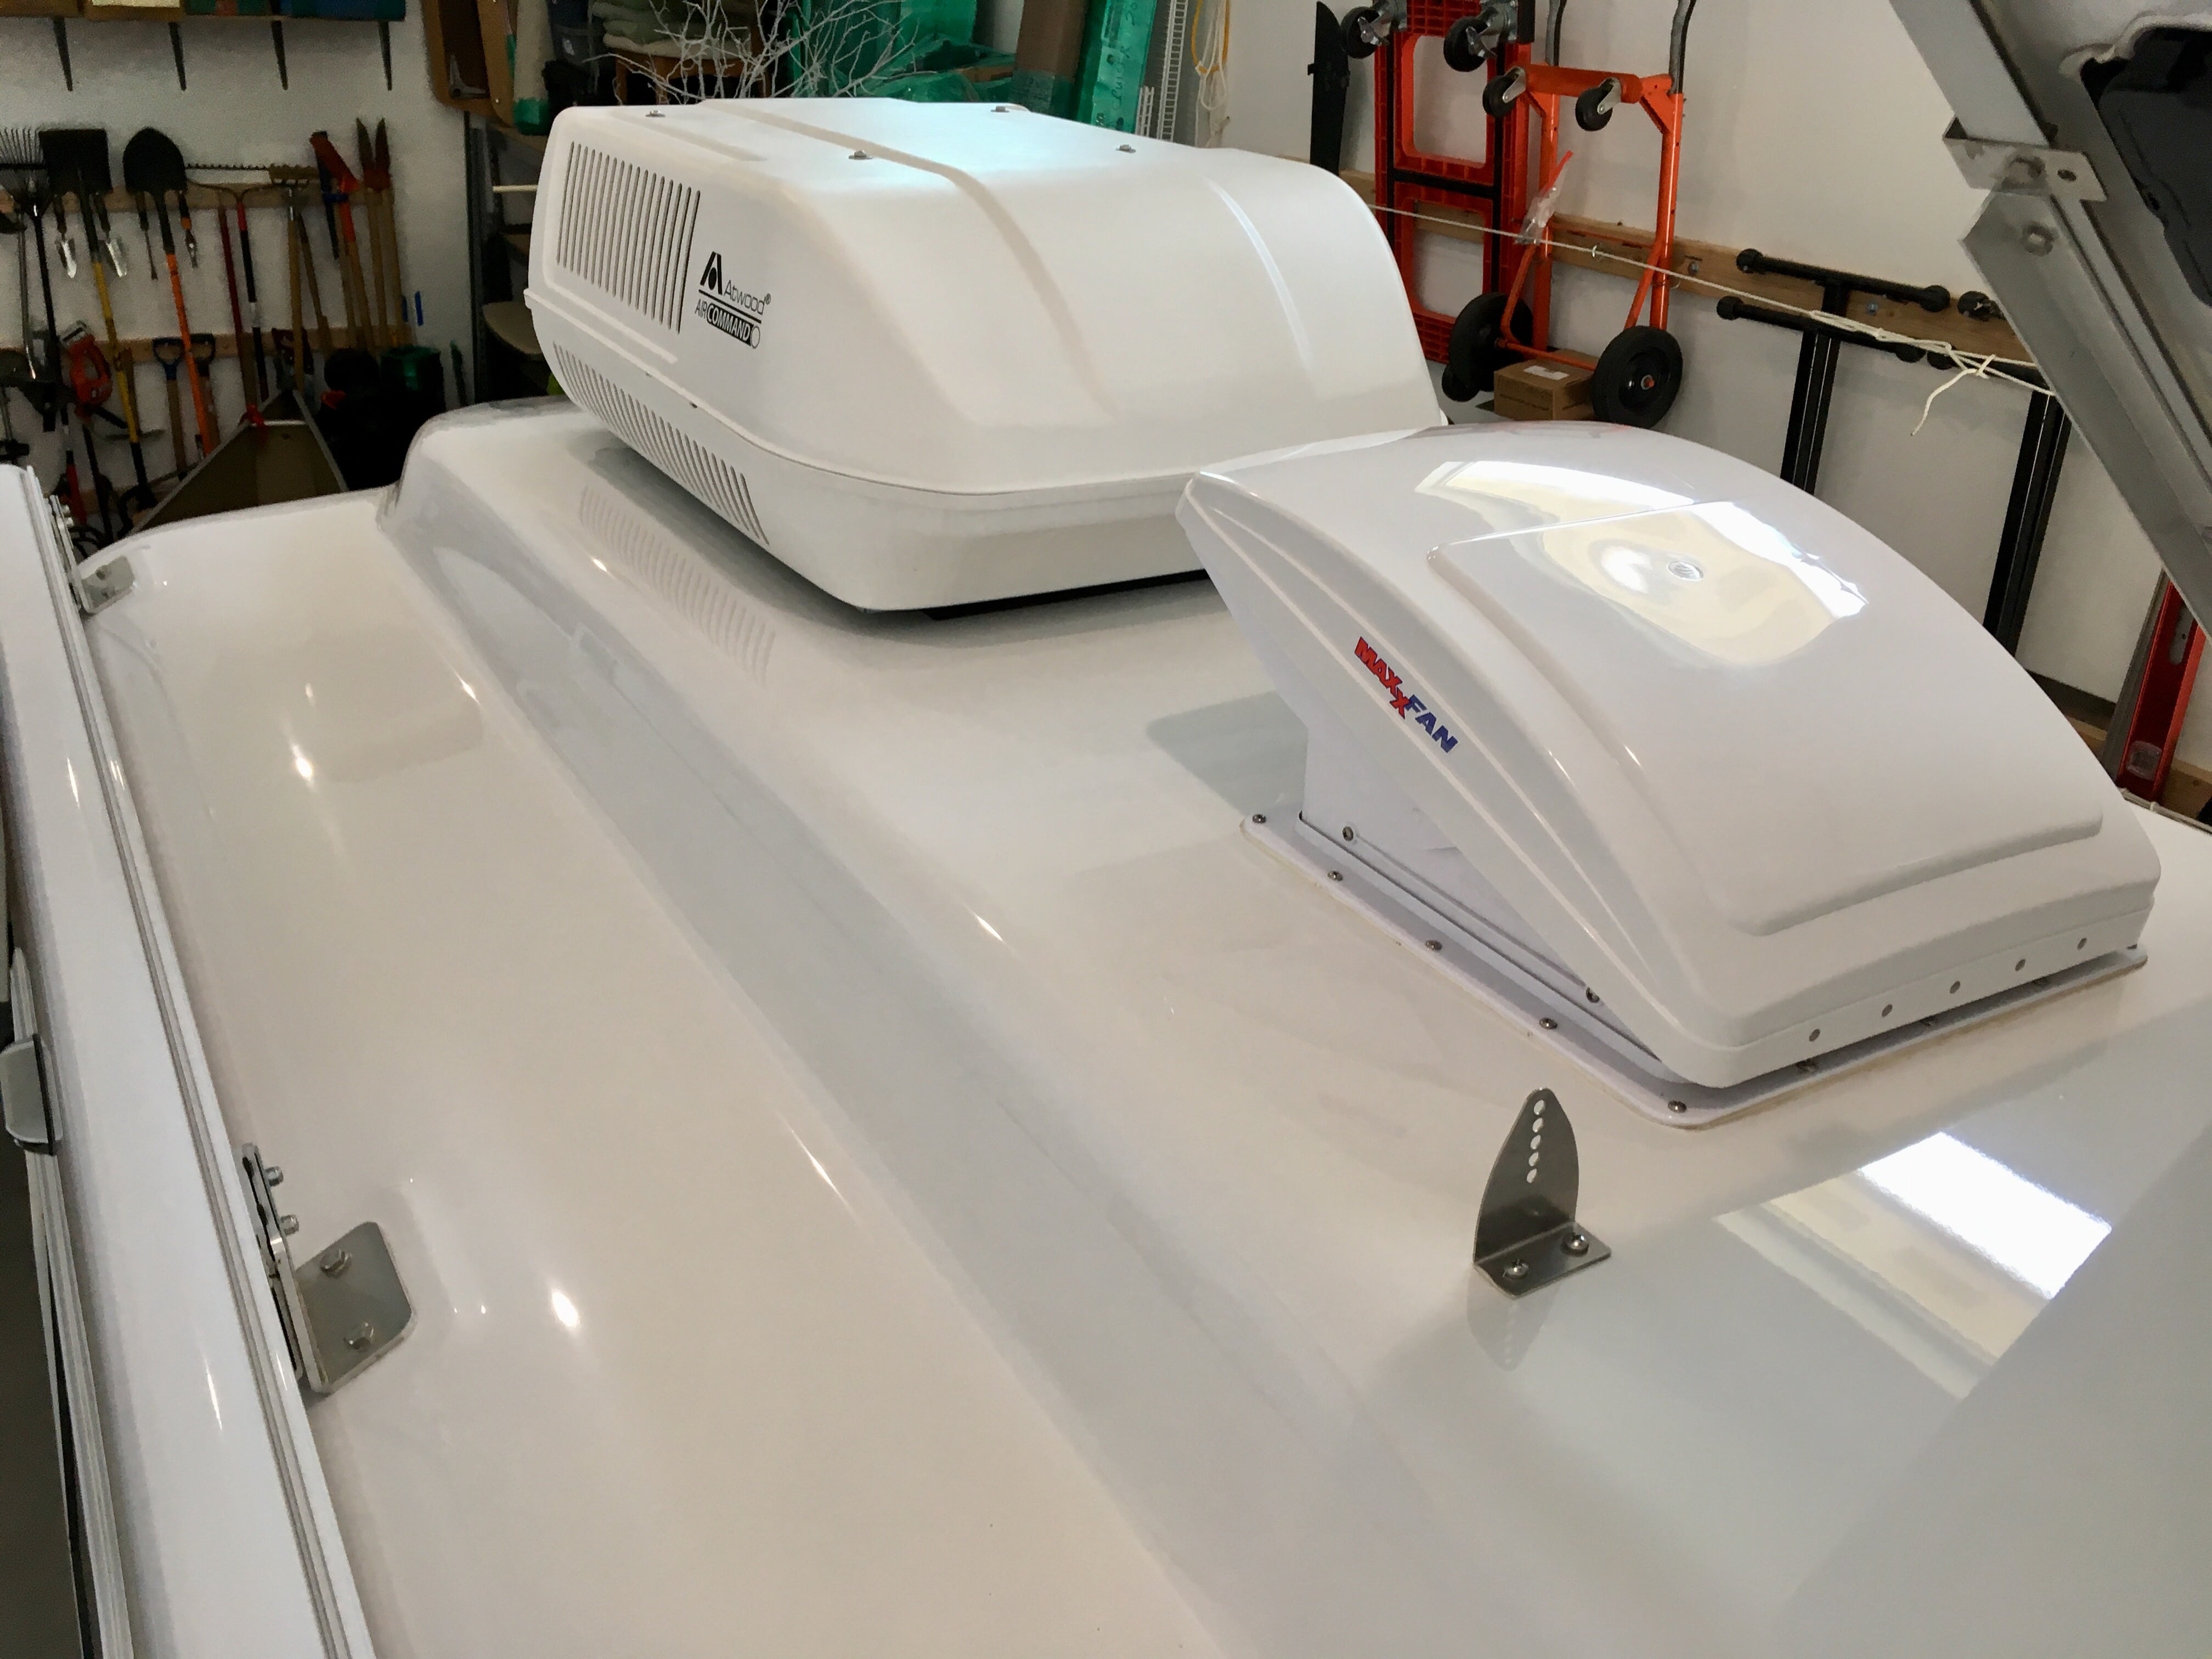
I considered adding a replaceable filter under the main fan, but then you have dust and debris falling into the cabin when you change it. The big negative is that the shape of the Max Air cover and the rear-angled inner “flap” serve to suck air out of the cabin while underway, passively. I seriously doubt that you could get enough backwards airflow to pressurize the inside adequately. Ideally you would use a ram air effect for the incoming air, such a forward facing scoop on the end of the inlet snorkel. Unfortunately they function only at moderate to high speeds and I need a system that will operate while barely moving. A reasonably high flow axial fan sucking the sort-of clean air from above the dog house should work great, as proven by a large number of Aussie “outbackers”. The filter used is not HEPA but it is highly efficient at separating particles centrifugally before they even approach the filter element, and you routinely dump the dirt out of the bottom of the can through a rubber valve, by squeezing it. Adding a cyclone pre-filter at the top opening increases efficiency even more. I have given this lots of though over the last three years, I really don’t see a really effective alternative. This is the test bed for air filtration, the bull dust of the Outback.... if it is ineffective you either destroy your engine or go through dozens of filters. Getting the intake up high is the answer. John Davies Spokane WA
1 point
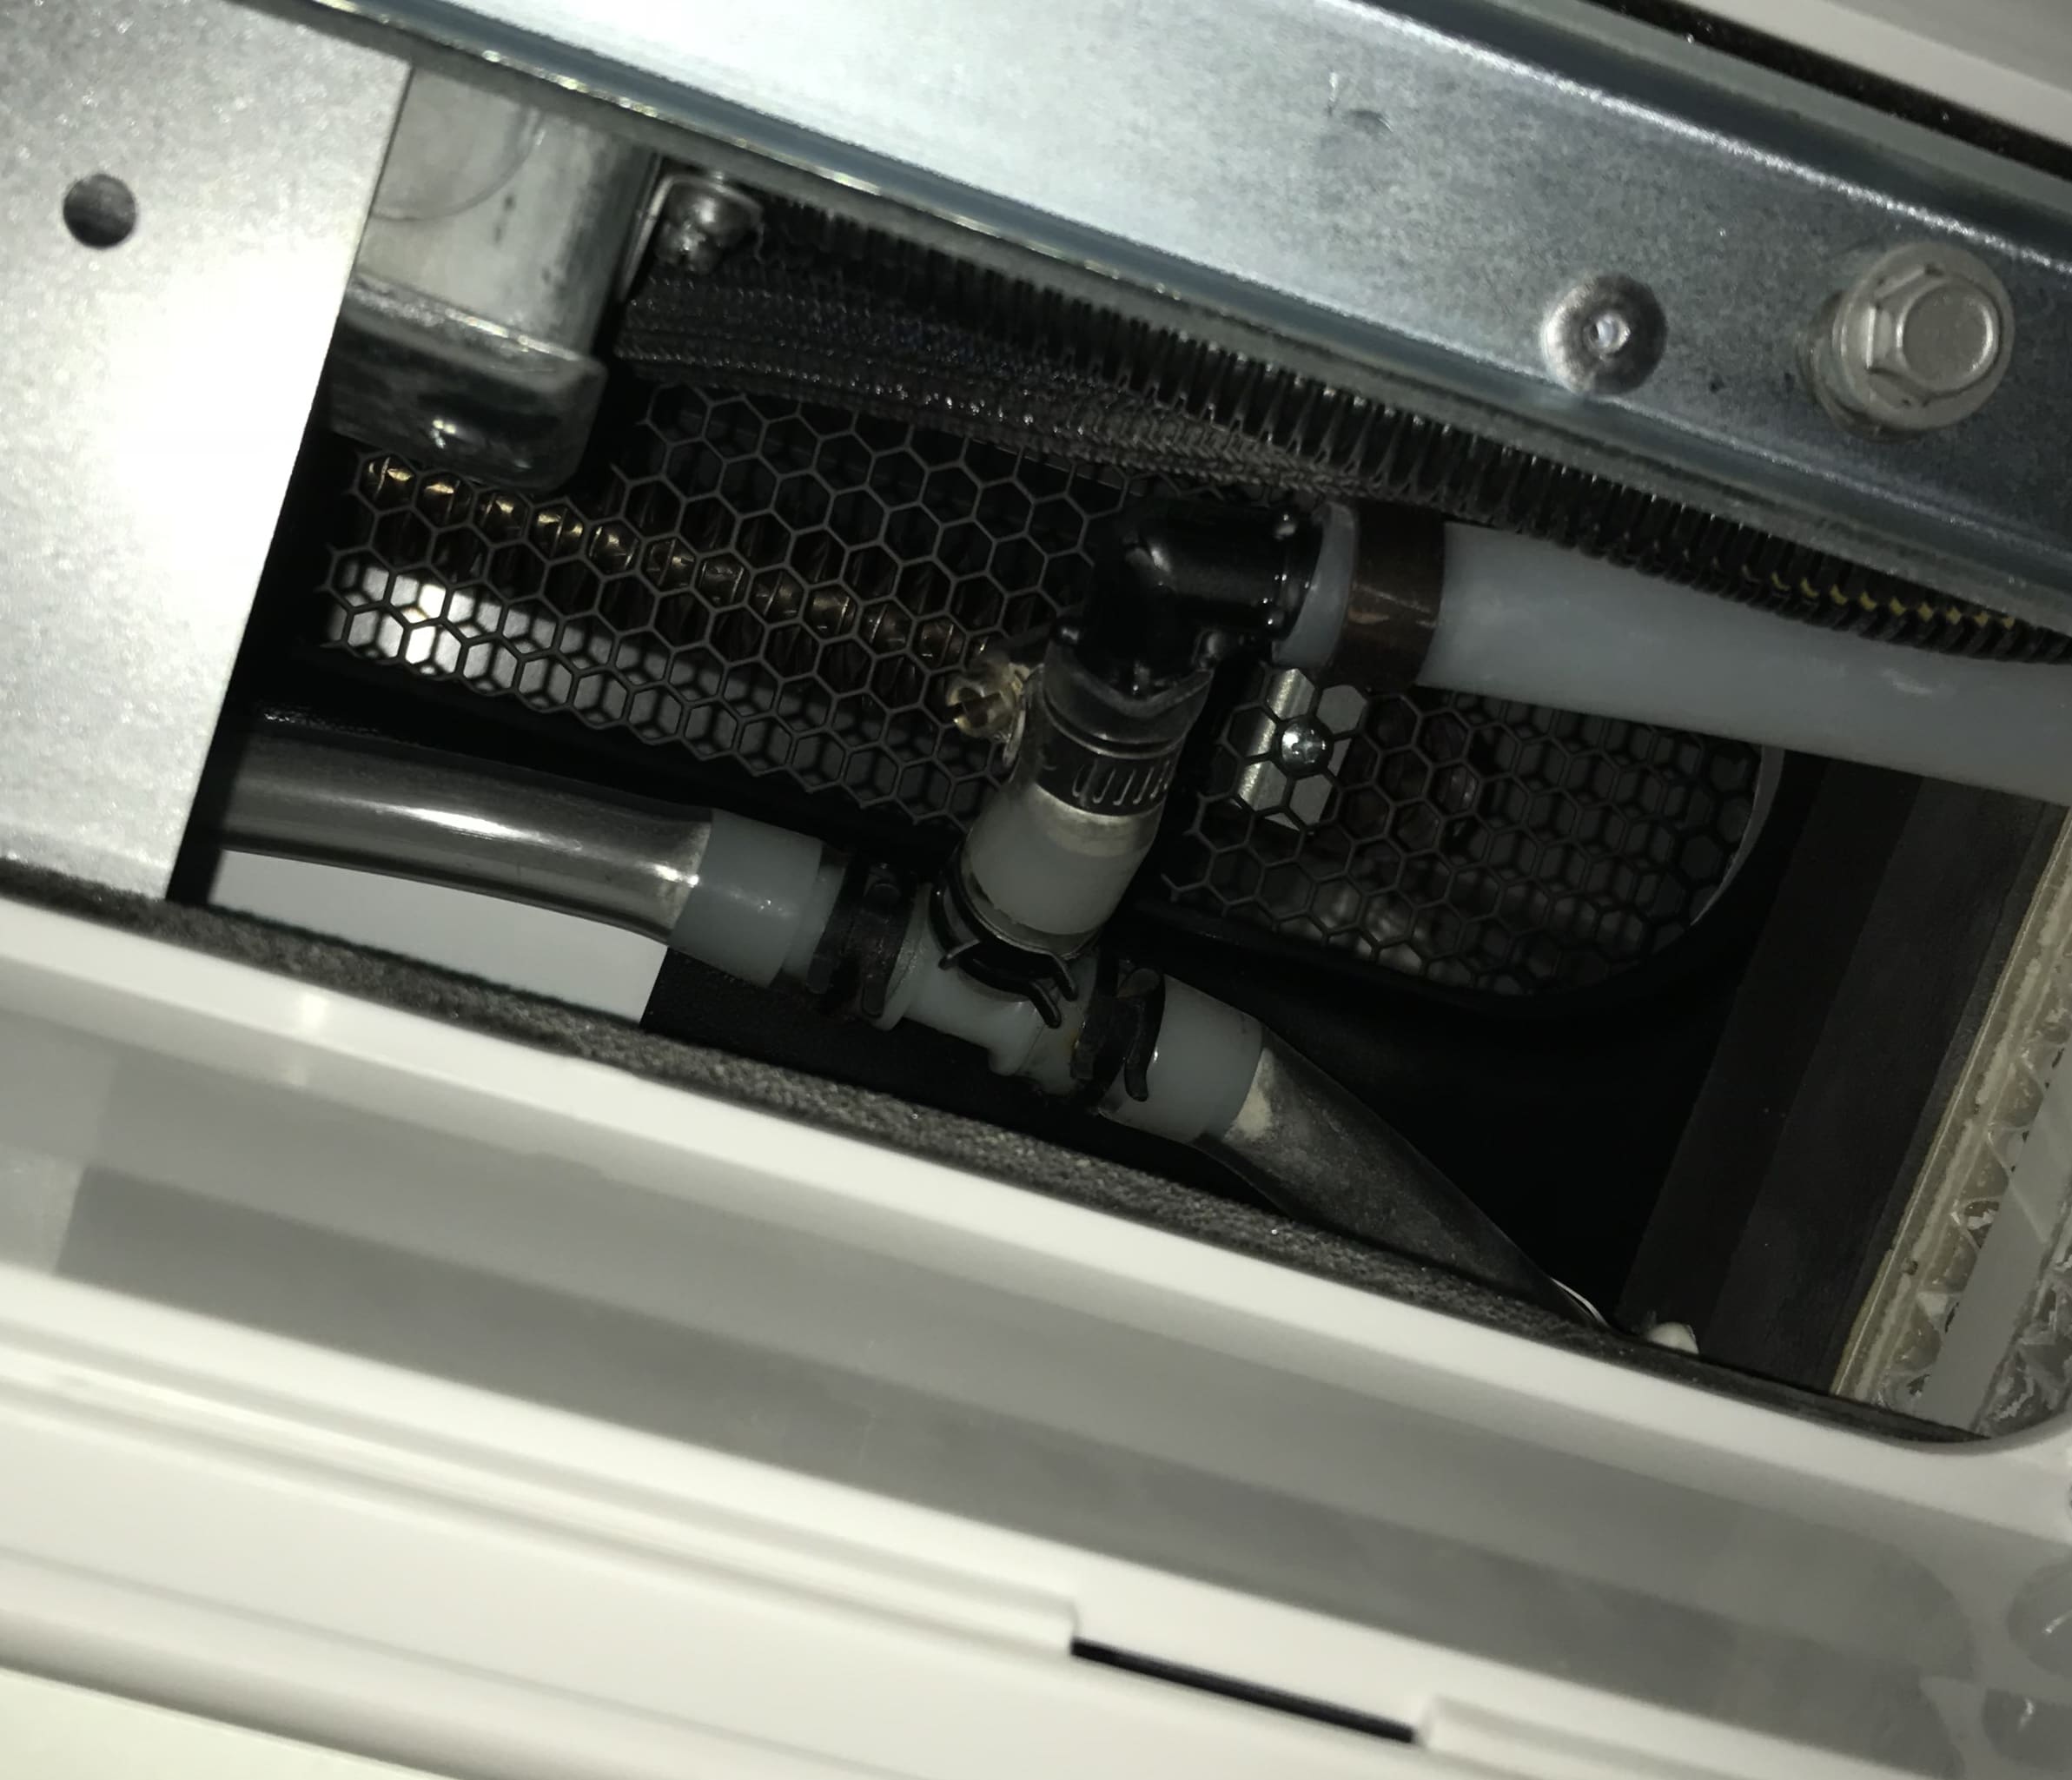
-
Ok I’ll take a stab at it. What you are calling cold air lines are the condensate drain lines I think. I think all of our roof top units are installed and run without the air distribution box being installed on the inside of the cabin. The return air filter is held by the air distribution box. The roof top units were run while (dust producing) operations were performed in the cabin. The unfiltered air was drawn through the evaporator coil where the dust was deposited on the coil fins. Condensate forms on the evaporator coil and drips into the condensate collection receptacles on each side of the roof top unit. The water/dust mixture flows through the condensate drain lines at low velocity. The dust settles out and remains in the lines. There is white residue in my condensate drain lines also. I don’t like it either. Again, this is MY THEORY as to how that white residue got there. Bill
1 point
-
When I started researching bike racks for the back of the Oliver, like Don Thompson who started this thread, I found that for many bike racks, mounting them on a towed vehicle voids the warranty. I wondered why, and I searched the internet with terms like “catastrophic bike rack failure trailer.” There are lots of examples and discussions on trailer forums. Most (all?) of these failures are on stickbuilt trailers, where they have bolted a receiver hitch onto a possibly flimsy bumper. And catastrophic failure can occur. After seeing this, I figured that the lawyers for Thule and Yakima were simply doing their jobs and voiding the warranties when the racks are on trailers. I felt that the Oliver bike rack was much stronger, and I would take my chances. After my research I decided on the Yakima Holdup bike rack that fits into a receiver hitch, and I am quite happy with it. I have the rear view camera, and I can see the rack as the car travels, and the rack and the bikes are remarkably stable. The new Oliver design for a rear bike rack that Yvonne & Doug posted pictures of looks very good; it was not available when we ordered our unit. However my reason for posting here is that for some people there is a good rationale for a standard bike rack. I am an experienced bike rider. I commute to work by bike and I did cycle touring multiple summers. I am comfortable riding on many kinds of roads. My wife, in contrast, is happiest riding on an empty road with wide shoulders; even better is a protected bike path. So for us, the campground may be on a poor road by my wife’s preferences. However, if we transfer the bike rack from the trailer to the tow vehicle, we can transport the bikes to a more desirable bike path. We camped at a BLM campground last month near Moab. The road was narrow with no shoulders. However, eight miles away there was a great bike path along the Colorado River. Some photos enclosed. There is a bridge across the Colorado River for bikes and pedestrians, and at each of the bridge piers there are wonderful sculptures of rock and steel. David
1 point
-
Here's recent photos taken at Fall Creek Falls SP TN. Like to hike to waterfalls, we had a fine time at this State Park: Out standing in it's field:1 point
-
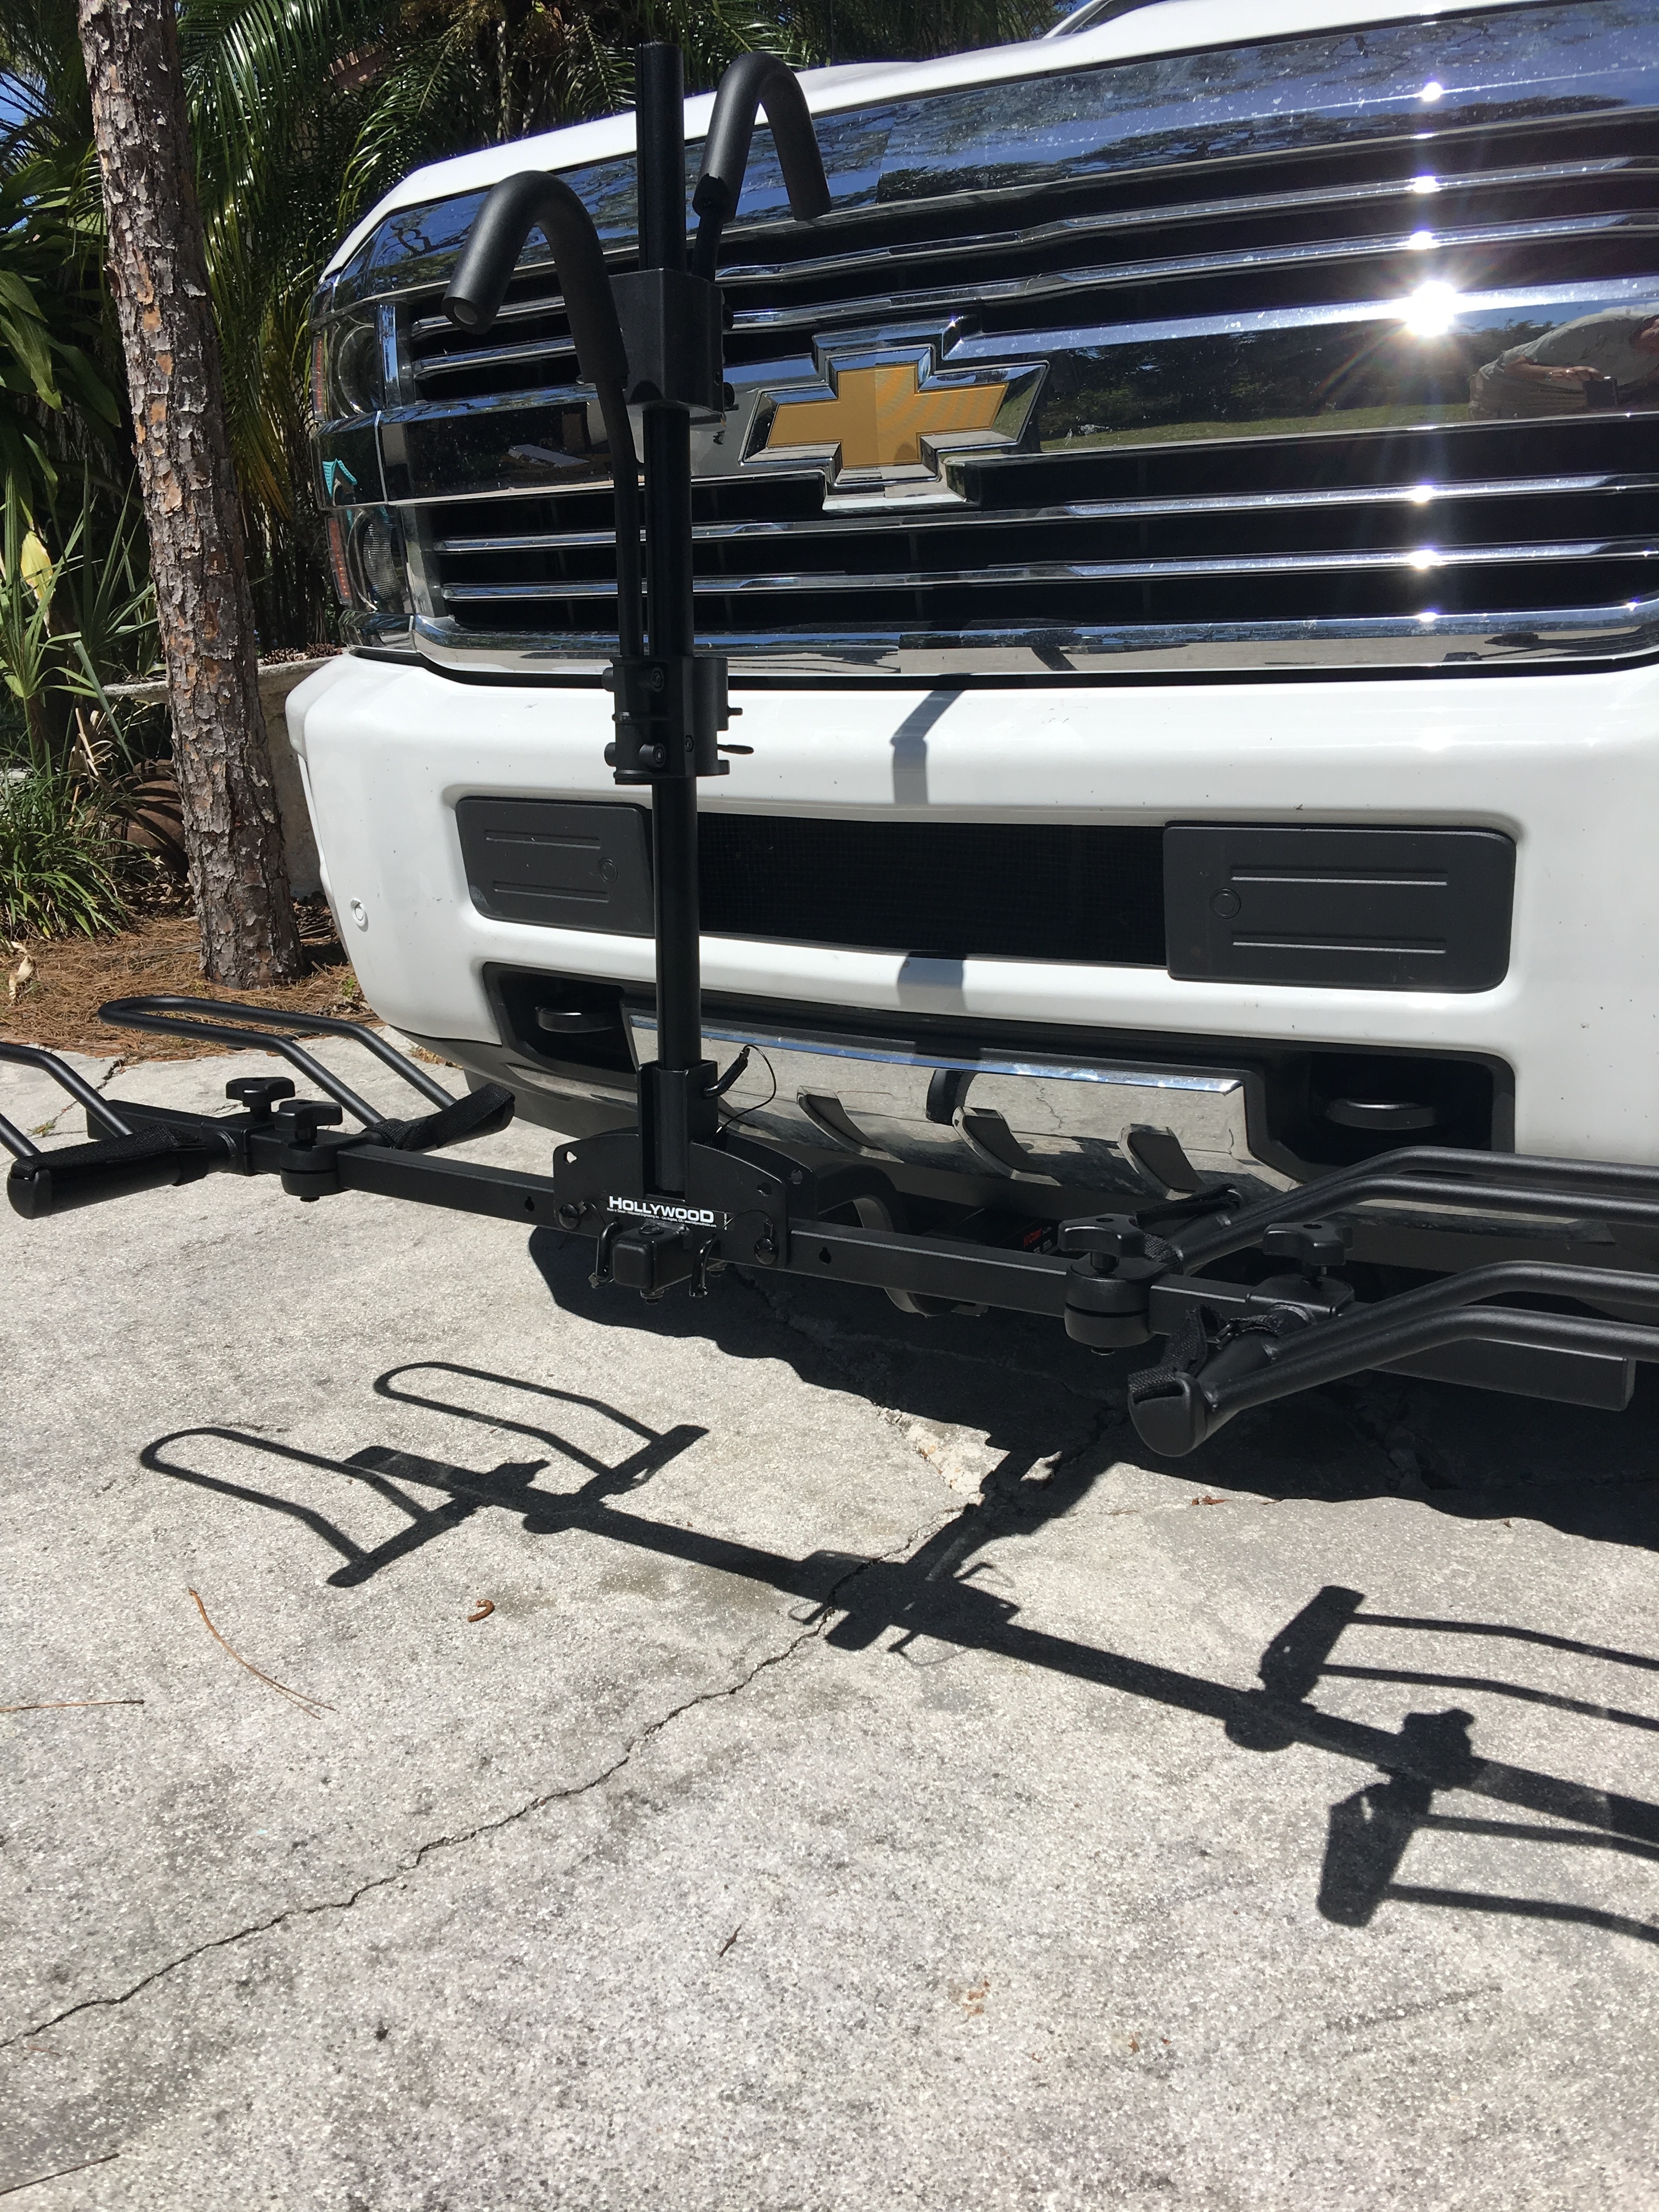
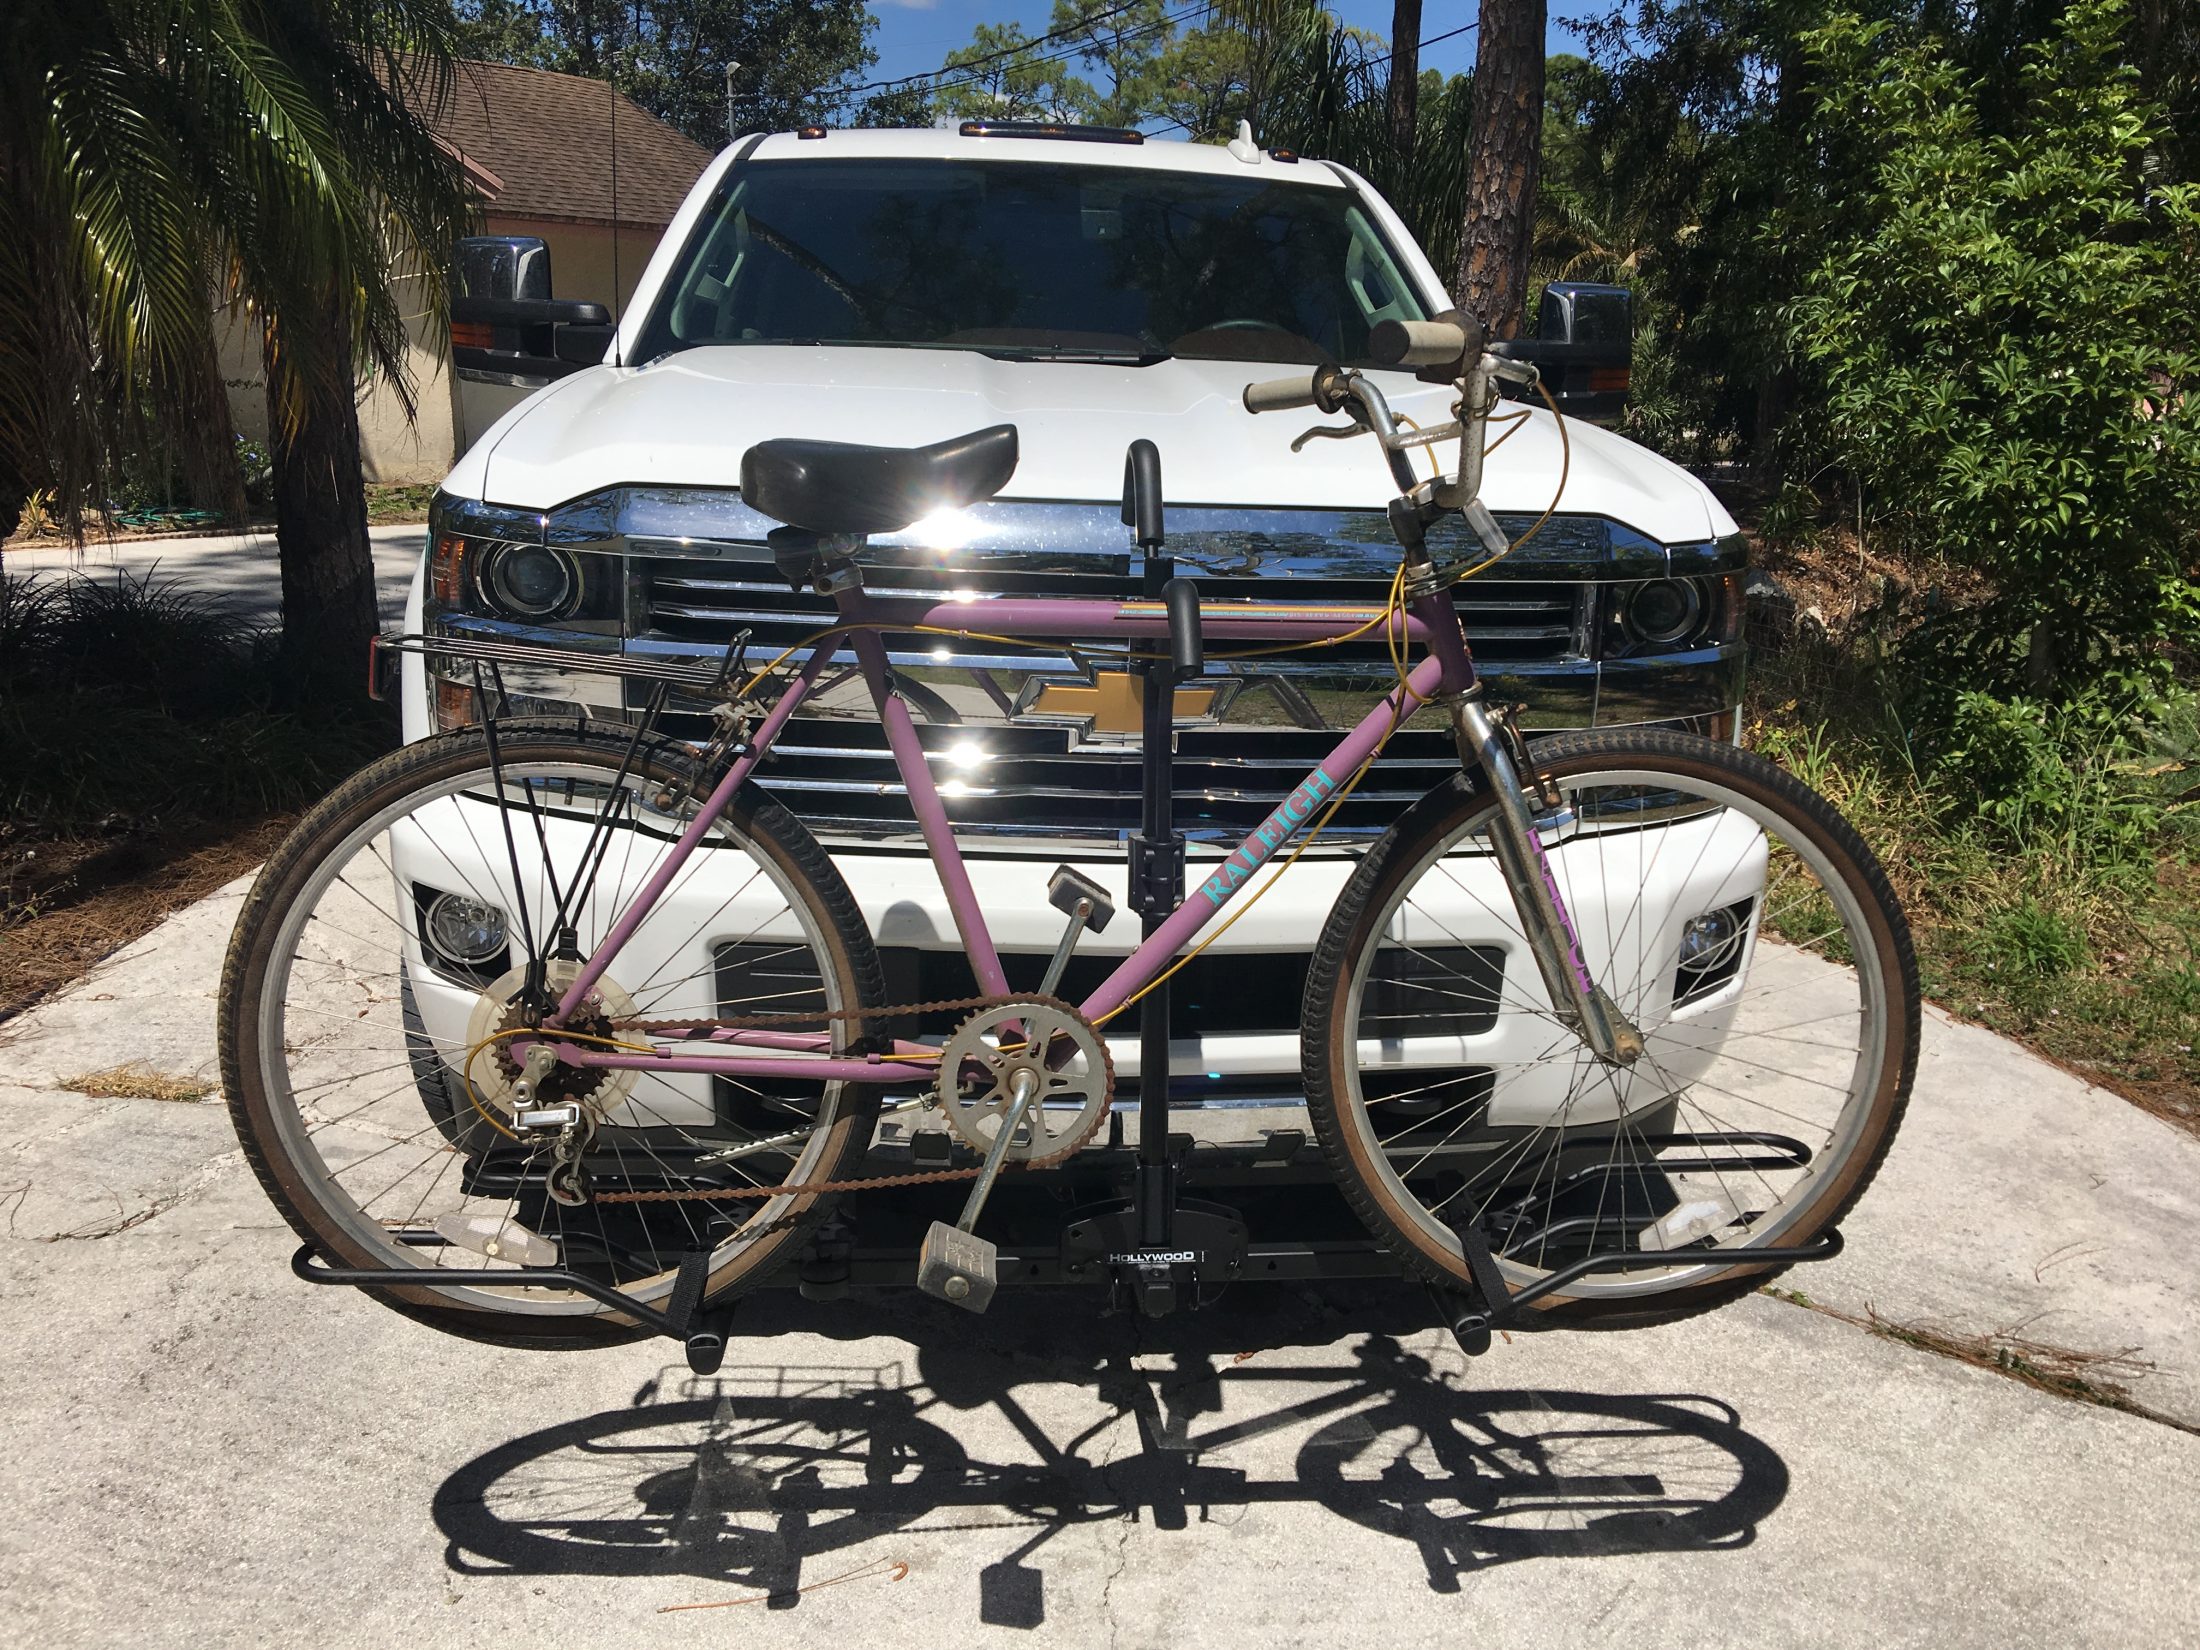
I am going to try this with a front mount bike rack have not gone on a trip with it yet I did try it around town and seem to work well. I will have it on my trip to the Rallies next month so that will be my first long drive test. I did get the one that the bike tires are what is supporting the weight on the rack and it had a 45 lbs capacity per bike vs the Swagman like this one was 35 lbs. We will see but I put on my own front hitch which was easy took less than two hours and can even use to pull my Trailer around to park if needed. At least another option I'll try a few photos. Thanks Gary
1 point
-
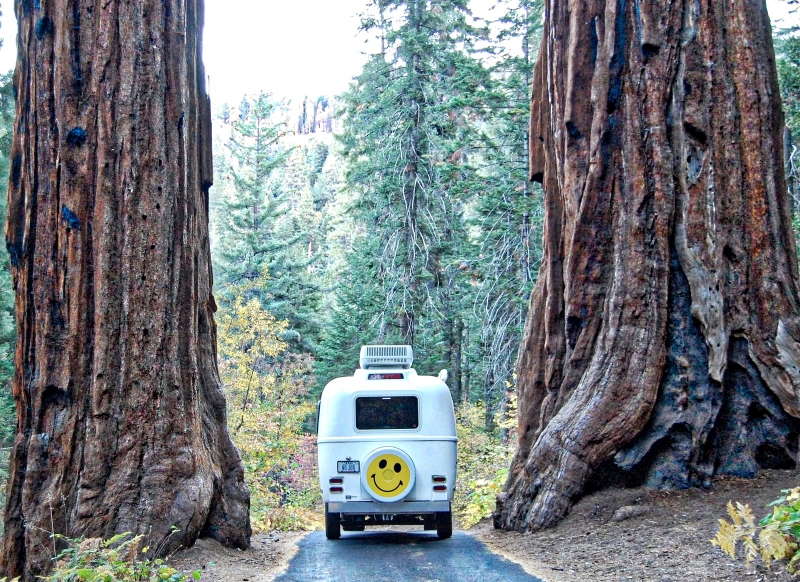
Sequoia National Park, 2008
1 point
-
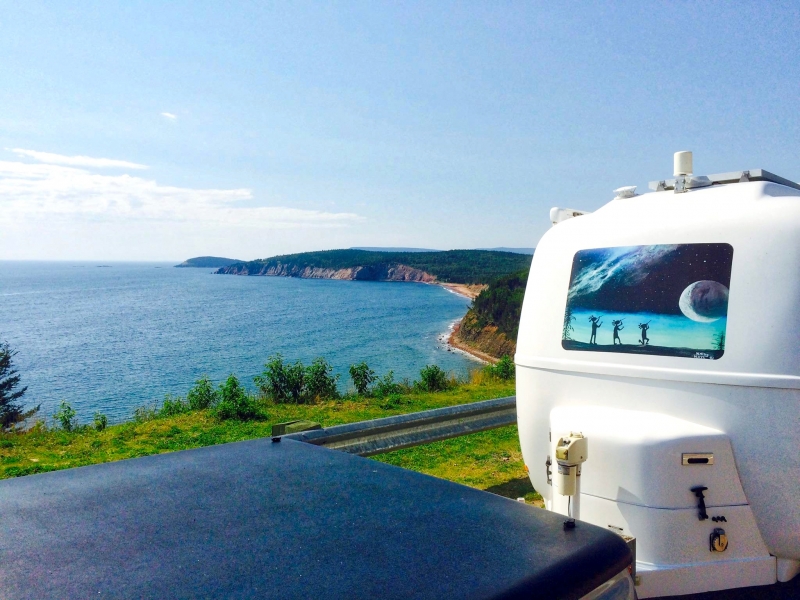
Following the Cabot Trail, Cape Breton Island, Nova Scotia - Summer 2015. Stunning scenery, friendly people . . .
1 point
-
Many have been concerned, myself included, with how well a battery pack stores in the winter especially if left outside. So with this being our first winter with the Oliver and its 4 pack of Trojan wet cells the following is what we have found. The long and short of it is there is nothing to worry about. We've had a fairly cold winter up here above the 45th parallel and keep our Oliver stored at an RV storage facility with overhead roof but not enclosed. I'll admit we were a bit concerned about leaving the batteries out in the cold for this long of a period although I know a fully charged battery is supposed to be good for something like 90 below zero. So over the winter I went out to check on them 3 times, after a month and half they had dropped from 12.92 to 12.87, and just yesterday I checked again for the 3rd time this winter and the pack was still at 12.84. Thats still a fully charged battery after 4-5 months in a MT winter. I hope this helps to alleviate any concerns for those in the northern hinterlands regarding battery problems. Granted for those of you living along the gulf coast and in the south its not a concern. The thought of unhooking all those batteries, taking them out storing at the house then re-installing later didn't seem like a good plan either.1 point
-
If you only turned the equipment (TV, Radio, Fridge, etc) off by their own power switches you would still have some power being used. To completely disconnect any 12 VDC from being used is to pull all 12 VDC fuses or turn the 12VDC disconnect switch to the OFF position.1 point
-
Routlaw: I assume you did not leave the trailer plugged into 120 VAC for the winter storage. But did you turn the battery cut off switch to the OFF position, so there is no load on the batteries?1 point
-
This is something we need to deal with shortly. We covered our Casita with a CalMark cover made of Sunbrella and are hoping we can have one made for our Oliver. We stored it for five Michigan winters with excellent results.1 point
-
You might want to go over to the fiberglass forum and check out the thread on covering you trailer. (Care and Feeding of Molded Fiberglass Trailers, Cover or Not) . Always a lot of opinions, for and against, but interesting reading. We have ours under a canopy that we had to raise the roof twice, since each trailer was always a little taller. Stan1 point


-
Recent Achievements
-
")


")


")


