Leaderboard


Popular Content
Showing content with the highest reputation on 02/19/2022 in all areas
-
I caught a break last night. After 2 nights of boondocking at Mather campground with temps in the low teans and some snow on our solar in a mostly wooded campground we decided to spend the night in Williams at a full service campground. They even had an indoor pool and hot tub. Nancy enjoyed that! After burning through a bunch of propane we were running our electric Vornado for warmth throughout the afternoon and early evening. I didn't hook up the water as I knew it was going to be cold!!! Unfortunately before I went to bed early I neglected to switch to propane furnace and turn the Truma to eco mode. The Truma was off. I was tired and despite knowing the temperature would get to 18, I fell asleep! Fortunately, I woke up at 1:30 am and realized what I had done. It was already 18 and dropping. It was 32 when I fell asleep. I immediately went to propane furnace and turned on the Truma. I had forgotten to flip the outside switch when we arrived. I quickly went outside and turned on the Truma. Inside the Truma was flashing when I turned it on. Fortunately after a few seconds (it seemed like an eternity) the light was steady and on!! I turned on the hot and cold water in the bathroom and all was good! Thank heavens! Just another rookie mistake! Still learning!!!!! Hope this helps some of the folks newer to camping like us. This forum is terrific, I used one of the hints on here, as I was having trouble getting grease into one of the zerks on my suspension today!!! The advice worked perfectly!!! Thanks!! Travel Safely and have fun!!8 points
-
I finally got around to adjusting the pitch of the two awnings today. Instructions were on pages 197 to 199 in the 2021 Legacy Elite 2 Standard Features manual. I wanted both awnings to be lower at the rear of the trailer so water would run off in that direction, and away from the entry door on the curb side. The curb side awning was already somewhat lower to the rear of the trailer, but I increased the pitch to lower it slightly more. The street side awning was pitched in the opposite direction, which didn't really matter since there is no door on that side, but I like symmetry, so I adjusted them to be the same. The adjustment is really easy, and you almost don't need to use a 17 mm wrench. With the awning fully extended, and lifting the awning arm slightly to relieve pressure on the adjusting cam, I was able to turn nut by hand (CW to raise, CCW to lower whichever arm you're adjusting). Like many mechnical tasks, it took longer to figure out how to do the job than to perform the job. I didn't need to adjust the elbow height of the hinged support arms, because they still retracted properly after adjusting the pitch.5 points
-
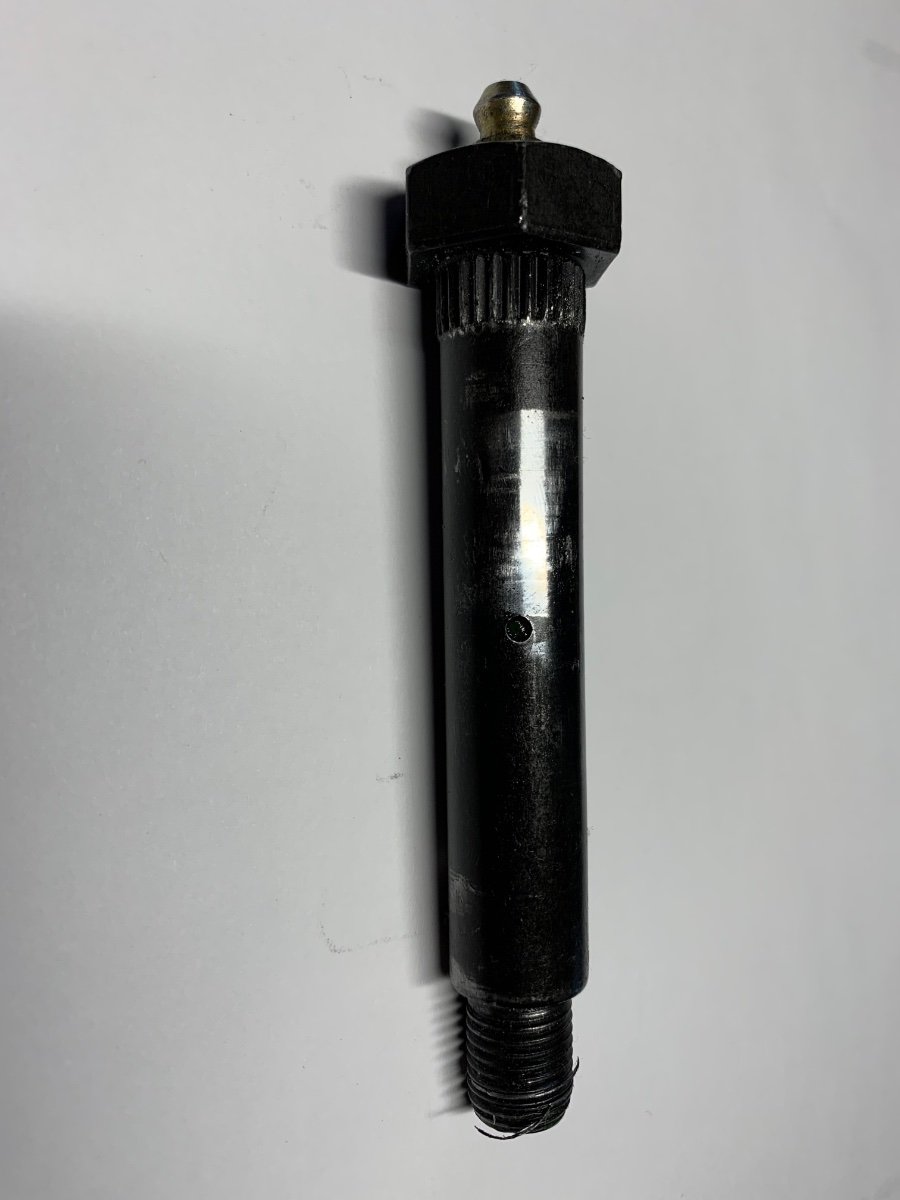
The replacement zerk fitting did not solve the problem of the wet bolt accepting grease, so I submitted a ticket to Oliver. Jason responded quickly, saying that they would send a replacement bolt, and that I could replace the bolt myself, or have a local service facility do the work and submit a reimbursement claim to Dexter. Coincidentaly, two days earlier a friend had highly recommended a local family-owned RV service facility, so I opted to have them perform the work. When I went there to schedule the repair, they told me to bring the trailer by that afternoon so they could determine if the bolt was truly faulty, or just needed a more powerful grease gun than the mini-grease gun I use. The bolt was indeed faulty, and they had a replacement in stock (the one from Oliver had not yet arrived), so they set about replacing the bolt. It took close to an hour, but they only charged for half an hour of labor (work stopped for a while as everyone in the shop had to come inspect and drool over my exotic fiberglass trailer. A happy ending to a small, but nagging problem, and I now have a trusted local repair facility to turn to when things get above my pay grade. Attached is a photo of the offending bolt. I'm not sure if the wear is normal after only 3500 miles or indicative of a lack of sufficient grease.
 5 points
 -
Brand new Oliver Owner here. Actually, brand new to camping! My wife and I picked up H#1014 February 1, 2022. The experience went well. After viewing the walkthrough videos over and over and over the actual walk through went very smooth and very fast. Camped 2 nights at the Oliver Camp Grounds. It was cold and rainy and I am happy to report we found no issues. Everything worked, everything opened, everything closed. We brought a small electric heater which kept it around 65 on it's own, even in 16 degree weather. I set the thermostat to 68 just to get the furnace to engage because I was worried about the pipes. I only heard the furnace click on about once an hour. We spent another week in Tennessee at a couple of state parks and campgrounds. Surprising to me, I prefer state parks! Wouldn't have thought that before this adventure. The reason for this post, however is one thing I forgot to do prior to pick up that I hope to share and save someone what I am feeling now. Don't be me, get mud flaps on your tow vehicle!! Traveling I-40 in Tennessee from Nashville to Pigeon Forge was a pot hole party, everyone was invited and only the smart stayed away. Anyway, amongst all the bug guts and dirt on the front of the trailer I found a rock chip in the fiberglass :-(. Although it's small, about the size of a pencil head, it hurts soooo bigggg! Ugh. So, my advice, don't forget the mud flaps! I hope this helps someone out. When I noticed it, I got on the Oliver Forums and sure enough, there were posts about mud flaps! Kraig4 points
-
Good Morning and Welcome!! I'm a newbie to the Oliver Travel Trailer thing, but not to towing. Spent most of my life hauling livestock. From your numbers your truck can pull it. You see a lot of posts like this where people worry about their tow vehicle. In my opinion, the real question should be can my tow vehicle stop it in an emergency situation. I believe in overkill. I want much more vehicle than I need, but that is just me. If you are concerned now, you will be concerned on travel days. This concern will add much stress to your vacations or get away. Especially on these fine roads out there that are constantly under construction, no shoulder, tire debris that just pops up in front of you and those drivers that really shouldn't be driving. You know, the ones that stop in lane 2 of a freeway so they can try to get over to exit. So, in my opinion, if this is on your mind now, it wont go away. In my limited miles towing the Oliver, it tracks true, you frequently forget it's back there. I have already scared myself looking in the rear view and seeing someone on my tail, only to realize.... its just the Oliver :-). I haven't weighed mine full yet or I would give you those numbers to help you out for a general ball park.4 points
-
Snake Eyes, I know that you don’t want to tell us the make and model, and that frankly is a little odd to me, but it really does matter. A turbo vs non-turbo, gas vs diesel …. the weight specs are important but so is the torque output and where in the rpms it occurs. A lot of naturally aspirated gas engines may look good on paper, but the reality is that the power happens high up, so under difficult towing conditions you find that you are struggling in low gears with the engine screaming. Even if it isn’t bad for the engine, it is bad for the occupants, and it is a very stressful way to travel. Also, the advertised tow ratings always have an asterisk - Here is the * for the Ranger: What that means is, the vehicle can easily pull a small boat to the lake, but put a tall and wide travel trailer behind it and add a 20 mph headwind, and suddenly you find that you don’t have enough truck. Note that the limit includes the tow vehicle itself! John Davies Spokane WA
3 points
-
That Plexus looks really super, but the price is hard to swallow - most epoxies have a relatively short shelf life, so once opened it may not last very long. The JB Weld in the big size is affordable and I have used two year old product without any issues. Plus it works very well on non plastic parts. The fuel access door on my car popped free from the hinge, I glued it back successfully, that saved me having to buy a used door and having it painted by a body shop. I am a JB Weld Fan Boy. John Davies Spokane WA3 points
-
PS, when you encounter a part that has popped completely free like that, it usually indicates poor prep work, either the parts were not roughed up or not cleaned well enough, or both. Or perhaps a bad lot of epoxy…. So yes, fill out a service ticket so they can keep track of stuff like this and maybe take corrective action at the factory. John Davies Spokane WA3 points
-
No, just one more thing to lug along with you and potentially leave behind, additional cost with no additional benefit.3 points
-
I don’t boat, but have lusted after a Nordic Tug for 20 years, back before they were building the longer hulls….probably because my sea kayak was a bit cramped back in the 90s. 😉 https://www.nordictugs.com2 points
-
Yes and Yes2 points
-
Standard mud flaps help, but if you want real protection you need something more elaborate, like Rock Tamers or the Rockstar mentioned above. I’ve had regular mud flaps on all four of my tow vehicles, I’ve also got a bunch of chips! They aren’t too noticeable unless you get real close! Mike2 points
-
Payload will be a limiting factor - just depends on what you take with you in the truck. Yes - It will be more than you think - esp over time. Secondly - as has been mentioned - just drive the TV with something comparable in tow. Give it a good workout in multiple situations - you will find your answer. As for the numbers - you are right near the cusp of not enough - doable - but if you go a lot, too many areas with varied terrain - you may find you're not quite satisfied. As JD said on paper it looks fine - ...."No hurry" across Kansas, Oklahoma, Texas, SD, .... No thank you- Warp speed for me......the Ollie tows just fine at 70mph. The cats meow is a 3/4 ton 4wd, diesel - but I digress. Good luck and happy trails. RB2 points
-
I am with John Davies on this one. Yes, travel trailers are subjected to lots of stress, bumps and jolts on the road. But if properly done at the factory, glued joints should not fail, particularly on a relatively new unit. This is not a bargain-brand trailer. Oliver sells a "Legacy" premium trailer for a premium price. Consider this statement on the Oliver website: "Our design and specifications provide superior insulation, durability, strength, and ease of maintenance. Our camping trailers are built to last a lifetime and then some. That is why we call it the LEGACY ELITE. The Oliver is built using only the highest quality materials, making it one of the longest lasting RVs on the market and can be passed down to the next generation." I, for one, am pleased that Oliver is being made aware that glued parts are falling off of relatively new units. I hope they address the underlying QC issue before mine is built for September delivery.2 points
-
Just put a coat of tung oil on it.
2 points
-
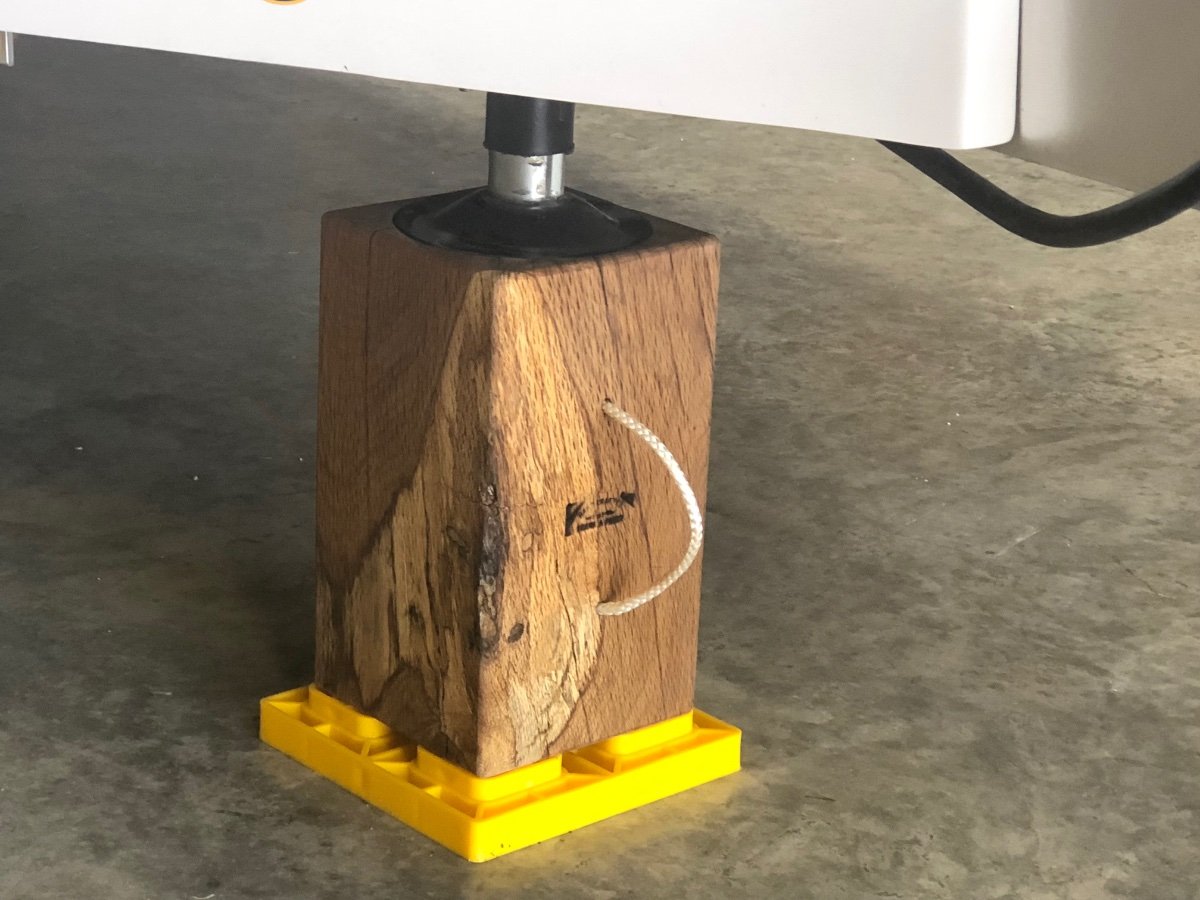
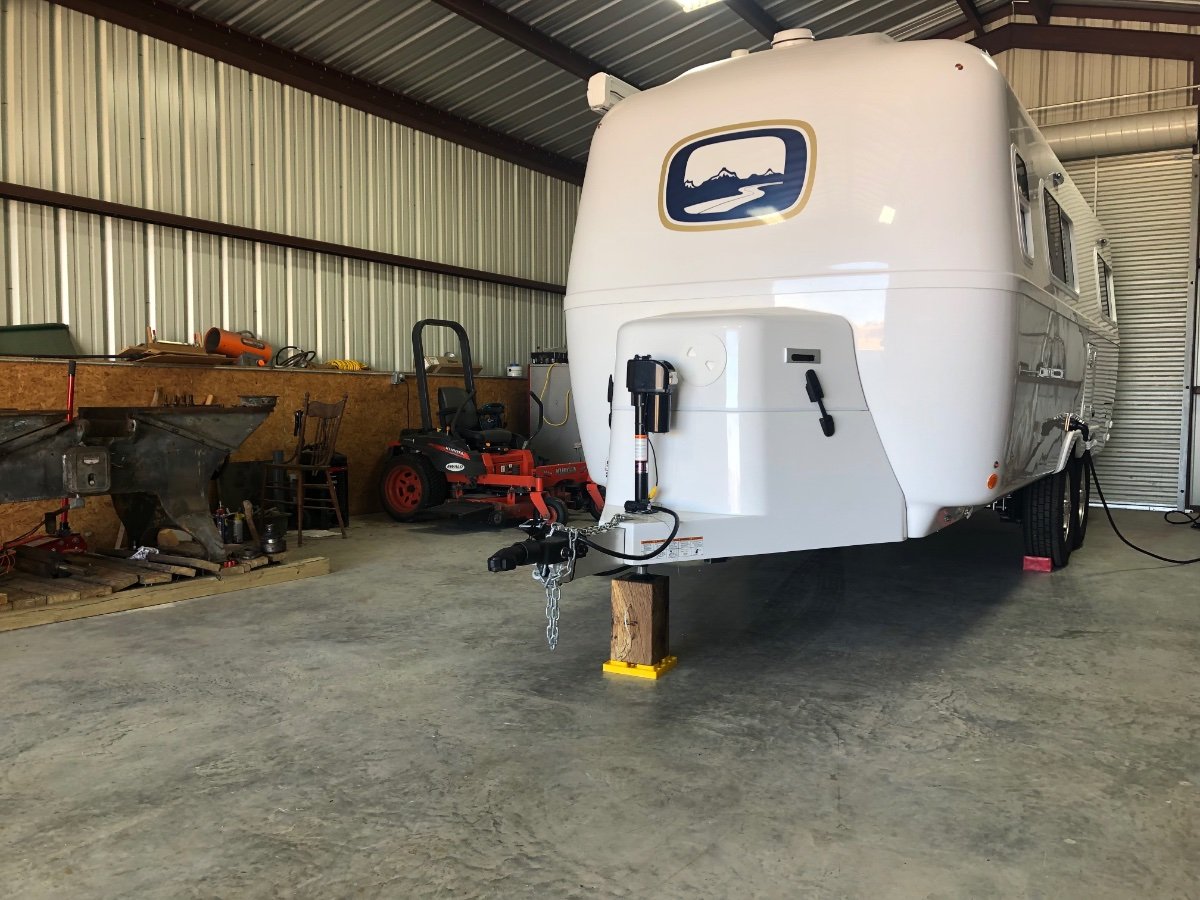
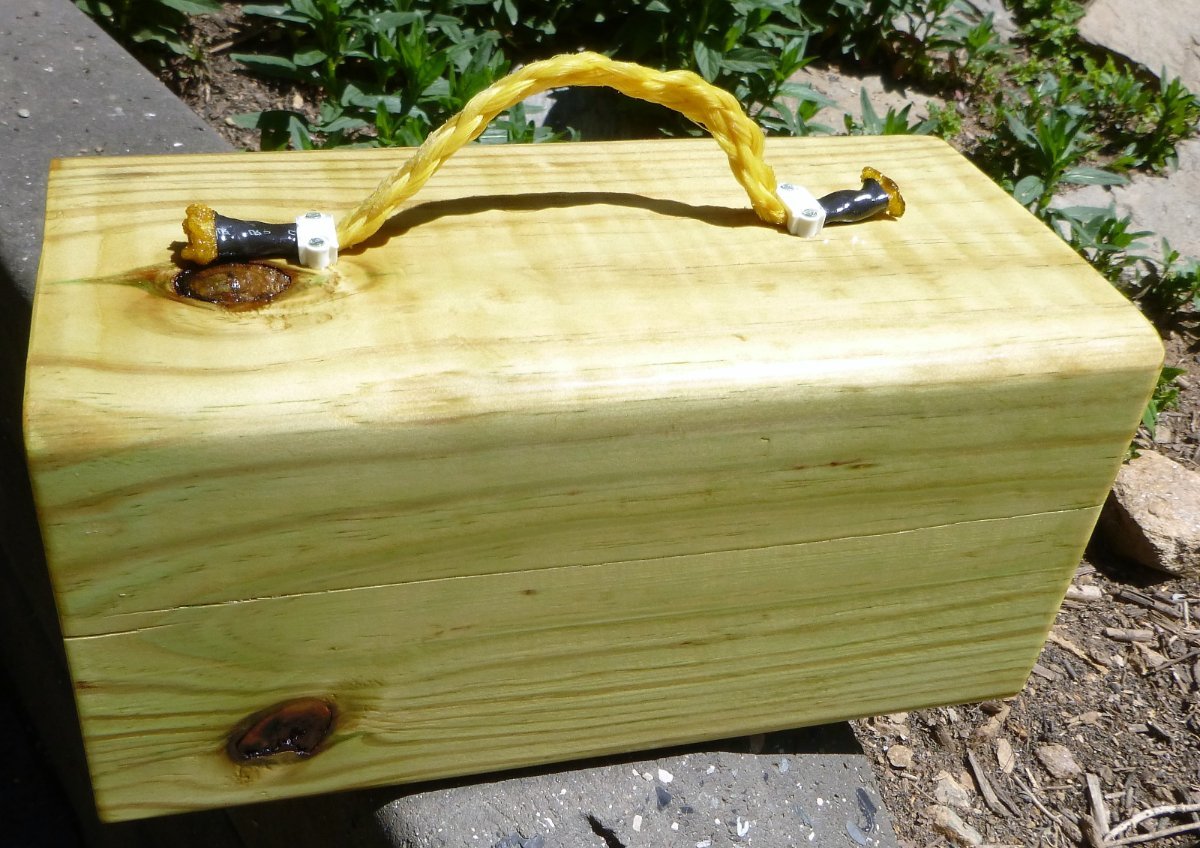
Bill and Mike inspired me to make a better block for the tongue jack. Price was right; had some off cuts from beams we sawed a few years ago, so made one for the Oliver and one for a camping buddy. Frank
2 points
-
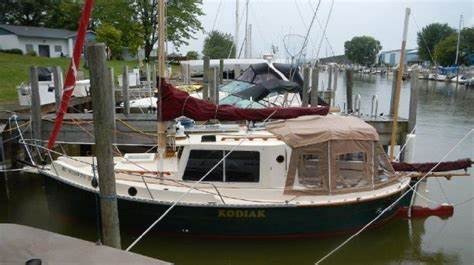
I have thought this out for some time now, long before I even knew of Olivers, so my answer is quick and steeped in personal preference 25’ Nimble Kodiak with diesel inboard Trailerable, durable and step-up/down is easy for when you do some canal cruising or the great loop. Not the sexiest or most efficient hull shape but bulletproof and roomy for its size
2 points
-
I don't think this is an ongoing quality control issue. Things that are glued on can fall off. Nuts on bolts can work loose. Remember folks, a travel trailer going down the road is a 6.0 scale earthquake going through a hurricane. Lots of stresses.2 points
-
JD suggested JB Weld to me about 2 years ago. And I have had very good success with it since then and as he mentioned, the self life is excellent even in Florida, where the 3M product's last a month if I’m lucky. I order the large size tubes from Home Depot. So I’m nominating him for president of the JB Weld fan club of which I am a member. Mossey2 points
-
The first thing I'd do is call Service and see what they recommend. The second thing would be to use epoxy as JD recommends above. Bill2 points
-
Any good 2 part epoxy, sand both parts with rough paper, clean with alcohol, glue and clamp overnight. I think the factory uses clear epoxy all over the trailer; JB Weld is better IMHO but it is visible (dark grey). I suggest that you buy the big size in case you find any other spots that need repair. https://www.amazon.com/J-B-Weld-8281-Professional-Reinforced/dp/B014OVHAOY/ref=asc_df_B014OVHAOY/?tag=hyprod-20&linkCode=df0&hvadid=312344907964&hvpos=&hvnetw=g&hvrand=14474563900679479226&hvpone=&hvptwo=&hvqmt=&hvdev=m&hvdvcmdl=&hvlocint=&hvlocphy=9033787&hvtargid=pla-434928186381&psc=1 John Davies Spokane WA2 points
-
We went with the Standard bed option. My wife and I are retired, camp primarily by ourselves and leave the bed made up. When company arrives for dinner or a visit, we stuff the bedding in stuff sacks we have on hand (primarily a down comforter and a couple of sheets) and put it in the back seat of the pickup. We use 2" memory foam toppers split down the middle of the bed and encased in sheets - these we roll up and stuff in the back seat of the pickup along with bedding. The whole process is easy, takes just minutes and leaves you with a large table / seating arrangement. We have seated seven adults comfortably around the table. Gettng in and out of bed for a nighttime stroll is easy - just slide off the foot of the bed (we sleep with heads to the aft end of the trailer). Accessing valves / breakers under seats is no different than a twin - lift the cushion, prop it up with the lid and make your changes ... it may be incrementally more difficult than a twin setup but not enough to matter. The bed, with standard cushions and the toppers is extremely comfortable and it is HUGE. One issue you might consider with the standard is that the upgrade, latex cushions are very bulky, heavy and could be difficult to deal with if you have a standard model and wish to store the inserts while using the dining table. For this reason, when placing the order for our standard Oliver II, Rodney in sales suggested we go with the original (thinner) mattress style. Incidentally, I have found that, leaving the table up, the smaller beds on the standard model are still plenty big enough for me @ 5'9 & 180#.2 points
-
Sorry forgot the photo.
2 points
-
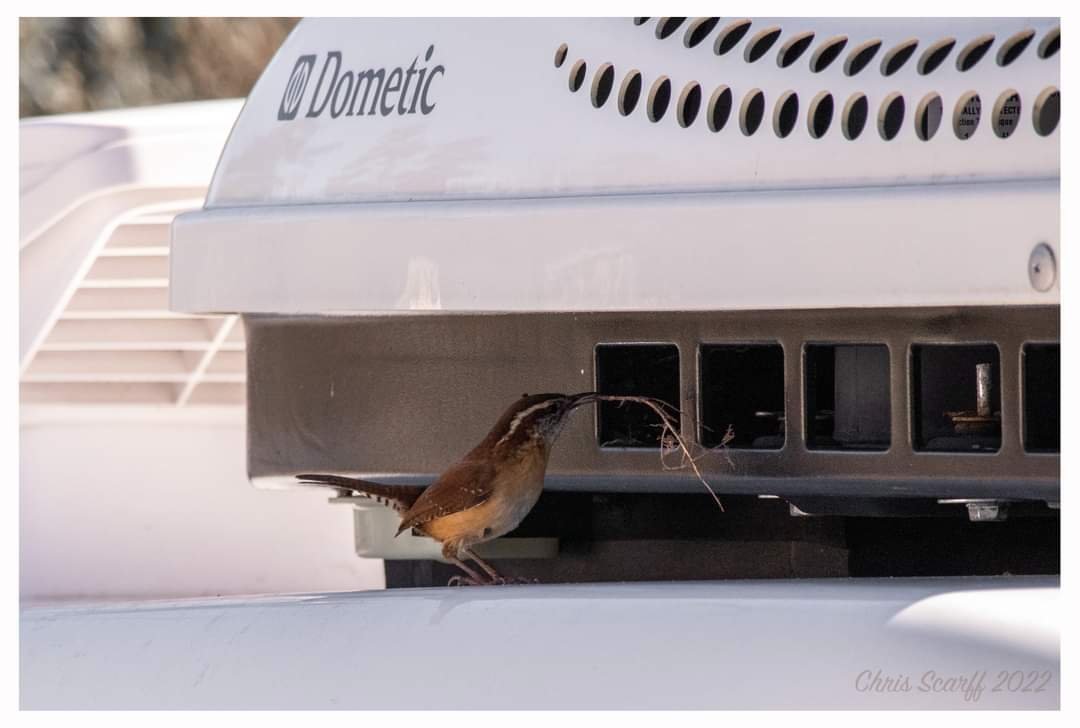
Well, it's been a while since I posted anything. Today I had to kick out some wrens building a nest in the air conditioner, on the driver's side, where there is open space under the cover. I temporarily added some screen material on the inside, but it will not stay without a better solution. I better add it to my pack-up check list to take down. Has anyone had this issue? Right now the trailer is in my driveway. Not where I want it, but for now, it must be.
1 point
-
Yes, your tow vehicle must have a trailer brake controller and the 7 pin connector near the hitch receiver to connect to the trailer brake/electrical/light system.1 point
-
Thanks, all for the responses. I did submit a ticket and also asked about jb weld and contact cement. The glue/epoxy is still firmly attached to the fiberglass but the aluminum had none on it. John1 point
-
Clamps! Best $35 bucks I ever spent at HD was a set of DeWalt Clamps. Nothing else will do.1 point
-
Yes, they do. And there is another QC inspection when the trailer is transferred from Production to Sales. Bill1 point
-
Ain't happing any time soon! Bill p.s. A former Oliver Elite II owner owned one of those small "tug boats". He went by the name - Windcrasher. His boat was really very nice as were his many other "toys".1 point
-
Kirk: Based on a recommendation from IL-Travelers on this forum, I have already installed a Rockstar full-width mud flap on our Tundra tow vehicle. IL-Travelers reports being very happy with the way it protects their Oliver. And, judging from the amount of dirt already collected on the front side of the Rockstar, it should protect the Oliver from most road debris after we take delivery in September. If you go with the Rockstar, I recommend the 2-piece "Adjustable" version over the Standard 1-piece. The adjustment is in how far the flap hangs down when you install it. You set that distance depending on where you secure piece #1 to piece #2 during assembly. For any off-pavement driving, I expect it would be better to have the flap hang down further than the non-adjustable, standard version.1 point
-
Hook up to a loaded trailer weighing about 5400 lbs and pull it around and see what you think. That should give you some idea. What I found is that numbers on paper or computer screen don’t take into account real life driving scenarios.1 point
-
Thanks, Our plan is to go there today.1 point
-
John, I had two fall off on my maiden voyage home from pickup. One I found, and service sent me two. Here is what service advised me to use to reattach. Plexus MA310 All Purpose High Strength MMA Adhesive 50ml/1.7oz Cartridge (#31500) https://www.amazon.com/dp/B06ZY7KMWD/ref=cm_sw_r_cp_api_glt_i_T0VC6EN5EERN8RPPRYQA?_encoding=UTF8&psc=11 point
-
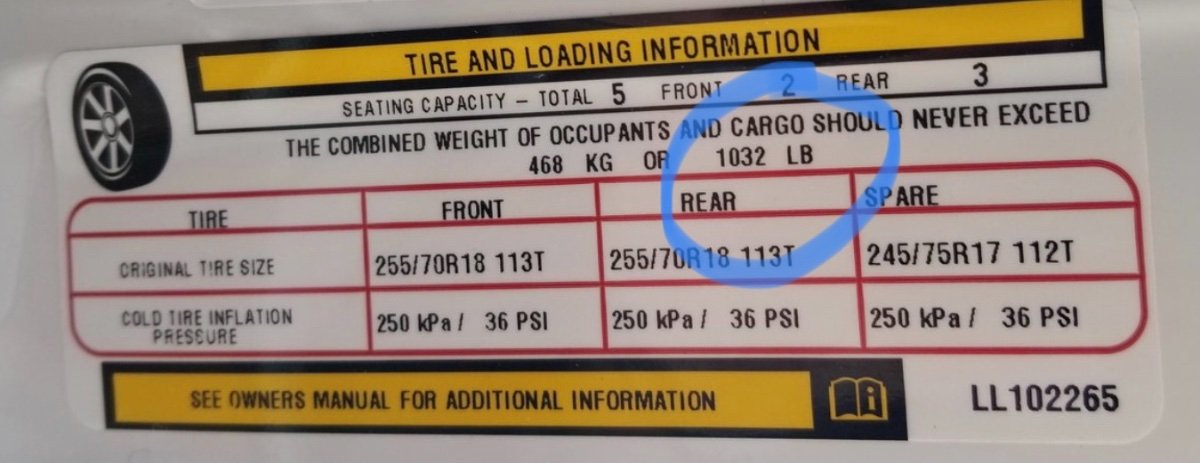
Since you already own the car I would drive it to the nearest weigh station loaded up with everything you would normally camp with and a full tank of gas. My guess is your available payload remaining will be a lot lower than you think. IMO you are asking a lot of a vehicle that is more oriented towards off road driving vs hauling heavy loads long distances. However, as long as you’re a few lbs under the legal limit that should put your mind as ease. Here is an example of a truck company that tricks the owners into thinking they have 1600 lbs of payload. You need to find this sticker, it will look very similar…
1 point
-
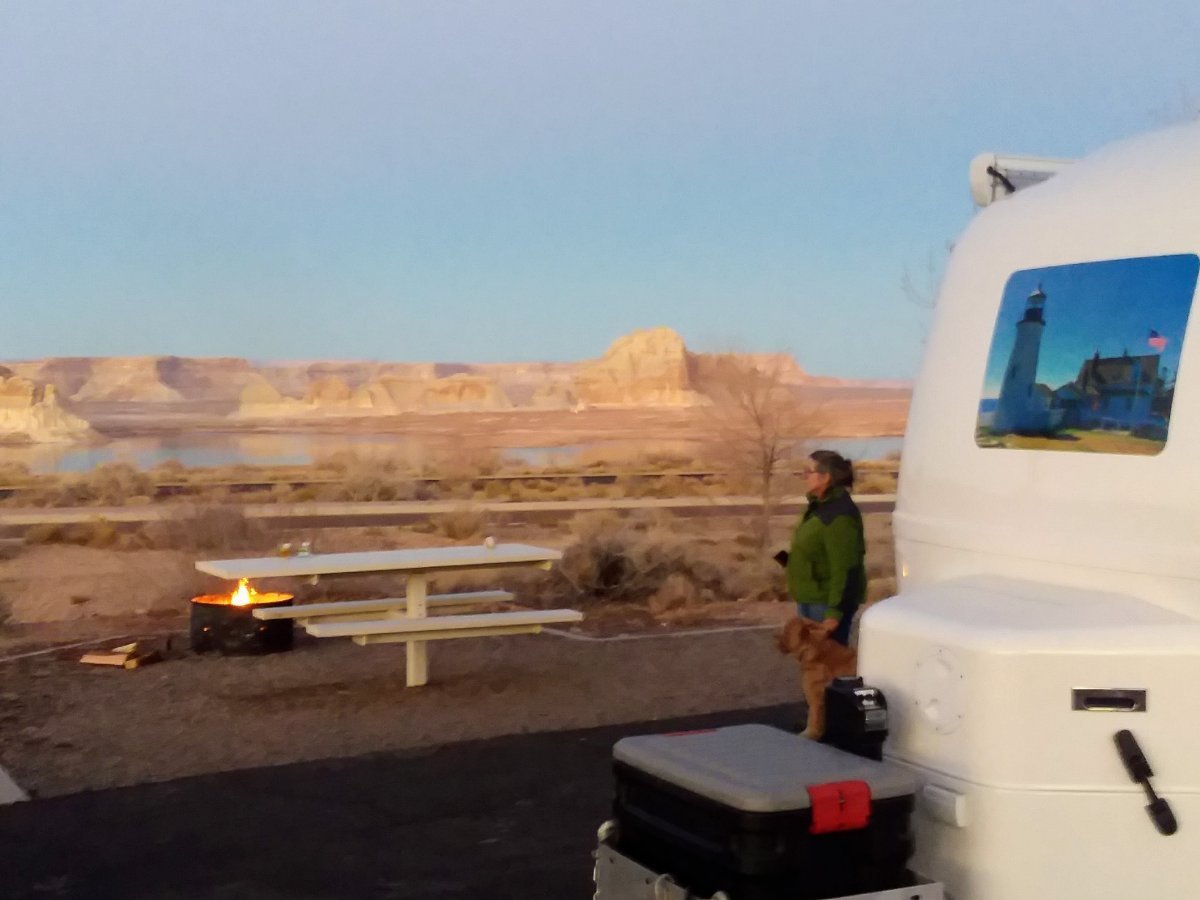
We have and like the twin bed. I am just over 6ft and height challenged for my weight. It works great for us for all of the already stated reasons. We also have a side mounted custom Lagun table from Overland's design. I believe Foy is now making those tables! Right now my wife is editing photos at the dinette and I am using the Laguna table to respond and do other internet stuff from the shore of Lake Powell in Page AZ. This Lagun set up allows you to have the nightstand with the basement access and seat 4 for dinner if needed. Best of both worlds. This is different for us as like most folks we were used to having one bed. Feels like we have more floor space for our dog and his bed.1 point
-
I’m 6’1” and do just fine with twin model. I like the open feel and as mainly solo traveler have other bed setup as couch for daytime and it is also bed for dog at night. I don’t move much and the width of bed isn’t an issue. Good luck !1 point
-
We purchased a used 2017 LE2 with the standard bed and used that bed for one trip. We left the table at home on the second trip. We experimented with different sleeping arrangements and as a 6' side sleeper, the rear bench worked best for me. Krunch claims to be 5' but I don't believe it, so she could sleep on either side or the dinette. And the dogs are just happy to be touching one of us while they sleep, so they had multiple choices. After the third trip, we made an appointment to take it back to Hohenwald for a twin bed conversion and we have never looked back. I believe that the standard bed takes up about 40% of the square footage and made the three rear cabinets very difficult to access for both of us and we didn’t enjoy the twice a day bed to table change over. And if you upgraded the standard mattress, you are pretty much locked into leaving to bed up 100% of the time. There are multiple OTTO's that have made the twin bed into a standard bed for temporary usage, such as camping with grandkids. Check out the option Mike and Carol created, allowing the very clever use of modified dinette cushions to fill in the gap. Mossey1 point
-
Welcome to the forum! For your payload number and tow weight/tongue weight numbers there are a few other things to consider that add up quickly. You’re going to need the Andersen weight distribution hitch for your truck, and that hitch system weighs close to 50 lbs. If you have a bed liner, cap or bed cover on your truck you have to count all that towards your payload limit as well. Tools, a cooler full of food/drinks, camping gear, bicycles, etc. all add up. And if you have your fresh water tank and gray water tank full that can be another 500 lbs of trailer weight.1 point
-
For anyone either thinking about or planning a trip to Glacier National Park in 2022, I'd recommend that they watch THIS YouTube video, It was released by Long, Long Honeymoon (LOLOHO) just yesterday and has a good synopsis of the 2022 requirements for the park. Bill1 point
-
Twin bed - easier to make up, can be used as "day beds" or couches, no need to bother your partner when getting up at night (or any other time), visually increase space due to the center isle being open, give you the added use of the "night stand". Standard bed - more overall room for sleeping and lounging, if left in the "bed" position there is copious room underneath for storage, if configured as a table there is very comfortable seating for four and overall seating for as many as six for eating or playing board games or ..... The twin bed can allow for the addition of a lagun table. Different strokes for different folks. Bill1 point
-
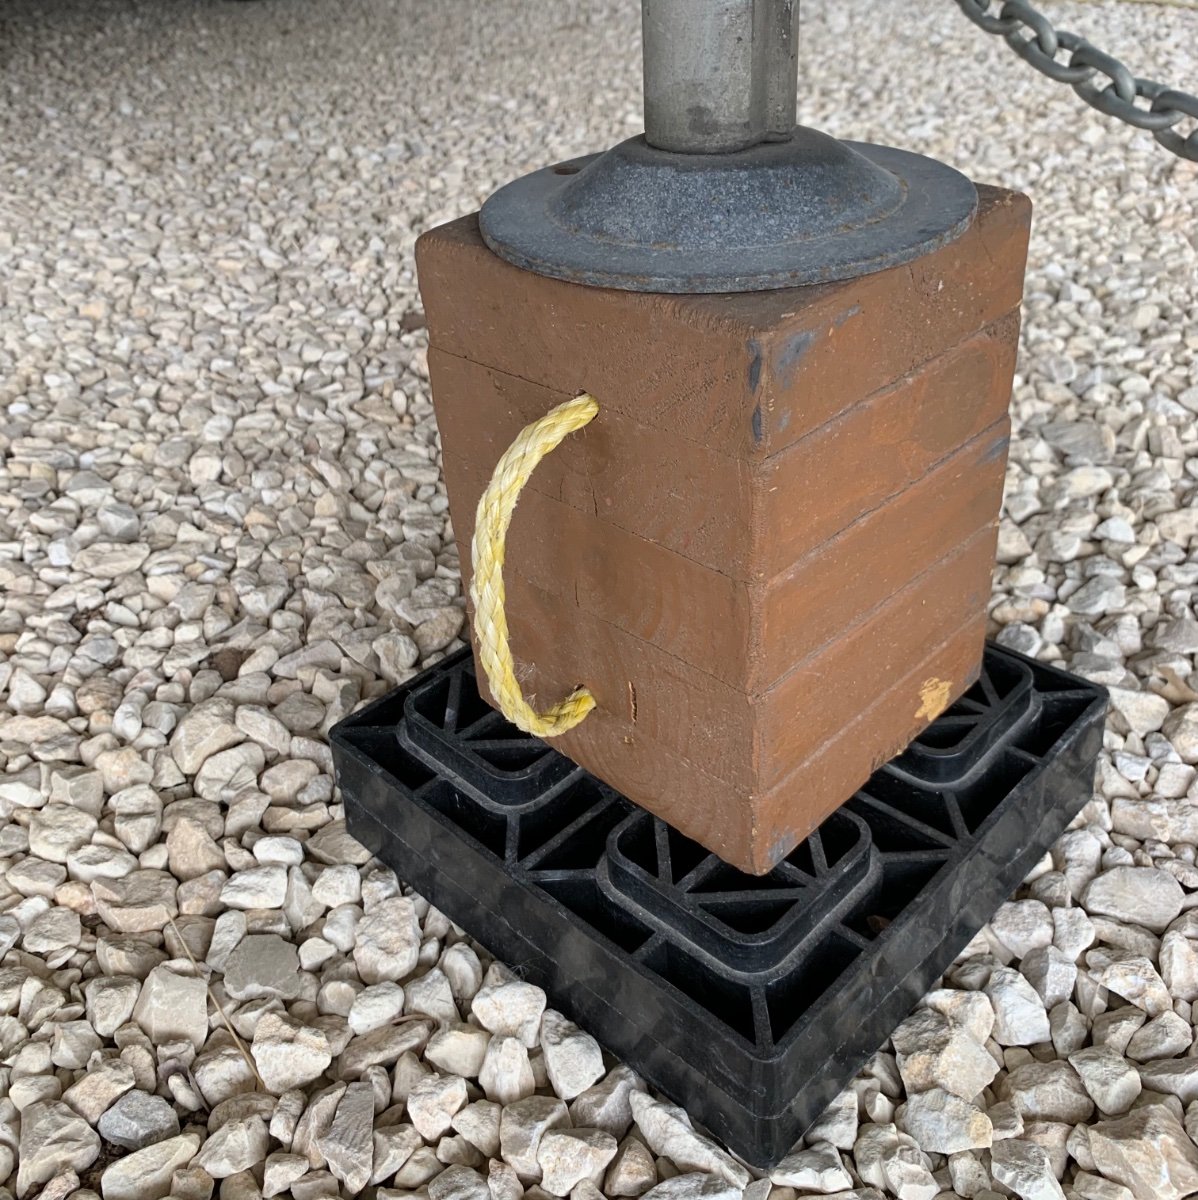
Basically I measured the distance from the bottom of the jack to the ground while the Ollie was level. Then I cut two blocks just a tad shorter in order to allow for ease of placing the blocks when there is gravel or "bumps" on the ground. For me, this measurement was right at 11 inches. The block I cut for the front jack is a touch shorter - about 10 inches - to allow for ease of placement given that the frame and Andersen chains can be in the way. Remember - these blocks can also be used on their sides which will be about 5 1/2 inches (for a 6x6 block). If you make a set of these, be sure to make some sort of "handle" so that they are easier to remove and carry. I used some old plastic rope I had around the shop - plastic "truckers" rope would be good - and some electric wire staples. Bill1 point
-
What is the approx length of the 6x6 blocks you all are are using? I now remember reading about minimizing jack travel when possible.1 point
-
A remote surge protector might seem like a belt and suspenders option but you can check on the pedestal before backing in.1 point
-
We just use the blue Camco water filters. I have a Culligan that had replaceable cartridges but I’ve found that it is a pain to use, especially if you are just wanting to fill the fresh tank. So, we went back to the blue filter but the jumbo size. We don’t have an on board surge protector so we use one at the pedestal. It’s worked well the last 6 years. I don’t know how a pedestal protector would work with the on board system, maybe someone who has done it knows. I made some blocks, similar to Bill’s above and use them on top of the big yellow/black legos to keep jack movement to just a couple of inches.
1 point
-
I use 6x6 wood blocks to lessen the distance the jacks have to travel and provide some protection against driving off with the jack all the way down. While a bit heavier than the plastic blocks, the wood blocks are a touch smaller and they are very inexpensive - free if you keep your eyes open. While there is no harm in using a second SP, I do not use anything other than the one that was built into my Oliver. It has worked well over the years. I use water from home or bottled water for drinking and cooking purposes. Water from the onboard fresh water tank is filtered and sanitized (via a blue Camco filter) a couple of times during the camping season. But, I only use that water from the fresh tank for bathing, washing dishes, etc. Also, I use the Andersen leveling ramps for side to side leveling. I used to use the "lego" blocks (and I still carry one set of ten just in case) but the Andersen ramps are much easier to use - particularly when traveling alone.
1 point
-
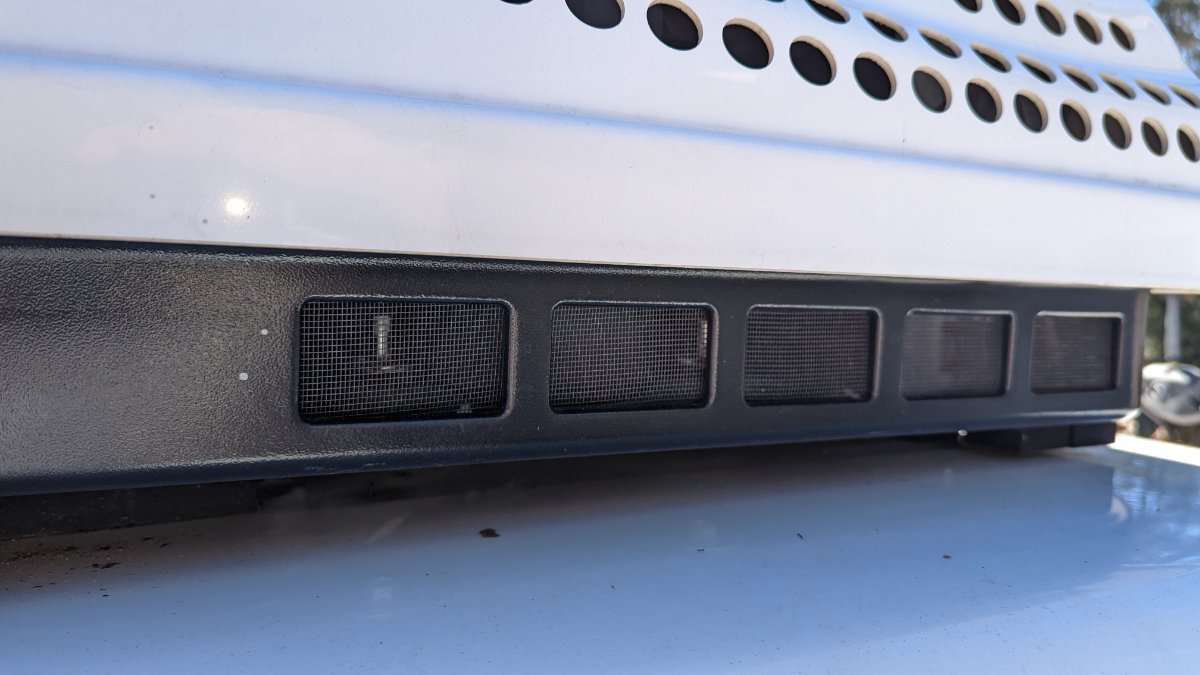
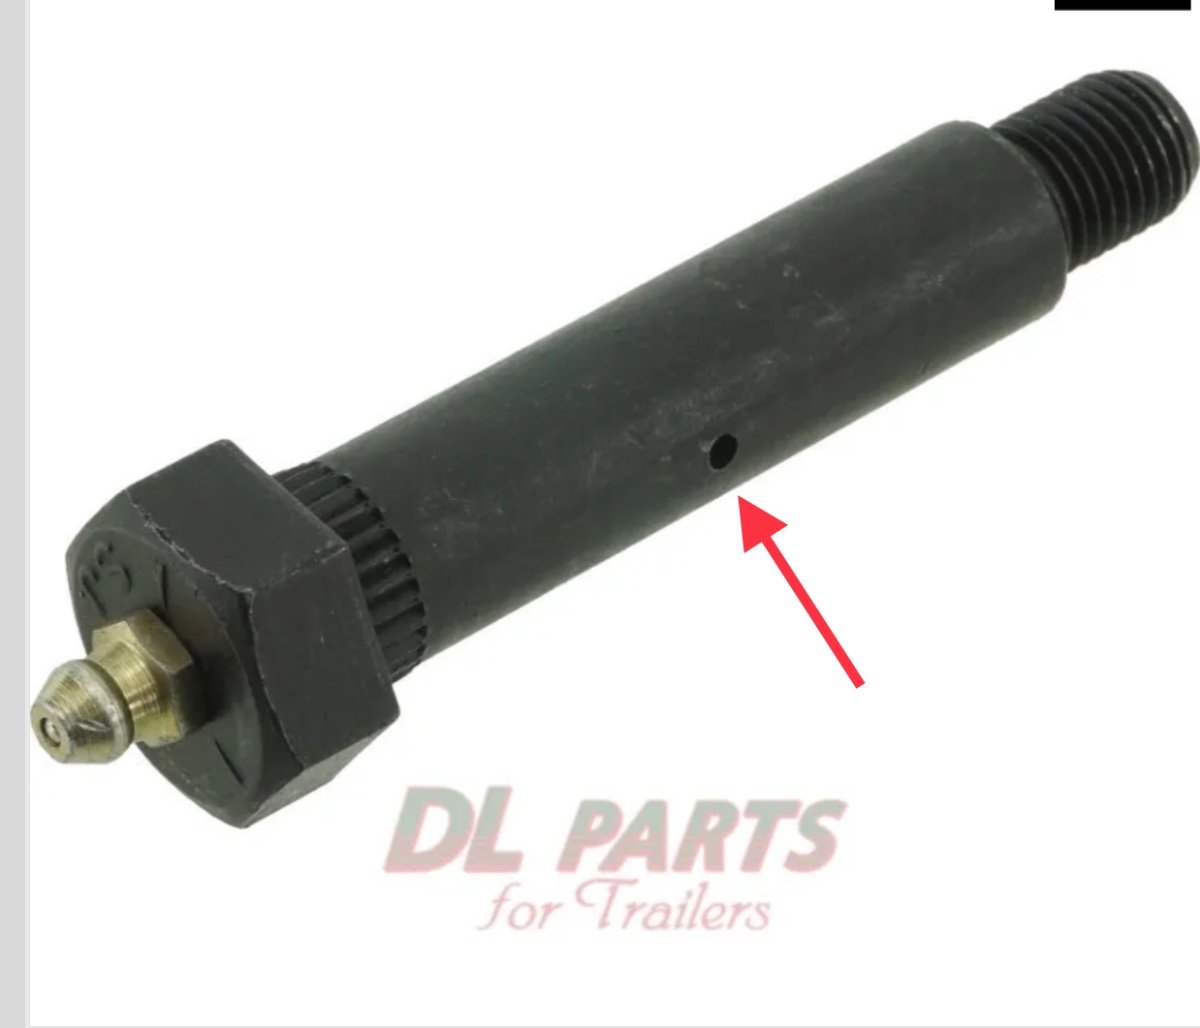
There are actually 16 zerk fittings in total. There are FOUR hidden ones (2 on each side of the trailer) on the EZ flex links where the links are attached to the subframe bolts, one facing forwards and one facing backwards on each side of the trailer. You found two of them. See photo. I always crawl under the trailer to get to those 4. Sorry about the bad photo, really hard to get the phone in there for a picture. The photo shows the forward facing zerk on the link on the right in the photo. There is rearward facing zerk on the other link on the left in the photo.
1 point
-
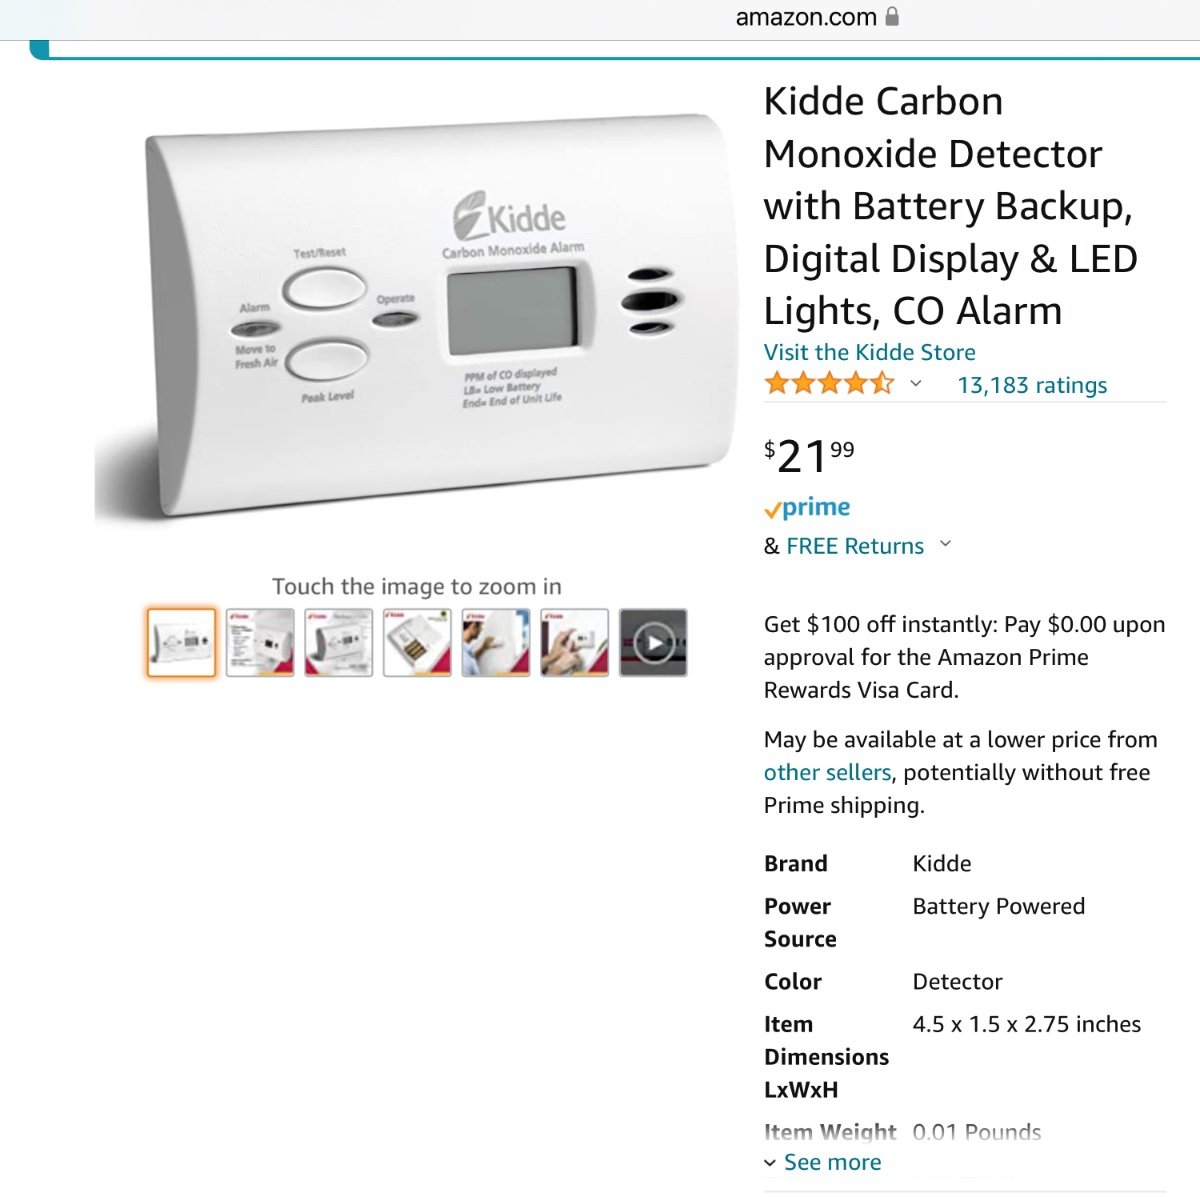
I have been using this portable one in my garage for a couple of years, and really like it, I even gave my son one for Christmas. I just ordered two more, one for inside my home and the other for “Mouse”. Kidde Carbon Monoxide Detector with Battery Backup, Digital Display & LED Lights, CO Alarm Note, this is battery powered only, three AA cells, it does not have a wall plug. So periodic battery replacement will be required. I have not yet had to replace the ones in my garage unit…. Carbon monoxide is slightly LIGHTER than air, so the location of the Ollie combination CO/ propane alarm under the dinette is bad for CO detection, (although the furnace vent will blow toward it, which may be why Oliver picked that spot), ideally it should be located at about eye level. …https://www.epa.gov/indoor-air-quality-iaq/where-should-i-place-carbon-monoxide-detector Soooo….. where should it be located inside the trailer? Beside the thermostat? On the back wall near the factory smoke alarm? At the front entry above the closet? Wherever, it needs to be away from the range burners and away from fan airflow. And the digital display (for the carbon monoxide current concentration, and maximum past level) needs to be easily visible. “Most people will not experience any symptoms from prolonged exposure to CO levels of approximately 1 to 70 ppm but some heart patients might experience an increase in chest pain. As CO levels increase and remain above 70 ppm, symptoms become more noticeable and can include headache, fatigue and nausea. At sustained CO concentrations above 150 to 200 ppm, disorientation, unconsciousness, and death are possible.” https://www.cpsc.gov/Safety-Education/Safety-Education-Centers/Carbon-Monoxide-Information-Center/Carbon-Monoxide-Questions-and-Answers Where do you think it ought to be located? Thanks for any comments. John Davies Spokane WA
1 point
-
Each bolt has a single hole in it, drilled at 90 degrees to the center hole, to allow the grease to flow outwards. Sometimes the weight of the trailer bearing down blocks one or three…. The first thing to try is to raise the hull to relax the suspension. Often that does the trick, if not, you could have a blocked zerk fitting, which can be replaced, or worst case, Dexter forgot to drill the holes properly. In that case, you need a new bolt and nut. The nuts are in theory one time use and should be changed. John Davies Spokane WA
1 point
-
Jack the trailer until the wheels are off the ground. The zerks should then take grease. there is a more comprehensive thread in the forums dealing with this.1 point
-
Going to work on Ollie over the next couple days, will give your approach a try! Thanks,1 point


-
Recent Achievements
-


")


")