Leaderboard


Popular Content
Showing content with the highest reputation on 10/30/2022 in all areas
-
There is no need to connect and disconnect the flush hose when you flush. My hose has been connected for years. After I dump I simply cap the end and stow the hose in the bumper area still connected to the trailer. Mike5 points
-
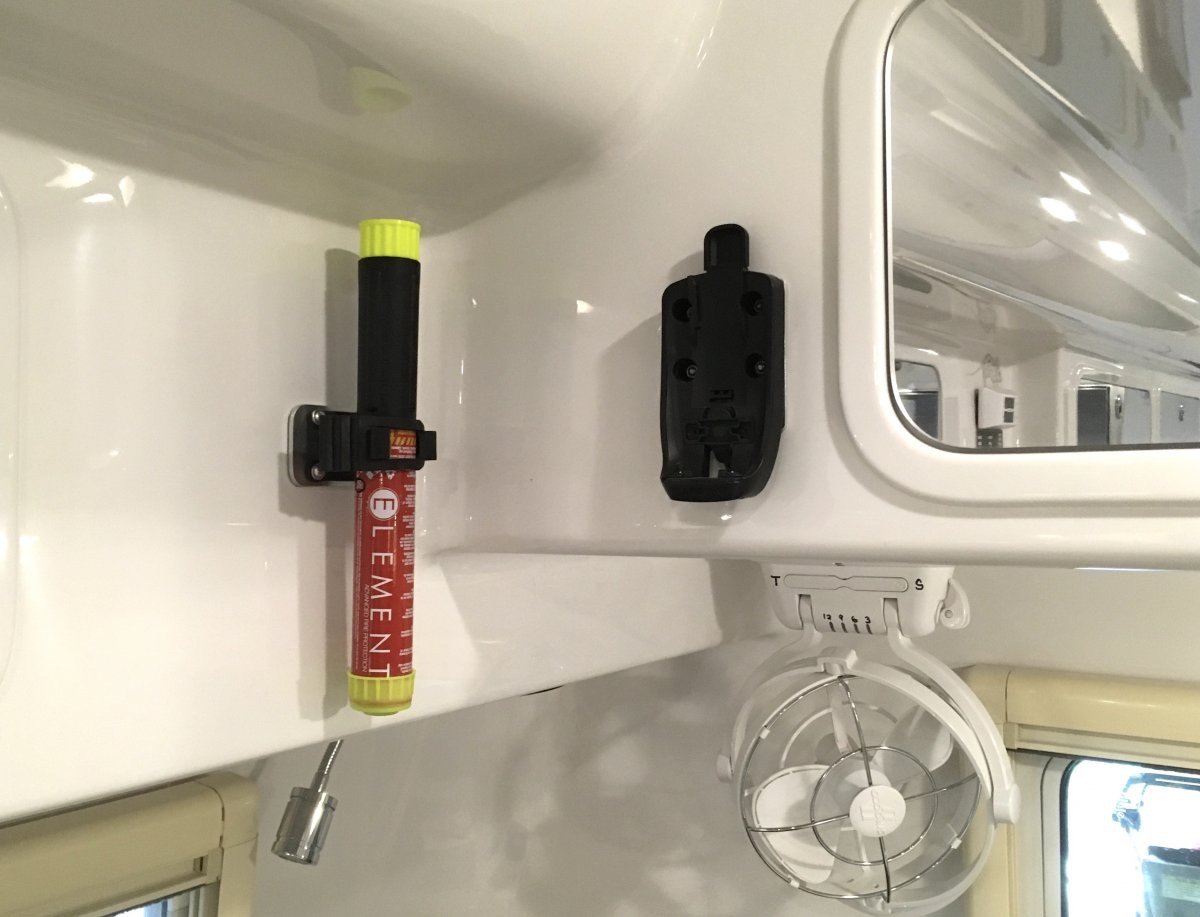
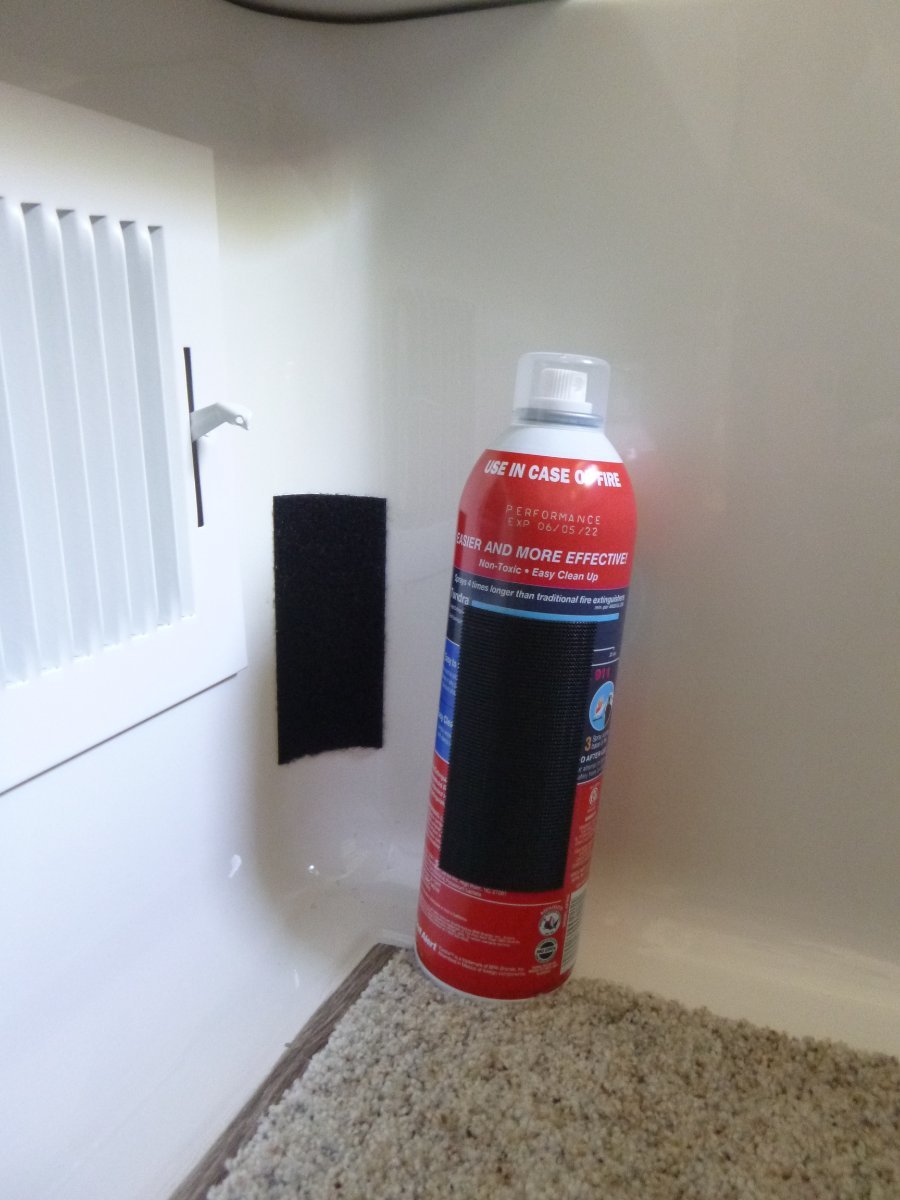
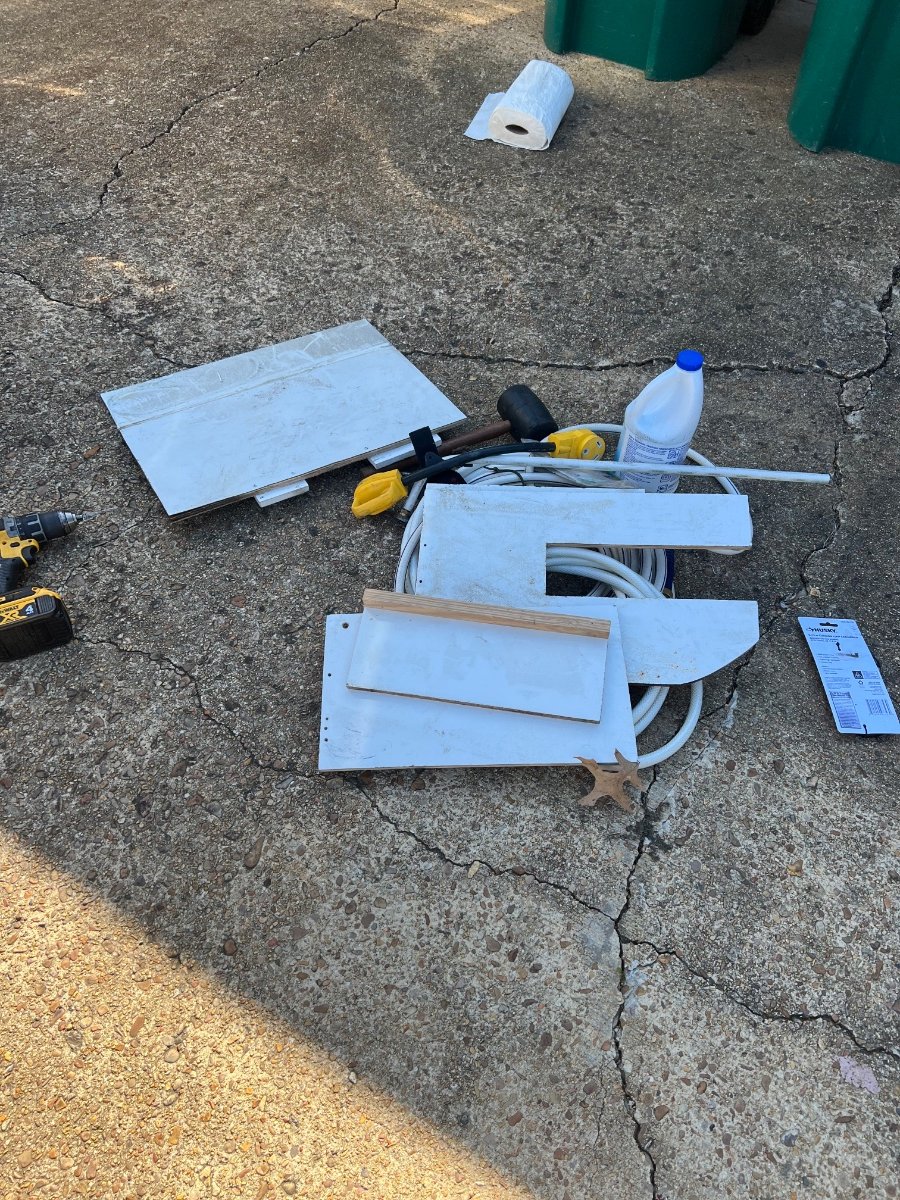
Here's another way to do the rear fire extinguisher thing:
 4 points
 -
That's exactly why we got the Oliver. Every time we took off with the helicopter it caused white caps in the hot tub. White caps in the hot tub caused the bikinis to fluff up. When the bikinis fluffed up the neighbor girls would get out and run home. To keep peace in the neighborhood we got the Oliver. Takes less fuel than the helicopter as a bonus...3 points
-
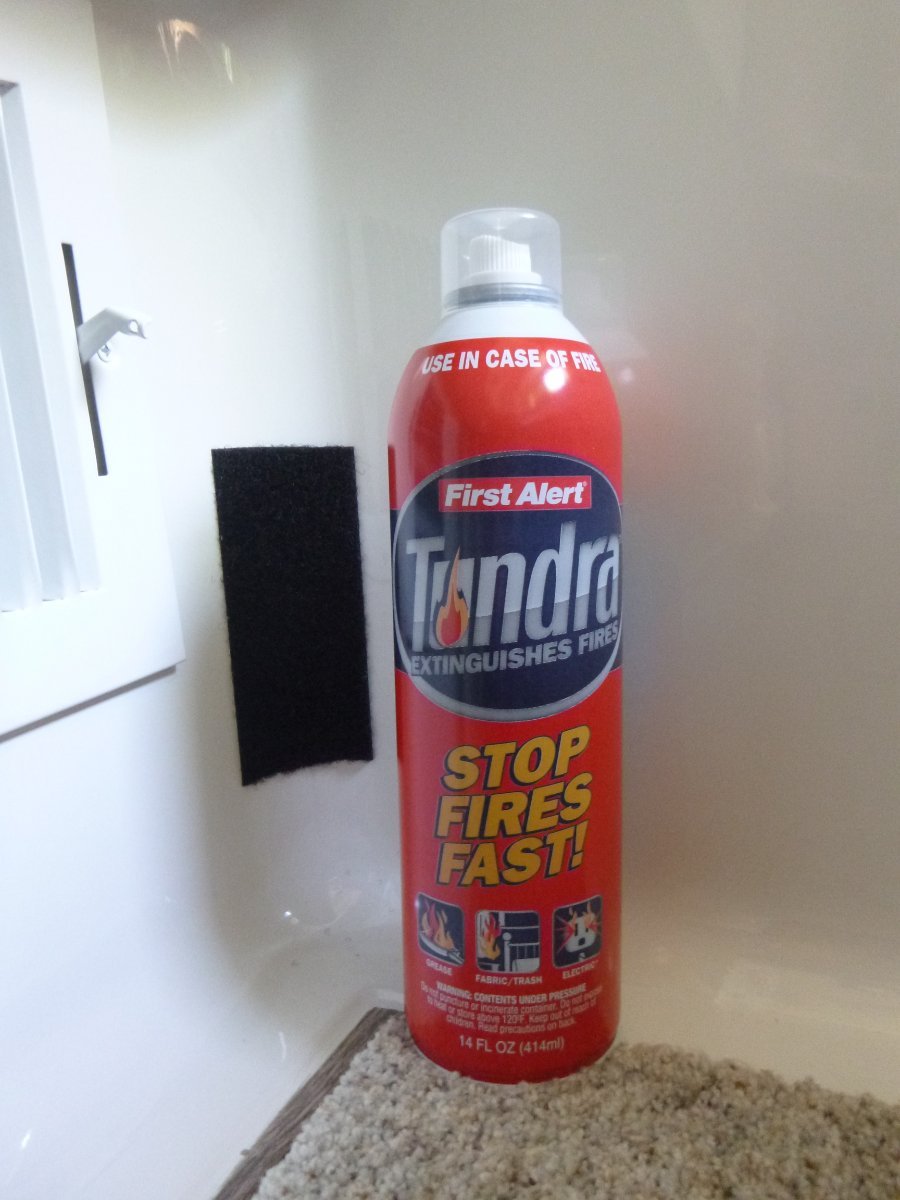
Incidentally, kudos to OTT for providing us with a full-size ABC refillable fire extinguisher rather than the half-size disposable BC extinguishers that come with most towable RVs.3 points
-
That's a tough one because fire extinguishers are supposed to be mounted by the exit. The idea is, you move to the exit to get the extinguisher and if the extinguisher doesn't work you now have the door behind you to escape. There is plenty of room in that area to mount the extinguisher. And plenty of options to do so. Easy access to the extinguisher will be a top priority. Want it easy to get to from outside as well.3 points
-
OMG... Don't know how many of you have had extended trips on our highways lately...but it looks like a "war zone" in some places... Cannot believe the bumps, holes, patches, dipsey-doos and just downright poor condition... If we didn't have an Oliver I think I would have left several hundred parts and pieces on the roads ! Hohenwald to Bellingham WA...I don't think we will ever take a trip that long again- maybe on the "back roads"... Just be careful out there !2 points
-
We all love our Ollie’s but….If you could change/add one thing on your Oliver what would it be? I would love a window over the kitchen galley.2 points
-
We turn on our Norcold refrigerator on 8 hrs before loading it up with food and set it on the #9 highest setting. It’s ice cold when we load it and it keeps the food cold until we return home. The freezer also keeps food really frozen as well, no complaints here and see no need for a fan. Having 30 amp shore power here at home really helps with systems check and trip prep. 😊 -Patriot2 points
-
Don isn’t on the forum much anymore, he’s moved on to some very nice Australian trailers. You could send him a PM, I’m sure he’d answer right away. Mike2 points
-
Like others, we got a cord holder that mounts to the front jack post. It covers the openings when the plug is seated. Then, we cover the whole thing with a heavy duty cover that goes over the top of the jack and extends down past the plug holder. Keeps it nice a dry. Mike2 points
-
I agree about the difficulty of reaching up inside the bumper to attach the hose. Many of us have discovered that it’s much easier to simply leave the dump hose connected to the outlet all the time. If you want you can attach a cap to the other end in case there’s any leakage.2 points
-
WHAT? Where are those people that wanted a hot tub and helicopter pad last time we had this discussion?😇 Bill2 points
-
A roof top deck but would settle for the fridge being higher.2 points
-
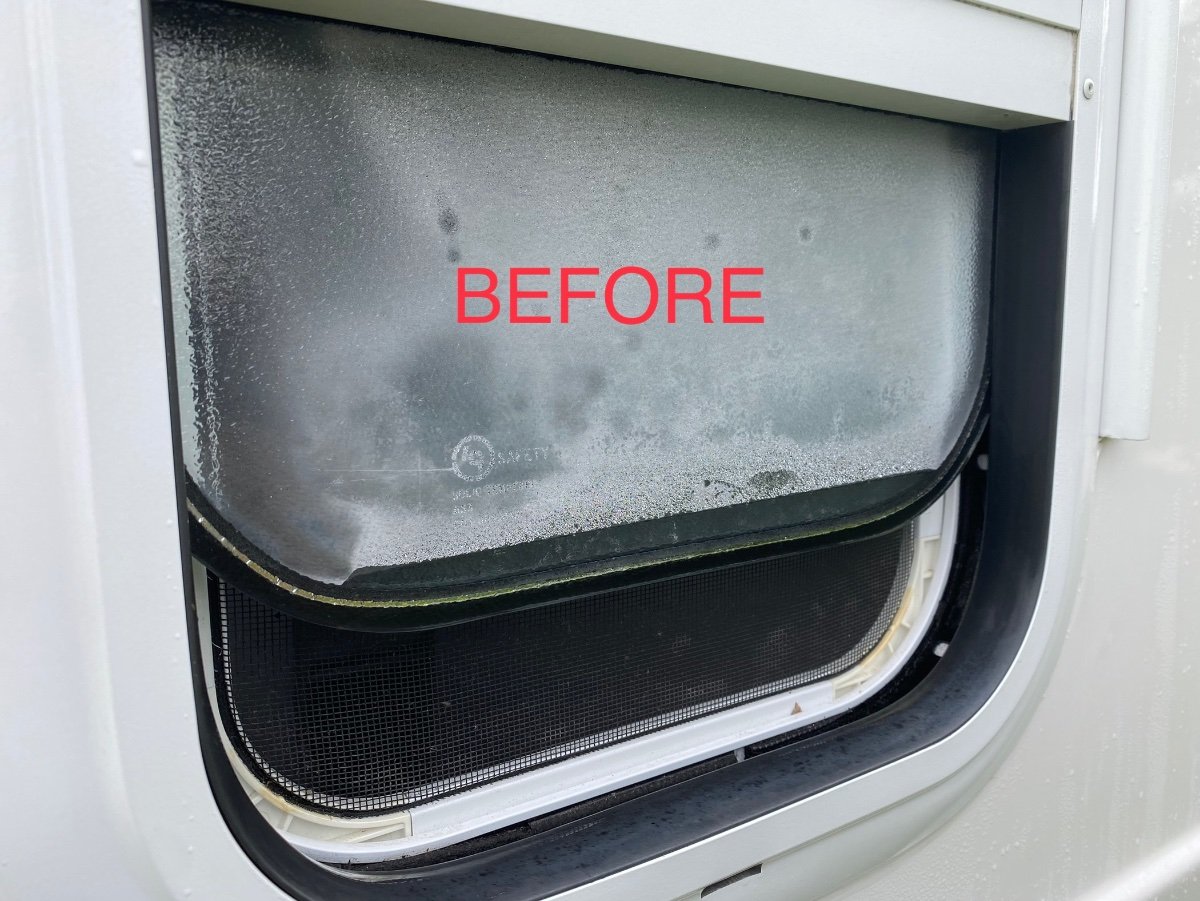
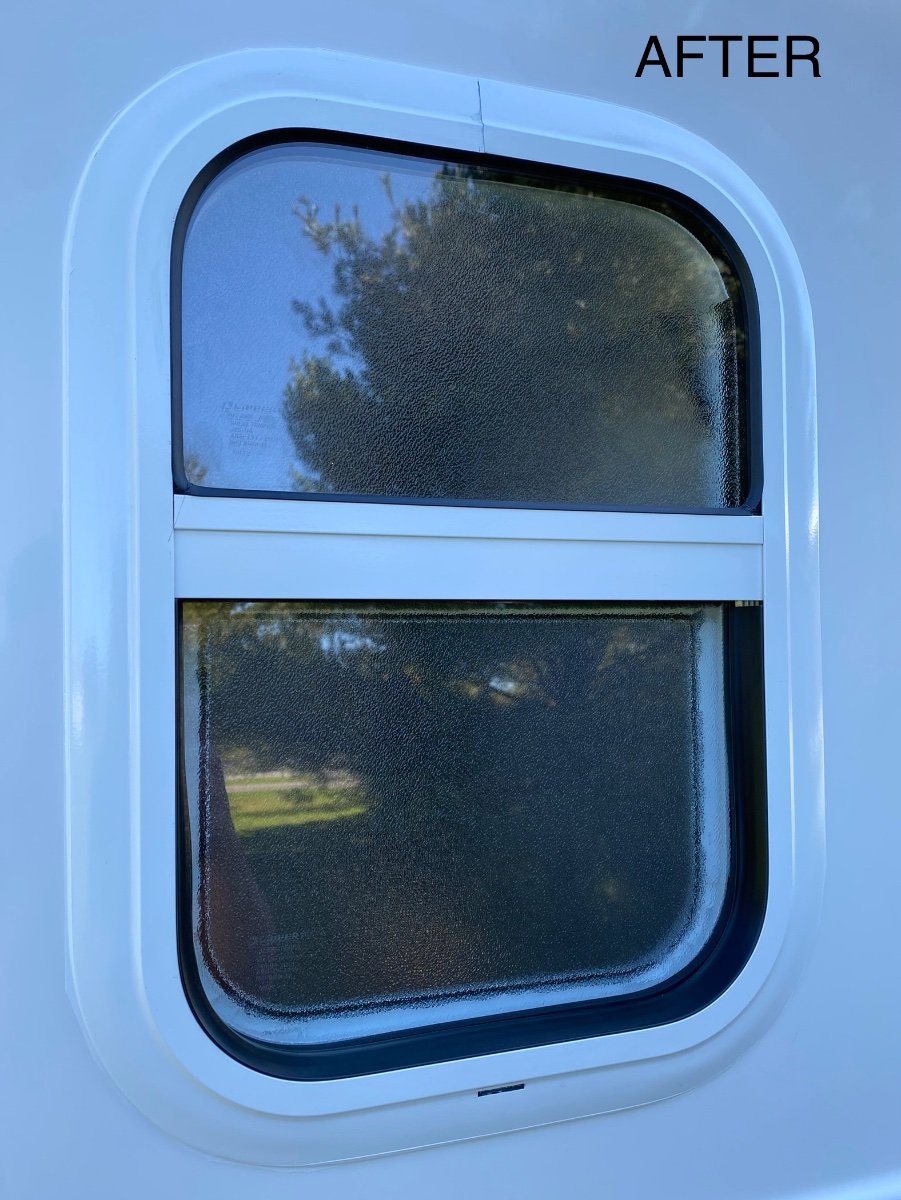
Assuming all windows are installed similarly as the bathroom window, the window is sealed on the outside by both butyl and caulk and secured to the hull by several screws from the inside which sandwich the hull between the inner and outer metal window frames. Once these screws are removed from the inside, the inner frame comes off easily. Best to have someone on the exterior holding the window in place as you remove the screws in case the butyl and caulk gives way and the window falls to the ground (mine was held tight by these two materials and necessitated the use of a plastic razor and a plastic putty knife on the exterior between the hull and frame to release the window from the hull). If I recall, I cleaned the hull opening first with a plastic razor blade, followed by a microfiber cloth with mineral spirits, followed by another cloth and alcohol. The butyl rope was applied fully encircling and around the underside of the window lip. When you place the new window in the opening the butyl compresses between the window frame and the hull, creating a hidden seal between the two. Careful tightening of the screws holding the inside window frame compresses the butyl and draws the exterior window frame to the hull. I used a dripless caulk gun and cut the nozzle very near the tip so it had a small, beveled opening. You only need a small bead of caulk around the window. Application did not require much caulk nor any smoothing. I suppose you could use blue masking tape both on the hull and window frame, exposing only the area you wished to have caulk applied, then use your finger to smooth, removing tape before caulk dried. If you are not used to caulking, I recommend practicing on the joint created by a couple of boards screwed together til you get the feel.2 points
-
Unless you are not able to reach either the extinguisher or the door. That is one reason for the emergency egress window in back, which is where I put my second fire extinguisher. https://olivertraveltrailers.com/forums/topic/4291-how-to-element-fire-extinguisher-install/ BTW, has everyone actually opened and USED the rear window? Are you able to actually climb out and get around the spare tire and or bikes? I removed my fiberglass cover long ago for other reasons, but the rubber tread makes it much less problematic in scrambling over it and to the side. Those of you who are mobility impaired and can’t climb out that way should definitely install a second extinguisher in back. John Davies Spokane WA
2 points
-
Our previous camper had Dometic Seitz style windows you could open while raining. They had built in shades, screen, and hinged window. Miss having that style of window.2 points
-
A larger refrigerator. I would forego the microwave for that.2 points
-
Swing out windows.2 points
-
This has been discussed several times over the years. I’d have a quieter AC and a larger black holding tank. Mike2 points
-
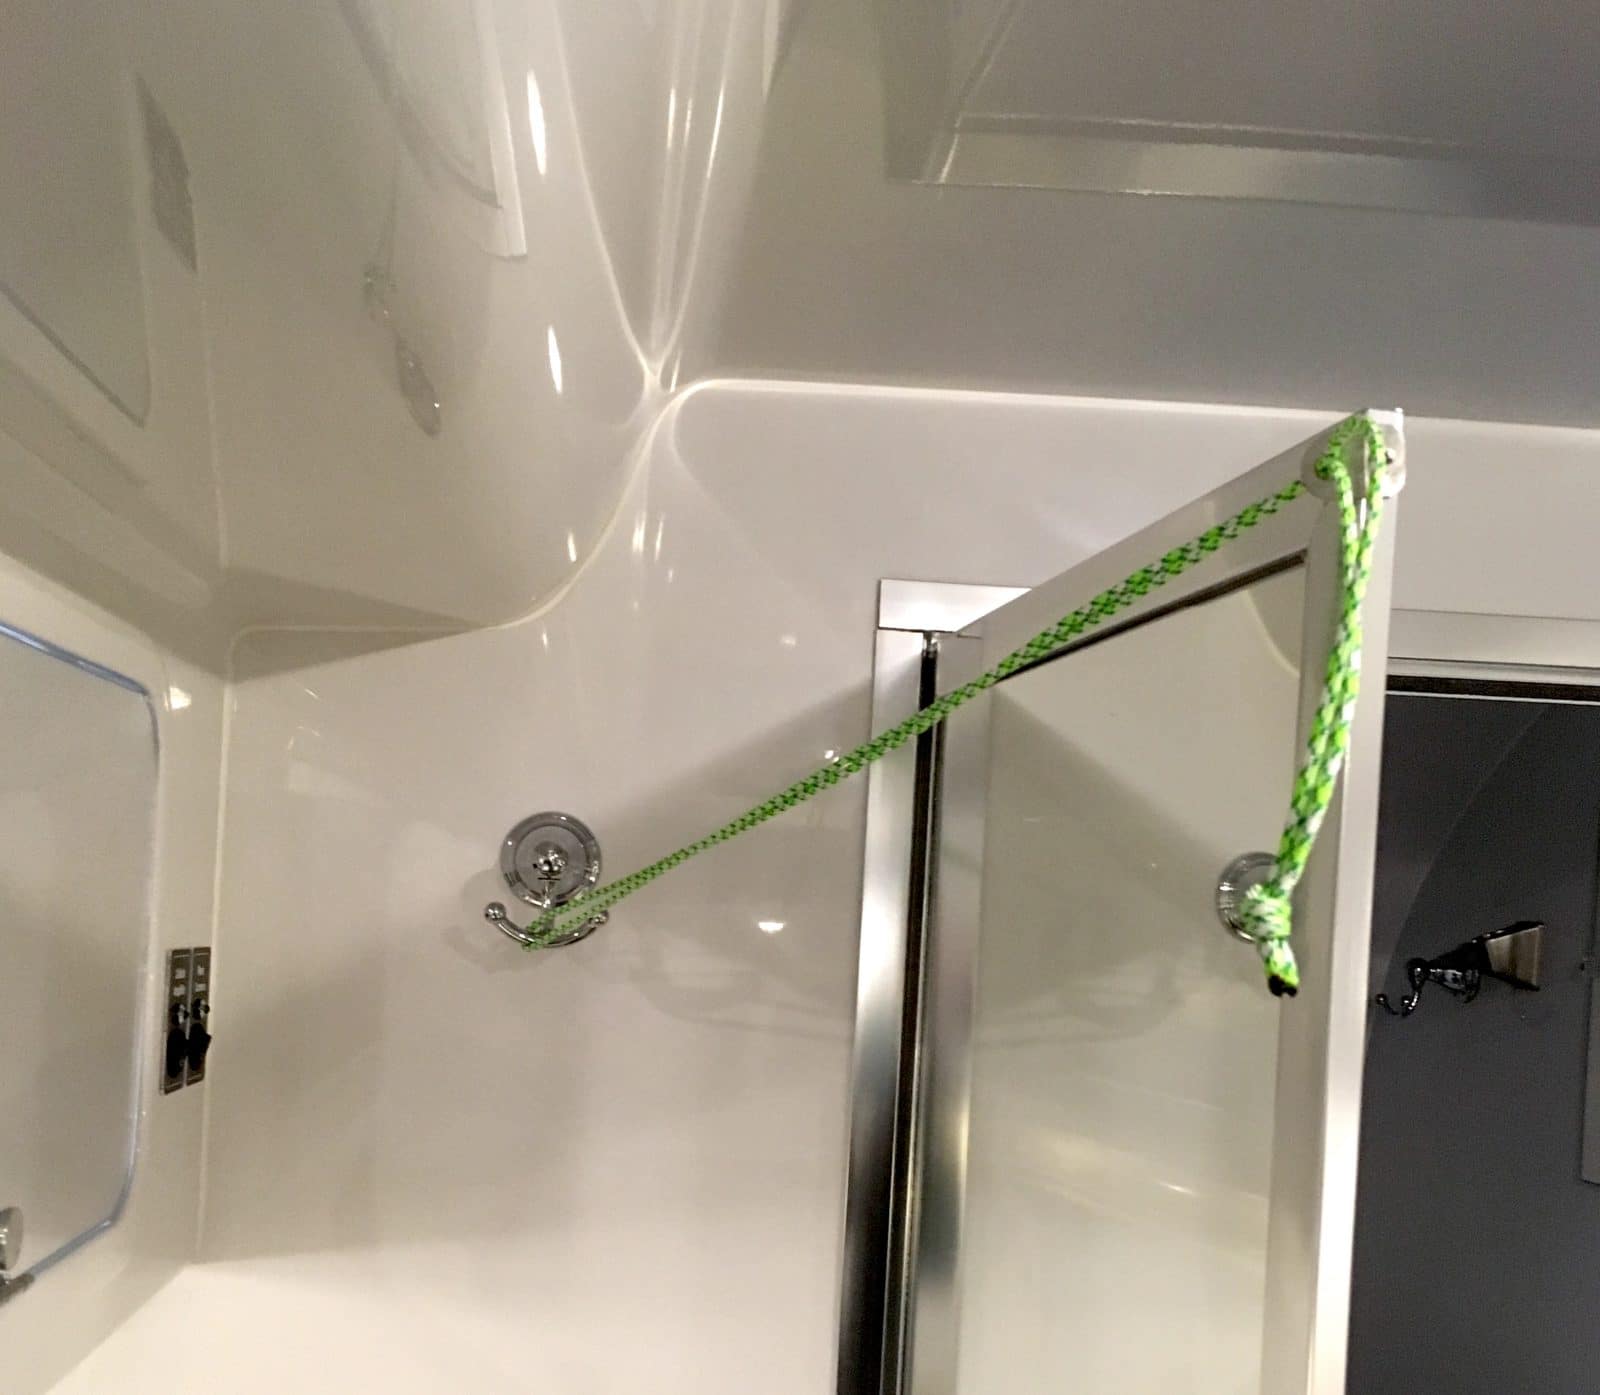
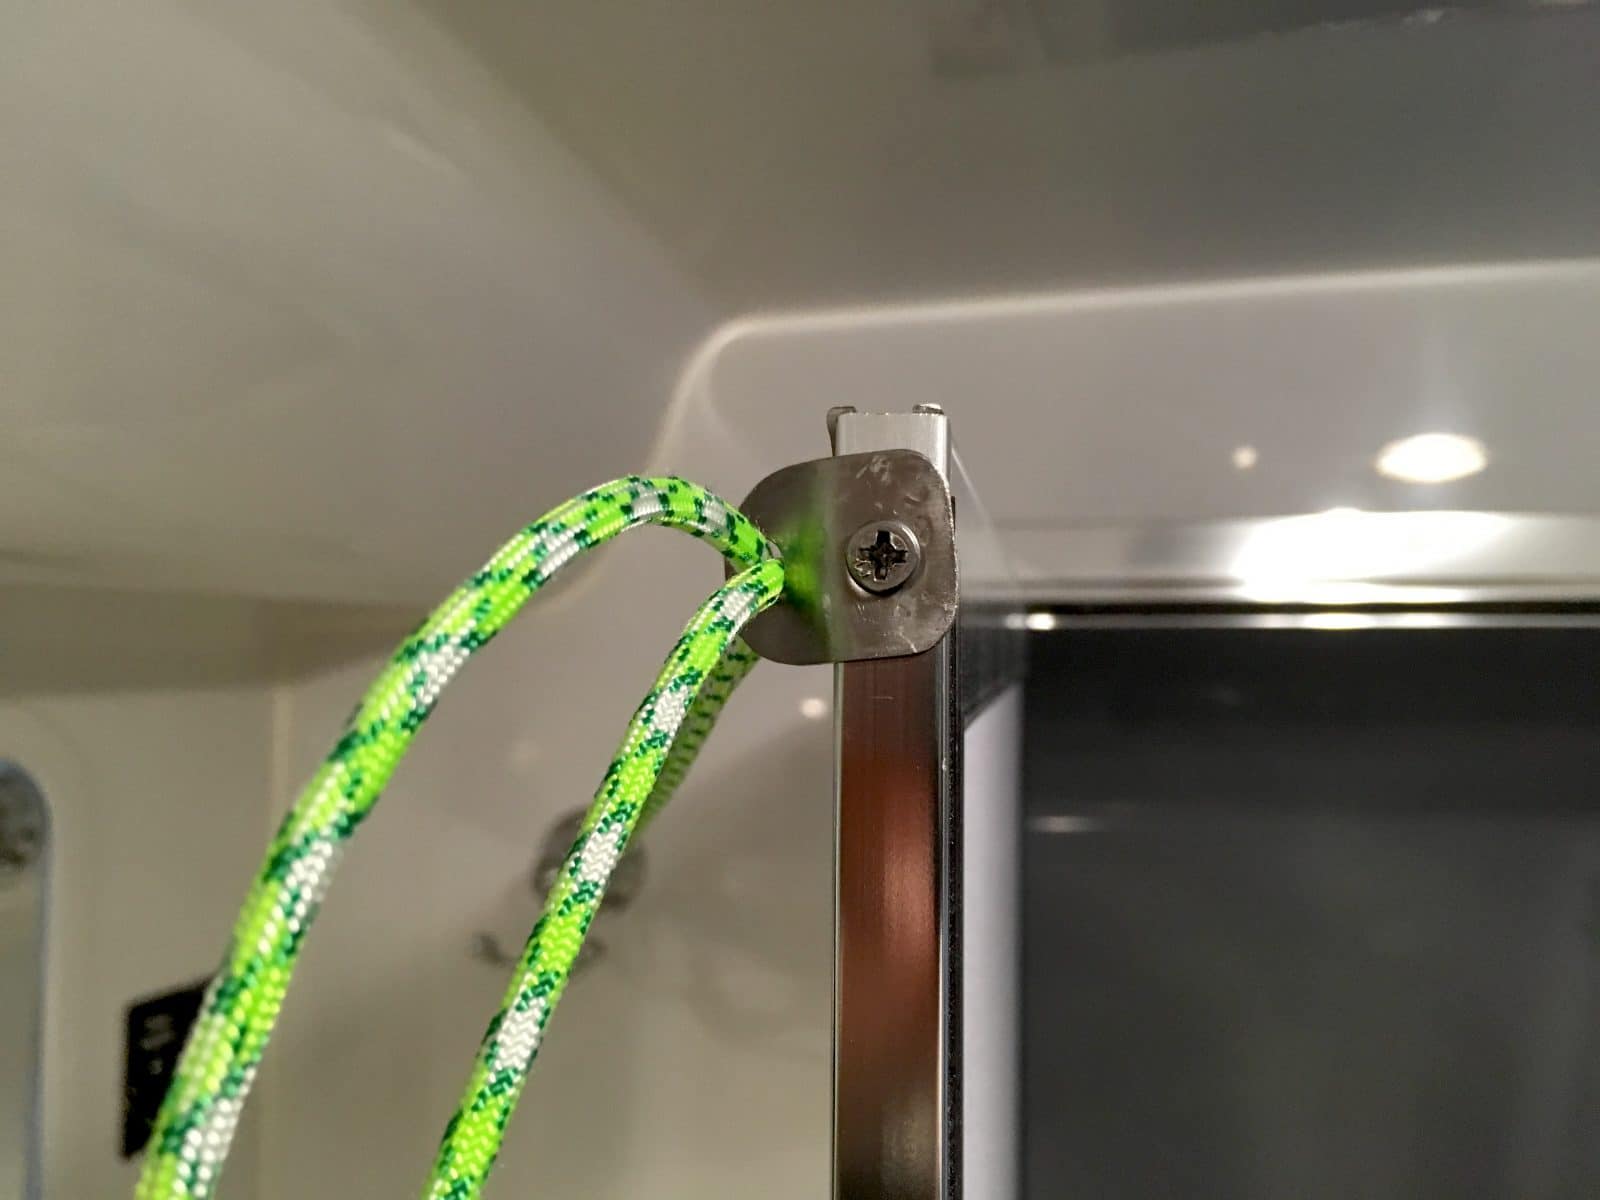
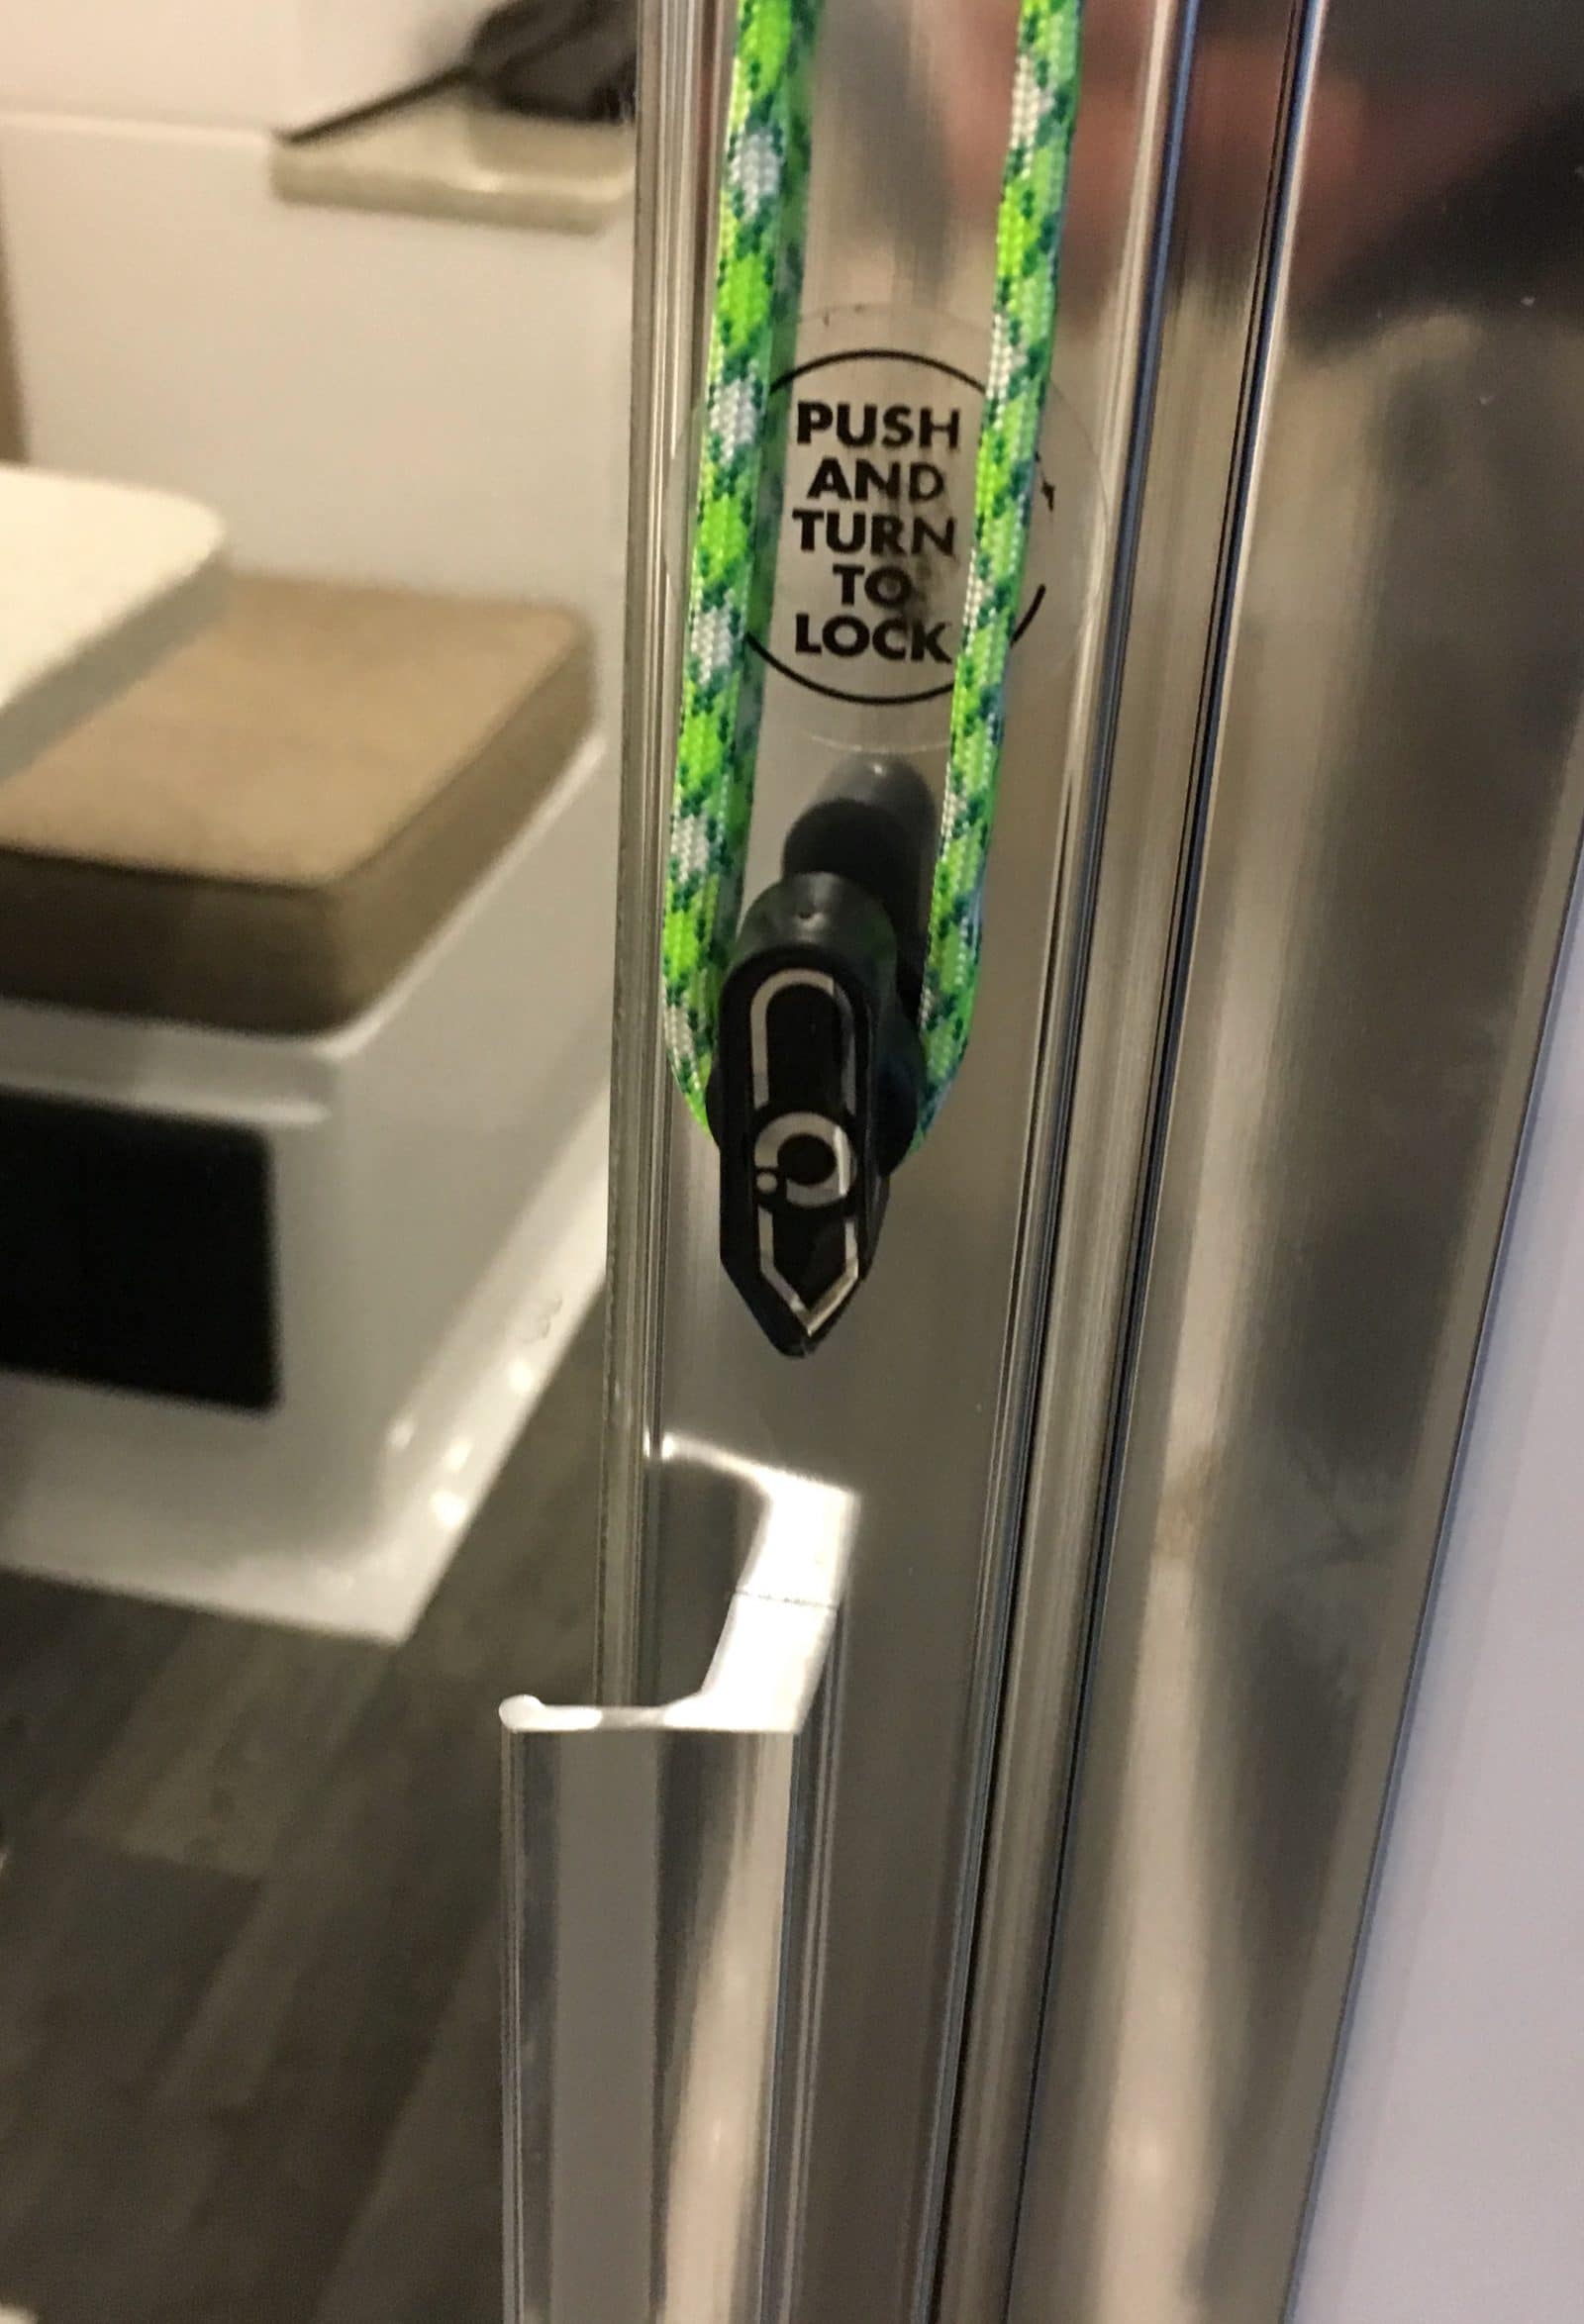
You know how it is when you are parked just slightly off level toward the street - the door will not stay open, no way, no how.... The eyelet is a thin piece of stainless steel, with a hole in it just large enough to allow two sections of standard nylon paracord to slide through it with a good amount of drag. When installing onto the door, be sure to support the bottom of the door or it might come apart, since that screw holds the frame together at the upper corner. The cord is adjustable for length just by sliding it, and you can remove it entirely by pulling through the eyelet since there is no knot in the left side of it. Set the length so that it will just slip under the knob at the bottom for travel. Works good, if you slip the end under just the outer arm of the coat hook, you can still hang stuff like hats from it. Be sure to sear the cut ends or they will look nasty. And you don't have to use bright green ;) John Davies Spokane WA
1 point
-
John - HERE is a link to the replacement jack cover I recently bought. There are a bunch of them out there to chose from. Bill1 point
-
Wow! Those things have really increased in price. I've got a little blue square fan and I don't think I paid $10 for it. I wonder if it has a gold plated switch or something - after all it really isn't anything but a simple electric motor, fan blades and a switch. Bill p.s. the main "issue" with that new fridge as far as I'm concerned is the size of the freezer. The new one is somewhat smaller than the old.1 point
-
B in NC - I'm guessing that you will be like a fair number of us in being surprised by how much you can actually get into the Ollie fridge and/or how long it will last you. Unfortunately, in addition to the relatively small size of the fridge it is recommended to not stuff it full to the brim. These fridges tend to work better when there is enough room for air circulation inside the fridge.. In this regard - I always have a small fridge fan running in mine. March will be here before you know it! Bill (in Western NC)1 point
-
A larger ref. means a larger black tank? Because it holds more beer?1 point
-
Hello, I want give everyone one who posts on this forum a BIG THANK YOU. We picked up Ms Ollie in July, traveled hill and dale from Tennessee to New York, Canada, Michigan and back home to California. A lot of states and miles behind us. Every little post has helped in a huge productive way .... and it is all inspirational when maybe you are having a less than perfect day. So, with this said. I do have a question about the curbside awning. We were told at pick up not to use the awning in the rain. It is made for sunshade and not rain protection. Big disappointment. It would be wonderful to sit out on a warm rainy evening under the protection of little awning right next to Ms Ollie. My question is, how do Oliver owners use their awnings? We have not used it in the rain because we were told not to. You cannot use it in any sort of wind because it retracts with the slightest wind gust. So we it gets used very little. other little questions: would like to change my graphics. I don't know where my head was at when I decided on green and gold. I took off the rear decal easily and now I'm thinking of taking off the front and maybe be brave to do the same on the sides. Does anyone have experience in replacing the graphics? I am assuming I could order a new set from the factory that actually matches the tow vehicle. Replacing them is certainly low priority especially when learning to use all the systems. but my poor choice bugs me every time I look at the trailer. Another sideline. Months ago I asked for opinions of compost toilet v traditional flush/black holding tank. We opted for the traditional flush system and have NOT regretted it for a second. Oh, we did purchase a new holding tank connection cap that extends out and easier to twist (thanks to forum suggestions). The location of the hose in the bumper is great, but getting to the hose connection was frustrating. Thanks!1 point
-
I agree with leaving a hose connected to the black discharge pipe. We do put a cap on the hose. It is easier to get the hose out than to connect it. If there is every any "drips" collecting in the hose at the next discharge just hold the hose up when removing the cap. If your awning has the were with all to tip, slant it to the sIde. Actually tip it to the rear so that you can still open your door. Decals. So many choices, and a chance to be unique. (As you might have noticed a lot of Olivers tend to look a lot alike). If you can start the peel process you can probably get the decals off. A heat gun ( hair dryer) will help. Now the exact decal on your TV is probably available at a dealer, but I would guess that a local sign shop is cheaper and probably b even better at installing. I would look for one that does police cars, commercial vehicles, and such as they are use to longer larger vehicles. What are you thinking of putting on the front? It is a lot easier to recognize someone closing at 140 mph on the interstate if they have a unique decal...1 point
-
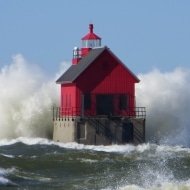
S C Lisa: I removed my front Oliver graphic to replace it with a lighthouse picture made by my local sign shop (I provided them with a jpg image). I used a couple of plastic razor blades. I also used a small hair dryer on the parts that came off hard. Just take your time and do not heat up the graphic/fiberglass too much.1 point
-
Quieter AC, awning windows, black out shade in the door window, agree on access to the tank valves waste basket, induction stove top. All that said, we really did like our Ollie a lot.1 point
-
My wife and I took delivery of our new Oliver Elite I on Sep 26, 2022 and commenced a 15 day "shakedown" camping trip through TN, SC, NC, VA, back through TN, AL, GA, and home to FL without significant issues. We love it! Still learning the details of the electrical system but it is great fun. We bought this particular model because it fits perfectly under our carport and we love the compact size of the trailer itself. Before my wife and I first got married 52 years ago, I purchased a new VW camper (not a pop top). We camped 55 days, 12, 500 miles around the US on our honeymoon in it. All three of our children grew up camping in that VW until we outgrew it 12 years later. Then we tent camped until they all left home. Now we are back in the camping business, albeit, significantly upgraded. 0E6177D3-23D6-4052-9298-13D9126CBD50.heic1 point
-
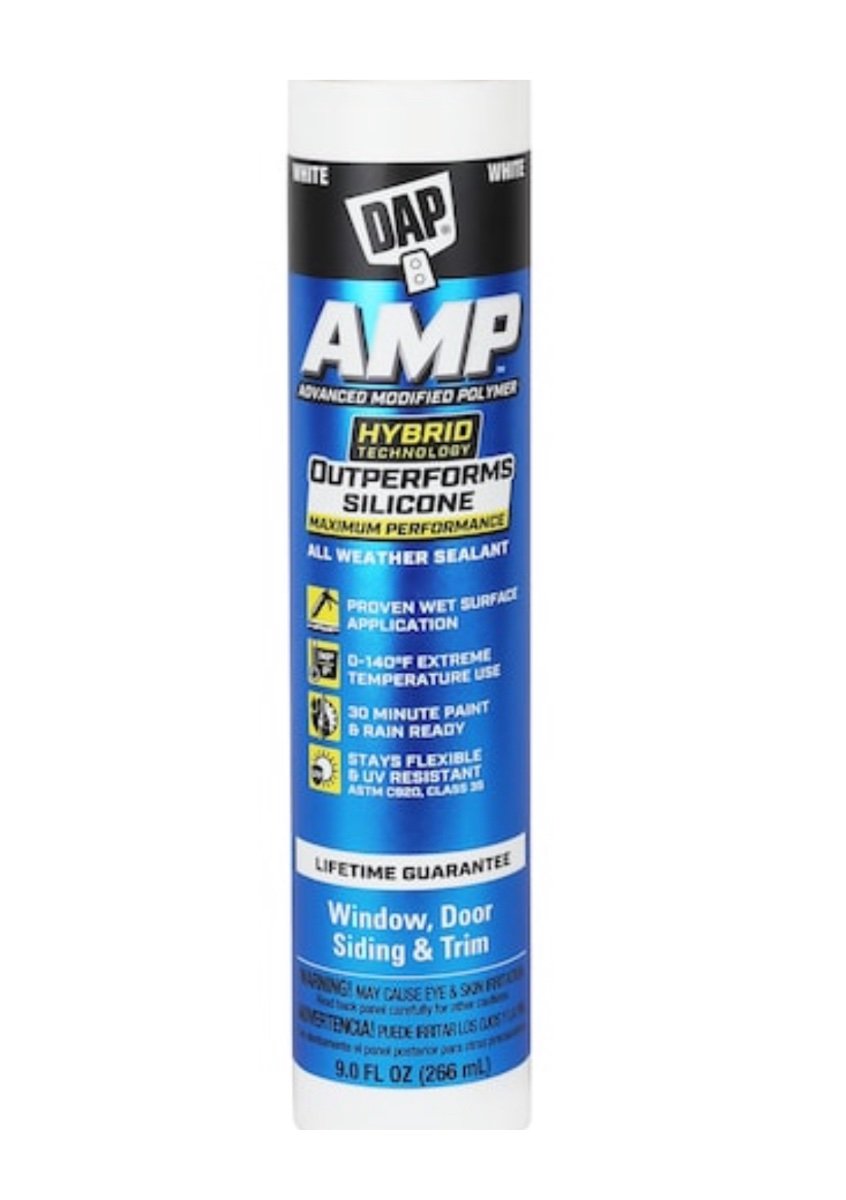
I just replaced the bathroom window in our Ollie as well due to fogging between the glass panes. The window replacement is actually pretty straightforward if you have basic handyman skills. As Andrew mentioned, removing all the old caulk to get a good clean surface is the hardest part of the job. I used Dicor Butyl foamcore tape (link below) to bed the window to the hull. Very sticky, and a round profile so it goes around the corners of the inside surface of window frame very easily without wrinkling, so it makes a very good seal. I finished it off with white DAP AMP caulking around the perimeter (UV resistant and specified for metal and fiberglass). https://dicorproducts.com/product/seal-tite-butyl-foamcore-roll/
1 point
-
I'm thinking that THIS is what he is talking about. Bill1 point
-
GJ - I used just the Velcro but I did use a fair amount of it. Here is a pic of the back of the extinguisher. I've been down some fairly bad roads (perhaps I mean something other than interstates here😁) and it has never budged. Yes, those "carpet runners" make cleaning up a breeze. I used two 6 foot runners. That way they are easier to simply take outside and shake versus trying to deal with a single 12 footer.
1 point
-
Lisa: Great to hear your thoughts of a super fun initial run with your Oliver! It would be helpful if you would add your signature line showing the typical info about your TV and Ollie. See Top Gun's above for a good example. Below are a few thoughts that have helped me become a bit "Awning Wiser". Our Ollie came with the manual awning. As with Topgun2, we love sitting outside under it in "reasonable" rain storms. For those owners with the older style manual awnings I garnered some great lessons learned (The hard way) during our TX to Alaska trip this summer: A. Even when expecting a "Reasonable" rain event, we would extend the awning about 1/2 to 2/3 out and cock the awning so that one side is higher than the other. We have done this many times so that the runoff would dump aft vs. near the entry. Works great.... BUT: water weight on the lower side streached our awning to the point where it could not close for travel. (For the Pros: Yes I did all the adjustments to compensate, but they were not enough.) Hence I gained an opportunity to convert my perfectly beautiful awning into a ground cover. Most expensive ground cover we have ever acquired. 😞 B. When replacing your awning, be VERY aware that securely tying off the awning arms at all three arms is IMPERATIVE. My aft paracord line knot failed due to poor rope-man-ship by the owner. At just the wrong moment, it self deployed. Very quickly much to my surprise, it went from 20" to full open far faster than I could react. Damage was total to the aft awning arm center "Elbow" joint. Please take extra time to carefully tie the arms off at the replacement open distance suggested in the installation instructions. My one knot failure caused my worst DUHHHHHH moment in a long time. (PS: A candid comment by the Carefree Tech was: "Sorry about your loss, sadly I see it all the time." 😞 C. Some professional awning experts advertise in the video's that they can replace their awning by themselves. I stupidly believed them. But from my one time experience, it was not true for this owner, and likely would be so for about 95% of us. Awning replacement needed to be for me a full time two-person effort. Also, it is a three person effort for at least one moment. (See Item B above) Despite the above learning opportunities, we continue to enjoy our awning even in rain storms. As stated above, we caution to not have it full out if we anticipate any adverse weather. I also fill my milk crate (Front basket container for jack blocking) and my large Fortiflex feed buckets (basement storage) with local rocks. They are then tied to each of the three awning legs to help keep them were we placed them. Finally as suggested, we don't leave it more than a foot out when not present. I hope that at lease one owner does not make the same dumb mistakes I learned this past summer. GJ1 point
-
You can adjust the sensitivity of the wind sensor on your awning. We use our awning when it’s a light rain so I can keep the window open on that side, we just don’t put it all the way.1 point
-
Great article on towing limits. https://www.rvtravel.com/maximum-towing-capacity-smoke-mirrors-1076/1 point
-
That's a tough one because fire extinguishers are supposed to be mounted by the exit. The idea is, you move to the exit to get the extinguisher and if the extinguisher doesn't work you now have the door behind you to escape.1 point
-
Never researched if they can be mounted in an Oliver, Yep, we liked being able to open windows while it was raining. Also liked having the ability to adjust shade and screen height together.1 point
-
Way to dump tanks when raining so that water running off roof doesn’t fall onto open outside basement door. Don’t want electric dump valves and don’t want to cut holes in basement door.
1 point
-
I would move the fire extinguisher and put a small half in/half out waste basket.1 point
-
Bad knees I would change the water hookup.1 point
-
Absolutely untrue. Oliver does have a Marketing Department with Matt Duncan as its head. Remember that Oliver Travel Trailers is a relatively small privately held company. Many of Oliver's employees wear multiple hats such as compliance, quality control systems, IT, marketing, etc. I personally know that these people work very hard and actually care about Oliver and us (the customer). Bill1 point
-
Yes, our interstates can use work in many places. My husband and I always laugh when we cross into South Carolina from Georgia on I95. We can literally feel the difference, immediately. And, the lanes squeeze down from three to two. That said, we put up with a number of years of "Bob's barricades " and slowdowns in Georgia, as the roads were being improved. We discovered some nice byways that didn't take much more time. And took us past cotton fields, pine forests, and through delightful small towns. And, slower speeds saved a bit of fuel. Found some good BBQ. It's all good. When you have the time, take the back roads.1 point
-
I agree. We take interstates sometimes when it makes a big difference and we know the general condition. More often than not, we take back roads through farm country and small towns. Slower speeds and less traffic make for a less stressful trip. When we head west to AZ most January’s it’s I-10 most of the way. Not a lot of other options. Mike1 point
-
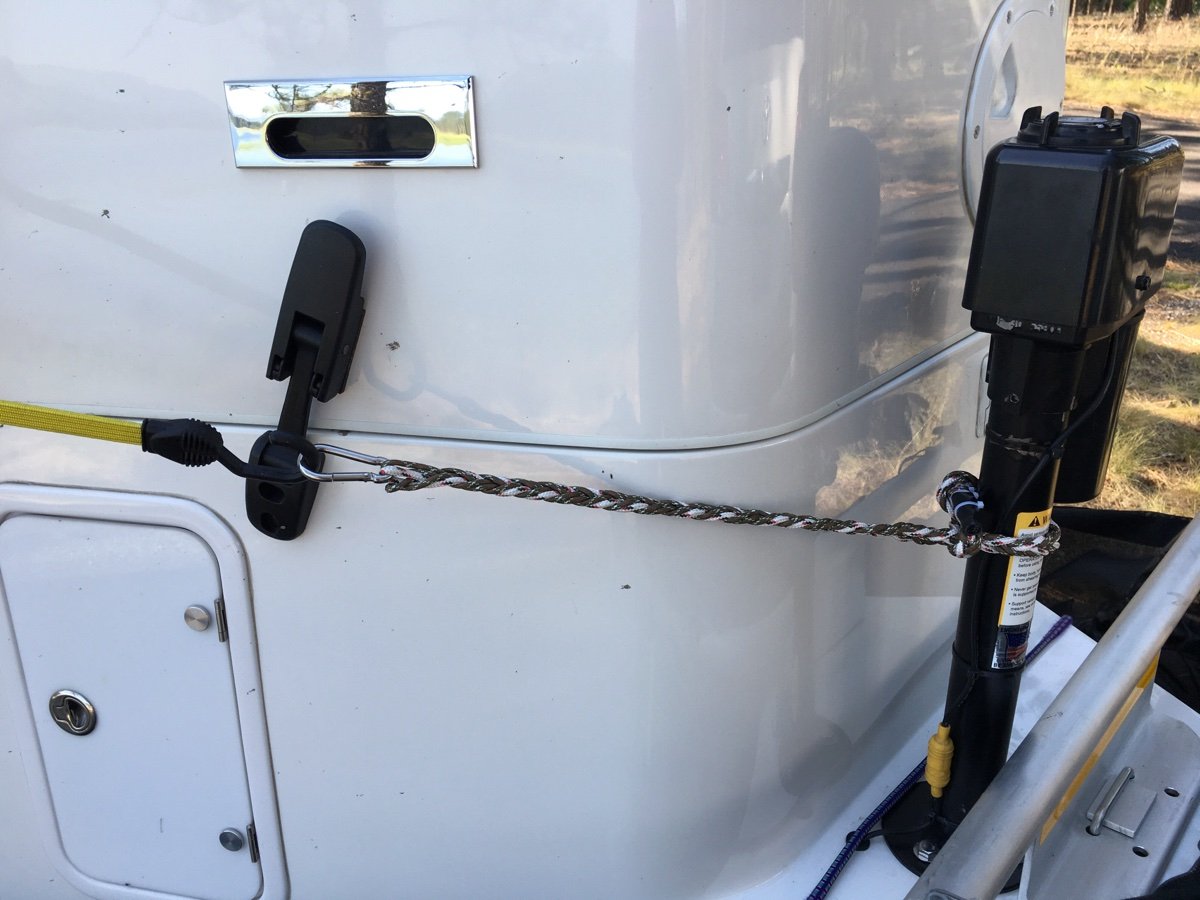
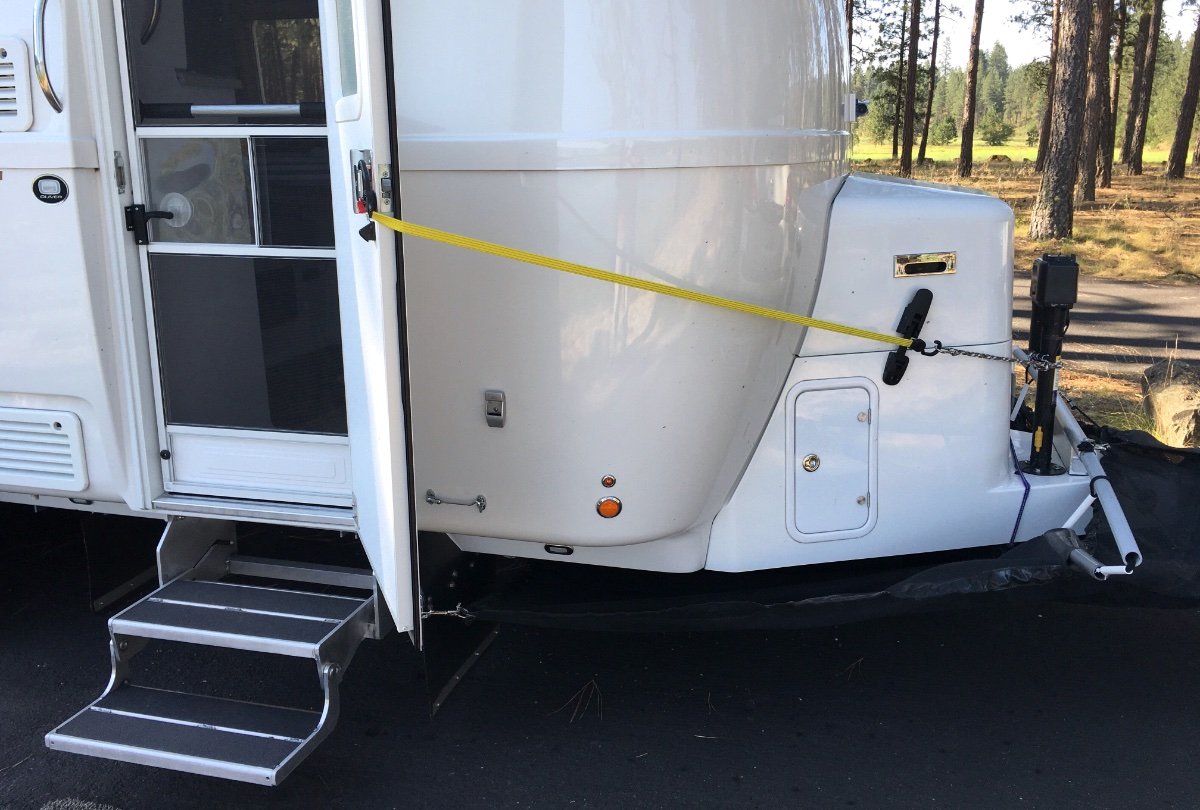
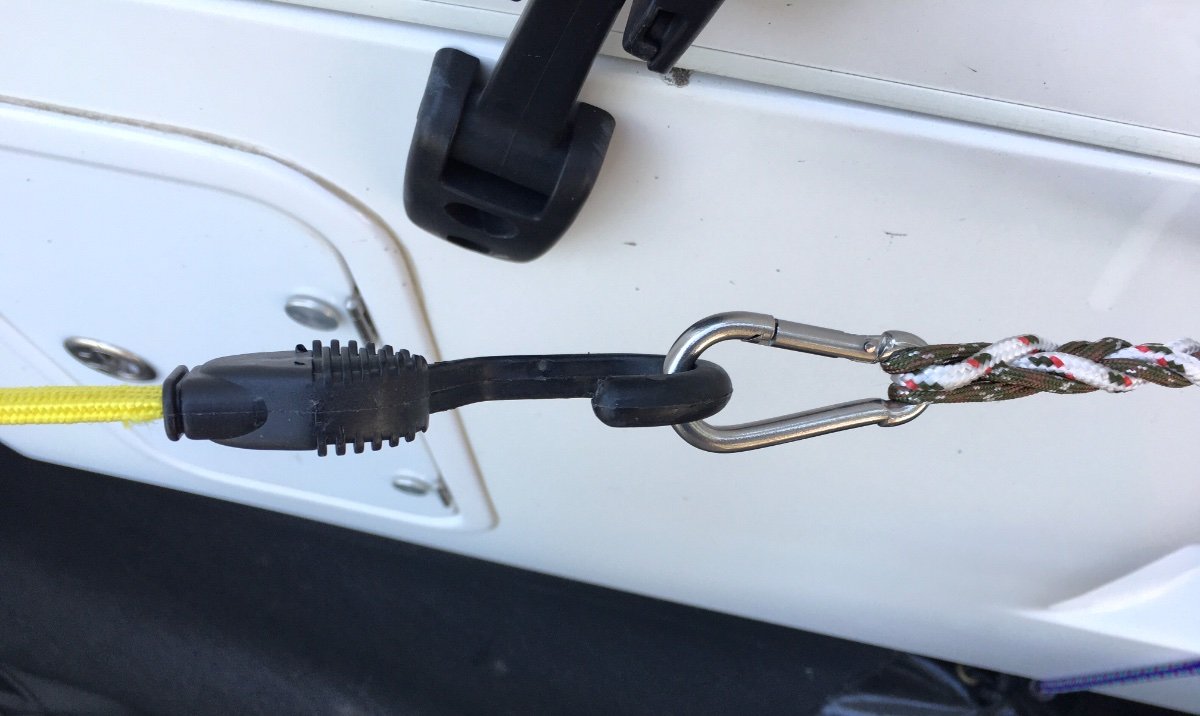
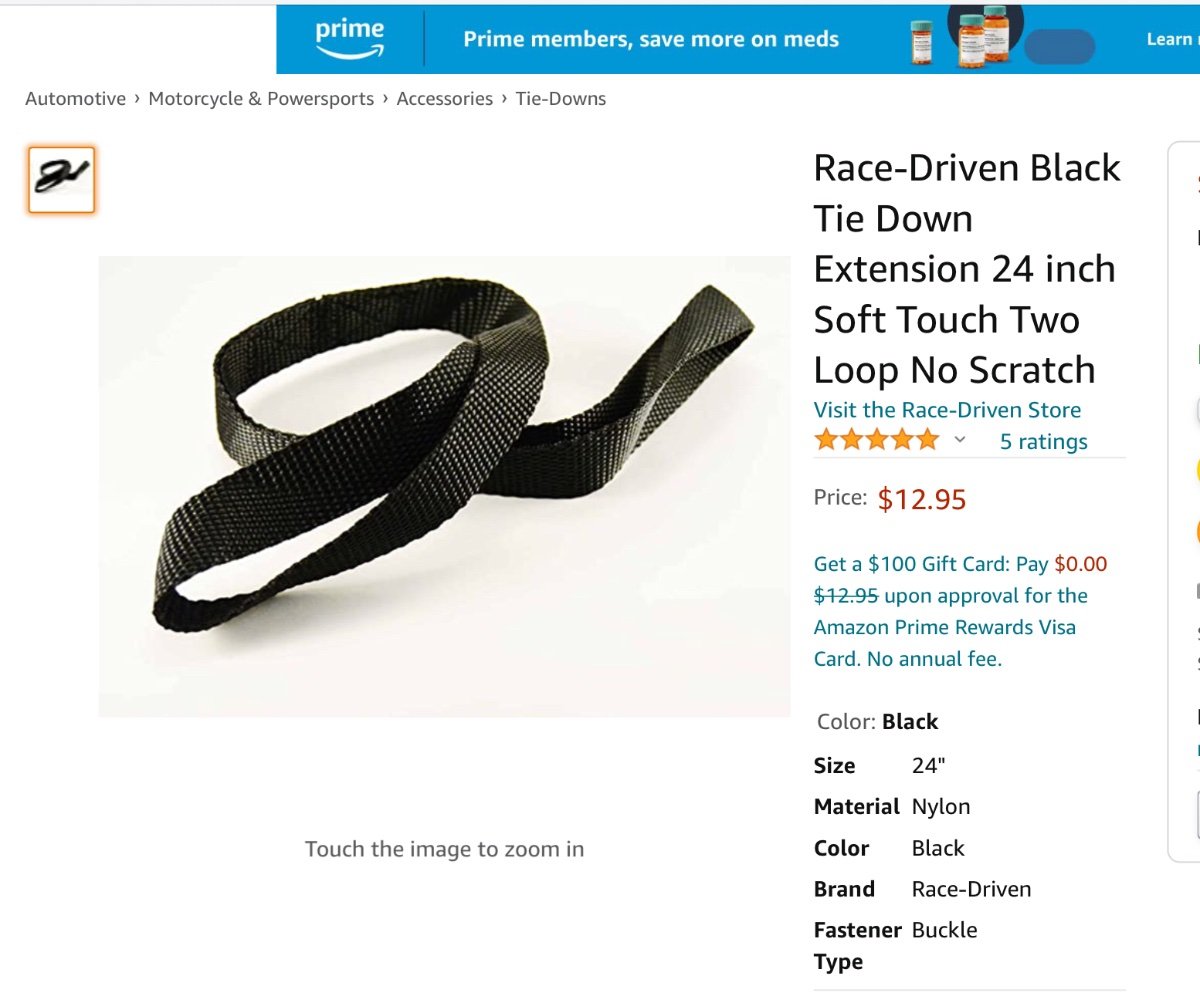
This is in no way original, pics have been posted here a few times over the years, but I finally got around to doing this and thought this cool and easy mod needed a “home” thread. I can’t recall who posted the original pics, but thank you! This provides protection against a strong and unexpected wind gust, which might possibly break the OEM hold open bar or pop its rivets out of the fiberglass. I have never liked that design, the marine latch works fine inside a boat to hold open an inside door, but it is not suitable at all for windy conditions. The yellow bungee is a 48” one from this assortment package: …. SmartStraps The stainless snap hook (carabiner): …. 3/16” Stainless Snap Hook 5 pack The bungee has a scratch proof plastic hook at each end, it won’t scratch anything when looped around the inside handle. The reviews are mixed, some buyers say it doesn’t last under constant UV exposure. I have never used these outside, so I can’t comment on that. I do like the big plastic hooks, they are way less dangerous than those little steel ones, which can remove an eye. The front strap is a home-built one from woven paracord, with a big loop in one end and a small one to capture the snap hook. The big loop goes around the jack body and then the other end feeds through it. It is about 24” long end to end. It touches the doghouse lightly, but any motion is linear at the bungee cord, the strap does not actually move at all. This is one reason I didn’t just use two bungees, I did not want the gelcoat to be scuffed. (You could eliminate the front strap and just connect the front bungee hook to the doghouse cover hold-down, but in that case it will chafe on the hull. This setup provides about 3” of clearance there.) If you want an off the shelf strap, with no steel parts, these would work fine: …. Race Driven Tie Down Straps. They would not look as sexy 😁 If you have just the screen door closed and want to close the outer one, you can just unhook the cord from the handle and swing the door closed. You don’t have to go outside in your pajamas to unhook the OEM hold open bar. The bungee will launch toward the ground behind the tow vehicle, but the front cord and steel hook will not go flying. John Davies Spokane WA
1 point
-
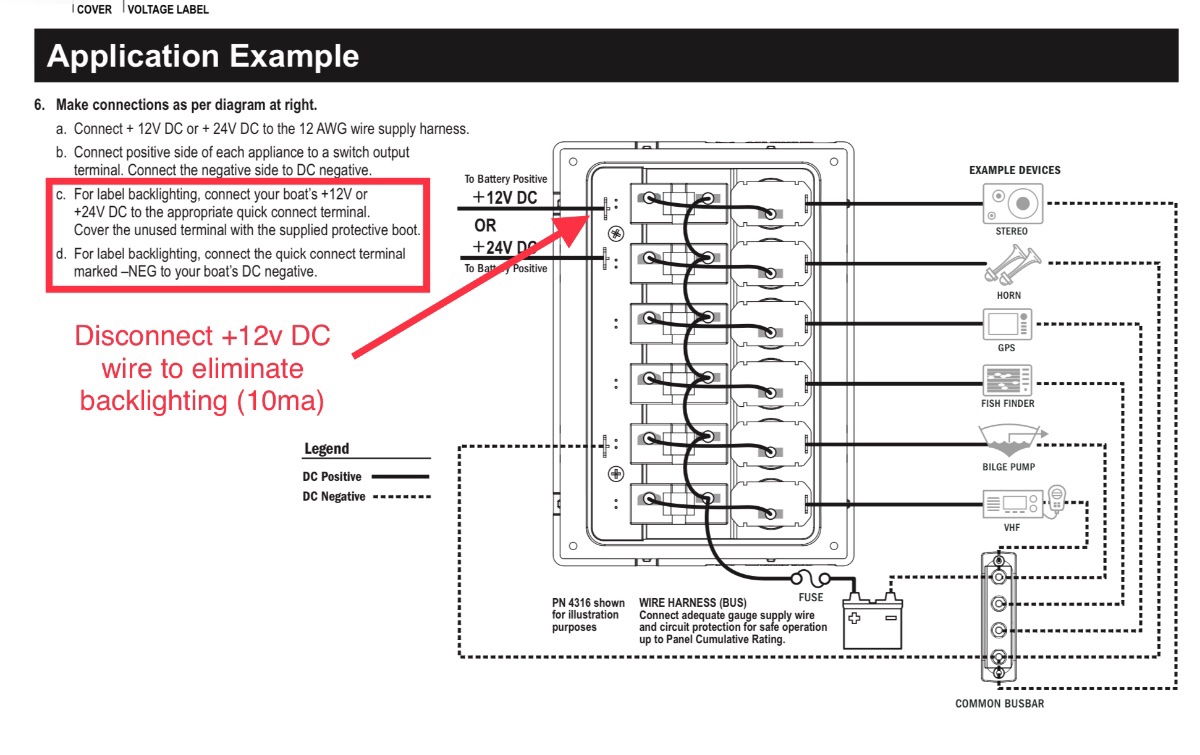
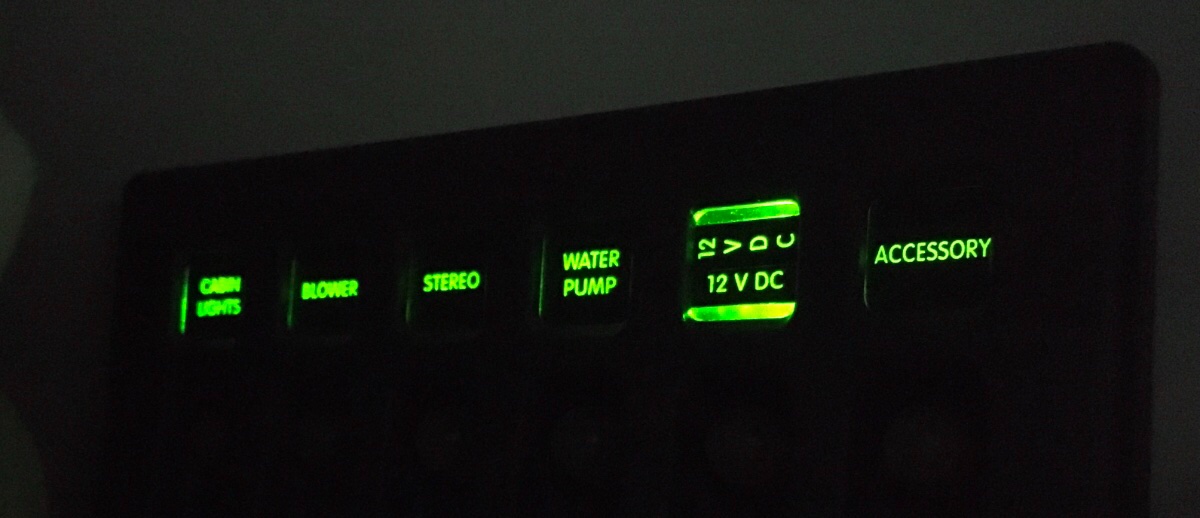
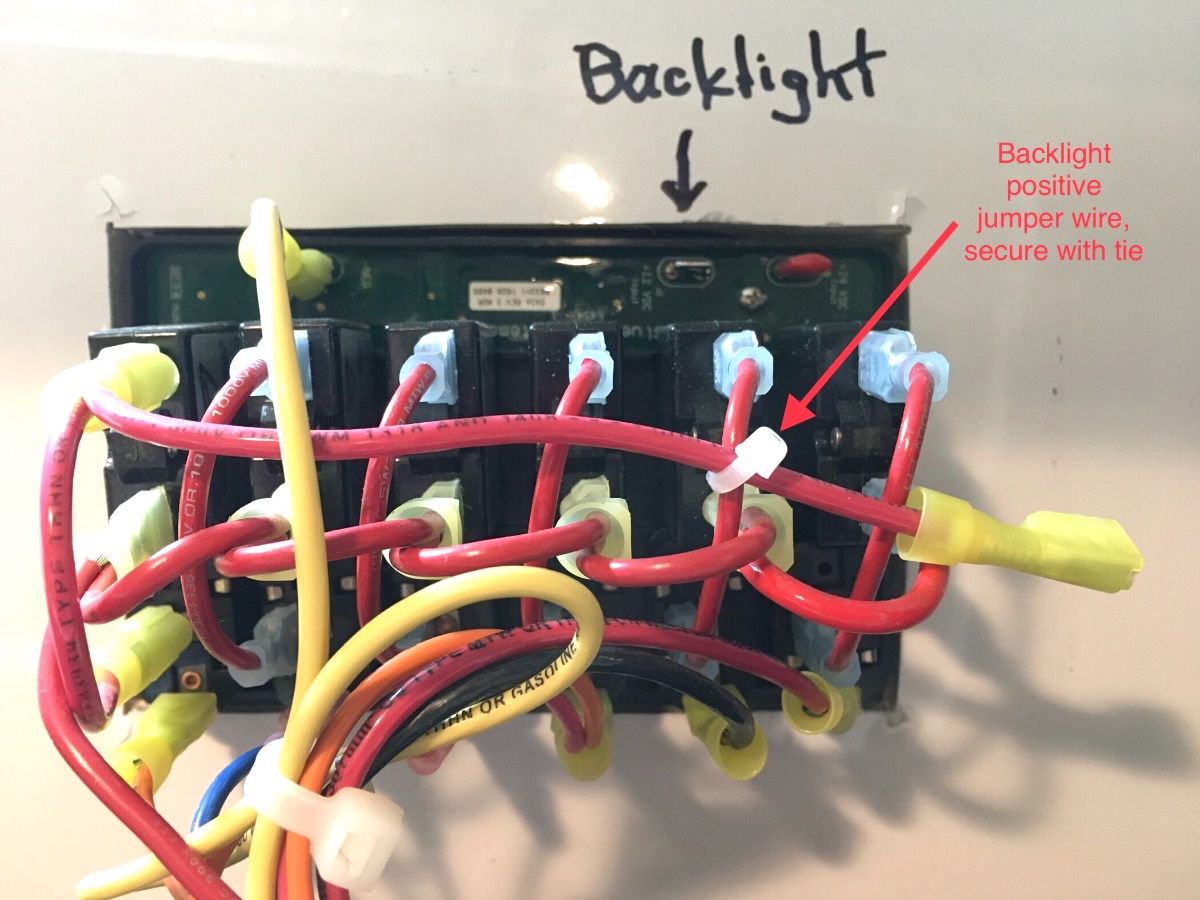
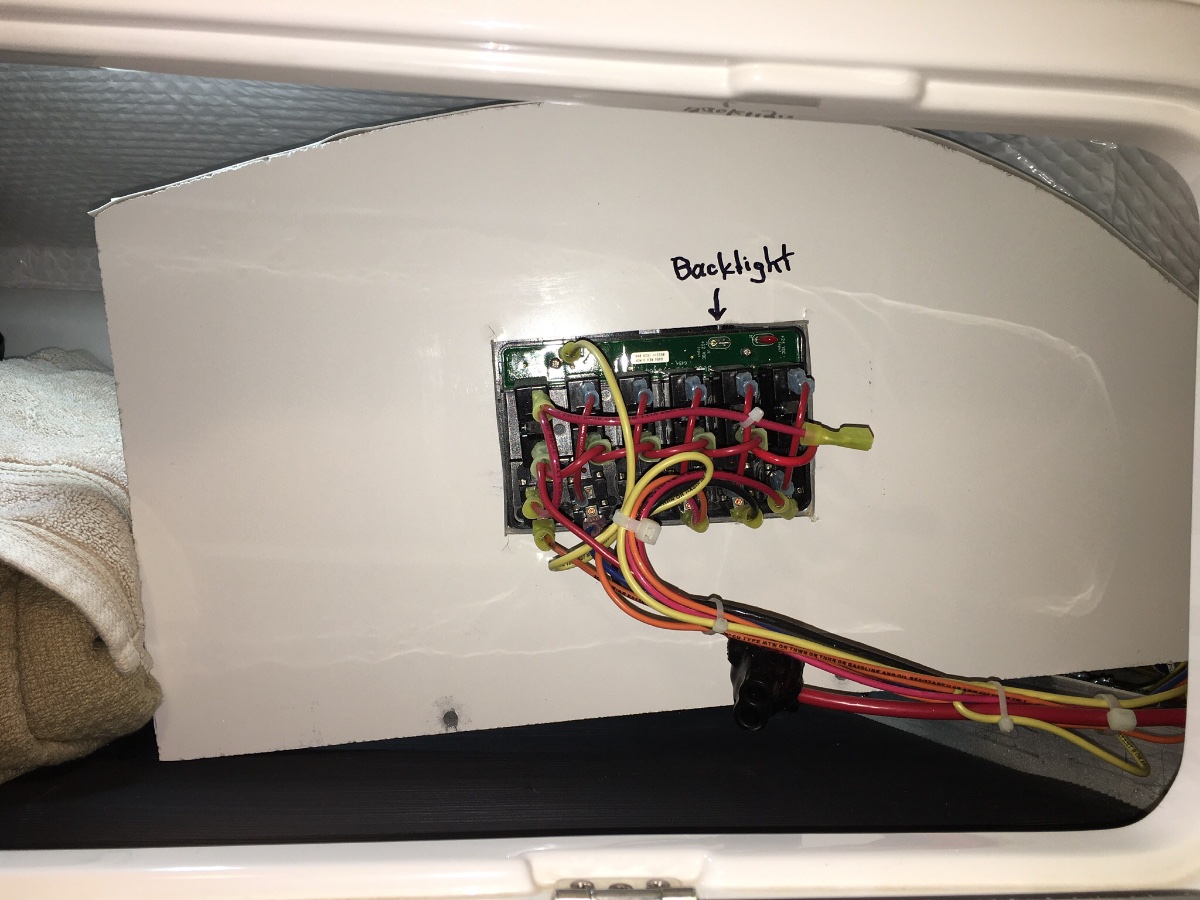
This applies to earlier hull numbers, I am not sure when they stopped installing these Blue Sea marine breaker panels up there. This is a related thread: .... https://olivertraveltrailers.com/forums/topic/5299-eliminating-phantom-electrical-loads-for-long-term-storage/ This is a VERY easy mod, just remove the screws holding the street side panel and rotate it around to where you can see the back side. At the upper right corner you will see the lighting connection, unplug the wire and secure it out of the way with a nylon tie. Label the unused connection so a future owner will know what it is. An anal owner could make a placard similar to this one (my hull has two extra loads added to the stereo wire): Now you have to turn on the overhead cabinet light if ambient lighting is dim. I am not sure why Oliver felt that it was necessary to connect this wire in the first place. John Davies Spokane WA
1 point
-
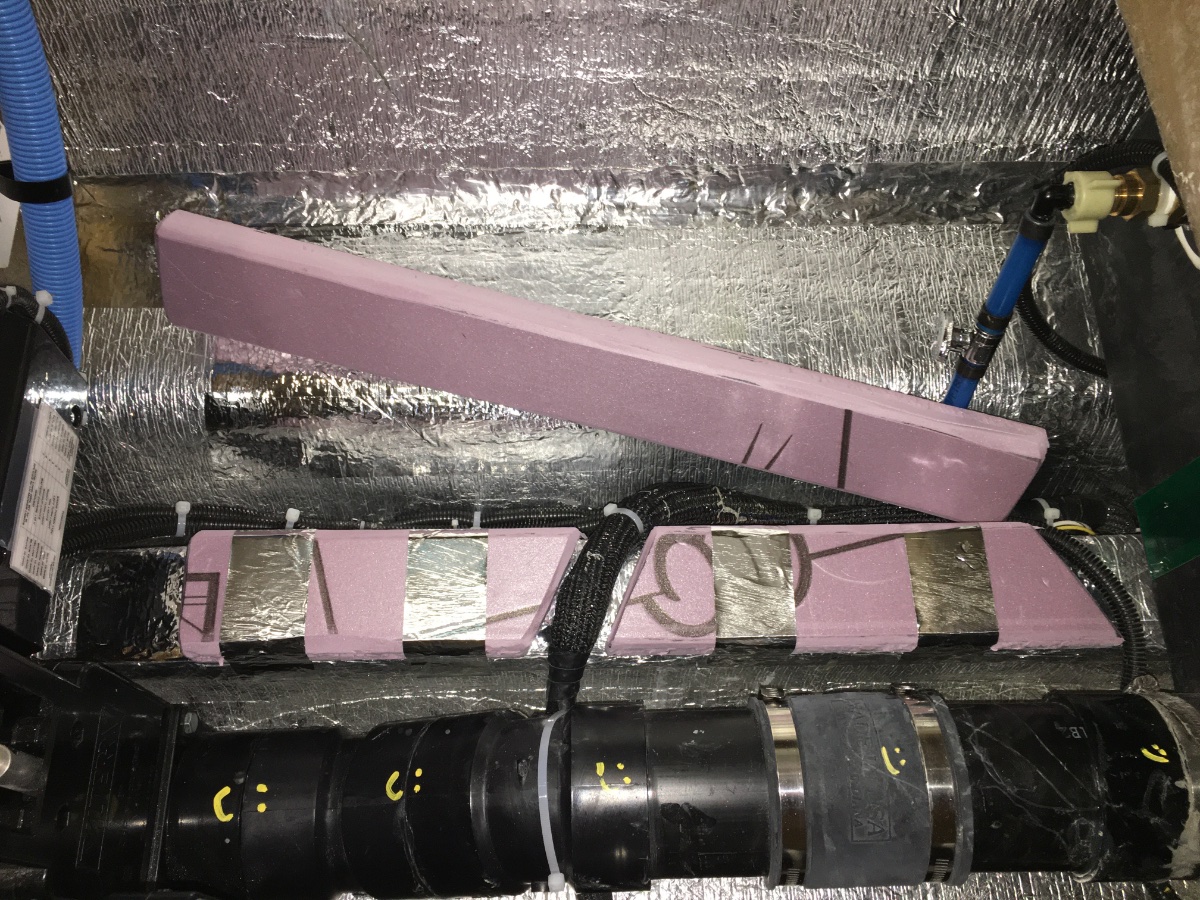
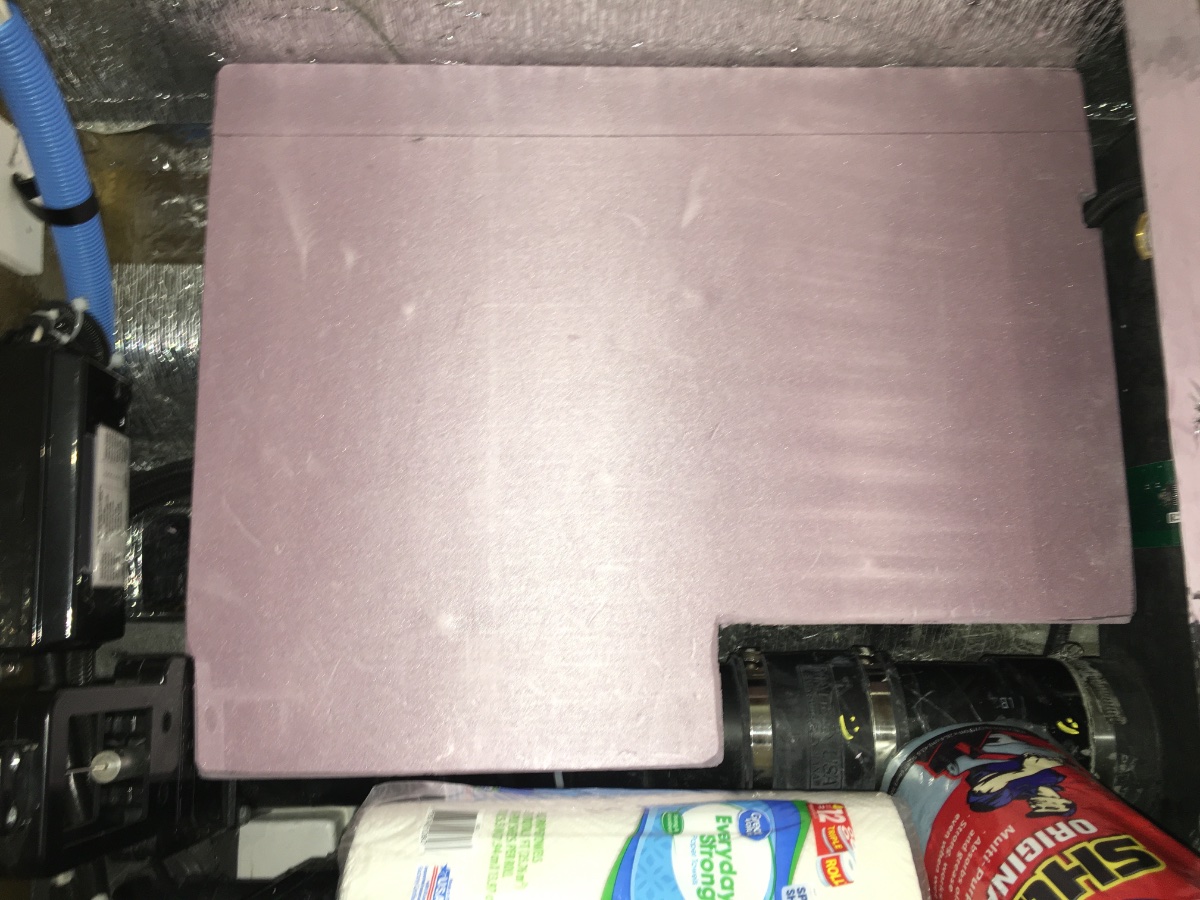
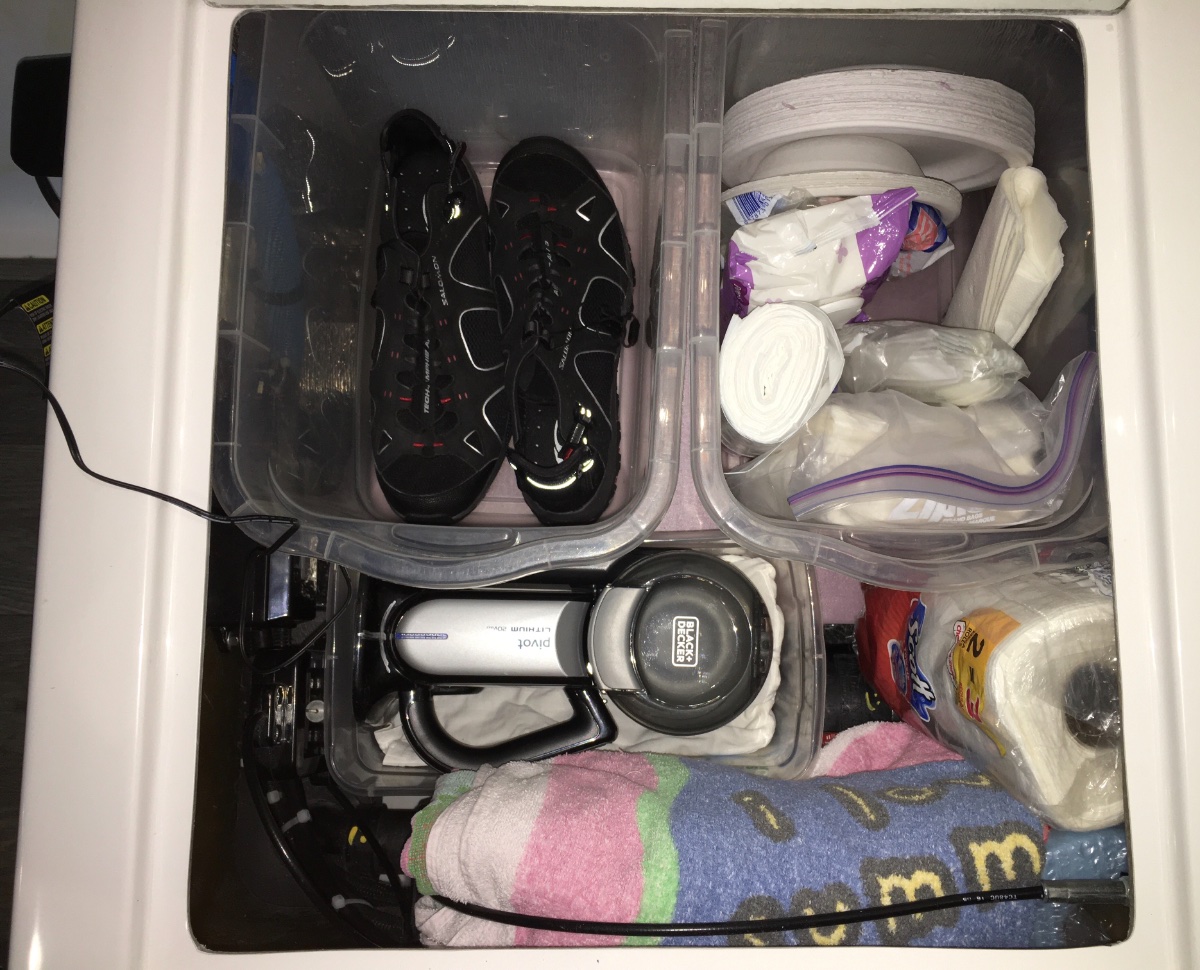
This is pretty bad for storing just about anything hard, I had been using a bunch of loose foam sheets to pad the wires and plumbing. I made strips from 1" thick Dow Corning R5 rigid foam board from Home Depot. It can be cut with a SHARP knife and dressed smooth with a bench top belt sander. Wear a dust mask! I used 3 mil aluminum HVAC tape to secure it. The frame member got 2" total thickness, the outside got 2.5" to make it level side to side. The black tank rinse plumbing has been bugging me for years, so I removed it completely (Natures Head toilet!) And capped the bottom fitting with a1/2" FPT Cap, so nobody could accidentally flood the interior: I cut out a tray and it just rests there, so access underneath is not an issue. Here is the area stuffed fairly full, it all lies nice and flat. The material is not especially strong, but it weighs absolutely nothing and is easily replaced if it gets damaged. Plus it is fire retardant. If you wanted it to look nicer you could cover the entire top with the aluminum tape. The material is however 100% waterproof. I tested that by submerging a piece in a glass of water for 12 hours. No worries! John Davies Spokane WA
1 point
-
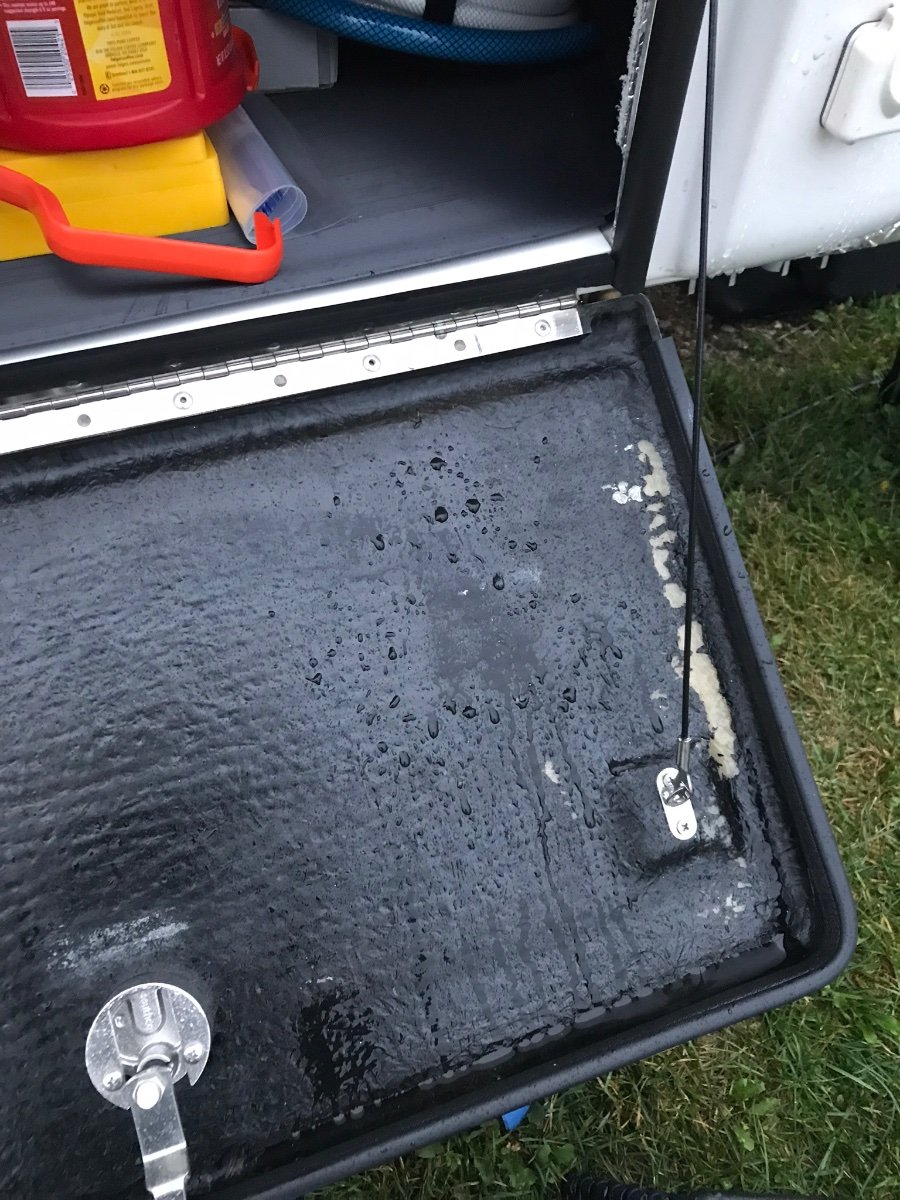
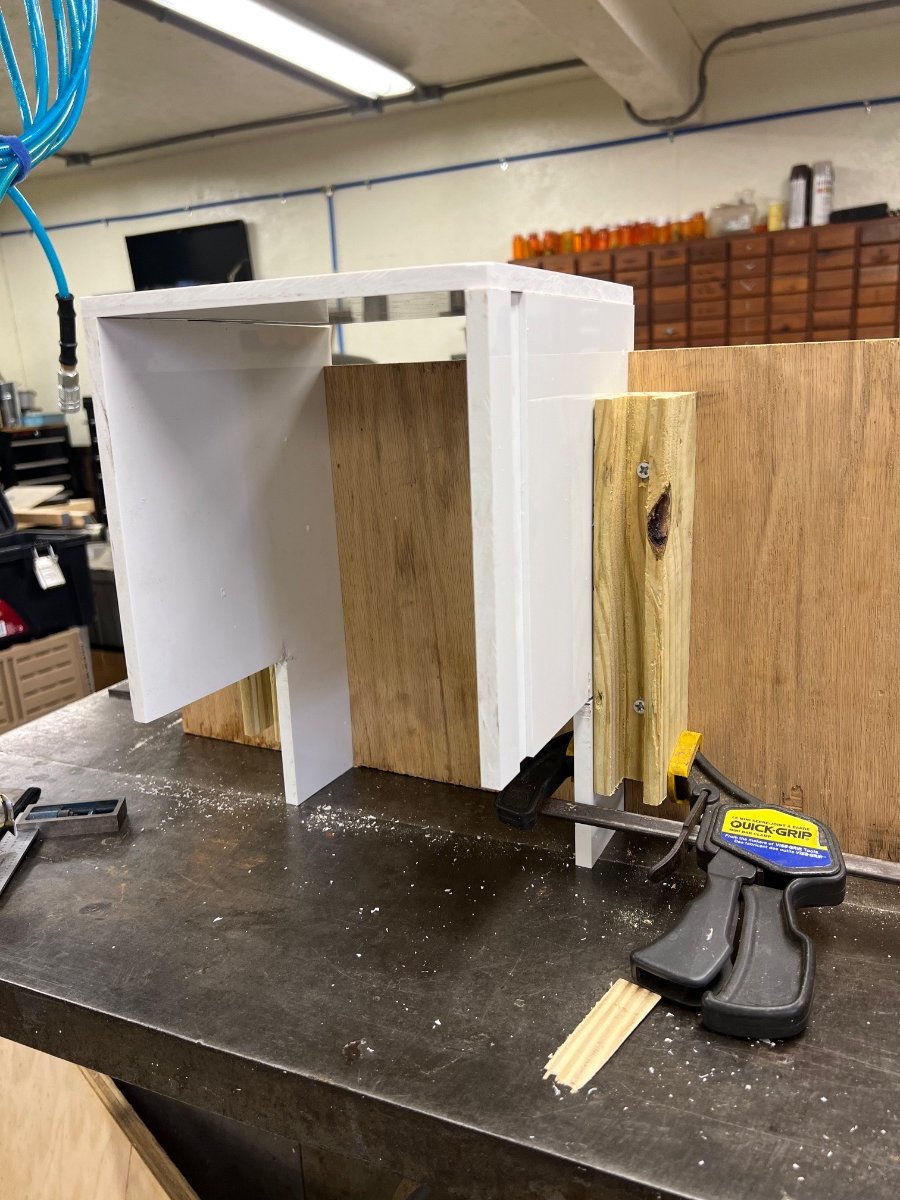
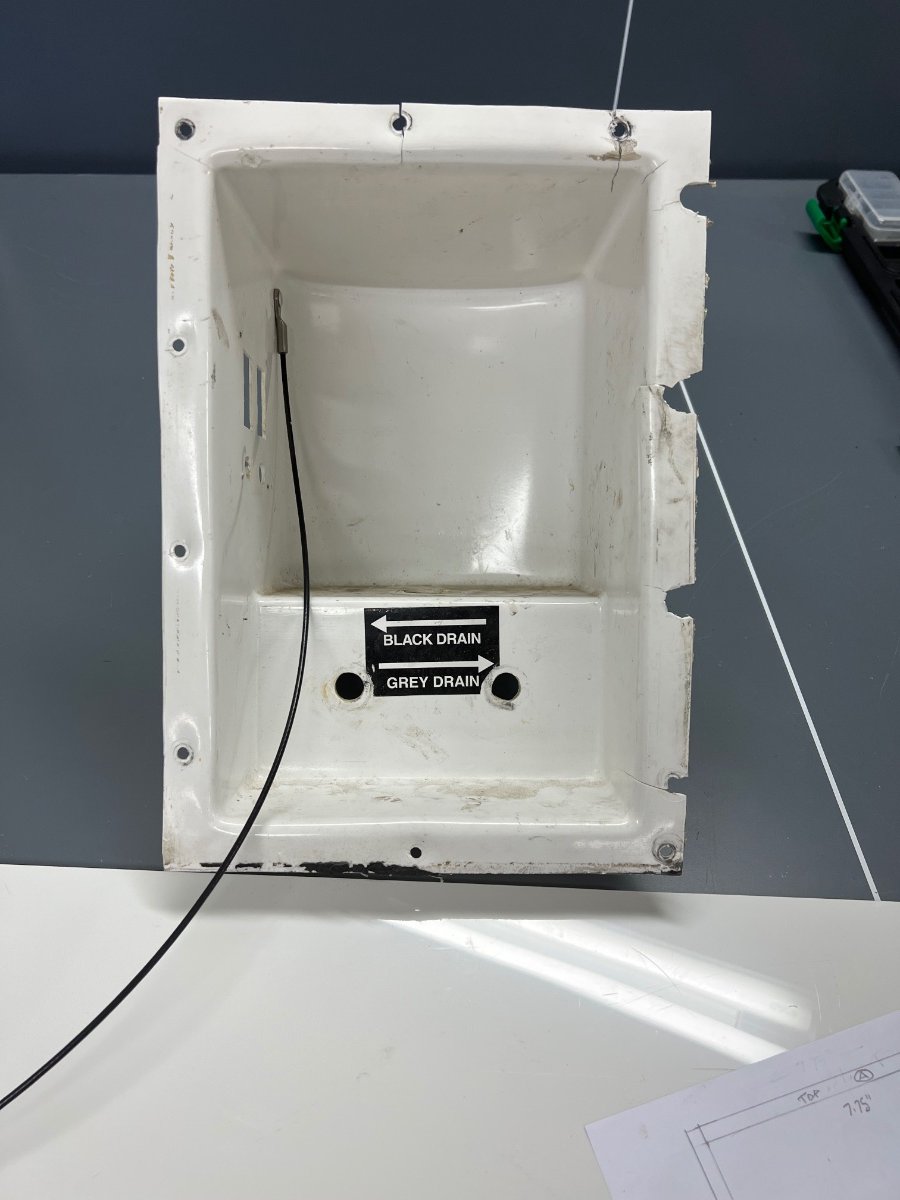
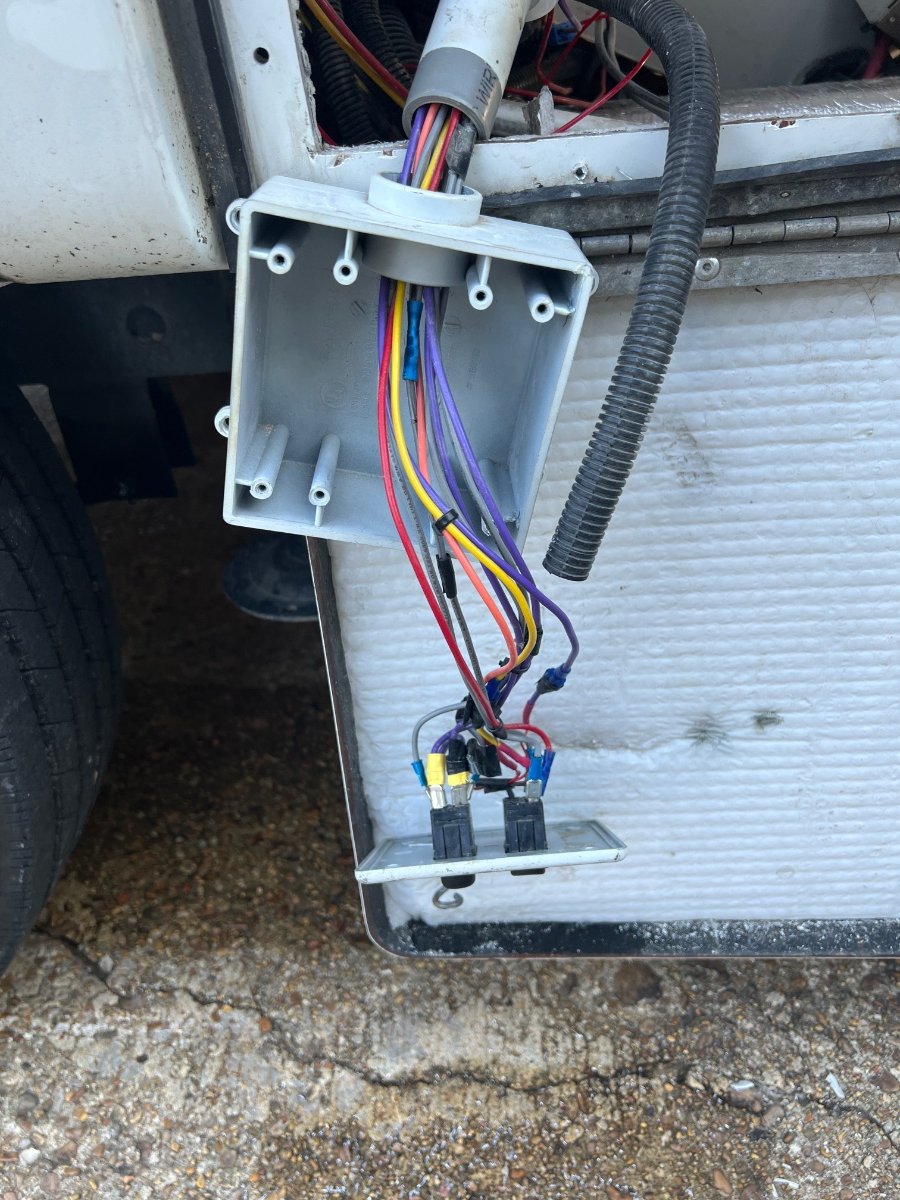
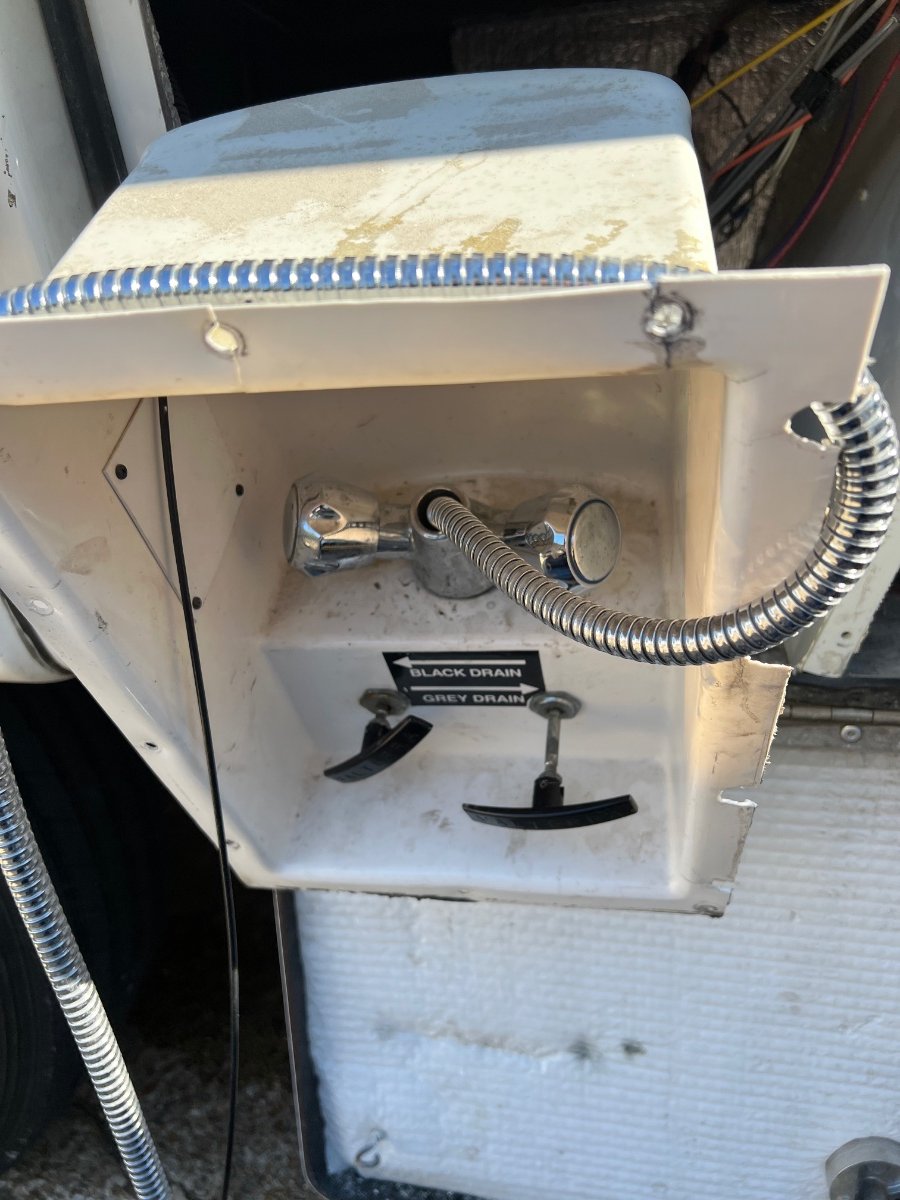
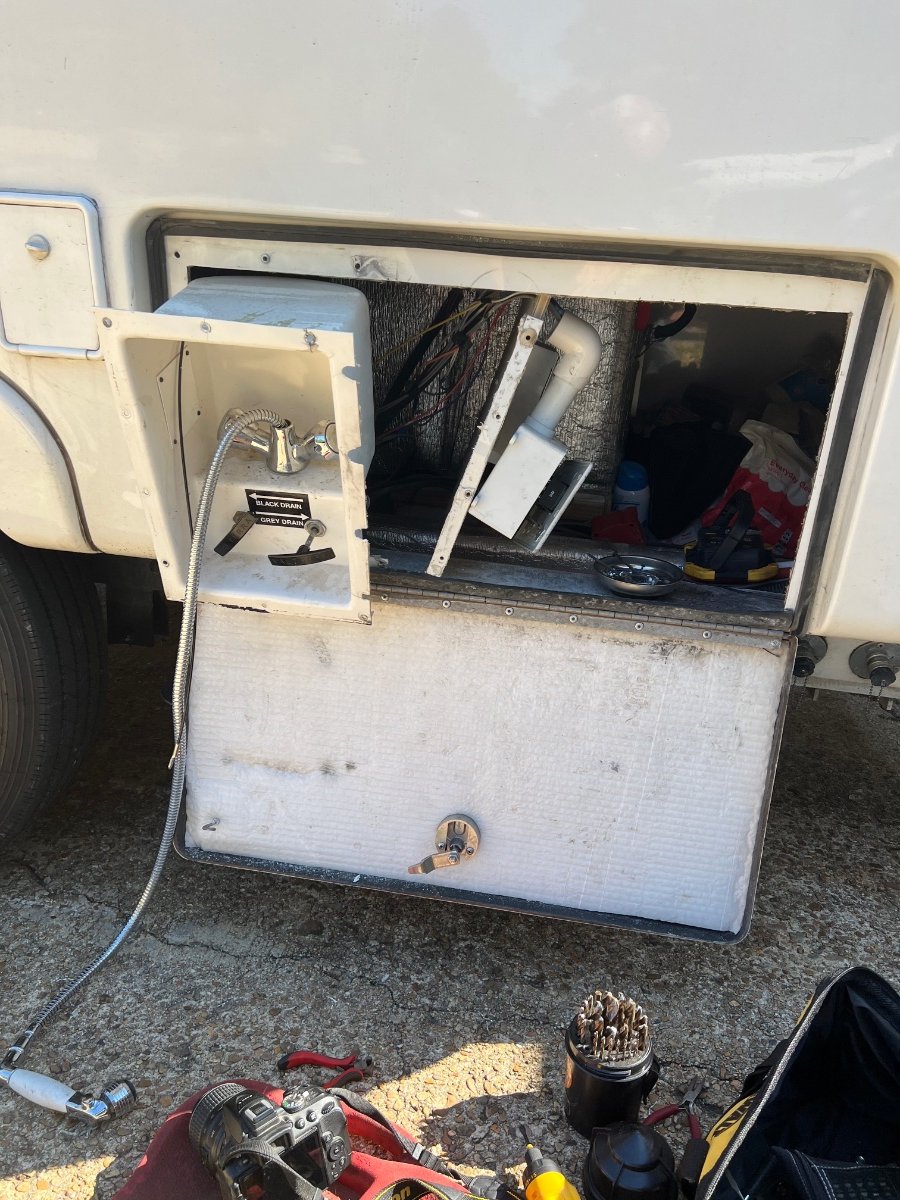
The key word here is “structural”. Although, no longer used, the front wall that separates the bath and closet and them from the rest of the cabin plus the basement floor were originally made in-house from a very high grade plywood coated on both sides with fiberglass and gel coat. These areas are now constructed using a commercially available 1/2” thick polymer plastic sheeting cut to fit. My basement flooring right inside the exterior hatch was delaminating like yours from it having gotten wet so many times through the years. We store our hoses there and apparently I’ve occasionally stowed them away without making sure they were completely drained AND the seal on that hatch has been known to leak while driving in the pouring rain. In addition, there have been times the outside faucets were left slightly open and that water found its way onto the basement floor. All of this is user error, but I decided to tear the entire inside of the basement out and redo all. This is involving construction of a new outdoor faucet and tank valve box as all the early trailers had a vacuum formed box made of really thin plastic. Mine was broken all to pieces and looked horrible. Also, I plan to reroute the plumbing away from that cold susceptible area right next to the outer hull to a more inboard position where it will be subjected to more between the hulls heating. My plan is also place electric valves in those lines so they can be isolated from the rest of the plumbing and drained if necessary. There will be some effort made to relocate some of the electrical wires in that area.
0 points


-
Recent Achievements
-


")


")


")
