Leaderboard


Popular Content
Showing content with the highest reputation on 05/31/2023 in all areas
-
When returning home from the Oregon Coast this April, my wife and I boondocked at a Harvest Host site. That cold evening, we tried to heat water for hot drinks in the microwave using the inverter, but it shut down after just a few seconds. We were surprised and disappointed, because our Lithium Pro Package with Xantrex Freedom XC Pro 3000 watt inverter should enable us to use the microwave on inverted power for at least a few minutes. It had been a cloudy day so we got minimal solar recharge, and with our Nordcold fridge running on DC while on the road, our battery State of Charge was down to about 74%. When we submitted a service ticket, Jason Essary confirmed that we should be able to run the microwave on inverted power at 74% State of Charge (SOC), and much lower, down to 25-30% SOC. With Jason's helpful guidance, I then spent dozens of hours trying to troubleshoot the electrical system, both on the DC and the AC sides. The inverter/charger was charging as designed, and would run 120V appliances that pull up to 1100-1200 watts (including the Truma air conditioner, which pulls 1100 watts with the compressor running), but loads greater than 1400 watts (like the microwave or a space heater on a high setting) caused the inverter to shut down. Nothing we tried solved the problem, including replacement of the Optifuse 300A inverter breaker, which Oliver sent to me under warranty. I also spoke with a Xantrex customer service rep (after45 minutes on eternahold) who assured me the problem could not be with the inverter, so it must be in the trailer wiring. Jason then authorized me to engage an RV service tech at Oliver's expense to try to find a solution. But that was right before I had planned to use the trailer boondocking at the Lochsa River the week of May 15. I decided to engage a tech after I returned home. But while camping (and running the Lochsa river during the day) I happened to mention the inverter issue to another RVer. He asked me if my inverter is a Xantrex. Yup. He then told me he had been advised by an RV service tech to do a "hard reboot" of his Xantrex inverter to resolve a similar issue. He explained that this involves disconnecting both the positive and negative DC cables from the inverter, and leaving it at least overnight, then reconnecting. I determined to give it a try after I returned home, as it would be relatively easy to do. To my surprise, the "hard reboot" solved the problem. My tests have confirmed that we can now run the microwave on full power (1540 watts) for 4 minutes or more at a time, at SOC levels down to 35%. So, the Xantrex customer service guy was wrong--the problem was with the inverter. And, the solution was relatively easy to implement: turn off all batteries, and ensure that shore power is disconnected (so there is no power to the DC cables), then disconnect the DC cables from the inverter and leave at least overnight. I left mine disconnected for 3 days. Then reconnect, and turn the batteries back on. If your Xantrex inverter is not performing up to spec, try a hard reboot.6 points
-
Previously installed a little Gorilla double sided tape on fiberglass where belly band is installed. When initially applied it can be removed in one piece, but if left for 24 hours difficult to remove, but removable with elbow grease, alcohol, and wood scraper made out of paint stir sticks with sharp edges on ends ground with belt sander. Tested a Dremel tool with wire brush attachment on a small section of belly band adhesive to rough up the old adhesive and it worked OK. Guess if you wanted to remove original adhesive stips, it can be done with a more aggressive Dremel attachment. Decided to install Gorilla double sided tape directly over existing adhesive on the belly band without roughing up or removing old belly band adhesive. Let setup for 24 hours before re-installing band, left white backing material on clear double sided tape until installation. Applied pressure rubbing over complete belly band where re-attached with microfiber cloth at least 10 times. EDIT: The Gorillia Super Glue double sided tape did not adhere in the corner where attached to fiberglass after several days. Cannot recommend it.5 points
-
When my Xantrex 2K inverter was acting up a few years ago the Xantrex tech had me do a few things which did not solve the issue. Then he said to do a hard reboot. I left it overnight and when I reconnected the issue was gone. Mike5 points
-
I am just smart enough to understand why a reboot would allow the inverter electronics and capacitors to fully "Stand Down" overnight. Occasionally my fat fingers have typed in some inadvertent key strokes on my computer that put it into a tail spin and the reboot did the fix job. If you have no need to be in the trailer needing lighting or fans, you could just turn off your master DC switch (or pull the 300 amp fuse) and you will accomplish the same thing without the PITA of removing those massive DC input cables at the Inverter. Me: I would gladly sleep the night in the dark with the Master Switch off, and turn it on in the morning and fire off the coffee pot and microwave in the morning and thereby avoiding messing with those difficult to get to cables. GJ4 points
-
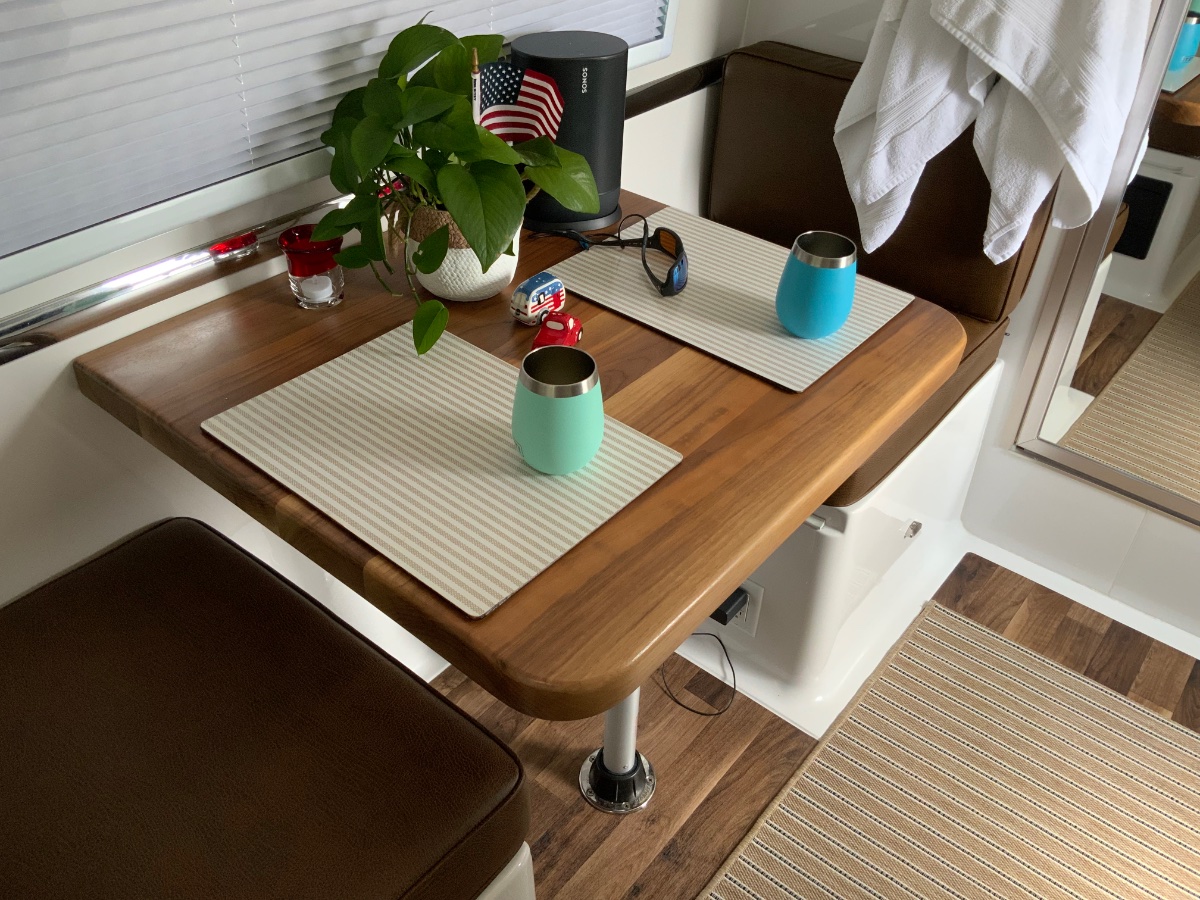
Oh yeah. Already did the larger table top out of walnut.
 4 points
 -
You think it's hard with the regular beds, try it with the raised beds. Back in 2015 while sitting out in the AZ desert on my first long boondocking trip, I didn't think of a deck plate, still too much trouble, but of installing motorized valves. All the valves move in concert, flip a switch one way--Boondocking Aux Fill, Flip it back--Normal operation. Don't leave home without it.4 points
-
We eschew the auto changeover. Switch when one is empty Fill the empty. wWe run a hand over the tanks, to feel the difference in temp. Modern gadgets probably work better.4 points
-
This is what I ordered. Less than half the price of the FlowJet, and fewer percentage of one and two star reviews. https://www.amazon.com/dp/B09W5NMGMS?psc=1&ref=ppx_yo2ov_dt_b_product_detailsI was also looking at this one, but figured I'd have another $30 in needed parts, so I bough the kit. I have a 10" extension and a gate valve to add to the trailer's dump port. Then I'll hang the 45° fitting and the macerator. This will put it in a downward angle to minimize air getting into the pump. I just got home from helping a friend put his sailboat in for the year, so haven't tried dumping yet. I did plug it in and it wouldn't start, so that's not a good indicator. I rotated by hand and then it did. I'll try it out with clean water to see if it needs returned... Harbor Freight has a 3/4" contractor grade 50' hose I’ll pick up tomorrow to reach the septic tank. This is intended for home use only for now. I saw some uphill dump pipes at the rally, but I don't know how common that it.4 points
-
We were there on a slow day. We went through the tasting line three times. 😂4 points
-
We have a home in Rockaway Beach, about 15 miles north of Tillamook, and I must admit that the brie and bagettes at the Blue Heron are worth the time to stop, as are the cheese curds at the Tillamook Creamery.4 points
-
Up as high as possible is best! https://olivertraveltrailers.com/forums/topic/1973-how-to-install-a-garmin-bc-30-backup-camera/ You want to be able to view any cargo hanging off the back, as well as down the road. John Davies Spokane WA
3 points
-
On all three of the Ford F-150's I've owned that came with the Ford brake controller, they were set at either 5 or 6. On gravel or rain slick roads I could back that off to 4 or 5. Bill3 points
-
Good suggestions on how to apply tape over pre-existing tape. We preferred to start clean as we have a dog who has black hair and were concerned that two layers of foam tape would allow enough of a slot for har to collect, sticking to the tape edges. Tried acetone, paint scraper and elbow grease which worked but was super labor intensive and would have taken hours. John's suggestion above to use adhesive cleaner would have probably been more efficient. In the end, we did the entire job with a belt sander with 80 grit paper. The best technique we came up with was to put the vinyl band face down on a towel and start at one end working towards the other. Held the sander at an angle with the "fresh tape" leading edge lifted slightly. This would heat up and push the gumpy residue towards the direction of travel. When enough of a sludge line was formed, would "jelly roll" the sticky material with finger tips and remove. Was able to do about a foot at a time. Blunt force instrument but did a great job. Cleaned the edges (which are translucent) and prepped the surface with acetone. Will reapply using two 1/2" strips of 3m double sided tape, leaving the paper on the outside of the tape which can be slid back as we go when reapplying. Had we known about the Gorilla tape, would have used that but had already ordered the 3m stuff which, for better or worse, was what Oliver used on the original job. Spoke to someone in the shop there who thought it was likely that the surface had not been properly cleaned before original application. Will prep the surface on the trailer with denatured alcohol before reapplying - then cross our fingers.3 points
-
I received the replacement/upgraded part today and it took about 30 minutes to swap out. Turned everything back on and flipped every switch previously causing issues and it works great no noise at all3 points
-
"Old School" isn't necessarily a bad thing - it works for me too. Not too sure about the school part - but - I'm certainly old!😁3 points
-
Failure cause found. I've installed a few TVs and the mounts often come with some spacers to go between the mounting plate and the TV - to account for obstructions, curvature, etc. Careful examination of our TV and mount reveals that the wings of the mounting plate itself are bent slightly upward. Look carefully at the TV back and the plate mounting screws in this picture and you can see it. Tightening the screws at installation pulled the center of the TV against the center post, causing two of the mount points to pull out through the plastic TV back on the left of this photo. Two possible solutions for the new TV: disassemble and try to flatten the mount plate, or install nylon washers or rubber spacers between the plate and the TV to stand it off away from that center post. https://pointerclicker.com/where-to-put-spacers-on-tv-mount/#:~:text=Report Ad-,Do I Need Spacers for TV Mounts%3F,the back of the TV.
3 points
-
We had the OTT BMPRO tank sensors, had them replaced multiple times, they were accurate when they worked but the battery clip inside the sending units weren't soldered on well and kept failing resulting in the sensors not working. OTT was wonderful about sending out new replacement units but after 2-3 attempts I finally sent them all back and got a full refund. Now we just let the tank run out and switch over to the full tank as needed (old school way of monitoring). IMO the sensors are a great idea that don't work. We found a 30# tank to last about 2-3 days in the dead of winter using the heat all the time, otherwise a 30# tank will last several weeks if just being used for hot water and cooking.3 points
-
Please, open a service ticket, and get checked locally. If you only picked up last fall, you're still under warranty3 points
-
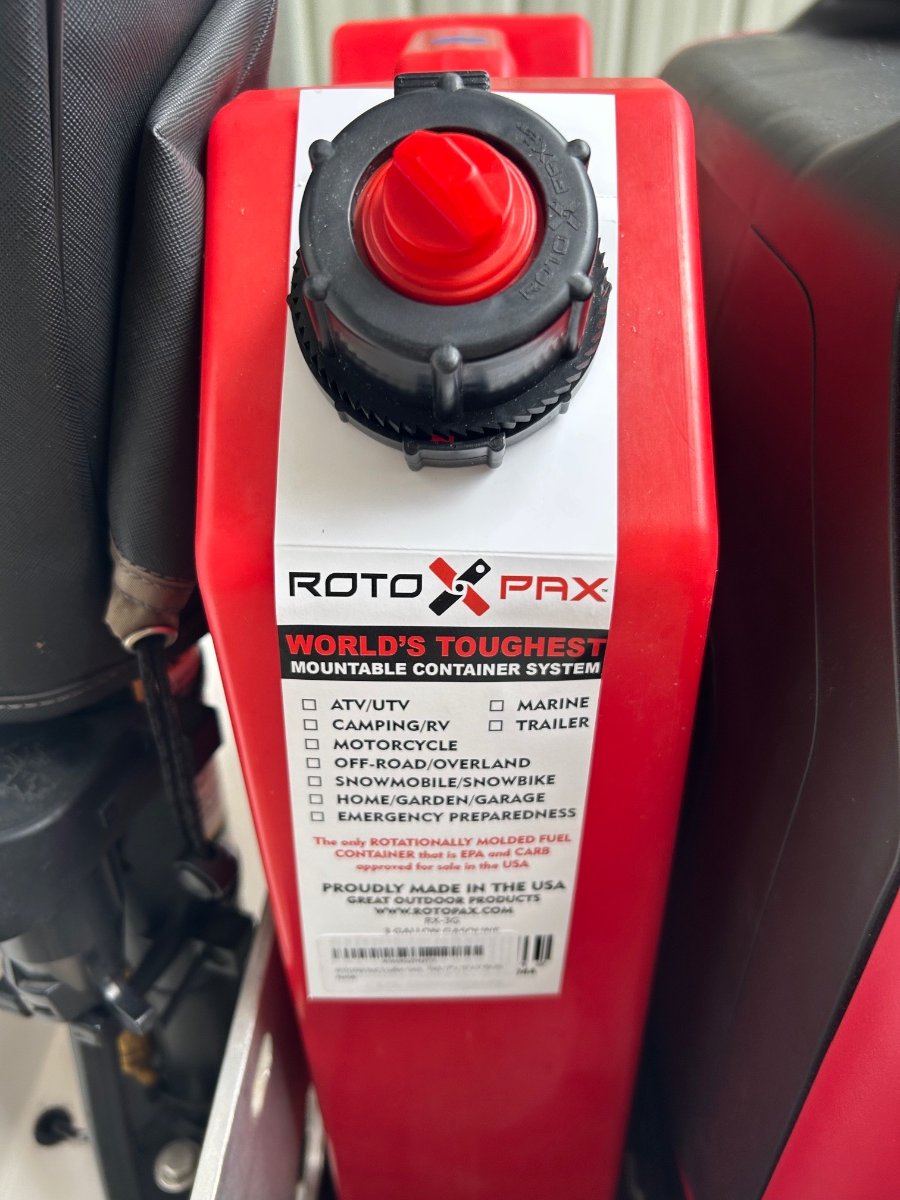
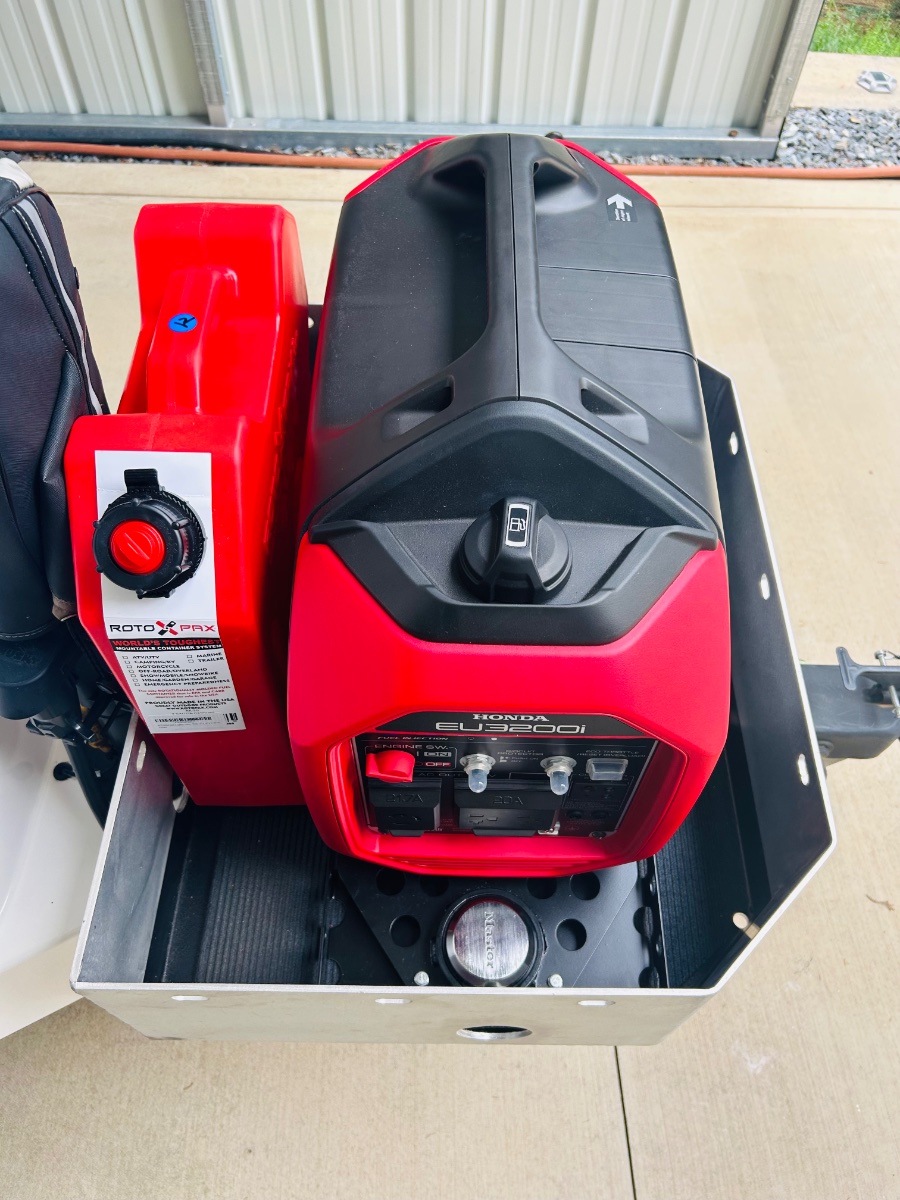
After installing my Honda 3200i generator security basket in the Oliver cargo tray. I decided to get a little creative and add a 3 gal rotopax spare fuel container. (Not a fan of gas fumes in our truck bed under the camper topper). I made sure to leave 5.5” of width between the rear cargo tray and the gen during the security install to accommodate the 5” wide roto pax. This allowed the 5” wide rotopax to fit comfortably in this space. You can just barely see the rotopax in the full front photo. Now I am waiting on the custom heavy duty gen cover I ordered for the 3200i to finish this mod. ⚡️Power On!⚡️ Happy Camping! A video dem of the 3200i running in the security basket from last Thursday. IMG_8731.mov
3 points
-
Gee! I wonder what words were said when this happened?😁3 points
-
I use the Mopeka tank sensor system. It sends reports to an app downloaded onto my phone. It works well. About $70 from Amazon. https://www.amazon.com/AP-Products-024-1002-Propane-Indicator/dp/B01C5RQKJA/ref=asc_df_B01C5RQKJA/?tag=hyprod-20&linkCode=df0&hvadid=312067194179&hvpos=&hvnetw=g&hvrand=12444925943405525704&hvpone=&hvptwo=&hvqmt=&hvdev=c&hvdvcmdl=&hvlocint=&hvlocphy=9029558&hvtargid=pla-492064932214&psc=13 points
-
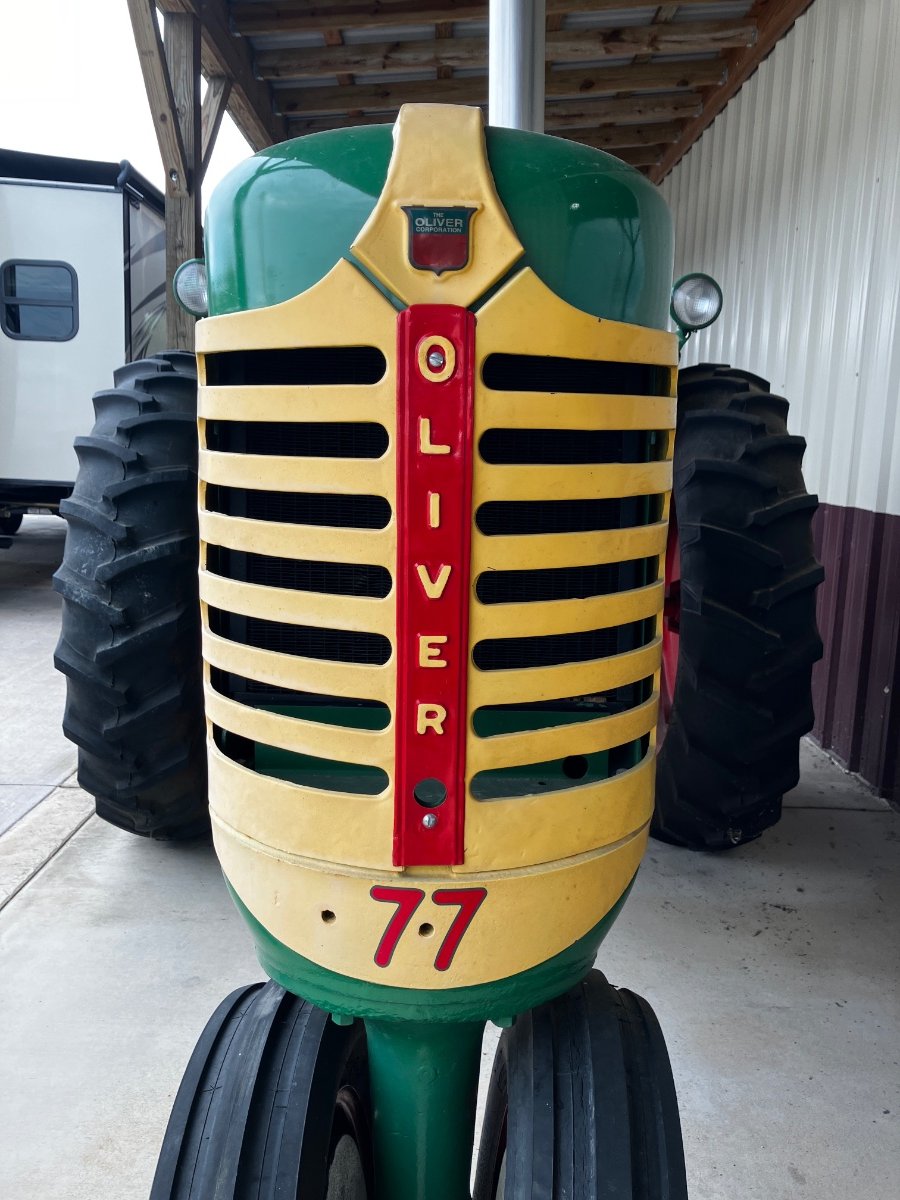
Fully restored Oliver Tractor in front of a local RV dealer in TN.
3 points
-
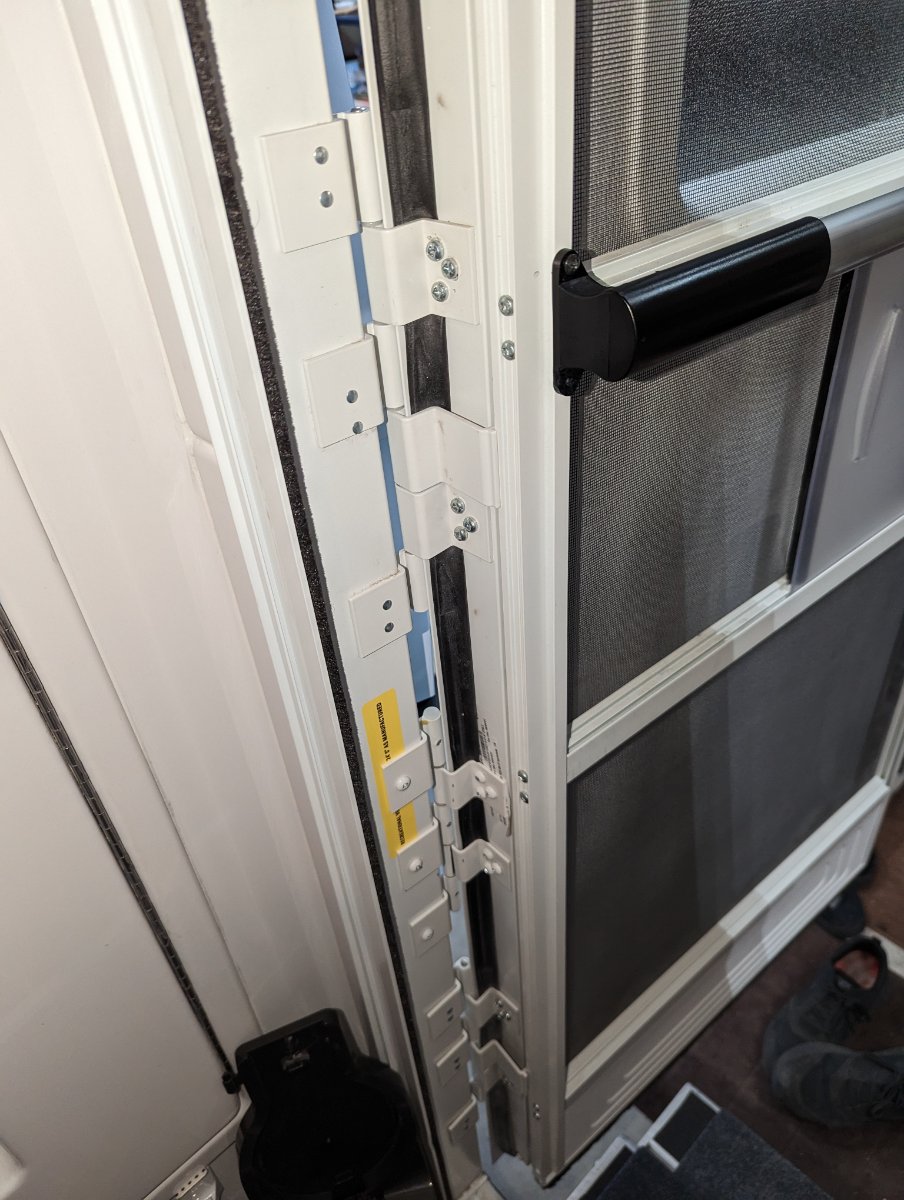
Added friction hinges on doors added over the weekend. Predrilled holes and simply added 2nd hinge set - along with Handle. Yes there is a door holder on back side but have had kids around yank them off in past. (Little weary of someone not being careful)
2 points
-
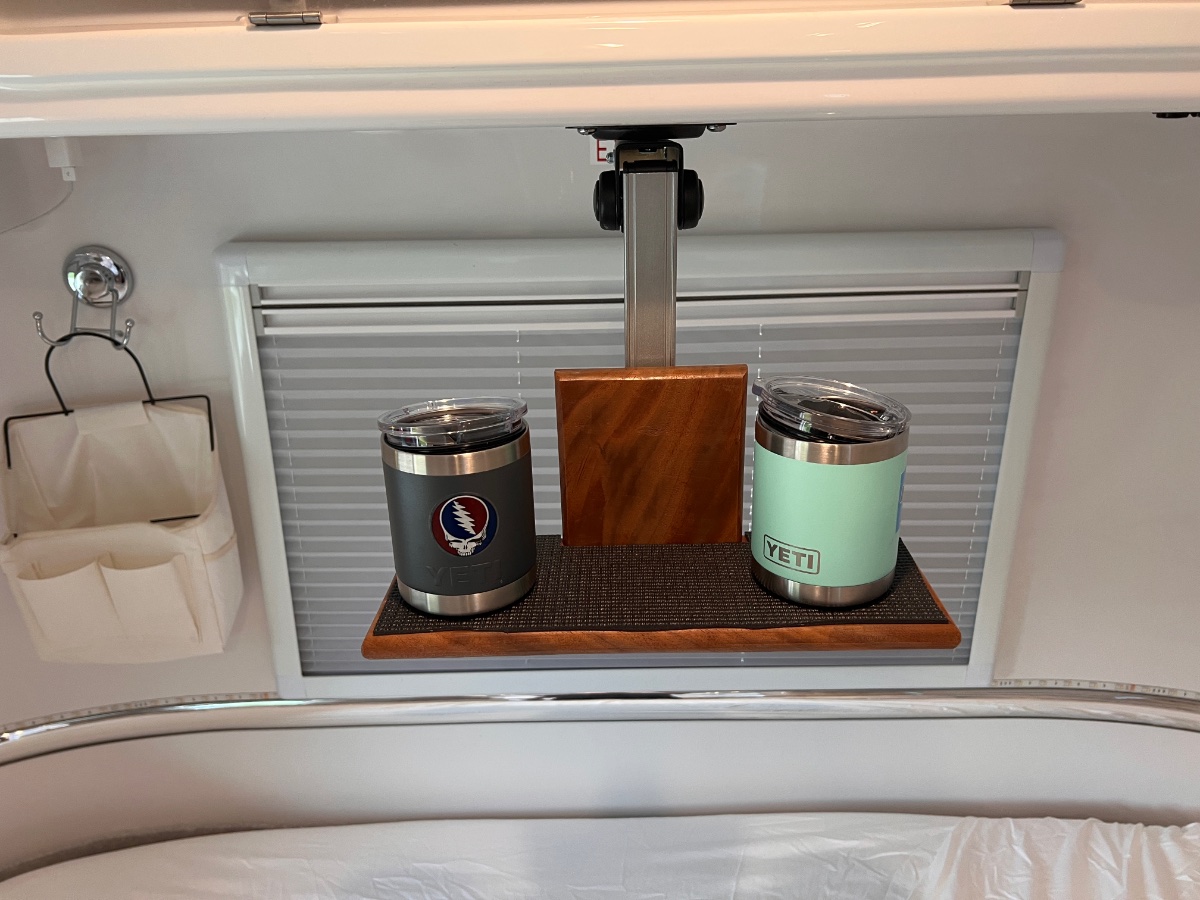
Here’s a quick little modification for those who don’t use the TV. I took ours out and repurposed the fold down mount by adding a small shelf to hold our coffee in the morning.
2 points
-
Yes - my first rear camera was/is located in the spare tire cover. There are a couple of issues - mounting and rainy weather. Mounting - the spare tire cover is not perpendicular to the ground. Actually it is off by 6 degrees. So if you mount the camera without making any adjustments to account for this, the camera will be pointing too far down towards the road. If you compensate for the entire 6 degrees you will probably find that the camera is now pointing too high. I made a "puck" out of a material called Delran (similar to nylon) that is easy to work with and cut it at a 4 degree angle. Thus when mounted on the tire cover you obtain a net 2 degree downward view which is about perfect. The second issue is rain. With the camera mounted in this relatively low position (versus the "normal" roof mount), the camera gets more road spray in wet weather. However, when it is not raining the I prefer this lower view for backing into campsites. A third issue with the lower mounting position is in heavy traffic you can not see as far behind you because the guy on your bumper blocks most if not all of the view. Given the above - I now have two rear cameras.
2 points
-
It might be as simple as spraying it with WD40. My Bull dog was sticking and hanging up. Just keeping it clean and a little lubricant goes a long way.2 points
-
The reason Andersen didn’t give you any help is that Andersen doesn’t make the coupler. The hitch coupler is from Bulldog Products. Here’s a link to their contact page. They should be able to help you. https://www.bulldogproducts.net/ContactUs2 points
-
With the twin turbo and ten speed transmissions, obtainable MPG is substantually determined by wind, grade and speed. The first two you can't change as they are what they are on any given day. So for a given day and highway, that pretty much means you can control only your speed. So picking a speed you want to run you can then play with the transmission gear limit seetting. I have done that enough on the interstates to know that any velocity under about 75 I lock out gears 9 and 10. If almost always keep my speed to 66 MPG or under, Doing so, I do pretty good on the MPG. At least until I get into Wyoming, where on most days, if you are not running well over that, you are the rock in the stream. It is there that I see that exponential rate of fuel burn..... GJ2 points
-
Now that you mention it, I did have enough lid left to make a sink stopper, all for a $1.96! 🙂2 points
-
Thank you for the testing and determination that it wastes a quart of water. I thought it was much more. So good news. However, with very few exceptions (i.e. going Lithium), just about every mod adds weight and complexity. I'm with the "Keep it Simple" group when considering mods. In this case the creative solution is really fun to see. But sadly we flush the toilet several times a day. So using a one quart plastic large mouth container to catch the cold hot water works great for the next flush. However this solution also adds weight (1 oz) and requires maintenance as well (cleaning). 😗2 points
-
@rideandfly Nice work Bill - thinking outside the battery box! Looking good! Patriot 🇺🇸2 points
-
And - now you can use that lid as a strainer!😇2 points
-
Contacted Oliver to see if current battery compartment door with louvered vents will fit on our #75 LE2 Ollie, but Oliver said the latest door is a different size and will not work on our Ollie. Decided to remove plastic plugs I installed in original battery compartment door vents and use 1/16" thick soft silicone plugs that can be installed & removed easily in original vents. Purchased a silicone lid and cut out 8 plugs installing in existing vents. Plan to monitor battery compartment temps or remove vent plugs while away from campsite when solar charging with an indoor/outdoor Acurite temperature monitor this season, will see:2 points
-
Thanks all for your input. I think I will not buy either and stay with the old school system as Seadawg and AlbertNTerri indicated..2 points
-
We use the Mopeka sensors as well. Only takes about 15 minutes to install and connect to the app on your phone. I also received and installed the wall mounted gauge and it seems to work just fine. I haven't run my tanks empty yet so I can't comment on the accuracy of the sensors but the reviews on line indicate they are very accurate.2 points
-
I also use the Mopeaka tank sensors and opted for the remote monitoring panel so we can look at them without always going to the app. We use the wall mounted display more than we do the app now.
2 points
-
In Florida, at Publix, we can get a few Tillamook products. Such great fresh taste. Love them.2 points
-
OK, guys - FULL DISCLOSURE: When rigging this flush system yesterday, we were discussing where the displaced air from the waste tank is venting... So about 8 or 9 gallons into the first "flush", I have the brilliant idea to inspect the commode ball valve. After a "mini-Old Faithful" shooting up a foot from the ball valve, I realized it was NOT a brilliant idea. All good in the "end" - so to speak... Whew!2 points
-
@rideandfly Yes! this worked really well where we had a little area of the belly band lift. No issues since! 👍🏻👍🏻2 points
-
@Mark Meadows: Thanks, Mark - no worries! We made it back as scheduled after having a great time at Rocky Point. The Playa Bonita RV Park was probably 80-90% full capacity and we were lucky to have been assigned the last "on the beach" site. The 64 mile run from the border town of Sonoyta to Rocky Point was on very good roads and our "caravan" made it easily without hassle. We made reservations for next year before leaving.2 points
-
The obstruction under the fridge is a gas barrier. That entire compartment is supposed to be completely blocked from the rest of the cabin, in case there is a propane leak. OTH there is no reason you can’t cut an access hole in the panel. John Davies Spokane WA2 points
-
Omg, @ShallowGal. Those two cute travelers can drink a lot (and obviously, wear a lot) of water. Our dogs sure bring a lot of joy to the journey, don't they? Sherry2 points
-
Jeff, the sales info and actual documentation are not 100% accurate. Nor would I expect them to be. But you can complain to Oliver Sales, tell them to correct the error and ask if they will send you one as an apology or at least sell you one at cost... then sell your old one online. There are a couple of errors in their LE2 pages that continue to bug me, especially the claim that it is built for off-road. That is highly deceptive, though the term is very common sales hyperbole with other RV manufacturer’s packages that are mostly cosmetic. Though I can’t imagine them saying “you must tow it down a potholed road at no more than 5 mph to keep from beating the cr@p out of the frame and your gear.” BTW Hull 218 came with a mechanical “furnace only” stat, because it has a non-Dometic AC and they could not figure out how to make a digital one work. I replaced it with a $22 battery powered non-programmable furnace- only one …. Cheap Stat …. when that one died when the points burned up. It is much more satisfactory than the old one, it doesn’t have a 4 degree dead band. I would have a hard time paying $250 for a smart one😬. But if it came standard, I might appreciate it…. As Ralph commented, a First World problem! We do seem to expect a lot from a camper. Good luck. I personally would not just let this stat issue drop. John Davies Spokane WA
2 points
-
1 point
-
Where will you put the rotopax while running the genset?1 point
-
@mossemiI was also considering removing that PITA gasket and put my extra gutter guard just over the door. I agree, that gasket is horrible and at least needs an area in the middle to release water and junk. Now you have me thinking.1 point
-
Well the window is tight as a drum, but the door seal by the hinges on the other hand, OMG, might as well be a strainer. New separate posting coming for that.1 point
-
We have the Houghton and I do find everything in this video to be accurate (I also have data to confirm this). We do use a dehumidifier along with the Houghton to control humidity/dewpoint AND temperature. I think this is normal as an AC unit is specifically made to operate based on temperature (not humidity) and a dehumidifier is made to operate based on humidity (not temperature). I know lots of people in NC that have a dehumidifier in their home and run AC and the dehumidifier to control both humidity and temp. Auto on the Houghton does not stop the fan from running when the compressor is off. I thought it was just circulating the cabin air when the compressor is off, but if it' s mixing in outside air that may be something that could be improved with the design, but it still wouldn't control BOTH humidity and temperature. What I've found works best for us is keeping the temp set at the lowest point (60F) when cooling so the compressor doesn't shut off. The cabin cools quickly and the dewpoint drops dramatically just as quickly. Once we've got the temperature where we want it, we turn off the AC before it starts cycling. The dehumidifier then keeps the dewpoint in check so even if the temperature goes up, it's still "comfortable". If the temperature does get uncomfortable, it means waking up in the middle of the night and running the AC for about 30 minutes to get things comfortable again, but this is rare. On nights when I know it's going to get too hot, I've used the timer function to have the AC come on for 30 minutes in the middle of the night and then shut off again without me having to manually turn it on and off.1 point
-
John Davies, your tutorial is excellent, as usual. As one with an Elite II on order, I asked my Oliver sales rep about the non-GFCI refrigerator receptacle. I was advised that it meets "RVIA standards," but was also told that Oliver engineering would take another look at the issue. I expect those RVIA standards are the minimums, such as for run-of-the-mill "stick and staple" trailers. IMHO, premium-priced trailers like the Oliver should do more than the minimum, particularly when it comes to safety. I note that a GFCI refrigerator receptacle could be problematic. It would be a PITA to pull the drawers and remove the access panel every time there is a nuisance trip. John Davies' hard-wired, waterproof j-box avoids this issue. If our Elite II comes with the same non-GFCI receptacle with standard plug that has been used for years, I have a different solution in mind: replace the breaker for that circuit with a GFCI breaker. More expensive than John Davies' solution, but much less work to implement. As an alternative, BillATX could replace his loose receptacle with one of the newer tamper-resistant ones, which I find hold plugs almost too well, then also replace the breaker with a GFCI breaker. I expect that would entail less work reaching through between the drawer supports, which sound terribly uncomfortable to my bad back.....1 point
-
John, I have no issue using thread locker on a SS fastener that I never plan on removing. If it were something critical that I still wanted to be able to remove if necessary sometime down the road, I would use anti-seize and double nut it. I agree with you that 3/8" and smaller stainless bolts snap pretty easily. However, I don't think that I would attempt that if the fastener was sandwiching a fiberglass component that I did not want to damage. I would use a cutoff wheel instead.1 point


-
Recent Achievements
-
")


