
Leaderboard




Popular Content
Showing content with the highest reputation on 06/01/2023 in all areas
-
Truma Aventa owners- a mod! I learned from Oliver Service that the Truma Aventa has a design flaw where the (8) fasteners that hold the AC cowling/shroud in place will hold water when it rains. This could result in a leak if the cowling screws are torqued too tight and the plastic cracks. Oliver has made Truma aware of this concern and has also taken steps to preempt water intrusion issues with the counter sunk screw holes by adding a self leveling sealer to each counter sunk fastener hole in the cowling. (See in pics) All new Olivers with Truma Aventa AC units have this self leveling sealer installed at the plant. Today I opted to take sealing these counter sunk fasteners to the next level with some 8 mil XPEL paint protection. I cut 8 small circles of the XPEL PPF and simply covered each of the 8 fastener holes. It took longer to trace and hand cut the 8 small circles from my PPF than to do the install. This PPF can easily be removed for access to the screws and then removal of AC cowling. The PPF will completely prevent any water intrusion issues even if the self leveling sealer should fail. I also covered the Truma side decals in PPF to prevent weathering or peeling over time. The PPF also has a UV protection which should also help keep the sealer from degrading under normal full sun light. This XPEL PPF is very tough material. We have had it installed on our cars, trucks and even 10 mil sheets installed on the front of our Ollie with excellent protection results. Mod On!!⚡️ Patriot🇺🇸 A few pics - These pieces were cut from scraps of 8 mil XPEL I had in my shop. Once installed they disappear. IMG_8826.mov
 10 points
 -
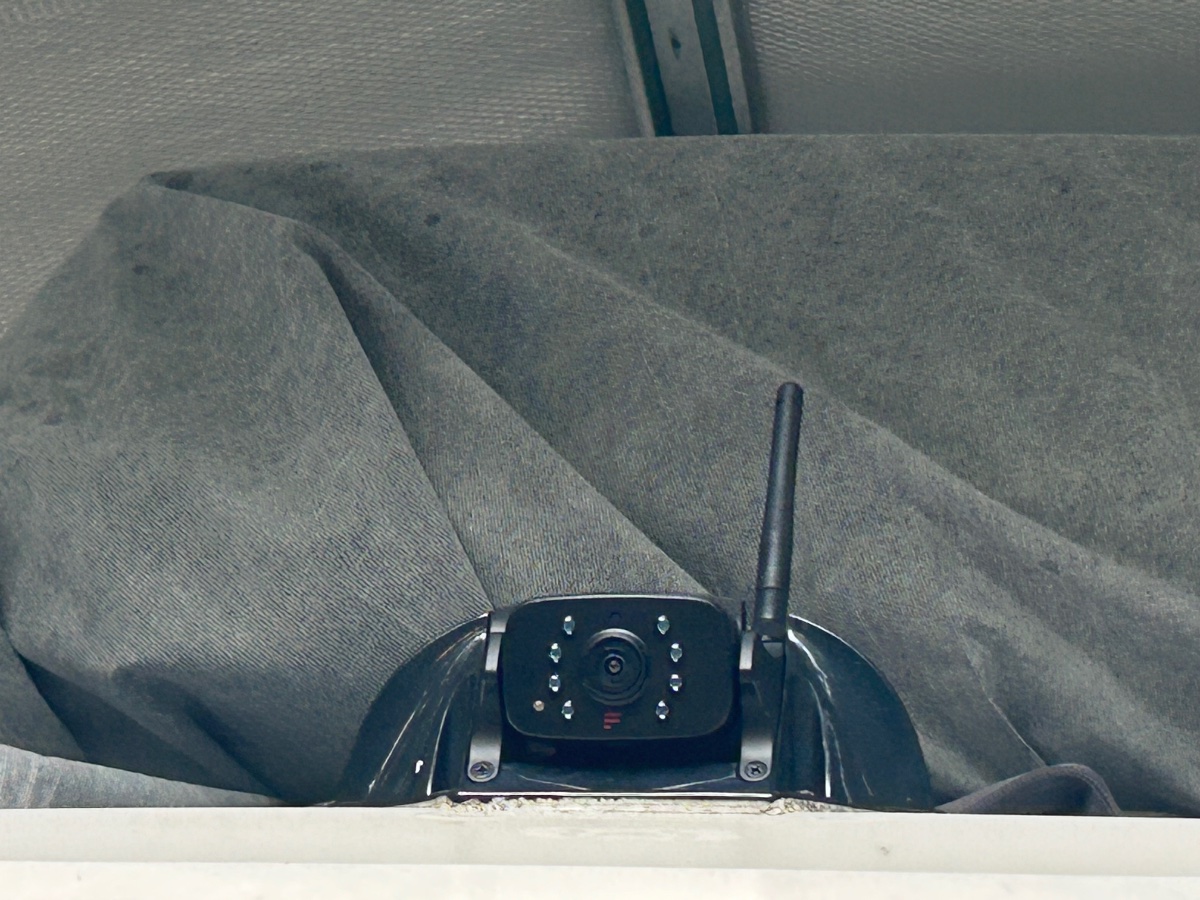
I did the same with my factory Ford camera this past weekend. I really don't plan on using the camera while traveling, just when backing into a camp site. Before backing in I will always park the rig on the road at the site and walk the site down before backing it. When I do this I'll make it my routine to wipe off the camera to prepare for backing in. The Ford camera has a very wide angle view so it allows you to see directly behind the trailer as well as several feet on each side of the trailer. That combined with the side mirror cameras you have a complete view when backing into the site.4 points
-
I mounted my Ford backup camera on the spare tire cover. It is integrated into the Ford surround truck camera system. It works well in that location, though if I were to carry bikes it wouldn't be so great. Its probably better up higher, but I didn't want to drill into the trailer to mount it and it was easy to run the Ford cable under the trailer and up to the top of the spare tire cover and keep it concealed. I couldn't do that for a higher mount, at least not within my limited ability. On the spare tire cover, the view is great, you just have to keep it clean, as it picks up more dust than a higher mount. It's easy to reach to just wipe off the camera lens.4 points
-
Like my old 2003 Toyota pickup, it's simple and durable. Thanks!3 points
-
Wal Mart for certain and possibly Amazon.3 points
-
We use our Oliver back up camera and large TV mirrors mainly to monitor traffic and lane clearance behind our Ollie when traveling. It also allows me to keep an eye on our bicycles on the 1 Up rack. I have noticed most vehicles don’t tailgate us as they think they are on video. It seems to keep most of the tailgaters at bay in my experience. I don’t think I have ever actually used it to back into a campsite. All said, I am spoiled, I cannot imagine not having the Oliver installed high mounted back up camera while traveling. Patriot🇺🇸 The factory mounted all seeing 👁️
3 points
-
This thread makes me very happy we opted for the composting toilet. Our last travel trailer 20 years ago still provides "fond" memories of black tank issues.3 points
-
John, All of my testing was under 65MPH towing Ollie. When we pass through WY, will bump it up to 8th gear. Initially had to work hard with throttle control using 7th, 8th, & 9th not using cruise control. Found using 7th gear @ 2150 RPM & 61MPH with cruise control on was a more pleasant ride with better average MPG in TN & NC hill country.3 points
-
I never thought about people speculating and reselling camp sites. People sure are resourceful. Do other states have laws like this? I guess I can see giving state residents first shot at camp sites if the state subsidies the cost and keeps them below true market value. Floridians can expect to get a jump on everyone else reserving time in state parks now that HB 109 has been signed into law. The law came about because of complaints that third parties took up reservations once the Department of Environmental Protection (DEP) opened up those times. It passed both chambers of the Legislature without a dissenting vote. The system presently allows for making reservations 11 months in advance. The legislation directs DEP’s Division of Recreation and Parks to open up reservations for Florida residents 11 months in advance and, for nonresidents, 10 months in advance. https://floridapolitics.com/archives/611771-floridians-get-first-choice-as-governor-signs-state-park-reservation-bill/2 points
-
Not quite a DIY Modification, so I'll put this here in General Discussion. Mods, feel free to move as needed. At-Home Macerator Pump Setup Based on several posts and YouTube videos, I put together a reasonably inexpensive home macerator setup to dump our gray and black tanks into our septic tank. I know large quantities from the black tank are not recommended for a septic system, but the Oliver’s small tank shouldn’t be a problem. Plus, it is usually only whatever use occurs on our overnight boondocking drives home. Components: Kitvance RV 12V Macerator Pump Kit - $126.97 as of June 1, 2023. It did’t want to start when I tested teh motor before hooking it up to the trailer. But a couple of turns manually (with the power disconnected) got it going. This concerned me, but in testing, it seems to run okay, and is less than half the price of a JetFlow, with better reviews. https://www.amazon.com/dp/B09W5NMGMS?psc=1&ref=ppx_yo2ov_dt_b_product_details Valterra 10” Sewer Drain Extension $13.13 - To extend the fixed sewer connection outside of the bumper. https://www.amazon.com/dp/B00303XGKU?psc=1&ref=ppx_yo2ov_dt_b_product_details Valterra Twist-On Waste Valve $18.91 - Because I want to have an emergency shutoff if something starts leaking downstream… https://www.amazon.com/dp/B000BGHYJS?psc=1&ref=ppx_yo2ov_dt_b_product_details Valterra 45° Clear Sewer Adaptor $15.53 - This is NOT the one shown in the photo. That’s the fancy Camco one with swivel connectors. This was the only failure to the entire setup. It leaked around both ends of the translucent (not clear like I thought I ordered) tubing. That one is going back to Amazon… (Returned - not surprisingly, they didn’t want it back.) https://www.amazon.com/Valterra-T1026-1-ClearView-Hose-Adapter/dp/B000NCS7GE/ref=pd_bxgy_vft_none_img_sccl_1/135-4765513-9824152?pd_rd_w=YlcHp&content-id=amzn1.sym.26a5c67f-1a30-486b-bb90-b523ad38d5a0&pf_rd_p=26a5c67f-1a30-486b-bb90-b523ad38d5a0&pf_rd_r=DQQXVYARJ409X8BAT0C3&pd_rd_wg=0Yol3&pd_rd_r=2e06d500-19c7-4cc0-a074-95b6863b7d68&pd_rd_i=B000NCS7GE&psc=1 Harbor Freight Greenwood 50’ X 3/4” Contractor Garden Hose $24.99. I wanted a 3/4” hose to minimize back-pressure in the pump. And 50’ just reaches our septic tank from the driveway. They also sell a 75’ version. https://www.harborfreight.com/lawn-garden/gardening-garden-tools/garden-hoses-nozzles-connectors/50-ft-x-34-in-contractor-garden-hose-63335.html Total Cost: $199.53 plus tax. The included power cord with inline switch assumes the use of a cigarette 12V outlet. I used the included alligator clip adaptor on a spare deep-cycle 12V battery in my garage, as the cables do not reach the battery bay. I’ll make a heavier-duty harness with switch to replace the one that came with the kit, but actually, the included bits never got hot or seemed undersized. The pump ran quietly and never even got warm, let alone hot. This was on an 80° day in the shade, and it ran for several minutes straight. I did not time how long it took to drain. I had the nose of the trailer elevated a lot, and filled both tanks completely. Then flushed the black tank three times, even though it ran clear by the second flush. The only leakage was around the Camco 45° swivel. The entire process was easy and clean. This is intended as an at-home system, but I can see the advantages of making it into a kit to take along if space allows. Our first time using a public waste dump had a 6” deep, 15’ diameter puddle around the drain pipe, due to heavy rain. I’d rather not repeat that mess! With this system, I could park a distance away and pump do the pipe without everything hanging into the water. So far, I call this project a success! IMG_9250.mov This is what grows on top of the septic tank. It's well fed! 🙂
2 points
-
We got our's on that sale...
2 points
-
Called Bulldog customer service. Said that what I am experiencing is not uncommon. Recommended spraying the lever area and the underside of the coupler with WD40.2 points
-
About 60 years ago, my grandfather and I built a buss bar knife switch very simular to yours. I had totally forgotten about it until I saw yours. Well done! GJ
2 points
-
Yep, Walmart is where the white plastic board the solar charger & Victron Shunt were mounted on (Cutting Board) and silicon lid were both purchased.2 points
-
The rumor is that this same tactic was employed in reserving sites for next year's Oliver Owner's Rally. Very disappointing if the rumor is true.😒 Bill2 points
-
I recently bought a Scan Guage lll which displays engine data in real time including various temperatures and also indicates when the torque converter is "locked" which should help in determining the correct gear for the condition and keep transmission temperatures lower. I haven't taken it on a long trip as yet but so far it seems to be helpful. Not a big deal but I'm somewhat disappointed with the relatively mild engine breaking capability that the truck has which could place more burden on the braking system on steep / long down hill runs. It hasn't been a problem so far out east here but could be more of a concern out west. Has anyone had experience with that issue out west?2 points
-
Have a 200 watt solar suitcase. Used it last year but just ran the cables thru the battery compartment gasket. WIll be installing the z-amp 20 amp plug in the door this summer. After last summer's use, if I were to do it again, I would have gotten two of the 100's. Easier to pack and would fit in more spaces on the move. Looks like I'll be getting a Mainstays silcon lid. Where did you find it? GJ2 points
-
I'll try that out this summer! GJ2 points
-
Welp, that precludes me from taking my cowling off and inspecting the inside of the AC unit. I just wanted to see if there's anything that needs to be cleaned/debris blown out of the intake screen or coil like most other AC units. Guess I'll deal with that down the road. Thanks for sharing!2 points
-
Up as high as possible is best! https://olivertraveltrailers.com/forums/topic/1973-how-to-install-a-garmin-bc-30-backup-camera/ You want to be able to view any cargo hanging off the back, as well as down the road. John Davies Spokane WA
2 points
-
Yes - my first rear camera was/is located in the spare tire cover. There are a couple of issues - mounting and rainy weather. Mounting - the spare tire cover is not perpendicular to the ground. Actually it is off by 6 degrees. So if you mount the camera without making any adjustments to account for this, the camera will be pointing too far down towards the road. If you compensate for the entire 6 degrees you will probably find that the camera is now pointing too high. I made a "puck" out of a material called Delran (similar to nylon) that is easy to work with and cut it at a 4 degree angle. Thus when mounted on the tire cover you obtain a net 2 degree downward view which is about perfect. The second issue is rain. With the camera mounted in this relatively low position (versus the "normal" roof mount), the camera gets more road spray in wet weather. However, when it is not raining the I prefer this lower view for backing into campsites. A third issue with the lower mounting position is in heavy traffic you can not see as far behind you because the guy on your bumper blocks most if not all of the view. Given the above - I now have two rear cameras.
2 points
-
We see this all the time. Empty sites. Ghosted. Stiffer cancellation penalties might fix it. The thing is, we rarely camp in our home state (Florida) because it's so difficult to get a site, in season. As in most states, our state taxes support the parks. Along with camping fees. I'd say better plan is charge extra for out of state users. Especially at prime sites . I've met Canadian campers who have told me they sit up and wait for reservations to open at midnight, months ahead. Not my deal. Not gonna do it. Too many things can happen in 10 or 11 months. But, our put of state visitor folks will make those plans, a year ahead.1 point
-
Your coupler will work better if you spray it with WD40 at least twice per year, then open/close the coupler several times to work it in to the mechanism. WD40 is also a good rust inhibitor.1 point
-
I have experienced 80 MPH winds there while setting still. I have experienced hundreds of times 40 MPH wind gusts. So if you don't want to see 80 MPH winds on the AC, you are now limited to running 40 mph or below. Just saying there are hugly strong wind gusts out west, and if the fasteners have cracked the cover, making those connections more sturdy by adding the SS fender washers would be a smart idea. Just saying.....1 point
-
My experimenting has been east of the Mississippi with the 2022 Tundra so far. Very interested to learn how the Tundra’s twin turbo V-6 performs up to 10,000 msl. Look forward to hearing about that! With a 5% grade found 6th gear and 55mph to work, if I remember correctly rpm was around 2150. Passing some 18 wheel trucks. Towed Ollie up 7% & 8% grades so far. Like to experiment with different rpm/gear settings for different % grades. Never try to maintain speed limit while towing up grades. Just find a rpm/gear combination up to maximum torque rpm. Don’t want to overheat drivetrain components by keeping up with automobile traffic towing up grades. Found it took too much throttle management seeking the highest gear causing transmission hunting instead of going with a little higher rpm lower gear combination up to maximum torque rpm of 2400. Believe the new Hybrid Tundra is a towing beast up grades, but have not driven one, yet! 🙂1 point
-
Would some gorilla tape over the line of vent holes stick? Would be a lot faster! Cost beats $1.98! But alas likely less life span. GJ1 point
-
I didn't use this type of camera mount because the camera is within reach of passersby. That means that anyone can tamper with it and/or can get "snagged" on it with clothing and/or other things. Bill1 point
-
Hi there, nice to meet you all guys! I recently moved from Kyiv to Toronto and happy to join the community. Sweet hello 🙂 ❤️1 point
-
Good suggestions on how to apply tape over pre-existing tape. We preferred to start clean as we have a dog who has black hair and were concerned that two layers of foam tape would allow enough of a slot for har to collect, sticking to the tape edges. Tried acetone, paint scraper and elbow grease which worked but was super labor intensive and would have taken hours. John's suggestion above to use adhesive cleaner would have probably been more efficient. In the end, we did the entire job with a belt sander with 80 grit paper. The best technique we came up with was to put the vinyl band face down on a towel and start at one end working towards the other. Held the sander at an angle with the "fresh tape" leading edge lifted slightly. This would heat up and push the gumpy residue towards the direction of travel. When enough of a sludge line was formed, would "jelly roll" the sticky material with finger tips and remove. Was able to do about a foot at a time. Blunt force instrument but did a great job. Cleaned the edges (which are translucent) and prepped the surface with acetone. Will reapply using two 1/2" strips of 3m double sided tape, leaving the paper on the outside of the tape which can be slid back as we go when reapplying. Had we known about the Gorilla tape, would have used that but had already ordered the 3m stuff which, for better or worse, was what Oliver used on the original job. Spoke to someone in the shop there who thought it was likely that the surface had not been properly cleaned before original application. Will prep the surface on the trailer with denatured alcohol before reapplying - then cross our fingers.1 point
-
I received the replacement/upgraded part today and it took about 30 minutes to swap out. Turned everything back on and flipped every switch previously causing issues and it works great no noise at all1 point
-
David, Thanks! Going to test the system very soon, too!1 point
-
You think it's hard with the regular beds, try it with the raised beds. Back in 2015 while sitting out in the AZ desert on my first long boondocking trip, I didn't think of a deck plate, still too much trouble, but of installing motorized valves. All the valves move in concert, flip a switch one way--Boondocking Aux Fill, Flip it back--Normal operation. Don't leave home without it.1 point
-
Read my posts in this thread1 point
-
Please post up photos of delivery day!1 point
-
I had a brief look at an LE2 heading westbound through Redding, CA today a little before 1PM as I was driving home from shopping. I had to turn right as the Ollie was continuing straight, so I didn't have time to notice anything specific other than that it had dual awnings. I didn't notice the tow vehicle either. Olivers are rare in northern California (Bigfoot sightings, the critter, not the trailer only slightly more rare), and this was the first I've seen in town in three years.1 point
-
Hey everyone, we are trying to put together a trip for the CGI team to travel to East Tennessee and surrounding areas in August for ceramic coatings. If you are in the area and are interested in having your trailer coated, please reach out to us! Here is a link to our website for more information about the coating, process, and pricing: https://www.cgidetailing.com/olivertraveltrailers We look forward to hearing from you, thank you!1 point
-
I also have a 2017and have experienced this exact same noise off and on for years. Just last week. I contacted Progressive Dynamics and they told me that they have made upgrades to the PD4045 KA converter and I needed the upgraded part PD4045CSV which I ordered fromBOAT & RV Accessories it costs about a buck eighty1 point
-
When I added one in 2017, it was also too strong. I moved the magnet from the outside of the dinette seat to inside and it works perfect, plus you can’t see anything on the side of the seat, just the white magnet on the bottom of the door. RV Door Magnet on Amazon Mike1 point
-
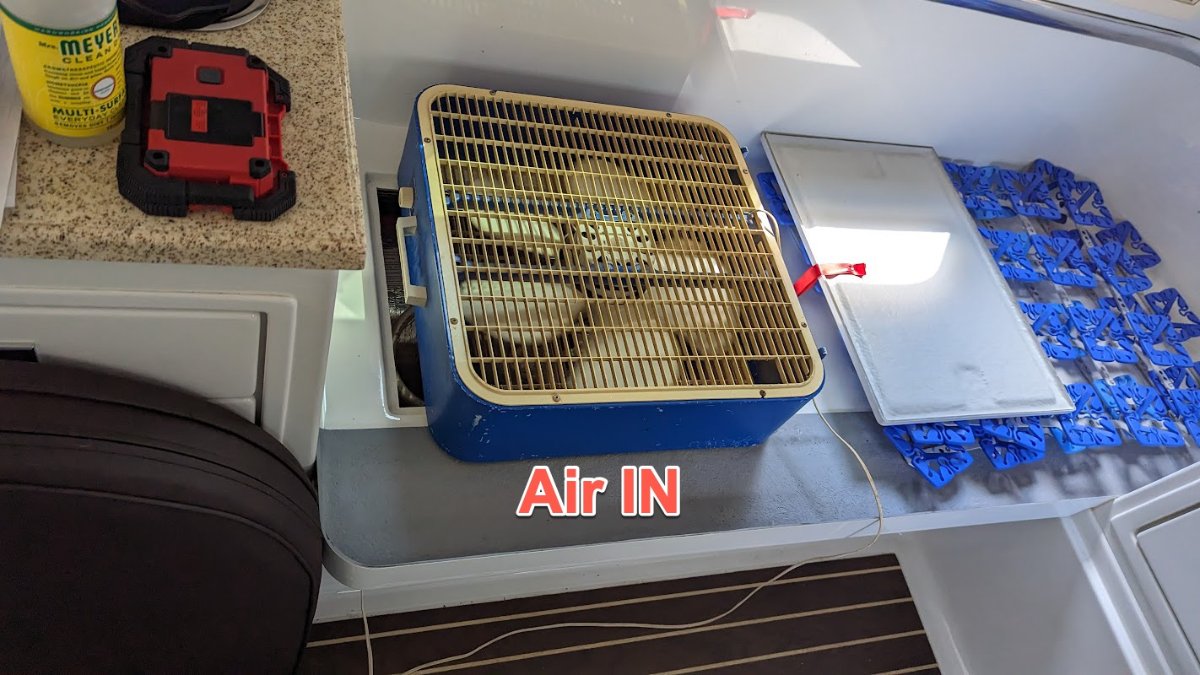
I thought I had posted something about airing out the hull using a fan, but that was nearly two years ago and I can't find the thread, if there is one at all. I wanted to update my findings on hull 110 (2016), which I purchased used in 2021. I had always noticed a "funny" smell from the trailer, especially from within the hull area. Not a horrible wet smell, but maybe more of a mechanical, glue-like smell. Well, even today the trailer still smells MUCH better, even after sitting in the sun all last summer. The inner hull is still not nearly as bad as it was when I purchased the trailer. I think Oliver, or more efficiently, the new owners, should air out their hulls a few weeks after they get them. Some owners get their new trailers so fast that I bet glue is still curing upon pick-up. This is what I do. A 24" fan blowing into the passenger side bed hatch with the dinette hatch open, tyically the one closest to the bathroom (not pictured), along with all windows open and roof fans running at least on low. Try it, see if it improves the hull smell, even on older Olivers. Good luck. I ran mine for hours on a nice sunny day the first time. I'm only showing the electrical hatch open, as that's where I was working replacing the CO detector today. 😉
1 point
-
there are a ton of these available HERE Bill1 point
-
Roger: Where did you obtain the dial dimmer switches for the Porch Lights and Outside Courtesy lights?1 point
-
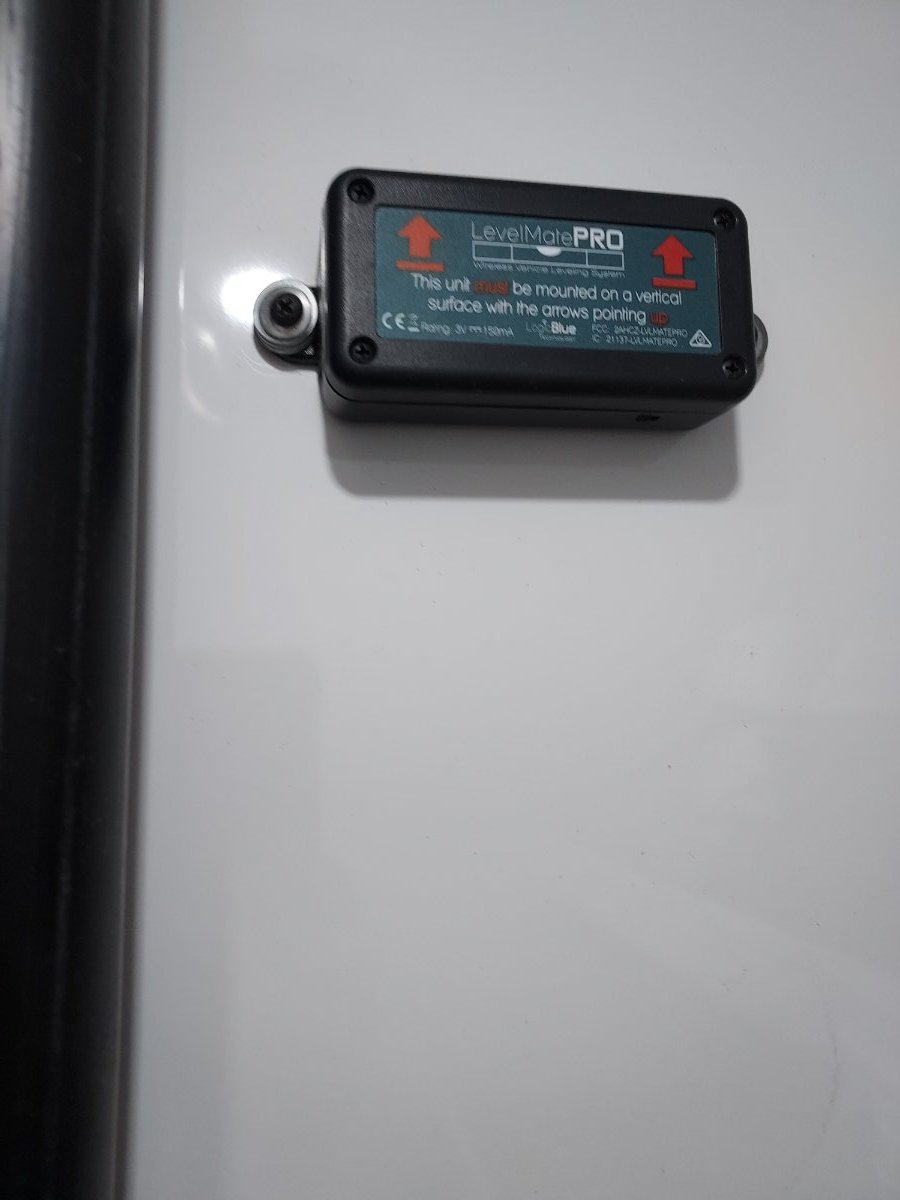
I use Velcro to install in the dinette seat on the wall adjacent to the bathroom. It doesn't need to be visible and can be remove to install new batteries.1 point
-
Another option inside the closet: the wall between the closet and the bathroom. The bath vent that runs through the roof is visible on the left side of the photo. Because that wall between the closet and the bath is thin, to avoid penetrating the bathroom side of the wall, be sure to either: (1) use washers, as I did or (2) attach it with double-stick tape or Velcro. In hindsight, it would have been easier to use double-stick tape.
1 point
-
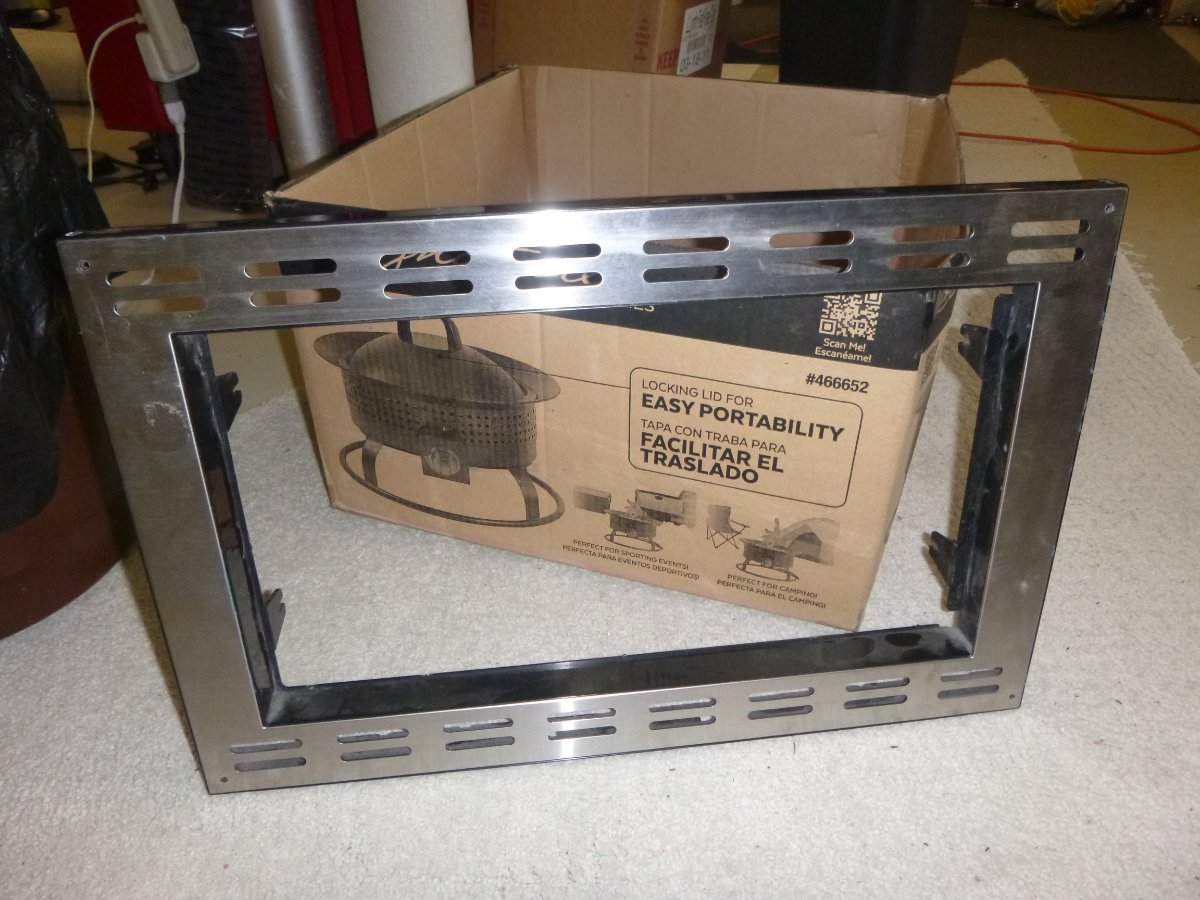
If your microwave trim is like this one then it actually does not "hold" the microwave in place - it is basically just a trim piece.
1 point
-
I've read 5 years or 100k miles. I agree, pretty good.1 point
-
I wrote to Dexter today and they said the bearings have a five year warranty. I will still ask Jason, but at least the warranty sounds reasonable.1 point
-
To make absolutely certain - I'd ask Jason Essary (Oliver Service Dept). Bill1 point
-
I personally think that this is a good rule to follow even if you have the "standard", "old style", "regular" bearings. Bill
1 point
-
Correct. 2022 models of LEII trailers are equipped with Never Lube axles. I specifically avoided purchasing a 2021 model to avoid the frequent maintenance required of the earlier bearing type. I am relying on Oliver product documentation that my trailer (Hull 990) is so equipped.1 point
-
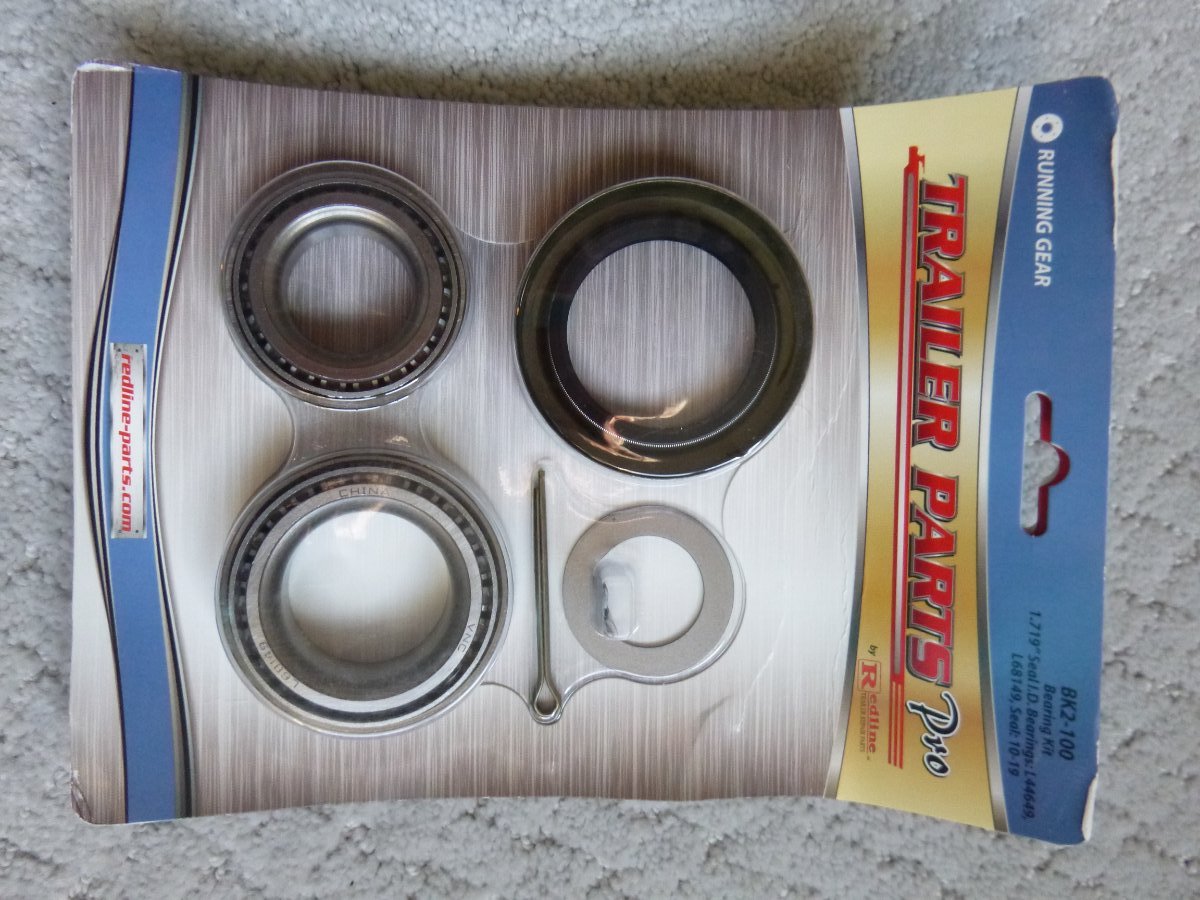
Good info, but at least you avoided a potential major catastrophe. What I don't understand is why, well into the 21st Century we are dealing with this sort of bearing to begin with. How difficult is it to supply sealed bearings like all the autos and trucks manufactured over the last 20 or 30 years or more. This is such and outdated technology. Can you imagine if you had to service your tow vehicles bearings this often. Not looking forward to it, but with all the discussion lately on bearings I am close to doing this operation myself.1 point



























-
Recent Achievements
-
















