Leaderboard


Popular Content
Showing content with the highest reputation on 01/13/2024 in all areas
-
Additional Update: I received a call from another person at Truma to follow up on the problem and repair (this individual called from the office in Indiana, the one I'd been dealing with previously was based out of Tampa/Lakeland area). He had viewed the video, I described the course and outcome. He informed me that they were aware of the collar nut which fastens the propane source to the burner assembly not being torqued to the appropriate level on some of the units that left the Truma factory and that they thought they had addressed this issue. He informed me that, "Out of the multiple thousands of water heaters they have produced, only a handful, less than a dozen, have had this problem, and they thought they had fully addressed it." He also informed me that they have been in touch with Oliver since it seemed to happen more often with units that were installed in Oliver's trailers. He told me (Truma) would like to see the unit and evaluate the repair themselves and suggested I bring it to the Lakeland FL location when we head north at the end of April. I told him that when this was initially discovered and I started talking to them last week about it, I was about 2-3 hours away from that facility and was happy to head over there (albeit in the opposite direction from our destination at the time). I actually started heading that way when they called me back and said they could not see me until the end of March due to their current schedule and work load. the gentleman from Indiana scoffed at that and told me that they will make the time to see me whenever I can get to them and to just call him when I'm heading that way so he can arrange me getting to the front of the line. (Currently we're settled in in Key West which is 5-7 hours away from Lakeland, traffic depending). For now, the unit is working well, no evidence of gas leaking. When we start heading north in April we may make the effort to swing by Lakeland since that will add less time to our journey north then stopping by The Mother Ship in TN. I'll update as needed. TAKE-HOME SUGGESTION: If you're so DIY inclined, I recommend removing the 2 star-head screws holding the bottom of the burner assembly in place, slide the burner assembly out enough to get a wrench on the collar nut (where the gas line turns upward 90-degrees and attaches to the burner assembly with a compression fitting) and make sure it is good and snug. I've reached out to Truma again and asked for their recommended torque for this nut, I'll update when they reply.8 points
-
I'm posting this in case anyone else encounters this problem: We were traveling back east from Hohenwald in a driving rain storm through GA and upon setting up at the campsite could not get the Truma furnace to heat; the error E 5 H was displayed on the digital display panel. The Truma documentation that I have did not list this particular error code. The furnace had been operating flawlessly prior to the rain storm so I suspected that the problem had to do with moisture preventing the furnace from igniting. I took a hair dryer and blew warm air up into the Truma exhaust vent to dry out any accumulated moisture and that fixed the problem. If anyone has a detailed description of the E 5 H error please post it here as I could not find a description online or in my documentation.4 points
-
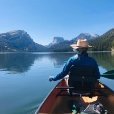
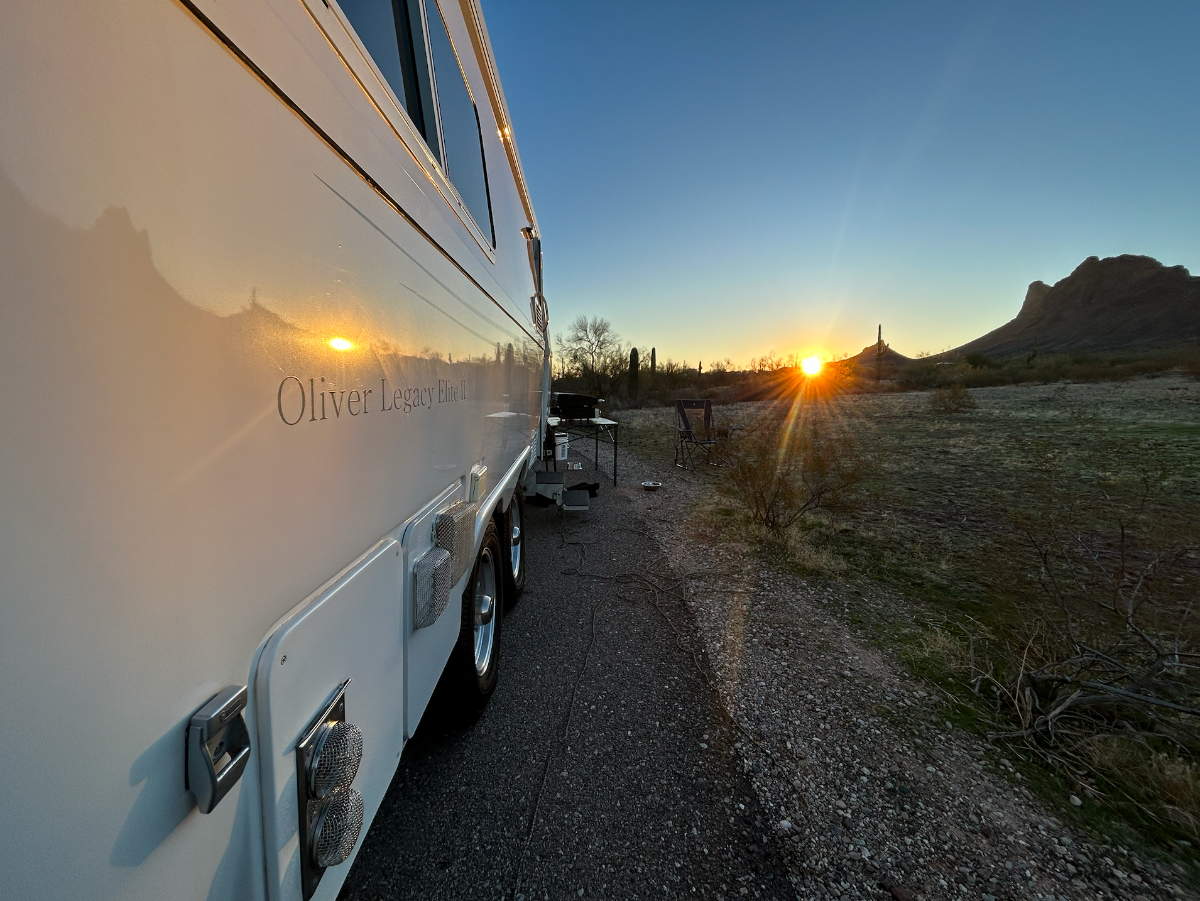
Where's Ollie? Well, this one's at Picacho Peak SP near Tucson enroute to "The Q" after breakfast this morning... Sunset last night: Sunrise this morning: The next sunset will be at Quartzsite later this PM... Cheers!
 4 points
 -
I sleep with my head by the nightstand, but when reading in the evenings I sit in the other direction. I like having the nightstand nearby for my glasses, water, phone, etc.4 points
-
Funny thing about that - my sleeping bag really doesn't look much different no matter how much time I take to "make it up" or direction I place it in.😇 Bill4 points
-
We both sleep with our heads at the rear, I like laying in bed and seeing more of the beautiful interior space I paid for! When sitting up with the bed and sham pillows at my back, I find the corner wall curvature very comfortable. As for the nightstand, items placed and/or being charged on this table are well within reach, and I really like having my iPhone handy, as well the clock display visible whether laying or sitting. We wouldn’t be able to use our Lagun tables in the same manner if our sleeping positions were reversed; they are placed above the foot of our beds at night to stage the sham pillows and extra bedding. Also, the window view from bed is generally better and more private due to the wall recess at the rear. This is what we are accustomed to and have found no reason to sleep any other way; admittedly, the elbow issue is ‘real’ and I completely understand other’s views regarding the matter, but for us the pros outweigh the cons. Lastly, when the beds are made-up, the overall look of the interior decor is so much more appealing!
4 points
-
We sleep with our heads at the galley.4 points
-
A pretty neat video on heat shrink self solder water tight butt slice connectors. Patriot🇺🇸3 points
-
Heads to the front. We like being able to see the tv. The back just seemed too cramped I sleep on the curb side, CPAP sits on the stove glass with 12v plug right above. CPAP put away in the closet during the day.3 points
-
@AlbertNTerri a very solid report and glad you have your issue fixed. Thank you for letting us all know. What I find really disturbing is that Truma knowingly admitted to you that they were aware of the collar nut not being properly torqued which resulted in a gas leak and a fire. Wow, very disconcerting. At a minimum one would think that Truma would have initiated a safety recall via serial number and address this serious fire hazzard. This could have really turned out to be a fire that might have completely destroyed your Oliver. I am so glad it did not, and you took all the appropriate steps to prevent further damage. Again, so glad you are both safe and your Oliver did not suffer and damage as far as you can tell. Hopefully Truma will do the right thing and immediately initiate a safety recall to address the torque issues on ALL serial number units with improper torque specs. Patriot🇺🇸3 points
-
We started with heads by the nightstand. After a couple of years we switched to heads by the kitchen. We did that a few years and now we’re back to heads near the nightstand. We always made the beds with the pillows at the nightstand. Either way works for us. We’ve also switched to using sleeping bags the last couple of years, easier than making up the beds each morning. We still have sheets and a bedspread we just throw our bags on top to sleep. Simple is good. Mike3 points
-
Those things are great. Have used them to fix brake wiring in the past.3 points
-
Steph and Dud B, I originally used a 4x4 vinyl fence post (may have been a vinyl cover for a 4x4 post). Just make one cut on opposite sides so that there is a short section and a long section on the opposite sides. That makes two shelves. Cut to length to suit and I used maybe four Command strips to attach it to the wall. Mine have been attached for about six years. Others have copied the idea and made a great improvement by using a vinyl cover for a 6x6 post. A much better choice as they can hold shoes better. Others have also added a small bar type of drawer pull at each end which keeps shoes from falling off the shelf.3 points
-
We feel exactly the same way you do about the way the trailer looks with the beds made as in your photo. But we wanted to sleep with our heads toward the galley so that we could watch the television. So, we compromised, We sleep with our heads pointed forward and place the pillows aft when we make the beds. And, strangely, if either of us takes an afternoon nap, we do so with our heads at the rear.3 points
-
Hi All - Our Oliver - Hull#1491 started production last week. We will pick it up on the 12th of March, and plan to take about two weeks to get it back home. In the middle of this adventure we have our anniversary so it should be a pretty memorable adventure. We have zero experience camping anywhere but in the West, so this is a chance to get a little more exposure to this incredible country. We do plan on going over to the Great Smokies as the photos we've seen over the years have been so compelling. After that though, we have no idea on our route back, except we should keep further south to avoid winter weather. We'd appreciate any advice or suggestions on routes to follow. We will likely use Harvest Hosts and any open National Forest or easy boon docking sites. We've got a 2023 F-250, so we shouldn't be very limited except for skills in reverse.... We also have two small (11lb) dogs who have their own unique points of view about camping, cars, and travel in general. - Doug & Jill2 points
-
Our trailer is 8 years old. We had it ceramic coated by the CGI team last year and the fiberglass looks as good as or better than new. Unfortunately, the outlet covers on the 110 outlet and back jack switches had turned yellow. The plastic chrome bezels around the tail lights had lost their shine. So, while this isn’t an easy “mod” it is an easy and inexpensive maintenance project. I ordered new Furrion outlet covers and six new chrome light bezels and had them all replaced in about 15 minutes. All are available on Amazon. Furrion Outlet Cover Light Bezel Old and new. This looks much better than the yellow version. Old and new. New bezel on top, old bezels in the middle and bottom.
2 points
-
We actually went about 30 miles on the Natchez Trace when we went to the Oliver factory. 30 miles of mowed lawns up to the forest. Some nice turnouts. We got a book on the park and have it high on the list.2 points
-
Another vote for heads to galley, and others have hit on our reasons, as well. Another plus for heads to galley is the ability to use the Froli adjustable headrest under the mattress; this headrest, coupled with their mattress support, have reinforced the heads to galley position best for us.
2 points
-
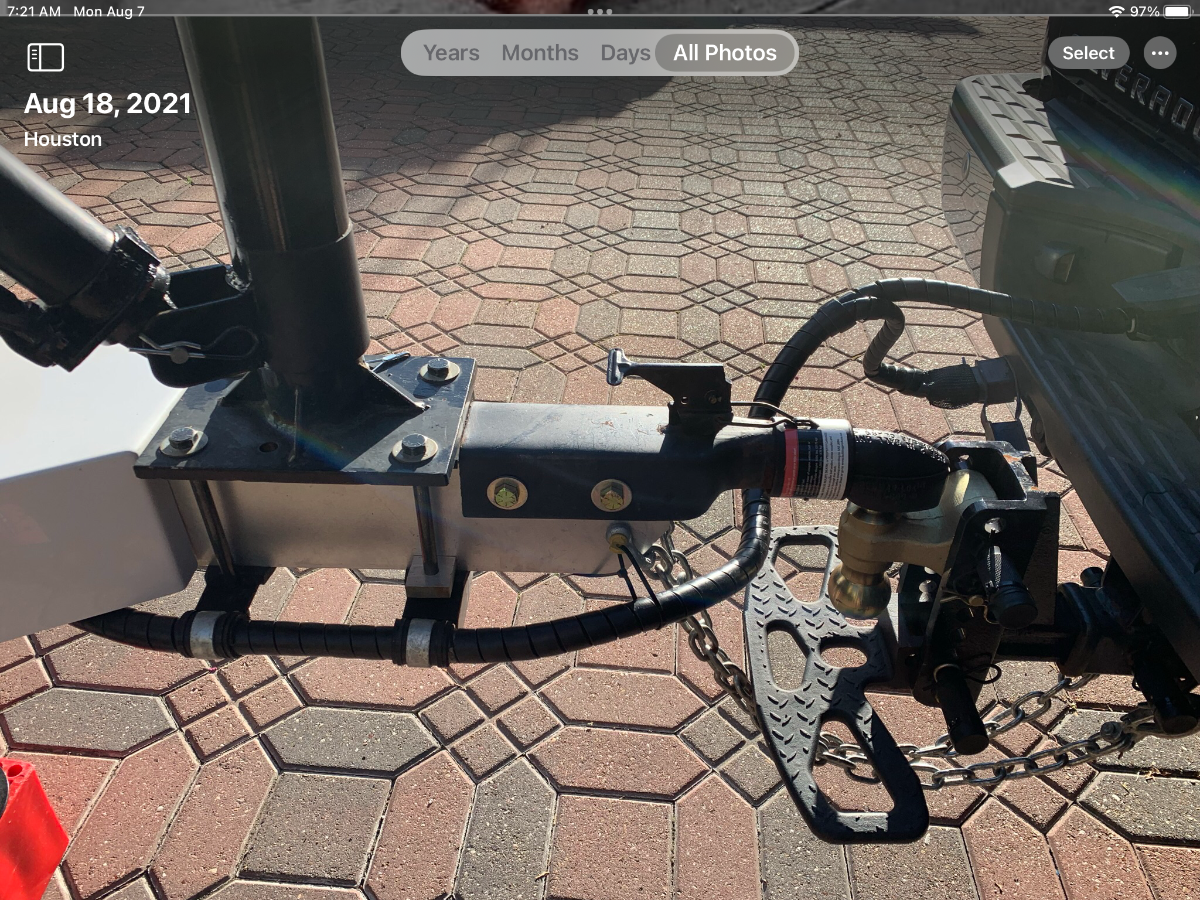
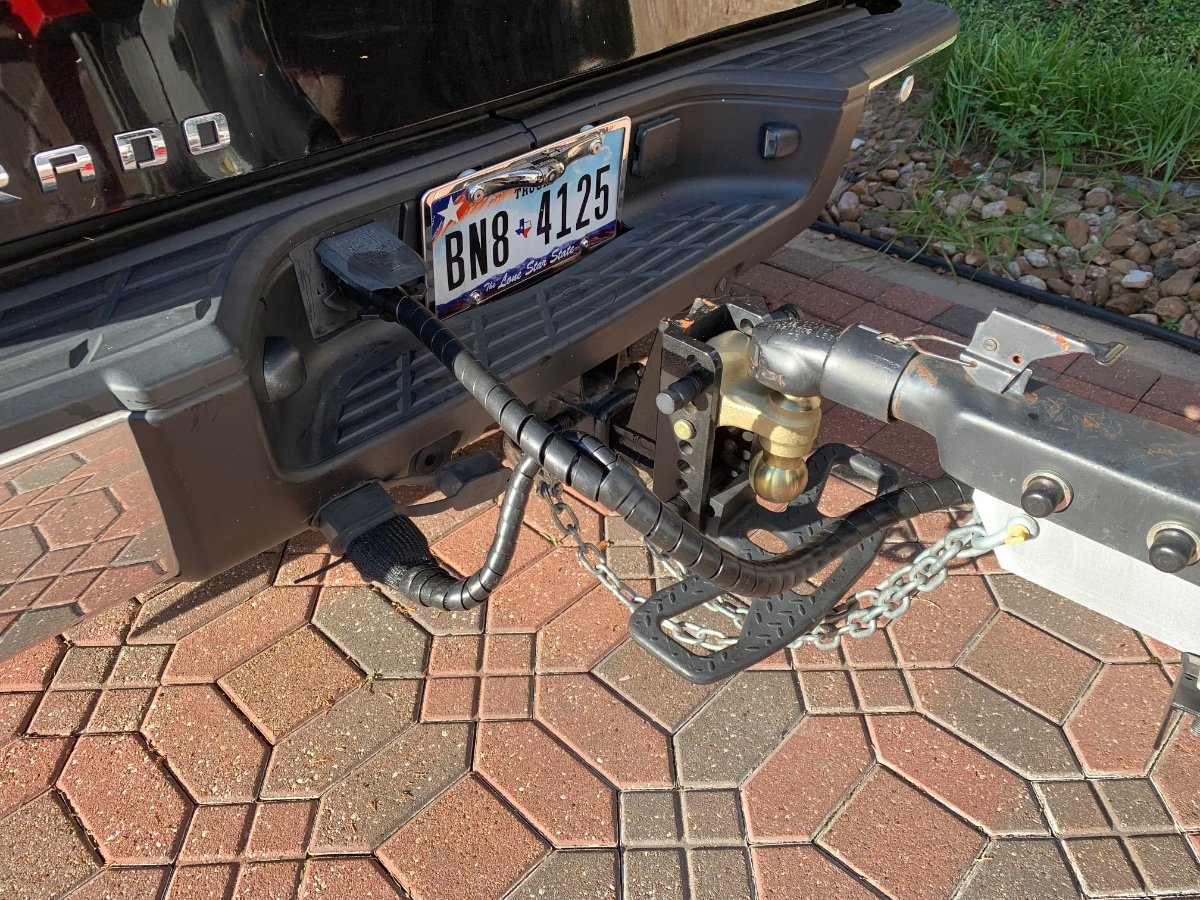
Nice install! For general information to those that may not be aware, Anderson has an Environmental Boot that can be used at the bumper mount, as well as the DC-DC cable connect on the OTT; this ensures a waterproof connection when in use, and protection from dirt and moisture when disconnected.
2 points
-
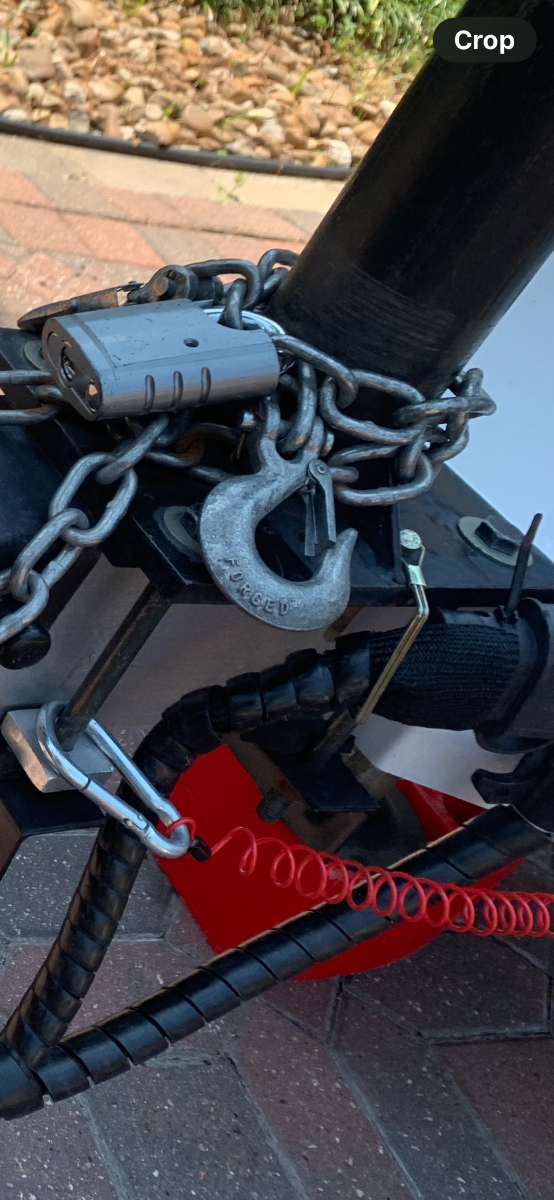
Hull 505 - Reports back Our SN for the failed unit was Hull 505 - SN DLE 60C - 29289053.. Another SN reported is.... Hill 1125 - S/N DLE 60C - 32153014 There were other reports before and after hull 505. Maybe Truma needs to reveal and report all suspect unit S/N to NHTSA?2 points
-
Many of the COE campgrounds at Land between the Lakes are closed for the winter. Our favorite is Canal COE and it is closed in March. You will need to check the others. Smoky Mountain National Park is one of our favorites. You will still have cold temps and snow in the mountains in March. I would suggest taking the Natchez Trace Parkway from Hohenwald to Natchez, MS. Plenty of campgrounds and State Parks along the way. That heads you South to warmer temps. Head into Texas with unlimited State Parks and Big Bend National Park.2 points
-
I will preface the following by thanking Mike and Carol for a segue into the issue of bedding variables. Hopefully it will be helpful to some or at least entertaining to others. We make our twin beds in such a way that eases this somewhat difficult task and doubles the layers of cover to better dial in personal comfort; works great for our ‘he’s hot’-‘she’s cold’ dilemma! It all starts with proper planning and prep, mostly done in the convenience of home when the bedding laundry from a trip is being done; sheets, pillowcases/shams, blankets and throws. I’ve grown accustomed to that ‘fresh’ scent opposed to the ‘seasoned’ smell of my old camping/hunting bedroll, but I’ve digressed! Once laundered, the fitted bottom sheets are folded in the usual awkward manner; however the flat sheets are each folded in half lengthwise, laid out (as if on the Oliver twin) to initially fold the bottom up and over to the desired bed length (foot of bed where tucked in to wherever you like the sheet top to be when made), then subsequent folds of the remaining in smaller lengths to complete the process for stowage; the blankets are folded in much the same manner, but rather than a half fold allow the top portion a bit more width for aisle overhang (more on this later). Along with folded pillowcases/shams, throws and pillows, all is zippered up in a clear bag and placed in the Oliver for future use. If a second set of sheets were used on a trip, they are folded in the same manner, but stowed at the closet upper shelf until next needed. We rarely completely make the beds prior to departure, but at minimum the fitted sheets are installed to protect the mattresses in transit. ‘Bed Scrunchies’ are your friend, especially if one uses standard twin sheets rather than the custom ones that better fit the curved mattress corner. ‘Why all the hoopla?’ you may be thinking, well let me explain! When it comes time to make the beds, your uniquely folded flat sheets are laid out ‘head to toe’ with the ‘lengthwise’ fold against the fiberglass wall, and if done properly that ‘initial’ fold you made will be at the foot of the bed. Now simply take that generous length of folded sheet and lift the mattress enough to tuck it into place; do the same with the blanket. Voila, the sheet and blanket ends are firmly anchored and the bed is almost made, less the pillows and optional throw, if desired. ‘Now wait a minute, what’s the big deal?’ you may be thinking, well let me explain! Traditionally, RV bed covers are tucked in at the bottom (easy), as well as along the wall (not so easy). A standard twin sheet/blanket is way too wide for the Oliver’s bed size, thus resulting in unruly bulk, and a lot of reaching, bending and tugging to tuck the excess away in good order. Many resort to altering bedding or making do with non-standard sizes, and I get it. However, I’m a simple man (my wife is laughing), but innovative! I now have two layers of sheets and two layers of blanket to crawl under, allowing me to peel off consecutive layers, as necessary. But there’s more! The crux of the matter is the simplicity and ease of effort in straightening the bed covers, whether during the night after getting up or just in and out of bed in the morning, and of course making it up for the day. ‘How is that?’ you may be thinking, well let me explain! If laying or sitting in bed, by grabbing and aligning the top corners of the sheet while slightly lifting and pulling, they will self-make; the blanket can then be done is like fashion. Because each are snuggly tucked and anchored, you can pull as taut as you like for the desired result. Making up the bed is just as easy, only from a standing position and in a jiffy! The proof is in the pudding!
2 points
-
My wife and I started with our heads to the galley. This makes the transition from watching TV to sleeping very easy. However, we switched to heads to rear as it's easier to swing our legs out without interference from the nightstand. Those mid-night restroom breaks helped us realize this. Fyi: We have suction handles (from Walmart or Amazon) that we install above us to grab and more easily assist out of bed. (Have one in the shower too.)2 points
-
FYI: The Victron instructions for the unit recommend mounting as we did instead of flat - they also recommend at least an inch of clearance behind the cooling fins for obvious reasons. We used aluminum angle for the mount, easy peasy. Did the same for the Cerbo S GX unit which now resides under the forward hatch under the port-side rack. Yesterday from Elephant Butte SP, NM to Lordsburg, NM (about 160 miles) - the charger moved the departure SOC of 76% up to 100%, this was sooner than I had calculated. Heat build-up wasn't an issue as the IR temp gauge measured 105F on the cooling fins at an intermediate stop with engine running in park during bulk charge mode. Cool gear, Victron, IMO.2 points
-
Nice creative and thoughtful approach - good work. But, THIS kind of thing probably shouldn't happen in the first place. I'd make sure that both Truma and Oliver Service know about it. Bill2 points
-
Creative solution! Glad it work out so well. GJ2 points
-
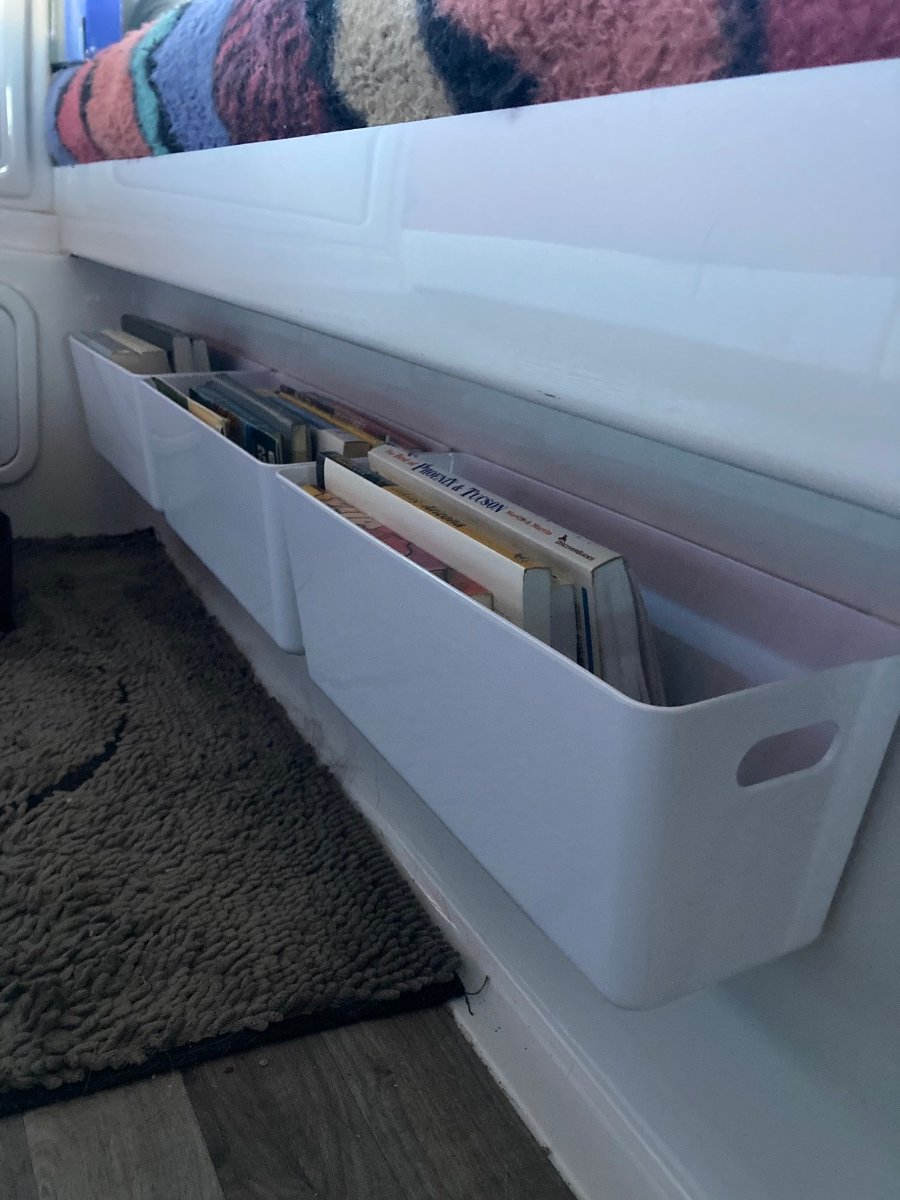
Tired of my books scattered all over the trailer and staring at the wasted space under the streetside twin bed “wing”, I installed three plastic bins that I found at Target ($6/ea) and installed using command velcro strips so they can be easily removed for cleaning. Now my books have a home, are easy to access while in bed and don’t fly around on rough roads. Bin dimensions/ea are roughly 5”Hx5”Wx14.5”L. I installed them about mid-way up the wall under the bed so there is still toe room underneath and books can still be removed easily.
2 points
-
We bought a couple of these but haven't installed them yet. Camco Camper/RV Drink Holder | Features Adjustable Space-Saving Design & Holds Almost Any Size Mug, Cup, Bottle or Can | Extra Cup Holder for Cars, Trucks, RVs, Vans, Boats, and More | White (44040) https://a.co/d/ayMR3mZ2 points
-
I remember those days. Also, when you could pitch a tent in the woods and not spend an hour collecting trash someone left behind.2 points
-
Bill, we have 20 year old sleeping bags. They don't look elegant like some pictures I have seen here. We talk about getting more into this century, but it's already nearly 1/4 way done, so why rush things. John2 points
-
This is exactly what we do including the nap in the wrong direction. lol2 points
-
We both sleep with our heads towards the galley. 😴 We really sleep great on our 10” memory foam mattresses.2 points
-
Originally I/we slept with our heads at the rear. However, with the corner radius and the nightstand at the rear I/we found that the room for one's elbows was diminished. So, we "flipped" and now not only are the elbows happier but the risk of cracking the inner hull has been lessened😂. Bill2 points
-
Update (and resolution?) We're currently in Key West until late April. The soonest Truma could see us at their facility in Lakeland FL was in March. Oliver sent a list of places they have blessed, the closest is about 5 - 7 hours north (traffic dependent) but they (La Mesa RV in Port St. Lucie) won't work on an Oliver since they don't sell them, so the next closest place is further than that. I discussed the problem with a local mobile RV repair guy who was highly recommended by a friend (name and address below), he took a look at it, reached inside and discovered a loose fitting, he pulled out his tools and in about 15 minutes he had the problem diagnosed and fixed (see below). $300 and he was on his way. A bargain! I Called Truma and Oliver to update them on the repair. Mike from Oliver said he would likely be able to mail me a check for the $300 later this week. Problem: Looking at the Truma from the outside with the cover open, the gas comes in from the right, goes into the burner assembly then makes a 90-degree turn upward and then attaches to the assembly with a large (about 3/4 inch) collar nut to hold the compression fitting in place. The collar nut had come loose and was freely spinning. You can't see it from this prospective, to access it there are two star head screws on the bottom, once removed the entire burner assembly is able to be slid out enough to get a wrench on the collar nut. Tighten it down, return the burner assembly to its home position and Viola! The tech hypothesized that the collar nut was never tightened appropriately at the Truma factory. Since there was no evidence of burned wires or other burn damage (see videos in the first post) we thought is was fine to continue using the unit. If there had been any concerns of damage then we would have had to replace the unit, Truma had already agreed to replace the unit since it was still under their 2-year warrenty. Fortunately the Gas fire ball only occured 2-3 times and the odd sound it was making prompted me to take a look at the unit. After seeing the "fire in the hole I opted to allow it to occur one more time (this time with a fire extinguisher in hand) so I could get a video of the symptom to send to Truma, Oliver and share with all my friends. I suppose the Take-Home message should be: if it's not looking or sounding like it has in the past, something has probably changed, go take a look at it, whatever it is.... RV Mobile Repair in Key West, FL: I highly recommend Vern for any RV concerns if you are on the Florida Keys. He's been living there for about 2 years, moved from Michigan. He has a very impressive tool set-up in the back of his pick up, a secure topper with tool boxes all the way around, very well organized, and clean. He is polite, responsive, knowledgeable, he arrived when he said he would and cleaned up after himself when he left. He apparently worked for another RV repair place in the past and is making a go-of-it on his own. I'm glad to support his efforts and will absolutely use him any time I have any issues. This is however the first time he had ever laid eyes on an Oliver or a Truma water heater. He was excited to see the Oliver first hand since he'd heard of them in the past and had seen them in pictures. GBoyz Mobile RV Repair LLC. Vern@gbzllc.com (269) 370-3905 65821 Overseas Hwy Long Key, FL 330012 points
-
For those that have a bit of time on their hands AND want to save a couple of bucks too: Take those "yellowed" outlet covers off, clean then really well, wipe with alcohol and then given them a couple of coats of Krylon white spray paint. Let dry overnight and put them back on. I did mine this way about two years ago and there have been no signs of the yellow reappearing. Bill1 point
-
We will definitely check. We are used to cold and weather. We live on the side of a mountain in Wilson, WY. Had a blizzard yesterday morning and a little over a foot of snow. But not in an Oliver!1 point
-
Lots of eastern campgrounds close for the winter, including March, so check in advance. As @John Dorrer suggested, heading south will increase your choices. (So envious of those who live in the South and West, with all your camping opportunities.)1 point
-
You Tremor guys are really a tough bunch! Usually those bears get a little touchy when it comes to burgers!😆 Bill p.s. DougS - If you get anywhere near Asheville on your trip an you need help, just yell.1 point
-
@Mountainman198 great idea? Could you please provide a link to the bins? I had no luck searching Target's website. Thanks, Don1 point
-
Great mod, brother! Thanks for sharing this with the OTT family! BRAVO ZULU!1 point
-
What a great idea. This is a good space for shoe storage as well. We implemented this after @mountainoliver showed us what they did.
1 point
-
@Mountainman198 Creative thinking on book or general use storage, nice job!1 point
-
Hello, fellow Texan. Longview, here. Delivery for me was spot on. Mine was on Tuesday which is a really good day to do the shakedown since Oliver will be open until Friday. I had no problems with mine but that might not be typical. Allowing two days, one at camp Oliver and another at a local campground will give you the chance to set up, break down, pull it (seating the brakes), set up and break down again.1 point
-
If there's space at Camp Oliver, spend two nights. Run absolutely every system the next day and night. If you have a bit of time, stay a few nights more at one or two of the beautiful Tennessee state parks in the area. A little more shakedown/gain familiarity time is great, and still close to Oliver if you need any advice or assistance.1 point
-
Like most of us we’ve experienced the type that seem to go out of their way to disrupt the peace and quiet without remorse. I like to wait till others around us are packing up to quickly blow off the awning and then put it away. 👍1 point
-
So, are you saying that you will not be blowing off that awning at 0 dark 30 just before getting that early start on a long drive day?😁 Sure do wish that ALL fellow campers were as considerate as you are! Bill1 point
-
Thank you @Ollie-Haus & @Steve Morris. I am not familiar with the Xantrex app yet (so far we’ve only downloaded the Lithionics app. But I will research that today. Sounds like it would solve our issue for sure - thanks again for the advice.1 point
-
Thank you Bill and nice to meet you. Boone is such a beautiful area, one of our sons attended App State. As for Michigan, my husband and I grew up in Lansing and now have a home near East Jordan up north. We just picked up our Ollie on Monday so the batteries are still over 90%, we may just be that we had the wrong adapter or accidentally left something on inside. Thank you for the thoughts though. We have a lot to learn about our new Ollie 😉1 point
-
@Cindy TownsendThis is most likely your solution. I've made this system change back and forth a few times. With the Xantrex app on your phone it only takes a few seconds. You have to be in the camper and connected via bluetooth. The change is made in the settings menu. You can change that setting pretty low as you are only float charging the batteries all winter. Sometimes a shore power GFI doesn't like what it sees when plugged into an Oliver charging system. I've not experienced this personally though.1 point
-
Welcome! There is an option on the Xantrex app under "Settings" that allows you to change the input Amp draw. When plugged in here at home, I set mine to 15 Amps, and have never tripped a circuit breaker. I'd tell you the exact steps, but mine is not plugged in, so the Xantrex app can't currently see the settings. But the name of the setting is something like "Grid Load" or similar. It is likely set at 30 Amps. Just remember to change it back when you go to a campground with 30 Amp supply.1 point


-
Recent Achievements
-


")


")