Leaderboard


Popular Content
Showing content with the highest reputation on 03/27/2024 in all areas
-
We have our first grandchild and his name is... Wait for it... Oliver! (He's going to love our trailer when he's old enough to read!)8 points
-
Just FYI: Our Alcan springs arrived this afternoon - just from observation, definitely a big difference in quality between the Chinese-made Dexters and these new ones. Measured eye-to-eye dimension to verify 25.25" across the board w/3" drop - all good there. Planning to have D drive Casablanca around some of the rather "rutty" roads in the neighborhood with me in the back to (hopefully) get a feel for the "before and after" install ride inside. Spring R&R will begin in the AM - we'll for sure keep y'all posted on the effort... Cheers!7 points
-
Are all the cracked doors on 2017 Olivers? Me thinks maybe there’s something goin’ on with a batch of doors. I’ve had Lippert door leak problems on two different truck campers, so I’m inclined to suspect Oliver may have been the recipient of another bad batch. The campers were custom built pop ups made in California by a friend, and component quality has been an issue for him. This may be worth having a discussion with Oliver about their supplier.6 points
-
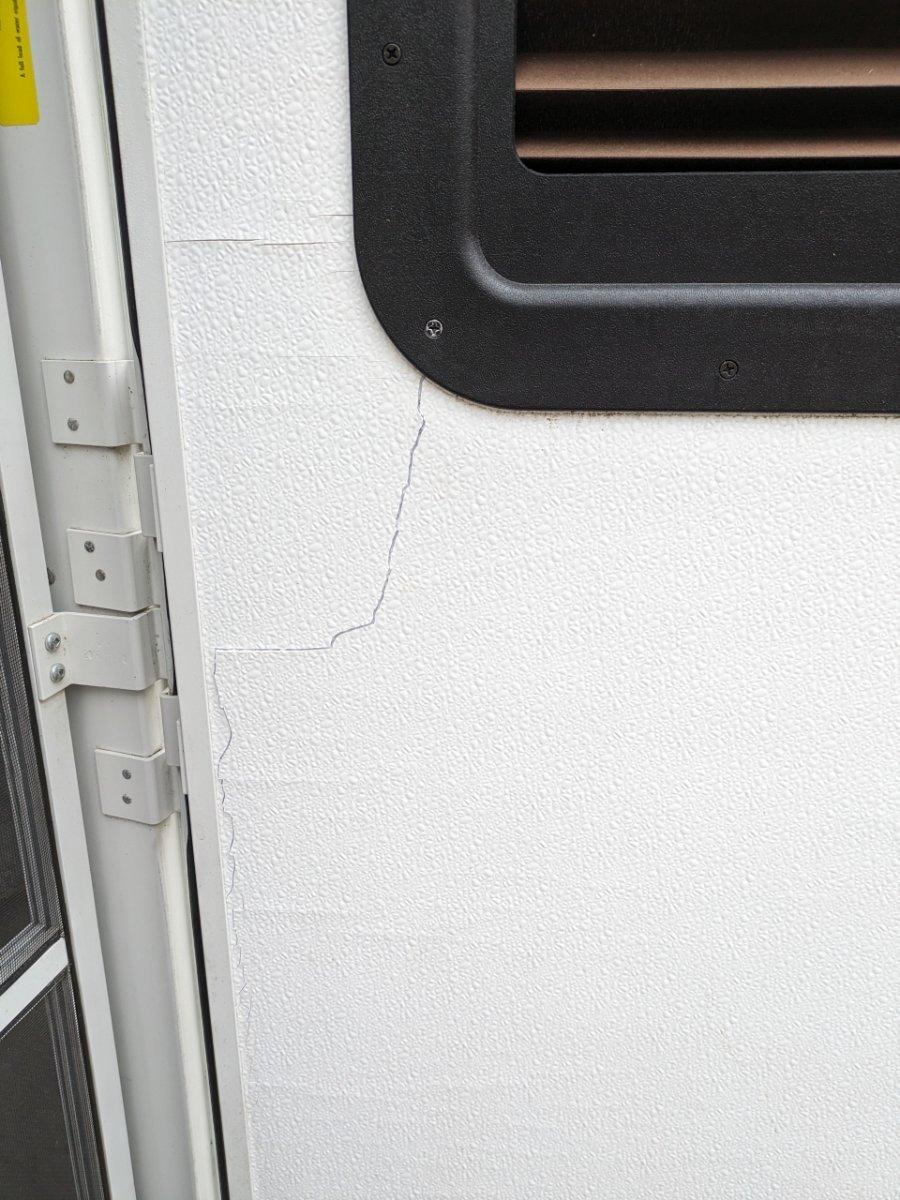
Looking at the photos of the cracks, it appears they all are located around the aftermarket window. That makes me wonder if the installation, in conjunction with wind, might be the culprit. I’d consider removing the window to see if there is excessive compression of the door materials due to the fitting of the new window. While the cracks are an eyesore, I’m not certain they’re catastrophic. Instead of duct tape, you might consider using Eternabond repair tape. Maybe first stop drilling the cracks to limit their ability to run. Edit: looks like Art and I were on the same page, same time.6 points
-
My 2017 LE2 door looks identical! I do not think wind had anything to do with it, but maybe sun exposure. It has puzzled me for several years and I haven’t really figured out how to fix it. The skin does pull the styrofoam apart, so I’m not sure if replacing the skin is the answer. I am leaning towards applying something to the existing skin, just haven’t figured out what. Mossey5 points
-
Like mentioned earlier, it looks like the door could have been caught by a wind gust judging by the crack being nearer to the hinges. Short of replacing the inner skin (which is totally doable, we've done one in a previous SOB), suggest finding both ends of the crack (under the window moulding and along hinge line) and "stop drilling" a 1/8" hole there. This process will stop the crack from getting longer. Its a foam-core door, so there shouldn't be any "draft" ambient air penetrating the inside crack from outside. We've got one a couple inches under our window moulding that runs horizontally for about 10". We "stopped drilled" the crack on @ScubaRx's suggestion after he saw it in Quartzsite last JAN. Good luck, cool maintenance/repair opportunity for you, @Steve-Gwenne - let us know how it turns out! Cheers!
 5 points
 -
Your profile shows a 2017. Even so, I'd open a service ticket. Those cracks look like the door was let go in wind, and stressed, to me. White duct tape will seal it for now. I'd guess a new door is in order. Imo.5 points
-
I started in photography back in the mid 60's when everything was manual. No auto exposure or focus. My first camera did not even have a light meter. Had to use a hand held one and set the camera's aperture and shutter speed from that. Manipulating either or both to create different effects. Bought 35mm film in 100 foot rolls and wound my own cartridges in total darkness. It was all black and white. I thought I was Ansel Adams. I even lugged a big 2-1/4 square camera and tripod to the top of Sentinel Dome in Yosemite to duplicate AA's picture of the old Jeffrey Pine growing there. Here's Ansel Adams original: Unfortunately, unbeknownst to me, the tree had died during an extreme drought three summers before despite the rangers best efforts of hauling water to the top every day to try to save it. So all I have to show for my trek up the dome is a picture of a dead tree. Oh well, it was a famous tree.
4 points
-
4 points
-
Our door has cracked all around the window area as well. Being the original owner I can say that our door has not been abused. I’ve seen a few other doors with the same issue as well. I’m guessing that this may be age related. I feel like this is definitely not an Oliver issue. The door is basically a thick piece of styrofoam with a thin fiberglass sheet glued to the outside and a thin sheet of plastic glued to the inside. Probably if you tried to peel the inside sheet off of the styrofoam it would damage the styrofoam. I’ve tried to figure out how to fix the cracking without having to completely replace the door, but probably will have to live with it.4 points
-
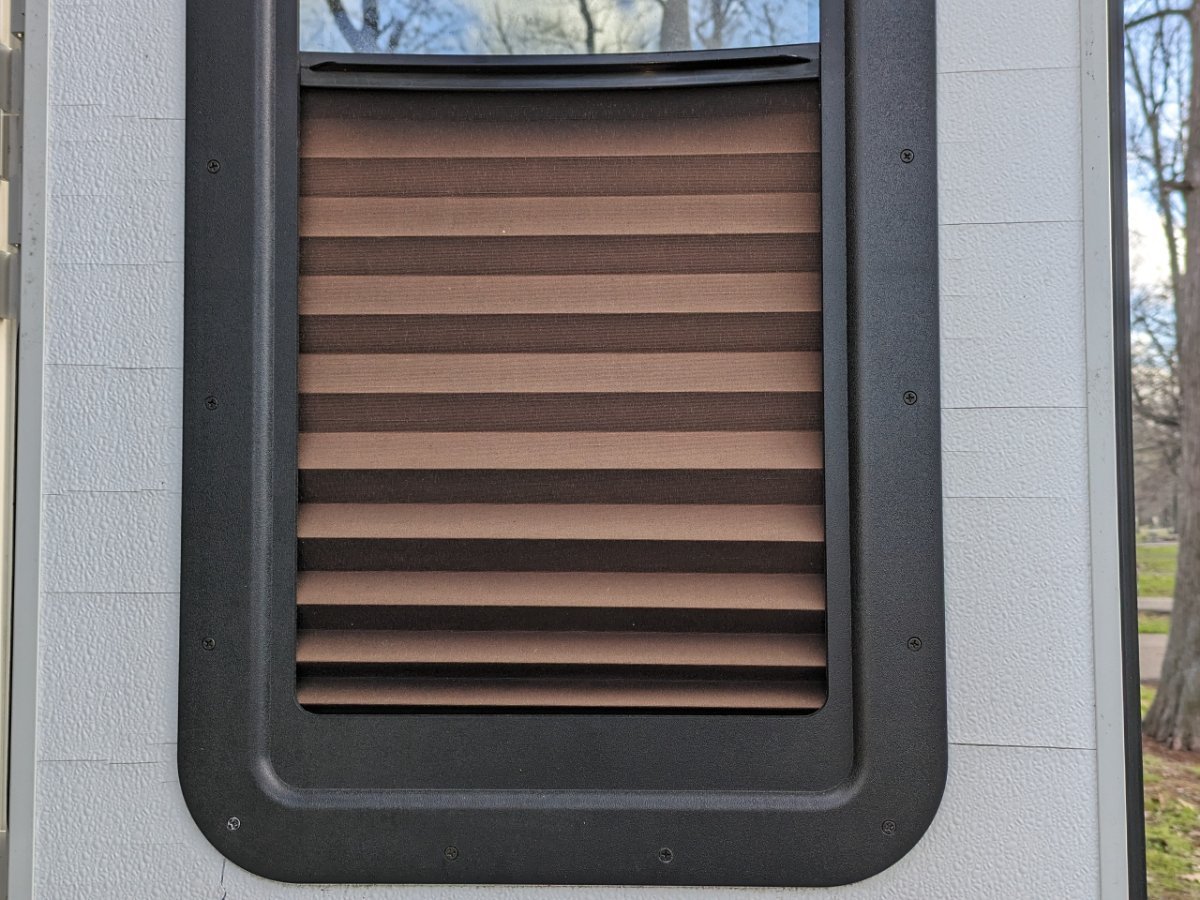
Several questions here - 1 - I've only seen one other door on an Oliver that had these same "symptoms". I believe that the owner replaced the door. 2 - All of the original doors on Olivers are NOT made by Oliver. I believe that Lippert makes them but am not positive. All doors originally come with "frosted/textured glass". There are a couple of "treatments" that can include replacement glass that is tinted such that it matches the rest of the windows (except for the bath) in the Ollie. 3 - I agree with the posts above that the "cracking" probably started with the replacement window being installed improperly. Add to this the black frame on the window would have different thermal properties causing it to expand/contract at different rates as compared to the surrounding white material. Add slamming the door or a wind guest and once the cracks start you'll more than likely get more cracks. 4 - given #1 above - it is likely that the cracking will continue and that the material will start "flaking". Perhaps tape of some sort will slow that process. But, most likely the process will get water/moisture behind it and simply start cracking/flaking in another spot. Therefore, either replace that interior portion of the door or get a new door. Good luck! Bill p.s. HERE is a company/product that many Oliver owners (to include myself) have used to change the glass AND install a "shade" inside the window.3 points
-
Will be very interested in your results!3 points
-
Definitely not normal. I've never seen anything like that before. The doors are basically hollow - fiberglass exterior and that plastic (fiberglass?) on the inside. Our Oliver door has foam insulation inside. I assume you bought this trailer used? Can't tell from the photos, are the cracks pushed in, or pushed outward? Any damage to the outside of the door? The window with shade is aftermarket. Maybe the damage was caused by that installation? The door can be replaced if you wish. I probably would.3 points
-
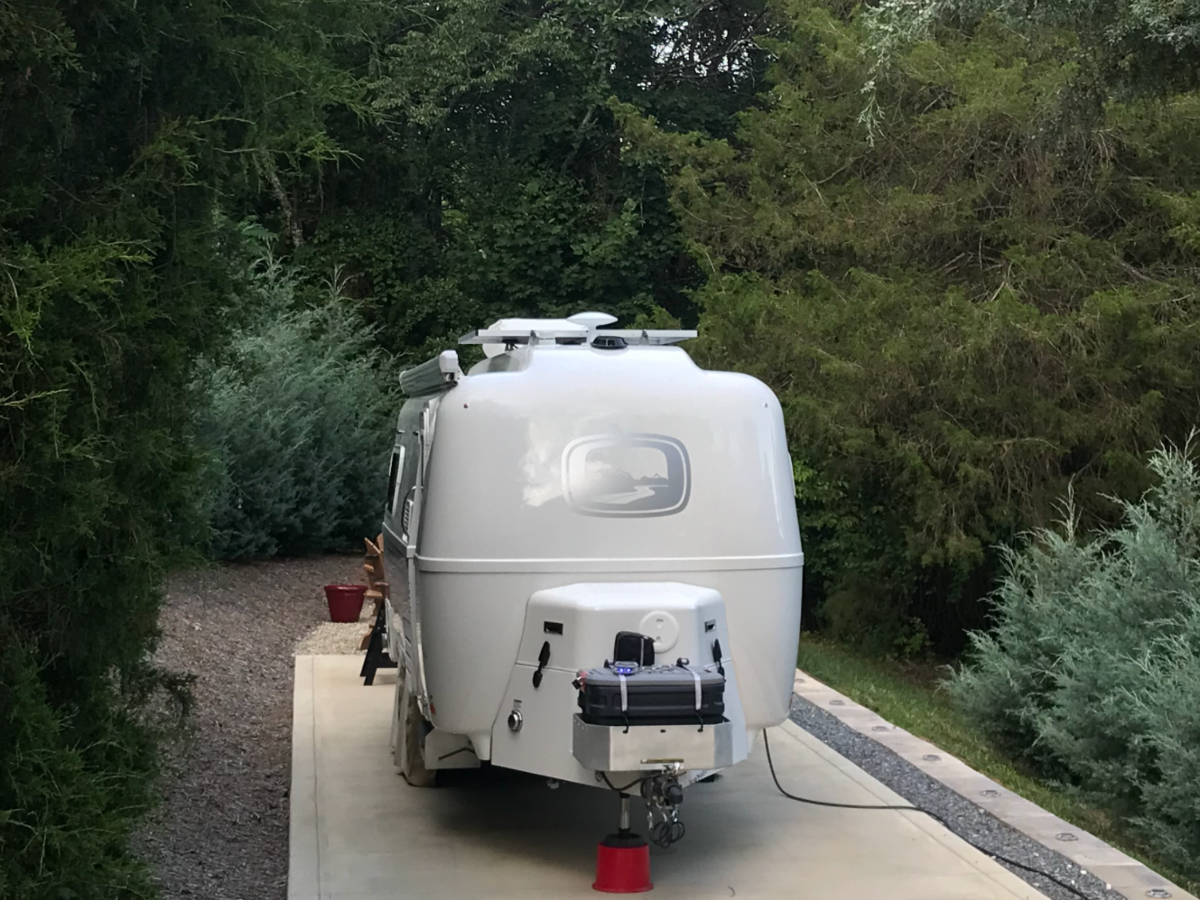
Our 2021 OEII came with a 2" hitch mount rack receiver but the installation was (in my view and with respect to a lot of other good work done by the prior owner of our trailer) not quite up to 'factory standard'. In fact the U-bolt-based attachment method distorted the receiver shape just enough to make installation, and especially removal, of our 1Up hitch rack next to impossible. So I sought to improve upon it. After some research I settled on a receiver ostensibly designed for use on certain Lexus GX460 models: https://www.amazon.com/dp/B0BRKR1Q4X Drilling and attachment was straightforward given a drill press, a decent 1/2" bit, appropriate measuring tools, and a center punch. The aluminum is relatively soft and drilling oil was not used. I have not been able to get all the chips out of the interior, but did not try too hard to remove an end cap and access the box section beam interior that way. The hardware is 3 1/2" x 1/2" stainless with stainless and yellow zinc washers. We have not tested the setup on the road yet, but static fitment went fine. The receiver and backing plate are fairly heavy; according to the retailer, about 10 pounds. This item is designed for towing, when attached to a GX460; it is likely overkill for this application, but that's OK by me. A side benefit is the receiver has safety chain mounts through which a cable lock could be passed. I discussed this with Jason and he indicated the factory were considering offering a 2" receiver option moving forward. Our bike rack is 2", our cars and TV have 2" receivers, and use of an adapter was not appealing to me. In hindsight I might have painted it white, or silver 😀 Enjoy! Tim
2 points
-
This could be a concern. Stories about SOB poor dealer service experiences are legion. No sale/no service, wait times measured in months, etc. For now, I'll hope that the dealers that OTT chose (or the other way around) will be better. On the larger picture, Oliver trailers are arguably one of the most expensive per square foot on the market. To us, direct factory sales and available factory service were part of the justification for the pricing.2 points
-
Thanks. I’ve scheduled at Cavender Ford which is 1.5 miles from the Alamo koa in San Antonio and has shuttle service for the day. I’ll report back later on how it went.2 points
-
Congrats! I hope yours is closer than our first grandchild that lives in Tasmania, Australia. We just got back from a seven week visit there. John2 points
-
I have several THOUSAND USGS Maps in my Geological 'library'. If you want to find 'good rocks' you have to know where to find them... theory. My wife and I enjoy what we call 'The Hunt'. We like looking for interesting rocks, minerals, fossils and even find items that hunter's lose while hunting. Easter Egg Hunter's syndrome. The hunt in the Wilderness never is a one day experience. I can even identify what we find... Cedar Breaks, Utah is 10,200 feet elevation. I said 7,800 feet... wrong. Go through Cedar City, Utah and about half way through town you will find the turn to the East to Cedar Breaks. When it is Hot in Cedar City... you will not be camped at Cedar Breaks. Geological Maps are also great to find obscure camp sites, but what was being mined or weathering out afterwards. Great exercise, as well. Your lungs at 10,200 feet improve your ability when down to your elevation at home. Really...
2 points
-
That window with integrated shade is aftermarket and uses the original door. You can find them online and install it yourself. Not too difficult. However, if they do replace the entire door, they can buy one with that option already installed.2 points
-
Looks like a pretty cool door! Our a 2016, a little older, only has a bathroom-style frosted glass window. Would this be a custom door, DIY replaced? The picture shows an accordion style roll-up shade, clear glass behind. This is a special RV door! It would be difficult to replace one with like options. I would think about repairing the interior skin. You could remove the window bezel and then remove the interior skin and replace that with sheets of 1/8" textured white plexiglass. You have cracks everywhere! Many around the window appear to the exactly horizontal and then the obvious one, down the bottom-left corner. Does anybody else here have this style of door? If so, then yes service ticket, but it looks like a mod to me. If it was mine, I'd love to replace the interior door skin, and make it better than new!2 points
-
I agree with Stephanie and Dudley. That is not normal. I have never seen anything like it either. My question would also be about the installation of the aftermarket window in the door first, then some other damage done to it.2 points
-
@jd1923 & @Townesw I think i will remove the two pressure regulators from inside the camper (since OTT did in 2018) in favor of using an adjustable one on the hose going to the camper. I think that will be the best solution because I think a large part of my problem came from those getting clogged up. I'll try and replace them this weekend and test it, along with cleaning the filter/screen on the bottom of the toilet as @MAX Burner suggested.2 points
-
Been to the Silver Bean many times, got the SS coffee mug to prove it, HA! Great Joe there, for sure. This was in '18 while on our annual "Spine of the Rockies" ride going through Cortez, CO:
2 points
-
@jd1923 That same regulator package, F3004 from RV Water Filter Store, was $138, shipped, in July 2019. I don’t know where it was made. Google “Camco water pressure regulator vs. diaphragm water pressure regulator” and read some of the discussions that pop up. This is one that I found: https://www.irv2.com/forums/f54/water-pressure-regulators-255560.html We primarily use full hookups, so this isn’t going to help if you’re using the pump.2 points
-
If you find it hard to thread the cover back on, use a little lube on the threads, Vaseline, WD-40, lite weight oil, doesn't take very much, less is probably better them too much. trainman2 points
-
$13 for for the newer hatch that Oliver Service sold me. I prefer it over the threaded hatch.
2 points
-
We are new to RV ownership so maybe this is to be expected; our door panel, on the inside, is cracking. See photos. Is this normal? If not, what has caused this? 'Sun' comes to mind but I do not think that pertains to us. What should we do? I am inclined to cover each crack with white duck tape. Is this a good idea? Or ???? I am concerned that all of the laminate, or whatever this bumpy material is, will peel totally off & leave the door looking like ???. 🙂 ty
1 point
-
Oliver Travel Trailers is excited to have our new dealer partners onboard to work with our Oliver owners as we strive to improve your Oliver Experience. We will be working directly with our dealers so that you receive the same quality service closer to home. Our customer support team will still be available to assist with any questions and work with you and our dealer partners to get any services you need resolved. As our service team will be working with the dealer's service departments on location, we feel it is prudent to discontinue most service work here at our location in Tennessee. However, we will continue doing major repairs, including fiberglass and aluminum, at our Plant Facility. At this time we plan to phase out the service department no later than the end of July and we are no longer taking on new appointments. As you continue reaching out to us with your questions and service needs, rest assured that we will help answer them and coordinate you with a dealership partner nearest to you. Whether on the road or at home, we are working to ensure owners receive the same excellent customer service you have come to trust here at Oliver Travel Trailers. If you have any questions or require further information regarding this update, please do not hesitate to contact us or call us at 1-888-526-3978. We are always here to assist you. Warm regards, Oliver Travel Trailers Team ------------------------------------------------------------------------------------------------------------------------------------------------------------------------------------------------------------ Of course, my team is still here to help support you as we always have with any technical and service questions as well as facilitating services for your Oliver. Thank you! Jason Essary Customer Service Director 888-526-3978 Important Update about Oliver Service.pdf1 point
-
I’ve had my RockTamers for 12 years now, and not once do I remember them staying tight on my hitch. I snug them down tight, snug the lock nuts down, and by our first stop, the blasted things are loose. I’m thinking of making some shims to fit between the receiver and cast RockTamer collet, but thought I’d ask if anyone has a better solution. Thoughts?1 point
-
Not what Oliver told me when they took my money...sad.1 point
-
https://olivertraveltrailers.com/dealers/1 point
-
https://olivertraveltrailers.com/dealers/1 point
-
Oliver's website now has a Travel Trailers / Find a Dealer page where you enter your address and a search radius.1 point
-
Found the list of dealers here, under the sales area of the site: https://olivertraveltrailers.com/dealers/1 point
-
Great news! Congratulations- Mike1 point
-
It would take a little work to make a precise template, and you would need a router, but I bet a white piece of Formica would work well to cover up the damage.1 point
-
I've done both shims and an "anti-rattle" hitch that Mossemi put me on to which is much better than the first two I tried. Even with that - on a trip of roughly 6,000 miles I will still have to tighten things up at least once or twice during the trip. If Mossemi doesn't beat me to it, I'll get you the name of that anti-rattle hitch. Bill1 point
-
Now congrats on your second Oliver in the family! 😊1 point
-
Congrats! Grandkidos are a total blessing! Enjoy!1 point
-
Another suggestion... What caused this? I would say it's the door banging in the wind! If you take time and money to replace or rebuild this door, spend another few bucks to eliminate the cause: Amazon.com: Lippert RV Entry Door Friction Hinge Kit for 5th Wheel, Travel Trailer and Motorhome Pack of 2 : Automotive1 point
-
Me too. All of us are interested! An engineering experiment... What if you had a large chunk of clay and put it between the axle and the frame. Drove down a test road and measured the height of compression before and after the test drive. Then do the same test, same path of road, with new leaf springs. The clay would likely be taller to start, but a ratio of compression, before and after would be measured. Yep, clay is old-school, so I love it! There are modern ways to measure this... My challenge to you, my special new friend, Art! 🤣1 point
-
We'll see. With our minimalist style, I'm still unsure if our plans will include lithium. We're installing it on the boat, but unsure about the trailer. Because, we're not sure we need it. We'll see.1 point
-
Our Dog House cap was getting a bit "gritty" and difficult to thread - so we swapped it with one of the "fresh" caps in the overheads, cleaned the threads on the DH side then lubed the cap w/a touch of Vaseline and attached the stainless steel lanyard (so as not to leave it adrift). All good again!1 point
-
Darn it Sherry, I had not ever noticed the off center. Now that's all I see! DRATS! 🙂 GJ1 point
-
I towed our Oliver with two different Ram 1500’s, similar to yours but neither had airbags. I used the Andersen with them. Mike1 point
-
Whatever happened to "Rosie the Riveter"? 😇 Bill1 point
-
When I was 11, Mickey Mouse was in second place, right behind Bonanza! And Captain Kangaroo was in last place.😎 My dad and his poker buddy’s guarded those cards and chips better than the whiskey and the clothes pins where in use on my rubber band gun! Mossey1 point
-
Appears that some folks think that Litho's are maintenance free. They sort of may be, but all the other stuff we put in there are not. In the ole days we would use high mounted light tension springs to encourage the cables to stay out harms way. GJ1 point
-
We've followed John's recommendation for our Tundra - a game changer...1 point
-
I've commented in a few different threads about my experience towing with my 2021 Chevy Silverado 1500 3.0L diesel. In 2.5 years, it now has 32K miles and about 5k towing my LEII. I thought I would post a follow-up that may be helpful for anyone considering the GM half-ton diesel as a tow vehicle. After owning Toyotas for almost 20 years, I have to say I was hesitant about the reliability of a GM product -- but it's been great so far. PROS: Power/torque more than adequate for towing an LEII. I just returned from a trip that took me over Loveland Pass, Rabbit Ears Pass and Berthoud Pass in Colorado. The diesel engine has absolutely no problem and no stress getting up and over. No noticable loss of power at high altitude and no high-RPM downshift that can happen with a gasoline engine. Fuel economy has been very good. I average 17 mpg while towing and the truck gets around 30 mpg in highway driving when not towing. In Colorado, diesel is now a little less expensive than regular again (yay!) but a year ago it was more per gallon so that wiped out any significant savings. 10 speed transmission is super smooth Automatic engine brake is fantastic on the long downhill runs. It's very reassuring to have it kick-in automatically and only touch the brakes a few times. I've always felt stable and in-control - even rolling all the way down Loveland pass at speed with traffic! GM trailer tow package and 360 degree camera package is excellent. It recognizes and remembers my trailer. It checks and notifies me of a wiring fault (I still check my lights/brakes manually). I purchased and self-installed the GM accessory trailer rear-view camera and it works extremely well. The live-motion back-up guidelines are super helpful (see photos). The truck monitors the TPMS sensors in my Oliver tires (had the GM sensors installed) and it displays on the dashboard screen. Comfortable and quiet ride both while towing and when being used as my daily-driver. You can barely tell its a diesel engine as there is almost no "clack" sound No problems in 32k miles so far CONS: Payload is around 1500 lbs (like all half-ton trucks) and that could be limiting for longer trips and taking more "stuff" Have to use the WD hitch (like all half-ton trucks). I find the Anderson WD hitch to be a hassle - but one that I can live with to be safe and legal. Squat from trailer tounge weight was not bad but a little more than I liked. I added Roadmaster Active Suspension (RAS) and this reduced squat by about an inch without any noticible effect on ride quality. Have to mess with adding DEF fluid. When towing, it uses a lot of DEF and the guage is not very accurate. Best to top off before leaving and/or put an extra 2.5g of DEF in the bed to minimize anxiety about it. Maintenance may be a little more expensive. I only trust the dealer to do the work as independent shops may not be familiar with the 3.0L Duramax. Oil changes cost $120 every 6K to 7K miles. Overall, I'm very pleased with my decision to buy the truck as my TV and as my daily-driver. I would buy this truck again and defintely get the 3.0 diesel over the 5.3 or 6.2 gas engines. If I were more of a full-timer in towing, I would consider spending the extra for a 3/4-ton. This would be primarily so that I had more payload and to avoid the WD hitch. Hope this may be helpful for anyone considering the GM half-ton diesel truck.
1 point


.thumb.jpg.e34bf01ef7f7d5e99ad31856d45afbeb.jpg)


-
Recent Achievements
-
")


")


")


