Leaderboard


Popular Content
Showing content with the highest reputation on 05/25/2024 in all areas
-
Just some quick feedback after 5,175 miles on the Alcan leaf springs, and 1,500 miles on the D52's and new Monroe shocks: 1. We replaced the leaf springs just prior to the Eclipse Rally in TX last MAR and logged just north of 1,900 miles on that round trip from our home in NM. To baseline the structural frame support integrity, we photographed each of the aluminum welds visible from under Casablanca. The welds were in good order/no visible cracks before and after the Eclipse Rally. Nothing unusual noted in the interior of the camper during this first trip with the new springs. 2. We logged another 1,190 miles on the Alcans on our first leg of the OTT Owner's Rally from NM to Hohenwald arriving there 8MAR. We coordinated with Jason Essary to replace the Dexter D35 axles with the D52s Nev-R-Lubes with 12" drums. Dusten Bowden (18-year veteran of OTT and now owner of Dr RV Mobile RV Repair) and I swapped out the axles and mounted new Monroe's on 9MAR without issue. 3. Performed the U-bolt nut torque tightening protocol recommended by Alcan for the 9/16" U-bolts at 50, 100, and 500-mile increments. Arrived at the Owner's Rally on Tuesday last week after logging 265 miles on the D52s/Monroes. No issues noted after checking the U-bolts for proper torque. 4. Arrived home yesterday. 5,175 miles logged since MAR. The trailer pulls well in all the weather conditions experienced including strong cross winds through Amarillo on I-40 and some of the lousiest interstate sections we've experiences through northern Louisiana on I-20. Integrity of frame welds show no change since before changing springs, FYI. We're pleased with the running gear mods as they 100% meet our style of travel trailering... Cheers, All!13 points
-
During the "Open House" at this Year's Rally there were a number of people who asked me what I used to keep the interior of Twist clean and shiny. Actually, I can take no credit for the product nor the formulation, but former owners of an Oliver (Cheryl and Bruce) showed me this product several years ago, and I've mentioned it a few times here on the Forum since: "The fan was then wiped down with the same mixture I use on the interior of the Oliver – 4 parts Duragloss detailer (product #923) with 1 part Duragloss liquid wax (product #951) – in order to give it a nice clean shine." This mixture can be used on any surface on the interior with the exception of the floor - you wouldn't want the floor to be slick. Obviously all the white fiberglass, the counter tops mirrors, stainless, aluminum - everything. All it takes is a light spray with the mixture and then wipe with a microfiber cloth. Flip the cloth over and wipe again and you are done. No streaks (even on any mirrors) and it leaves a very light coating of wax that helps repel dust and dirt. Bill7 points
-
Every time I read a post, new members introducing themselves, or someone with an issue or question, my first thought is, "where are they located?" We all have interest in location, or we would not be interested in RVing! Those of you with the colored maps in your signature are certainly into this. My semi-retirement job is online learning for PMP certification. During class introductions, I always ask, where are you located? City/state in the US, Canada or where else in the world? Being a member of many forums, I always have Prescott AZ in our signature. For us, Chris & John, it means if you're traveling through the SW, PM me come visit for a few days and stay a while in the greatest small city in Arizona. We would love to meet you! For example, for over 15 years we were members of the Chrysler 300 Club International (I had restored our '59 300E during that time). The club published a member book, with complete contact info. Members could opt out, but rarely did. Members cruising these old cars cross-country could contact others for a visit. We counted on each other when needing help in a breakdown situation. I once delivered a spare part I had on hand to a member in distress, stuck on the shoulder of a nearby highway. Without my help, they would have needed an expensive tow and be stranded for a week or so to acquire such an extremely rare part. We became good friends. Location also matters in our repair topics, sometimes as much as hull #, really. Location determines climate (hot & humid to cold or dry), altitude considerations, east/west or north/south, coastal or inland all has different considerations as much as camping style. We just parked our Oliver for the summer as many of you just pulled yours out of winter storage! All members on our Oliver Forum have a profile page and a signature. Location is a field on the profile but if I was to guess only 10% of you have entered your location. I understand we must be careful in this day, but City/State is not asking your SS# or even your street address. For example, @MAX Burner's signature states, "the Great Southwest." In communication we realized we're just 6-7 hours away, northern NM to Central AZ, a relatively short distance in the west. We now have mutual open invitations. I learn to trust the members here, who put their gut emotions into helping others on our forum. Just a suggestion, but I for one would love to see your location posted on your profile page and signature line! And again, please PM me when traveling across our great state.5 points
-
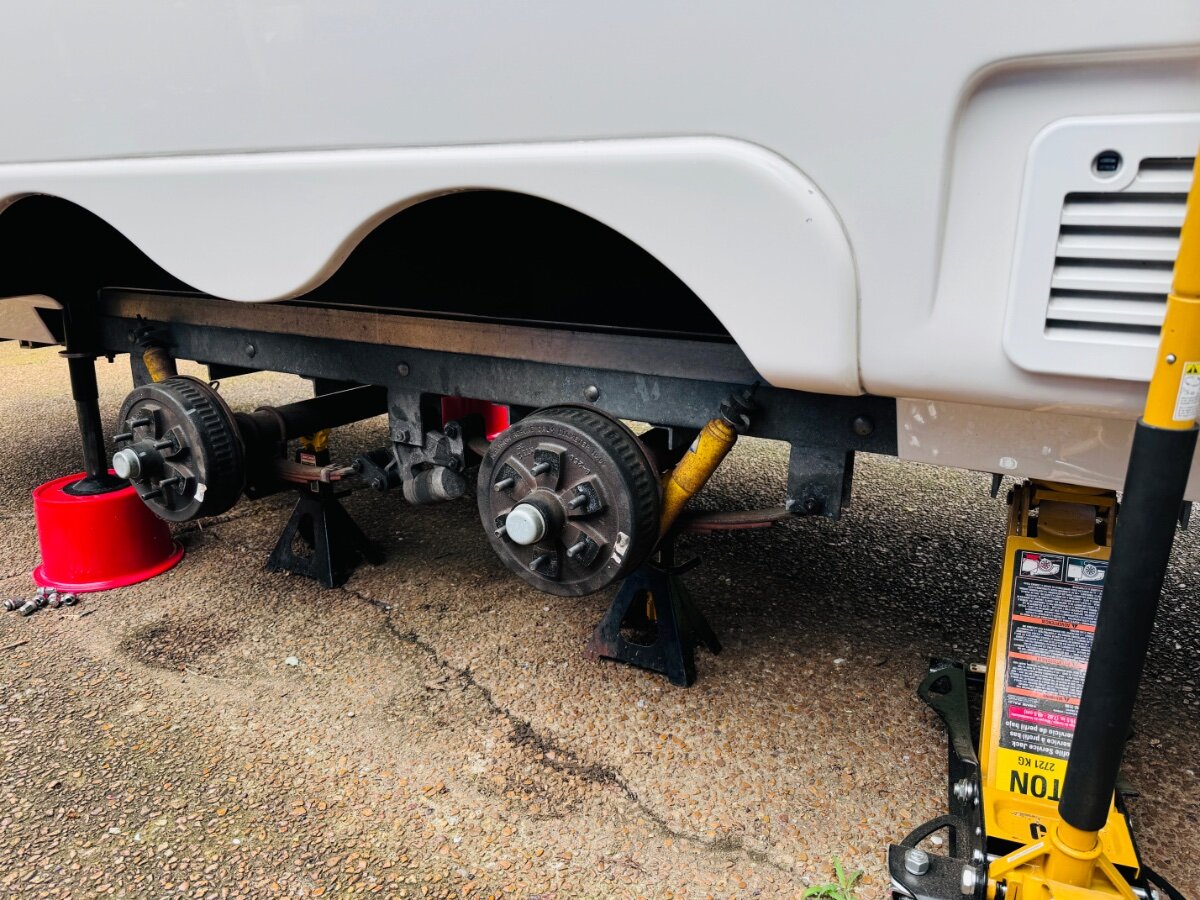
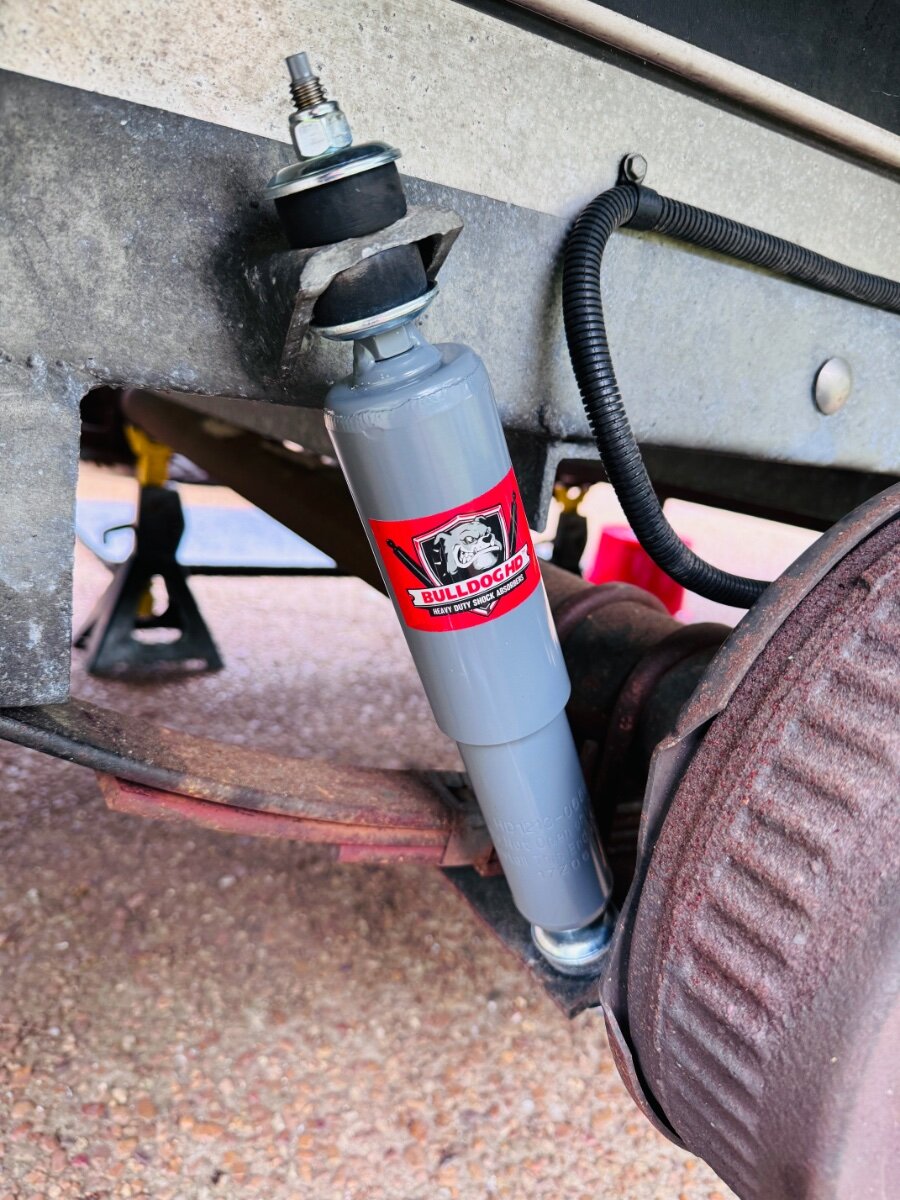
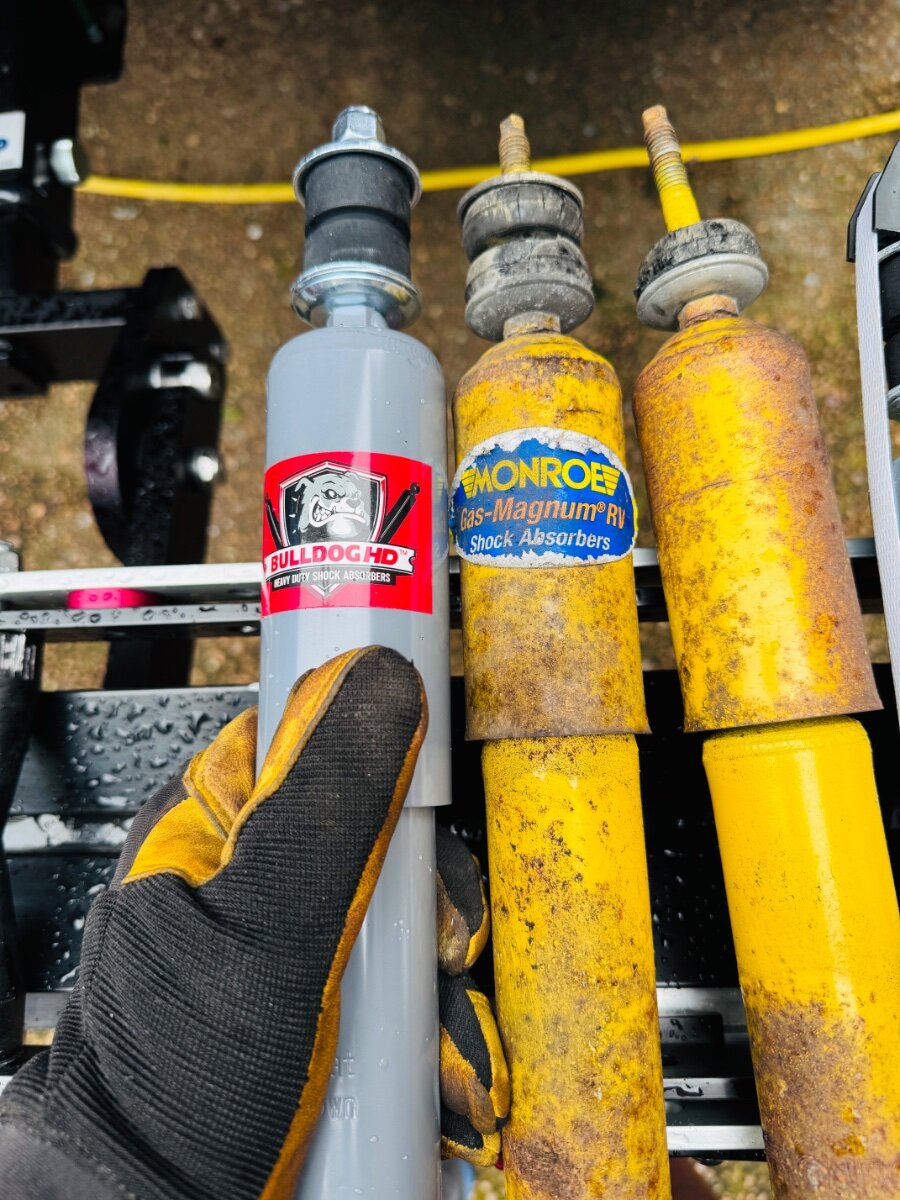
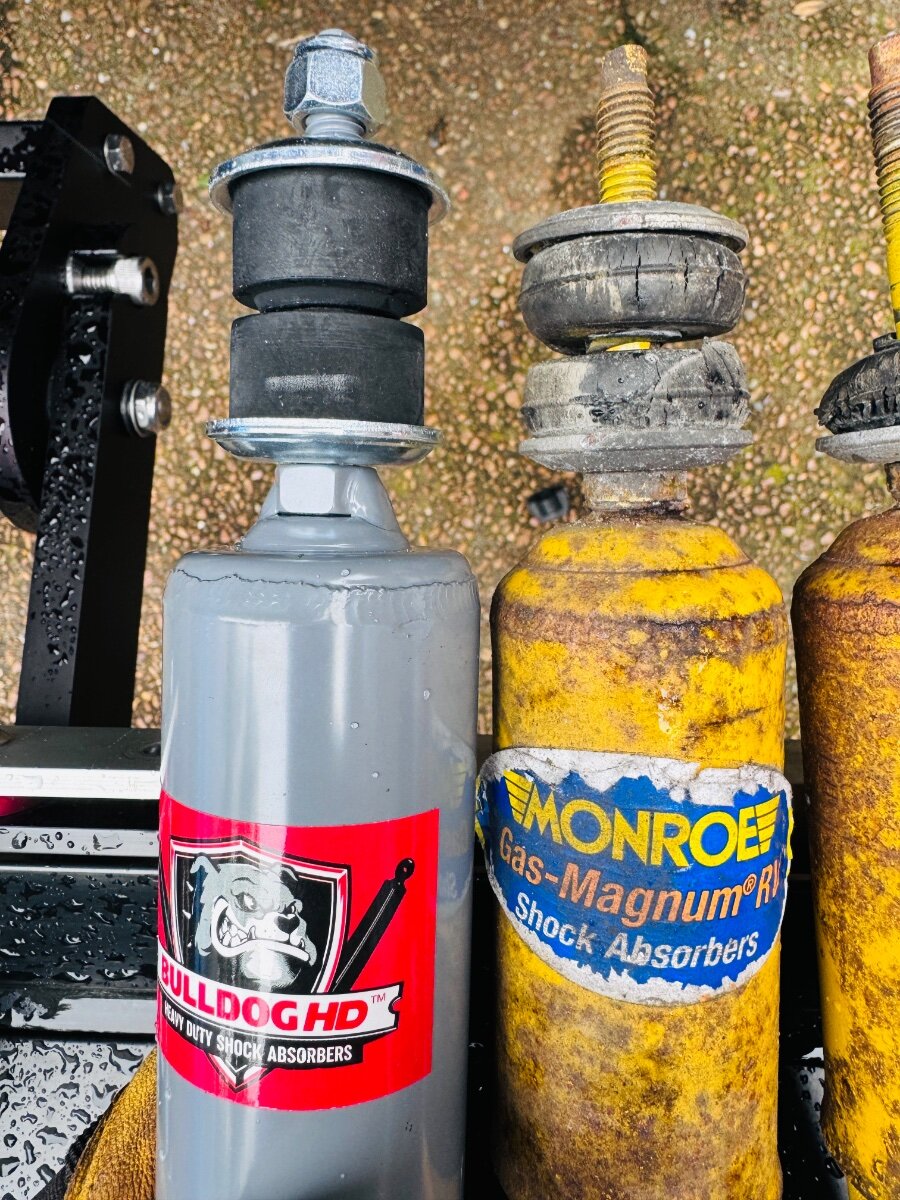
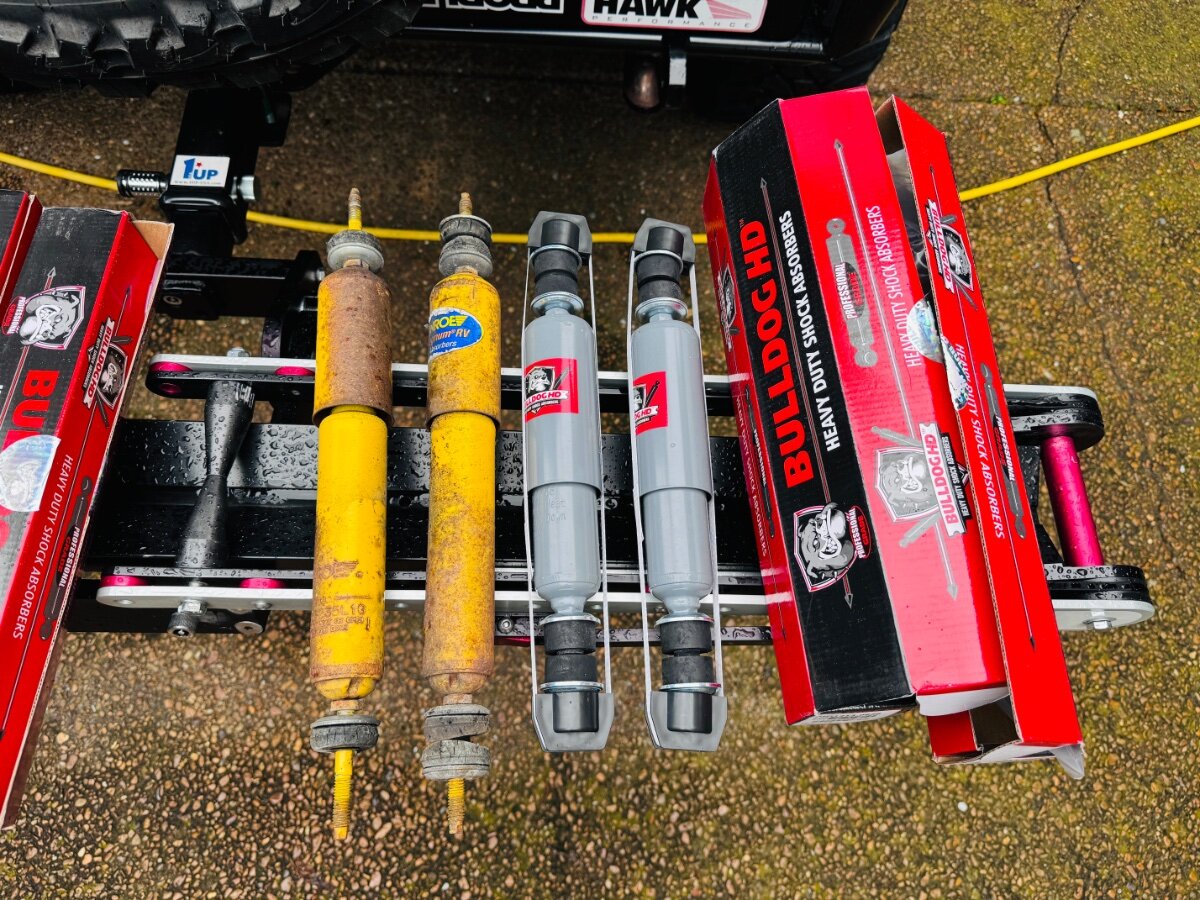
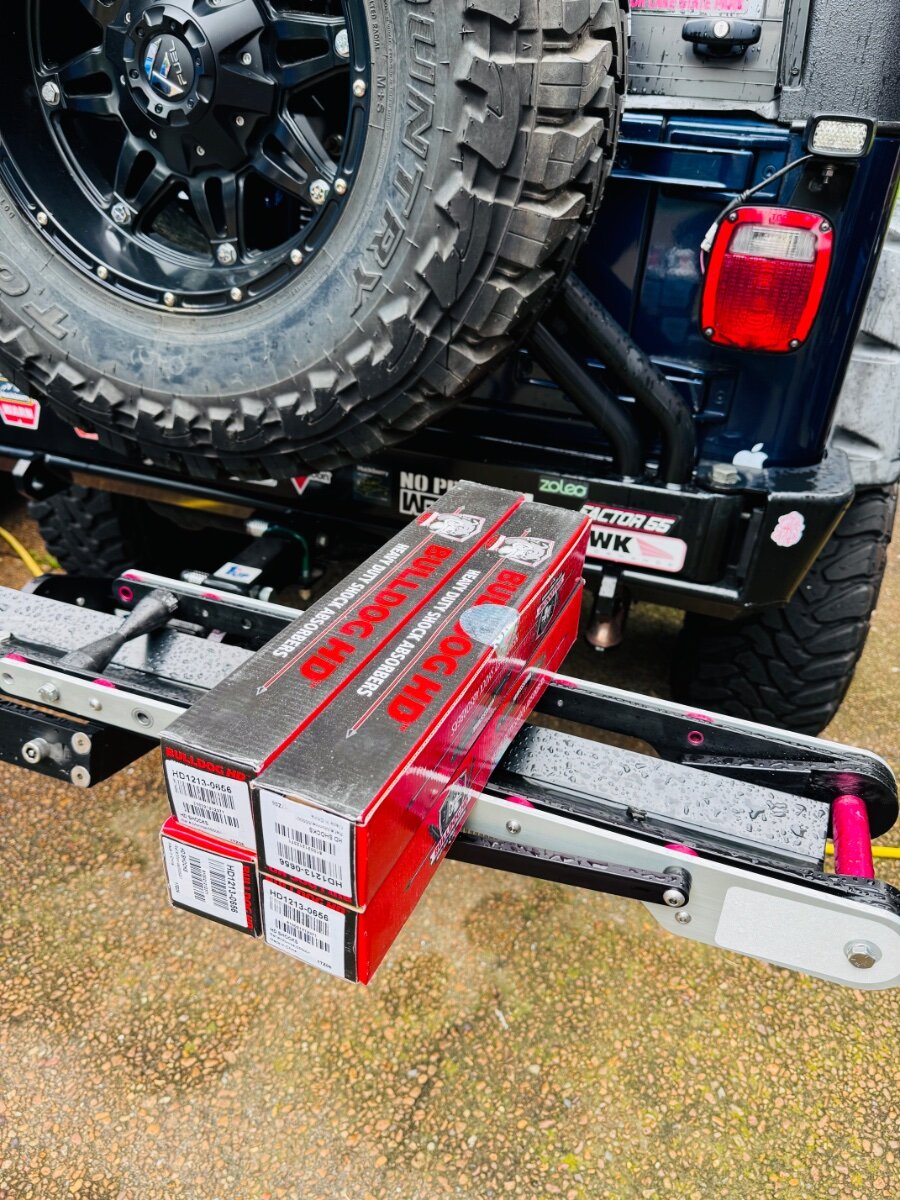
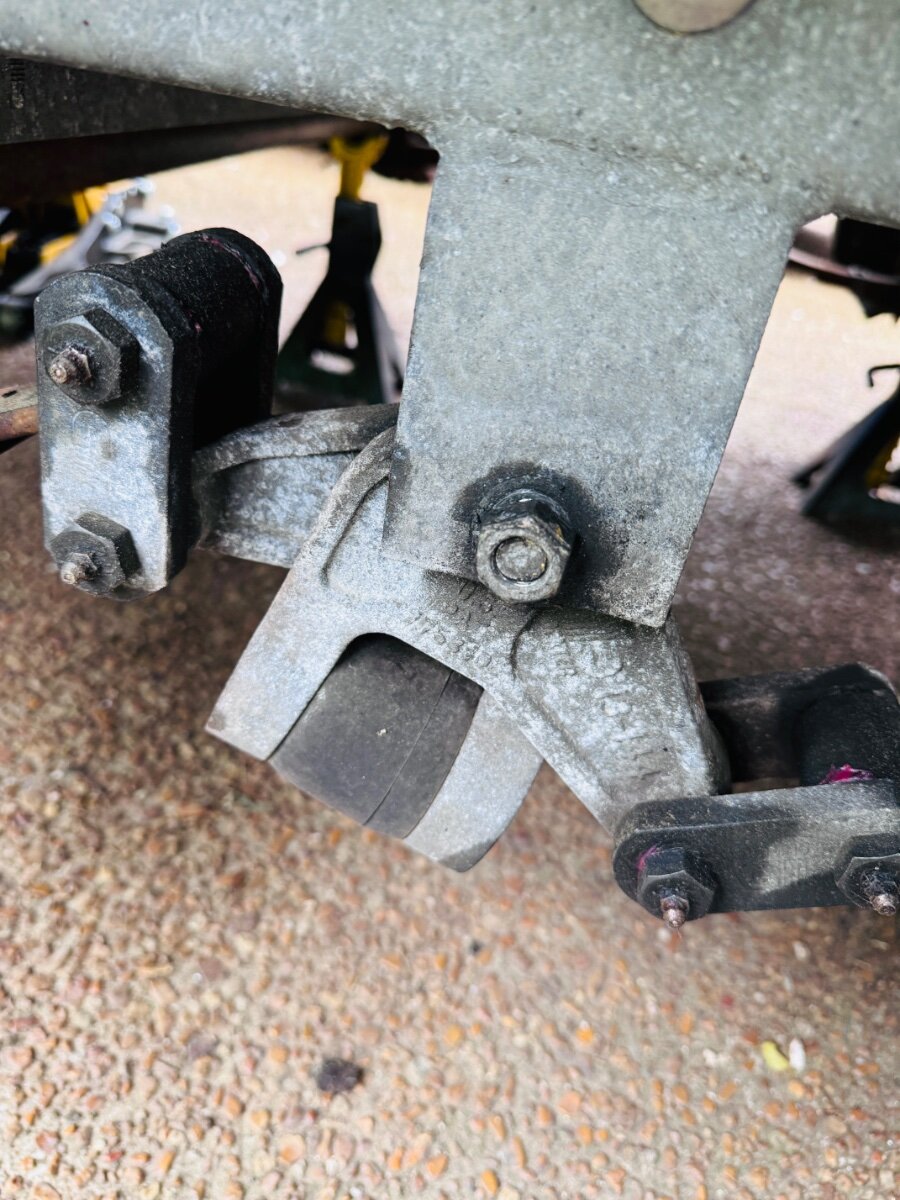
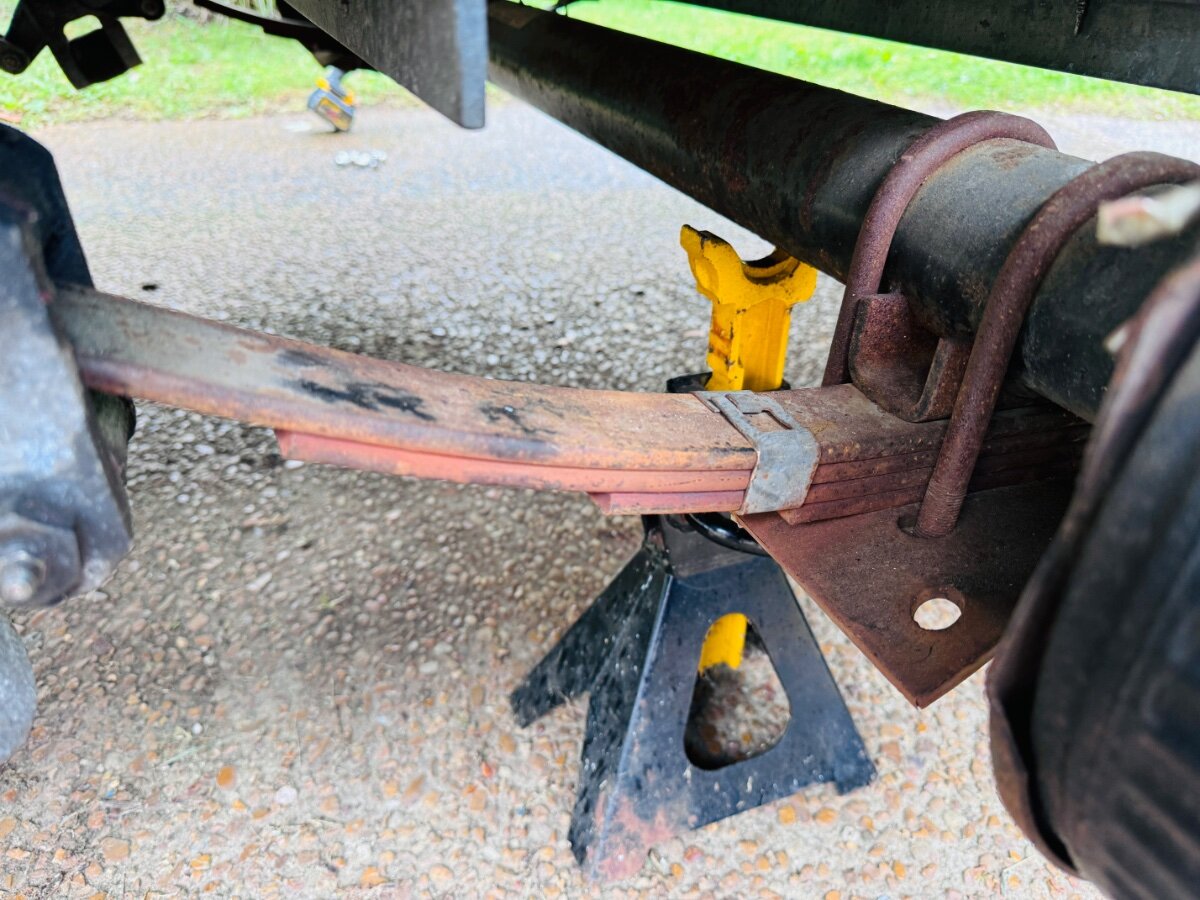
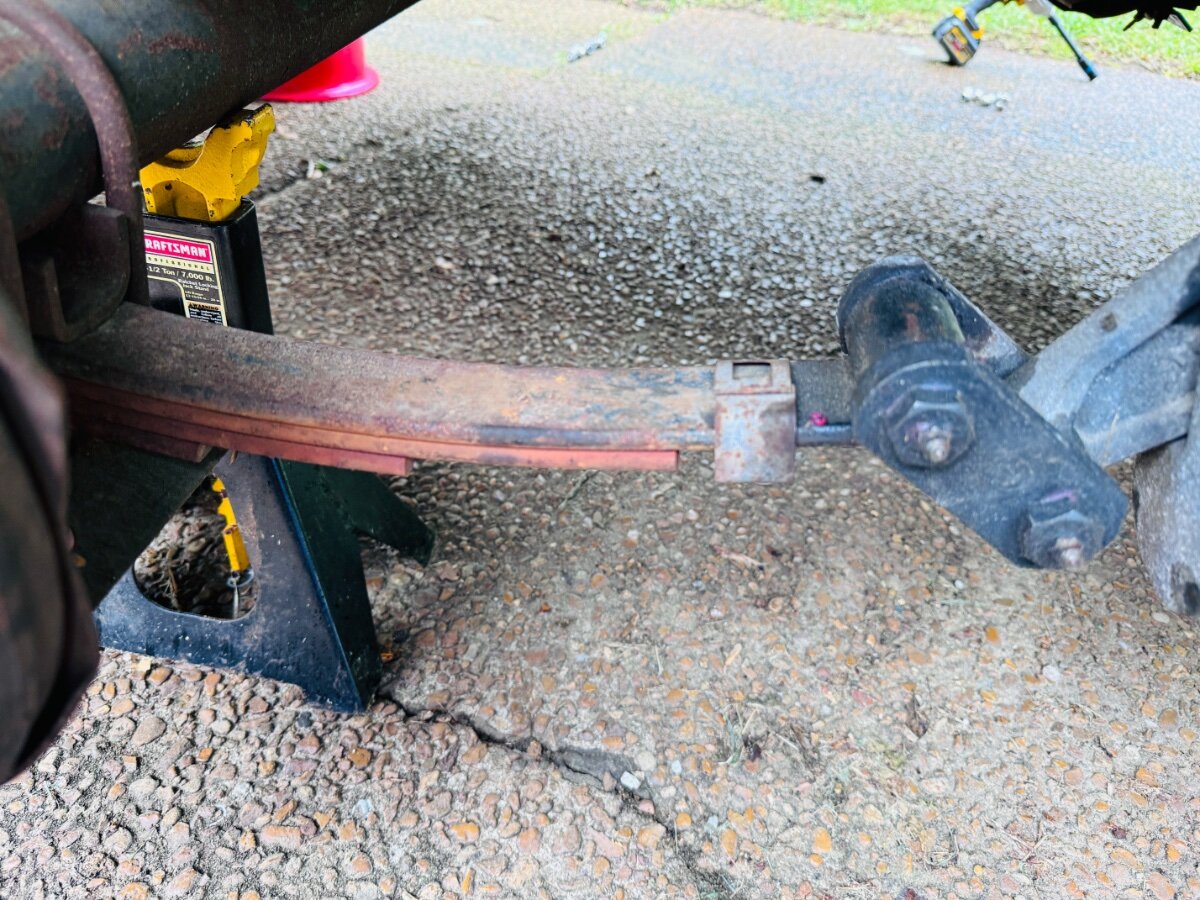
Bulldog shocks are a bit beefier and look like they are well made. Easy swap. Leaf springs look good, still on the fence about upgrading to the Alcan 5 leaf springs. Clips were loose on both springs on the right. Center bolt nut on the left EZ flex was loose and about to fall off. All of the Monroe shocks seemed to be in good working order just rusty. Future plans include the ALCAN highway so trying to get everything done now. New tires in the morning. https://www.4statetrucks.com/bulldog-hd-shock-absorber-replaces-555001-19-050000007 Wildpeak H/T02 LT225/75R16 E/10PLY BSW *** Now back to torquing the shocks so that the cushion is the same diameter as the metal retainer but not larger. ***
 4 points
 -
I've been a member watching from the sideline since February 21, 2018. Now, retirement is a week away and we pickup unit #1525 June 8th--EXCITED IS AN UNDERSTATEMENT!!! Delivery photos coming soon.4 points
-
@rideadeuce - A tip...Last year when we went to Alaska we bought some yoga mats and used some 3M no residue tape to attach them to the lower front of our trailer. They worked like a champ at keeping gravel from the Yukon highways from chipping the body of the trailer. We also used a roll of clear rug protection plastic from Home Depot on top of the Yoga Mats to keep them from absorbing moisture. Below: First week of the trip and the yoga mat's are doing well...tne extra coat of vinyl floor protection film is holding water at bay. F Below: After a full 9 weeks on the road the yoga mat's took the beating, but our trailer was protected. Below - After yoga mat removal and quick wash...
3 points
-
Looks Like Jim is the lucky winner. I’ll be in touch. John3 points
-
Similar report to Art's.... We're almost back to our home in Maine. Right around 3,200 miles round trip. No new issues to report. Our Oliver has always traveled well behind our 3/4 ton truck with virtually no porpoising but there's even less now that the leaf springs have been changed. Longer drives are less fatiguing. I checked the torque of the u-bolt nuts at 2,000 miles and none of them needed to be tightened so I think they're set. I had to tighten them twice after having the new leaf springs installed. I haven't checked frame welds but will when I get home. I'm not expecting to see anything unusual. I think an important adjustment is to tire pressure. When we picked up our trailer in 2021 the first thing I did - based on helpful feedback from others - was to lower the tire pressure from 80lbs to 60lbs. With the switch to the Alcan's I've lowered the pressure to 48lbs. Based on some of the roads we've traveled on, I think I've found a good number. I'll keep an eye on my new Monroe shocks that were installed at the same time as the leaf springs and Timken bearings. If the bulldogs are noticeably better or they last longer, I'll switch to those when I service my trailer again.2 points
-
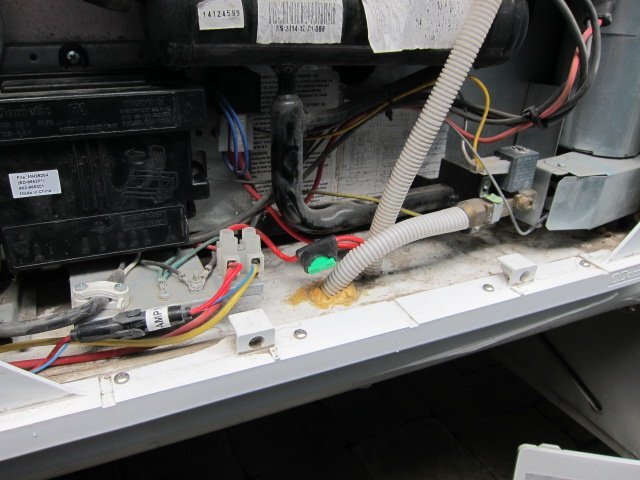
Thanks JD for all your input. My batteries are the Lifeline AGM's and they have been great. In fact, I may just replace them with the same when the time comes as they have completely met our electrical needs over the years and have some advantages over the lithiums like cold weather charging, TV charging, and cost! The 30 amp automotive fuse for the fridge's DC heating element is seen when you remove the lower fridge vent/access cover. It's green as you can see in the pic below. Inside the black box on the left are two cartridge fuses: a 5A ac heater element fuse and a 3A control system fuse. We bought a fridge button guard from RV Widget Works as it is very easy to bump into those fridge selector buttons and change a setting. Happened to us a few times and since putting the guard on, no problems. http://www.rvwidgetworks.com/Photo-Gallery.html Thanks again for your tips and insights. Dave
2 points
-
The FreshJet 3 was not discussed by Jason Essary during the service presentation at the rally. I bet if you reached out to Road Lotus with a PM she could provide you with further details on your questions. We had the Truma Aventa retro fit professional installed by Oliver absolutely zero regrets. Cheers!2 points
-
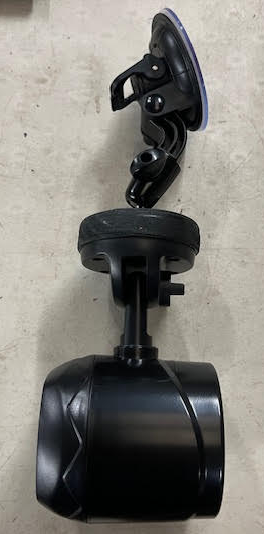
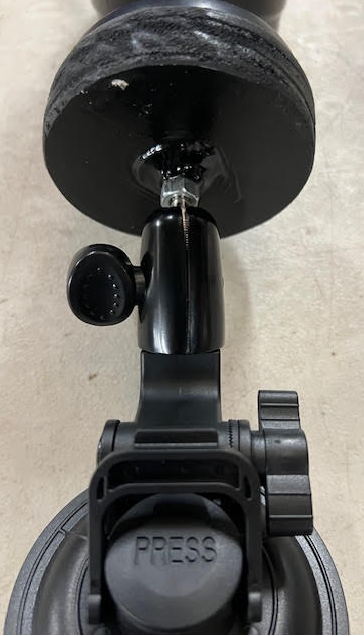
We wanted to get some "security" lights for our local boondocking to ensure we don't miss catching a glimpse of the bigfoots (or is it bigfeets?) roaming the Big Thicket just up the road from us. 😳 Here's what we ended up with - an LED motion sensor light running off of rechargeable D-cell batteries all mounted up on a GoPro style suction mount. Item list given below. They work well - suction enough to hold the weight of the batteries and lights with no problem (assuming fiberglass is cleaned). Lots of other alternatives, but this worked for us! We also use the rechargeable D-cells in our little frig fan. Wish us happy bigfeets hunting 😆 Parts list: Motion Sensor Outdoor Lights GoPro style suction mounts Rechagable D-Cells Recharger 1/4-20 nuts JB Weld Marine Epoxy Scrap wood, approx 1/2" thick Light mounting base diameter - approx 3 1/8" - cut circles from scrap 1/2" wood Drill 1/4" hole in center of wood circle - large enough for stud from windshield mount 2x 1/4x20 nuts - JW Weld Epoxy welded to center of wood circles
2 points
-
Seadawg, What do you use as a tooling lubricant for the PL marine? I had no luck with it using multiple different solvents. I went back to my Sika 291.... Also, with a quality butyl tape like Bed-it tape, I do not think mechanical fastening is necessary for something like the Oliver lense, unless you like the look. Mine stuck down with powerful tenacity. Then adhesive sealant was added to that. It's not going anywhere. Your choice! Dave2 points
-
Great report. Thank You👍👍1 point
-
John, Added state, hull #, tow vehicle, and first names! 🙂 Bill1 point
-
Just remembered how I tested the black 12V wire. No TV connected, just check at the plug. Use a voltmeter or 12V test light and connect the black 12V to the ground at the plug. It should show the voltage of your house batteries (light ON). Disconnect the black wire on the busbar, as shown in the picture, to produce an open circuit and it should read 0V (light OFF). Remember whenever the 7-way plug is inserted into the TV, you always have this connection. Current will move either direction, from high potential (voltage) to low. OTT recommends removing the 7-way plug whenever parked for a period of time, certainly when camping overnight. I do not want to do that, as we often stay hitched and what if you forget? Less setup/tear-down checklist items the better! One evening prepping dinner, our fridge somehow got switched to DC. Operating that panel is NOT straightforward! I woke at sunrise to find our 450AH LA house batteries down to 63%! Sure glad the TV starter batteries were not affected, or we would not have been able to break camp and drive off that morning! We also want to switch to DC when towing. This time we had to pull away with LP on. I have our black wire always disconnected, labeled and taped below to the insulation of another wire so not to hit ground. Our solar generally produces enough +Amps to cover the need, or when cloudy we arrive at 94% +/-.1 point
-
Thanks Bill! Copied to my Oliver folder for reference.1 point
-
You'll find much faster download speeds in remote areas. SL throttles back and otherwise regulates speeds in high population areas, FYI. You'll love it on the road!1 point
-
Nice, simple video for electric brake inspection while you have hub off for packing the bearings. https://youtu.be/P5J3OFKK4DI1 point
-
Torque settings and wet bolt grease cross-hole alignment. Wet bolt 30-50 ft-lbs Center bolt 65-75 ft-lbs Grease cross-hole alignment 3 or 9 o'clock position 059-A45-00E-ZFlexInstructionSheet-3.pdf1 point
-
I'll parse your Qs one at a time... You should really disconnect that wire. I forgot where I connected to ground but be certain that it's on/off connecting the 7-way plug. It's hard to know in the complex Oliver wiring systems that you are not getting feedback current. The 14.5V reading shows you have a secondary power source still connected unless you had the truck running as only the alternator could achieve this voltage. Check voltage at the truck battery and you should see closer to 12.6V (or more just after charging) on a good lead-acid starter battery. Addition: in your next post you wrote, "That black wire tested 12.8V with my engine off and 14.5V with engine on." Now you got it, this is perfect. Wow, 9-year-old LA batteries! Load test? Maybe just replace them. First rule in any automotive electrical issue is starting with good batteries. Prior owner replaced ours 2-3 years ago with LA again. I would not want to travel far from home with your house batteries as it gets expensive to purchase batteries just anywhere. I'm assuming LA batteries on a 2015. If LiFePO4, you may have some life. If not, perhaps it's time for the LiFePO4 upgrade. Check our Epoch batteries. Now I'll learn from you on this one. Where is your 30A inline fuse for the fridge? BTW, the 3 inline, yellow-jacketed fuses in my pic are for the 3 levelers which draw considerable current. With each issue and upgrade, we all learn more about our Oliver electrical systems! Problem is OTT changed things at will year to year, if not hull to hull. More standardization on the newer hulls. There are no schematics and the closest electrical diagram I've seen is for a 2018. Another BIG obstacle is having electrical components the length of the streetside basement, with the pantry and hull below blocking access and vision to make sense of the whole thing. I added the EMS that was not optioned on ours and learned a bit from that. I'm only one year into this (Chris' Birthday, June 7 will be our anniversary)! I believe when I upgrade to LiFePO4 in a year or two, I should have most of it figured out. Sure will, when I upgrade our inverter too. 😂 Glad I could help!1 point
-
Thanks so much!!! You are a scholar and a gentleman!1 point
-
Good plan on tightening the shocks. First I heard of this model Monroe still holding pressure, especially when looking like that. Mine looked much better (AZ trailer) and 3 of 4 were totally shot and the 4th barely holding on. Too bad I did not know of the Bulldogs last fall. Your leaf springs, at least what's showing in the pics look nicely arced in very good shape.1 point
-
Today, I finish the install of the first wet bolt on the spring on the first axle. I had to thoroughly tighten the new bolt to draw the splines into trailer and then torque to 40 foot pounds. I grease the fitting afterwards and grease the other 3 fittings on the forward axle. Later this weekend I will do the EZ-Flex shackles and wet bolts and complete the install. I will be replacing both wet bolts and installing new shackles on the rear spring at the point of connection to the EZ-Flex. If I don't find any suspicious damage there, I will just grease all the zerks on the rear axle and call it a day. I do need to grease the street side zerks, but that will be later this week and shouldn't involve any bolt replacement.1 point
-
These are what I use for any holes larger than 1/2”.
1 point
-
Agree completely with the hole saw recommendation. Will add that it must be extremely sharp and of high quality ... recommend bi-metal hole saws of professional grade construction. Cheap is never worth the cost as you can get hundreds of dollars worth of pissed off when a poor quality tool fails causing you to make a major screw up. Never more true than with cutting tools. It may not be possible, depending on the job, but if possible stop just short of complete penetration of the hull and then make a cut from the backside through the existing pilot hole. This will ensure a clean cut on both sides of the hull as it eliminates exit slivers.1 point
-
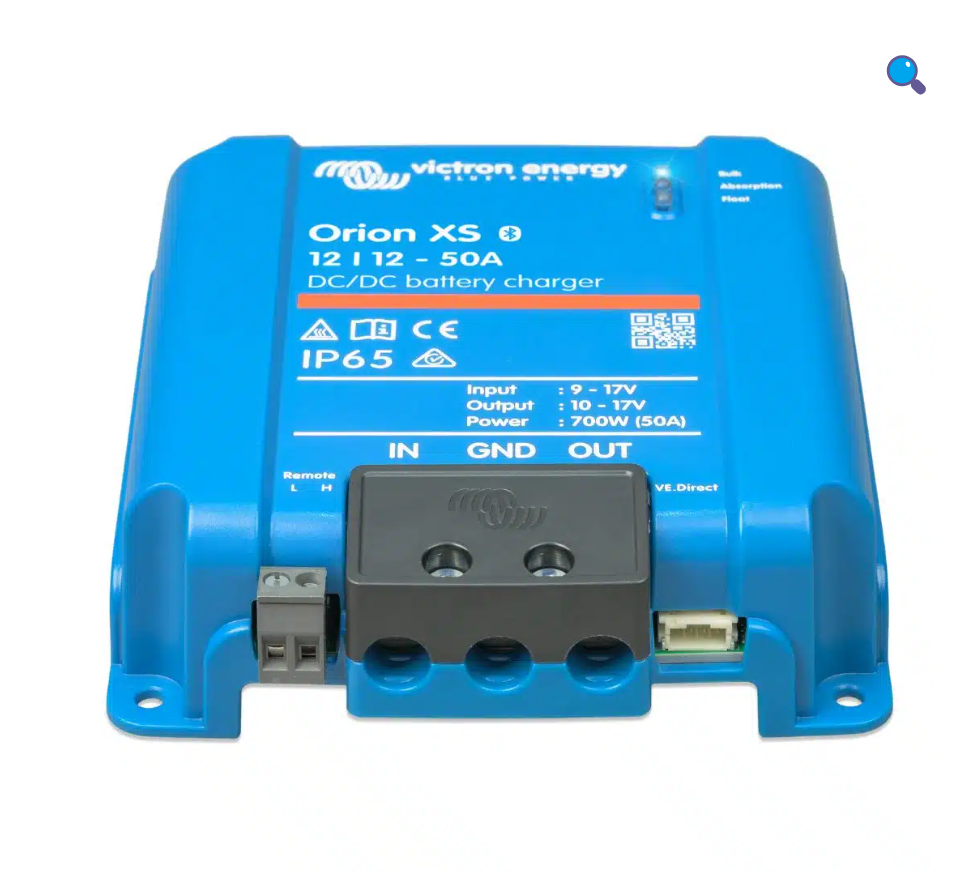
I am using this setup to charge my 4 x Battleborn batteries. The Main unit is under my bed and 2 x 2000 watt are under the garage. I drilled hole so they sit perfectly in dead corner of the garage. and main unit sits under my bed. Ill have to crawl and get pictures. FYI you could charge your main batteries with your goal zero. With 97 percent efficiency on the new dc to dc charger you will not lose much !
1 point
-
A Forstner bit is a very clean way to cut holes in fiberglass. Make a very small pilot hole, 1/8", and then use the size you want the hole to be. Light pressure and run the drill at a medium speed. Forstner Bit Set1 point
-
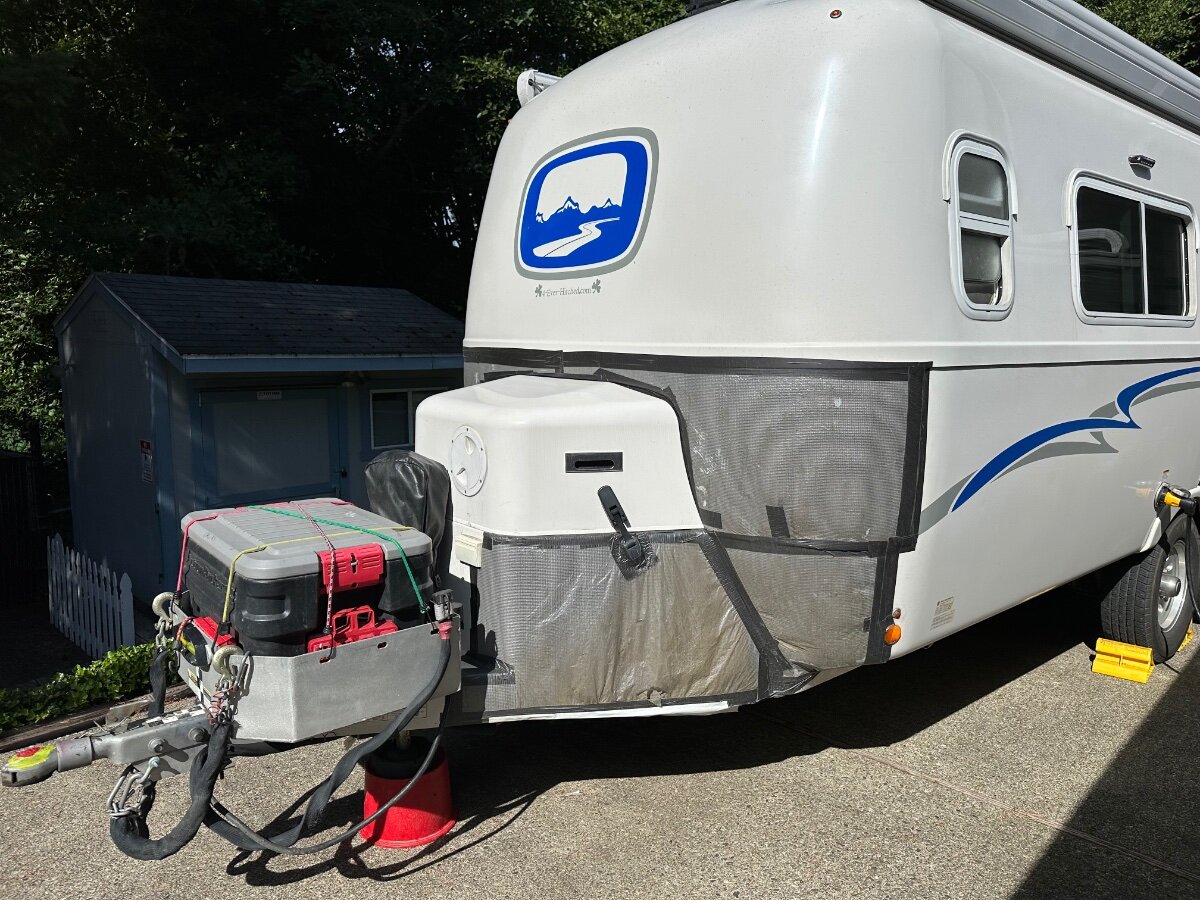
Duct tape? Hope you're kidding. I never want to do the tedious strap mod on ours. We had one drawer doing that and found out it needed a new slide latch. This is the part, very good backup parts to have btw considering the price: Side to Side Adjustable Locking Device for 563/569 Series Blum Tandem Drawer Slide - 2 Pair (4 Pieces) with Installation Screws - Amazon.com Since the repair we've never had drawers opening and the roads out here can be bad, even after 25 miles of washboard dirt roads. Have you checked your suspension for any issues? Is your tire pressure set BELOW 50 PSI MAX? Run ours anywhere between 42-46 depending on temp and altitude. Common cause for any interior cabin disarray is certainly running tire pressure too high.1 point
-
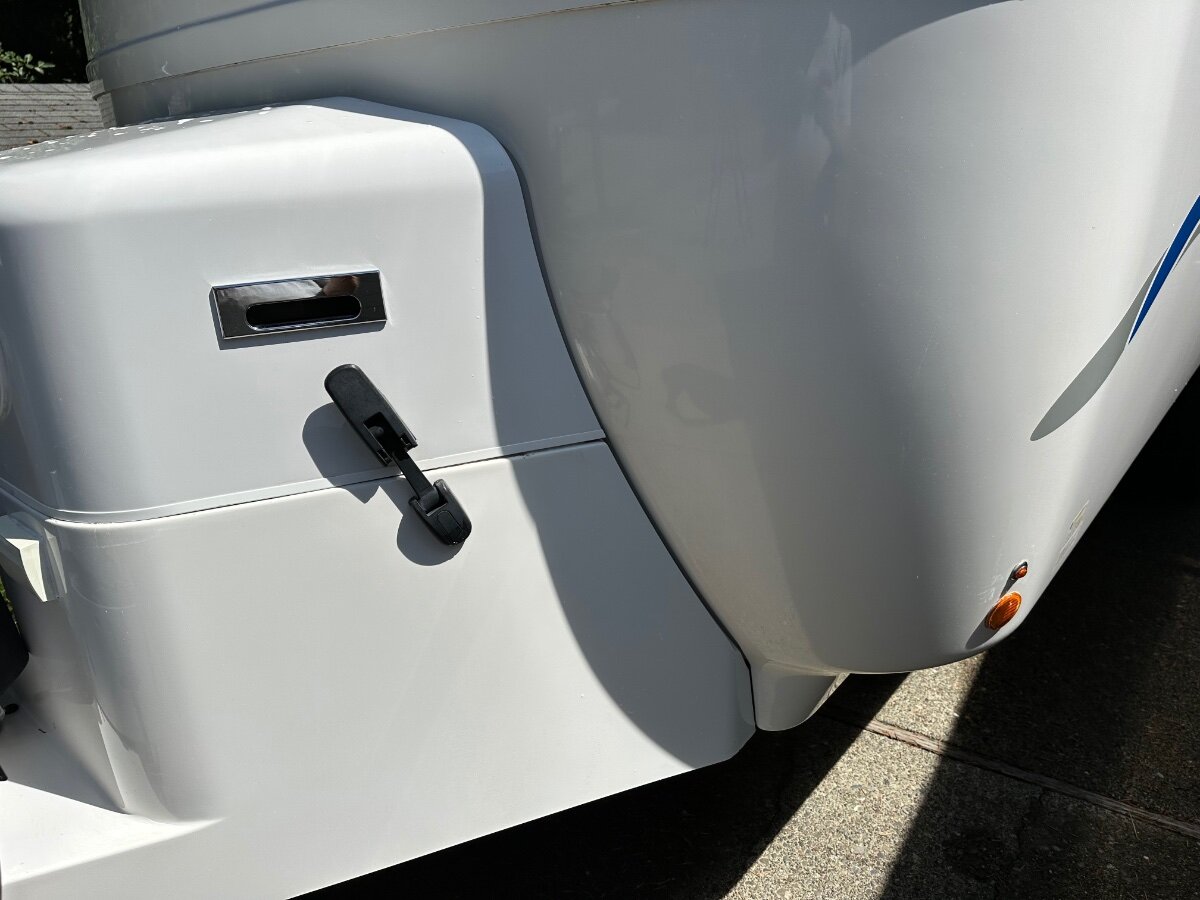
Ours is Furrion, front and streetside, and look to be original. I had to replace my streetside receptacle due to the threaded plastic portion had cracked into pieces. I used the wood screws supplied since I had no cracking and they snugged nicely. I certainly agree with machine screws and Nylock nuts, but harder to reach under the dinette and behind the EMS, etc. The front one is a no-brainer as the back is visible with doghouse removed. The part was $160 or so on e-Trailer.
1 point
-
More than a few of us have completed the John Davies kitchen drawer strap mod for the very same reason.1 point
-
Another option, and one that I prefer to traditional saw toothed hole saws, are diamond grit hole saws. The hole is much cleaner and smoother, there is no chipping of the gelcoat, you have much more control with the cut, and no drama of worrying about the holesaw catching an edge and torquing your hand off or marring your work piece...especially on the larger holes. 5/8" will not be a worry with that here. 5/8" is pretty small, these probably won't have a pilot drill, but you can still use them effectively with the proper technique, or using a template as a guide. If you are set up to use Lenox hole saws and have the mandrel for it (and 7/8" isn't too big) I'd consider this: https://www.amazon.com/DG-HOLESAW-14DG-22-2MM-PK/dp/B002QMK8VQ/?_encoding=UTF8&pd_rd_w=Ou7U8&content-id=amzn1.sym.a725c7b8-b047-4210-9584-5391d2d91b93%3Aamzn1.symc.d10b1e54-47e4-4b2a-b42d-92fe6ebbe579&pf_rd_p=a725c7b8-b047-4210-9584-5391d2d91b93&pf_rd_r=EGJYD83A35XQGWK1X3ST&pd_rd_wg=HMKiX&pd_rd_r=ea23425b-78dc-49b7-9ce2-921c2afd6922&ref_=pd_hp_d_atf_ci_mcx_mr_hp_atf_m&th=1 Otherwise, I'd still get a 5/8" diamond grit (Bosch makes great smaller bits) without the pilot bit. Use water from a spritzer when drilling! Dave1 point
-
I always start with a very small bit, then a counter sink bit until the gel coat removed is slightly larger than the final hole, then finish with the final size drill bit. This has worked every time for me- so far...1 point
-
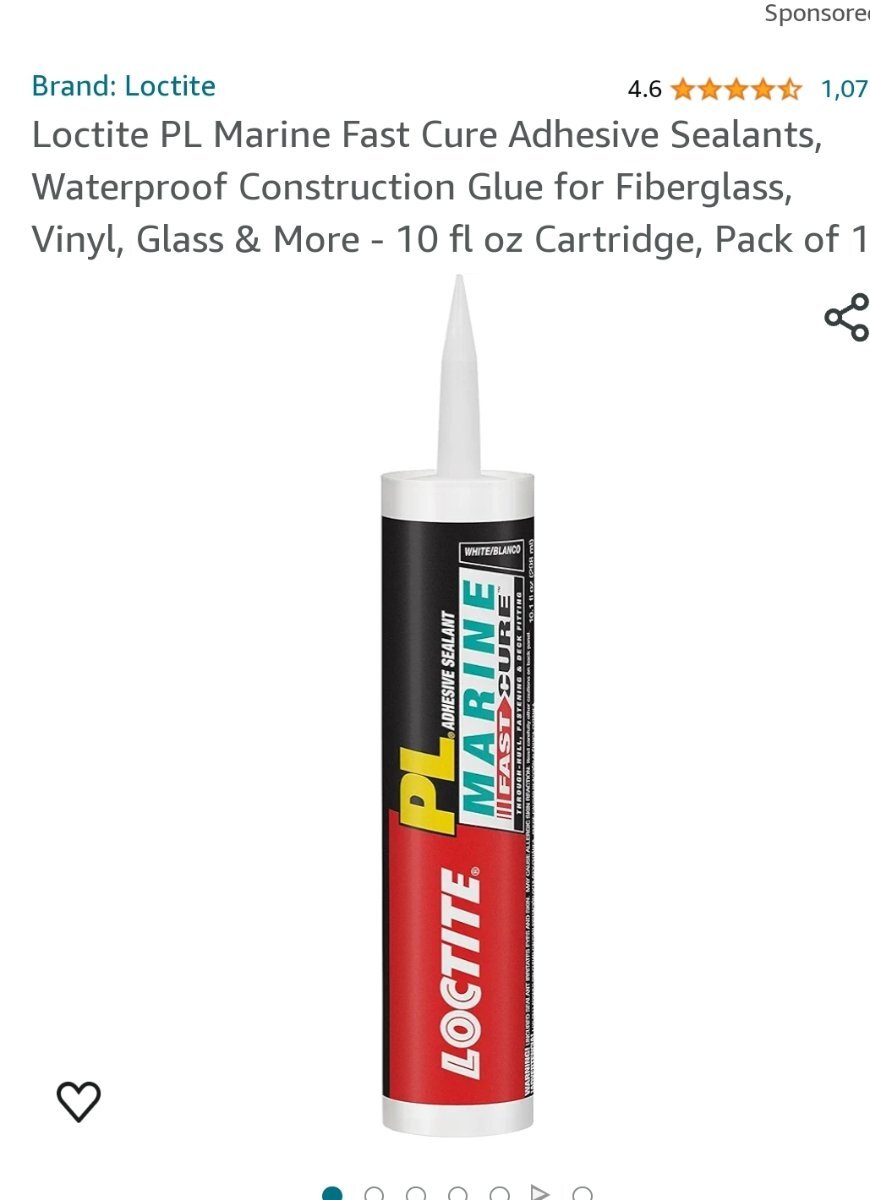
You know my feelings on the Oliver light. Permanent solution is remove, rebed with butyl, and add mechanical fasteners/ screws. Butyl is a wonderful, pretty much permanent sealant, but not an adhesive. That said, loctite marine sealant, fast cure is what we've been using as a polyether flexible sealant adhesive for a number of years, ollie and boat. No yellowing in Florida sun (yet.) Polyethers play well with fiberglass, wood, and plastics. Def no to 5200. Either of the 3m 4000 or 4200 are difficult to remove, later, imo, though 4000 has better uv resistance, so I've read. Pick your poison. And, add an eyebrow of rv Eze gutter over the light, as a bonus. The loctite product is "reasonable" at about $17 at lowes or Depot. Do read the date code. It's sometimes out of date at big box stores, and then it's tough to work, and useless.
1 point
-
Our favorite subject....sealants! That darn Oliver light strikes again. You may want to rethink not removing the lense, but I understand why you would not want to. My lense (hull 107) was "bedded" in some open cell foam weatherstripping. It was totally useless as a secondary barrier for the 3M 4200 that I think was applied around the perimeter of the lense. Thankfully it was not silicone. After a thorough cleaning, I used butyl tape to bed the lense, then Sikaflex 291 to seal around the edge. Several years later no leaks at all. There's been talk of the new polyether sealants on the market. I tried a tube and found it not very workable...maybe a bad tube? It was not past the expiration date. They say the polyethers play well with plastics where the polyurethanes do not, but I have not noticed any adverse reactions with my Oliver lense, and I like the 291 for everything else. If you want to give the polyether a try, and don't want to remove the lense, then maybe this is the way to go: https://www.westmarine.com/3m-4000-uv-fast-cure-polyether-adhesive-sealant-white-10-oz.-cartridge-3760196.html?queryID=d26afaac5e5422519ed7e4ec5eec6510&objectID=3760196&indexName=production_na01_westmarine_demandware_net__WestMarine__products__en_US Tape around the outer perimeter on the gelcoat, and you can tape the lense as well to help with getting clean lines. Take your time with the tape, use small pieces to define the radiused corners.Try not to get too much sealant in there! When you tool it off with a little paint thinner on your gloved finger, the sealant edge should just butt into the tape edge. If a lot of the sealant goes over the tape, then when you remove it, you're going to have a mess to deal with. Tool the sealant tight to the edge of the tape! Once the tape is off, a very light swipe with a thinner soaked gloved finger will smooth out the small ridges left from pulling the tape. Those ridges will collect dirt and look bad after a while so I think that last light swipe is important. Good luck. Keep an eye on your marker lights up there. One started to leak and the water ran down the wire to its low point, right over a neutral bussbar. Good luck! Dave1 point
-
I asked this question on a mod thread, "Does anybody know a good fill product for screw holes in fiberglass?" This is an important subject, so I started a new discussion. And thank you @aaronorange for suggesting Marine-Tex Epoxy for this purpose. MARINE-TEX® EPOXY PUTTY - ITW Performance Polymers I have witnessed at least a dozen threads here where members have replaced shore power or solar terminals, and many other items screw-mounted where the screws have cracked the fiberglass. Many have just remounted as-is or used larger screws, into the cracked hole. If the screw hole is cracked, a proper repair would include filling and redrilling the hole. Our hull needs so many fiberglass repairs that I will work this summer. With all of my automotive experience, "autobody" has never been a strength. Never owned or repaired a fiberglass boat either. I have two 3/8" holes in the interior hole from removing the original TV mount. There is a small hole in the front made by a stone and a blemish behind the AC which looks like somebody banged it with a tool. I will remove the Dish Satellite and OMG the amount of damage OTT created in installing the dish is crazy. I like the Marine-Tex suggestion as I have learned that ITW also produces Permatex, a trusted product line that I have used in automotive work for 3-4 decades. I would also like to learn from your experiences and more about "how-to?" Besides suggested products, what are best practices in fiberglass repair work. Thank you for any advice you can provide!1 point
-
Maybe u could trade?1 point
-
This is huge "Gotcha" of the process. Glad you did your homework!. Damaged splines must be repaired. But that for sure is another thread. Any owner with damaged splines may want to PM me. GJ1 point
-
I’ve successfully use fiberglass body filler and Bondo for all the reasons outlined here.1 point
-
The VHB metal discs are permanently applied, but the magnetic rubberized feet on the mount make it removable for land mount or cleaning/waxing.
1 point
-
Some zerks are 1/4-28 UNF tapered thread, but they fit a straight 1/4-28 tapped hole. Others I've seen lately are metric M6. Do not drive the bolts from the shackle straps that have two pressed in. If you do, you will have to remove the zerks and place the bolts back into the shackle straps and drive them in with a large sledgehammer until the knurls under the head completely seat. Do not attempt to pull them home with the wet bolt nuts. You will ruin both the wet bolt and the nut.1 point
-
For hull 342, I have recently purchased the Dexter Bronze Bushings. Per their sales Order Confirmation: 8 each cost $47.76 plus tax. Their part number is D014-077-00. They are .57" ID X .690 OD X 1/74 long. Can't help you with the Shackle bolts themselves. Hope this helps a little. GJ1 point
-
Same here no issues.1 point
-
Looks like there are several vibration dampers on that unit. Truma Aventa Compressor Vibration Dampers Kit1 point
-
note: I thought I had submitted this days ago, but evidently it did not go through. Hi Jim, You would use the existing air distribution face plate and thermostat that you already have. And yes, it runs through the same condensation lines. The only thing you are changing is the top unit. I also discovered yesterday that I can run the AC with my lithium batteries. A couple of hours dropped it about 20%. So it’s not long-term but it was very helpful. Sincerely, Mary aka RoadLotus
1 point
-
@Rolind, how many watts are the newpowa panels?1 point
-
Hi all, I spoke with the tech regarding the Dometic Fresh Jet and here is what I know so far: -The quoted price does NOT include the interior duct feature - but you don't need it because you can use your existing one -There is no need to cut the fiberglass because it uses the same footprint. -There is no remote or heat pump on the US option at this time. -He *thinks* the drainage will be the same, but I asked him to confirm this with the company rep. He was supposed to call me back on this Friday but I did not hear back, so I have another call in today. I will update when I know. I am still in their queue for a couple more weeks, but I am planning to go with the Fresh Jet and use the existing thermostat. It will save me a lot of money and be the simplest change. I will continue to keep folks posted. I did tell him there are a number of interested people wanting to see how this goes. Thanks! Mary1 point
-
Here are all the handouts the tech (appropriately named "Jason") gave me. Some is sales advice, but there are flowcharts for retrofits and good data - you'll see the Penguin II that is in the 2022s listed. 1971602662_ACModelFlowChart2022.pdf 1834042850_acFreshJetSalesTraining2023.pdf acFreshJet_FeaturesANDBenefits_Fall2022_FINAL.pdf1 point
-
The Dometic freshjet has awesome reviews in European and Australian markets. Your post is the first I've heard of it in the USA. I'm extremely happy to see it stateside, finally. (I posted a lament years ago that we in the US are the last to get the best in ac). Builtin soft start. Lightweight. Heat/cool/dehumidifier. https://www.diycaravans.com.au/shop/ac-unit-dometic-freshjet-2200/1 point
-
Hi dewdev: I think that I may be the only Elite I owner using the Andersen with a 1/2 ton. We towed without it for the first few months and never had any issues except for slight porpoising at times. I decided to buy the Andersen mainly because of liability concerns: our TV requires a WDH for a 500 lb+ tongue weight. While our tongue weight is normally sub-400, we do draw near 500 with a full fresh water tank. I just didn’t want to worry about it so added the WDH. The Elite pulled very nicely without it, since adding the Andersen the improvements are minimal but noticeable; less porpoising and a bit better tracking. - Brian1 point
-
Finally made it back to Tampa 🙂 73 nights, 13 states, 4 national parks, 3 state parks, a couple of KOAs, 2 siblings' driveways, and one highway rest stop. 5,000 miles on the new truck. 3,400 on hull MDIV. Changed the composting toilet twice. Greased the zerks once. Learned soooo much, saw many beautiful places and met loads of nice folks. Thanks to everyone for all the hand-holding and advice. Ollie gets a very well deserved bath tomorrow. Then we check out the storage facility. He might get to rest there for a few days before we get the energy to head to a beach or some place else close by. 😜0 points


.thumb.jpg.e34bf01ef7f7d5e99ad31856d45afbeb.jpg)


-
Recent Achievements
-


")


")


")

