Leaderboard


Popular Content
Showing content with the highest reputation on 12/23/2024 in all areas
-
I decided to chime in on this because I don’t think you’re missing anything, your discharge rate is perfectly correct! All the given advice is good, but it’ can be a bit miss-leading to fully understand whats going on. I hope to provide a better explanation, and show you a simple and very accurate way to check your “parasite” loads, which I’ll refer to as normal “stand-by” loads. Your 390 amp hour battery with a daily discharge rate of 3% equates to a loss of 11.7 amp hours over a 24 hour period. This further equates to a stand-by load of 0.48 amps, which is not overly excessive considering all the electronic devices in the Oliver. Devices with memories, remotes, touch lights, rain sensors, USB ports, electronic boards, etc., can each draw milliamp currents even when turned off, and they do add up quickly. I took some current readings from my own trailer to show you what I mean. It’s the same year as yours and it also has a 390 amp hour battery. Remarkably, the values add up to exactly the same current as your calculated load. But more importantly, it shows that there is no single extraordinary load: Fuse 2, Various electronics = 0.117 amps Fuse 4, Furnace = 0.012 amps Fuse 5, Main lighting = .003 amps Fuse 6, Fans = 0.016 amps Fuse 7, Water heater = 0.113 amps Fuse 8, Radio = .204 amps Fuse 9, USB outlets = 0.007 amps Fuse 10, USB outlets = 0.009 amps Total = 0.481 amps These measurements were done with a precision multimeter having a resolution of 3 decimal points. My Victron shunt has a resolution of 2 decimal points and it showed a lessor current of 0.42 amps. My Clamp-on Amp Meter has a resolution of 1 decimal point, and it showed a higher current of 0.5 amps. This demonstrates how subjective and inaccurate some of these measurement methods can be when dealing with such small milliamp values. Another potential misconception is that the Lithionics BMS App will provide the overall charge and discharge values. It’s only true to the extent that it provides values for the battery selected, but not for each battery combined. For example; the 390 amp hour package consists of three 130 amp hour batteries. If the overall load is 3 amps, then the App will show each battery discharging at 1 amp. Additionally, it’s only accurate to 0 decimal points so it won’t show anything less than 1 amp. This is another good justification for installing a Shunt. There are a number of ways to measure stand-by or parasite current, but the easiest and most accurate way is with an inexpensive Multimeter through the fuse box. It will show the load of each circuit, but not each component on the circuit. Thats okay because some of the individual component loads are too small to be accurately measured anyway. Caution: When using the ammeter function, the meter is in-line with the circuit. This means that the current is running through the leads and meter. So don’t use it with loads greater than it’s rated maximum current, which is typically 10 amps. Before testing, make sure that everything is off including the inverter/charger and solar (Solar switch is in the street side overhead cabinet.) Make sure shore power is unplugged too. Pull each fuse one at a time and the red LED “blown fuse” indicator will light-up if there is any load. Put your ammeter leads on each leg of the fuse socket and read the current. Add up the values and you will have an accurate overall stand-by load. FYI, the inverter/charger does not go through the fuse box, but it will add another 0.2 amps load if left on. I keep my trailer undercover without shore power and the batteries also discharge rather quickly. In fact the shunt screen shot below shows that it will discharge in 10 days. I considered adding a battery master switch, but it wasn’t a viable option for a number of reasons which is why I believe that Oliver doesn't install them either. I ended up getting an auxiliary solar panel, with charge controller, and I mounted it on the roof to keep the batteries at 100%. It was better than running an extension cord and risking complete discharge mishaps. Hope this helps Cheers, Geoff
 9 points
 -
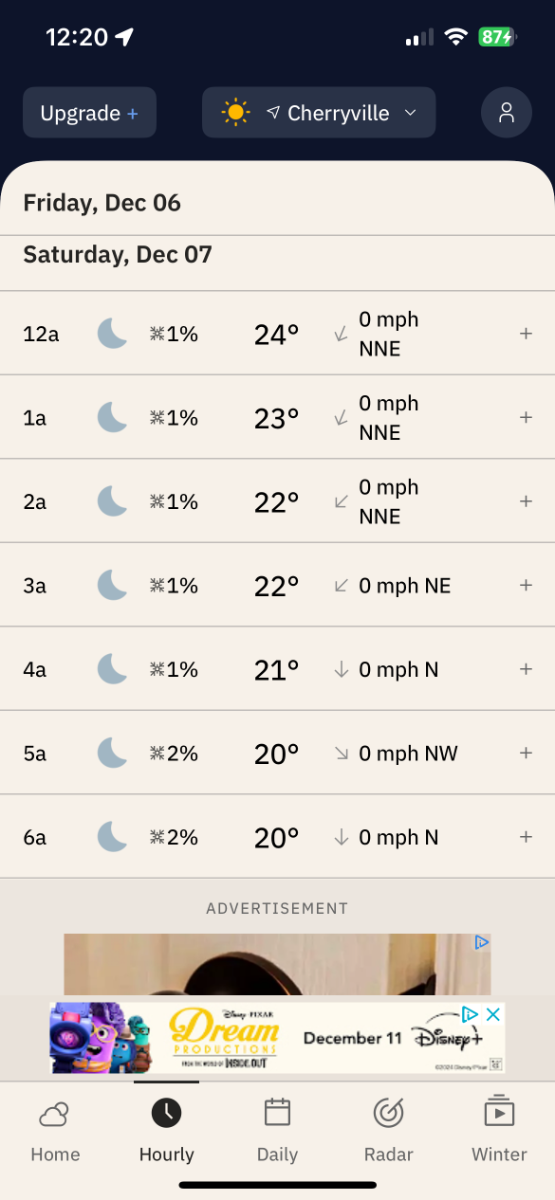
This will only be our second winter owning the Oliver in Indiana. Temps here can be all over the map through the winter season. For that reason I thought it would be a fun experiment to install several sensors throughout the camper to have a running data log of seasonal temps in key areas. I also like the idea of being ready to camp year round, even if locally, if the weather is going to be decent say on holidays. I have winterized both winters at this point, but also leave a heater running in the camper set at around 50 degrees. Our camper sits in the driveway under the Calmark cover, and even when we have experienced temps in single digits and occasionally below zero, the basement spaces have always maintained above freezing with the access covers open. It’s nice if I decide to driveway camp in a snow storm just for the thrill of it, and go out to a relatively warm camper. Turn on the furnace and everything is toasty in 10 minutes. If/when we get the garage modified to make room for the camper inside, I would be very confident in doing as @ScottyGS has described without doing a full winterization. After all. If the power goes off at home in the winter, the house would be as big a concern as the camper, and we have contingencies for that in place. BTW, I’m using the Yolink brand of sensors with WiFi hub, and an older IPhone that stays permanently in the Oliver as a hot spot for monitoring. It adds only thirty dollars per month to our phone plan and has proven very reliable for this system. Anyway, my long winded $.02 of saying I like the way @ScottyGS is thinking. Edit: For anyone interested this is the system we’re using. It’s very effective for the price, and you can add as many sensors as you like. I have seven sensors including the cabin, basements, battery compartment, front under sink, refrigerator and outside under the propane cover. You can export the data every two months if you want to keep a permanent record. https://a.co/d/fjmAmBD3 points
-
In June a couple of years ago I was heading to Medford OR. Stopped at a huge parking area and decided it was a perfect place to spend the night. it was 74 degrees. Set up the BBQ and grilled some burgers. Hit the sack around 9:30 and slept like a log. Until I woke up at 3:00 and Ollie was 40 degrees inside. Turned on the heater and looked out in the morning to 4" of snow and 24 degrees. Sure was glad I had not gone off down a logging road to boondock Getting back up to the snow machine parking lot would have been dicey. Point is, sometimes we get curve balls tossed into our chili pot!3 points
-
Here in the NC in the foothills of the Blue Ridge Mtns, we are risk adverse and just spend 15 minutes to winterize. If nothing else, we sure sleep better. The Truma AquaGo makes winterizing a breeze. 😄🥶
3 points
-
Ditto on my 2005 Silverado. We keep what works.2 points
-
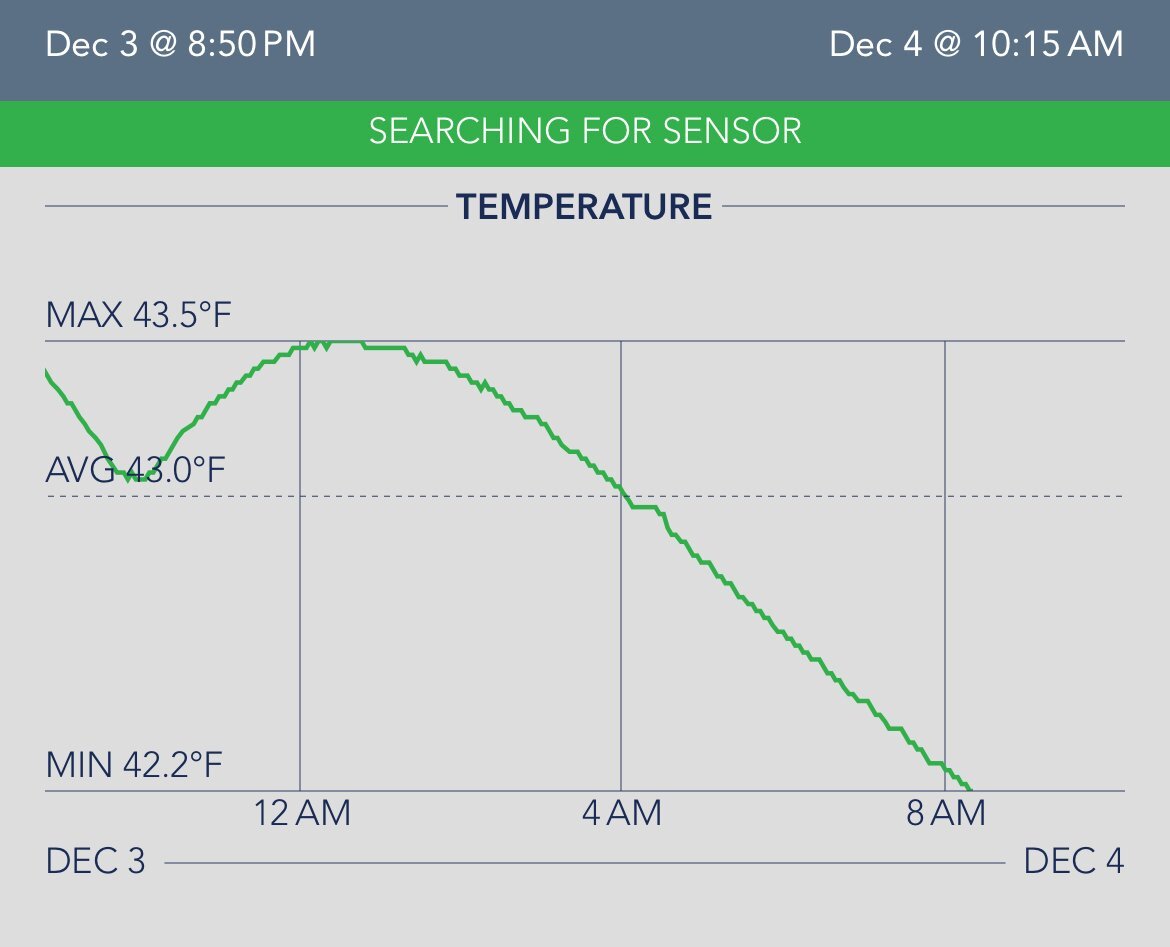
We have a large unheated garage that we store our trailer in. We are in the WNC mountains about 2200 feet asl. It can get cold here in the winter and we have had a week of night time temps ranging from 13 to 35 degrees. Previously I have winterized and that was fine. But.. we are planning a late December into January trip so I did not winterize. So, here is my strategy for your consideration if you find yourself in similar circumstances. Outside temps dropped to 13 degrees by morning. The garage temps are usually 15-20 degrees warmer. A Sensor Push was placed close to the pipes that go to the outside faucet. All hatches were open and a Delonghi oil filled heater, set to 50 degrees was placed in the camper. See photos. In the morning this was the result. Outside Air Temp = 13 degrees. Inside Garage Temp = 33 degrees. Inside camper = 55 degrees. In the hatch where the outside faucets are = about 42 degrees. So, I am thinking this is a pretty good plan going forward and may not winterize again ... Unless I have to be away from home. If the trailer was stored outside and the inside temp was still holding 42 degrees vs. 13 outside... hmmm... don't know if that would work. It's going to be about the same temp tonight so I've already set the heater temp up. BTW... the Sensor Push is pretty awesome. Provides a lot of comfort knowing what happened temp wise inside the trailer. Happy Camping, Scotty
2 points
-
The RUUVI tags work very well. I got four after reading about them on this forum. I have one in the fridge, one in the cabin next to the thermostat, one in the battery compartment and one in the basement. They seem to be very accurate and allow me to know what's going when I'm in the TV or walking around outside.2 points
-
JD & JD: Roger on the CO detector. Also there are: The transformer for the USB plugs, The refrigerator LED's on the control board. The furnace feeding power to the T-stat if digital The Microwave control board and LED's The feed back loop that can occur where the tail lights have a dim light despite not being plugged in. to the TV. What else have we missed? So basically there are multiple sources for power to be drained. Super small amounts each, but together they can be measured. Years ago John Davies tried to find them all, and pretty much did. But after spend a lot of time on this drain and eliminating all he could, he was still losing power, I believe .1 amp if I recall. If he could not find it, it was not worth looking further in my eyes. GJ2 points
-
When we did our initial walkthrough of our new Oliver, the Oliver service rep strongly suggested we keep short segments of pool noodle between the back of the retracted tv and the lower surface of the attic to prevent the fiberglass from fatiguing around the tv mounting bracket. Even ratting around Moab, we have never had the TV deploy while traveling.2 points
-
Many of us RoF's would love a separate (new) thread about this and other systems for monitoring temperature in and around our OTT's. GJ2 points
-
NOW I know why someone would not want to open the barn doors and run the Suburban heater! LOL. Well played! GJ
2 points
-
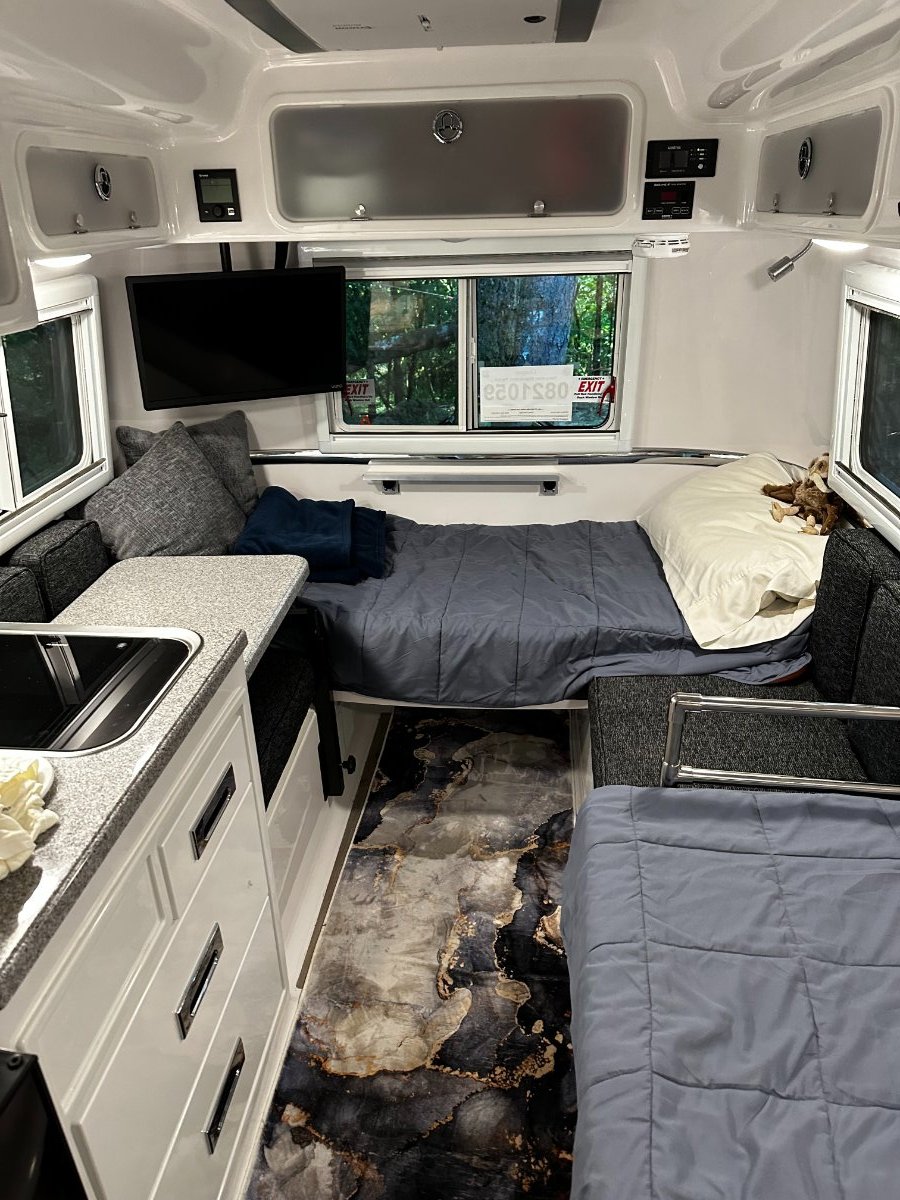
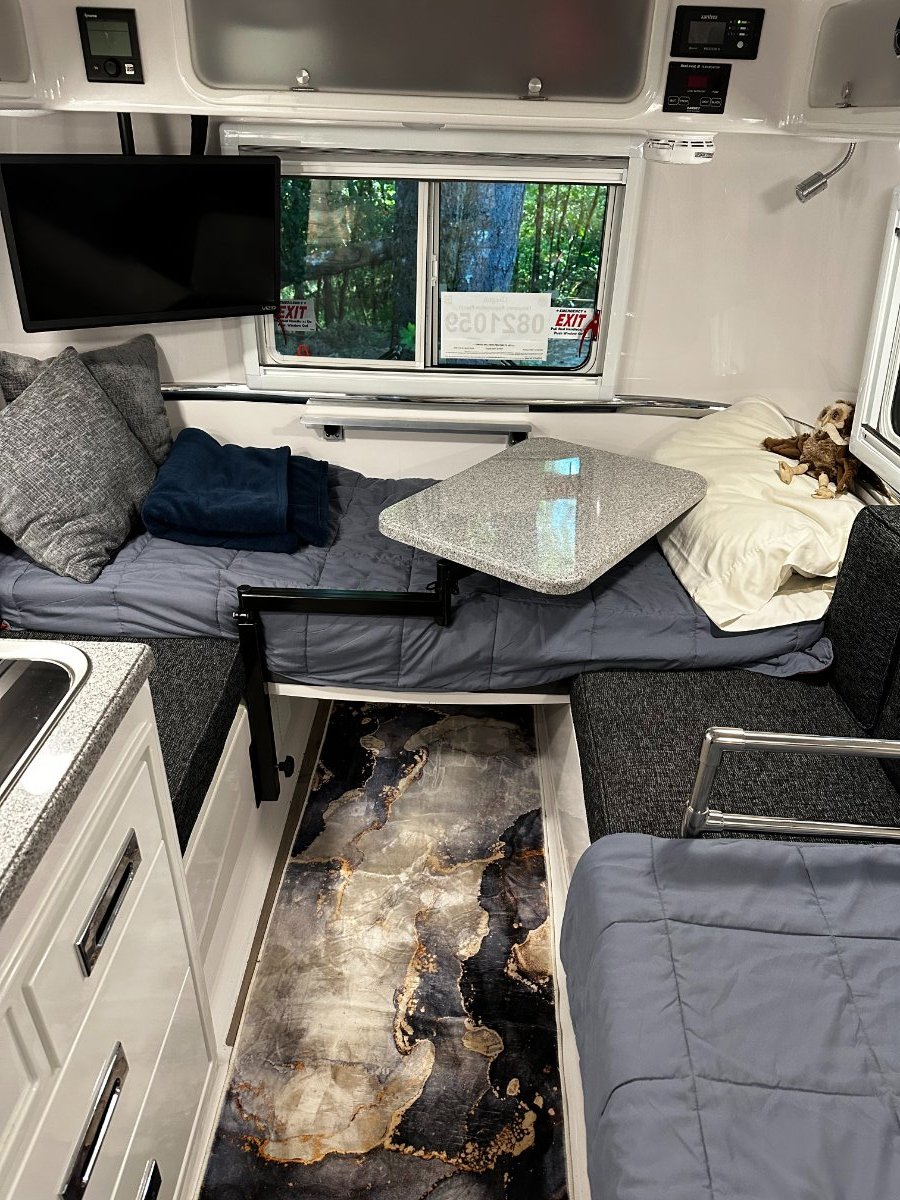
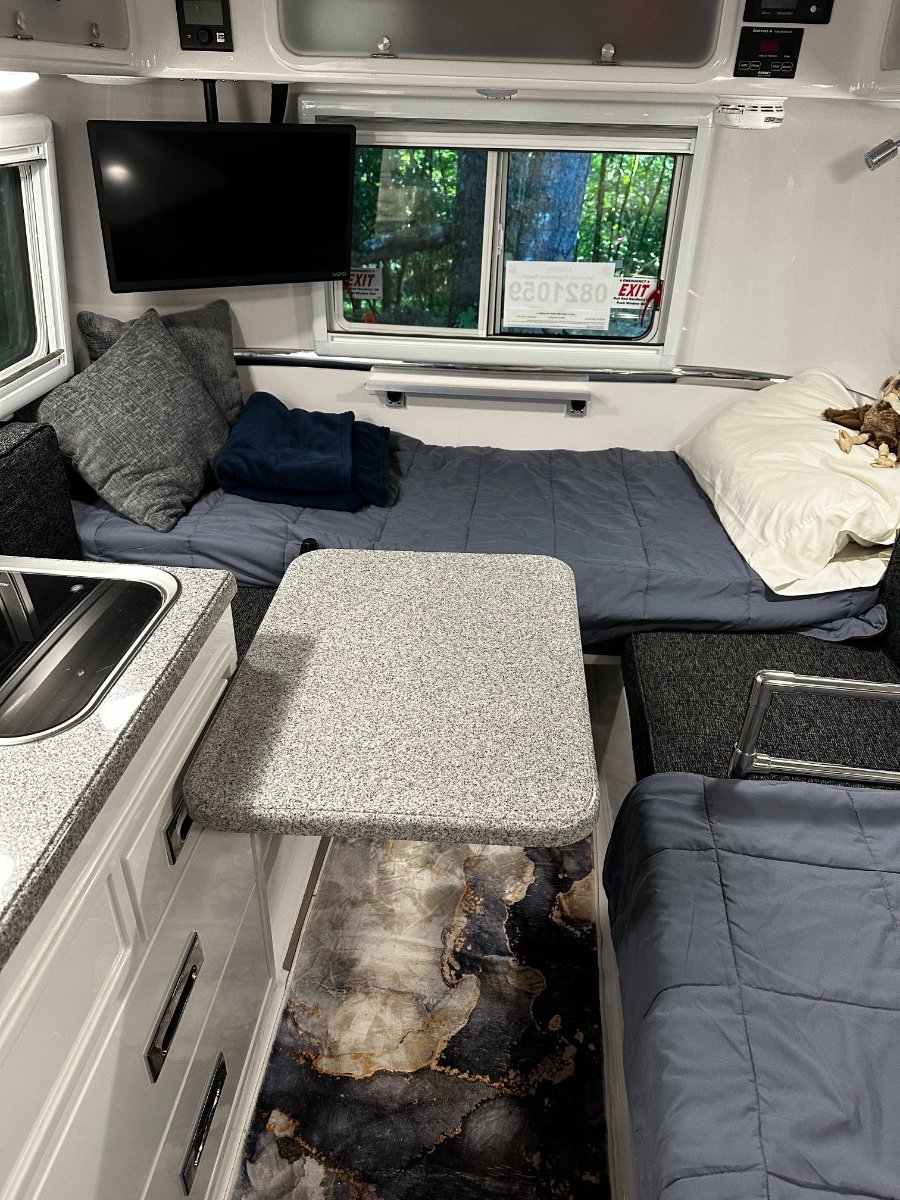
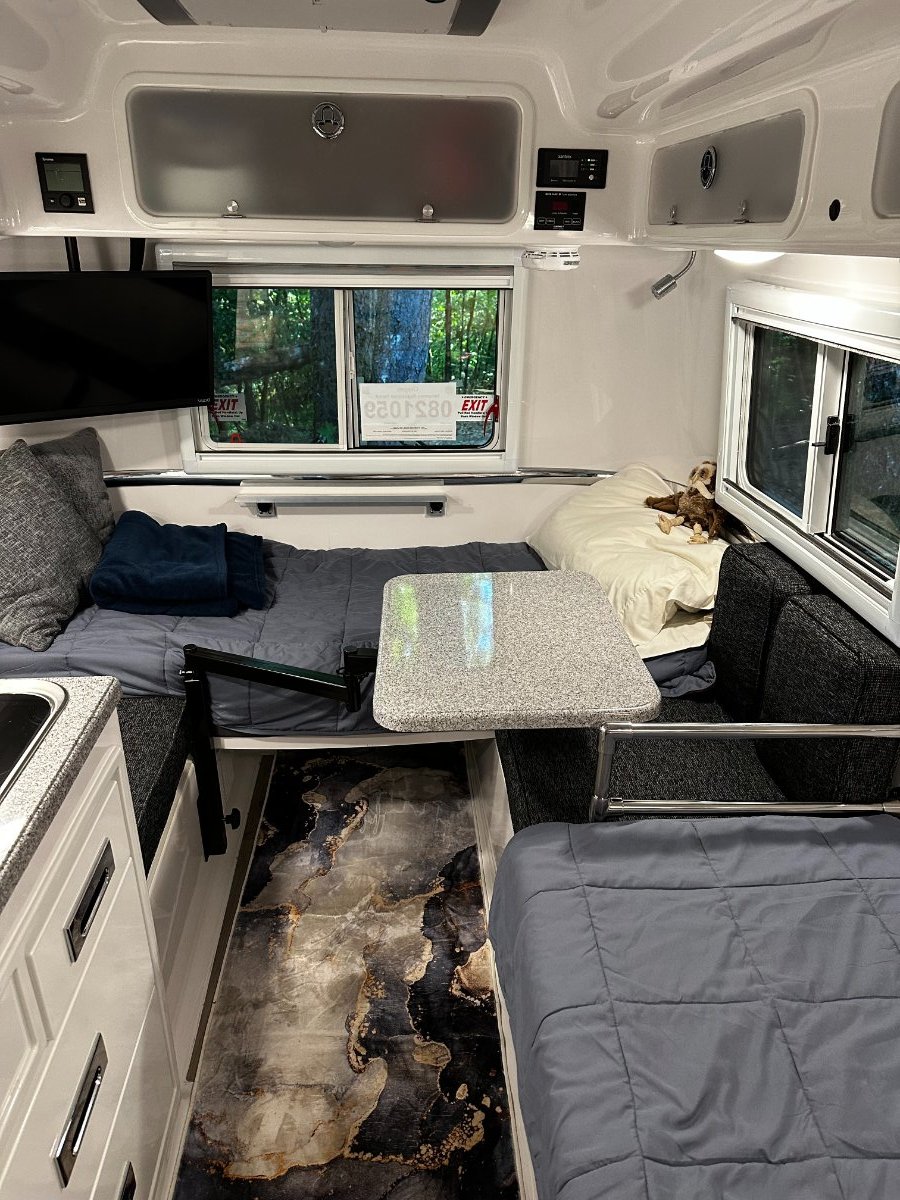
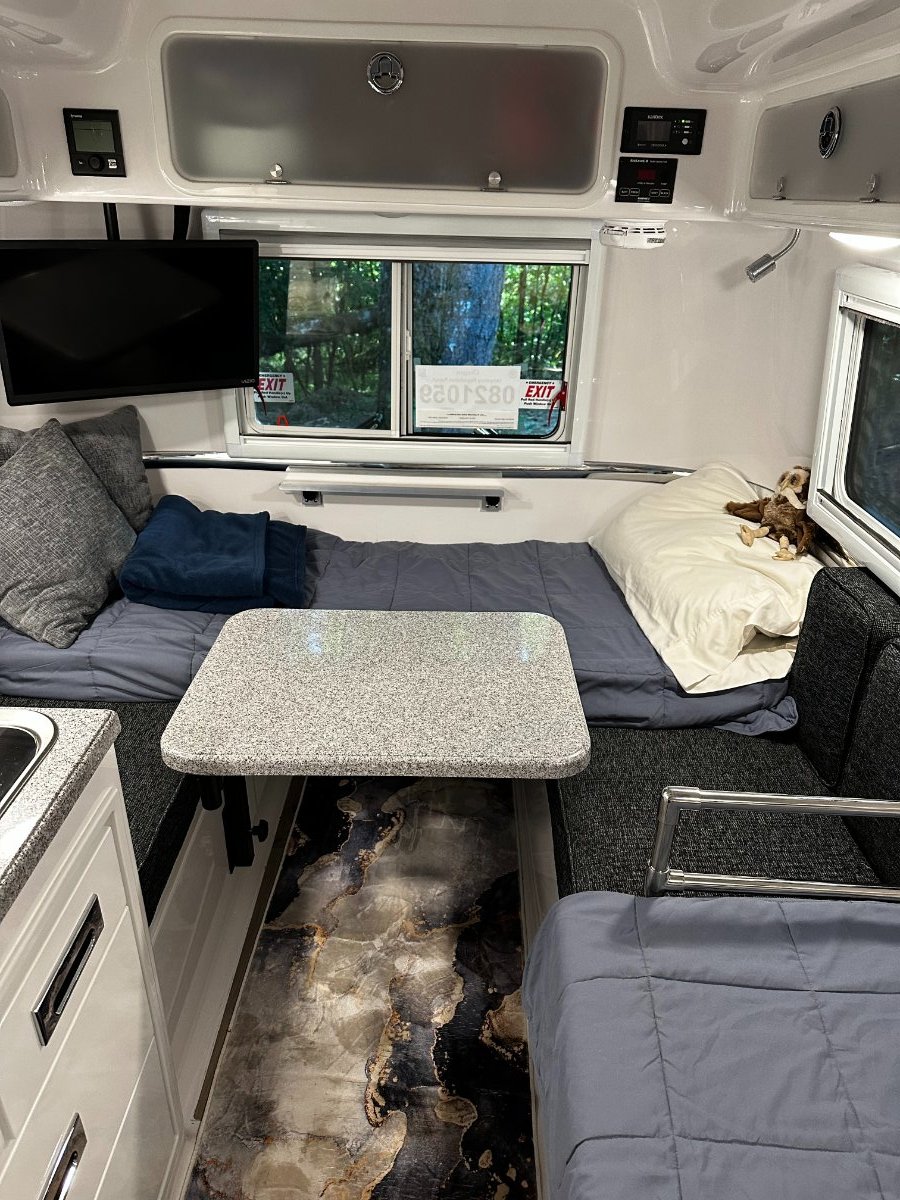
We were accustomed to separate single beds in our pop-up A-frame. Since picking up our Elite I Hull # 1209 on August 11, we are trying a single bed across the back for my wife, that we leave in place. I use the dinette bed across from the galley, putting it up each evening. This keeps us from having to crawl over each other during the night. It also creates more space by not having the large dinette and opens up a seat on each side in front of her bed. I simply made a plywood support and use the small fiberglass extension that was in the closet. The 4 small side cushions are the middle of the bed and we have a 3 inch memory foam over the cushions that extends across the back. By no means will this work for everyone, but we're not very large so it seems to be working well for now. Having lots of small pillows, that I recovered, helps for lounging around in the evening while watching a movie or reading. The valances are on 1x2 poplar with the fabric stapled to it and velcro holds them in place very well so far. I borrowed Foy's ceiling panel design. I did have him make me one of his beautiful shower mats! Ron
1 point
-
Geromino John, thanks for the kind words. Sure I can elaborate why I haven’t installed a Master battery switch, and I’ll also provide a better solution if the objective is to switch off all the stand-by loads when the trailer is in storage. The battery switch will add resistance to the circuit from the additional cable length needed to reach the switch, and through cable lugs and switch contact resistance. Granted it’s not much, but anyone who has ever dabbled with cable resistance knows that it doesn’t take much to create a voltage drop, particularly in high amperage battery systems like the Oliver. Voltage drop impacts the systems efficiency and it means your creating heat and burning watts. I don’t think there’s an optimum place to install a switch given the stiffness and limited bending radius of the size cable that you would need. It's best to keep the cable as short as possible and that really limits the mounting options. I haven’t see a compelling reason to install a huge battery switch. I’m in and out of the trailer enough where it would be an unnecessary burden to turn the battery off. The only reason I can think of for installing a switch, is to shut off the stand-by loads while in storage. I personally think stand by loads are not a significant concern. There are not many scenarios where solar or shore power is unavailable and, if so, there are other solutions. If there is a desire to shut off the stand by loads while the trailer is in storage, then simply shut off the DC breaker that supplies the DC fuse panel. It’s located next to the inverter. You can see from my previous post that all the primary loads are fed by the DC fuse box. However, I’d recommend re-powering the CO2 detector so that it always stays energized. Hope you find this useful! Cheers, Geoff1 point
-
I got tired of messing with them last year and, like others, took all four hubs and caps off. Looks fine and now I don’t have to deal with them anymore. Mike1 point
-
To avoid clutter one could Velcro a square section of pool noodle as suggested. GJ1 point
-
Can’t be much. Haven’t tested but likely about 0.02A. Anybody test it power on then off?1 point
-
How much draw on the CO detector?1 point
-
We’ve been in Main this week at Schhodic Woods Campground in Acadia NP We left this am to head south stopping a Walmart to re-supply. Upon returning to the trailer I noticed that the steps were much closer to the ground. Upon further inspection I found (After 5 years and about 65000 miles ) Hull 505 EII finally broke a leaf spring. it was the curb side rear and sheared just where the first and second leaves meet. Lucky this happened 5 miles from a Maine Trailer location. it looks like the issue was caused by a small crack in the leaf that has the bolt eyes. That small original impurity caused internal rust weakening the metal and over time and bumpy roads it finally snapped right where the next leaf touched the longest spring. I called them at 11:30 and they got us in on a Friday at 12:30 and on the road by 2:30. That’s pure luck! I had a spare pair of springs in the bumper from our Alaska trip, but had them put on 2 new springs that were a perfect match, so I kept the spares and put on the new ones on the rear axle. $314 installed! new springs Maine Trailer 101 Coldbrook Rd, Hampden, ME 04444
1 point
-
Good for you! What are the odds that the piece of 2x4 would clear the grill and hit the important stuff behind it? Glad you had the JB with you. Also, thanks for the update on the DC to DC charger. Bill1 point
-
State parks are primarily supported by state taxes. I have no problem paying extra to camp in state parks outside my state. Prime camping season in my state is winter. Out of states book it up, routinely. Makes it harder for families to book sites in season. I totally support additional fees for out of state. I've never complained in the states that charge me extra. I get it.1 point
-
Spent a lot of time at this refuge while collecting field data on the Northern Leopard Frog for a National contaminants study with the USFWS. Now that I’m retired from the Service, a return to camp there is on my bucket list!1 point
-
Maxwell National Wildlife Refuge. Maxwell, NM. Just off I-25 but very quiet. Pit toilets and 5 (free) campsites. Only ones here
1 point
-
For sure on both accounts! For an hour of my RoF time, and about $7 dollars of RV antifreeze, I can easily do the full monte winterize. At what someone is willing to pay for my time, say $2 an hour or one of Art's fantastic home brew's (Priceless), it would only take two hours of anxiety caused sleep loss to amortize my time and materials rate. But for me, and many of those reading this, our anxiety is worth less than five minutes of time to cover the cost. Especially if we pull in to our boondock heaven, and CINC - House is stepping into the bathroom for a hot shower for happy time to follow. But she discovers our tanks are empty due to a frozen pipe the night before thawing. Now that alone is enough to make a man weep. 😢 So JD go right ahead and gamble you are right every time. But for me, "I just don't feel that lucky". LOL~ GJ1 point
-
Just turn your Delonghi heater up to 70F the night before you're leaving. It's NOT like you're leaving from the Yukon or the Twin Cities! Am I the only forum member here that is giving @ScottyGS confidence in his extremely thoughtful plan? (Yes) You guys with your pink stuff, I've never have used it and never will. Lately most of you have found your winterizing is signaling your CO Monitor! 🤣 Really? You can do better. Big Pharma, Big Food, Big Chemical, Big Gov, we don't use ANY of it, although we are stuck with the last one! Hopefully much of that is corrected soon! Scotty, God Bless you and your family and Merry Christmas. Let us know later that all was fine. Have a great trip!1 point
-
I’ve have tried to extend our “season” to thanksgiving by not winterizing and running the Truma for heat. I quickly found that my anxiety was more expensive than the time and materials it took to winterize. The other issue is the weather and temps you will encounter when you pull out for your late Dec trip.1 point
-
That's what many in the Asheville area sadly said before Helene roared through killing over 100 people. 😢1 point
-
From Mr. Google: The record low temperature in Asheville, North Carolina for winter is -16°F, which was recorded on January 21, 1985. This was part of a wave of frigid temperatures that affected much of the state, including Mount Mitchell, which recorded a record low of -34°F. Scotty Some Observations: For sure these hatches also should be opened up, as well as the bathroom door. If you store any liquids in the upper cabinets, they too need to be open. Your above post indicated that you are only one deep in heat sources with the nice oil filled radiator heater. Suggest setting your Suburban heater to on at a bit lower temp in case you lose power and are away from the area by choice or emergency. You are making some assumptions that can not 100% of the time for every winter be assumed. Just one time you got caught away, or utilities went out you could get into a plumbing nightmare. On the other hand, the OTT specified winterization process is pretty much an absolute. Me personally I would not risk it. But then some others likely would take the gamble. I would at least use the air method that JD mentioned so as to reduce the risk. One other thought, hopefully you have a sensor point inside the street side rear area where the plumbing problems seem to crop up during Ollie Freeze-ups. GJ
1 point
-
Looks good to me @ScottyGS! I just used my compressed air method since we had a full 2 months, no travel plans 'til Feb 1. When it's just a few weeks, I have often set the Oliver furnace (and other RVs) to about the same 50F, leaving beds and basement doors alone. We keep our 30# LP tanks full at all times. Here we only get below zero for a few hours near dawn so very little LP is actually used. I also have a Ruuvi sensor right below the water lines in the rear basement. The Delonghi is a rather safe heater. Your plan looks very good to me. 😂1 point
-
My new springs from Maine trailer l are clearly Chinese.
1 point
-
99.999% probability that they are of chinese origin with steel from a ‘59 Buick. So on the bright side they may in fact be made of mostly USA steel. 🤪1 point
-
Did you replace the leaf springs or have them with you in case you do need them? Is there a particular weight rating for the 5-leaf springs from Alcan? I plan to get the 5-leaf springs next April and have the shop in Grand Junction install them. What did you do with the shocks? Lew said he could put better shocks on our Elite II than the Monroe. Our trailer and yours are only one hull number apart. Thanks.1 point
-
@jd1923 ; Studying the Leaf spring upgrade thread is a good call, brother! Concur 100%. It's key for OTT owners to know that U-bolts are a "one-time use" item. Once torqued correctly, they should not be removed and used again because they actually "stretch" to fit that particular axle/spring configuration. The leaf spring upgrade thread has proven to have saved several owner's some heartache by having spare leaf springs in their kit when experiencing a spring failure. It's good to learn that @Galway Girl had spare springs and was near a good shop to handle the R&R for them. BRAVO ZULU! Imagine if that particular thread had not been started! Cheers, All!1 point
-
You were very fortunate to have been close to a trailer shop. Good for you! Onward!1 point
-
Glad that worked out so well!1 point
-
Its actually easier than it looks. Do one side at a time, take pics as you remove the broken string so that you can remember the exact routing. Unfortunately, I never found a way to "test" my progress as I went. That meant that I never really knew if I was doing it correctly until I got it all back together and tried putting the shade up and down. Perhaps one additional hint - take another of your shades into the work area with you to use as a reference. I'm not saying that you should take it apart, but, having one that you know works properly as a reference provided me with at least some assurance that I was on the correct track. Bill1 point
-
Mine is sitting in the dining room while I try to work up the mental energy to tackle it. I am getting confused just reading this thread! Things that look like mazes baffle me. 🙂. Paula1 point
-
Toilet Chemical... what do you mostly use? We have lately used Eco-Save. We like scented, just because of the scent. The dry is just right for boon docking as it last so long, and it lubricates valves. A nice thing is it can freeze, shake it, works fine. First saw it used at a campground dump station. A newbie had a sun damaged blue 'stinky' hose that broke, and lost it's content all over the ground. It was a real hot dry day. The CG owner raked and shoveled any solids and flushed away in the bathouse.. He then put about an ounce or so of Eco-Save and some water in a spray bottle and spray covered the area. I watched the area that weekend and never a hint of odor or problem. I like it because it is not chemical based. They don't even recommend it is used ntil there is waste in the tank. Doesn't seem to be mass marketed, but available at a lot of campgrounds. Their web site list where its available in your state.1 point
-
I was in the automotive business for quite a few years and learned alot about bearings and grease. I also have been boating for over 40 years and dunk my trailer in salt water all the time. Over the years I've learned that China can make quality bearings depending on who manufactures them. I prefer the Japanese bearing because they seem to have the best quality control. Had the least issues with them and got the most life time without on ball going bad first. Mobil I synthetic grease seem to work the best because it's not effected by water and withstand high tempertures with melting. Doesn't mix and look like chocolate milk and lose it lubricating ability. I've been using Mobil I sysnthetic on grease fitting on my vehicles and three trailers and never had a issue with bearing failures. Just my take.1 point
-
Given you cannot get the #5 position to stay on after selecting it, can only be the board. We usually run ours in the #4 position, saving #5 for when we might need it. Did you work the new fan installation?1 point
-
For now, I have a problem my Domestic. It will not go to level 5 on the eyebrow board. I can only set it to #4. It seems like the lights sort of flicker when trying #5. The check like does not go on, but there's a quick flicker. Has anyone seen this behavior? I've not found much on the Internet about that. So #4 setting really cannot keep temperatures down to proper level if the inside of the camper gets warm. The fridge will hover around 45 to 48 degrees when camper is warm but if camper is cool, say 77 degrees, then fridge will maintain 35 and freezer around 7 degrees. This behavior is on all three power settings, propane, AC, and DC. Could this be a board issue?1 point
-
Sounds like you only have the two axle trailer rather than the four.1 point
-
More than a few of us, myself included, have found that our trailers look just fine with the eight FOUR center hub caps and their supporting "Cones ???" removed. This is especially true of owners that routinely shoot their hubs with an IR temperature sensor. With the cones and caps installed, it is difficult to get a good bearing/hub temperature readings. This is the topic of several members here on the forum. GJ1 point
-
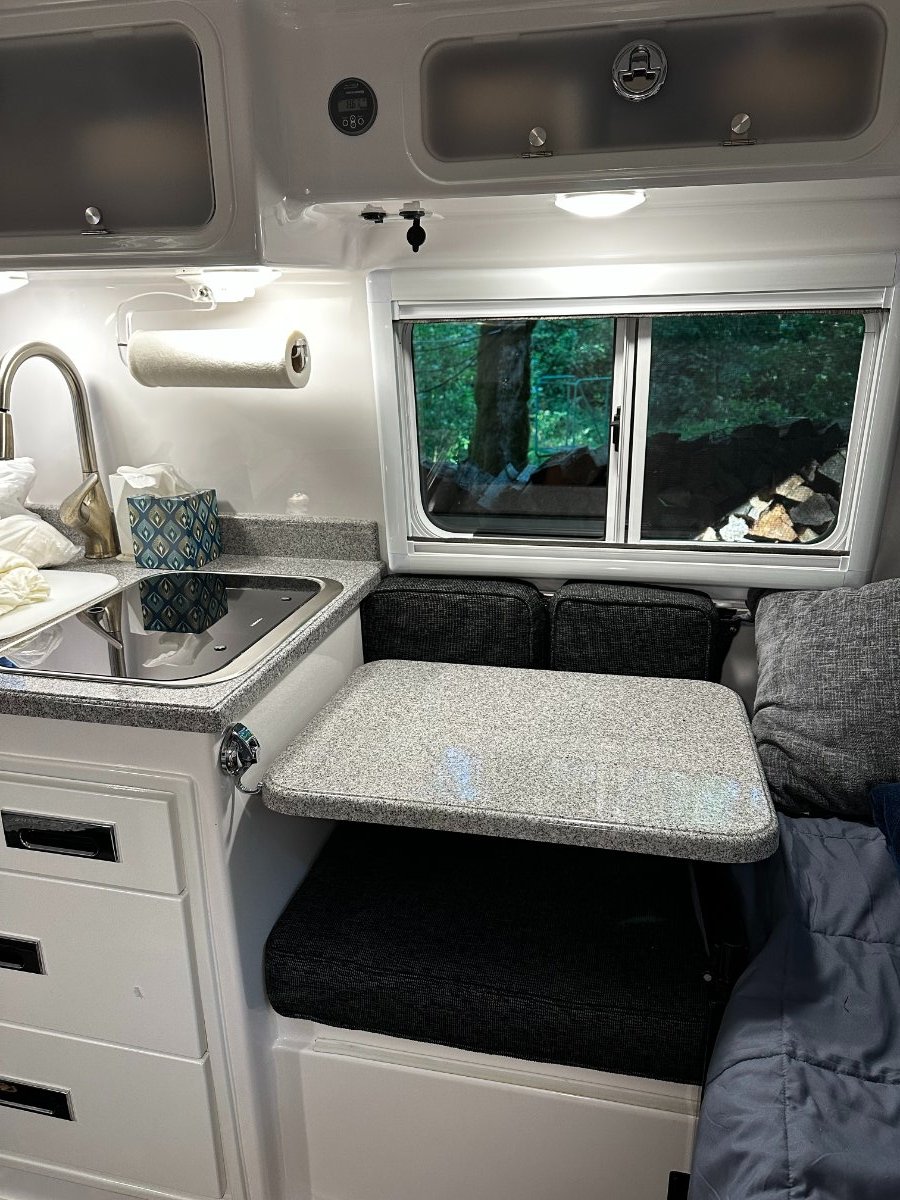
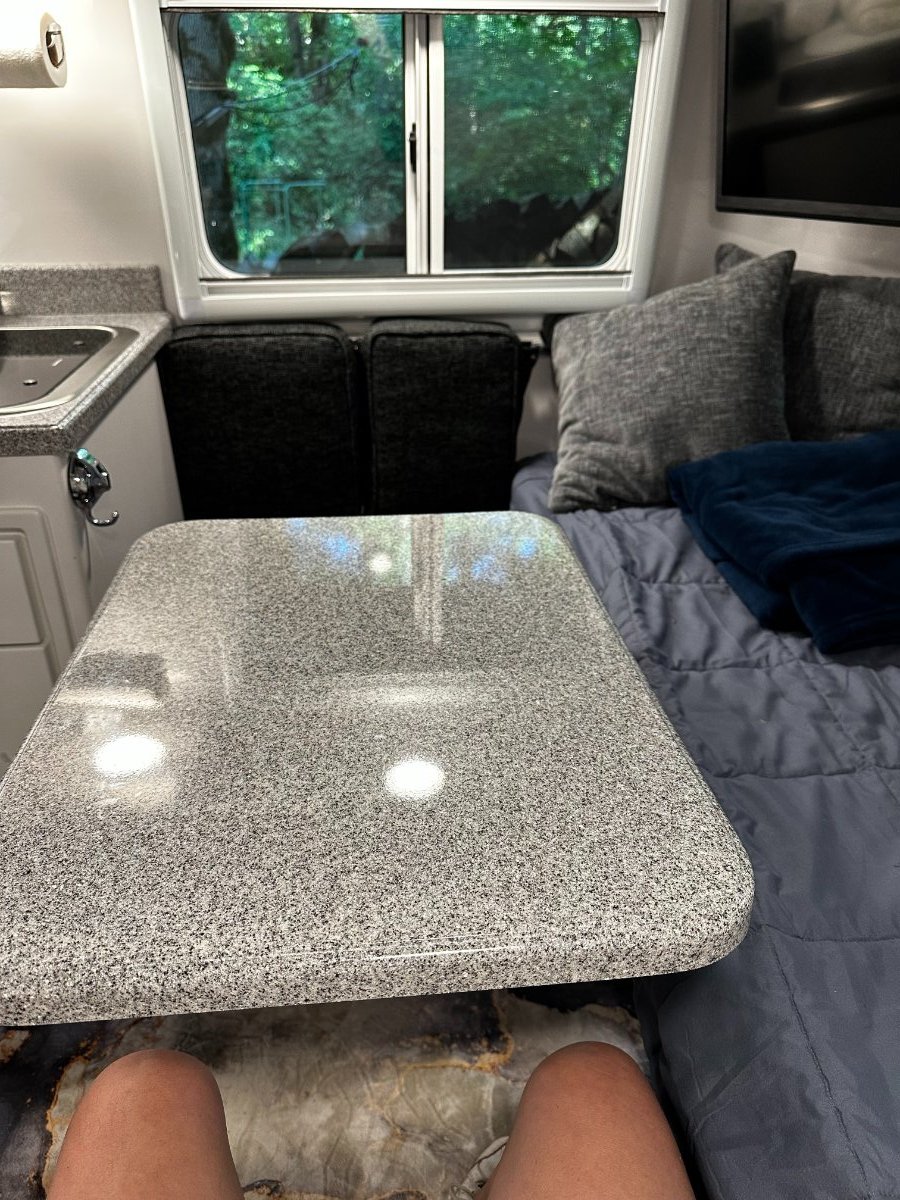
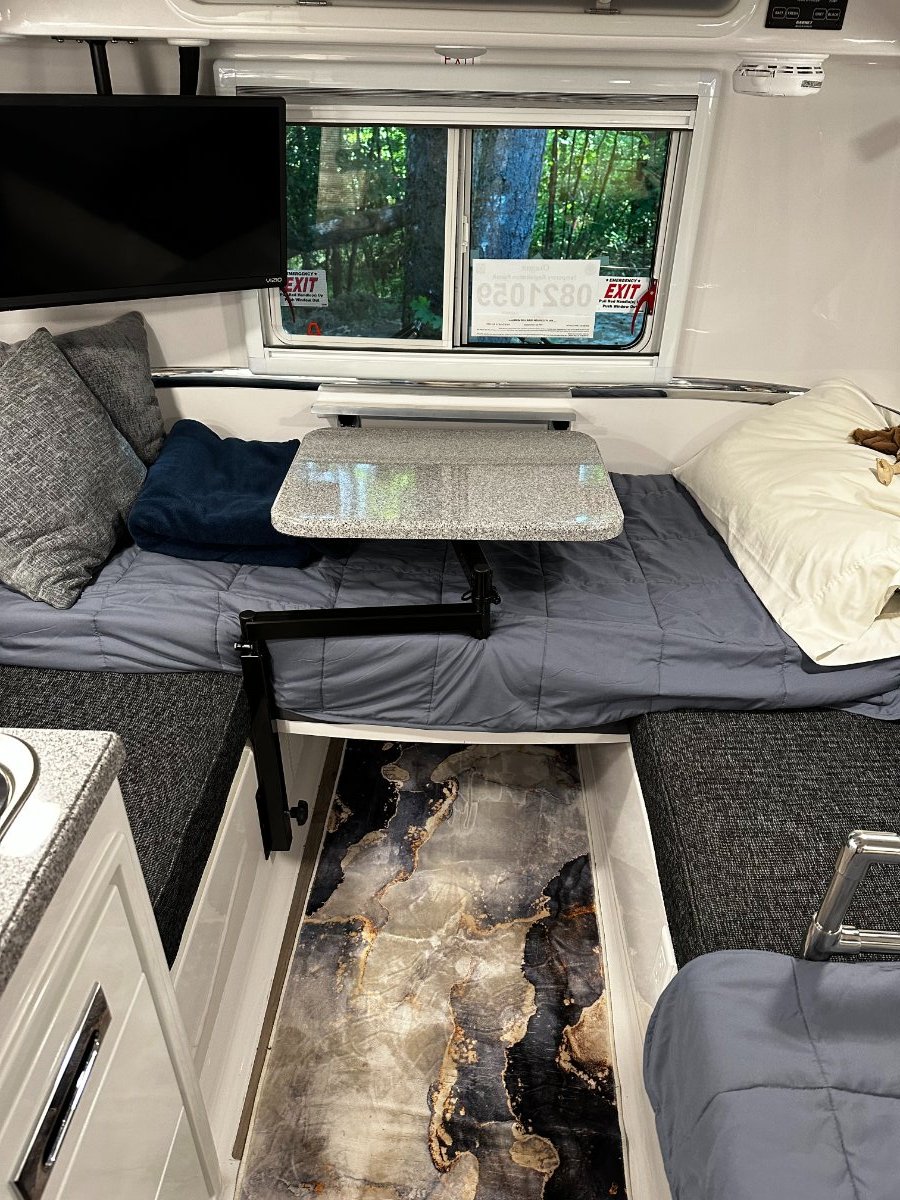
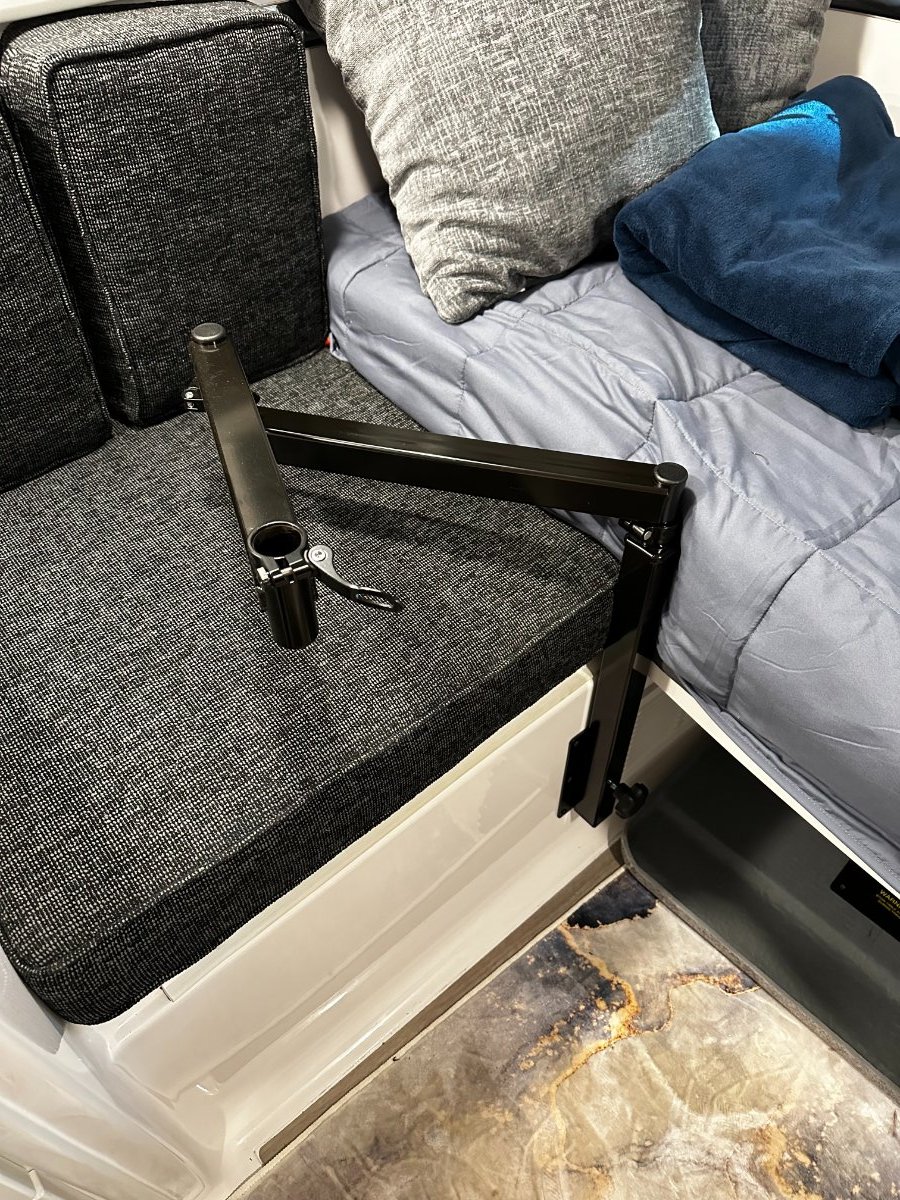
OK, I finally completed the modification with the lagun table and we are very happy with the results. We have ordered some backrest cushions from OTT to replace the split backrest cushions. We just returned from our first camping trip with Coddiwomple and really like this setup. My wife, Martha, sleeps on the back bed (28" wide) and I sleep on the side dinette bed (24" wide). David
1 point
-
Because of this thread I had repacked my bearings over a year ago, wow, over 1.5 years. Oy! Time flies. Anywho, when putting on my tire I had got checked out at the tire shop I noticed not one, but two wheel bearings needed to be snugged up a tad bit. It was a good find and a quick tweak. All-in-all, a good night for minor repairs and improvements. Maybe a step closer to a super long trip. I still prefer these forums over Facebook. 🙂1 point
-
Most septic safe paper is ok. If you're not sure about your favorite brand, put a couple clean squares in a jar with some water, give it a couple gentle shakes, and see if it falls apart. If it does, you should be good to "go." So to speak. If not, find another brand. The key to avoiding the dreaded poop and paper pyramid is enough liquid in the tank, before you dump. It doesn't have to be a lot of clean flush water. The water that's already been through you works just the same... Edit to add: Scott makes an rv tissue that's a little softer, smaller rolls, still pretty inexpensive. The big Scott one ply megarolls we get at Costco don't fit well in the marine style dispenser in our Ollie, till I unroll a bit. That's ok, because I save those bits in a zip lock to carry in my pocket for campground facilities. I learned a long time ago to not count on available paper.1 point
-
Definitely, don't use household toilet bowl cleaners. Dishwashing liquid is quite enough to clean the bowl, and use that sparingly. Toilet bowl cleaners like Lysol are very caustic. Dishwashing liquid is all I've ever used, in the camper, as a cleaning solution.1 point
-
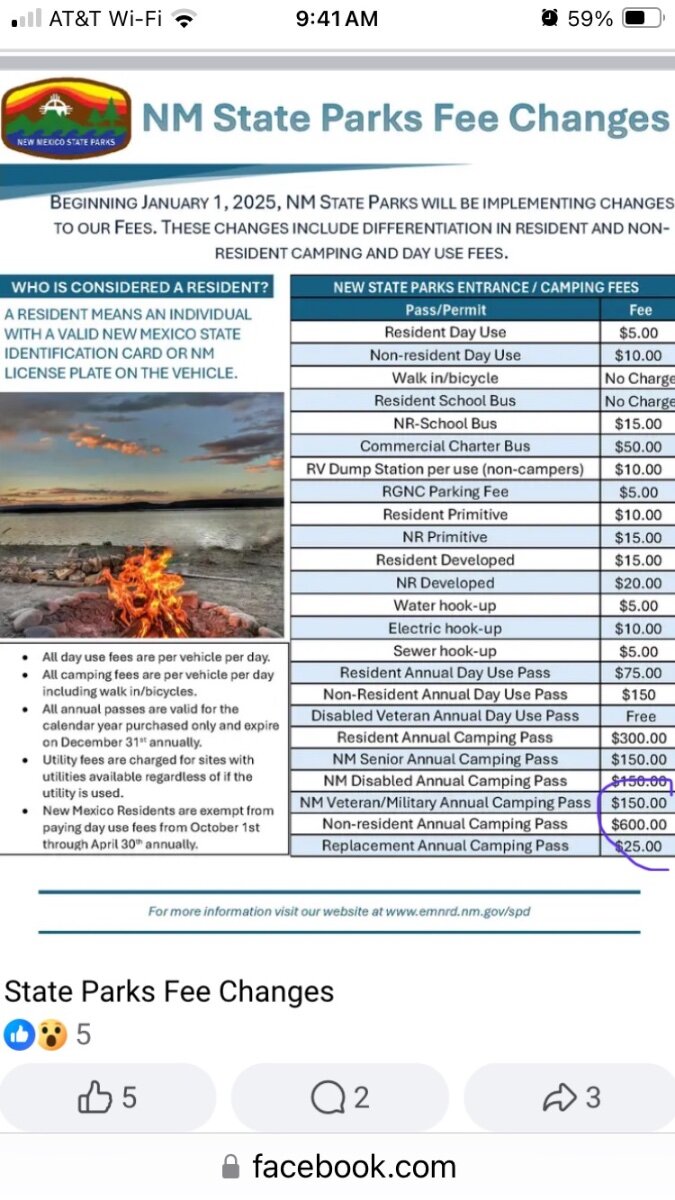
New Mexico State Parks will be implementing a new fee structure beginning January 1, 2025. For those who have been following this topic this is not news. If you have not been following, the rate increases can be substantial, particularly for non-NM Residents and may come as a surprise. Most notable is the increase in fees for the non-Resident Annual Camping pass from $225 to $600. Passes purchased in 2024 will be honored til expiration in 2025. If you are a non-Resident and plan to purchase the Annual Camping Pass for 2025 you may wish to do so yet this month so you will not feel the impact from the increased rate until 2026.
0 points
-
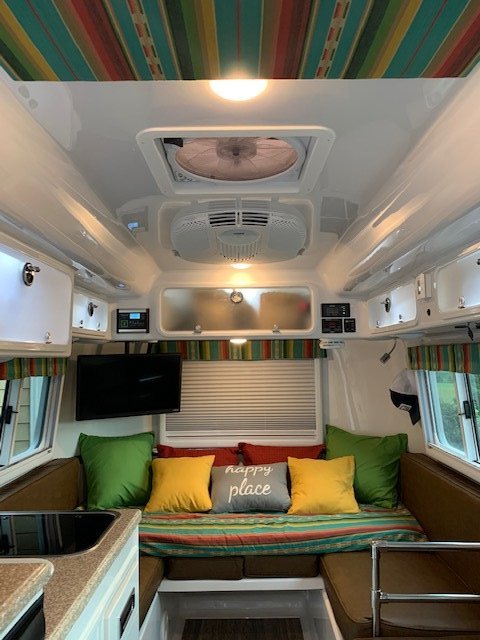
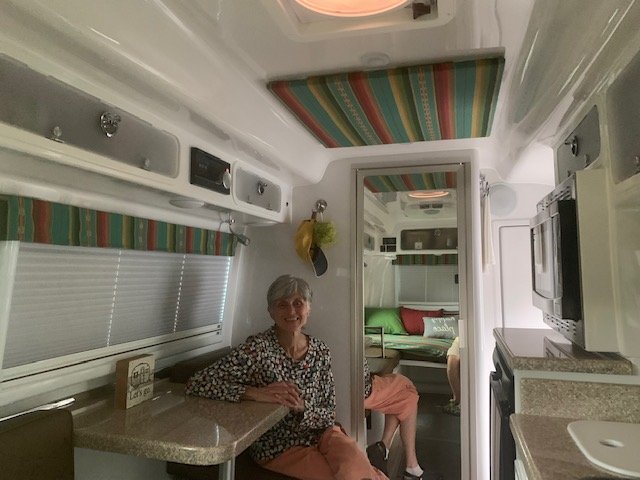
Having a grand old time reading all the posts. No need for controversy. Not even seeking advice... although I always appreciate the comments and alternate views from the brain trust. This was just one strategy for keeping the pipes from freezing in some very particular circumstances. I thought to share it in case someone was in similar circumstances and would benefit. I do have one observation for everyone that read this post and took a look at the picture I attached. NOT ONE OF YOU! ... Not one... Not even me and I took the picture... Noticed what was lurking outside the window of the trailer. Look again! Scotty0 points


-
Recent Achievements
-


")


")


")


