Leaderboard


Popular Content
Showing content with the highest reputation on 06/04/2025 in all areas
-
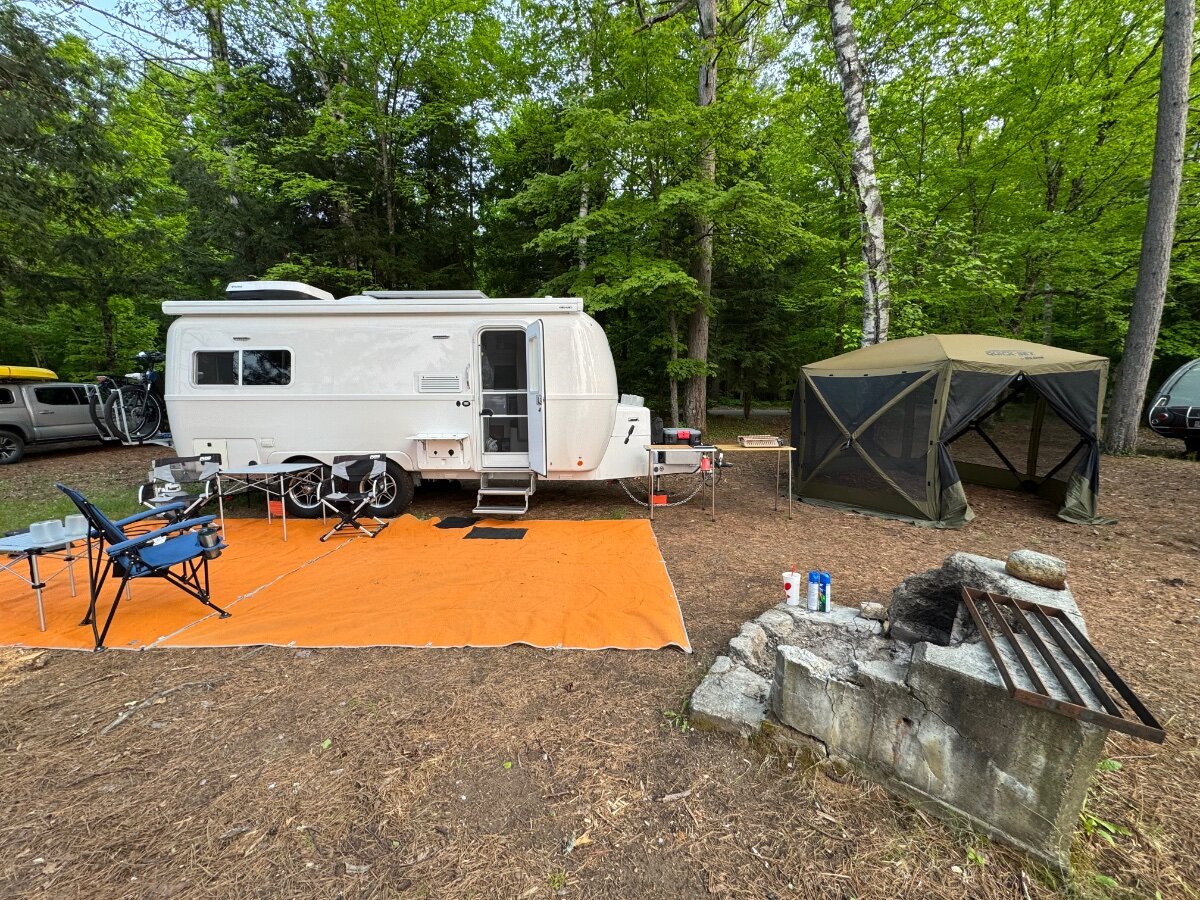
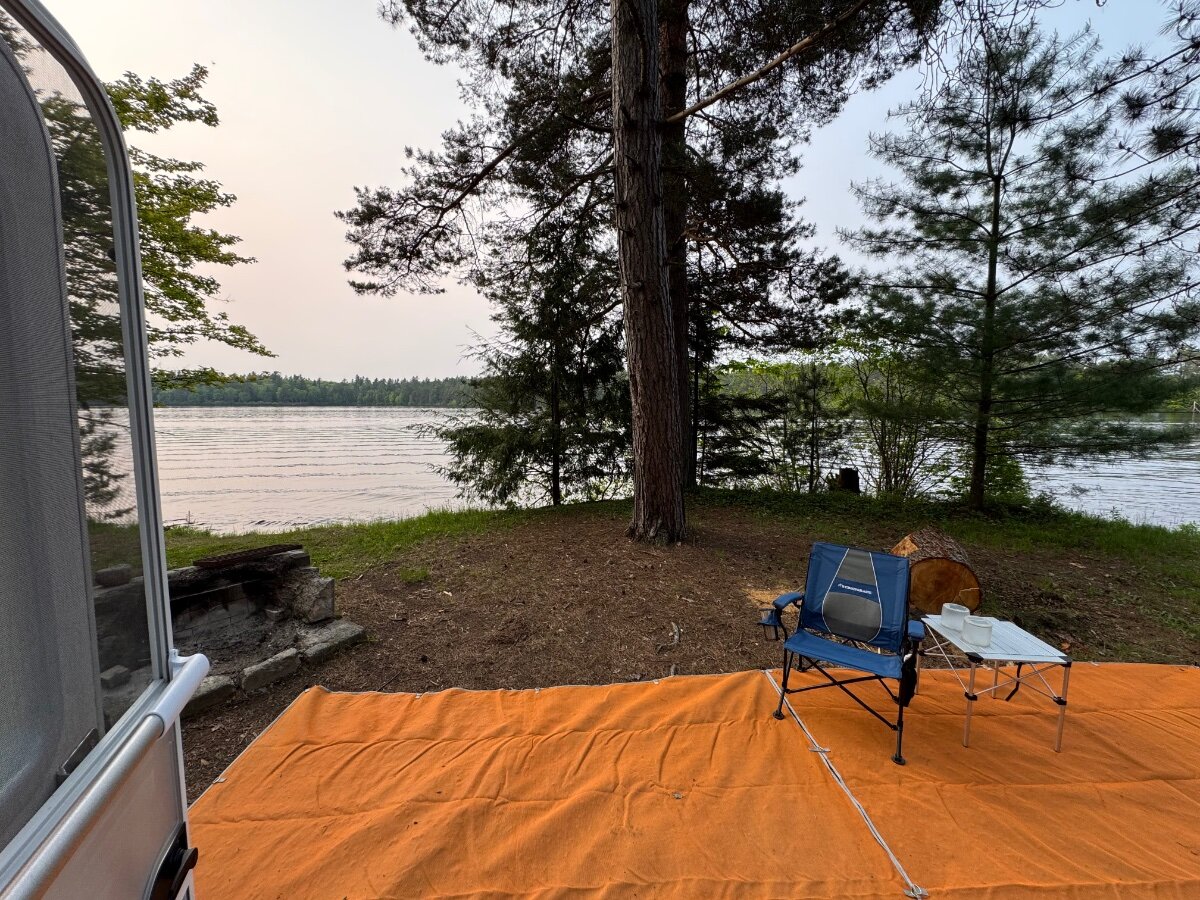
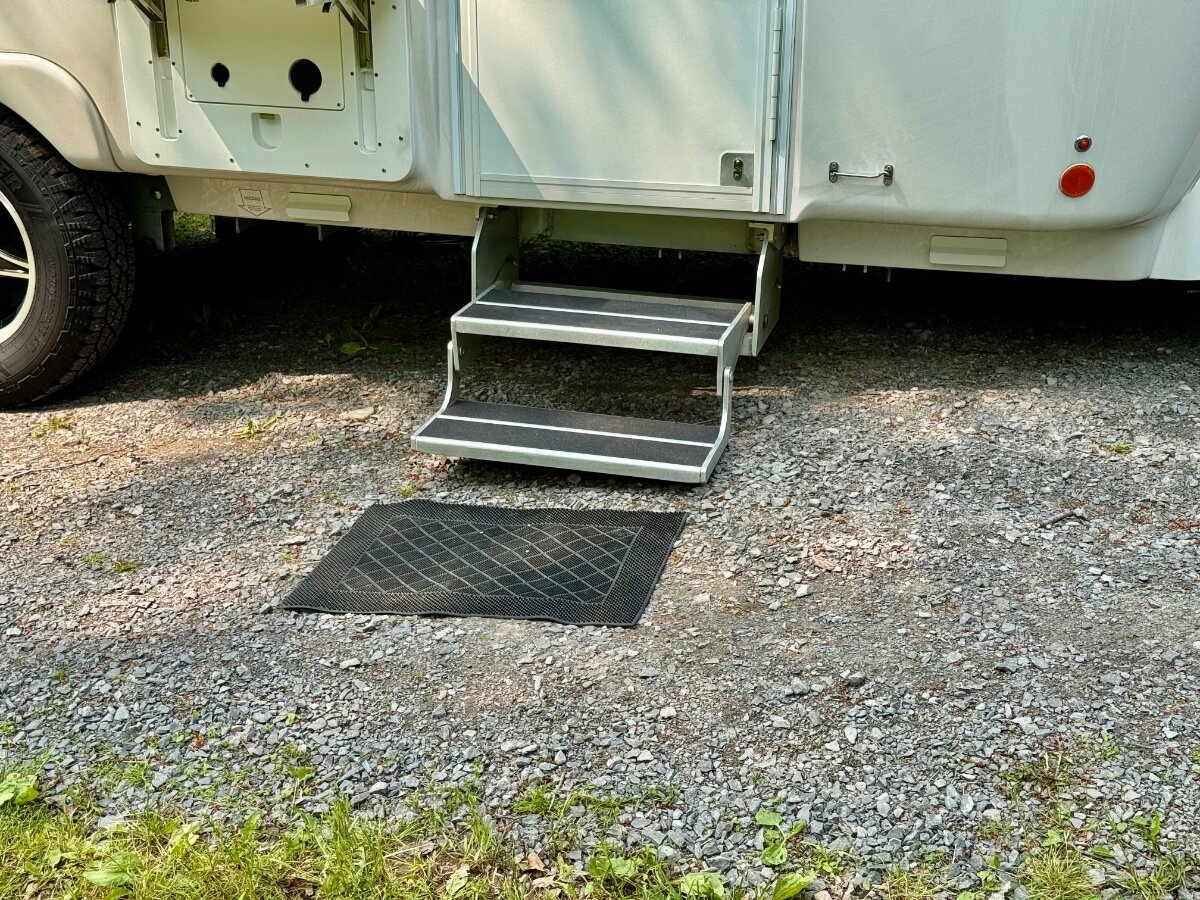
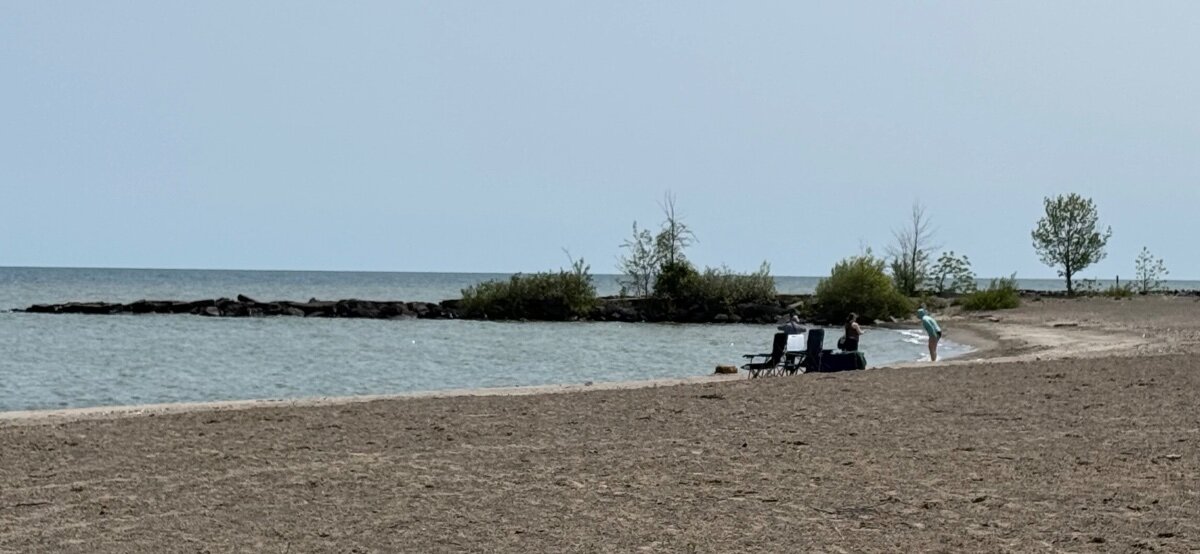
Current location: Fish Creek Ponds Campground site 222 in the Adirondacks. Absolutely beautiful! The view from the door
 7 points
 -
It gets better!
4 points
-
With storage space at a premium, we have been using this Pro Breeze since Feb of 2020. - https://www.amazon.com/Pro-Breeze-Electric-Dehumidifier-Portable it has served us well and packs up small. It is quiet and has an automatic shut off when it becomes full. We store it on the closet floor when underway.3 points
-
That’s fine for cleaning the fan blade & screen. Unfortunately, the rest of the fan collects just as much grime and dirt. Aside from @jd1923’s pressure washer trick, the rest of the unit needs cleaning just as much.3 points
-
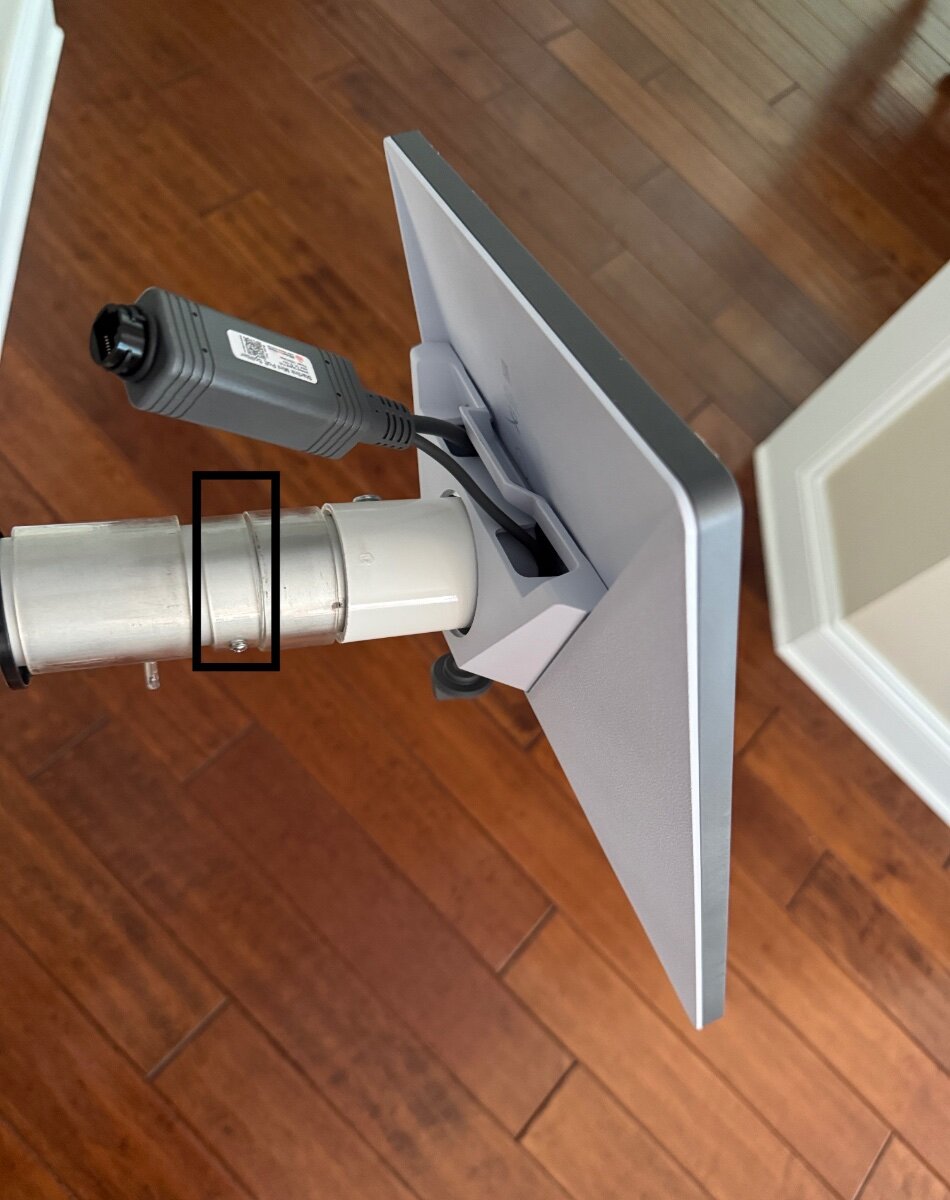
For anyone with the harbor freight flagpole and the Starlink mini, a 1 1/4 inch PVC union works perfectly with the mount that comes with the starlink. You just need to drill new holes for the clear support ring a little lower down to make room for the PVC.
3 points
-
TLDR - this post tells you in words how to detail-clean your MaxxFan I haven’t seen it posted anywhere else so far, so I thought I’d throw this out there. After three seasons of practically full-time use of our Ollie, the MaxxFan was looking pretty cruddy - especially when it was sunny and you could see the dirt and grime buildup inside the hood. The fan “maintenance” I’ve found online seems to be limited to cleaning the screen and maybe the fan blade. I had done that a few times, but it didn’t address the real dirt. There’s no way to clean inside of the hood with the unit assembled. Nor would you want to try doing that with the unit overhead. Since I had to pull the unit off the roof to replace the motor. (Wouldn’t go above 30% without beeping, and shutting down.) I decide to pull the whole unit apart and give it a serious bath. Sorry for no pictures - by the time I thought of that I was elbow-deep into soapy water. Instead, I’m giving you the 10,000 words. I pulled the control panel with circuit board, the fan motor, and the open/close gearbox off the unit. I left the rest of the opening mechanism in place. I pretty much tore the unit down to individual parts. Every screw - aside from those holding the open/close mechanism to the main frame - was removed. Start with the hood in “open” position. It’s probably easiest to remove the interior bezel and manual open/close knob first - though it may be possible to access the power wiring with it in place. The black ground wire and white + wire can be disconnected by removing the electrical tape Oliver put over the connectors, and lifting the orange tab to release the wire. (I was originally thinking I’d have to cut & re-splice the wires, believing Oliver used some kind of crimp-on connector. In my case, luckily not.) Once on the roof, removing two screws on each side of the base on the unit will allow it to lift the unit off of the roof. Back on terra firma- Flip the unit on its back - upside down - on your workbench. (Picnic table?) If you didn’t remove the control panel and circuit board, do so now and set it aside. (Four screws for the control panel, one more in the center of the open/close knob.) The fan motor and open/close gear motor have keyed 2-wire connectors that attach them to the circuit board pigtails. The hood is held on by eight sheet metal screws that go into “u” nuts, so no worries about screws going into plastic stripping out. Five at the front edge, three at the rear edge. Once those are out, disengage the hood operating arms and lifting the rest of the unit off/out of the hood. Be sure not to lose the two plastic bushings that fit over the pins in the ends of the operating arms. The pivoting rear grille has two keyed tabs that attach it to the main frame. Rotate the grill up to disengage them. That frees the grille. At first, I left the piece of hardware cloth and its plastic retainer attached to the grille. Later, I found I couldn’t clean it thoroughly with it assembled, so I took out the four screws. These four DO go into plastic, so use proper technique when reinstalling them. The fan motor wiring is held in place with a plastic clamp and two screws. Take out the screws, lift off the clamp and feed the motor wire connector out through the hole. The motor is held in with two nuts onto threaded through-bolts. I think they were 5/16”, but don’t quote me. There are also a couple of wire ties holding the motor wires to the support “spoke”. These can be clipped off. You’ll need new ones. I used electrical tape. The open/close gear motor is held on by three sheet metal screws. Be sure to remove the ones holding it to the frame - not the ones holding the gear motor together. There also a splined coupling between the gear motor shaft and the opening mechanism. This is loose, so make sure you don’t lose it. Now - all the electrical parts are removed, you can do the cleaning. I sprayed all the dirty surfaces with a household cleaner/degreaser. “Fantastic”, “409”, etc. I used Clorox kitchen cleaner because that’s what I had available. I suppose you could use Dawn or TSP or whatever your favorite water-based cleaner degreaser is. I used a cheapo hardware store “chip brush” to do the cleaning. There are a LOT of crevices and internal corners to collect grime. I probably took about 30-45 minutes with the brush, then sprayed the parts off with a hose. You’ll probably see spots you missed to revisit with the brush and the 409. Dry everything off and admire your handiwork! As the old saying goes: reassemble in reverse order. Really. One caution: to avoid stripping out thread-cutting screws that go into plastic, set the screw in place and with just the weight of the screwdriver on the screw, turn it slowly -backwards- until you feel it “drop in” to the old thread. Then gently turn clockwise to tighten. It -should- screw in fairly easily until it’s fully seated. All of the above just goes to say that if your MaxxFan starts to look like the inside of your range hood (and it will if you use it much - especially if you cook inside of your camper) then you can easily clean it to like-new condition with just some time and effort.2 points
-
I have used 303 products for years and have their streak remover. I have been washing on a regular basis after a trip and have not had the issue for a couple of years😊2 points
-
Great view. 👏👏2 points
-
I occasionally do some pretty daring things - including flying single engine aircraft and climbing on ladders. This ^^^ is something that increases my pucker factor to an unacceptable level. Then again, I might opt for this method if I was drinking hard with a buddy and he dared me. Even if I wasn’t worried about the circuit board (which I would definitely be!) how much dirty soapy water ended up -inside- the trailer would be a concern. Another concern would be damaging the hood with the power of a pressure washer. That said - if it’s working for you - who am I to say not to do it?!2 points
-
Getting water in the motherboard has caused numerous fan failures. We remove the screen and with a hex the fan blade. They go into house to be washed with hot water and soap. I then use a moist paper towel to wipe the fan housing.2 points
-
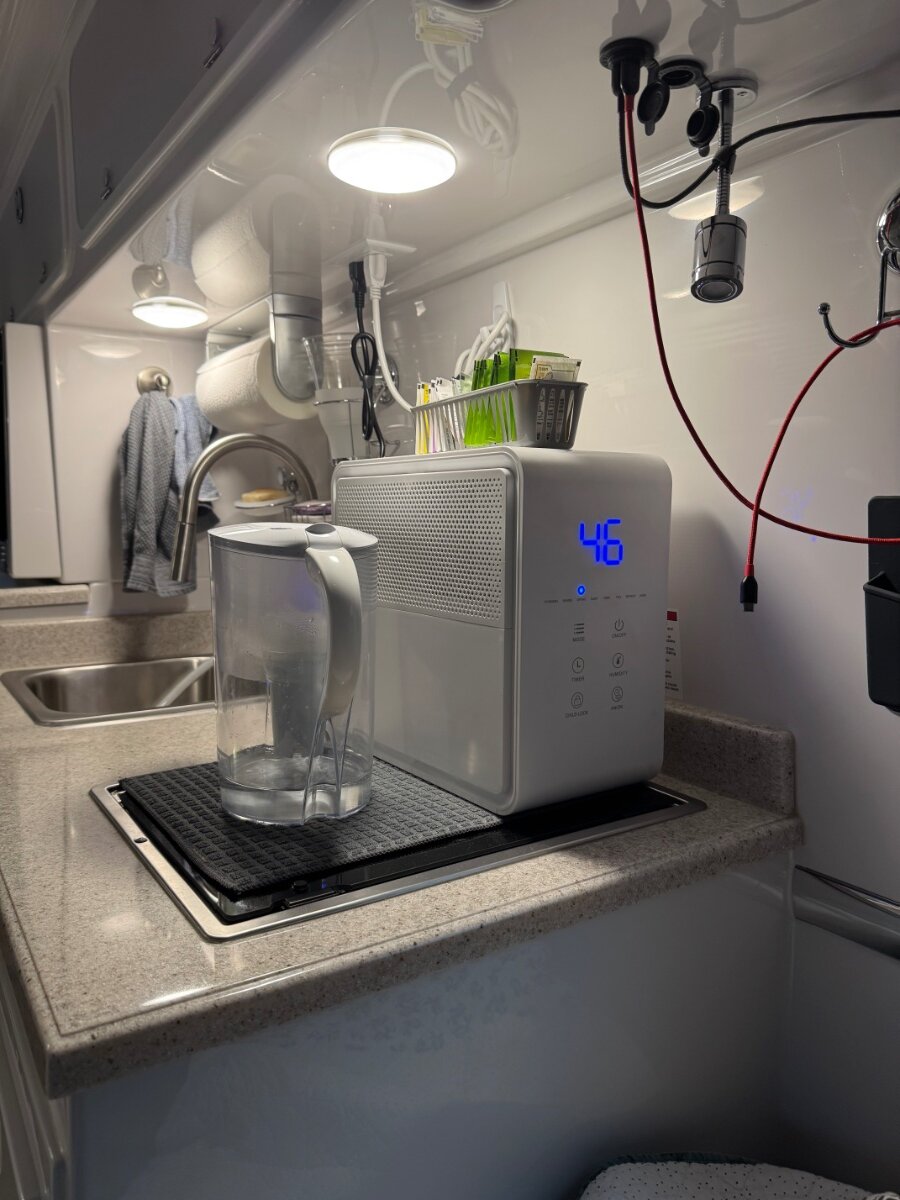
This is a duplicate of a post I made on the Facebook Oliver owner’s page. I’m sharing here for those not on Facebook that may be interested in a dehumidifier option for their Oliver. We were experiencing rainy and cool weather at the rally and conditions in the Olivers were getting steamy. Facebook post: Temperature and humidity outside at Lake Guntersville state park are 62deg and 94% humidity this morning. Inside OllieHaus it’s a perfect 73 deg and thanks to our counter top dehumidifier, it’s a very comfortable 46% humidity with all windows closed. No heat or AC needed. Loving life in our Oliver!! Edit: Here’s a link on Amazon for the dehumidifier if interested: Dehumidifier
1 point
-
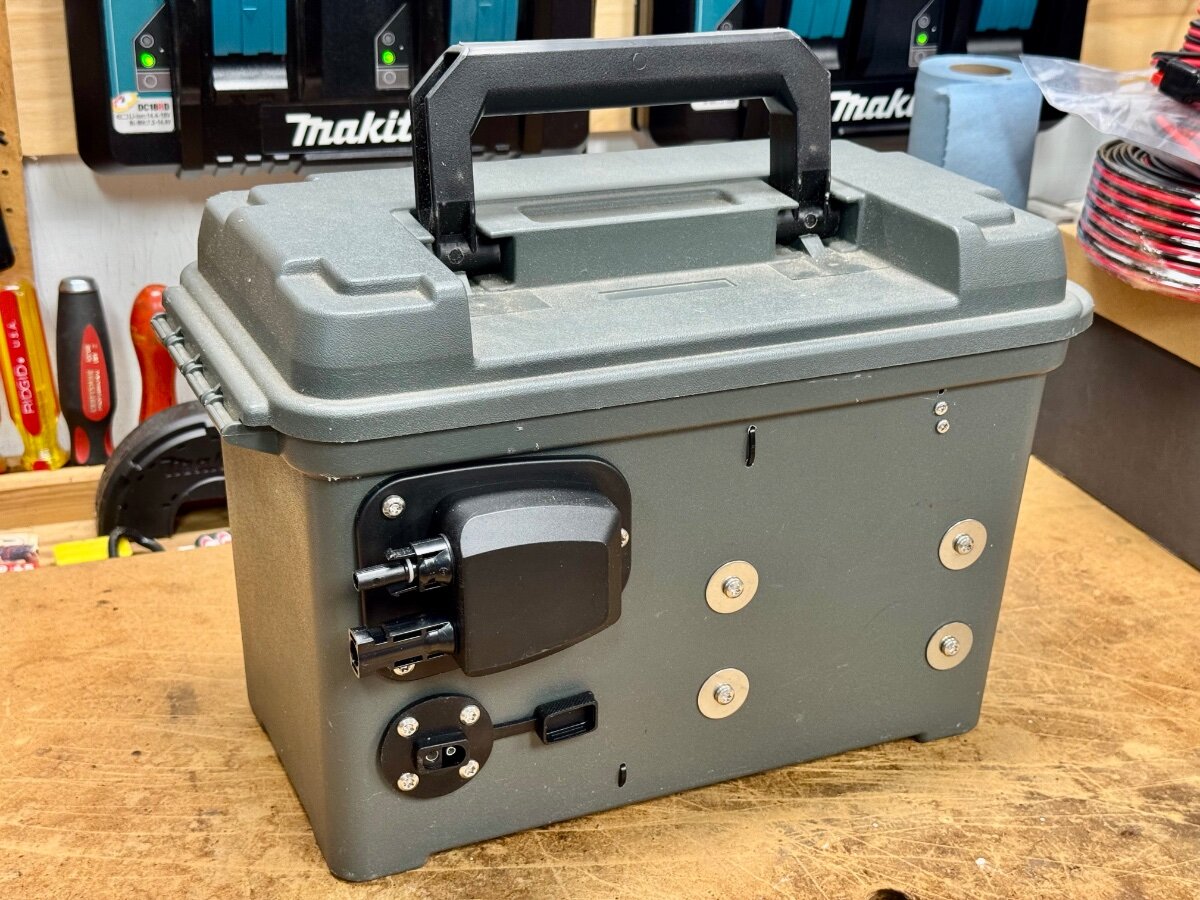
Prompted by similar posts on the Facebook groups and here on the Oliver forum, I finally assembled my portable solar kit. I’ve had a Bluetti 200W solar panel (which does not have an integrated charge controller) for several years to help keep the EB70 in my truck charged up. I added a second after we got the Oliver, as well as a Vicrton MPPT 100/20 charge controller. My original intention was to interrupt the line between the solar port and the battery. But I really didn’t want to do something that invasive. So instead, like many owners before me, I built a suitcase case to supplement my suitcase panels. A Cabela’s plastic ammo box works great to mount the charge controller, an SAE solar port, and an MC4 PV port. It also holds the 10 gauge SAE and 30’ 10 gauge MC4 cables, inline fuse, polarity reverser, and MC4 tools. All in a handy box. This will be handy next weekend, when we leave for a ten day trip to New York’s Adirondack area at Fish Creek Pond. There are camp sites all around the lake; every one a waterfront spot. But no hookups and lots of trees. So hopefully 800W of solar panels will keep us well charged.
1 point
-
When I picked up my New Ollie LE 2 in 2021 the Remote Panel wasn't working. I called Xantrex many times and installed a new Remote panel and Cable all to no avail. I gave up. The Inverter charger always worked but checking settings was a Yoga Class! So last week I had some time and called Xantrex. The Rep read my notes from previous calls on her computor. Talked to her manager and they sent a new XC 3000. It was the communication board on the old one that was faulty. I installed it and everything is working fine now!!! Just wanted to put a thank you here to both Oliver and Xantrex Tech. They really went the extra mile for me.1 point
-
There are a number of products on the market that specifically deal with "black streak" removal. Amazon has a bunch LIKE THESE. I've used a couple of these products on both the Ollie and other campers with good results. Bill1 point
-
I cleaned the top of the trailer just this past weekend, so not sure what would be running down onto the side. The street side of the trailer actually looks quite a bit better. Not pristine, but not as dramatic as this. The marks aren’t coming off with just “soap” so I guess I’m gonna have to use something with some polishing capabilities. It’s strange that it looks worse after it’s been cleaned. That makes zero sense.1 point
-
Are those electronic control boards a fairly straight forward fix or replace issue IF it's determined that they are bad?1 point
-
Upon further review- While the Amazon site doesn't show any certifications, I decided to check the ETL website and the Airplus *is* ETL certified! No idea why they wouldn't include that in their specs... I hereby remove my red flag @Ollie-Haus. ETL listing1 point
-
We don't travel with one, so I don't know what else is out there that meets those specs. When not traveling I keep a 22 pint Frigidaire on the shower floor that continuously drains but it's a little too big for a countertop.1 point
-
I was with you 100% until this statement. Walked through an Ikea ONCE in Austin TX. Could not wait to get out of their maze of cheap kits, ASAP leaving EMPTY-HANDED! 🤣 My son who has been an Angie's List contractor, on and off, has installed these kits for the mechanically-impaired for big bucks! Hey - I generally don’t care for IKEA “furniture” either. (Though I used to have my share of “O’Sullivan” pressboard bookshelves and entertainment centers.) I just used IKEA as a reference gif people who are remotely familiar with common hand tools and putting together adult Lincoln Logs.1 point
-
Yep, when hitting with the hose, stay dead center and clear of the two corners with the two electronic control boards!1 point
-
We're traveling this week, 1300 miles in a few days on our original leaf springs (backup set onboard in case of roadside failure). This will be our first trip of real mileage, likely 4500 miles when back home and done. I love auto restoration with HD/HP parts, so I will start collecting parts, budget permitting over the next year or two, as I always have. First, I will purchase two 5200 LB axles to fit the Oliver (68" or 68 1/2")? Then likely a disc brake system, although upgrading from 10" to 12" drum brakes may be enough for a trailer (cost basis). Then we will go with the Alcon recommended leaf springs, proven by our friends and confidants, Lance @Mountainman198 (how are you buddy)? And of course Steve @ScubaRx (call me before I call you), and say hey to Tali, see you soon)!!! When you see Steve's 3500+ Diesel Truck, 1000 LBS of tools onboard (beside the usual campin' stuff), he is cruisin'. 🤣 We're are going to have a b!tch'n setup (when?) and when we're up I will likely mount my Honda CRF in place of the front basket and mount a big-@ss basket in the rear. I totally need a waterproof carrier like a Thule carrier, just to hold my acoustic guitar! And to carry all the extra weight, my 25-year-old Ram-Cummins will need extra leaf springs on each side of the rear axle! 🤣🤣🤣1 point
-
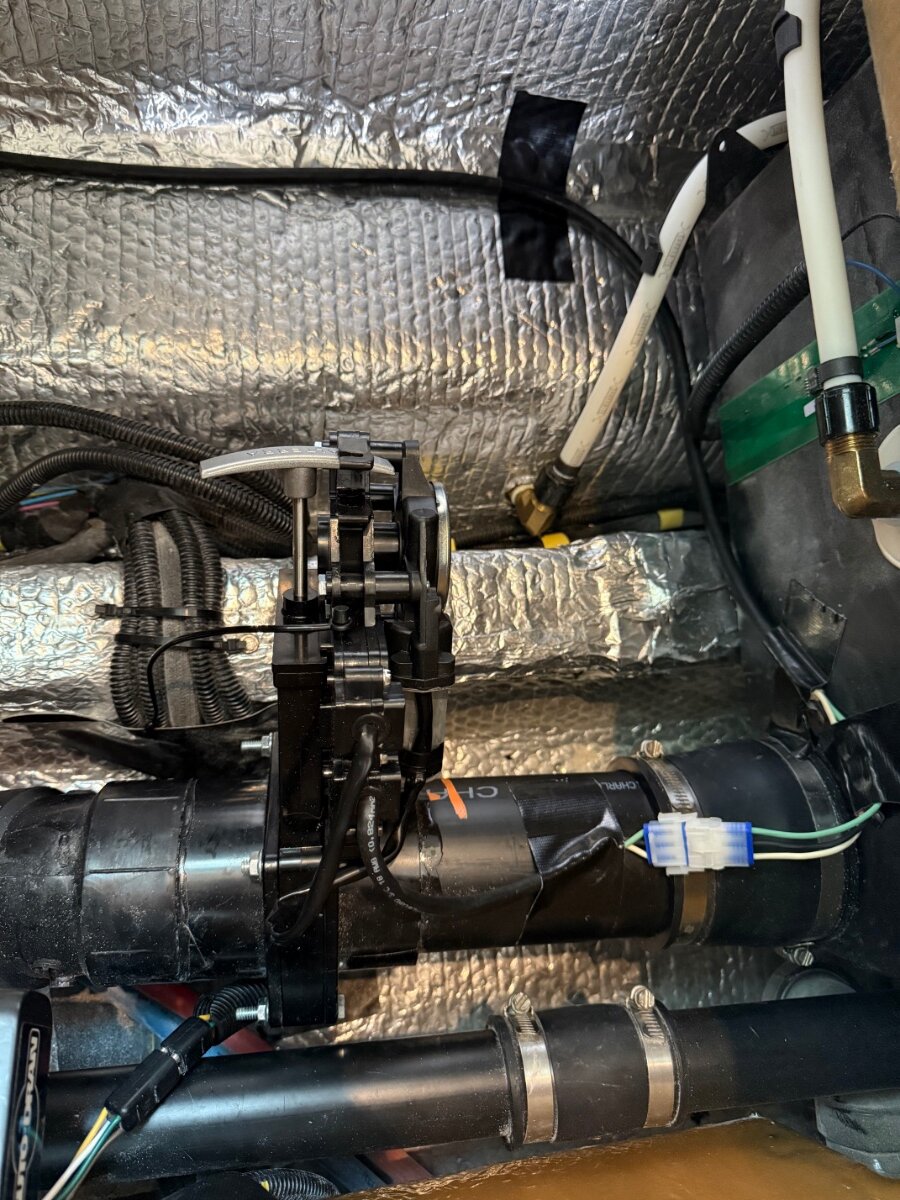
Finally finished! I admit to being quite lazy and uninspired - and yes - busy traveling and not in one spot long enough to get to it. But, the rest of the Valterra electric black tank dump valve installation is complete! The 18-3 wiring harness that came with the valve was far too short. Since I was going with a longer run, I upgraded to 16-3. I used the existing manual valve cable to pull the electric cable through. It was certainly easier than if I had to pull a harness with terminals on both ends. Only snag (literally) was where the original cable was taped to the insulation. I had to duplicate the control end of the cable. Basically 5 crimp-on 1/4” female disconnects and two jumpers. The valve end of the harness has a special connector which I couldn’t find the terminals or removal tool for - do I just butt-spliced it onto the end of my harness. Not my preference, but it was either that or cut out the connectors entirely and just butt-splice the harness right onto the valve. Six of one, half a dozen of the other. First picture shows where I installed the control. I contemplated putting it where the manual pull handle was - but it’s a tight fit, and I’d have to scrap the switch plate and open/closed legend. That, and it looked much easier to make the cutout in the place I put it than the manual dump handle location. I’m not super thrilled with this location - and having visions of it being actuated by accident - by an elbow or something I toss back there. (I don't wanna go full Dave Matthews on anybody!) I debated adding another switch, but for now, I can always swing the valve handle out of engagement with the actuator until I’m ready to dump. The “board” here - between the basement area and the location of the outdoor shower and other goodies is easily cut with a spade bit and a utility knife. Second picture shows the valve in position. Pretty straightforward. The electric physical valve swaps out with the manual one. Route your wires, use OTT official black gorilla tape to hold cable in place. Snap the connectors together and - Bob’s your uncle.
1 point
-
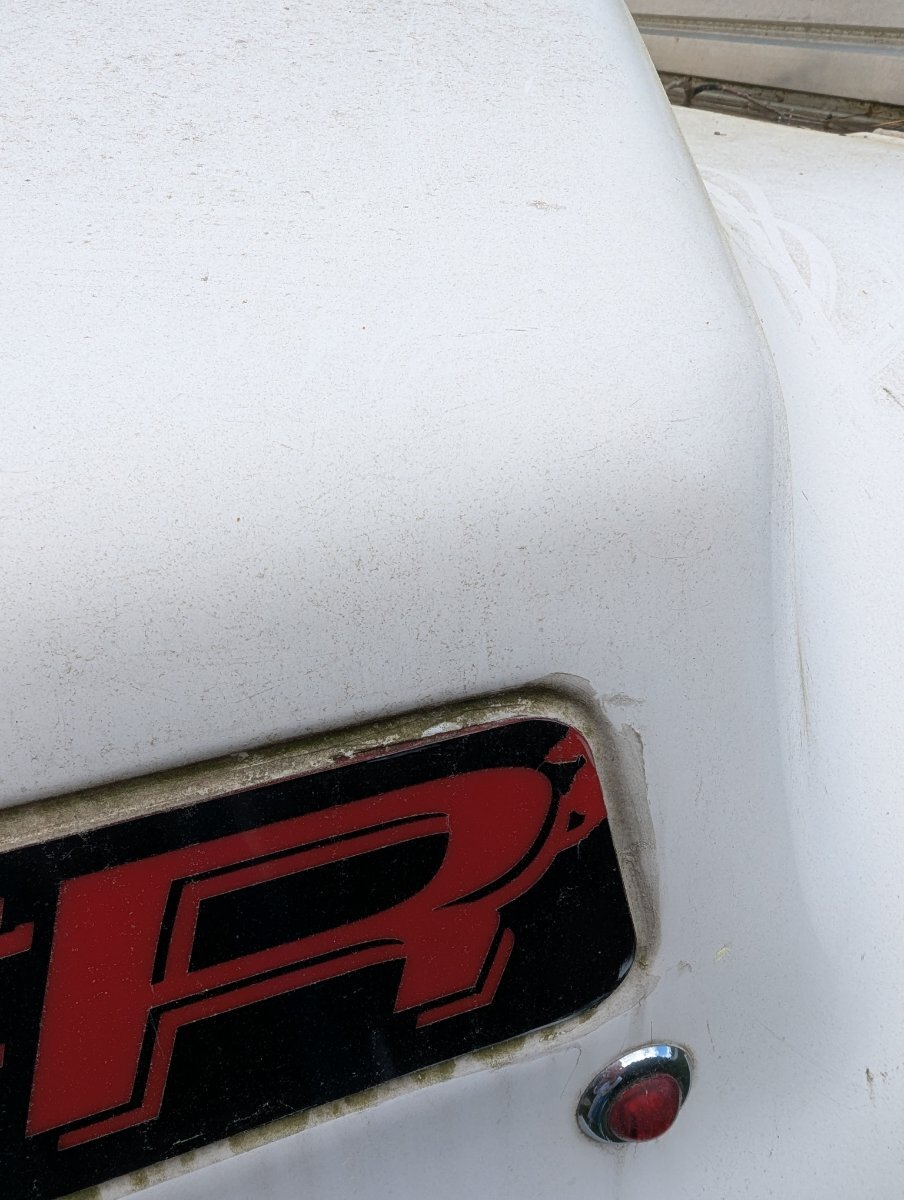
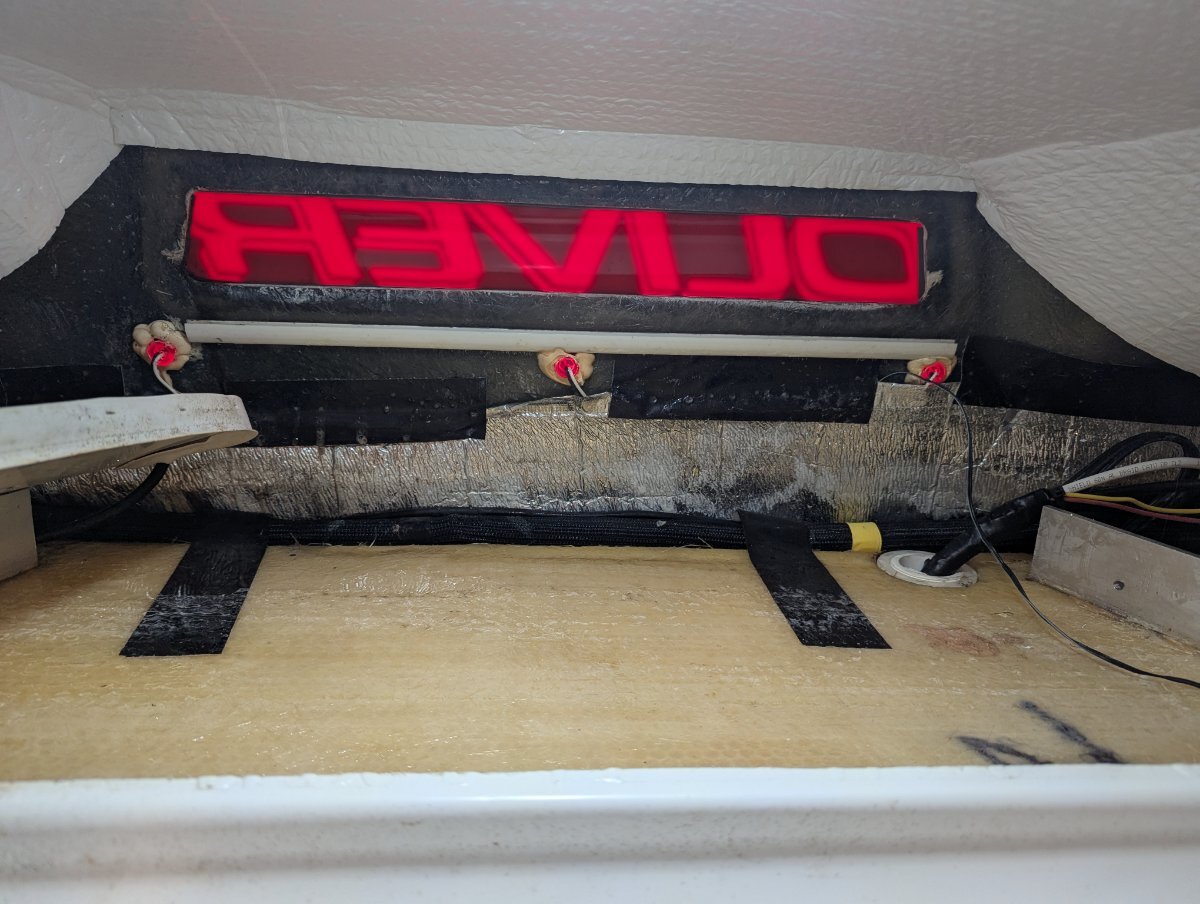
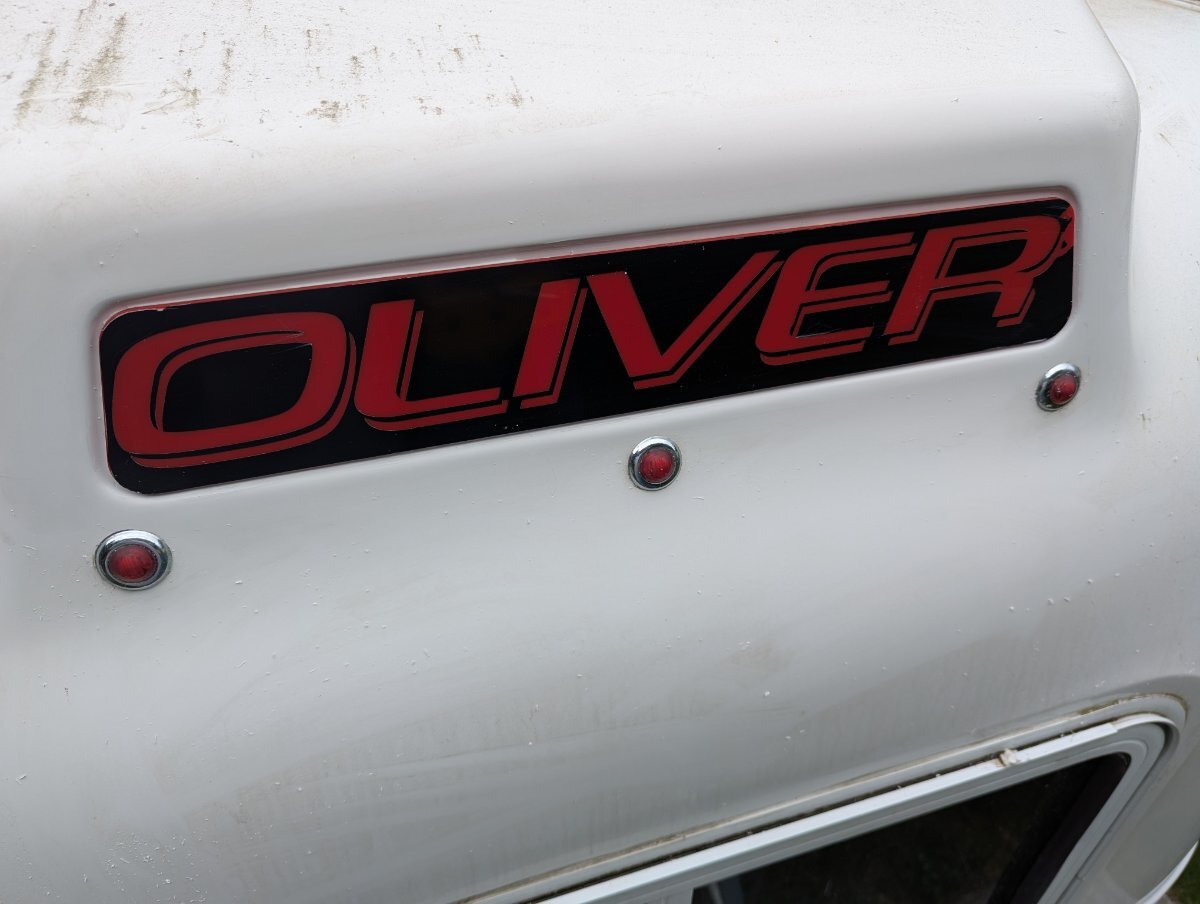
So the rear Oliver lense strikes again.... I would also check those marker lights. The one under the O of the Oliver sign especially. If it leaks, the water would run down its supply wire where it looks like it touches your TV cables. The water would then continue down that cable and into the cabin. All those wires up there with no drip loops designed in are are major pathway for water to travel to far off places. I had drips out my rear speaker from one of those marker lights.... Cheers, Dave1 point
-
Barker did the welding. Problem could be there. OTT likely drilled the holes in their bracket. Problem could be there. .....Leaving you holding the bag. Seems like a joint discussion is between them. Regardless IF OTT Manufacturing has spare in stock, which they sometimes do not, they could ship you one. If not then they would have to send Barker the bracket, if they have a bracket in stock. Which last year they did not have as well. .......In which case you are still holding the bag. So ... OTT oh so rarely does not make things right. If there is going to be a delay, I would consider shimming up the hatch with a ring of 3/4" X 1" trim. If you have a foam pad over the OEM cushions you would not notice the difference while OTT/Barker sort it out. 🙂
1 point
-
After returning home I was able to better investigate the water issue. Turns out the attic was not dry. It was wet underneath the white insulation layer. I was able to easily peal the the insulation up. The leak was coming from the Oliver Sign. The caulk had dried and cracked. It is actually amazing how much water could get in from that source. All things considered this was the best scenario for the source of the leak. I was able to remove all the old caulk and re-caulk the sign.
1 point
-
Yes, corrected post🙃1 point
-
Starting clean up and repair. 1) Grey hose is shot. Multiple holes. It all happened one night in Grand Canyon Campground. Like some critters tried to chew through it (or my very rude neighbor took a knife to it?). Very odd. 2) Front door stopper came off. I still have the screw and the little rubber donut, and the metal plate is still there. But neither fiberglass nor metal will hold a screw any more. I'm thinking of filling the pre-drilled hole with epoxy or glue or something??? Then just trying the screw again. Any thoughts? 3) Bathroom fan makes a very loud noise when running. I think we damaged a blade when trying to close it while it was still running. ☹️ I'll have to climb up there and see what's up. 4) 2 months in the UT, AZ, NM and Ollie stayed pretty clean. 16 hours of driving in AL, MS, LA, FL and the front is plastered with bugs. 🤪1 point
-
Invest indeed! I have the ELEY Garden QC sets, which happen to be on sale now. I like that they are full-flow, commercial-duty fittings.1 point
-
Received my 2 Gorilla hoses last week. Looking forward to using them. I have had one soft hose for 12 years I use to flush my black and gray tanks.1 point
-
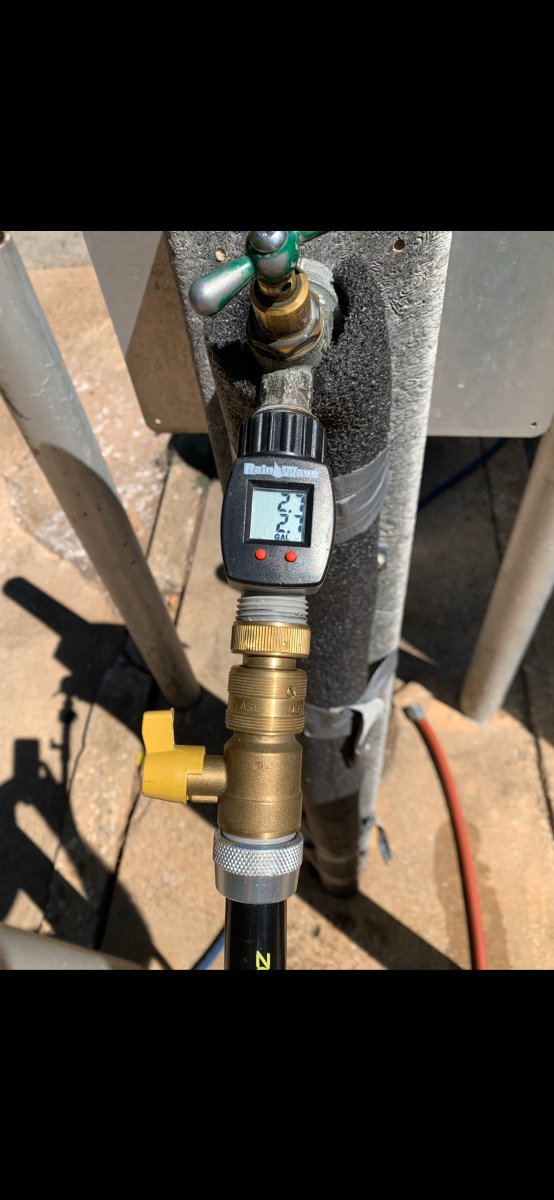
I have quick connect components on all of my hose ends so no need for tightening/loosening. I also use Teflon tape on all of the threaded connections. I have a 25’ zero-G fitted with a flow meter and stowed in the rear bumper compartment. It doesn’t take up much space and is easy to access. I generally flush the tank a couple of times following the initial dump. With the black tank valve closed, I meter the amount of flush water prior to release and leave the water flowing during the process for added spray action; the process is then repeated.
1 point
-
John, your idea of overnighting is the same as mine. Stay hooked up if at all possible. Drop the tailgate and slide the little Weber Q1000 out. Quick and easy! Looks like a great trip developing! Mike1 point
-
Well, I put one of these grills in my shopping cart on the Sansujyuku webstore, but did not follow through due to the price fluctuations. Today I was contacted by another seller, GW Store, asking if I still wanted to order the grill. Sounded odd since I had never contacted GW before and didn't know who they were. They already had my shipping address and asked if I wanted to finish the order, at the regular retail price of $329. No thanks, I cancelled. JD, I know you're on the road. Did you save the box the grill was shipped in. It might be telling whether Sansujyuku shows as the sender, or someone else. A little research (below) reveals that Sansujyuku is likely to be a scammer. Though they do deliver to some customers, others have simply been cheated out of their money with no product delivered. You did receive your grill, but it could still be a scam. One of the tricks is for the scammer to set up fake ID credit card accounts, then they take your order and use their fake ID account to pay and have the product shipped to you from another vendor. The scammer gets your money. The actual product is effectively stolen; either the credit card company or the vendor that actually shipped the product takes the loss. I'm not saying that's the case with your purchase, but you know the old saying, if it sounds too good to be true.... https://www.trustpilot.com/review/sansujyuku.com1 point
-
Lowrider! We are currently at Hamlin Beach State Park, in New York, on the shores of Lake Ontario. On the way here, I realized that I’d never seen this Great Lake before, despite several trips across New York over the decades. It is a very nice park, with brand new bathroom/showerhouse combos, and lots of beach, shelter houses, laundry, playground, etc. Tomorrow we leave for Fish Creek Pond in the Adirondacks for the six night TearUp ADK rally.
1 point
-
For any Oliver owners that have an interest in rear mud flaps. I sent David Hess at Sea Biscuit the info on this thread about rear mud flaps for Olivers. I would not be surprised if Sea Biscuit starts fabricating and selling a nice set of rear mud flaps for our Olivers. @connor77 has also been instrumental working with Sea Biscuit to possibly get this mod into production. 👍🏻 Stay tuned! 🇺🇸1 point
-
I've been traversing the southern section of Nebraska this week, following along the Platte River, and parts of the Oregon Trail / California Trail / Mormon Trail and it's .... very different from the Sandhills or the Badlands. I stayed at Pawnee SRA (State Rec Area); Windmill SRA; a freebie (if barren) spot in Bayard City (2 nights free with power and water, additional nights for a fee; one of the power poles wasn't working); and Riverside Campground in Scotts Bluff (which turns out to be part of a fairly large city park with a lot of amenities for locals). The landscape is dramatic. Pawnee SRA (the prettiest of my spots in NE); Buffalo Bill's Ranch NHS; Chimney Rock; Scotts Bluff National Monument
1 point
-
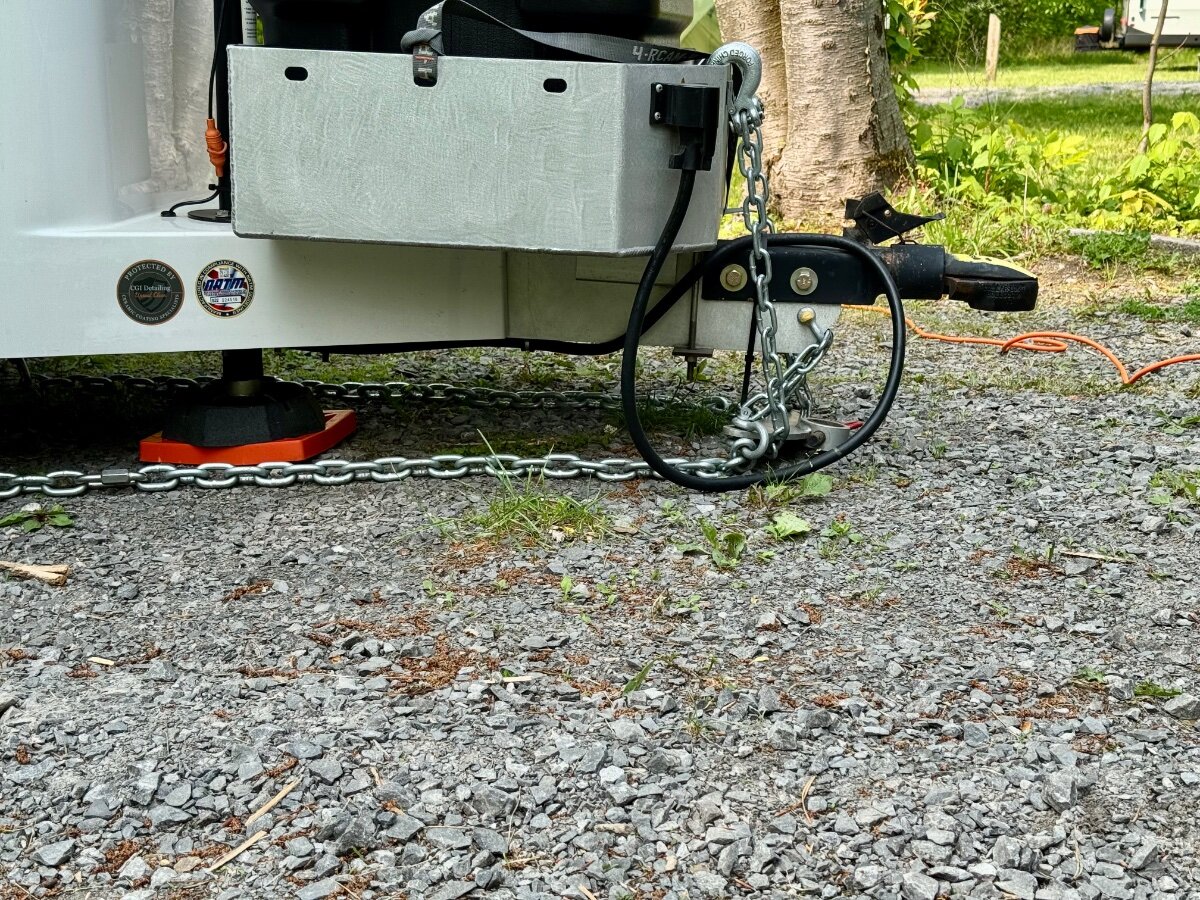
Where's Ollie? She's hitched up and rearing to go! She's usually behind our Tuff Shed getting some shade, but I backed her in further so the Ram can get some shade as I work on a last few details. Mostly all packed, brakes adjusted and tires set, new Bulldog and Anderson parts. Hitched and did a test drive yesterday. Not a big deal for many of you, but we're leaving Thursday for a 5+ week trip, back home on the 4th of July! Our longest trip ever by far. Off to Minnesota to see Chris' sister. We'll take 10-12 days to get there and we'll have 3 weeks for a long return, camping in the northern Minnesota woods, boondocking on the Badlands with a Mt Rushmore night visit. Then we'll make our way across the Western Slope of Colorado. Cool thing about this trip is we have not made a single reservation! We'll find our routes and camps along the way. We have all we need to be off-grid for days! Signed up for Harvest Hosts which may help in the farm country and we'll see... 🤣
1 point
-
I can verify, as others have said, the Truma AC works fine but you need to be a polar bear to enjoy it. I believe it also uses the same amount of power at it does in AC mode.1 point
-
We have 5200lb axles with 5 leaf spring packs on our LE-2 #75, probably like your Ollie. Some folks here have had one leaf of the Dexter 4 leaf spring pack (3500lb) to break, covered in another thread. Not aware of any of the Dexter 5 leaf spring packs having issues, yet. Here's the 12" brake drum on our 5200 pound axle with "Me-Pack" 🙃 axle bearings, I will continue packing my bearings so I can inspect brakes, drums and bearings during service. A few here have upgraded to disc brakes, very nice modification! Here's the original 5 leaf Dexter spring pack on our #75 Ollie 5200lb axle and spare Dexter 5 leaf pack before installing bronze bushings:1 point
-
This is the first I have heard of being able to use never lube bearings. I do have the 5200 lb axles just by luck as Oliver was out of the 3500 lb axles when building mine but did have some 5200 lb units. Is it possible to simply replace bearings on my setup with the never lubes or are their more complicated mods one has to do? Also while on this subject what is the advantage of adding more springs for a trailer that will never be carrying the max load? Seems to me this would make for a much stiffer ride for the trailer vs the 4 leaf springs. But what do I know:) Thanks1 point
-
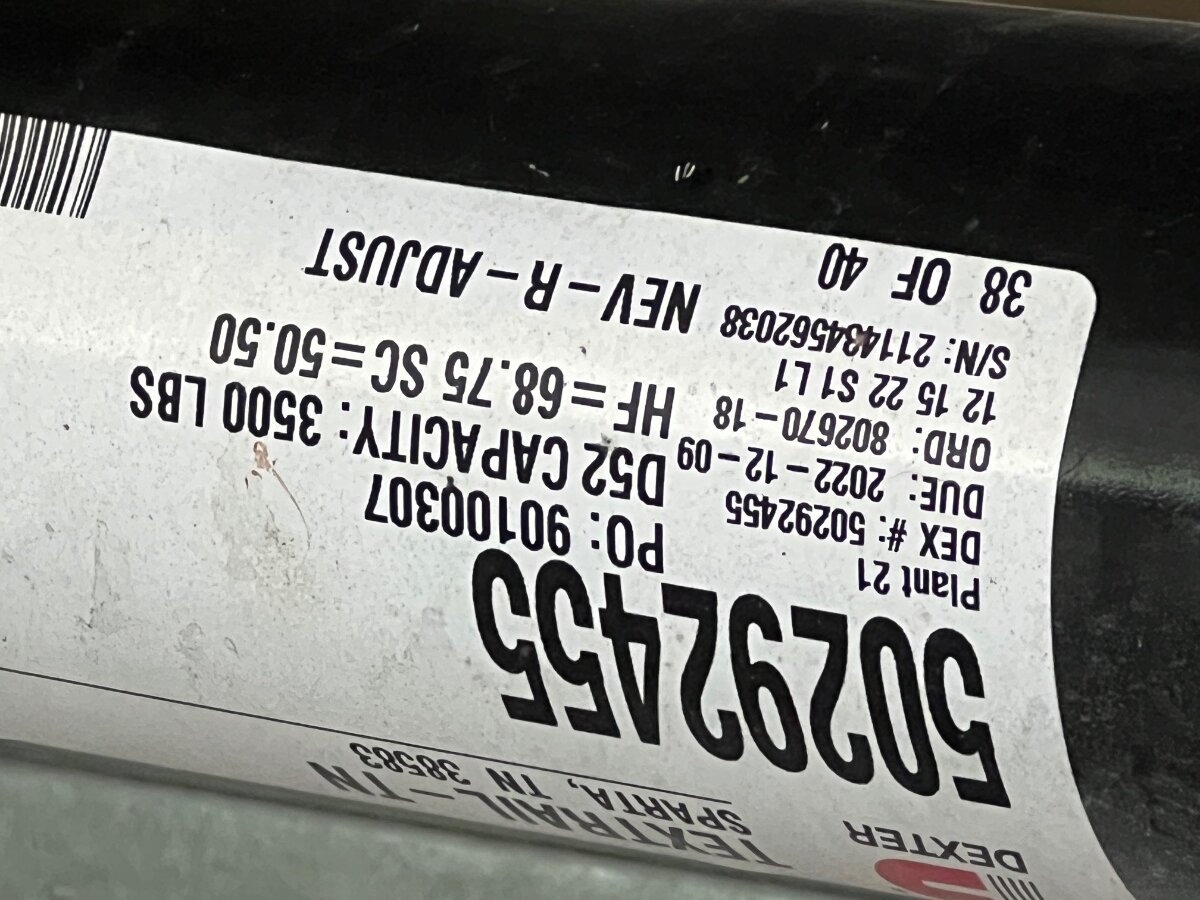
If label is missing or hard to read, look at the backside of the wheels. If the drum brakes backing plate shows it is bolted on in a 4-bolt square pattern, you have 3500# axles and 10” brakes. If you see 5 bolts in a pentagon pattern, you have 5200# axles with 12” brakes. Good to check, just to be sure, in case of mis-labeling!1 point
-
I thought the heavier duty axles had 12" brakes.1 point
-
I was wondering same, we have a 2023 with the D52 axles. @John and Debbie check the label on your axles, if you see D52 you have the 5200 lbs axles, the 3500lbs on the label refers to the springs (2 x 1750lbs), NOT the axles. See pic.
1 point
-
A couple of years ago a friend of mine had a bearing fail on his work trailer with the never lube axles. He was able to get a new Timken bearing through Summit for around $50 which is far less than Dexter charges for their Chinese bearings. He said they use these same bearings on some production cars.1 point
-
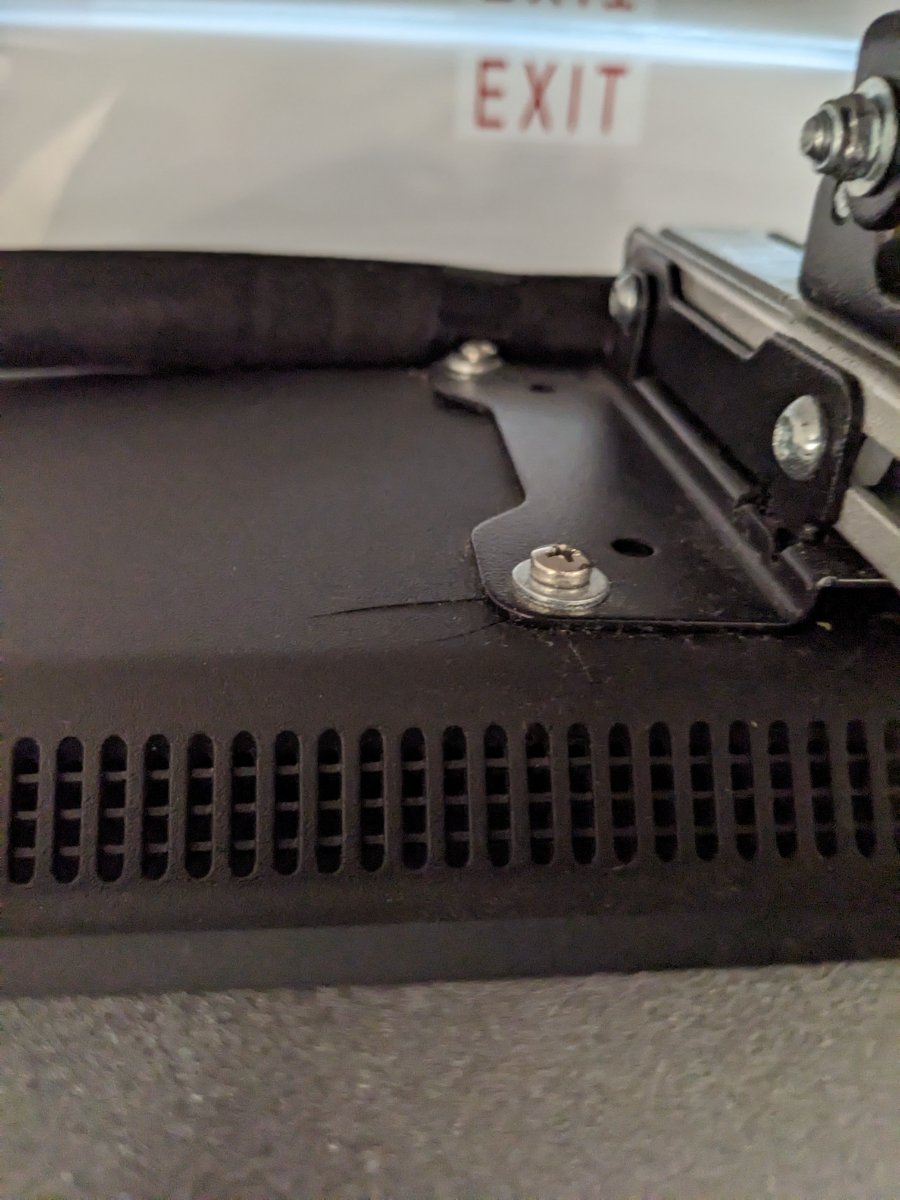
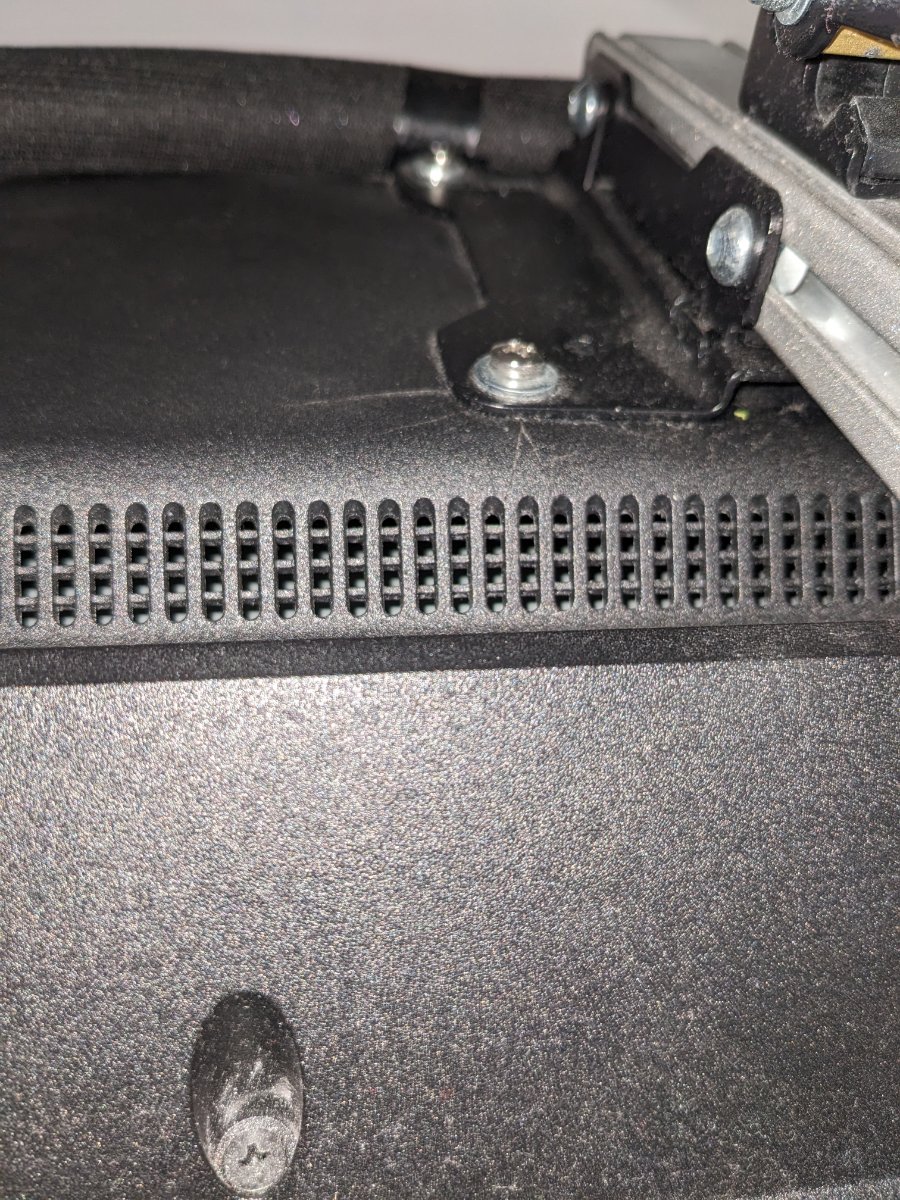
Shortly after arriving home I noticed our TV in Hull 1373 was mounted at it's lowest point on the arm. When in the up position for travel this maximizes the dynamic of bumps and just any up and down movement. I decided to adjust the TV up the arm as close to the mounting base as possible to reduce the length of this "lever" and hopefully reduce the stress to the TV and the under cabinet mount. You can slide the TV up 2-3 inches and it will still hang vertically without touching the bottom of the cabinet overhead when in the viewing position. I don't know if this will significantly reduce the stress on the mounts but it seemed like a good effort at least.1 point
-
This still needs to be reported to Oliver, We inspected ours and found all ok! Thank you for posting! Edit- We did lower our tire pressure right after pick up. Patriot🇺🇸
1 point
-
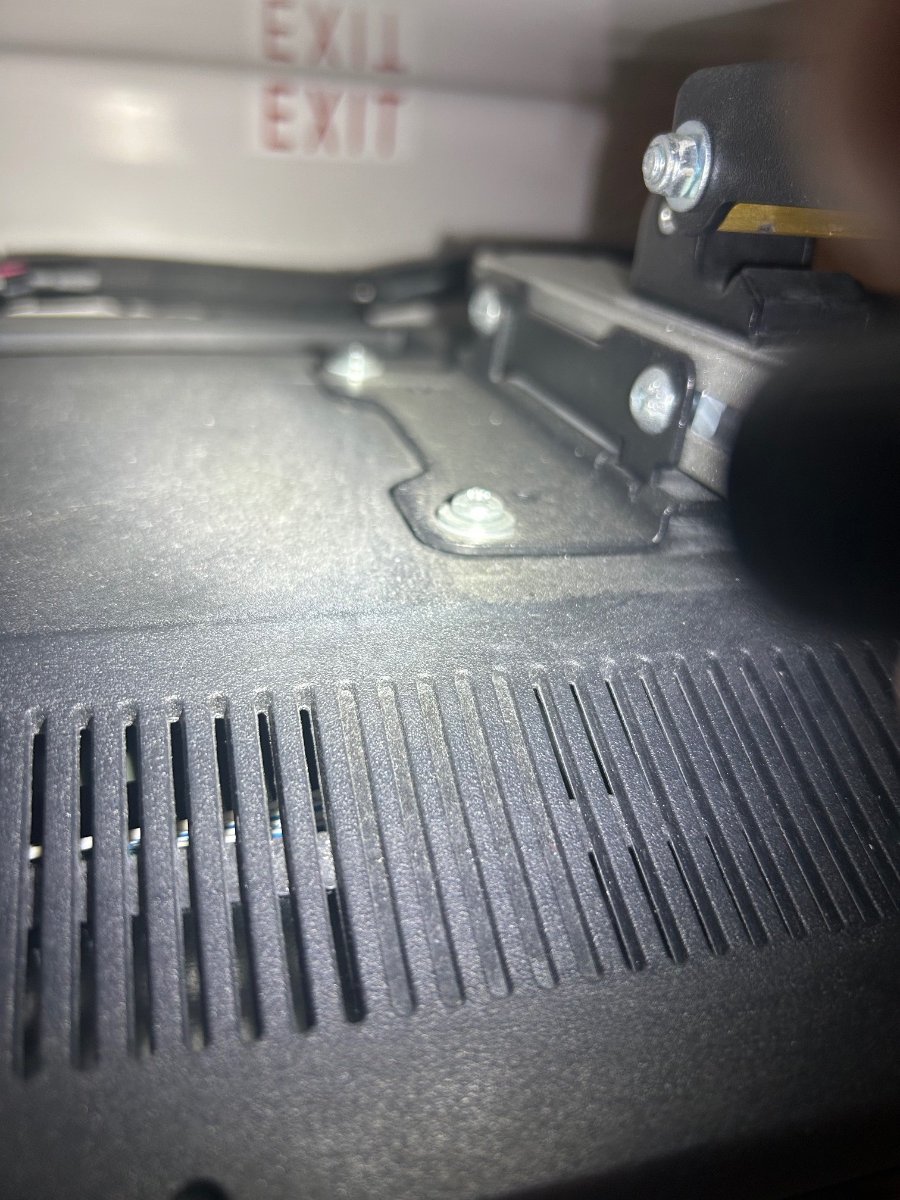
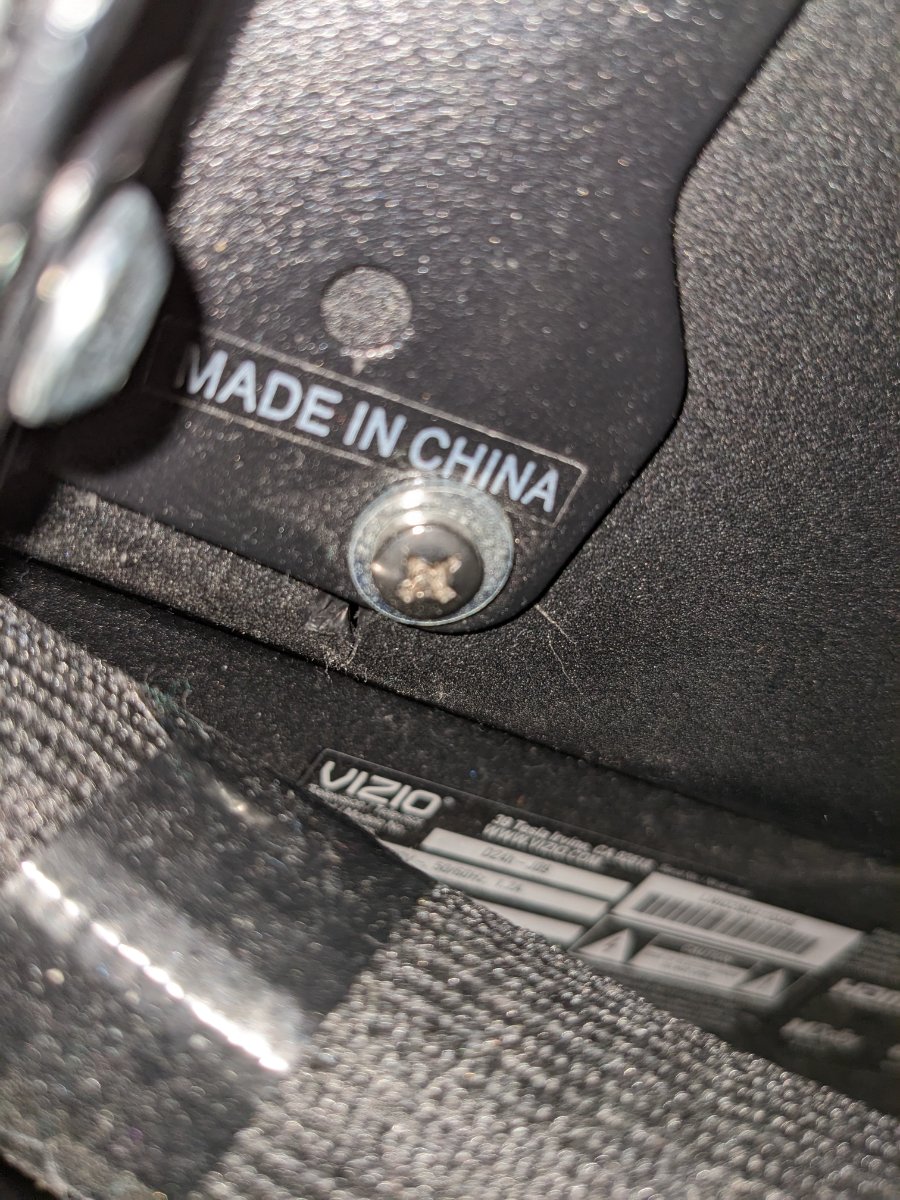
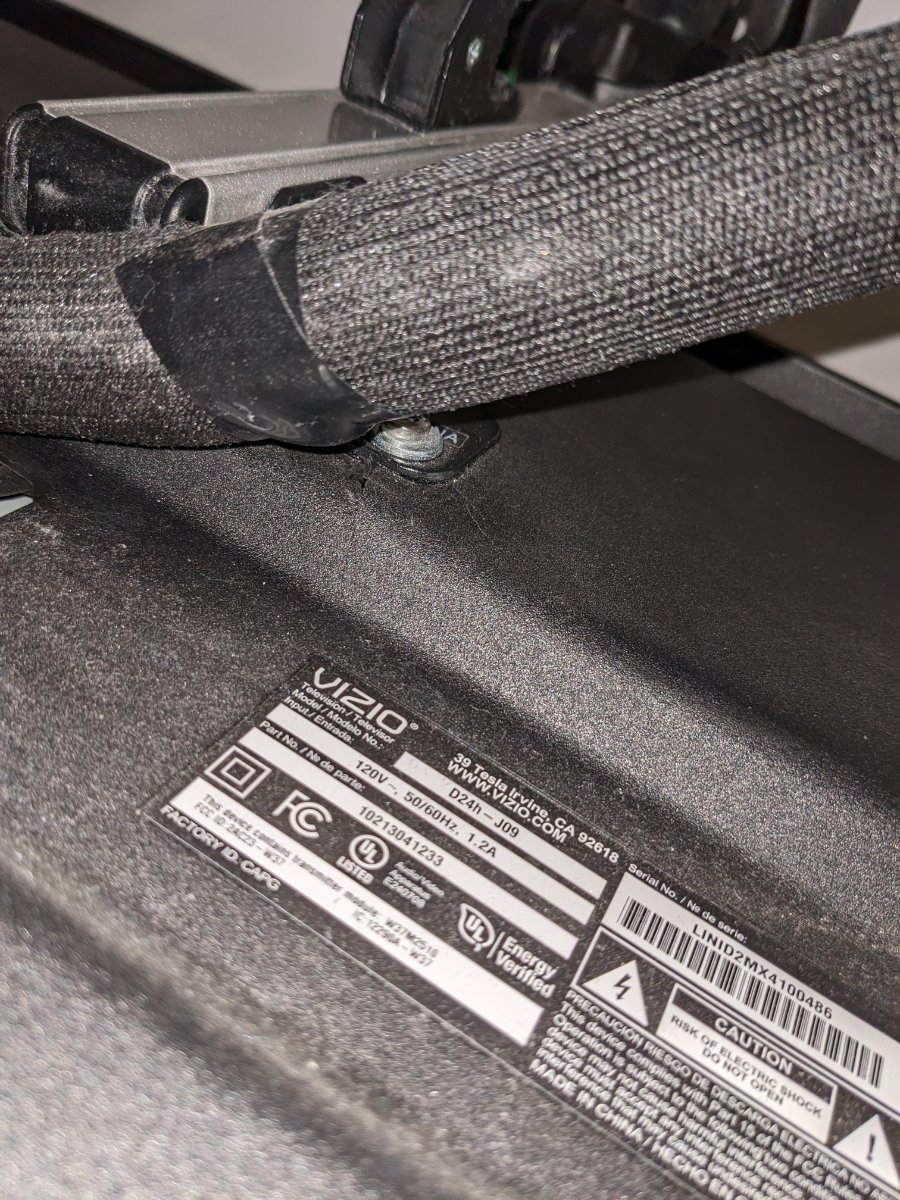
The rear of our Vizio TV is developing multiple cracks radiating out from 2 of the mounting screws in the back of the TV. I'm assuming these are stress fractures from flexion while traveling. Trailer still under warranty, ticket submitted, will see what happens. These cracks are hard to see if you're not looking for them.
0 points
-
Well Ollie folks, I got tired of the brown trickles that were coming down over the fridge vent panels and rearward edge of the door from where the rubber seal had detached from the camper body and leaked the brown water from behind the awning. I purchased a new 20’ seal through Amazon - looks like the same exact thing. Pulled the old one off yesterday. Peeled and “rolled” off 99.5% of the old double-sided tape that held it on. (Got a blister on my fingertip from the technique I found to be effective. And then, took my soapy water and assorted brushes to clean the residue an dirt from the former dam created. It came cleaner than I expected. No staining from crud that had built up. All that remains are a few small traces of adhesive that I planned to attack with 79% isopropyl alcohol today. ”Today” decides it’s gonna be a rain day. Bummer. Went outside to do some unrelated chores and was surprised/horrified by what I saw. Multicolor streaks down the side of the trailer! Really surprising as there was really nothing left to run down the side. That, and I had rinsed the whole area and whole side of the camper yesterday. This sucker was CLEAN yesterday and there was no crud left to drip down the side. There was a speck or two of leaf/tree litter, but no streaks of stains or anything. The masks don’t easily wipe or rub off. I am under some trees right now. I’m probably gonna have to use something with a little polishing ability to get it off. Anybody else seen this appear on an otherwise clean camper during/after a rain? I typically use blue Coral cad wash to do regular washing. Though I haven’t used it on the rest of the trailer, I’m using a product on the bug-prone “nose” of the trailer (and front of my TV) that is recommended to make bugs less likely to stick. That stuff seems to work. Im gonna try some StarBrite and Maguires wash and cleaner/wax products to attack these new stripes. Any other suggestions? BTW - I had decided to pass on installing the new rubber seal - but if this is what I have to look forward to - I’ll likely reverse that decision.
0 points
-
I was with you 100% until this statement. Walked through an Ikea ONCE in Austin TX. Could not wait to get out of their maze of cheap kits, ASAP leaving EMPTY-HANDED! 🤣 My son who has been an Angie's List contractor, on and off, has installed these kits for the mechanically-impaired for big bucks! I do however, certainly appreciate your long written procedure, pictures not required! I have another way to clean this fan QUICKLY (though many forum members do not always like my unique methods)... With fan fully opened, old bath towel on floor below, pressure washer in hand with short wand and wide tip, blast upwards in a circular fashion for 10 seconds and the whole unit is as clean as can be! I do this every summer (and it works well)! 😂0 points
-
That's good to hear, and I hope they continue to work flawlessly for you. Personally, it's a red flag and I won't run any appliances in my home or Ollie without a UL or ETL certification. Even then, still not a guarantee that the unit is actually certified as seen with the Gree dehumidifier recalls that covered a decade of units that caused hundreds of fires and a few deaths that were found to have faked UL certifications.0 points


.thumb.jpg.e34bf01ef7f7d5e99ad31856d45afbeb.jpg)


-
Recent Achievements
-


")


")


")

