Leaderboard


Popular Content
Showing content with the highest reputation on 07/01/2025 in all areas
-
FWIW...I've had the springs and later, axles, installed by Alcan. I had a wheel stud snap off and Alcan said they would take care of it. I went to them and sure enough they took care of it. They did say the stud is indeed pressed in. I don't know about the splines. I have been torquing at 100# and have not had any issues...don't know why the one snapped. While I was there I asked them to remove all the wet bolts and had them installed so the zerks are all on the inside as to not have to deal with tire clearance for the zerks. The only issue with that is I have to lube from beneath the trailer and that is ok for now... I can still get under there! I had some issues with the zerks accepting lube so I wanted the bolts removed and inspected, all was fine, and put back with the zerks on the inside. My thought was since I rotated back to front every 5000 miles and lubed every 3000 miles, I compromised in that at the 4000 mile point I would remove the tires and lube. Maybe the lube hardened up and couldn't accept lube, I don't know. I did replace all the zerks in case they were filled with whatever, and that didn't work. And I do use caps on the zerks. So the happy ending is Alcan replaced the stud and reoriented the wet bolts the way I wanted and since they reused the bolts...they did all for no charge. No labor charge either. Alcan is top shelf IMO. John5 points
-
First off, to stick to the purpose of GJ's post, it appears that Dextron dealers carry the Nev-R Lube axles. Alcan does not carry the other. OTT does not install EX-Lube either and perhaps they can be special ordered. Everybody who has upgraded to D52 axles has purchased Nev-R Lube axles, which is what I also did last week. Alcan called me first thing Monday to confirm Dextron will build my special order D52 50.00 axles (they stock the more common D52 50.50 size). I high-jacked this thread the other day, something often tolerated in Ollie-and and wrote the statement, quoting myself above. Mike @Mike and Carol replied with this: Simply put, I'm chicken! Our TV can do it, the 1/2-ton TV can do it. I've watched the YouTubes on this dangerous road, so no thank you! When young, I used to ski the mountains of USA and Europe, like Kirkwood at Lake Tahoe or Cervinia (the Italian side of the Matterhorn). Later in life I've become afraid of heights, don't like 2nd-story ladders, don't enjoy gondola rides anymore and we're going to Telluride today! 😞 Somehow I can still bomb up the steepest dirt road in AZ on my dirt bike (slower on the downhills), but won't ride ATVs traversing a mountain, don't like that leaning sideways feeling and same on some roads. I believe it's an inner ear thing I've acquired through the years. And towing down a steep mountain can bother me at times, like AZ I-17 +/- to Black Canyon city, which I run a dozen time a year because I have to! It's the most direct route from home to The Valley, or I can drive/tow Hwy-89 down Yarnell mountain which I do to go to Wickenburg or Quartzsite. I drive slowly down, keeping an eye on the sideview mirrors allowing the speed-demons to pass whenever possible. Our older Dodge Cummins 2500 is fine TV and I've rebuilt it to like new. With it's 2500 rating and Cummins, it surpasses the Tundras and Eco-boosts many of you regularly use (maybe this post should be in the towing section). I was online shopping for more modern TVs the last few late nights. Those with greater than 440 torque, more than a 4-speed trans and with the exhaust brake! I could not find one used on Auto Trader and Craigs that fit my needs! We MUST have and 8-ft bed and I prefer 2WD for its lower stance and stability. Do not want a quad-cab or worse a crew cab. I've seen what y'all back into your back seats! 🤣Love our half doors which keep the cab short, making up for the longbed and back there is only our Pickleball bag, extra shoes under and behind the driver's seat and Charley's bench seat that he loves. In upgrading our TV, we could not find these features! 95% of trucks are 4WD quad-cab short beds. I would love a 6 or 10-speed Alison trans, or the 10-speed Ford but $7500 will get my an awesome stage-2 rebuild on the old Dodge and there is a premiere rebuilder in Phoenix. I believe the exhaust brake which @Patriot mentions often would make me feel much better on 8-10-12% downhill grades that are everywhere out here and I can add the recommended Pacbrake system for $2K which is possible since we already have a Cummins, btw no DEF required which you all know is a PITA. On the other side, I could sell the '01 Ram for a little more than the paltry $18,200 paid and not re-coop most of the additional $10K invested to-date in its rebuild. Uninstall and reinstall our Pepwave router system. And pay $50K, or $60K for a good used truck that would be better in many ways but not have the features we like. And they just look good together. What was I thinking, we're family!
 4 points
 -
Rest stop North of Council Bluffs. Heavy t-storms early this morning but clearing now. Only Ollie I've seen so far today. Bill
3 points
-
So, jumping out of airplanes isn’t on the agenda either? It’s been a few years since my last jumps but I still think I could do it, even as I’m in my 70’s! I think Highway 550 is a scenic and exhilarating drive from Ouray down through Silverton. Traffic generally moves slow and the drive doesn’t have to be white knuckle. The drive around by Telluride is much tamer but also very scenic. You can’t go wrong either way. Stay in your comfort zone!! Mike3 points
-
90 lbs is the better number. Generally a stud will snap from over-torquing. Studs should also be clean and dry. If that single stud happened to have some grease or oil on it plus the 100#, that would do! To repair, remove the drum. On a workbench hammer out broken stud with a HD center punch. Line up the splines from back side and hammer in place. If you have the old-school bearings, removing the drum means repacking the bearings, not necessary with Nev-R Lube of course. Thought I would also copy instructions from the 2016-OTT-Owners-Manual.pdf here, where it states to use the stabilizer jacks to change a tire and provides the 90# torque spec (Oliver jacks and 6-bolt studs have not changed, from the first hull to the last). Loosen the lug nuts on the tire you want to remove. Check for a stable footing under the jack and place an ABS footing pad or block of wood about 4” in height below the jack foot plate. Raise the jack until the tire clears the ground, then finish loosening and removing them. Pull off the old tire, slide the hubcap out backwards and insert it on spare. Set spare tire evenly on the lug nuts and hand tighten lug nuts. Retract jack back to travel position. Now tighten lug nuts completely. Lug nuts should be torqued to 90 ft lbs. Place the flat tire in the spare location.3 points
-
Please, please, please just use your stabilizer jacks! It’s safer and easier, recommended in the OTT 2016 Owners Manual, later OTT lawyers changed their recommendation. “What do you call a thousand lawyers at the bottom of the ocean?” a good start. 🤣 i suggest using a jack stand close as possible or on bottom-center of leaf springs for safety except for a quick tire change. Yes, connected to TV is always safer, yet not possible in my driveway or other locations. I wrote all this up in another post last week and quoted the 2016 OTT manual. Floor jacks don’t fit and bottle jacks can slip. Do it the easy way, takes just 2 min!3 points
-
I use the 90° LockNLube attachment for those Zerk fittings that won't take a straight on attachment. Be very careful with attaching the 90° to the Zerk and also unattaching so you don't loosen too much and lose the three small pieces. I did that and had to buy a new 90°. I torqued my wheel lug nuts to 90ft pounds. I thought I read that somewhere. I use the rear stabilizer jack and a bottle jack with chocking the opposite tires. Attaching to the tow vehicle sounds good too. I have done that before and chocked the TV also along with the trailer wheels. John3 points
-
This is the method that I've used. Also it's a good idea to have the trailer connected to the tow vehicle for safety while jacking the trailer. I also block the wheels on the other side of the trailer. The second picture was a parking lot tire change from a failed tire valve. If you have rubber tire valve stems and you have tire pressure sensors installed I suggest that you change the tire valves to metal tire valves. Luckily we were close to a Discount Tire location and had all the tires valve stems changed to metal.
3 points
-
I've read that the PB Platinum models have a payload capacity around 1250 lbs. The Lariat will be a bit more, but not sure how much. Do your calculations and be safe! Cargo weight adds up in a hurry with just the most basic things (passengers, canopy, hitch/mudflaps, tongue weight...) The 6.5" bed would be what I would pick for many reasons including the longer wheelbase, which will improve your ride. Living in the great state of Wyoming, and the inter-Mountain West, if I was towing with only a 30 gallon gas tank, I'd for sure carry an extra 5 gallons in the back. My tank is 36 gallons and I have already needed it! Good luck and hope the new truck works well for you. Dave2 points
-
I have towed our 2022 Ell with a 2014 and now 2019 3.5L eco boost. Both trucks XLT with tow package. The 2014 had a 6.5' bed and the 2019 has a 5.5' bed. Both tow the Oliver easily. We live in Ohio and have towed it to Alabama (rally), Miss, Tenn, KY and WV camping and have had zero issues. Payload was a learning curve at first but after loading and unloading stuff we never "used" vs stuff we take "in case" it became easier. I think the only issue with the Powerboost and some other options would be less payload capacity. We are looking to move to a 3/4 or 1 ton truck this year to accommodate more extended trips. Getting away from the Anderson Hitch is a bonus for me, lol. Scott2 points
-
I only saw one Oliver since I bought mine.2 points
-
Bill: spot on. My decision was based upon not having a consistent load for the TV. One moment I have just the TV empty. Later in the day I may be towing Ollie with 540 pounds of Tongue Weight either with or without a cargo load. Then hauling a super full load of pilots and gear crawling up a mountain. Then empty coming down. With a Timbren system it just is not adaptable to such use. The air bags however are. I also agree that the timberline's are good for a consistent load. Dial it in and you are golden and have not broke the bank. But if you load profile looks like a Yo-Yo, then you would want air bags I think. GJ2 points
-
I rode my bicycle twice from the Pacific Coast to the Atlantic Coast. Sea level to sea level, but the equivalent of about eight or nine Mt. Everest's between. I have heard that RAGBRAI is a tough one. Congratulations. John2 points
-
I rode my bike across Iowa in RAGBRAI... It may net out to flat, but those rolling hills are a killer!2 points
-
Well, it's finished! The installation of the DC to DC charging system in now complete and operational. I first started the installation in the Oliver Elite I trailer (#924) and finished the installation with the Jeep. I'm generally a DYI guy, but this was a bit of a stretch for me. It's not that it was difficult, I stressed on doing something to the Oliver that would ruin it, especially penetrating the hull for the charging cables. That was a big concern. But with careful planning and a ton of help from this community, I was able to get this done. Special thanks to Coddiwomple (David) for his help, patience, and guidance. I first went out to his place to view his installation in his Elite I. It's amazing how different his wiring was in just two model years. Mine is a 2021, and David's is a 2023. It was a bit confusing for me at first so a second visit was called for. In the second visit, I pulled my trailer to his place and asked more questions and advice. That second visit really helped! Thanks again David! Here is a few pictures I took during the process: I followed David's idea of mounting the components on a board that I later installed in front of the street side wheel well. I used the buss bars to step down in size from 2AWG to 4AWG which was necessary to connect to the Orion XS. I think pulling the 2AWG wire was the toughest part of the installation. A shout out to my son-in-law who was there helping that day. Couldn't have done it without him! Upon examination of the hull, I realized that under the sink (above picture) the hull is only a single layer thick, not a double hull there. That made things a bit easier. There was little existinting space to run additional cables through the hull, so I modified the housing for the propane tanks just a bit. With the propane tanks and tray removed, it was easy access to the trailer font. With my oscillating saw, I cut out an addition piece of the propane housing to the left of the three existing cables. That gave me plenty of room to install two additional cable glands for the DC charging cables. The way the propane tank housing is constructed and attached to the hull, the small piece I removed does not compromise the integrity of the housing. The following pictures show the final hull penetration. With the cables pulled, I was able to finish connecting everything to the DC charger. I finished the umbilical cord that connects to the back of the Jeep. I used the Trailer Vision enclosure to protect the Anderson SB120 plugs. Onto wiring the Jeep. (Much easier) At the battery box, I used a KASS terminal extender to accommodate the fuse and the other cables. I ran the cable along the chassis and installed the Anderson connector in a Trailer Vision enclosure which allowed me to mount it directly to the rear bumper of the Jeep. With everything installed and attached the batteries at both ends (Jeep and Oliver), I plugged it in and tested the amperage. I was getting between 49 and 50 amps at idle. Now the next step is to road test this on a long trip. Can't wait. Very excited to always have full batteries after a long day driving. Thanks again to everyone who had a part in making this a success! Carl
2 points
-
Who said Iowa was flat? I always knew Iowa was rolling hills of farms and cornfields. I had no idea of how steep some roads could be! This is from a few weeks ago on our current trip. We rounded Omaha on I-680, crossed the Missouri north of Council Bluffs, the same town Bill had mentioned. Somehow Apple Maps showed me what look like an interesting country route to our destination at Arrowhead Park... I could NOT BELIEVE the roads, steep limestone dirt roads, sometimes a 10% grade which on dirt you better be careful. And we live in Arizona where steep is normal! Hard to see how steep in a picture, but you'll get the idea. Iowa was beautiful in the 2 campsites we stayed and the country roads in-between! (So was every state we traveled, every state in the union!)
1 point
-
It comes down to the surface area of the contact patch, pad on disc or shoe on drum. Disc brakes likely have some efficiencies but certainly not 10” discs over 12” drums. The main advantage of disc brakes is the cooling which is much greater since air cannot flow inside drums where the heat is created, and brake fade is caused by the materials over-heating. A simple way of looking at is, I (we) replaced axles rated at 7K to 10K. The brakes must also be capable of stopping the rated weight. Simple conclusion is it provides a 43% increase in braking power (10 / 7 =1.43).1 point
-
Thanks but for the record I live in Montana not WY but we often travel to and through WY, camp, hike and bike. From what I know the payload does differ a fair amount depending upon what other options are installed from moonroof to off road package. For the most part other than toys, ie bikes or kayaks we are fairly light travelers. Even over estimating our load with everything we might bring along I don't get anywhere near what the lowest payload might be on this truck. Future experience might prove otherwise, hopefully not. Like many others on the forum I have had great success with my previous eco boost engine pulling the Ollie for over 10 years. A 3/4 ton would be great for towing but just not in the cards for me for a litany of reasons. Once I have this new one in hand I will report back on all of the concerns we have all come up with. It's interesting how the Ford truck forums have so much vitriol for this one model of truck though, just on the issue of towing and none other. Almost funny how so many people get worked up over these issues. Oh well.1 point
-
Nope, you Army guys are tougher than me. Don’t like turbulence either!1 point
-
And pack whatever you can in the Ollie if you're running up against your payload limit. 100 lbs packed in there only adds 10-15 lbs to your payload.1 point
-
That's a big accomplishment. I always said that the people who say it's flat are vehicle drivers.1 point
-
But if you already have them at 100# they're OK, leave them alone for now and do 90# next time.1 point
-
Wow, I can't imagine a bike journey like that! Congrats to you for such a great accomplishment! I only rode about 70-80 miles per day in "flat" Iowa.1 point
-
Camped with another Oliver at Angel Fire RV Resort, Angle Fire, NM; Midway COE, Waco, TX; Galveston Island State Park, Galveston, TX; Outer Banks, NC, KOA, all in the last 12 months and the year isn't over😊. Passed several on the highway.1 point
-
I went into etrailer.com, but didn’t find a 6 on 5.5 bolt pattern offered for 3500 axles.1 point
-
A free rig wash! 😄1 point
-
I've towed my Oliver 5,800 miles so far this year and I've only seen two other Olivers on the road.1 point
-
Roger all. On the 5.5 bed: For those that need to store their vehicle in a Public Storage shed, having the 5.5' bed is the cat's meow for a 20 ' x 10" box. Going with the 6.5' bed and you are now into the 30' stalls. MUCH more expensive. Also hauling pilots and flight gear up switch backs is easier with the 5.5' bed. And 40 PSI in the air bags. GJ1 point
-
I've used both a bottle jack and conventional auto jack with long handle pump. Both work just fine but honestly the bottle jack is easier to get placement with given the limited amount of space and the small target areas. Of course I always use jack stands too. As for the wheel lug nuts, have never ran into what you're describing but do torque them to 110 ft/lbs. Seems like this is the official torque values the last time this came up on the forum. Don't have a clue as to whether the bolts are splined or not.1 point
-
After upgrading my grease gun to a “LockNLube Professional Series”, I discovered I couldn’t sneak the coupler behind the tires to get to some of the fittings, so I figured it was time to pull the wheels off to get to them. While I was at it, I intended to try the “unloading the suspension” to get some of the Zerk fitting unwilling to accept grease to submit. Then again, taking the wheels off without unloading the suspension would be more fun than I was up for. Anyway, a lot of realizations in what should have been a fairly straightforward operation: First off, getting a floor jack under the best lifting points on the axles isn’t very easy. That’s something an owner would have to do just to change a tire. What kind of jacks are people out there using? Related to the above, the marked lifting points on the frame require a jack that has pretty high lifting ability. So again, best kind of jack? (I currently have an AC “Racing Jack” - which is fine for most vehicle, easier than a hydraulic bottle jack, and a lot less effort than the mechanical jack that comes with your average TV.) I decided to rotate the tires - front to rear only - since I was gonna have them off. Seemed prudent. I had been naively been trusting the 120 foot-pound torque specs from the Oliver owners manual. I’d been re-torquing them periodically as advised by the manual. No issues until now. This was the first time I had a wheel off. So it’s the first time I’ve actually tightened a lug nut that wasn’t already tight. On the right side - aside from struggling to jack the beast up - everything went fine. However - on the left side - when trying to torque the lug nuts, I found that a couple of them didn’t seem to tighten. They didn’t feel stripped, just wouldn’t tighten. My wild guess is that the studs are pressed in, but don’t have splines to keep them from spinning - which would be unlike every other wheel stud I’ve replaced. (I had even snapped a couple off back in the old days when I tried to remove a lug nut on a ‘64 Dodge that had left hand threads on one side of the vehicle.) Once I searched here and found that 120ft/lbs is likely too high, I tried again at 100ft/lbs and I was able to torque them to that spec. (Kinda like that 80psi on the tires….) So does anyone know if the studs are not splined? Im sure I’ll have more questions as time goes by…1 point
-
I have come to the conclusion it leaks when the pump runs. Not sure where. I have looked everywhere but under bathroom sink. Not sure why the pump cycled like it did. It has not recycled since I only filled to about 90%. Now it only runs when we use water. Maybe it went into some kind of vacuum spasm when I use the overflow outlet..1 point
-
I had this problem. I solved it by spraying the wife’s hair spray on both sides of the rubber piece then worked it back into position using a large C clamp. The hair spray dries and changes from a lubricant to a slight adhesive.1 point
-
I know this is an old thread, but I needed to get information on lug nuts and wheel studs, and, thought I would offer John & Debbie an option I haven’t heard mentioned yet. Check with your friendly, local Snap-On tool dealer. They typically drive around in big truck full of cool (expensive) tools and make frequent stops at car dealerships and independent auto repair shops. They often have a torque wrench tester/calibration checker on their truck. I have Snap-On torque wrenches and had mine checked by my dealer last summer. They tested within tolerance. Mine are more like 40 years old - but have been treated pretty nicely. (Kept in cases, NOT dropped in concrete!) I imagine of you ask nicely, your local Snap-On guy will test your wrench regardless of who made it. They’d probably do it for the goodwill and hoping to snag a new customer. The real reason for my digging up this thread in in the next post.1 point
-
I was thinking about this and nobody can be sure without real experience. However, the fact that the inverter A/C runs the compressor ALWAYS, and slows as it gets temp down to target, it may not produce the effect of the standard compressor A/C that shuts off and blows air across the cold frosted coil fins producing humidity. Give this idea a thought. Since the Atmos/Tosot discussion came up again, and let's keep that on the other thread, I started looking at these again. After travelling 5 weeks and getting more summer temps than we expect in the Dakotas, WY and CO, we've had to run our awful P2 more than I expected. I watch TV with expensive noise-cancelling headphones! I've learned that low power consumption is a feature that is more important to me than the quietest unit, since all of the models discussed likely produce half the noise of the Dometic. My need is to run A/C on 600Ah and the unit that can do that for the longest time would be the best for our needs. Anything new out there? We've all read @Treasure Coast Vault's post on the Pioneer which appears to be a Turbro Greenland clone, or vise-versa (can never tell when made in China which company owns the IP and which company stole it). Treasure Coast Vault reported exceptionally low power consumption, but if you read the Pioneer and Greenland specs, the Amp and Wattage usage specs are as bad as the Dometic P2. It's hard to make sense of it. And there is ALWAYS a difference in calculations EEs make and what is actually produced given climate differences and current conditions. I just found another option, running on DC which some of you like, but not me given our Victron MP2. I think it would be a pain to run heavy gauge DC cable up to the A/C when #12 is already there for 120VAC. 10K BTU should be enough for the Oliver, unless you regularly camp in the muggy summers of the southeast! https://www.amazon.com/dp/B0DW3TYSNR/?th=1 I'm still waiting, but please if anybody sees something new in inverter A/C for 14x14 rooftop RV application, even a new YouTube, please add to this post!1 point
-
If you can't make it to Idaho and still want a mini-version of lava fields, you can always try Snow Canyon State Park. This park is located north of St. George, Utah with the lave field hike at GPS: 37.222005386630634, -113.64194019098785. There's also lava tubes and petrified sand dunes here. Bill1 point
-
Is THIS the link to Road Active Suspension you were looking for? Bill1 point
-
Steve, Are these next to the Lathe & Drill Press when you are under tow???1 point
-
HOLE-E COW BATMAN!1 point
-
I said the same thing. WOW. thanks for the suggestions. Parks On The Air (POTA) is fun ham radio activity. Hole in the wall will keep the bugs out, maybe. I used Forster bits for woodworking. Diamond blade also seems sensible. I actually took the trailer to a mechanic for an electrical issue. He has been in the trailer business for more than 30 years, and said that this was the first Ollie has had seen, and that it is the best made plastic trailer he has ever seen. I want to keep it that way. john NS6X1 point
-
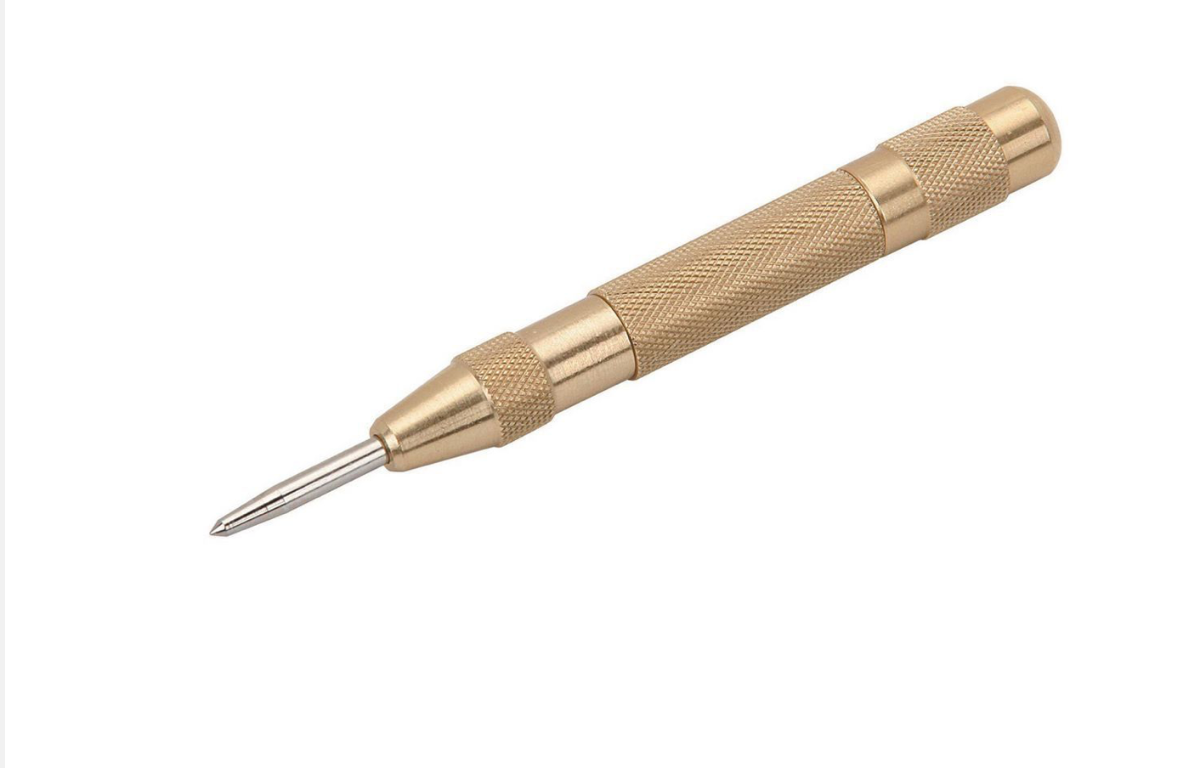
These are what I use for any holes larger than 1/2”.
1 point
-
Agree completely with the hole saw recommendation. Will add that it must be extremely sharp and of high quality ... recommend bi-metal hole saws of professional grade construction. Cheap is never worth the cost as you can get hundreds of dollars worth of pissed off when a poor quality tool fails causing you to make a major screw up. Never more true than with cutting tools. It may not be possible, depending on the job, but if possible stop just short of complete penetration of the hull and then make a cut from the backside through the existing pilot hole. This will ensure a clean cut on both sides of the hull as it eliminates exit slivers.1 point
-
A Forstner bit is a very clean way to cut holes in fiberglass. Make a very small pilot hole, 1/8", and then use the size you want the hole to be. Light pressure and run the drill at a medium speed. Forstner Bit Set1 point
-
Here's a clean install for your SO-239 and ground connection for your rig on the interior wall... FYI, we always use a spring punch on the gelcoat prior to any drill bit action:
1 point
-
I always start with a very small bit, then a counter sink bit until the gel coat removed is slightly larger than the final hole, then finish with the final size drill bit. This has worked every time for me- so far...1 point
-
Long ago when I had boats, I'd run the hole saw backwards to cut through the gelcoat, then forward though the fiberglass. This almost always eliminating chipping.1 point
-
I like using a fine tooth circular hole saw. Cut softly into the fiberglass to slowly penetrate. GJ.
1 point
-
Steve, I realize that it takes a certain amount of nerve to drill a hole in our Olivers. It's kinda like the first dent in a new car, after that it's easy. I've mounted quite a few things in ours, from a paper towel holder to drilling 1 1/4" holes to mount a new switch panel for the inverter I installed (yet again more holes.) Any drill bit will work, I used a hole saw for the larger ones. The sharper the better, it will tend to "grab" as it goes thru so you want to make sure there's nothing too important behind where you are drilling (like a wire, gas line, holding tank, etc.) Screws or bolts work for fasteners. If you are supporting a lot of weight, make sure you use washers or a substantial backing plate. If you are handy with tools and using your hands, it's really not all that hard after the first hole. Good luck, Steve1 point
-
True that, but not very much! Added benefit of the on-board air pump: each time the ignition is turned ON a few seconds of inflation is initiated to bring the bags up to the set pressure. Regardless of whether the vehicle is a daily driver or infrequently used, when the ignition is engaged the lost pressure is immediately restored. However, if wired to a constant 12V circuit and left unattended for a period of time the starter battery will be drained and possibly damaged in time. No bueno!0 points
-
Really good info, guys. Sometimes I'll use tape and sometimes not. I haven't noticed any difference in the amount of chipping, so I mainly do it in situations where I might scratch the surrounding gel coat somehow. I'll have to try the friction drilling. And yes, always a mask when drilling or sanding the fiberglass. Sometimes I worry about those guys at Oliver. Doesn't seem like a lot of dust control is happening there.0 points


.thumb.jpg.e34bf01ef7f7d5e99ad31856d45afbeb.jpg)


-
Recent Achievements
-


")


")


")

