Leaderboard


Popular Content
Showing content with the highest reputation on 07/28/2025 in all areas
-
@Wayne and Karen, If would complete your forum signature to include your Oliver model, year, hull number and any other modifications that make your Oliver unique, it would allow members that may be able to help, provide answers that are specific to your question about your Oliver. @rideadeuce just provided an answer that might work for you. My Ollie has the original Dometic AC that came with my 2017 LE2. It is 120V AC powered and the wiring could be modified to run on 12V or battery power through the inverter, which rideadeuce and Ronbrink have done as well as replacing their original AC units with Atmos air conditioner's. And just adding to the answers to your original question, I have replaced my original thermostat with a MICRO-AIR Easytouch. I was eating lunch when I read your original post and picked up my phone and turned my air conditioner on over Bluetooth. To be clear, my AC is plugged into my house electrical system so I can’t drive away like you would like to do, so depending on your Oliver, this may require a bit of work to accomplish. Mossey7 points
-
Well it's been a year since we walked into the Oliver showroom dreaming about hitting the road. It was a big step for us since we have never owned an RV and we really did not have any idea if we would even like hauling a travel trailer across the country. Nevertheless, we bought our Ollie I in July 2024 right off the showroom floor. Within a couple of months we had both retired, watched a hundred videos, and were ready to launch. Our first 3 outings were to a corp of engineers campground near our home in Nashville. Since those shakedown trips we have put 12,000 miles on the Ollie, spent over 70 nights in it, visited 17 states, attended 2 Oliver rallies, and visited 11 national parks. We weathered 100 degree heat waves, teens in Arizona, dust storms in west Texas, and hail storms in South Dakota. We have fielded questions from dozens of folks curious about our little Ollie, and their comment is nearly always the same - "That thing is cute." Thanks to all who have answered questions for us during our first year, and it has been great meeting you all at the rallies. And thanks to the staff at the mother ship who have been so responsive in answering questions and helping get the bugs out over the last year. The folks at Oliver are the best in the business. Bob and Barb P.S. If you would like to see some of our photos from the first year feel free to request to join our instagram. (It is a private account but we would love to add you.) campbells_olive2roam5 points
-
Very easily done. The Cielo Home app and others work great with the Atmos AC unit. Just have to have a compatible unit. You can monitor, change temp or mode, and turn on/off from the tow vehicle cab. I regularly make the journey from Nashville to the beach with the AC set to 72 degrees. Our two Welsh terriers have the best seat/bed for the drive down. We do have a 900 aH battery bank and usually have 20-40% left over sometimes more since the DC/DC charger and high output alternator install.4 points
-
The problem as I see it, is being able to remove them if they are a single unit with a snug fit. With individual chocks placed on either side of one tire or behind the rear and in front of the front tire, you can pull forward to remove the rear chock and then back up to pull the front. My wife is the chock person when we are getting ready to hit the road. Chocks are meant to be hammered in place with a rubber mallet to prevent any movement of the trailer. IMO there is zero value to doing what you suggest. You would struggle trying to get a molded piece out. Bad idea. I wouldn't want that even if there was an adjustable mechanism. I want control knowing my chocks are tight to the tire.4 points
-
There is a slight risk of the drilled holes and new bolts supporting the weight of the marine board &inverter resulting in “spider webbing” the exterior gel coat. Hopefully with all the bouncing around running down the road or super slab with your Oliver in tow this does not occur. The glue failed on my inverter board shortly after we took delivery in 2020. I contacted service and they recommended using a strong adhesive and not drilling through gel coat to secure the inverter marine board. So I cleaned both surfaces and reglued the marine board back on with no issues since. Service did not recommend drilling through the gel coat. The adhesive on the marine board spreads the weight out across the back of the board vs just the bolts. Hopefully long term you won’t have any issues with your gel coat cracking or spiderwebbing where the bolts are. 👍🏻4 points
-
Perfectly do-able as long as you have the battery capacity to spare.3 points
-
I have seen reports of this happening before to the inverters. I have had other things come off where it was adhered to the fiberglass. I made the decision to be proactive and when I was working in the area, and decided put #10 bolts through the marine board and through the fiber glass. I used and white plastic screw head cover on the outside to hide the bolts.3 points
-
Yes, stop and say Hi! Get hull #s, take pics… 🤣3 points
-
It's interesting. We are just coming off a 3 week road trip and saw our first Ollie a day before we got home. We got so excited we considered pulling into the gas station where they were parked just to say hi. 🙂3 points
-
I had the pleasure of growing up in the Ozarks. As a kid is was not hiking, it was hunting, fishing, and wading in the creek. Magic moments and wonderful memories.3 points
-
They must work, then.2 points
-
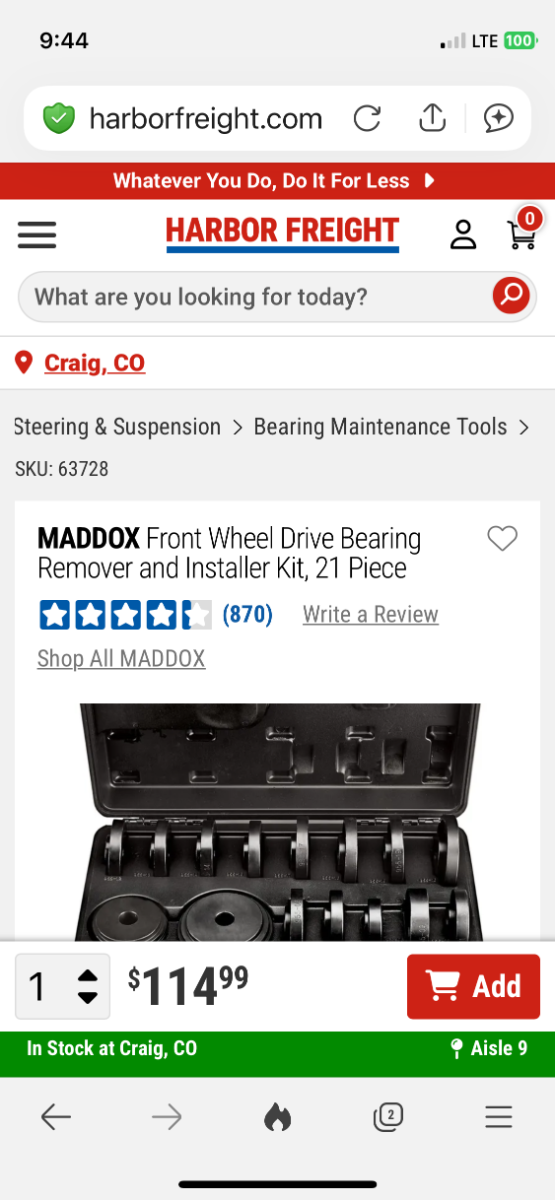
I would think given the hub-drum off the axle is substantial in weight, it would be easy to hold not allowing it to rotate. I would sit the drum on a piece of rubber on my truck tailgate. The press requires a specific socket with 1/2" drive ratchet or breaker bar. I would use some grease to allow the press parts to turn more freely. It should not be too hard. The press is designed for hand-use and advertised "while keeping the steering knuckle and strut assembly intact on the vehicle." Should be easier with drum on a flat surface. Chris is going to Harbor Freight for me today since she will be in the same shopping center for something else and my 15% coupon expires tomorrow. I hope it's the right kit. The numbers look right, but if wrong I can return it later. When my axles get here, I will remove one drum and mount the tool to see how it works and which of the many pucks and spacers are needed for this job. I'll post pics. I'll just need to figure out where to order the correct spindle nuts, given the Timken parts on Rock Auto are correct.2 points
-
Now, a new mod idea: a remote control in the truck for the trailer thermostat so you don't have to pull over to turn the A/C on. Electrical wizards commence...2 points
-
Yes, it would have to be adjustable, even for a specific trailer. If the ground is uneven, with a bump in between the two tires, a chock designed to fit snugly on flat pavement wouldn't fit between the tires anymore.2 points
-
Someone has had the same idea....I would not use either LOL (First from Etrailer.com, second from Home Depot).
 2 points
 -
FYI, I edited the above post adding info on the bearing tool, after @CRM and @Mike and Carol had read this.2 points
-
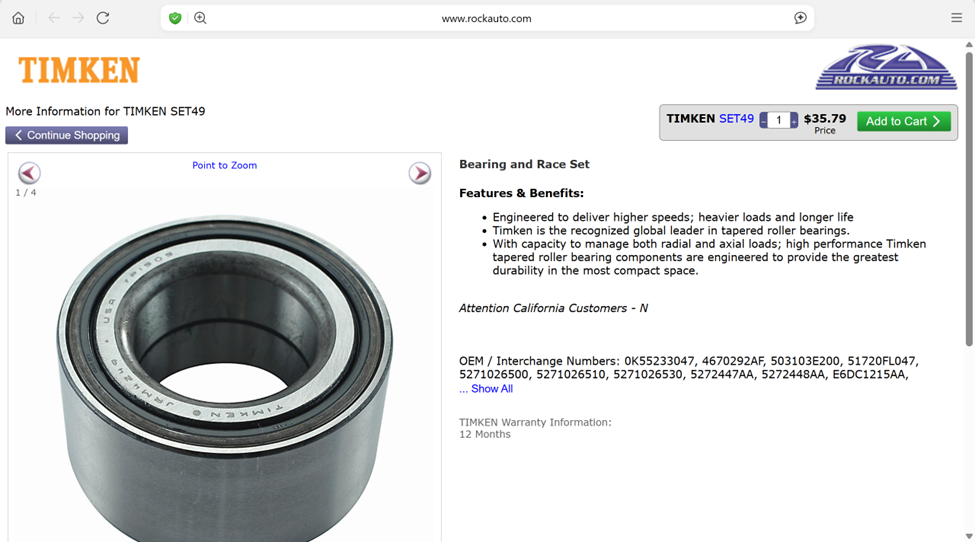
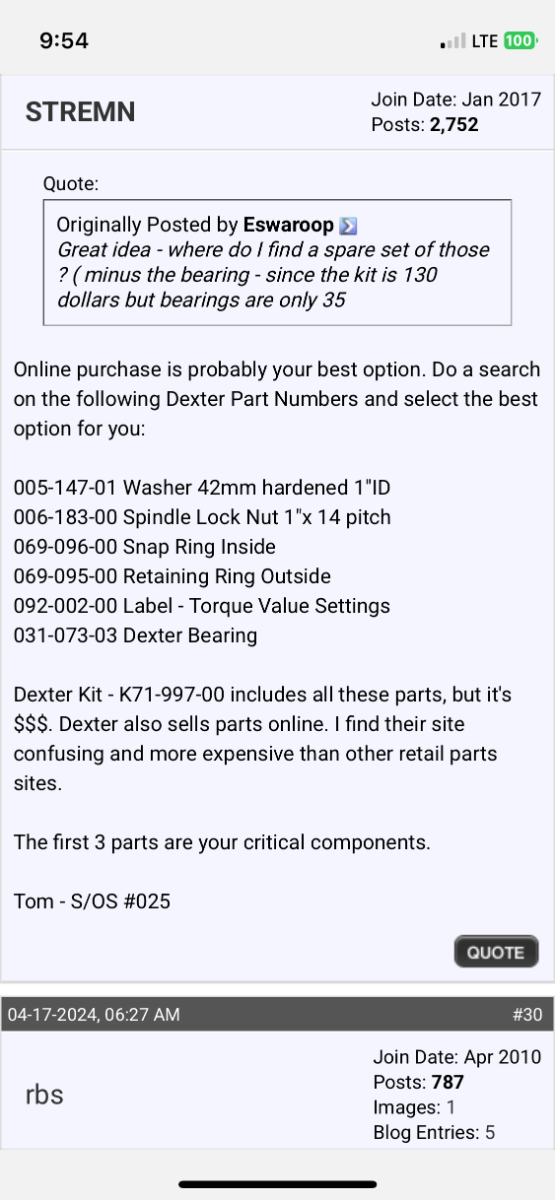
Thanks @srthomsen. I'll get a photo of the label off my new axles when they arrive for comparison. And thanks again Ken @mountainoliver. I really like the forum post that mentioned it is the front wheel bearing for the 2010 Chrysler PT Cruiser! Went straight to RockAuto.com and found this very reasonable Timken Bearing. Rock Auto for the PT Cruiser shows a different kind of non-locking spindle nut. They do list the larger snap-ring which along with the washer can be reused. I will verify when my axles come that this is the right part. The spec shows 1.654" ID which does convert to 42mm. Nice! Re the bearing press. This bearing has a 76mm OD. We'll need a kit that has a 75mm puck to pull and press this bearing. The Maddox kit that Ken showed from Harbor Freight has one at 2.96" which converts to 75mm. This kit will likely work well and Harbor Freight just sent me a "We miss you" email with 15% off! Two bearings and this bearing kit at $200 OTD plus the cost of a couple correct spindle nuts, now we're talking! 😂
2 points
-
Why is it 5033#? I thought the standard D52 meant 5200 LBS. Here is a blurry pic of what I was able to capture on my phone yesterday. I do know that the axle itself may be rated at or to one spec but that the actual numbers can be less if, for instance, the D52 5200lbs axle is outfitted with leaf springs that are rated to a lower #
2 points
-
Upon examination it appeared that the original application of adhesive did not adequately fill the gaps between the mounting board and the fiberglass as a result the mounting board was only adhered to the fiberglass in a few spots ( along with the black tape ). I followed the recommendation of @John Dorrer and applied Gorilla Max Strength Construction Adhesive making sure that the adhesive bead was adequate to more than fill the gaps and surface area. I'm pretty sure that this bond will last longer than anything else in the trailer.2 points
-
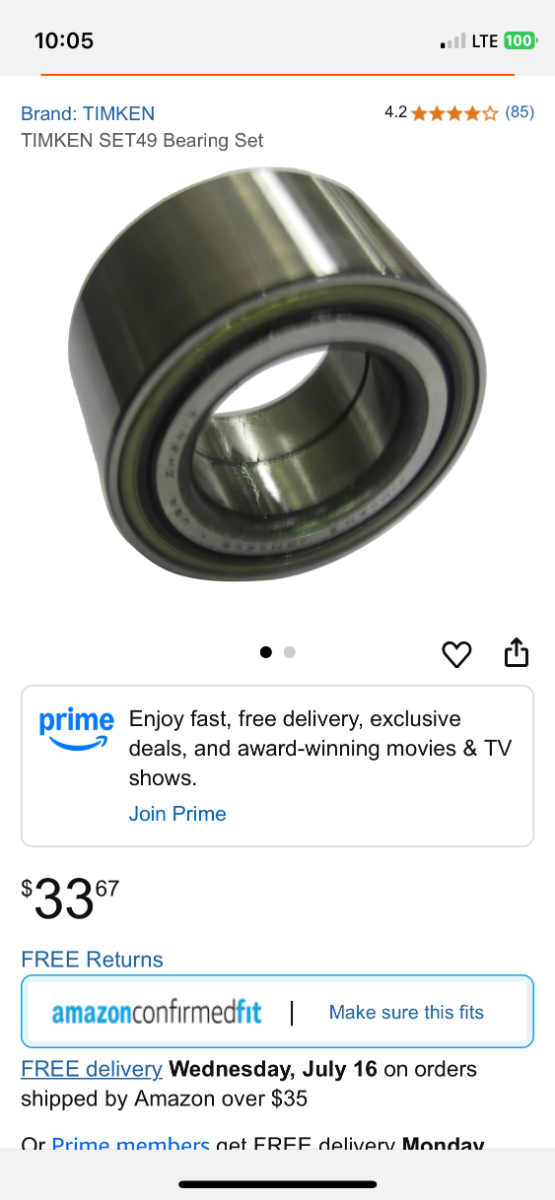
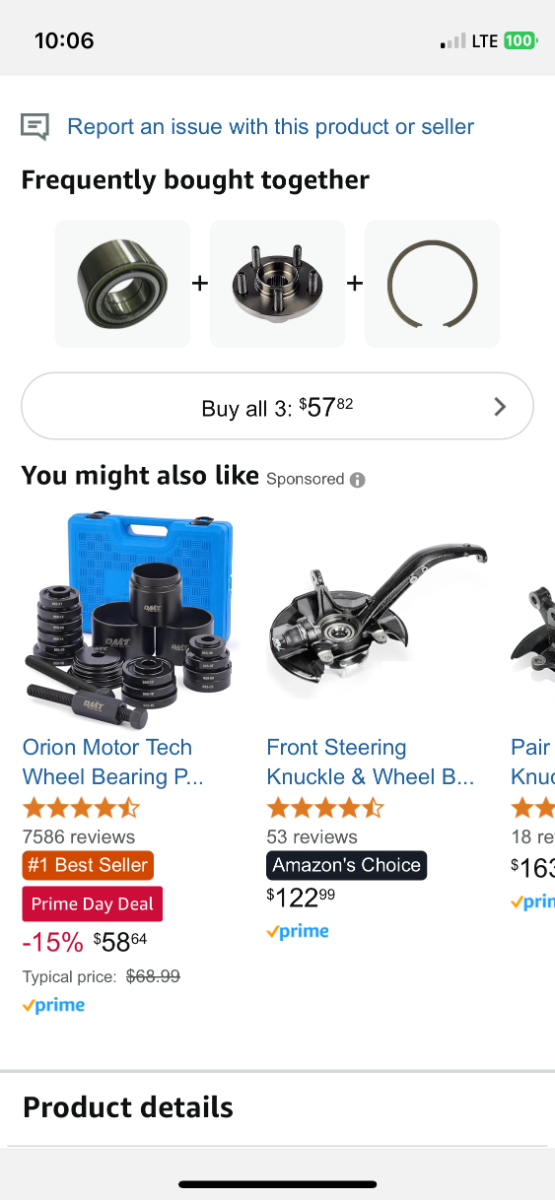
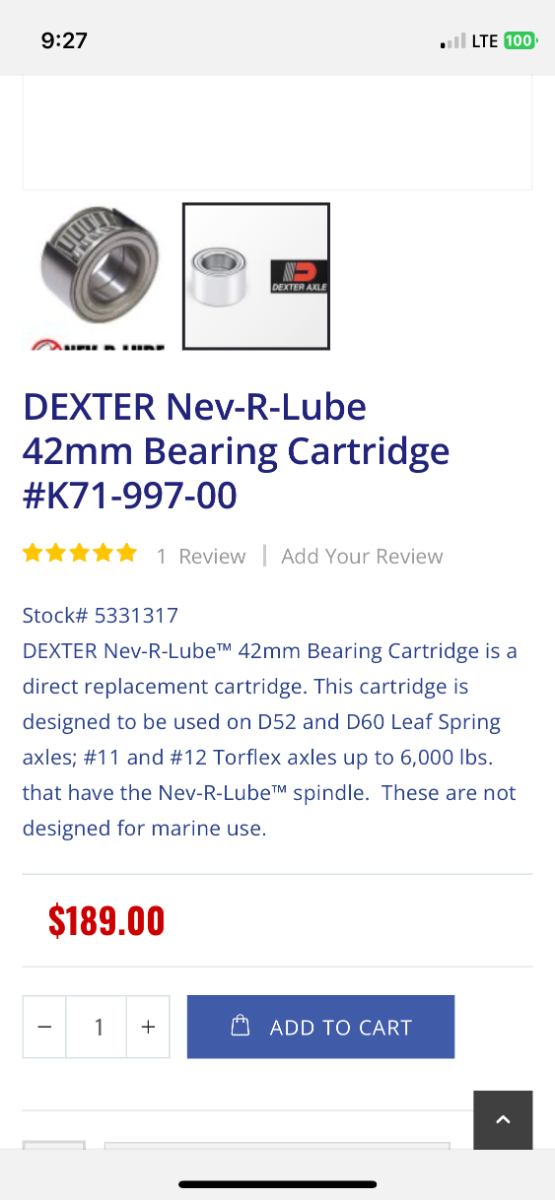
I’m in the midst of a 3 1/2 month western trip with many places that have zero to minimal cell service so have not done nor taken the time to do a lot of research. My axles/springs were installed in Grand Junction Colorado during our trip (I know, white knuckle experience) so I’m still getting used to them. In the beginning I stopped every half hour to check bearing temperature. These are different from the old ones. I also have completely turned the brake control off to make sure that non of the brakes were dragging/overheating. Anyway, developing a new baseline of operation. Now I’ve gone back to my old routine of stopping every couple of hours to check bearing/brake temperature. Right now the only link I have is a screenshot of an Amazon page that I saw. I also have screenshots from a couple of old Airstream forum posts. We should all do more research. I’ll continue in depth when I return home in August. Here’s what I have so far. These are all unedited photos/screenshots. Keep in mind that pre assembled bearing cartridges are not new. The automotive industry has been using them for years. They have been used in industrial applications for years as well. I may be wrong but I personally feel comfortable with the Nev R Lube axle especially knowing that our axles are the smaller of two that use the same size bearing. The 42mm bearing is used in the 5200 pound Dexter axle and the 6000 pound Dexter axle. Plus we’re not going to overload our trailer (now are we?) so our trailer maximum weight rating of 7000 pounds is still the limiting factor. Longevity and maintenance issues remain to be seen and it remains to be seen whether I made a mistake or not.
2 points
-
Yes, there’s got to be better pricing for real Timken bearings and the hub-drum assembly! (I’ll get 2 extra bearing kits and the proper tool, no hubs for me.) For those of you who have service companies do your maintenance and repairs, just buy a couple bearing kits to have with you. I do not believe this style bearing will immediately freeze up. There will be warning signs, heat and noises, allowing you time to tow more slowly to a trailer repair shop. But if you don’t have the parts, you’ll be there waiting 2-3 days! Think about the etrailer price of $655. We just purchased whole axles for $1,001 each that include two hub-drum assemblies, two brake assemblies and all working (spare) parts! Who would buy a hub at this price? Maybe I should have ordered three axles!🤣 Alcan was going to price the bearing kit for me, now that I remember. I’ll have a couple items to talk to them about this week. Will keep you posted!2 points
-
Several years ago I was going to replace the bearings and brakes on my 3500 pound axles. I contacted a local Dexter dealer and the hub/drum assemblies were over $100 each and the loaded brake assemblies were close to that as well. Of course e trailer was even higher. I called the Dexter distributor that Oliver was using at the time, Textrail. The hub/drum with Chinese bearings were something like $46 each and the loaded brake assemblies were like $45 each with the manual adjust brake assembly even less. Anyway, e trailer is not necessarily the price leader so check around. And absolutely yes! I’d never buy Timken bearings from Amazon. I bought mine from a local industrial supply company that I dealt with for years. Bearings ordered directly from Timken. I think even the ones from Summit may have been knockoffs as well. I could be wrong on that but it seems like someone did a deep dive into this at one point. Anyway, buyer beware!2 points
-
Awesome, glad you got it worked out ok. Bluetooth can be finicky for sure, makes sense.2 points
-
The missing battery mysteriously showed up 24 hours later. I talked extensively with Geoffrey at Epoch technical, a very kind and informative person, and he gave a few ideas as to what the cause was. As you said, another device could have hooked up to it at the campground so I'll attach password protection. He said Apple Air Tags can adversely affect the app...we don't have Apple products but I'm sure many at the campground do. Also we boondock very often and don't use our inverter all that much so I believe Geoff said a capacitor (in the battery?) could have lost it's charge and that could simulate a short and cause the BMS to shut it down. I did not uninstall and reinstall the app but Jeff said to do that as a first step if it happens again. Also Geoffrey suggested to run the inverter a little more often (a few minutes a day) to charge the capacitors. 3 days now and all is still good :)2 points
-
After removing the old adhesive, I wiped the board and fiberglass with rubbing alcohol to achieve a very clean surface.2 points
-
I have been chasing down the solution to a Norcold refrigeration problem for 18 months. My fridge worked well on AC, so so on DC and inadequately on propane. The best it would do on gas was 7-10 degrees in the freezer and only 50 in the fridg section. We do a lot of boondocking and really wanted to keep the gas option. Here are the various steps I took one at a time without success: Pulled the fridge and cleaned the burner tube, changed the thermistor (3 times), changed the main board, checked the gas pressure, changed the thermostat and added a dual extra fan to the top, changed the DC board (one to the right of the main board), changed the eyebrow board, added venting, added insulation. All of these steps were recommended by techs who I paid. The last tech I hired told me that I needed to replace the cooling unit since I was wanting to keep the existing model. Unfortunately, Norcold no longer makes the N412.3 model and replacement cooling units are out of stock. I was advised to find a cooling unit from a 3rd party, order it and then pay the tech to install it. The first cooling unit manufacturer that I contacted did not make units for this smaller fridge model and recommended talking to a guy in Olive Branch MS who rebuilds cooling unit. When I spoke with this gentleman in MS on the phone, he was far more than helpful and told me that my cooling unit was not the problem. He told me to remove my burner and soak the orifice in a high percentage alcohol for a few hours, then blow it out with a compressor and reinstall. Now mind you that my flame looked fine and didn’t seem to be a problem to me or to the two professionals that previously looked at it. 80 year old Mr. David Force, owner of Cooling Unit Warehouse explained that there was a paraffin buildup in my orifice and that although my flame’s appearance didn’t visibly change after cleaning it, the temperature of the flame had been slightly below the necessary temperature. He said that a 10-degree flame difference can change everything. Bottom line, I followed David’s advice, the fridge has been working like a champ for 50 hours on propane so far. I wish I had known this before I spent 18 months and 7-800 dollars on un-needed parts. Nevertheless I am thankful that it works like it is supposed to so that we can head out next week for a month long trip. I'm posting this in hopes that someone can avoid a refrigerator adventure.1 point
-
September 10, 2024 Hello fellow Oliver Elite owners! I am letting everyone know that the Highsierra company has made a handheld bathroom faucet with adapter (chrome or brushed nickel) that fits the original Oliver hand held bathroom sink faucet plus hose and I LOVE this design! This way you no longer have to replace the whole faucet housing while looking great and you'll only need to replace the handheld part by screwing on the adapter to both the original hose (will only connect to the hose with the female threads) and Highsierra handheld shower head. Due to this handheld design and being metal not plastic, I noticed when I showered that my hot water lasted longer during cold weather and the force of the water was stronger than the original hand held. If interested, below is the link to the handheld faucet and you can call if you have any questions. I hope this helps! Highsierra Shower Heads Company # 1-888-445-1941 https://www.highsierrashowerheads.com/shop/rv-handheld-olivtrailers/F1 point
-
Hello, I purchased an (2019) Oliver elite ii hull 489. Never owned a camper. I have a lot to learn. Haven’t taken it camping yet. i was opposed to campers generally because I think they are built like complete disposable garbage. Oliver is an exception …..won me over.. plan to pull it with a 2014 Tundra 5.7 liter. At least for the time being. Hope to upgrade rig before too long. Seemed to tow really well driving it home. Will probably stick with tundra, but I’d like one with a plusher trim and/or a bigger fuel tank.. I live near Paris, Texas. GG1 point
-
We were thinking of turning the AC on an hour before we get to a campsite and wonder is this safe? With the heat this summer when we get to our destination the Ollie is an oven. Friends told us they pull over and turn their AC on for an hour, using the batteries to power their AC so the travel trailer is nice and cool when they arrive. Thoughts please?1 point
-
We started doing this on our last trip when it got to mid 90s up north unexpectedly for too many days. Great results! Please see my most recent post on our DC-DC Charger mod thread --1 point
-
Saw this nice LE11 yesterday by the Buc-ees in Madisonville, TX. Howdy ya'll!
1 point
-
There’s a shopping center down on the north side of San Antonio we go to sometimes, there’s a Best Buy there. Earlier this summer I was there for something one morning and I saw an Oliver parked in the lot. I parked near it. I did my business and came out and there was a couple coming out of the trailer. I approached and introduced myself adding that I had owned an Oliver since 2016. He looked at me and said “nice to meet you” and then walked off towards Best Buy. Didn’t give his name. No handshake. His wife (I presume) said he had run over his cell phone while leaving their campsite and they stopped at Best Buy to get a replacement. She then left quickly to catch up to him. I understand they might have been stressed out, but they were not even cordial much less friendly. I wrote it off to him being upset that he had crushed an expensive electronic gadget and I went home. Don’t know who they were, I didn’t look at their trailer for graphics or anything, I was just a little surprised at the experience.1 point
-
Better yet, maybe I could use the axle upgrade to get the wife to approve one of these? https://www.homedepot.com/p/DEWALT-20V-Brushless-Cordless-3-4-in-High-Torque-Impact-Wrench-Kit-with-Hog-Ring-Anvil-Tool-Only-DCF964B/3325253961 point
-
A long HD screw driver or crow bar between the hub and two lugs should hold it. Your spouse or travel partner holding the bar may help for the 3rd hand! Yes, we'll see! At least we are preparing ahead of time vs. broke-down-on-roadside! 🤣1 point
-
The external SAE port goes directly to the battery, not to the charge controller. Even if it did go to the charge controller, you wouldn’t necessarily be able to tie into it. In my case, the Oliver mounted panels are 24 volt, where my portable panels are 12. Mixing voltages drags the 24V panels down to the lower input. And if both your installed and portable panels are the same voltage, you might need a larger charge controller to handle the combined input. I’ll eventually mount a controller inside for convenience. But having the setup that I have now has already saved the day for a friend while camping with no hookups. He was able to use my kit to keep his battery charged enough to run the fridge instead of having to go home early.1 point
-
I may do something like this, but is it necessary? Does the wiring from the external SAE solar port connect directly to the batteries, or do they go to the onboard charge controller? I have 2 portable 160 watt EcoFlow panels that do not have a controller. If the external wiring goes from the SAE connector to the charge controller, all I need is a MC4 to SAE adapter, and possibly a reverse polarity adapter if the trailer side has Zamp polarity.1 point
-
We usually do if it’s along our way! 👍🏻🇺🇸1 point
-
I wonder why no one sell a wheel chock that fits snuggly between two wheels made out of resin or heavy plastic shaped like If you have access to an injection molding machine and want to make me a pair I will pay you.
1 point
-
I ran across a guy from Texas with an Elite II that made some out of wood. I came back and made some. I have been using them this year.1 point
-
Yes, that is my practice! I find a minimum of 30 minutes enough to feel the comfort upon arrival; whether at a campsite or just for a rest or lunch stop. This is assuming one’s rig is setup to run the a/c on inverter/house battery bank. Also, upon pulling out of a campsite the a/c is ran in like manner until the dump task is done, and a shower at the park’s bath house to freshen up and change clothes, oftentimes followed by lunch. Then the a/c will be turned off when finally leaving and the DC-DC will begin to recharge the battery bank when underway.1 point
-
Aren’t there a number of different dual axle configurations with varying distances between the two wheels? It might not be profitable to try make chocks to fit all the different situations. Maybe some kind of adjustable chock? Not sure what that would look like. Mike1 point
-
I have no idea. The tag on the axle on my trailer is located on the top of the axle tube and I wasn't able to get a decent photo of it. The photo that I did get shows a capacity of 5033 lbs.1 point
-
That's what we do. We always turn the campground power post breaker off before connecting or disconnecting from the trailer. It's more important while disconnecting, to prevent drawing an arc from your plug blades to the outlet terminals as you remove the plug. We don't turn off the trailer's main breaker when connecting to the generator because there's a delay before the transfer switch kicks in anyway, but we do turn it off before disconnecting from the generator.1 point
-
They're the Vise Grip of the power tool world. Can't believe you don't own one!1 point
-
Mine did that I scraped that off and applied a heavy duty Gorilla Adhesive, re-adhered with compression and have had no issues since. Set blocking underneath to keep it in position1 point
-
I've used epoxy before, but it's rather permanent and overkill IMHO. I've had great results from ACE construction glue. There are plenty of inexpensive and high strength construction glues that would be more than adequate. These come in caulking tubes that require a cheap caulking gun for super easy application. It's tacky enough that clamping is not required, just push it firmly in place and prop the board up so it doesn't slip. It appears they originally used this type of construction glue from your photo. I've also had original glue failures, and I believe it was caused from glue application on dusty surfaces, and it looks like yours was barely touching both surfaces. There is a surprising amount of dust on the interior surfaces, so be sure to clean surfaces before using glue. Also, I think you could just add more glue to that surface and save yourself a lot of scraping of the old glue. Cheers! Geoff1 point
-
Amazon purchases:
1 point
-
A follow-up to the above. I just called to return my adapter, and was told a new one is in the works for newer trailers, and should be ready by the end of the month. I’ll be getting one as soon as they ship.1 point
-
<p style="text-align: center;"> </p> We had Oliver service install the WiFi Ranger and Cell phone booster in our trailer after it was a year old. They did a great job and it looks better than the others I have seen that were installed during the build.1 point
-
I think television coax and antennas are rated at 75 OHM and wireless coax and antennas are rated at 50 OHM. If you connect a 50 OHM device to a 75 OHM device or coax, you would create an impedance mismatch which would cause signal loss. Since the idea is to boost a weak wireless signal, you would want all components balanced for the best signal improvement. That being said, the short coax length would be a benefit and possibly not create enough impedance loss to be a problem, but it is a consideration. I don’t think it would be too difficult to replace the television coax with wireless coax. I’m not sure if your Cradlepoint is a WiFi receiver or not, it depends on the model, but I assume it is based on the 5 way antenna. The big signal boost you get with your equipment is the roof mount antenna. If I was going to spend the money to add a wireless booster or router, I would install a wireless antenna and coax cable which I think you did from your description. Although an antenna on JD's flag pole would be an interesting test. Mike1 point


.thumb.jpg.e34bf01ef7f7d5e99ad31856d45afbeb.jpg)


-
Recent Achievements
-


")


")


")

