Leaderboard


Popular Content
Showing content with the highest reputation on 11/26/2023 in all areas
-
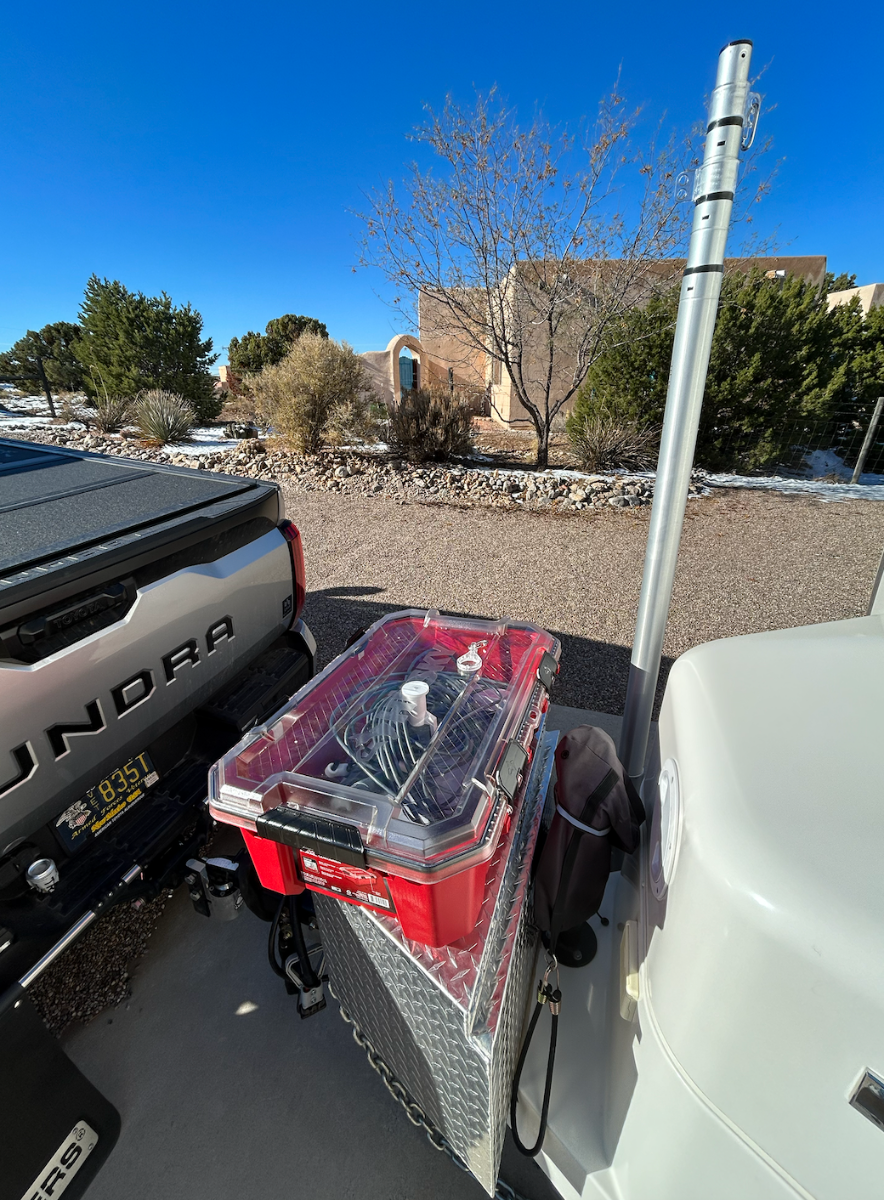
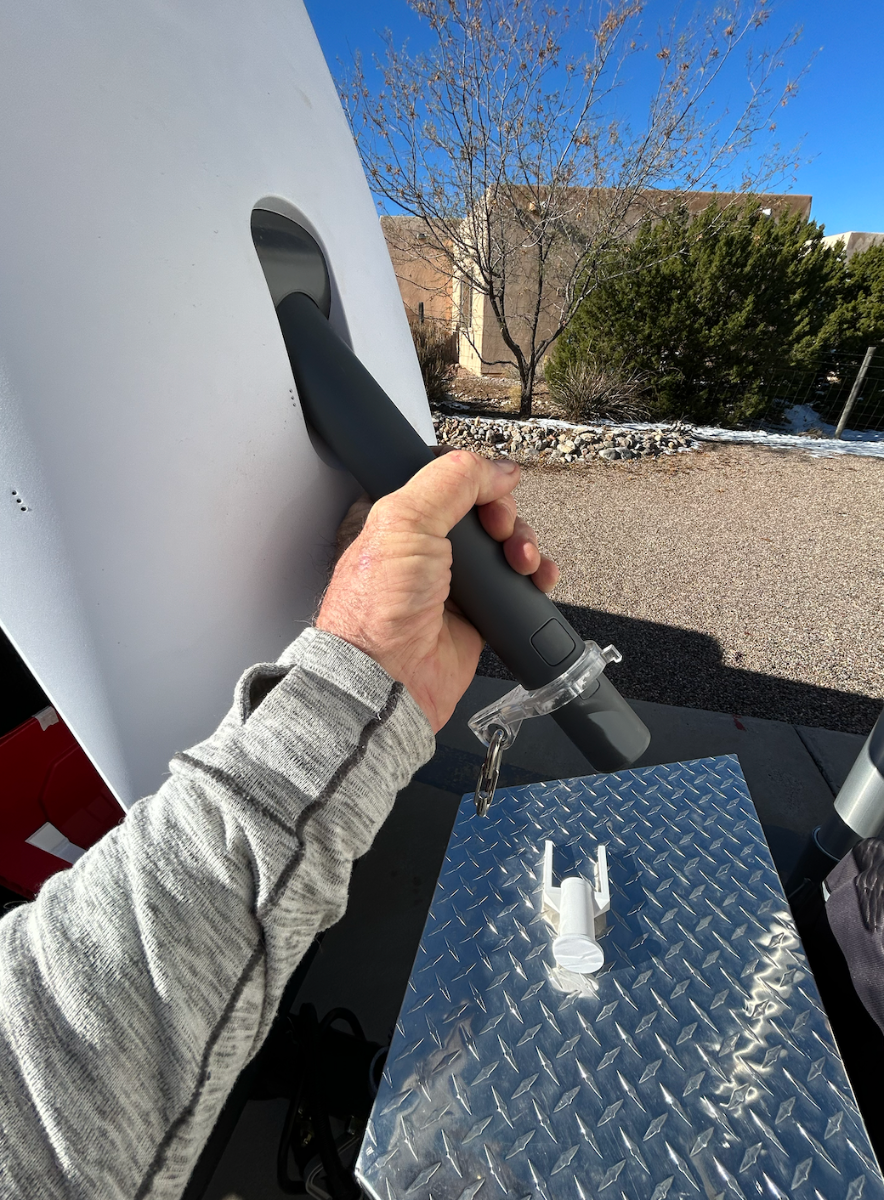
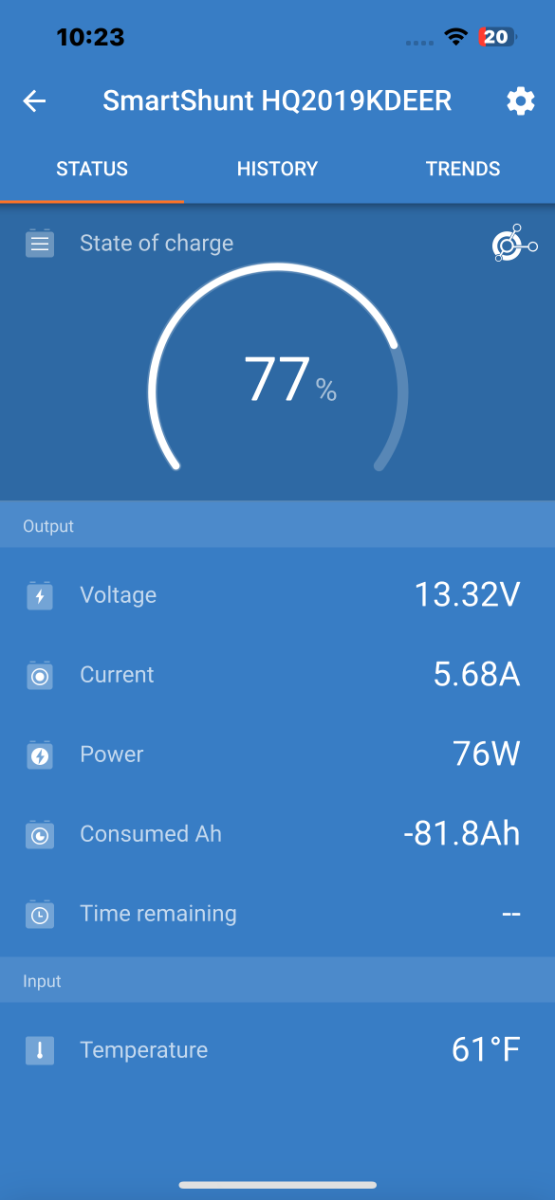
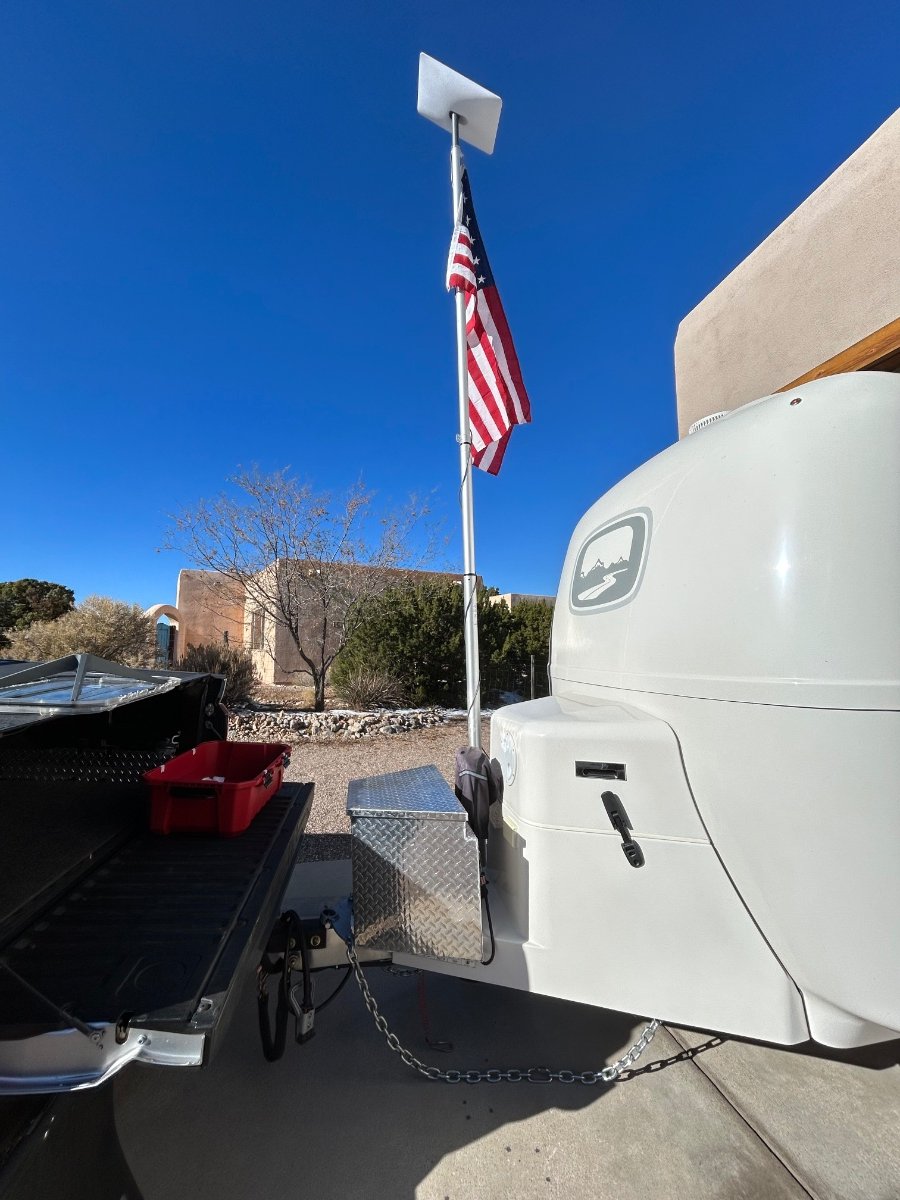
So, since D works from home and spends quite a bit of time on Zoom, Teams, etc., we decided to get into a Starlink-Mobile kit. The kit will allow her to work from Casa Blanca with Starlink's scorching fast internet connectivity and allow us to travel more often. Today we played around with a proof of concept for using Starlink in our Oliver - there are literally dozens of YouTube vids and deep rabbit holes for ideas of how to integrate Starlink with RVs. Here's how we'll be lugging is around: We're using a 12-gallon plastic Husky tote with custom-fit travel pieces from Etsy to keep components from bouncing around when towing. Its a neat and tidy mobile kit. Next, we didn't want to use the Starlink-supplied "quad stand" so we modified the top of our E-Z Flag Pole to accommodate the "Dishy" mount that would normally be inserted into the stand. We inserted an adapter (a 3D print from Etsy) into the top of the E-Z pole so the Dishy just snaps inside. By drilling-out the upper mostIMG_0441.HEIC flag connector with a step-bit, we're still able to fly the colors. We used the exterior curbside AC outlet for the Starlink router power connection. With the inverter energized, it took about 10 minutes for Starlink to connect to its satellite. Energy consumption varies between 60 and 80 watts according to our Victron Smart Shunt via the Cerbo GX. The solar modules are generating about 180watts at today's low sun angle, which more than makes up for the inverter/Starlink consumption. We'll likely put a through-hull connection using a modified waterproof Furrion capped connection (same one OTT uses for the satellite coax connection). The standard supplied cable is 75' and needs to be shortened anyway - so we'll do that when we install the modified Furrion. More later...
 3 points
 -
You’ll sell it faster on Foy Sperring’s FB page. After managing the classified section for about a year, I decided that only about 50-60% sold. Based on the number of hits each seller got, there didn’t seem to be as much traffic as I expected. Don’t anyone hold your breath waiting on Oliver to change their mind. That ship has sailed.3 points
-
Yes, descale HWH with vinegar. But dump it. Keep it isolated from any bleach. Use the hot water isolation valve to do so. When done, then button up the HWH open the isolation valve and flow fresh water through it to purge all vinegar and scale out of the HWH. I have attached my water systems checklists. It has several processes with detailed steps that a new owner could follow easily. Once you have done them a few times, it will come natural. But I do understand not knowing for sure what you think you may not. Each use I find ways to improve them. So If you or others see errors or ways to improve them, please PM me and I'll update. Mahalo, GJ 2024 WATER SYSTEMS SERVICE AND SANITIZATION (Updated 2024 Version).docx3 points
-
Those seals are considered to be " consumable" parts, meaning you should just replace it and move on, But you are correct, that was an installation error. Coat the oring with a silicone dielectric or plumbing grease every time and you won't see further problems like rolling or tearing. You can buy tiny tubes at $10 per ounce, this one a much better value and a great product; it can also be used to moisture-proof electrical connections. I always use it on every oring, such as those on my PCP air rifles. and always on spark plug boots. I have been using this particular DC4 product for over 40 years. Now that I am retired from fixing airplanes, a big tube like this lasts me about ten years... 😉 Dow Corning 4 Electrical Insulating Compound 5.3 Oz (150 g) Tube (1, Single Pack) John Davies Spokane WA
3 points
-
Well, thank you all for your input. Unfortunarely, most of it leans towards a very expensive lesson! I will try to redeem first. Wish me luck. PS: it's a 2022 model.2 points
-
Also check all your brake wiring and brake operation. I've heard of SOB trailer owners having melted wires and/or damaged brake magnets from this scenario.2 points
-
Hey, GJ! Thanks, brother... It's a work in progress for sure. Regarding your questions: 1. The E-Z Pole mast is designed with 4 nested aluminum sections with "twist-to-lock" fittings in each. To unlock, it takes about a 1/4 turn clockwise. Push the top section up first, lock, then 2nd, and 3rd. The pix show the mast at about 2/3 max height, FYI. The mast configuration gives us more use options - for example, we can use the quad-stand at the house should we lose our Xfinity/Comcast service. 2. I measured the speeds today in on the apron at 225mbs download; 28mbs upload. Basically faster than our Xfinity service. However, we've learned through some of the previously mentioned rabbit holes, that speeds vary depending on location. In some highly dense populated areas speeds can be slower, as Starlink "chokes down" speeds - same goes with remote locations. A subscriber can pay extra for guaranteed higher speeds. We've decided to try the basic plan for the time being. 3. The basic Starlink Mobile kit is $600. The Husky tote was $28 at Walmart. The custom fit packaging pieces were $50 from Etsy. The Esty pole adapter cost $15. We're planning to modify the kit (router) from AC to 12vDC. Switching to 12vDC drops power consumption by approximately 18%, FYI. I've already purchased the component parts to make the DC conversion for about $125. Parts needed are a PoI injector, 12-48vDC converter, and a standalone router. Easy peasy. 4. The Starlink Mobile monthly service is $150 - but, service is set up as "pay by the drink". If you're not planning to travel during a particular month, or your rig is in storage mode, you can access you account online and deactivate service. Only the "Mobile" option allows this feature, the "Residential" plan does not. Hope all is well on your side - best regards to June... Cheers!2 points
-
All it takes is one time to damage them. You need to get them charged and have a battery place do a load test. How old are they? IMO I would be surprised if they aren't toast. Hope that isn't the case. I have seen many cases were AGM's were run down to 11.8 and damaged.2 points
-
I used it more than a year ago on our Airstream, had issues with the AC control board and used some of it. Was recommended on the airstream forum, and it worked, but I’m not a fan of the fingertip dispenser, not easy to control the flow!2 points
-
A search for 'Keg Lube' will return a food grade o-ring lubricant brewers use on their brewing equipment. All the fittings in a brewery have o-rings in the mechanical connections in hoses and tanks that handle liquids. You can be assured that if they are being used in a brewery they won't impart and flavor or taste to the beer or your Oliver water supply. I'm not sure the same can be said of the tubes of silicone lube you'll find at the hardware store. You can buy keg lube in sizes that vary between 1 oz and 55 gallon drums. A 1oz tube would last forever for most people. And it'd be food grade. If I was on the road, I'd probably just use some cooking oil of some sort with a plan to replace it when I got home. It'd eventually go rancid. This is the keg lube I use.
2 points
-
That will work fine, you should use a NON-CURING silicone GREASE, not a sealer/ sealant, which would definitely stop the leak but you might never get the part back out. https://www.crcindustries.com/marine-premium-dielectric-grease-3-3-wt-oz/ It says: "Also ideal for lubricating plastic & rubber." How do you like that finger tip dispenser design? Is it useful or a gimmick? I don't understand why anyone would want a pressurized container of this stuff, you only need a very tiny amount each time. John Davies Spokane WA2 points
-
Some hardware stores sell o-rings in the plumbing department. I have sometimes been able to find a replacement by taking the "old" o-ring to the hardware store and comparing it to what is available. Then, as John Davies has wisely recommended, apply dielectric or plumber's faucet grease to all o-rings before re-installation.2 points
-
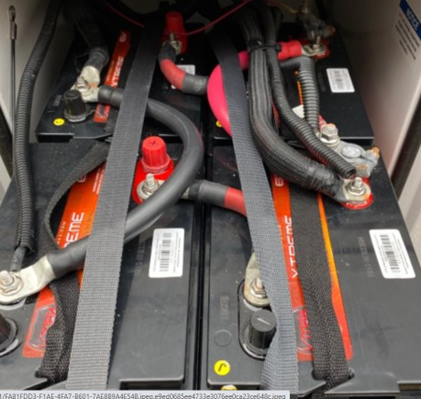
David: Nice install! I may get a couple of your straps for my battery compartment. Two thoughts: To keep the batteries in place requires a significant amount of tension. Hence your heavy duty straps. When in motion, energy pulses from the suspension system imparts to the frame, and then to the metal plate that supports the battery bay. Fortunately with EZ Flex and four shocks, these pulses are significantly reduced... but not eliminated. The result is varying tension of the straps. Higher pressure when the pulses are up, and lower when they are down. In essence your cables will be acting like super strong springs between the straps and the AGM's. That over time, the spring movement (Cables) will impact the crimped connections and possibly effectiveness of the system itself. In short, I recommend running the straps under the battery cables. Thus forces of the straps on the batteries will not have nearly as much on the cables and connections. Secondly, if you do not already have a Master Battery Switch, I would certainly suggest your getting one. BlueSeas 350 amp is a great one that many of us use. GJ
1 point
-
David sold his trailer some time ago and hasn’t been here since. You might try sending him a PM. He was a great contributor to the forum and a great photographer! Mike1 point
-
Battle Borns are on sale big time, maybe your toasted batteries are a sign from above that you should upgrade to lithiums now…. They will survive abuse much better than ye olde fashioned lead acid boat anchors… BB Black Friday sales I have never heard of even one owner that switched to lithiums who regretted it afterwards. Maybe you should add some 21st Century tech to your electrical system. John Davies Spokane WA1 point
-
Art: Great effort. Down the road June likely will need the same set-up. Some questions: How do you raise the mast? What kind of speed does the system generally provide in "city" and while "remote"? Any wag on the equipment and accessories cost (not counting your time which is priceless of course?). About what does the monthly cost run? Thanks GJ1 point
-
To do so, you would also have to have the gray line valve (next to the toilet) in the travel (closed) position. Or, you could drop a lit M-80 in the toilet... that for sure would do the trick. Not recommended.1 point
-
I don't ever recall a post in which this was either shown or discussed.🤔 Something shouldn't be all that difficult to make - perhaps Foy has looked into it for something fancy? Bill1 point
-
I used a ratchet strap to minimize the slop between the bike rack and the bumper mount, and between the bumper mount and the trailer. I put just enough tension on it to pull both joints "up", and then a click more. This allows a little bit of bounce to absorb road irregularities, but eliminates almost all of the movement I had before adding the strap. (Yes, I later replaced the hook with a clevis. 😉 )
1 point
-
One of the major reasons we bought the Oliver was knowing when it was time to sell, we could do it in a more personal way here. This is a terrible decision by Oliver Travel Trailers and I hope they will reconsider.1 point
-
Happy Huskies: Magnus and Oscar are absolutely beside themselves with the light dusting and our first winter wonderland this morning....
1 point
-
You might find some storage ideas in this post. Mossey1 point
-
OK - but it will have to wait until the next time I'm out at the storage yard - should be within the next two weeks. Bill1 point
-
@ScubaRx, replacing my halogens with leds was much less. They're still working. Cost isn't the only factor. It's workmanship. That's an unknown, til crap happens, and I'm sad for the folks who got a bad batch. The new,,individually switched lights, will be much more expensive, imo, but better lights.1 point
-
Ditto. Also need to add that protecting the front of your trailer is ESSENTIAL. Below is a picture I lifted from Sherry's post link. Mud flaps near the rear and front tires plus bigger flaps at the bumper is not enough. But they are the first and second line of defense. There are posts on our forum of several ways and materials to do the protection. But I like hers the best personally. GJ
1 point
-
I posted this inside our closet door.
1 point
-
Just don't ever mix vinegar with bleach. Not a good result.1 point
-
When you take a look inside you will see that the microwave has a sheet metal piece attached to the bottom that extends about 5/8 inch from the bottom of the microwave. Then there are four rubber feet - one at each corner - that extends another 5/8 or so for a total of 1 1/4 to 1 1/2 inches. As I remember, I used scrap 2 x 4 around the bottom to wedge around that wood box and under the microwave until the wedges hit the rubber feet. Then where that didn't fit I shaved off slices (using my radial arm saw) until it was tight. Pay attention to the fore/aft movement - you can wedge wood not only against the rubber feet but also between the sheet metal at the base of the microwave and the front of the interior cabinet. I did not drill into anything - the simple wedging did the trick. Once you get the trim piece off, you will see that the "metal" is actually very thin and only supported via the plastic framing. There really isn't much metal there at all. Bill p.s. in wedging the material around the unit I used a small hammer to tap the wedges into place. Small because of the working space and I didn't want to bend anything out of shape on the microwave. However, I did want to have the wedges very snug. Finally, when I was satisfied I drilled four holes in the front of the face plate and screwed directly through the fiberglass into the wood box. Then I used screw covers to "hide" and dress up the screws. No one has ever commented that the covers look out of place.1 point
-
The obvious most important warning is not to mix those chemicals in your living space. More than a few folks trying to unclog/clean a sink/toilet have done so to their peril. So good reminder. But for this discussion (Tank and Fresh Water Line Cleaning), the solution to your process is not to mix the Pine-Sol that you put into the black/gray tanks with the the Vinegar you put into the hot and cold water lines to sanitize. How? Raise your trailer tongue at a dump station or camp site where you have full hook-up and open the black and gray valves to drain them after your tank cleaning. Then flush the water lines first with a bunch of clean water to flow water through the water and they drain into the tanks to remove any Pine-Sol residue. Then introduce the bleach water into the hot and cold water lines and complete the sanitization process. Flush the tanks some more and close the valves. Always remember to bypass your hot water tank. You don't want bleach in it. GJ1 point
-
Planning to soon descale the water lines with vinegar and after that is good and rinsed, I will sanitize the lines with a bleach solution - WARNING!!! Just realized you CANNOT have Pine-Sol in the black and gray tanks when working these procedures! Pine-Sol contains glycolic acid, when mixed with bleach will create chlorine gas, which is immediately lethal. Same reason we do not mix bleach and vinegar. Pine-Sol plus vinegar is not as bad, as they contain two similar acids. Pine-Sol company states specifically not to mix there cleaner with any others.1 point
-
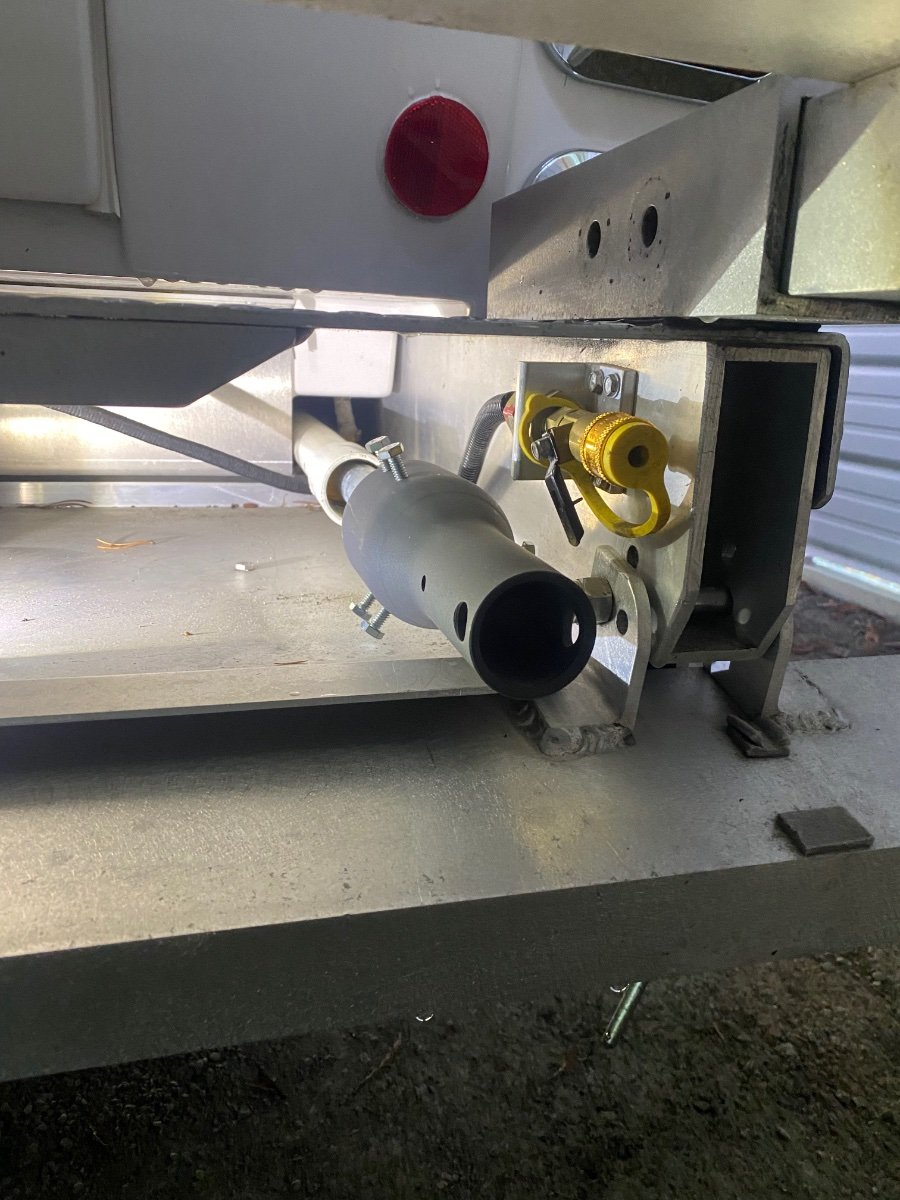
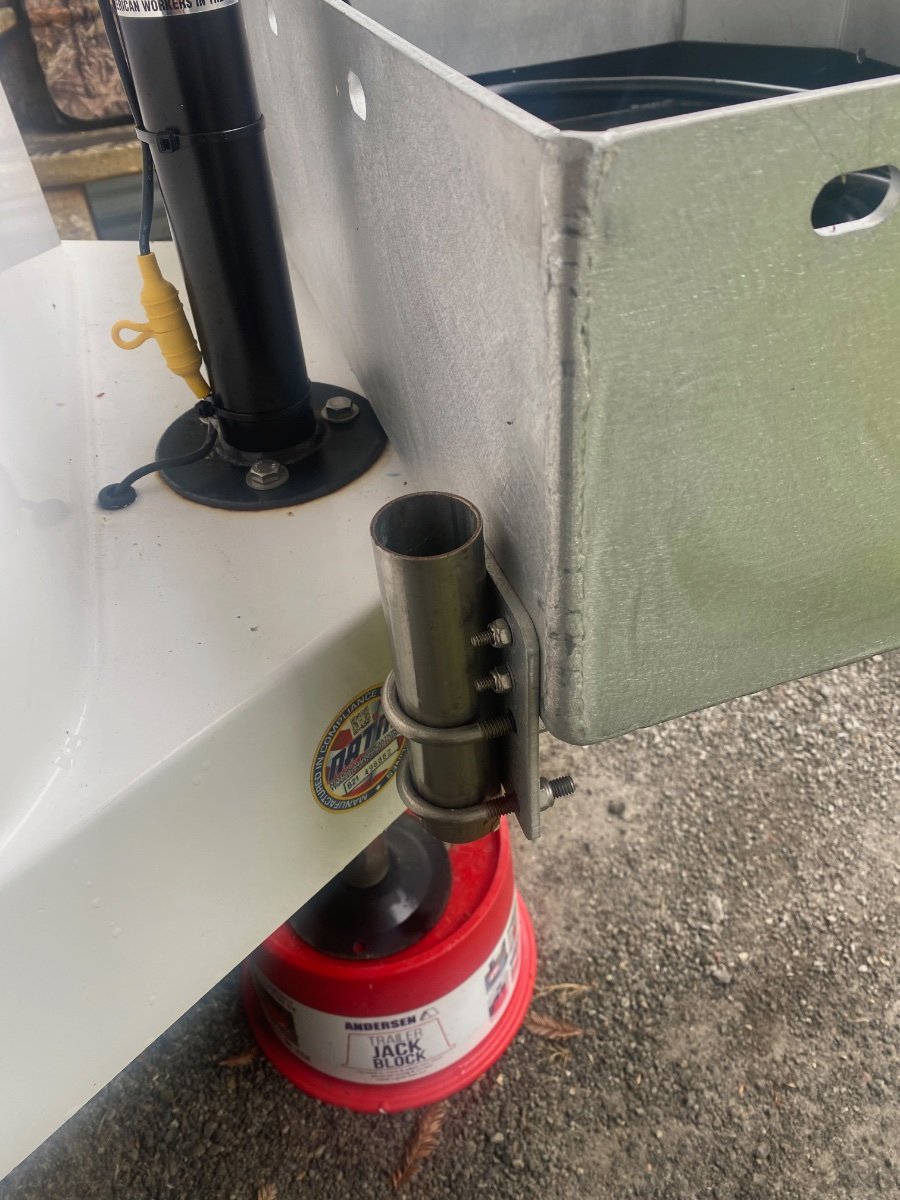
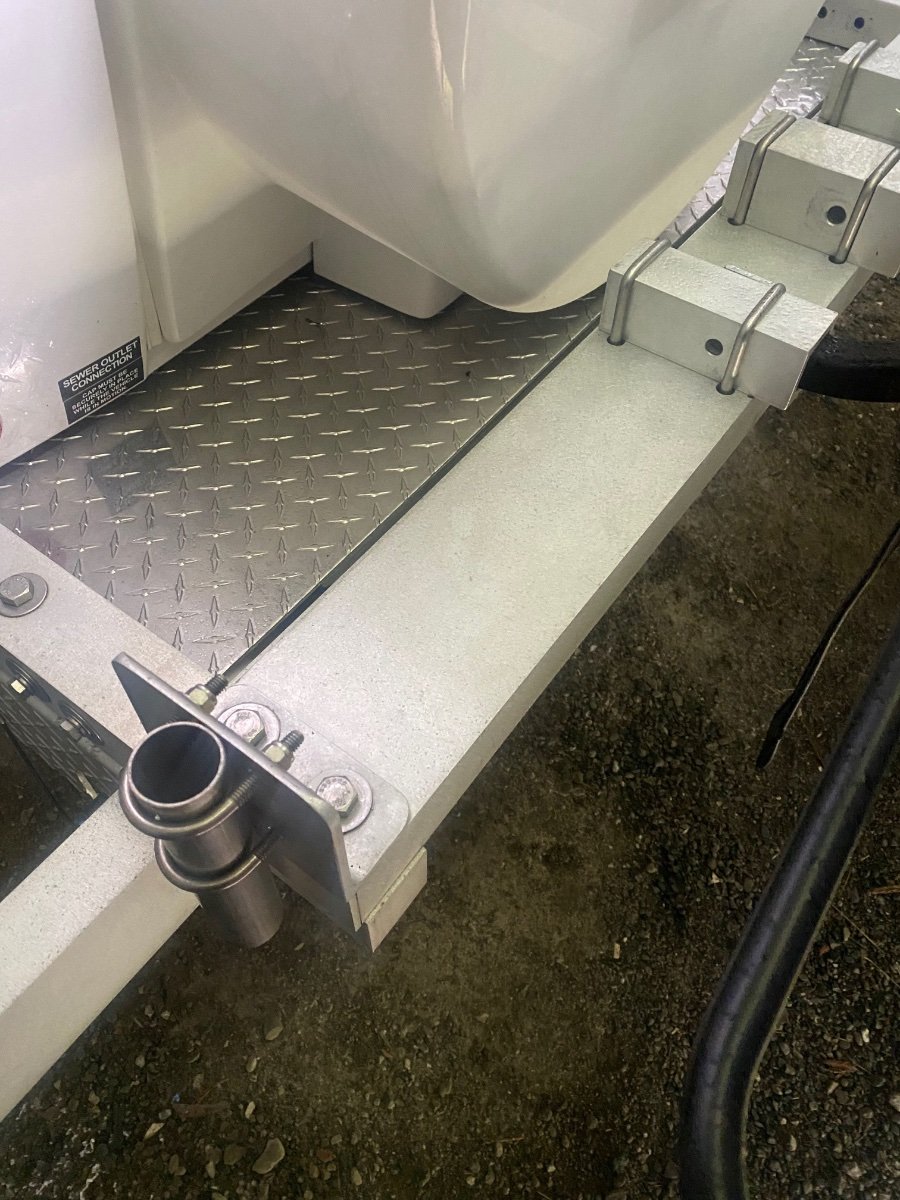
Greetings. Our tacky dishy mast is simply a 10 foot stick of 1” EMT (Electrical Metallic Tubing) with a Starlink mast adapter on one end. It was overpriced for $20 at my local ACE hardware, but much less than other flimsy looking masts that were available the time. I wasn’t keen on mounting anything to the Fiberglass, or using a ladder to step it on the roof. My experience is that you need to be able to move dishy around to get obstruction free sky at many RV sites. I’d discourage any fixed or permanent mounting because parks love trees and you'll often will find yourself without internet because of them. For that reason, I put mounts on both the front and rear of the trailer because it alway seems like one end or the other is shaded by a tree. Of course here in the Great North Wet we have lots of tall trees and we often have to put dishy on the ground to avoid them. We’ve put dishy in neighbors sites more than a few times, on the hood of the truck, and even in a tree. Were thankful that Starlink provides a tripod and long cord. Oh, I should mention that the Starlink App is a great tool for finding obstruction free satellites. I made my mast mounts with 6” x 1-1/2” OD stainless pipe, the rear one was mounted on a 3” x 3” aluminum angle with 2” stainless u-bolts, and the front on a 3” x 3” plate cut from the same piece of angle. They sell 12” lengths on Amazon for under $12, but I got some cut-offs at the local metal supply. The stainless pipe I already had laying around from a marine supply, but I’m sure the metal supply would have it too. The 2” inch stainless u-bolts are pretty common and I may have bent them a smidge to fit around the pipe. The rear mount is attached to the existing (optional) bumper mounting bolts, the front is screwed to the (optional) front cargo carrier. I drilled and counter sunk the front mounting screws. I think there are other frame places you could mount the pipes if you don’t have the optional bumper and cargo carrier. The mounts almost look like they belong there, so at least that part is not too tacky. The mast just slips in through the pipe and sits on the ground. Makes a tacky flagpole too! The mast is stored under the trailer, not tacky at all! I used heavy TY-Wraps to secure a length of 2” PVC pipe with an end cap along the frame rail and into the sewer hose storage compartment. You can’t see it, and it can’t come out unless the bumper is folded down. That reminds me, don’t forget to pull it out before parking to close to something in the back. I provided a few pictures as best as I could… but I couldn’t pull the mast out because I was parked to close to something in the back. Good luck and Cheers, Geoff & Tanya
1 point
-
Well - Its a bit of a long story and - sorry - no pics. When originally delivered the microwave in my Ollie wasn't installed properly - a bracket that supposedly held the microwave in place from the top simply wasn't there. This caused the MW to simply bounce around in the "box" where it resides with only the four trim screws that hold the face plate onto the outside fiberglass actually holding the entire unit. As you might imagine, those four 3/4 inch screws didn't hold much in place for very long. Supposedly, the fix was to drill a 4 inch hole through the fiberglass floor of the storage cubbie located directly above the MW. Then remove the MW and install the correct missing bracket. Slide the MW back in place and "blindly" screw two self tapping screws through the inner MW support box (this is accessed through the 4 inch hole mentioned above). While this "fix" stopped some 80% of the MW movement, the fact was that the MW was still only held in place via those two screws and bracket at the top of the MW. This meant that the MW could still move around at the bottom. So, once again, I removed the trim plate, installed "lumber" on both the sides and the front and back of the MW such that the MW simply had nowhere to "run". The trim plate hides all of the ugliness so I didn't have to worry about being pretty. Note that my MW sits on rubber feet which gave me room to wedge this lumber all around the bottom of the MW while at the same time wedging it against the side walls, back and front of the interior cabinet. The last piece of wood was actually "tapped" into place at the front of the opening where there is a bit of a lip. Hope this helps. Bill p.s. I'd take the trim plate off and take pics for you but those trim screws have been in and out of the fiberglass a number of times such that I'd rather not deal with the possibility of repairing a stripped screw at this point.1 point
-
After dumping noth tanks, I close the black tank valve and fill the black tank to 50-55%. My wife sets the counter and tells me when we hit the magic number and then I open the valve with water still spraying the tank for a few minutes. That seems to get me to clear water.1 point
-
That is how we do it. Then we add a little Calgon and Pine-Sol to the toilet and flush a couple of times to let that work on the tank using the bumpy road travel to loosen anything and everything. I have found the roads around Lafayette Louisiana very good for this process. 🤣1 point
-
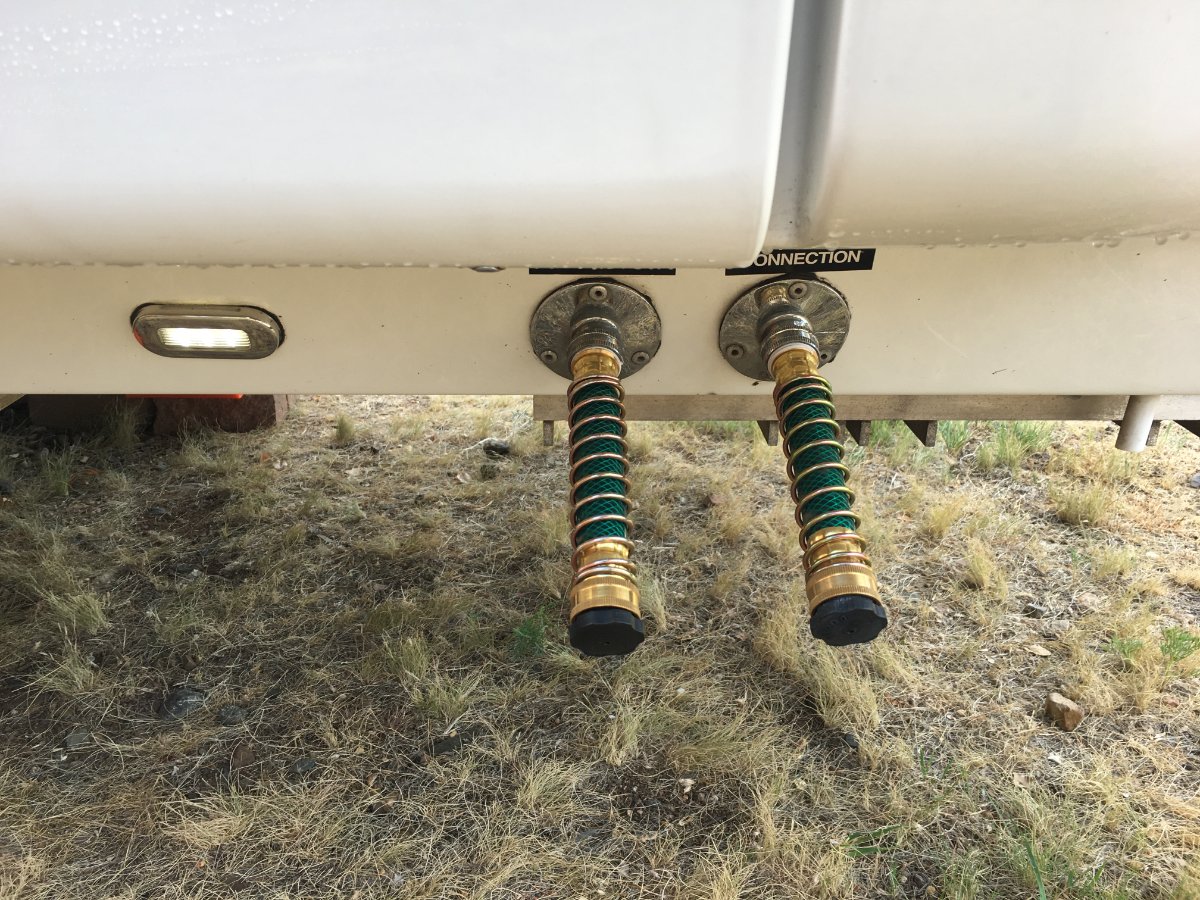
I went with 6" extensions, since I really dislike craning my neck to reach under! They connect easy, hand-tight without leaking. The 4-pack is perfect for an Oliver. Amazon.com: Hourleey Garden Hose Protector, Hose Extension Adapter with Coil Spring (4 PCS) : Patio, Lawn & Garden
1 point
-
Given the necessary 90-degree relationship between the two tank valve outlets and the two regulator inlets, I wonder why Oliver doesn't use 90-degree hoses for factory installations, instead of installing straight hoses with a severe S-bend? The cost differential can't be more than a few $$ per hose, and installation should be easier, saving some labor time. Has anyone suggested this to Oliver?1 point
-
I am working on my presentation for the Rally and wanted to include storage ideas. If all y’all who have posted pictures don’t mind I will incorporate some of them on a couple of my visuals. We can all learn a lot from each other... Mike1 point
-
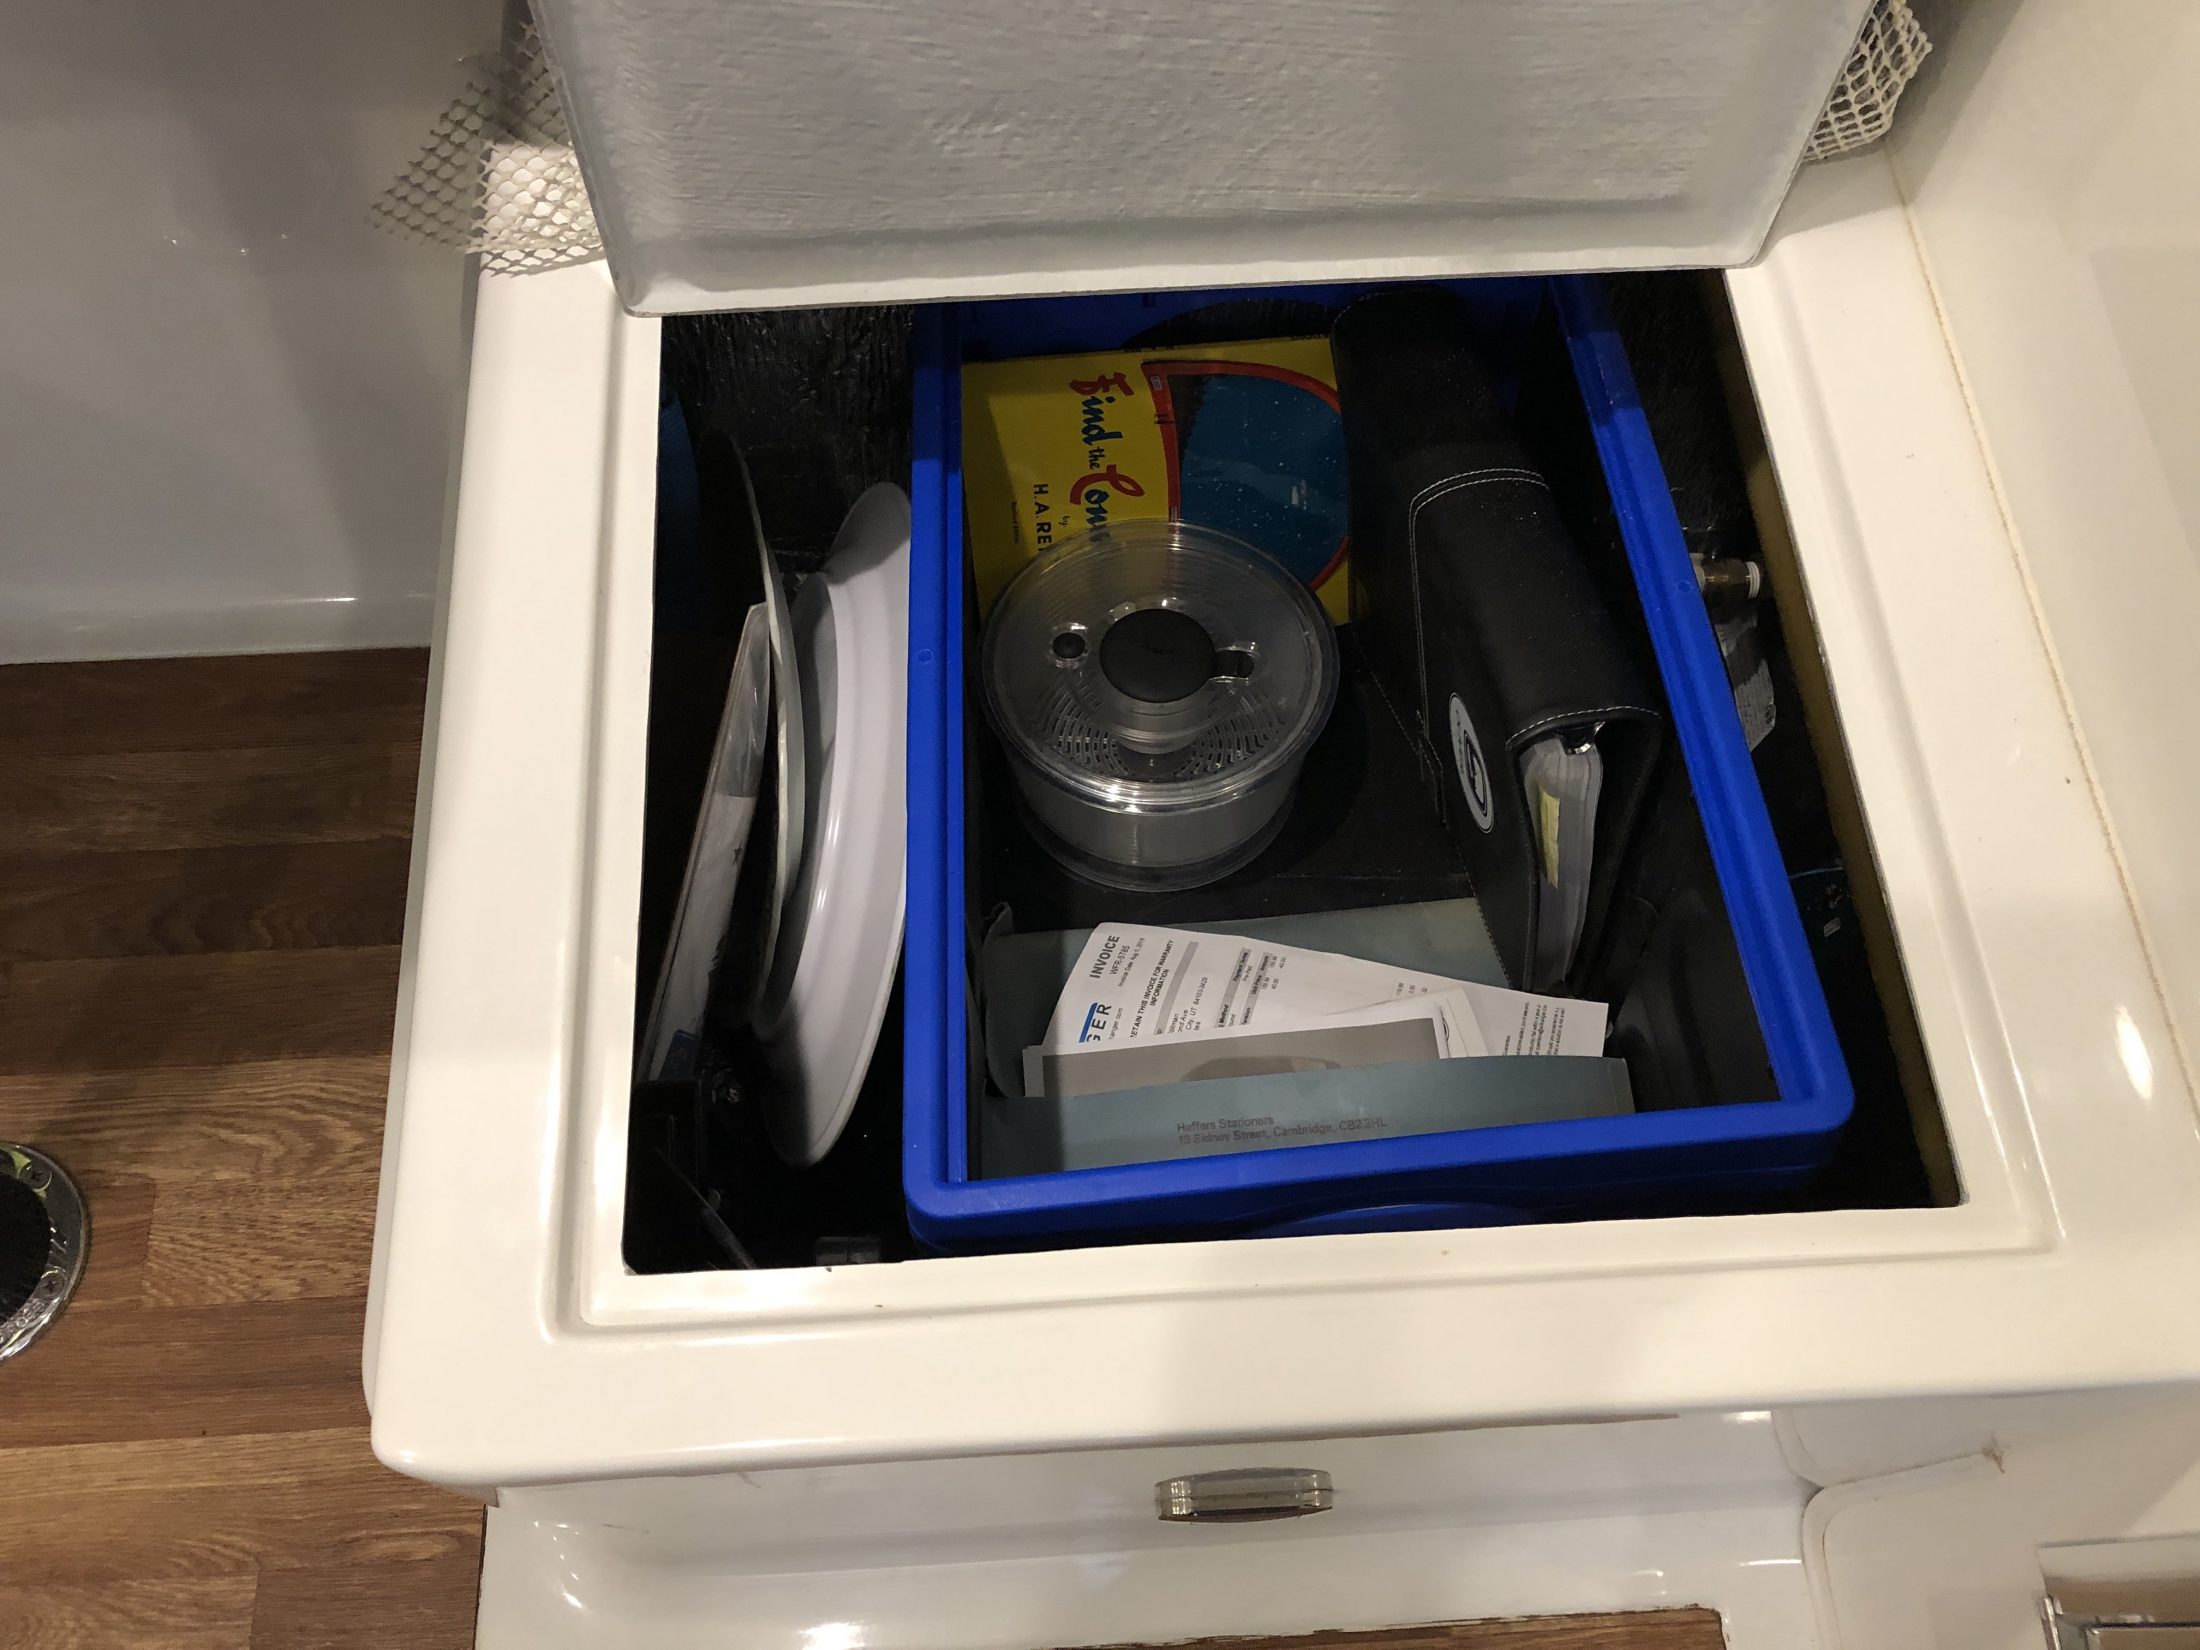
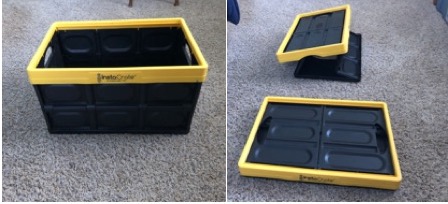
We found that we weren’t using the cupboards above the dinette very efficiently, since some of the things we were storing there were not very tall. We solved this by buying two of these wire shelves, one for each of the two cupboards above the dinette. Before we got Ollie we were advised to get refrigerator bars such as these, to prevent stuff from falling out when the fridge door was opened. We found that stuff in the pantry shifted around during transit, and so we got some spring-loaded bars double bars for the pantry. We had put heavier stuff on the bottom shelf of the pantry, but things just moved fore and aft during transit, sometimes making a mess. I found the fruit box from the Farmer’s Market fit perfectly, and I could stack canned beers or soda two high in the box to optimize space usage, and they would not shift during transit. But the pantry bars were not enough. The major problem was not being able to maximize the use of vertical space in the pantry. I measured both the available space and the size of the opening at the pantry door, and then went virtual shopping at Amazon and the Container Store, looking at dimensions posted on the web sites. I ended up getting these Wire Storage Organizer Baskets from Amazon. They fit perfectly. GrumbleandTwist put an Ikea bag under the front dinette seat. I wanted something with a solid bottom and sides, as we wanted to carry our pressure cooker in this storage area. So I measured the space and again searched at Amazon and the Container Store. The problem was that bins large enough to use the space effectively are too big to fit through the opening. And then I had an inspiration. Have you ever seen InstaCrates, these collapsible storage bins? We got them at Costco for $7 each, and they are available at Amazon and Walmart for $12-14. We use them when organizing for our trip (foods or clothes), and to carry stuff out to the trailer. At the end of the trailer trip, we bring a bunch of collapsed InstaCrates out to the trailer and use them to carry stuff into the house. We love them. Well, I discovered that the collapsed InstaCrate will fit through the opening into the storage area under the dinette seat, and then I can open it up when it is inside the storage compartment. It works well for our needs.
1 point
-
Air pressure should not be able to build up in any tank. They should be vented through the roof, even with the dump valve and toilet closed. I suspect the tank and part of the vent stack was completely filled with fluid. That would absolutely create a toilet geyser.0 points


-
Recent Achievements
-


