Leaderboard


Popular Content
Showing content with the highest reputation on 04/14/2024 in all areas
-
At the eclipse meet up I was asked about tightening the stabilizer rear jacks. i use blue threadlocker to help with bolt retention. Spec: 3/4” Leveling Jack flange bolt nuts (43 ft-lbs). Bolt locations shown for rear. inside : outside:
 6 points
 -
GJ - Just remember to add 'Air-Down' to your step-by-step before leaving the 'Barn', if you do 'air-up' once in. I'm following this thread, with great interest and maybe I should have joined the discussion about 9 pages ago. Our (2) rear leaves broke on the 'eye leaf' at the point where the leaf below the eye ended. I believe I saw some similar break points on other pics posted above. We were in the NWT/TUK area so resources were limited. We cobbled together 2 new but different LS's to get us back down to Whitehorse, YT. Image a horse with two worn shoes in fronts, with a loafer & tennis shoe on the rears... But it tracked & pulled straight. OKAY, maybe not that bad, we can smile but not yet laugh about it now. We had all 4 LS's replaced by 'Jacob Industries' (HIGHLY RECOMMEND IF YOU NEED WORK DONE...) the go-to suspension business in Whitehorse YT, last summer to get us home. So we'll probably not be replacing LS's unless we break another on our return adventure to AK this summer. And yes, we now carry 2 (the fronts) LS with new brass bushings if we needed. Our new LS's had some differences in length from what we had from the build, they are rated at 1830 lbs. The ride home from Whitehorse was slow and not 'stiff' at all, but by this time we were on pavement. There is a lot more that ScubaRX & I found out about LS's that are compatible with the the LE2, in research & discussion. Starting with 'where does Oliver source them from' to that sources part numbers & spec's. Even on some of the supposed same universal PN's from different suppliers sometimes there are slight/negligible differences in the A B C D measurements that make it less that totally consistent by supposedly the 'same industry PN' across suppliers. And that was just the 4 leaver's. I have spreadsheets, but this thread is way beyond that point, by going with ALCAN. I actually like the idea of going with 5 leaves, not for load increase (which we will not do), but the fact that the first leaf below the eye, extends to the eye. Snow maybe Wed, after the melt we'll pull SNYSDUP out of the nesting box, and start loading him up, Cause "WE ARE GOING CAMPING". B-Out,
4 points
-
Another good Andersen day. Took two tries. I'm calling that a win. In other news: 1) After yesterday's spectacular hike on the cliff trail, I drove 10 miles through Del Water Gap with my tailgate down. But NOTHING fell out. This is the first plus from our dramatic overpacking. Things are so crammed in there I don't even need the tailgate! 😏 2) We got a drawer stuck. I was able to slide a ladle in, push down on the offending dish, and get it to open. But this is the second time I wish I knew how to remove the drawers. Now that we have wifi, I'll go take a peek in Oliver U. 3) 4 days in Worthington State Park with no hookups, we used half our fresh water, half our grey tank (of course), maybe 1/3 a tank of propane, and left with 50% charge in our batteries (it was cloudy almost the whole time). That confirms my suspicion that fresh water is what will limit anything we do that approaches boondocking. (And I was using the campground shower. DW, refused cuz it was stinky.) And I now know that our major electric draws (beside the AC) are: jacks, microwave, hair drier, water pump. TV, radio, fridge and lights are almost nothing by comparison.3 points
-
Thanks for pointing this out!3 points
-
I like the Nova Kool R5810. Has a larger freezer and other benefits. Ken (Mountain Oliver) installed one and I put together with his ideas and edits the attached DYI guide for install. There is a good amount of info here in the forum threads as well. GJ Nova Kool R5810 Installation (7 MARCH 2023 Version).docx NOTE:: I edited the attachment to correct several typos and some minor clarifications. No significant changes otherwise.3 points
-
Perhaps anyone planning to tow their Oliver Elite II to Alaska should invest in a set of ALCAN 5-leaf springs before the trip.2 points
-
Here is a thread I posted back in 2017 about some mods I had done to the Outlaw Oliver. One of them concerns a rear basket I made to carry chairs and lighter, bulky stuff.2 points
-
Hey Art, Nothing wrong with hanging out in a cow pasture shooting the bull. 😄2 points
-
Best instructions yet Mike. 👍🏻1 point
-
If your drawers now open without trouble, it’s a good time to practice taking them out. Before you begin, a word of caution is needed! The edges of the metal portion of the drawer slides are very sharp, so be careful. Also take the time and unload the drawer you want to remove, it will make everything that follows easier to complete. Only 5 of our drawers come out, the exception being the one under the sink. So pick any of the other drawers and slide it all the out until it stops. Now put your thumbs inside the drawer on each side close to the front of the drawer and your fingers outside with the tips of your fingers under the bottom of the drawer. Now you should be able to feel the release for the drawer slide and squeeze the tips of your fingers to the outside of the drawer on both sides and slide the drawer out of the drawer slides. Dang if that paragraph doesn't have a lot of drawers in it! Or just get on the floor and slide a drawer out and you will see the orange handles that you will squeeze to remove the drawer. Good luck, Mossey1 point
-
Excellent situation report - thanks for sharing!1 point
-
Oliver is doing away with the debit card and will now send a check. Had the fee taken out on our first showing, but not on any of the other showings. I spent all but $10 on our Texas trip. I would use it up asap.1 point
-
Guess it’s time to spend or lose it.1 point
-
Hi all. I had discussed my problem of very low water pressure at my shower faucet even with the faucet head removed on an earlier post. No issues at kitchen, outside faucet or toilet. I decided to share this on a separate post on how I fixed the problem since others might have this problem sometime. I bought the vinegar (see pic) at Home Depot and was planning on pumping it though the fresh water tank (bypassing the water heater) and decalcifying before my next trip. But meanwhile I had the idea of removing the faucet head, turn of water or pump and drain as much of the water out of the shower water line as I could. Then I took a syringe - see pic (no needle) and slowly over 1 hr. injected about 2 cups of the vinegar down the faucet hose (see pic) . Be sure to wear gloves and eye protection as the vinegar will burn. I hung the shower hose to the shower holder so I got max amount of vinegar down the hose. Pics need to be rotated 90 degrees. After 1 hr. I went back and turned on the water pump and water pressure is back to normal. 👍
1 point
-
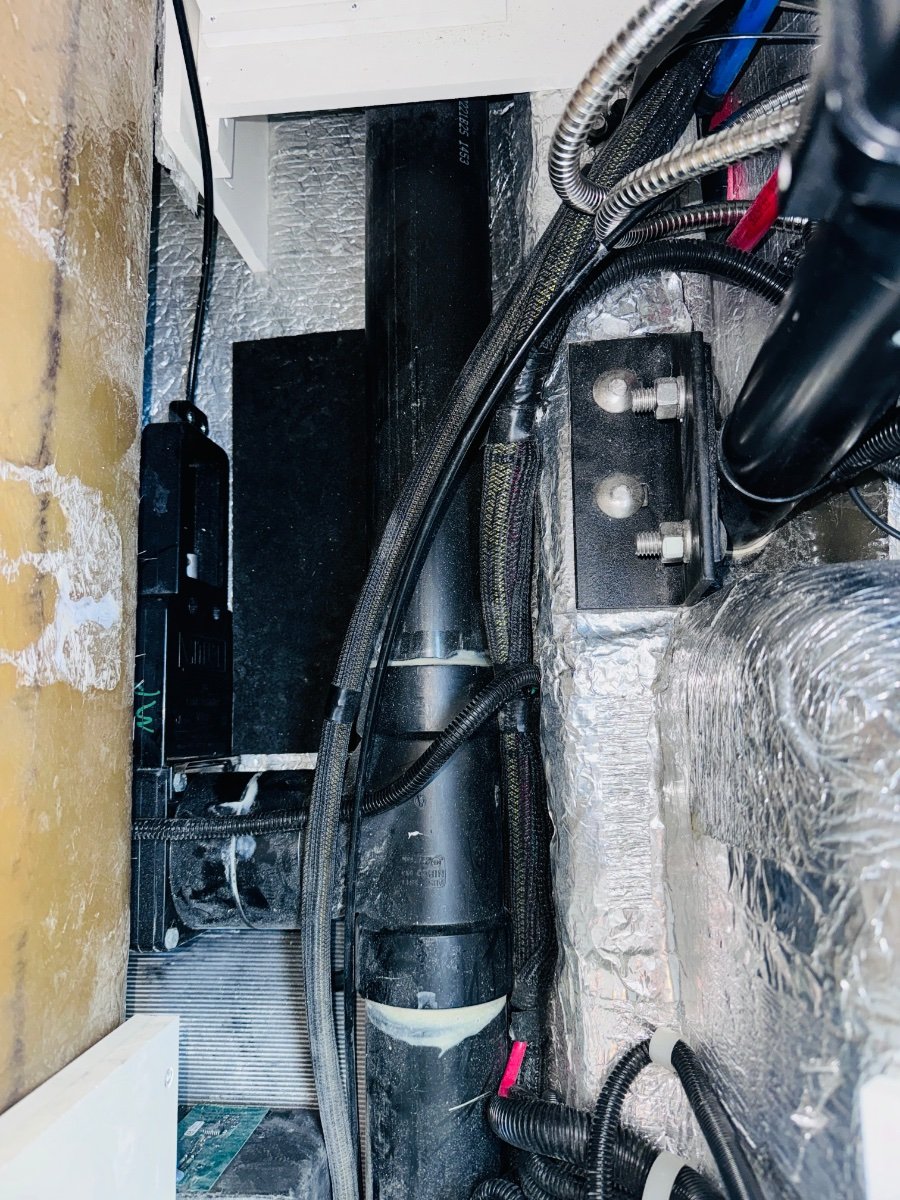
Day #3 Wired in the MP2, Pos and neg bus bars, smart shunt. Turned on inverter... Microwave works nothing els. AC plugged in... nothing. Oh well, had fun installing the hardware and attempting electrical. So everything is mounted except Ekrano display. May give the project a break for a few days and then wire the inverter back to OEM configuration and then hire an RV electrician or talk to OTT to make the changes necessary to use inverter for AC. Best, M
1 point
-
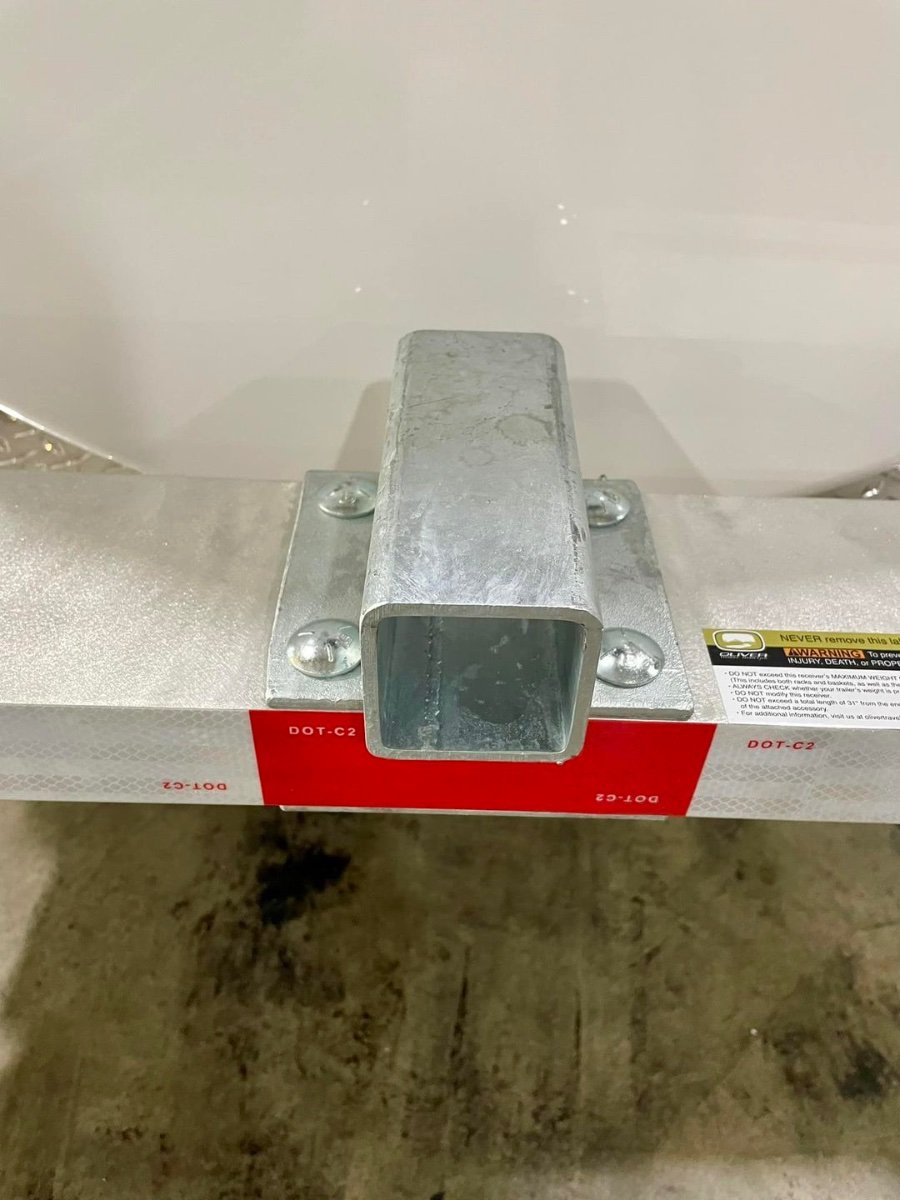
@HDRider coolers are very heavy when full, a tank tote is light when stored empty. Pull your 1 1/4" hitch bar off completely, buy some 2x2" Aluminum stock and build something like what @rich.dev showed above (an excellent example). You really need the two receivers, so it doesn't wobble up-n-down and left-to-right. The beauty is OTT already installed two perfect receivers for any kind of well-supported shelf or basket. They say 150 LBS MAX for the bike rack. I would think Rich's design could easily hold 250+ LBS, if you want that much weight, that far rear. You want to over-engineer such a cargo carrier so that it is safe and sits nicely for years.1 point
-
Galway Girl (Craig); thank you for posting this and very kind of you to offer assistance at the eclipse meet up regarding this. I had asked Craig about this at the rally and he crawled under my trailer to show me where the bolts were. And now he posts pictures with torque specs and all! Thank you. David1 point
-
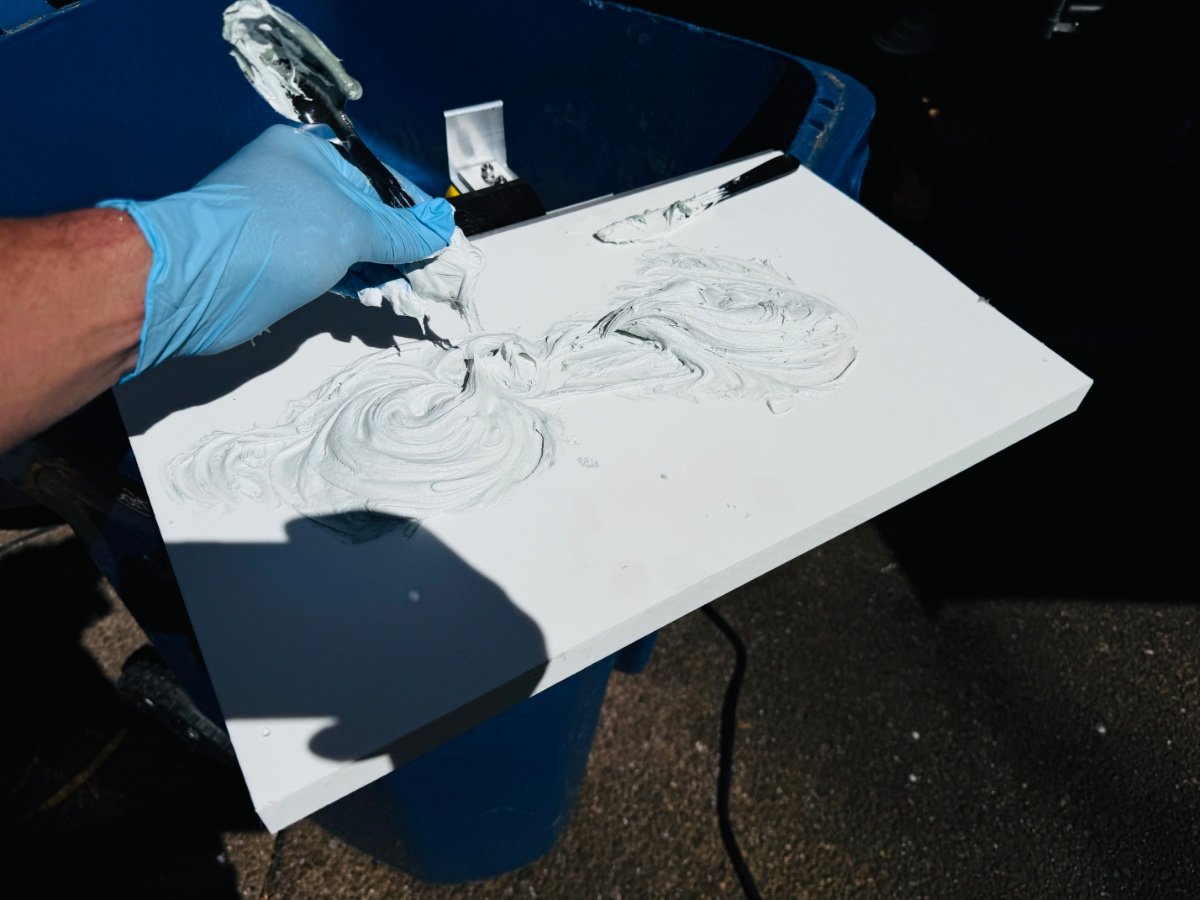
HDPE Marine Board from Buyplastic.com. 12x27x1. It is heavy and expensive but turned out to be very well suited for this install. $57.00 PC-11 Epoxy adhesive paste. 1 lb in 2 cans. from Amazon.com1 point
-
Looking good Mike! What heavy duty star board and epoxy did you use here?1 point
-
DAY #2 Yes, it is. Costly and ended up not fitting very well for this application without a lot of customization. So it gave me the idea of making my own mount with the heavy duty star board I did not want to use. Turns it out came in very handy!
1 point
-
No idea, but "westbound I-40 near Santa Rosa" you must be back home now! Right on - back in pocket Thursday afternoon after about 1,875 miles over 9 days. No biggie, like @ScubaRx mentioned- most of that time was hanging out in a cow pasture.1 point
-
I still have the outside upper vent on my 2023 with the 12V Isotherm fridge, but no more outside upper vent on the 2024s though. My 2023 ..and a 2024
1 point
-
Yes, the new Olivers do come with a 2” receiver.
1 point
-
Same here, brother! Couldn't agree more, David! We should all invest in something like one of these unless already owned... ...just one last blow to the horse! HA!
1 point
-
@Geronimo John look inside the rear bumper. There is a rubber seal around the sewer pipe where it goes into the lower left rear of the trailer that will become dislocated and permit dust intrusion. Reposition the seal and place a clamp around the sewer pipe to keep the seal from slipping back out of the hole. I used a Stainless steel Banjo TC-331 just snug. Not tight.
1 point
-
Don't know how many of y'all ever rode in the OTT under tow, but I've done it a few times just to check what needs attending to. I try to convince my bride to keep the speed down -- with little success...😜 FWIW, I rode in the back for the last several miles yesterday on our way back from the eclipse adventure.... From a qualitative perspective, the ride was interestingly noisy, solid/stiff - but not like a buckboard.... It was not appreciably different than the ride I took before changing out the springs. Don't think it would comfortable for more than a few miles, IMO. I checked the torque settings for each of the U-bolt nuts after logging 1,895 miles on the new springs over the last 9 days - all good, no more stretch. Probably a good idea to keep doing so every 5k miles or at least annually. Not to highjack this thread, but: Regarding frame cross member welds - visually inspected all yesterday and photographed each weld to set a baseline for our records. All good. I'm suspecting that the broken welds reported in a parallel thread could be caused by an inexperienced welder at the factory and not a design flaw. I also suspect that Oliver engineers designed the frame to withstand "normal" usage (that may be difficult to define, however). Like other owners, we routinely, yet carefully, travel over unpaved and unimproved roads with a full fresh (empty black/gray) tank without issue - I believe this practice is within the design limitations of the trailer. We'll definitely keep inspecting the cross members after such trips... Thoughts?1 point
-
Hey Max, Ask your bride to keep it under 100 while you’re in the Ollie. 😄1 point
-
This is the direction I would like to see as well. One of the US Spring manufacturers (St. Louis Spring) said they would replicate the springs on my E2 with USA sourced 5160 spring steel if I would send them a new one to copy. Knowing what I know now, I certainly would have paid a premium at time of purchase of my Oliver for USA made springs. I would like to see Oliver investigate this path. Now that they are at dealers, it would certainly further set them apart from the rest sitting on Chinese suspension. I cringe now knowing that my trailer went 25,000 miles supported by a $150 set of springs (again, not Oliver's fault. The entire RV components industry has gone to the cheapest possible cost model without regard to quality or safety).1 point
-
A different suspension design would be great going forward but I doubt that it actually could be retrofitted at a reasonable cost. Right now I’d be happy with USA made springs. That small change could make a huge difference. Maybe Oliver could start buying just the axle assemblies from Dexter and springs from a different manufacturer. I know that none of the other mainstream trailer manufacturers would ever do anything so bold or even consider out of the box thinking but Oliver often thinks out of the box, that’s the very reason we have such a great trailer and they’re in such high demand!1 point
-
Keep in mind that four wheel alignment becomes a periodic maintenance requirement with independent suspension. There's always trade offs so depending on your style of camping. Also there are a lot of other possible fail points with that system. It's a very complex system. I wander what the cost of a conversion would be? Edit: PS - The beauty of the current suspension is you can pick up replacement parts rather cheap, albeit not lifetime quality, at any local farm store and be back on the road in hours. The high end suspension would likely require sourcing parts long distance that would have at least a few days lead time. I think I would be hard pressed to consider this type of upgrade.1 point
-
Just so everybody is on the same page, the bearing Kit shown above is for the 3500 pound axles used on the Elite II's through 2021. In 2022 Oliver started installing a 5200 pound axle on the Elite II models. This axle is the same size that has always been supplied on the Elite's except it is de-rated to a 3500 pound weight capacity due to using a 4 leaf spring pack (3500 lbs) instead of the normal 5 leaf spring pack (5200 lbs.) These new axles are now standard with Dexter's Nev-R-Lube Bearings. If you have a 2021 or earlier Elite II with the standard bearings they cannot be replaced by the Nev-R-Lube style. There were changes made to both the hub size and the spindle size. The complete axle would have to be replaced. If you have a 2021 or earlier Elite I it will require the standard bearings for a 5200 pound axle. If you have a 2021 or earlier Elite II it will require the standard bearings for a 3500 pound axle. Advantages with Dexter's Nev-R-Lube Bearings: * No need to pull the hubs to repack the bearings or replace the grease seals when checking the brakes. * No more inner and outer bearings. Just one sealed bearing cartridge. * Pre-set adjustment means installation is easy and human error is virtually eliminated in bearing adjustment. * Pre-lubricated at the bearing factory providing resistance to contamination. * Sealed for life which means increased durability and reliability and no more bearing maintenance. * 5 year or 100,000 mile warranty against defects in material and workmanship. I do want to emphasize if you do have a trailer that has the Nev-R- Lube bearings installed there are periodic checks that need to be performed to make sure they are in good working order. Nev-R-Lube Bearing maintenance needing performed every 12 months or 12,000 miles. 1. Elevate and support the trailer unit per manufactures instructions. Never jack the trailer up on any part of the axle. Always jack the trailer up on the main frame rails of the trailer. 2. Check for excessive wheel end clearance by pulling the tire assembly towards you and by pushing the assembly away from you. Slight end play is acceptable. 3. Rotate tire slowly forwards and backwards. The wheel should turn freely and smoothly. 4. Excessive wheel end play, restriction to rotation, noise, or bumpy rotation should be remedied by replacing the bearing unit. Note: A slight amount of grease weeping from the seal is normal. Excessive leakage may indicate abnormal bearing operation. The important thing to remember is that even though this bearing is sealed and does not need lubricated it still needs to have a yearly inspection for the end play. Having this checked will hopefully keep you from having wheel bearing issues on that next adventure you are planning. If there's a downside, it would be that if/when you need to replace them it will cost a lot more than the old style bearings and seals. A sealed Nev-R- Lube bearing Kit -42MM CARTRIGE & ATTACHING COMP, FITS 5,200 LB & 6,000 LB AXLES - Part #K71-997-00 will cost over $300 per wheel. I would be remiss to only replace one at a time.1 point
-
Renting out my Oliver is not going to happen.1 point
-
Good job Imelda. Sorry I missed your earlier question about vinegar vs CLR but looks like you figured it out. I've never used CLR because white vinegar is always on hand and it works. It's also a lot cheaper with no worries about damaging seals.1 point
-
I was curious about your use of HDPE and PC-11 Epoxy as I haven’t ever tried using the 2 products together. I haven’t used any of PC-Products line of adhesives, so I went their website and looked into their does and don't. I found the information below, so I will be looking forward to your results. Mossey
0 points
-
Trainman sold his trailer and hasn’t been active on the forum in a while.0 points
-
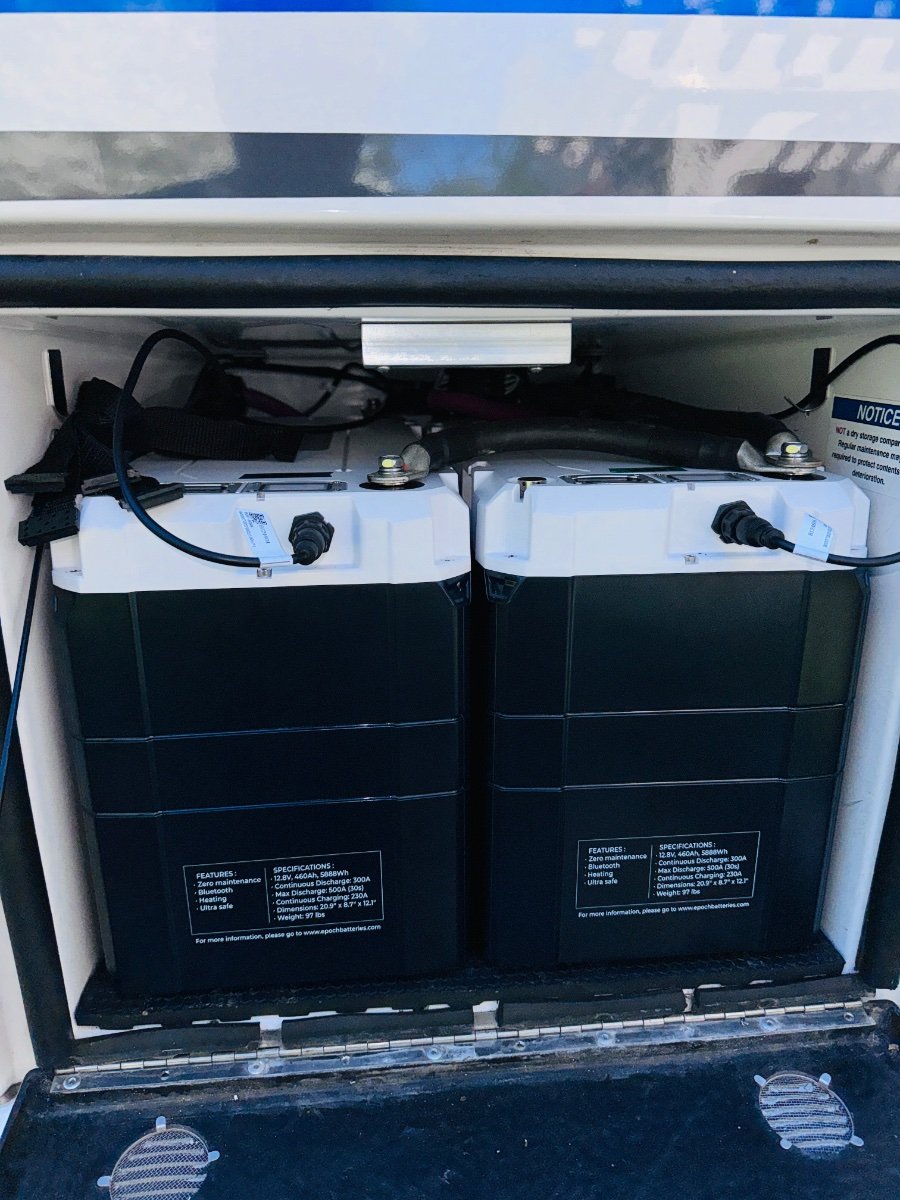
Packed to the gills. I felt like a German mechanic changing a water pump connecting batteries but I am happy with the result. No maintenance and they have remote monitoring and shut offs so they shouldn’t need to come out.
0 points


.jpg.51b49cb15d1d402da89e0fb926679919.jpg)
.jpg.59e69d2e42eb6184aecdf56fba370a12.jpg)


-
Recent Achievements
-


")


")


")
")


")

")

