Leaderboard


Popular Content
Showing content with the highest reputation on 06/16/2024 in all areas
-
I have posted this before when talking about this light’s propensity for leaking. My light leaked four times in the first three years of owning our trailer. Oliver caulked it twice and I caulked it twice. I realized that this issue was going to come back over and over so I decided to do one final repair. When I picked up our trailer, I asked for and picked up several sheets of fiberglass scrap cutouts from windows and doors. I used a piece of this to make a plug for the hole. I removed the light and epoxied the plug into the hole from the inside. I used a high solvent based epoxy for this then I later fiberglassed over the plug to reinforce the patch. Now four years later still no leaks.
 7 points
 -
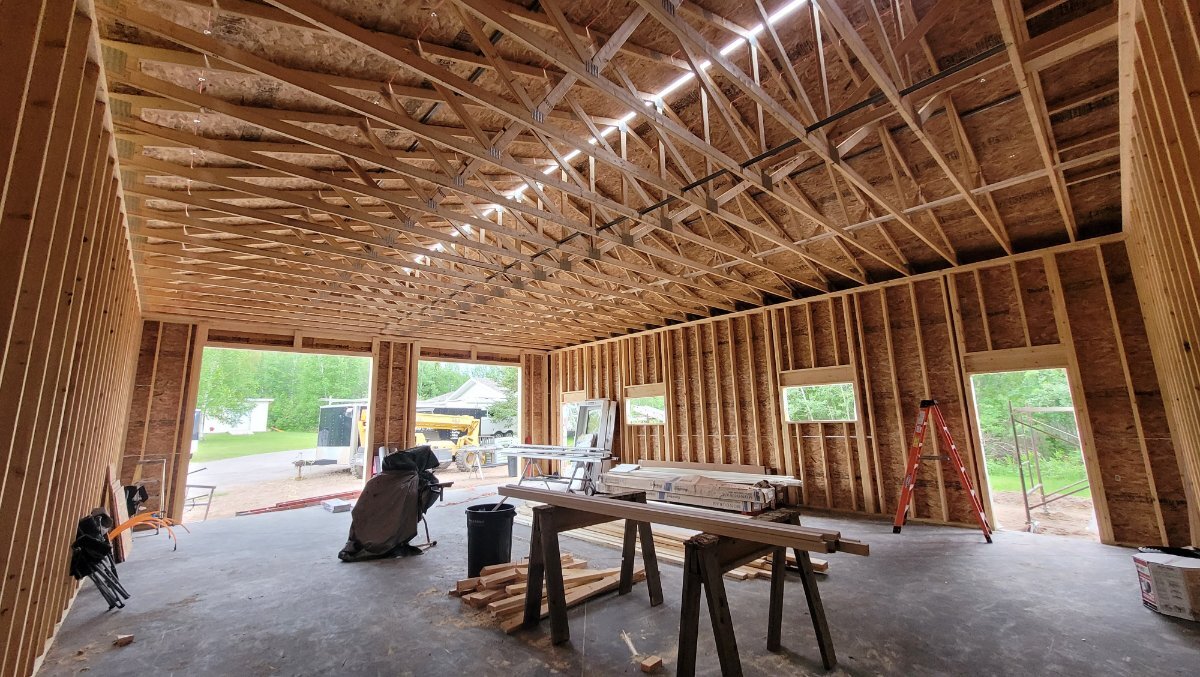
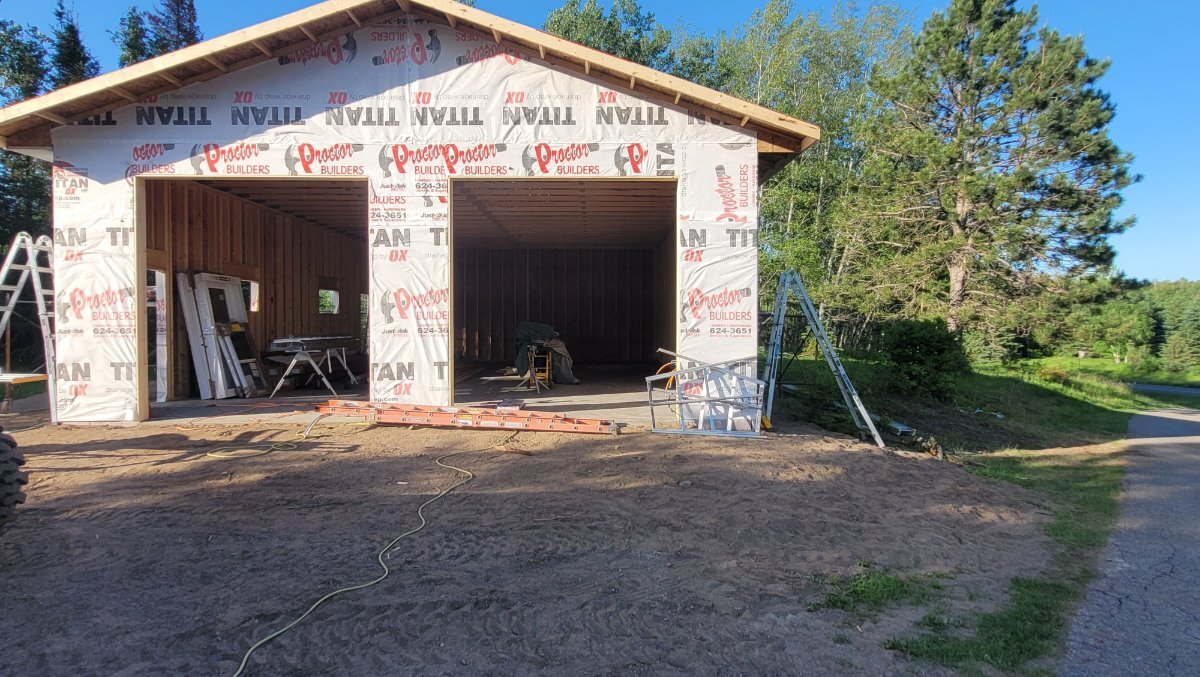
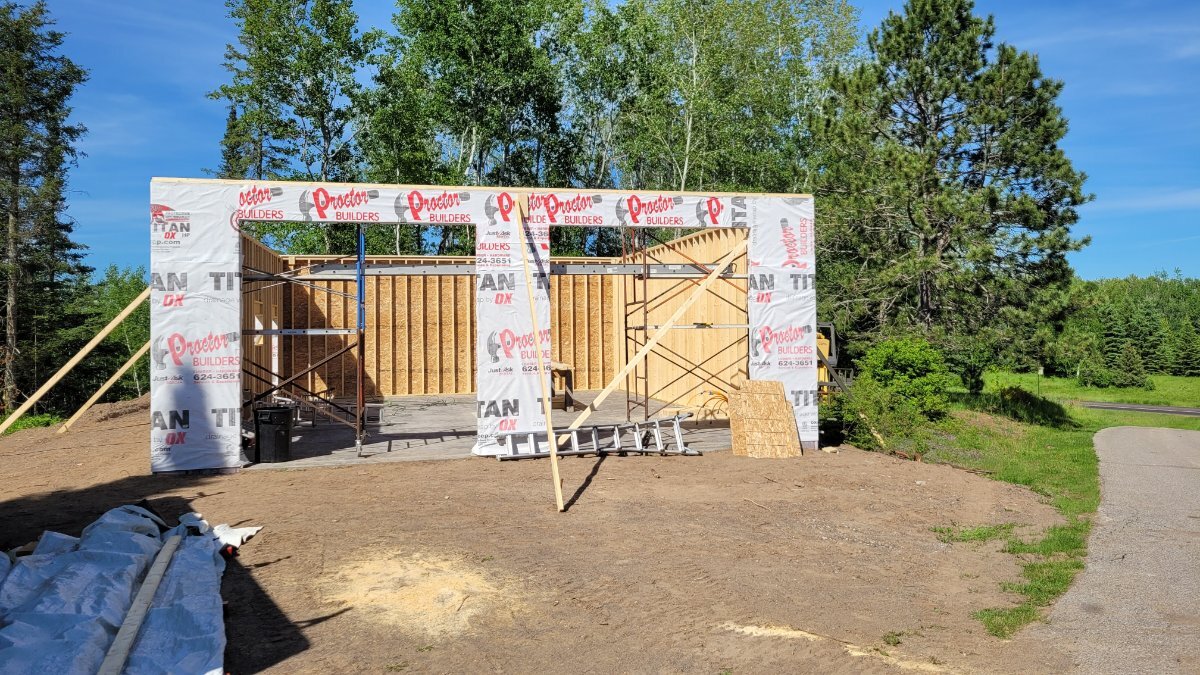
We were making good progress. Currently in a rain delay!
4 points
-
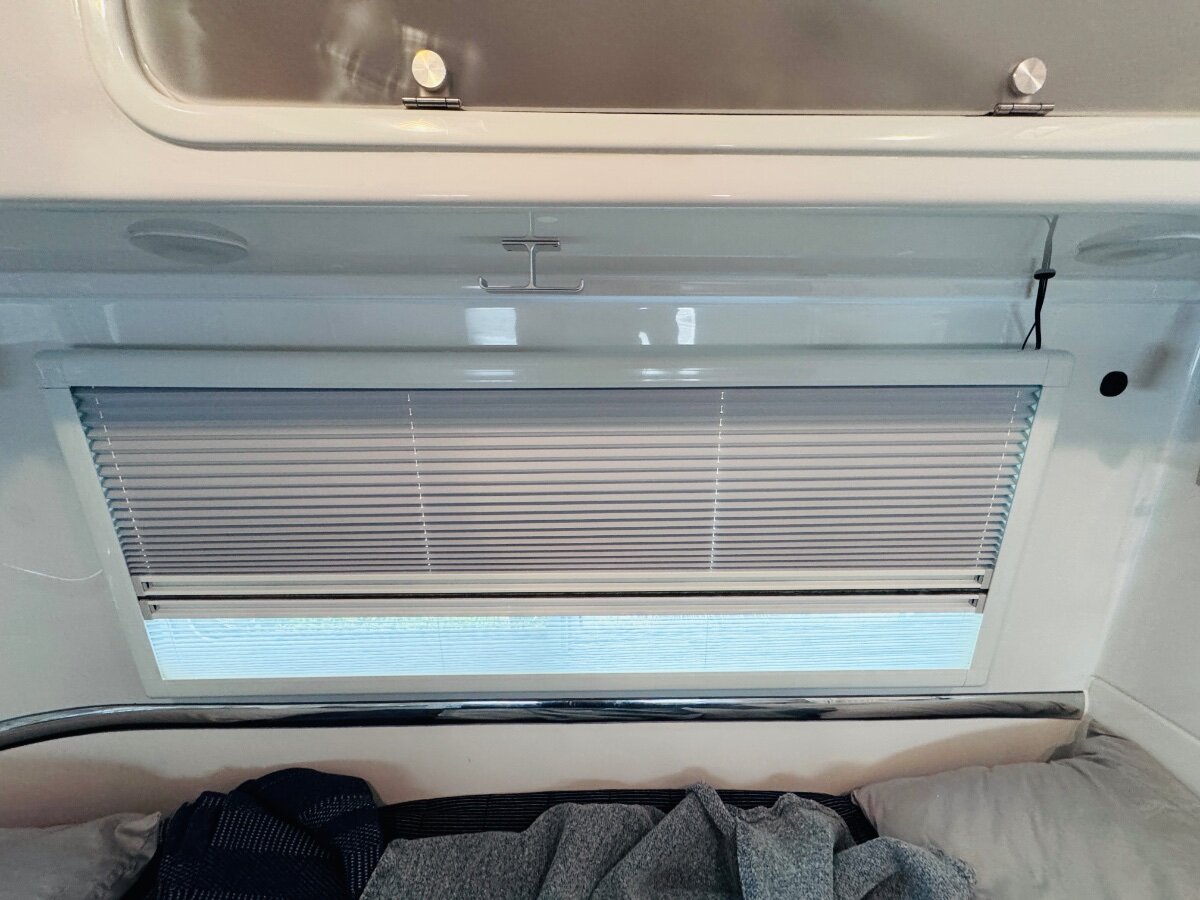
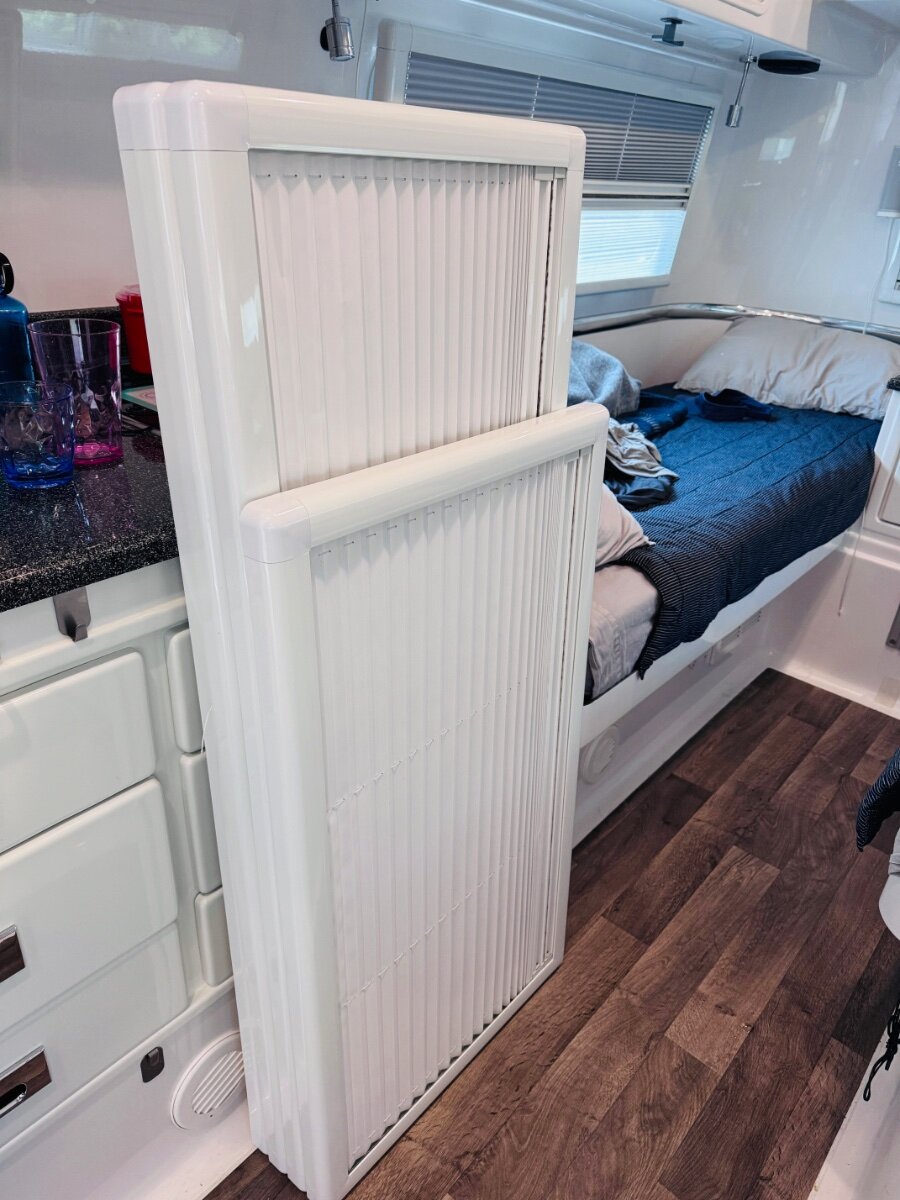
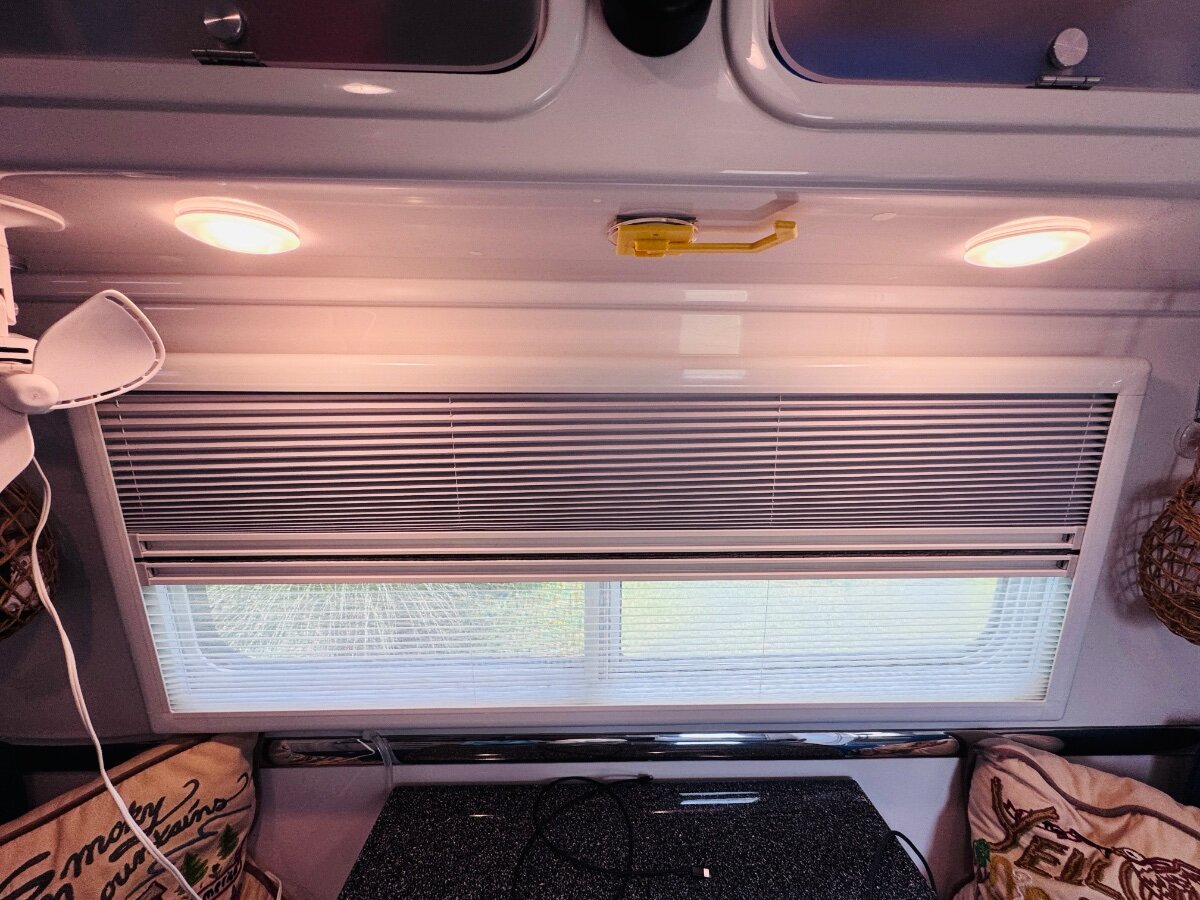
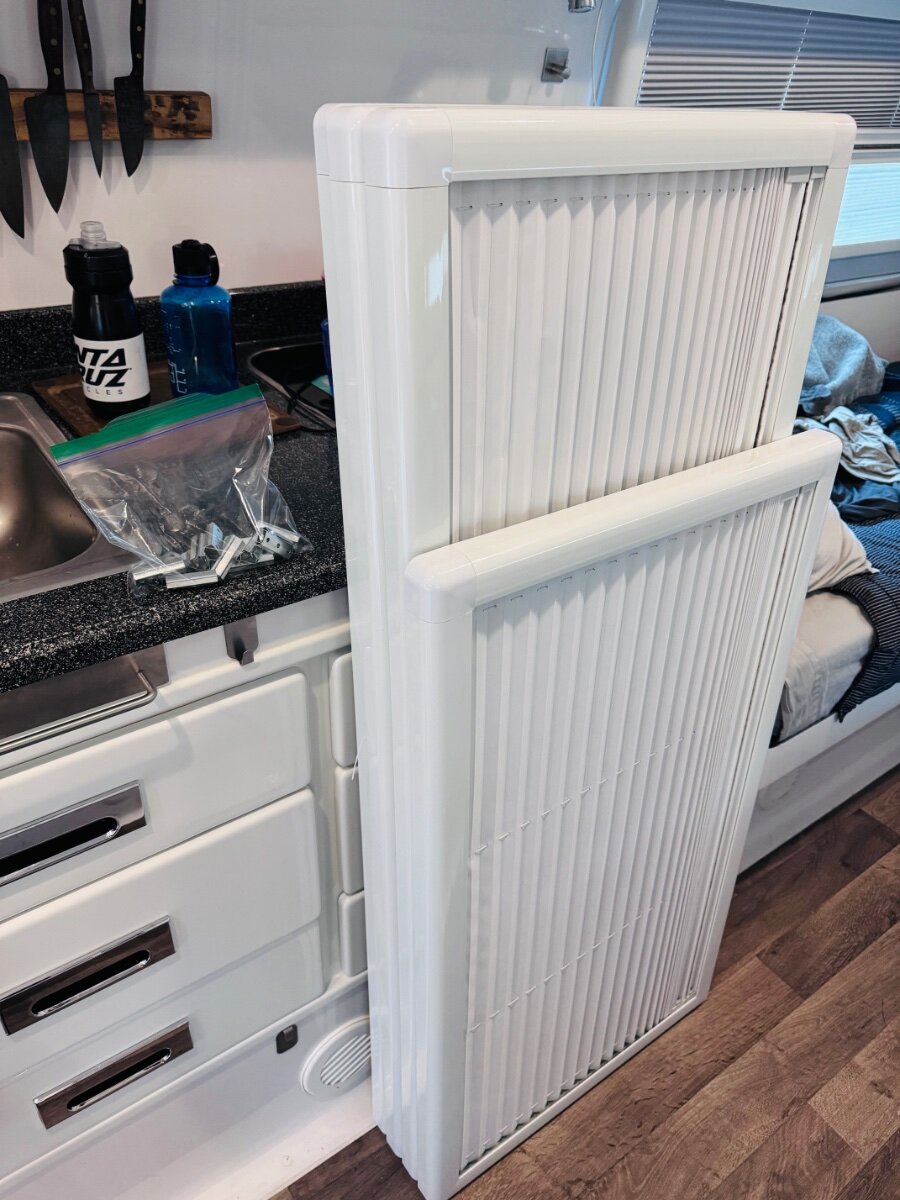
Soon after I purchased my 2018 E2 there was a collective warranty replacement sent out for the window shades. I guess some let a bit of speckled light through. I got mine and never swapped them out because it did not bother me. I decided today to do the swap. There is a little less light shown through and the color/material seems a little better made. Saying all this to say I have a set of window treatments available to anyone who needs them. Local pickup only due to size. Mounting hardware is available too. OLD BLINDSNEW BLINDS
3 points
-
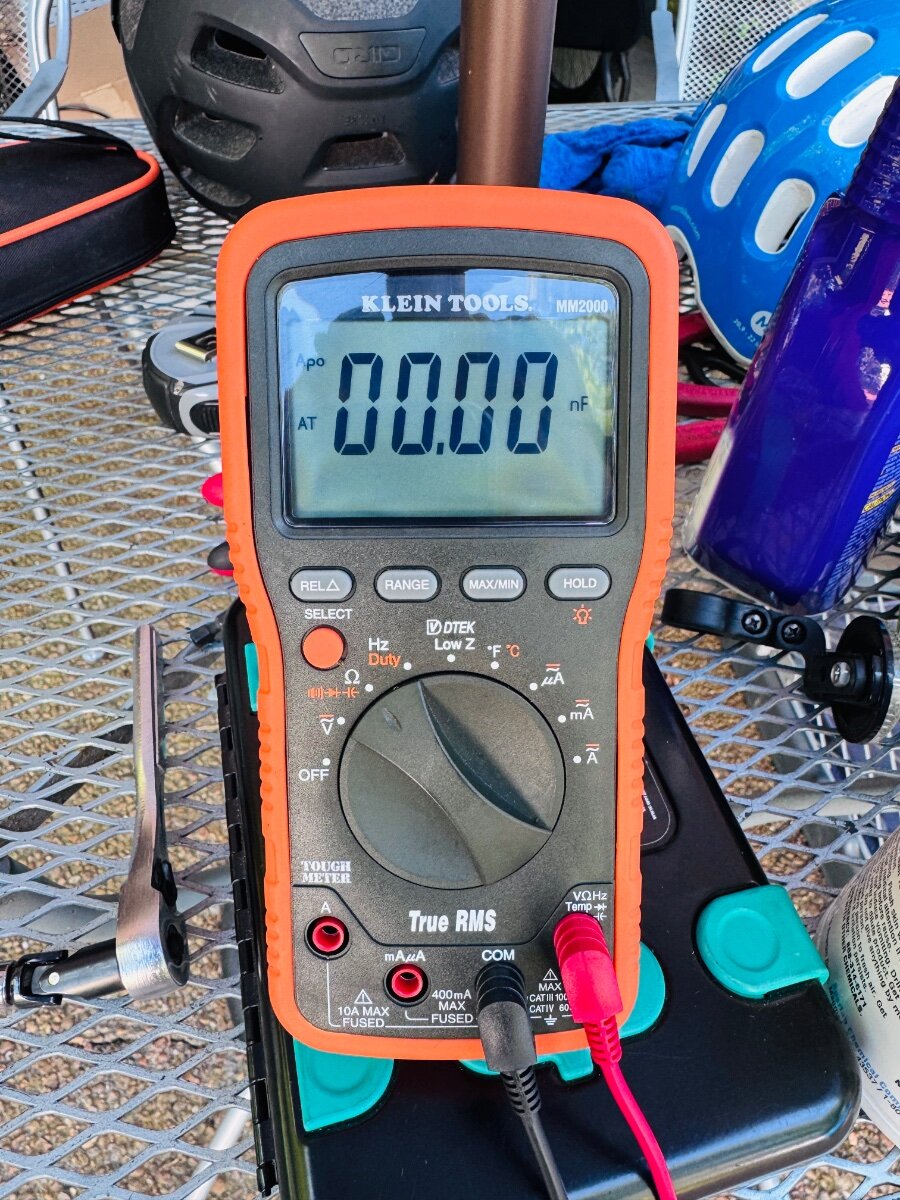
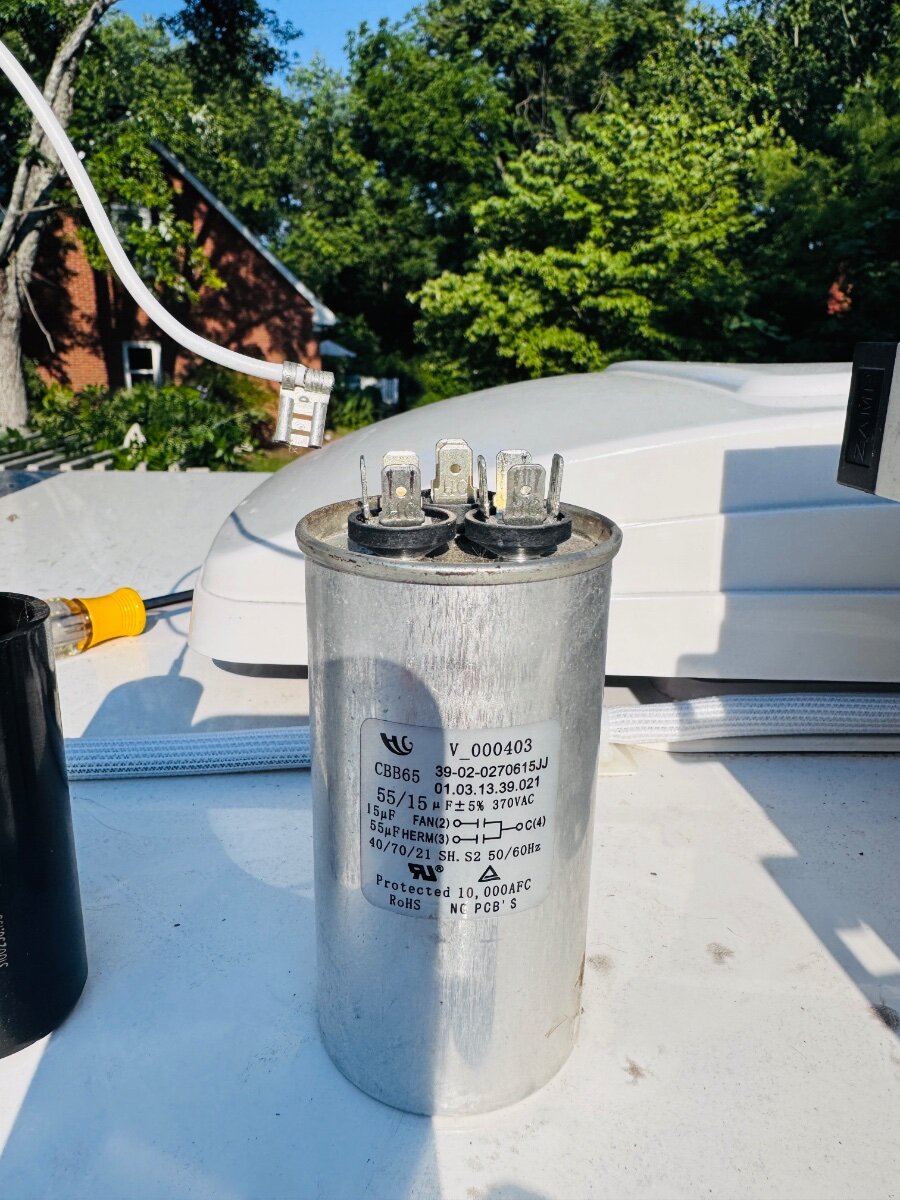
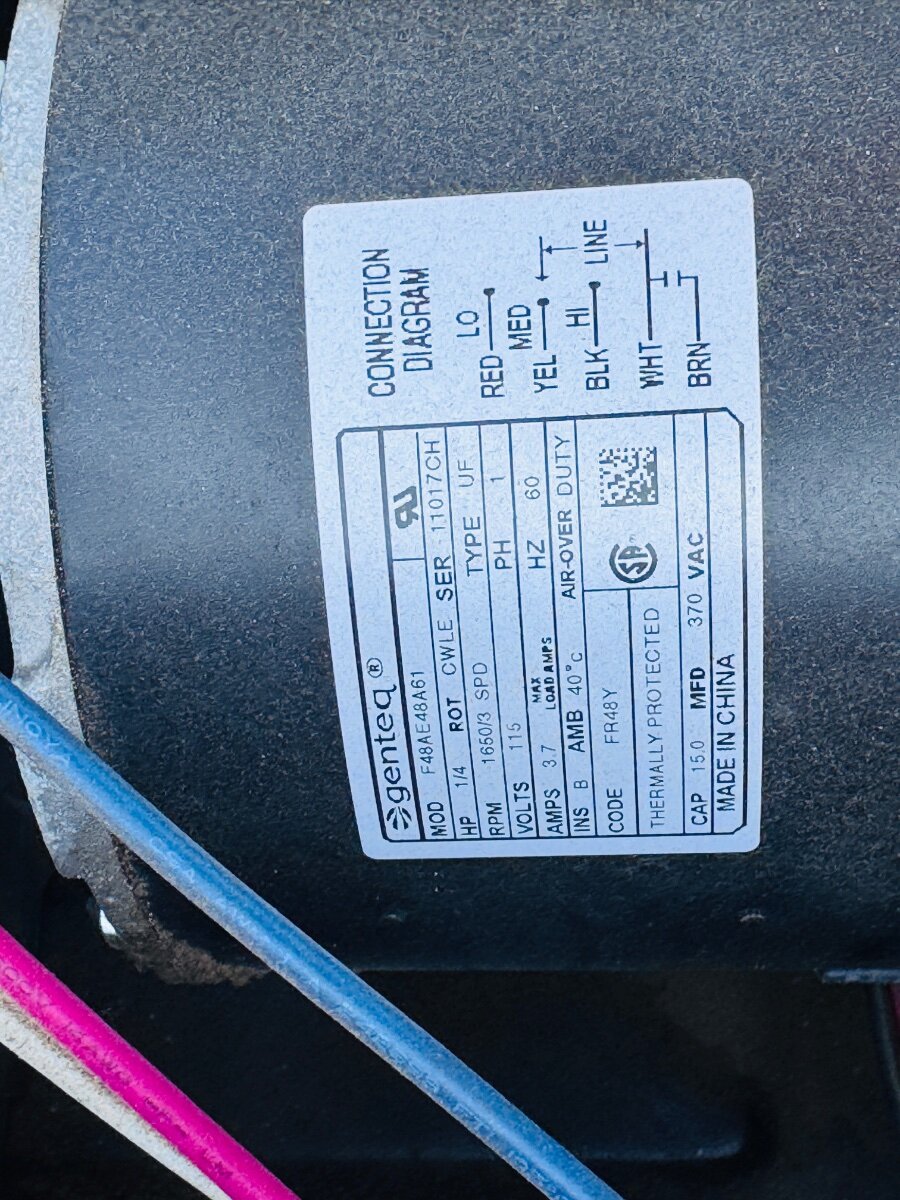
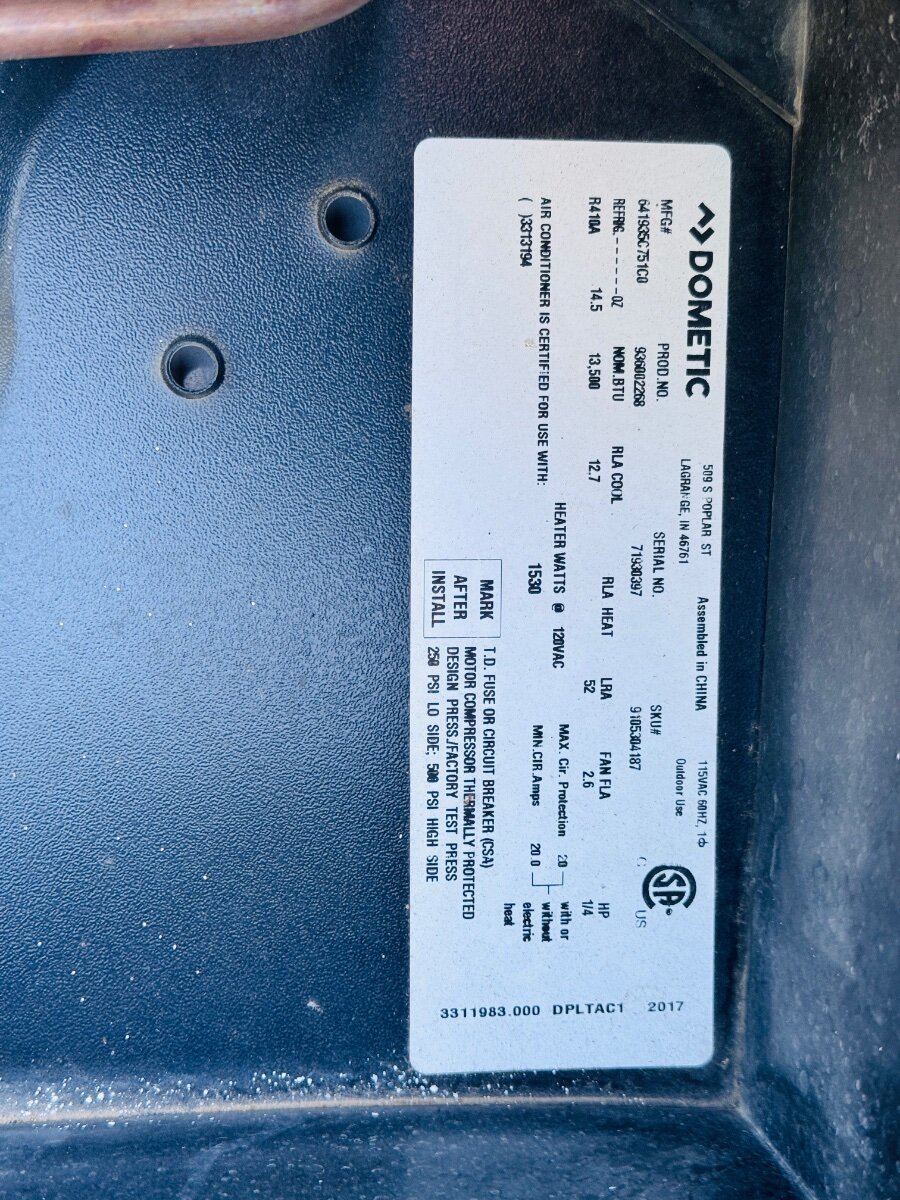
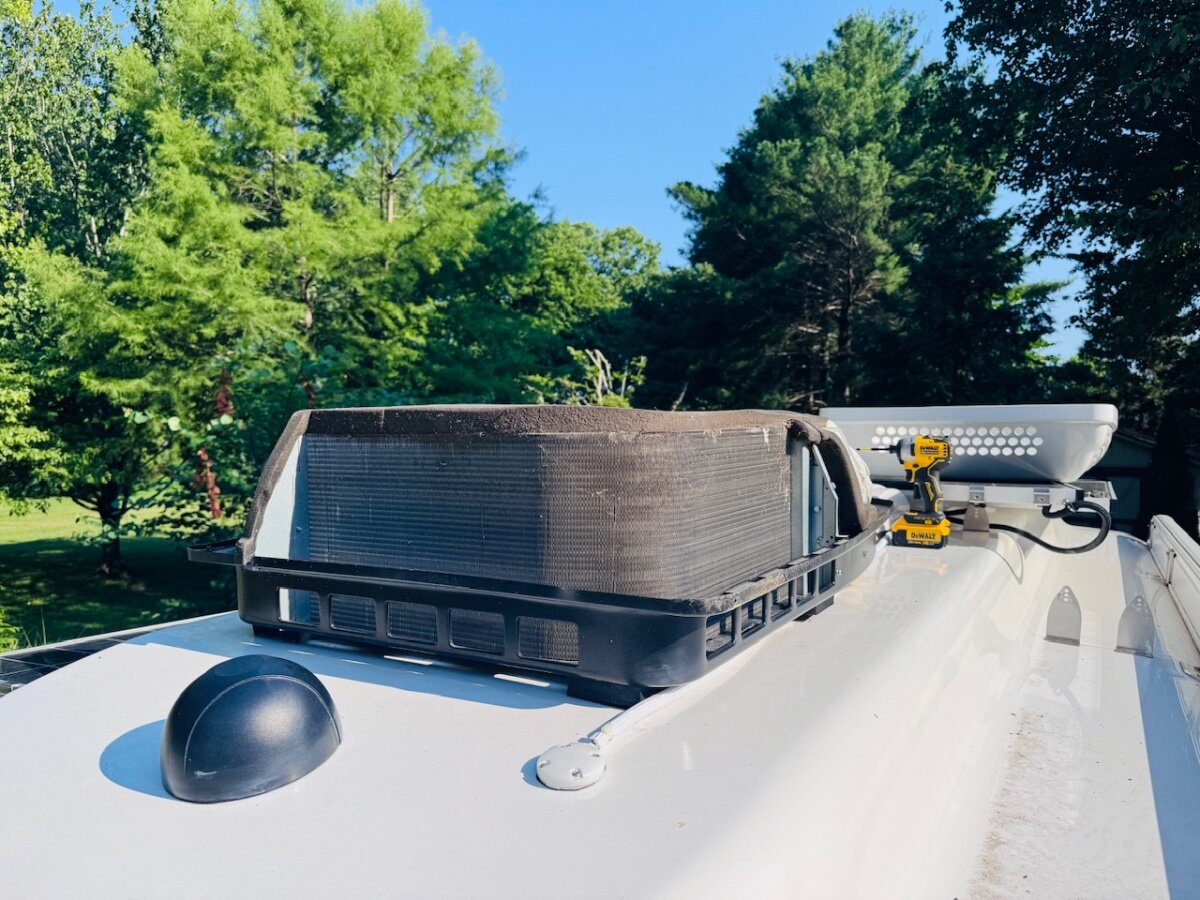
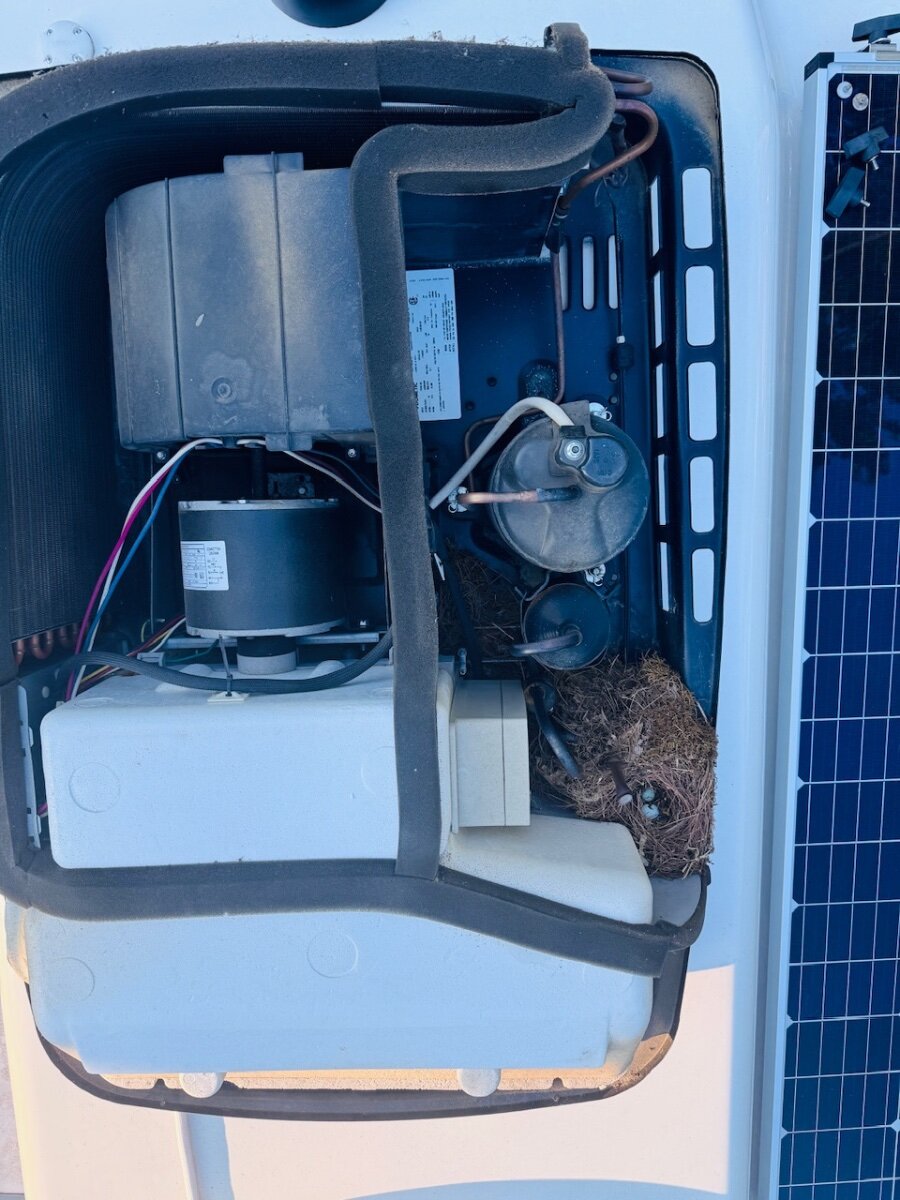
So the unit is over 6 years old, thought it might be time for some maintenance. 😁 Also, making some high pitched screams (fan motor?) occasionally. and not cooling as well sometimes. Took the shroud off by removing 4 phillips (easy). Found a birds nest from early this spring, I guess, 2 hatchlings didn’t make it. Probably hatched while in FL. The nest and eggs look fairly fresh. Took out the big and small capacitors (5/16 screw that is needlessly hard to reach), both tested WNLs (Big silver one 55/15 +/- 5% micro farads and small black one 43-53 micro farads). Fan shaft had some wiggle to it but pretty tight. Maybe a bearing went bad? Not sure if it was a good idea but sprayed the shaft toward the motor with some CRC power lube. Thought maybe it would help give me some time before replacing fan motor. Got pics of everything for later if I have to order. Cleaned the coils with some mild soap detergent and low pressure water from hose. Let everything dry, cleaned the shroud and put everything back together. No noise and air coming out is definitely colder or I am just enjoying it more after being in the morning sun! Hope it helps someone tackle their maintenance. Really not that hard. Best, Mike
3 points
-
To close this out… I cleaned out all the old caulk and wiped it down with mineral spirits. I used 3M Marine 4000 and layed a bead all around the Oliver light. The next morning I simulated a good rain storm on the back of the trailer. No leaks. Hopefully this will last. When I was cleaning out the old caulk I was surprised that there wasn’t much to clean. Mike3 points
-
Hello all! Just joined your wonderful forum today. We are a retired couple from Tennessee who are looking forward to owning a Legacy Elite II someday in the near future. So we’re newbie wannabes right now. We made the mistake, I guess, of first looking on line at the Legacy Elite II and now everything else just seems subpar. So, we’re pretty much sold out of the gate on Oliver’s quality and customer satisfaction. We continue to learn every day, mostly from this forum and other research what it’s like to own a travel trailer and why other brands of rv’s should be avoided. Once again, hello and we look forward to getting to know you all.2 points
-
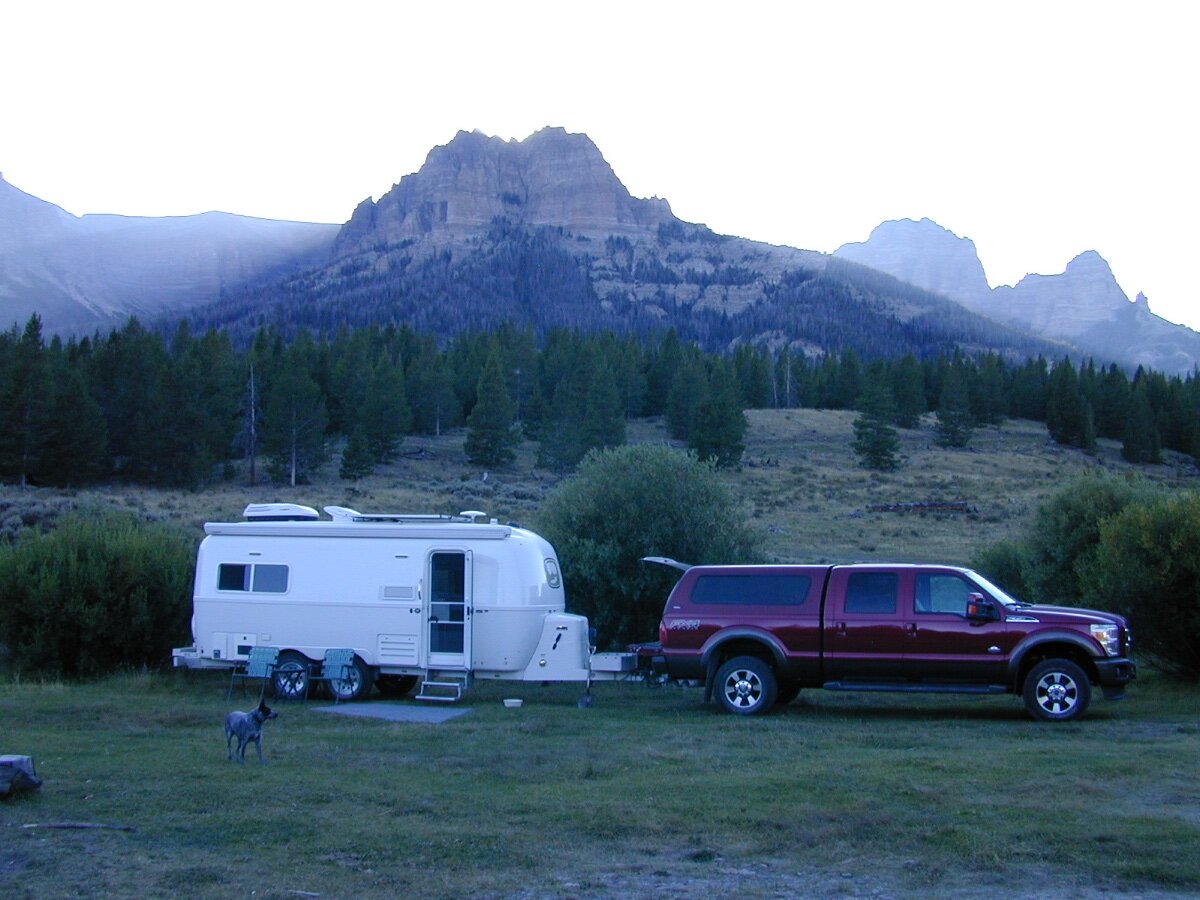
Missed this photograph of the Go Anywhere Oliver!
2 points
-
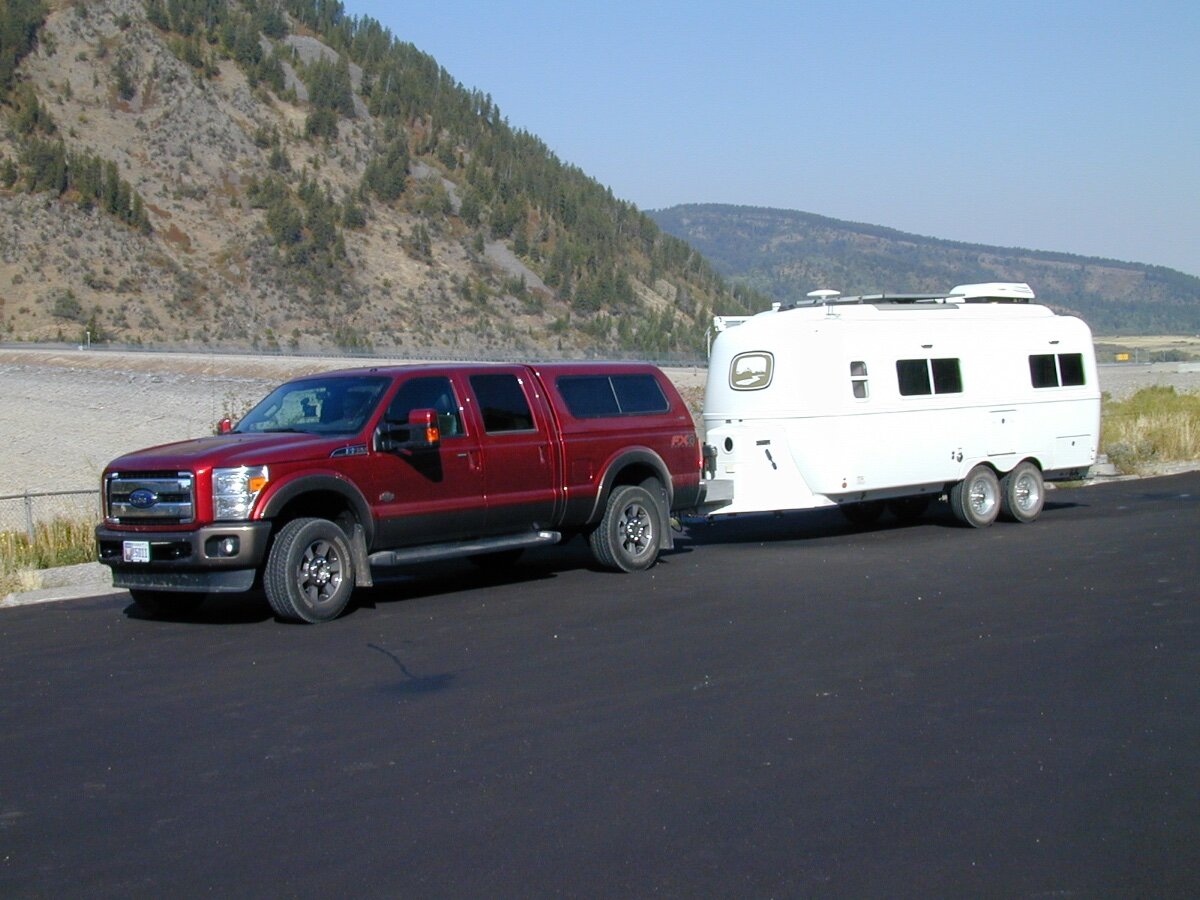
We have alternated our 2019 27/28 foot Airstream and the 20 foot 2019 Oliver Elite II for the last several years. Towing either travel trailer is smooth towing 'On the Ball' behind a F350 2016 Ford Diesel. I like the F350 Tow Vehicle best of all four wheeled rolling homes. Towing has been a pleasure, without any issue of sway or weight control. Lengths do matter. There are MORE options for an Oliver Elite II to travel, set up camp, remaining attached to the F350 tow vehicle, while on the ball. Another advantage an Oliver has is the Clearance and Michelin 16 inch tires. I added 3 inch lift and 16 inch wheels and 16 inch Michelins to the Airstream, which was a great advantage to do when purchasing new. The Oliver Elite II has this clearance... standard equipment. Nancy is wiping down the Interior of the Oliver now for dust. The most likely spots are on the floor, on the sides of the hallway carpet. Static Electricity IS your friend with Fiber Glass. She just came in and commented how easily the Oliver interior cooperates for a clean up. Many Oliver owners may not realize how easily the Travel Trailer... travels. It is the 'Go Anywhere Travel Trailer' and wind does not push the Tow Vehicle or Oliver around. We did our Boondocking Camping with the Airstream... with a 23, a 25 and lastly a 27 foot. The 25 foot was our favorite, as the Elite II is our choice, also having Double Axles. Necessary for go anywhere travel and four tires on the road. If a Elite II has a tire failure... the weight on the remaining tire can manage if inflated to your comfort zone. Having more PSI in the Michelins will not Pop Rivets, nor cause cabinets within the Interior to... become loose from the Factory. An Airstream with experienced owners know where to upgrade hardware and travel with the same confidence as we have in our Oliver. For Boondocking... the Elite II IS a go anywhere travel trailer. A single axle, you may have the passenger walk along side when crossing a dip in the unpaved road. Although the clearance exceeds most other Travel Trailers easily, have that extra axle is worth every dollar spent. The only improvement made to our Oliver Elite II after just over Two Years, WITHOUT ANY UPGRADE OR IMPROVEMENTS. Imagine that if you own an Airstream. For Boondocking I knew where to upgrade hardware and walls on the 2019 model. Learned mostly in the 2006 23 foot, fixed it in the 25 foot and perfected it in the 27/28 foot Airstream. Now the 2019 Oliver Elite II and the Airstream 27 foot FBQ just Rock and Roll. (Nancy did make a fabric shower curtain to replace the factory plastic. I like her work! Soon we will be having to make a choice, which one of the two. License plates, taxes and insurance have increased our costs for two travel trailers. Enjoy your Oliver when time permits. Eventually time takes its toll... not the our Travel Trailer... the Human Beans within. Plan your next trip soon... time is being wasted.
2 points
-
Shades are spoken for. Mike2 points
-
Welcome to the family (almost). As with many other things in life - what you plan to do with your RV has a bunch to do with what RV you should purchase. Hard thinking about the first part will lead you towards making a decision that you can live with for many years. Many of the members of this Forum have in depth experience with a number of other types of RV's and can speak about the pluses and minuses of these. Olivers are not perfect, but, in my experience they sure do beat the heck out of everything else on the market that is within $50,000 of the price. Unless you are sure and/or have had a few years of experience, perhaps renting a couple of different types of RVs will give you the insight you need. Good luck with your search and, as Mike said, ask those questions. But, first, be sure to read, read, and read some more - it is likely that most of the "usual" questions have already been answered a number of times within the many pages here on the Forum. Bill2 points
-
this thread reopened2 points
-
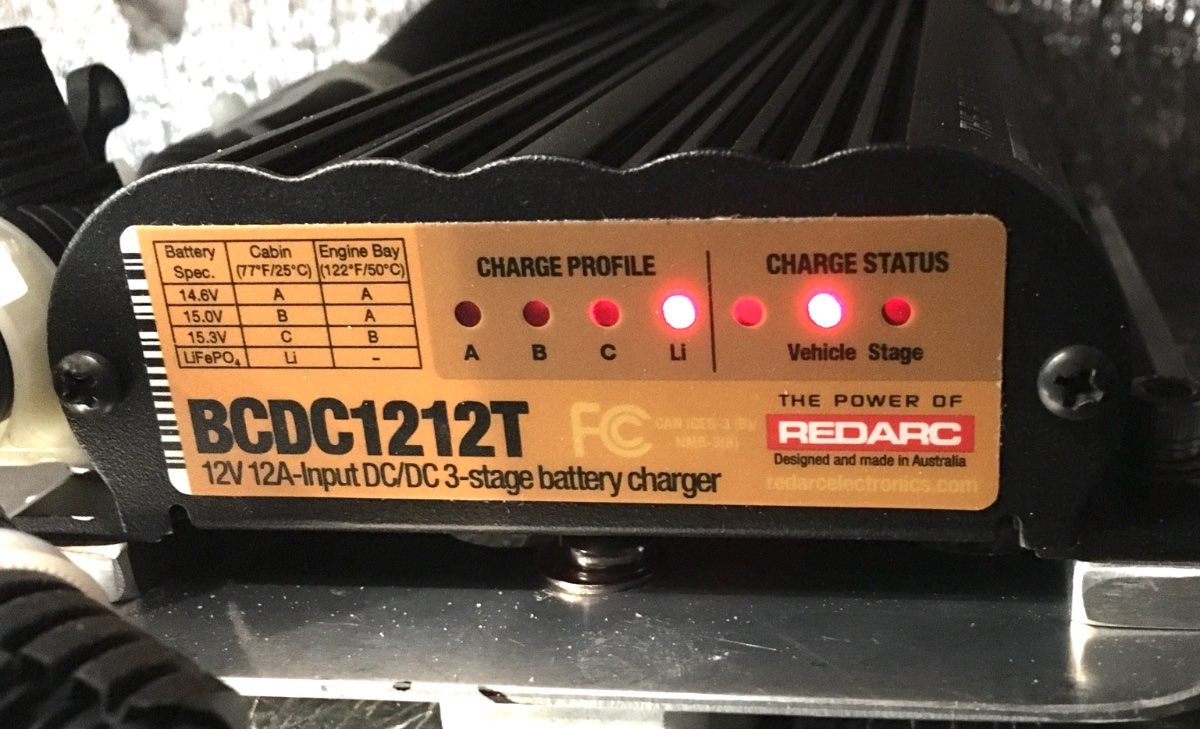
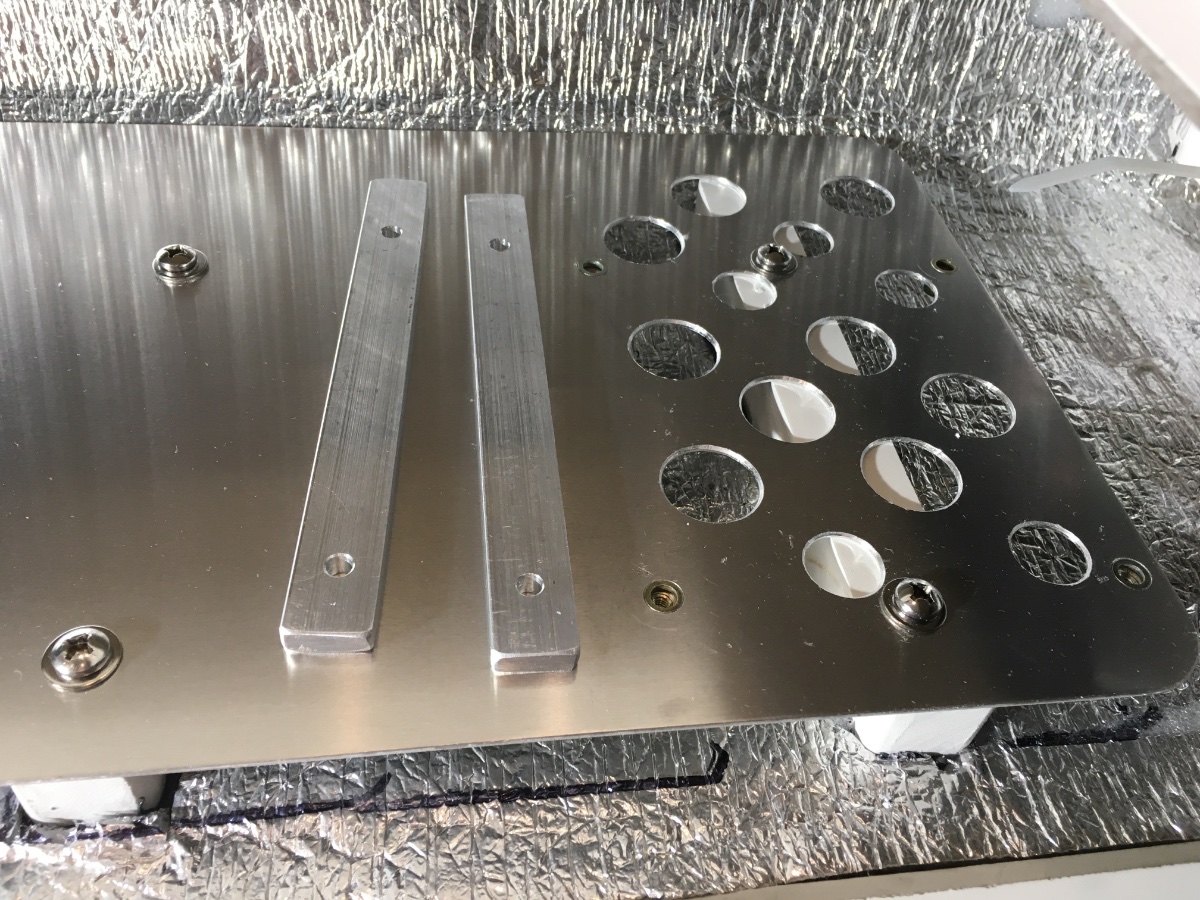
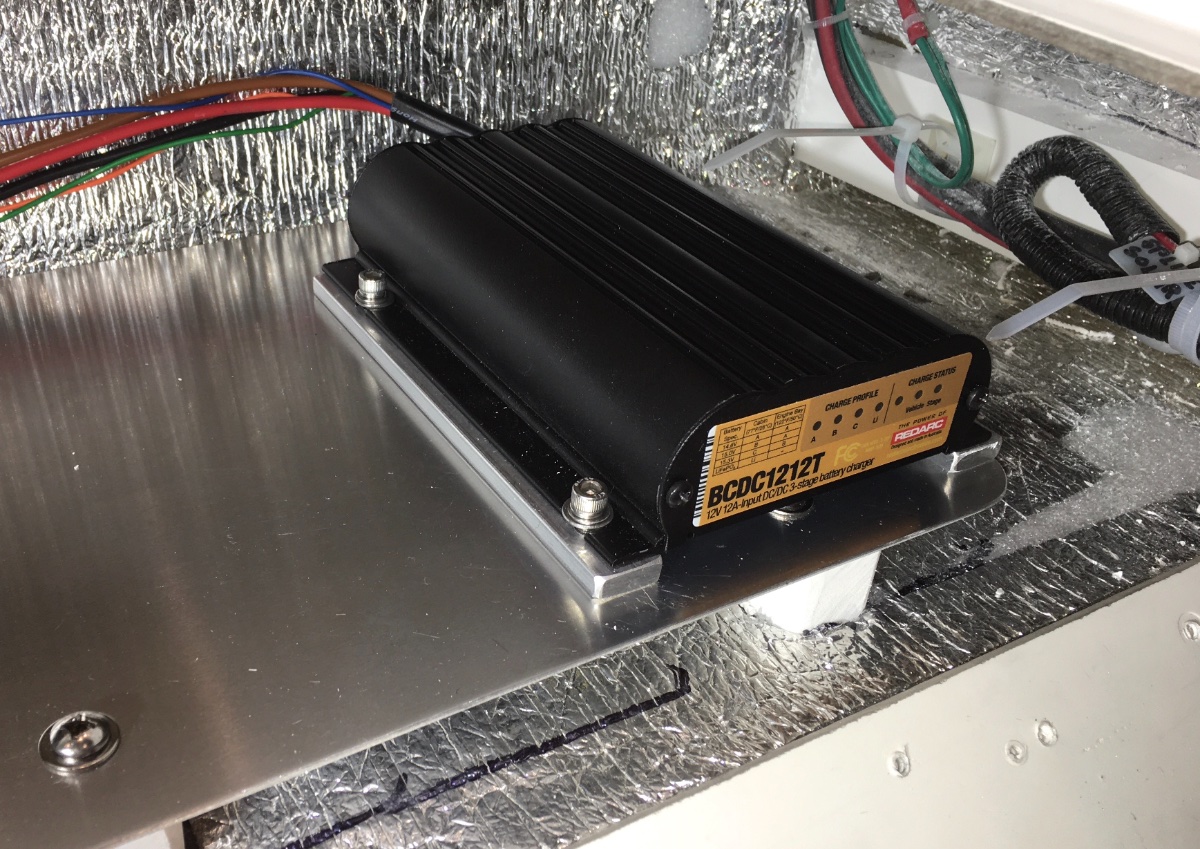
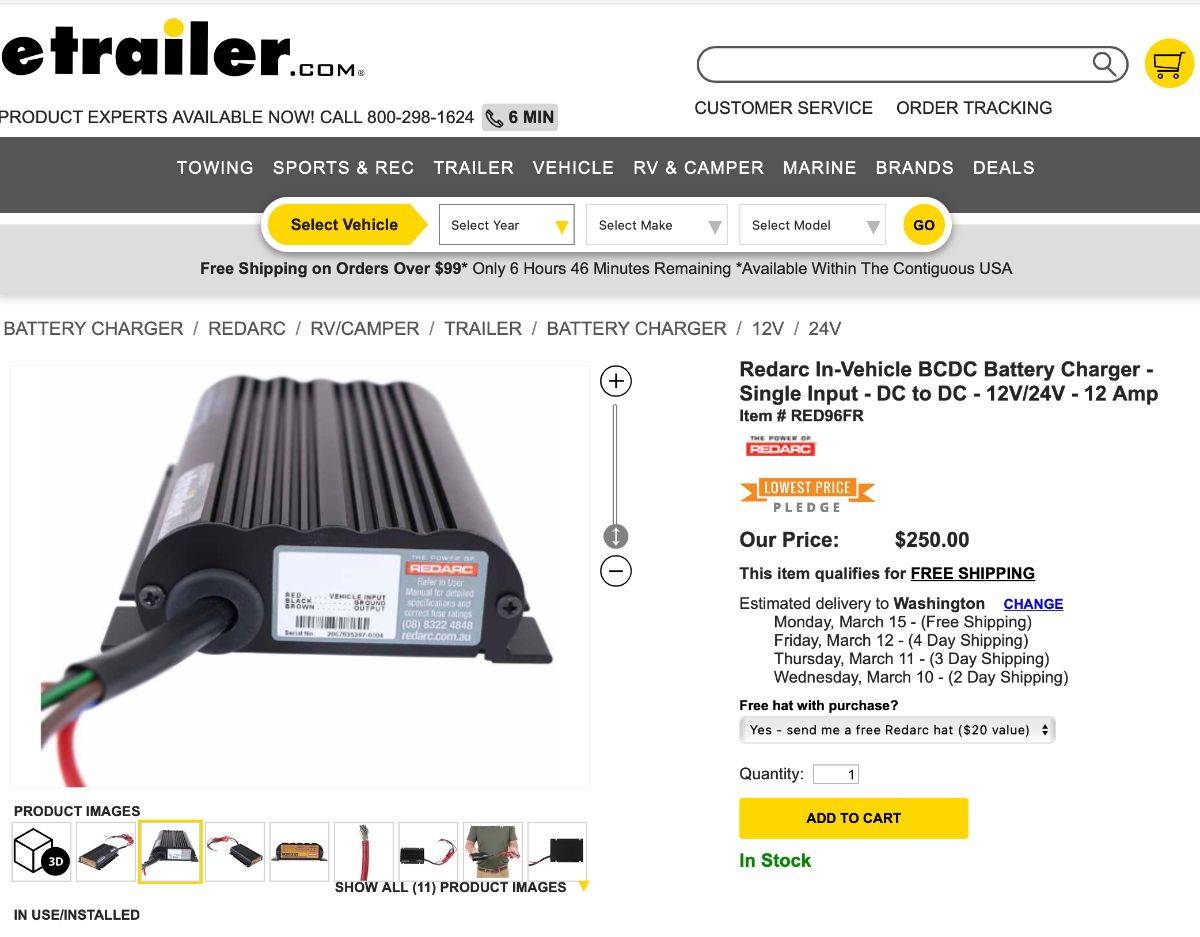
FYI, related thread and discussion: https://olivertraveltrailers.com/forums/topic/4759-redarc-trailer-charger-mounted-inside-the-ollie-for-100-lithium-charge/?tab=comments#comment-49376 https://www.etrailer.com/Battery-Charger/Redarc/RED96FR.html I won't add much commentary, it is pretty self explanatory. The instructions allow you to mount in any position, I chose horizontally with 1" cooling holes and a 1/2" gap between its housing and the mounting plate for cross flow of air. Note that there is a ton of extra space, I plan to add a small Victron MPPT Solar charge controller for my portable panel, it will go just to the rear of the Redarc, and there is room for another circuit breaker too. More.... John Davies Spokane WA
1 point
-
Next trip is planned, Colorado and Utah, leaving in two weeks! Adios Texas heat!!1 point
-
Four 6 volt wet cell batteries about one year old. They should have had full charge at the time since we had just disconnected from shore power that morning. But can’t say without a doubt. We are at another campground now on shore power. I may disconnect and see if happens again, or what I can run on inverter since I had never used before.1 point
-
Finished up the bathroom vanity yesterday. I had a supply of 1/4" u-clips but the fiberglass is quite thick at the opening and decided that would be too much work, the placement must be extremely accurate. I merely used thin panhead wood screws with no taper. Measured with a digital caliper to drill just the right size holes. Added a SS washer so the screw head would not drag on the plastic. Thoroughly cleaned off all the old caulk and sealant. This product has just the right size opening and adequate length: uxcell U Channel Edge Trim, 6.5ft Length Rubber Guard Seal Strip Edge Protector Fit for 1.5-2.5mm Edge, (13/64" W x 5/16" H) White - Amazon.com To-dos left are the bathroom to under dinette vent and the return air filter housing. Waiting for parts...1 point
-
Welcome to the group! Lot’s of folks here who like to answer questions, so ask away. You should run over to Hohenwald and get a factory tour and meet all the great Oliver folks. The showroom is worth spending time in to check out the floor models. Mike1 point
-
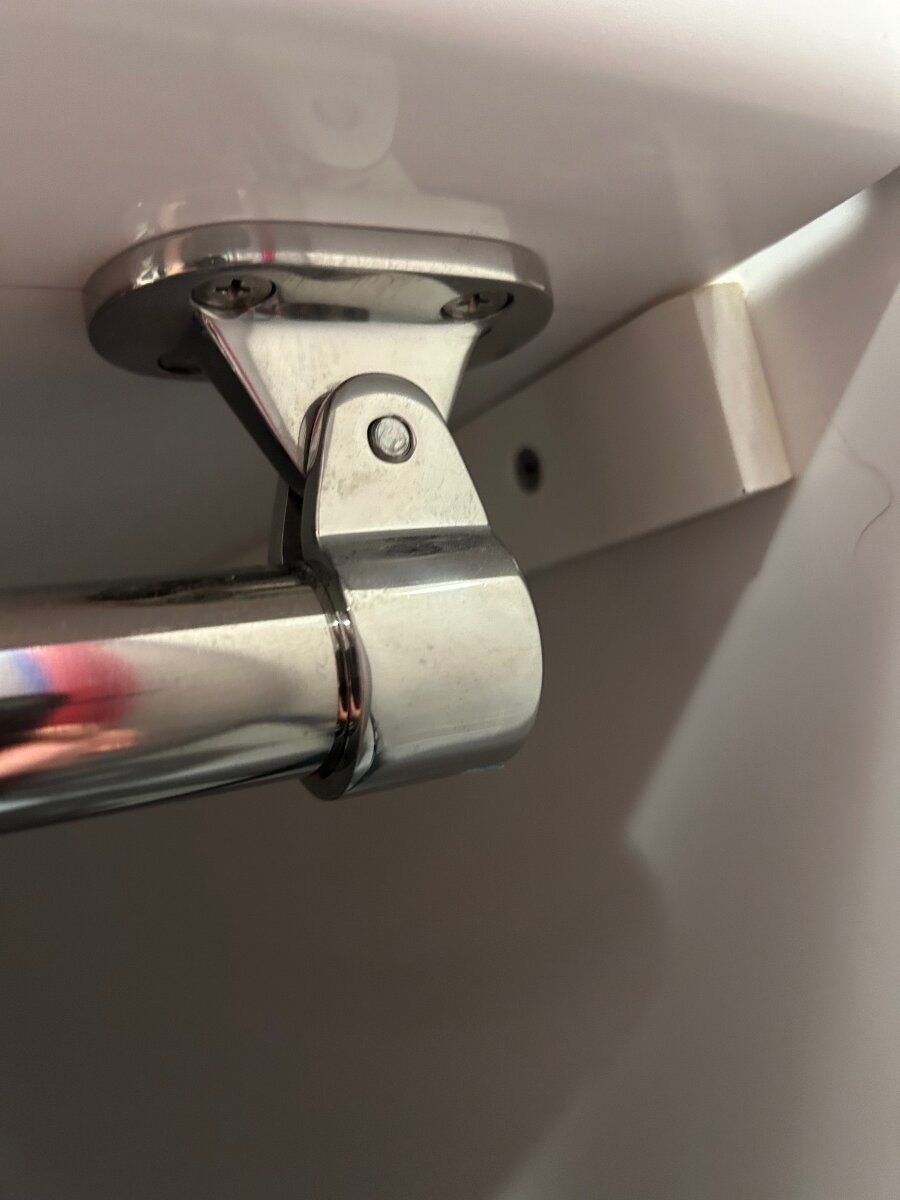
That's exactly what came to my minds-eye. I remember seeing one of these when I was very young. Upside down it would work great as both a pull out limiter and a support for the plastic. It's called a shoulder yoke. For ease of install way back there, one could use some Gorilla Tape around the ends. GJ
1 point
-
Thanks for posting Mike. I'm a firm believer in having spare capacitors on hand as cheap insurance because you never know when they're going to stop working and their easy to switch out. I'm using your pictures to order the spares. I'm guessing the black capacitor is an added on hard start capacitor? Do you have the Oliver factory installed Micro-Air Easy Start option on your A/C unit? I know the Micro-Air unit also contains a capacitor but I've not taken the time to look it up. I'm thinking an A/C unit wouldn't have both a hard start cap and the Micro-Air. I need to do some preventive maintenance on mine. They're easy to forget about until they don't work.1 point
-
What batteries do you have? Are they fully charged?1 point
-
Older thread, but relevant, I think.1 point
-
I would need to see the monthly sales to customer numbers for Oliver trailers for a couple of years, new and used, but it is very likely what you are seeing is a sluggish market in general, not just Oliver, which is what I assume was your first impression as well. When you are paying much more for your daily groceries, utilities, and gas, optional large investments tend to drop significantly as I have seen. Regardless of the general RV issues. Sales of gyroplanes are pretty sluggish right now with great downward pressures on used gyros. For me, as a potential buyer, the general RV issues above suggest to me it helps to be new, highly mobile, small, and to plan a year ahead. Hearing many reports of failures to bypass years of RV life restrictions in some RV parks, for example. Returning to economics, I think it is a buyer's market at the moment and affecting the price/value consideration. I do know that one RV custom trailer manufacture who has a normal 12 to 14 month order-to-completion time called me a week ago to tell me they had two build slots open in November and two build slots open in December he could slip me into. That is alarming. No, I did not commit. End of the RV season deals should be very good this year. Trying to avoid the political side, but I believe there is a strong majority of people who believe, rightly or wrongly, that the economy will vastly improve with a fresh pair of eyes in the Oval Office and a change of ideology. Reports say that is happening in Europe as well.1 point
-
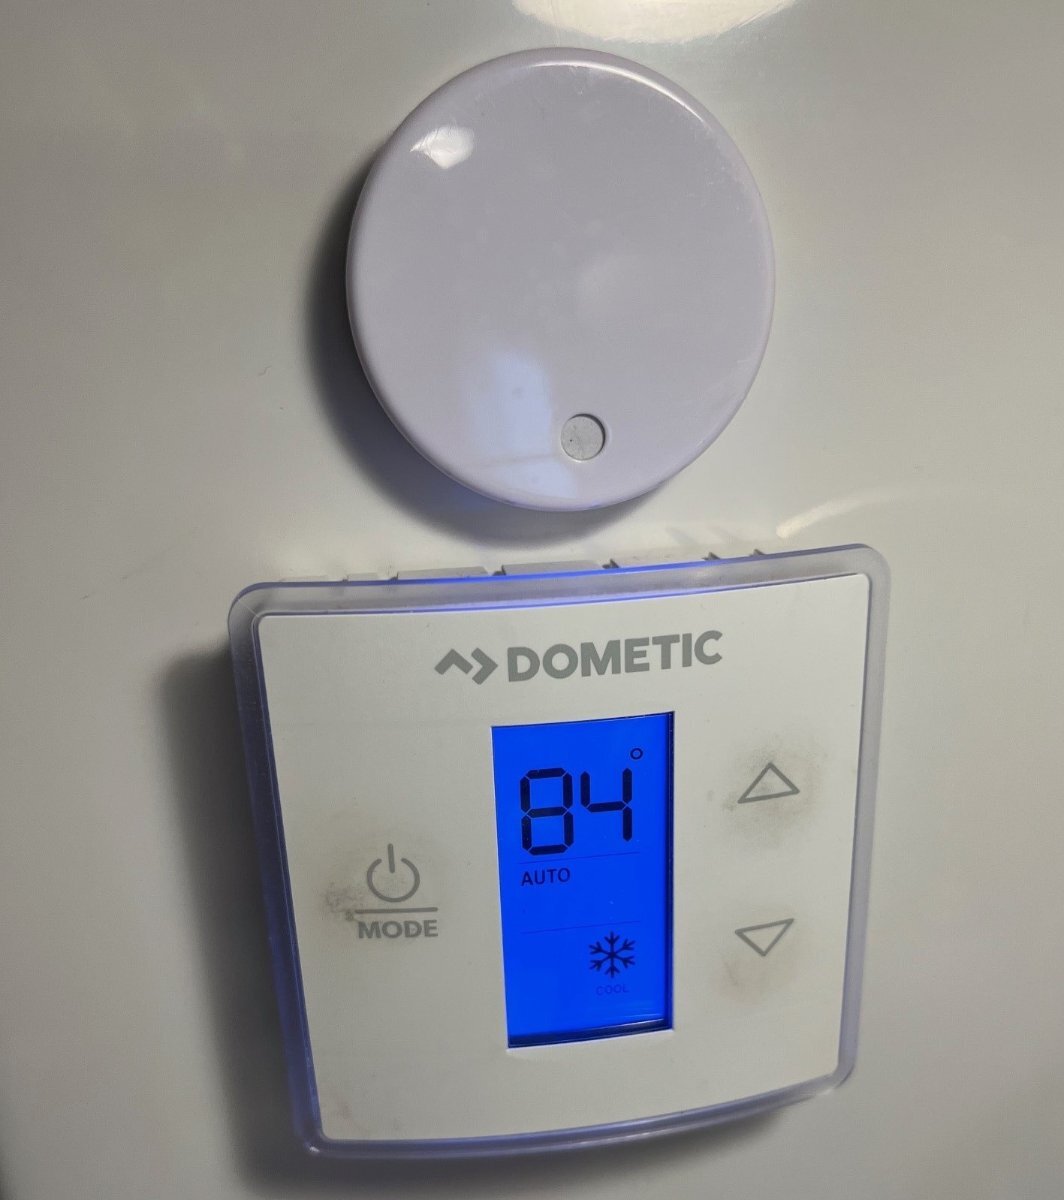
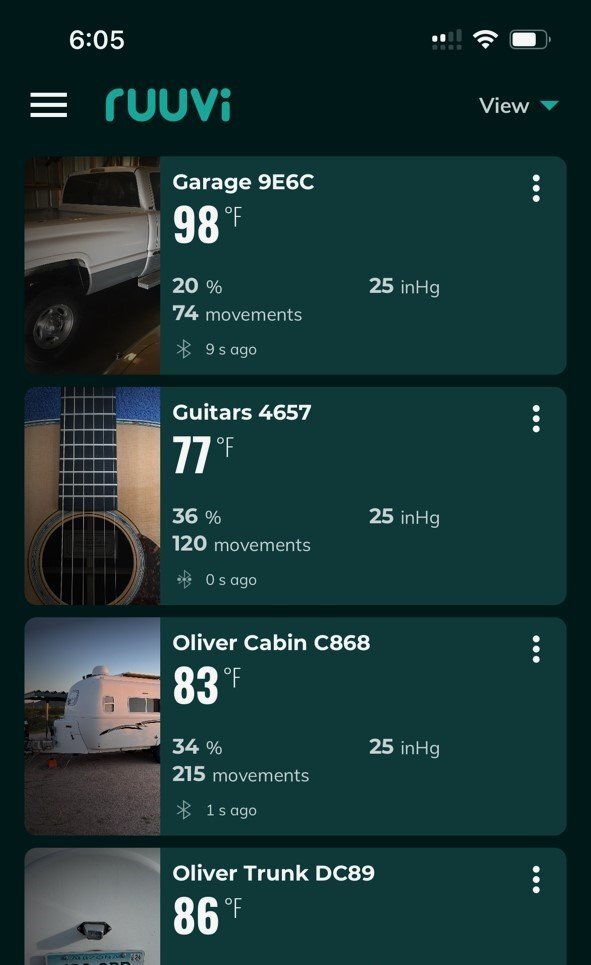
For those of us who use RUUVi, why not just mount one of these in the fridge? We put one in there when traveling, but when home it monitors my garage temp which is always too hot with southern exposure. Love the one placed above our Dometic thermostat since the dumb thing only shows set temp! (always set at 84 Auto when parked in the summer months.)
1 point
-
Decided to submit another thread on my complete mod!1 point
-
 I believe the community consensus is to disconnect the 7-pin charging wire, either within the plug housing or inside the Oliver, upon installing lithium (lithium iron phosphate) batteries. OTT routinely does this during a build when an upgrade to lithium batteries is opted. Reason being, the TV alternator does not have the proper charging profile for lithium. You can however, install a DC-DC charger and utilize the TV’s charge system to maintain the house batteries.1 point
 -
@DunnYet Same closet rod connectors as @MAX Burner. I bet a quick call to Oliver Service would get you exactly what you need to install the closet bar. Oliver Service is great about shipping fairly quickly in my experience. 👍🏻
1 point
-
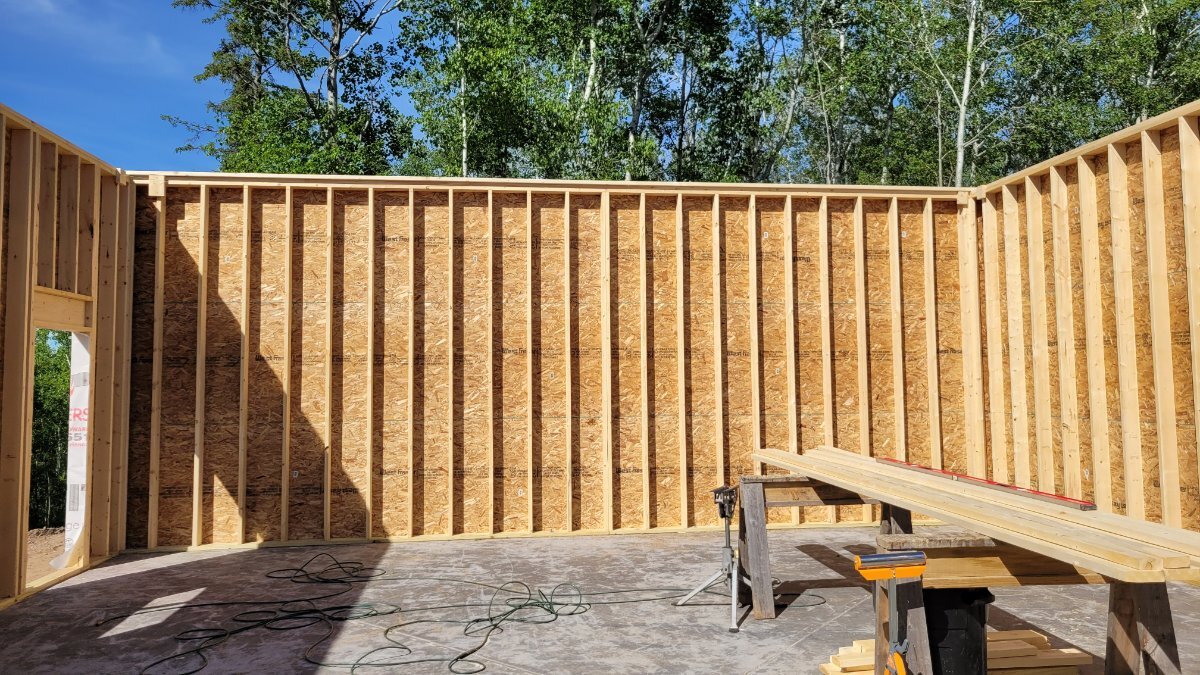
Some more recent pictures as things are progressing. Weather has delayed things a bit. They were starting to set trusses today.
1 point
-
I kinda like them for the sheepherder nostalgia, but I’m not going to buy one.1 point
-
Any idea how old that bottle of Dawn is? My new does not give any warning about bleach. It also says "50% less scrubbing" and "dawn believes in safety and quality of our products". Pretty good evidence that they changed their formulation. I too use Dawn a lot. Regardless of what those "Experts" say, I'll follow your lead and not be mixing the two. Good catch between the two of us! GJ1 point
-
Thanks! We have a FanTastic vent, but a number of reviews mentioned that they had other brands than MaxxAir, and it worked! I'll download the install manual and see if it looks like it could work for us.1 point
-
Quick Update: my replacement Nature's Head fan arrived, via General Delivery. They sent me TWO (no charge) so now I have a spare. All good.1 point
-
Excellent of you to do the follow-up and to notice something this detailed. Many would not have noticed. A good check to see if they are truly deformed is to take a good nut from the other side (better yet a brand-new nut). If it threads nicely by hand the threads are good, if it gets stuck you know the rest.1 point
-
Thanks for all the input. I did try the opening and closing valves one at a time to bleed air. Also tried city water hook up. I tried pulling water in from boondocking port. No draw from that connection either (with valves in boondocking configuration). Put in a ticket with Oliver and sent video. Mike responded promptly and said likely pump and or accumulator. I replaced both. Still no draw from fresh tank but it did pull water from boondocking port. Progress! I checked all connections between fresh tank and pump. I had an air leak at connection where water line comes out of fresh tank. Pump failure was from us leaving pump on overnight while parked on a slight decline with very little water in fresh tank. We stayed in their house so did not notice until morning. We have named this O-squared E. Oliver-Operator-Error.😁1 point
-
Better than tape would be some kind of donut clamped to the hose, so that it cannot be pulled too far.1 point
-
Out here, Amazon and UPS are my best friends and dance partners.1 point
-
BTW, the link @MAX Burner supplied for a replacement door on AMzon, currently has a “Like New” one for $90 less. Like new on Amazon means the packaging has been breached!1 point
-
Like the simple design @Snackchaser showed. I will do our mod this summer. I’m also thinking of deleting the bed area duct. We’re camping in colder weather last few days and I have this one shut as much as possible which helps the air flow in the bath. The bed area duct is too close to the return and we like the cabin warm but cooler air where we sleep.1 point
-
Can you cut the duct, move the blue pex line(s) out of the way (pex lines are fairly flexible), and then reconnect the duct, incorporating the duct Tee?1 point
-
Try cycling cycling each valve one at a time while the faucet is open and the pump is on. This can burp the system.1 point
-
I think you mean amps, correct? In the past, some owners have solved some pump issues by closing the outside shower valves that were inadvertently left open. Mossey1 point
-
When the water flow starts getting reduced by the filter, or the end of the season, whichever comes first.1 point
-
Update. I did get 3 100 AH BBs and had them installed. I've just returned from the auto parts store where I had the AGMs load tested and one of four tested "bad" and the second of four tested "nearing end of life", the other two were still good. I'll keep the two good ones and use them in another application I have in mind. I watched the entire installation and I have to say, thank you to all who tried to help me understand how to do the swap myself. However, from what I saw, I would NOT have had the hand strength to manipulate those cables ( @Terry McCaffertyI was able to re use the existing cables and my tie-down now looks kind of like yours only black ) AND hold them onto the bolt while tightening the nuts. I most DEFINITELY would not have been able to lift the AGMS out of that tray. The entire process of discovery and completion has been very educational. Having read the Solacity piece among volumes of other material, I now feel that I need to re learn how to read the Solar Controller panel and use the information there differently. I *think* I understand that I need to know much more about the batteries' state of charge but I don't really know how to monitor/track that. More research! Thanks again to all of you1 point
-
Not in your wheelhouse today, maybe, but you've shown you're pretty fearless to learning a few new skills, @csevel. If you decide you want to ditch the microwave, I'm sure you can do it. And, we'll help. Got rid of ours a few years ago.1 point
-
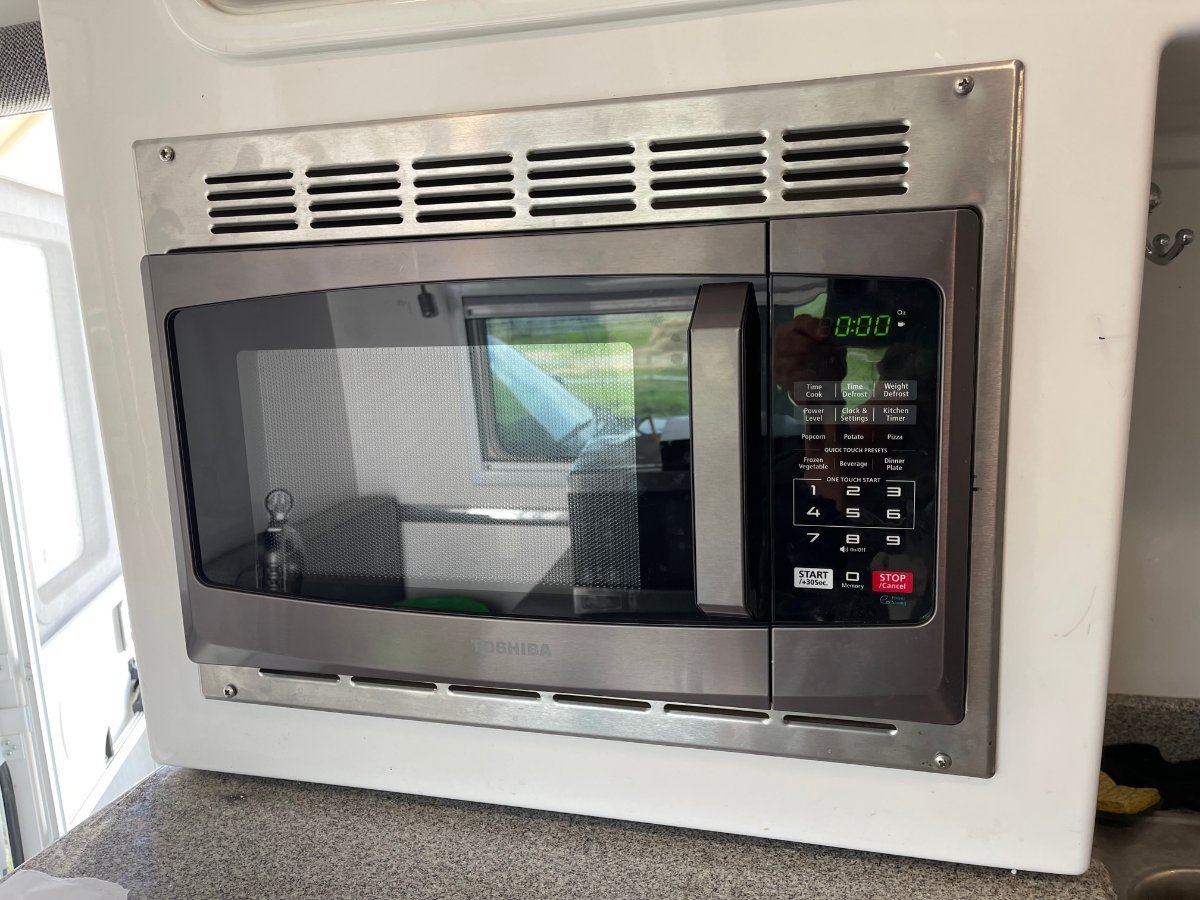
Success, I got the new microwave in. 😃 I replaced the High Point one with a Toshiba EM925A5A-BS That was a lot cheaper than High point. It is the same size and wattage and I was able to use the existing trim, screws etc. from the Non functioning High point.
1 point
-
@dewdev, do you have the manual for the generator? If you don't, I can send you a pdf, or you can Google it. It has good illustrations and instructions of maintenance, specs for proper spark plug gap, valve clearances, etc. Your unit has a low oil shutoff, like our westinghouse. (Another reason the previous owner possibly couldn't get it started.) Before I tried to fire yours up, I'd do all the annual maintenance, especially the fuel filter and oil change. We've seen those foam fuel filters pretty much disintegrate, with lack of use. Looks like two screws to remove it for inspection, wash it and dry it between two old towels, if it's not crumbled, already. (I'm embarrassed to say, this had happened to us on a rarely used yard tool, but it happens.) Best of luck. You've already done a bunch for a "non-mechanic." You'll get there!1 point
-
I work on a lot of small engines and motorcycles professionally and as a hobby. Here in Minnesota they get stored for an extended period annually. The number #1 reason they won’t run in the spring is a gummed up carburetor due to evaporated gasoline, especially ethanol. If you’re a non mechanic, consider sinking $20-$30 on a brand new carburetor. They’re cheap on Amazon, eBay, and small engine sites. You’ll spend hours unsuccessful attempting to clean/test/clean/test your old carb and you’ll still end up buying a new one. I have an ultrasonic cleaning bath, chemicals, tools, and experience and I spend very little time cleaning carbs anymore because the new ones just bolt right on and off the engine fires. Take lots of pictures of the linkage routing. Unbolt the old carb, bolt on the new one. It’s going to take longer to find which one to order than actually replace it. HTH. Ken1 point
-
John: First, welcome to the Oliver Family! I need to clean up my documents, but they are 95% done. PM me with your E-mail address and I'll send you a materials list showing sourcing and costs for my entire Lithium project, as well as my edited version of pirated copies of other members many suggestions. (Galway Girl, Minnesota Ali, John Davies, Overland, etc.) I am using 4 AWG stranded premium copper cable from BatteryCablesUSA. Found them to be the best price. Also they are VERY helpful in calculation the actual voltage drop. that size cable is also what the voltage drop will be. As far as return back yes on the run both out and back. Also use high temp wire loom as likely it will be passing by your turbo's and/or exhaust at some point. For my 3.5 EB turbo area, I will also be wrapping the loom with heat shield. You want to minimize connections and also the higher resistivity of the frame. Yes, for the hull penetration, use the same method that Galway Girl documented in her report. It runs below the bathroom floor. You can see the path from under the front dinette seat. Yes on the clean up and removing all not required cabling from the battery box. GJ1 point
-
October 2022 Post Project Edits in BOLD. A With three lithiums, I am assuming you have at least 300 AH capacity. With that in mind I was wondering why you have chosen the 18 amp Victron? The incremental cost to their 30 amp one may something to consider. B. Your cable length of 30 to 35 feet warrants a re-look. For my "Little" F-150 Super Crew to OE2 will require cables ( plus and minus) ffrom battery to battery of right at 110 feet of #4 AWG. This is due to needing to run both cables from TV battery to Oliver LiFePo4 battery box. C. The voltage loss is calculated for both the out and back length. It likely will be in the 100+ foot range for your big rig. At that length I would have concern with just using #10 AWG for 18 amps as well as the voltage loss at that distance and cable size. May want to re-look at that. In my case I went with the Orion 12/12 - 30amp and with a 54' run both ways (108' Total Cable Length Used) the 4AWG was strongly suggested by BatteryCablesUSA. Should my above thoughts actually apply to your project, the logical conclusion is that you'll be running new cable front to back. Should that be the case, with your three lithiums, I would go with the larger charger and power it up with twin AWG #4 stranded copper cables. Concerning mounting the Victron in the front dinette under seat cabinet, that is where I have posted and where I plan on mounting my 30 Amp Orion 12/12-30. My thoughts are that since the only time that the charger will be generating heat is when I am on the move. I will be removing the cushion and under- seat storage cover to allow the heat to escape to the trailer cabin. This solution does not add to the under bed heat build-up issue mentioned above. Good luck.1 point
-
John: Very correct. The intent in my post above was directed only towards charging wire size between TV and Oliver. You bring up other equally important concepts that those wanting to use a newer TV's with smart Alternator to charge up their trailer batteries. Direct connecting TV to Trailer where you have L.A. to L.A. or AGM to AGM can be done as Raspy posted a couple of years ago (Battery to circuit breaker to Anderson Connection to Trailer batteries). The reason is that the two systems operate at the same voltage and have the same charge profiles. The voltage drop (I.E. a measure of cable resistance over its length) from the front battery to the back batteries will to some degree self limit the amount of power that could flow. This in turn provides a good measure of protection to the TV electrical systems. However mix a L.A./AGM TV to a Lithium Trailer batteries using direct connecting will really cause grief for several reasons: The internal resistance of the Lithium's is insignificant to that of the AGM or L.A. batteries. This would allow HUGH currents to flow from the TV to Ollie. If properly fused at both the TV battery terminals you would just be inconvenienced a lot. However, you are still at risk of damaging the TV charging/battery. Lithium batteries generally require a three program charge process that a direct connect does not provide. A smart TV alternator varies the output voltage to match the need. As a result, it will tend not to provide high enough voltage much of the time that the Lithium's need to get charged up. So to use your TV smart alternator to charge your lithium's, you need a current limiting device, that also acts as a "Buck Boost" transformer, and provides the computer smarts to provide the lithium's their three phase charge program. The unit you suggest appears to do all these tasks at 11 amps. A larger unit is the Victron Orion 12 -12 30. The "12 - 12 30" translates as: A 12+/- volt input providing a 12 to 14+ volt charge voltage to the lithiums, with up to 30 amps continuous (if needed), with current limiting and smart charging profiles. If you have a smaller battery bank, and drive many hours a day, a 11 amp charge system would work great and save you $$$. But we are now seeing Lithium battery banks commonly in the 200 to 300 Ah range. And some up to 630 Ah (such as Galway Gal's and the Oliver OEM Pro set up). For those, you likely would want the larger Victron Orion 12 - 12 30 charging system. Just a reminder these auto smart transformers are not 100% efficient. In the case of the Orion, it can continuously produce 30 amps at the correct voltages as needed, and is listed at 87% efficient. So that would mean your TV alternator/batteries could see up to a continuous 34.5 amp current draw. This means that there will be about 57 watts of power lost to the heat sink. So be careful where you locate this unit, and provide cooling holes/vertical space for the heat to dissipate (See JD's Posting On This Topic).1 point
-
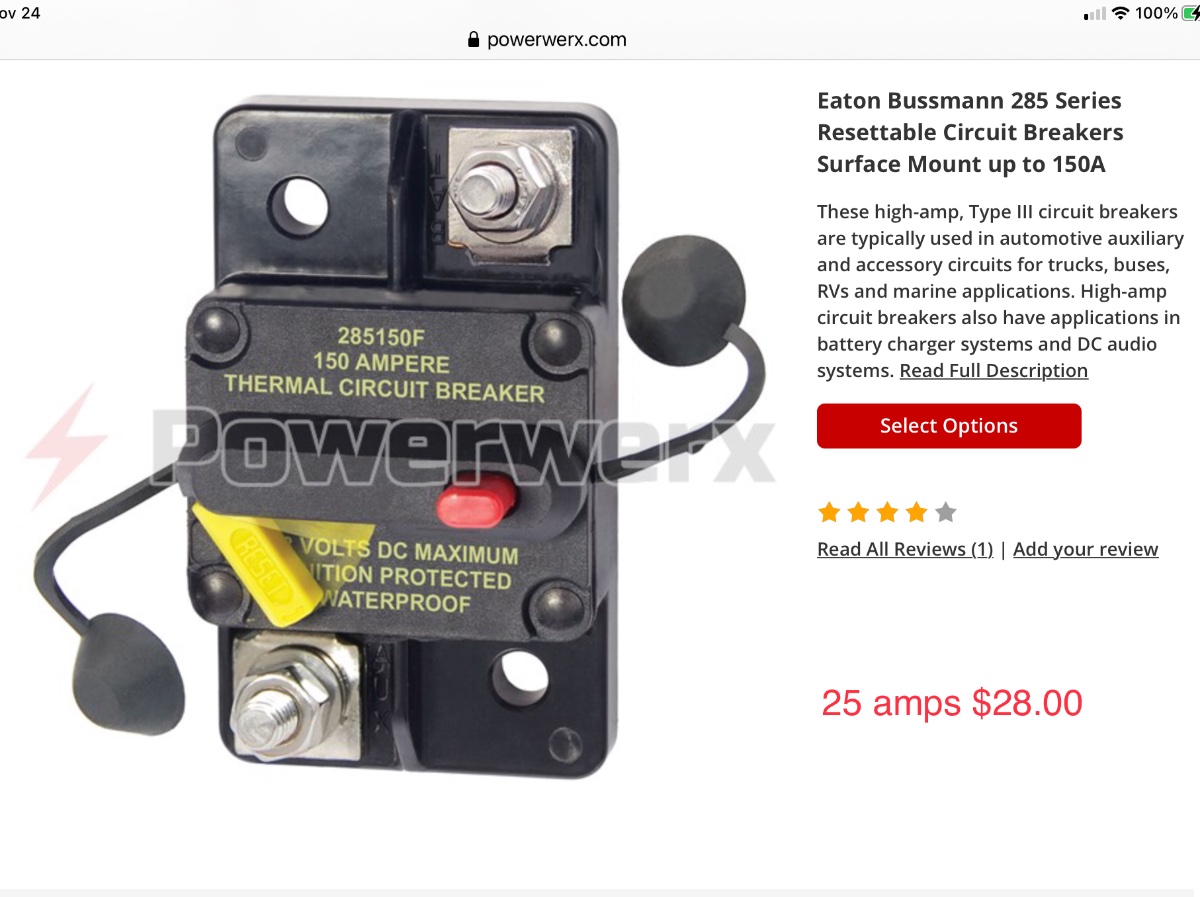
Owners; NOTE 15 OCT 202 updates are in BOLD. GJ Note that JD's 12-12 charger has an output of 11 amps. Those going to Lithium may want significantly more power. It appears that many of our owners are using or are looking at the Victron Orion 12-12 30 amp charger. Depending on your vehicle and Oliver cable run length and wire size. For my F-150 Crew Cab the length of wire needed for the upgrade was 108 feet actual (I had purchased 110) 4 AWG as suggested by BatteryCablesUSA. For the 4 AWG, you would need the Anderson 120 amp or 175 amp connector to handle the diameter of the cables. For running the two 4 AWG cables from the battery back to the firewall, across the firewall (To avoid both the Cat and the right side turbo), zigzagging back under the cab between the frame and body, and back to the hitch is an easy, but long run. Note: I chose to run two cables (Pos and Neg) and not rely on the vehicle chasis for grounding. I found Mike at BatteriesUSA to be exceptionally helpful. If you think you know your cable line measurement, I highly recommend you add another ten feet! Mike can give you the voltage drop for the various types of copper stranded cable. Specifically you can buy 4 awg welding cables or 4 awg power cables. Both are the same AWG. BUT they are not the same strand count. This can certainly impact which lugs you buy for the same 4 awg size. I chose stranded copper cable, not welding. Finally, for DC circuits you can go well above the normal 3% voltage loss. So if you are new to large DC cabling, measure twice, add an additional ten feet, and consider giving him a call at BatteriesUSA.1 point
-
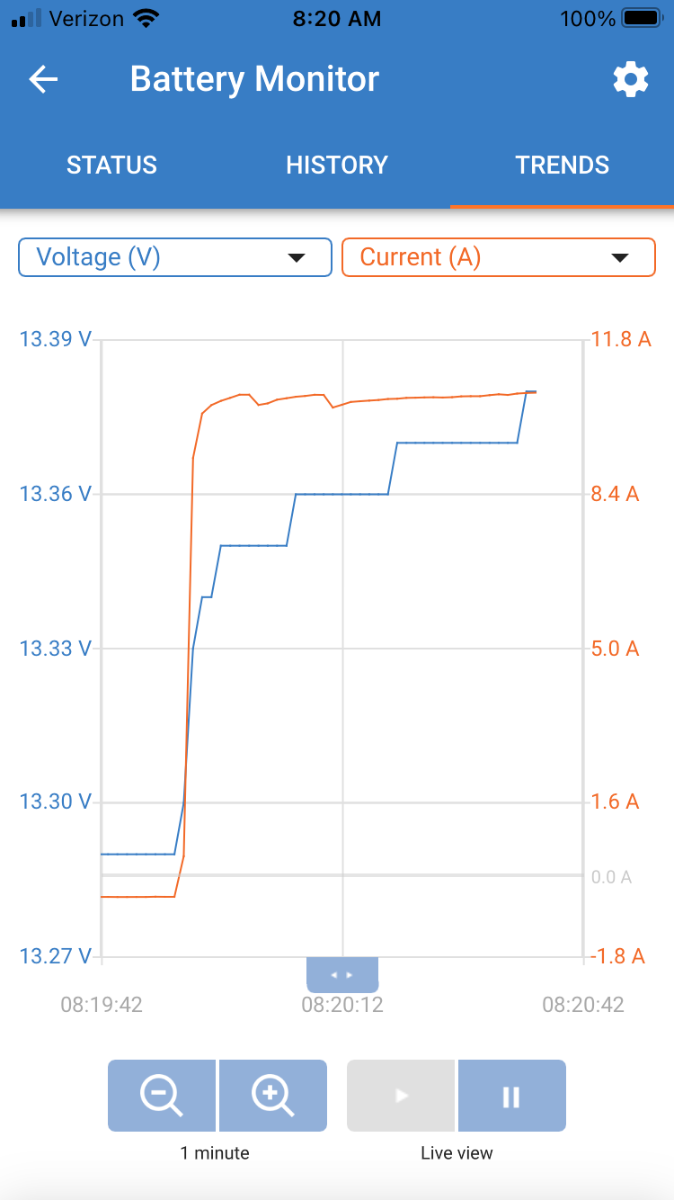
My Land Cruiser 200 charging voltage is 13.6 volts with the trailer hooked up (using a digital OBD2 Scan Gauge).It never gets above 14 volts, regardless. Here is the history using my VictronConnect app, showing the initial parasitic load (propane detector and stereo mostly) of about minus 0.3 amps, then the engine starts and the trailer battery voltage and current shoot up nicely, to just under 11 amps. It maintains that charge rate right up until the batteries are close to full. , The only fly in the ointment is that the wiring needs to be 12AWG or larger, all the way from tongue to charger. My Hull # 218 had a splice from 12 AWG down to 14 AWG, so I had to rewire the entire 7 wire harness, essentially. That is another thread. ... https://olivertraveltrailers.com/forums/topic/5271-how-to-junction-box-for-the-7-wire-trailer-harness-under-the-front-dinette-seat/?tab=comments#comment-54709 I went on a 90 minute, 40 mile test drive yesterday, it worked flawlessly, I can monitor the Victron app inside the truck, the sky was hazy high clouds, not ideal solar conditions, but the total charge current kept around 16 amps, going up to 22 when the sun broke through a little. Total cost was about $312, not including all my labor! Questions are welcome. John Davies Spokane WA
1 point


-
Recent Achievements
-
")


")


")


