Leaderboard


Popular Content
Showing content with the highest reputation on 08/13/2024 in all areas
-
Ok more experienced people will chip in but I’ll try and answer some of your questions…… Yes Yes you can, but if you have the solar package you have the Zamp solar port on the street side, your solar suitcase “should” have a SAE connector but with the Zamp port you will need a polarity reversing adaptor. The wire for the Zamp port is a 10ga wire capable of 30a. OTT use a 20A fuse, you can probably go with 2 x 200W external solar suitcases, but with onboard charge controllers there could be voltage drop based on wire size and length of wire. Here’s a nice video explaining voltage drop based on charge controller location relative to the batteries.4 points
-
Took Ollie on a local camping trip to Bandit's Roost ACE NC for a test camping trip with the new tow vehicle. The rig is working great! 🙂3 points
-
Looking awesome Bill and a great report!2 points
-
You can use the solar panel solar charge controller, cable and alligator clips that came with your suitcase solar panels. The suitcase solar panel manual probably has a connection procedure to follow, be sure to verify. You will have to look at the solar charge controller display on the suitcase panels to verify that it is working. FYI, the Zamp port is a simple 2 wire SAE waterproof port. When installed on the side of the Ollie, the wires go directly to the battery positive and negative, with a fuse on the positive wire. The alligator clips do exactly the same thing. It’s is just like jumping your car battery with the positive connection first and then the negative connection. The battery connections usually happen before the solar panel connections. Mossey2 points
-
I actually went back to the original link for the US Map and scrolled down to find the Canadian Map. I entered the Provinces and then copied it and pasted it into my signature. Thanks for the help.2 points
-
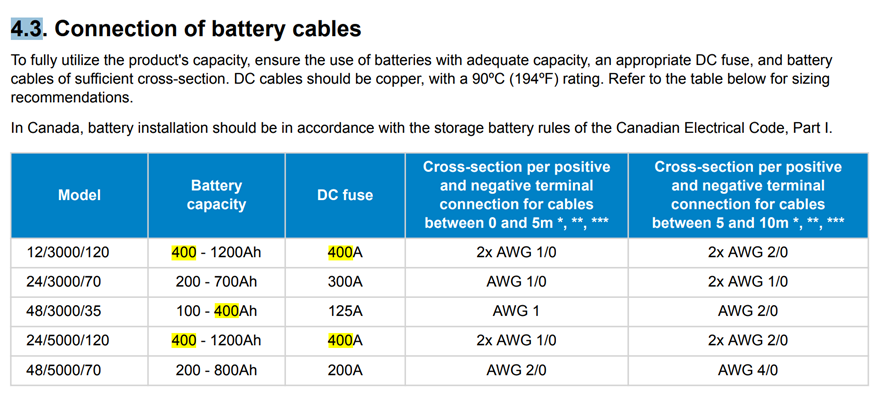
I'm not seeing 250A for this application. Keep in mind the 4/0 welding cable is rated at 600V and of course we're at 12V. OTT had installed a 250 ANL fuse in ours for the 2KW Xantrex and I think you would blow the 250 soon enough running the MP2 at capacity. I was going with a 300A until I found this. See PDF page 16 of the Victron MP2 manual (where they have written a spec for a 400A fuse on 1/0 cable for short runs): There is much confusing and differing information out there! You got me thinking 300A would have been a better choice (but why does Victron write 400A for the12V model?). See this from What Is The Ampacity Of 4/0 Welding Cable? (nassaunationalcable.com) where they state: "According to IEWC, the ampacity of 4/0 welding cable for 600-volt in-line applications is 315 Amps when the copper temperature is 60 C, and the ambient temperature is 40 C." They do not state for how many feet of cable. Also, tables like this are everywhere online, stating the 4/0 Welding cables handles 600A: Also, does the Victron table mean running two (2) 1/0 cables, doubling up the cable? Why would they do that? BTW the cross-sectional area of two (2) 1/0 cables is basically the same as a 4/0 cable.
 2 points
 -
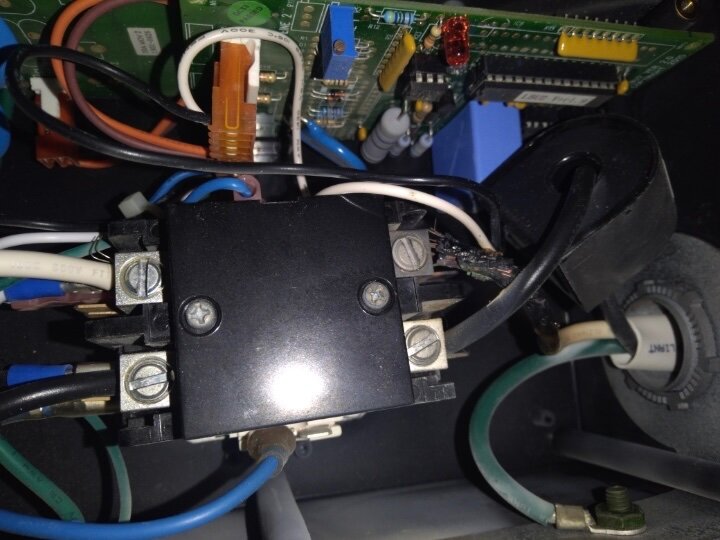
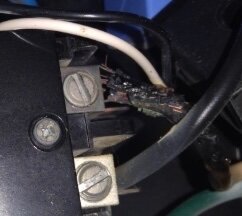
I found out what was wrong with electrical in trailer. I open up the inline surge protector case and found a burnt wire, replaced wired, and 120 volt appliances and outlets worked, I still don’t understand even with a burnt wire the ems still showed no errors and 120 volts
2 points
-
That's for sure! We lived in Georgetown and Lakeway, TX over a 9-year period when we still owned our AZ home, going back and forth 2-3 times a year. I drove it straight through once, pulling a cargo trailer, Prescott to Lakeway, 5AM to near 2AM. In our 20 roundtrips, AZ to central TX, we rarely drove the exact same route twice. I can't stand driving I-10 unless it's January and snowing up north. Sometimes we would leave a Friday afternoon after work and drive I-10, stay at a lovely (just kidding) 3-star hotel in Van Horn, TX (pretty area NW of the Davis Mountains). Make it the next day, home in Prescott. We will camp at the Davis Mountains SP this year returning from the Texas Rally. Most of the time we would head out of Austin area NW on state highways. Driving through Llano, Mason, Brady, San Angelo, Big Spring and often an overnight in Roswell NM. The next day we would head west through Lincoln County NM to Socorro and then take US Hwy 60 into Arizona. This route is an hour or two longer, but NO interstates. This is basically the route we will drive the opposite direction heading to the Texas Rally this October, 3 nights camping on the Mongollon Rim (Rim Rd east of Payson, AZ) and Greer AZ, one night somewhere in-between, then 3 nights in Ruidoso, NM. All that will be boondocking, but we will need a campsite or RV park somewhere around Big Spring TX as a layover to Inks Lake. Living an hour from Sedona, there are so many stops I mentioned here that we much prefer. Now that I am semi-retired, having periods 2-3 times a year with 3-4 weeks off, I like to plan easy trips where we drive only 2 to 4 hours max per day.2 points
-
I have not installed the Beach Lane Twin fans yet, but I did just verify they work and noted how much they use per manual setting, at least indoors with ambient temps around 75 degrees. There are impressively quiet, even at 100%. And they move some serious air. Make a nice decorative wooden enclosure and they'd be better than any desktop fan you could buy. Would keep you cool at night for sure! Hmmmm! Speed - Watts Used 50% - 0.6w 60% - 1.2w 70% - 2.05w 80% - 3.2w 90% - 4.6w 100% - 6.6w
2 points
-
Toyota requires a weight distribution hitch for your Tundra when towing an Oliver, we use the Anderson hitch. As you've mentioned your payload will be limited with the Tundra, visit a CAT scale and check your weights especially the weight on the rear axle. If you have the air bag suspension the truck will trim out nicely when towing the Oliver. The Tundra tows the Oliver very nicely and with the Tow+ mode and the twin turbos you'll get good performance. I've noticed no sway whatsoever with my setup and gas milage is reasonable at 13 mpg typically when towing ( 20mpg when not towing ). We have the composting toilet and are glad to have it. We can go three weeks between changing out the compost which is easy to do. You'll save a lot of water by going with a composting toilet and not have to deal with other peoples messes at the dump stations. Twin beds are the way to go with the Oliver. Water conservation is key when boon docking but you can easily add portable jugs of water to the system if you need to by using the Olivers boon docking configuration. The platinum lithium package is wonderful. The pantry can hold a surprising amount of food. We went with the 30lb propane tanks, they are heavy but came in handy for winter camping.2 points
-
Also, we are currently on the 50 GB plan. We watched an Olympic Volleyball match (so about 2 hours) and went through 8GB of data. So not ideal for a lot of streaming as people have mentioned. However, you can buy more data (not cost-effective) or use the standard data unlimited plan ($150 a month) with the mini.1 point
-
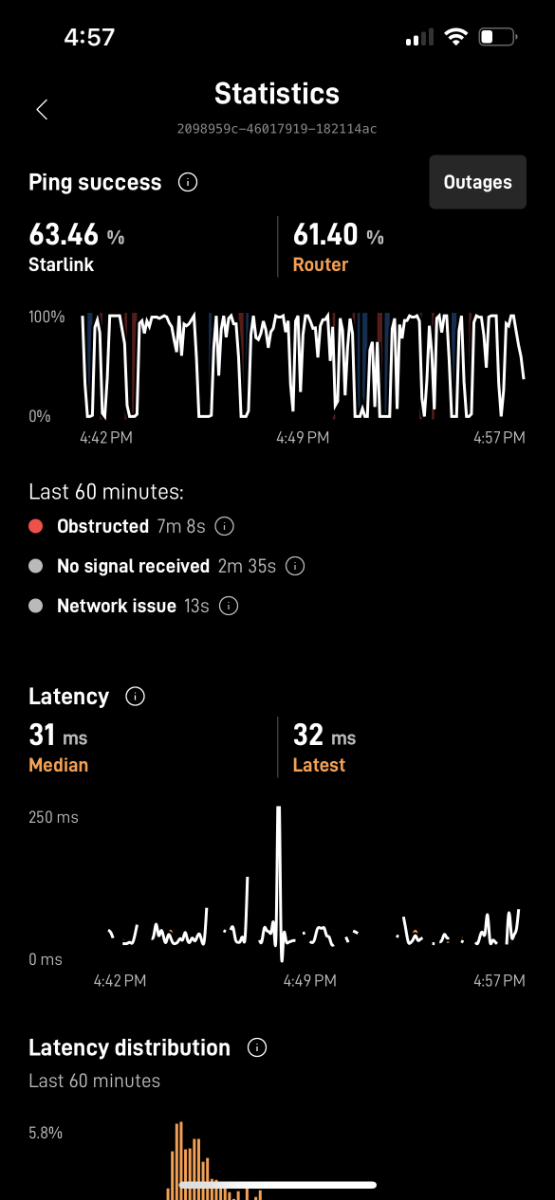
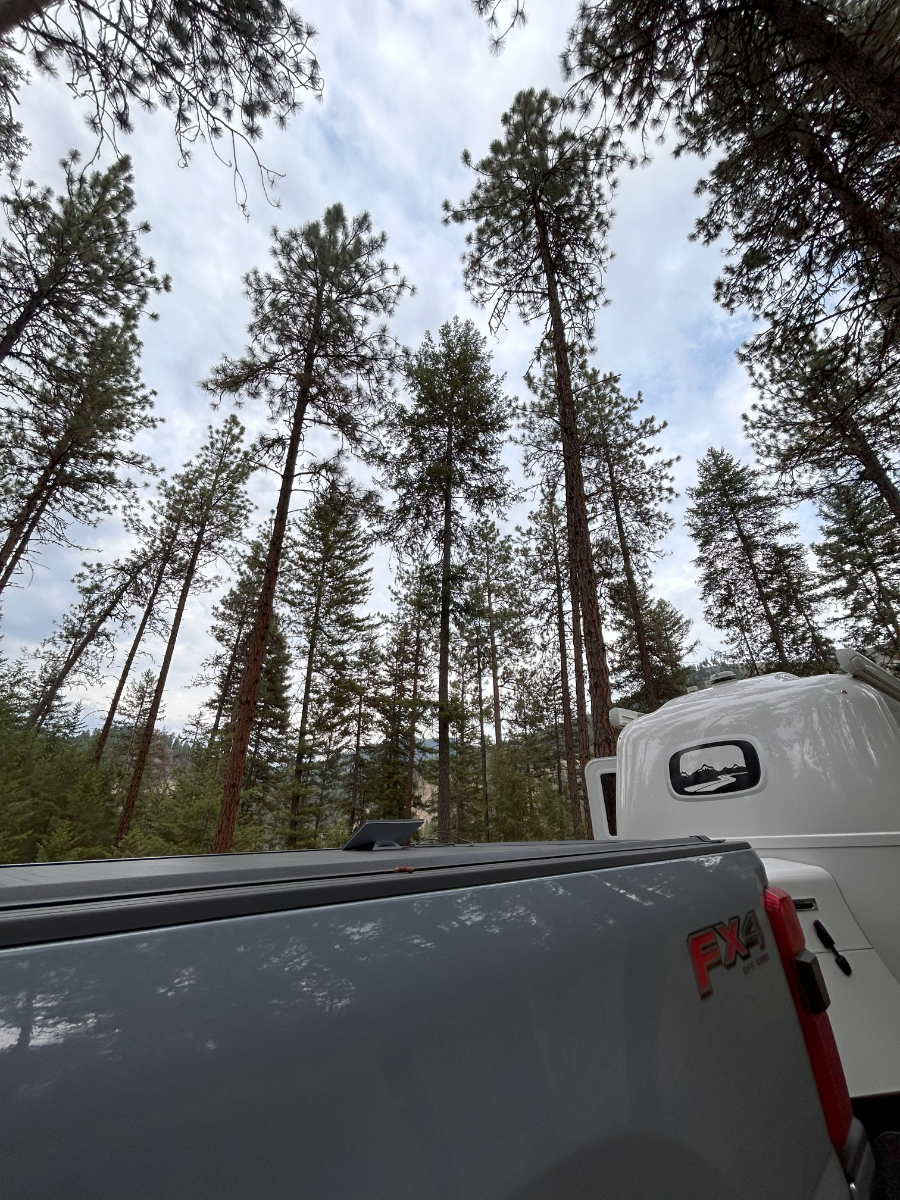
The first use of the mini out in the wild. I was surprised it worked pretty well given the tree cover we had. The setup is super easy and does not seem to care much about how it is pointed. Pull it out, plug it in, open the app, and follow the instructions. The app does all the work to align and celebrate based on where it is pointed. You can see in the images below how it was set up and how many trees we had creating obstruction. The screenshot shows based on that setup how it performed over 60 mins. 2 mins of no single and 7 mins of obstructions. For streaming and video calls not great but for web surfing and some slack messaging it worked great!
1 point
-
Ouch. I went with the mini a few weeks back. Oh well, the smaller size is nice.1 point
-
Mark, Agree with John, would not want to leave the battery door open with the Lithium batteries exposed. Did Oliver install a solar port? Would like to see photos, too!1 point
-
Thank you, Mike! Or perhaps consider a 350A ANL fuse if you want to error on the side of caution (350Ax12V=4200W). I'm not sure why they spec a 400A fuse (4800W)! This is actually double the stated 2400W continuous power output of the MP2. Peak at 2x continuous seems high to me but Victron engineers should know. Certainly, a 250A fuse is not enough for the power needs of the MP2! I also wonder if the Class-T is needed in our application? You already have Class-T built into your batteries which is the most expensive component of your installation. I took a couple courses in electrical engineering, but like y'all, I learned what I know from doing, decades working on old cars, RVs and homes. And we all learn from forums and the OTT Forum has amazing members, helpful, knowledgeable and super responsive! When researching online, I often add the word 'forum' to the end of a keyword search. I join a new forum every time I purchase a new project vehicle! I learned most of this subject from another online forum, when building a from scratch solar/inverter setup in a Bigfoot RV. On the BOCI forum, I became friends with an EE who worked his installation prior to mine and was there to help, every step of the way! Our AZ home came with one 200A panel. Over the years, I've added 4 subpanels! The first was 60A for the spa, running 100' cable from garage through the attic and down. Then 100A in an outbuilding for 220V compressor and woodworking tools. 60A for the kitchen with separate 20A breakers for fridge and extra oven (while running natural gas there for a new cooktop). I removed the electric cooktop, so I thought to use the original 8-3 cabling for having a better powered kitchen! Chris loves it, as she can run two ovens and the microwave without worries and the fridge does not overheat in the summer months anymore (with a 10 AWG feed vs 14 AWG wiring on a 15A circuit along with other wall outlets). Most recently we added a 60A panel for a new (used) Tuff Shed with 30A RV outlet. We trenched the side yard and ran 125 FT of 8-3 direct burial cable. Just some ideas to consider! 🤣 Restoration and enhancement projects have been my lifelong hobby, as I can tell so many here have as well. We have a huge amount of collective tacit knowledge in the regulars here. I've been often asked, "How do you know how to do that?" My usual answer is, "I don't know, but I will when I'm finished." I was able to work a quick effective project here, starting from 3 Oliver owners who came before and posted. I posted my project in great detail for those who sooner or later will have this on their Wishlist. I did not have this on my radar at all, thinking the LiFePO4 investment was too much $$$, until you Mike made it look reasonable and relatively simple! Thank you for that. And thank you @mossemi for your insight here and often! I can see how running 1/0 cables, even doubled, would be an easier installation in boat hulls then the bulky 4/0. Perhaps also cheaper when puchasing large spools.1 point
-
It will be a pain to open the battery door daily and don’t leave the trailer that way with expensive LiFePO4 batteries exposed! Common RV theft is batteries and LP tanks. If you know the parts you need, you could order on Amazon today and get before the weekend. You’d have to be comfortable drilling a small entry hole in your Oliver. Since you’re purchasing a suitcase with integrated SC, all you need to do is run the two wires to the pos and neg buses built into your Oliver. A couple of pics and we could advise. Just a thought. What model suitcase solar did you buy?1 point
-
I think a lot of Victron's thinking is based upon their marine market. I don’t remember if Overland used 2 x 1/0 or 2 x 2/0 cables with the first MP 3000 installation in a LE2, but I’m sure he doubled the cables. He installed the MP under the front dinette seat so the cable run was a little longer and it was easier to run below the floor. Mossey1 point
-
Never took one off, but we installed an OEM curtain traveler track... To remove, unscrew the small stainless screws at the ends of the track. The track has a double sided tape to help secure it to the gelcoat - pull track off slowly, use an orange plastic razor black so as not to scratch the gelcoat. Use "Goof-Off" or a similar adhesive remover for the remaining residue. Clean and wax when done - easy, peasy!1 point
-
That is reassuring. Great research, as always! I think I will order a 400 amp ANL for now and maybe switch to T class when I catch up a little. I do wish I had more of an electrical education. Learning as I go, thanks to the forum members many times. Thanks! Enjoy seeing your take on the install.1 point
-
Many were saying a bad neutral and that’s what you found. The hot output has a current sensor around it. However, the EMS is monitoring input shore power, the hot out, but not the neutral on the output side. Good find!1 point
-
Texas is not a boondocking state, unless you like Walmart. My preference out of SA going west is Balmoreah State Park past Ft. Stockton, then one of the Arizona state parks the next night. I've done a straight run to Arizona State Park for night one, but you have to enjoy 12 hour driving days. El Paso is 500 miles, slightly uphill and usually into the wind. Watch your gas levels. Even on I-10 it can be lonely out there..1 point
-
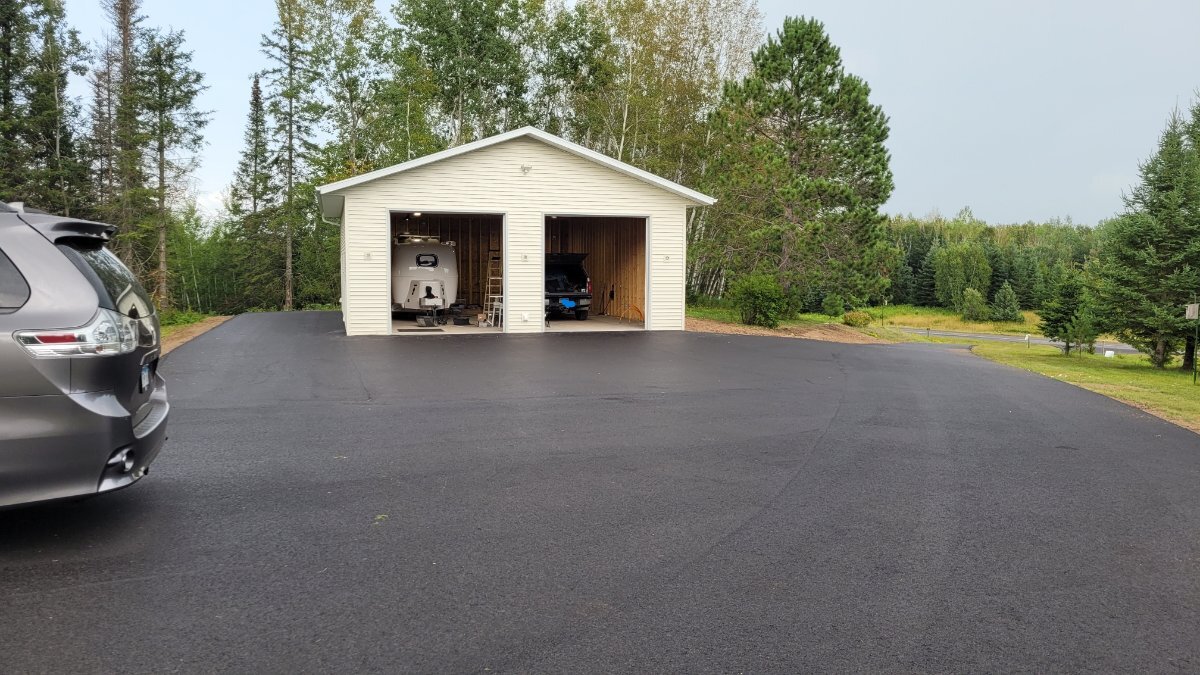
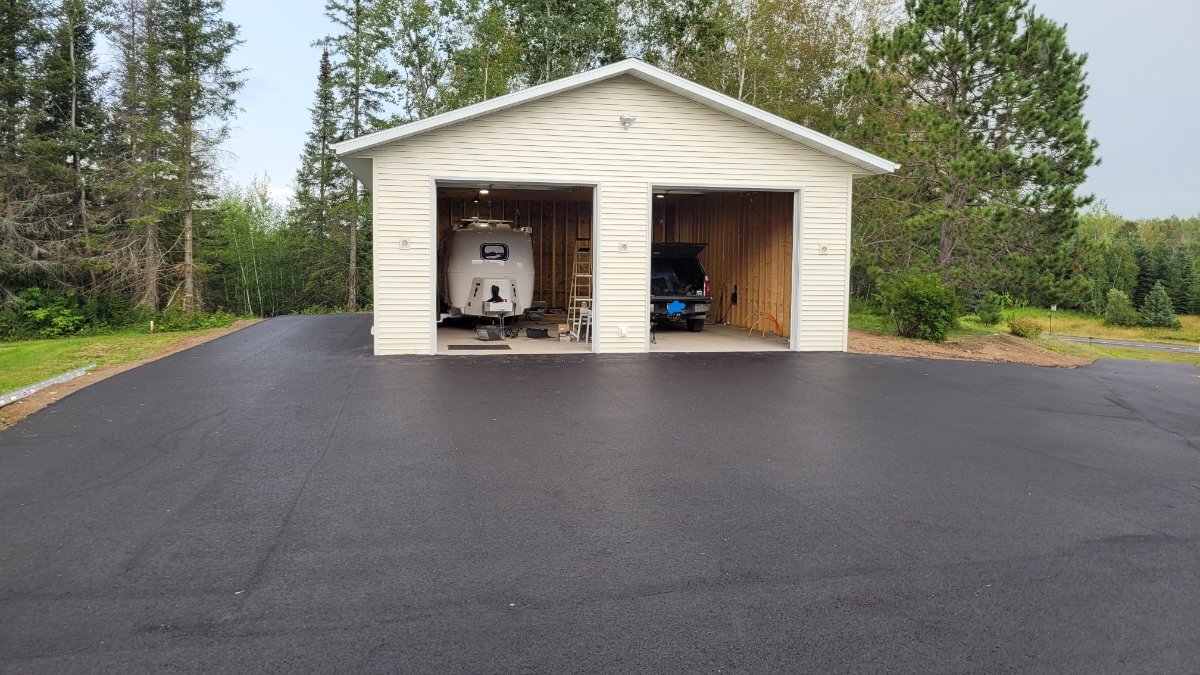
Well, passed rough electrical on the first go round so that's good. Had some coordinating to do as the driveway guys got behind, the service line went under the driveway, and the only electrical inspector for our region was on vacation in Mexico until last week. Anyhow, liking how it's turning out so far. The lights have worked out great, the doors are awesome, plenty of clearance backing the Ollie in. Paving and gutters got done this past week. Now, onto the insulation, finishing, and heating system. The fun never ends!
1 point
-
We installed Bulldogs this year.1 point
-
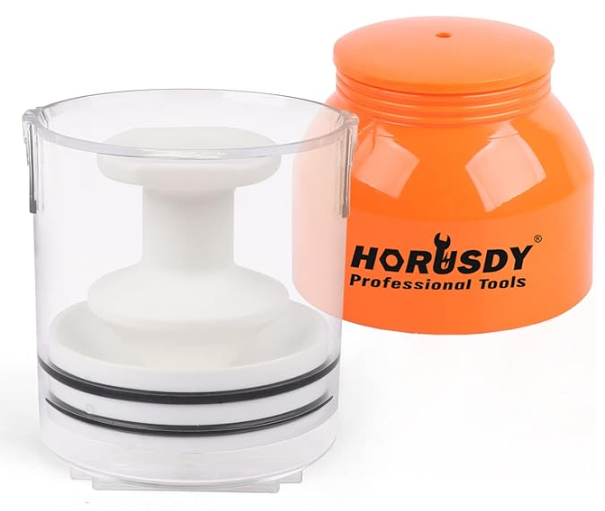
Yes, for sure! I like the simple tool better because the two discs are easy to wipe clean. Less money too. I've had mine for 40 years now. One disc is cracked and it still works. I should likely get a new one: 65250 Universal Bearing Packer | Lisle Corporation1 point
-
Two rolls of paper towels and seventeen pair of gloves, but it's done. This helped me a ton:
1 point
-
Here’s another Lisle product that I am using now to pack bearings. You fill it with your grease gun through the zerk on the stem. A lot less waste than packing in your hand using grease out of a tub. https://www.lislecorp.com/specialty-tools/handy-packer-bearing-packer IMG_2453.mov IMG_2454.mov1 point
-
I realize I'm probably in the minority, but I didn't find that the Redline CV2 lasted any longer than the Mystic or Lucas. I just repacked my bearings last week and the grease looked a bit lacking after only 9000 miles. Much like DewDev, I couldn't find the CV2 readily available locally and it's become a bit expensive online. This go around, I'm trying the Valvoline Extreme on the bearings and zerks.
1 point
-
Those work great to verify a hot leg is live, but it seems like he has that already out to the outlets according to his circuit tester. Someone is going to have to use a multimeter and check voltage from the hot leg to the neutral at each connection point between the EMS to wherever the problem is. My guess is a bad neutral connection somewhere or a bad EMS itself.1 point
-
This is the area of testing where I like to use a non-contact voltage tester. Mossey1 point
-
Now I'm back to @Rivernerd's suggestion. Get a multimeter, or someone who knows how to use one, and follow the electricity's path until you find the problem. Test your home outlet, test the power at the end of the shoreline cable, test the power at the back of the shoreline connector in the trailer, test the power at the EMS input, test the power where it enters the circuit breaker box, test the power coming into the GFCI outlet, test at the AC, and keep going down the line. But this means working around live power and knowing how to use the meter correctly. You might be approaching professional assistance territory.1 point
-
I can't believe I waited so long to do this mod. It was easy! The only problem was trying to fish wires up to the cabinet above the micro for the controller. I did not succeed, so the controller is down behind the bottom fridge vent for now. It was in the high 90s when I did the install and only got down to 75 or so overnight so there was lots of hot air coming out of the top vent, thanks to those Beech Lane fans. Before going to bed I dropped the fridge cooling level down to 6, and it was 37.5 degrees when I woke up. I think I also learned something important. In the middle of the afternoon, while it was still in the high 90s, I put a plastic container with water in the freezer to make a chunk of ice, and I think that made it hard for the Norcold to maintain it's temp. In the future, I'll only do that at night or when the outside temp is lower.1 point
-
Like several others, I use CV2 for bearings and Mystic. kfor the suspension. GJ1 point
-
I got this six-pack earlier this summer from Amazon. Not cheap, but worth it! https://a.co/d/i8OSeF1 Testing by Project Farm: https://youtu.be/ZEiSdZGInm81 point
-
I bought a ten-pack of this 3 years ago and on my 5th tub. Was $7 a tub then, $8 now: https://a.co/d/1t6lys3 I go with brand names at times, but not at 4x cost! This company has good reviews and it’s as good or better than any grease I’ve used, in 45 years of doing brake jobs, where I always pack bearings. Use this in all our vehicles and Oliver bearings and stabilizer jacks. Even better deal if you can get a friend or neighbor to split a case with you!1 point
-
I’ve used Mystik JT-6 since the trailer was new. I use it to pack the wheel bearings also. It’s what they were using at the factory when we picked up hull 313 in March 2018. I think you can get it at TSC. Use a good grease and use it often.
1 point
-
It truly takes a fatal error to blow a 300A fuse (like connecting the battery lead to ground)! You would notice it for sure and generally the inverter would error and shut down first. These are cheap China made breakers, regardless of brand name. I’m surprise OTT uses these for the inverter charger. They used to use ANL or better Class T fuses. The breaker itself is most likely your issue. You can replace it with same brand for $76 on Amazon, or other brands for $20+. I just purchased 2 Class T fuses and holder for $120 plus tax.1 point
-
I'm reading every word of every comment on this topic. I got my Beech Lane delivered today, and I'm hoping to put it in tomorrow. I was recently towing the Ollie in 113 degree heat and the poor Norcold wasn't so cold. I'm hoping the install goes as smoothly as some of you have described. I'll also take pics and provide a follow up.1 point
-
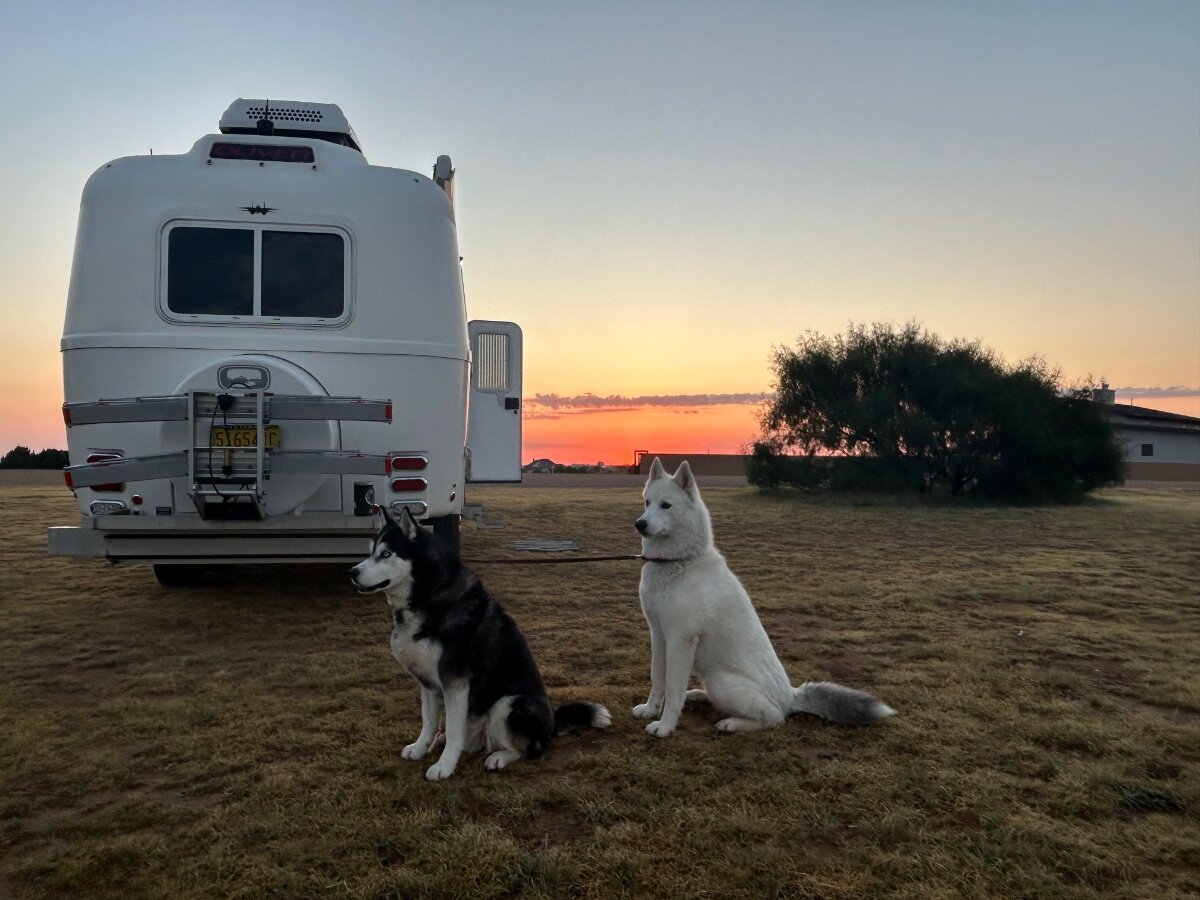
A couple knuckleheads enjoying a sunrise near Palo Duro Canyon SP this morning.... Then we had some visitors... IMG_2333.MOV Gotta love 'em! Cheers! A & D
1 point
-
At 24,000 miles on our OE2 I chose to replace the Monroe shocks when doing springs.. All four were still functioning with no leaks or adverse signs of wear. I would consider that 5 seasons or 24K miles would be a reasonable "end of life" goal. GJ: Crazy Horse adds: "Yea on the goal, but maybe early just for highway use. But for sure not for the boondocker five-leafer herd". CH1 point
-
I picked up this hard case from HF awhile back and decided it was now going to be storage for the Mini while we are wheels up in the bed of the beast. If nothing else it keeps it all organized.
1 point
-
I always download movies to my phone before we leave on a trip, but still haven't found a way to stream them to our smart TV without a high speed internet connection. I've tried Wi-Fi direct to the TV, screen mirroring through a Chromecast dongle, and using a USB to HDMI cable from the phone to the TV but all I ever get is a black screen with sound only. Seems like Netflix and Amazon Prime have all those methods locked down. If anyone has a work around I'd love to hear about it!1 point
-
Forgot to add the picture
1 point
-
Love the duct tape! Why not use a closed cell foam yoga mat to avoid soaking up water or needing to add the clear layer? Per Google: Closed-cell mats are thinner and more water resistant, and don't absorb liquid (yes, that includes sweat) as quickly. These are generally more porous than thicker mats. Thicker, spongier yoga mats tend to have an open-cell construction, so they soak up more liquid (sweat) which also means they retain more bacteria.Mar 11, 20221 point
-
Thanks MAX Burner, I think I follow you. I see where you have dremeled out the receiver. I think I'll give this project a try. Question for the community...can I leave the Oliver factory fan setup as installed and just find a power source to connect the new fans. And then just set a temp on the Beech remote control that is slightly less than the value that turns the Oliver fan on so that maybe the Beech fans will keep the Oliver fan from ever coming on? I'd really like to avoid any rewiring of the original setup..an electrician I AM NOT! Thanks for all the help, John1 point
-
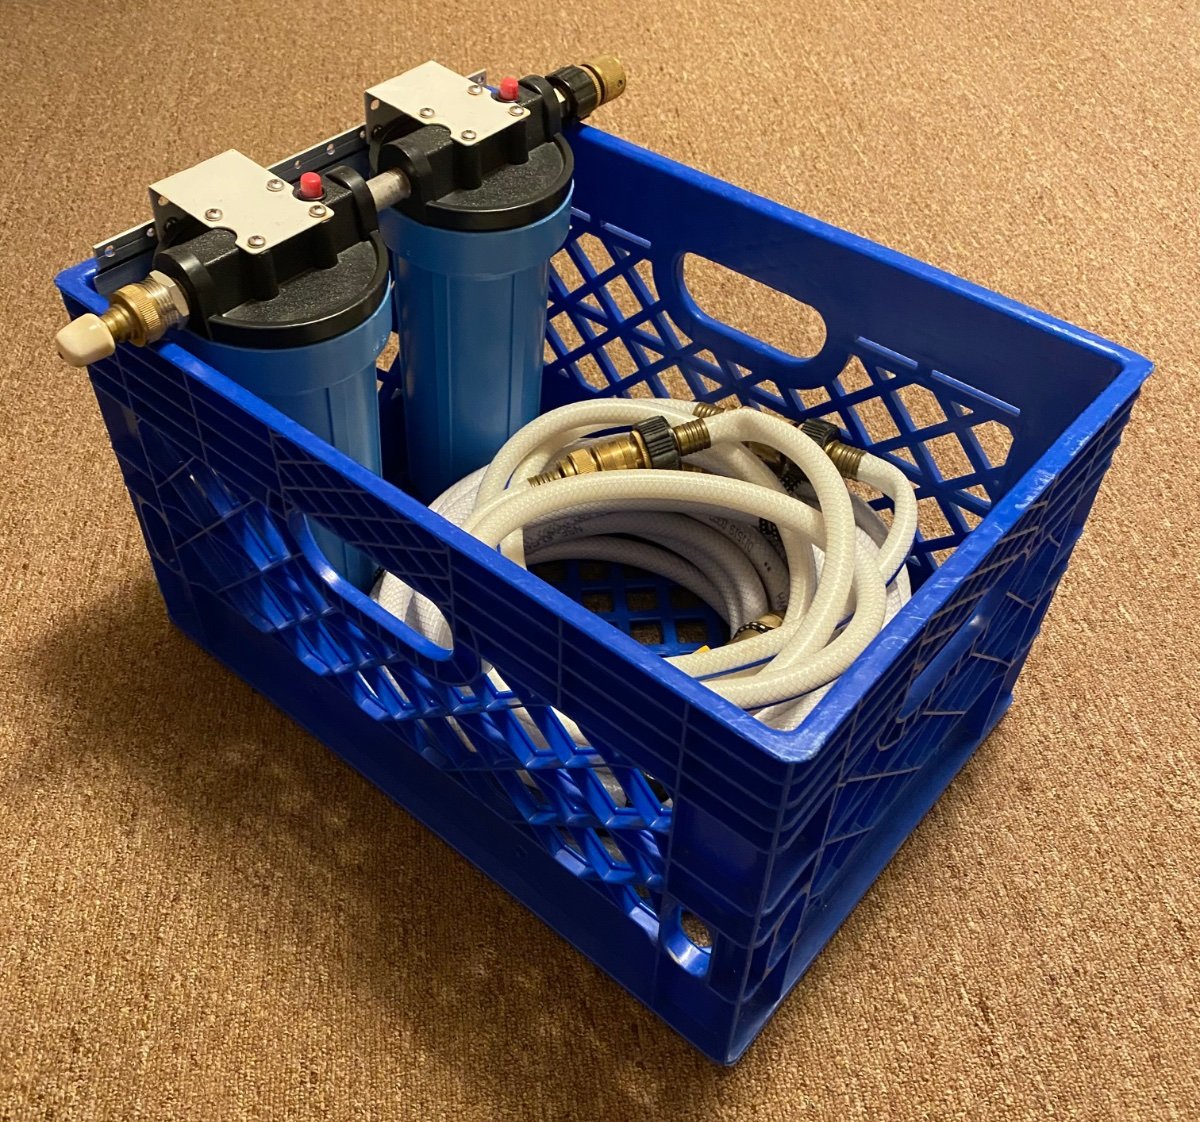
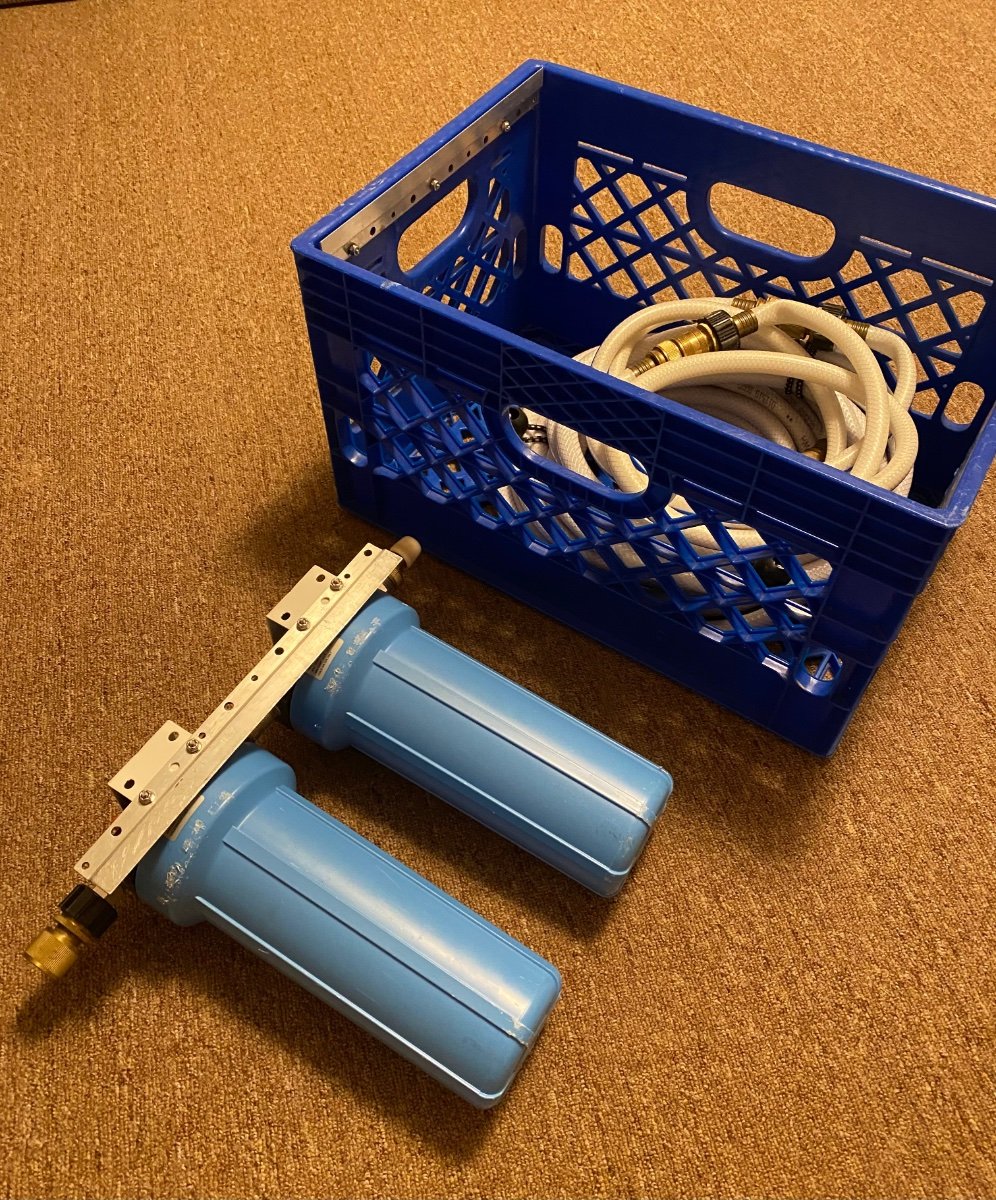
I built a similar 2 stage filter system but mounted it in a standard 6 gallon milk crate. All hoses, regulator and fittings store in the crate and the whole thing slides easily into the basement storage area for travel. The filters are mounted using Camco filter mounts attached to aluminum “Z” hanger picture hanging brackets (one bracket on the filters and one bracket screwed to the milk crate) so the filter assembly lifts out to do filter changes. Quick connect fittings on everything so setup at the campground is quick.
1 point
-
Your question sounds straightforward but the answer is complicated and multi-dimensional. Cooling a hot trailer to the preferred set temperature is a function of the capacity of the AC expressed as the hourly maximum Btu's of heat that the AC can extract from the inside of the trailer versus the heat gain into the trailer from the outside. My AC is rated at a maximum of about 13,500 Btu/hour so I will use that as an example. If the trailer is absorbing heat from the outside (heat gain) at a rate greater than 13,500 Btu/hour, than the air conditioner will not be able to cool the inside of the trailer at all. It will be doing well just to keep the inside from heating to warmer than the outside. If the outside temperature is 95 degrees and the heat gain is 7,000 Btu/hour, then 7,000 Btu/hour of AC cooling capacity will offset the heat gain and the remaining 6,500 Btu of cooling capacity is available to actually cool down the inside to the preferred temperature setting. If the outside temperature is 105 degrees and the heat gain is now increased to 10,000 Btu/hour, then there is only 3,500 Btu/hour of cooling available to actually lower the inside temperature and it will take longer to cool the inside. As the inside temperature falls relative to the outside temperature, heat gain will continue to increase. Heat gain is a function of the several factors, the most important being the difference between the outside temperature and the inside temperature. The good news is that compared to most trailers, the heat gain in the Oliver is on the low side if the user cooperates. This lower heat gain is a function of many design attributes including the insulation between the hulls, the white outside color, the tinted windows and the "tightness" (very few penetrations of the hull) that minimizes the number of outside air exchanges per hour. To get the most out of your air conditioner, you must park your trailer in the shade, make sure all windows and vents are closed tightly, and don't open the door unnecessarily. If shade is not possible, extending the outside awning can help reduce heat gain in the trailer somewhat as can closing window shades. The speed with which one can actually cool down a hot trailer is a function of how warm the inside is to start with (stored heat in the thermal mass of the trailer itself) and the excess cooling capacity of the AC remaining after offsetting the ongoing heat gain from the outside. There are things you can do to achieve the best performance upon arrival on a hot afternoon. After minimizing heat gain to the extent possible by parking in the shade, etc. , make sure that the trailer is closed up as tight as possible by closing all windows, hatches, doors and vents to the outside. Then turn on the AC and set the thermostat down as low as it goes, and open all the inside vents on the AC itself to maximize airflow through the heat exchanger. You will want to turn the thermostat down way low because you want the compressor in the AC to run continuously until the trailer cools to the desired temperature after which you can reset the thermostat higher to hold the desired temperature. I have concluded the Dometic thermostat in my Oliver does not work very well. It will cycle the compressor off and on unnecessarily, even when the inside of the trailer is still well above the set temp. By setting the set temperature down to say 60 degrees initially, the hope is that the compressor will run continuously until the trailer is cooled . Any cycling will greatly increase the time it takes to cool the trailer. While the trailer is cooling down , stay outside if possible and try not to open the trailer door unnecessarily until it has cooled down inside. A human body adds several 100 Btu's an hour and two persons inside can easily add 500 Btu's an hour to the cooling load. Opening the door several times can do the same. Once the trailer has cooled inside to your desired set temperature or below, you can move inside, raise the thermostat setting to your preferred set temperature and the AC should cycle normally to maintain the inside temp you want.1 point
-
When you "cover" the solar panels the rays of the sun do not hit the cells of the panels and, therefore, they do not convert sunlight into electricity. Having said this - if you go outside and put a sheet over your head and look towards the sun, you will most likely be able to "see" a bit of the sun through the sheet (of course assuming that the sun is shining 😁). This shows that depending on the density of the material covering the panels - some solar energy (light) is likely able to get through the fabric that is covering them. I don't know exactly how much is getting through your CalMark cover, but, I'm certain that it is not a lot. Perhaps it would be enough to keep parasitic draws at bay but most likely it would not be enough to continually power much else let alone put any significant charge into your batteries. Bill1 point
-
IMPORTANT TECHNICAL SERVICE BULLETIN ISSUE Potential Internal Battery BMS Damage MODELS IMPACTED 2021 – 2022 Oliver Legacy Elite II models equipped with (3) Lithionics Lithium 130AH Batteries & Xantrex 3000W Inverter INFORMATION Oliver Travel Trailers was alerted that under certain conditions the Lithionics internal BMS could be damaged if the full load for inrush amperage to the inverter is loaded on a single battery. RESOLUTION Owners with impacted year models should follow the Lithionics approved method for the proper restart/reboot sequence of the batteries and inverter to ensure all batteries are ON before turning the inverter ON. NOTE: The inverter is also a charger and when it powers up while connected to shore power this is utilizing the charger side. The above referenced potential condition exists only when the inverter side is turned ON. PROPER RESTART/REBOOT SEQUENCE If the inverter is OFF, drained or has entered (LBCO) Low Battery Cut Off and any or all of the batteries are OFF (no LED light on battery), then the following procedure should be followed: 1. ENSURE THAT THE INVERTER IS TURNED OFF 2. UNDER THE STREET SIDE BED ACCESS PANEL, SWITCH THE INVERTER CIRCUIT BREAKER TO THE OFF POSITION. PRESS THE RED BUTTON Note: This will cause a communication issue for the inverter remote display and requires a proper restart sequence to ensure proper communication between the inverter and remote display. (Error 20) 3. TURN ALL BATTERIES ON 4. SWITCH INVERTER CIRCUIT BREAKER TO THE ON POSITION. PRESS THE LEG BACK INTO POSITION 5. TURN THE INVERTER ON AT THE INVERTER 6. VERIFY COMMUNICATION SOFTWARE HAS LOADED: U3 01 06 A. PRESS THE UP/BATTERY BUTTON TO SCROLL THROUGH 7. TURN THE INVERTER OFF AT THE INVERTER 8. TURN THE INVERTER REMOTE DISPLAY ON View a PDF version of this Technical Service Bulletin here For questions or assistance please contact the Oliver Travel Trailers Service Department. 228 Industrial Ave, Hohenwald, TN 38462 Service Phone: 1-888-526-3978 | Email: service@olivertraveltrailers.com1 point
-
The settings inside the inverter are dependent on the type of batteries, number of batteries, incoming AC power, and how it is used. Below is a link to the Xantrex Inverter Settings article for best setup. You may find that some settings require a change as not everyone uses their camper in the same way but we have reviewed these settings and set them based on majority rule and least amount of callbacks for issues. You may have to change some of the settings based on your current location, current shore power connection, or if you make a change to your battery bank. https://support.olivertraveltrailers.com/portal/en/kb/articles/xantrex-inverter-settings If you need assistance changing your settings please contact the Oliver service department. If you are able to download the Xantrex App and Bluetooth connect to the inverter remote it is much easier to change the settings. How to connect via Bluetooth is included in the article link above.1 point
-
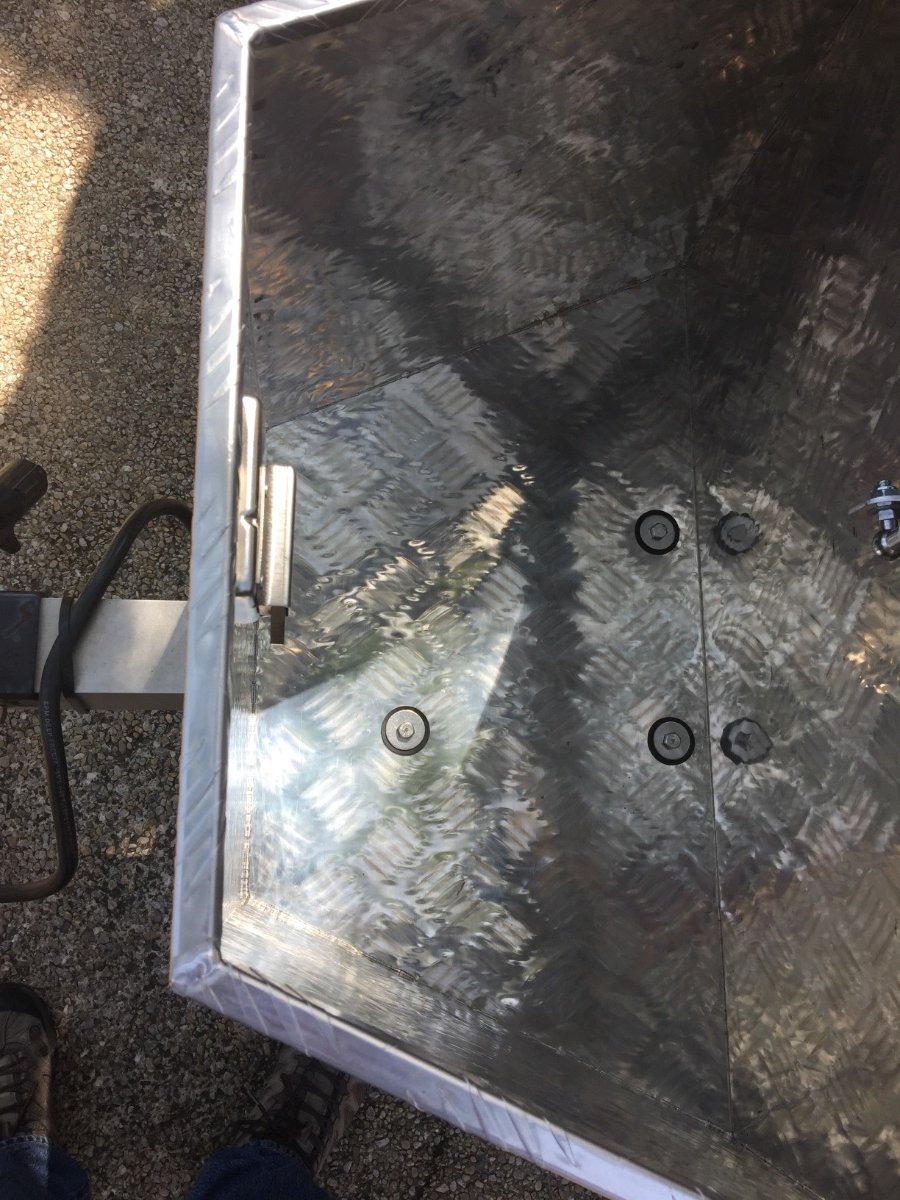
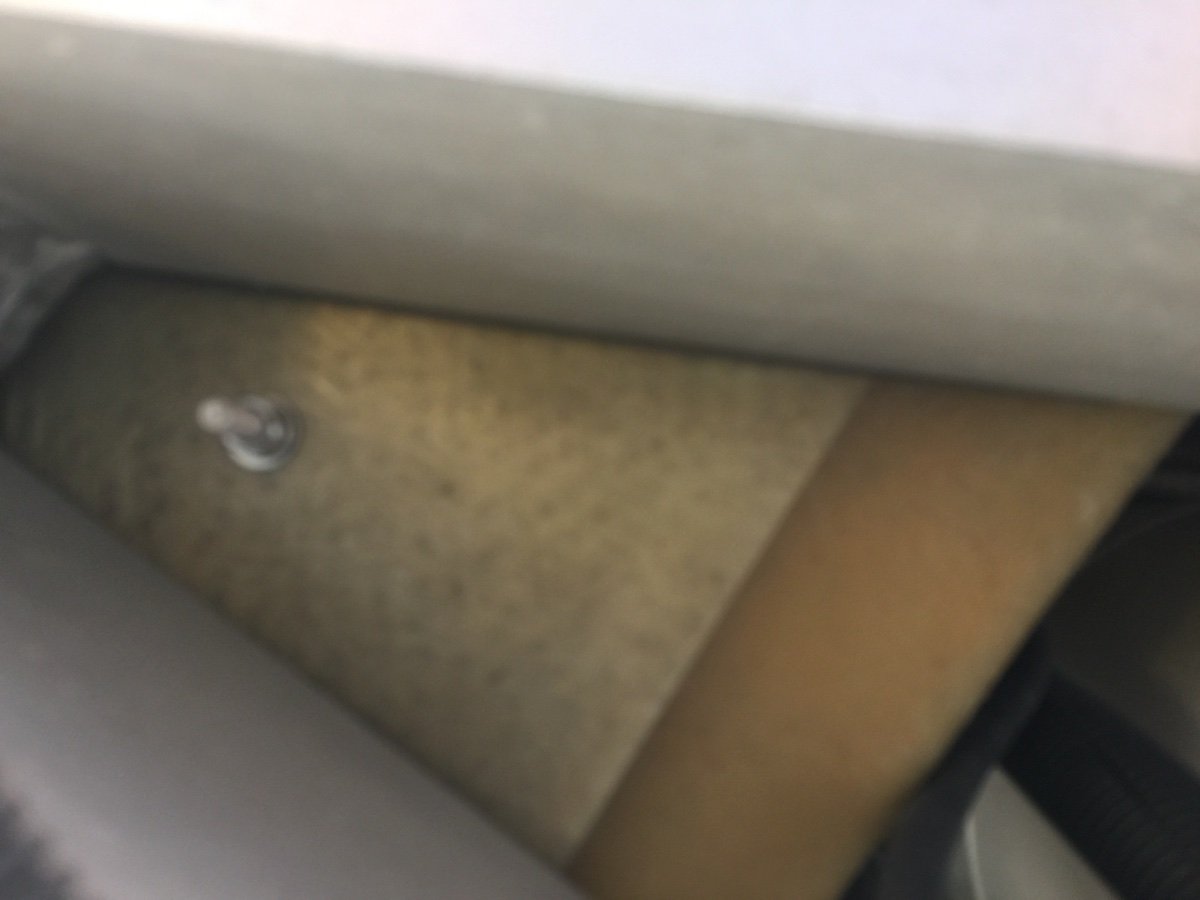
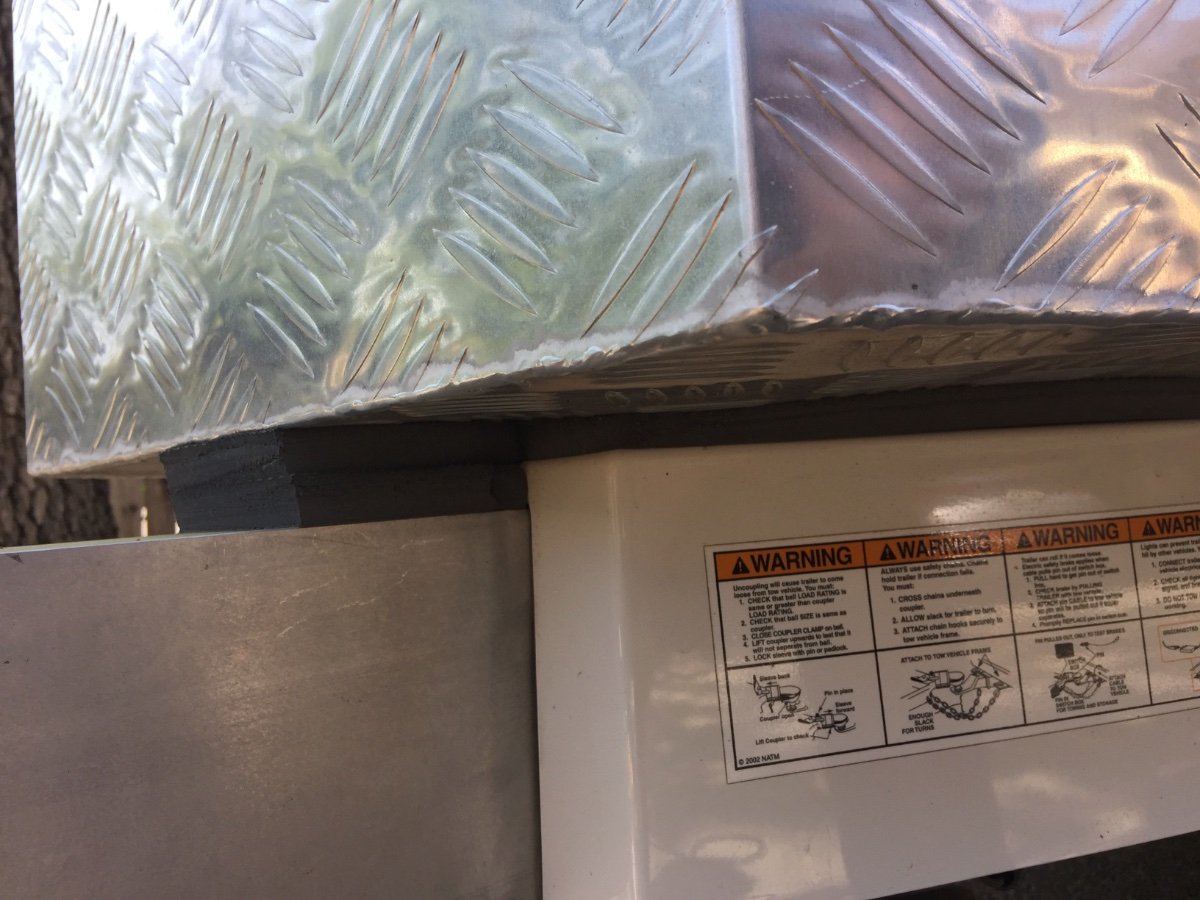
My installation may not win any awards, but it has worked well for the last couple of years. I had some of those interlocking foam mats that I cut to provide a surface under the box. One thickness on the fiberglass area, and two thicknesses on the aluminum tongue. I got some stainless steel bolts and nuts and some rubber washers from Home Depot. I drilled three holes through the box and the fiberglass in front of the propane tanks. I used the Home Depot hardware to secure the box with the foam mats underneath. It has been rock solid ever since. I cut a piece of the foam to fit on the bottom of the box to fit over the hardware. Here are a some pics of the holes I drilled.
1 point


.thumb.jpg.e34bf01ef7f7d5e99ad31856d45afbeb.jpg)


-
Recent Achievements
-


")


")


")

