Leaderboard


Popular Content
Showing content with the highest reputation on 06/27/2023 in all areas
-
Timely topic, just went through this on both my TV (F150) and the Elite II. Had Les Schwab install the Vredestein LT Pinza AT's on both units but here's the odd part. They insisted on keeping the PSI on truck the same as the door sticker which was 35 front and rear but a week later when they installed the same tire on our Oliver they ran them at 80 PSI. WTF, go figure. I am currently running the truck at 45 PSI and Oliver also at 45 PSI. There just isn't enough load within the Oliver to run them at a higher PSI IMO. Also worth pointing out, after getting both sets of tires installed I also ordered a TPMS. Initially installed them on the truck, took a 60 + mile drive on the interstate and while it was a mild day 70's for temps at no time did the PSI increase more than 5 points. Consistently the tires on the side that faced the sun ran 1-2 PSI higher than the shady side. Granted I was not carrying a load and it was not hot temps but thought it to be a fairly good indicator of adequate PSI for the truck. For those who would like to delve into this more can't recommend the following link enough: https://tirepressure.com Lots of excellent information, calculators etc on this website regarding tire pressure for all vehicles and types of tires.8 points
-
Everyone needs to pull up their particular tire specs sheet, you know, the one with the inflation chart to weight load chart, and follow the manufacturer's recommendations. Everyone saying they run between 45 and 55 lbs are doing it right. It dumbfounds me how Oliver AND even tire shops are maxing out the tire pressures on a TT, but yet not the tow vehicle. Like @routlaw indicated, how the heck does their logic work? LOL I have brand new Michelin Agilis CrossClimate #72022 (225/75R16) and I run them now at around 48 to 50 PSI. (I'm conflicted between 45, which is still well above what I'm hauling, and the traditional 55 PSI). LOL. So I chose 48-50 PSI. It might be me, but I felt like it towed just a tad better just below 50 PSI, but again, I still do not have the Dexter EZ Flex suspension upgrade installed. Maybe this Fall I'll get time to put them on along with new break assemblies.5 points
-
5 points
-
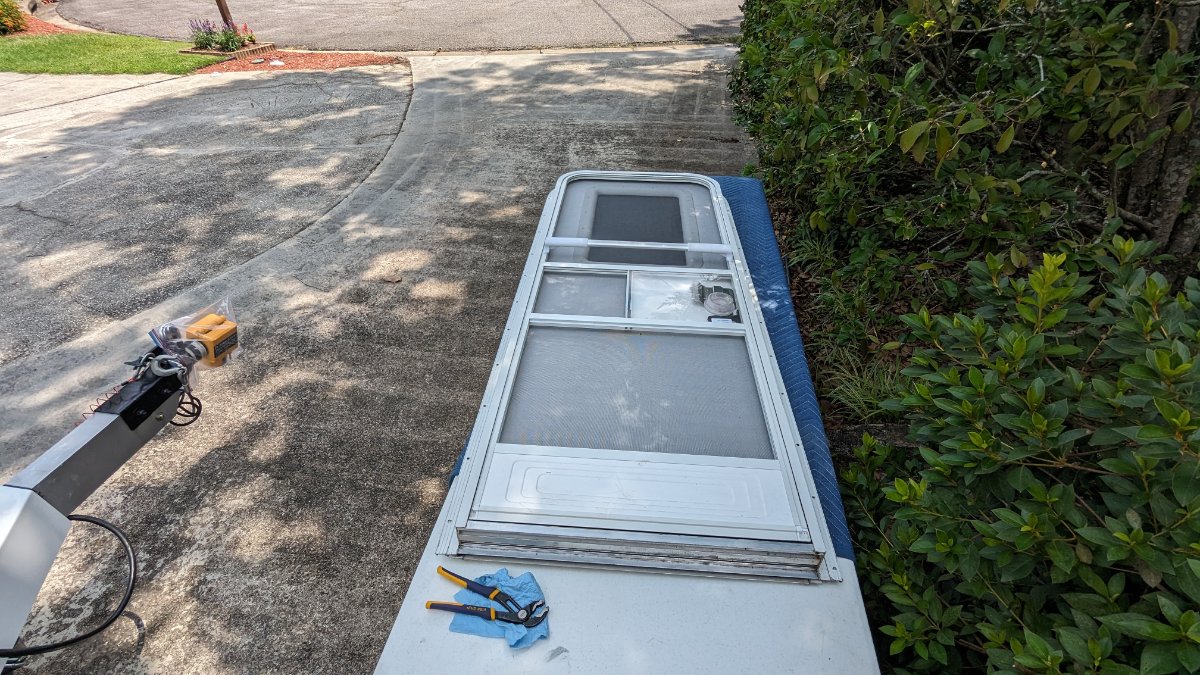
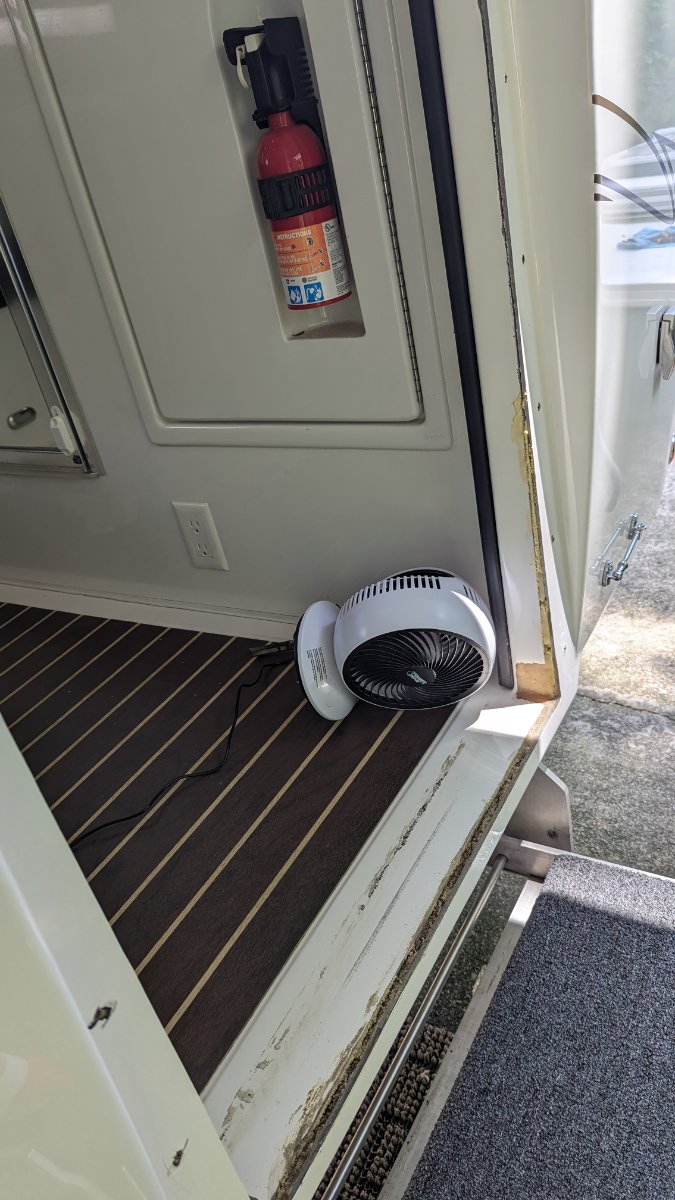
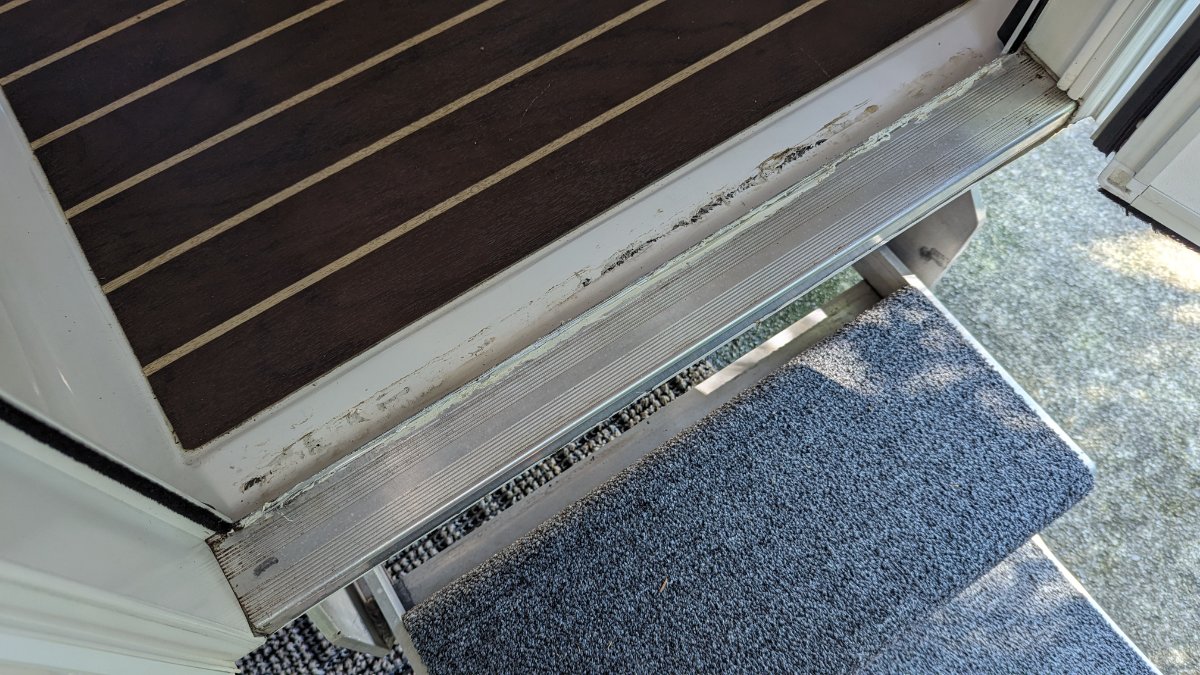
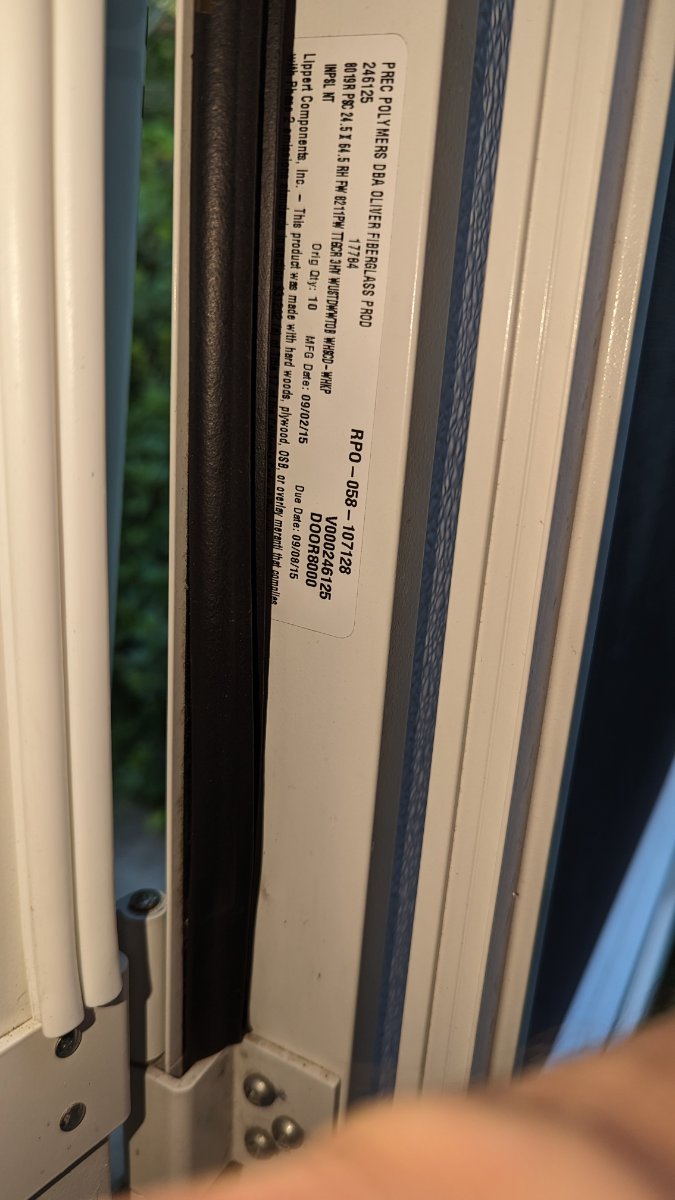
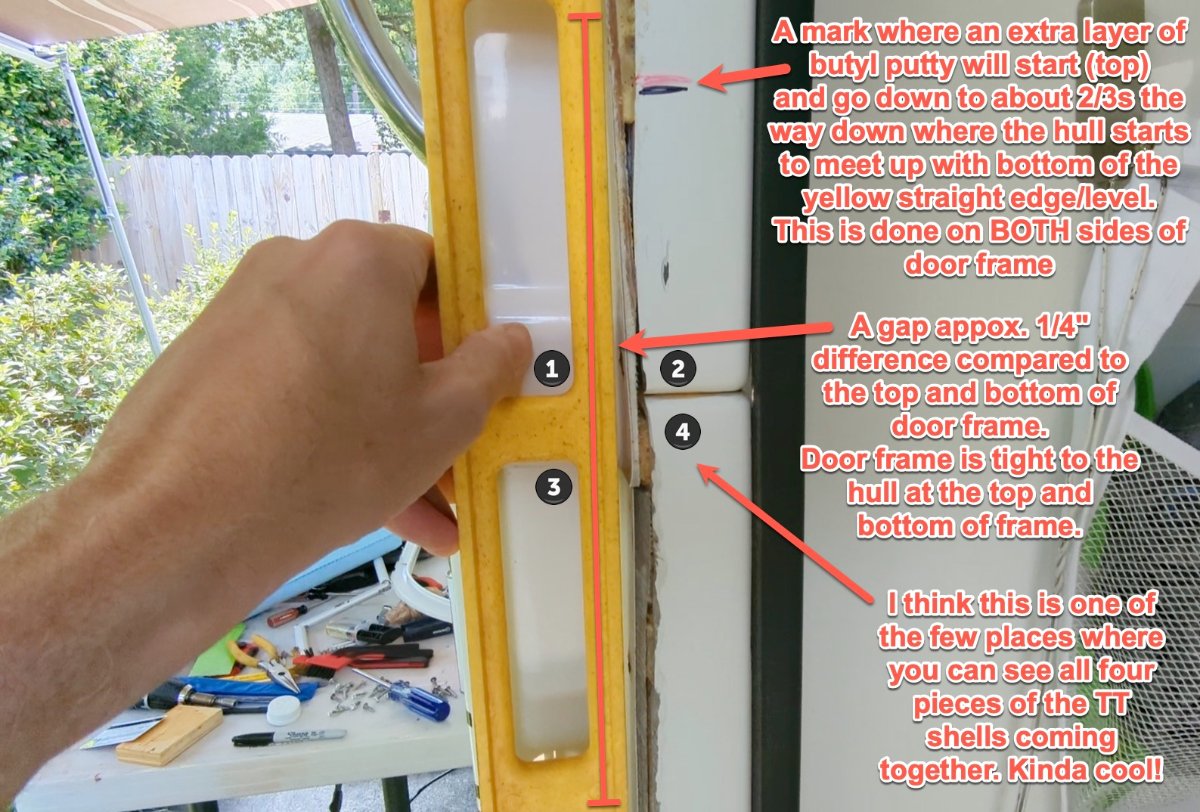
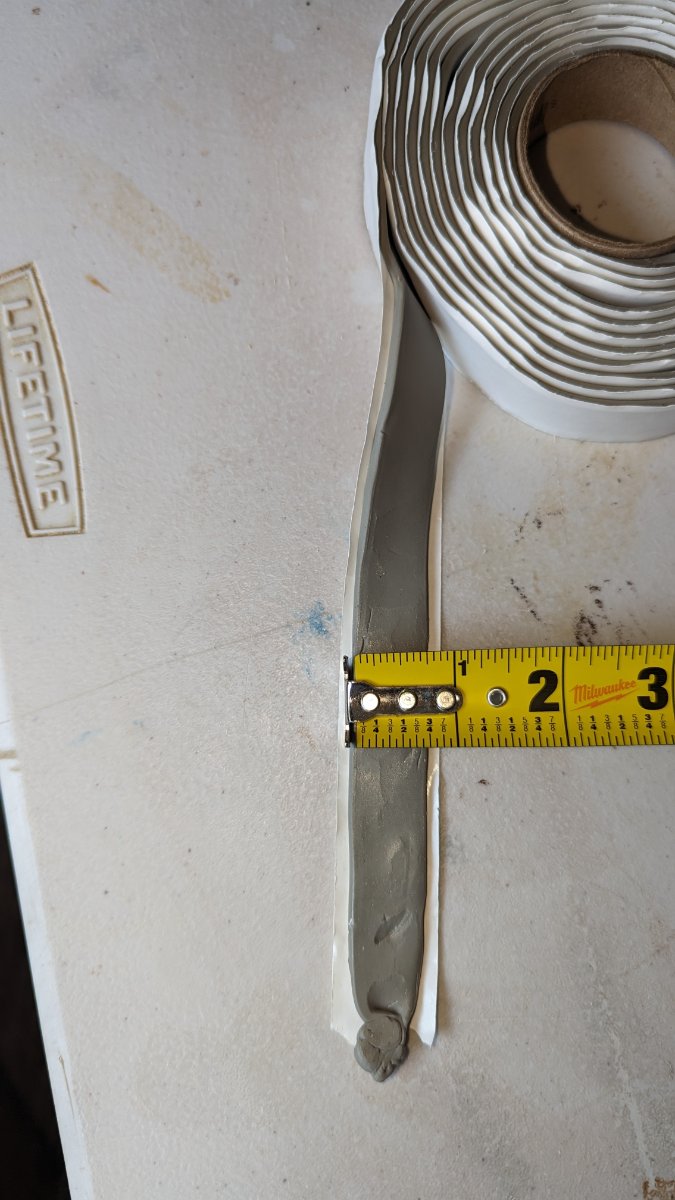
Well, after a year or more of using towels to soak up rain water, I finally got the nerve up to take off the walk-in Lippert door from the trailer. The sealant putty behind the door frame, where the screws go in, had failed and leaked bad. This was an easy job! It only took me three hours and most of that time was prep-work and clean-up of old butyl tape (putty). I have a bunch of video clips to put together to make a YouTube video of the process, but I'm finding it difficult to organize everything. I need to re-shoot a better intro. I'm still learning. Anyways, the door & frame came off WAY TOO EASY. It appears that someone before me attempted to repair the leaks (left & right sides), but they did not cleaned off all the original butyl sealant/putty. Don't be lazy. Clean everything like new. Also, I used two layers of butyl tape in the middle area of the door frame, on the left and right sides of the door frame, due to the distance between the yellow straight edge (see picture) and the curved pieces of hull and where they meet up. I used a plastic scraper to take off the heaviest of old butyl tape from the hull and the door frame itself. I then used 3M adhesive removal and a rag to get the surfaces perfectly clean. (Wear gloves) Everything went back together quick and easy, no issues at all. I waited 18 hours before performing a leak test, to ensure all putty had warmed up in the sun and "squished" around as needed. I've done a heavy, heavy leak test and it's gone through one heavy, blowing rain storm and another lighter rain since completion, all without a single drop inside. YAY ME! You don't know how happy I was to see that I did it better than the last guy. The original putty(s) looked really bad and it did look like someone attempted to address the issue before I purchased the trailer. What a crappy job they did. Shaking my head. Also, in those middle sections of the hull, where I doubled up the putty, I noticed that old putty was not even remotely "squished" in by the door frame, indicating there was air gabs between the putty and the frame, or the hull. THIS WAS NOT A DIFFICULT JOB. I should have done it sooner! Many of the screw holes were too large for the screws used. Really, there were about 10 of the 23 screws which could have been removed by hand or simply pulled straight out of the holes. I Epoxied the worst of the holes and re-drilled. I also added a handful of new self-tapping screws to ensure the door frame snugged up tight to the trailer where needed (not in the middle sections of the left & right door frame). Remember, the door frame will not really "bend" towards the hull due to the door frame itself being so stout and with right-angles, hence the need for doubling up the putty in the middle, where the hull was too far way from door frame's edge, where the screw holes are located. As some of you know already, this door, I think, is custom made for Oliver, as my door did say Lippert, but the sticker essentially said, made for Oliver, mine was from a lot of 10 doors. I looked on the Lippert web site and I did not find the same dimensions of doors as Oliver uses, or I'm measuring wrong. The fan in the attached picture is where I was drying up the spray foam between the floor and the outer hull. Oliver used foam as a filler, likely to reduce movement, but my foam was soaking wet with rain water, so it sat and dried while I worked on everything else. Again, if your door leaks, but is not damaged and does not need replacing, this is a super easy job, and likely if you did need a new door and might be able to have it shipped from Oliver, it would still be easy. I say that because someone on Facebook just mentioned their door got damaged in a wind storm recently. This is a one-person job too, unless someone wants to help clean up old putty from the hull or door. That would save a lot of time.
 4 points
 -
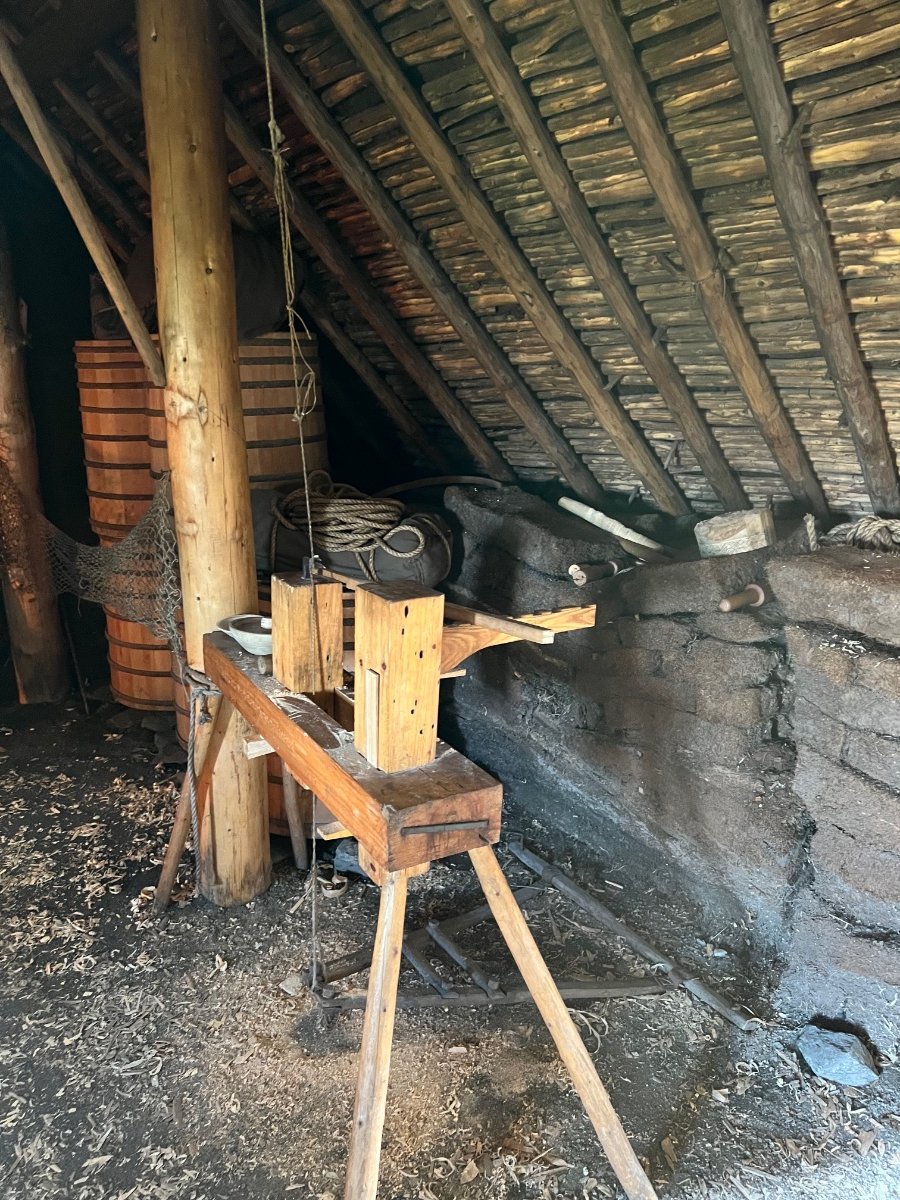
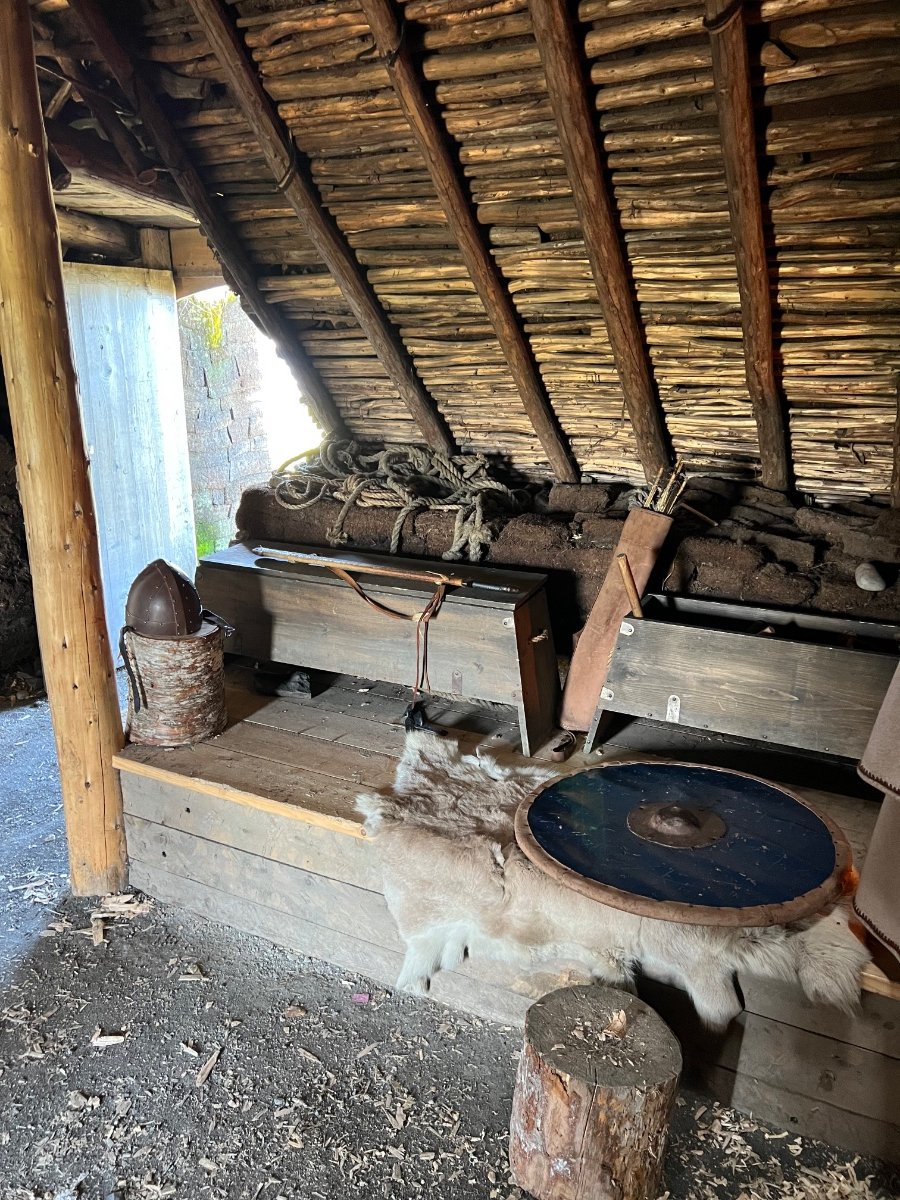
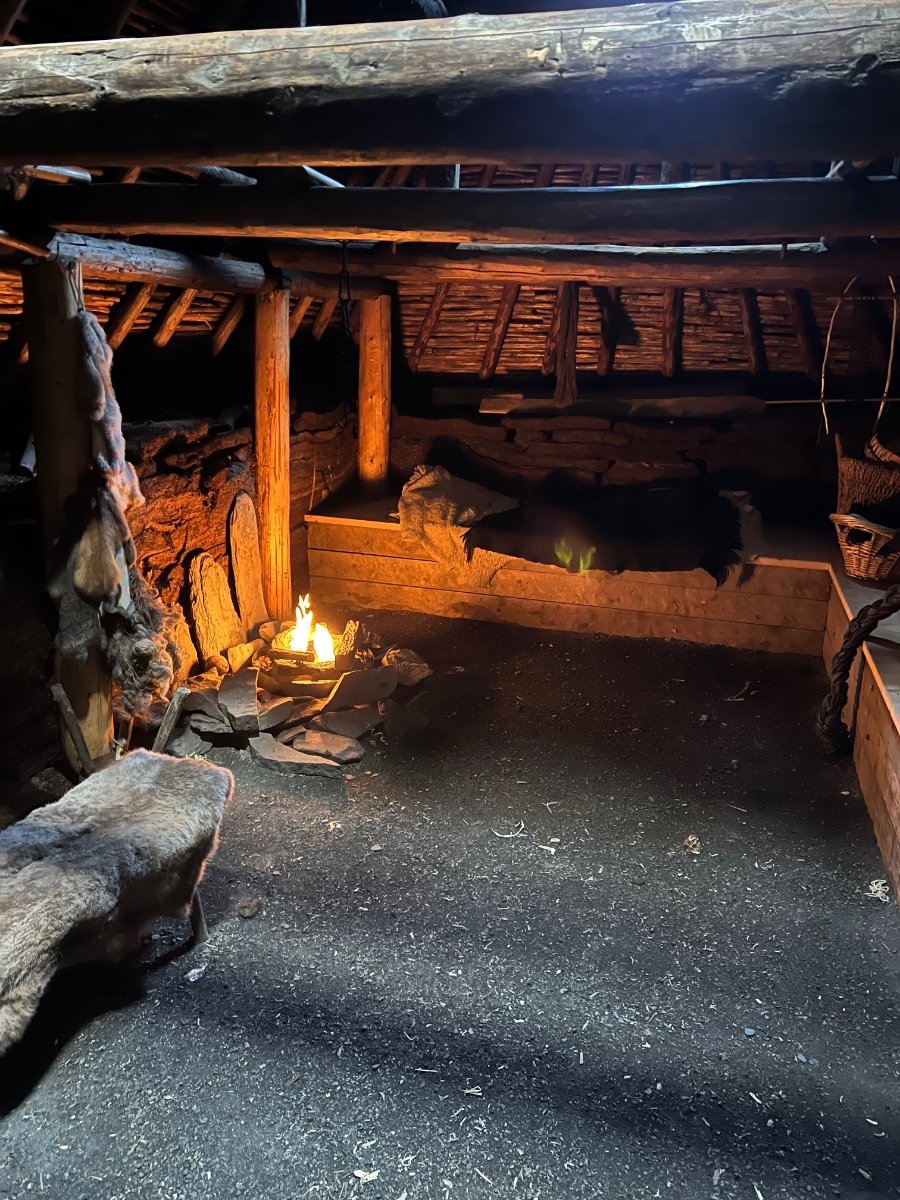
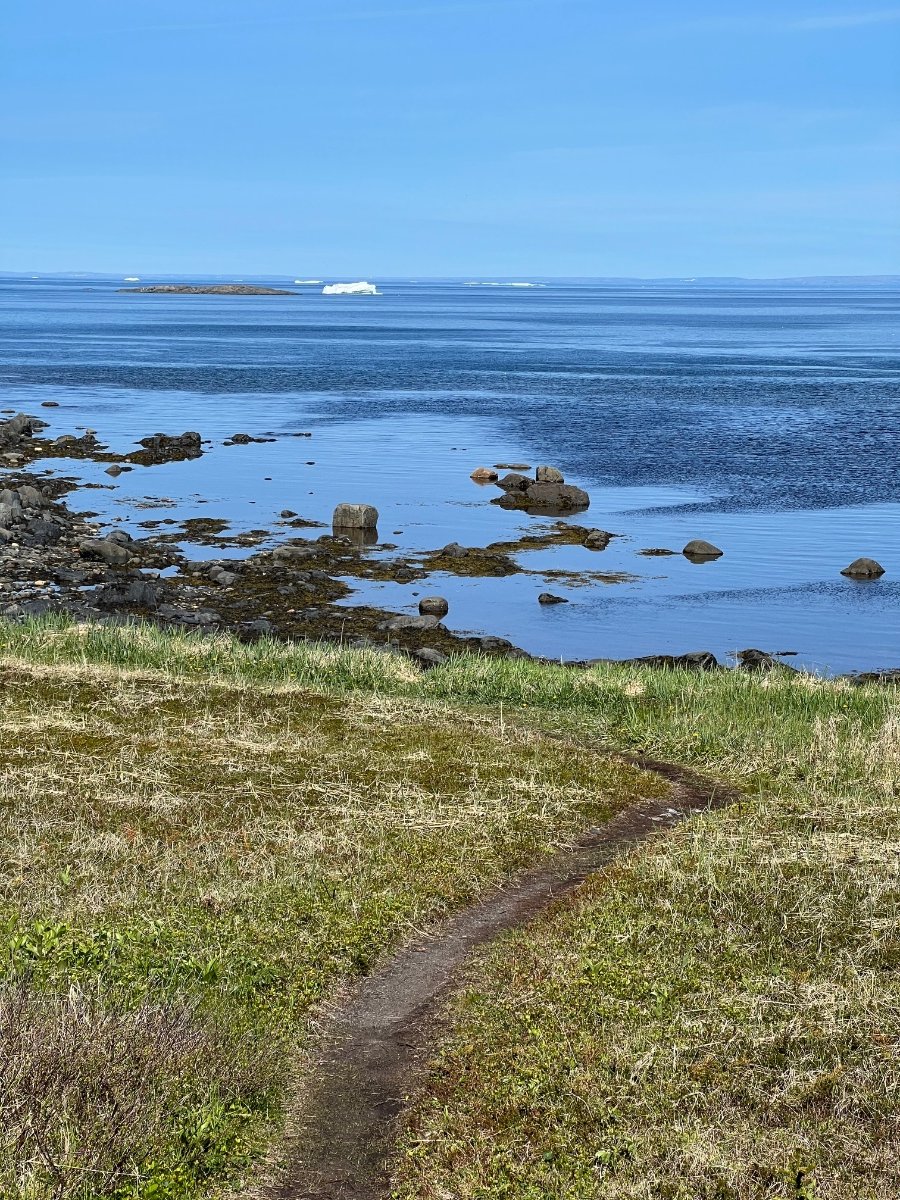
I agree, cracks me up when I see a potholes ahead sign when you spent the last hour avoiding them. We spent today at L’ANSE AUX MEADOWS Here is the view from the Viking village
4 points
-
As several above owners have hinted, Champion has many generators and the one you want is their inverter generator. Their hammer mill older technology will get your head on a pole at most boondock sites and RV parks. GJ3 points
-
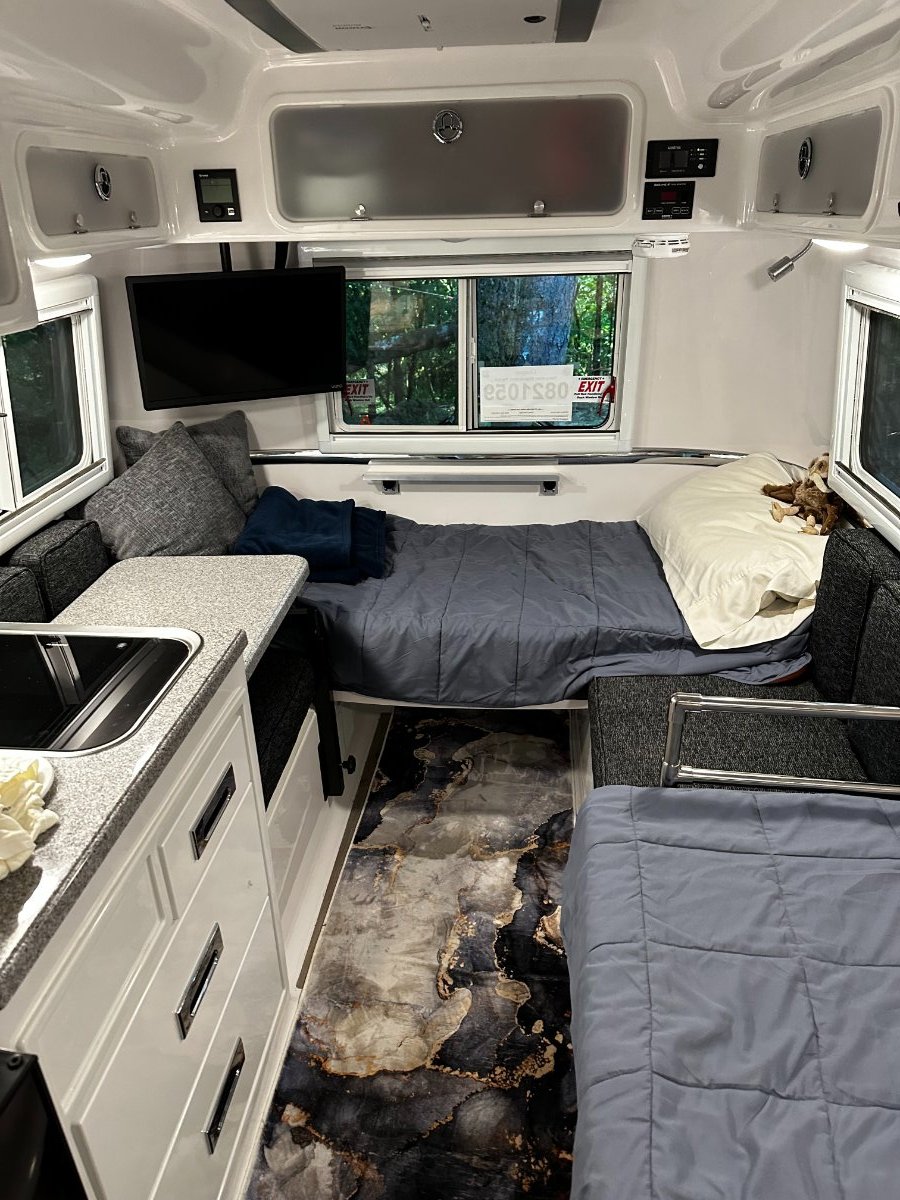
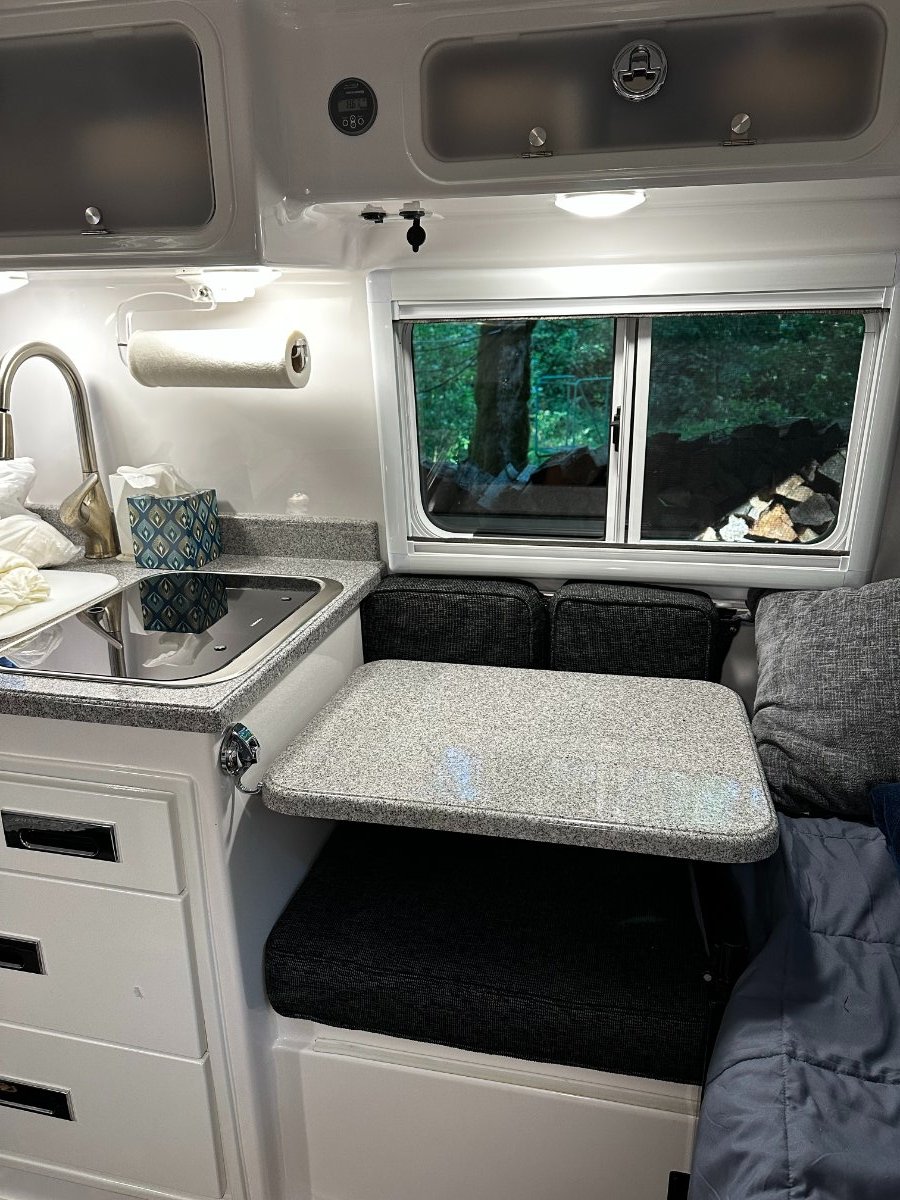
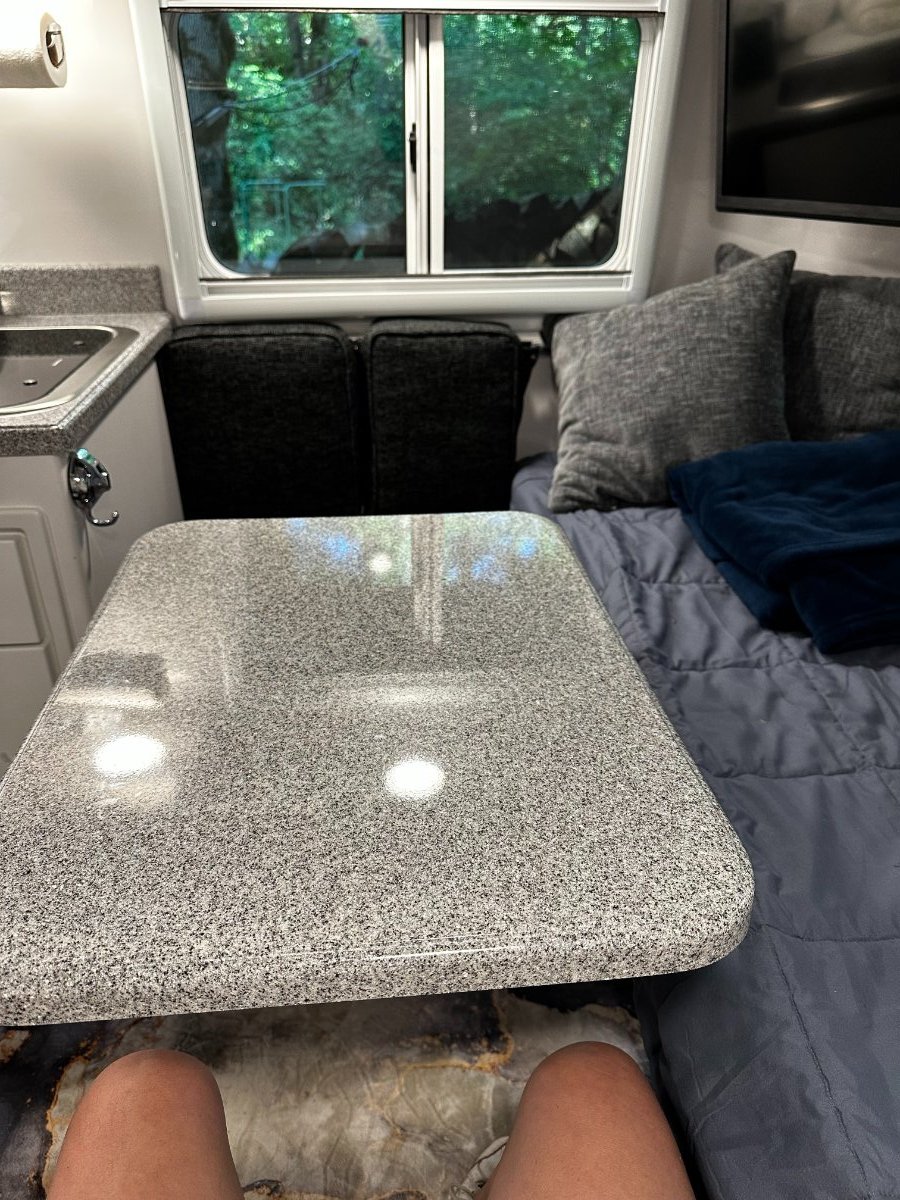
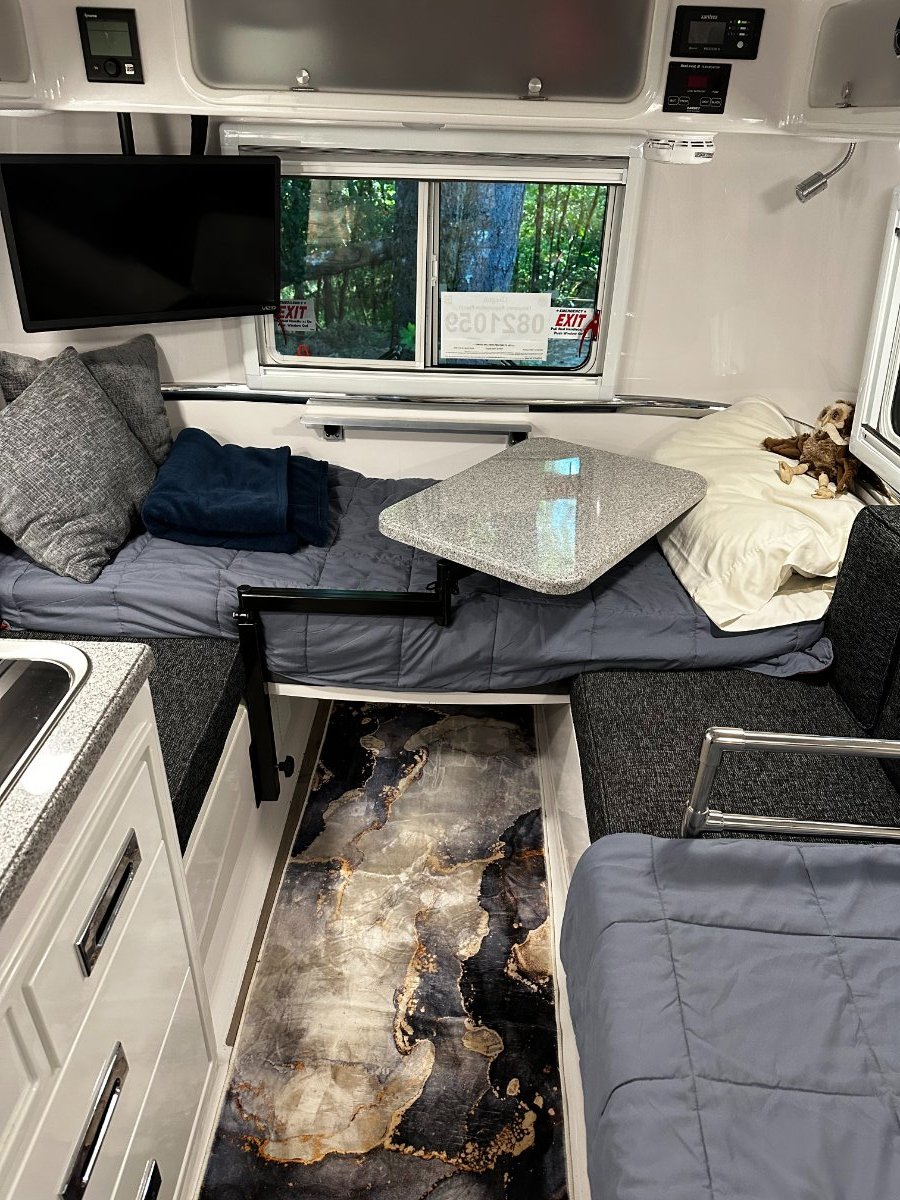
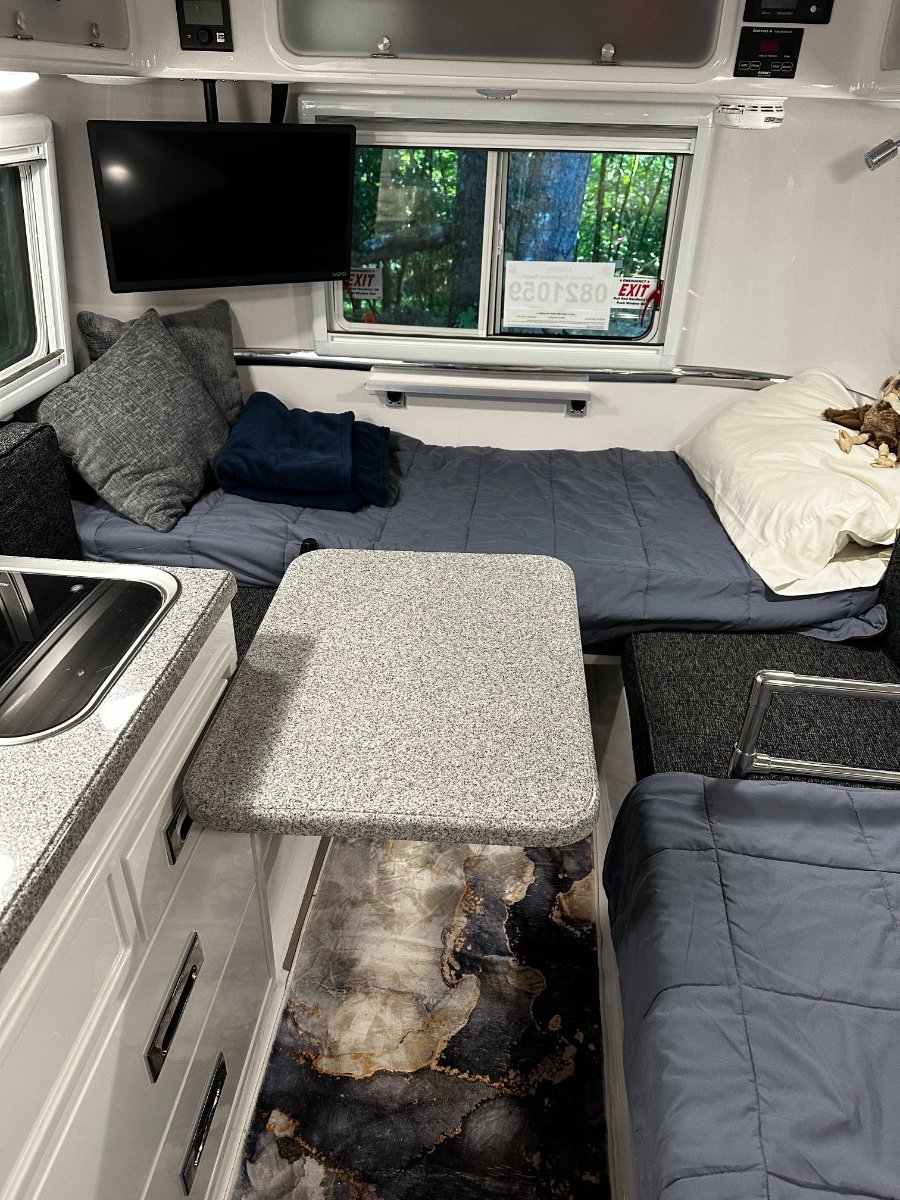
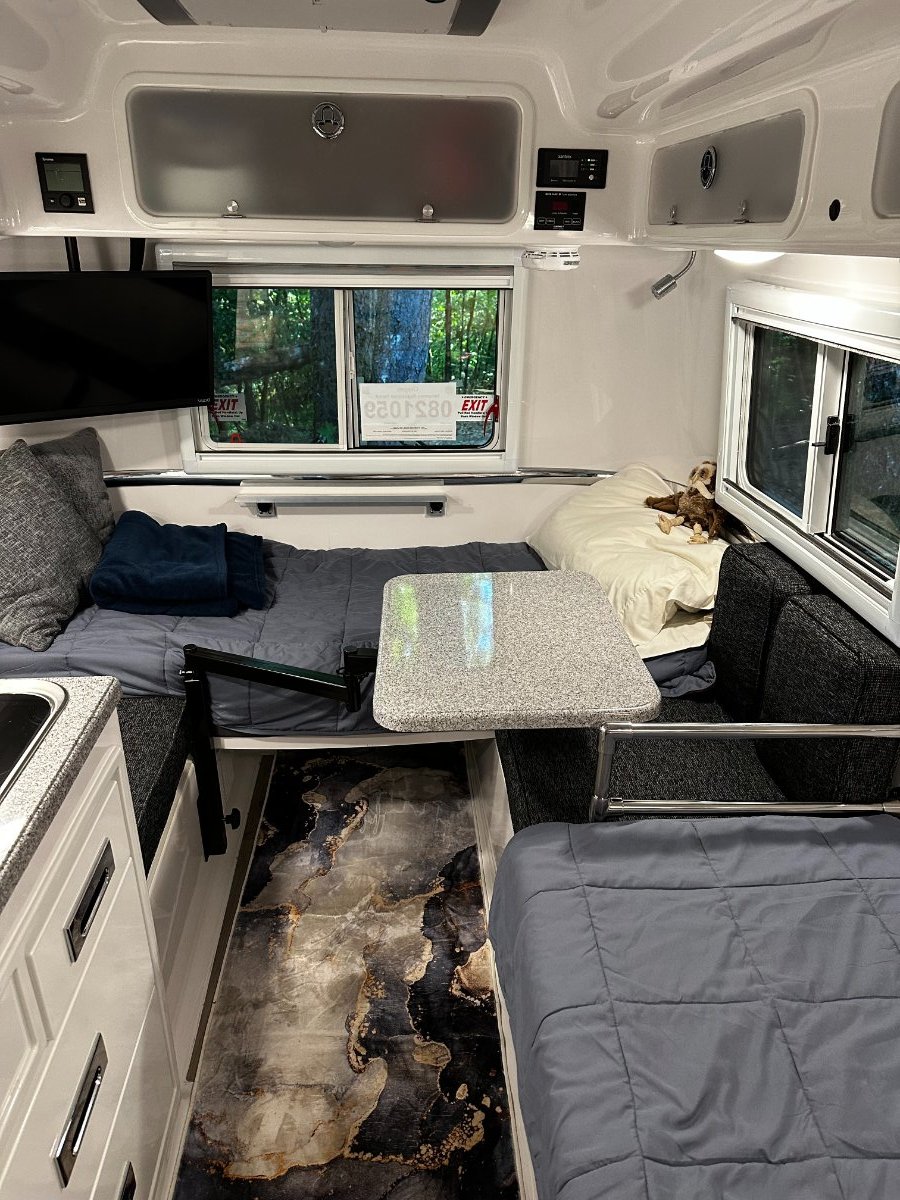
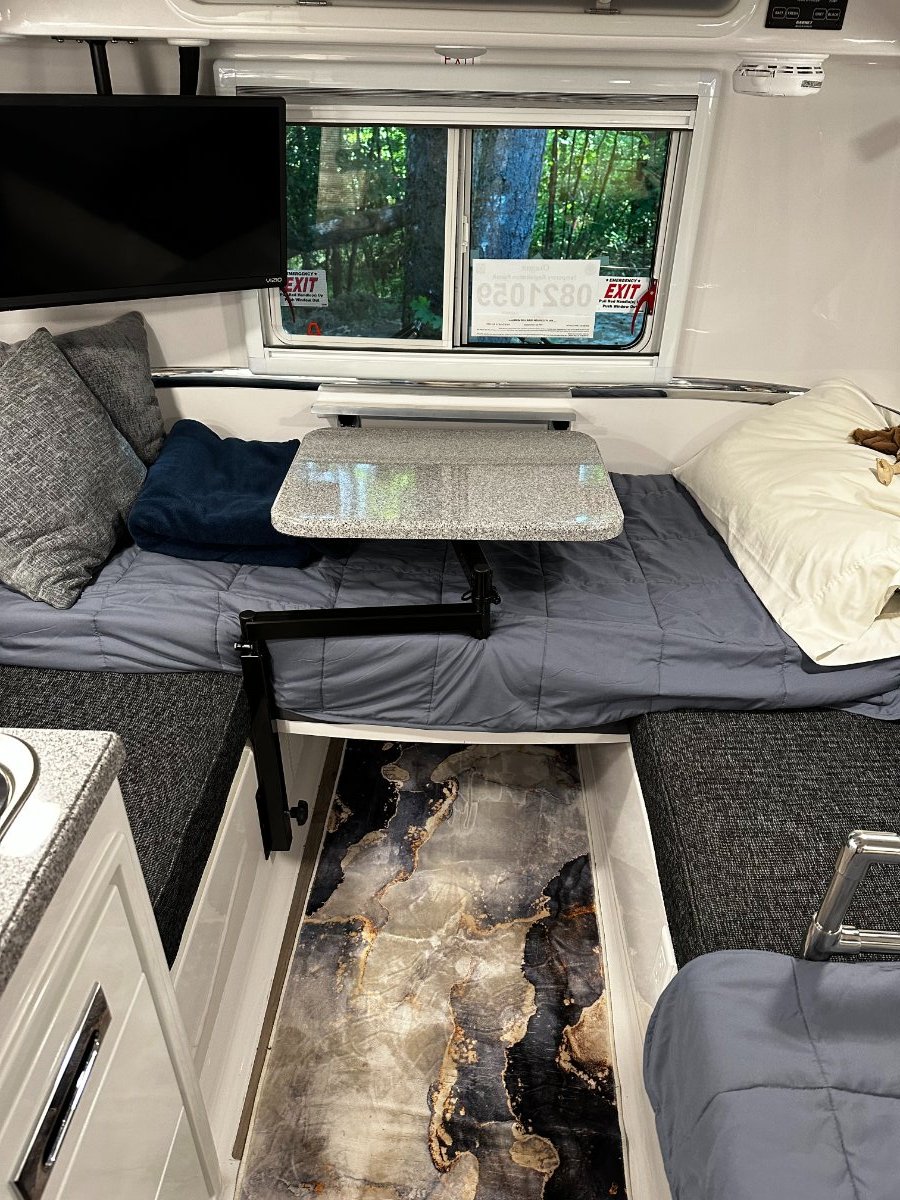
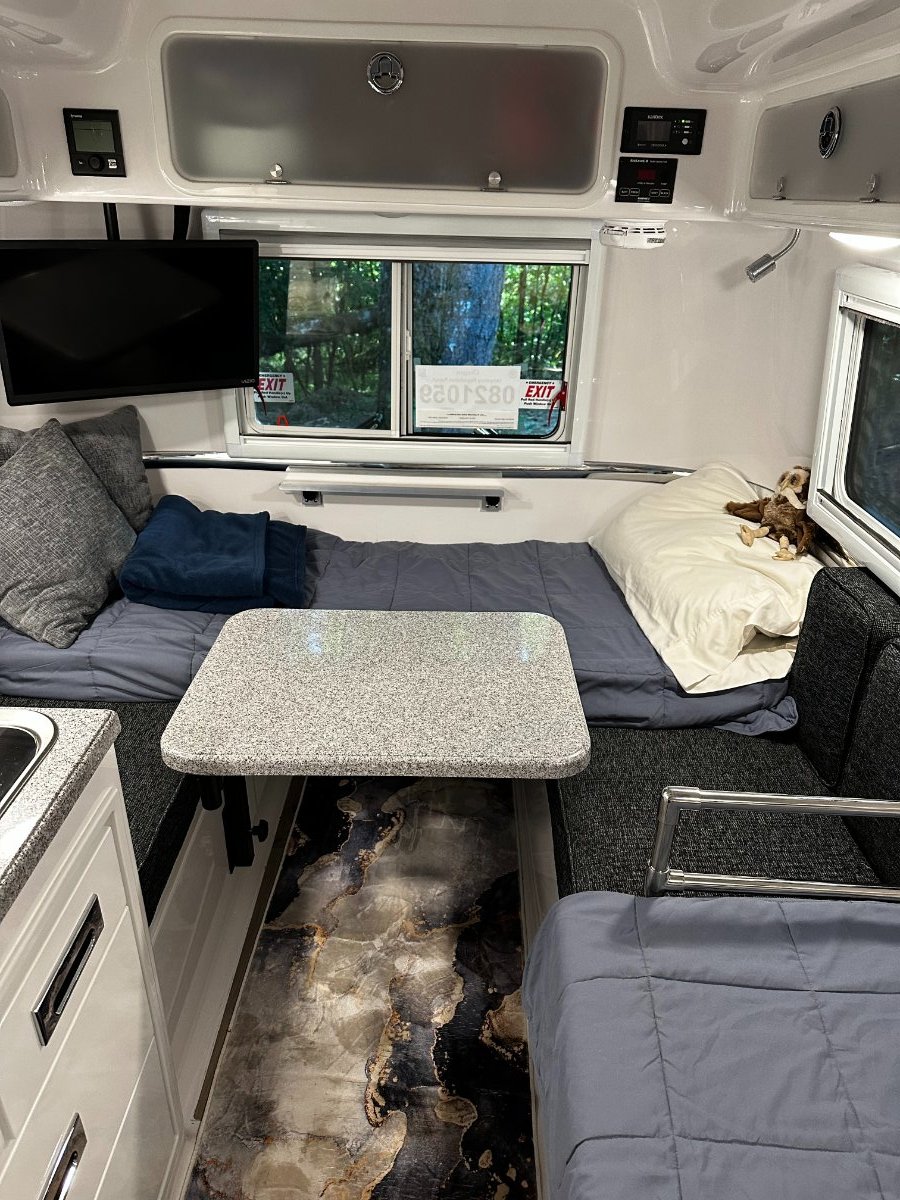
OK, I finally completed the modification with the lagun table and we are very happy with the results. We have ordered some backrest cushions from OTT to replace the split backrest cushions. We just returned from our first camping trip with Coddiwomple and really like this setup. My wife, Martha, sleeps on the back bed (28" wide) and I sleep on the side dinette bed (24" wide). David
3 points
-
Also, a TPMS will let you know right away what your pressures are!3 points
-
It does not get any simpler than that video.👍🏻👍🏻 Patriot🇺🇸2 points
-
https://youtu.be/M-bTLdMjuqU This YouTube link should provide enough information about bonding the output of a un-bonded generator to satisfy your curiosity. Mossey2 points
-
Just be aware that your new "2500 Watt" generator will have 2500 starting watts, 1850 running watts and up to 11.5 hours run time on gasoline OR 1665 running watts and up to 34 hours on propane (although I would assume this depends on the amount of propane you have available.) Running on propane, it's doubtful it will run any air conditioner even with the easy start option.2 points
-
The water was not as cold as I expected, the mosquitoes are annoying, no bears so far, a couple of moose and lots of icebergs.
2 points
-
I got tires on my truck at Walmart a few years ago. Their rules were inflate to max. (I asked.) I "fixed" that myself. Truck rode like a lumber wagon til I got home, where i have a big compressorand gauges. Glad it was only a few miles. Great reminder. Thanks!2 points
-
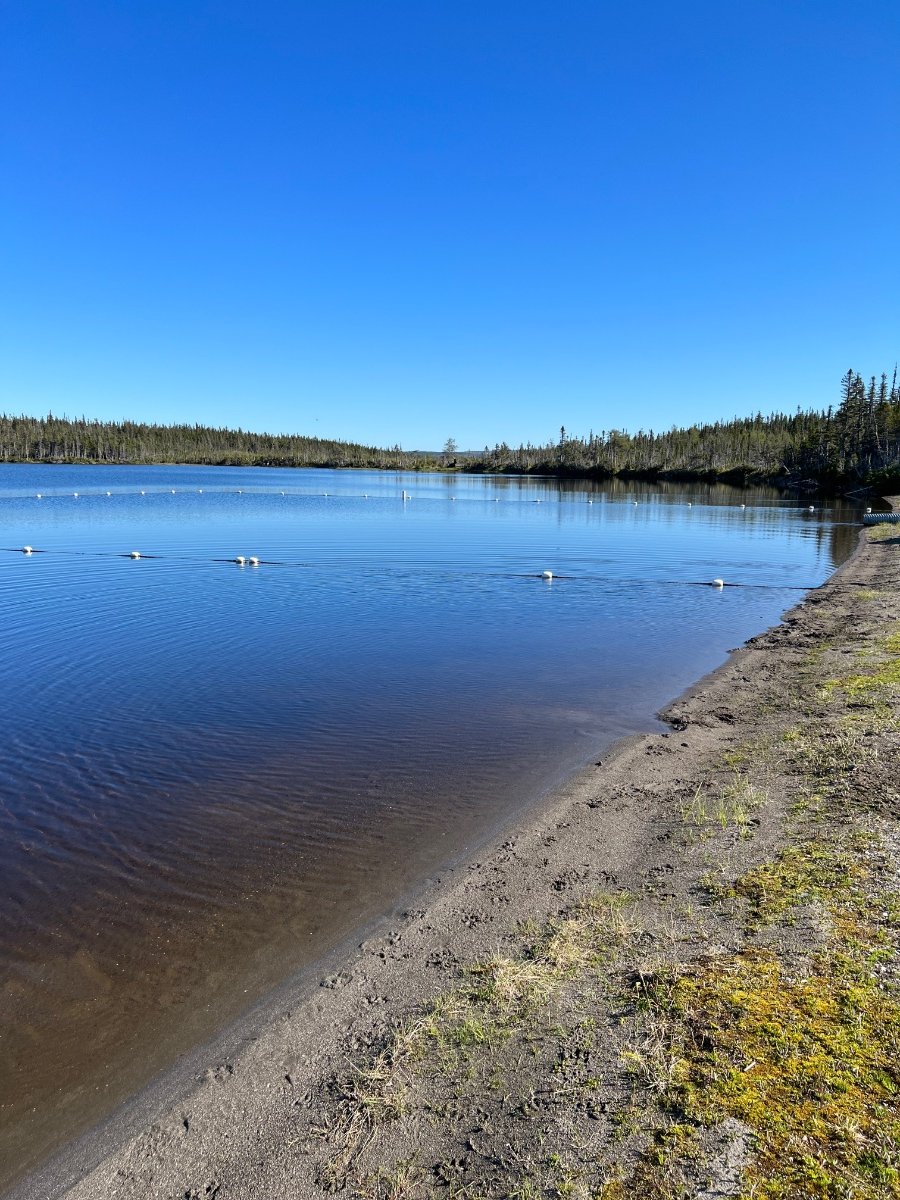
The smoke is gone and the sky is clear at Pistolet Bay Provincial Park, it amazes me how blue the skies and waters are here in Newfoundland.
2 points
-
We have been getting smoke from the mainland fires the last couple of days, so it’s limiting the photo opportunities.
2 points
-
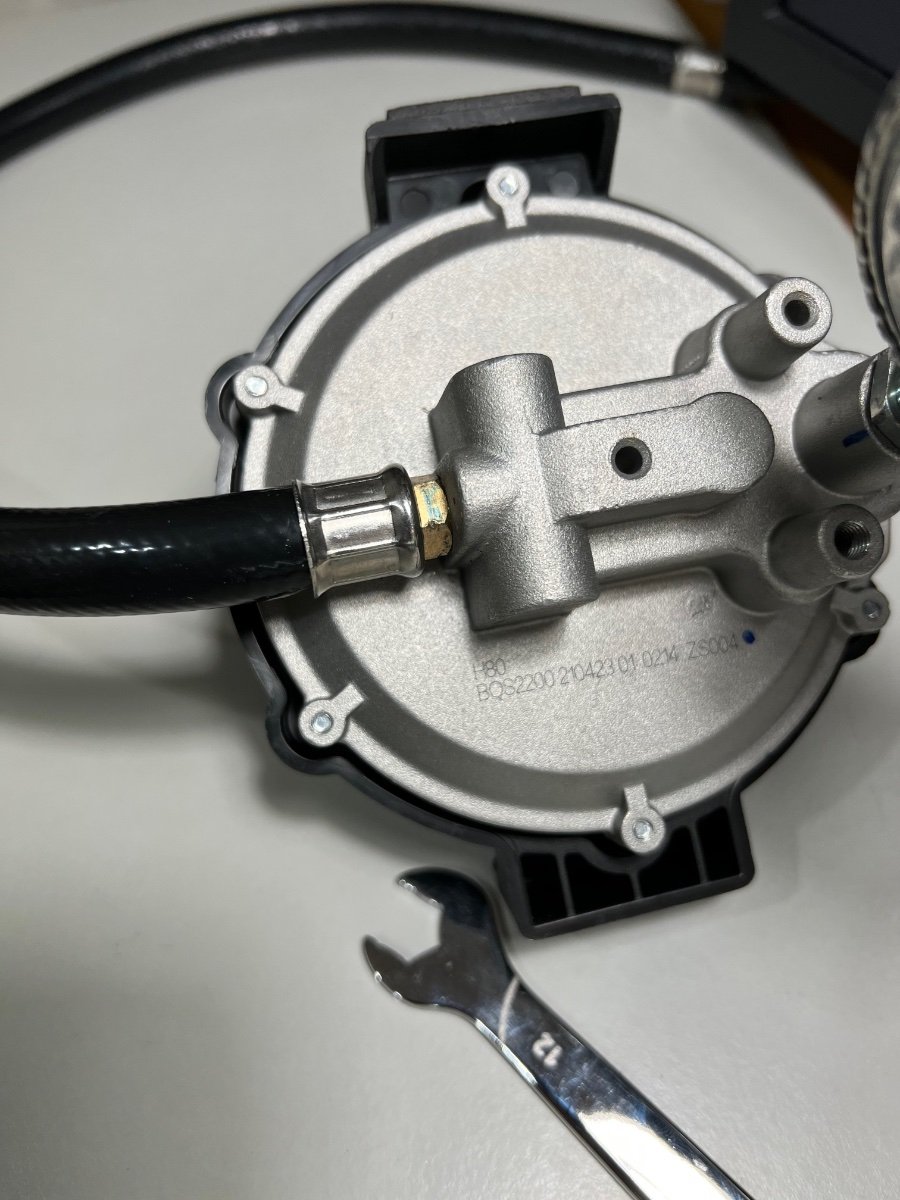
I own both the Champion 3500W and now the 2500W Generator. I wanted to mod both to run off the Quick Connects from the Oliver...and also still have the ability to quickly setup with stand alone propane tanks for other applications. Both use the 2500W and 3500W us a dual stage regulator propane hose (one with the little finger, one without.) The first stage small regulator connects to a standard propane tank with the larger plastic ACME fitting. The first stage regulator knocks down the high pressure from stand alone propane tanks in prep for the larger diameter second stage regulator. This second stage (much larger size) provides a more precise regulation needed for the generator under various load situations. Stage 2 is really a flow regulator. It doesn't change pressure, it just restricts the amount of gas that flows into the generator. Without it you basically flood the generator with gas and it won't start. To make the Generator work with the quick connects from the trailer, one must remove that smaller first stage regulator. The Oliver Quick connects are already regulated to the correct pressure for the larger second stage regulator on the generator propane cable shipped with the Champion Dual Fuel Generators. In my case, I've disassembled the original dual stage and broken it into two pieces at the coupler between the stage 1 and stage 2 regulators. 1) The second stage regulator has been modified to have a quick connect male feeding into the larger regulator. That stage 2 regulator now connects to my long extension hoses that attach to the female quick connects on the trailer. 2) The first stage regulator is then coupled to a FEMALE quick connect for re-use with stand alone propane tanks. Shown below: First stage regulator with ACME fitting is modified to have a female quick connect coupler. The benefit of this mod is that I still am able to use stand alone 20lb propane tank by coupling the modified smaller regulator to the tank, and the larger stage 2 regulator hose to that this modified coupler. This may be a repeat but I was writing up for my blog anyway so thought I'd post it here. Craig Hull 505
2 points
-
We keep our Oli EII @ 55psi also. For a couple reasons. 1. I have calculated the weight for the Oliver while towing, the tongue weight, and the weight on both my front and rear axles of the truck with everything fully loaded for towing. 2. The truck uses the same psi and all I have to remember is 55 psi for all the tires. 3. I figure that at 55 psi it’s a little high for the Oliver but it allows that if one tire goes bad the other three tires still have enough strength to carry the load. If I remember correctly I did the calculations for 6500 trailer weight. Not that I am planning on driving on three tires on the Ollie I just wanted that extra safety factor so by the time I found out that a tired gone bad I’d still have time to get it parked over on the side of the road and maybe limp it to someplace where I could change it without getting someone hurt2 points
-
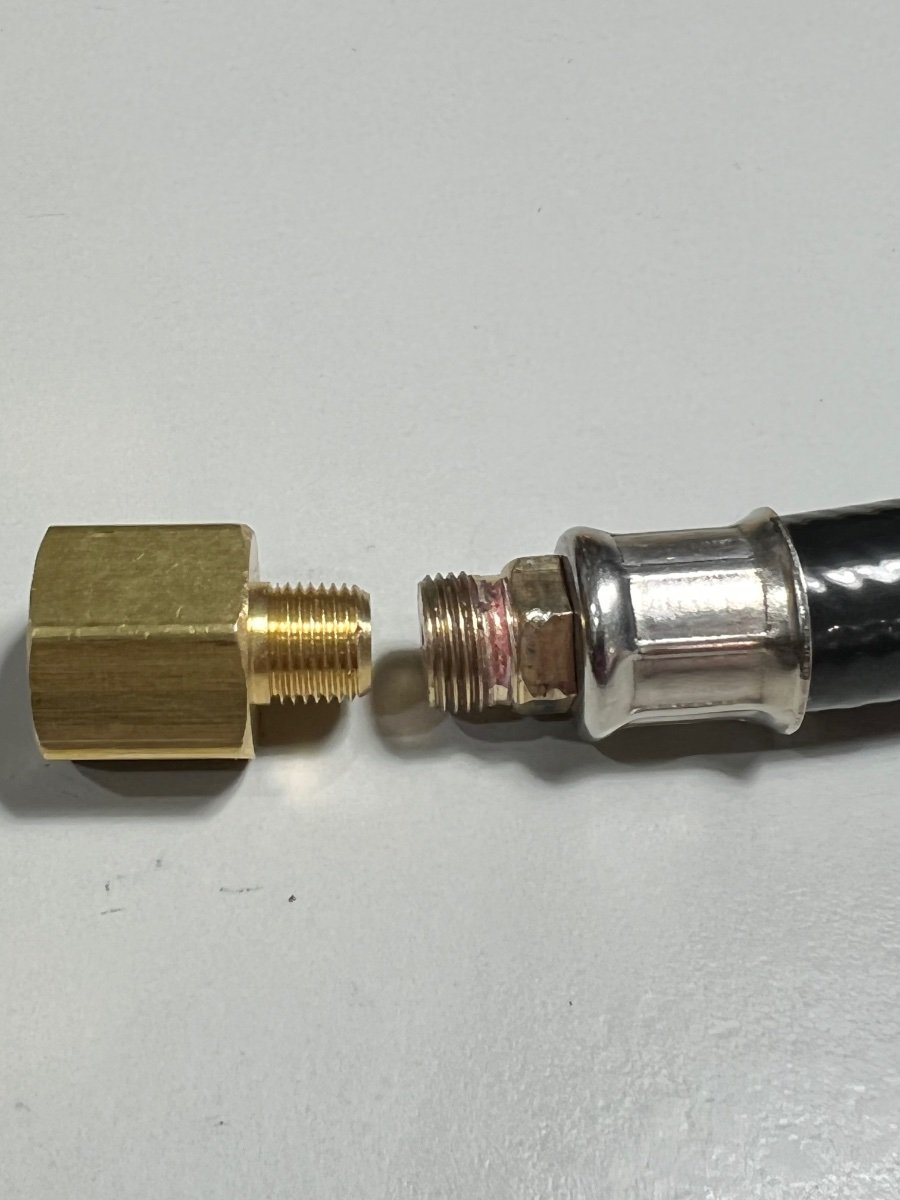
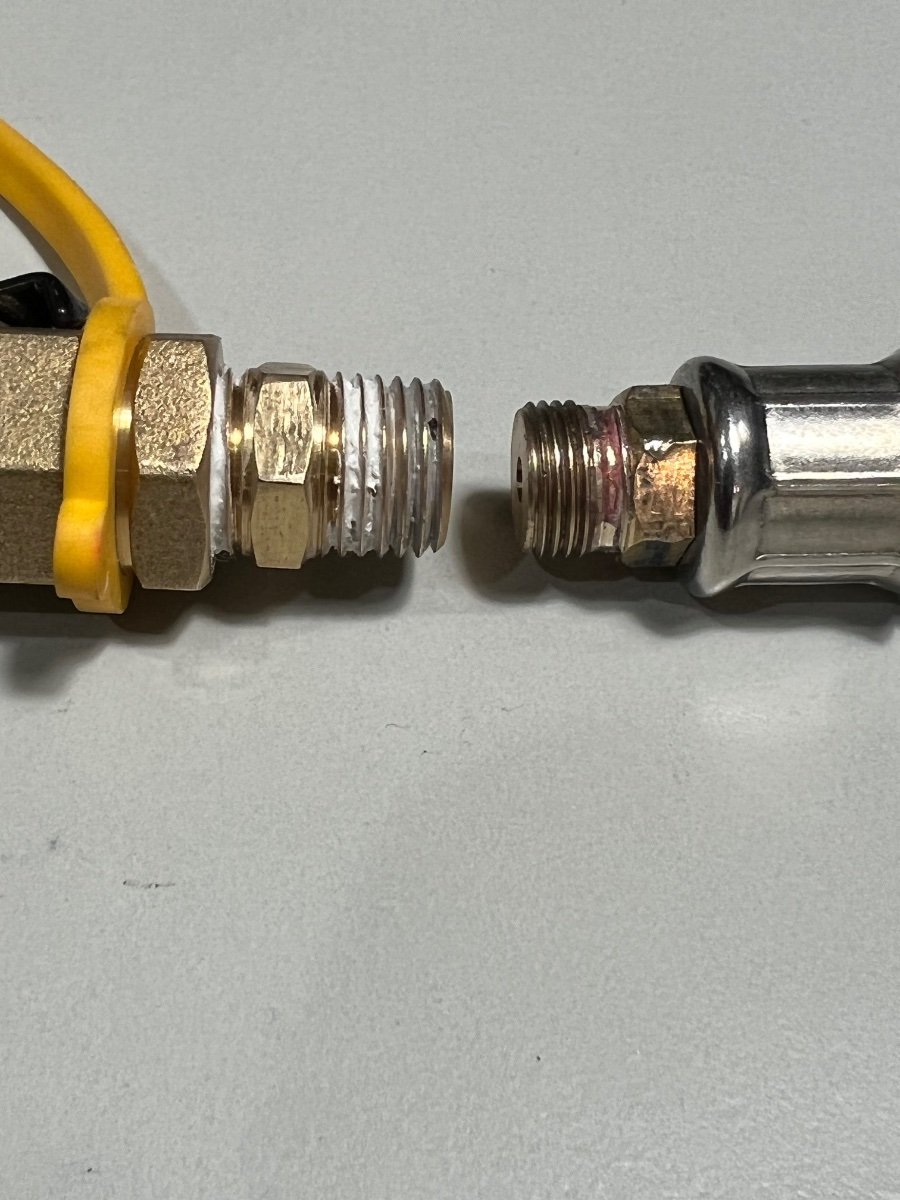
@Happy Camper, I also purchased a Champion Dual Fuel 2500 watt generator, Model 200961. From reading the OTT forum I learned the regulator provided with the generator should not be used when connecting to the low pressure propane system on our LEII (pickup on Thursday). So I set about checking that I had obtained the proper low pressure hose and connectors to eliminate the Champion regulator. I tried connecting a low pressure hose with common ¼" NPT quick connectors to my generator. I then learned the male quick connector on the hose was incompatible with the female quick connector on the generator, and could not be connected. Comparing the male quick connector on the Champion regulator male quick connector (below, left) with the ¼" NPT quick connector the low pressure hose (below, right), I found they differ slightly, as can be seen in the photo below. The ¼" NPT quick connector will not connect to the female quick connector on the generator. On the left is the male connector on the Champion regulator assembly; on the right the low pressure hose and ¼" NPT quick connector I purchased on Amazon. DOZYANT 18 feet Low Pressure Propane Quick-Connect Hose, RV Quick Connect Propane Hose, Quick Disconnect Propane Hose Extension - 1/4" Safety Shutoff I contacted Champion technical support and found them to be, essentially, no help. I searched extensively online and found this link: https://www.forestriverforums.com/forums/f224/champion-dual-fuel-inverter-q-c-to-rv-on-board-propane-153043.html The photo shows a layout of various parts, with detailed notes. This looked straightforward, so I proceeded to obtain the needed parts. Only after receiving the parts and attempting assembly did I discover the ports on the safety valve are NOT ⅛" or ¼" NPT, but some ******* size no one has ever seen before. I spent most of a day calling and visiting suppliers of hose connectors for gas and hydraulic applications in the DFW area. None had any compatible adapters to connect the common ¼" quick connects to the ports of the safety valve. The connectors on the Champion hose connecting the regulator and safety valve measures 0.44" O.D., with a 12 pitch. Left- ¼" NPT connector; Right- Champion regulator hose connector Left- 1/8" NPT connector; Right- Champion regulator hose connector Having reached an impasse, I decided to purchase a Y connector and a high pressure extension hose, to run the generator directly from the propane tanks. DOZYANT Propane Splitter, Propane Tank Y Splitter Adapter with Gauge, 2 Way LP Gas Adapter Tee Connector for 20lb Propane Tank Cylinder, Work with BBQ DOZYANT 12 Feet Propane Tank Hose Extension with Gauge Replacement for Gas Grill, Heater and All Other PropaneAppliances, Acme to Male QCC/POL Fittin I don't view this as the optimal solution, as I would prefer using the low pressure connections. However, with no way to connect the Champion generator without its regulator, I have no other option. I want to be able to operate the generator at a safe distance from the trailer to avoid intake of carbon monoxide. If anyone have overcome the issues described above, I would love to hear the details.
2 points
-
I know nothing specific about Champion dual/tri fuel generators. However, I do have to use a "demand regulator" downstream of on-board regulator when we converted our Honda generator to use LP from the trailer's external LP connections. Again, I don't know if Champion's need this or not but Honda conversions do need it. On the subject of GasStops (which we give 2 thumbs up) - while they won't necessarily shut off in a slow leak situation, they do provide the capability of a good slow leak test. Start with tanks being turned on - gas in all lines. Turn off all gas appliances (water heater, cooking stove, frig, furnace, etc.). Turn tanks off. Watch indicating gauges on GasStop(s). If they move towards red area after a minute or two, it indicates a small gas leak in system. If they don't move, you have no leaks. I have this little test on both our pre and post checklists.2 points
-
Happy Camper - Perhaps another way to "attack" your concern would be to install a couple of THESE on your tanks. Note that if there was a "slow leak" these GasStops possibly would not work but they would work in the event of major failure. Bill2 points
-
Hello everyone, I'm new on here and excited to be a part of the community. I just placed an order for a small 2500 watt dual fuel Champion generator and plan on running it off of the propane quick connects. Will i need to get a diaphragm regulator? Anyone have advice and/or photos of their setup? Thanks, Happy Camper1 point
-
Yes we have 15” Goodyear Endurance on our 2023.1 point
-
We had one of the very few twin bed setups in our original 2008 Elite. It was set up very similarly to what you are describing here and it worked very well for us.1 point
-
I'd give it another week or so and then if still nothing send a PM to Matt Duncan with the details that you submitted. Bill1 point
-
Very nice mod! That's an excellent arrangement for y’all. Mossey1 point
-
I'm sure you've noticed the prevalence of car swallowing potholes on the roads when you are off the few main highways on Newfoundland. Be very careful as you make your way down the two lane back roads. Here, in the US, if you see someone weaving down the road ahead of you, you might think the driver was drunk and you'd keep your distance. On the Rock, when you see the car in front of you going back and forth, he is likely avoiding the potholes and it would be good to follow along his path. Should you see a car going perfectly straight, keeping to the center of the lane, beware, he is likely drunk! Two whole months on the Rock! Sounds wonderful . . .1 point
-
Without the Neutral-Ground Bonding Plug, NO 120V AC plug should be "hot" with only the generator running. This has nothing to do with the plug itself but rather the nature of the wiring of RV units. Without the plug no electricity from the generator can get past the EMS. This is not necessary when on shore power.1 point
-
Initially ran 50PSI in our LE2 tires for a few years, now running 45PSI without issues in our Cooper HT3 tires. All cold pressures.1 point
-
School is out forever! Today was my last day of teaching, and I’m beginning my retirement tomorrow. My husband and I purchased an Elite II, and will be picking it up on June 26. What advice do you have for us on delivery day? What items are must-haves for pick up day? I should mention we are new to camping so even basic advice is appreciated! Thanks!1 point
-
As you watch the Oliver videos before delivery date, jot down questions that you have according to category (towing, fridge, quick connect, etc) Bring your organized list of questions to delivery and ask them as each feature is explained to you on the day.1 point
-
I took my Oliver in for service at the highest recommended local place (I'm so far from Oliver).... and when I got home I found that they had inflated the tires to the max. This is just a reminder to check the pressures, if you've had your Oliver serviced 'elsewhere'.1 point
-
Max Burner, The MicroAir Easy touch RV T'Stat has a very colorful display and seem intuitive. Hope it functions great.1 point
-
"Casablanca" Thermostat Update: We returned home yesterday afternoon after spending 4 days on the road between DEN and ABQ. Sort of a test trip for our newly mounted MicroAir Easy touch RV T'Stat. Installation was a "breeze" (pun intended) - and like our original Dometic T'Stat, the MicroAir unit controls the Dometic "Noisemaker" AC/Heat Strip and the Atwood furnace. It's got an "away" function which keeps the internal temps over a longer "cycle-time" when not occupying the OTT - jury still out on this function. What we really like is the WiFi and BT modes, so we can monitor/control internal temps while away from Casablanca using the iPhone App. Headed to TX today and should experience much wider temp ranges than we had in CO over the weekend - will follow-up with posts during the week... "Ravel-On!"
1 point
-
Hi all -- I have a different brand RV but have been following this thread because I'm experiencing some of the same humidity problems with the Houghton/RecPro A3400 that others here have had. I've seen a fairly recent video on YouTube from FloridaAmbient that discusses an additional relay to switch the fan on/off in tandem with the compressor cycles. He says it has made a "huge difference" with the interior humidity. His video is short and I gather that with his mod you only have one fan speed. He selected Low but it appears each speed has its own relay and a different speed could have been selected (this is my assumption, it's not stated in the video). My RV is 23' from snout to tail so maybe 19' of interior living space with no slides. The AC unit is about as center as it can be so I'm not concerned about having only the low speed. Once the interior is brought down to the set temperature, it pretty much runs at low anyway. My brother is an electrical engineer and I trust him to guide me through this process. I have the parts ordered and he will be visiting in mid July and will be staying in the RV. We plan to do this mod and document it will with pictures and narrative and I'll turn it into a PDF. Stay tuned. I hope it's okay with the forum guidelines to post an external link! Here is the video:1 point
-
Thank you! Tomorrow is our delivery day and we are feeling underprepared, but your advice is reassuring!1 point
-
Water systems are tricky. At home, we work on a rainwater collection system, and an 8000 gallon cistern. We spent an entire day, checking everything. Valves, pump, connections, Power. Sediment filters, etc. Blowing out possible sediment, every way. Checking check valves. It can be very frustrating. We found, on ours , a faulty float switch, which has nothing to do with the Oliver system, but I share your frustration. Every connection is tightened, and retightened. I share your pain. We both now have working systems. Please share your Oliver challenge with service, via a ticket. They need to know.1 point
-
Sorry to hear about your issues with your trailer. Oliver has been very good addressing our very minor issues to hull # 901. And we have been very pleased. I have no problem working and keeping and eye on the systems of our trailer and annually check all electrical and mechanical connections due to road vibrations helps feed my OCD. Have fun and safe travels.1 point
-
JD & GAP, Thanks for the reply! Really like how GAP & Dave Phelps reused their 2" belly band! If someone chooses not to reuse the old 2" belly band, in addition to the chrome molding rich.dev mentioned earlier, found good reviews on Cowles 2"X16' automotive Chrome molding on Amazon, but that's probably not long enough to have a one piece chrome molding around the beds. Also found Cowles 2"X30' Chrome molding with 3M adhesive strips on their website, but it's presently sold out. https://cowlesproducts.com/body-molding-official/Cowles®-38-900-Custom-Chrome-Truck-or-SUV-Body-Side-Molding-2-x-30-p266461334 For fiberglass preparation, ordered 3M adhesive cleaner, 3M White Scotch-Brite pad, and 3M adhesion promoter from Amazon as mentioned by JD & Dave Phelps.1 point
-
Just a guess on my part but it's possible that as the company has grown and to producing more trailers at a faster rate, that some items fall between the cracks. Our E2 (hull # 701) had quite a few problems that were caused by less than perfect installation. Similarly to ScubaRx, we've been able to straighten them all out on our own but it's taken time and a bit of frustration to get there. These include unsecured wires in the neutral and grounding blocks, antenna mast hanging from it's wires, a window missing it's butyl tape, inverter with incorrect settings, lube bolts mounted with wrong orientation, to name a few. When I asked about our belly band coming loose, I was told the surface must not have been properly prepped during installation. As far as I can tell, Oliver has far superior quality control as compared to the rest of the industry. For comparison, check out the Airstream forum which is rife with sloppy manufacturer mistakes. Bottom line is that these are complicated systems and a one-off craft build so a bit of missing the mark is to be expected.1 point
-
When fiberglass boats are made, the hull and deck come out of two separate molds. The seam, where the two parts join, is sealed with fiberglass tape both inside and outside. The outside seam seems to be taped in and there is a raised ridge of fiberglass all around. I think John is probably right that the inside seam is secured with some sort of pins. Not sure if there is any sort of aluminum framing between the shells but the pins must secure the top to the bottom and the inner to the outer shells.1 point
-
Our trailer is over 10 years old. Belly band still right where they originally installed it. In fact, I don’t recall ever having any problems that I couldn’t fix.myself.1 point
-
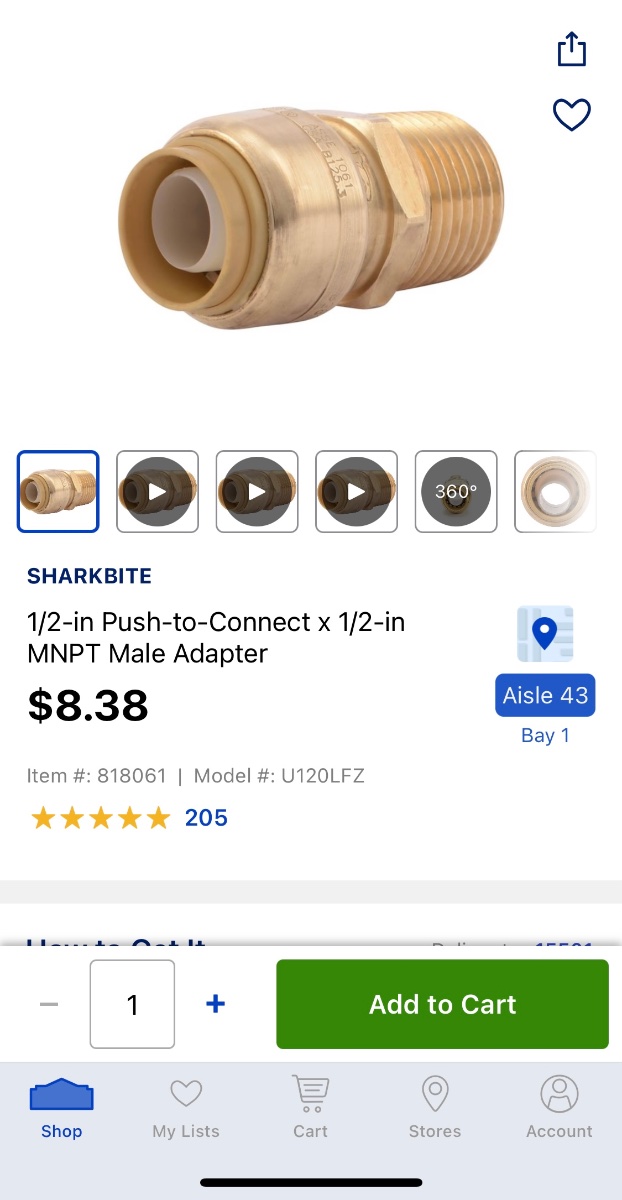
I used sharkbite connectors to go from the braided supply lines to the original plastic plumbing lines. I got all the parts at Lowe’s.
1 point
-
Mine was powered by a positive and negative wire from the Ollie and connected to the positive and negative wire leads from the CO/Propane detector with crimped butt connectors. The wires and butt connectors are probably covered by wire loom and should be visible under the aft dinette seat, near the detector mounting location. After disconnecting the batteries via a cutoff switch or manually removing the negative cable, while working on 1 wire at a time, cut the wire on the Ollie side, the strip the wire insulation and crimp on a new butt connector. Then repeat for the second wire. Now you can remove the bad CO/Propane detector and install the new one. Then crimp the new detector wires to the Ollie wires. I’m not sure, but I think the positive wire has a fuse under the street side bed, near the stabilizer jack fuses. And don’t forget your solar system is also supplying power and if you can, cover the panels with a moving blanket. If you have any further questions, let us know, Mossey1 point
-
Yes they do, here’s another set. We are now headed for Gros Morne National Park
1 point
-
We will be on the rock for 2 months.1 point
-
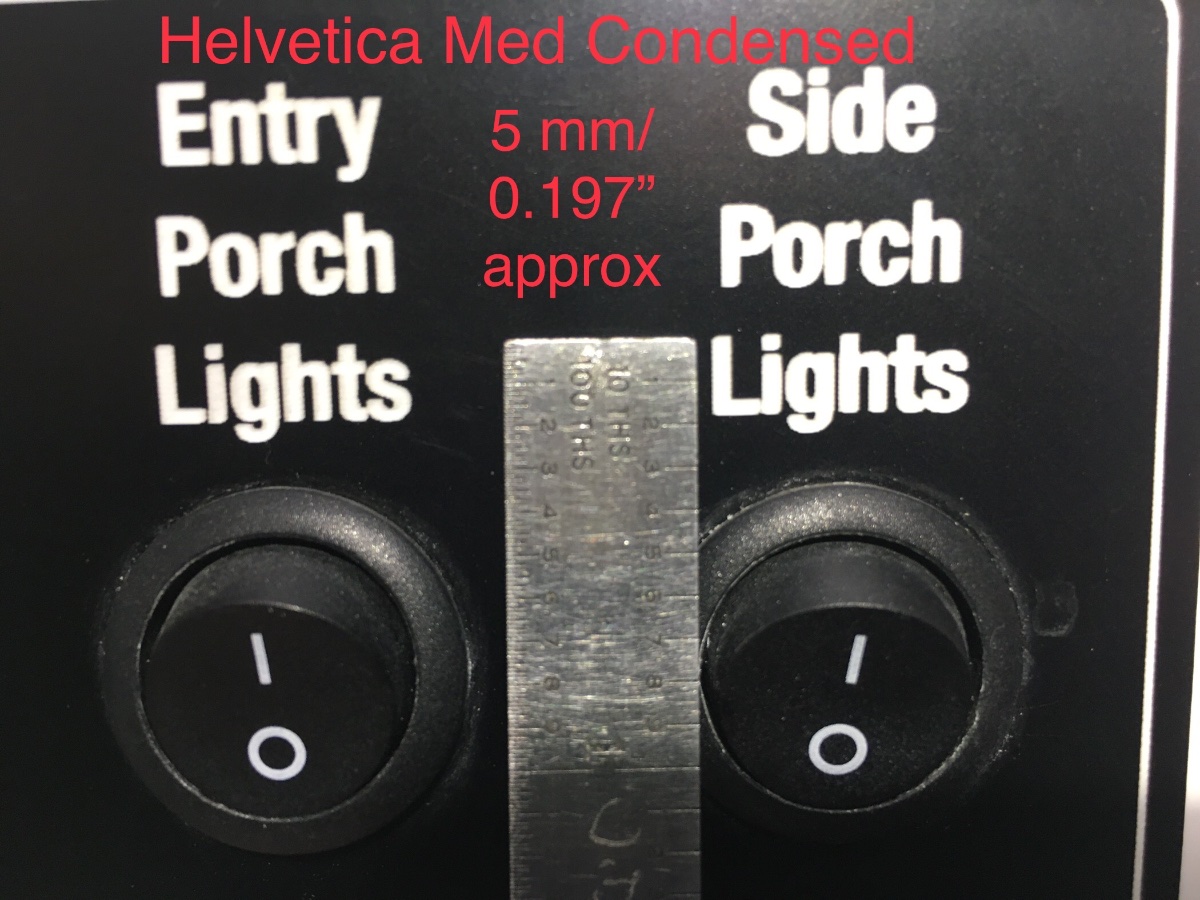
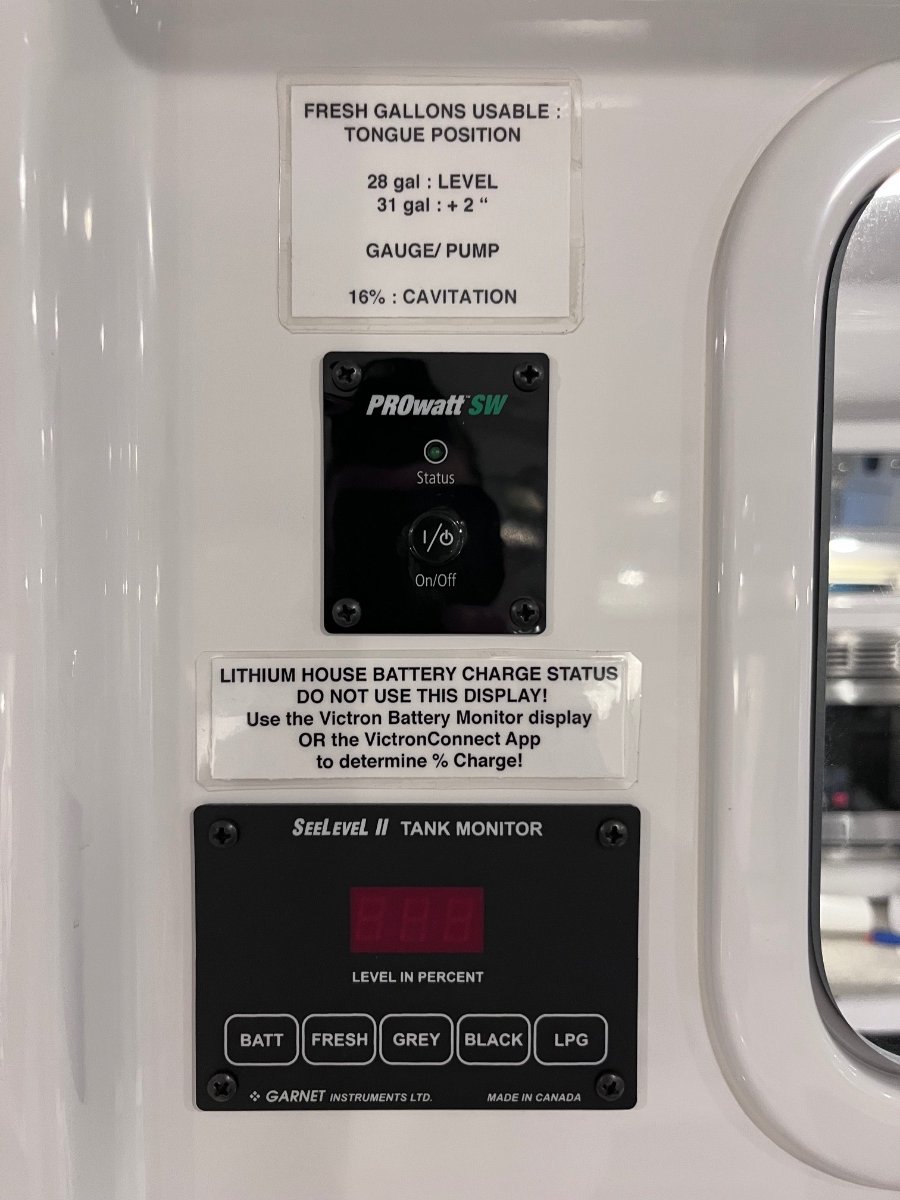
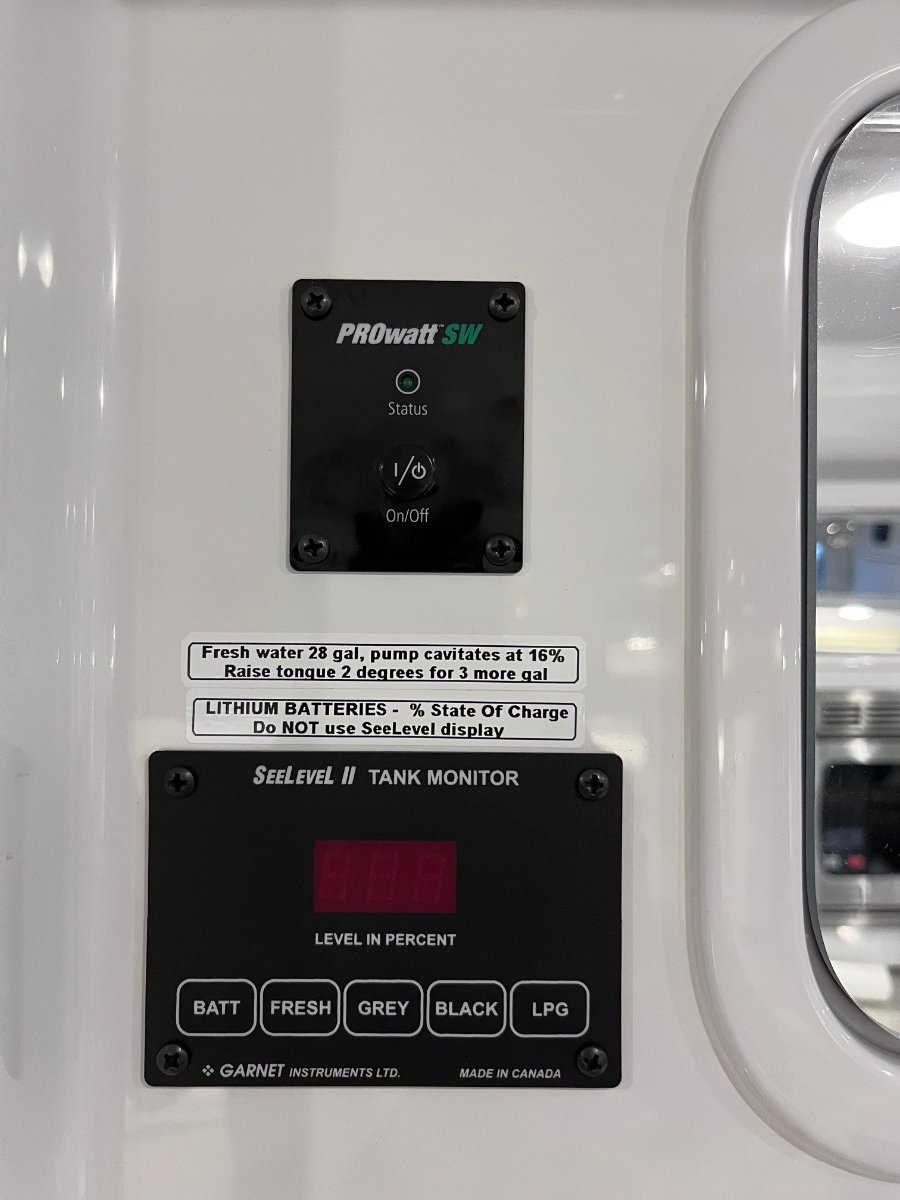
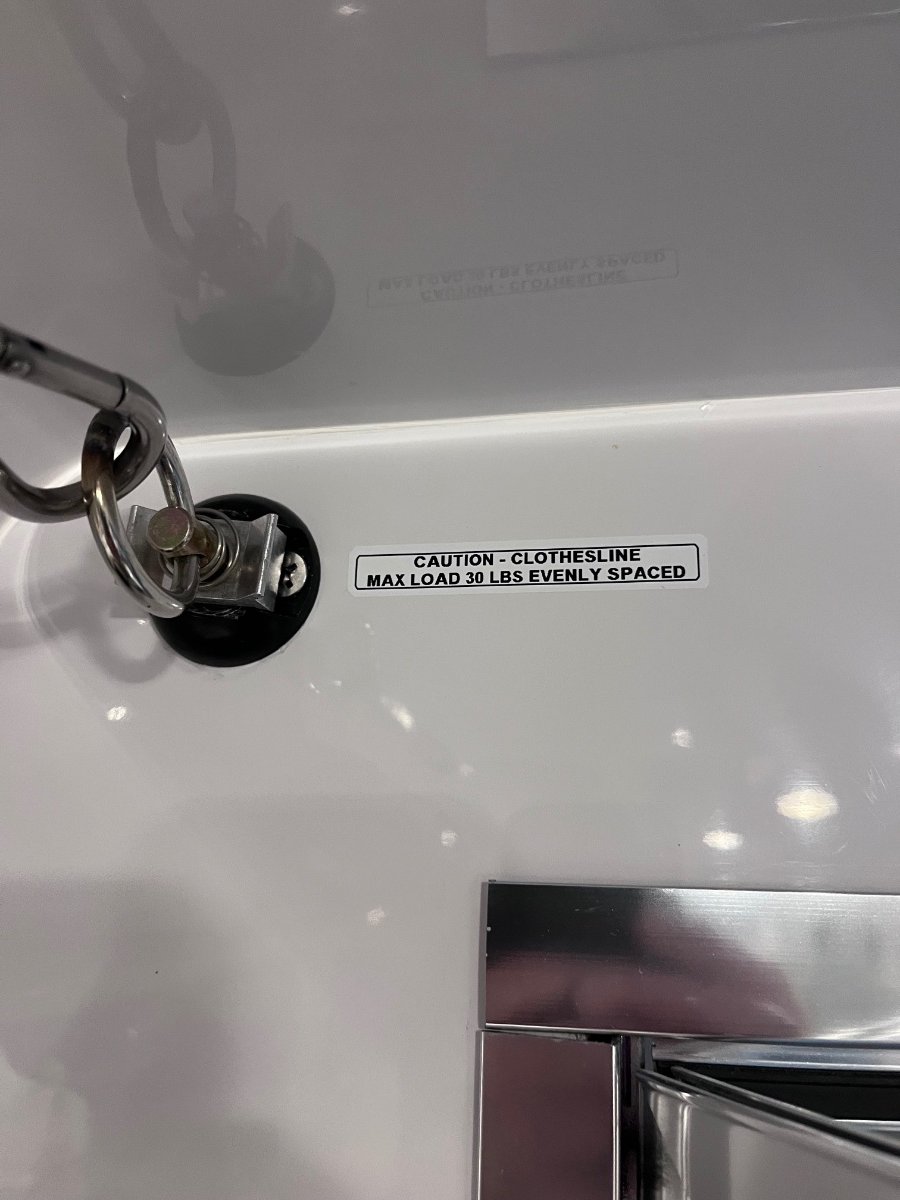
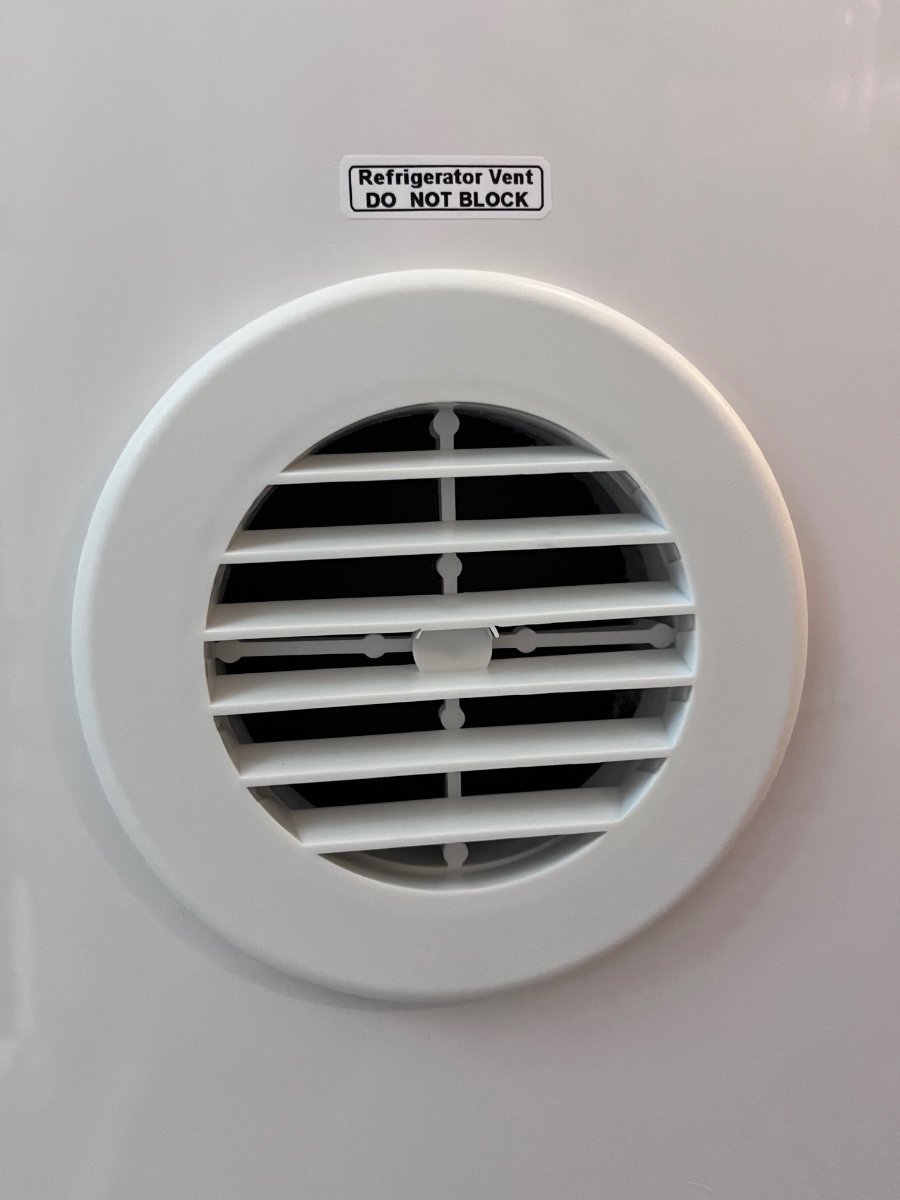
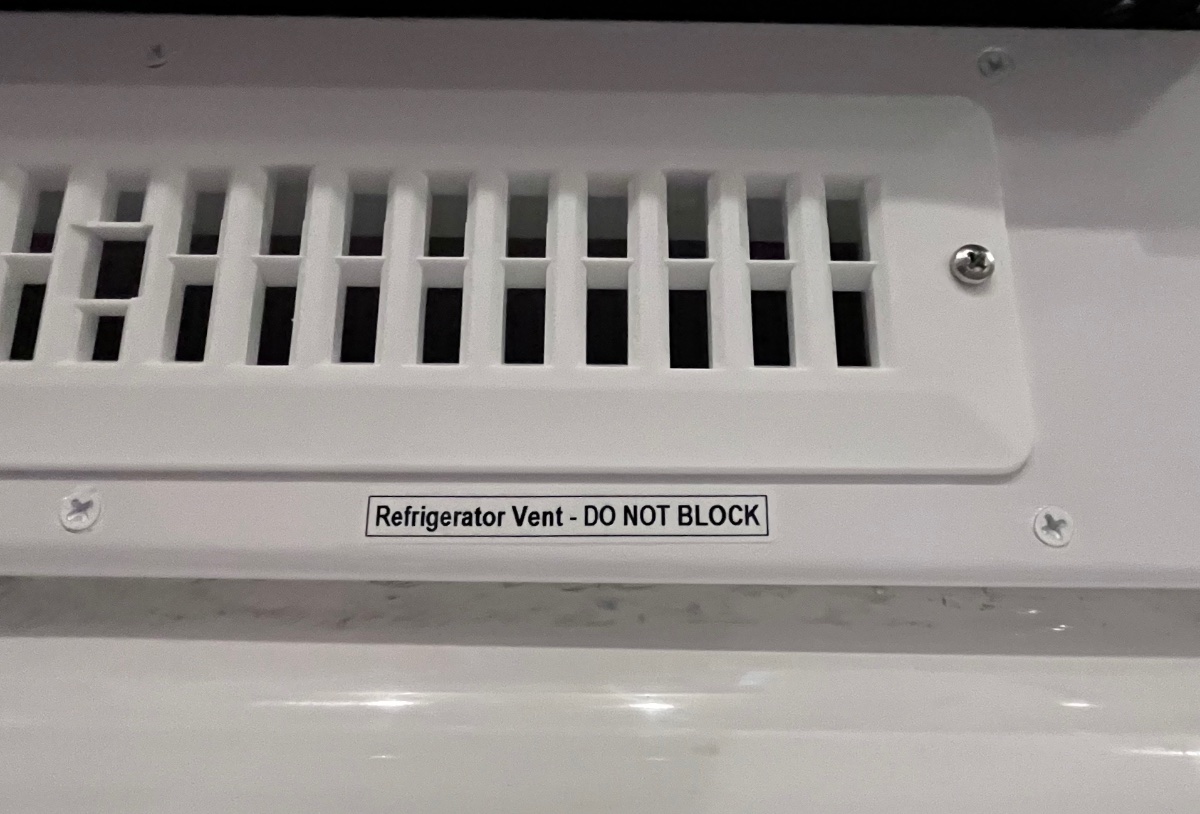
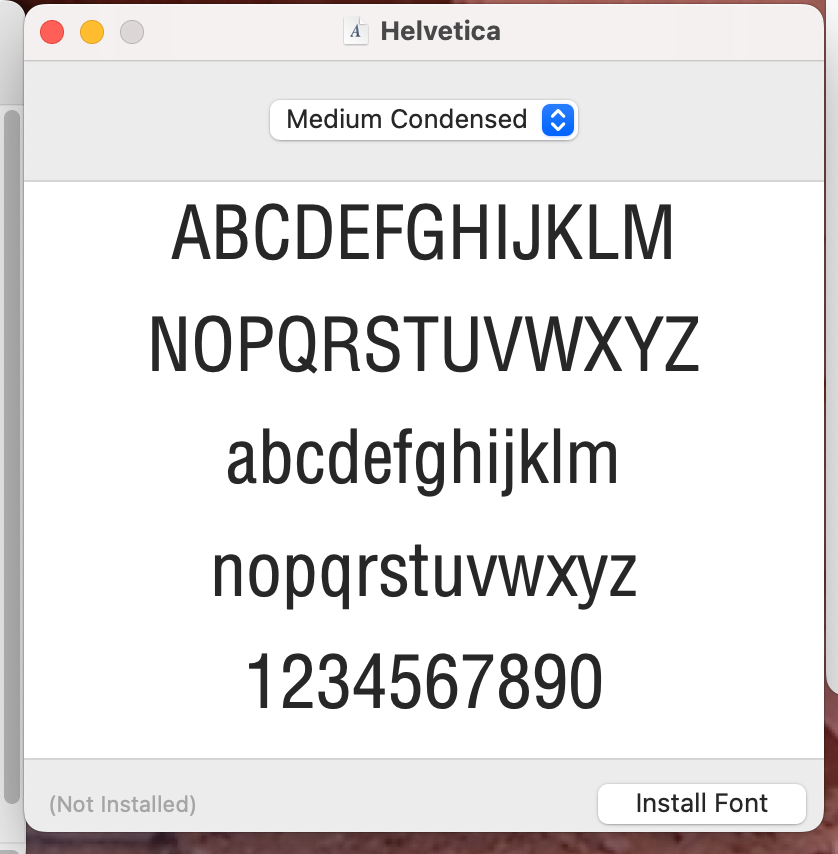
I recently bought a DYMO LabelManager 420P at a killer price, 46% off the price when I added it to my watch list a couple of years ago. DYMO Label Maker with Adapter | LabelManager 420P High-Performance Label Maker, Rechargeable, PC and Mac Connectivity, Bright Backlit Display, Easy-to-Use, Portable, for Home & Office Organization I also ordered a case, which is quite nice:: Case Compatible with DYMO Label Maker LabelManager 160/280 Portable Label Maker, Label Printer Storage Organizer for AC Adapter, Tape Cartirdges and More Accessories(Box Only) Black I was hoping to be able to match the existing font and style of my Oliver switch placards. I was able to measure the size and track down the font. I added the Helvetica Medium Condensed font to my iMac and was unable to access it using the DYMO lable software, drat. However, I did find out that the basic onboard font preloaded into the tool makes for very nice labels that look similar to this, the bonus is that you can sit inside the trailer and make them there. No computer hookup needed. If anyone wants to try the proper one, I have attached it as a "otf" file below. You double click to launch the font installer on an iMac. I do NOT know if it will work on "Some Other Mac" aka a PC. Helvetica Medium Condensed.otf Previously I would make a label using the iMac, print it, cut it, laminate it, cut it out again using a flat paper cutter, and stick it down with double sided tape. It worked but was a true PITA and it did not look great. So I replaced a few of those: And added some new ones. I am pleased. I used the generic tape, not the DYMO ones, because they are 20% the cost. If you wanted to ensure that they would stay on a long time, you could add some clear (not transparent) Scotch tape over them. All these were done on the 1/2" Black on White tape, the tool will handle up to 3/4" (four lines) DYMO LM420P UserGuide.pdf John Davies Spokane WA
1 point
-
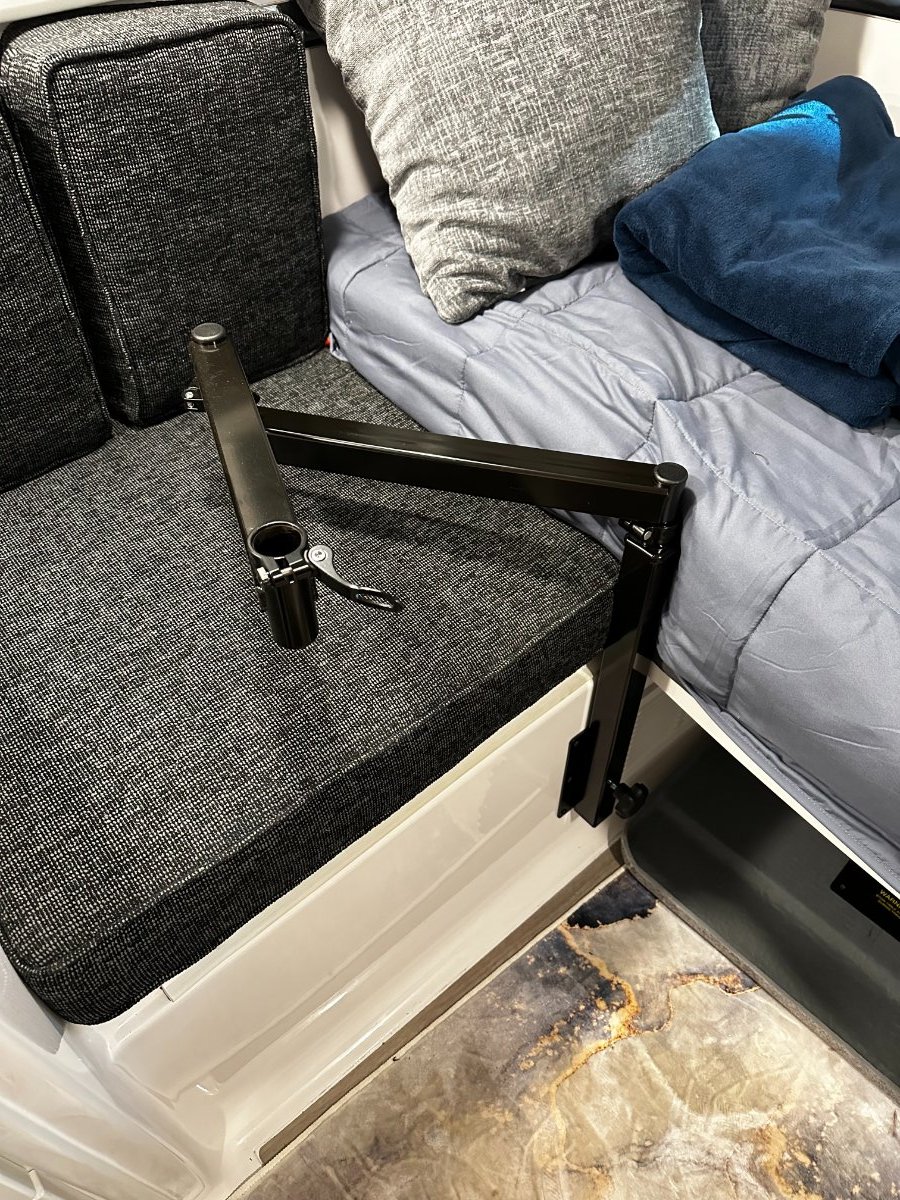
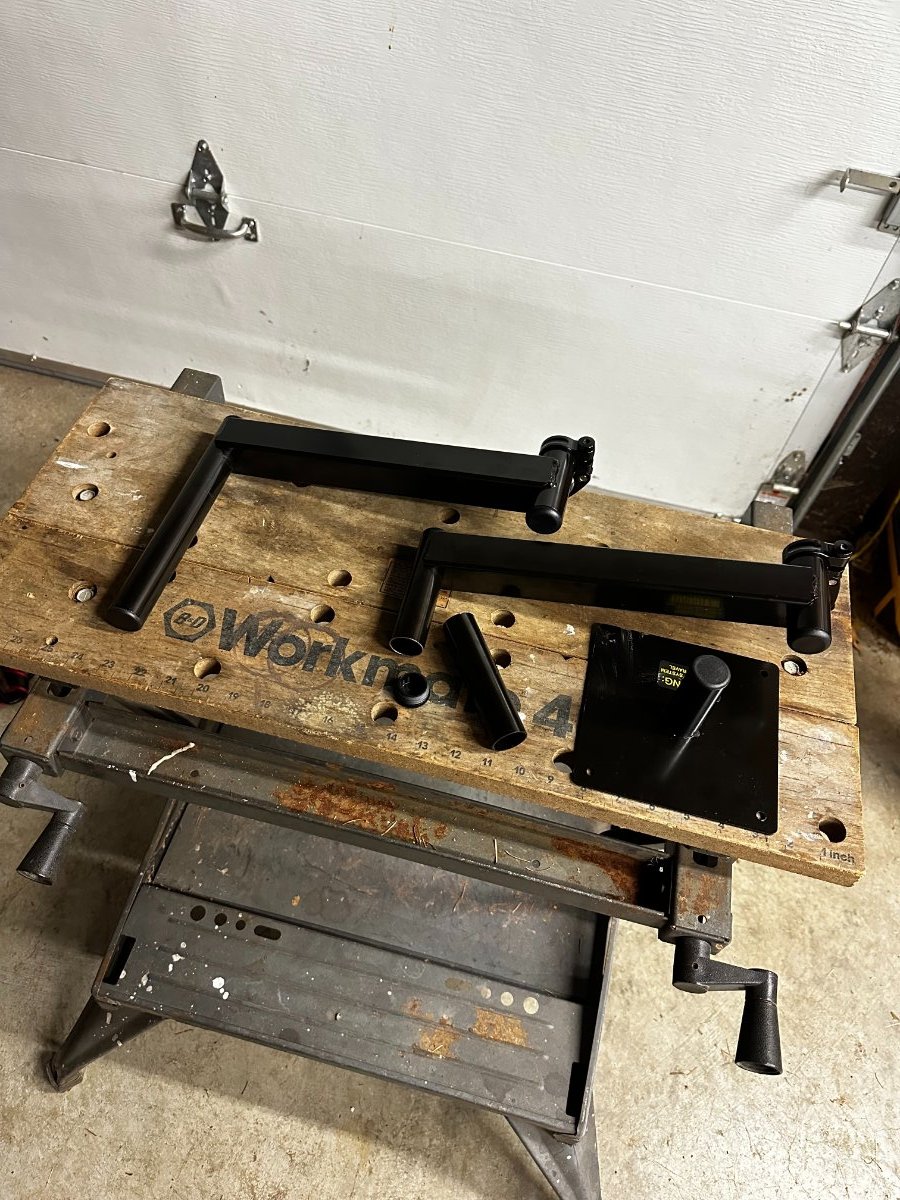
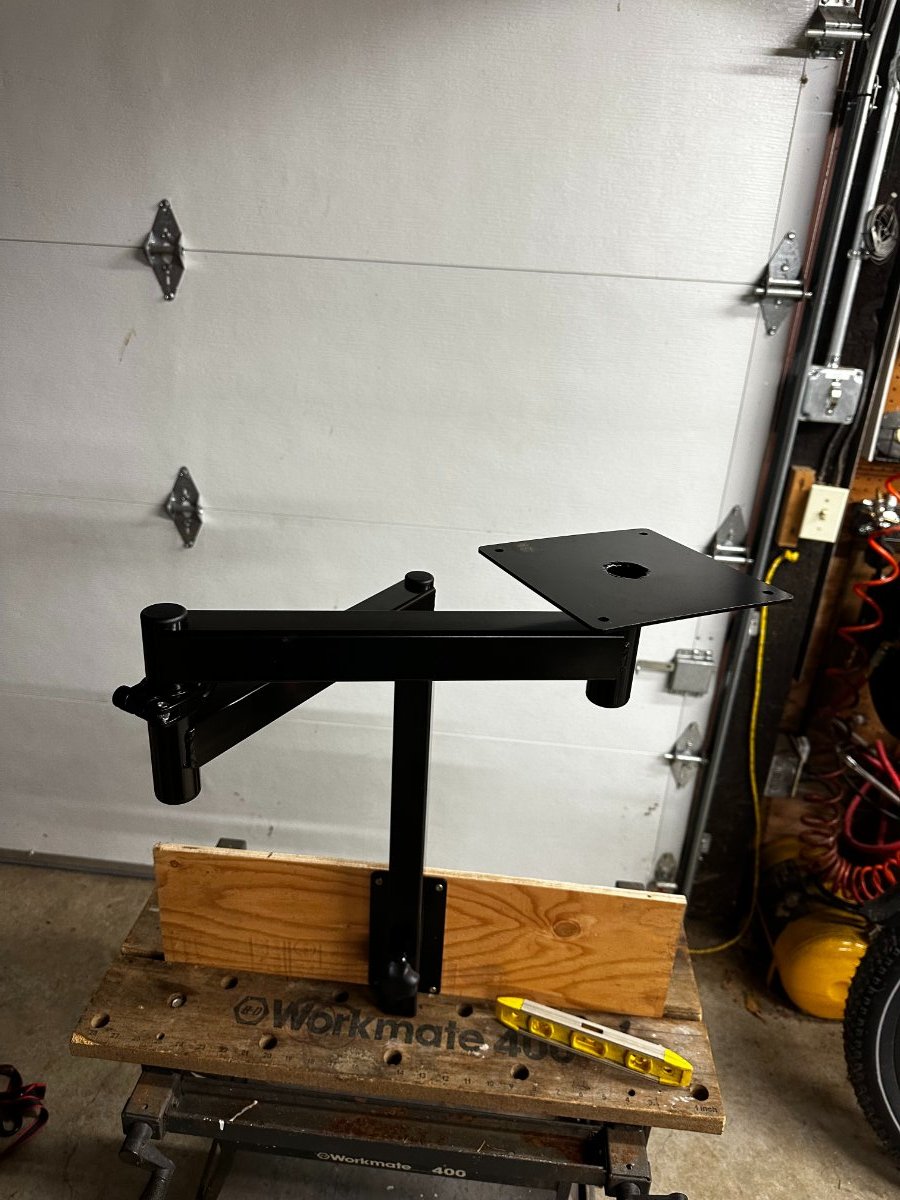
Ron, Following up on the articulating table mount. Here is what I plan to install in "Coddiwomple" (Elite 1) when we get it next spring. With this setup we should be able to position the tabletop next to the stovetop and my wife is happy about that. It is a lagun-type removable table mount and seems to be very strong. The powdercoat finish is nice and the fit is tight. I contacted Foy and he can make a tabletop for us with the underside routed out to lighten it up so I will order that later when I dial in the final tabletop dimensions. Need to figure out support bracing and backing later. Might have to have a custom brace made so as not to stress the fiberglass. I purchased this from EZ-Reach (division of Cass Hudson) and spoke to the design engineer about my plan to add a second arm so I would have an elbow like movement rather than just one arm with an arc. He thought it was a good idea and would work so I ordered two of the 12" arms. I cut one tube down so it would fit in to the other and it works great. I extended it out all the way and put 20lbs on the table bracket - It is solid. Now I just need a trailer to install it in! David Purkey
1 point
-
42 to 45 psi. 50 at the very most. 80 psi is the maximum that the tire can take, it is not at all appropriate for a little trailer; running double the ideal inflation pressure will beat up the frame, hull and your personal belongings😳 Have you been finding stuff shaken up, rearranged, and or lying on the floor? Does your television fall down? BTW, Did you ever get a tire inflator? You started a thread asking about it and sort of dropped out. John Davies Spokane WA1 point
-
Out of curiosity I Googled whether a separate regulator is needed for a Champion dual fuel generator connected to an RV propane outlet. I found this web page: https://www.jaycoowners.com/forums/f7/tips-for-running-dual-fuel-generator-on-propane-62240.html As I read this, you will need a different set of hoses to run the generator from a quick-connect outlet. For me, this has confirmed the decision to run my Champion generator from a separate propane tank. I will only have to haul one hose set. Hope this helps.1 point
-
It would be the height of folly to pull even a lightly loaded LE2 with a TV rated for just “up to 3500 pounds”. Legally speaking. Is there any reason not to buy the Gladiator? John Davies Spokane WA1 point
.thumb.jpg.91ab93de4a01f9040d89cc75c92a3115.jpg)


-
Recent Achievements
-
")


")


")


