Leaderboard


Popular Content
Showing content with the highest reputation on 02/01/2024 in all areas
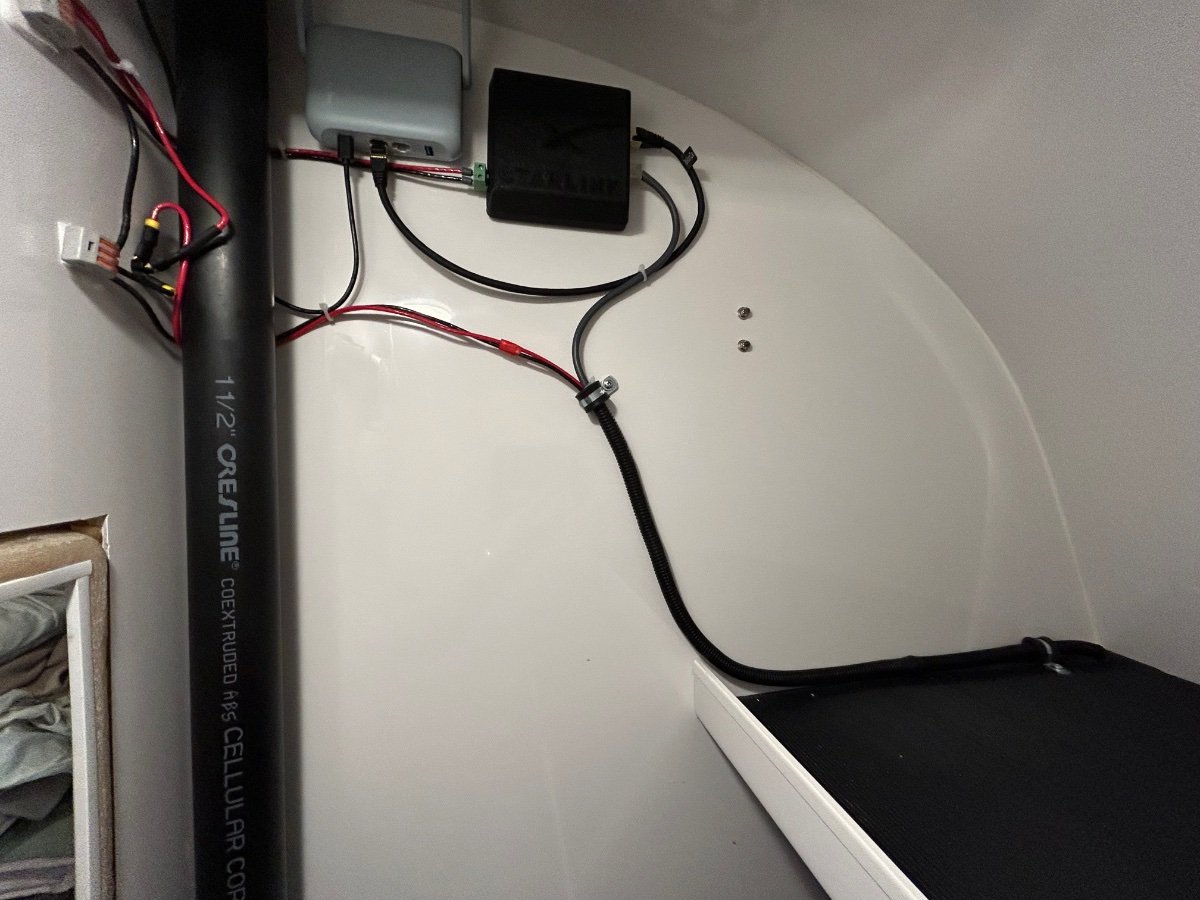
-
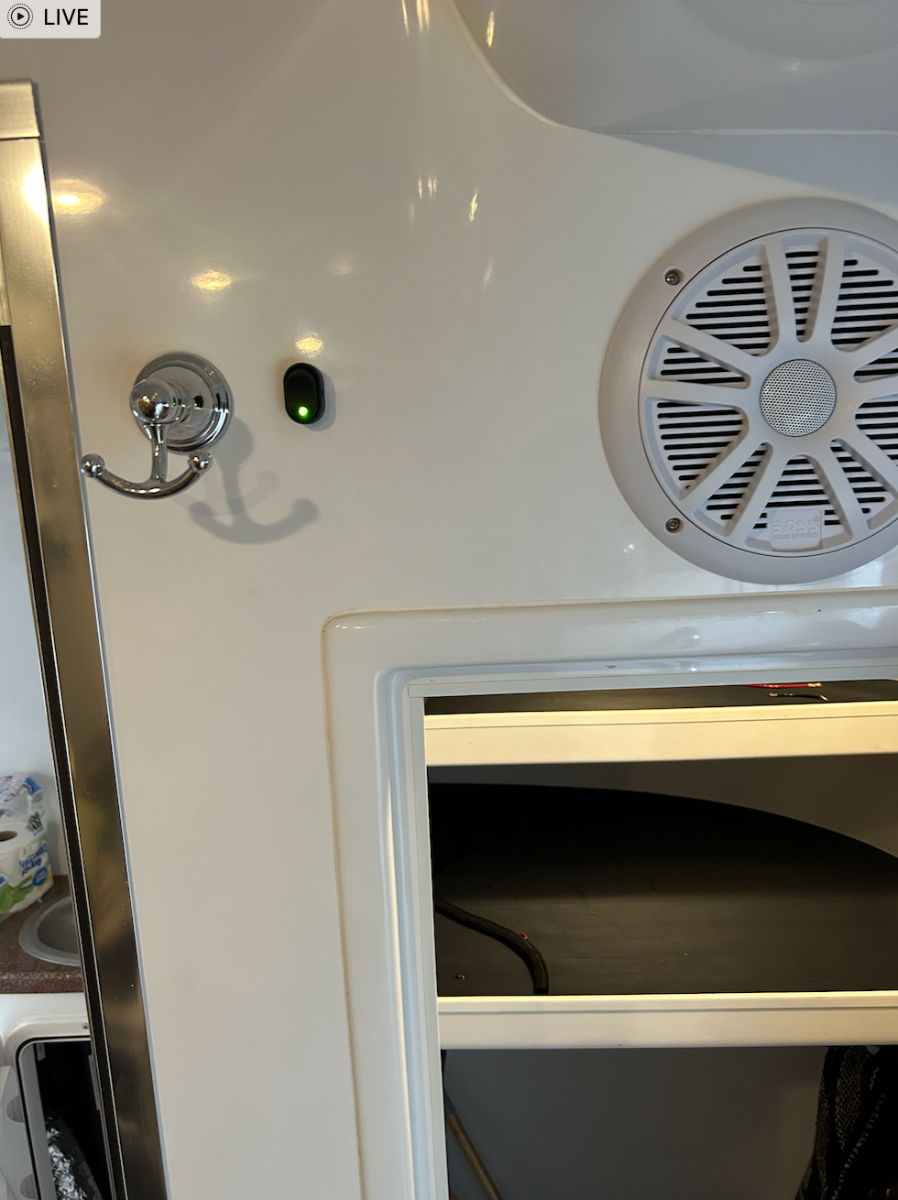
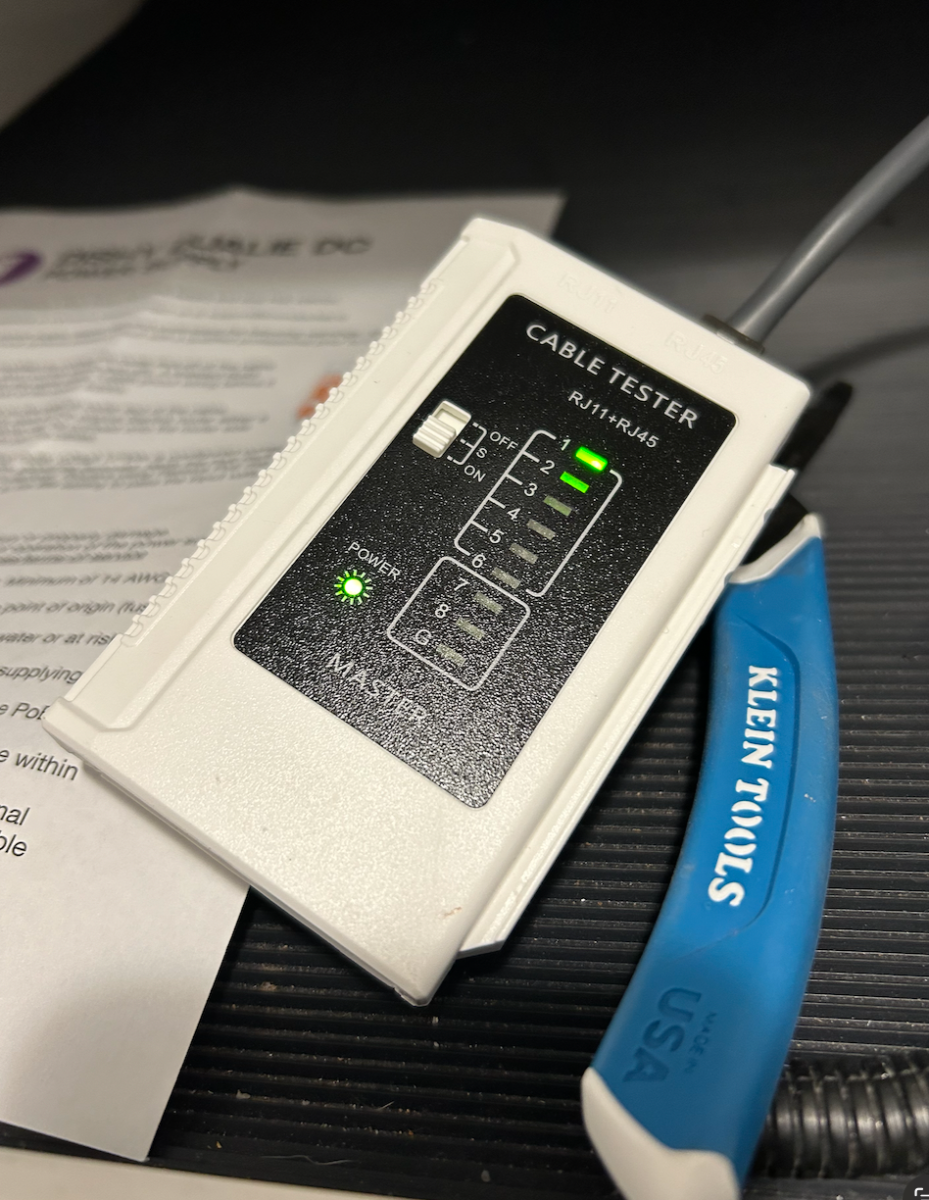
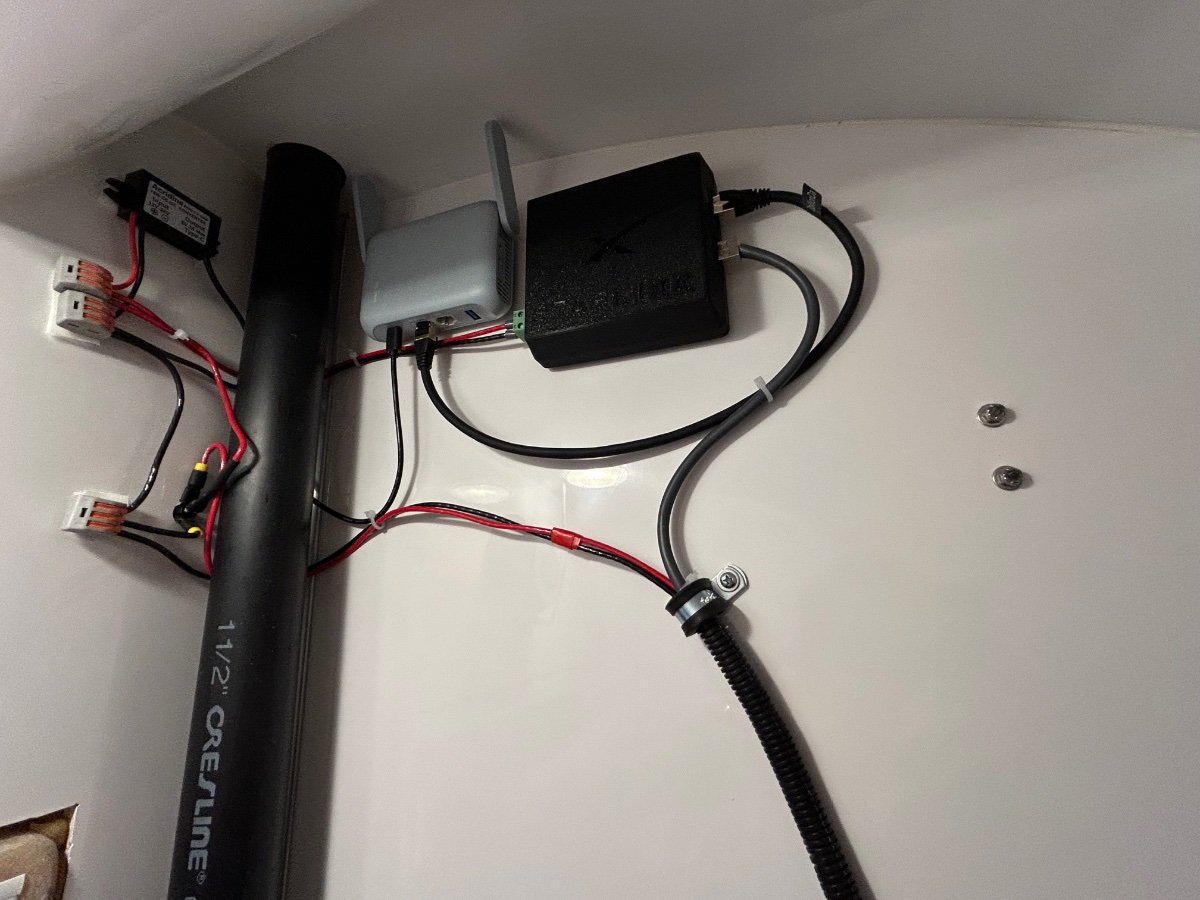
STARLINK 12vDC Conversion UPDATE #2: While after 5+ hours of "final install" steps, we're about 90% complete. Todays efforts include the following: 1. Power Switch: Determine SL power switch location, drill 1/2" hole in bulkhead, pull supply, ground, and load wires. Connect switch. Green LED illuminated indicates that SL kit is energized: 2. Prepare "Closet-end" ethernet cable with an RJ45 shielded connector. Test the continuity of the ethernet cable from the Dog House connection to the Duely circuit board inside the closet with remote tester: Above pic show the rolling continuity test between Dog House and (below) closet end: 3. Mount Components: Roughly mounted components in general area of need with blue painter's tape. Final locations of component will be adjusted slightly for best wire runs. Planning to use a strong double-sided "carpet-type" tape for final install: (L to R) Components are 12 to 5vDC power converter which supplies power to mini router, next is the back of the power switch, then the mini-router - power cord and SL ethernet cable visible on bottom of unit, finally - the workhorse of the mod... the "Duely Dishy 12vDC to 48vDC power supply and Power over Ethernet (PoE) injector. Visible on the Duely is the red LED "ON" light, the mini router cable on top and below, the SL Dishy ethernet cable from the antenna atop the EZ-Pole: 4. Prepare the power supply wires: Turned main battery bank switch to "OFF" which is located inside battery compartment. Connected positive (red) 12AWG stranded to main bus from battery bank below aft dinette seat/pantry area. "Anderson-clipped" an inline 10amp fuse (recommended by Boondocker.oi) as close to the bus as practical. Connected negative (black) 12AWG to the main negative bus which feeds into the Victron SmartShunt. After double-checking SL power switch LED "OFF", turned main battery switch to "ON". 5. Energize the SL Kit: Ever watchful for the release of the magic smoke from black boxes, selected the "ON" position of the SL power switch. Got the green LED to illuminate - good sign. Peeked inside the closet - no smoke, another good sign. Opened the SL app and followed the connect procedures - exactly like with the 120vAC router configuration. The system behaves in the same manner with the 12vDC mod. Waited a few minutes for the system to go through its satellite connection protocol. Selected "Casa Blanca Starlink Kit" on the iPhone, Settings, Wi-Fi, which was programmed into the router yesterday during the test set-up drill. Ran the speed test and got 209up/12.5down - good sign, yet again. 6. Check energy consumption: The CERBO S GX registers our baseline (no systems in the OTT on) background/phantom wattage consumption at 8w. With the SL energized and connected and all other systems "off" the energy consumption registered 52w. So, that's indicating that the SL kit is pulling 44w. This is lower than we thought as during CERBO readings with the 120vAC/Inverter tests averaged about 70w, that's about a 37% decrease in energy using the 12vDC configuration. Not bad - another good sign. FULL DISCLOSURE: Today's plan was to have the components full mounted and system tested, frankly, I ran out of gas - the components in the closet will still be there tomorrow when they get permanently fixed to the bulkhead. Oh well, it's time for a cold one, friends! Cheers...
 6 points
 -
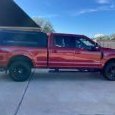
JD, we do, too. It’s made by Highway Products in White City, OR. We try to keep the weight at 100 pounds or under. Because of the width, there is a set of brake/turn signals on top. The bars also accept Yakima round bar fittings.
4 points
-
OK... You're boon docking in a remote area on BLM/Public land and you experience a critical medical emergency requiring local EMS response. A call to EMS on your commo device (either via local cell net, Starlink, PEPWave, SATPhone, HAM radio, or whatever) will require a hasty report with specific location information as accurately and efficient as possible. You may not have an accurate street address or may not know your grid/GPS coordinates. Even if grid/GPS coordinates are known, this data is a lengthy alphanumeric string of up to 17 characters which could easily be jumbled up or miscommunicated in the heat of the emergency, sending responders to the wrong location. Using the first 6 lines in a military-style "9-Line MEDEVAC" report is a good start to communicate for your EMS request. Line 1 of the 9-Line MEDEVAC format contains the most important data in the report - your location, expressed using either grid or GPS coordinates or a simple street address. Clearly, this critically important data should be quickly and accurately conveyed to the response team in a life-saving scenario. The problem is making this happen accurately from a remote location. An available free application has solved the problem - it's called, "what3words". While attending an amateur radio campout last week, "QuartzFest 2024", one of the EMS presentations introduced this application and how it can be used to more effectively vector-in a response team. At https://what3words.com/products/what3words-app you can learn what this app can do to accurately describe your location to an EMS team using only 3 random words. The developers of "what3words" have mapped the planet into discrete 3-meter grids, each of these grids is assigned 3 random words that never change. For example, sitting here in my living room, my "what3word" address is: "seamlessly.gossips.bottle". Should an emergency response be needed here, we could contact response personnel and pass along these 3 words to describe the location of the emergency. Provided the local EMS has access to the free app, many do, they'll be able to navigate their way to my living room. Responders across the country are using this app, as are companies like Amazon, Uber, and food delivery services, to bring their resources to a precise location without grid/GPS coordinates or inaccurate street addresses. The "what3words" address is compatible with many navigation apps and can be shared via text. Turns out, last year during the QuartzFest, an attendee experienced cardiac arrest. One of the HAMs contacted Quartzsite EMS, quickly communicated the specific "what3words" address of the patient's location and EMS deployed to that grid square using the app's navigation feature. We've got our family members up to speed on the "what3words" capabilities and would like to get the "word" out to the OTT RV community to consider using as part of their boon docking regimen. Stay safe out there! Cheers!3 points
-
I will join the others with my response for some warranty work. First after we picked up our Oliver we spent the couple days at Oliver then we had plans to head south to explore some areas we had not been to yet. On our way back home we came back past Oliver and stopped, no appt, they had someone come out and take a look and fix a couple small items we found - been a couple weeks. Second - I submitted a ticket on some other issues I suspected this fall, got an email, ticket was updated and did actually get a call next day to discuss the issues. Walked me thru some diagnostics and determined problem, they scheduled appointment for spring to get warranty work completed and schedule yearly maintenance while they had it. Cudo's to those folks, they truly help distinguish Oliver from other Brands/Companies.3 points
-
I have been using what3words for a while now, and it is really high resolution, down to a 3 meter area. I have a Motorola Defy, which uses a satellite, but I'm not sure how quick the response would be vs. having cell service and using 911. But would highly recommend what3words.3 points
-
You may have already fixed this, but just in case: Oliver uses (at least in our 2021 trailer) a push latch like this: https://www.amazon.com/CampN-Pair-Push-Catch-Replacement/dp/B074WFN45Y?th=1. They work well, and should work well as retrofits on older trailers also. A note of caution: their little tabs can break off if a drawer is forced closed and the latch is not in position to accept the tab, rendering the latch useless. But if the drawer is tilting and not sliding correctly, I would check two things first: (1) there is a flat pin at the back of the drawer that has to fit into a hole drilled into the rear wooden drawer panel. If the pin is not in the drawer then the drawer will not be correctly fastened to the Blum slides. Second, if the front drawer latch (the orange one toward the front of the drawer), is not fully attached to the slide then the drawer will tilt and the slide will not operate correctly. If lying on the floor and installing the drawer, you should see and hear the orange latch click into place. Yes, it looks like the orange latches you have in the photo are the correct ones. Our trailer too has these Blum tandem slides. They are arguably among the best in the business. Blum instructions specify mounting the drawer slides to the cabinet wall with 3 screws. This might be fine for non-rolling homes, but rolling kitchens need more screws. After the first year (and 8,000 miles) several of ours had jiggled loose (leading the slides to move and the drawers to appear tilted). I installed more screws into each slide (after removing the drawers from the slides) and have not had a problem since.2 points
-
Good idea adding an inline 1amp fuse... We also put a small piece of Scotch Tape over the REALLY BRIGHT green LED - it fully illuminates the front of the rig at night!2 points
-
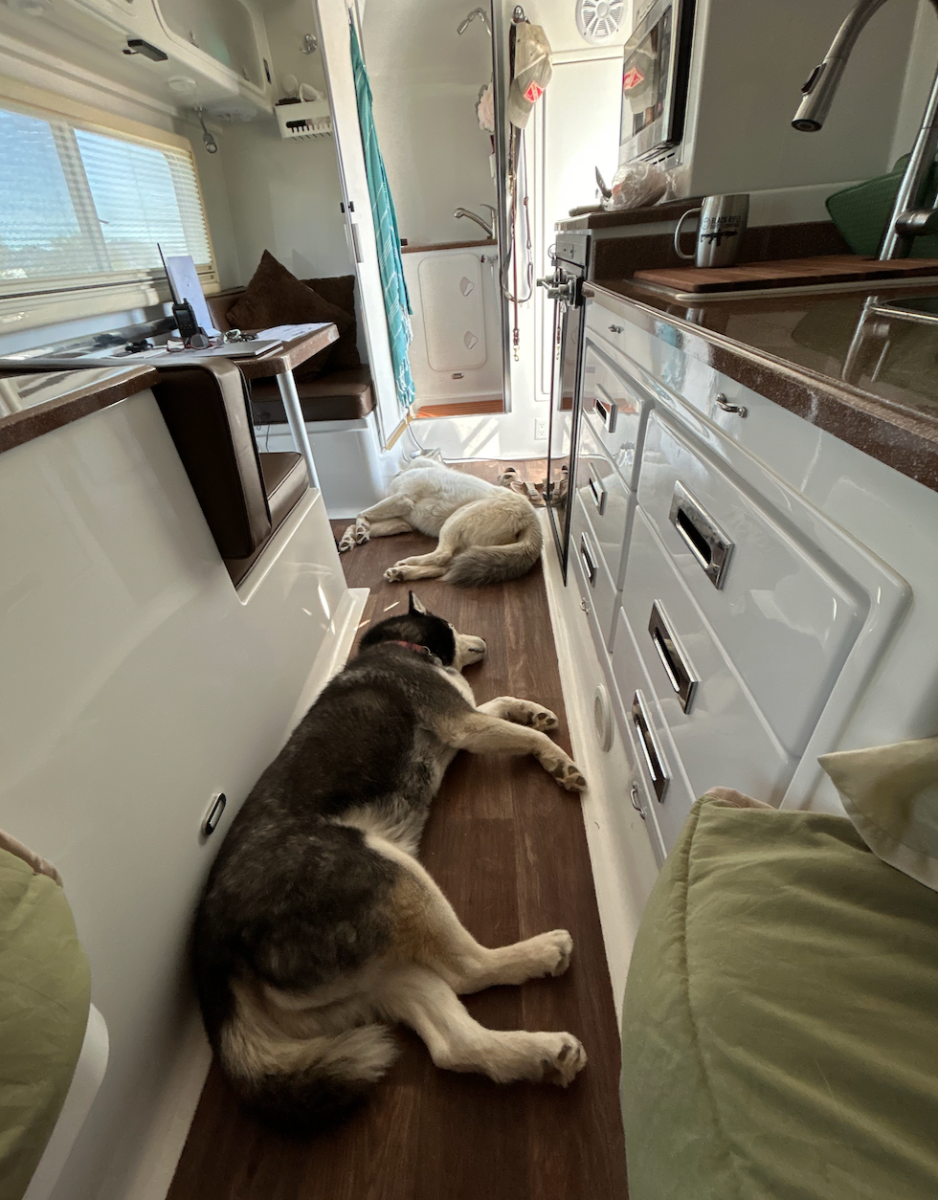
HA! Couldn't resist quoting you on this one, JD! Magnus (4 years next month), the white one hails from Colorado Springs, Oscar's pedigree, OTOH, totally unknown to us. Doesn't matter, IMO, he's a rescue about 10 years, also 65lbs, but he's still able to jump up to his rack (with the help of the table top on top of the rack rails). Plenty of room for all 4 of us because the "boys" usually curl up into little "Husky Doughnuts": But then again, sometimes we need to deal with serious "Dog Logs" in the passageway: HA! OMG, we love traveling with these two Knuckleheads! Cheers!
2 points
-
Chris Neuhaus, Stephen Cobb, and Marla King all have lockable boxes on the rear. Still need to remain under 150lbs.2 points
-
Same here... We've never had anything but exceptional service from Mike, Jason, Hannah, and Ryder. Their performance only adds more value to owning an Oliver - giving owners confidence in their rig. For example, last May we were headed down to Mexico and overnight near Tuscon, we discovered the water heater was inop. With no time to file a maintenance ticket, called Mike and we figured out that one or both of the two thermocouples in the Atwood unit could have failed. This troubleshooting was accomplished while driving westbound on I-10 approaching Tucson. Well there's a Camping World just north of the interstate, calling them we learned they've got both the electrical and gas thermos - in luck! Vectored to CW, bought two each of the thermos and replaced them in their parking lot - put the spares in the maintenance kit. One and done thanks to Mike's troubleshooting. Keep up the great service, Oliver! BRAVO ZULU!2 points
-
Now that I have this installed in the TV, there is no way I would want it installed in the Oliver. No drilling for the antenna, no 7x7 ft of cable in the attic, and a stronger cell signal to boot. I also use my truck around the county pulling dirt bikes for a day trip and drive 3-4 business trips annually without the Oliver. Now we have Wi-Fi on board everywhere. Works well with the diesel engine running, maybe because it sits much higher. Chris can use high-speed internet while I'm driving. Yours has been sitting in your attic for 1 1/2 years (had read your earlier posts) and perhaps this year is the time to do it right! You need to make your mount so that it would sit above the A/C and btw running the air may cause some electromagnetic interference to the signal. They say the Parsec Husky is the BEST cellular antenna and that it does not require a ground plane but would benefit from one. No better ground plane than the steel roof of an extended cab pickup truck! The magnet mount sits tight, just drop it in place. I placed a towel under it until I was sure of position to make it easier to move. With this install all was required was a 1 1/2" square hole in the back panel of the cab behind the rear seat. No Dicor necessary, no caulk, the rubber grommets and housing seal on the Icotek cable entry solution is all you need. I used speed clips for the 4 small bolt holes and 3M VHB tape to mount the Pepwave to the truck cab back wall. Not just Wi-Fi at your camp, but anywhere and everywhere you drive. I can get caught up on work on my computer, while Chris is grocery shopping, or when we are parked at a restaurant! Think about that.
2 points
-
After some thought of how little we used our 3200i generator in the cargo tray on our last 42 day trip out west, we decided to move forward with a custom all aluminum cargo/storage box from Sea Biscuit metal fabrication shop. My wife and I took a 3 hr drive up to Johnson City, Tenn and visited the Sea Biscuit metal fabrication shop. We met David and Kristine Hess the owners. Some of the nicest folks you will ever meet, and they are campers as well. After seeing the high quality of the Oliver storage boxes that David and his team craft we decided to purchase one. The fit and finish is excellent. We like supporting small companies and their products made right here in the USA 🇺🇸. We know we will get a lot more use from our cargo box each time we set up camp. It has lots of room for all things for initial set up. Our gen will be secured in the truck bed. I custom ordered and installed the XPLOR metallic silver graphics from https://lettering.com/ another excellent customer service experience. Had a buddy of mine install XPEL PPF on the front and sides of the box as it sits in the road rash blast zone. For questions on custom boxes and pricing reach out to -https://seabiscuitmetaldesigns.com/product/oliver-box/ a few photos - PPF - I bought and trimmed a fatigue mat to fit from HF to line the shelf and bottom. Added graphics- Moose rack holds our cables off the ground. Plenty of storage for all initial set up gear- XPLOR graphics installed-
2 points
-
Another "arrow" to place in the quiver! While I use a Garmin Inreach mini that automatically transmits my GPS coordinates in the event of an emergency, I can see situations where the "what3words" system would/might come in handy. This is another good place to remind everyone about a presentation that was made a couple of years ago at the Oliver Owner's Rally. This presentation covered the type of information that each of us should have available in the event of an emergency. A copy of the information that would be helpful plus some other ideas can be found IN THIS THREAD. And, for those of us that keep this information with us - now is a good time of year to take a look at it to make sure that the data contained in it is still up to date. Bill2 points
-
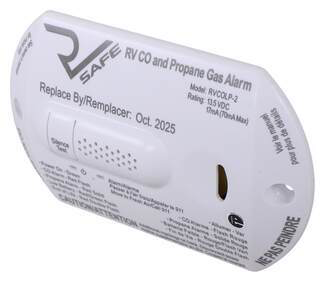
Max Burner is correct. I replaced mine this fall (it had a 2017 mfg date on it) before it went bad. Followed the wires back toward the source and found one red and 1 black wire. I also found a fuse holder in the line. I added a switch in case of futher alarms/problems, but the fuse could be pulled instead of adding a switch.2 points
-
I concur. That is why I added 4" return air vents in the closet and under the front dinette seat. (Our Hull #1291 came with a return air vent in the bathroom.) The return air vent under the front dinette seat is particularly important, because it channels more warm air through the "basement" of the street side of the trailer, and ultimately back to the furnace on the curb side. This is important not only for furnace airflow balance, but to help keep the tanks and plumbing in the "basement" from freezing. In my opinion, Oliver should install such return air vents in all new trailers. It would add little to production costs, yet would make Olivers a much better "4-Season trailer," as Oliver aggressively advertises.2 points
-
Starlink 12vDV Conversion - Final Update: Project completed. Decided to mount the components with white heavy duty Velcro. Tidied-up cable runs, all good. In fact, sitting in the OTT now connected to Casablanca Wi-Fi Starlink Kit” as I peck out this post on my mobile. Some pix that may be of interest of the final config: Internet speeds have varied this afternoon anywhere between 135 to 260mbs down and 6 - 23mbs up, FYI. That’s just a function of this location and the Starlink System. Cheers, All!
1 point
-
Living in Central Arizona we are surrounded by so many great day trips! Less than an hour to Jerome and Cottonwood, 1 1/4 hours to Sedona, 2 to the Grand Canyon. Check out Sycamore Canyon Wilderness Area, even better (2nd largest canyon in Arzona) just 90 minutes, just past Williams. Just to name a few! We're here for 3 nights, at $14 a night or $7 with the Lifetime Senior pass. Where can you get 3 nights in a most beautiful canyon for $21. No hookups, but a dump station and a separate freshwater station. 85 miles and 2 hours from our home. Burro Creek Campground | Bureau of Land Management (blm.gov) NO cell service though. Starlink would be great to have here. Also, no TV or even radio reception in the canyon. At just under 2000' elevation, winter is the season here. Low mid 30's last night and at 1:40 PM it's now 62 (a cloudy day today, otherwise it be 70+). It's too hot in the summer here. Half the sites were empty, many of them listed FF on recreation.gov. I'm thinking if you could get service here, this place would be fully booked. Stopped for lunch at LUCHIA’S RESTAURANT - 136 Photos & 97 Reviews - 15797 S Hwy 93, Wikieup, Arizona - New American - Restaurant Reviews - Phone Number - Yelp Highly recommended on any Phoenix to Vegas trip, quick stop on the Hwy 93 just north of Wikieup, AZ. They have guest Wi-Fi. Much more re our trip when we get back home this weekend, as we plan to spend our remaining time offline! Note in the first pick Charley is busy watching Dad setup camp.
1 point
-
@MAX Burner @Wandering Sagebrush Thanks gents. My bride aka navigator and I are happy with how it turned out. Your kind words are appreciated!1 point
-
@Patriot, that is a nice looking storage box!1 point
-
...ok, Full Disclosure: a little "Box Envy" going on over here in the Great Southwest! Very nice mod, @Patriot! Cheers, brother!1 point
-
I bought the same package in November 2022 during the holiday sale, even before we had our trailer. Mine is mounted in the trailer's attic, but I'm still using the stub antenna. I have the same external mount as you, but just haven't drilled that big hole yet. I'll be mounting mine on the pole mount, but mine will be on thereat awning bracket instead of using a pole.1 point
-
Those look like shim clips to make the window tight against the sill. I could get a better idea by looking at the hole and the window.1 point
-
@thompsonkd: Go back further (on the Oliver side) into the wire loom - you'll see that there's a single red wire (+12vDC)... You'll need to connect that red wire to the RV Safe detector - suggest adding an "on/off" switch since you'll be in there anyway...1 point
-
The top green LED tells you the Xantrex is receiving shore power. The center green LED tells you it's running off battery power. For some reason you still don't have shore power for your Xantrex. You need to determine if it's only the Xantrex not getting power or the entire trailer. Is your microwave working? What does the red power management display in the rear "attic" cabinet display?1 point
-
I worry about Oliver owners with the Suburban furnace that close any heat vents (supply vents) in the trailer. This is almost always detrimental to the functioning a an HVAC system but in the case of my generation of the LE II it can be dangerous. According to my furnace manual, the furnace requires 25 square inches of unobstructed hot air venting to work properly. Even a few feet of lightweight flex duct will restrict airflow and any bends in the flex duct will restrict airflow even more. The two 4" round supply ducts in the Oliver total exactly 25 sq. inches at the furnace so technically, when the runs of flex duct are considered, Oliver has not ensured sufficient airflow for the furnace to operate at its best as it is. (An analogy would be someone that exceeds the GVWR of their tow vehicle). Closing one of the two cabin vents inevitably causes a sharp increase in back pressure against the furnace fan with the result that the fan cannot move as much air across the heat exchanger and into the cabin. The result is hotter air coming out of the remaining open vent but less Btu's in total flowing into the cabin, and the likely overheating of the heat exchanger resulting in the furnace shutting down prematurely (short cycling). In milder weather, this might not be noticeable but it is dangerous in colder weather because if the high temperature limit switch in the furnace ever fails, there is a serious risk of a fire. The only safe way to increase the flow of hot air into the Oliver's cabin is to increase the number or size of return vents, which will reduce cabin pressurization when the furnace is running and thereby enable the furnace to move more air (and Btu's) through and out of the supply ducts. In my experience, the key to comfort and balanced heating in the Oliver along with a warm bathroom is to ensure that all the hot air from the cabin must flow through the entire basement on its way back to the furnace, thereby heating the entire basement as well as the cabin. This requires additional return vents in the middle and front (bathroom) of the cabin.1 point
-
Dunno if this will help you?
1 point
-
The absence of return air vents in Olivers before 2022 also impedes air circulation, and, therefore, distribution of warm air to the front of the cabin. For your Oliver, I recommend the ductwork upgrade detailed by Minnesota Oli. My Hull #1291 came new with upgraded ductwork. Yet, I have also added more 4" round return air vents to the closet and under the front dinette seat. See this thread: As noted in that thread, our Hull #1291 came with a return air vent (as well as a supply air vent) in the bathroom. In your earlier model, I would add such a 4" return air vent for the bathroom as well. With these return air vents in the bath, closet and under the front dinette seat, the flow of heated air in our 2022 Elite II is much improved. The front of the trailer is no longer cold. Good luck!1 point
-
I agree with “dewdev” on the grill dampers. I removed the damper from behind the grill at the kitchen and the one from behind the grill in the bath. I typically have the one under the bed mostly closed allowing the heat to flow mostly towards the front of the camper so that the furnace return will draw the warm air back towards the rear. Seems that the rear stays pretty warm compared to the front so hopefully this helps balance out the heat distribution some. Remember that the outer hull is insulated so even if the basement is heated, the floor will be warm.1 point
-
Our 2022 E2 doesn't put out much noticeable heat in the bathroom. I had to go under the sink for something else and found no kinks. I think the lack of airflow (heat) is related to the long distance from furnace to bathroom vent. We have the same thing in a bedroom and bathroom furthest from the furnace at home.1 point
-
Hull 45 has *no* ductwork, it just has a single grill attached to the heater itself. All the early Oliver's I've seen so far have been built this way.1 point
-
2015 LE2 # 75 has a heat outlet under the toilet paper holder in the bathroom.1 point
-
Was Texans for near 10 years (2006-14) if that counts! Best state in the union for business, earn a good living, putting your children through school, high school and college sports, cost of living and many more reasons! Ran the TX to AZ roundtrip dozens of times! Our son's middle school tennis coach taught us a term we still use today. She'd say, "All y'alls" gather round, and we couldn't wait to hear what's next! Where but in Texas do middle schools have tennis teams? Yes, football of course. Our son played 1-2 tennis tournaments monthly in just about every city in Texas, from Abilene to Houston, Wichita Falls to Laredo and everywhere in between! He later played for a division 3 Texas university. We just loved traveling everywhere in Texas, our fondest memories. Welcome to the club and enjoy your new Oliver!1 point
-
Looks like a great spot! We enjoy Dead Horse Ranch State Park and the surrounding area. We’ll be leaving for AZ Monday. Mike1 point
-
The Oliver checked all the boxes. Before buying, while shopping, I asked my self the following about various trailers: 1. How's this thing gonna do off road? How's the clearance, suspension, tires, etc? 2. How's this thing gonna tow? Aerodynamic? Good tracking? Too big or too small? 3. How's this thing gonna do with upkeep? Will screws pop out? Will things fall off? Will parts of the trailer de-laminate? 4. What's the deal with the manufacturer? Will they stand by their product? Will they answer my phone calls? How's their quality control? 5. How well can I boondock? How are the water tanks, propane system, solar generation, etc? 6. Is it pretty? After renting a Jayco and an Airstream, and kicking the tires on a lot of other trailers, the only thing I could find that had the right answers to the questions above was Oliver.1 point
-
I second what Mike wrote. We're able to see around the trailer with just our stock mirrors on our Ford Expedition. It tracks in the same area as the tow vehicle, so it's easy to tow and we're not concerned with where the trailer wheels are. John1 point
-
Our 2022 Oliver is our 4th trailer: 1 travel trailer and 2 fifth wheels prior. Our main goal in moving to a molded fiberglass trailer was to reduce potential roof leaks and the damage they can cause. Ease of towing was a secondary reason. When it comes to the molded fiberglass trailers, Oliver has no equal, as you'll find when you see one in person. (Note that Olivers are heavier than their molded fiberglass competitors, requiring a more substantial tow vehicle.) What we've found to be the Oliver's strengths are: construction materials, size/maneuverability/ease of towing, the lithium/solar package (love this), and sound proofing (the double hulls and dual pane windows can really block outside noise at night). Service has also been better than most RV manufacturers. Weaknesses have been various errors made during its construction and the inherent limitations of its size (limited storage, smaller tanks, etc.), but we understood that we were downsizing. To be 100% honest, our Oliver has not been as trouble-free as we had hoped, perhaps because it was a COVID-era unit. I've detailed our problems in this forum so I won't repeat them now. Fortunately, Oliver service has largely lived up to their reputation in addressing our issues quickly and we're starting to enjoy our trailer more now. Also, to be honest, we've heard far worse from many people who bought non-Oliver RVs in the same time period, so I suppose it was still a net-positive for us. There's only one other manufacturer I would consider today, and they're brand-new, so it remains to be seen if their reality can match their promise. How do you plan to transport your sea kayaks while towing the trailer? Rooftop on the truck?1 point
-
As topgun2 and Rolind mentioned, the quality of the Oliver is one of the best in the industry. Oliver is far above the others in support of their owner's (both new and used). Contact the Oliver company and they will let you know where the closest Owner's are located to your location who can show you their Oliver. They will also set up the meeting day and time for you. I suggest that you look at both the Elite and the Elite II for comparision.1 point
-
@DonnaDuane here is a list of the EMS codes, looks like open ground! this box should be under your rear dinette. Check out this thread, sounds like (might be) your ground bonding plug is faulty, so either get a replacement neutral ground bonding plug, or turn off the EMS and trust the generator. IF it’s a faulty ground bonding plug, a replacement bonding plug is not that expensive, that would be my go to. Stupid question, did you check if the ground bonding plug is seated properly in your generator?
1 point
-
Seems some of my posts are not showing up here. I posted the following last night to see if any of you know that this means. When I run the generator the LED on the EMS switch lights up, so power is getting to that switch. However, still no power to trailer. When it's switched to the ON position, I get the following codes: 128, OA, 60H, E2, PE2 Just spoke with Oliver. Here's what I learned. Those codes are saying either the Neutral Ground plug is faulty, or the surge protector is faulty, or the connection to the bypass switch is faulty. He recommended having an RV Tech check it out after trying a new Neutral Ground Plug. Duane
1 point
-
Please post up what you learn from service. It will be invaluable feedback for everyone. I feel sure they will get you taken care of quickly.👍🏻😊 Patriot🇺🇸1 point
-
Yes. have been using a Bonding Neutral plug since I got it. I have been using the generator for power to the trailer for the past 5 winters, as that's when I use the Oly most. I take it skiing. I just learned from Service that I need to record the messages on the EMS LED when switched on. It displayed an error message and some other info. I checked the circuit breaker panel for issues and found none. Thank you for your suggestions and keep them coming if you know how to get this thing working again.1 point
-
A neutral bonding plug plugs in to one of the 120V receptacles on your generator. It looks like the image below. Your Oliver electrical system will not accept power from a generator without one:
1 point
-
I have the same adapter I’ve used for years that I plug the 30Amp cable into1 point
-
Do you have your neutral ground plug - plugged into the generator?1 point
-
My favorite English professor in college used to write romantic stuff to his wife. He once wrote their initial relationship was like "sweet wine," but that over the years as the relationship deepened, she became more essential, like "morning bread." He reported that the "morning bread" analogy was not well received...1 point
-
I am one of those guys that has to keep his vehicle looking and smelling like it just rolled off the showroom floor. Of course, it gets dirty from daily use, and we do eat in our vehicles, but periodically, I get that itch to detail it to perfection. It just so happens that it always happens before the trip. Now that you mention it, I do believe my cleaning routine may just be a subconscious way to verify that it is in good working order. Regardless, I travel much more comfortably and calmly in an immaculately clean vehicle. We are planning on leaving on Sunday now (my wife's idea). We will stay in a hotel in Hot Springs, AR. Any good things to do there with a dog, anyone? Then travel the remaining distance on Monday before our appointment on Tuesday. I know that the excitement of finally getting our Christmas present will eventually wear off, but this trailer really is a means to an end not the end itself. At the end of the day, it is a tool to allow us to do the things we love.1 point
-
Pretty sure they have a 5 year shelf life. 2017 / 2018 trailers are pretty close to done. We replaced ours last year.1 point
-
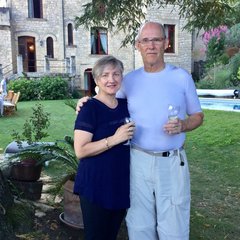
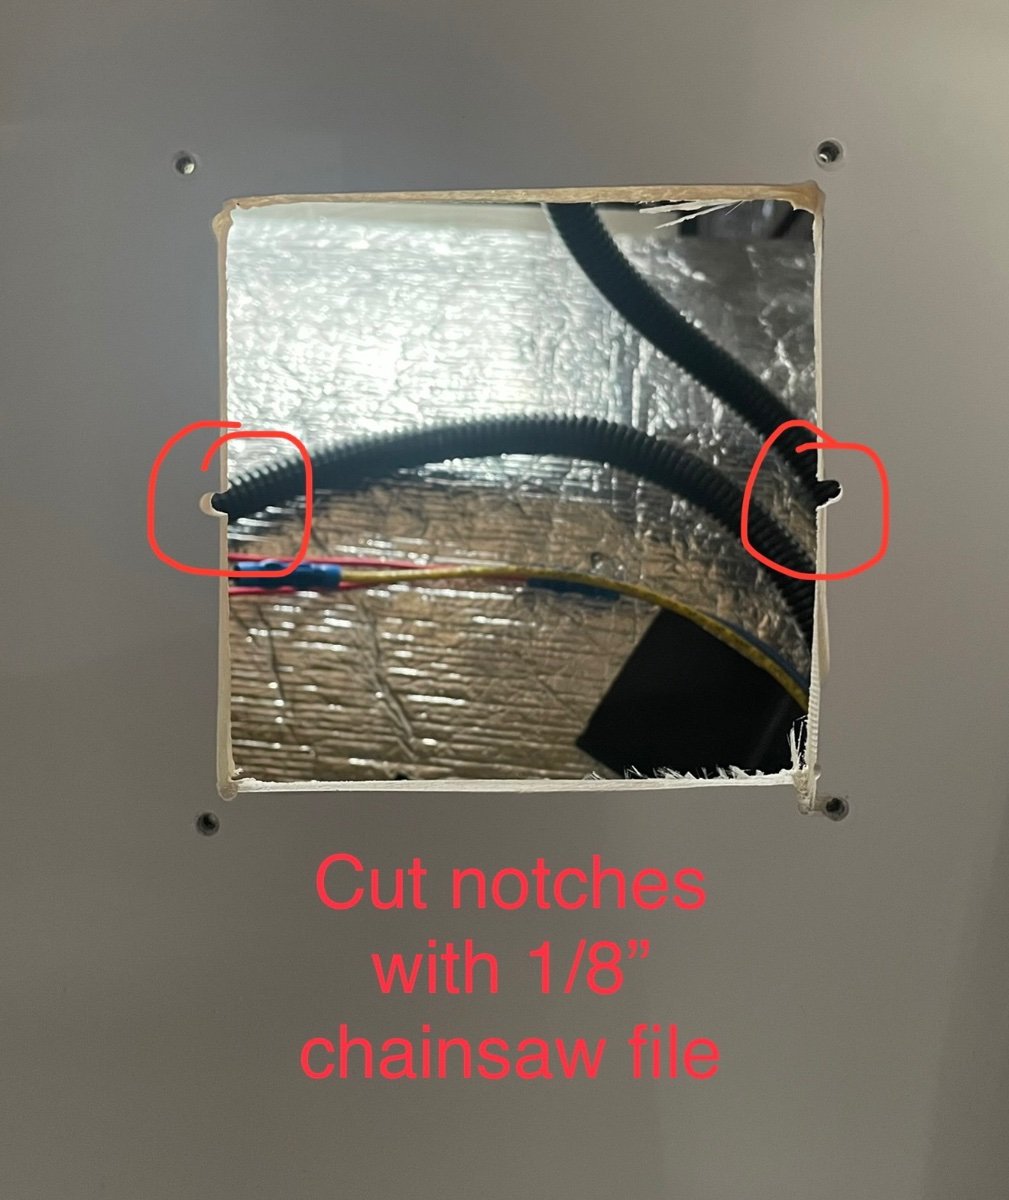
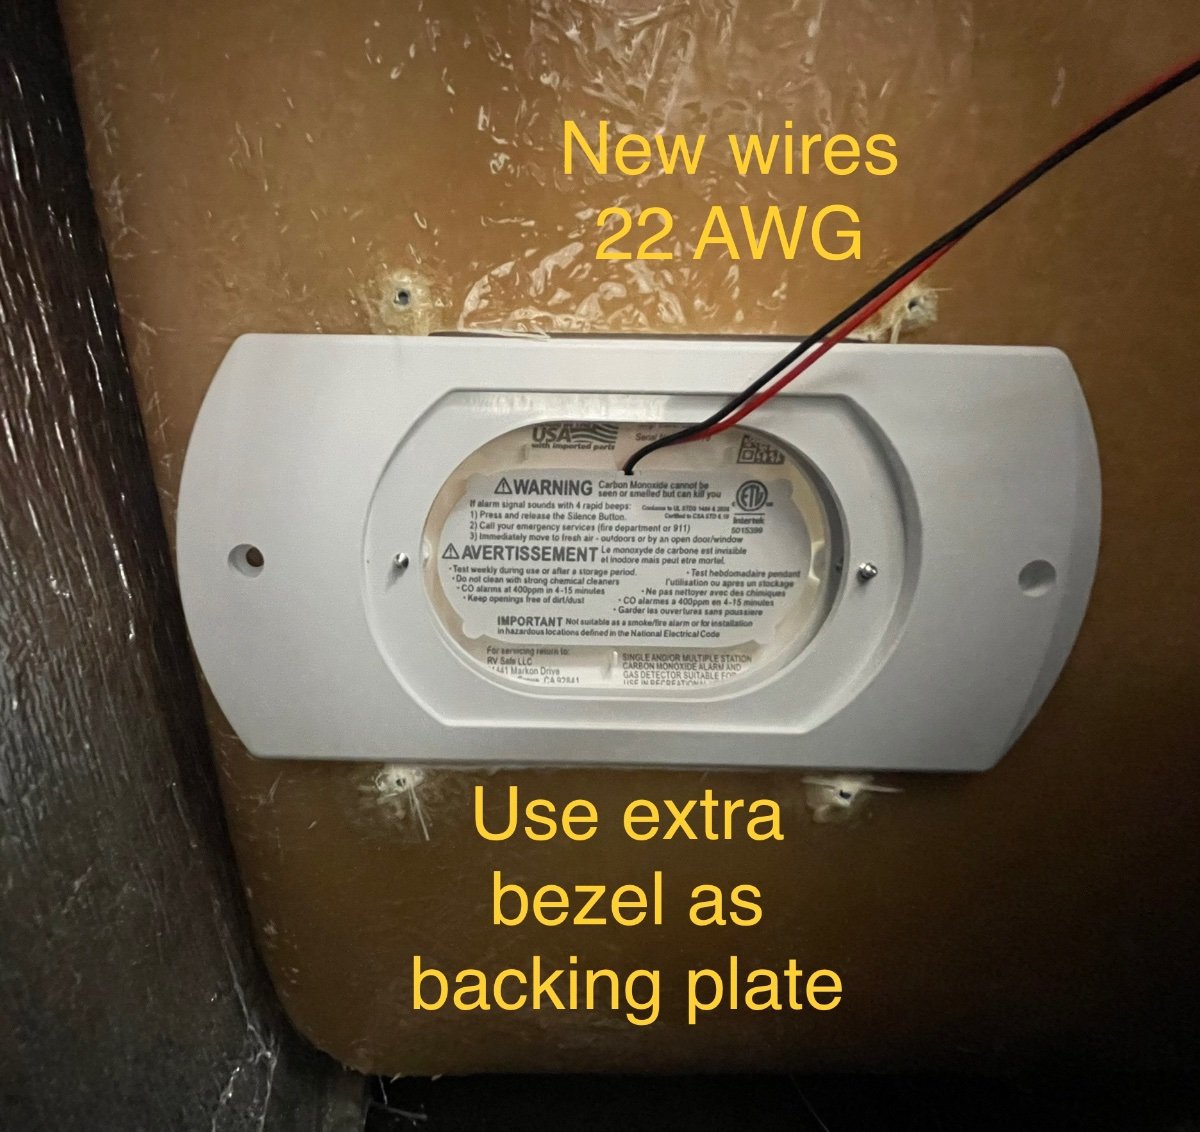
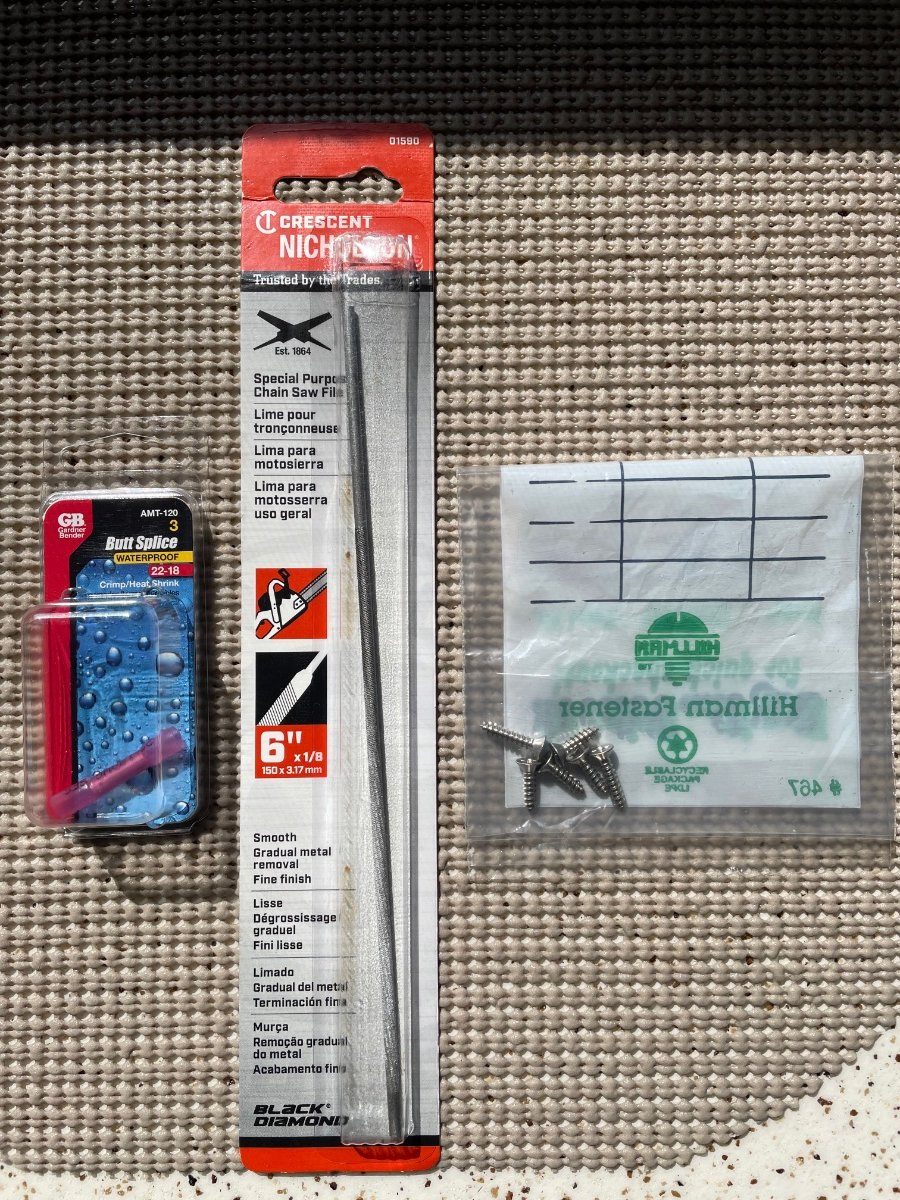
I didn’t want to drill any holes so I used an 1/8 inch chainsaw file to make a small notch on each side of the existing hole I enlarged the existing holes on the large bezel provided in the box and used the small bezel provided as a backing plate for 2 (#6 I think) flat head SS screws inserted into the 2 enlarged holes and through the notches and used 22-18 ga butt splices to attach the wires since the old monitor had 18 ga wires and the new one has 22 ga wires stuff you’ll need -(2) 18-22 ga butt splices -(1) 1/8 inch chainsaw file -(2) #6 x 5/8 inch SS flathead screws
1 point
-
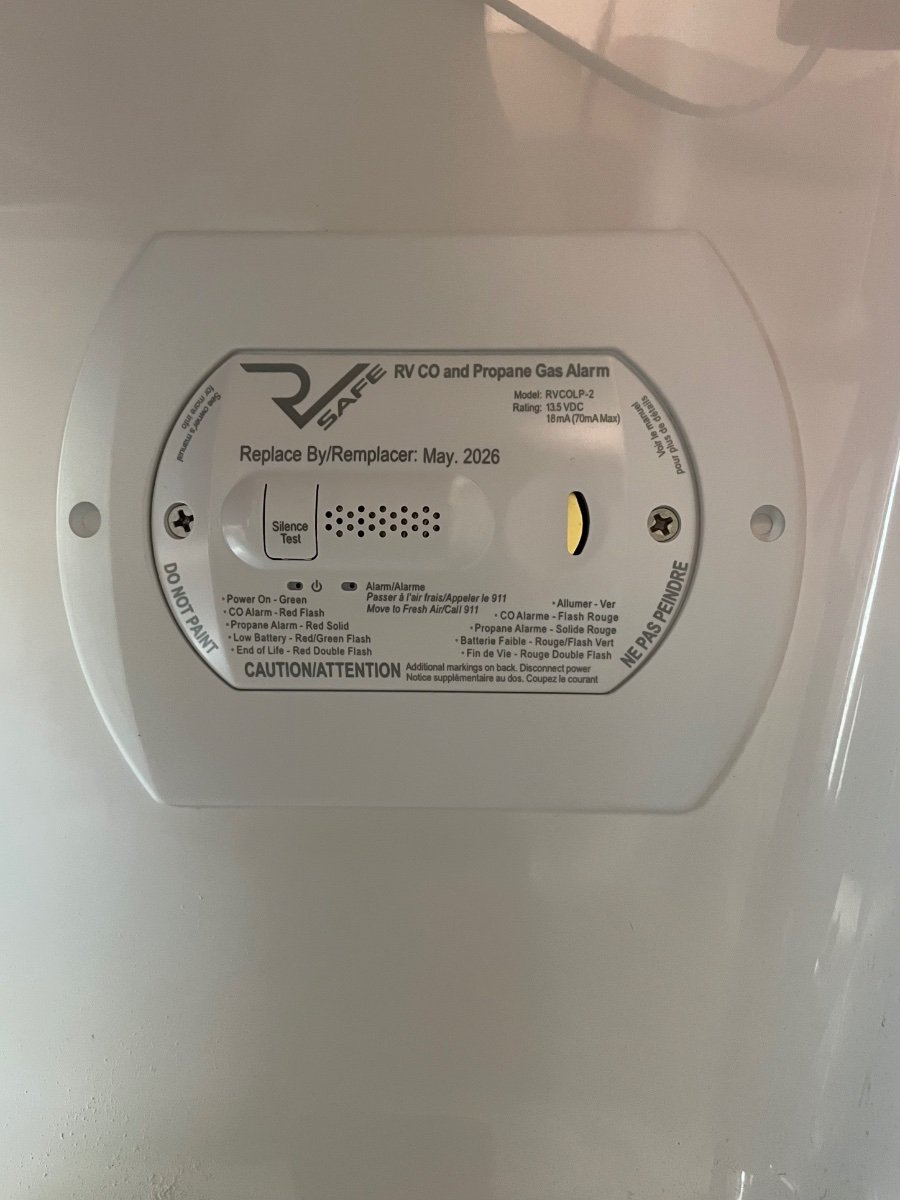
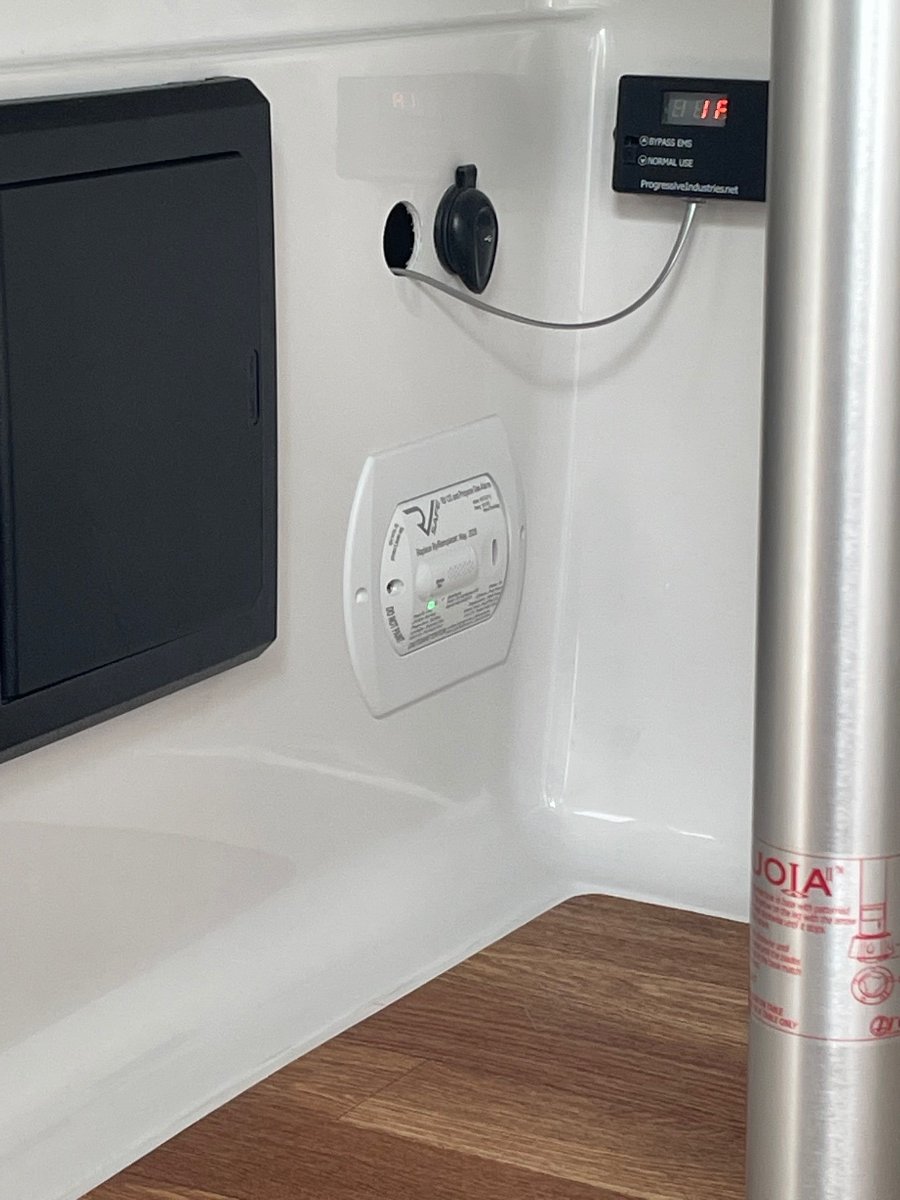
I just replaced the one in our new older trailer with a alternate brand. The one used in the 2017 Oliver was hard to find (Atwood) and about 40% higher in price. The installation was easy enough as one of the two supplied faceplates covered the existing hole and only required a pilot hole for the new screws. Below is the link to the one I installed. No more alarms in the middle of the night! https://www.etrailer.com/RV-Gas-Detectors/RV-Safe/RS34FR.html
1 point
-
We purchased ours in March of 2020. Ours went bad last month. I contacted Oliver and was directed to file a warranty claim with Dometic. I got the new one in this week and will install tomorrow.1 point


.thumb.jpg.e34bf01ef7f7d5e99ad31856d45afbeb.jpg)


-
Recent Achievements
-


")


")


")


