Leaderboard


Popular Content
Showing content with the highest reputation on 05/24/2024 in all areas
-
I've been a member watching from the sideline since February 21, 2018. Now, retirement is a week away and we pickup unit #1525 June 8th--EXCITED IS AN UNDERSTATEMENT!!! Delivery photos coming soon.7 points
-
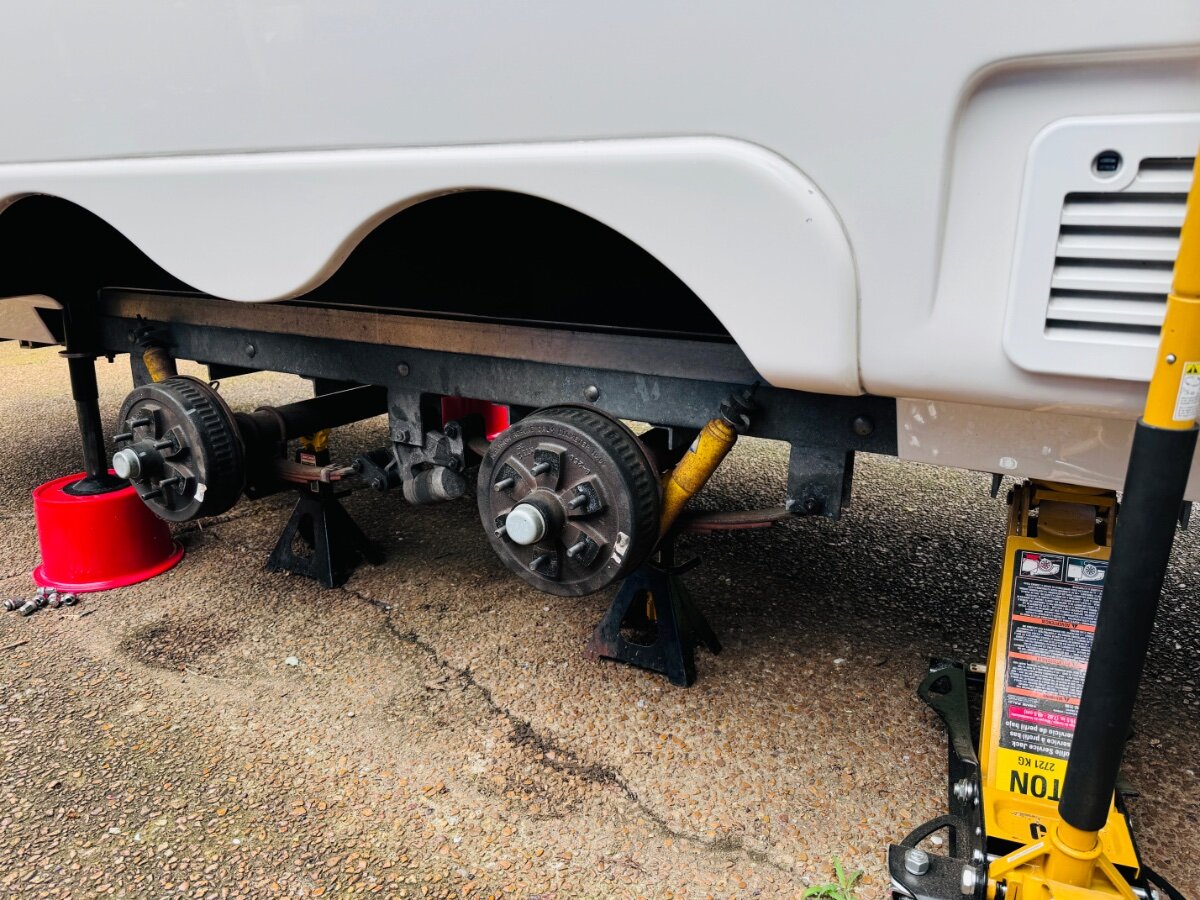
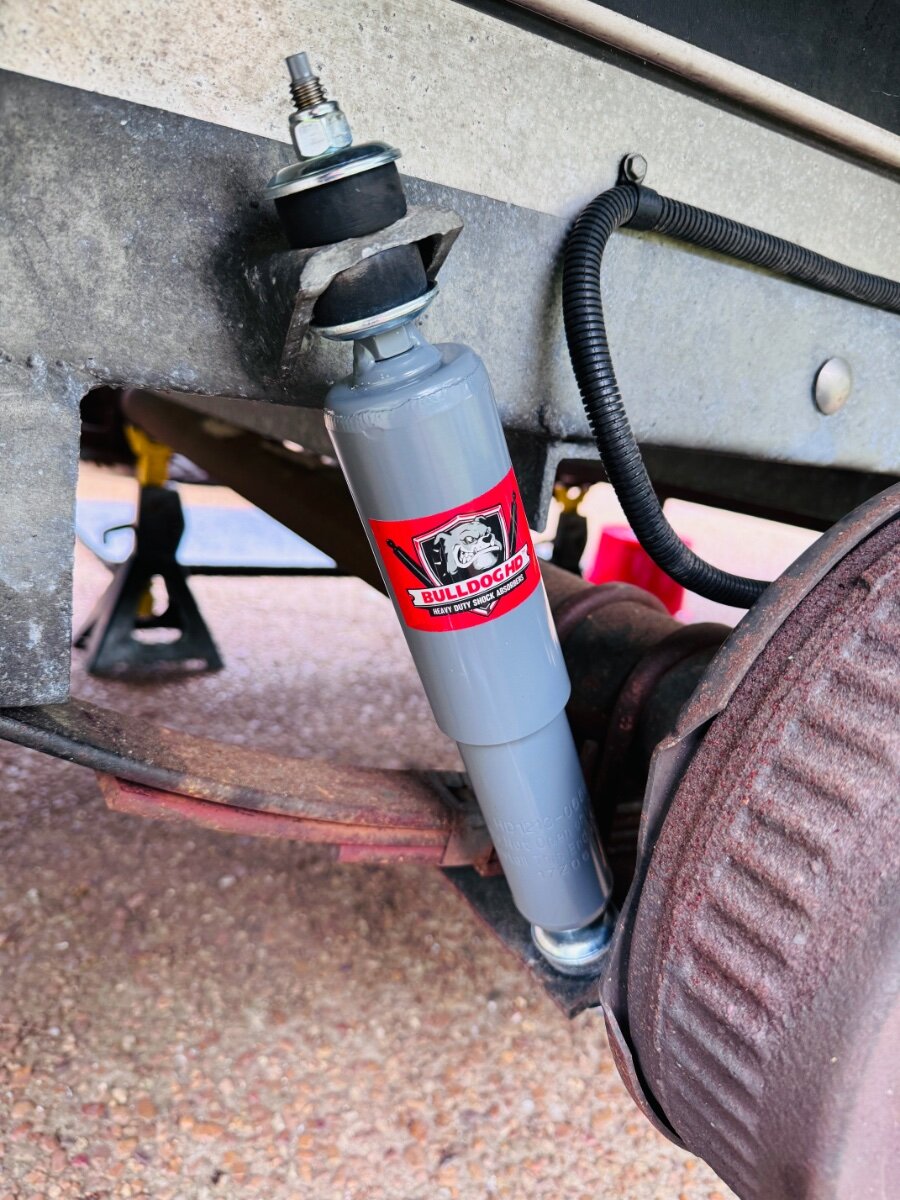
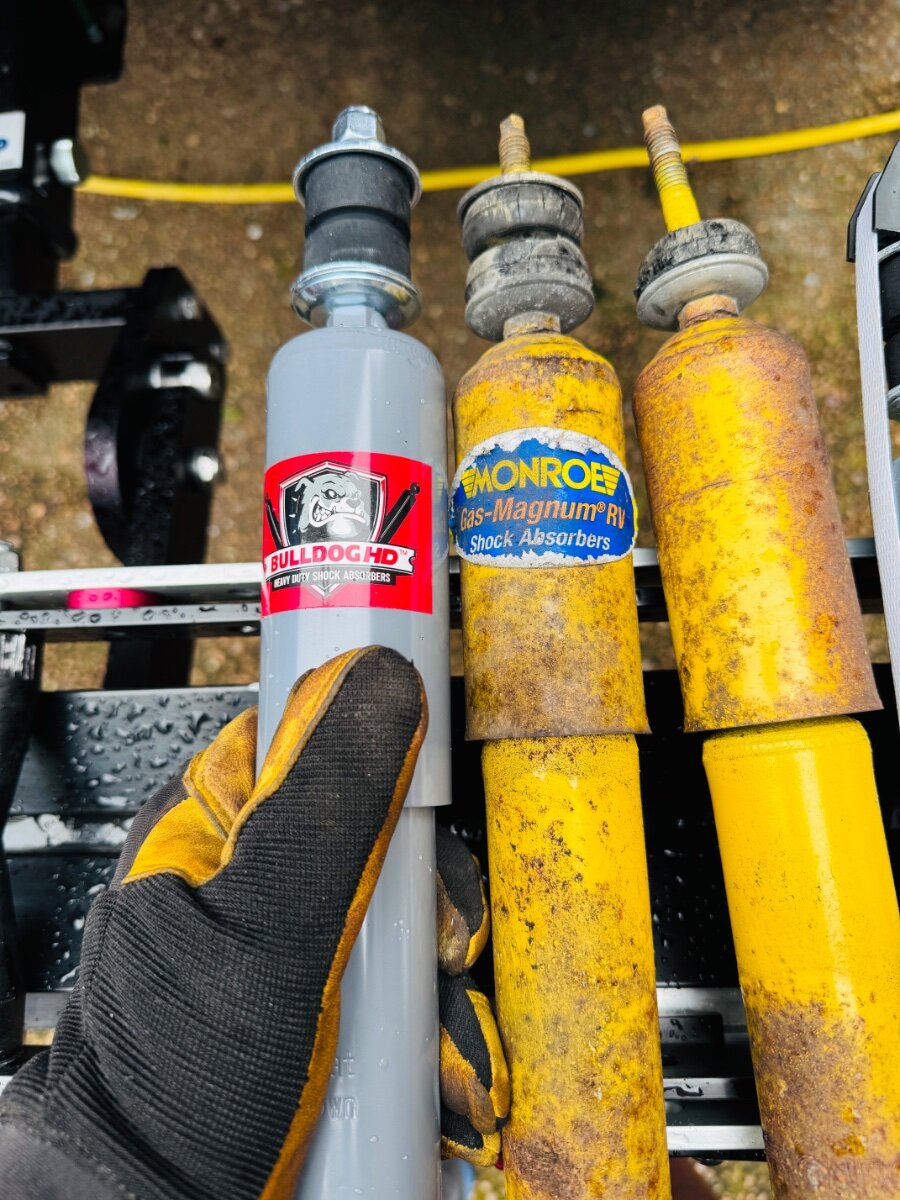
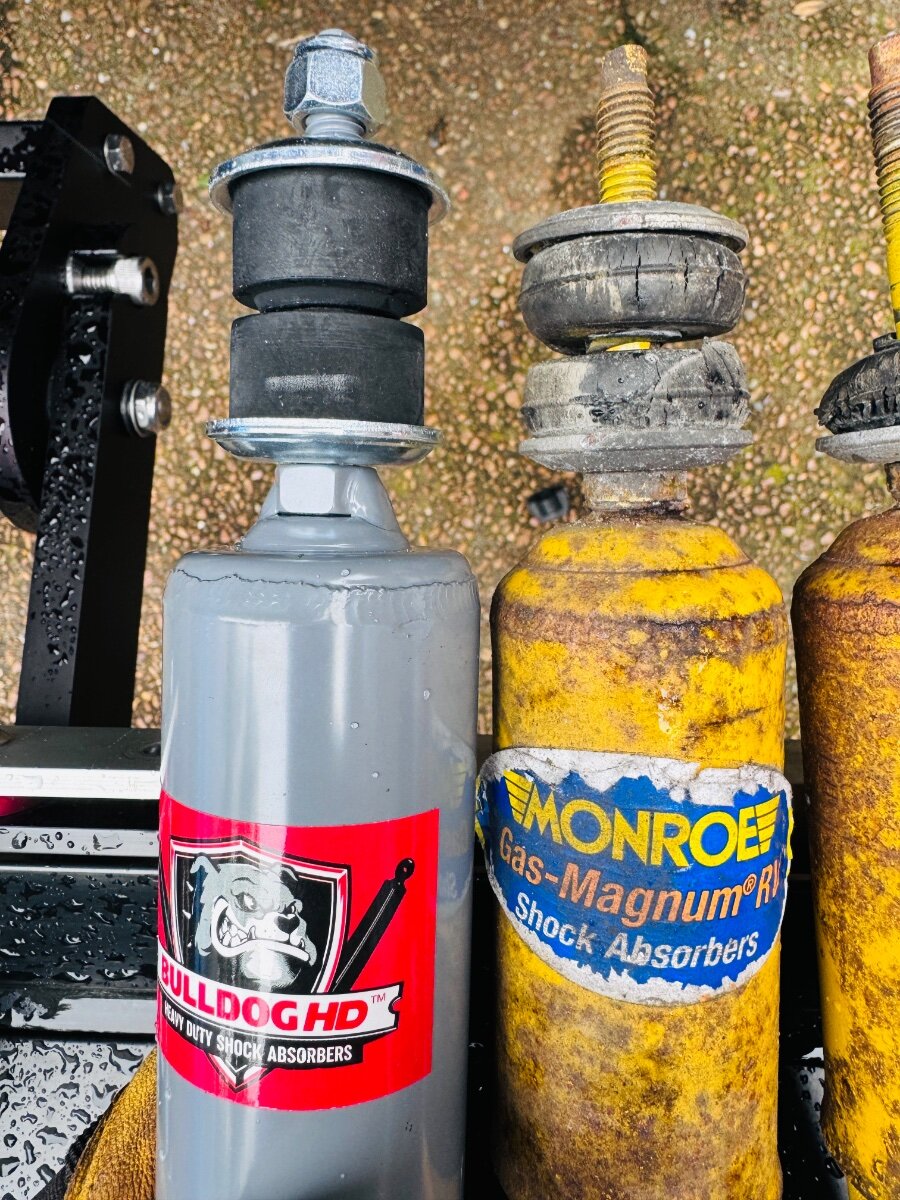
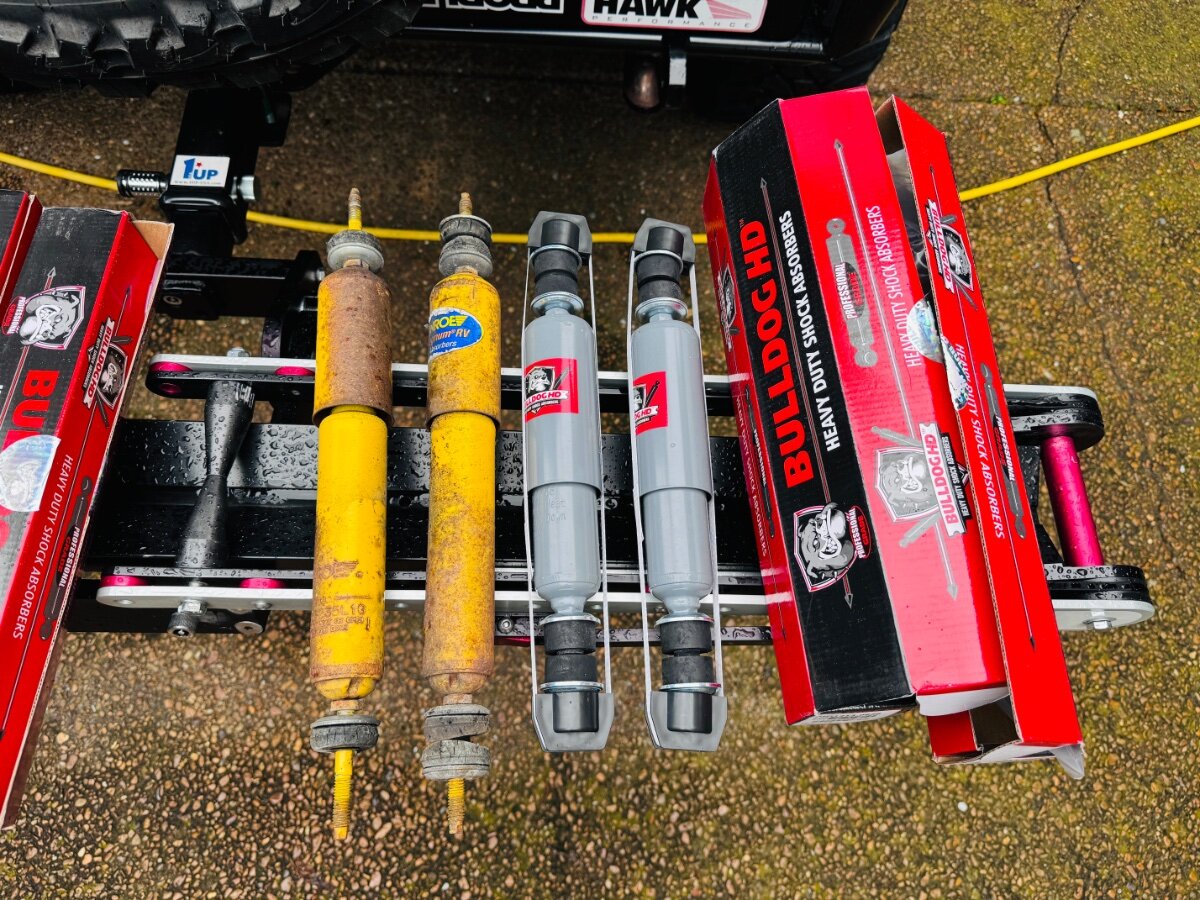
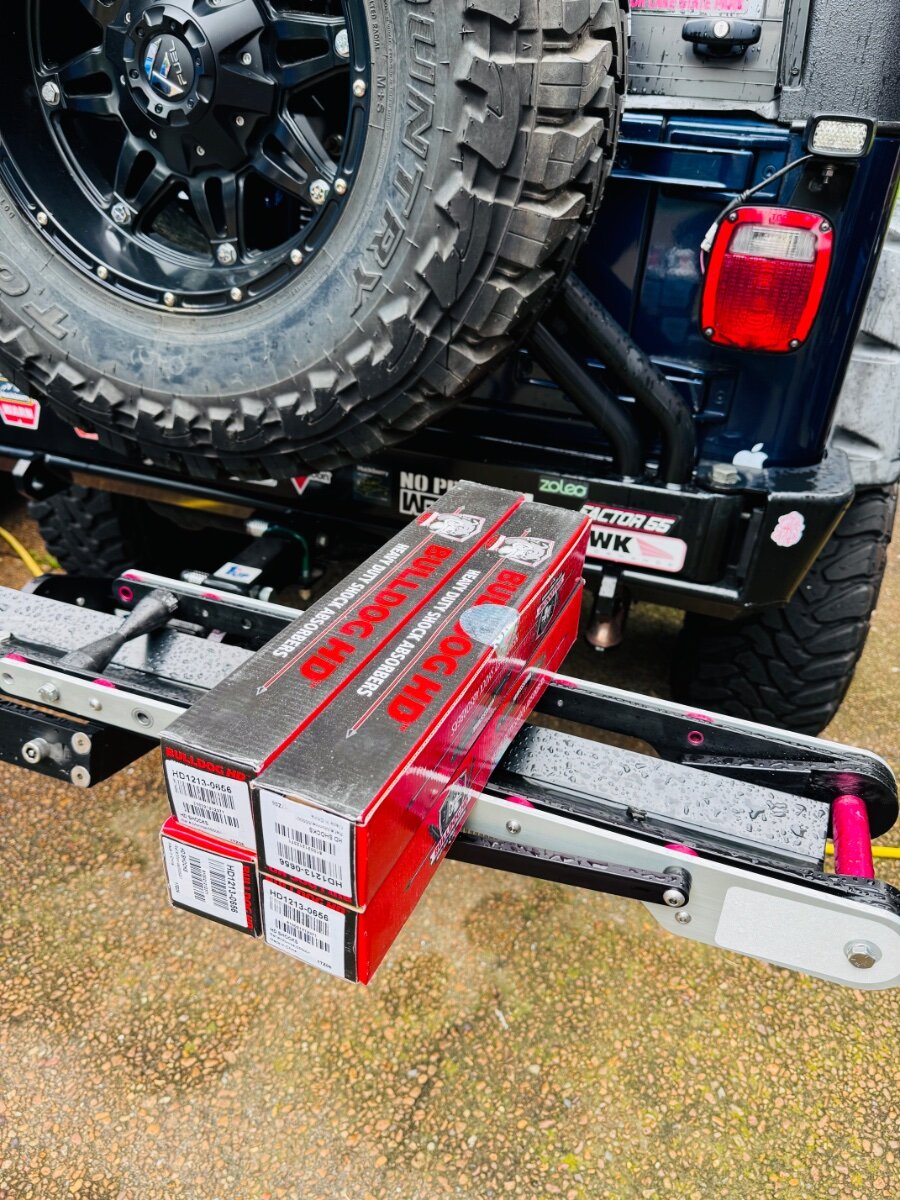
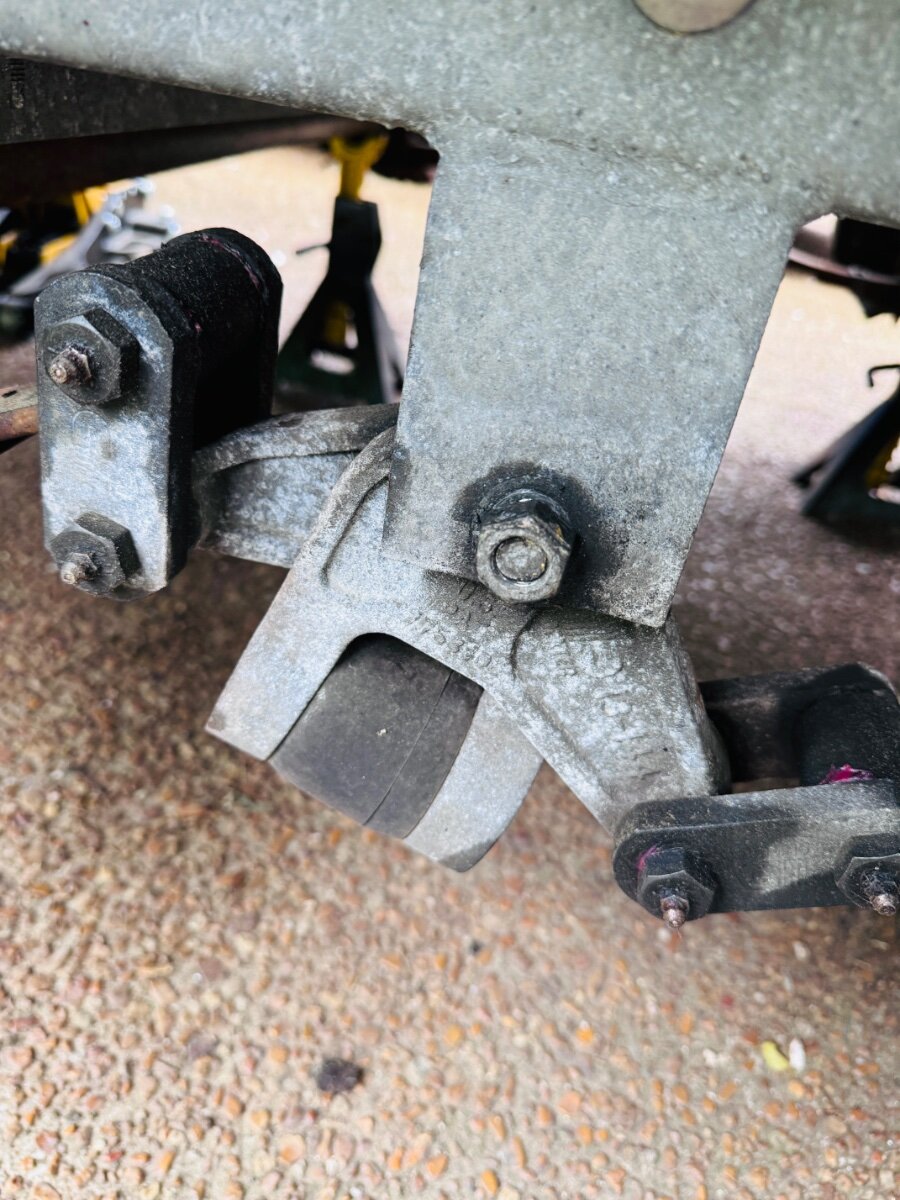
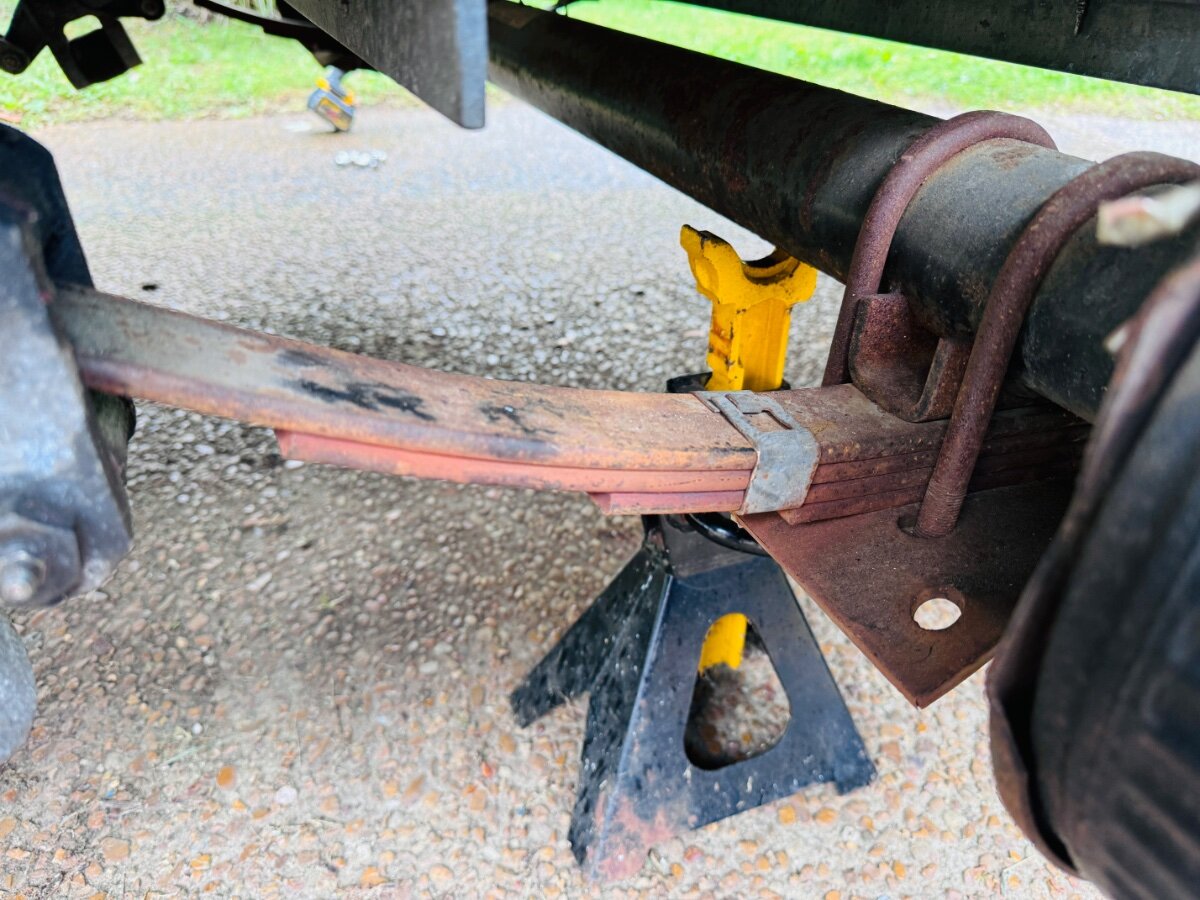
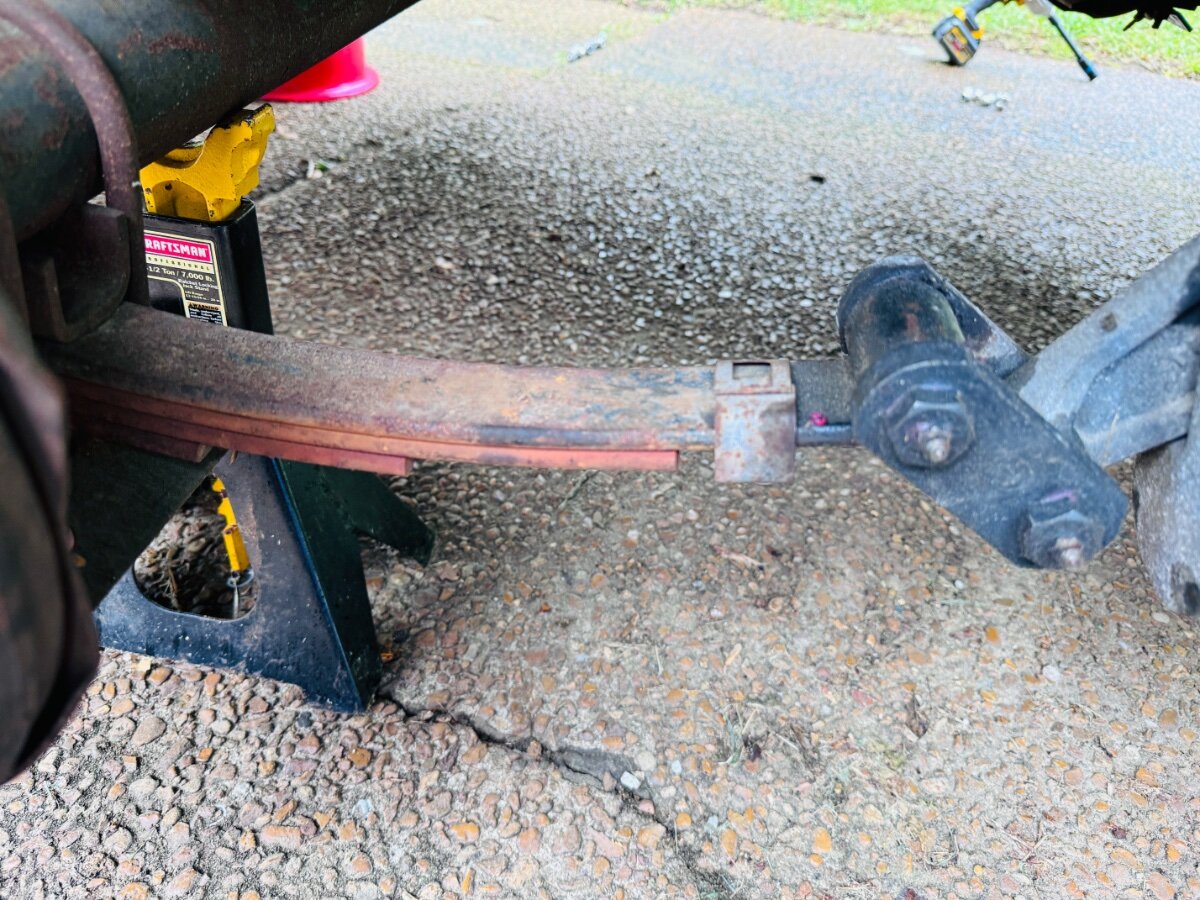
Bulldog shocks are a bit beefier and look like they are well made. Easy swap. Leaf springs look good, still on the fence about upgrading to the Alcan 5 leaf springs. Clips were loose on both springs on the right. Center bolt nut on the left EZ flex was loose and about to fall off. All of the Monroe shocks seemed to be in good working order just rusty. Future plans include the ALCAN highway so trying to get everything done now. New tires in the morning. https://www.4statetrucks.com/bulldog-hd-shock-absorber-replaces-555001-19-050000007 Wildpeak H/T02 LT225/75R16 E/10PLY BSW *** Now back to torquing the shocks so that the cushion is the same diameter as the metal retainer but not larger. ***
 5 points
 -
Tape the surface to be cut or drilled5 points
-
Long ago when I had boats, I'd run the hole saw backwards to cut through the gelcoat, then forward though the fiberglass. This almost always eliminating chipping.5 points
-
These are what I use for any holes larger than 1/2”.
4 points
-
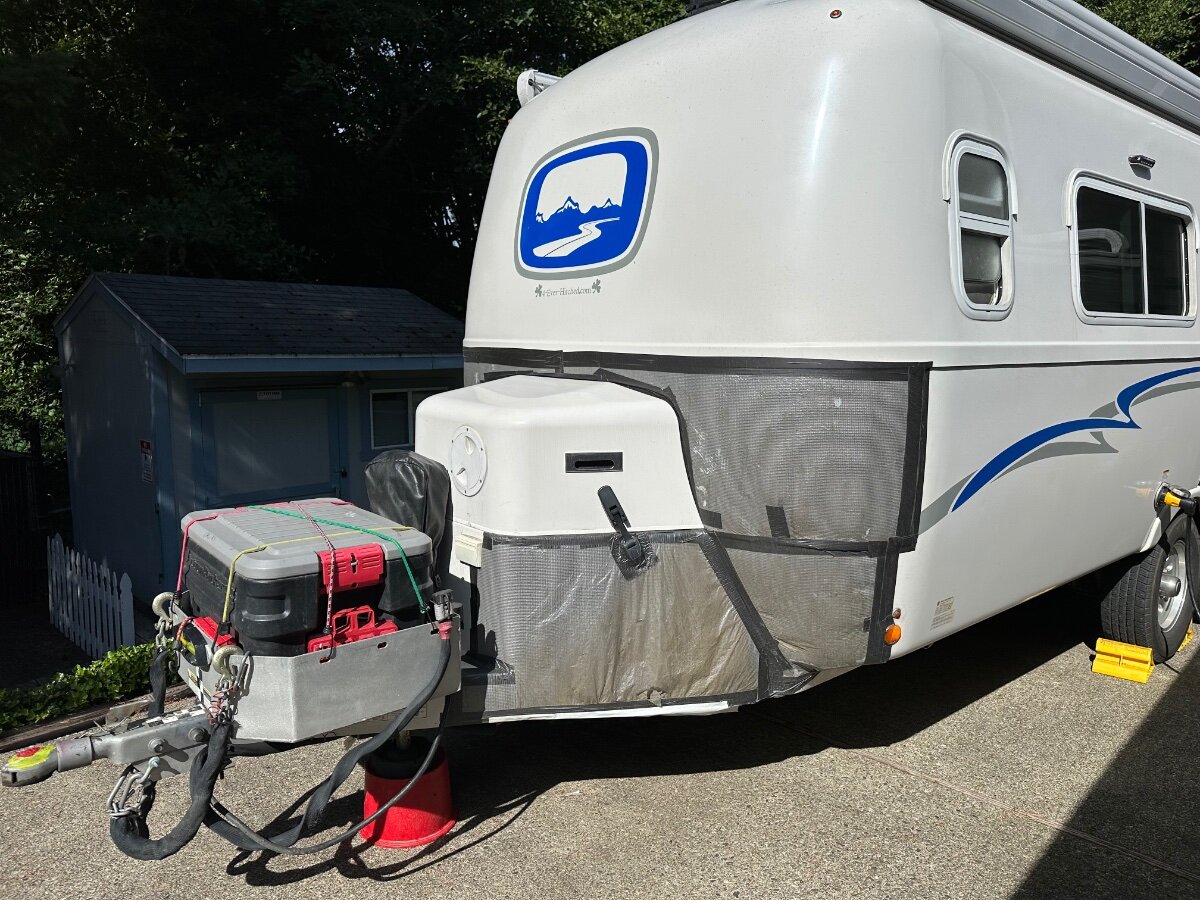
Duct tape? Hope you're kidding. I never want to do the tedious strap mod on ours. We had one drawer doing that and found out it needed a new slide latch. This is the part, very good backup parts to have btw considering the price: Side to Side Adjustable Locking Device for 563/569 Series Blum Tandem Drawer Slide - 2 Pair (4 Pieces) with Installation Screws - Amazon.com Since the repair we've never had drawers opening and the roads out here can be bad, even after 25 miles of washboard dirt roads. Have you checked your suspension for any issues? Is your tire pressure set BELOW 50 PSI MAX? Run ours anywhere between 42-46 depending on temp and altitude. Common cause for any interior cabin disarray is certainly running tire pressure too high.4 points
-
Thanks for posting the link! I meant to add it here but it slipped my mind. Then I saw youtube showing that I was getting a lot of views from olivertraveltrailers.com and I figured someone had posted it 😄 Yes, I didn't get everything, but it would have been an hour long just from his remarks. Maybe next time I can setup a better camera on a tripod and get the whole thing. Thanks! I had a great time as well! Thanks, appreciate it. Didn't hear anything specific from Oliver about the springs... Thanks Steve, appreciate you and Deb being so friendly and welcoming! Hopefully will have part 2 out in a short while, with the Cathedral Caverns trip and also a few of the open house tours4 points
-
Another option, and one that I prefer to traditional saw toothed hole saws, are diamond grit hole saws. The hole is much cleaner and smoother, there is no chipping of the gelcoat, you have much more control with the cut, and no drama of worrying about the holesaw catching an edge and torquing your hand off or marring your work piece...especially on the larger holes. 5/8" will not be a worry with that here. 5/8" is pretty small, these probably won't have a pilot drill, but you can still use them effectively with the proper technique, or using a template as a guide. If you are set up to use Lenox hole saws and have the mandrel for it (and 7/8" isn't too big) I'd consider this: https://www.amazon.com/DG-HOLESAW-14DG-22-2MM-PK/dp/B002QMK8VQ/?_encoding=UTF8&pd_rd_w=Ou7U8&content-id=amzn1.sym.a725c7b8-b047-4210-9584-5391d2d91b93%3Aamzn1.symc.d10b1e54-47e4-4b2a-b42d-92fe6ebbe579&pf_rd_p=a725c7b8-b047-4210-9584-5391d2d91b93&pf_rd_r=EGJYD83A35XQGWK1X3ST&pd_rd_wg=HMKiX&pd_rd_r=ea23425b-78dc-49b7-9ce2-921c2afd6922&ref_=pd_hp_d_atf_ci_mcx_mr_hp_atf_m&th=1 Otherwise, I'd still get a 5/8" diamond grit (Bosch makes great smaller bits) without the pilot bit. Use water from a spritzer when drilling! Dave4 points
-
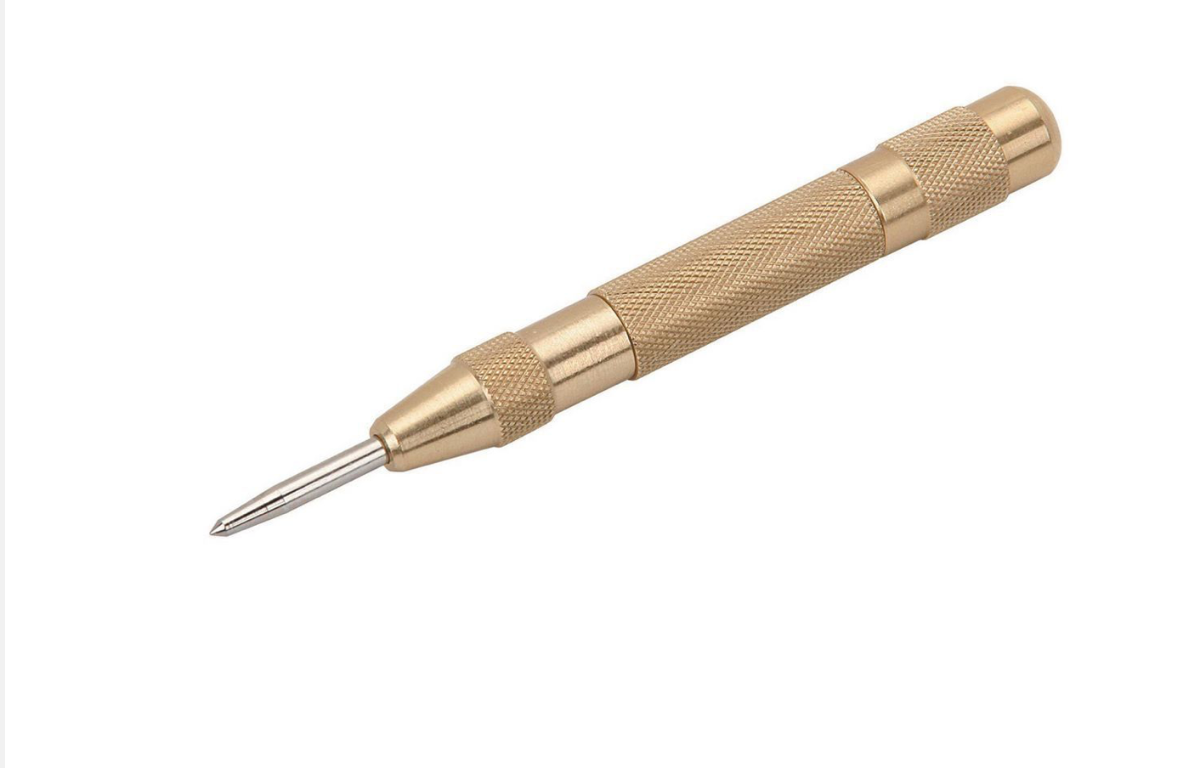
Here's a clean install for your SO-239 and ground connection for your rig on the interior wall... FYI, we always use a spring punch on the gelcoat prior to any drill bit action:
3 points
-
And, start with small, sharp bit at low speed. Expand.3 points
-
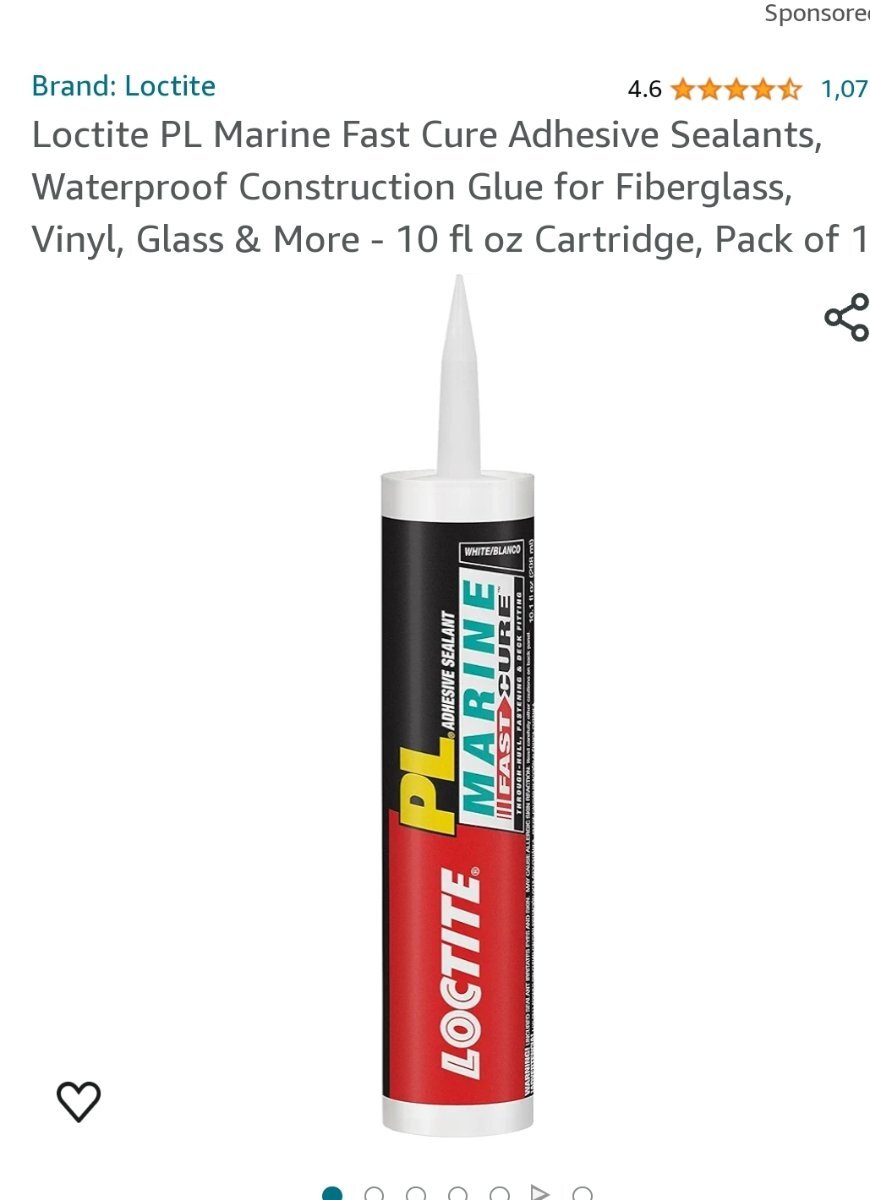
You know my feelings on the Oliver light. Permanent solution is remove, rebed with butyl, and add mechanical fasteners/ screws. Butyl is a wonderful, pretty much permanent sealant, but not an adhesive. That said, loctite marine sealant, fast cure is what we've been using as a polyether flexible sealant adhesive for a number of years, ollie and boat. No yellowing in Florida sun (yet.) Polyethers play well with fiberglass, wood, and plastics. Def no to 5200. Either of the 3m 4000 or 4200 are difficult to remove, later, imo, though 4000 has better uv resistance, so I've read. Pick your poison. And, add an eyebrow of rv Eze gutter over the light, as a bonus. The loctite product is "reasonable" at about $17 at lowes or Depot. Do read the date code. It's sometimes out of date at big box stores, and then it's tough to work, and useless.
3 points
-
Our favorite subject....sealants! That darn Oliver light strikes again. You may want to rethink not removing the lense, but I understand why you would not want to. My lense (hull 107) was "bedded" in some open cell foam weatherstripping. It was totally useless as a secondary barrier for the 3M 4200 that I think was applied around the perimeter of the lense. Thankfully it was not silicone. After a thorough cleaning, I used butyl tape to bed the lense, then Sikaflex 291 to seal around the edge. Several years later no leaks at all. There's been talk of the new polyether sealants on the market. I tried a tube and found it not very workable...maybe a bad tube? It was not past the expiration date. They say the polyethers play well with plastics where the polyurethanes do not, but I have not noticed any adverse reactions with my Oliver lense, and I like the 291 for everything else. If you want to give the polyether a try, and don't want to remove the lense, then maybe this is the way to go: https://www.westmarine.com/3m-4000-uv-fast-cure-polyether-adhesive-sealant-white-10-oz.-cartridge-3760196.html?queryID=d26afaac5e5422519ed7e4ec5eec6510&objectID=3760196&indexName=production_na01_westmarine_demandware_net__WestMarine__products__en_US Tape around the outer perimeter on the gelcoat, and you can tape the lense as well to help with getting clean lines. Take your time with the tape, use small pieces to define the radiused corners.Try not to get too much sealant in there! When you tool it off with a little paint thinner on your gloved finger, the sealant edge should just butt into the tape edge. If a lot of the sealant goes over the tape, then when you remove it, you're going to have a mess to deal with. Tool the sealant tight to the edge of the tape! Once the tape is off, a very light swipe with a thinner soaked gloved finger will smooth out the small ridges left from pulling the tape. Those ridges will collect dirt and look bad after a while so I think that last light swipe is important. Good luck. Keep an eye on your marker lights up there. One started to leak and the water ran down the wire to its low point, right over a neutral bussbar. Good luck! Dave3 points
-
I like using a fine tooth circular hole saw. Cut softly into the fiberglass to slowly penetrate. GJ.
3 points
-
During the "Open House" at this Year's Rally there were a number of people who asked me what I used to keep the interior of Twist clean and shiny. Actually, I can take no credit for the product nor the formulation, but former owners of an Oliver (Cheryl and Bruce) showed me this product several years ago, and I've mentioned it a few times here on the Forum since: "The fan was then wiped down with the same mixture I use on the interior of the Oliver – 4 parts Duragloss detailer (product #923) with 1 part Duragloss liquid wax (product #951) – in order to give it a nice clean shine." This mixture can be used on any surface on the interior with the exception of the floor - you wouldn't want the floor to be slick. Obviously all the white fiberglass, the counter tops mirrors, stainless, aluminum - everything. All it takes is a light spray with the mixture and then wipe with a microfiber cloth. Flip the cloth over and wipe again and you are done. No streaks (even on any mirrors) and it leaves a very light coating of wax that helps repel dust and dirt. Bill2 points
-
@rideadeuce - A tip...Last year when we went to Alaska we bought some yoga mats and used some 3M no residue tape to attach them to the lower front of our trailer. They worked like a champ at keeping gravel from the Yukon highways from chipping the body of the trailer. We also used a roll of clear rug protection plastic from Home Depot on top of the Yoga Mats to keep them from absorbing moisture. Below: First week of the trip and the yoga mat's are doing well...tne extra coat of vinyl floor protection film is holding water at bay. F Below: After a full 9 weeks on the road the yoga mat's took the beating, but our trailer was protected. Below - After yoga mat removal and quick wash...
2 points
-
Looks Like Jim is the lucky winner. I’ll be in touch. John2 points
-
I'm not sure, but I think more than a year. They have been full-timers (with SOB trailer) for 2 or 3 years -- not only full-timers but nearly full-time Boondockers. They note that boondocking is difficult in the eastern US. Their preference for this composting toilet seems to stem from a) ease of emptying (so much easier - don't have to deconstruct the unit or move large parts around) and b) better results for her, when using (the separation of liquids and solids is easier during use).2 points
-
Not a problem, you have an immediate need so hope @Jps190 can help you!2 points
-
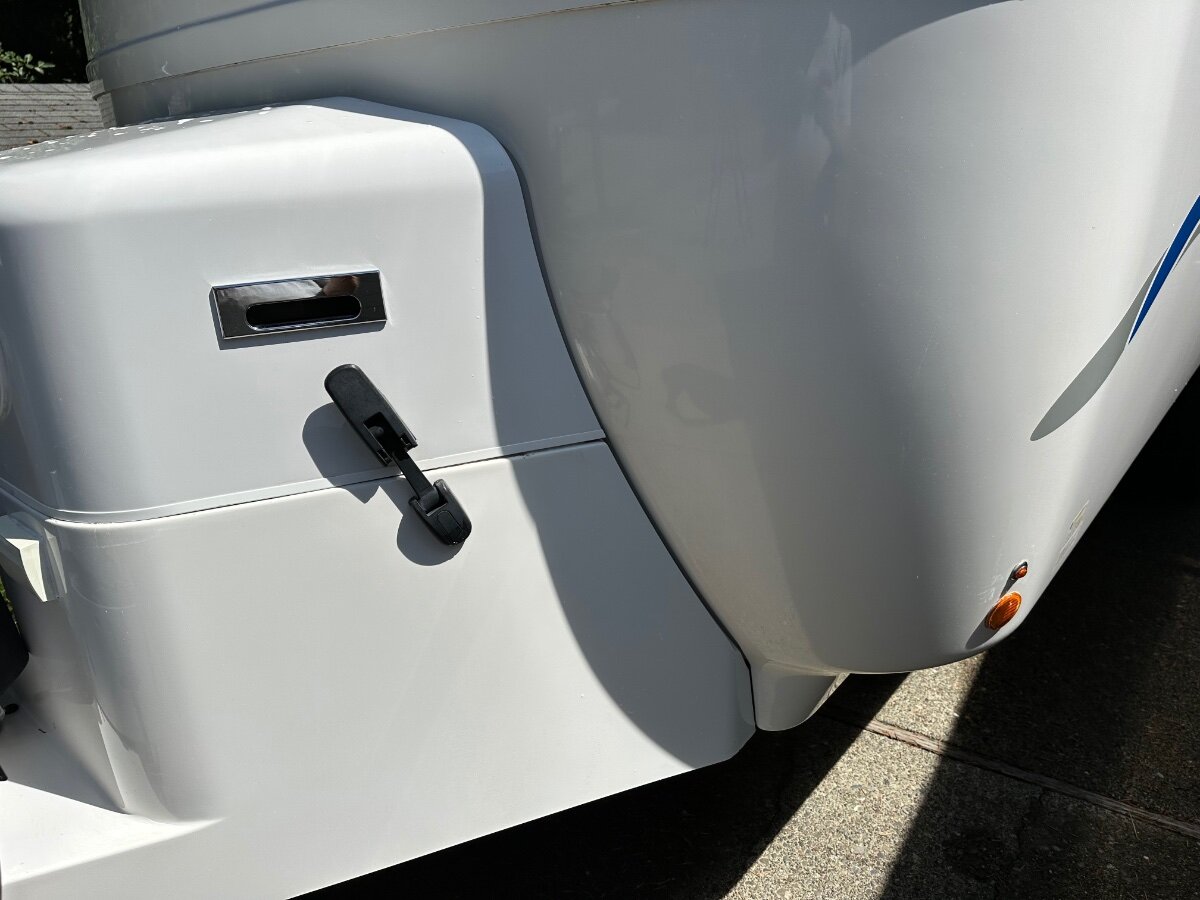
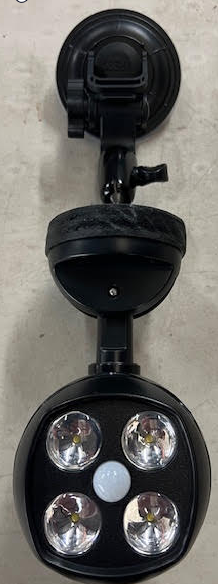
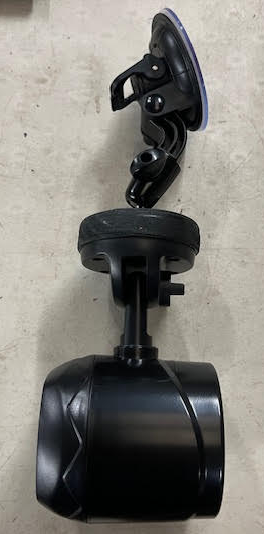
We wanted to get some "security" lights for our local boondocking to ensure we don't miss catching a glimpse of the bigfoots (or is it bigfeets?) roaming the Big Thicket just up the road from us. 😳 Here's what we ended up with - an LED motion sensor light running off of rechargeable D-cell batteries all mounted up on a GoPro style suction mount. Item list given below. They work well - suction enough to hold the weight of the batteries and lights with no problem (assuming fiberglass is cleaned). Lots of other alternatives, but this worked for us! We also use the rechargeable D-cells in our little frig fan. Wish us happy bigfeets hunting 😆 Parts list: Motion Sensor Outdoor Lights GoPro style suction mounts Rechagable D-Cells Recharger 1/4-20 nuts JB Weld Marine Epoxy Scrap wood, approx 1/2" thick Light mounting base diameter - approx 3 1/8" - cut circles from scrap 1/2" wood Drill 1/4" hole in center of wood circle - large enough for stud from windshield mount 2x 1/4x20 nuts - JW Weld Epoxy welded to center of wood circles
2 points
-
A Forstner bit is a very clean way to cut holes in fiberglass. Make a very small pilot hole, 1/8", and then use the size you want the hole to be. Light pressure and run the drill at a medium speed. Forstner Bit Set2 points
-
Ours is Furrion, front and streetside, and look to be original. I had to replace my streetside receptacle due to the threaded plastic portion had cracked into pieces. I used the wood screws supplied since I had no cracking and they snugged nicely. I certainly agree with machine screws and Nylock nuts, but harder to reach under the dinette and behind the EMS, etc. The front one is a no-brainer as the back is visible with doghouse removed. The part was $160 or so on e-Trailer.
2 points
-
More than a few of us have completed the John Davies kitchen drawer strap mod for the very same reason.2 points
-
Seadawg, What do you use as a tooling lubricant for the PL marine? I had no luck with it using multiple different solvents. I went back to my Sika 291.... Also, with a quality butyl tape like Bed-it tape, I do not think mechanical fastening is necessary for something like the Oliver lense, unless you like the look. Mine stuck down with powerful tenacity. Then adhesive sealant was added to that. It's not going anywhere. Your choice! Dave2 points
-
I like the white marinetex, as I've suggested many times, for minor projects. It's always in our supply locker, as in most boaters. It's "pretty close" to our Oliver color, "pretty close" to the boat color, to fill in screw holes. If you cover the filling with saran wrap or tape (remove promptly after set), it stays fairly glossy. And smooth. Wprk on cooler days (70s) No need in inobtrusive areas to gel coat, as you would need to do with bondo or fiberglass paste. . Which is a pita. If you don't like the end result, it's easy to drill out and redo. There are many videos out there on YouTube.2 points
-
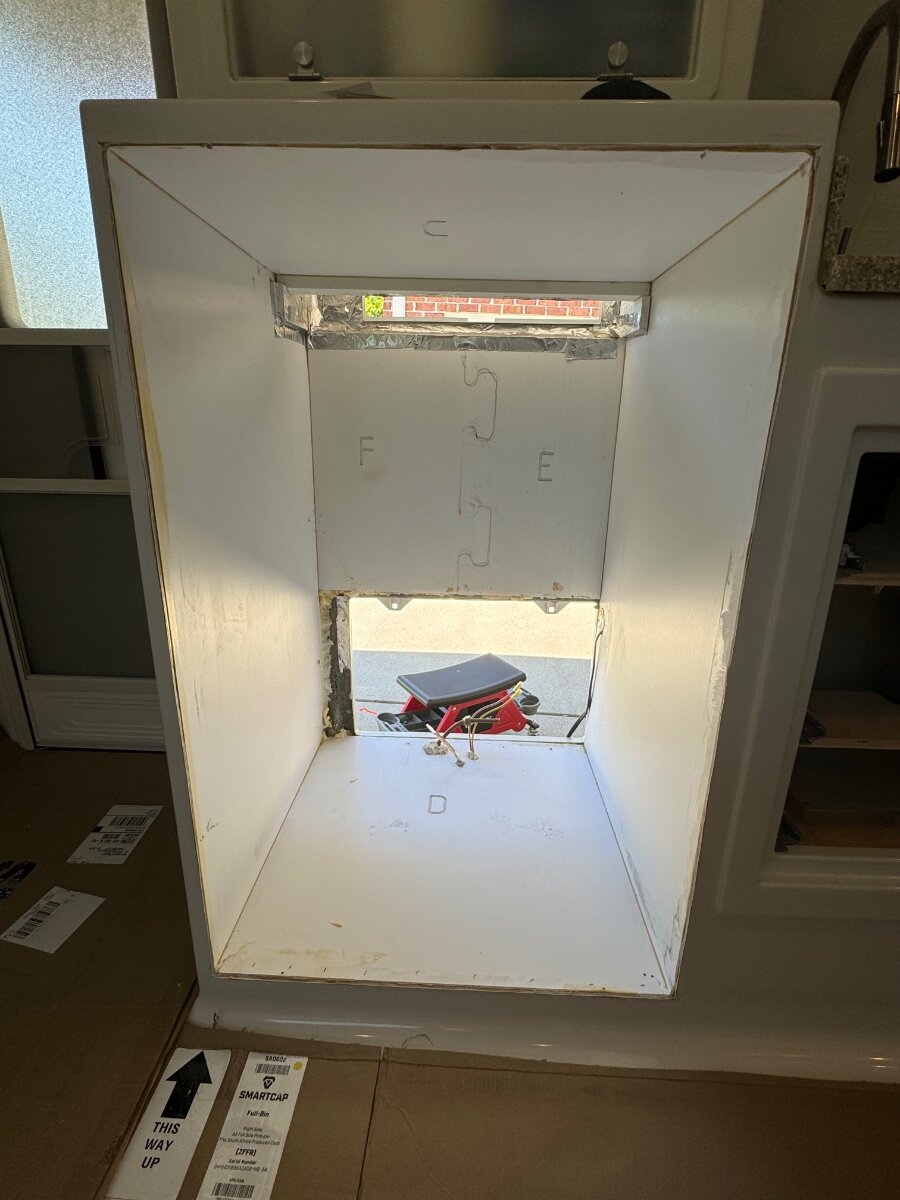
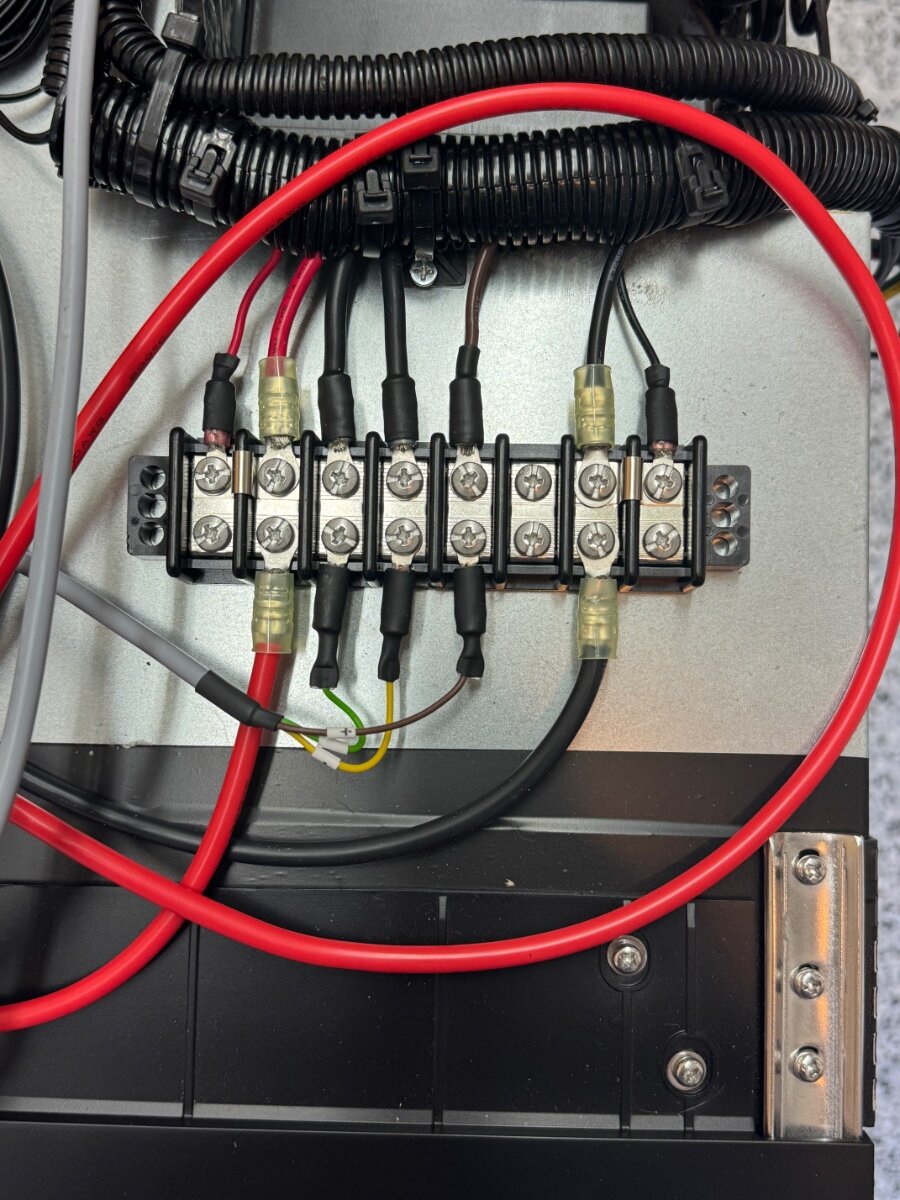
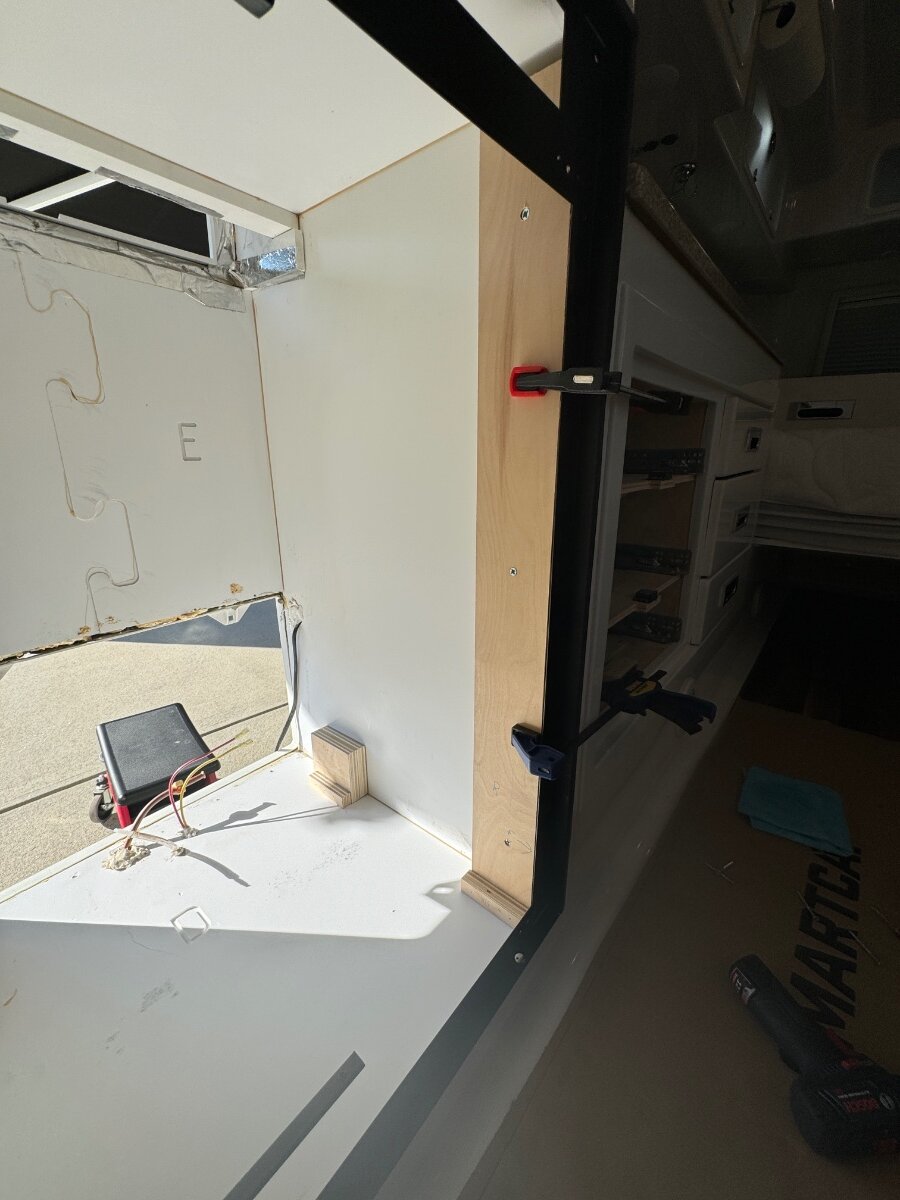
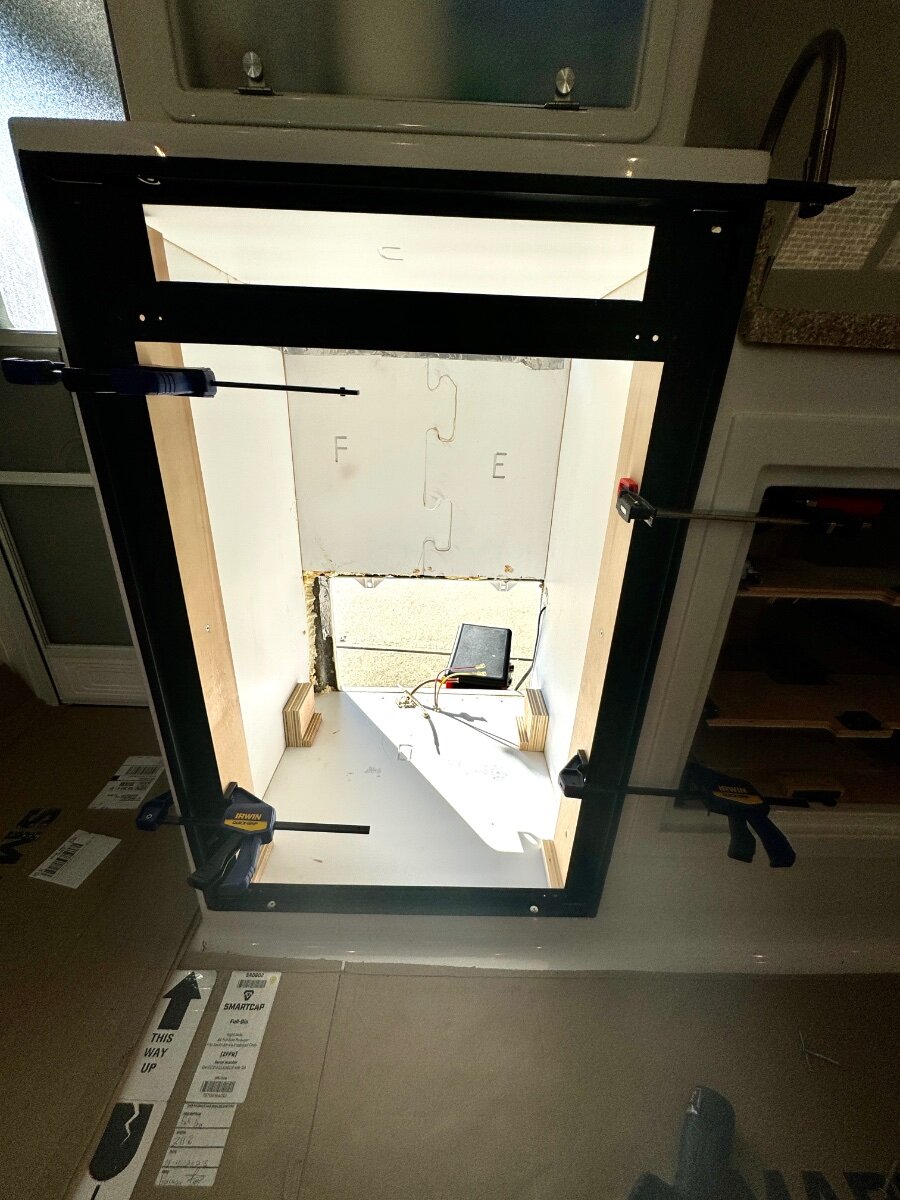
I'm not completely done just yet. I was able to extract the face frame from the Norcold to use instead of creating a whole new frame. I still need to get that installed and figure out some vent covers and where I am going to mount the Isotherm ITC controller. My install is very similar to John Davies with regards to building a platform and wiring everything to a bus bar on top of the fridge. I was lucky in the fact that my cabinet area was relatively square. I'll post some finish pics when I'm done. John
2 points
-
....and his brother-in-law smoking a stogie while dumping his Class-A in Griswold's driveway gutter! 😅2 points
-
I’ve successfully use fiberglass body filler and Bondo for all the reasons outlined here.2 points
-
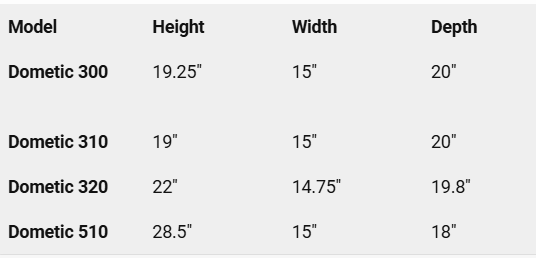
MS AI says the dimensions by model are as follows: (Suggest independent verification) GJ When I had to replace my OTT OEM toilet due to a 25 cent part breaking and no available parts, my research yielded the below info. I chose to go with the low profile elongated seat 321 Full Timer. Hope this is useful. GJ MODEL 311 Part Timer 320 Full Timer (Wrong P/N - My Error) 320 Full Timer 321 Full Timer E-Trailer # DOM67FR DOM87FR DOM87FR DOM99FR DESCRIPTION Low Profile Round Stand. Height Elongated Stand. Height Elongated Low Profile Elongated SOURCE: OEM PROVIDED May 2018 E-Trailer OR# 113709215 Shipped to Idaho, 83255 Dometic Warranty Replacement Need this model COLOR White White Same White STATUS Plastic Flush Rod Failed. Discarded in Idaho upon receipt of E-trailer replacement. Replacement toilet purchased. Flush ball seal not centered. Leaked water & sewer gas Still in original unopened box. DEPTH 19" 22" Same 22" HEIGHT 14.25" 19.25" TILT! Same 13.5 The 5" step between the toilet mounting surface and where you feet go is why just about all of us under seven feet tall need the low profile model. For more efficient printing, I have transformed the above into my DIY format. DIY - Dometic Toilet Replacement Specifications.docx
2 points
-
We replaced our 2019 EII standard toilet with a Dometic 311 (due to broken foot pedal.2 points
-
Good morning Kevin. I would be happy to help you. I ordered my LE ll with the composting toilet and after six months decided I would rather have a flusher and converted to the factory toilet myself. If you’ll give me a call. I can offer some guidance. John Burton 480-390-69962 points
-
I'll look forward to your posts. You can compare heights on any low profile toilet. Our 2008 Aqua magic has been great. All the composting toilets are tall. If you like that concept, buy/get a footstool. If not, retrofit, and join the rest of us with the stinky slinky.2 points
-
That's an interesting, and lovely toilet, as toilets go. Small footprint, fairly modern appearance. Reasonable price. Wish I'd seen that before I bought the Separett for the barn. (I thoroughly hate the Separett. ) How long have they had the Ogo?2 points
-
I know there are several threads on leaks from the Oliver light on the back of the trailer. I’ve read them all. I have a small drip from the Oliver insert that runs down to the window. We noticed water dripping from the middle of the bottom of the window on this May trip. Our first leak! All the marker lights are good. I would rather not remove the Oliver insert. Just caulk around it. I don’t want to use silicone, I usually make a mess with it. From what I’ve read some owners used 3M 4200 or 3M 4000. 3M 5200 is not recommended. Any thoughts on what to use? Mike1 point
-
I am finishing up installing the Isotherm fridge in my 2021 Oliver. I removed the Norcold 3-Way fridge and stripped the 2 circuit boards and front control panel. They are free to anyone who wants them. Just pay the shipping costs. John
1 point
-
As we subject our trailers to the abuse of highways and travel, we should expect some problems and issues. But one that I had not expected came from the original installation of the cellular telephone extender external antenna, mounted on the top, rear, street side of the trailer. When I would plug in the trailer electrical connection to my truck, the running lights fuse in the truck would blow. I figured the plug had a problem, so changed the plug. Still the same problem. Let it set for a few weeks, for various reasons, and it worked fine. The problem was everytime the fuse blew, it was $6 for a new fuse. And I didn't know when/why the fuse was blowing. So, I took it on the road, and eventually, about 2 days out, the fuse blew again. I just didn't drive at night or in the rain. When I got home, I took it to the trailer repair store - Conejo Vacation Trailers in Thousand Oaks, CA. Mike had the trailer for 6 days and figured out that one of the screws from the antenna mounting had made its way to the running lights wire insulation, and caused a short. It had punctured the insulation enough to cause the short. A green wire provides power to the running light/marker lights/tail lights. He was able to trace the green wire and through elimination, figured out the problem. He removed the screws from the antenna mount, glued the antenna mount onto the trailer and filled the mounting holes, and no more intermittent problem. I have been on the road for 3 weeks now without a blown fuse. I only mention this in the case that someone else has a similar problem. Oliver service had not heard of a similar problem. Mike, from Conejo Trailer, spent time on the phone with the Oliver service people, who were helpful in helping him to trace down the problem. (something else that should never have happened, as my drawer fell out again today. Tired of having to use duct tape to hold the drawer closed.)1 point
-
The thread below about filling holes suggested to me that I ask about making holes. I need to make 2 holes through the hole, about 5/8", for a ham radio antenna cable. I have a bulkhead mount to affix in the holes where the exterior antenna attaches to one side and the radio attaches to the interior side. I have a hole saw, and before I get to cutting into the hull, was wondering if others have done so and have recommendations on best practice. I plan to go through one surface at a time, because I am not sure what I will find between the hulls. I plan to make the holes at the smaller dinette on the Oliver I, single axle model.1 point
-
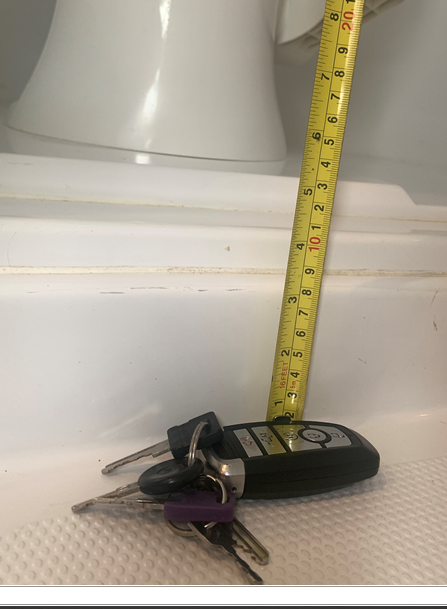
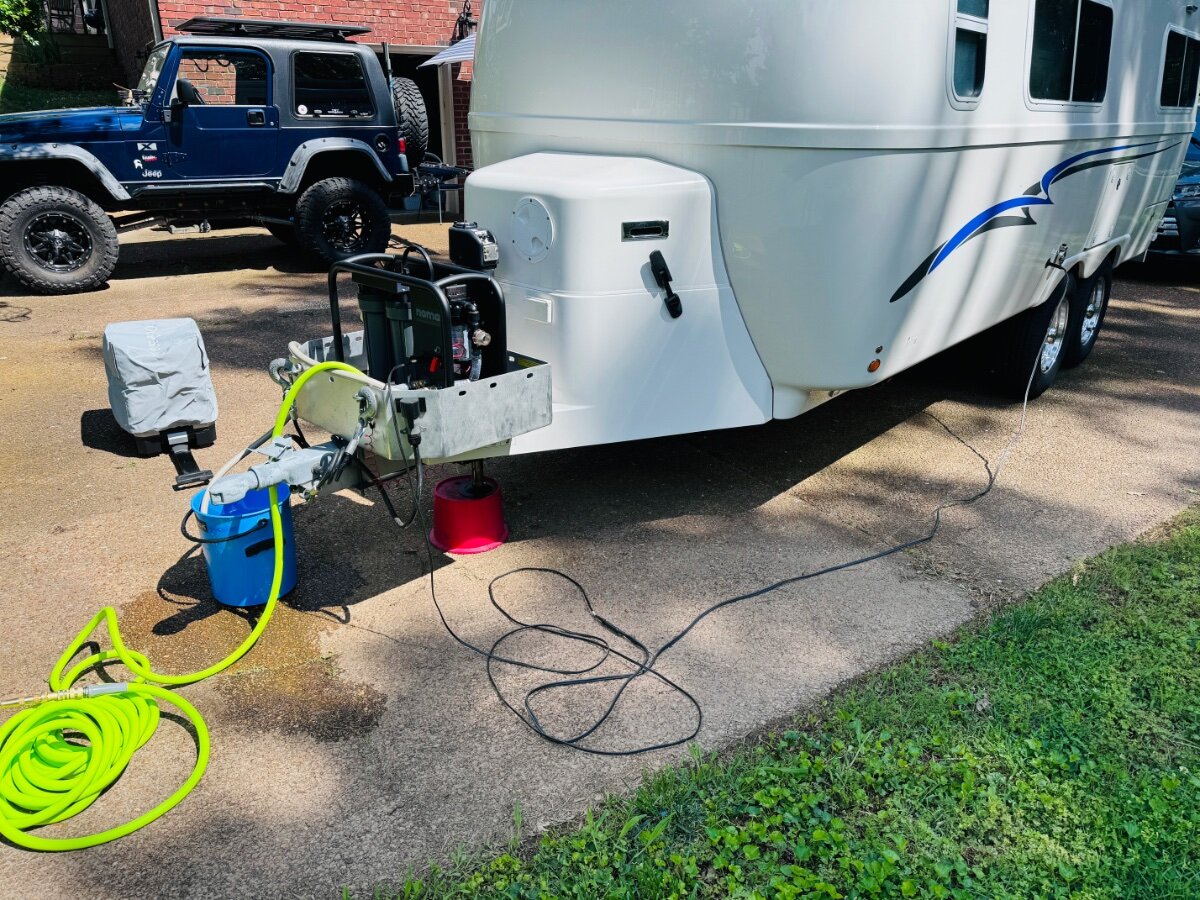
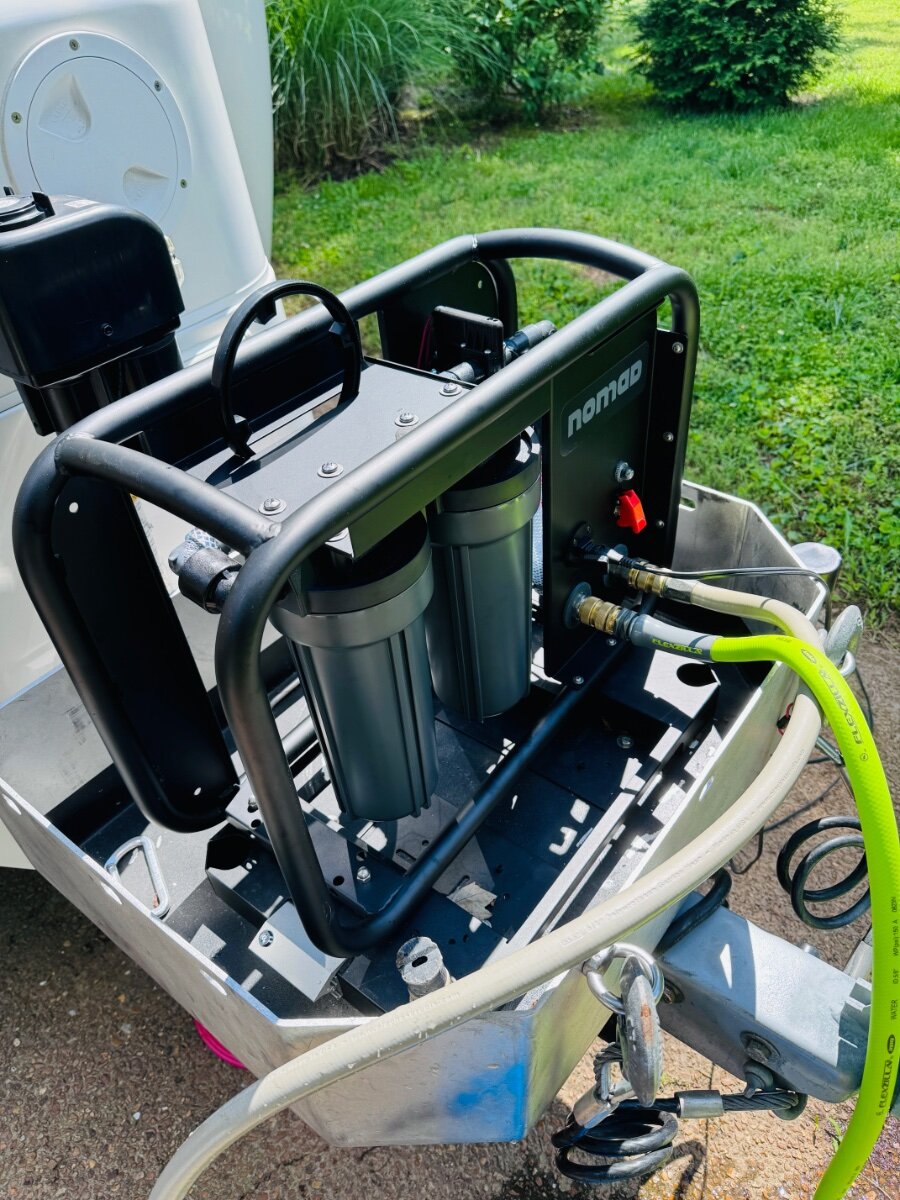
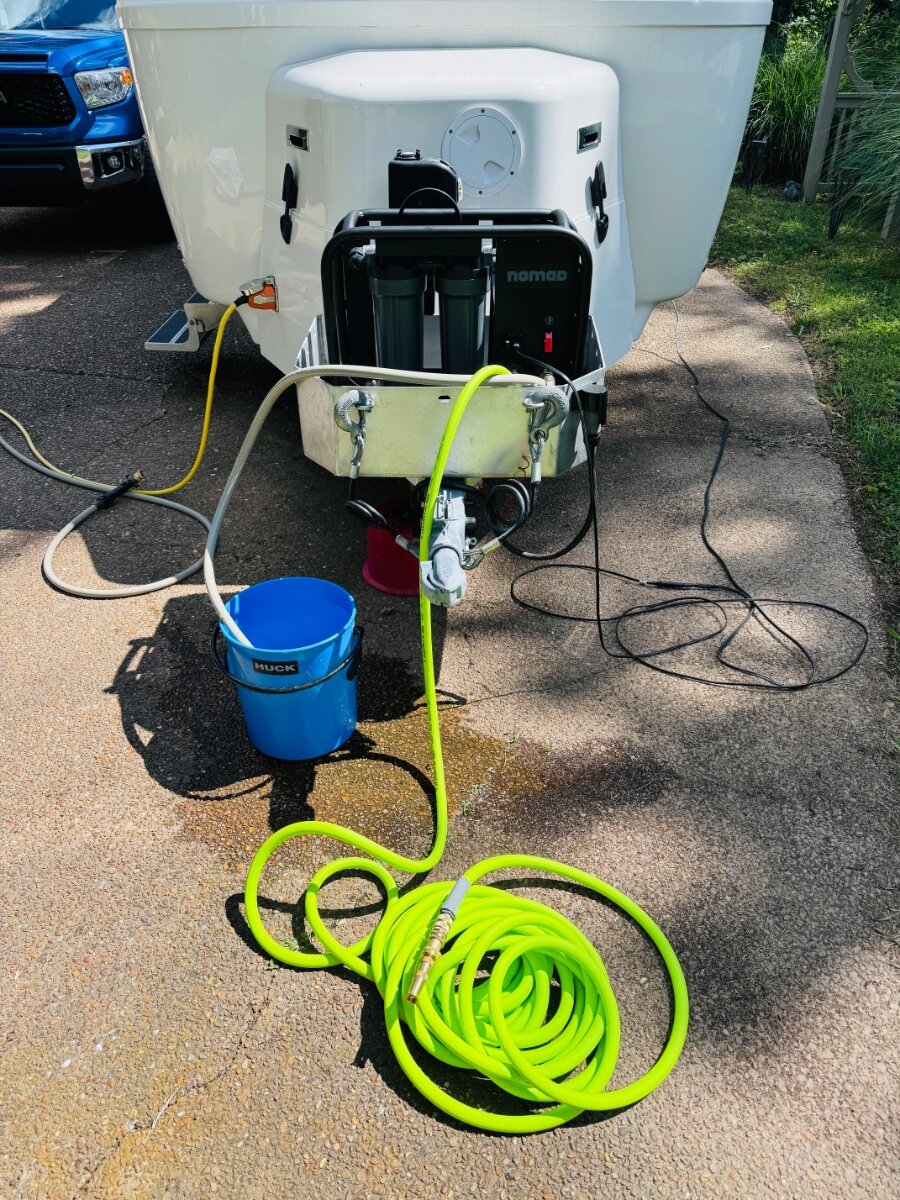
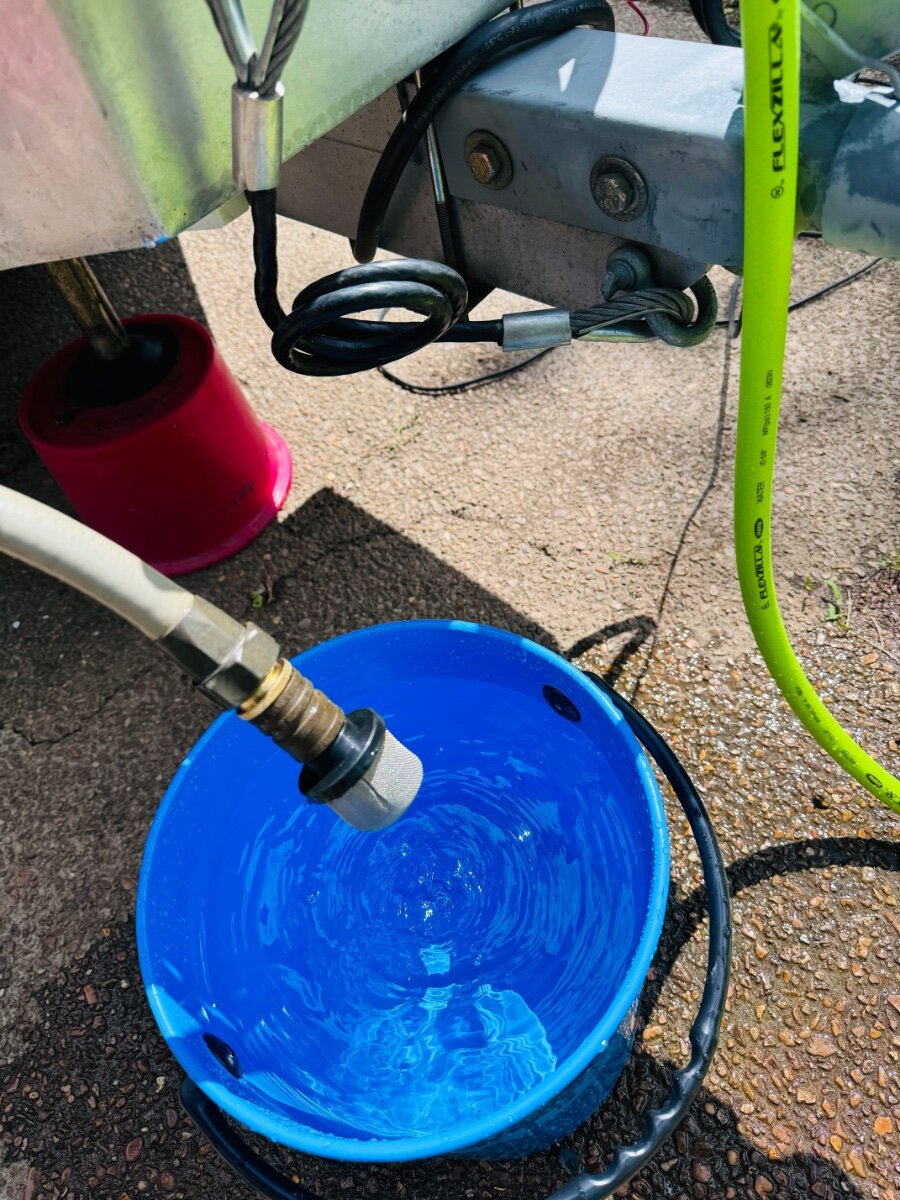
Got this specifically for boon-docking/backup. It will pull from 100 ft away and uphill 20 ft. The best thing is you can use it as a general systems water filter all the time without the pump turned on. Not the smallest or the lightest but well built and should help us with better tasting water and carrying less on trips. Runs off 12V from SAE solar port. This was me just trying it out, not the home for it on the TT.
1 point
-
Agree completely with the hole saw recommendation. Will add that it must be extremely sharp and of high quality ... recommend bi-metal hole saws of professional grade construction. Cheap is never worth the cost as you can get hundreds of dollars worth of pissed off when a poor quality tool fails causing you to make a major screw up. Never more true than with cutting tools. It may not be possible, depending on the job, but if possible stop just short of complete penetration of the hull and then make a cut from the backside through the existing pilot hole. This will ensure a clean cut on both sides of the hull as it eliminates exit slivers.1 point
-
@Steve Morris Well that is strange indeed, wonder what the deal is. Good for you though, congrats.1 point
-
Or repair it quickly yourself! Artist not required to fill and drill 4 holes.1 point
-
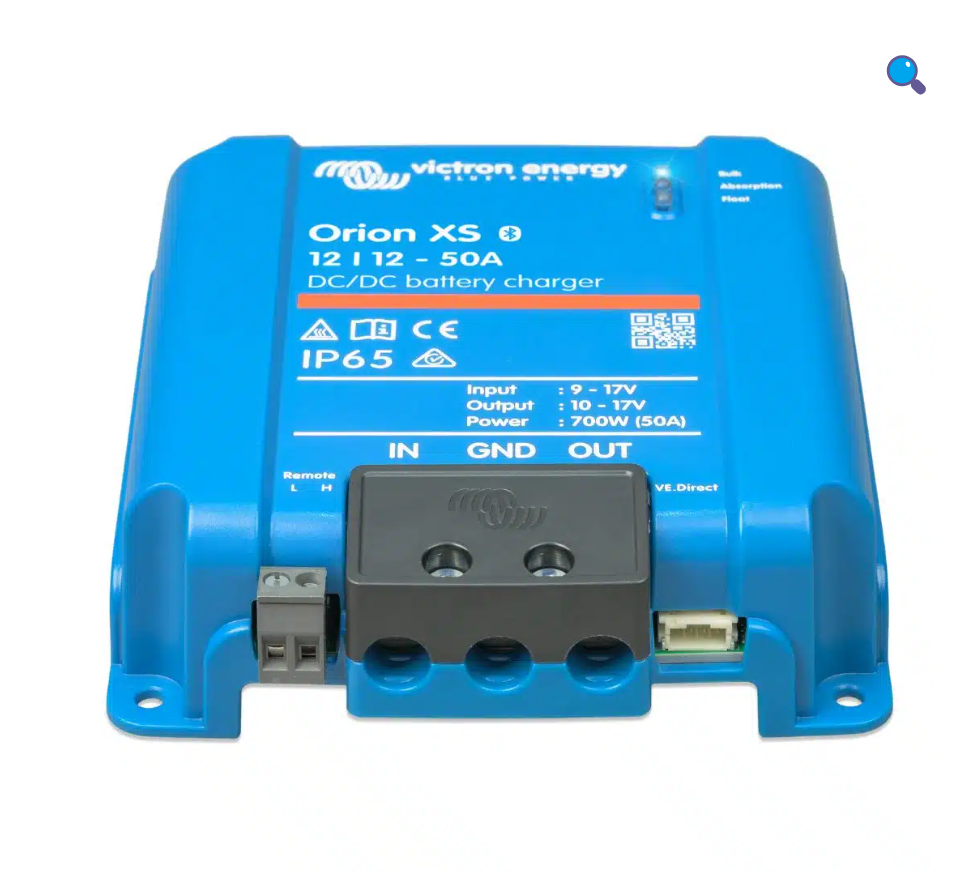
I am using this setup to charge my 4 x Battleborn batteries. The Main unit is under my bed and 2 x 2000 watt are under the garage. I drilled hole so they sit perfectly in dead corner of the garage. and main unit sits under my bed. Ill have to crawl and get pictures. FYI you could charge your main batteries with your goal zero. With 97 percent efficiency on the new dc to dc charger you will not lose much !
1 point
-
PM me if still available, thanks!1 point
-
So, if you were to land mount, for example when trees are over the Oliver, do you have an additional long cable, external terminal and a stand for it? Would be a pain to remove the rooftop cable. Another Q: what is the model of your thin solar panel? Link? Is it connected at the junction box for the stock panels? I could envision two of these left and right angled some to better catch the winter sun.1 point
-
Do you have any photos of the installation? I’ve already installed a compressor fridge in my trailer five years ago but, there may be others who would be very interested in seeing the installation (I am as well!). Thanks1 point
-
@Geronimo John Glad you appreciated my update. Now the actual thread can continue on about Steve ‘s awesome vid of the rally. 👍🏻 Your courtesy to the thread is also appreciated. 😉 Onward! 🇺🇸🇺🇸1 point
-
1 point
-
I have to agree most things can be attached with proper prep using VHB tape, especially on fiberglass, it is a perfect medium for VHB tape. I was actually going to use it to attach the rain guard on the new Maxx-Air fan but decided not to use the guard at all. My two 90 watt panels I installed up top are held in place by VHB only. I did use some backup attachment screws for the wiring mounted on the aluminum solar panel frame. It's been 4-5 years and everrything has held up great. AmSolar.com swears by it, says they have never had a panel come off that was installed correctly. One does hate to drill into the beautiful, waterproof fiberglass unnecessarily, maybe with time, more and more people will ask for VHB tape's use. The drive for its use also needs to come from the manufactures of 3rd party items to make them more conducive to VHB tape installation. This is I am sure is not a priority for them but it sure would be nice for us. https://amsolar.com/shop/mounting-accessories/#1 point
-
Like @jd1923 said, the truck model does not matter, and if you have a F150 it probably has a 2" hitch receiver. ***Important, do you know what size the bulldog coupler is on the EII that you're purchasing, probably 2", but it's also available with a 2 5/16" bulldog coupler (we have it)? You want to know that spec because the AWDH is also available with a 2" or 2 5/16" ball. BTW, we got our 2023 LEII with the 2 5/16 bulldog coupler and 2 5/16" AWDH with 2" receiver. We recently upgraded to a Chevvy 2500 with 2.5" receiver so I prchased a 2.5" stinger/shaft from Anderson for the AWDH. Yes, I know I don't need a WDH with the 2500 but I'm thinking I have it so why not use it!1 point
-
Yes, sure do.1 point
-
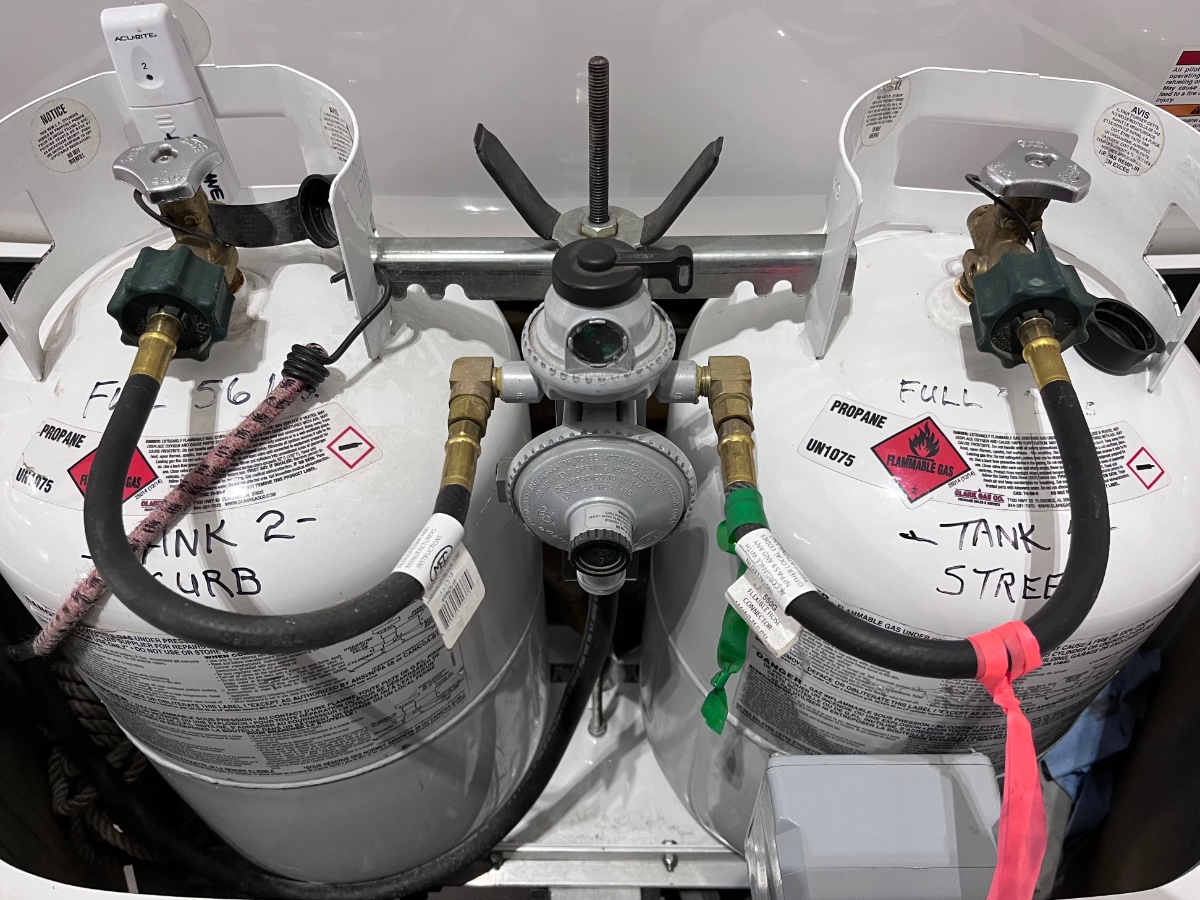
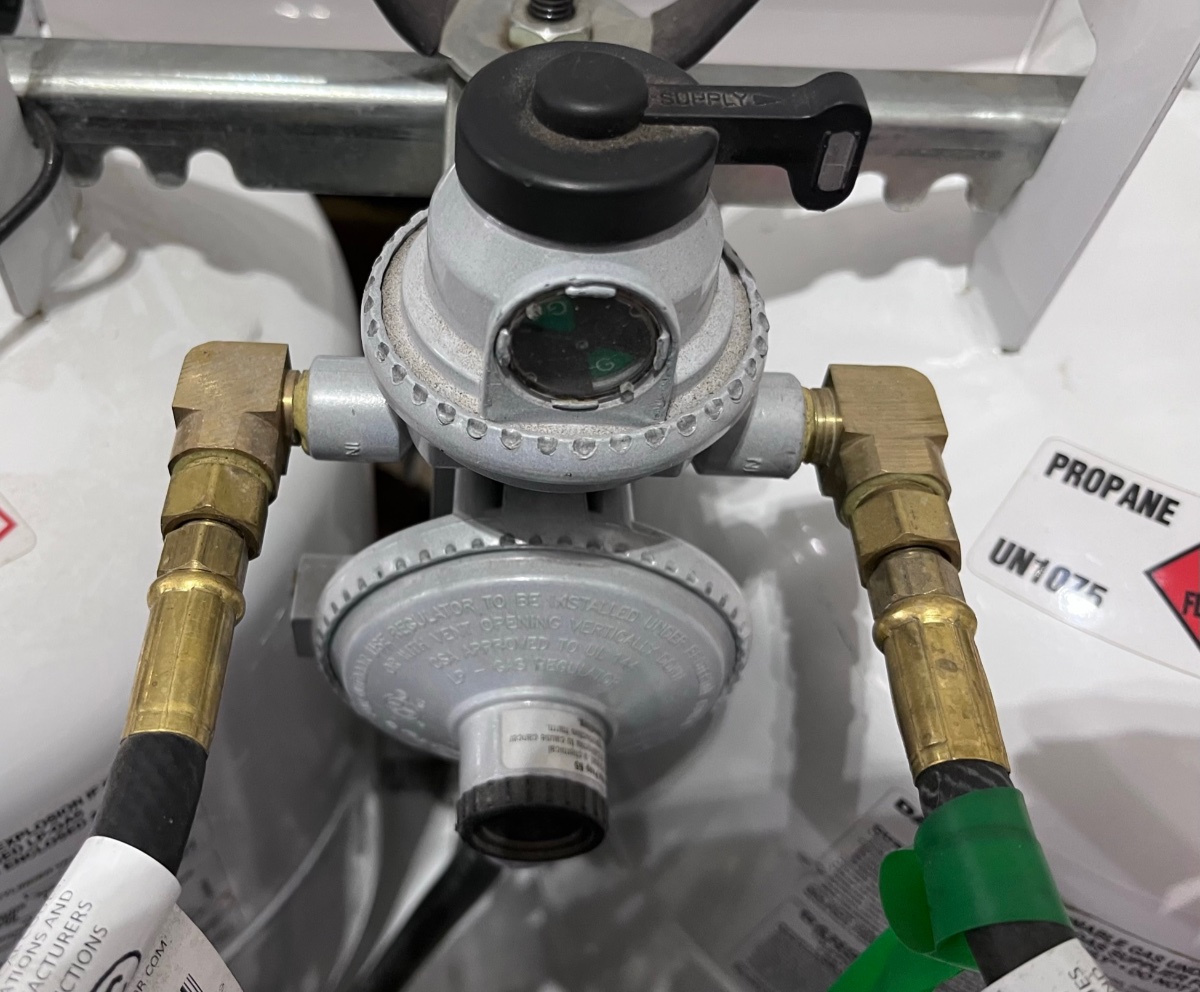
You can leave the plastic cover off all the time, it is a rain shield and completely open at the bottom. It isn’t needed in an Ollie. That way you can inspect the hose connections more easily. And it saves weight, the trailer will be lots faster…. John Davies Spokane WA
1 point


-
Recent Achievements
-


")


")


")
")


")

")

