Leaderboard


Popular Content
Showing content with the highest reputation on 08/30/2025 in all areas
-
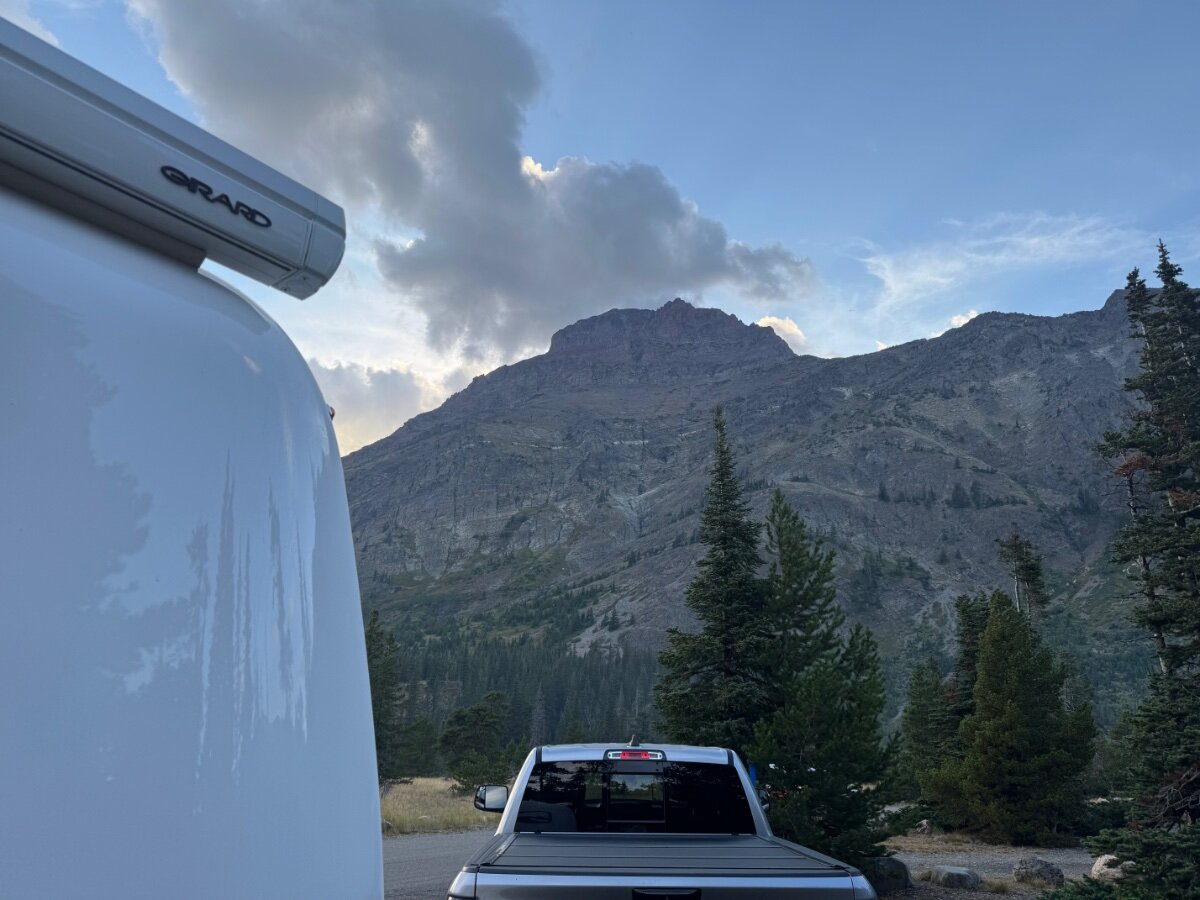
Glacier NP Two Medicine campground
 8 points
 -
To add to the braking and bearing conversation: About the difference in braking ability: A couple of weeks ago when John received his new axles from Dexter he disassembled one spindle in order to make some bearing, drum, brake measurements. I measured one of my old 3500 pound axle 10 inch x 2 1/4 inch brake assemblies and John measured one of his new 5200 pound axle 12 inch x 2 inch brake assemblies. In comparing the square inch surfaces between the two assemblies, there is about 5 more square inches of brake lining surface area per wheel. Also the 12 inch drums are heavier (34 pounds vs 24 pounds) and the 12 inch drums have deeper cooling fins around the outside so should be able to absorb and radiate more heat, which will aid in braking performance. Once the brakes are fully seated we should see better performance and I imagine that it will take quite a few miles of actual braking to fully seat the brakes. Also concerning the bearings: I went to my go to auto parts store and purchased a couple new wheel bearings to have on hand spares while traveling. They are standard front wheel bearings for the 2010 Chrysler PT Cruiser and apparently several other vehicles as well. The actual brand that my auto parts store carries is the exact NTN (ET-CRI-0846) bearing that John found in his Dexter axle! The Timken Set 49 bearing is also the same. The NTN (made in Japan) bearings were less than $50 each and can be purchased from any auto parts store and are much, much, much less expensive than the exact same brand from Dexter! With the Harbor Freight (or similar bearing press kits from many other sources) and spare bearings, the Nev-R-Lube hubs can easily be repaired on the road. Please use this information for reference and do your own research and bearing cross references.7 points
-
I never keep trout unless I'm back packing and need dinner. Actually, I'd much rather have a steak. I just got home from a stop at the Mothership and there were a number of Olivers there. And, Craig & Vicki and Steve & Debbie were celebrating the first day of ownership of their brand new Ollies! Bill p.s. also, the Russo's were in the Sales office filming a review of the brand new 2026 Elite II. Hopefully they will have that up on YouTube soon.6 points
-
@mountainoliver: FYI, We definitely noticed a more efficient braking performance after upgrading to the NeveRlube D52's w/12" drums after the brake shoes settled in. Backed off the brake controller a few volts so as not to lock them up using the 10" BC setting. You'll not be disappointed with the 12" drum upgrade, IMO.5 points
-
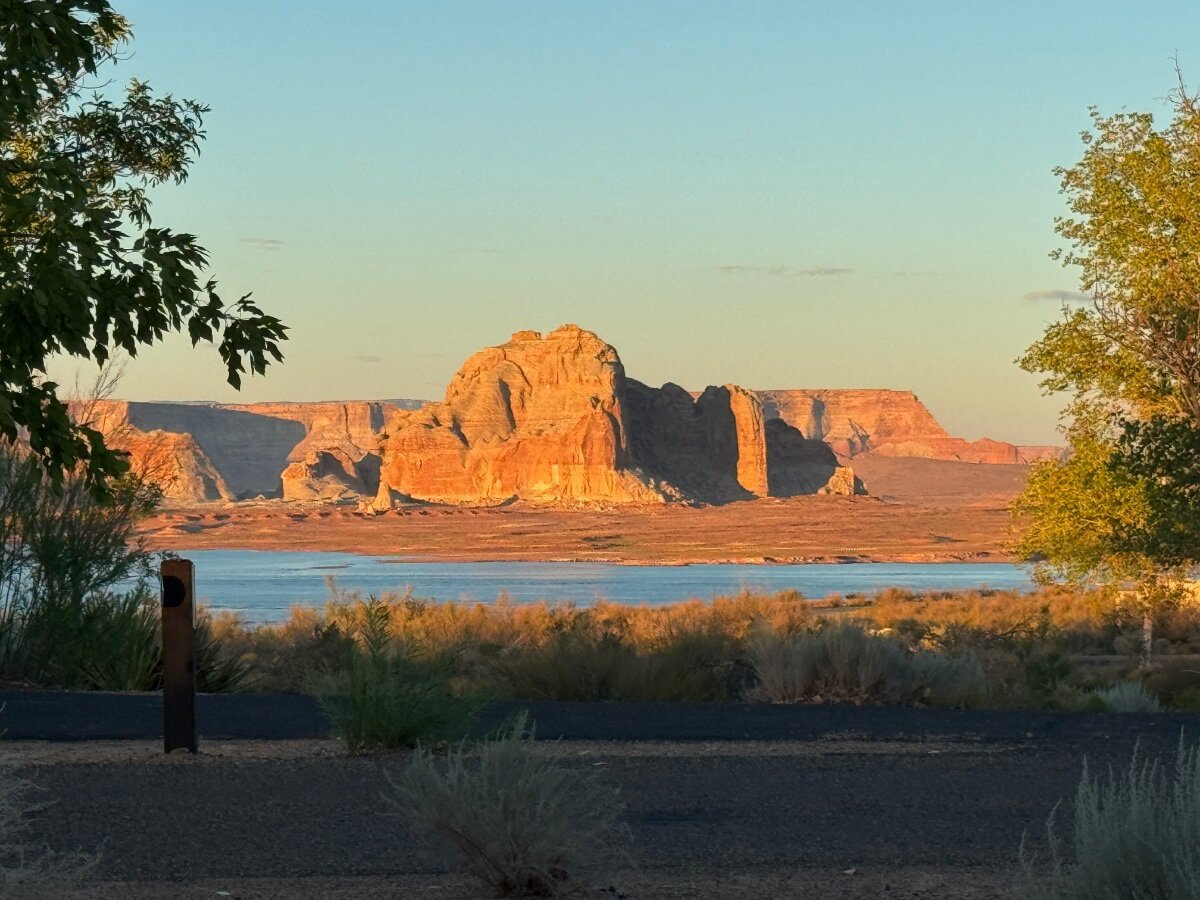
Site A4 at Wahweap campground near lake Powell.
4 points
-
Jason Essary and Jason Ballentine told me that these two Olivers were bound for Seattle. They should be there by now and getting ready for new owners. Bill4 points
-
For what its worth - Jim Oliver's hull #1 is currently sitting outside the Oliver Sales/Service building in Hohenwald right in line with a bunch of other Ollies. Mr. Oliver's #1 is easily picked out because it doesn't have a rear window, how "diamond plate" "boxes" under the frame that were used for additional storage, has a satellite dome on the roof, has "square" porch lights (these were on both the Legacy I's and II's until early 2016. If you are in Hohenwald, be sure to ask to take a tour of this Ollie - the interior has many other "different" features. Bill3 points
-
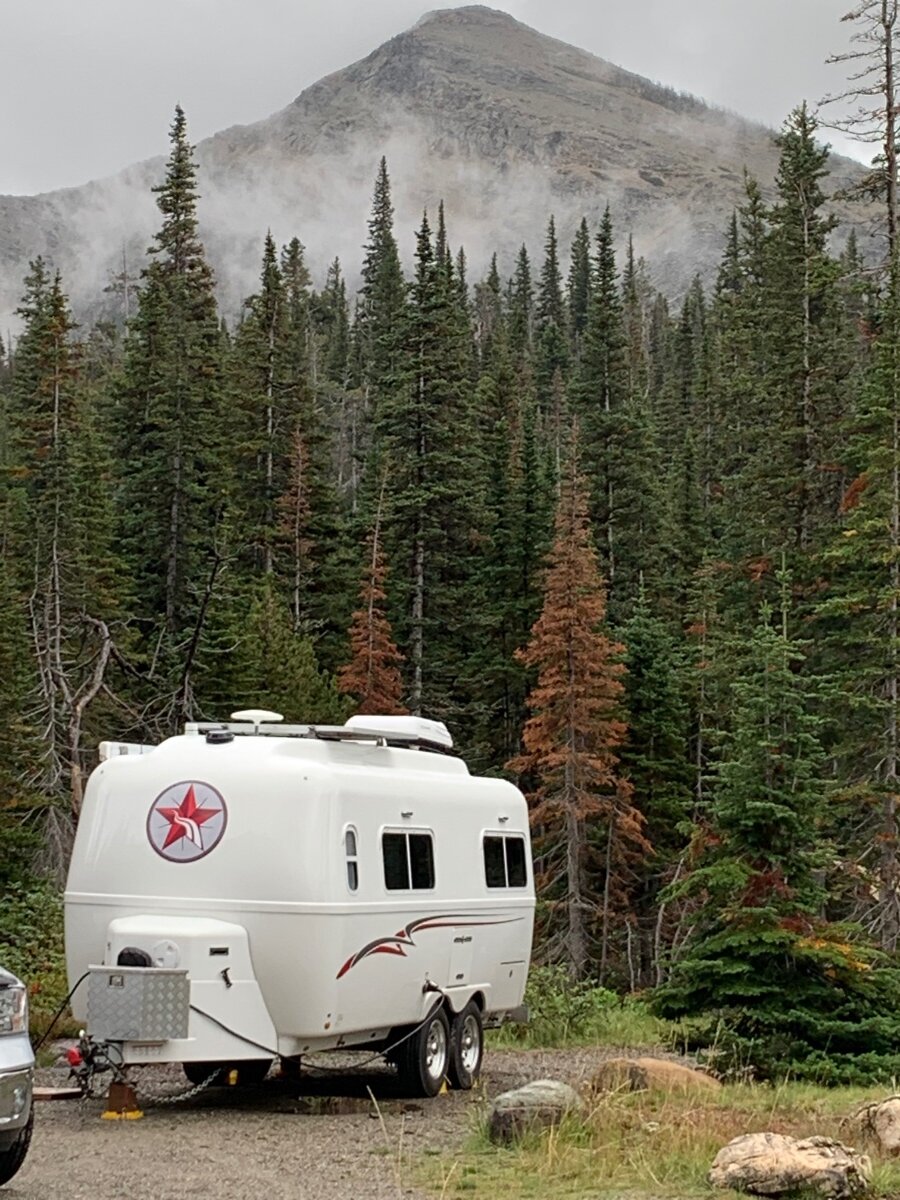
It’s been a great trip so far - this is our first 2 night stay. We have gone up to Glacier and then up to Coleman in Alberta at the base off Highway 40. Close to 100 miles of gravel and very dusty road. Then into Kananaskis Country and up to Banff, where everything is full-we got the last site in the 600 site RV park. The “long weekend” filled Lake Louise so you couldn’t even view the lake. We then connected with 93/95 and are down close to Kimberly in BC. As we entered Kananaskis Country the scenery changed dramatically! Massive mountains- folded and rising 6-7 thousand feet from the floor- more and more glaciers. A really different feel than our section of the Rockies in Colorado and Wyoming. Very “Individual” and massive.
2 points
-
We have an appointment on Sept 19 at ALCAN for new axles. Looking forward to the upgrade.2 points
-
We really enjoyed Two Medicine campground!
2 points
-
First Alert says they aren’t making the model currently in my Oliver. The model in my Oliver is an SCO5RVA. It is nearing end of life. SCO5RVAs are still available online but I suspect they are NOS (New Old Stock) which means they are already a few years old. I don’t want to buy a NOS unit that could be already nearing end of life. That’s why I want to know what detectors Oliver is putting in the newer trailers. If I did find an SCO5RVA on the shelf I would look at the mfg. date before I bought it. I got bit on an LP/CO detector that I bought online from a reputable RV Supply house a few years ago. It had been made the same year as the one I was replacing. https://support.firstalert.com/s/article/rv-smoke-co2 points
-
A couple of years ago I secured a small bag of these clips - probably 20 or so. Be happy to send you a couple if that is what you need. Bill PM me with details2 points
-
I just ran across this older post... You'll be happy to know they are NTN brand made in Japan! More info here: https://olivertraveltrailers.com/forums/topic/11020-dexter-nev-r-lubetm-bearings-–-will-bearing-replacement-be-necessary-on-the-road/#comment-1199012 points
-
If you look VERY closely at the left side of this photo you can see the tongue of our trailer 😂
2 points
-
Have two 30lb tanks and never even bother to weigh them. Run one tank until it's empty , switch to the full one, and then just plan on filling the empty one as soon as I can.2 points
-
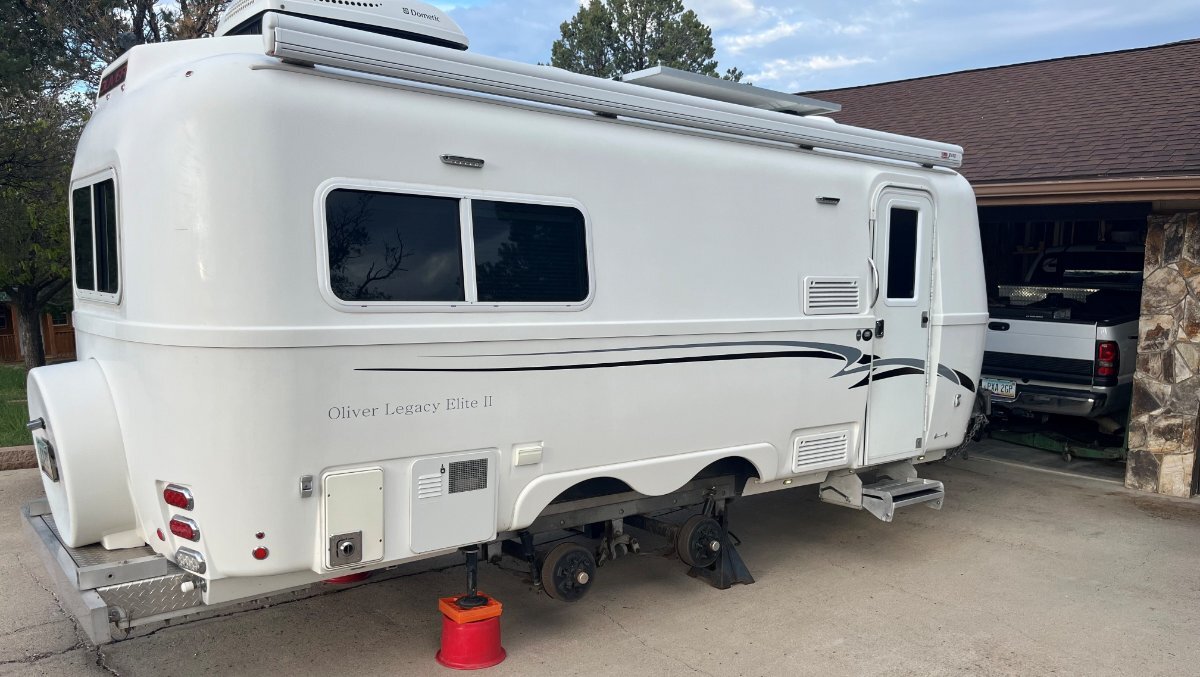
Regarding price.... We just had 5200 lbs Nev-R-Lube axles and 5-leaf springs installed by ALCAN. Total price was $3,928.28, and that included $141.99 in convenience fee for using a credit card (3.75%). They only accept the equivalent of wire transfers to avoid the convenience fee. They do not accept checks (I didn't ask about cash). Regarding the functionality... Larger brakes did not cause me to reduce the brake controller gain on my OEM controller (2020 F250). I had to increase it initially, but as the brakes adjusted I decreased it back to roughly where it was initially (+5). Braking is MUCH better. The first two tows were 50 miles each, and ALCAN re-torqued the U-bolts each time. Both times the TV had come down, but nothing else was disturbed. We then towed about 237 miles and then 170 miles, and the TV has not come down again. I usually use the stabilizer jacks to take out less than 2" of height on the low side for leveling. When I first tried to take out 1.75", the wheels lifted off the ground. I had to use the Andersen leveling wedges, and found that anything more than 1/2" would cause the wheels to lift off the ground. As we relocated, this improved somewhat, and Tanner said it would improve more as the springs break in. I expect it will be even better riding when I get new shocks. Two of them were blown, and one of these was broken as well. ALCAN fixed it up the best they could, and we ordered Monroe shocks to replace all four. I would have ordered the Bulldog shocks, but the stories on availability had me concerned in the timeframe in which I needed them. They will be installed this coming Monday.2 points
-
Had similar issues with my Legacy1 trailer. Washboarded roads really puts these connections to the test. I had Oliver send me some extra clips which I added in addition to the OEM clips. One or two per shade as I recall. I then used thin nylon washers to shim the clips out so they were all in plane and fully engaged the groove on the back of the frame (use a straightedge). Since then, I have also started towing with all shades in the up position (both sheer and blackout pulled up). This puts the drawbars (?) at the top of the shade frame, placing a little more weight at the top of the frame and not stressing out the clips as much. So far so good. Dave2 points
-
No. I have thought of the possibility, but we drain the tank after each trip and sanitize once a year. John1 point
-
VERY nice! Expect to be at St.Mary / East Glacier on the 10th for 5 nights. Fingers crossed we don't get an early blizzard this year!1 point
-
I'm installing ours this weekend (more info soon)... Out with the old and soon in with the new D52 axles and Alcan leaf springs! 😂
1 point
-
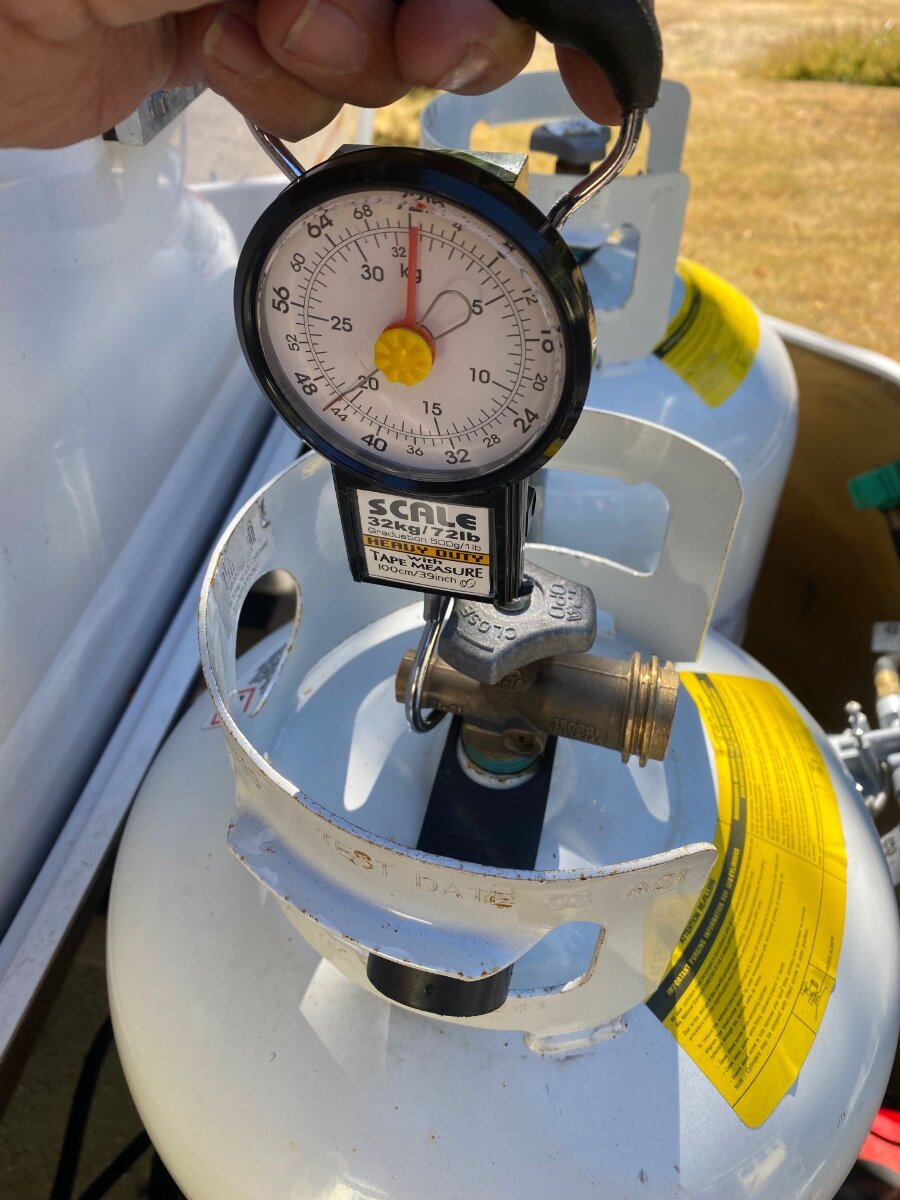
Although there are several ways to check propane tank levels, I’ve found the easiest way for me is a luggage scale. They have large hooks that balance nicely when hooked on to the fill valve, and they remember the weight so you don’t have to contort yourself to see the scale. Mine has an analog dial with a memory needle, and thankfully no batteries. I’d recommend these over ones with batteries that always seem to be dead when you need them. Flame King sells a more expensive scale made for this purpose. It conveniently reads in percentage, but it’s battery operated too. A 30 pound tank weighs around 55 lbs when full, and about 25 lbs when empty. A 20 pound tank is around 37 lbs full and 17 lbs. empty. I’ve labeled my tanks with their weights and I can determine exactly how many pounds are left with the scale. The tanks can be weighed in place with the spin-off clamp loosened, and it helps to put a stick or bar through the scale handle to lift with both hands. I know some people swear by the Mopeka ultrasonic level detectors, and I heard the newer ones work pretty good. But I’m still not over the problems and uncertainty of my old ones, so I’ll stick with my trusty scale for now. Cheers! Geoff
1 point
-
Great shot! We were there at Fish Creek campground on Monday. I think the park is completely full.1 point
-
Thanks for the nice words JD! Yes, one of the travelers is always hot, and the pump is grounded separately. My referenced sketch shows standard 3-way wiring for simplicity, with the (+) on one end of the circuit, and the switch leg (feed to pump) on the other. The Oliver is wired as a "dead end" 3-way switch, where both the hot (+) and the pump feed come to the main switch location, and bathroom is the dead end with the red point wire doubling back and being spliced to the pump feed at the main switch location. It doesn't matter how the travelers are connected, or if they are reversed. One or the other, or both, switches will always be in the physical On or Off position with the pump running. You may be curiously interested in how three or more switches (4-way switches) work in this 3-way circuit. The travelers will switched to run straight through, or they will be switched to Criss Cross each other. Clever! This is also illustrated in my referenced sketch! Cheers! Geoff1 point
-
Yes and no. The travelers will turn on/off the pump regardless of which is attached to the switch outside terminals. But they do make a difference. Many like having a circuit OFF when both switches are down. If yours is this way, do nothing more. If the pump is off with one switch up and the other down, then reverse the two traveler wires and you will be happy. Said differently, if the pump is on when the bath switch us down, reverse the travelers. Hope this helps. GJ1 point
-
Joshua Tree is like visiting the Flintstones back yard! It should be a bucket list park. I'm pretty sure we stayed in that very same site. We had to reserve two different sites because of limited availability. Our first site was a 20 point turn to squeeze in, and then some kind folks suggested that we look at google satellite maps when reserving a site. This proved to be a great tip! Cheers Geoff1 point
-
Jumbo Rock Campground. Site 71, Joshua Tree NP1 point
-
Boondocking in Lewiston MT for the night in a Kiwanis Club campground adjacent to a little airport runway. Fun to watch the small planes takeoff and land
1 point
-
Saw two Ollie's headed north being hauled on the back of a semi just north of Kansas City at about 9am this morning. Other than seeing an Oliver Elite I headed west into Dubois, WY about a week ago and camping for several days with another Elite II about a month ago, that is all I've seen in the past two months on the road. However, I'm guessing that will change when I land at the Mothership tomorrow afternoon. Bill1 point
-
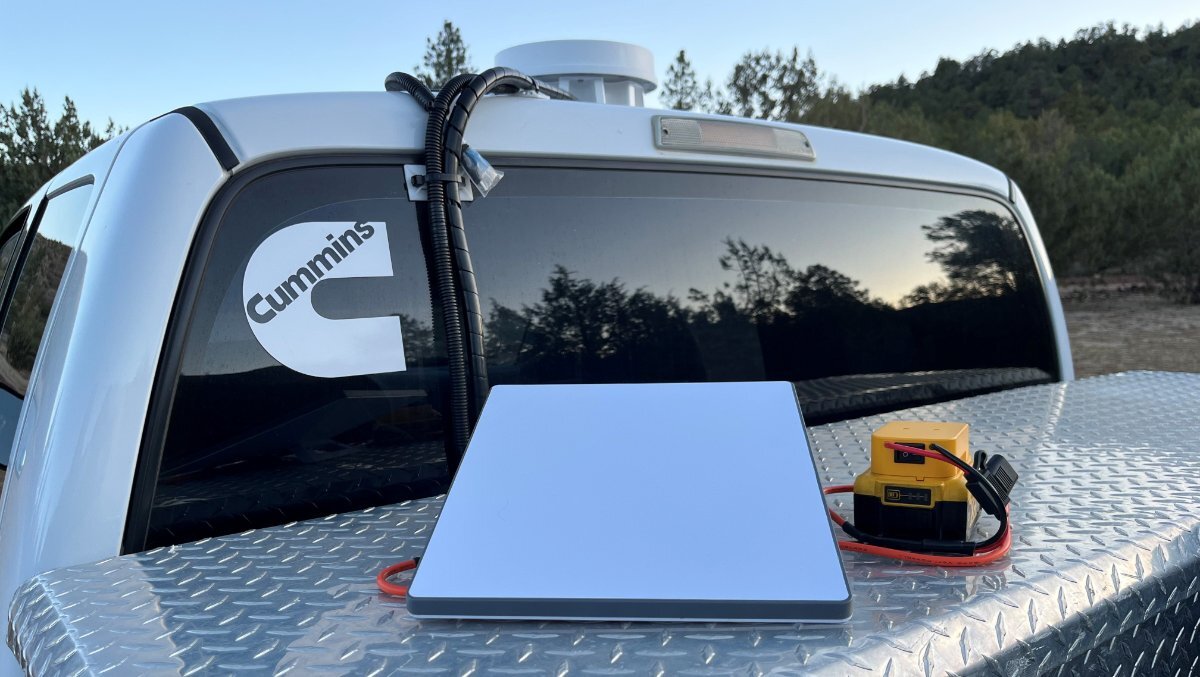
I’ve been plugging the power cord into the outside trailer outlet when on shore power and into a Jackery when not. I just coil the power cable so that it fits in the cut out in my case. The Ethernet cable for the mini router sits in there, too. The dish sits on top. The case was from Amazon, not expensive but got great reviews and has worked well. Cut outs for the mini, mount, power plug, mini router and cables.
1 point
-
Theodore R NP site 21 in Cottonwood
1 point
-
I felt the same way until recently. There could never be enough cold water, with room in the fridge for at most 6 water bottles. We make ice too, but for drinks other than water. I long pooh-poohed the idea of an extra fridge, but it makes all the difference in the world to ALWAYS have fresh cold water! We keep 1-2 of these pitchers full in the outside fridge and one inside. When the inside one empties, I bring in one from outside and refill one so we always have one cold in and another cold one outside. Another 6-8 store-bought water bottles outside too for anybody who needs one. Now I'm getting thirsty! It's how we roll. 🤣 https://www.amazon.com/dp/B08VFK4WS6/?th=1 https://olivertraveltrailers.com/forums/topic/11018-dometic-cfx5-refrigerator-tow-vehicle-installation-with-solar-power/1 point
-
I came up with an equally inexpensive yet much simpler approach that also avoids the use of batteries. I thought about buying the tanks with integrated gauge from Costco that @routlaw mentioned but I didn't like the thought of getting rid of two perfectly good LP tanks. Then I saw these gauges at my local Wal-Mart for about $15. They simply screw right onto the tank. Just open the porthole access and peek inside to see if your tank is empty.
1 point
-
I was going to say this same thing.1 point
-
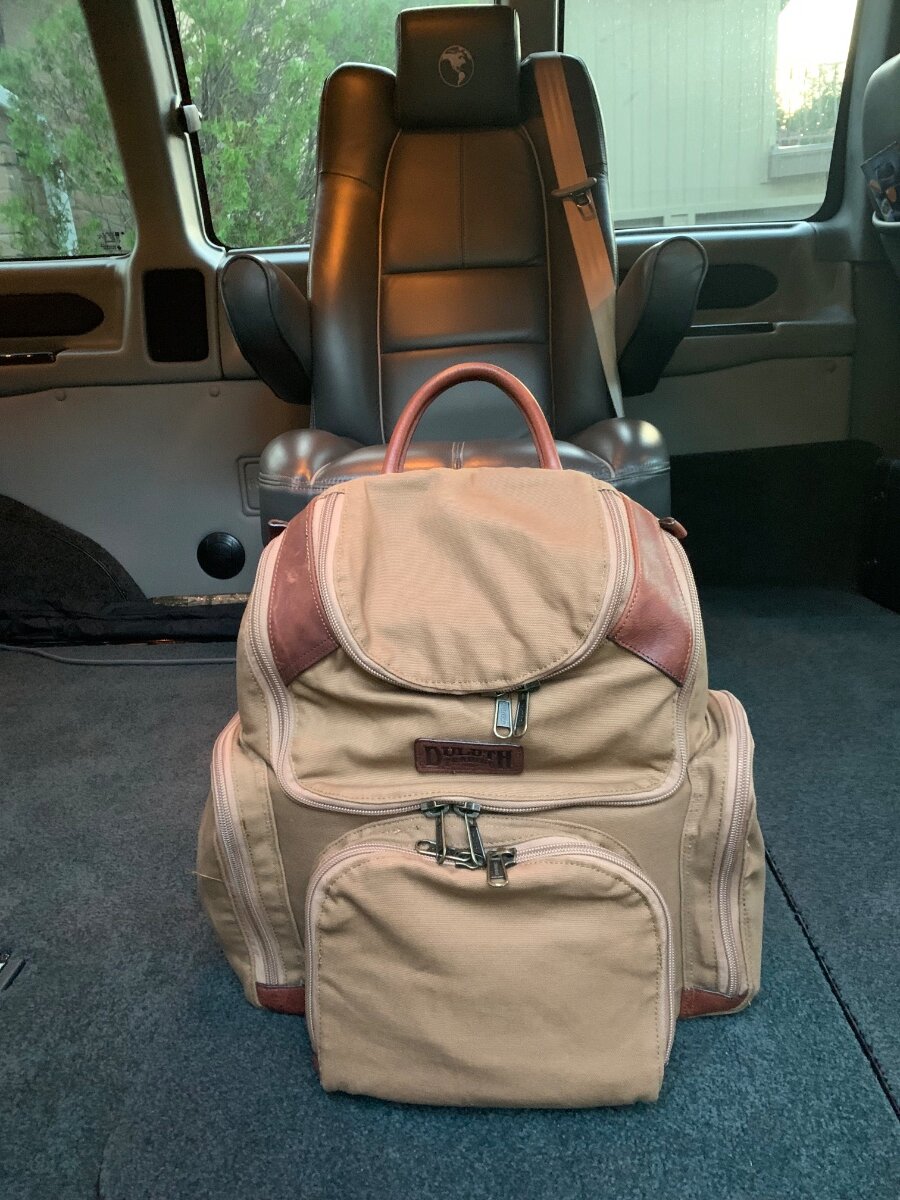
“One is none and two is one.” Like minded here Ron. My past years of military training and deployments have always kept me thinking contingencies. Better to have it and never need it than need it and not have it. As we use to say prepping for deployments, you don’t want to be left flapping. That is what’s great about the compact Mini, well done, nice pack and kit! 👍🏻1 point
-
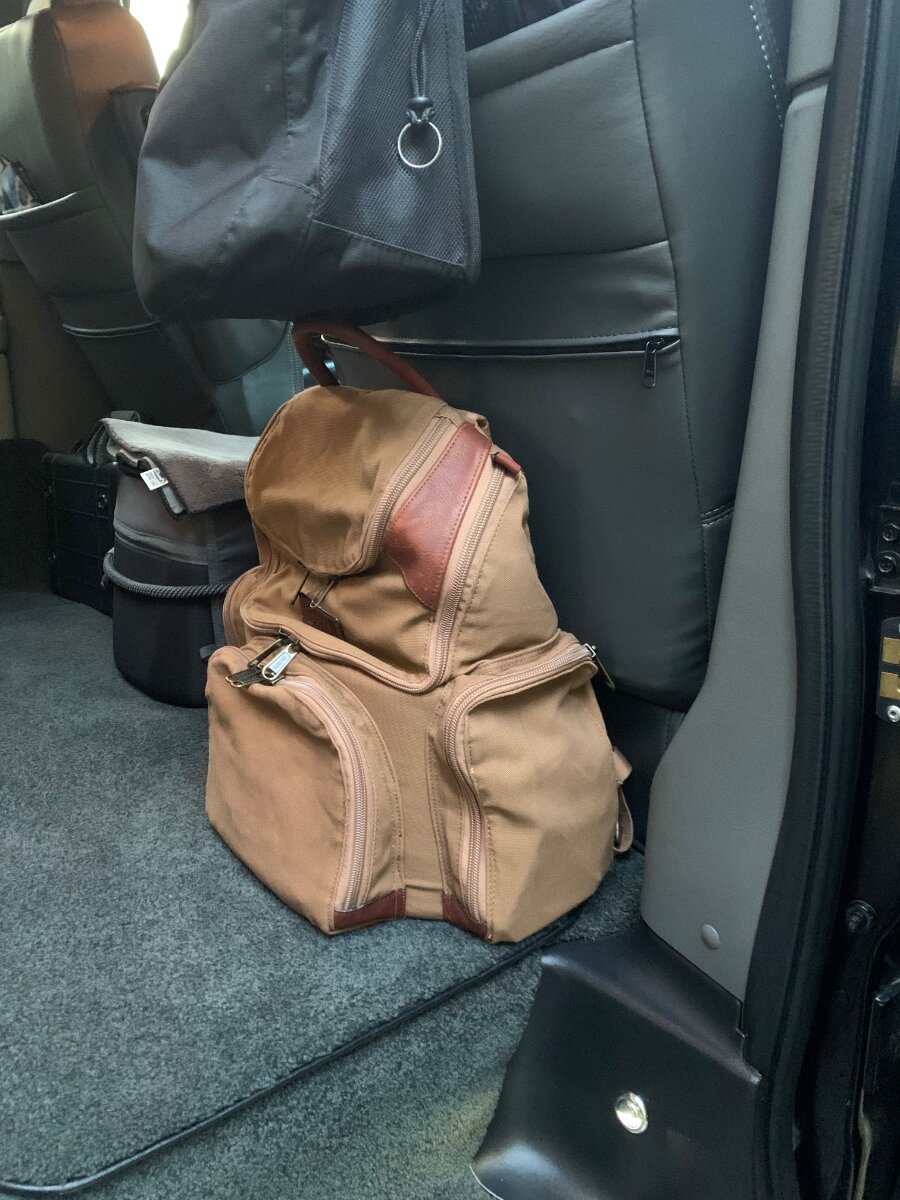
I have long cords, short cords and some in between; charging accessories and adapters if need be; suction cups and magnets for pole and rooftop mounts, or anywhere the satellites can see; all nicely packed away in an emergency communications bug-out-bag near me!
1 point
-
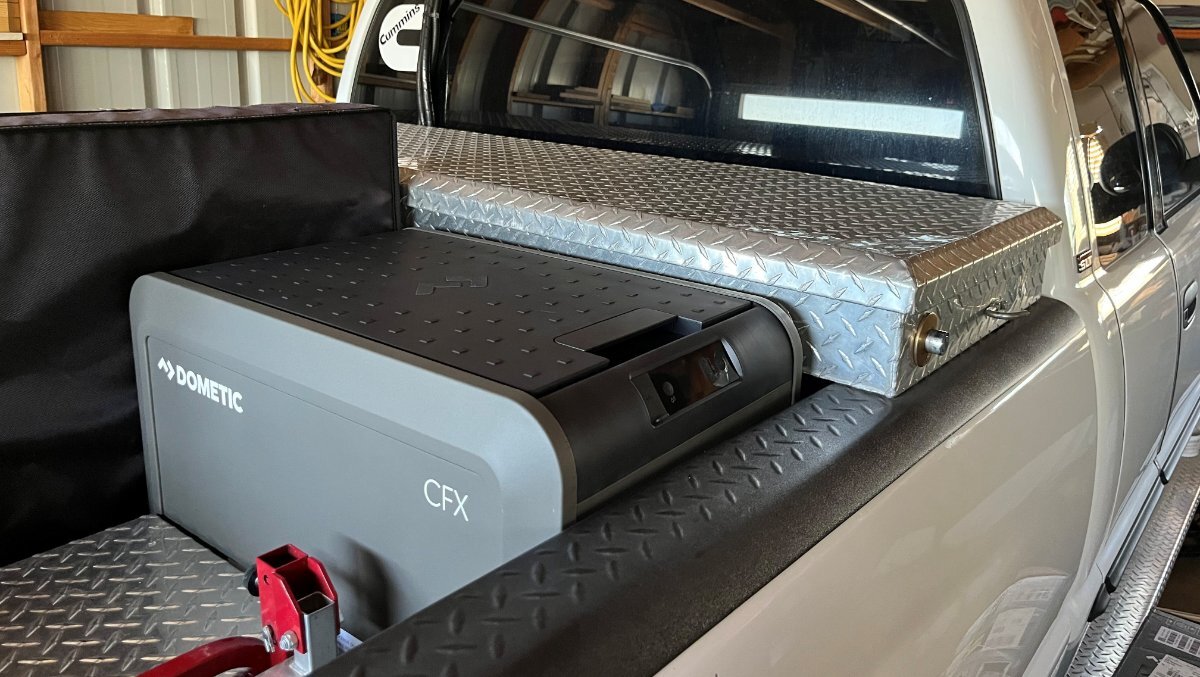
After deciding on which model to buy, what size would fit, and whether to go single or dual zone we went with the newest Dometic model CFX5. The single-zone 45L model fit perfectly in the front curbside area of the truck, behind the toolbox and in front of the wheel in arms reach from the passenger side truck door, so convenient holding cold water and food while towing! I built a stand to fit the cooler above the corner of the wheel well and bring the control panel to the proper height, just above the truck rail. Notice one stand support is cut short to clear the wheel well. There are four 6mm threaded sleeves built into the bottom of the fridge to hold it down. I let the refrigerator sit for 48 hours after having it sideways when mounting the platform. It looks very good installed, doesn’t it?
1 point
-
Like @Snackchaser, I use a luggage scale to get an accurate read on the propane level in the tanks. I purchased a pair of Mopeka sensors and found them to be unreliable and not very accurate. I had a couple replaced under warranty. They also seemed to have need frequent battery replacement. I would NOT recommend them. Amazon has a large selection of luggage scales for about $10, that are compact and accurate. With tare weight labelled on both tanks there is no mystery to the amount of propane when the total weight is known. Such as: https://www.amazon.com/Etekcity-Portable-Handheld-Suitcase-Temperature/dp/B082LYC2TN/ref=sr_1_7?crid=2PAZR2PQNSA24&dib=eyJ2IjoiMSJ9.lrxtiYiAaOxFumPFwJLLfi-V2pD7fJpKxfsl6UyzsKbSFL3YNBR0L1a7Px8SBzHhhW25VLBh912CrUyahxdkUjT1pqB3pRe933JDFfDr7ZaTgoTCb1mXdfINMMhl5OU0FibEUB2mMbq_9R89XeAeSb5MhrkSnnQ5YT6uUSpTQctrjSJqa-90Rcwkt-jGQLzD4jSFjCSRtp-YFlVIJhme_3etEGEES17uG605HrMmwLGyk2YZsL2lLr-nGzZUe7jC60bztrvKDpr9oVktN97bzUFLTJ8jfQEvF9T4OU-tq1A.NFHYzomQyFXtHPcZxq8NaPUGd5FyqkWMxZL0L2YMZgw&dib_tag=se&keywords=digital%2Bluggage%2Bscale&qid=1754537940&sprefix=digital%2Blugga%2Caps%2C138&sr=8-7&th=1 Don1 point
-
Cut the cord! 🤣 (I also purchased the Mini Router per @Snackchaser post proving its use, but have not had the time to pull it out of its packaging.)
1 point
-
I have shared with you numerous times that 2022 LE2 's have: 1. 5200 lb. Axles 2. Nev-R-Lube axles/Hubs 3. Nev-Adjust brakes This was confirmed by Oliver. Your Hull # is 200+ after ours. Since I'm responding to this again, why are you replacing springs? The problems were with old Oliver's with the 3500 axles. You have the beefer axles and shouldn't need to replace them at this time. Unless you are planning to drive to Alaska, or drive wash board roads, and/or chemically treated roads, you shouldn't need to replace them.1 point
-
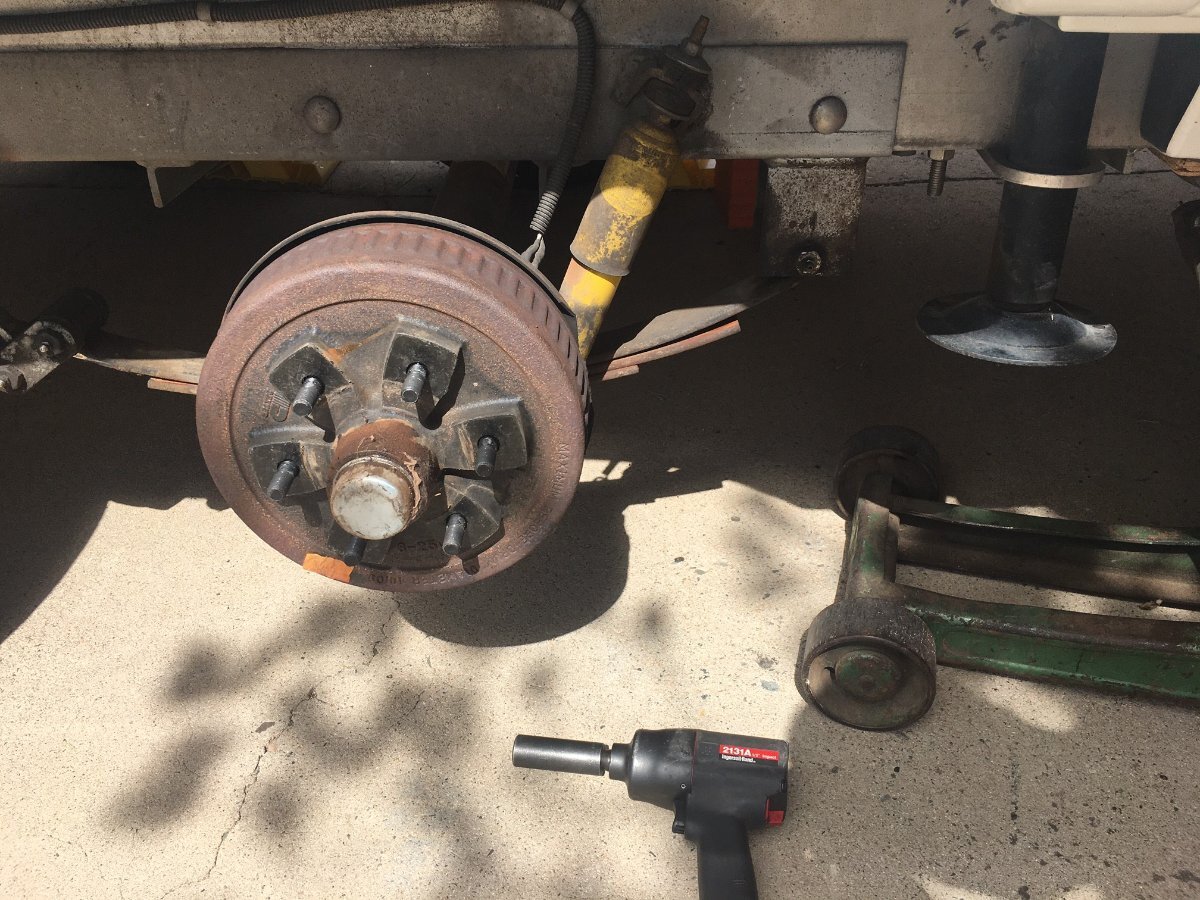
@John Dorrer had answered, YES for 2022 to 2025 Olivers. But to be sure... You should just check yours. Remove one wheel so you can see the drum. If you see the bearing cover plate like in the first picture you have the Nev-R Lube bearings. The cover plate is larger and has Nev-R Lube stamped into the cover. Second picture is the only picture I had with the drum on, just before I did a first bearing service on our older hull. It shows the old style axle with inner and outer bearings that must be packed with grease. The bearing cover is smaller without stamping. I believe if you have the EZ-Lube model, the cover plate has a Zerk fitting to add grease. EZ-Lube is not Nev-R Lube.
1 point
-
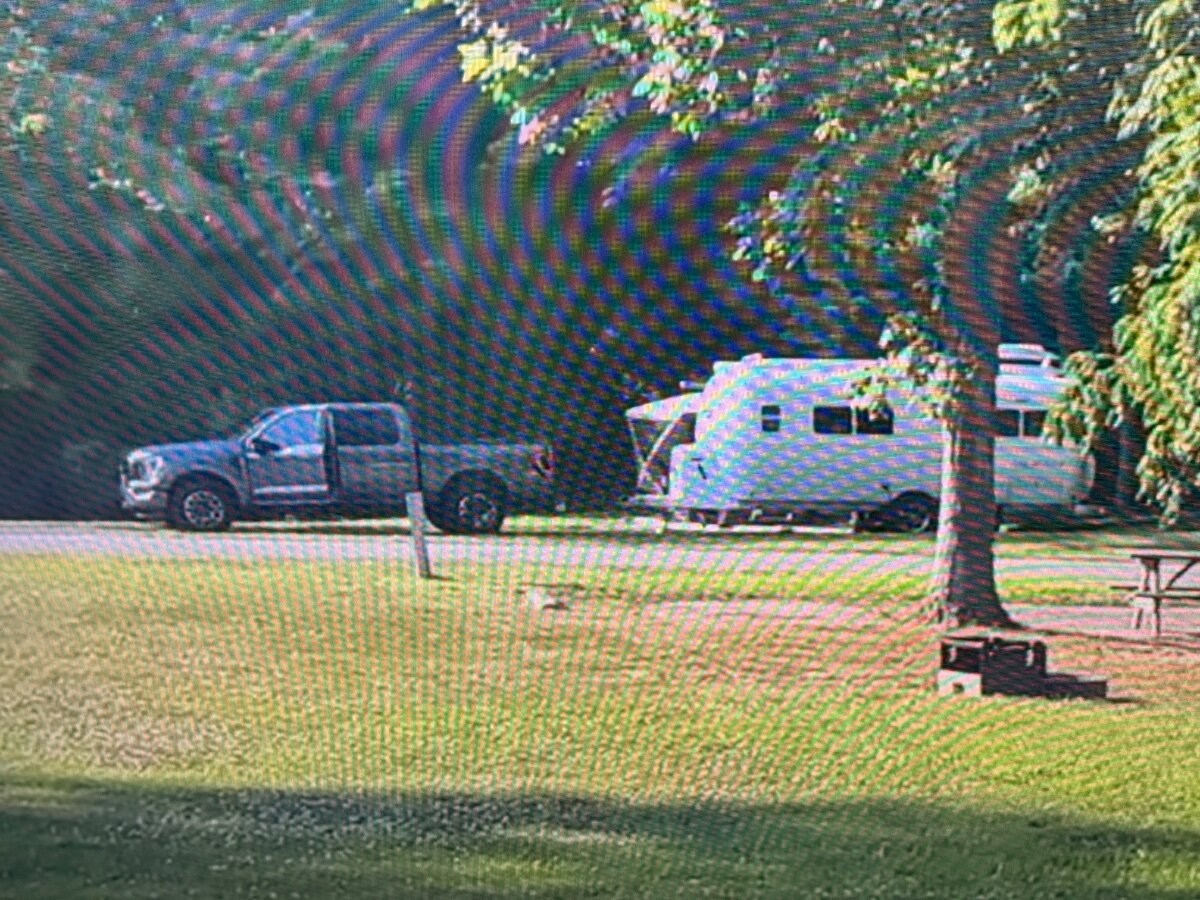
Who was at Patoka Lake in Indiana during a recent heat wave? You made it in the background of “We’re the Russos” latest YouTube video. https://youtu.be/Fnykd-E1qw4?feature=shared
1 point
-
If you’re not connected to shore power the AC will not show up on the cp plus screen unless you turn the inverter on, with the inverter on it will show the “heater” and “AC” option.1 point
-
Just by noticing some had them and some did not. Yes, they are on the back of the clips.1 point
-
My spare tire is 9 years old, so started researching what tire to replace the original 16" spare tire with one that fits in the original spare tire housing. On our 2015 LE2 Ollie the original spare tire is a 215/60R/16 SL load range tire. The other 4 trailer tires are LT225/75R/16 E tires. Understand some other LE2 owners have P215/70R/16 tires. Around 2017 (please correct me if I have this wrong) the spare tire fiberglass cover was modified to accommodate the full size 225/75R/16 tire/wheel assembly. Recently, Oliver started installing 15" wheels on LE2 Olivers mounting Goodyear Endurance ST225/75R/15 E tires. Went back to an old thread here posted by Steve about Oliver's move to LE2 15" ST tires. Started thinking 🙃 (that's trouble for me sometimes) if a 215/70R/16 will fit in the original spare tire housing, will the newer 15" tire, ST225/75R/15 E fit in the original spare tire housing. Contacted Oliver service and they said the ST225/75R/15 E tire will fit inside of my original spare tire housing on my 2015 LE2. Started doing some research and learned the following: Original LT tire: LT225/75R/16E Tire height: 29.28'' Section Width: 8.86'' Maximum load capacity: 2679 pounds New tire used on LE2: Goodyear Endurance ST225/75R/15E: Tire Height: 28.28'' Section Width: 8.86'' Maximum load capacity: 2833 pounds Tire used that fits in 2015/2016 LE2 spare tire housings seen in two different threads: 215/70R/16 Tire Height: 27.86'' Section Width: 8.46'' Maximum load capacity: 1764 pounds The 2015 spare tire fiberglass housing ID (inside diameter) is around 28 7/8" and around 9 1/2" deep. It looks like the ST225/75R/15E will fit if the tire/wheel is centered. Couple days ago ordered a Sendel S20 15"X6", six lug trailer wheel with 5.5" spacing and a Goodyear ST225/75R/15E tire mounted. http://sendelwheel.com/wheels/s20t.html https://www.goodyear.com/en_US/tires/endurance-trailer-tire/24464.html Load range/Load index explained: https://www.discounttire.com/learn/load-range-load-index I normally keep Ollie's spare tire in the TV pickup bed instead of in the spare tire cover, but still want a tire/wheel that fits in the spare tire housing, will see. Plan to experiment with learning how to put a nice finish on the original aluminum spare wheel before eventually polishing all of the original wheels, too.1 point
-
Will make four UHMW plastic plugs same thickness & shape and install in unused portions of the milled slots to prevent the wheel mount from slipping down with existing flat washers holding plugs in place.1 point
-
Another option might be to simply drill four new holes in places that allow you to use the existing plate and move it up the amount needed and still have round holes instead of slots. That way there would be no chance of the mount being able to slip back down.1 point
-
The machine shop slotted each mounting hole on the aluminum spare tire mount lower by 7/16" retaining original hole width. This allowed raising and centering the new Goodyear Endurance ST225/75R/15 spare tire fitting easily in the original rear fiberglass spare tire cover. 🙂 Keeping 16" LT tires on our LE2, just wanted a higher capacity spare tire that fits in the original fiberglass spare tire cover. Understand 2015 and 2016 LE2 Ollies had this 15" spare tire cover with later years having larger spare tire covers to accommodate 16" LT tires. Another way to modify this aluminum spare tire mount would be to relocate the round tube in the center by moving it up by 7/16" leaving the mounting plate in the original location. I normally keep Ollie's spare tire in the pickup bed, but when I started this project wanted a Load Range E spare trailer tire that would still fit in the original fiberglass spare tire cover. Before modification: After modification:1 point
-
Found a Drag Race Car shop in Lincolnton, NC to weld Ollie's frame earlier this year. Found an engine builder, machine shop, with engine dynamometer (Dyno) this morning at Iron Station NC to do the machine shop work on Ollie's aluminum wheel mount. This area is close to Charlotte Speedway with many shops involved with NASCAR. The owner of this shop used to build race engines at Joe Gibbs Racing. He had a low boost/supercharged Marine engine on his Dyno this morning. Removed the aluminum wheel mount yesterday and the machine shop now has Ollie's wheel mount for modification.1 point
-
ScubaRx gave Oliver's reasons here: This thread is a good read, one of the earliest LE2s had 15" tires and LE2 spare tires are discussed, too. From information in this thread and over internet Goodyear Endurance ST tires have a good reputation. There has been a couple cases mentioned on this forum that Discount Tire will currently only install ST tires on travel trailers, when in the past they would install LT tires on trailers like they did on our LE2. I want a higher load capacity spare tire, Goodyear Endurance 225/75R/15 maximum load capacity 2833 pounds, because our original spare tire is a 215/60R/16 has a 1521 pound maximum load capacity. The full size LT 225/75R/16 is too large to fit in some of the early 2015 & 2016 LE2 spare tire housings.1 point
-
@rideandfly I always use this app when upgrading wheels and tires. Play with it and it will answer all your tire/wheel size questions! Use the left frame to enter Original and New Setup specs and look to the graphic on the right to see diffs in the measurements, for diameter, width and offset (for wheel changes). Hope it helps! Wheel Offset Calculator (tiresize.com)1 point


.thumb.jpg.e34bf01ef7f7d5e99ad31856d45afbeb.jpg)


-
Recent Achievements
-


")


")


")

