Leaderboard
Popular Content
Showing content with the highest reputation on 08/21/2023 in all areas
-
Thank you to all veterans for your service to America! Y'all earned this camping privilege, enjoy it! Mossey6 points
-
We’ve stayed at a couple dozen military Famcamps around the country from California to New York. It’s a nice benefit for us tired old military retirees. Mike4 points
-
We camped at Redstone Arsenal this past week to attend the Huntsville Hamfest. Redstone is an Army facility with over 140 spaces. They are all 24 feet wide by 45' deep with W/S/E(50/30/20). Spent several days in the area and one day "geeking out" at the Hamfest. It's only $25 per night flat rate but you have to be active duty, retired, 100% disabled, etc. to use it.4 points
-
I think that we have the same dog! We've had the same experience in that people with other dogs assume that it's ok to let their dog approach without asking. It's funny that you mention the "find it" game; We have a ritual whereby while she's eating her dinner we hide her after-dinner snack somewhere in the house. When she's finished we shout "FIND IT" and off she goes. She quickly tracks it down and upon doing so we throw up our arms and exclaim "she saw it with her dog nose!!" 😁 while she proudly does a victory lap around the house.3 points
-
In Oregon, veterans with a service connected disability are eligible for free entrance and camping at State Parks, additionally we can have one vehicle license that is permanent. The one time fee for the license is $100. Ours is on our Ollie, as RVs are more expensive to title and register. Semper Fi3 points
-
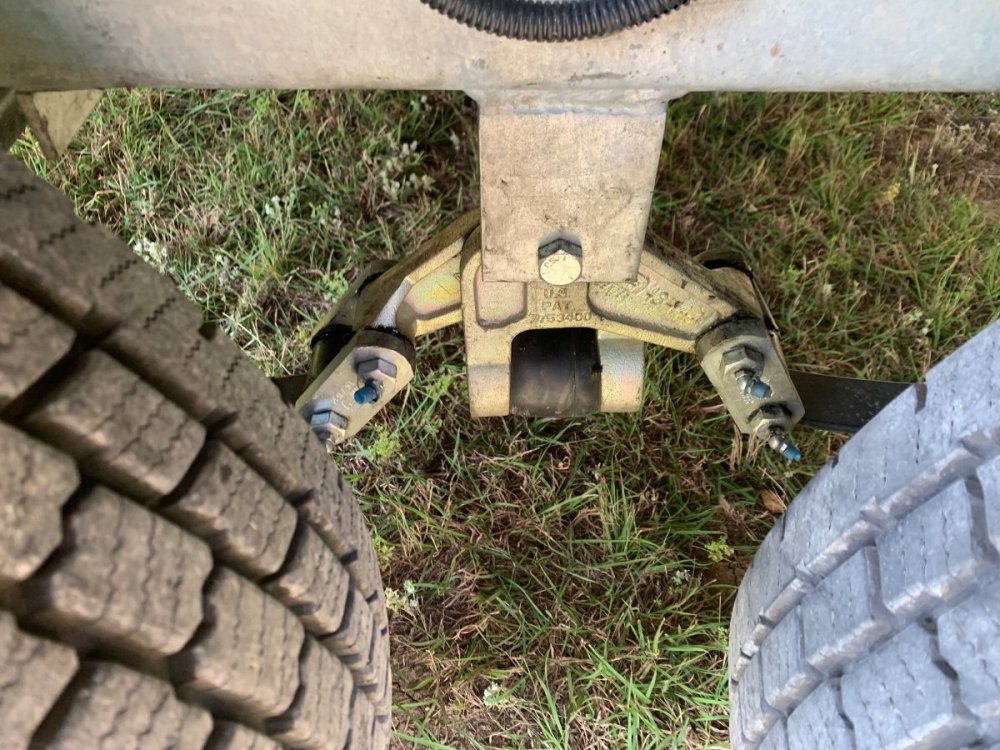
Stuff happens! Used the rear stabilizers to level my 2020 OLEll 579 once, ended up lifting all four tires off the ground. Didn’t know until the next day that both axles had dropped, yikes! Struggled for two hours in heat and humidity, but finally got it done. Random act of stupidity, lessons learned!3 points
-
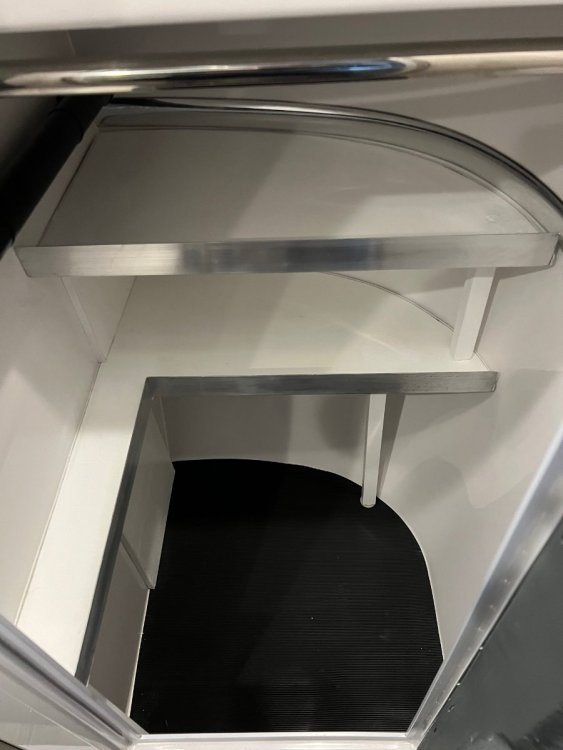
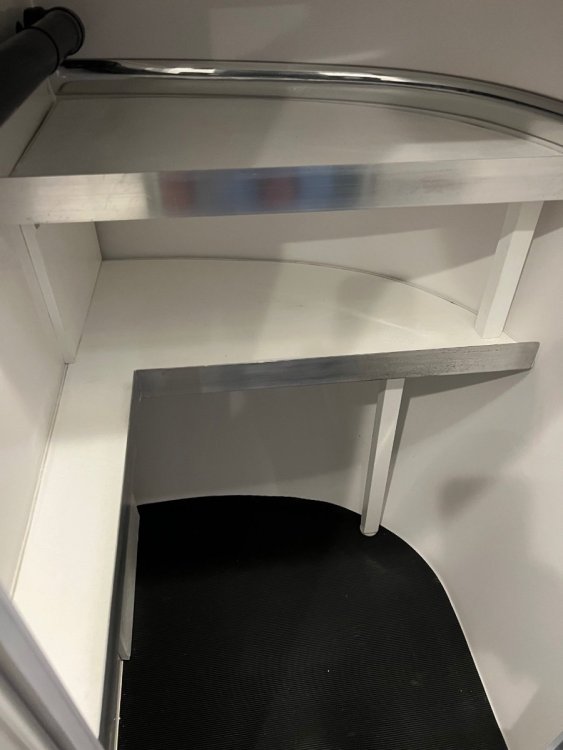
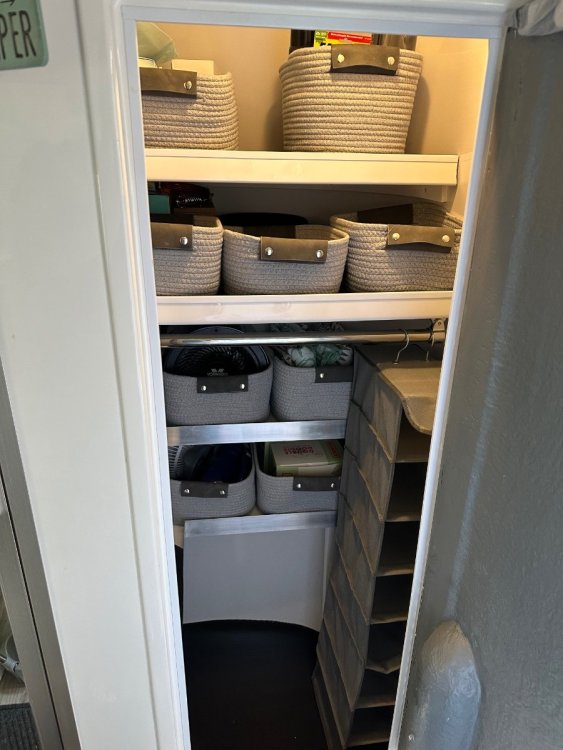
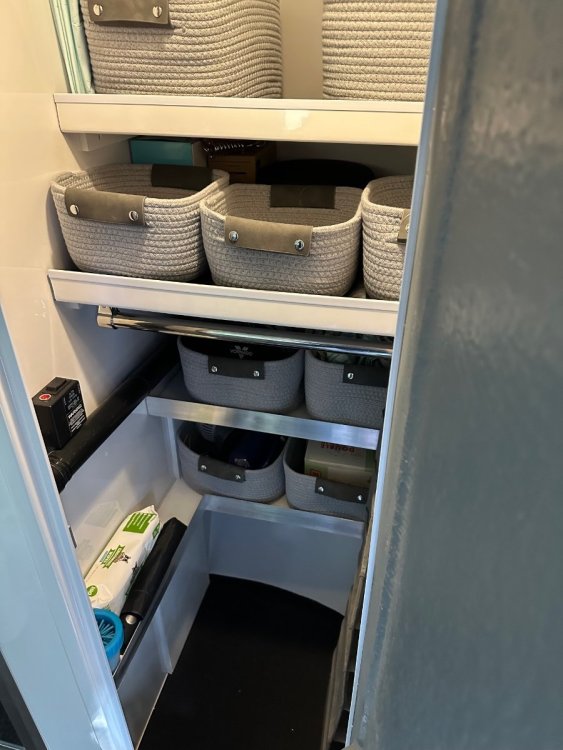
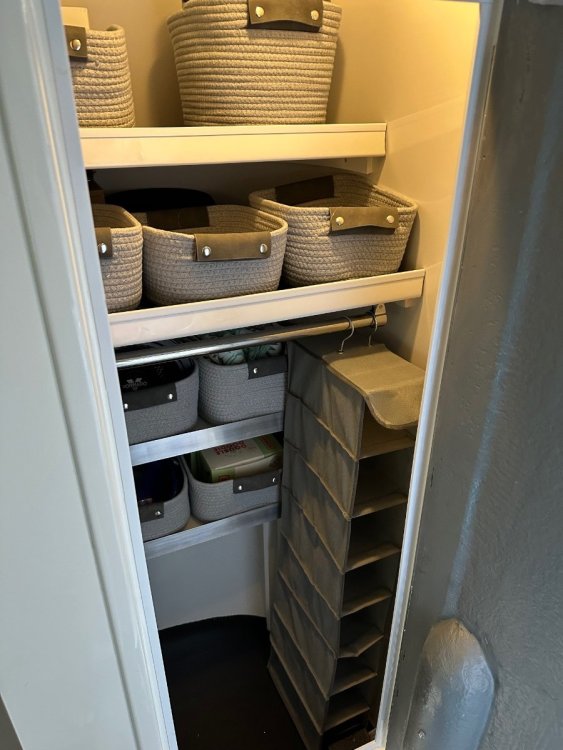
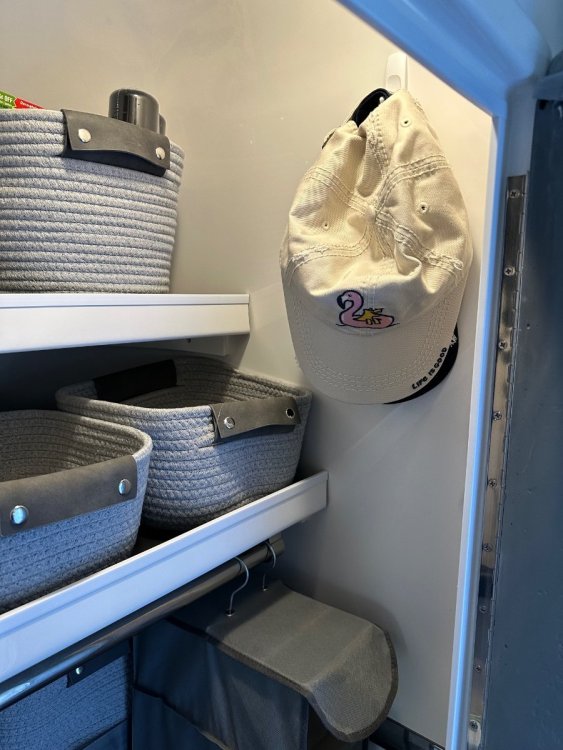
I asked my husband to build me some closet shelves after seeing posted photos of others who have added shelves, and here they are! I love it! So much more space and so much more organized! We opted to not wrap the shelf around the right side because I hang a shoe rack and I didn’t want to lose hanging space. He did add a small shelf on the opposite side. We ordered the black rubber shelf lining from Oliver which will be here soon. I also added command hooks to hang hats. I love that the wasted space behind the clothes rod is now useable and valuable space. ❤️ IMG_7332.mov2 points
-
The Airstream sold today. We had a lot of fun with our Desert Tortoise, but it was sad to see it go.2 points
-
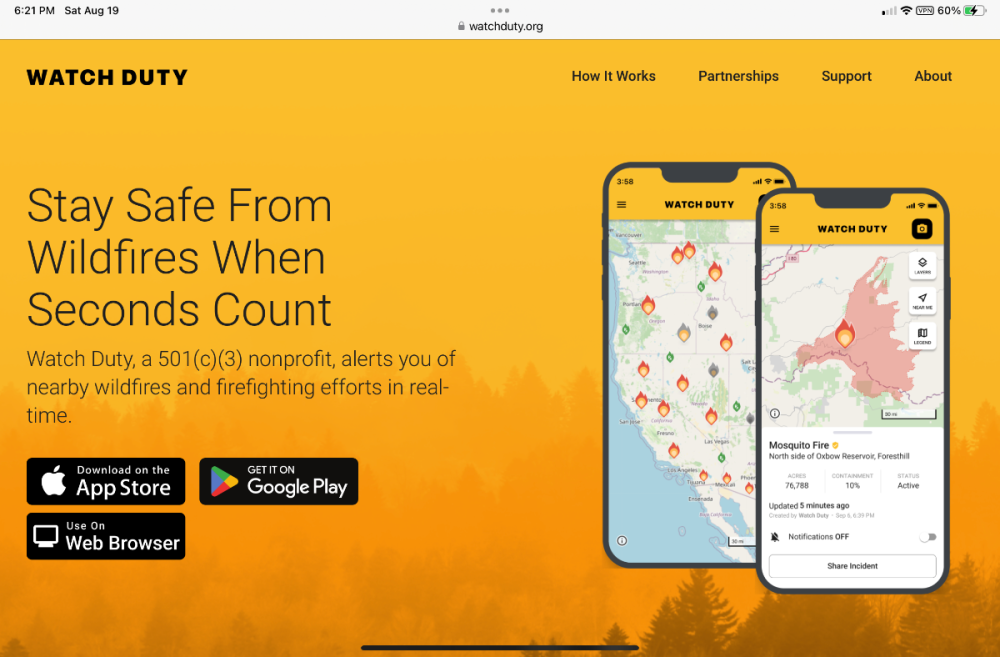
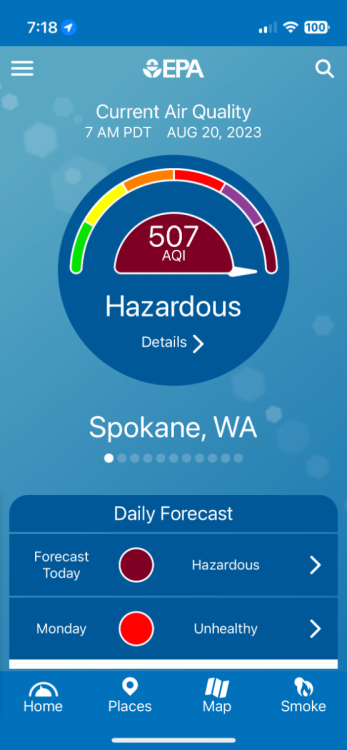
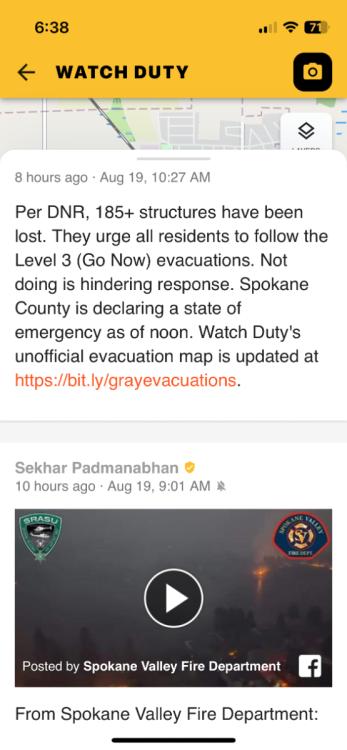
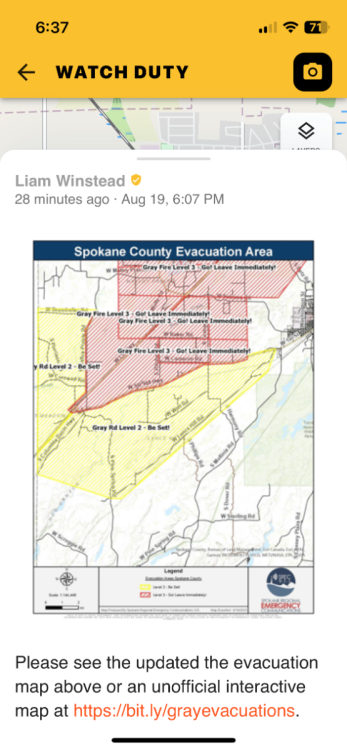
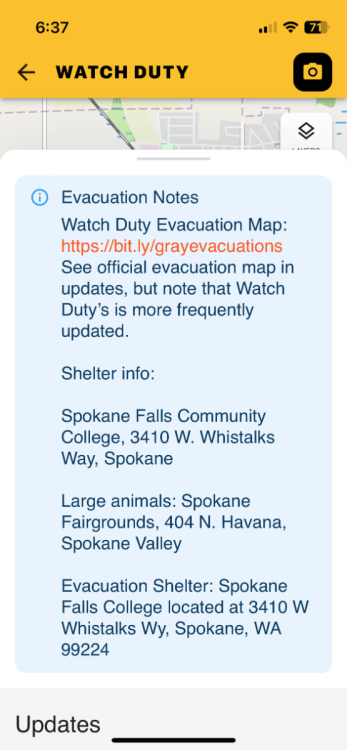
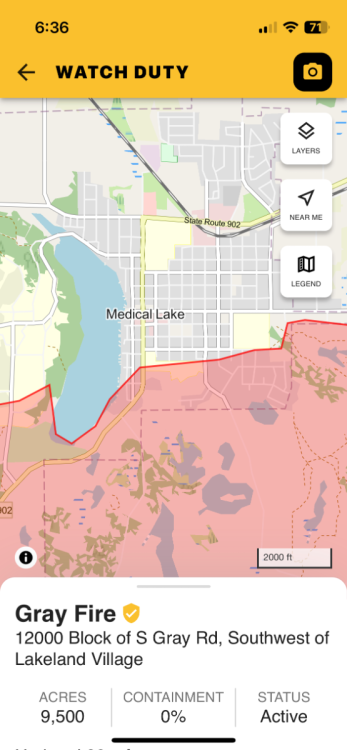
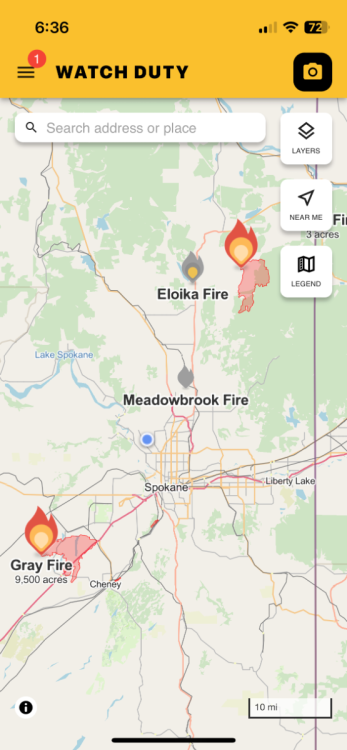
This one is excellent: .Watch Duty - Stay safe from wildfires when seconds count We had three major fires explode yesterday, part of a nearby community was destroyed. None of the fires are even remotely under control at this time. https://www.spokesman.com/stories/2023/aug/18/it-almost-sounded-like-a-warzone-wind-whipped-fire/ Stay safe, in wildfire season it is prudent to NEVER camp where there is no reliable cell signal! always have a second exit route available, avoid long one way back roads that can trap you before you are even aware of the advancing flames. John Davies Spokane WA2 points
-
I had this issue with my 2019 Oliver. What I found was the two screws that attach the handle to the plastic cover over time had deformed the outer cover around the screw head. When pulling the handle down to close vent the plastic around the screw head made contact with the sealing surface and the rest had a small air gap which allowed air to get under and lift the cover up. The link shows what I did to remedy the problem and I'm happy to report that I no longer have that problem.2 points
-
Speaking of which - Back in the day when I owned a pop-up camper, I bought what amounts to a reflective "tarp" for the canvas of the pop-up. This "tarp" certainly kept the tent area much more comfortable when exposed to the sun AND it also helped retain heat at night. Plus, it reduced wear on the canvas. These tent covers that are made by a company called Pop Up Gizmos can be found at: https://www.popupgizmos.com/ Bill2 points
-
Thanks to everyone for all their comments, pictures and ideas. We are investigating dual e-bikes with the 1-Up dual super duty rack and replacing the 1.5" Oliver receiver with a 2" Curtis 5000lb bumper mounted receiver. Having just watched a YouTube video on the results of over tightening some lug nuts, it made me think some more about the potential loads on a hitch receiver for a bike rack. As I think about it, there are two ways to look at it. Simple loads from acceleration (force = mass x acceleration), and then there is the boogey bear of shock loads. I took my iPhone the other day and measure the g-force of a rather nasty bump in my truck and got about 2.5g at 40 MPH. Given the max length of the 1-Up rack in a dual configuration of about 25.5" and a weight of two e-bikes w/o batteries and the weight of the rack, you get about 1000 fl-lbs of bump on the receiver. Doubling it for safety brings one to 2000 ft-lbs. Looking at shock loads yields exponentially higher figures. I am not totally confident of the following numbers (need help from some Mechanical Engineers!), but I used the following variables in a standard shock load formula for a rectangular beam 🤔. 2 ea 65 lb bikes - 130 lbs total (w/o batteries) 47 lb rack on a 15" lever arm (over estimate as center of weight would be ) 3" drop bounce height (bumper bounce distance) 25.5" total beam length from receiver to end of rack 0.25" receiver wall thickness It's a guess as to how much the rear bumper actually could move/bounce on a large road bump. I estimate approximately 0.6" of LEII rear bumper vertical movement for every 1" of tow vehicle bumper movement given the LEII's axle distance from hitch to LEII's rear bumper. I end up with close to 675,000 PSI of potential shock load being distributed over the face of the receiver mounting plate (approx 20-24 sq in). With a 4" trailer rear bumper bounce (6.7" rear tow vehicle bumper bounce) this goes to +750,000 PSI. This gave me pause! No inclusion of shock absorption from trailer suspension is taken into account, which I am sure in non-trivial and over estimates given that it assumed the trailer is a non-flexing beam with no suspension. Use of good straps provide additional shock load dampening in addition to flat tire mitigation. These number suggest getting rather high grade bolts for attachment of the receiver to the LEII bumper. As previously mentioned by @taylor.coyote, @John E Davies and others, caution is needed! To reiterate, I am not a licensed Professional Engineer, so these number may be inaccurate. Spreadsheet attached for giggles! In addition to insulating the receiver plate from the bumper (with rubber, thin nylon sheet, or coating), any thoughts on using a nylon bushing through the LEII bumper to help mitigate bolt-to-bumper galvanic corrosion or would a thick coating of a galvanic corrosion coating work well enough? Bike Rack Forces Estimate.xlsx2 points
-
Our first tow vehicle for our (then) new 2014 Oliver Elite II was a 2007 Chevrolet Tahoe LTZ, a holdover from our previous 2008 Oliver Elite, for which it had been a wonderful tow. After several months of towing, I realized there was a significant towing difference between the two trailers, and the ~7000lb tow capacity of the Tahoe wasn't gonna cut it so we decided that a new TV was in order. The newer Tahoe's are somewhat better with towing capacities >8K pounds, but this is still under powered for a trailer that will weigh 6500 pounds. Yeah, I know the numbers say it should work, but my experiences say differently. Keep that Ram 3500, I promise you that's your best bet.2 points
-
I forgot to mention that we often times walk the campground at odd times of day and night, trying to minimize the chances of meeting other dogs. And a final note, we camp in the neighborhood of 20% of the year so that leaves us with about 80% of the time when behavior problems don’t affect other campers. I also think the payoff we get every time we come home to Nick is priceless! Mossey2 points
-
I fixed it for you. In 20 years the eastern forests may be burning too. ;( But regardless, you will have to live with the @#$&* smoke from this side of the USA and from Canada and Mexico. John Davies Spokane WA1 point
-
Going from a 3500 to a light duty passenger SUV is a huge downgrade in terms of towing, and well, everything except passenger comfort and parking volume. You get a weaker drivetrain (brakes suspension axle shafts tires wheels) and the axle gearing is usually wrong, since SUVs have to meet EPA requirements. Shorter wheelbase means less stability on rough roads, less payload means you get paranoid about overloading. You have to use the Andersen hitch, which is a PITA at times. Cushy P rated tires are definitely squirmy when towing in difficult situations and they flat more easily (sidewall cuts from the low profile and soft plies). The only reason I chose a LC200 rather than a pickup, when we sold our 2006 Ram 3500, is its way overbuilt construction and legendary reliability. Plus I wanted to explore roads and tracks that bigger vehicles could not traverse. No stock Tahoe could have gone where we went. Maybe if you explain the reasons that you need to sell the truck, we could point you toward a better TV than a Tahoe…. Like a newer Ram 2500 gasser with rear coil or air suspension - they ride beautifully and the higher end interiors are to die for. John Davies Spokane WA1 point
-
1 point
-
Our old original 10 year old ventline model never popped open during towing. I have just installed the Maxxair Dome (because it has a light, nothing was wrong with the old one) but we've not towed any since installation. I don't have any reason to believe it will open during travel.1 point
-
Thank you Everyone for your replies and recommendations. User error on our part for not properly cleaning all tanks … black, grey, fresh. Cleaned our fresh water supply as directed, flushed the grey 3 or more times. It took a while for all the gasses to leave. Now we are diligently using Grey water TST. Black tank never an issue, but using proper treatment for that as well. I also scrape and wipe every food particle from dishes before washing. Something, as a former State Park employee, had to explain to every incoming camper. It was to minimize crow and ravens’ attraction to the park i.e. protect other birds from their predatory nature. I should know better. Also, the vent under counter on the right side was not properly aligned which was allowing gases to escape into the cabin. My husband fixed it, thank you Oliver and Mr Davies for pointing him in the right direction.1 point
-
I guess the next question is, have you done any rving or camping before? (Sorry if I missed that in your other posts?) For example, my husband and I have camped 7 weeks in Australia in a very small camper van (portapotty, two burner stove, hatbox dc fridge) , and we were very happy, with just the two duffel bags of stuff we could bring on the plane. Ditto, camping around Iceland, in an even tinier van, with no kitchen but my jetburner and backpack cookware. Not everyone would be so happy, as we were. We like the challenge of basics. And, understanding layers of clothes, etc. really does help. Any van, rv or trailer is a big time saving and comfy step up from tent camping, imo. The Elite 2 is infinitely better than those two examples, but, I think you will have to honestly pare away a lot of "stuff", especially if you want to tow with any suv, for full timing. I know my husband and I could be very happy, but I don't honestly know that everyone could. We routinely spend 150 days or more in the smaller Elite, each year. Everything is a tradeoff. If you want to get into the tiny spots, you need the smaller setup. We've seen places we never would have seen with a big motorhome, or even a small class c, with the vans, and with our little Ollie. Just my opinion.1 point
-
1 point
-
1 point
-
Everything depends on your wants, needs, and willingness to scale back. We had, way back in the day, three couples out of the first twenty or so, who full-timed in the smaller original Elite, for several years. And, we routinely spend three to five months a year in ours. The Elite II is luxuriously spacious, by comparison. What you don't carry can be as freeing as what you do carry. Traveling light can actually be fun, in my opinion. It's challenging to learn how little you actually "need" sometimes, vs "want." Depending on where you want to go, @John E Davies does make a very good point about getting service. Small towns in the hinterlands don't always have mechanics familiar with foreign made vehicles, of limited USA production numbers. I can find someone capable of working on my 2005 Chevy Silverado, or my husband's 2008 Ram, just about anywhere. Not so true in many small towns for foreign badges. If you stick with the VW that you know and love, my advice would be to get good tow insurance that covers both the vw and the trailer (like good Sam's premium), unlimited mileage, "just in case."1 point
-
Well - yes and no. Oliver has worked with a few "shippers" to get an Oliver delivered directly to a customer. However, I believe that the actual shipment and arrangements for the shipping are completed between the shipper and the customer versus Oliver handling all of the details. In any case, it can be arranged such that a customer does not have to go to Hohenwald to get their Ollie. Bill1 point
-
1 point
-
David just fixed the light above my bed. He drilled out the rivets, tightened the nut and used the blue Loctite to (hopefully) prevent loosening in the future, and reattached the light using 1/2 inch aluminum rivets (per Oliver). Paula1 point
-
You need a tow vehicle that is serviceable in most small towns. NOT a German, Swedish, Tesla, or other non-mainstream brand. You will be spending lots of time away from large urban areas where those brands have (a few) dealers. Ford, Chevy, Ram, Toyota, and no other brand, if you want to avoid major headaches in the event of a major breakdown. You really should have a HD vehicle, so that takes Toyota off the list. Ollies have very little storage capacity for full timers. Actually they have very little storage for two-weekers …. They are not the best choice for full timing, so you need to have massive cargo volume and payload (weight capacity) in the truck. If I were going to full time, an Ollie would not even be on my wish list. I would look for a smaller used high quality diesel pusher motorhome with NO slides. John Davies Spokane WA1 point
-
This is an easy fix. If you don't already own a rivet gun, drill out the rivets, take the light down, tighten the backing nut (Loctite here?) and put it back up with some one inch #6 screws. You may not even have to un-wire it. The wiring can be accessed from inside the cabinet above. Just lift the rubber mat in the bottom.1 point
-
1 point
-
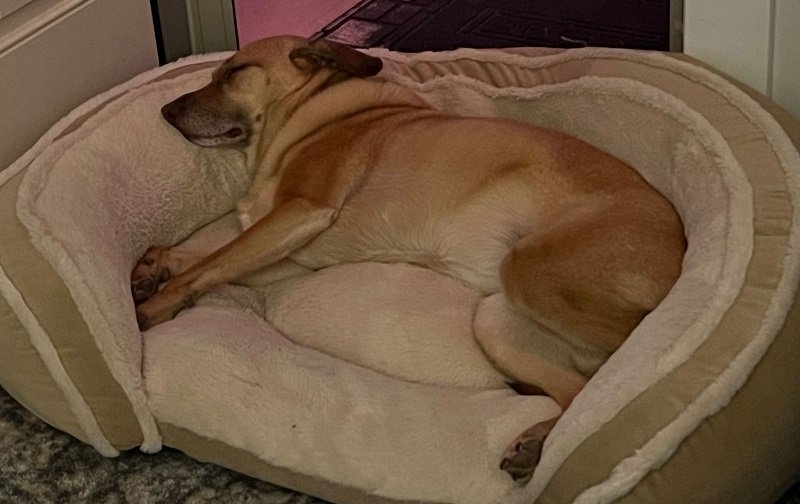
We camp with a dog-reactive girlie. Fiona is great with people, but having had some scary dog-dog interactions when she was younger, she does bark and sometimes lunge especially if the other dog comes at her. It requires some management but certainly can be done. I've become much better at telling other dog owners to NOT let their dog greet mine. The phrase "but mine is friendly" from other dog owners now has me bluntly replying "mine is not". After lots of training she can walk pass campsites with barking dogs and not make a peep. That is amazing! One thing that helped a lot was learning and practicing pattern games, especially those from Leslie McDevitt. You can find several of them on You Tube. If another dog passes our campsite she will bark a bit but then is quiet, as she gets paid with a treat for being quiet. 🙂 We don't leave her outside the trailer if we are not out there with her as we know she will bark more then. If we meet other dogs while hiking we move off the trail and I toss her a few pieces of food into the grass or leaves and tell her to "find it." She's too busy sniffing them out to react to the other dog. We have worked on "find it" a LOT, over and over, especially without other dogs in the picture. The cue to "find it" is so strong now that she doesn't stop to think, her nose just hits the ground. Unleashed dogs with owners who can't recall them are a nightmare though. I've tried to teach Fiona to go behind me if an unleashed dog approaches her but haven't been to successful at that. At least not yet. 🙂. Like I said, it requires management but is doable. We've been very happy many times to find that she's one of the better behaved dogs in a campground, despite her dog-reactivity! Here she is relaxing at an HH. Paula1 point
-
Try a different trainer. Sounds like she just needs some socialization training from a good trainer. I sincerely hope they don’t put her down, it’s not her fault she’s not trained/socialized. I’m guessing since she was a rescue dog she may have had a not so great life prior to being rescued. Don’t give up on her, training takes time and work, an aggressive/reactive dog is an unhappy dog, good training will turn her life around. Wish you the best on finding a trainer, she’s so cute and it sounds like she loves being with you.1 point
-
Thanks! Shackle flip. I’m learning. I drove the offending tire up on about 4” of blocks and WHAM, with a loud crack, it flipped back in place.1 point
-
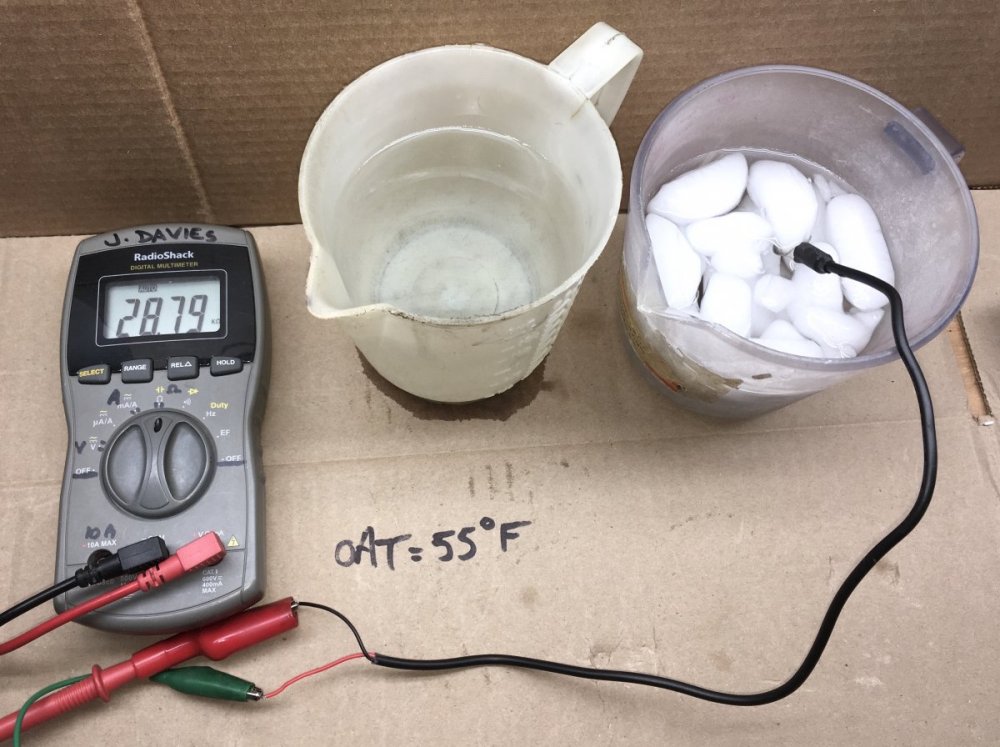
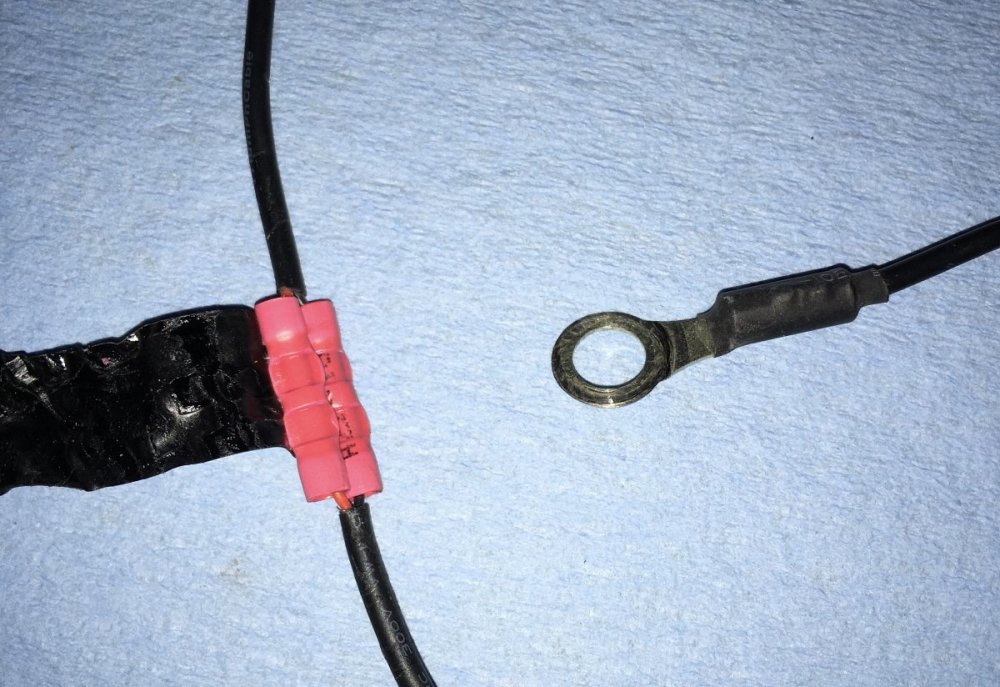
You can extend any thermostor/aka temp sensor a reasonable distance, just use HIGH quality connections (solder and heat shrink) and use an equal or heavier gauge (smaller number) wires. Then no worries - you won’t see any significant resistance increase. Especially for a sensor that has a range of 15,000 to 30000 ohms like the Zamp solar one!. Adding a few ohms to those figures is irrelevant. NO, NOPE, NO WAY: If you do anything in terms of splicing or repairing, always test the sensor before and then after the operation, in equal environmental conditions.. https://olivertraveltrailers.com/forums/topic/4205-how-to-check-your-zamp-battery-temperature-sensor-for-proper-operation/ John Davies Spokane WA1 point
-
EDITS IN GREEN: Ok, now that I have my Houghton 3400 heat pump installed and have run it in 106 degrees full sun on our OE2, I can respond with a professional M.E. opinion: The 13.5 KBTU Houghton 3400 is NOT oversized for hot running conditions. I would not recommend a 11,000 BTU unit for an OE2 if you go to hot places, Secondly, again in my opinion the humidity problem is certainly caused by re-evaporation of humidity on the coils after the compressor is shut down. Frankly IMHO, this is a bad design element of Houghton units for USA use where humidity issurs are common. But for the dry Aussie Land it makes sense. As such, I am doubling down on my long-ago suggestion of adding a relay tied to the fan low speed and compressor as a trigger (Mounted in the upper unit) to shut off the fan when it auto cycles to low speed while on auto. This suggestion is exactly what another AS owner (GSMBear) posted last month on their web site and one of our owners posted on ours. I took a deep dive into that video and the relay part is relatively easy. But one also has to know how to relocate the room air sensor from the supply air duct to the ambient area. Detailed info on this must be known before just adding the relay. GJ1 point
-
I just thought I would make others aware of an issue I found, go figure just the week after we bought our older Oliver EII. I can't remember a time, when purchasing a used car or truck that I had not laid on the ground inspecting the bottom side, left, right and front to back! For some reason, when we first viewed our OTT listed locally for sale, I did not look underneath. I think I was enamored by the beauty of and cleanliness of it, along with I felt we were just looking, and I wasn't thinking I would spend this kind of money on a TT. Later we closed the deal over the phone. Paid for it 2 days later and the prior owner brought it to our home. I was down low installing 6" hose extensions on all the hose inlets, and I thought it was a good time to inspect underneath and could NOT believe what I found! Pictures to follow. I found 2 broken welds, curbside the first two right behind the wheels. OMG, my heart sunk! I called the prior owner. He thought I did it by overdoing the stabilizer jacks (not). He said he recently greased the Dexter components and he could swear the damaged was not there before (again, not). You could tell by the aluminum corrosion that these had broken some time ago. I'm not asking for help here, as I found a guy in town who runs a welding shop and does contract welding for many metal artists in town. He repaired this, charging an hour $75. Most of the hour was setting up for aluminum welding and creating a heat shield. I believe he used MIG. I gave him a Ben Franklin and it was done prior to our maiden voyage a few weeks back. I had no idea the aluminum welds would break at the contact point. The OTT welds must have been defective when the frame was built (edit: OTT likely welded this fine, later replies show this to be 80 PSI tire pressure). I called OTT service to ask about this and other questions, and the rep really had little to comment. My reason for writing this thread, is to let others know and to suggest that if you haven't looked under recently, it is a good idea to inspect your frame soon and regularly. Thanks for reading.1 point
-
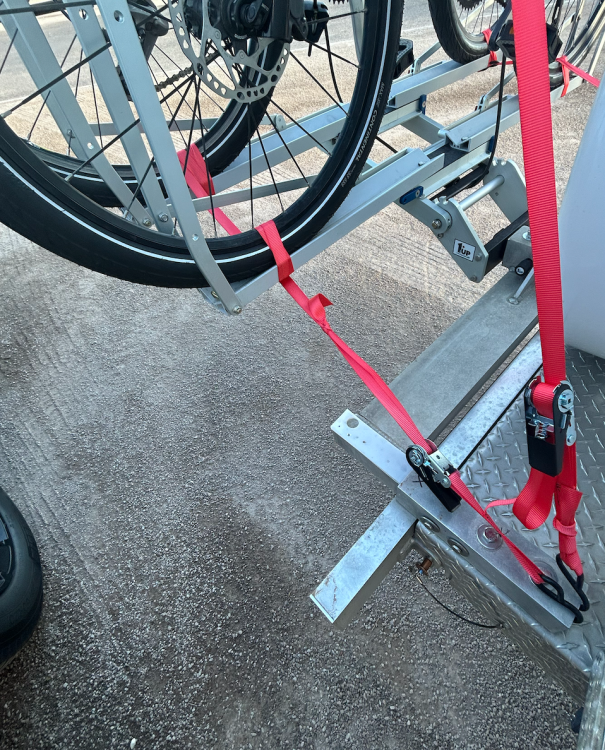
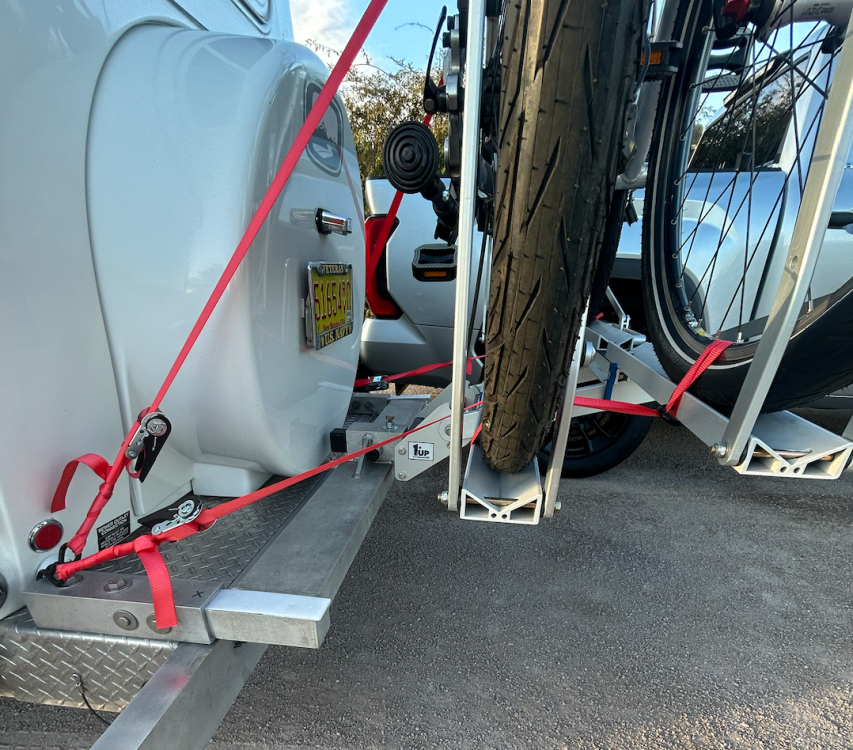
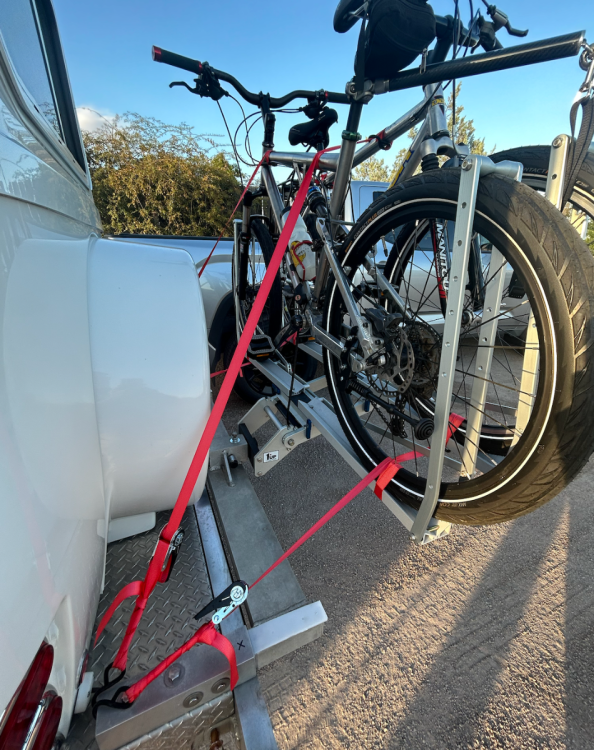
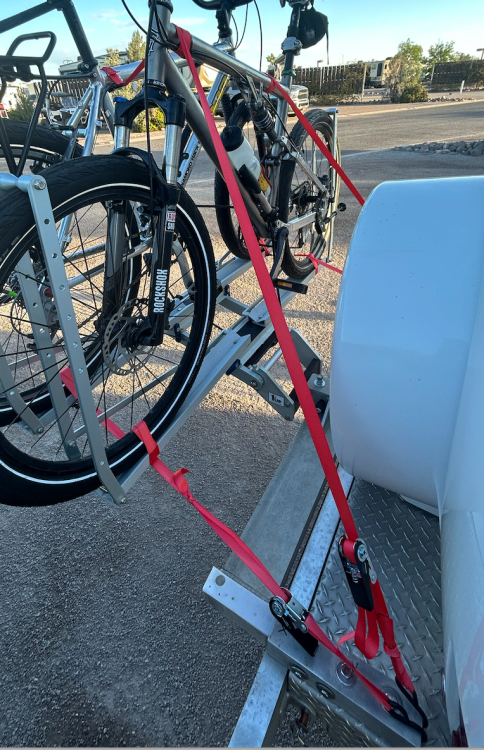
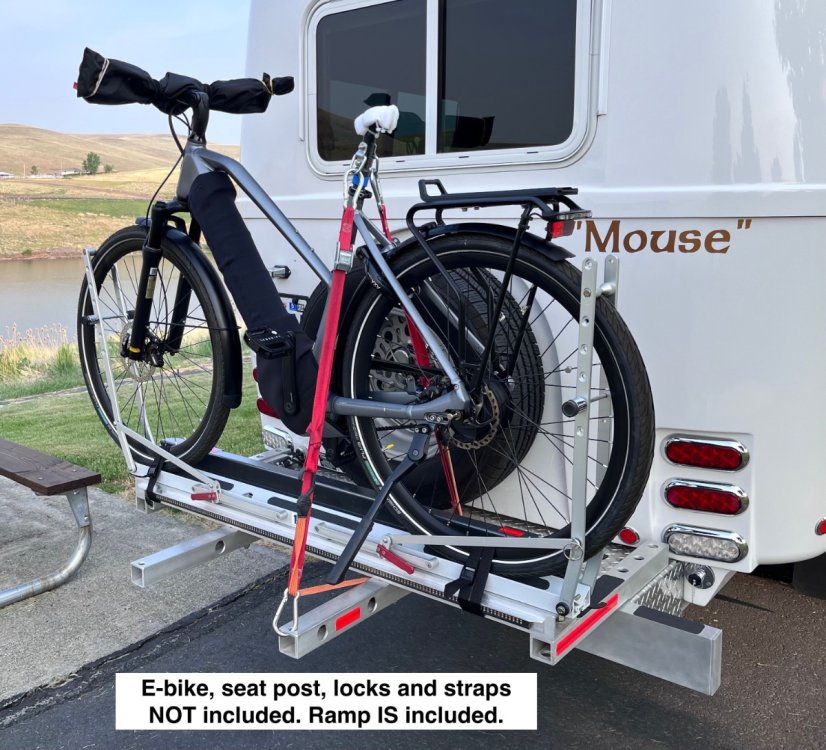
@Steve Morris, @John E Davies: As mentioned in previous thread, same subject - we were not pleased with the jostling around back in the back with the bike rack loaded with two 30#+ bikes. OK... So here's what we did yesterday for a possible solution of reducing the slop in the 1UP/OTT "bike carry" system... After our previous 350-mile trip a couple weekends ago, it was clear that there needed to be some sort of "high" and "low" tie-down hard points from the bikes to the OTT frame in order to reduce the movement of the entire rack/bike arrangement when encountering rough pavement while towing. We applied two 300# rated tie-down straps port/stbd linking both bike's top tubes (triple-wrapped) to the end of the factory OTT accessory hitch, and 2 more straps linking the bottom of the wheels/rails together with the same hard-point at the hitch: Now, there's virtually no observable movement between the bikes themselves and the back of Casablanca while towing. Drawing the straps "snug" (not too tight) to the hard-points has replicated the same rock-solid mount of the 1UP rack when its on the Tundra alone (without straps on the truck). No S**t, this hasty solution may not look pleasing to the eye, but it considerably reduced the jostling (up/down and side/side) movement of the system when towing. The lower straps are triple-wrapped between wheels/rails adding more connectivity and safety as @John E Davies described earlier. We traveled 247 miles with this configuration yesterday, mostly interstate, stopped a couple times to inspect system integrity along the way - no issues. Also, as we described in a previous thread - on our rig, was a noticeable "up/down" slop in the factory installed optional 2" hitch assembly. If you look closely at the last pic, you'll notice where we slid in a wedge of Delrin between the male/female receiver connection near the two through pins. This wedge eliminated any up/down movement - it will be replaced with a lock-nutted 1/2" bolt tapped into where the black "X" is on the female receiver end after we get back (ran out of time before we departed to do this). Again, the tie-downs aren't pretty, but they sure do the job! Good luck, @Steve Morris- looking forward to learning about how you'll solve this issue on your rig, because our's is configured slightly differently. Cheers! A & D1 point
-
RecPro Houghton Interior Fan Mod.pdf (Disclaimer -- I'm an owner of an Airstream rather than an Oliver. My Airstream came equipped with a 13.5K Dometic AC with heat pump.) I finally had a chance to document the steps for modifying the factory wiring for the Houghton/RecPro A3400 air conditioner to prevent the interior fan from running continuously. Houghton's intent for running the fan continuously is to keep interior air running across the thermistor sensor located in the return air duct for more accurate cycling of the compressor and therefore a more accurate overall interior temperature. The problem, for me, anyway, with this design is that the air being circulated is blowing across the wet cooling fins and that moisture is quickly reabsorbed into the air and returned as humidity into the living space making it uncomfortable. I'm not sure why this isn't a problem in the more hot/humid areas of Australia where the unit is manufactured. The General Manager who responded and is quoted upstream didn't seem to understand the humidity issue that I and others have experienced. This wiring modification solves the humidity problem nicely but, since interior air is not blowing across the thermistor temperature sensor continuously, there is a greater swing with interior temperatures before the compressor cycles on to cool again. Overall, I'm pleased with the change. The humidity issue was a real problem for me and I'll learn to adjust to the wider temperature swings (about 4 degrees F) with the compressor cycling. When time (and courage) permits, I might try snipping the wires of the thermistor sensor and adding an extension so that I can relocate the thermistor in an external location away from the interior of the AC unit. I still have the RJ45 "phone" cable leading from the 14" AC roof cutout area to the original location of the Dometic CCC2 thermostat that is no longer in the equation. Maybe that wire will be used to extend the tip of the thermistor to a new location. The instructions are in the attached PDF document for anyone interested.1 point
-
Steve, any of the racks that clamp the tires, like 1-Up and Kuat, have a deadly flaw, an Achilles heel (other than the fender clearance issue). If a tire goes flat, the bike will start to flop around. The larger the tire, the more it will loosen, for example fat tire bike vs road bike…. At the very least you should strap the two bikes to each other so that they can provide mutual support. For a single bike that is not an option.You need some sort of secondary straps. Do you do anything about your plate? It is hidden with the rack up or down. In some states you might get you a ticket. 1-Up makes a relocation kit. Or you can just use heavy nylon cable ties. OTH when I first got “Mouse”, the lady at the Sales office who does the temp trip permits was absent, so I towed 4000 miles with no plate or permit, and nobody mentioned it. John Davies Spokane WA1 point
-
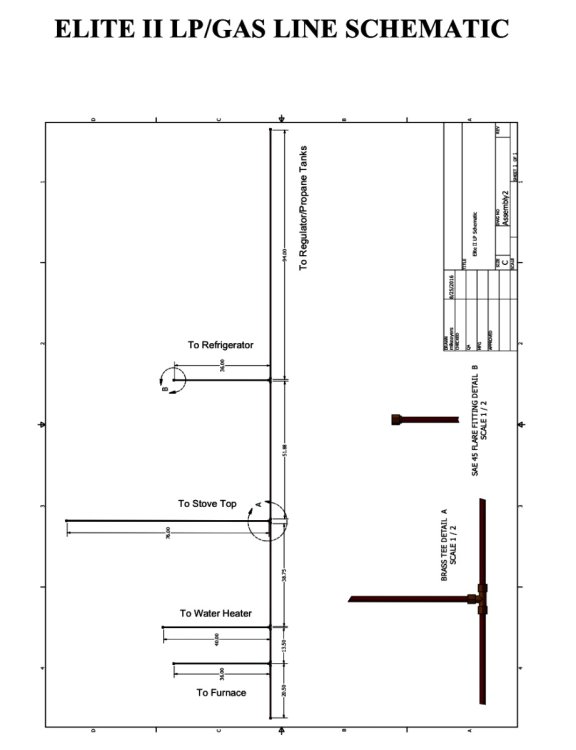
I agree that it would be nice to have diagrams for every model year, but that’s not the case. I’m lucky because my 2017 LE2 has a great manual, available in the Oliver University and after downloading it to my iCloud, it’s almost always accessible. I would suggest to anyone that didn’t get one with their Oliver delivery or hasn’t been able to get the information that is available in a model specific format, to go ahead a look at other model years because the information could be the same or similar enough to guide you through the problem or repair you are working on. If you have an original refrigerator that Oliver installed and it runs on propane, the schematic below from 2017 may be of interest. You can probably verify the propane line running from the propane box in front to the rear bumper by looking for the copper tubing below and outside of the trailer on the curb side. And if you have an outside access panel at the bottom of your refrigerator, the penetration of the gas line is probably visible coming through the floor. Mossey1 point
-
1 point
-
Eagle Nest Lake State Park, NM... Where's Magnus? He's love'n the 60F temps (so are we for that matter)! His FAV spot - right under the Ollie steps! Red River, NM - 8,600' near Eagle Nest - great weekend romp! He's spent... Oh, well... charge up his batteries and go again in the morning. Cheers, A&D1 point
-
Last weekend we went to Art in the Park at Blowing Rock NC as we do every year, but normally it was in May, June, or October in our Aliner pop-up at Julian Price CG on the BRP. This time we decided to try July in our almost 1yr old Elite I (Hull #1209). We caught the peak of the Catawba Rhododendron bloom. We were in the clouds, a good bit of the time but 10-15 degrees cooler than the 90 degrees when we left home in East TN just 90mi, a couple or hours away.1 point
-
Background: Using @John E Davies's modification (HOW TO: Connect a STANDARD SAE 4 pin harness (or 4 pin with backup lights) to your OLIVER FACTORY 7 pin wire), May 15, 2022); as inspiration, we installed the same LED light bar (Amazon $90) on the bumper to compensate for blocking the tail lights when carrying cargo/bikes. Our application for the light bar is for a permanently mounted fixture and not removable when the 2" carrier assembly is disconnected from the bumper. Others have mounted it to the carrier assembly exclusively - we decided to have the light bar function with or w/o the carrier attached to Casablanca - so, it gets mounted to the bumper in our case. Process Description: The light bar is shipped with a 4-Pin harness and male/female plugs and a separate (16AWG white) wire for the backup light feature. First thing we did after receiving the light bar was to connect it to the factory 4-Pin female plug on the TV to function check the assembly. It is a 2-row multi-color light bar (red, orange, and white) which illuminate depending upon the driver's input. Basically, marker, L/R, brake, warning, and back-up lighting features are present. Function check proved successful - we didn't want to get too far down the installation path and find out we've received a bad unit from Amazon (been there, done that...). The light bar comes with metal clips as well as a 3M-type adhesive strip for mounting. We decided to mount the bar about 1/3 down from the top of the bumper using the 3M strip for best observation/view from those following behind. Determining the routing for the power harness was interesting and somewhat different than John's "How To" procedure. First off, we learned that the wire colors from the light bar were non-industry standard going into the provided 4-Pin plug, but coming out of the opposite 4-Pin plug the colors were standardized. Furthermore, as you may know, and as John described, the 2017 OTT 7-Pin wire colors are non-industry standard either. We needed to make a wire color/function matrix for what would be 5 Anderson Power Pole connections in the bowels of the TT because we would not be using the light bar provided 4-Pin connector. Power runs from the OTT 7-Pin harness located on the street side under the garage floor; left-rear most area just outboard from the waste water dump mast. The light bar electrical harness will pass through the left-rear bulkhead in the proximity of the small round red reflector left of the spare tire cover. Through a Blue Sea Systems Cable Clam (Amazon $23), the harness passes through the aluminum diamond plate deck into the waste water hose compartment, then through the bumper to the light bar. Removing the black mat, 3 floor panel wood screws and removing the floor panel exposes waste water dump mast, red/blue/clear PEX lines, and several split combed electrical harness as shown above. Also above, note the sacrificial wood piece placed on bulkhead to avoid an incidental perforation of water & electrical targets in the vicinity of where hull penetrations will be drilled from outside. We removed the small red reflector, cleaned off residue from its adhesive and prepared the drill site with blue painter's tape. The 4-piece Blue Sea Cable Clam (rubber gasket, base, grommet, and compression cover) requires a cable penetration hole and 4 mounting holes for the base. Carefully measuring, marking, drilling the holes places the Clam where the reflector used to reside. Cable penetrations were then drilled in the diamond plate deck and on both sides of the bumper - wiring harness was double heat-shrinked and grommeted at each penetration to avoid chaffing. Once the "power run" penetrations were made good, we connected the 4 non-standard LED bar wires to a corresponding set of standard 4-Pin wires using Anderson Power Poles which make for a clean connection bus. Finding and isolating the non-standard 7-Pin wires within the OTT harness was next. As John described in his "How To" post, there are 3 buses easily accessible, one each for back-up, ground, and marker lights. The L (red) & R (brown) are found in the same split comb as they exit and head for their respective light assemblies. The Anderson connectors are convenient in the manner in which they can be attached "side-by-side" - used for years in the HAM radio community, they provide a positive connection even when coupling different gauge wires; which was the case here: Penetrations were chamfered smooth and the harness was "double heat-shrinked" and grommeted at penetrations to avoid chaffing. (Unknown why this pic insists on rotating itself....!) Function checked light bar - all good, zip-tied 7-Pin harness, replaced split loom, screwed in garage floor panel, placed mat in position, closed garage hatch and got a cold one. I'm happy with this mod - D likes it, too with an enthusiastic "thumbs-up"! "Ravel-ON!" Cheers, A & D1 point
-
The General Manager of Houghton responded to my questions with the following: Thanks for reaching out with your queries. To answer your questions regarding the Houghton A3400 and A2801: 1 – There is no option or modification available to collect condensate and direct it to an internal drain. 2 - There is no option for stopping the inside fan when the compressor has stopped in Cooling mode. We do this very deliberately to maintain air flow over the return air temperature sensor. This ensures that the unit will respond appropriately to the cabin temperature. If the fan is stopped then the unit is no longer sensing the true air temperature of the living space and may not turn on again until the space is unacceptably hot. We have used this arrangement in the Australian climate for many years. Our northern states are hot and tropical, similar to Florida, and our units have excellent performance in these conditions. However, we are aware that this arrangement is not typically what you encounter in the USA market. I am very interested in better understanding your concerns about the inside fan remaining on once the compressor has stopped. Can you help me to understand the source of your discomfort?1 point
-
Correction: ThecRecPro Houghton 13.5 is a heat pump, does not have a heat strip. I re-read the lengthy thread “Got Earplugs” and there was some confusion and mis-reporting over heat pump vs. heat strip. The heat pump function is a significant benefit over the Dometic Penguin II, will save a lot of propane when on shore power.1 point
-
I do not believe that it mixes outside air with conditioned air as there is no interconnection between the two. If there was, you would have to insect screen and filter the OA intake. The unit only has one filter, and it is for cleaning the return air going into the unit from the cabin. Also, such a design could lead to a really bad insect migration into the cabin problem. Can you imagine a Florida swamp no-see-un's swarming around such an air intake? Sends shivers down my back... I strongly believe the cause is re-evaporation of condensate on the evap coil by the continuously running supply air fan. GJ1 point
-
If, in the mean time, you want to flush the tank, you could just pour a bucket of fresh water down the toilet? Fix it at you leasure?1 point
-
Living here in the SE, ticks are just expected. We spend a lot of time in the forest/brush/tall grass. In season its normal to do a tick inspection at days end. A good spray of Cutters helps, but is not fool proof. My dog gets special treatment - an oral pill every 3 months - works very well, but not on humans, alas. Quite honestly, its not something I worry about, I should, I suspect. After 30 plus years in the area, I just accept it and go on. I never worried about it when out west - didn't think Lyme had spread that far, perhaps the spotted fever is there however. Weird, in my younger days I spent a lot of time working in and around the swamps of South Louisiana, and I don't remember ticks being an issue, snakes and alligators, yes, ticks no. Oh, and mosquitos the size of hummingbirds..... The good old days.1 point
-
1 point
-
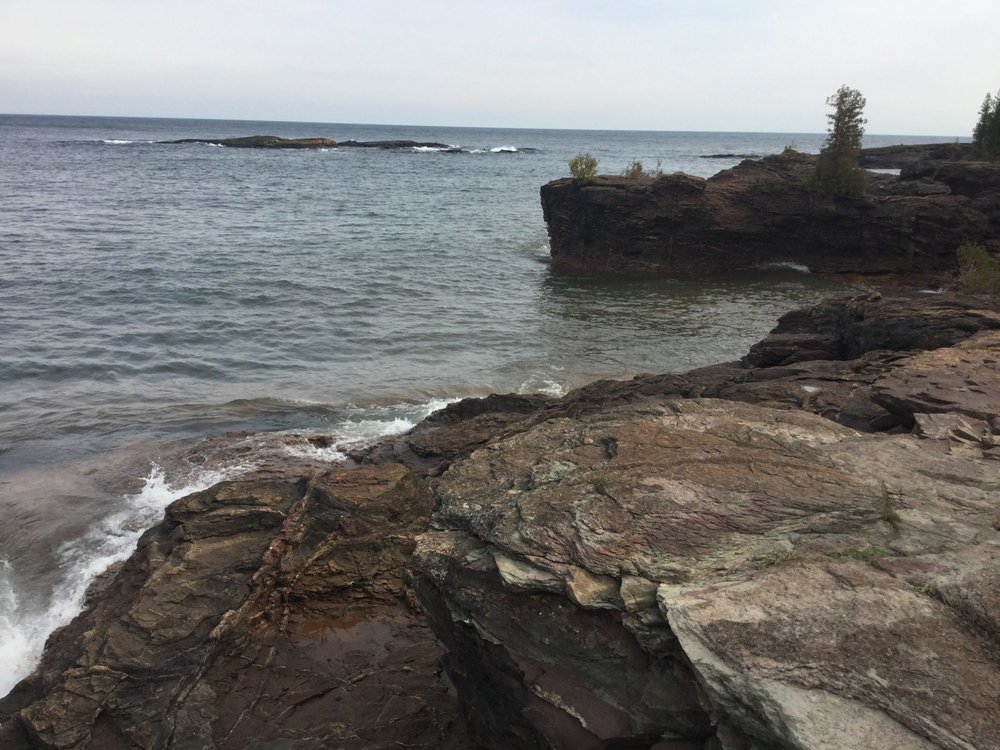
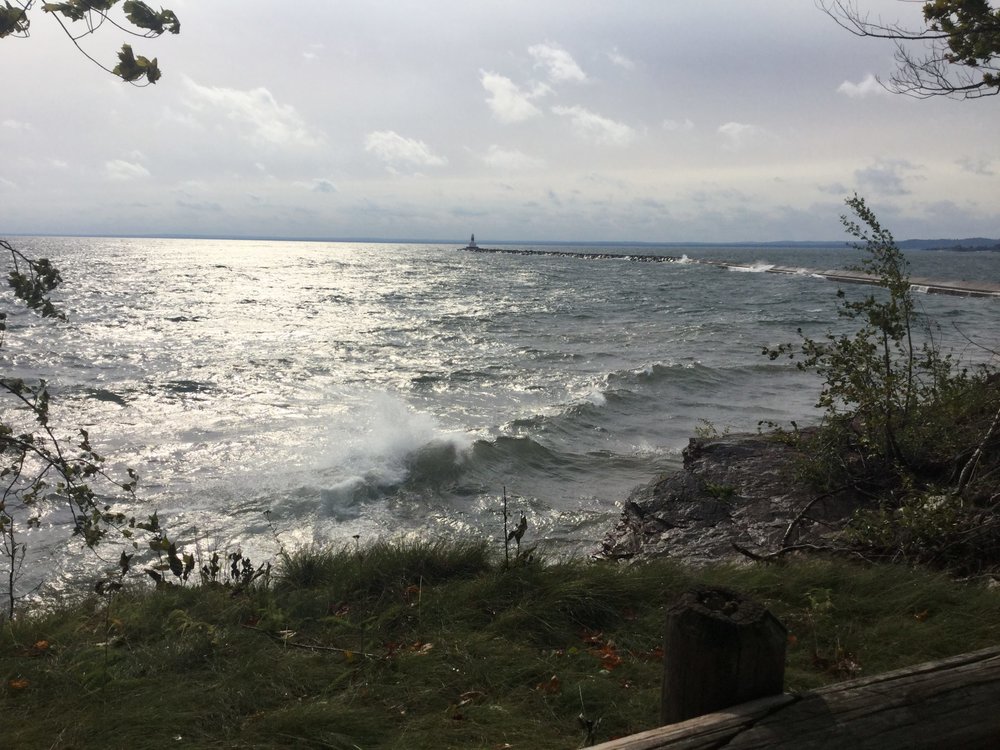
[attachment file=150088] [attachment file=150082] Staying at the Marquette Tourist Park in Marquette, MI. The park is on the edge of town, situated on the Dead River. Nice and quiet. Have 3 Casitas, 1 Scamp, and 2 Airstreams near us. Tomorrow we are headed towards Escanaba, MI to check out the Fayette Historic SP. We’ve been told its very interesting. Took a few photos of the Lake Superior lakeshore at the Presque Isle Park this morning. A lovely day!1 point
-
Recent Achievements


