Leaderboard


Popular Content
Showing content with the highest reputation on 02/12/2021 in all areas
-
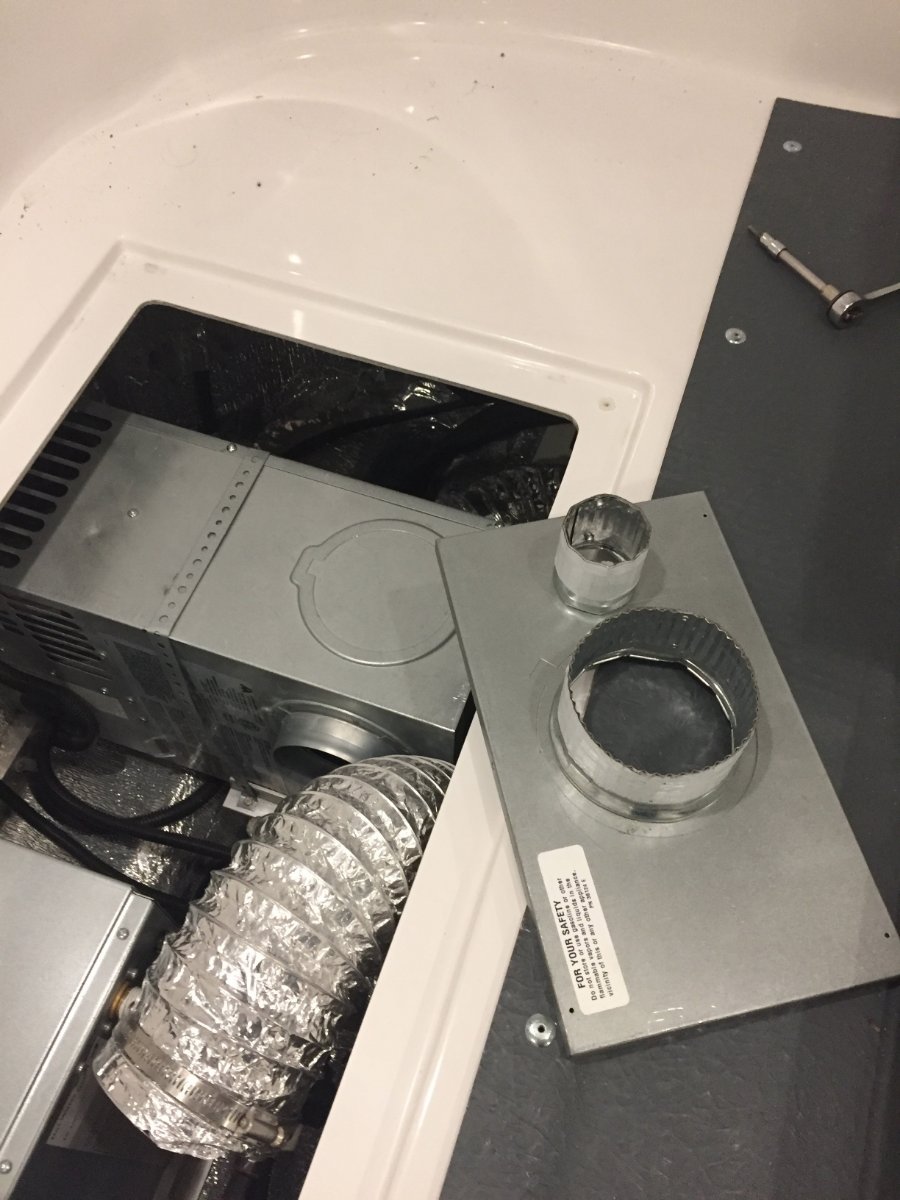
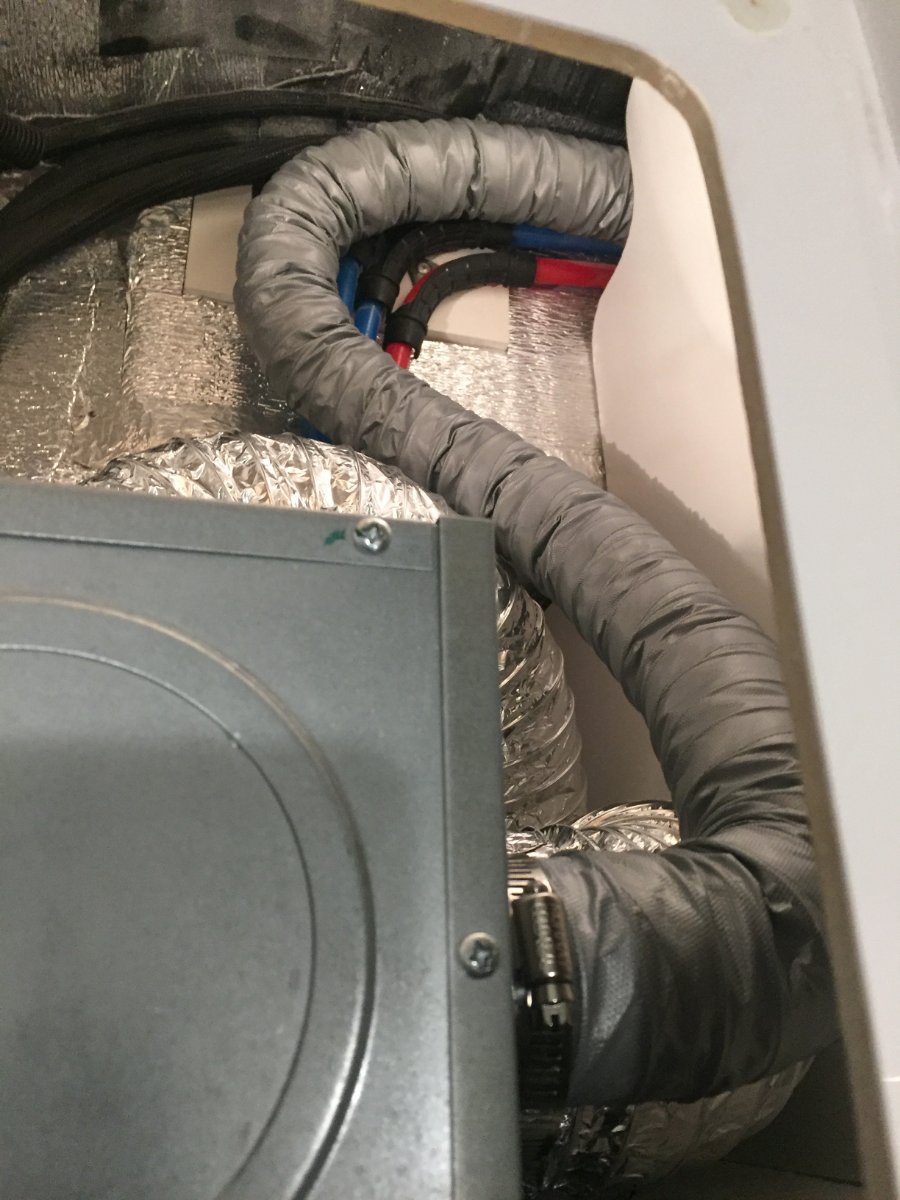
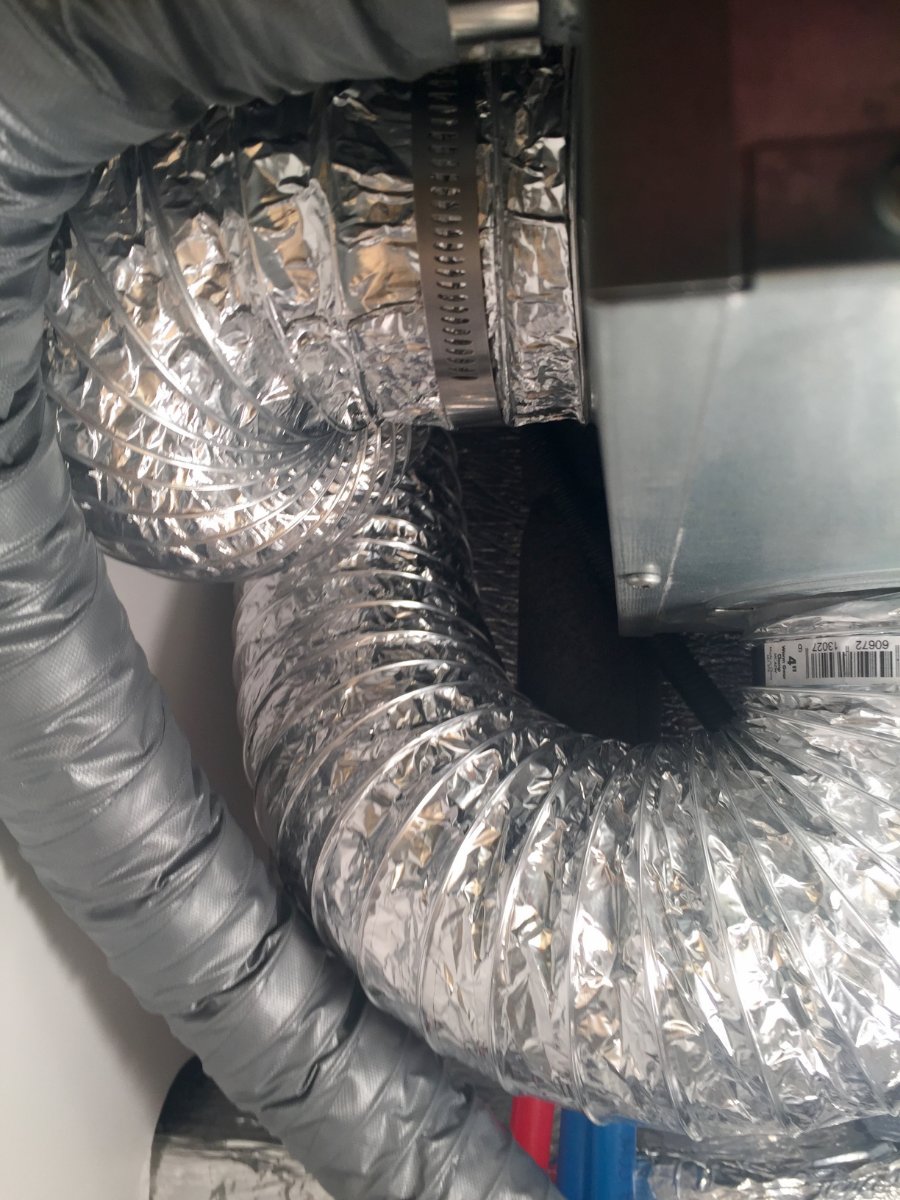
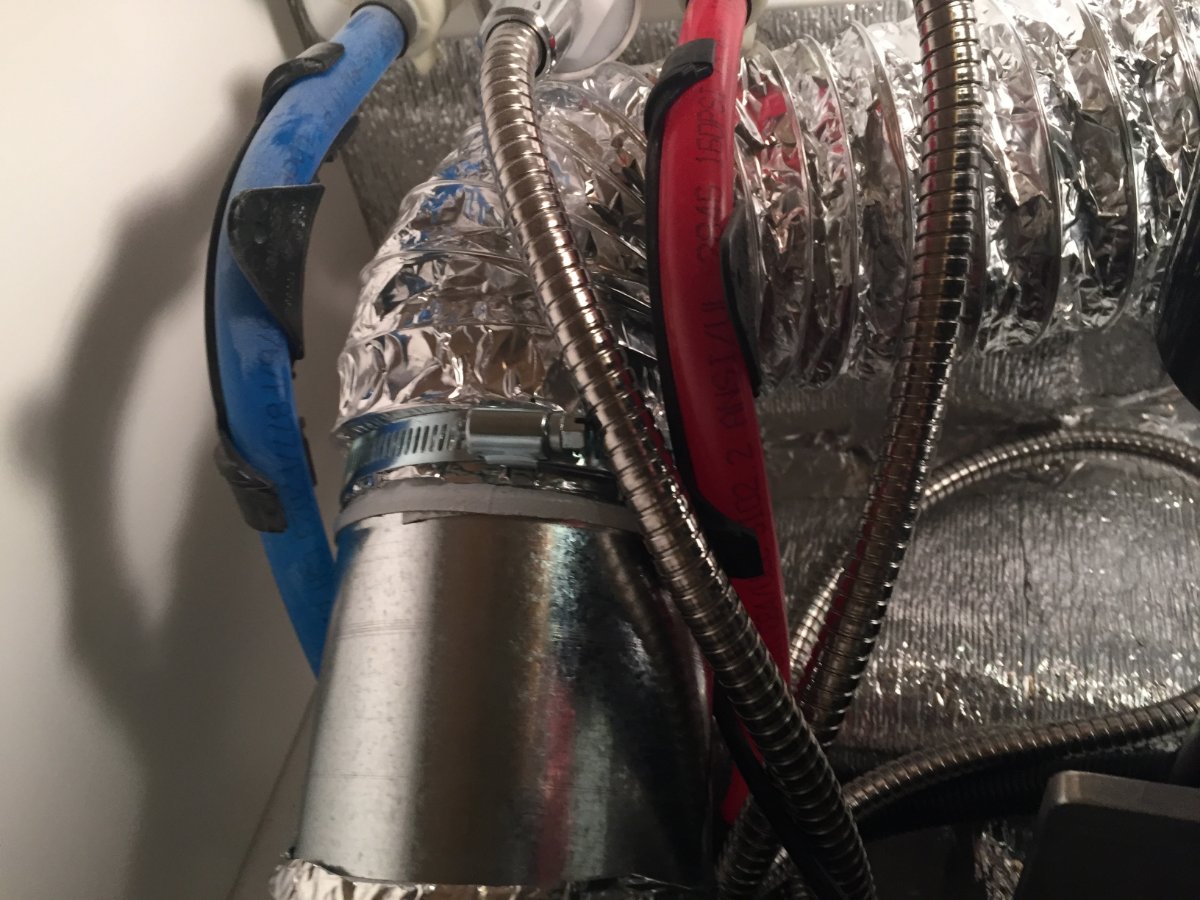
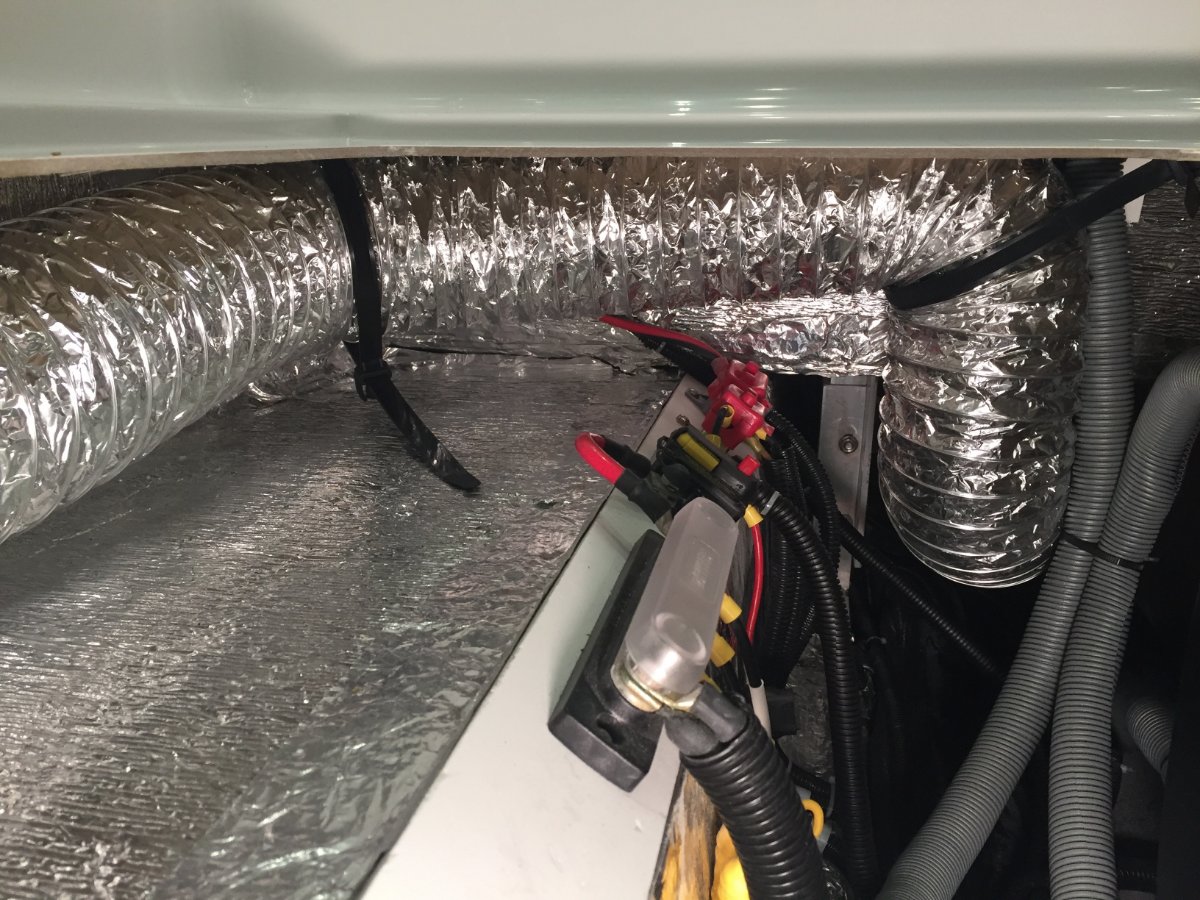
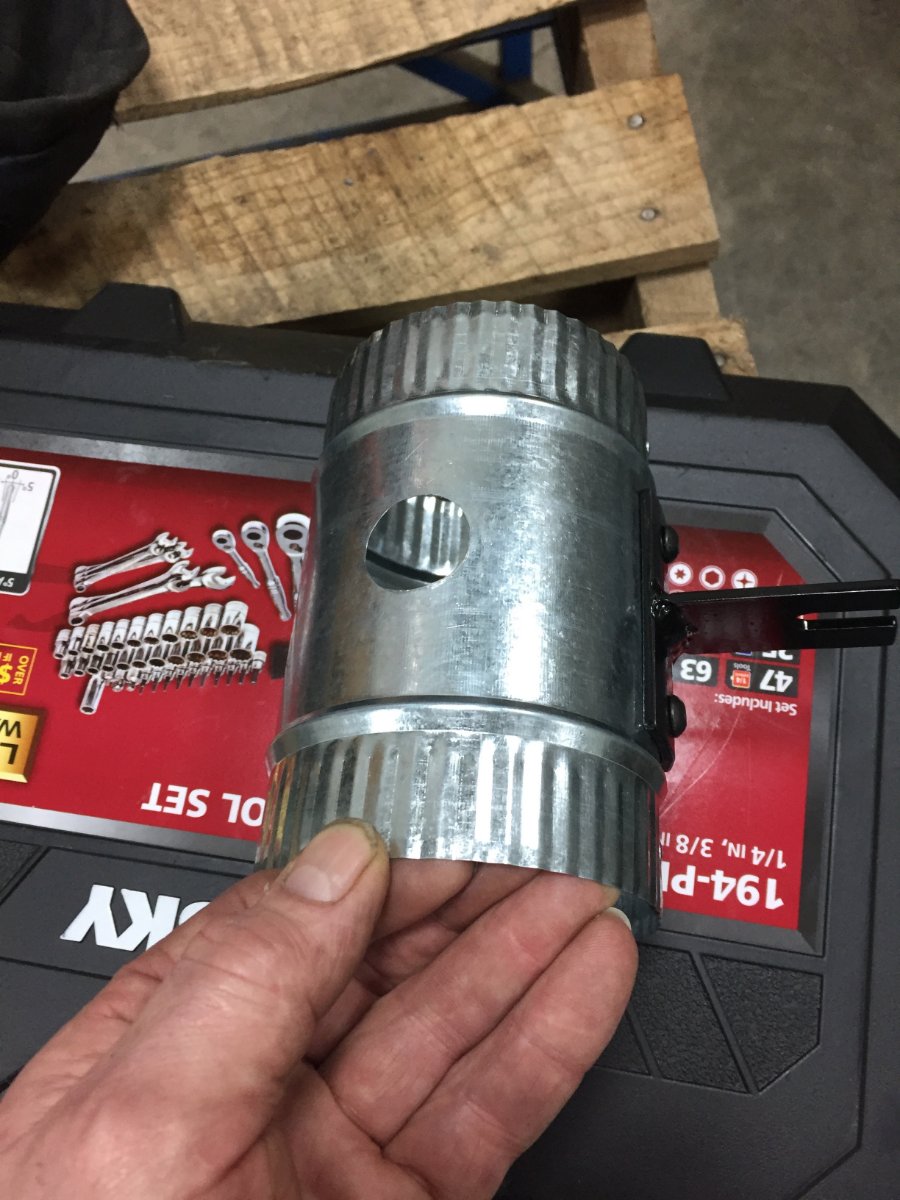
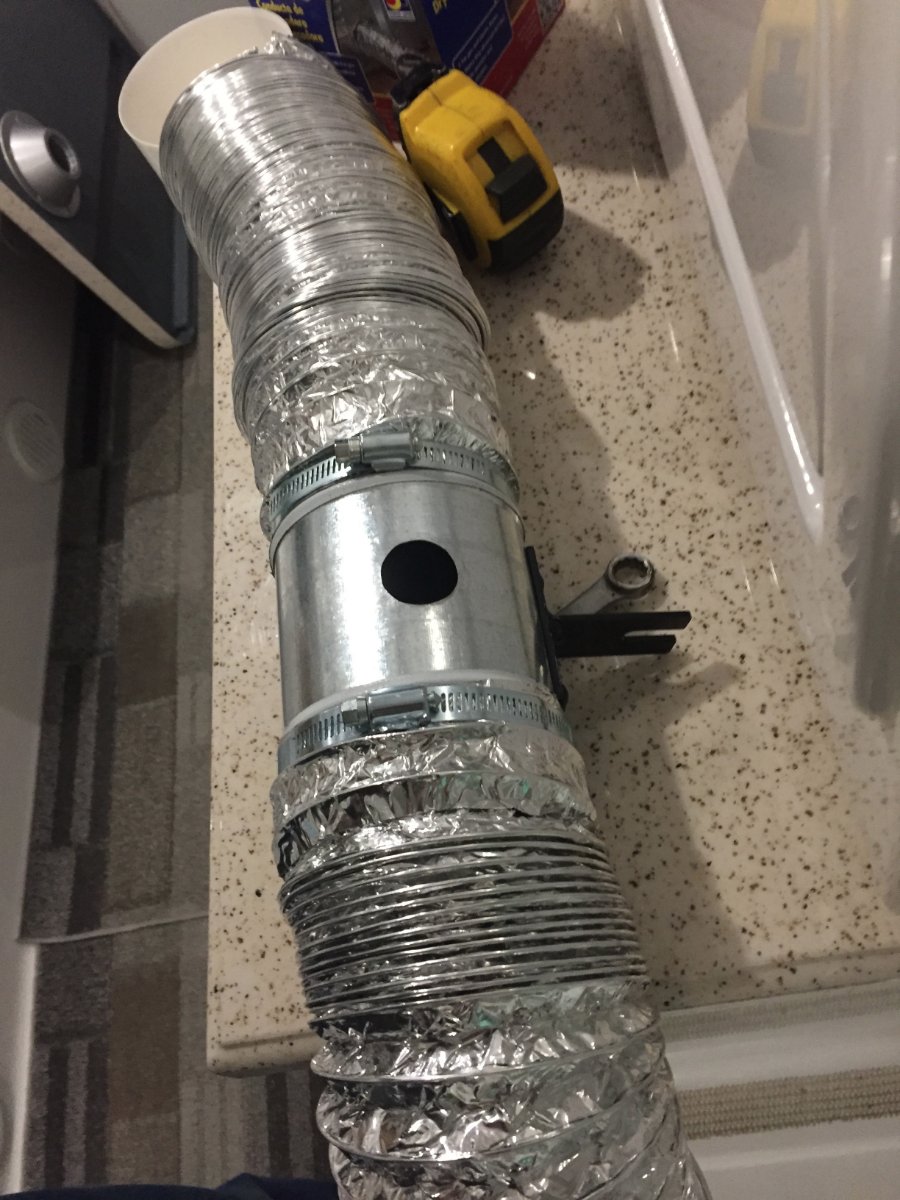
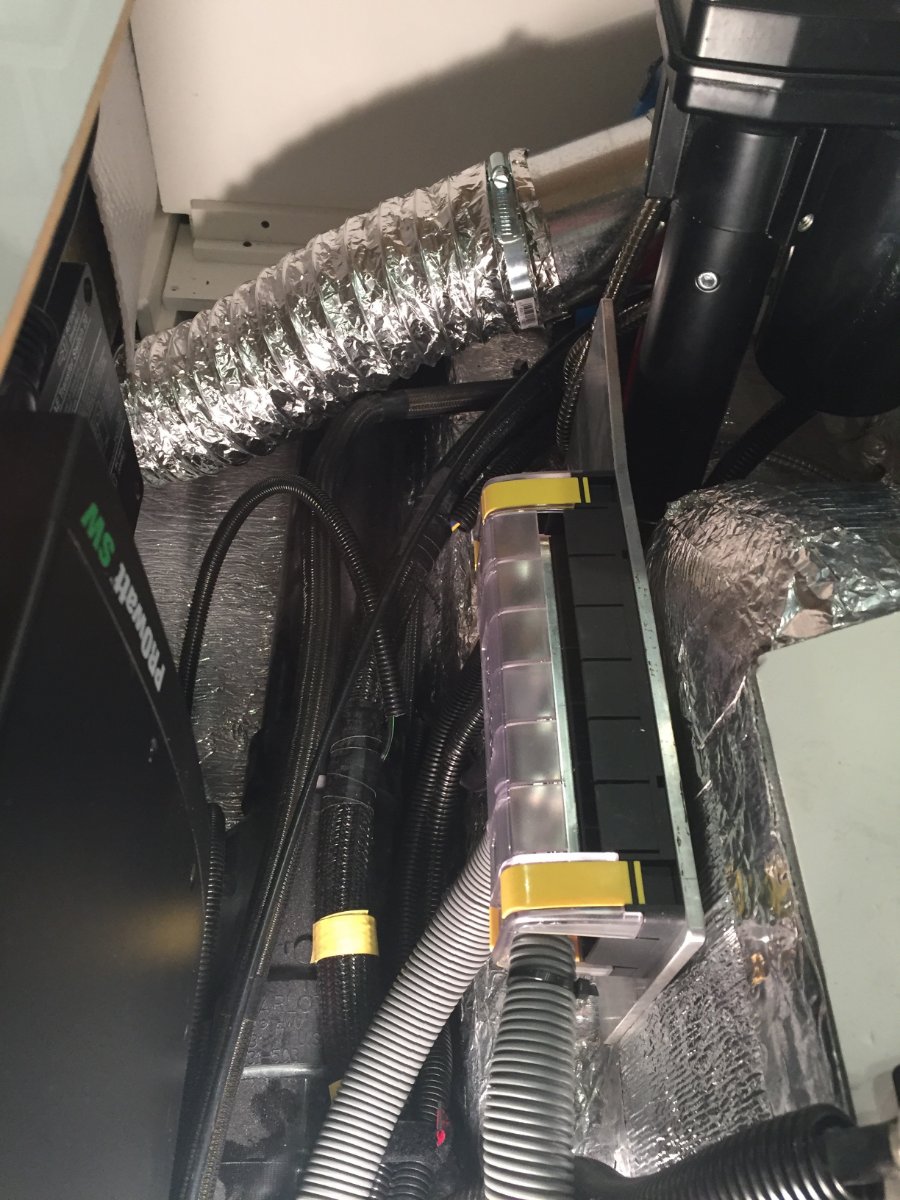
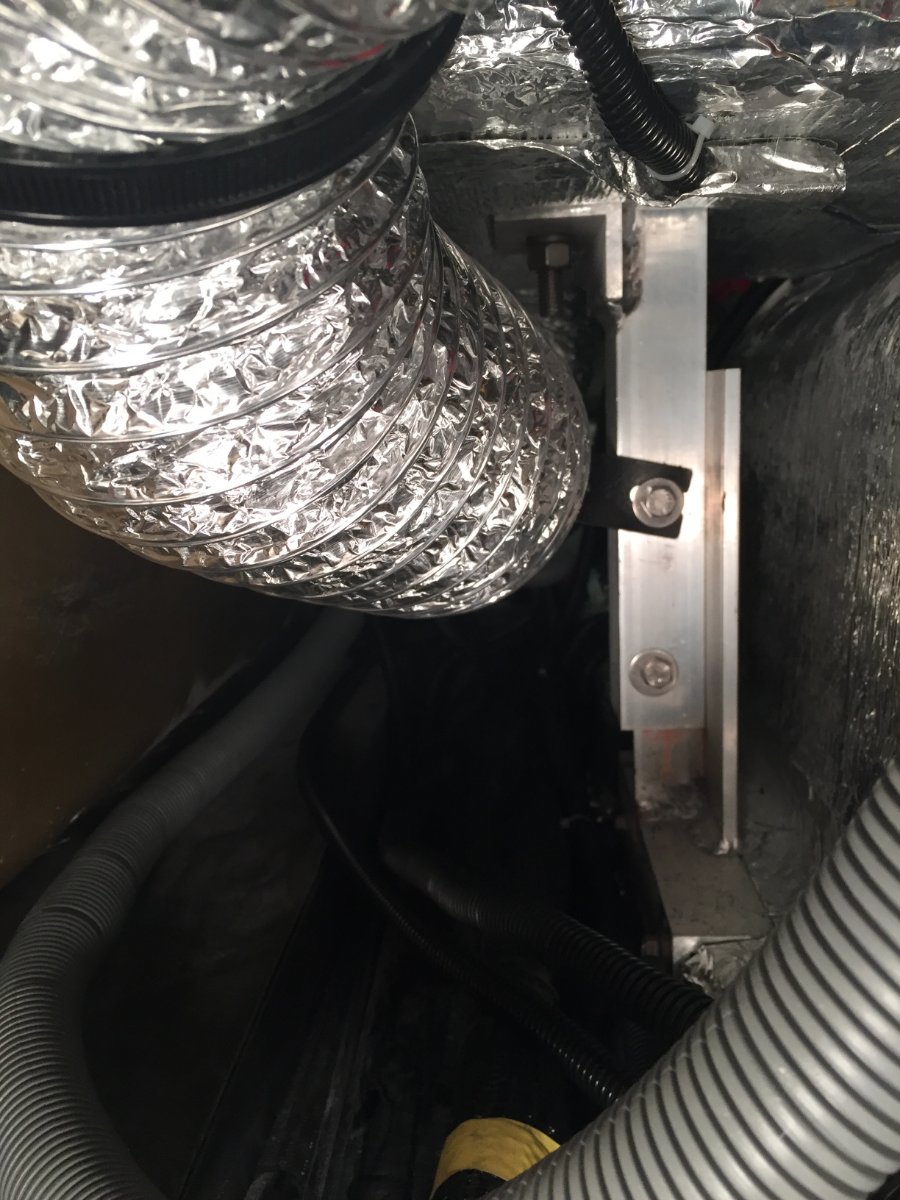
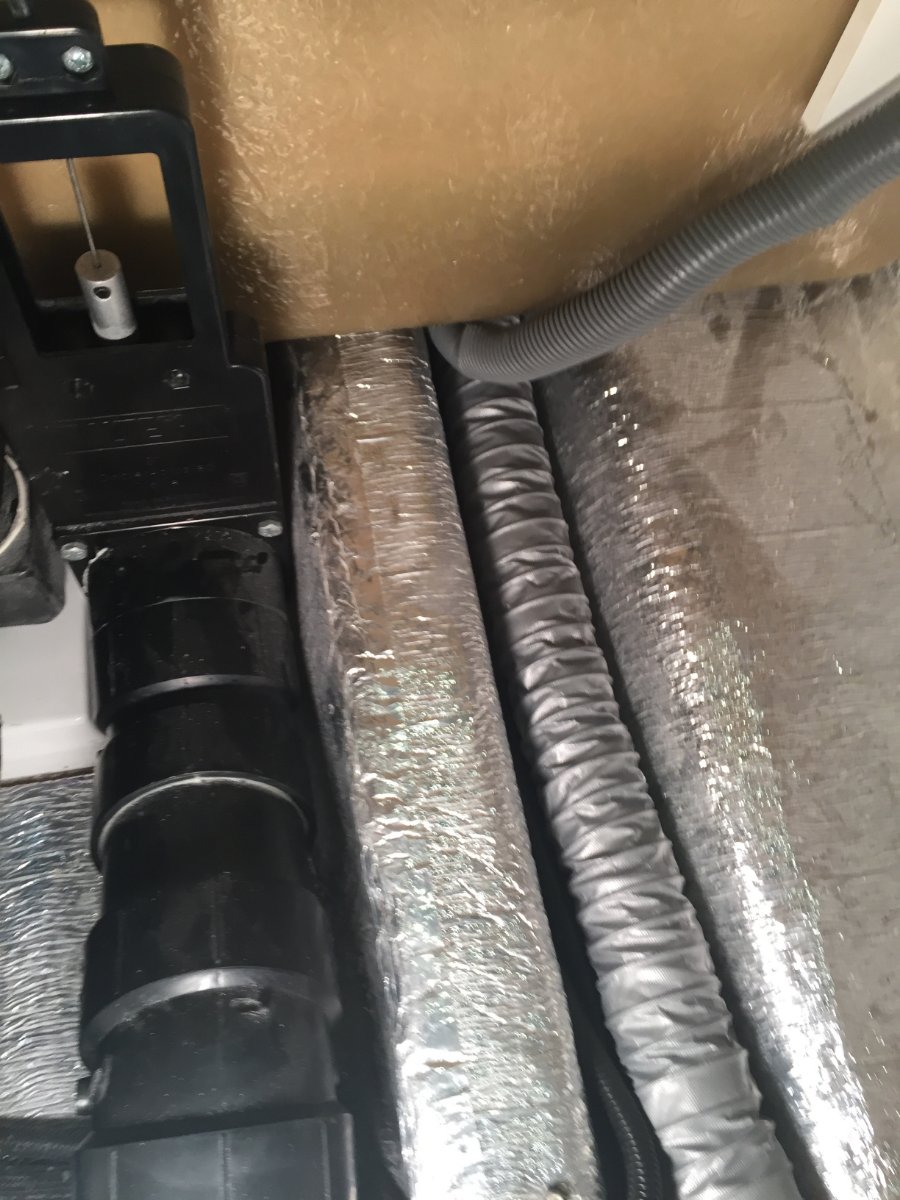
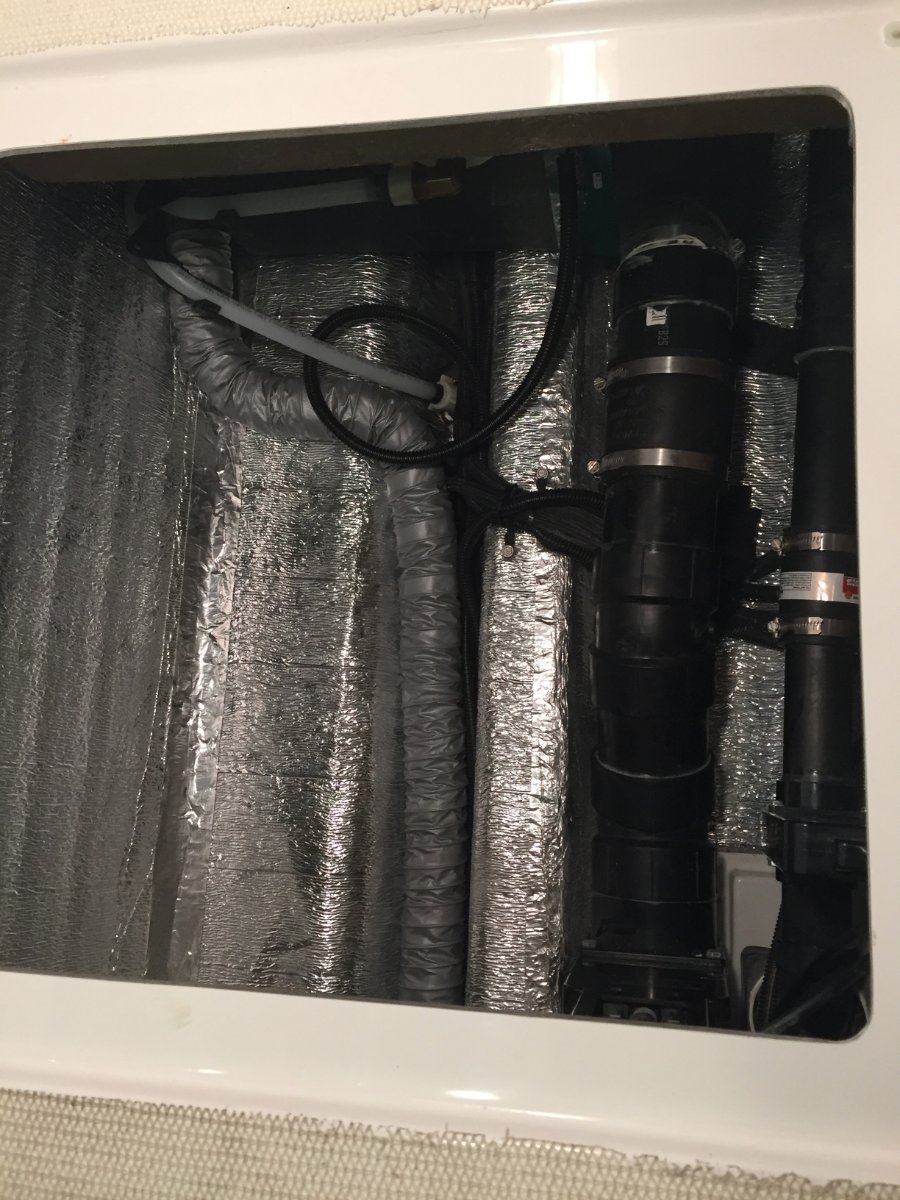
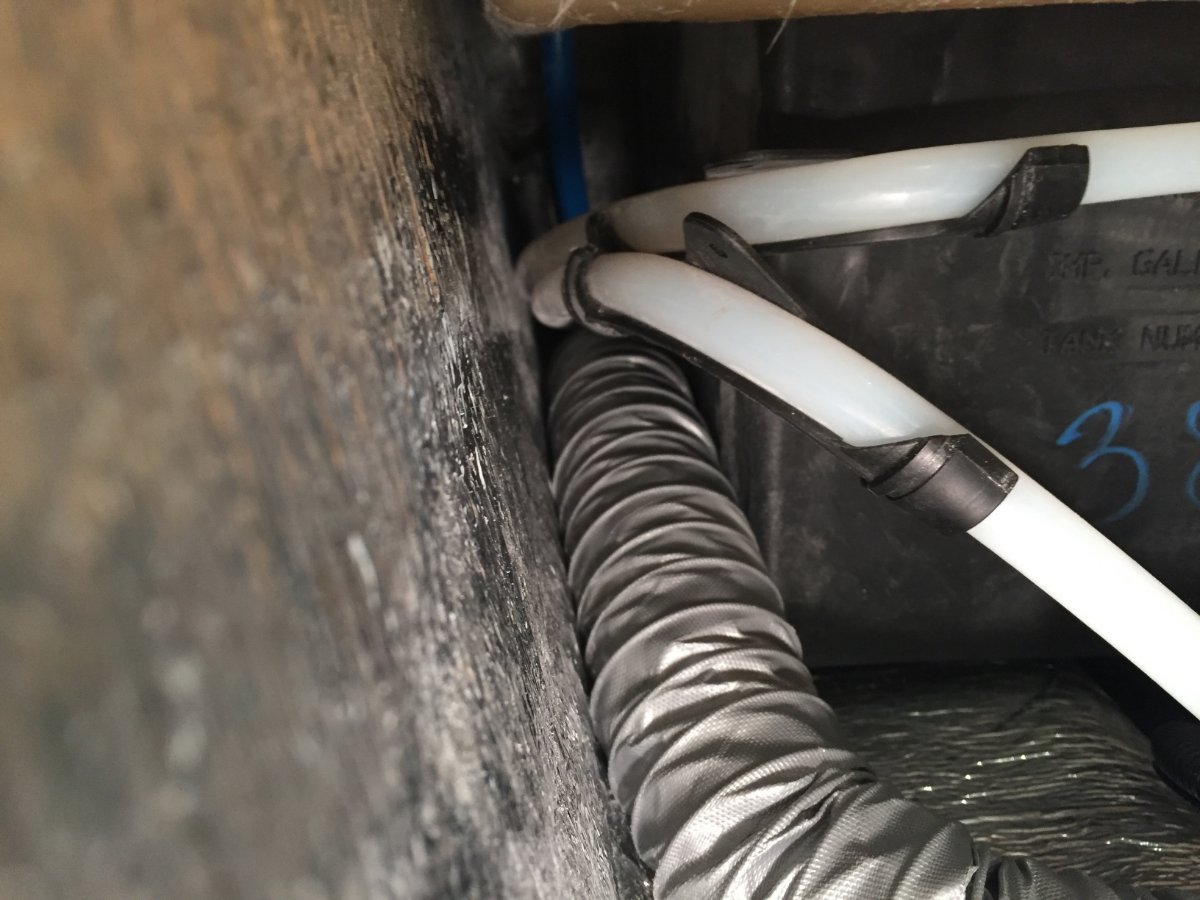
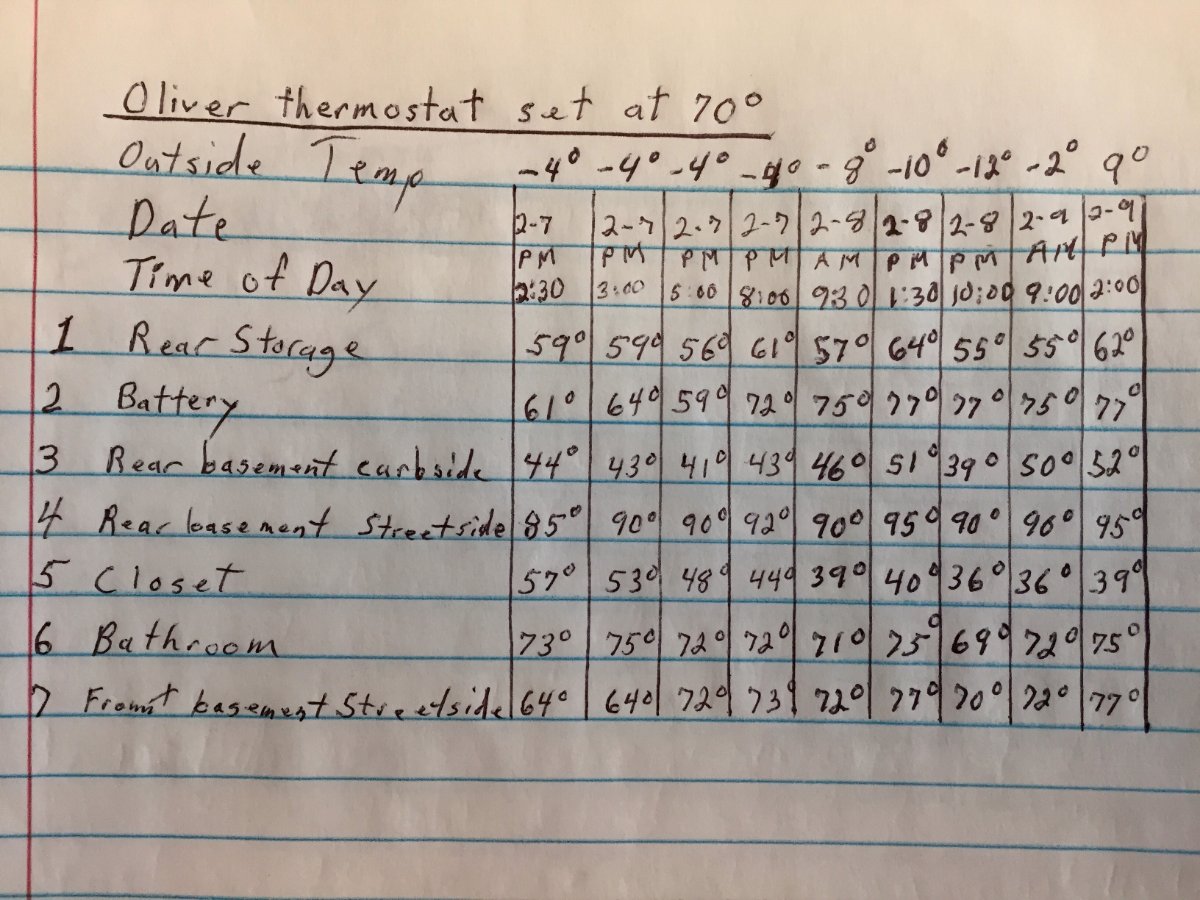
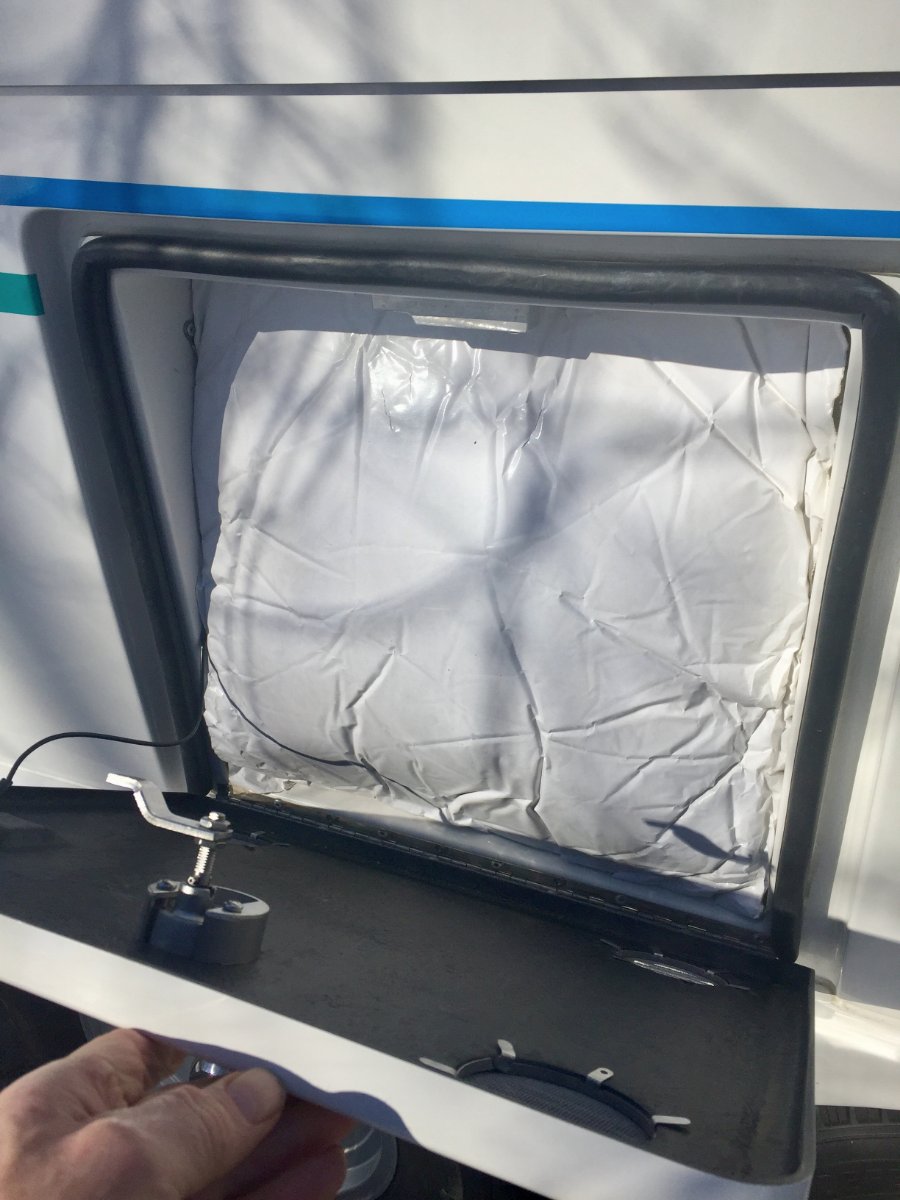
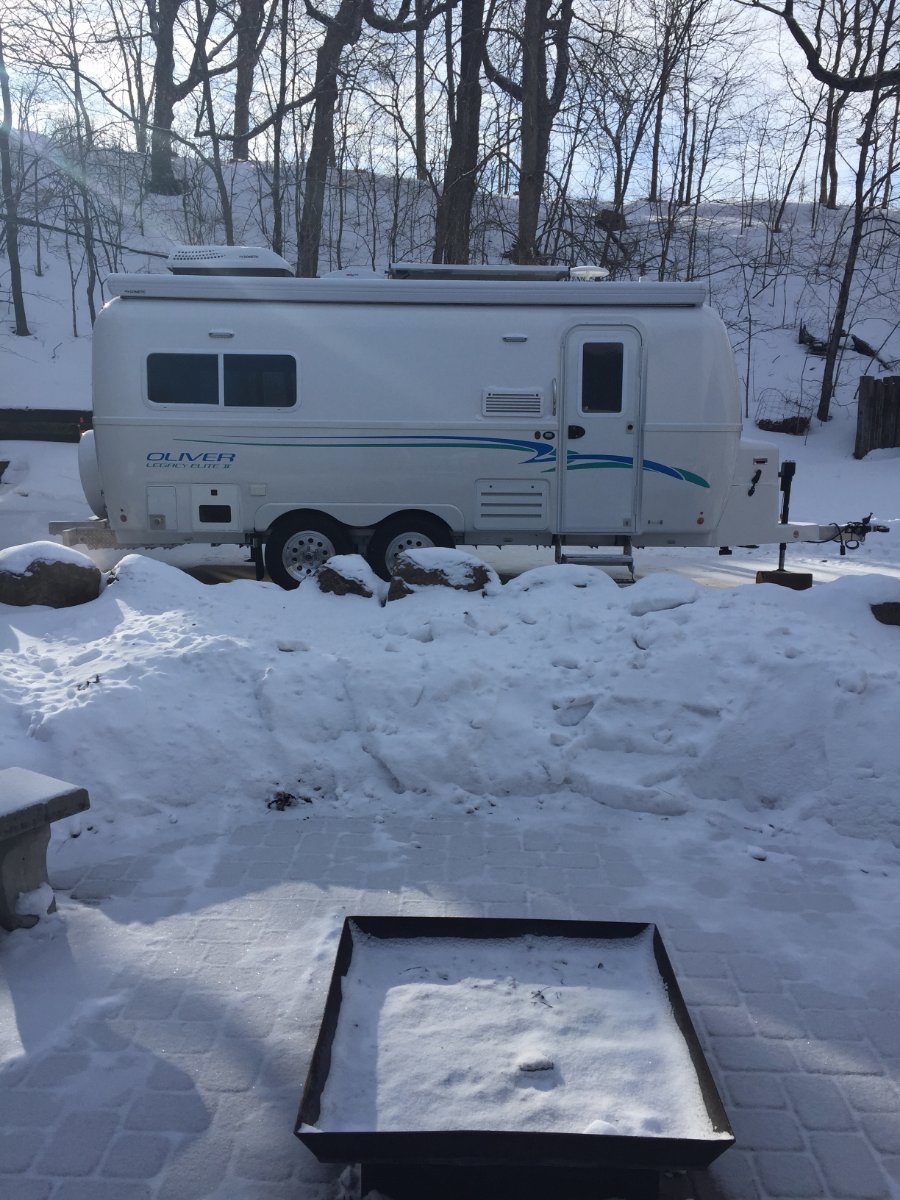
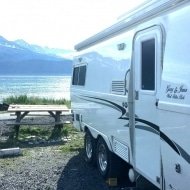
The seed was planted for this furnace mod when we grabbed a canceled reservation three weeks out at a Minnesota State Park. This reservation was mid October and when the date arrived the weather forecast had changed for the worse. We stayed for only two of the three days and we received our first snow of the season, 6 inches of wet snow. We had a non electric site and my batteries were having trouble making it through the night and I was concerned about the water freezing in the Oliver. I have already addressed switching to lithium batteries and posted about it on Oliver Forum. Now I want to share with you what I have done to relieve my worries about water freeze ups in the Oliver, provided that I have a functioning furnace. I first tried to identify the weak spots and came up with the following. Boondocking Inlet Outside Wash Station Fresh Tank Fill Inlet City Water Inlet Black Tank Flush Port Toilet Water Supply Line Hot & Cold Lines Crossing Back Of Oliver The Oliver has all of it's heat ducts run on the curbside which protect the kitchen and the bathroom faucets from freezing. My plan is to run a 2" ducting along the back to the street side and terminating in to the trough that the water lines run in for the city water inlet, fresh tank fill inlet and outside faucet. This trough also has the check valves for those two inlets and has the floor of the exterior storage compartment covering over the top of it. To get at the trough you will have to remove the back wall of the storage compartment and flip the mat back that covers the floor. This exposes the water lines that come across the back of the trailer and drop into that trough. There is a wall that separates the furnace compartment from storage and extends past the wall you just removed. It has a opening for the water lines and it is large enough to run the 2" duct through it and on top of the water lines across the back and into the trough. Now you can flip the mat back down and they are long enough to cover the water lines and the newly installed 2" duct, then the wall is put back in place. On the connection to the furnace I removed the back of the heat exchanger. There is one hard to get at screw on the bottom but the rest are easily accessible. I made two holes, a 2" and a 4" in that back plate. I could not find a 2" starter collar locally so I bought two 4" and removed the rivets on one of them and formed a two inch collar, cut to length and re-rivet. I then installed the 2" and 4" starter collars to the heat exchanger back panel and then the panel to the furnace. I then hooked up the 2" duct to the furnace. Looking in to the access hole under the street side bed you are able to see where the water lines come up and out of the trough and to the valve of the out side wash station. When the furnace fan is running it will blow out a lit Bic Lighter held in that area. So we're protecting water lines, the check valves and dumping warm air underneath the outside wash station valve. Now back at the furnace I attach a 4" heavy duty aluminum foil duct to the newly installed starter collar. It is routed forward a short distance until it can be routed across the basement to the street side and then fed between the hot and cold water lines that go to the outside wash station valve. At this point I need to use a 4" coupler that is 6" long to attach the next 8' piece of 4" duct. I use the 6" long coupler so I can add holes if I need to flood a area with heat, this particular coupler did not need to. I then routed the duct from the wash station valve along the outer wall and over the wheel well, make the corner by the battery compartment and then once getting past the wheel well go down and under battery compartment. Up in that corner I attach a adhesive base 3/4" cable anchor so I can loop a 20" releasable tie strap through it and around the 4" duct holding it up and out of the way. A second 20" tie strap is used were the duct heads down under the battery compartment, it utilizes the loop that anchors the 4/0 cable coming out of the battery compartment. Next I prep another 6" long 4" coupler by adding a metal mounting bracket. It is bolted to the coupler using two 10-24 machine screws that go through the bracket the coupler wall and then a backing plate that has tapped holes. This coupler I will add a1" hole that will be pointed up to flood heat at the battery compartment. The mounting bracket will be utilizing the upper bolt of the support leg for the battery compartment. This keeps the duct up and away from the inverter and electrical components and positions it to flood heat up against the bottom of the battery compartment. The next length of 4" duct is clamped to that coupler and routed up from under the battery compartment over to and along the wheel well. It is held by two 20" tie straps similar to the other side. Because I want to run the heat duct under the foot space of the dinette I need to transition to 2" duct. There is access via the same trough that I utilized in the back of the trailer, but at the front there is more room and I am able to pull the 2" ducting through. From there it continues toward the front until it reaches the black tank flush inlet where it then follows that pipe back along the black tank and terminates by the water supply line for the toilet. At the transition point I add two more short pieces of 2" duct and route them down to where the main black tank drain pipe goes under the dinette foot space, they are terminated on either side of that pipe. There was not enough room to run the 2" duct but enough to force air along either side. At the transition from 4" to the three 2" ducts I simply inserted the three 2" into the end of the 4" and used aluminum foil duct tape to seal the transition. I also want to mention that I used the aluminum foil duct tape to reinforce the ends of every 4" duct by wrapping outside and inside before clamping. That should cover the install, now lets talk about the results of the test in subzero weather. I rounded up seven digital thermometers and put them in the areas I was concerned about. Was placed just inside the empty rear storage compartment. Was placed on top of the batteries and a piece of acoustical insulation that was for large generator enclosure, it was 1-1/2" thick and 19" square. This was squeezed in the opening before the door was closed. Was placed in the rear basement curbside next to boondocking inlet. Was placed in the rear basement street side below the outside wash station valve. Was placed on the floor of the closet with the door left closed. Was placed on the lower shelf in the vanity in the bathroom with the door left closed. Was placed in front basement street side next to the black tank flush port line. I moved it out of the heated shed at 1:00 pm on Sunday 2-7-21. I moved it back in at 3:00 pm on Tuesday 2-9-21. The furnace was cycling off and on at -4 ' but I noticed at -8' and colder it ran continuous. I have the Truma water heater and that was also turned on. I checked propane consumption by putting on two 20 pound tanks that I had weighed and left them in place for 12 hours. It was -12' when I put them on and -2' when I took them off. Because of the subzero temperature the propane was not gasifying very well and the regulator automatically changed from the primary to the reserve after only consuming 2.353 gallons. The total consumed out of both tanks in 12 hours was 3.294 gallons, so that would be .274 gallons in one hour. My Victron BMV-712 was telling me that I had depleted my 400 Ah Battle Born batteries to 47% and at rate of use I had two days and nine hours left. I thought I would comment on a couple of things I like about the outcome of the project. The bathroom was comfy warm and the wall next to the bed was not icy cold. I am not planing to take up subzero camping but it does gives me a benchmark to go off of for any situation that I might run in to. If you have any suggestions or see something that is of concern please let me know. Paul
 10 points
 -
Last night I saw video footage of the 100 vehicle pileup near Fort Worth, TX that killed at least 5. Scary stuff! Hopefully none of our Oliver family was involved. With the large amount of cold and snow now gripping the USA, please be very careful out there. In particular this applies those that are soon to be picking up their new Ollies. Bill3 points
-
We live 30 minutes south of FW where the accident happened. 133 vehicles involved and 6 dead. We were scheduled to pick up our OLE2 on Monday, 2/15. However, our low temp here on Sunday is 3 and Monday is -2 which is unheard of in North Central TX. We are also expecting 3-7+ inches of snow between Sunday and Wednesday with the temps below freezing the entire time. Tennessee is also expecting lots of ice and snow so we have delayed our travels by a week. It's disappointing after waiting so long and having everything gathered and ready to go but better to be safe than sorry. Certainly not looking forward to pulling a trailer in ice/snow and possibly coming home to broken pipes at the pool equipment or house. Forecast for the following week looks so much better! Cindy3 points
-
It is piece of acoustical insulation that was for large generator enclosure, it was 1-1/2" thick and 19" square. I believe It is open cell foam with a black finish that seals the cells on the one side and the other side has adhesive applied with a plastic tear off sheet. Just the edges would have exposed open cell, I would not expect the R-value to be very high but it did the job. If you look at the chart I put up It stayed in comfort range that Battle Born recommended and it sealed the opening with the water proof adhesive backing facing my door vents, plus easy to install and remove.3 points
-
Floor mat or large rug for outside the door. Small electric box heater for backup or extra heat in the bathroom. Extra 50 or 100 foot heavy gauge 15 amp extension cord, 12 AWG or bigger. You can plug in and run all your normal stuff off a small cord, just keep an eye on the total load. If they happen to have a 30 amp outlet within reach, use your factory cord and you can run everything at once off shore power. Make popcorn😬 Maybe ask them to send you a picture of the site and ask if there is any solar exposure. In winter a sunny spot will be much more pleasant than a fully shaded north side of the house. Ask if there is a place for you to dump your grey tank, because unless you use their shower, your tank will be full in a few days. You should buy a 4” sewer to garden hose adapter, and bring along a 5/8” or bigger junky hose you can screw on there to reach a drain or other location. Make sure you mark the hose Waste Only with a Sharpie. This is a good one: Camco sewer to garden, avoid any brand that only has two “ears”, because one will surely break off. This one is very durable. The absolute worst case for the grey water, drain it into a bucket and carry it inside to dump, 4 gallons at a time, into a toilet. You won’t want to do that again. A two foot piece of 3/4” hose with a female garden hose fitting is useful for this. Again mark the hose Waste Only. They may be OK with your letting the tank just trickle slowly onto the ground, since it is mostly soapy water, but always ask! Finally, have fun, de-stress, and be prepared to show off your new toy. John Davies Spokane WA3 points
-
Who da thunk it ?!?! I am sorry to hear you all are having to delay - but, as Bill said, wise call! I doubt the stress of driving in those conditions is not what you need for pick up. Here's hoping the week flashes by quickly for you and next week's weather is great! Jim2 points
-
For the readout on the interior I use just two of those strips. Other than taking it down for winter storage, the unit stays right there. For the exterior sensors I used exterior "Velcro" (remember the thread regarding the different types of this stuff). These also stay in place during my Rving season and are taken down during winter storage. The sensor in the "basement" is also attached with a command strip. Bill2 points
-
Cindy- I think that this is very wise of you. Certainly it will make for a much more enjoyable trip and delivery experience. The current weather conditions are very unusual for most areas to include Hohenwald and as you point out a week from now will bring a change for the better. Bill2 points
-
Nice work - as usual -. You do high level work. I must admit - I try not to be anywhere its gonna be below freezing for much more than a few hours. Over night's perhaps - it better warm during the day. We did get snowed upon at elevation last summer (10k' FT). Summer in the CO mountains.... I love the outdoors, camping, RV'ing, paddling WW , etc. - but not at freezing temps - not anymore. I even hesitate to paddle much below 40.... and that is a change - seems each new year finds me a somewhat more - adultish.. However - given the topics lately - I will add a little cold weather materials to my travel tools and equipment stash - esp. if it is during the transition periods Spring/Fall. Thanks all for the ideas. RB2 points
-
Most WD hitches creak and groan. They were probably just admiring your rig.2 points
-
Oliver supplied a lug wrench set with the universal selection of sockets when I picked up my LEII. If they still do, just repurpose the handle and use the socket with your torque wrench. You will have to buy a short 1/2" drive extension however.2 points
-
This will cover most Mine are 19mm.2 points
-
Alright, closing the loop on this one. I'll spare the details as to how but with some spare HDMI and RCA audio cables I was able to isolate the source of the problem to somewhere between the HDMI input of the Jensen TV and the analog audio out of the TV. All other cables and components passed testing. So a new Jensen TV is > $250 bucks. Or perhaps I can take it to an electronics repair place but I doubt it. In any case, I have other priorities right now so what I did was instead run a 12ft RCA cable from the back of the receiver to the attic and then mounted an HDMI audio extractor box (and and HDMI splitter for other devices living in the attic) and that's working like a charm. https://www.amazon.com/gp/product/B00XJITK7E/ I suppose I need to come up with some nice racking with cable management for the attic since I have a PS4, Vero, Raspberry Pi, surge protector, HDMI splitter, and audio extractor up there now. Time to break out the 3D printer. ;)2 points
-
Neat! do you have a link for the flexible insulation material you used in the outside access doors? You might want to think about sealing off the big screened vent holes in your battery door. Wouldn’t it be NICE if Oliver would build these trailers with molded in place fiberglass air ducts going through all those locations? Thanks, John Davies Spokane WA2 points
-
For the last 20 years of my working life I was a service manager for a company that sold expensive large format printing equipment. I sold extended warranties they were a huge income producer. Not for the customer, but for us providing the contract. That is one reason I never buy one. I’ve been on the other side of the equation. If I am looking at a purchase that I think is going to require a large amount of expensive maintenance, or that I do not think will be reliable instead of buying an extended warranty I probably need to be looking at buying a different product.2 points
-
not sure why this thread is in classified2 points
-
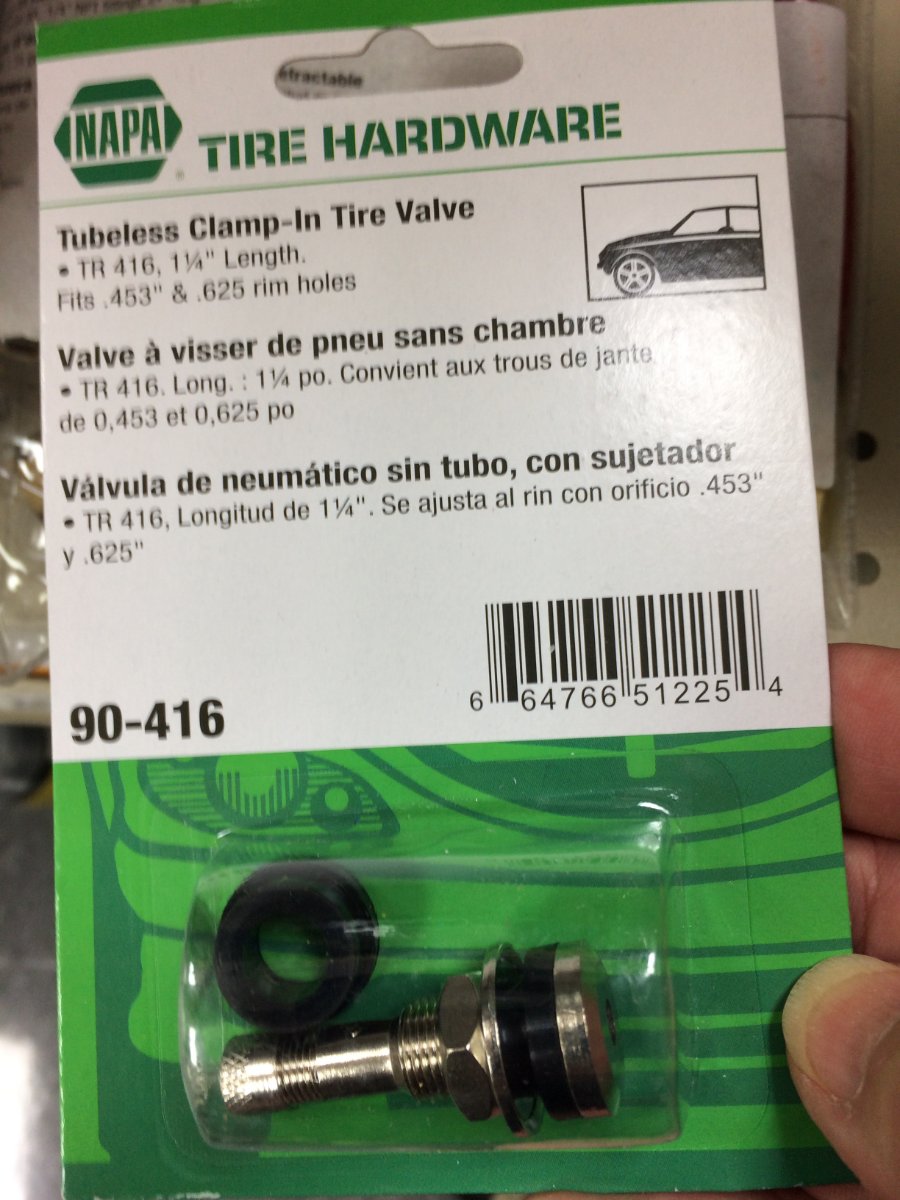
If you have a NAPA auto parts store near you, they stock the metal valve steams.
2 points
-
I would just throw in my few cents and say to all the issues with cold camping have a back up propane heater like a buddy heater should your furnace fail and you are not at an electric site. This happened to me in the Canadian Ice fields with show falling and boon docked across from the glacier in the visitors parking lot ice on the truck be a boy scout and be prepared. Just my two cents. Thanks Gary happy camping2 points
-
It never hurts to throw in an adult beverage (or two), some flowers, or chocolate for your hosts of course.2 points
-
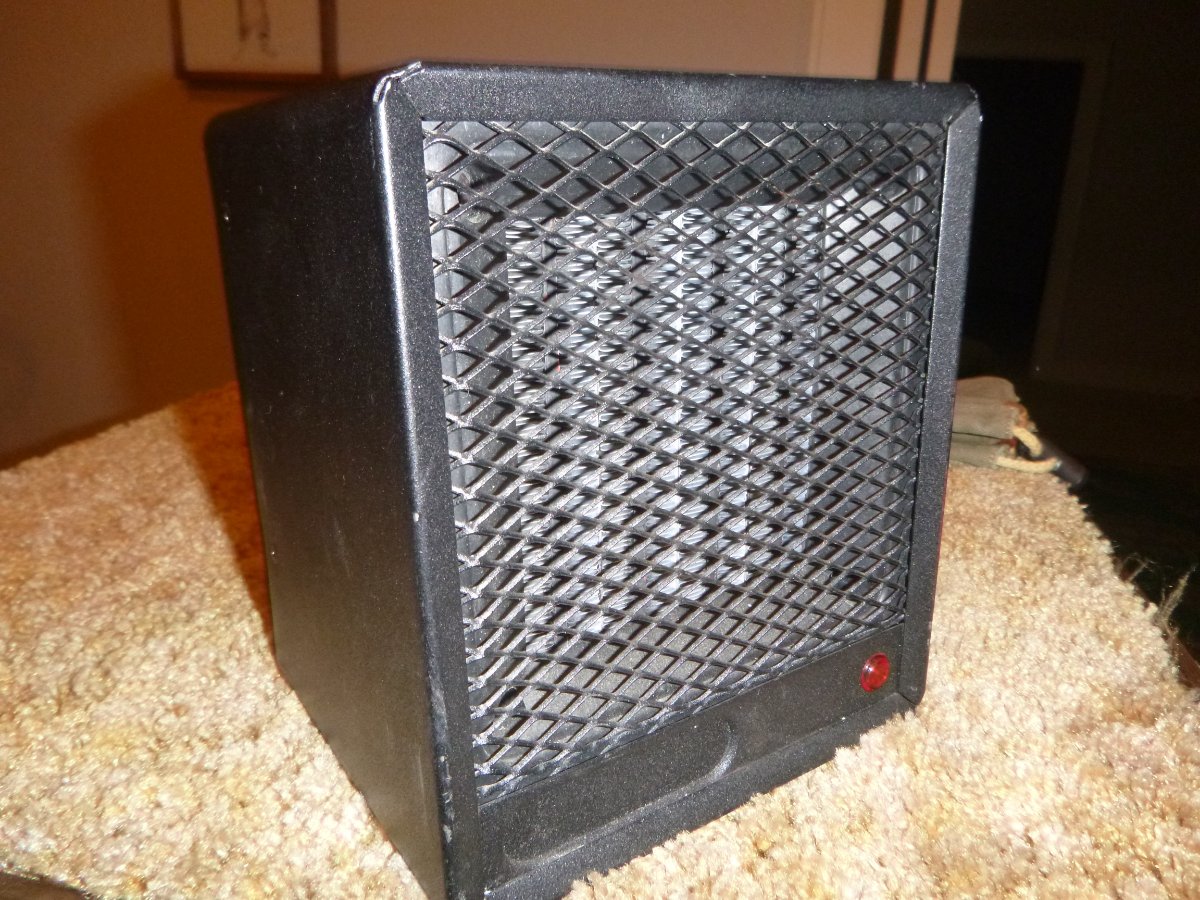
Carl - IMO there is absolutely no substitute for having a number of these remote temp sensors - particularly if you are camping in cold weather. In addition to the sensors for between the hulls, don't forget about putting one under the propane tank cover and another under the rear spare tire. With these in place, you will be able to read the rear sensor in the event the sun is shining on the propane cover or vice versa, thus giving you a more reasonable idea of what the exterior temp currently is. With regards to electric heaters - due to the fact that these heaters take a fair beating while traveling down the highway and those heating elements are fairly delicate, I bought one of the little square "ceramic" jobs at a garage sale a number of years ago (actually I bought two thinking that the first would die). Fortunately, after 6 years it has not missed a beat and the very small size is excellent for storing in any sized Oliver. I'll take a pic of it tomorrow and post it here as an edit. Bill
2 points
-
Has anybody tried this? I think that having that huge opening right under the sleeping area is a problem. Could the grill be relocated to the other side of the cabin, under the front dinette seat? Or in the front entry wall at the fridge? Then the big hole in back could be covered or replaced with a hinged access door. It seems as if the fan noise would be greatly reduced if it was located far away. You would have to install a baffle to keep stored items from blocking it under the dinette, which would reduce the volume a little. I’m unclear about the fridge area, if that could be suitable. Before I start messing with it, has anybody tried this? Did you do any sound measurements, before and after? There would be an added benefit - conditioned cabin air would be pulled around the water tanks, helping to keep them and the plumbing a little warmer. Thanks. John Davies Spokane WA1 point
-
We are one of the registered Oliver owners who show our trailer to those thinking of buying an Oliver. We created new "trading cards" to hand out as appropriate to visitors and for friends we meet on the road. In this instance we've also included a QR code, which when scanned with a smart phone or tablet will show the link to our blog page where we review various campgrounds, and list some of the many accessories Oliver owners find useful. Please give it a try and see if scanning the QR code takes you to our website: https://4-ever-hitched.com Craig
1 point
-
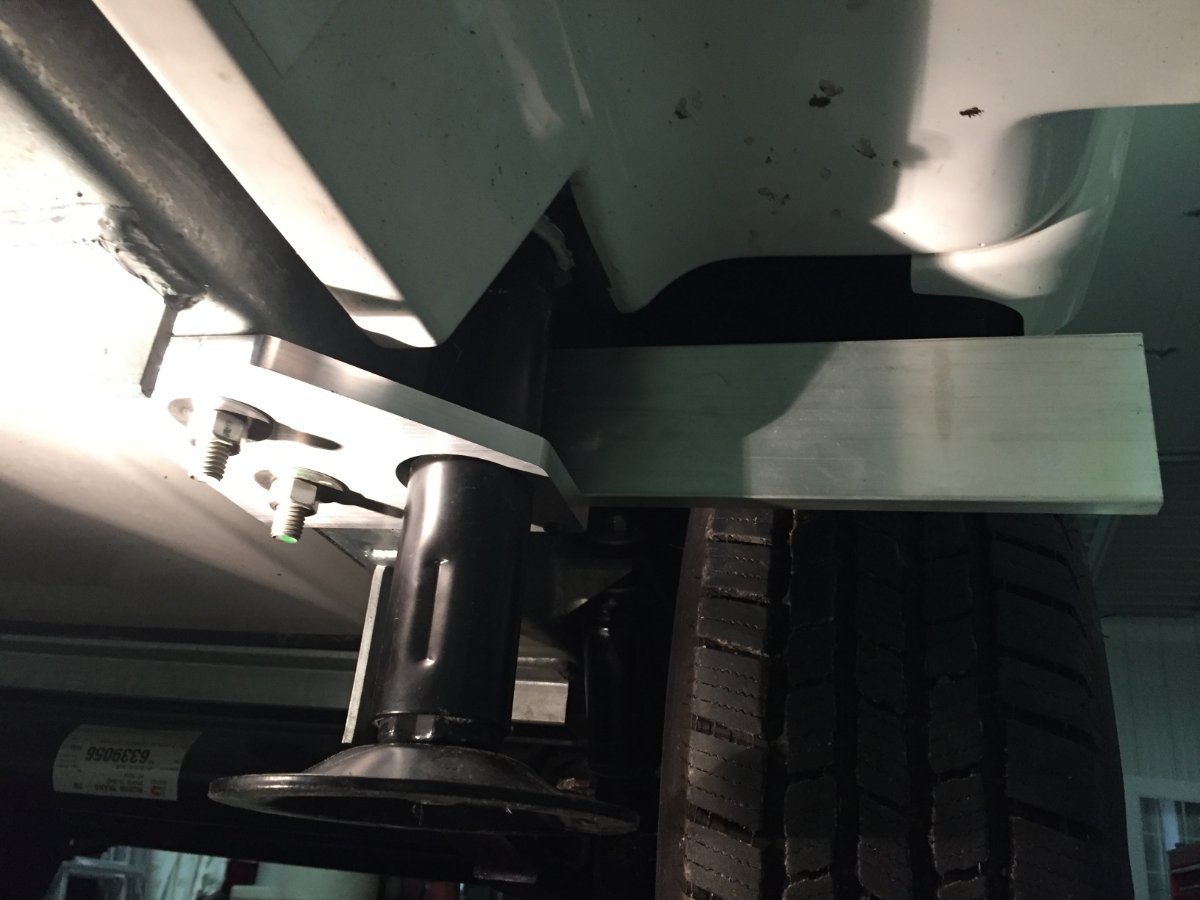
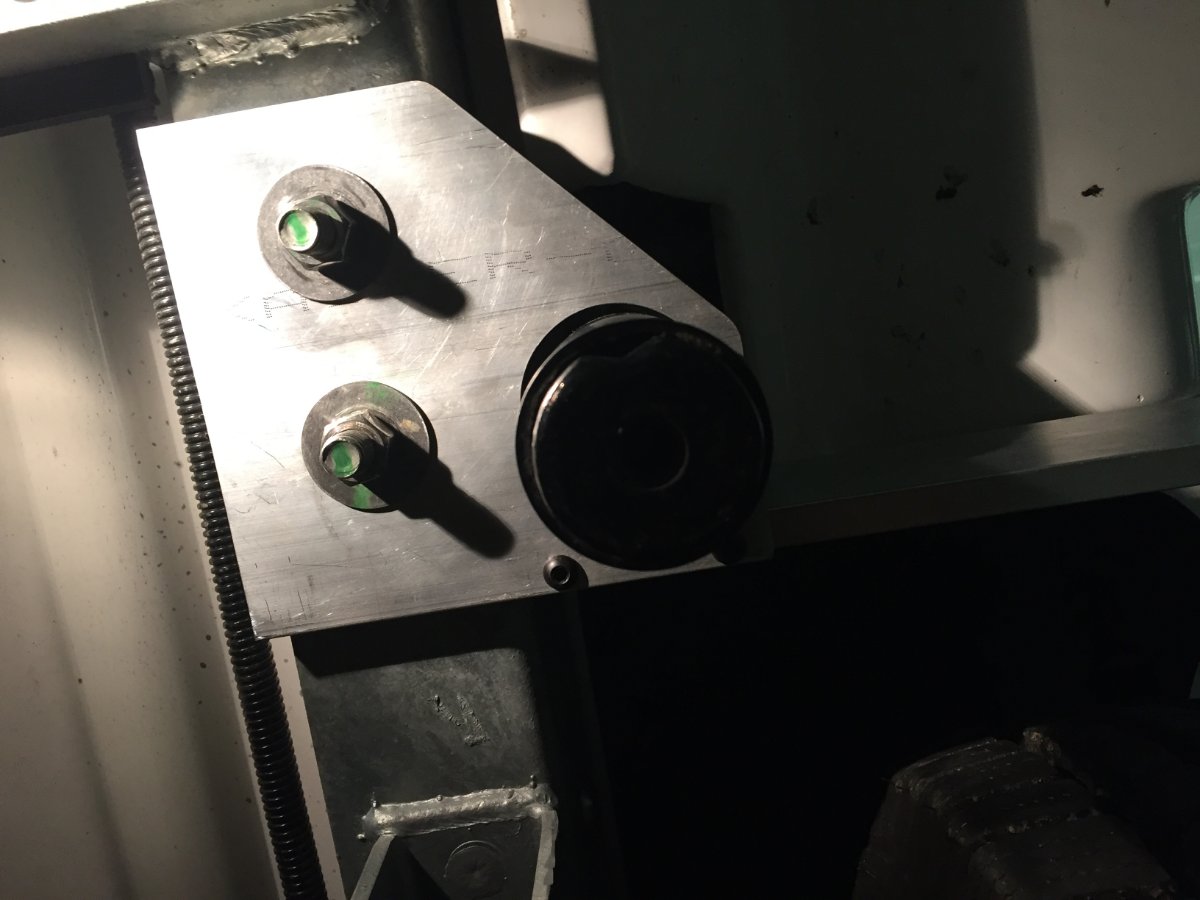
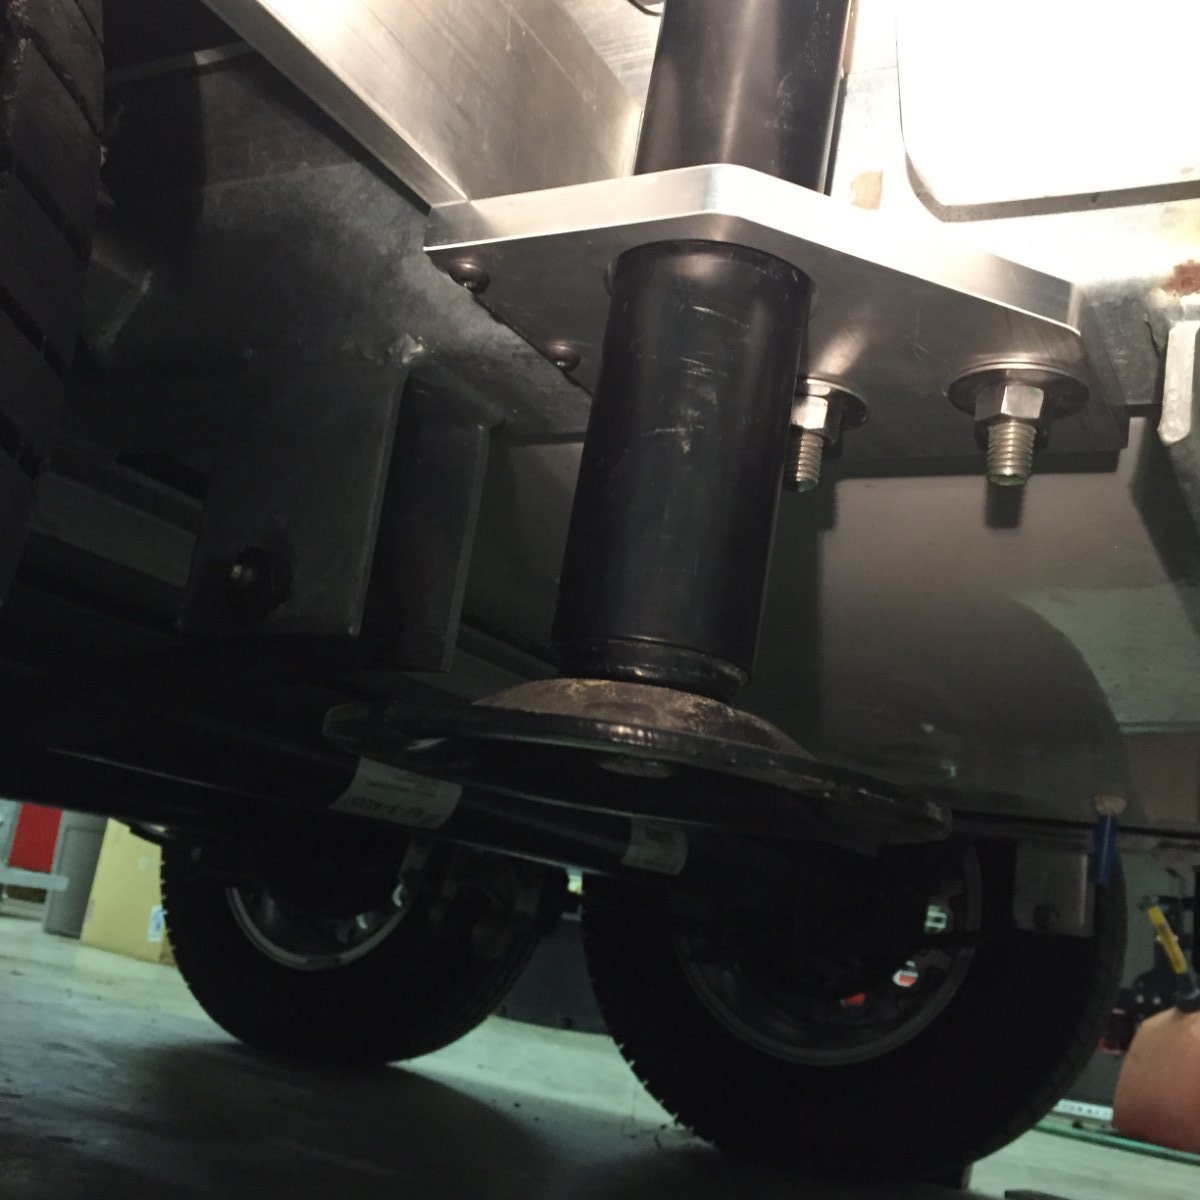
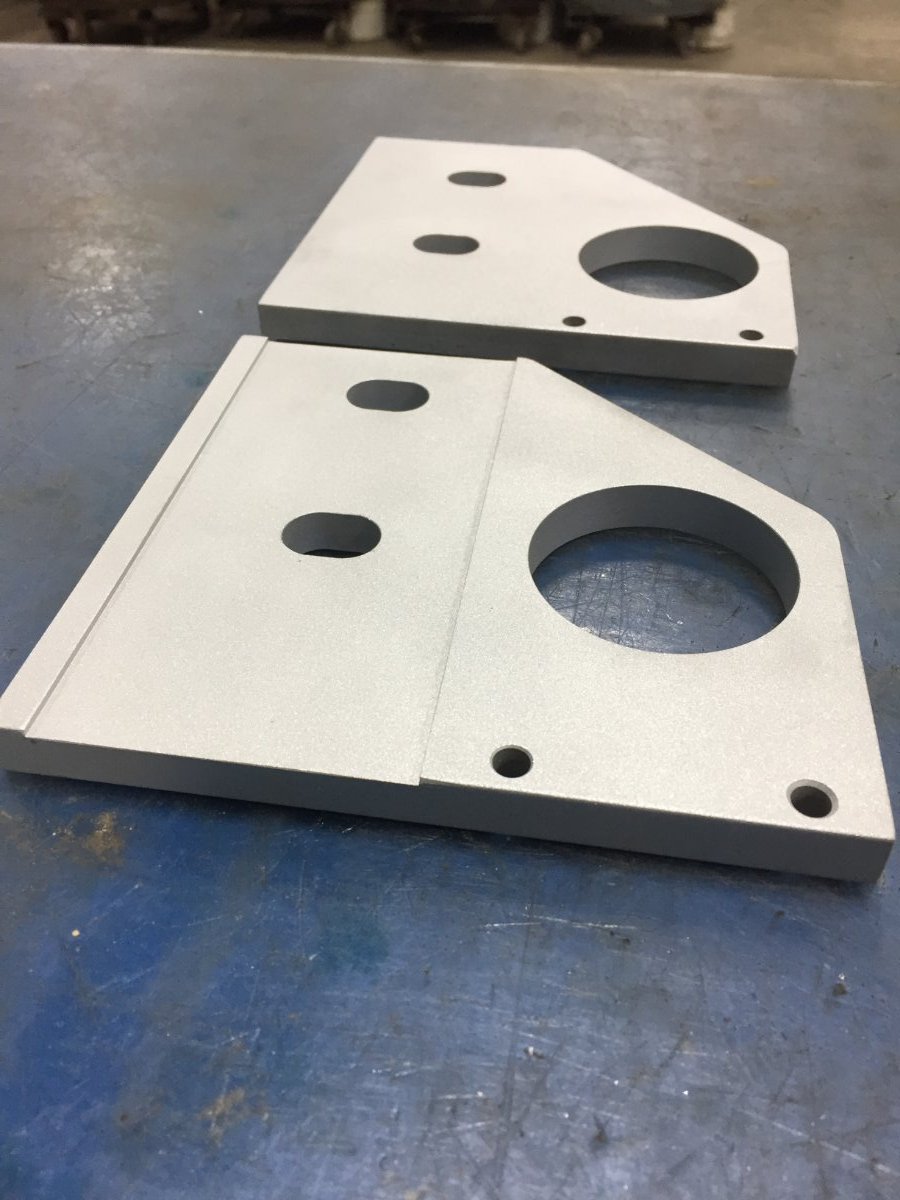
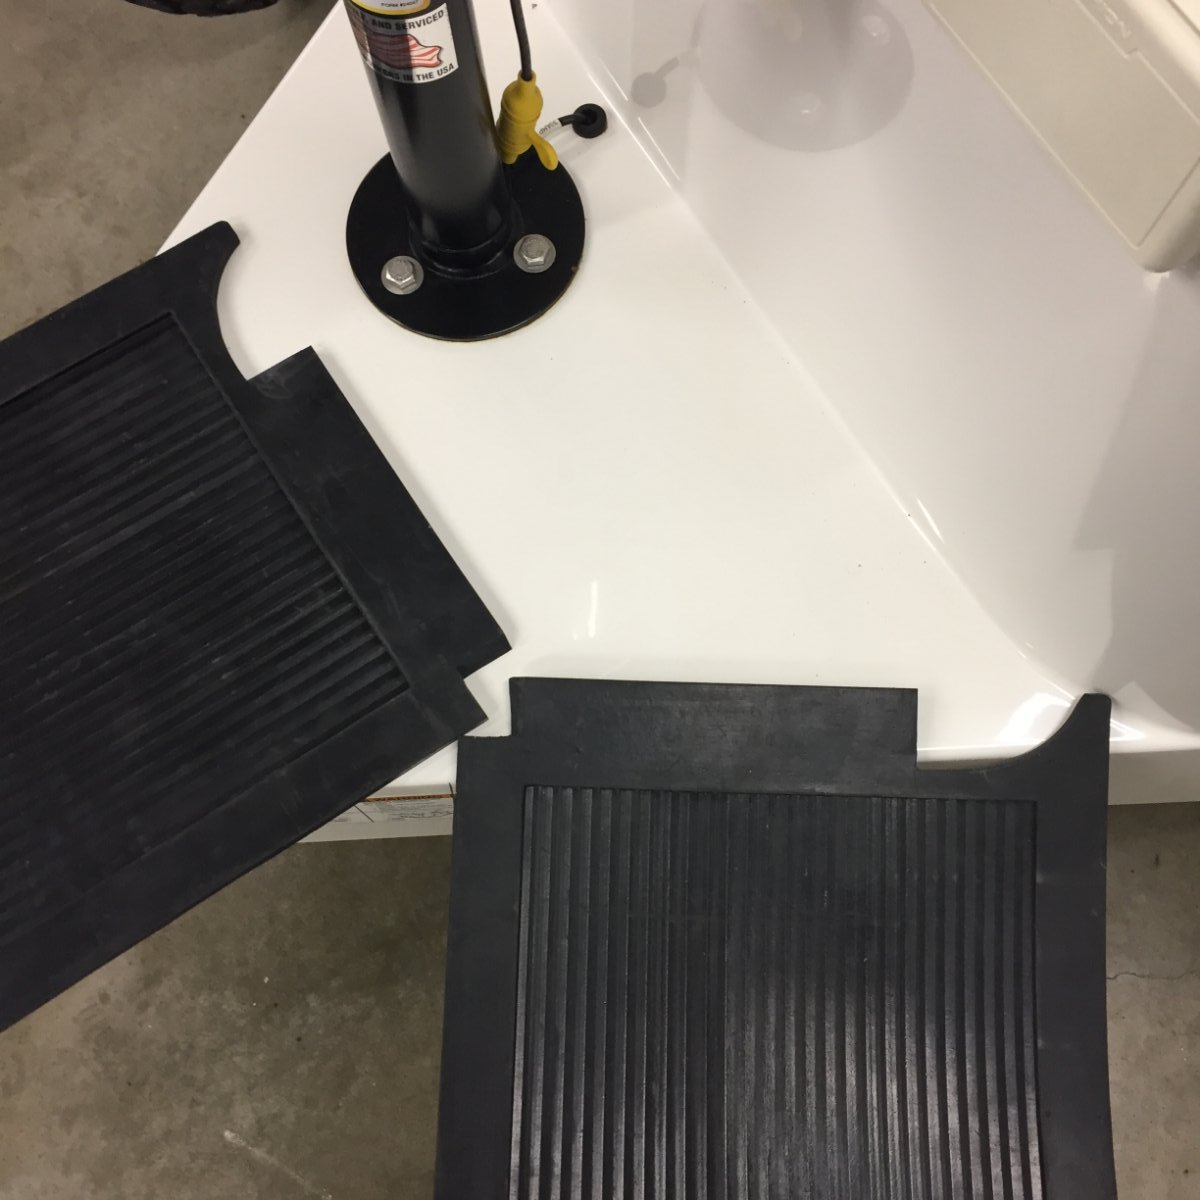
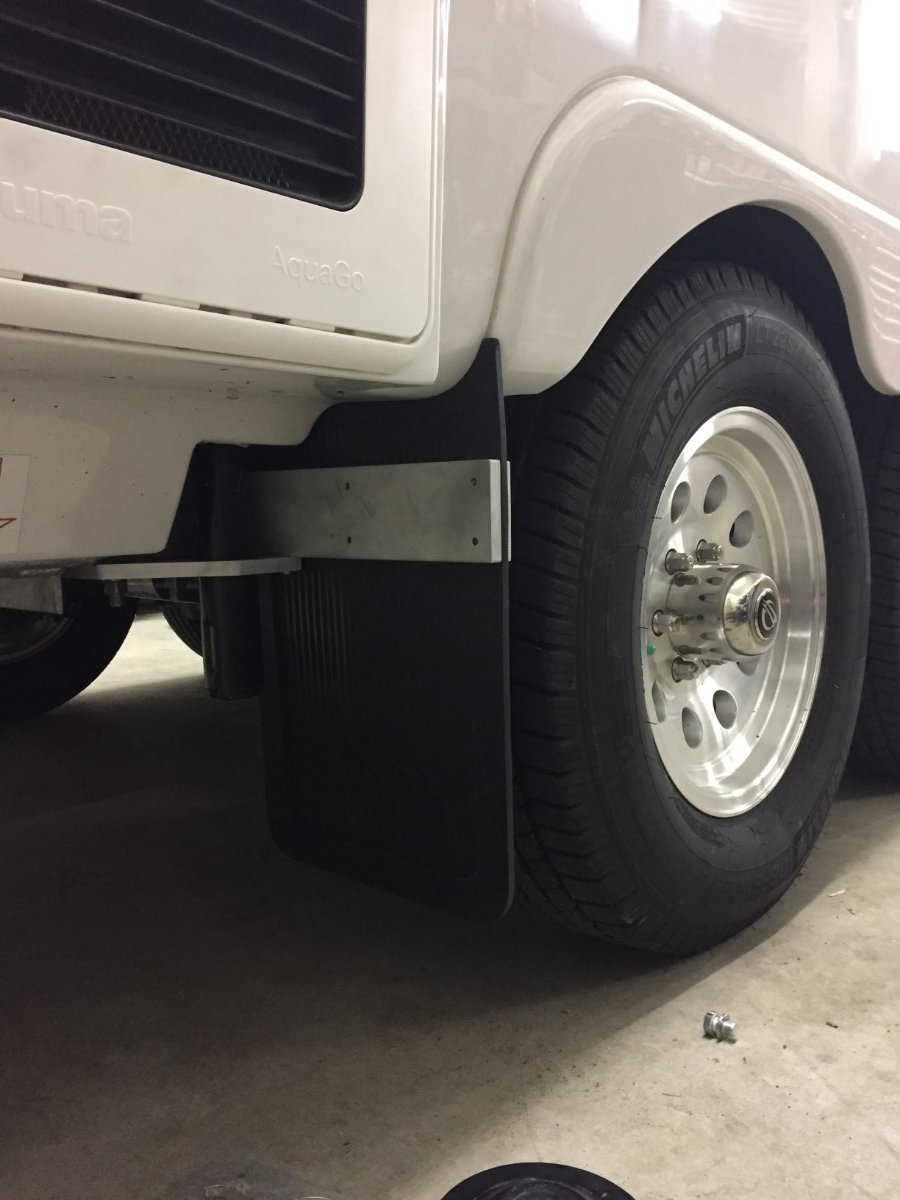
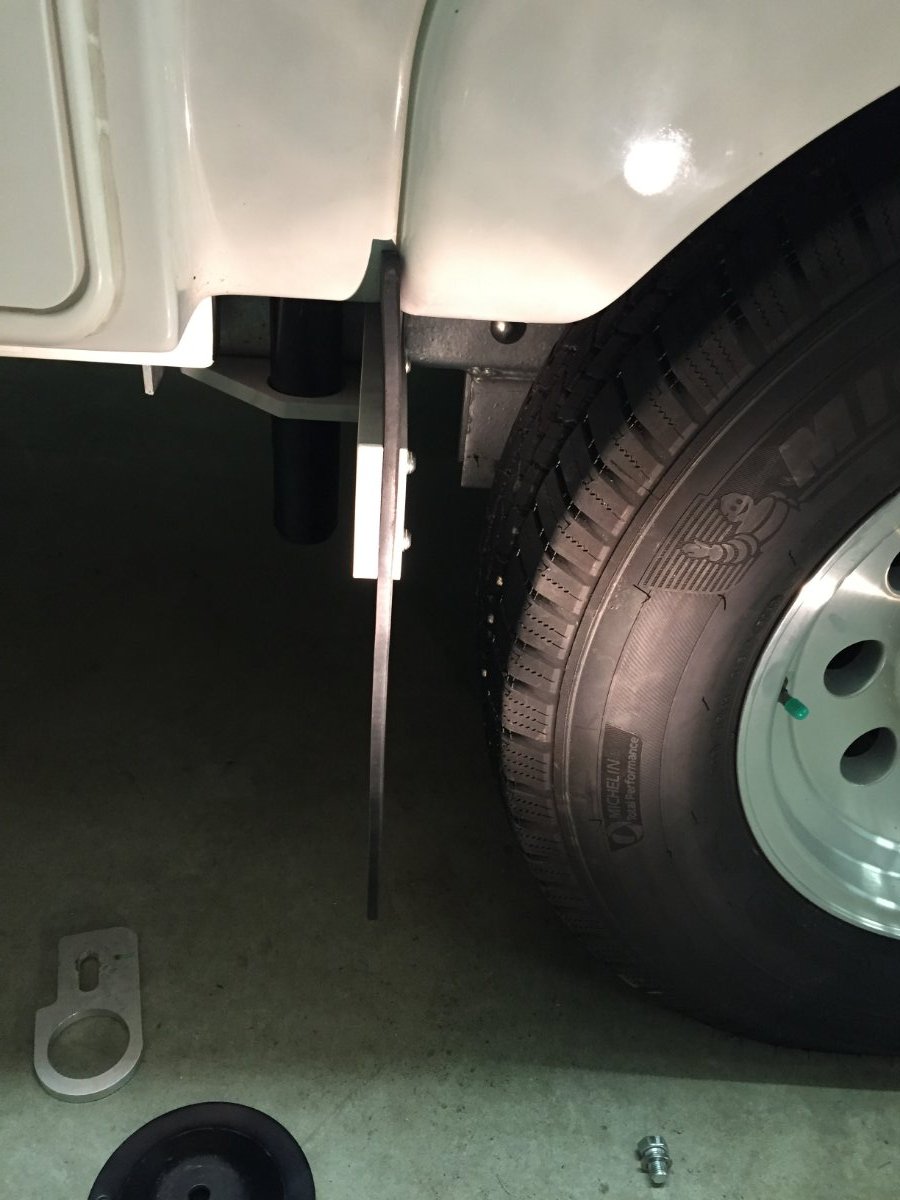
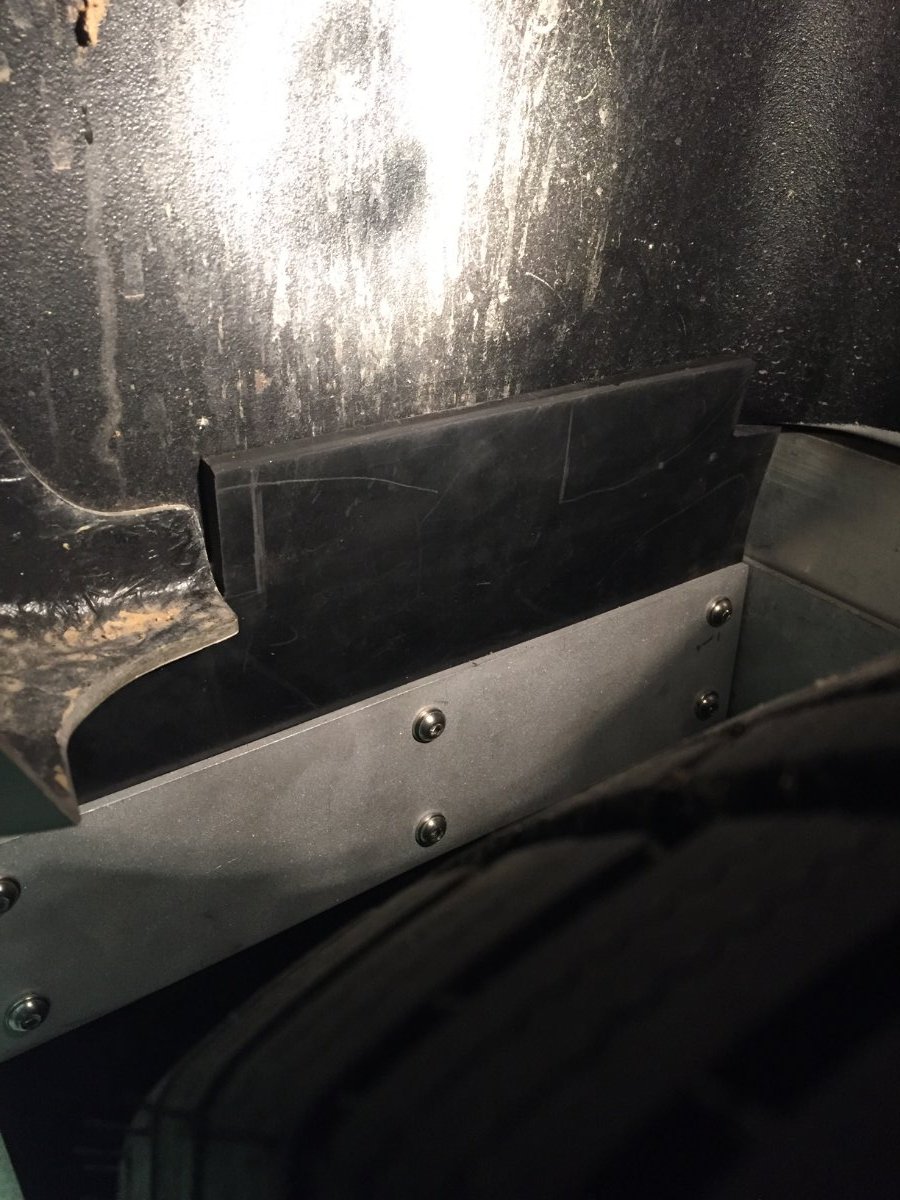
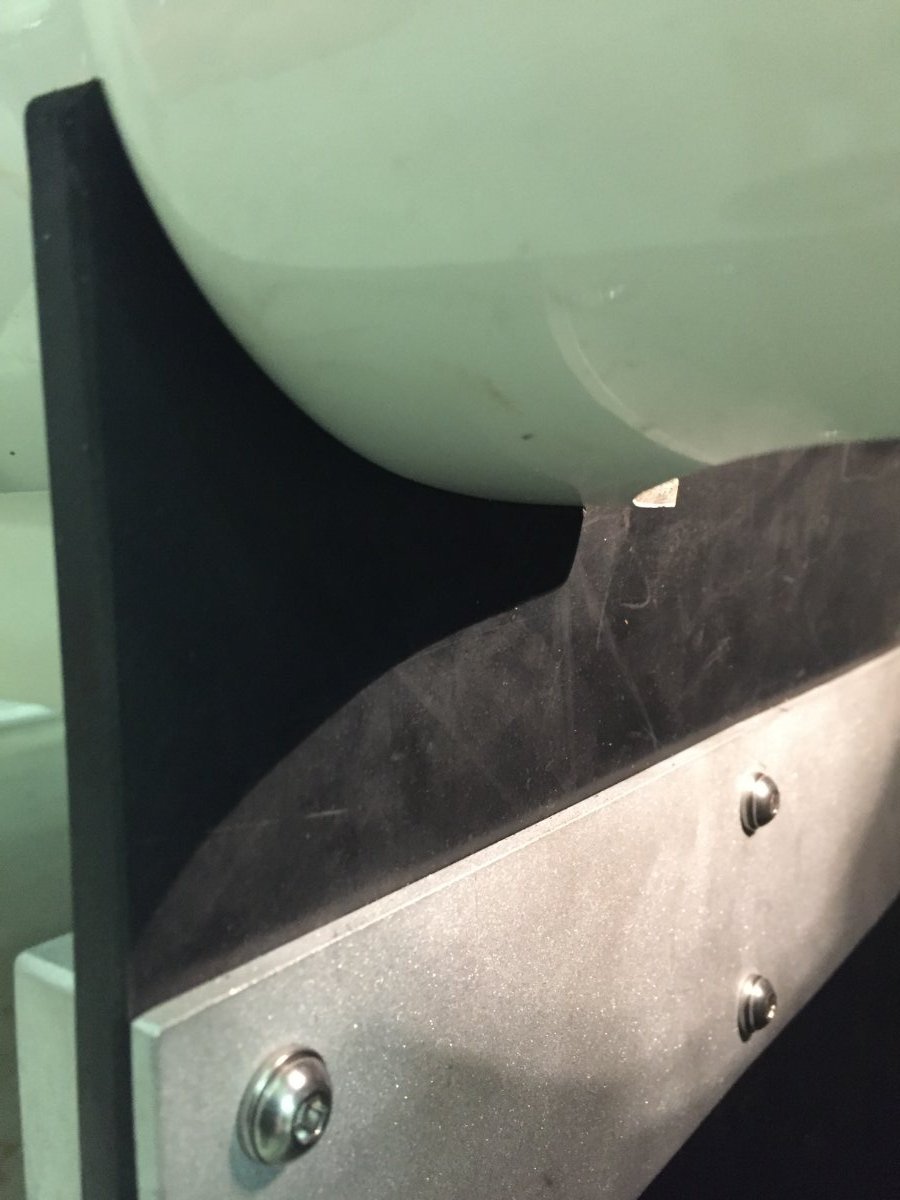
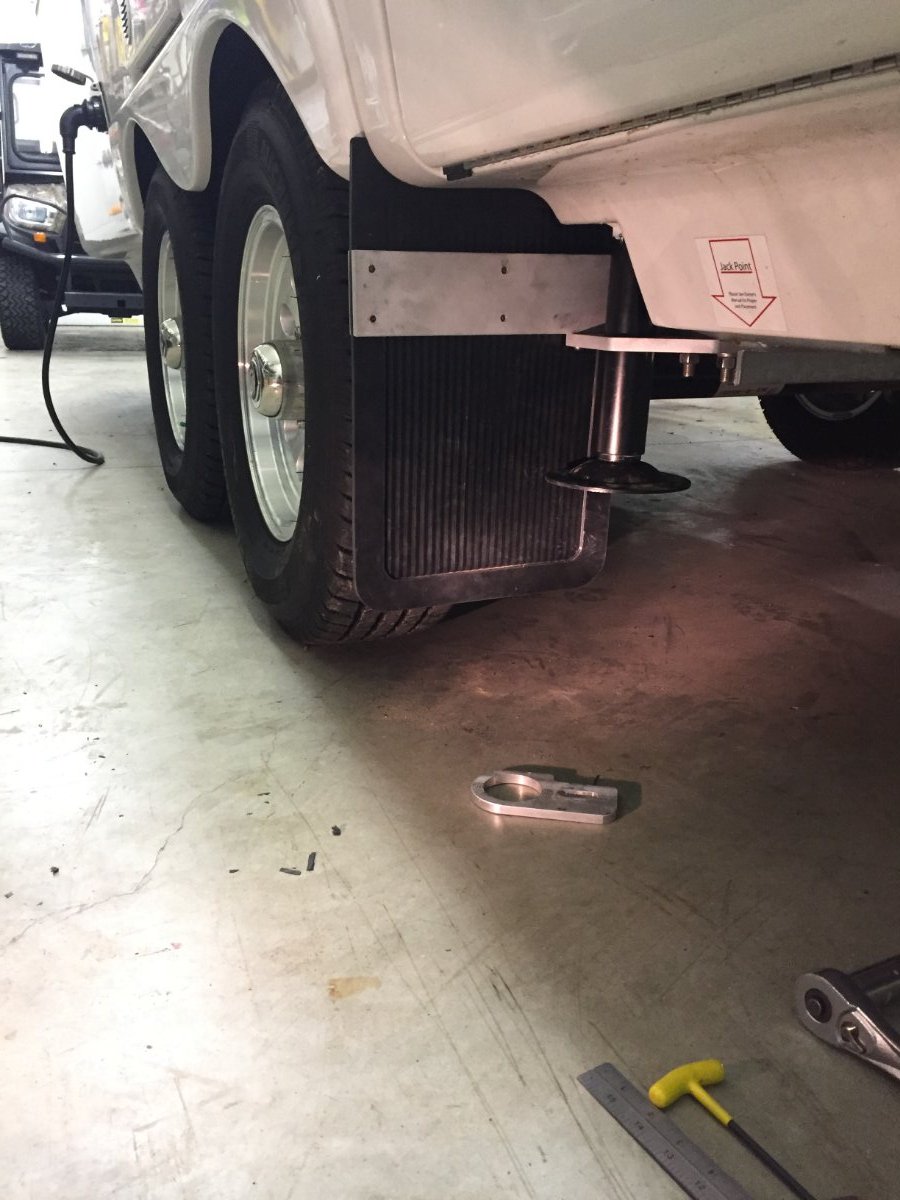
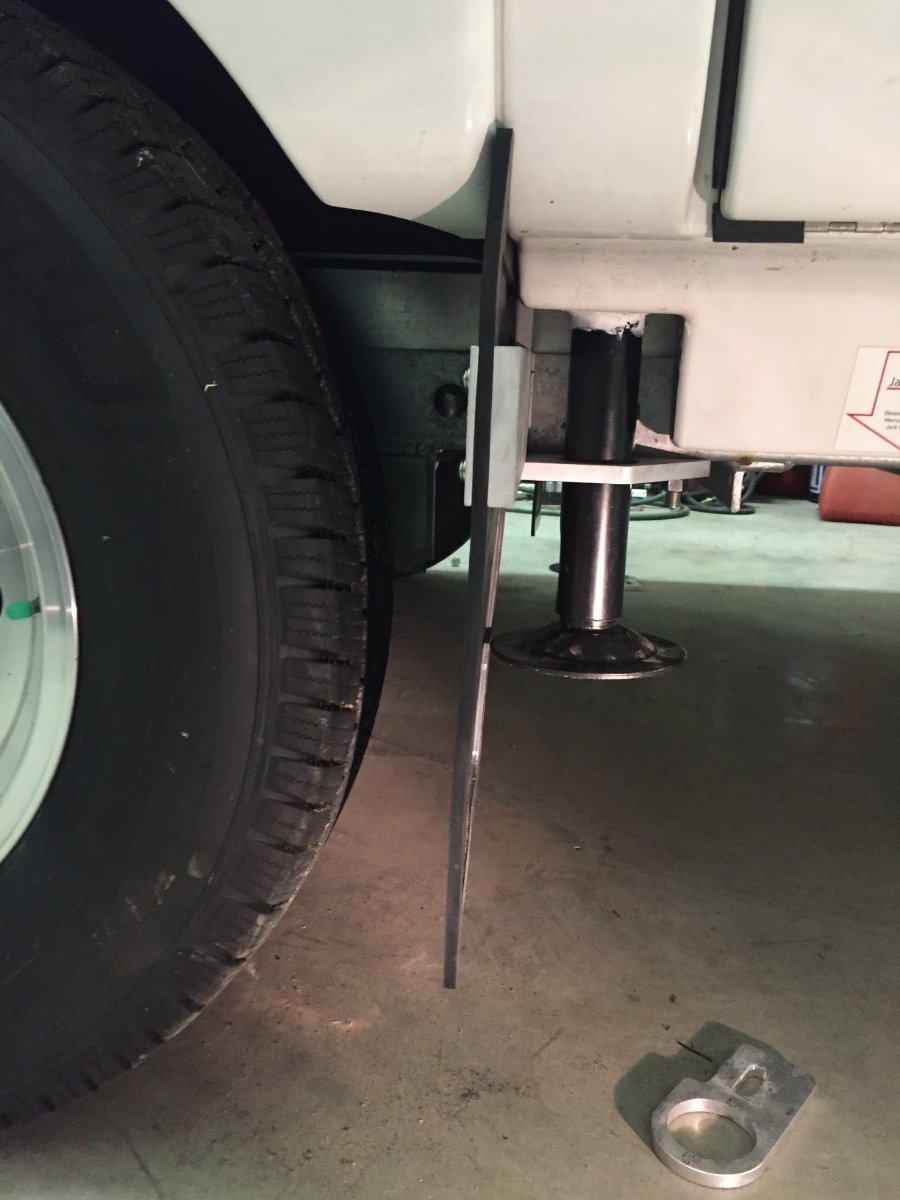
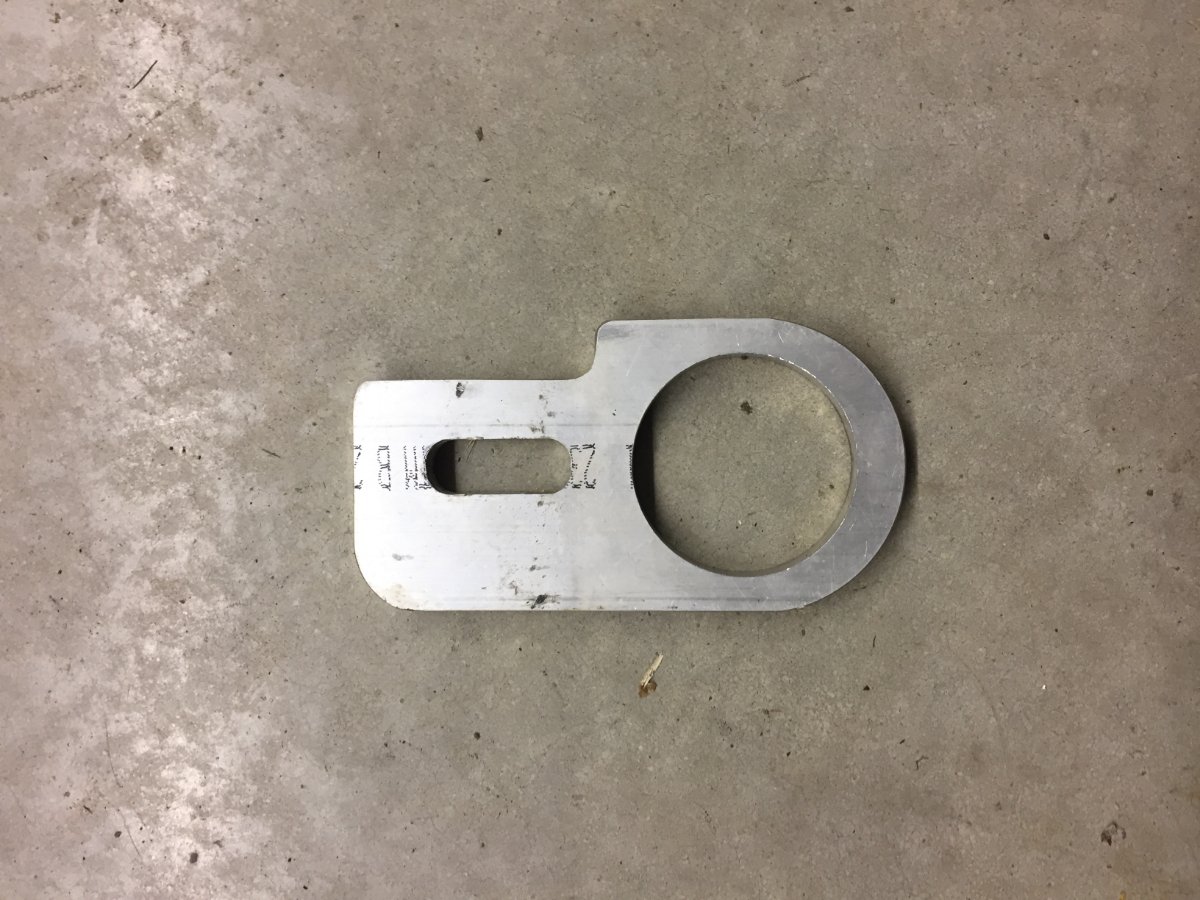
Sharing my modification to bring mudflaps closer to protect everything beyond the wheel well.
1 point
-
I recently upgraded from a 34 gallon stock fuel tank to a 60 Gallon S&B Fuel Tank. The install was into our 2021 F350 6.7L Crew Cab/Short Bed. It fits in midship as shown in the image below from the S&B Tanks Site: As part of the upgrade process, I needed to use Forscan to update the "fuel tank size" so the dash display correctly displayed distance to empty. I now have a scanner, and the Forscan software and have learned quite a bit on how to "safely" make modifications to things like the display settings (added TEMPs to gauges) and the features. Now with the upgraded tank we're ready for the long road trip planned for later in 2021. Here's how the updated range looks on the Ford app...and that's after a 50 mile drive. Any questions just ask. Craig rs=w-1280.webp
1 point
-
I want to thank Minnesota Oliver for the very detailed report. Have to say, I loved the photo of the outdoor shower spraying. 👍 As much as I love my native Minnesota, I'm always glad (in the winter) that I live in Florida. Though, I miss my family.1 point
-
I agree. Much safer to stay home, and postpone, no matter how disappointing. Black ice is the scariest. When I lived in (tropical) Southern Minnesota, it was the worst part of winter.1 point
-
Thank you - sounds good and just got off the phone with Ryan! He is great!1 point
-
The learning center at Blue Sky is great. So is their customer support. Ryan has answered all of our questions over the years. Bluesky support (760) 208-21491 point
-
These are really slick if you're a data junkie: SensorPush: https://smile.amazon.com/gp/product/B08PKWPKM21 point
-
How many velcro strips did you use and does it stay on the wall when traveling or do you take it down? One thing I did was to label each zone: basement/fridge/freezer to avoid confusion.1 point
-
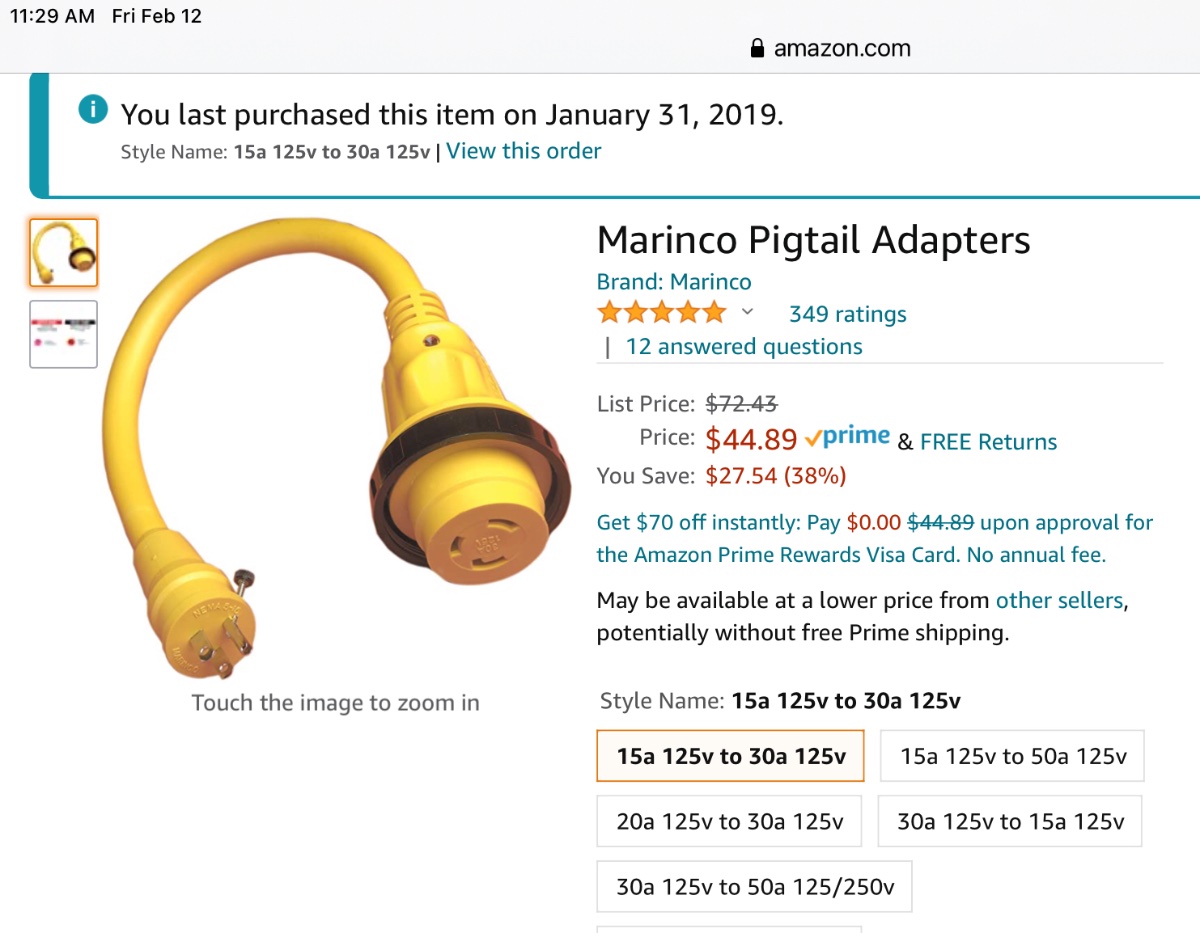
There are at least two schools of thought. Use the factory supplied 30 amp cord, and add a 30 amp to 15 amp male adapter at the power source. This means no worries about a too small cord, but you are still limited to just 15 amps. The very expensive cord is much more likely to be stolen, it will get a lot more dirty and worn since you use it all the time, and it puts a whole lot of stress on the socket it is hanging off.If the outlet is worn, it may be hard to get a good connection. I prefer to use a cheaper 15 amp cord which is smaller, lighter, less likely to vanish, and it is simple to plug in at the 15 amp source. At the trailer, use an adapter like this. Marinco 30A female to 15 amp male pigtail If you do need a 30 amp connection (running AC and other stuff in Summer), pull out the factory cord and use it without any adapters. You can buy a cheaper no name adapter, but it will likely be poor quality and not very durable. The Marinco one is perfect, a “yacht” part, and is of the highest quality. I had a no-name one which burned up, this one is about 30% heavier and much better built. John Davies Spokane WA.
1 point
-
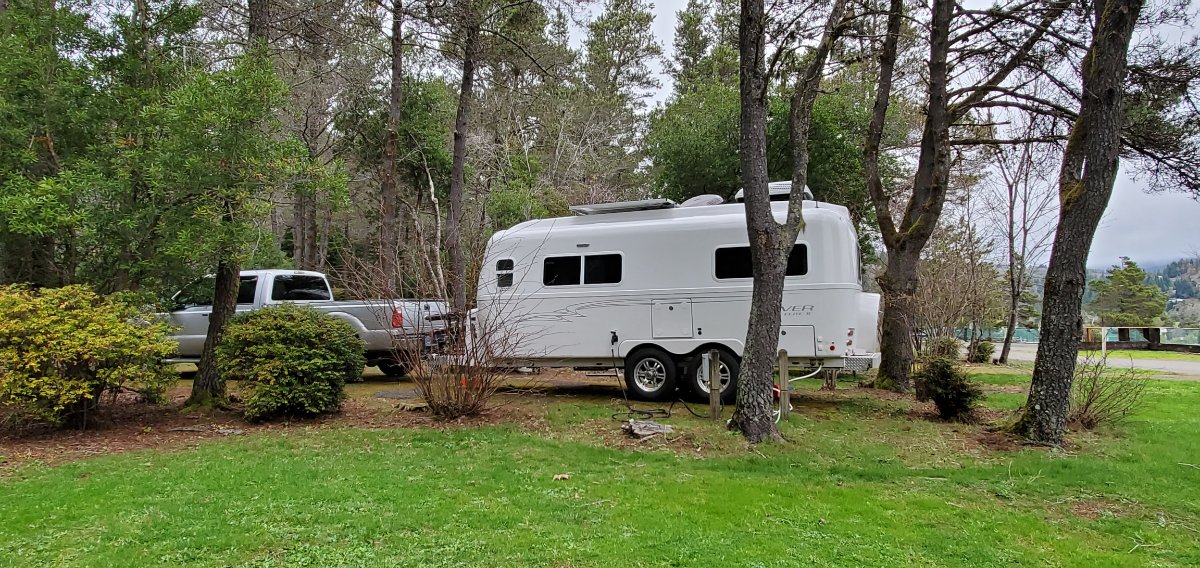
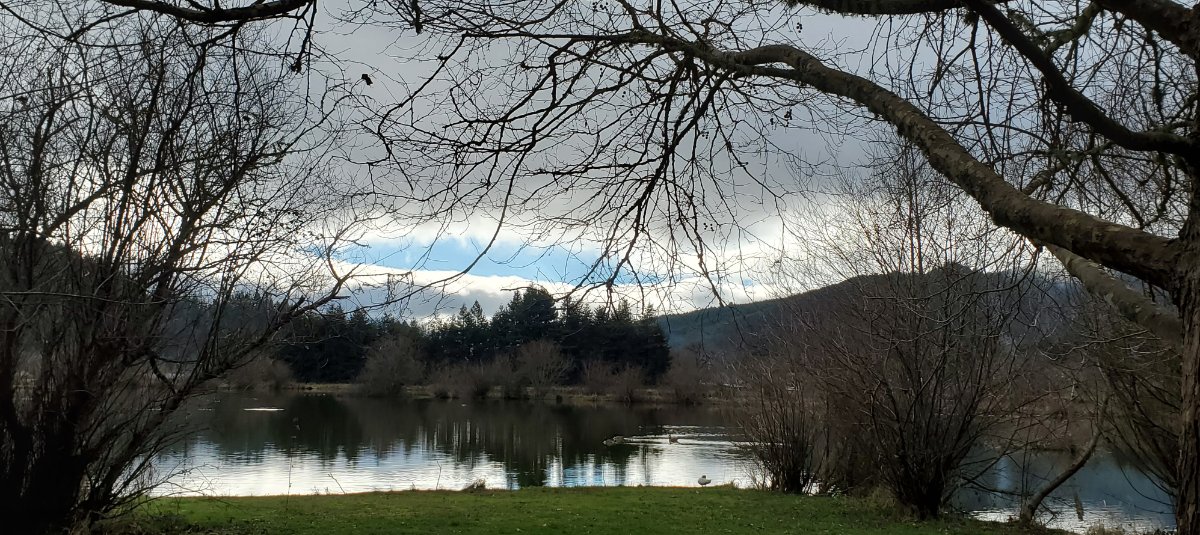
Spent three nights last weekend at a local park - Powers (Coos) County Park. It's less than an hour from home, so we often stay here while exploring the surrounding USFS. There is a large pond, for fishing and kayaking, but it was too cold for that. We did some biking and explored FS roads. Powers Park is our basecamp for the annual Tour de Fronds bike ride that we and several of our family participate in each year. It was cancelled for 2020 (Covid), but they are hoping the event will go on this year. Wishing you safe travels.
1 point
-
You cannot run a whole bunch of loads off a 15 amp circuit. You should probably read up on this, it gets discussed at least every couple of months here. Download and understand an “RV electrical load chart”. With a heavy gauge cord you can run more stuff at once without too much voltage drop and overheating of the cord and plugs. The light duty 14 AWG cords have no place in an RV. I use a 10AWG cord to run my air conditioner, it certainly can handle that kind of load which would fry a smaller one. A decent cord, and not too far to the outlet, lets you run at once all the normal inside stuff like lights, fridge, converter (charger), furnace. Maybe a box heater on Low (750 watts or less). Too many amps at one time will trip the house circuit breaker. So you learn to ration your usage, turn off certain circuit breakers like the hot water heater and microwave. Run the HWH off propane instead. Or run it on electricity when you are away and not using a lot of other stuff. A 30 amp cord and 30 amp power source allows pretty much everything to run at once. Your onboard surge suppressor will show the amp load, I do not know where it is currently mounted. You can flip on things one at a time and see how the number changes. If it gets over about 13 amps on a 15 amp circuit, you need to back off on the usage. I have both of these and they work fine. The bigger the cord wire diameter (a smaller number) and the longer it is, the more $$$. USW 12/3 cord Polar / Solar 10/3 Cord John Davies Spokane WA1 point
-
MandD, I would not worry a second about the wheel bearing grease, just take care of it next Fall. Even when grease separates (the oil seeps out of the wax-like carrier) it does not simply vanish, it pools at the low spots and will get mixed up again as the wheel rotates and the bearings warm up. No big deal. If it actually leaks out past a bad seal, contaminating your brakes, that becomes a very big deal. I do strongly suggest that you use a premium synthetic grease that hardly separates, like Redline CV2 Grease. The cost differential is minimal and it really is a much better product. Use it in the suspension too, it doesn’t make such a visual oily mess there. John Davies Spokane WA1 point
-
JD - Mister Heater claims the following fuel consumption rate for the Buddy heater - Fuel Consumption/Burn Rate (Gal/Hr) at 4000 BTU = 0.044 Gal/Hr. Obviously this is a fairly expensive way to get heat in that these one pound containers are relatively expensive AND for the most part there are very few places that recycle the steel tanks. However, they do save electricity in that they do not use the furnace blower motor or igniter. When using mine, I place it near the dinette basically pointed towards the rear of the camper - well away from any wall. Leaving the bathroom door open (as I virtually always do when camping) I simply pop open the bathroom vent. This supplies enough needed ventilation without creating those cross breezes you mention and I don't have to worry about rain either. Bill1 point
-
I have found the same. The low setting is more that adequate even for warming a tent early mornings in the great outdoors.1 point
-
Note that the little shorty extension that BHNCB mentions above is to be used so that you do not "dent" your chrome hub caps in the center of the wheel. The set that mjrendon mentions right above that gets you the socket and the extension for a good price and the quality from Harbor Freight is good enough given the number of times you will actually use these parts. Bill1 point
-
I was hoping someone would answer this; I have the same question!1 point
-
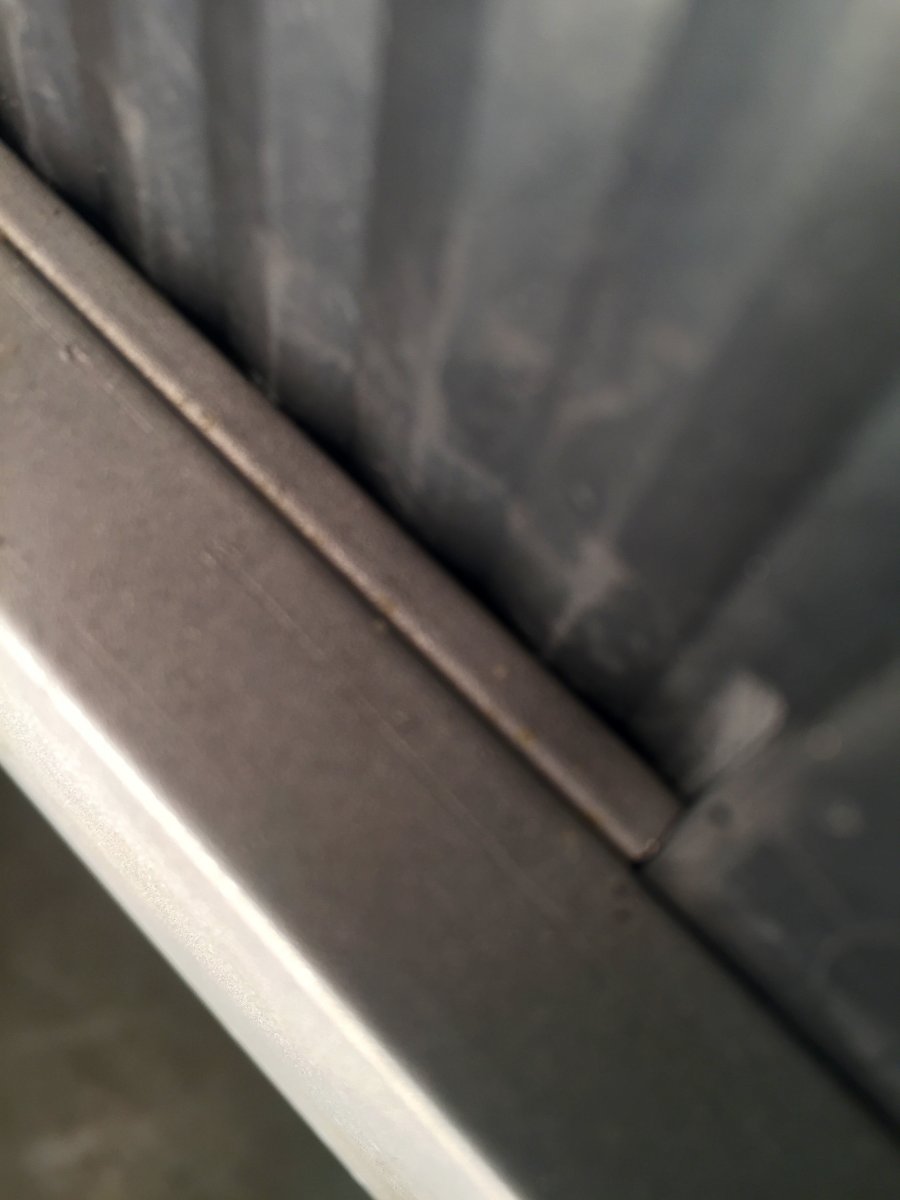
Without a doubt, the sound was coming from the chain rubbing the inside of the square tube, on the chain brackets. Andersen first sent me the updated ball assembly then then an undated triangle plate. I now have their newest versions of each and neither solved the problem Andersen said this was not uncommon to have rubbing sounds , when extensions chains were used and to try grease. Grease worked for a few hundred miles and then the sound came back. I called Andersen back and told them greasing the chains/brackets didn’t work and they suggested shimming between the bolt and the frame to cause the bracket to angle down. To put it more inline with the chain. Given the lack of space to shim and the fact the rubbing was mostly on the inside front edges of the brackets, I didn’t see how shimming would help. I then flipped the chain brackets from hanging on the outside of the frame to hanging from the inside. This improved the relationship between the chain and the bracket and reduced the rubbing significantly. The negative to flipping the brackets, is that they are a little further under the trailer and a little harder to get to but, the trade off is well worth it. When we roll into a campground, we no longer have have everyone stare at us because of the noise coming from the hitch. Andrew1 point
-
Thanks for the input Bill. I don't have a 4x4 and so don't go down crazy roads until I do. Google maps has taken me down some roads I've regretted with zero turn arounds...lol I bet most know what I mean...lol1 point
-
Assuming that you know that Oliver provides the water hose and pressure regulator for hook up to your acquaintances property. I have an extra water hose too that can be used if the bib is very far away. You could also use their water to fill your water tank and be self sufficient. You will want a water filter either way. You can get a good Camco filter at Walmart. I did buy and adapter to convert the external connector to be used with a heavy duty 12/3 extension cord. Alternatively, there are adapters that work on the power cable that Oliver will supply too. We have the Andersen levelers and also Balco X-Chocks. I love both. If you have a composting toilet, you will want either some dry peat moss or Coco Coir for the bottom of the toilet. If you will only be using the toilet for peeing, you can skip the peat or Coco Coir. Hope this helps.1 point
-
Is this a remote camping property? Or a driveway camping experience? We've done both, and lots if other experiences. Just helps to figure things out. Like, trash, power outlet, etc .1 point
-
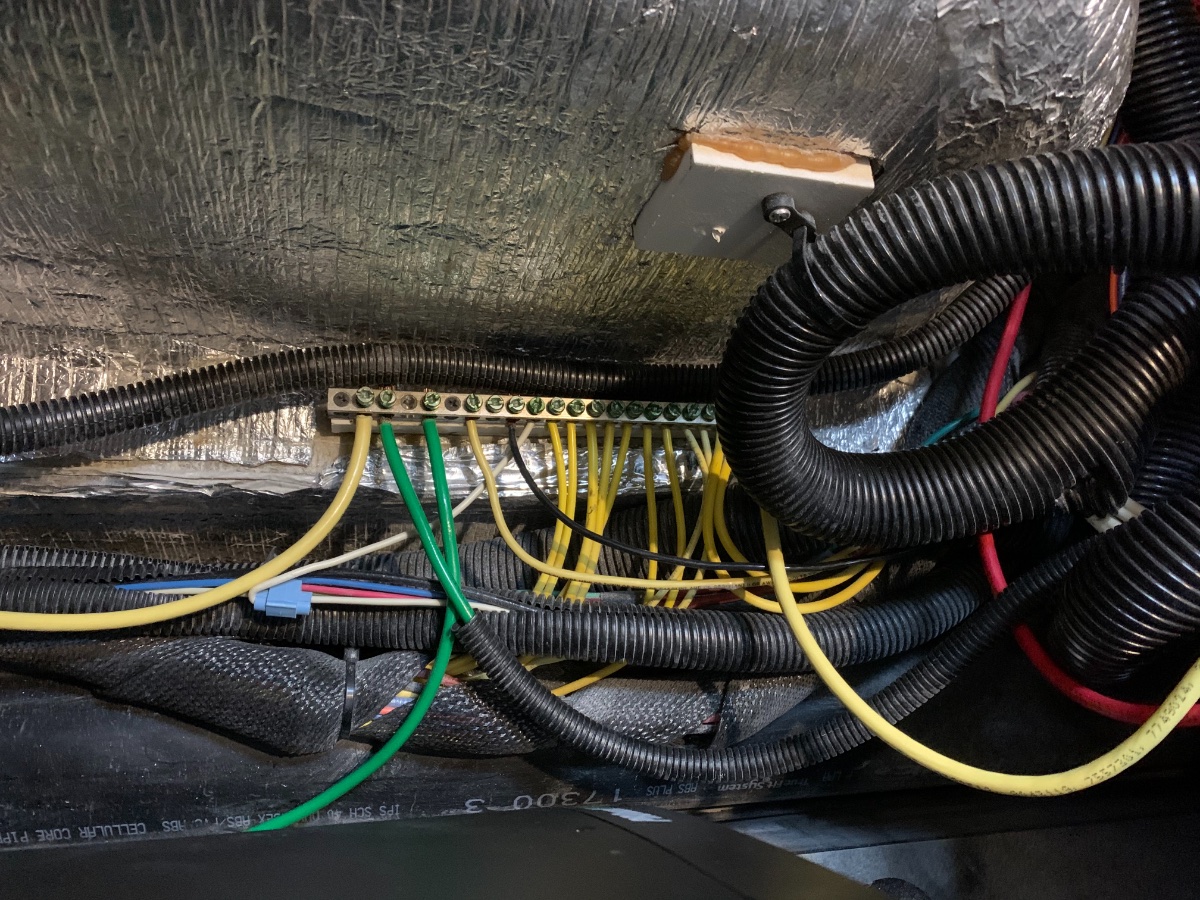
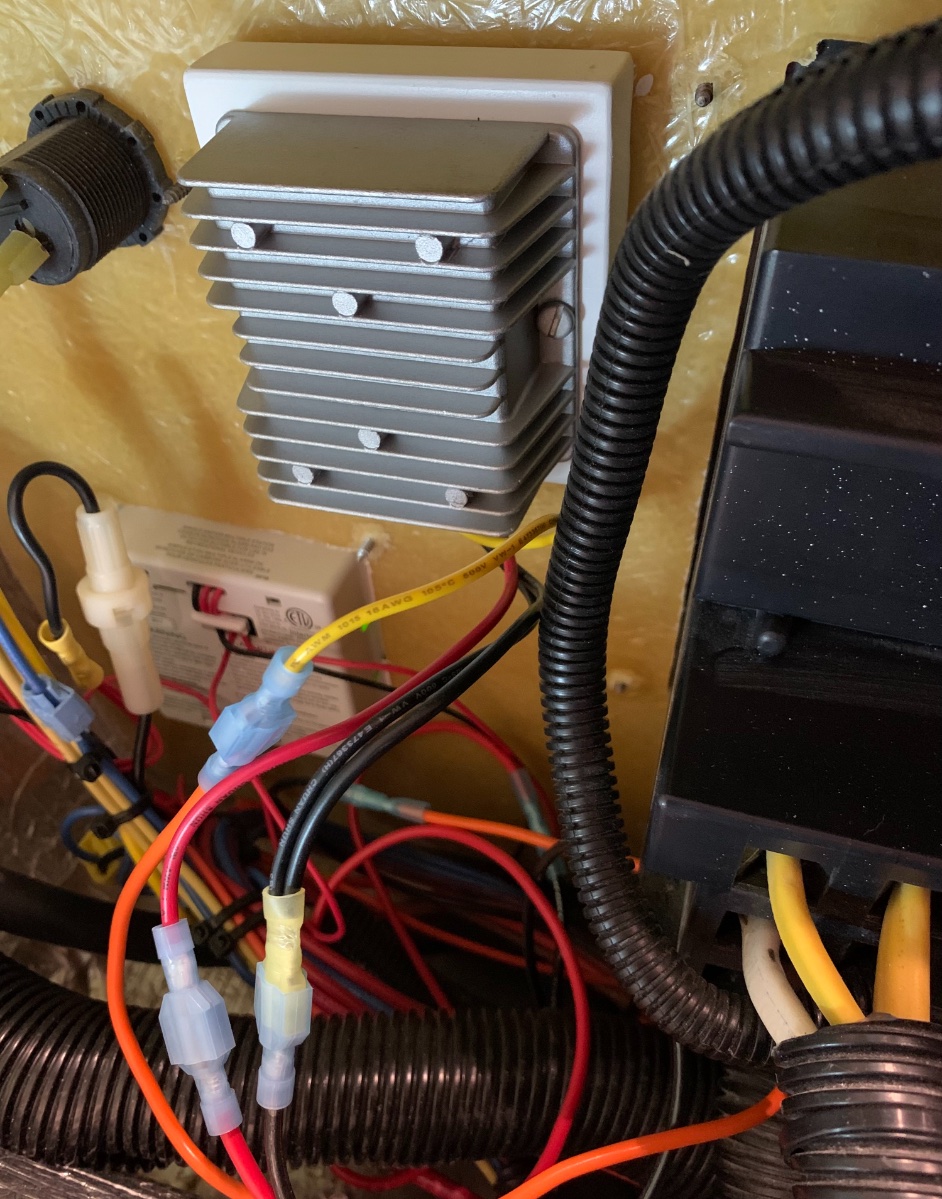
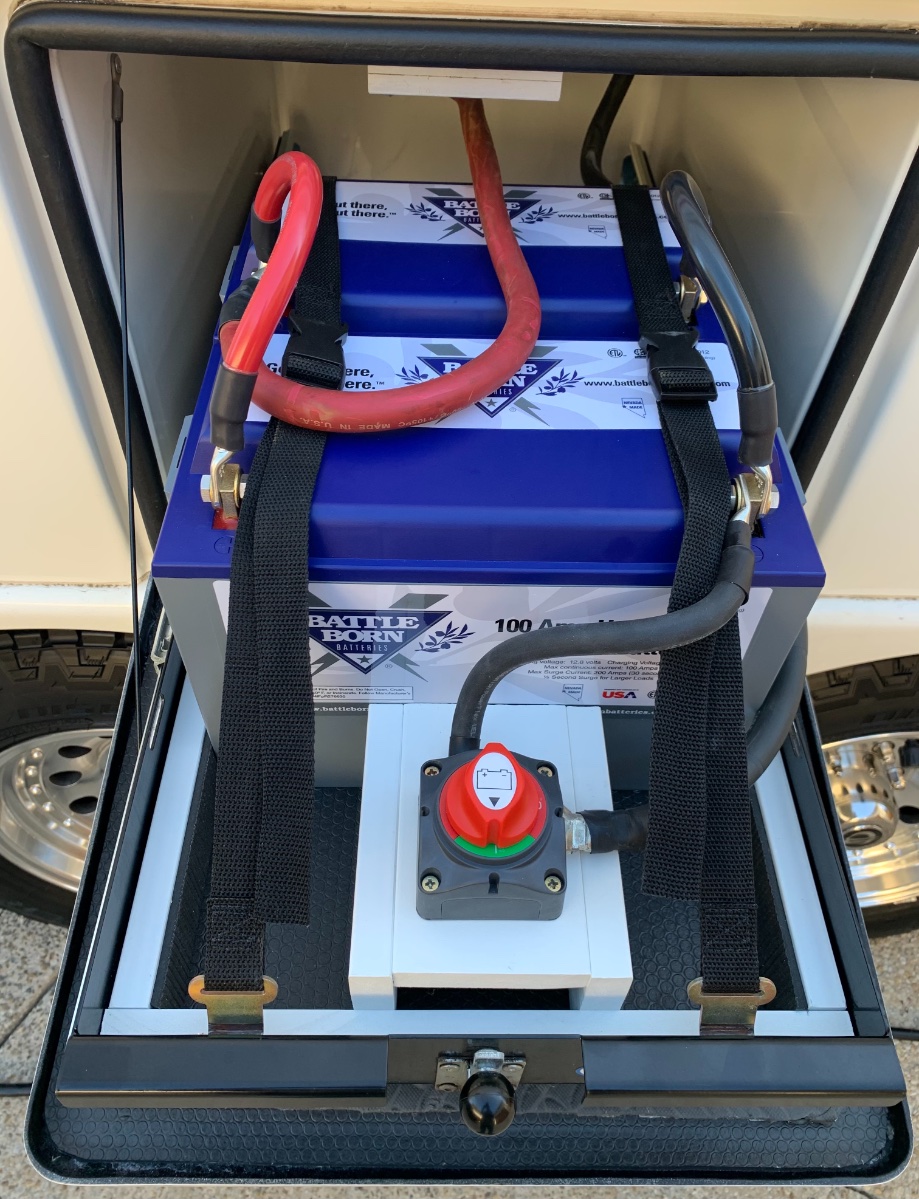
Yes, the jumper cables are 1/0, provided by Battle Born. We used the buss bar on the “under the bed” side and the terminal strip (not sure the correct name) on the “under the dinette seat” side. Under the bed next to the solar controller. Buss is behind circuit breaker. This is under the dinette seat. Added this voltage controller for the Maxxfan and bath fan.
1 point
-
Nicole, the full size (53 or 54 inches wide bed) is 6 inches wider than a lot of other small travel trailers (including many small airstreams). But, a queen is 6 inches wider, yet, at 60 inches. Adding 6 inches to the bed of an Elite would make the kitchen and small dinette super tiny and uncomfortable, or require an expensive mold redesign and change to add 6 inches to the trailer. I totally get it. We have a king at home. Used to have a queen, so the difference wasn't much. It still doesn't bother us. Especially during cold weather camping, the smaller cozy space is nice. Oliver doesn't really monitor this space, so you might want to send your suggestion in an email? Years ago, I used to say that if Oliver would make a little larger trailer, with a queen bed and a bigger fridge, I'd consider trading up. At this point, I don't think I would. We love our 13 year old trailer. It may not be "perfect " for us, but it's pretty close. Sherry1 point
-
Wowie Bill, that is an amazing list! Thanks so much, I’m going to enjoy going thorough it and checking all the places out. Even if we don’t use any of them this trip, we have lots of East/West runs in our future ( grandkids on both coasts ) so this kind of intel is invaluable... thanks again, mark1 point
-
There are a couple of other recent threads that address some of your questions and concerns. I asked BB about jumper cables, they recommended 1/0 and sent me two along with my two batteries. I also had them send a new PD4045 that had a lithium setting. I have the BlueSky and there were some settings that needed to be reprogrammed. BB sent me those settings. I installed a battery cut off switch because BB recommends disconnecting them for periods of storage longer than a month or so. I have a little over 1AH phantom draw when everything is off and that can add up over a week or so. They don’t recommend leaving the charger on continuously while in storage more than 2 or 3 weeks. I was told if it is parked in the open then the solar can keep the batteries charged long term while allowing them to “rest” each night.
1 point
-
Hopefully anyone that is planning on attending and planning on playing golf will reply here. However, unless your husband is a scratch golfer and Matt Duncan from Oliver shows up, tell him (your husband) to be careful with whom he plays 😁. Bill1 point
-
He/she who sleeps closest to the controls.... is elected 😆1 point
-
I too thought about building my own battery - that is how I found Will. As for $80 K a month - more power to him. I have way too many irons in the fire as it is - but just learning about and understanding the technology is cool - and I will say from what I've found - Battle Born is very transparent and open with customers and the industry - my kind of business. I understand why they have a ten year warranty - experience. RB1 point
-
That's right. Thanks for the eyes on. As of this morning I'm not getting any audio from HDMI through the house speakers so perhaps I have a loose connection. Would be great if it just worked out to be a loose connection but, like you say, I suspect its an issue with D/A conversion. Currently looking through my pile of AV equipment in storage to see if I can put something other than the TV inline between the Vero and the head unit to isolate the problem to the TV. Will update as I figure out. A replacement Jensen TV is ~$200 retail. Sort of considering just replacing the TV to see if that resolves.1 point

.jpg.b4fb182c2dd38b005d42f99a3317e409.jpg)


-
Recent Achievements
-


")


")
")


