Leaderboard


Popular Content
Showing content with the highest reputation on 10/25/2023 in all areas
-
We’ve done the closed valve rinse for years. There’s no reason to fill to 90%, or even 70 or 80%. When Carol tells me we’re at 50 or 60% I open the valve. Do that twice and you’re good. Mike7 points
-
I will add to Bill's post about the Orbit flow meter, mine works pretty good, but I only use it when camping solo. I always flush the black tank when we are leaving a site equipped with a sewer connection and like Mike and Carol, we use the SeeLevel to a 50-60% fill and then flush. We may do a black tank flush at the dump leaving the campground, but only if there isn’t anyone waiting. If I start rushing things because people are waiting and 👀, it often ends badly. I always thought that a 50% flush after the main flush was only beneficial in cleaning the black drain pipe. One last comment, I try to stick with the method I have been using to setup, breakdown, sterilize or anything concerning the Ollie, it helps prevent mistakes on my part. If I think there may be a better way, I make a note and then mull it over a while before putting into practice. If I break away from any of my normal routine, I usually end up making a mistake. Happy camping, Mossey5 points
-
Bleach is for sanitizing, only, and often corrosive to seals. I prefer the calgon /detergent method, personally. Calgon can be hard to find. If we can't find it, I mix borax in hot water.5 points
-
My thought in buying the Waste Master was that if it lasts 2X longer than the leading competitor at twice the price then nothing lost, right? My Amazon purchase three years ago was $133, double the cost of the former Rhino Extreme setup. Now get this, I listed the Oliver Camco (still in the box) and the Rhino Extreme (used one year) on Marketplace, and sold for $17 and $80, respectively. I should mention the Rhino also went with an orange garden hose (for black tank/sewer hose rinse) and a Valterra Twist-On waste valve. That said, in actuality my upgrade was not that expensive. No regrets, the upgrade resolved a year’s worth of frustration trying to stuff the ‘uncooperative’ Rhino into its’ cage and other cumbersome antics, and having a single connection with the very secure CAM lock is unsurpassed satisfaction. Another worthy note, there is less anxiety at the dump station that ‘all will go well’ as either dump valve is opened; think sewer hose staying in place and/or hose end jumping out of position at the sewer receptacle, thus resulting in a much dreaded unintentional release, yuk! I can now open the ‘primary’ dump valve at the OTT, then hold in place the sewer hose terminus as the ‘secondary’ valve is opened. WOW, I never imagined this task being fun as opposed to just a chore, but I’ve digressed! NOW. when curious drive-bys slowly pass while dumping, I’m never certain if they’re checking out the Oliver or the Waste Master!4 points
-
Totally agree with Mike, though there is an easier method... Usually, Chris is doing her stuff and I only ask for help on a job, when I cannot do it myself. The mechanics motto! Normally, I just go with my gut feeling, on how much water would half fill the black tank. But if you were the more cautious type, you could time filling a one-gallon jug of water, given you're using an unknown water source (PSI and GPM). Then determine your black tank capacity, divide that number by 2 for 50% full, and run the hose for that amount of time. If you go less or longer NBD since you are only targeting 50%. I do this 2-3 times, until the drain water looks clear and clean. No way you want to come anywhere near full. The cr@p and TP is in the bottom 10-20% of the tank, given you empty regularly. Best wishes and keep the brown stuff downstream! 🤣4 points
-
Ive just put the Ollie 2.0 into storage for a few weeks while ill be gone for work and having spent most nights in it over the last few weeks i now have a few observations of the differences to share. The new folding outdoor table is super handy, I can pull the truck up next to the tongue and use my portable grill on the tailgate coming from the forward quick connect and having that little table is a handy addition for outdoor cooking. I do appreciate the extra fridge space that the new fridges have however being of the younger crowd i am a sucker for pizza rolls and the freezer section is so tiny you really cant put much in it. i never did get around to testing fridge power draw strictly off batteries but supposedly its much more efficient on 12v than the 3 ways were so hopefully that makes up for what i consider a loss of no longer having the option of running it on propane. While the new truma furnace and ducting changes definitely do a better job of quickly reaching set temp i absolutely think the room temperature sensor should be relocated to over the bed or at least somewhere more central rather than the far corner of the ceiling next to the bathroom wall. on the first night i ran it with temps in the low 50's at night i had set it at 70 and woke up roasting with my weather station i had set up stuck to the aft wall reading about 85 inside temp and checking my propane tank levels showed i had ripped through about 30% of a tank in only one night. setting the temp at 62 the next night and pointing a fan in the direction of the sensor kept the bed area at about 70 through the night and a much more reasonable 10% propane usage. Honestly i think they wouldve been better off keeping the old furnace if you dont opt for the truma package and simply reworking the ducting which would eliminate the need for a separate control panel for each A/C and furnace as now you are forced to get the truma package if you want it on the same panel because i have not been able to find anything that would let me control both the dometic penguin and the truma furnace on one unit. I specifically did not want the truma AC becuase i like having the easy start and being able to run it on the small honda 2200 or the slightly sketchy 80 year old wiring of my grandparents garage when im back home visiting the folks and as little as i use the ac anyways i dont really mind the noise all that much, maybe ill swap it out for a houghton at some point. i would have liked the truma water heater but they will no longer install that unless you get the whole truma package with the AC.4 points
-
Lots and lots of RVers do what you did - close the valve to put some water in the tank with the rinser. I do. Many have reported similar, and worse (much worse), results. Glad you didn't create a rooftop fountain or toilet gusher as others have.4 points
-
Same roughly ten year battery life. (That's not what you meant, but just added for clarity.) Think of it as a bigger tank: You can go 640 Amps on a fill-up vs 390 Amps. The 640 A/Hr batteries are also automatically self-heating, where the others have a heating mat under the batteries that you turn on.3 points
-
If we got ourselves into that crazy situation, I'd "probably " attach our chains to the tow,strap clip. Every situation is different. A number if years ago, we got ourselves into a sticky wicket in New Hampshire. We attached , disengagaged, and reattached several times to get a better angle, with our 4x4 dodge. I'd try that first, vs tow strap, or winch cable, or combo, imo. If you do decide on a tow strap route, please make sure the tow strap is fairly new, and rated for the job. We've broken a few, over the years, that were older. The snap back could be lethal. Got a big hole in the tailgate of our dodge ram from inadequate/aged strap, trying to haul a tree out of the road. Had anyone been in the trajectory, it could have been deadly. Everyone was in the truck. Out of the way. We are very careful about that, tow strap or winch cable. Please do the same.3 points
-
I like the idea of spot facing the copper bars where needed. I also like the flanged nuts. If you could spot face a large enough area to allow for the flanged nuts on the battery studs that wouldn't be a bad idea. Like your idea and I too would run a test period to find out where you stand now. Knowing your connections are improved, any other issues could be traced to their true source. Electrical troubleshooting can be challenging. Here's an example. We had a relatively new front load washing machine, you know, the kind that have a hundred bells and whistles. The kind the average Joe can't work on. Just out of warranty I got an error code on the screen that indicated a failed main control board. You're talking $300 plus for the part. I was doing a little research and stumbled onto a discussion about failures due to poor connections on the connector plugs on the boards. The solution was to pull all the connections, clean inside the tiny spring sockets, clean all the wire pins on the board side, use a micro screwdriver to bend the inside of the plug socket contacts to increase their "squeeze" on the wire pins when plugged in, and finally smear a thin layer of dielectric grease on the contact surfaces. Sounds like a lot but actually took 20-30 minutes to do to all the plugs. Reassembled and tested. All was well and no more failures for the 5 years following the "repair". The new owners are still using the same washer and dryer. Now when I'm trouble shooting electrical, especially the new stuff with built in diagnostics, I always start by checking all connections and improving as described above to eliminate false error codes.3 points
-
This post is offered in the hope it will help someone else avoid my dumb mistake. It has been my practice to flush the black tank after dumping using the black tank flush inlet port below the bathroom window. I carry a separate black-colored hose just for this purpose. In the past, I have always left the black tank drain valve open when flushing. At the conclusion of our most recent camping trip, after a first flush with the drain valve open, it occurred to me that I might get a more complete flush if I mostly filled the black tank with clean water through the flush port first (which required that I close the black tank drain valve) then let gravity force the contents of the mostly full tank out the drain. To avoid overflowing the black tank, I carefully watched the Seelevel monitor, then ran outside to turn off the hose bib when the Seelevel black tank monitor hit 90%. I then opened the black tank drain valve to drain the black tank contents. Out of an abundance of caution, I decided to verify that this process had caused no overflow from the black tank. I removed the access cover from the front dinette seat so I could see the aft part of the black tank. Good thing I checked! When I saw a few tablespoons of water in the bottom of the trailer just aft of the black tank, I realized that our Seelevel monitor is not 100% accurate, and that even though I turned off the hose bib when it read 90%, the black tank was actually full of water! Fortunately, the overflow was limited to a few tablespoons, which were quickly mopped up. When I got home, I sprayed that area, twice, with Lysol disinfectant spray, in case that bit of water leakage was contaminated. The moral of the story: when flushing the black tank, always leave the drain valve open. Fortunately, my momentary lapse of judgment (it seemed like a good idea at the time...) occurred after a complete drain, then a first flush with the drain valve open. So, the minimal overflow should have been mostly clean water, which was easily dealt with. I expect it would never occur to most people to leave the black tank drain valve closed to mostly fill the black tank when flushing, just to get a more complete cleaning. But if any of you folks, like me, ever think of trying that method: don't! It's not worth the risk of an overflow.2 points
-
UPDATE: Three cheers to Oliver’s Service Department! My propane leak was a loose connection at the propane stove. They detected the leak, there was no debris or issues with flare, they simply had to tighten the connection. (That Riverside RV Service Center in Bismarck should be ashamed. I went all summer without using my propane because they didn’t detect the leak that I suggested was coming from the stove.) OTT also fixed damage I had, resulting from the handling at Riverside Service Center. And OTT also managed to squeeze me into their schedule for an annual maintenance. So hats off to Jason and the team!2 points
-
Welcome to the family! I’m answering from the road, on my phone, so pardon my brevity: I own the 2022 Elite II, twin bed, upgraded mattress, solar (3 lithium batteries), composting toilet, convection microwave, the convenience power connection up front, and a front basket. I tow with a 2500 HD truck and a 2-5/16” hitch ball, so I didn’t need the Anderson hitch. I chose 20# propane tanks, after I learned what they weigh when full. I love everything about my Oliver; no regrets on any of my choices. If there’s an option for backup camera size, I’d recommend larger. TOYS & OTHER EQUIPMENT: I am shopping generators. During my first OTT plant tour yesterday, Josh mentioned a newer model Honda 3200i that is smaller (fits in basket) and DUEL FUEL. It sounds pretty decent. I haven’t researched it yet. I bought the “Sand Mat” and love how it lets dirt and sand pass through. Look for sales, or used on REI. It’s not light weight, but comes with a storage bag. I have several electric adapters: 50 to 30, 15 to 30, and I’ve needed both for various purposes. Torque Wrench is a must (mine is hand powered, easy to use and lives under my back seat in the truck.) You might need to buy the right size fitting. This summer I’ve added: COOKING: a Blackstone 17” propane griddle (great thread on this forum will give you lots of options and ideas); a third 20# propane tank in the back of my truck; a Duxtop electric Induction cooktop (has two model numbers on the box! BT-200DZ and 9610LS). COMFORT: a DREO space heater model DR-HSH004-G that can run at eco setting using the battery (I never leave it on, as I didn’t need it running all night, including during 20+ degree temps, as I had winterized my trailer.) MAINTENANCE: a grease gun with extra fittings (see Jason’s excellent service video on Oliver Travel Trailer YouTube channel plus forum threads on greasing Zerks); a small mirror on a handle, to see some of the zerks, and other equipment in small spaces; a Combustible Gas Detector. EDIT: I almost forgot to mention, I’m from SW Florida and I cannot store my trailer at home. I opted not to buy the cover, and I rent a covered space in a secure storage facility. It’s north and inland from where I live, and it was worth the expense, as my Oliver didn’t suffer from Hurricane Ian last year, and was protected from UV. I’ve been on the road since early July (and I’m not home yet). I’ve only needed to empty my compost solids twice.2 points
-
Why not use a "garden" hose? Even a 3/4 inch one would be a bunch easier to handle versus ANY slinky I know of. Bill2 points
-
I stand outside beside the trailer while filling the black tank through the flush valve. You can hear the water spraying inside the black tank. When I hear the water level in the black tank rise above the flush valve I leave the water running and just pull the black tank dump valve. I do this 2,3,4 times or as many times as it takes until I see clear water and no floaters in a clear fitting at the terminal end of the sewer hose. Only then do I turn off and disconnect the flush hose. Never had a problem doing it this way. Sometimes I delay pulling the dump valve a little just to make my wife hollar at me “Ok OK OK DUMP DUMP DUMP!!”2 points
-
...getting a bit "stinky-slinky envy" going on here 🤪2 points
-
That is how we do it. Then we add a little Calgon and Pine-Sol to the toilet and flush a couple of times to let that work on the tank using the bumpy road travel to loosen anything and everything. I have found the roads around Lafayette Louisiana very good for this process. 🤣2 points
-
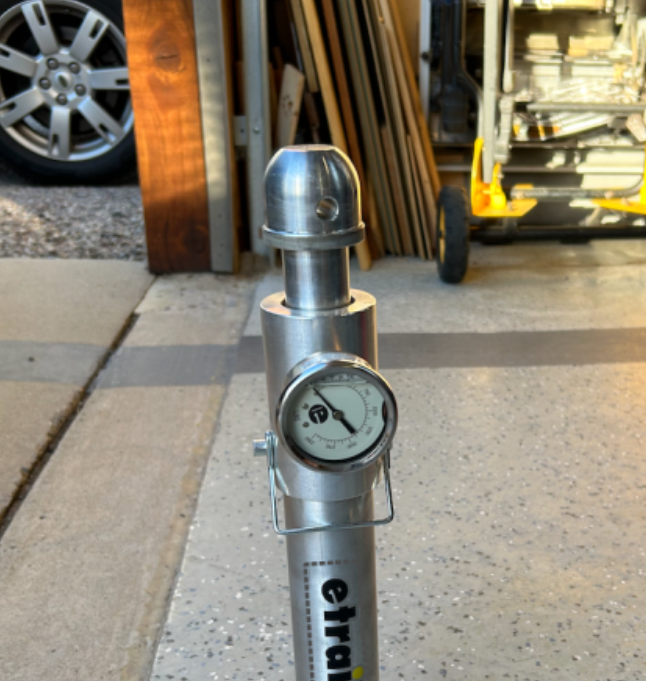
This past Summer while visiting at Max Burner's lovely home, Art asked what I thought my tongue weight was. I guessed 600+ pounds. He whipped out his tongue gauge. I was pleasantly surprised that our Ollie's tongue weight was just 540 pounds. Really good info to know. Excellent tool to bring to any Ollie gathering! GJ
 2 points
 -
BTW, I'm just using it for gray water since we have the Nature's Head2 points
-
We use West Marine Dri-Dek cut to fit floor. It is low and easy to lift to spray out underneath when needed. Has saved my bald head.2 points
-
I am that not so handy owner lol2 points
-
I agree that all pex fittings should be brass from the factory, but shark-bite fittings are 10x the cost. They don't work any better than the crimp-on's, they are just easier for the not-so-handy owners without every tool known to man and the know how to use them.2 points
-
Your initial reason for closing the black tank drain valve is a good one. Your down fall was relying on the electronic gauges. My process is to stand on the toilet tank flush valve and to observe the water level in the black tank while flushing. The advantage of my 2018 OE2 is that it has a manual water shut off valve just a few feet from the toilet (Under the front dinette seat). This allows me to slow down the fill rate as the level in the black tank approaches full. Then when nearly full, I turn off the water flow at our valve. Sadly, OTT decided to not install said shut off valve on newer models. GJ2 points
-
The problem you encountered is one of the reasons that some people use one of THESE versus trying to use the SeeLevel system. One of these flow monitors also reduces the need for running back and forth from outside to inside and back again. Glad the "overflow" wasn't too bad for you. Bill2 points
-
Yep, in good keeping; Oliver owners ‘spare no expense’!2 points
-
Let’s not hear complaints, after all… it’s Lippert, and it’s on “sale”. 😳2 points
-
I haven't purchased any of these waste hoses in awhile - but - they sure seem to be "proud" of this one. Bill2 points
-
In addition to using the Rhino Extreme hose, I never lay it across the ground, where a gravel rock or some other sharp object could puncture the stinky slinky. instead, I cradle it in one of those gradually descending support structures, such as the Camco Sidewinder 20-Ft Camper/RV Sewer Hose Support which can also be useful for routing around obstacles.2 points
-
Since i only have grey water i opted for just an 8ft garden hose its much slower but easier to handle and has worked well for me so far. except when 2 other trailers decided to pull up behind me at the dump station the other day right as i started. Some dirty looks since it was taking so long.2 points
-
Ours are 3 yo. My problem is I have accidently stepped on them while dumping. Some slight oval-ing, but no cracks or leaks. I think I will replace before next outing...2 points
-
We have a Diamondback cover on our truck. It's secure and you can strap things on top of it (you can walk around up there). We added racks to carry our bikes or whatever (tank tote, firewood, etc.).
2 points
-
The tools needed to install SharkBite fittings and PEX pipe are a PEX pipe cutter and a SharkBite fitting. The tools needed to remove SharkBite fittings are Disconnect Clips or Disconnect Tongs, which are SharkBite products and are pipe size dependent. SharkBite makes 3 different types of fittings and those branded EvoPEX are not reusable. You just cut the pipe and throw the fitting away. SharkBite’s warranty specifically states that it applies to SharkBite pipe used with their fittings. Mossey2 points
-
We've owned two different Oliver's over the past 12 years. Collectively, we have traveled over 150K miles. I have had one fitting to break and it did cause a mess. I agree that brass fittings are better than plastic and they should be using them. I always carry several feet of tubing, a few different brass pex fittings, and the tools to replace them in case that ever happens again.2 points
-
Typical installation requires altering the OTT’s discharge pipe by shearing off the bayonet retention posts and gluing on a supplied female CAM lock fitting to connect the WM, which is what I did. However, bayonet fitting converters are available and perhaps can alternatively be used to maintain subsequent use of any bayonet-type applications. In my instance, there is just enough room to keep the sewer hose connected, but is generally disconnected and capped, as explained in another comment. As measured, that distance is 4.5” from the closest point of the female CAM lock fitting to the inside rear bumper surface. That distance, at minimum, would be your target with use of said converter in an install.
1 point
-
A "no cook" thing I often do. I buy little bags of avocados at Costco, lidl, or aldi. Homemade guacamole, or smashed avocado dip. Cut the avocado around the meridian. Slice halves with a little knife six times each way. Scoop onto a bowl with a spoon. (Best stuff is closest to the skin.) I add finely chopped onion and jalape, a bit of lemon juice, a splash of hot sauce. Mash with a fork My healthy (😍) late night snack, with gluten free seedel chips.
1 point
-
@Rolind, victron customer service is really good. I'd call them.1 point
-
Too long ago now for me to remember lol, sorry!1 point
-
Try this earlier thread on the same topic: HDPE "Marine Board" is good for some things, PVC "Foam Board" is good for other things...1 point
-
I think a few have. Imo, you'd be better off to get the solar option, and upgrade batteries if you found the need.1 point
-
You still need to do a LOT of research before you start checking options in the order form. This is a good start: https://olivertraveltrailers.com/forums/topic/6629-how-to-find-happiness-with-lifepo4-lithium-ion-batteries-solacity-article/ I **** STRONGLY ***** recommend that you delay your order and rent a small travel trailer for a few weeks. You will learn more in a single day than you will thru months of videos. You may even decide that you do not like the whole concept, or that you are uncomfortable with towing. You might prefer a Class B or even a truck camper, neither of which will work with your new truck. The basic rule is to buy the camper first, then the truck that works best for it! Doing it the other way causes lots of heartache. And it is so very common. There have been several excited Oliver newbies that discovered that they just could not adapt to the lifestyle and the many technical challenges, and they sold their trailers shortly afterwards. This is very preventable. Take it very slowly and be sure you know enough to make educated decisions. John Davies Spokane WA1 point
-
Indeed - putting your Ollie inside a building when you're not using it is the best storage solution. However, I've been storing my Oliver for almost the past eight years at a storage yard that is totally open (except for the fences and cameras, etc.). For each of those years it has been stored under a CalMark cover. I make sure that it is clean before storage and that the cover is always snugged down with the rear bumper and the solar panels padded so as to not tear the cover. There have been no signs of abrasion due to this cover. It should be noted though that the cover is not waterproof . Therefore, when taking the Ollie out of storage it still needs a bath before hitting the open road. But, this bath is much easier than cleaning the grime off of it that would have accumulated without the cover. Bill p.s. Once a year I also give the cover a bath.1 point
-
Welcome Dennis & Melissa! I’m another advocate for solar, it’s so much nicer than listening to a generator one or two times per day. Your camping neighbors will appreciate it as well. Sun is the enemy of every RV, and UV rays degrade sealant and components, and is hard on gel coat. If possible, find a covered storage site to protect your investment.1 point
-
"get a decent 12v meter" - yep. on the list "tell your sales rep that you want the second electrical connection up front" - OMG. Great idea. Never even knew that was a thing.1 point
-
Good choice on the truck. I towed with two different Ram 1500s, both with the 5.7 V8. It would be helpful if you told us what kind of camping/traveling you think you’ll be doing, if you know. We had never camped when we ordered our trailer. I didn’t think we’d do much boondocking but went ahead and ordered solar. Lithium wasn’t an option then. As it turns out many National Parks have campgrounds with no hookups. Many other desirable camping locations are also no hookups. We’ve utilized Harvest Host locations and they are mostly no hookups. So, I would recommend thinking about where you will go and how you’ll camp before going without solar. Mike1 point
-
My ommission. Anderson hitch for sure. And some sort of hitch lock. Going to pass on lithium/solar for now We will look into the sound levels of the AC TYVM1 point
-
I would like to see an Oliver video of wheel bearing replacement - the complete process from start to finish. I know there is a Dexter video to watch and it's good but I don't think it's complete. I'm also aware that there's a very helpful thread about this that's about 5 or 6 pages long but I still like to see things because I'm a visual learner. Would also like to learn more about optimal Xantrex inverter settings when not connected to shore power. Specifically, how to adjust the settings to charge (or stop charging) the batteries but also, at the same time, run an AC off of a generator as an example. There are some good threads about this already but a little more depth and detail about how flexible the Xantrex is might be helpful. Lastly, it would be great if Oliver focused on a few (like 3 to 5) of the most common yearly maintenance tasks that owners can do themselves (low skill level items) and showed videos of these...or one video that captures these 3 to 5 tasks. Because Oliver has done these tasks so many times, maybe they can show us some time saving tricks to make these tasks easier or more effective. I find the Educational Shorts videos helpful. They don't need to be long but they should be very focused. As a reference to the above, when I've done my winterizing and de-winterizing I bring my laptop outside and watch Jason go through the steps. I can pause the video so that I can "catch up" to what's he's done. Makes the task at hand super easy. Jason speaks in a very clear and deliberate way and, maybe most importantly, he makes no assumptions about people's skill sets. I hope he continues to do more videos.1 point
-
A little along the lines of my previous suggestion, perhaps Jason could talk a little bit about custom items being installed after manufacturing, in the service department prior to delivery. I know they used to do customer requests but have moved away from that as far as building the camper. Is it possible to work with the service department after the order process to arrange for specific items to be installed, such as plugs, switches, lights, brackets for medical devises, or galley/bathroom/closet storage items? Other service installed options could be a frame mounted mud flap system similar in principal to those posted in threads by current owners, and paint protection film on the front of their camper for stone protection. Would the service department be able to do this type of work prior to delivery? For folks that don't have a shop or the tools and skills, it would be very attractive to have these type of mods/additions done in a seamless process before delivery. The process of finding a shop and scheduling work after taking delivery can be quite daunting and costly, plus the long lead times to get into another service facility.1 point
-
Nicky: Did you reuse the valves and the PEX tubing on either side of the valves? When you removed the PVC elbows, was the PEX tubing the correct length when installing the brass sharkbit fittings?1 point
-
I'd agree, we don't get caught up in replacing "everything." But, if others want to, and feel more comfortable, I certanly won't criticize, either. Everyone has their personal comfort zone.. The brass vs plastic is a no big deal for me, either, as plastic fittings are often used in new construction. Just not within 18" of hot water... We've had exactly one fitting fail over 15 seasons, so I personally have no desire to invest the time and considerable money, til necessary. We don't even carry spares, as they're readily available in pretty much every hardware store, and we already know how to use them. But, then, we may apparently live on the edge.1 point
-
Thanks for the post. After reading some threads about leaks emerging at fittings after some travel time on some trailers, I bought some tubing and a mix of fittings and a few tools (crimper for crimp style fittings and a cutter made for cutting the tubing) and have that strapped and taped down under the curbside bed. It indeed takes little space and is not heavy and it was fairly inexpensive even going with decent quality tools and fittings.1 point


.thumb.JPG.dd838cdb3df463dab6a16861fa23a319.JPG)
-
Recent Achievements
-


")


")


