Leaderboard


Popular Content
Showing content with the highest reputation on 04/04/2025 in all areas
-
One more… Molly Tuttle covering Johnny Hartford’s Gentle on my Mind.4 points
-
Always liked this version of "The Rain Song" by Jimmy Page and Robert Plant:3 points
-
These days, unless you just always camp using hookups, I can't think of a single reason why you would want to put AGM's in your RV.3 points
-
Hull #527 ready for carrying bikes! After the factory tour, I wanted a bike rack receiver hitch but NOT the one they sold. At the time there was not a safe option for an 2” receiver. After buying a used LE II, I decided to look for a good welder. I am happier than ever with the way this turned out and at a fraction of the price.
 2 points
 -
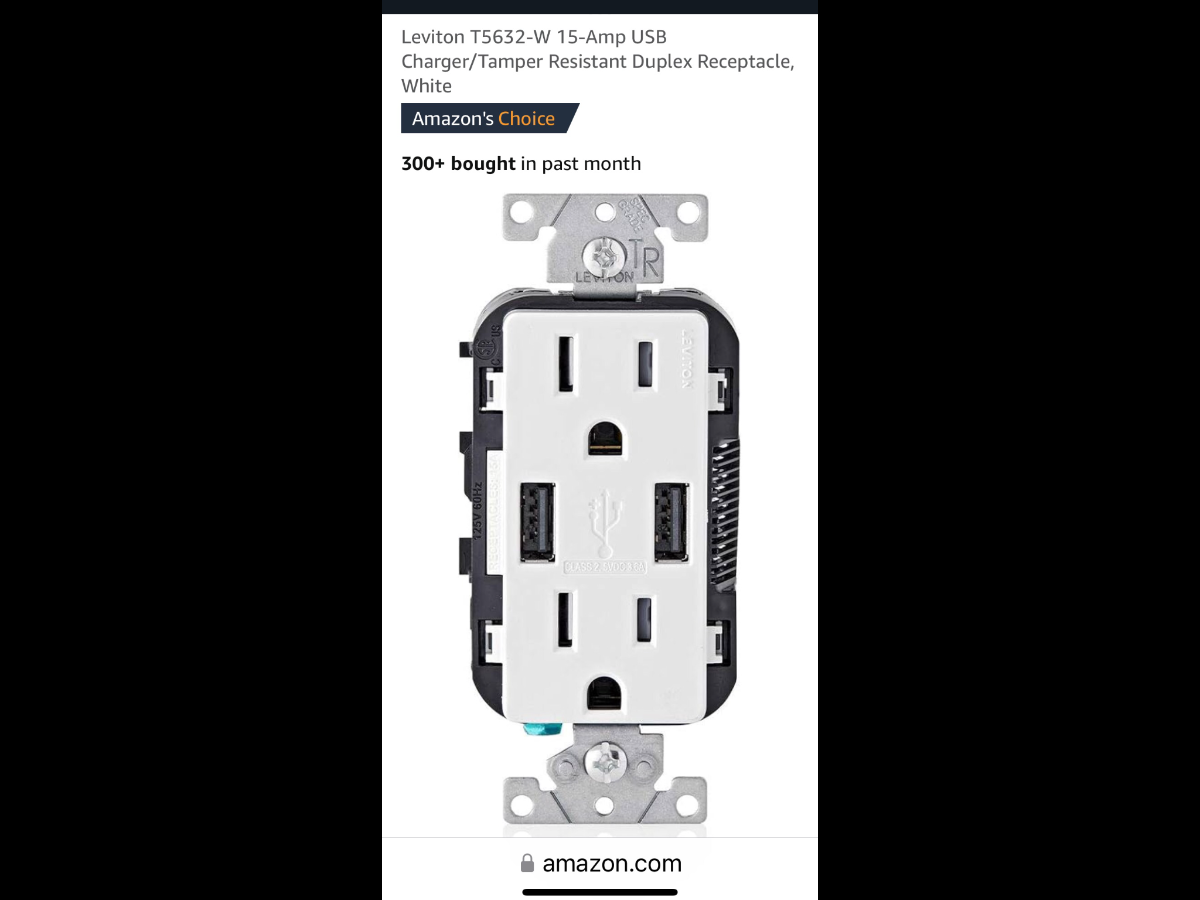
With my auxiliary outlet installs, I choose duplex receptacles with USB charging ports, as well. For example:
2 points
-
Speaking of Mark Knopfler, always like to listen to him with the late Chet Atkins:2 points
-
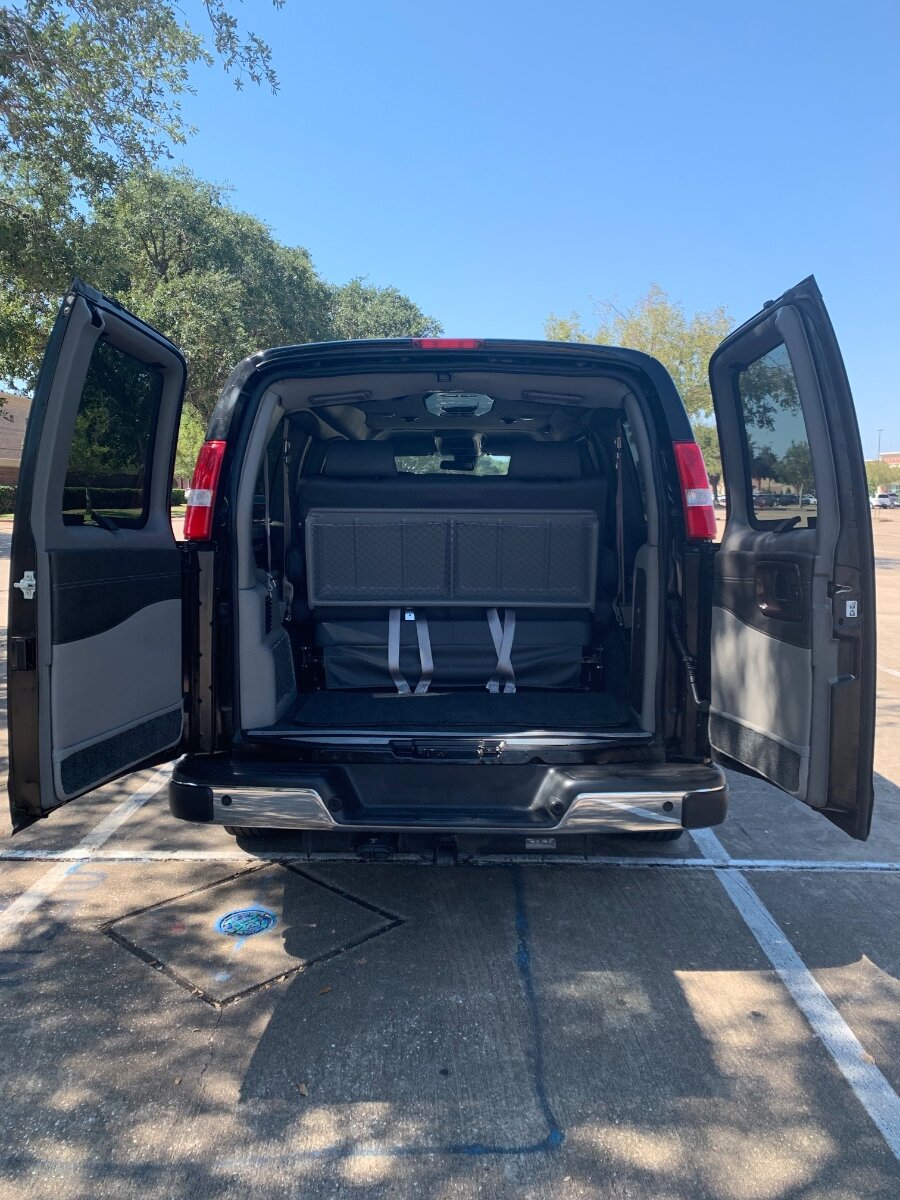
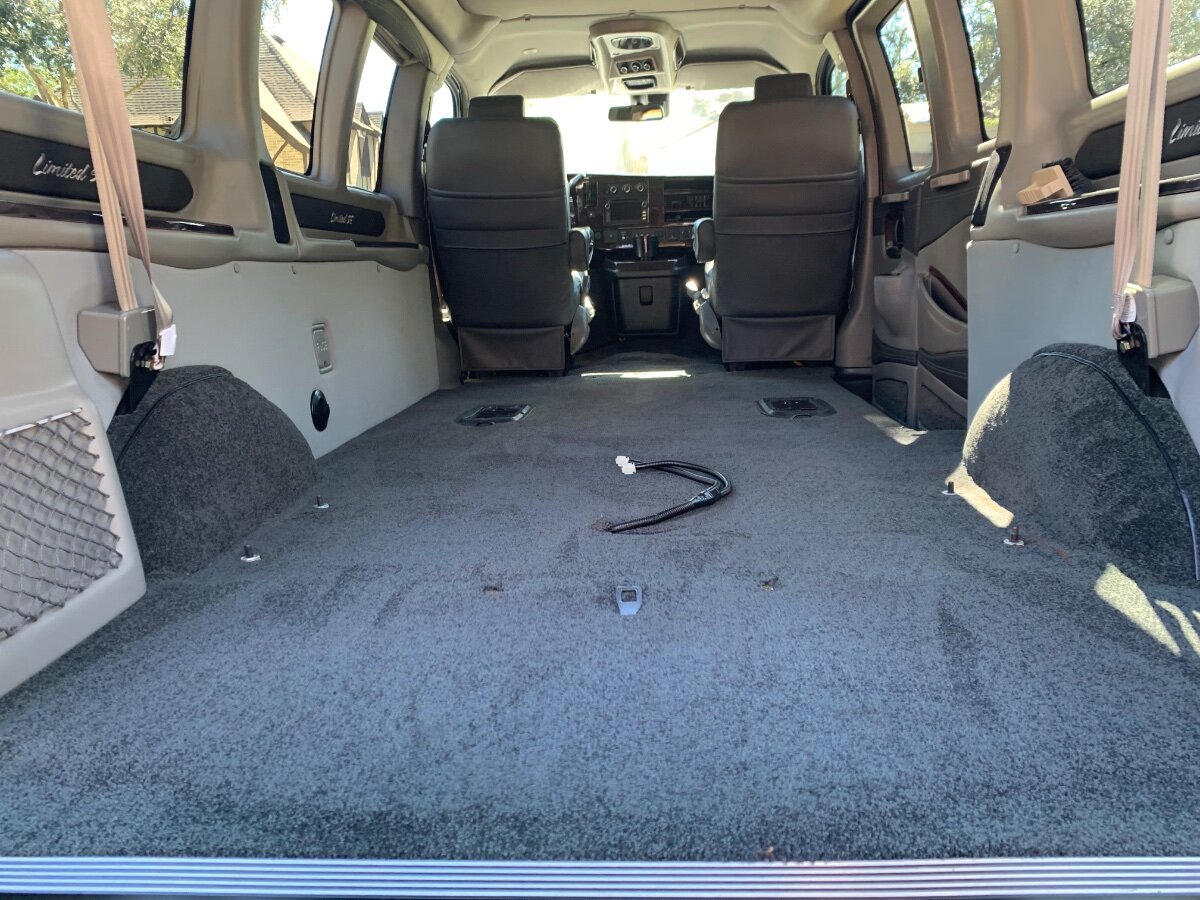
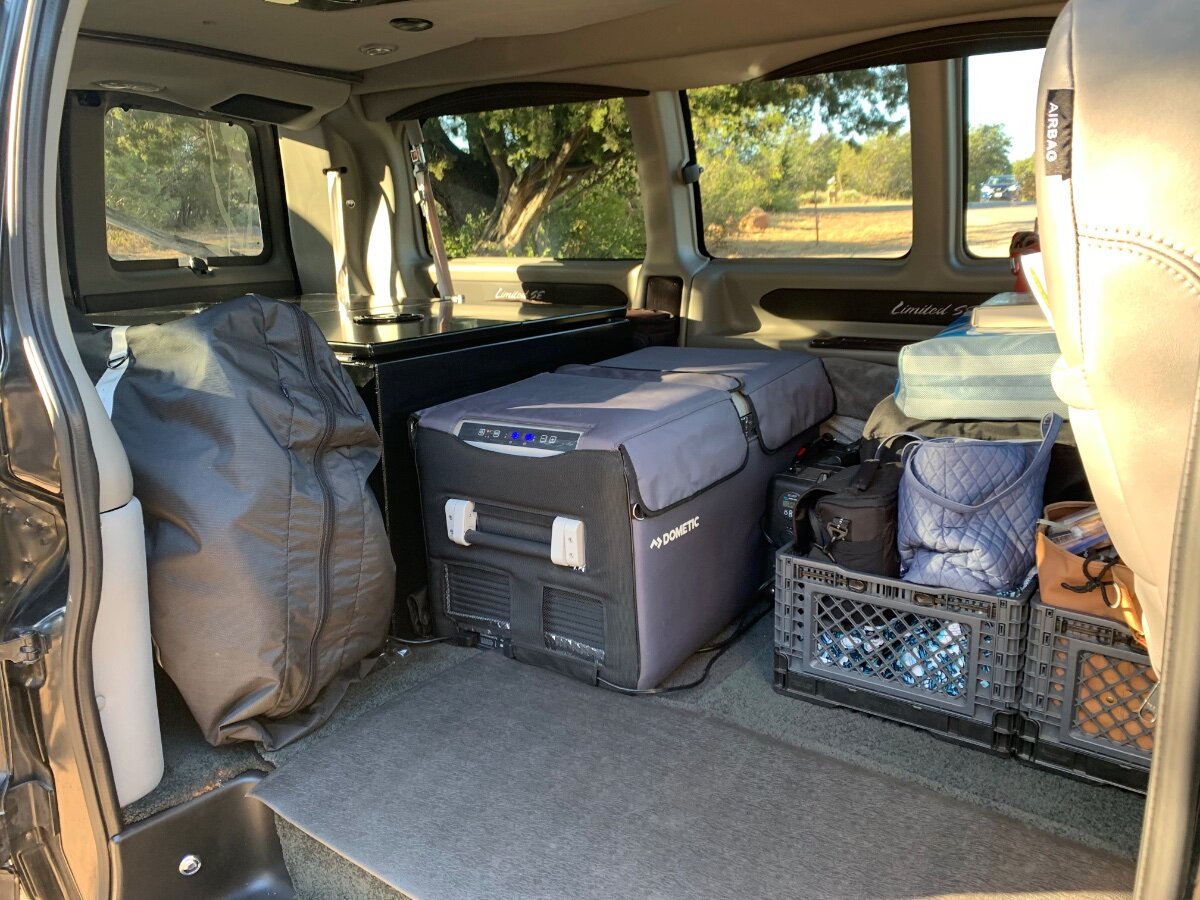
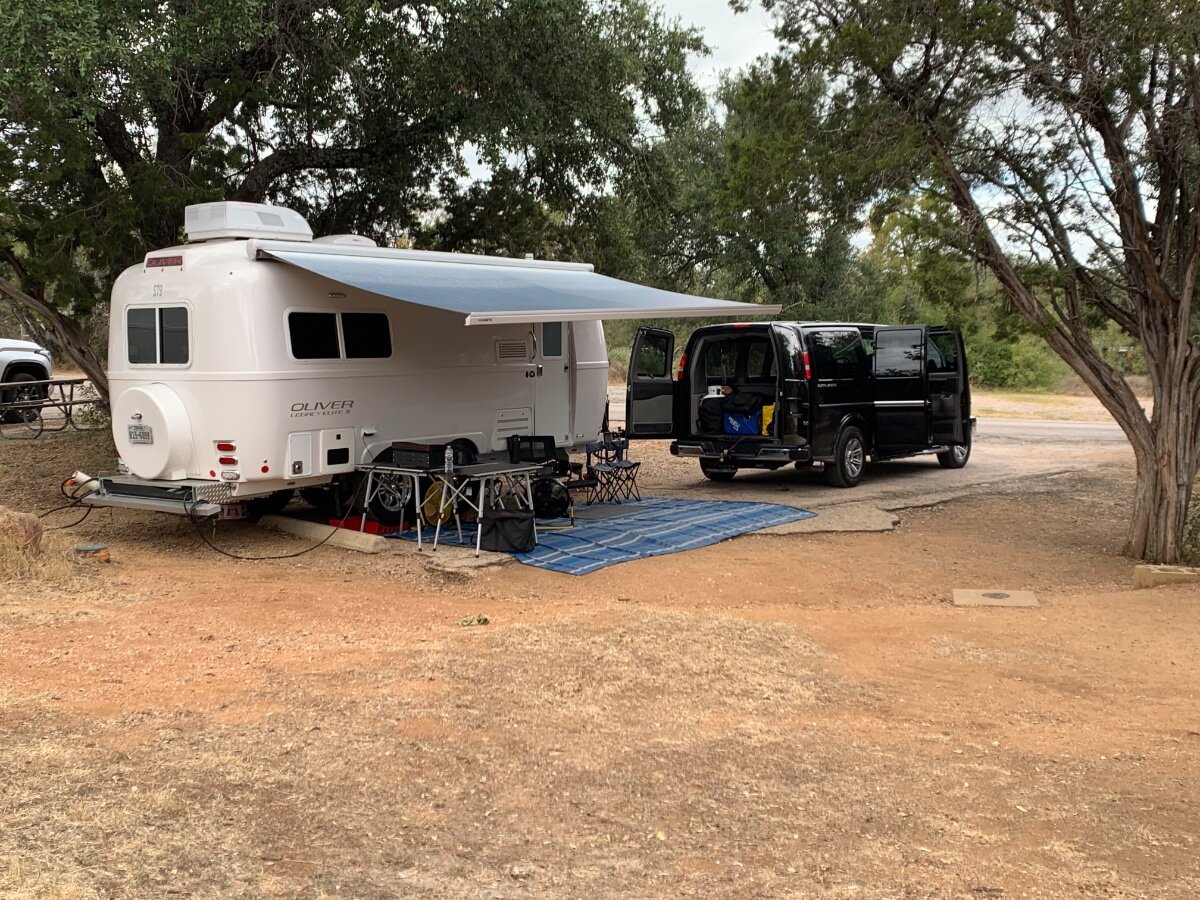
After several months of researching a suitable replacement TV, a van was decided to be our best choice based on perceived criterium, ie engine/drivetrain, cargo/tow capacity and tongue weight requirements for our OLEll and style of camping. The former 2012 Silverado 1500 4x4 was reaching ‘retirement age’ and I’ve been pushing its limits, regarding carrying capacity, for a couple of years. I will acknowledge up front that we are not minimalist! That said, this Explorer conversion van well exceeds my expectations in both spacial and towing considerations, as well as comfort and convenience. BTW, I told my wife “remind me to never buy another tow vehicle days before a planned trip!” Although ‘well appointed’, the passenger seats had to go; at least when towing our Oliver. The two second row captain’s chairs are easily removed via a release mechanism from the floor mounting base for occasional use, as needed; the third row couch/reclining bed not so much and will go to storage. By removing the passenger seats, I now have 10’ of open cargo space from the rear doors to the front seats; the Silverado’s bed only measured 5’8”, plus limited space in its back seat. Having double doors on both side and rear of the van vastly improved access to the cargo area. The two vehicles were positioned end-to-end to facilitate easy cargo transfer for organizational purposes. Ultimately, two storage boxes were acquired to safely stow much of the cargo; specifically, underbody tool boxes. Yep, delivered one day before our departure to the Texas Oliver Rally at Inks Lake SP, what was I thinking! The boxes are serving their purpose by providing secured organization of supplies and gear, with ample room for our folding e-bikes, Dometic fridge/freezer, portable power station, generators, spare 30 lb. propane tank and a couple of small bins. Camp R&B, Inks Lake SP, Site 227; Texas Oliver Rally, October 20-25, 2024.
1 point
-
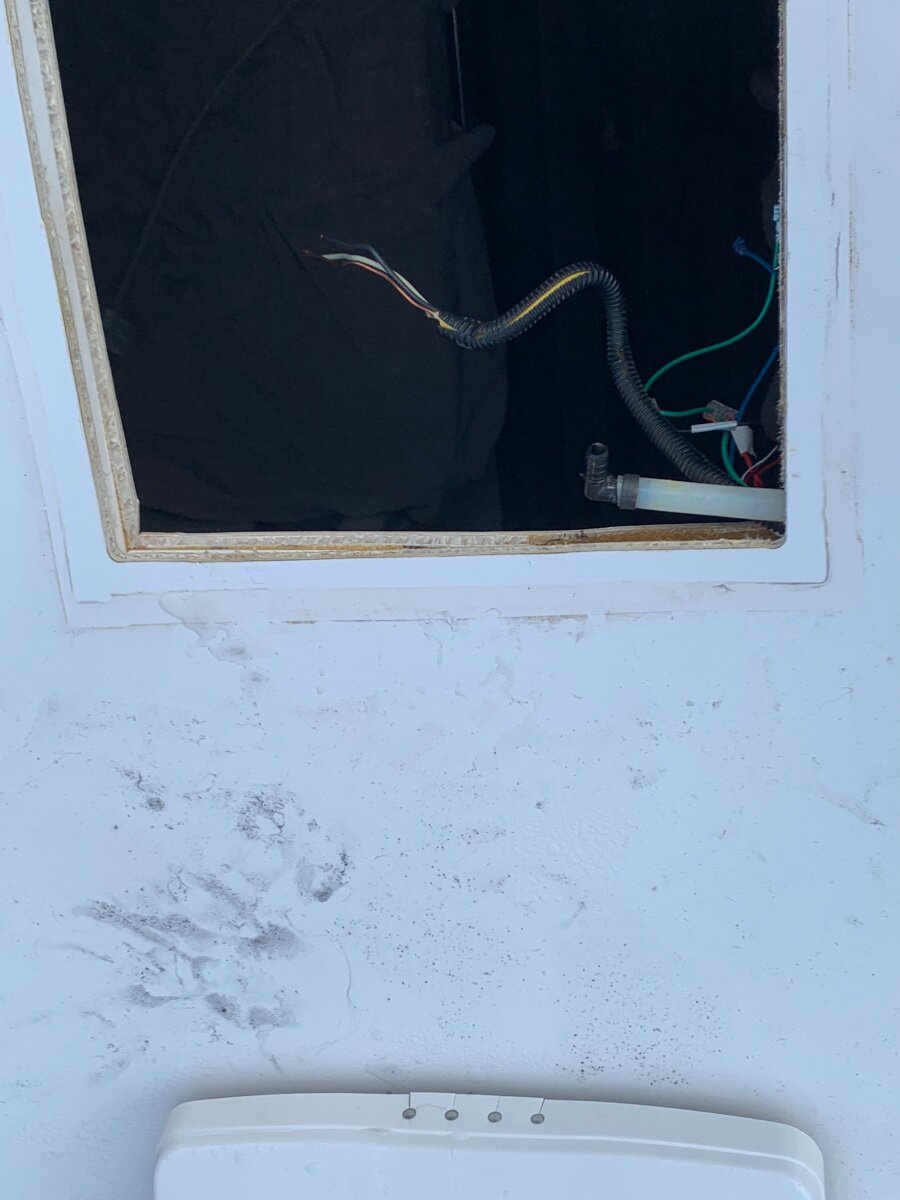
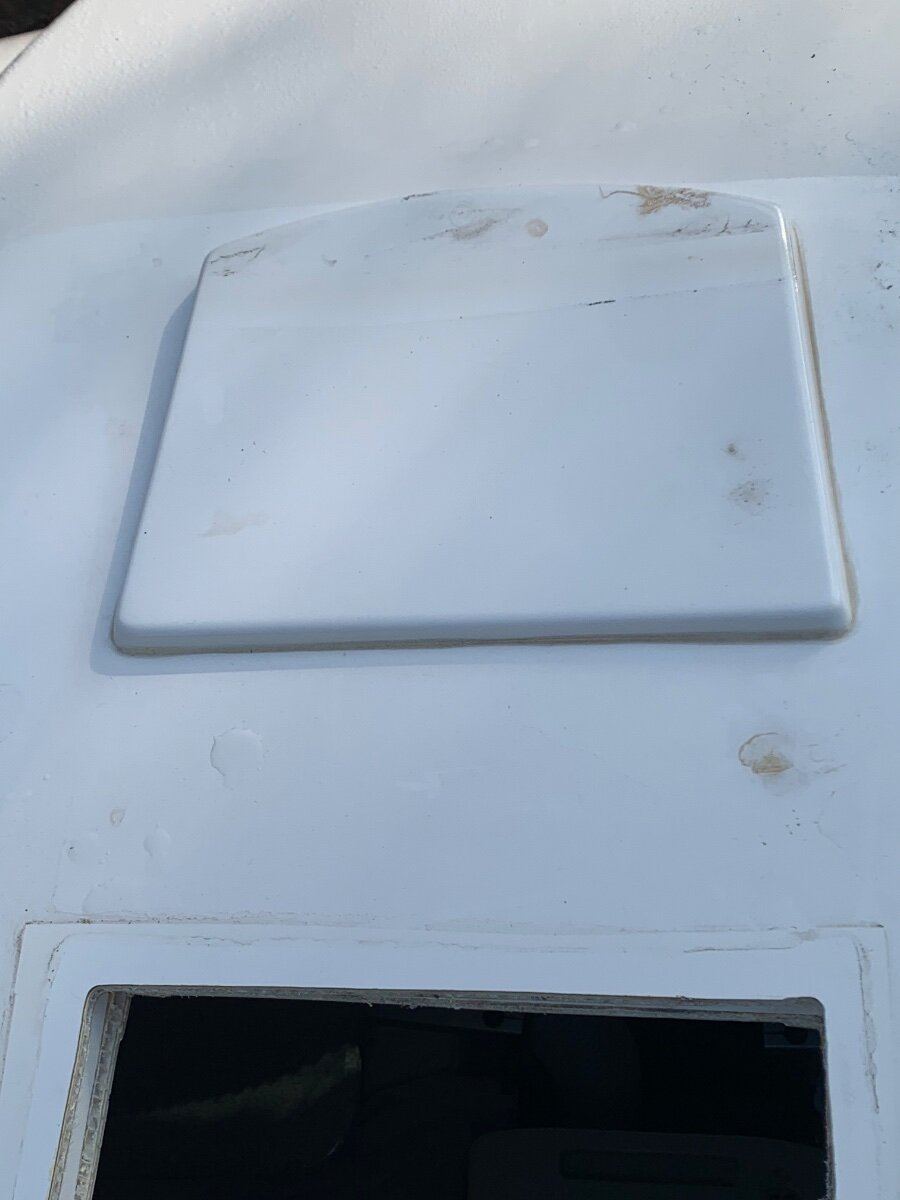
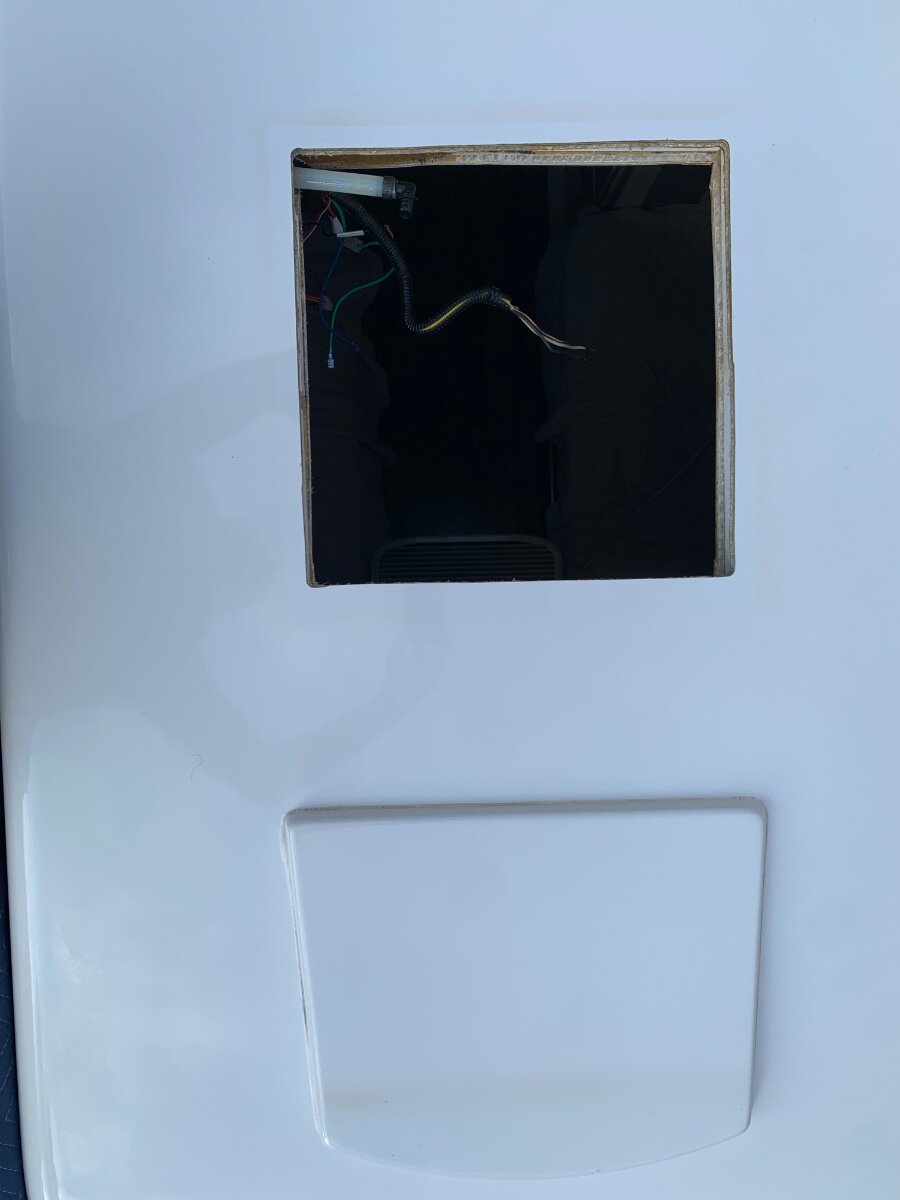
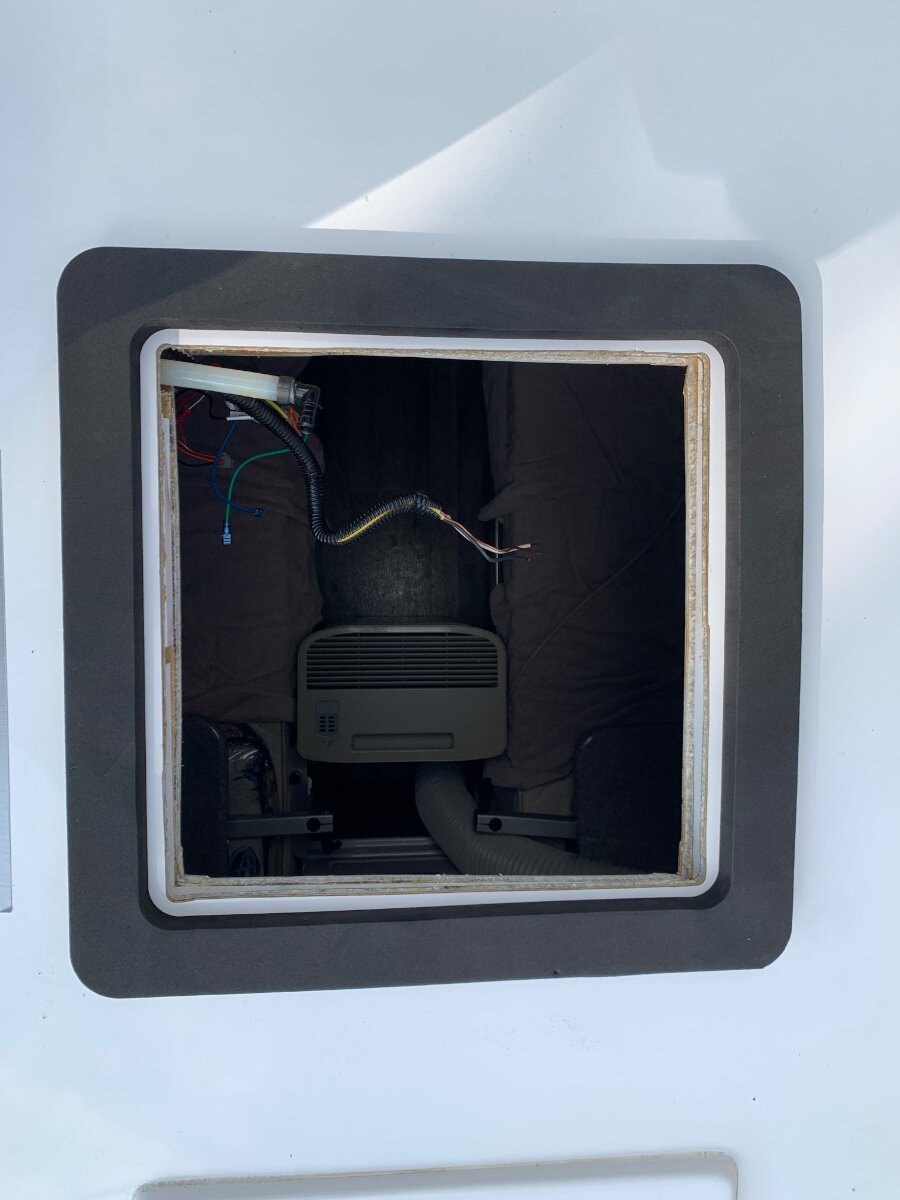
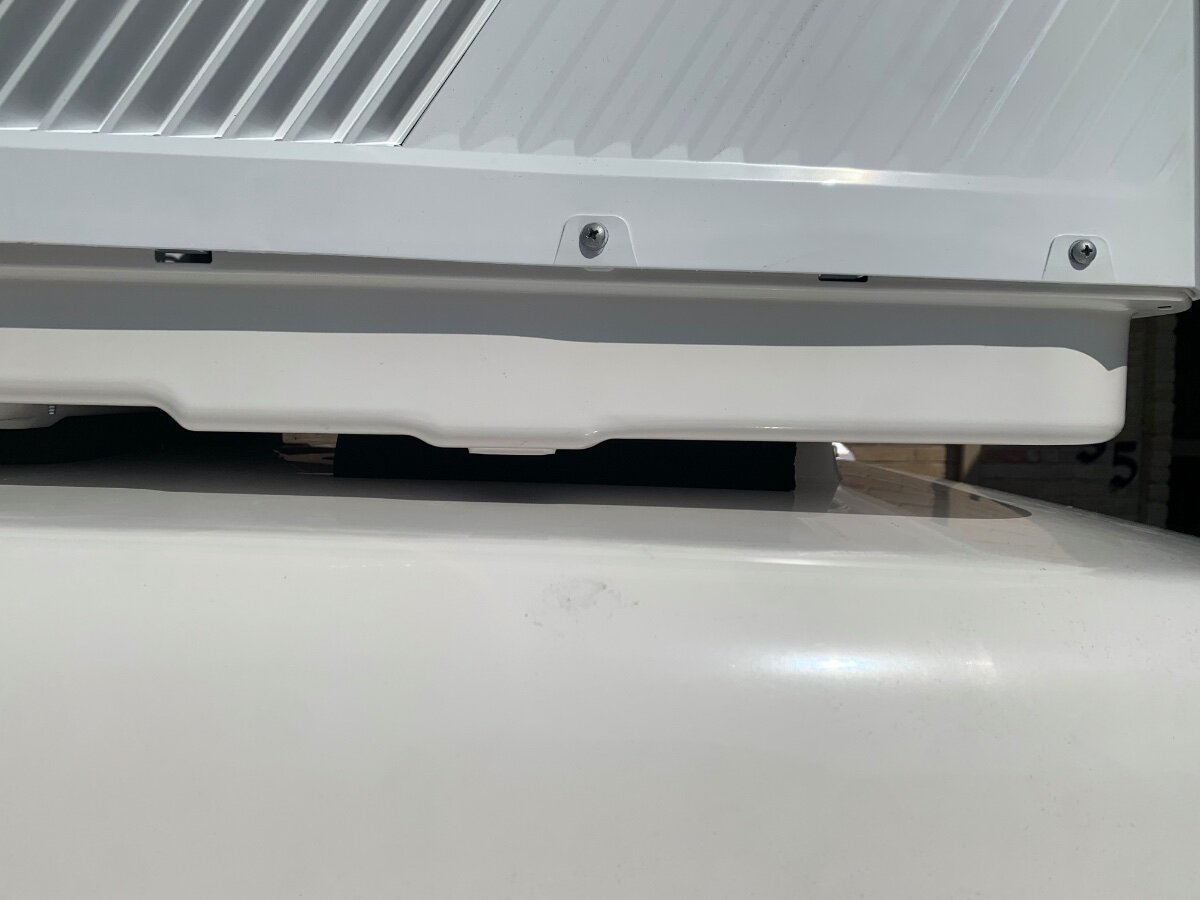
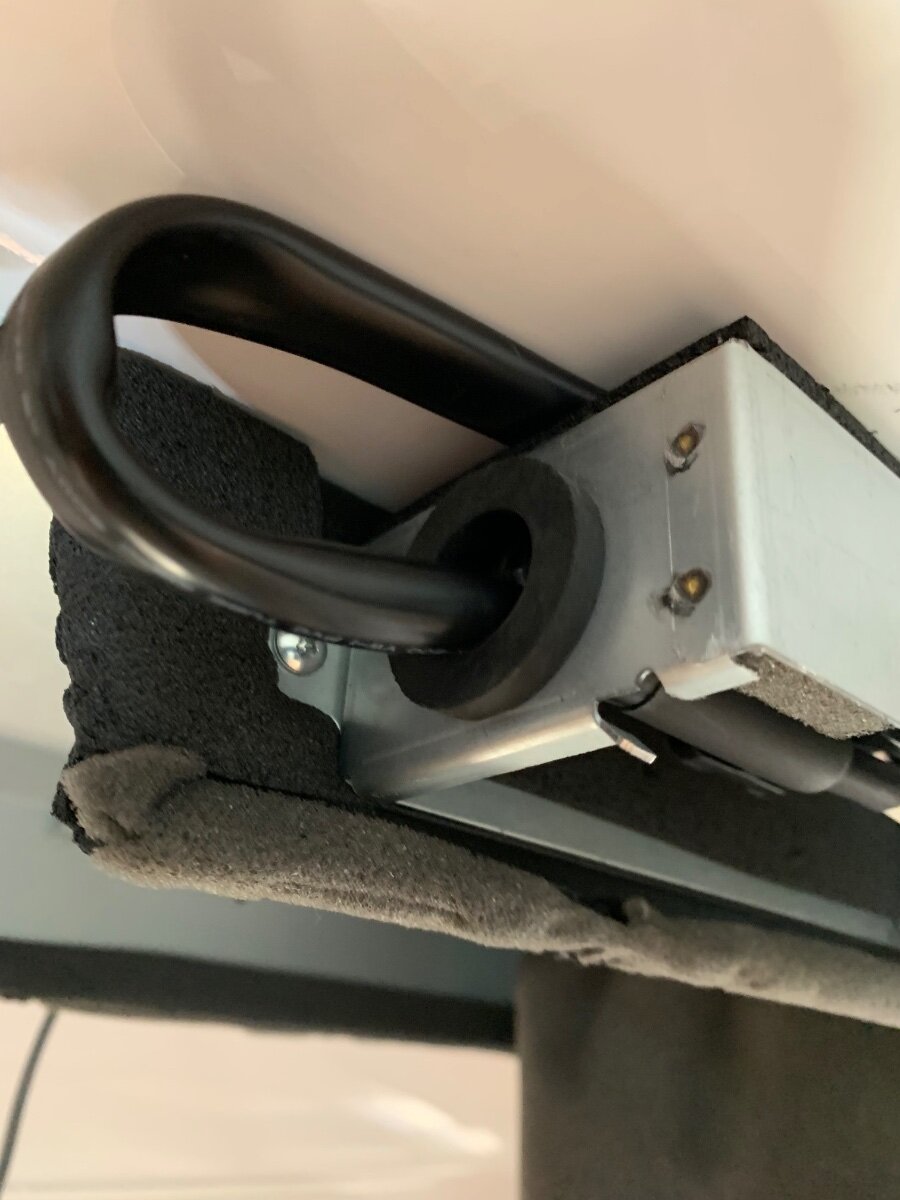
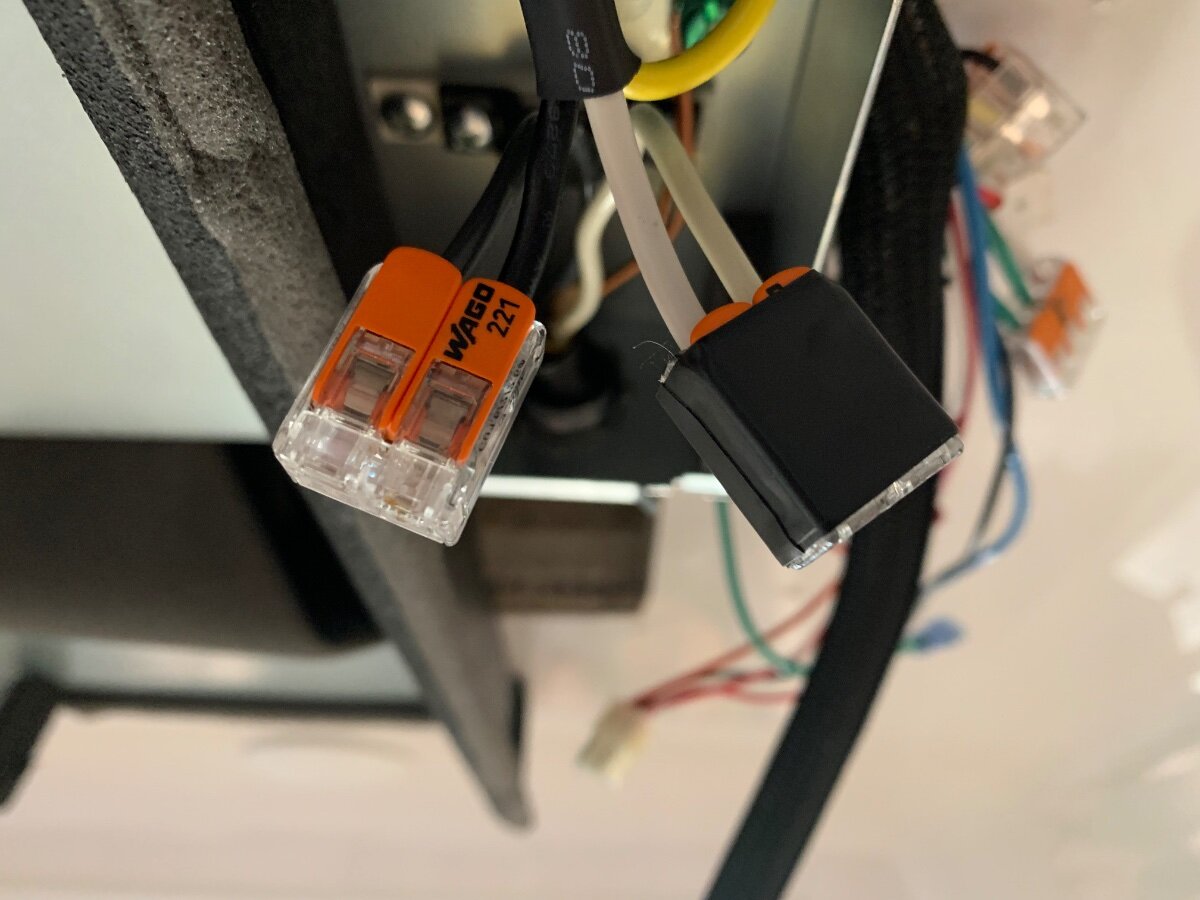
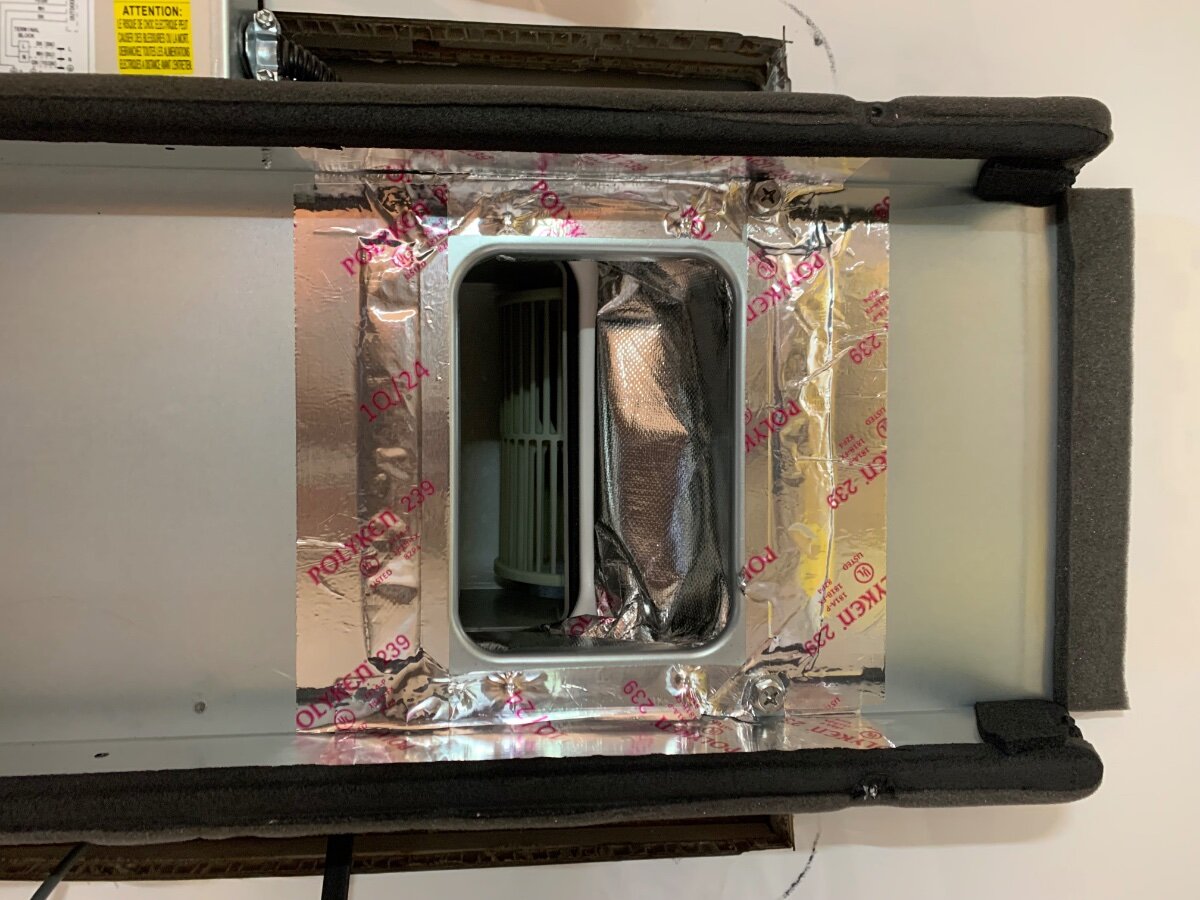
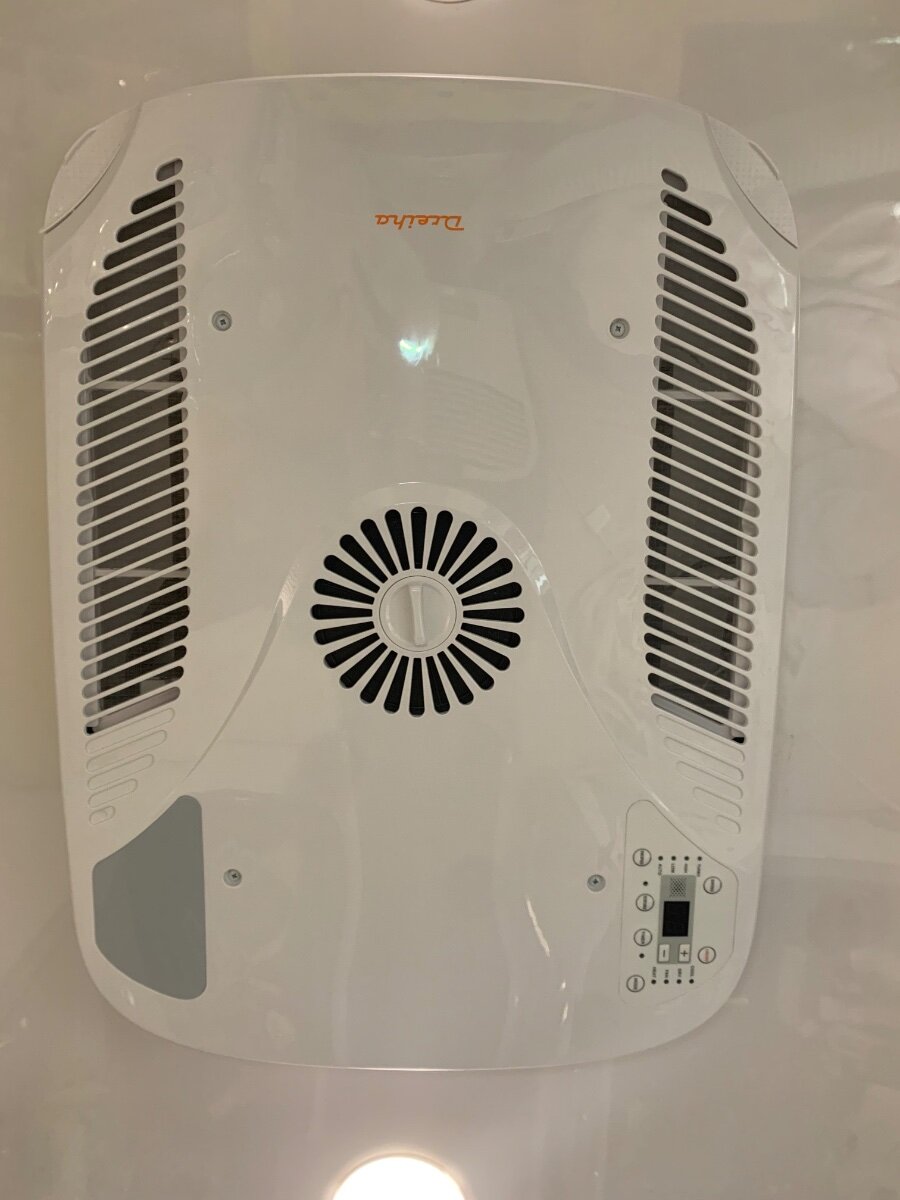
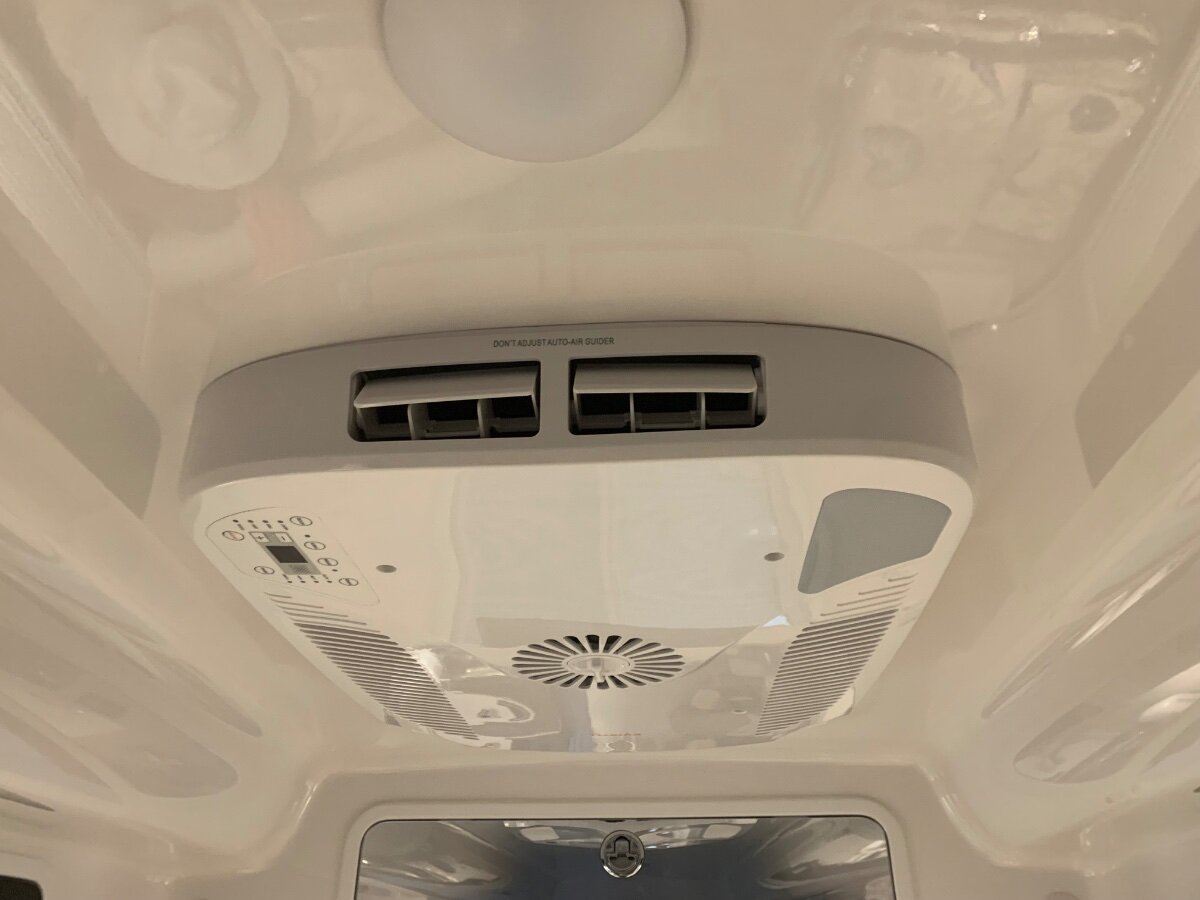
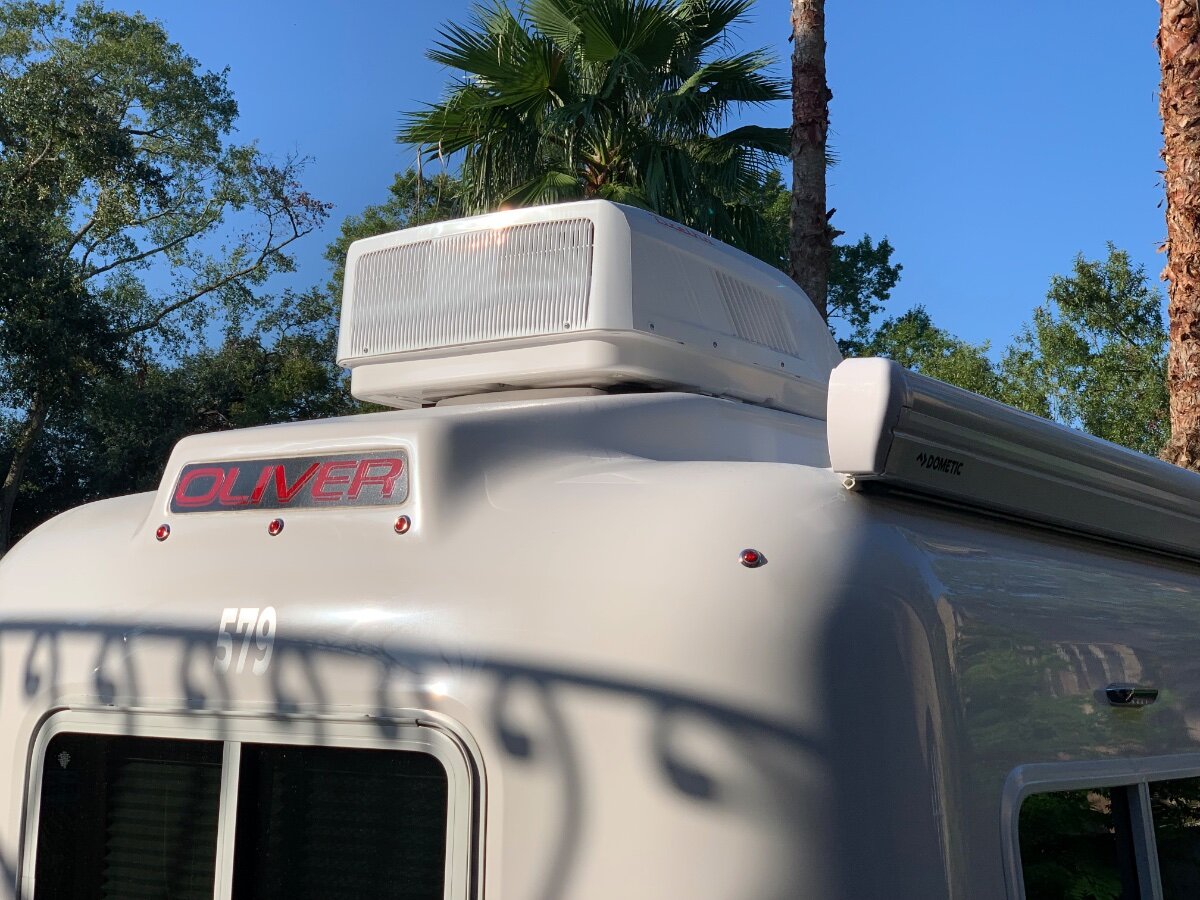
This long awaited swap-mod is now checked off my to-do list! Like many, I tolerated the noisy Dometic Penguin ll long enough; so glad I was finally able to take decisive action with this install. After a couple years of mulling over the various replacement models being marketed, a unit emerged that caught my attention; the newly available Atmos 4.4 seemingly met all of my expectations. I will forego the removal of the Dometic, here is how I proceeded forward: First and foremost, all AC and DC power sources were turned OFF! Scaffolding and equipment/supplies were then staged for Dometic ‘liftoff’ and subsequent Atmos ‘lunar landing’ (only appropriate since I live a couple miles from the NASA Mission Control Center in Houston). Roof area in need of cleaning. Notice the raised fiberglass landing on my year model and that the former condensate drain tube was simply disconnected rather than cutoff. Roof area throughly cleaned and prepped. I decided to adhere the square self-adhesive foam roof seal directly onto the fiberglass and then apply non-leveling Dicor around the cutout perimeter to further ensure the best seal possible. In positioning the foam seal, care was taken to center it as evenly possible, thereby allowing about 1/4-3/8” of exposed fiberglass to lay a bead of the Dicor and finger smooth to finish. Interior view of the Atmos being positioned over the roof cutout. Note the use of the mounting bolts as a guide, as recommended by SDG. Because the ‘rough cut’ edges of the layers of fiberglass (inner and outer hulls, and spacial filler) were inconsistent, I used the foam seal as a reference to accurately center and align the unit; distances measured to each respective bolt. Initially, installation instructions were followed by adhering the supplied straight piece of self-adhesive foam onto the bottom of the unit as a rear support, but it did not make contact with the roof due to relief of the aforementioned fiberglass landing. Alternatively, the foam piece was cut in half and each adhered onto the fiberglass, in like manner as the square seal, along the outer edges of said landing. This adaptation proved very effective in application and purpose, as the last of the next three pics demonstrates. Now that the exterior unit is properly positioned and supported, it’s back inside to further installation. As a side note, I made use of a portable a/c to buffer the heat and humidity of the day! Although my son helped with the heavy lifting and positioning, I cut him loose and completed the remaining tasks solo. Before proceeding, I used foil tape to treat the end of the aforementioned condensate drain tube and secure it to the side. Next the installation of the fabric air plate duct subassembly was started (provided Dreiha Atmos 4.4 Manual details the process). Note I used foil tape on both the upper (at Atmos bottom) and lower (at mounting frame) duct plates, even though most installs viewed applied to the mounting frame plate only. Between the upper and lower duct plate installs, the ceiling assembly mounting frame was bolted in place and hand torqued using a screwdriver only (torque specified in Manual). The AC power connection was very straightforward. The ceiling assembly’s junction box cover was removed, a strain relief fitting installed at one end (the other end had a preinstalled protector) and respective wires routed inside. I reused the Wago Lever-Nuts from the Dometic install, but first tinned the stranded wires of the Atmos lead for optimum assurance in application; electrical tape was used to further secure the Wago connectors. Ground wires were secured per the Manual. The junction box cover was then replaced, DC thermostat wire bundle loom wrapped and tucked away for future use, and ceiling grille fastened in place. . I’m very pleased with this mod, quality of the Atmos and ease of installation! I should mention that SDG preinstalled a SoftStartRV. I will provide an update once the furnace wiring and thermostat mount is completed. A special shoutout to @rideadeuce for forging the way with his install of an Atmos!
1 point
-
A lot of forums like to post music video threads and I am one of those people that has music going all the time. Here's what I am listening to: What are you listening to? Post your youtube video link below.1 point
-
FYI - Garmin has released a map update for GPS devices (at least the 890 and the 2797 models). This update must be fair large in that it took about 45 minutes to download and install. Bill1 point
-
Patriot- I did a search and your post was exactly what I was looking for! I'm upgrading my truck to an F-250 Super duty Lariat 6.7L Diesel...and I was considering exactly the hitch you bought. Because I don't have the truck yet... I can't measure it up to determine which "drop" to get and ensure our Ollie rides nice and flat. Did you need the 10" drop to make that happen... or do you just have multiple trailers that require it? I see that the hitch comes in several drops... 6", 8" and 10" drops also.1 point
-
GL, JD, Have fun out there...doubt you'll get stuck with your rig :) And congrats on your starlink! John1 point
-
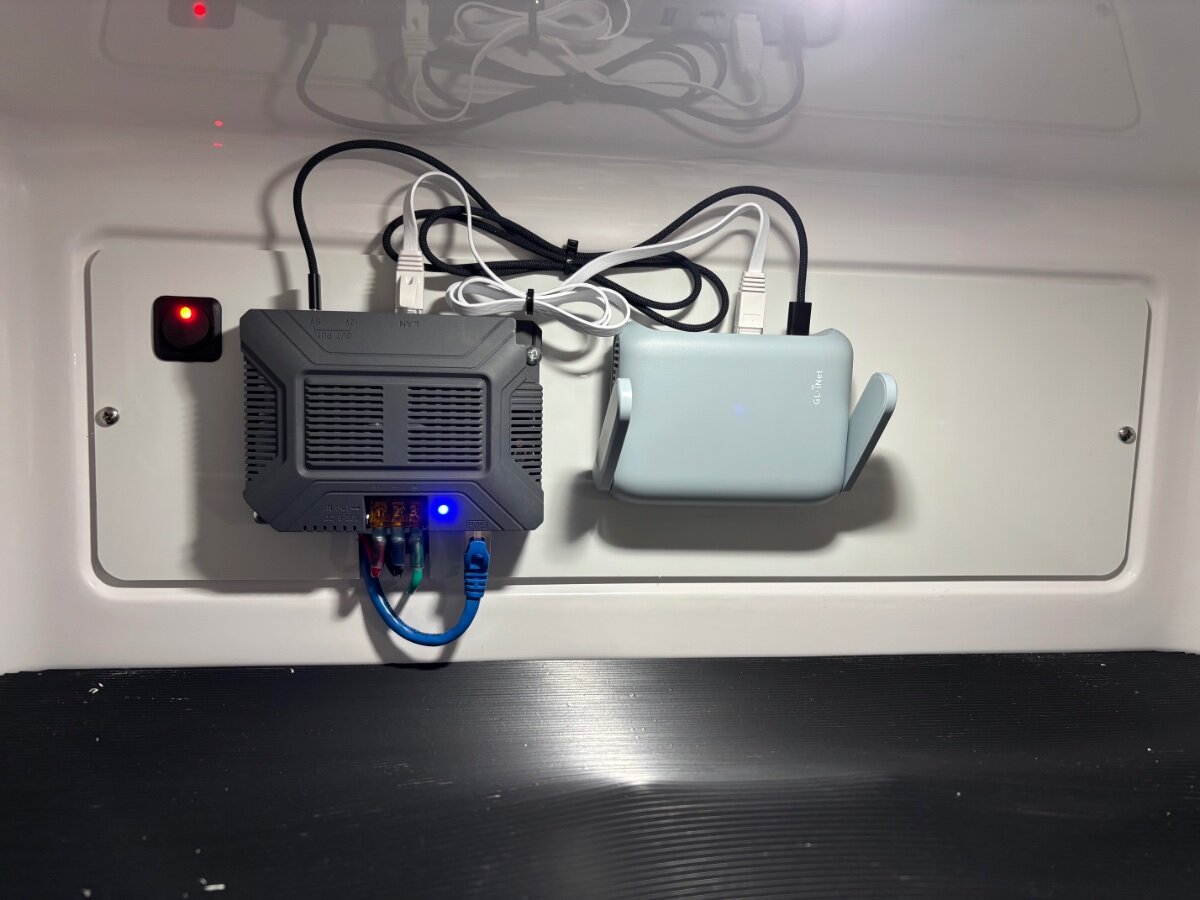
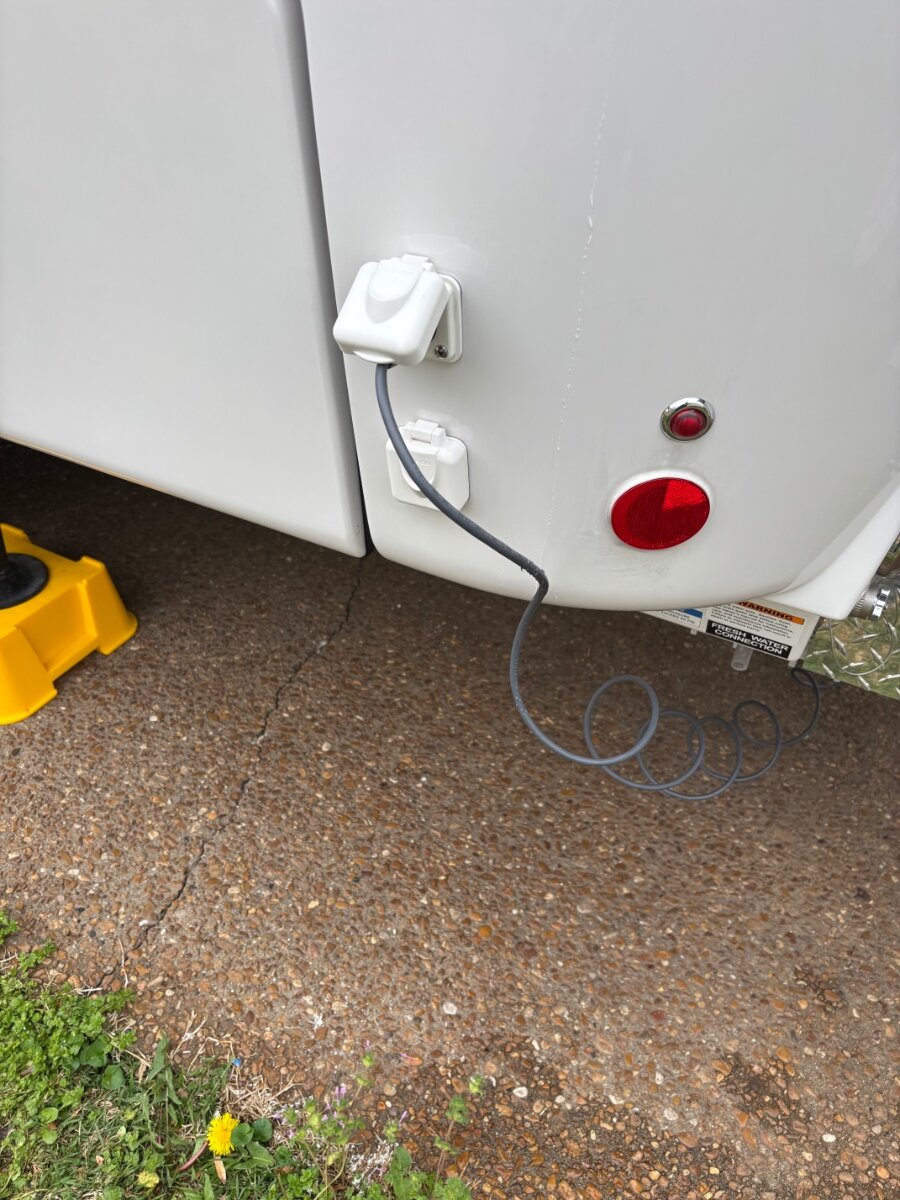
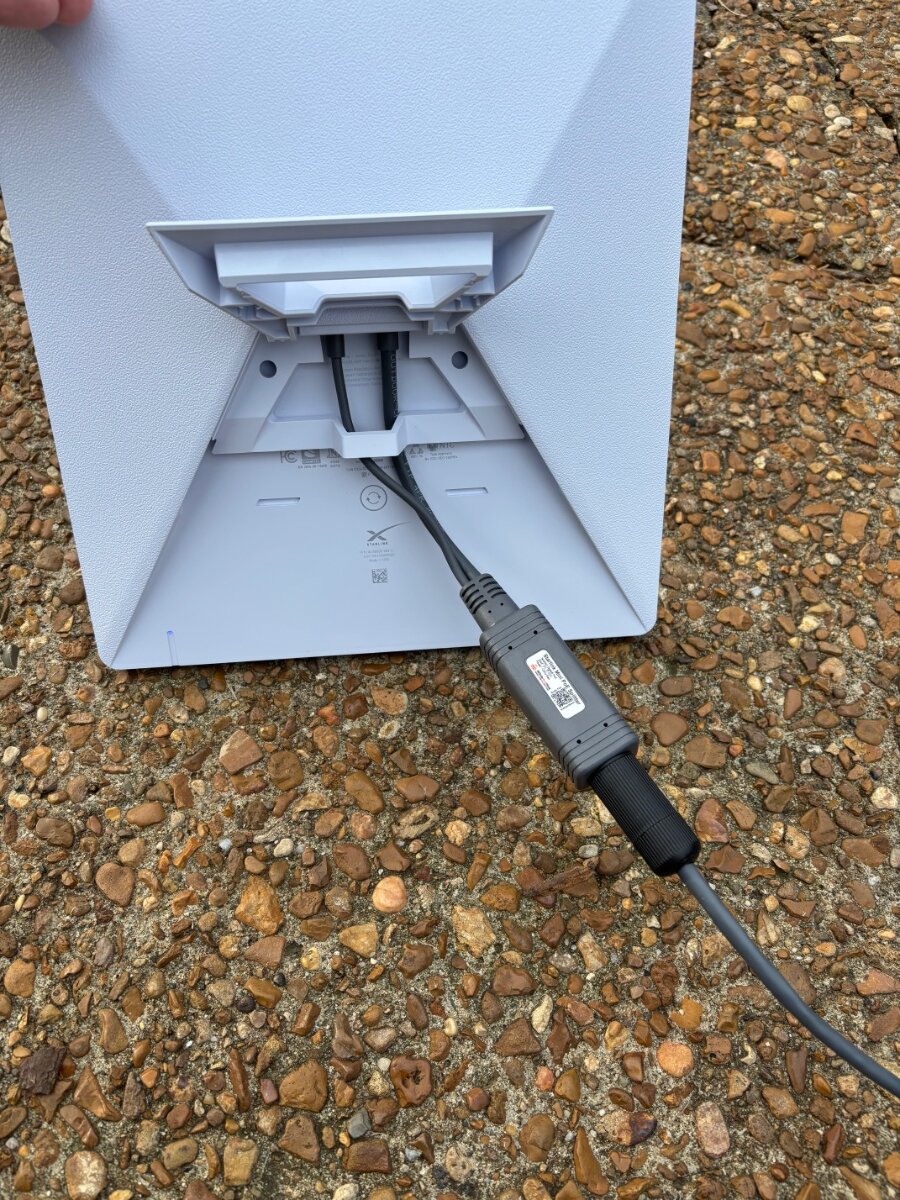
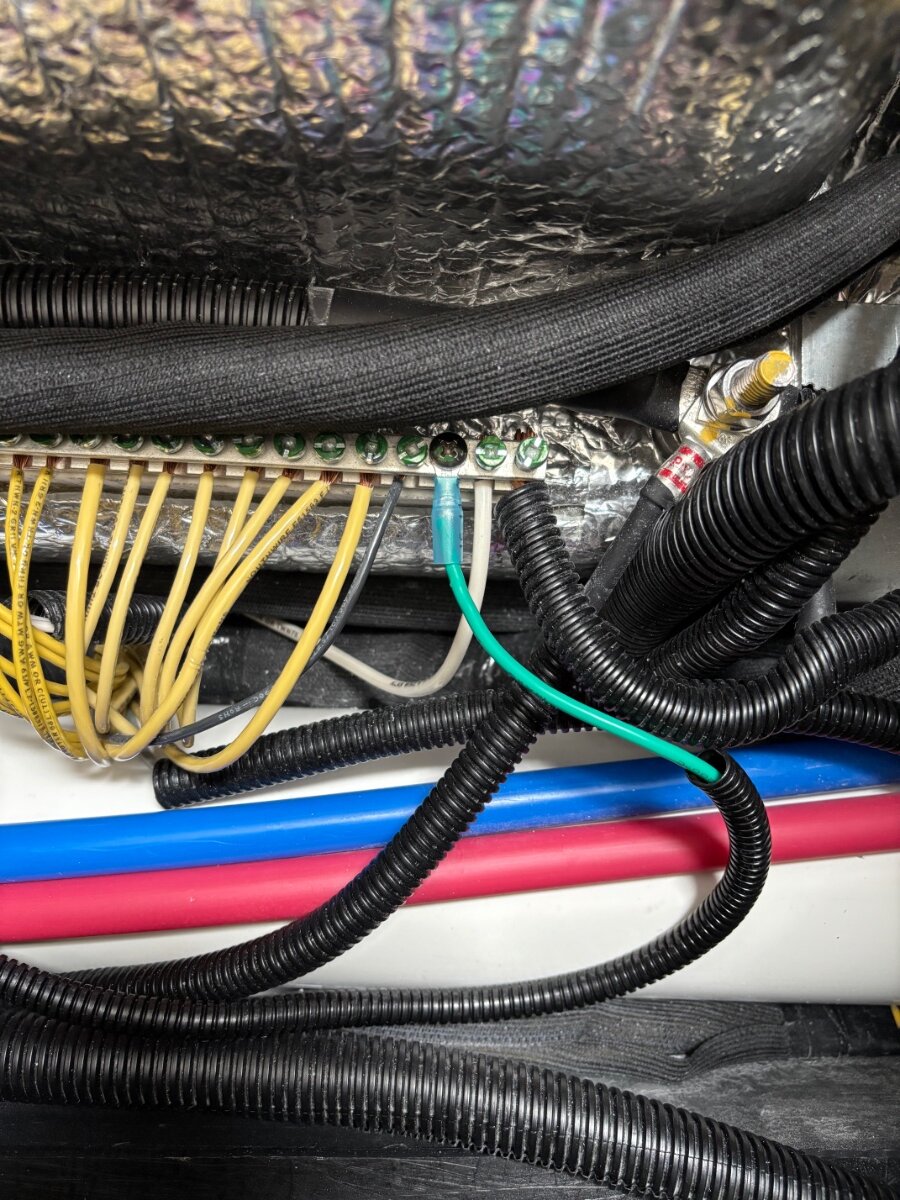
Installed and tested. Works as intended. I tapped the wires going to the 12V receptacle and installed a cutoff switch which you can see in the photo. I’m not sure if the POE injector consumes power all the time or not, but installing that LED switch guarantees it and the router are off when I’m not using it. The injector has a chassis ground terminal, and I ran a wire back to the common bus. (The instructions said this would help reduce signal interference.) I did have to do ethernet cable surgery on the end going into the waterproof connector at the splitter going into the dish. After many bad words and prayers for forgiveness, I finally got the tiny wires in the right order and pushed through an RJ45 shielded connector. I probably could have got by using a cable intended for indoor use, but I purchased an outdoor rated cable made to the same Starlink standard. The protective boot over the connector was too big to fit inside the waterproof connector, so I had to cut off the end and put on a plain shielded connector.
1 point
-
Hi GJ, Wiring from my vehicle is all 6 AWG to the charger and wiring from the charger to B+ and B- busses are all 6 AWG. I could have used 4 AWG if I trimmed some strands to fit receptacles on the Victron charger but I chose to use 6 AWG on advice from installers. The terminals on my 30a Isolated Victron (4 terminals) will allow up to 6AWG, thus the need to trim strands if larger wire is used. I'm certainly not an expert in this area but this is the way I ended up installing everything. Hope this helps. John1 point
-
And I "ASSUME" that you have run a #4 AWG all copper cable from the frame to the B- terminal as well. I have to adopt a different set of charging parameters, and once done will check performance. If it does not improve, then I will likely try adding such cables to the anderson connection at the TV rear bumper and battery. Would certainly prove your hypothsis. BTW: Assume is often spelled Ass of You and ME. LOL1 point
-
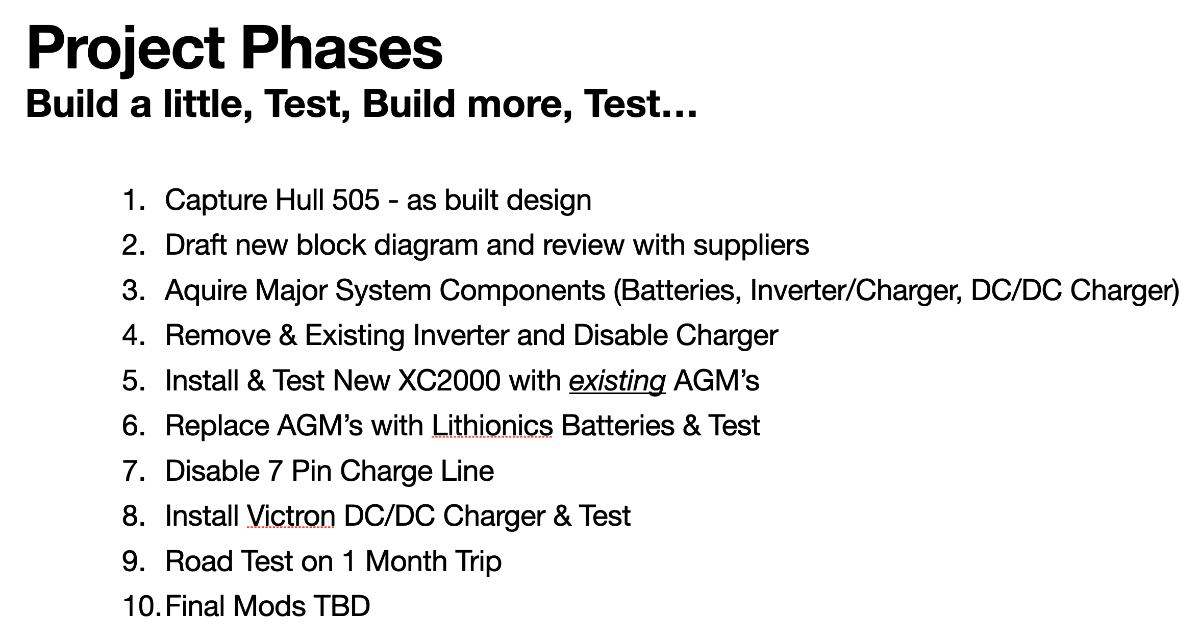
Try reading my upgrade article here... In it I describe all the steps to an upgrade - Also - check my personal message I sent today. Full Article in our Blog Here: https://4-ever-hitched.com/ggs-blog/f/lithium-battery-upgrade?blogcategory=Electrical+Upgrades Slides of the upgrade & Pix in this PDF: 12V Layout.pdf Craig - Hull 505 - (Galway Girl)
1 point
-
Hull #527 additional outlet. Some people were asking about adding an additional outlet for 120v possibility. I chose this location over others and I think it turned out well! Happy drilling.
1 point
-
Great. I thought I could not reserve till May. Will get on it today1 point
-
Great info. Thanks. Will research and plan a trip. Hope you have a great trip soon1 point
-
We are currently camping at Mt Madonna County Park near Santa Cruz. Our plans to visit Yosemite were derailed by snow at elevation. We visited Santa Cruz today and will go to Monterey on this stop. Some lovely hikes in park too. From here we will venture to Marin County north of San Francisco for a couple of days to visit my brother-in-law who is a golf course architect and has a job there. Thinking of taking the 101 north from there to Redwoods and into Oregon. Any thoughts on pulling Ollie up that route? Redwoods camping is booked so we would welcome any other ideas.1 point
-
Putting the Wayback Machine in gear. Another beautiful voice gone far too soon. Nina Gerber on guitar.1 point
-
If Garmin only knew - even you with that Japanese fishing pole might be able to land a couple.😇1 point
-
Oh, any ideas on how to remove the duct tape residue from taping the solar panels to the roof? %^)1 point
-
Your update took so long because you tasked it with displaying all the best trout holes in the US.1 point
-
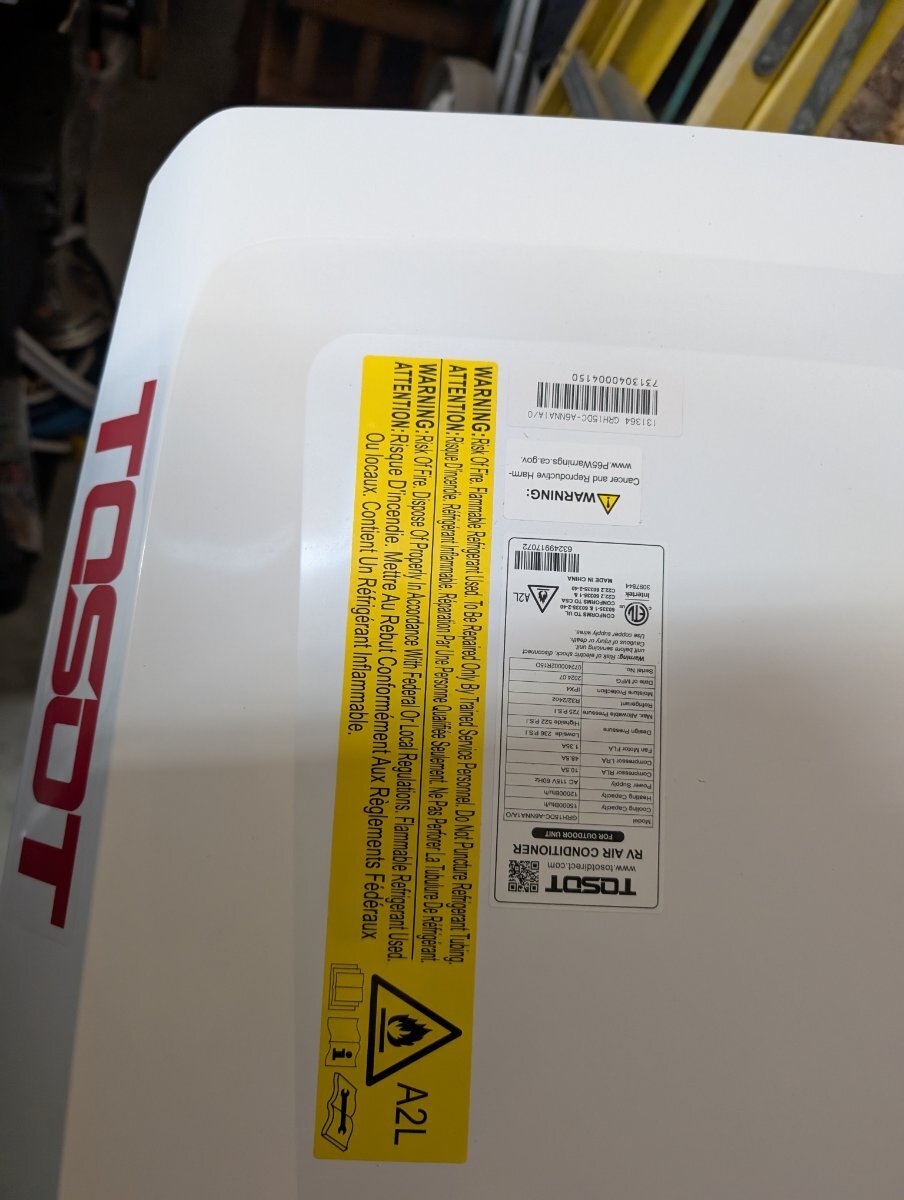
Wow I did take picture of Serial and specs. Looking through my pics. R32 Softstart was recommended by Tosot support
1 point
-
Gary, aH stands for Amperes Hour, the number of amps a battery can provide in one hour. 100aH means the battery can provide 100 amps in one hour. There might be a more technical explanation that some of our techies can provide. We’ve found that our 300aH has been plenty and when we had 200aH for over a year we never had an issue. There is more useable power in a lithium than in an AGM. When we had our 400aH AGMs we got very near our limit while camping in cool cloudy weather at Glacier NP and Grand Teton NP. I had to run the generator because the solar was unable to keep up. Because you can take lithiums down lower than AGMs I don’t think we would have had the same problem. I will add that we don’t use the AC on battery power, run the fridge on propane, and are generally pretty conservative in our electricity use. Occasional microwave and blow dryer are the big loads. Mike1 point
-
I'm currently in process with "option 2" and my "friends" have been @jd1923 and @Derek B here on the Oliver forum 🙂 Today I removed my 4 6v AGMs and installed 2 Epoch Essential 300aH lithium batteries. I happen to be 6'5" and strong enough to lift the batteries so the weight was not an issue for me..but it certainly could be for others (Each AGM battery is 66lbs. Each 300aH Lithium is 58lbs). I still have some work to do on the spacers in the tray but will post pics of my finished upgrade soon in the thread that I started in "Ollie Modifications." The info and photos from JD and Derek were super helpful and encouraged me to give it a go myself. Big thanks! I reused existing cables. It did require a bit of modification/McGuivering so I would say you need to be at least C+ category like me for using tools and thinking through projects. I took advantage of the recent Epoch sale and paid $1698 total for the 2 300aH batteries plus $25 for the BlueSky disconnnect switch on Amazon. Then I needed one longer battery bolt so $2 at the hardware store and some scrap wood I already had in the garage for spacers in the tray. $1725 total for 600aH of lithuim power and no other new equipment needed! Epoch batteries checked all the boxes for me -- self-heated as I camp in CO/UT/WY, built in BMS with Bluetooth App that shows SOC and all data, highly rated by folks here on the Oliver form with expeirence as well as 3rd party experts. They are not the cheapest option but they are far from most expensive. It's only day 1 but I'm impressed so far... Hope you find what will work best for you!1 point
-
No specific experience with the VIP3500 but both models should be standard for replacement on ANY trailer. The upgrade it likely a good idea. It would be great if the VIP 3500 was stronger and faster! I would check the manuals for both and compare measurements. It should be 3 bolts and one wire to replace! 😂1 point
-
Option 3: I mentioned before re a local solar company that works with Xantrex or better would be Victron. I spent about $3400 (parts, no labor) for the Victron 3KVA Multiplus II and two 300AH Epoch Essentials with new wiring, buses, etc. I spent MANY HOURS getting this all installed (and so has craig on all of his mods). Batteries are easy, new larger inverter is a custom install building a shelf, an overhaul of battery and 120VAC wiring, and more. Gary @Teaney Hull 292 you live in Tampa. There must be 100 custom solar installers and marine shops that work with Victron. Any local option would be better than OTT and OTT is very likely already book before, during and after the national rally.1 point
-
Gary, To help you get a range let's think of it like this: Option 1: Factory Upgrade: $10K + If you upgrade at the factory you can get an accurate quote by contacting service via email. My guess is around $10K to add 3 Lithionics batteries and a new 3000 Xantrex Inv/Charger. One reason for the high price is uprading to a new 3000 Xantrex Inverter Charger would also likely have them change around some wiring in your trailer to enable it to run your AC off of your new batteries. The other thing you discussed was a fridge replacement with a compressor fridge. Those are a very time consuming upgrade and costly. A real quote for time and cost can be had via email to Oliver Service. Option 2: Self Upgrade with help from friends: $1-2K About the lowest cost would be to drop in (1) Epoch Essentials 300AH Heated with Bluetooth battery for $999 (SKU: 12300A-H) and charge it with the existing charging circuits. You would likely be able to reuse all the big battery cables you have now. If you dropped in 2 (about $2K including cables) then you would have 600AH capacity about 3x what you have now...and that would enable you to switch to a new fridge. Hope that helps. Craig1 point
-
We went down with the kids to visit my nephew last night in Birmingham, AL. 3 hr drive. The Oliver is very well suited for city boondocking. We parked with no hookups at his apartment complex in a great spot that very few TT/TV combos could have reached. We had 100% batteries (920 Ah) when we arrived due to the solar and DC/DC charger working great finally. During the night, it dropped down into the low 40s. We had the heat set at 68 AUTO on the Atmos and I have to say between the quiet and new Tochta mattresses it was probably the most pleasant night I have spent in the Oliver. Comfortable and quiet. Great combination. The Auto mode on the Atmos works very well heating or cooling. I have said this before but I like the fan on more during cooling for the air circulation in the cabin. Doesn't get stuffy. I did kick on the heat with the dedicated Honeywell thermostat that sits where the old AC control was and it fired right up.1 point
-
That is correct, and thanks for explaining another aspect of the bilateral drain design. I read this morning of a video wherein a mod was done to have the fan only run when the compressor is running in Cool Mode. An Atmos owner (not Oliver) stated in the Sprinter forum that he was going to do the mod, but no further report to date. Such mod would void the warranty.1 point
-
Mark Knopfler and Emmylou Harris All The Road Running (album)1 point
-
Ahhh the years we lived in Texas…so much fun.1 point
-
Beautiful day.... Got the oldies going here at work. Hope y'all's day is going great! FORUMS looking good after the migration, seems faster, at least to me.1 point
-
Anyone else out there a Joe Bonamassa fan? Here is one of our favorites... especially when we are on the road with our Oliver.1 point
-
Darth Maul approves.1 point
-
Very nice installation. I wish we had that kind of room in the Oliver so the Multiplus could be installed vertically. I saw that one was installed horizontally in an Oliver and it's why I asked for feedback on his experience with it. Sure like the interoperability of the Victron components and I know they have a great reputation. Trying to decide if it's worth taking this installation on and spending the retirement dollars.1 point
-
Thanks for your concerns John, No I do not have a electrical certification but have a electrical background, and I am working with a good friend who is a electrician. There is proper clearance on front and back , but time will tell with the heat , I have Govee thermostats that will monitor the space and alert me if its over 95 degrees. Your right we may have to put more ventilation and fans to blow out into garage as necessary. I would like to find room for a small mini split that I installed in my last trailer It was a 12 volt mini split. It was not efficient enough, It was a experiment and I would go with a 120 volt next time. It kept campers one room comfortable 75 degrees below 92 degrees outside. I am looking at upgrading the a/c this winter, have been looking for the best route to go with a heat pump. Yes heat could be a issue. time will tell. That is not a recommended mounting (have looked at many other forums they mounted horizontal with no issues) I did mount my other unit that way and the fan ran full blast when charging the batteries, but never overheated in higher temps. I could program the victron to charge at a slower rate and it was not a issue. I will definately keep eye on temps. 4 years of running my old unit never had a issue in same enclosed space, this unit is only charging 4 batteries and the other unit I had was charging six battleborns. I could run my ac approximately 6.5 hours stopping and starting every 7 to 10 minutes in 100 degree temps. The cover on the bottom and top can be removed for service also. I agree with you on there batteries, thats why I went with battleborn. I trust the BMS in the system. There are smaller, more compact manageable Lithium Lifepo4 batteries out there Lion energy and even batteries that are half the price out there. The BMS is the proof in the pudding , I put my full trust in there technology of BattleBorn . I have 3 x friends with the same Victron system and love it. Warranty is not a concern. I am not retired quite yet another 5 years , we camp from 30 to 45 days a year and that is pushing my time off already. Before I know it the system will be out of warranty. Yes safety should be my primary concern , mounting it that was is unfortunately only option in a oliver, cannot find another proper location that is high enough. This is a learning process , I am learning the oliver Elite II ins and outs and appreciate all of you for posts. Thanks for all your input. Time will tell. Here is a picture of my older first try system. Yes its messy. Definetely could open a can of worms here!
1 point
-
Why would you get anything less than the maximum available battery power...? You can never have too much power but you can definitely have too little...? In the scope of the whole project...get the best!1 point
-
As Overland said, the charger fan does shut off once charging is complete. It also tapers off toward the end, cycling on and off in gradually lengthening periods and for shorter "on" cycles, as the heat build-up from charging decreases. On the plus side, charging from solar is extremely efficient and silent, apart from a slight buzzing from the controller when the battery is actively charging. Thrilled with the difference in performance over the AGMs.1 point
-
Interesting - was it supply chain issues or engineering design considerations? In any case - I have decided I'm going - Li -- just as soon as I can get 600 amp hours in a 12 cubic inch box, at a cost below $500. I figure that will happen - oh - say 2025 or so. Moore's law in battery storage - one can hope. RB1 point
-
Andrew, That's an EXCELLENT point, if you have the PD4060 it is on a 15 Amp AC breaker. Flipping that off will only allow the solar to charge your batteries. That would pretty much negate the negative side effects of having the PD4060 converter. I wish I'd thought of that one! Craig1 point
-
Russell, I apologize if I am befuddling you today? And Harbor Freight had a Blue Light Special on tarps last week or maybe it was Kmart. Mossey1 point
-
Mine uses the Progressive Dynamics Converter and a Xantrex Prowatt inverter and I do not see any charging capabilities listed in the ProWatt Inverter owner's guide. Progressive Dynamics does have a 2000W inverter listed on their website. I just don't have one. My 2017 LE2 has these electrical components; Progressive Dynamics Inteli-Power 4000 Series Converter model PD4045K Progressive Industries MS-HW30C Surge Protector Xantrex 2000 watt inverter ProWatt SW2000 Xantrex Prowatt remote Xantrex transfer switch ZAMP ZS30A Charge Controller1 point
.thumb.jpg.e34bf01ef7f7d5e99ad31856d45afbeb.jpg)


.png.17f4a3e11d2f6b6e9ecf0469b11a8c25.png)


-
Recent Achievements
-


")


")


")

")