Leaderboard


Popular Content
Showing content with the highest reputation on 07/10/2023 in all areas
-
Used ideas from previous post in this thread, Thanks! Removed old adhesive with 3M adhesive cleaner. Placed blue painter’s tape along top line to guide where new belly band will be placed. Rubbed 3M White Scotch-Brite pad over areas where belly band 3M adhesive strips will contact. Applied 3M adhesion promoter with outside air temperature between 60F and 80F as per 3M instructions. Wore a respirator while using adhesive remover and adhesion promoter. The new belly band is shipped rolled with chrome on outside of roll in an opposite bend direction when applied to the two corners of an Oliver. The day before installation, rolled the belly band with adhesive strips outward in a 3’ diameter roll for overnight at 70 to 80F to get rid of opposite band bend memory to make it adhere better in the corners. The installation went well and should not have any future “Belly Band Sadness”! 🙂
 5 points
 -
If you use a water softener at home, and always fill the trailer tank from that source, especially for long term storage, those white hard water deposits will clear out on their own throughout the entire system, in a few months, and never return. When you are on the road, you must use whatever sources are available, just drain and refill the tank with the good stuff when you get back home, and flush out the pipes and water heater. Otherwise you need to do vinegar flushes every two years. This is a great reason to invest in a softener at home, it cleans out your home pipes and gets rid of spots in your shower, plus you can tee into that supply and wash the Ollie and your cars with it. It’s a win win win …. win situation. 😉 https://www.health.state.mn.us/communities/environment/water/factsheet/softening.html#:~:text=Advantages of home water softening,%2C bathtubs%2C and washing machines. John Davies Spokane WA4 points
-
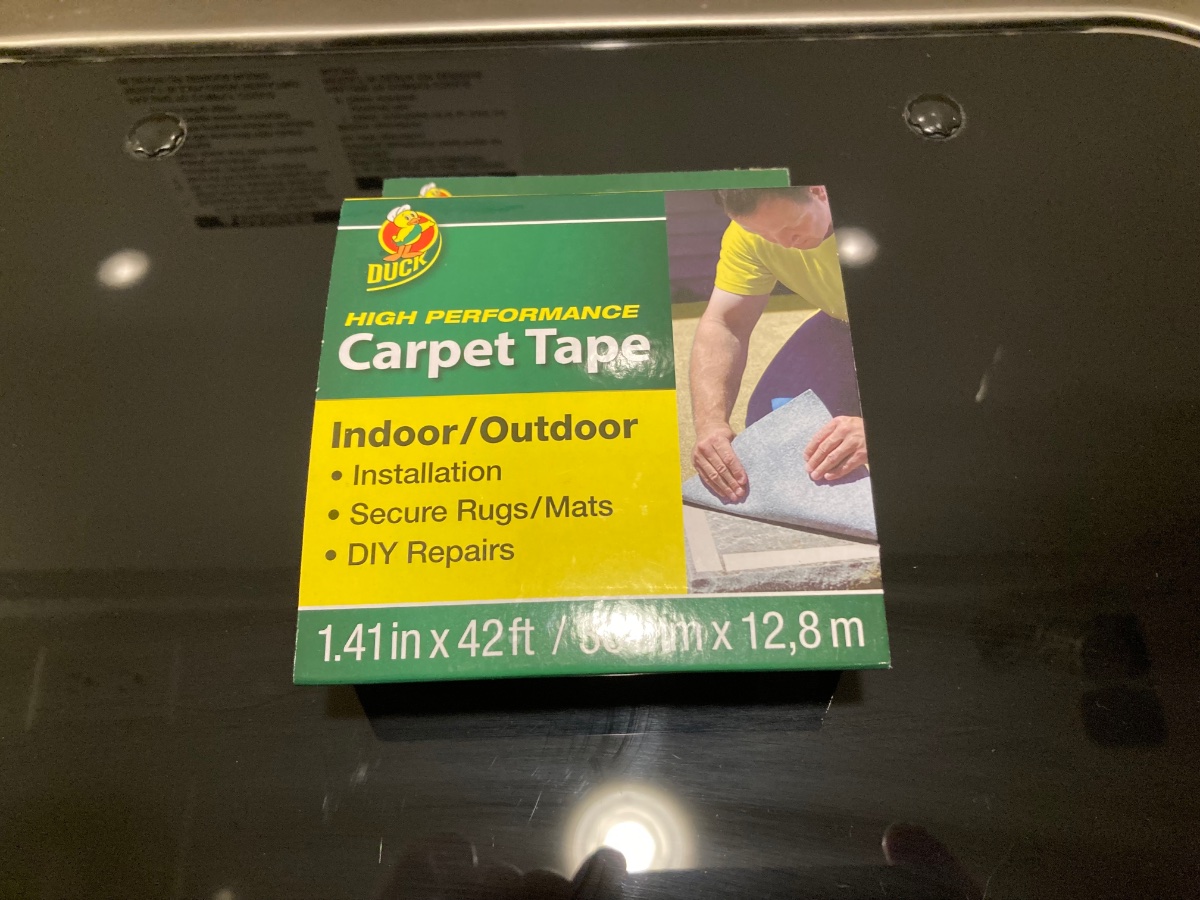
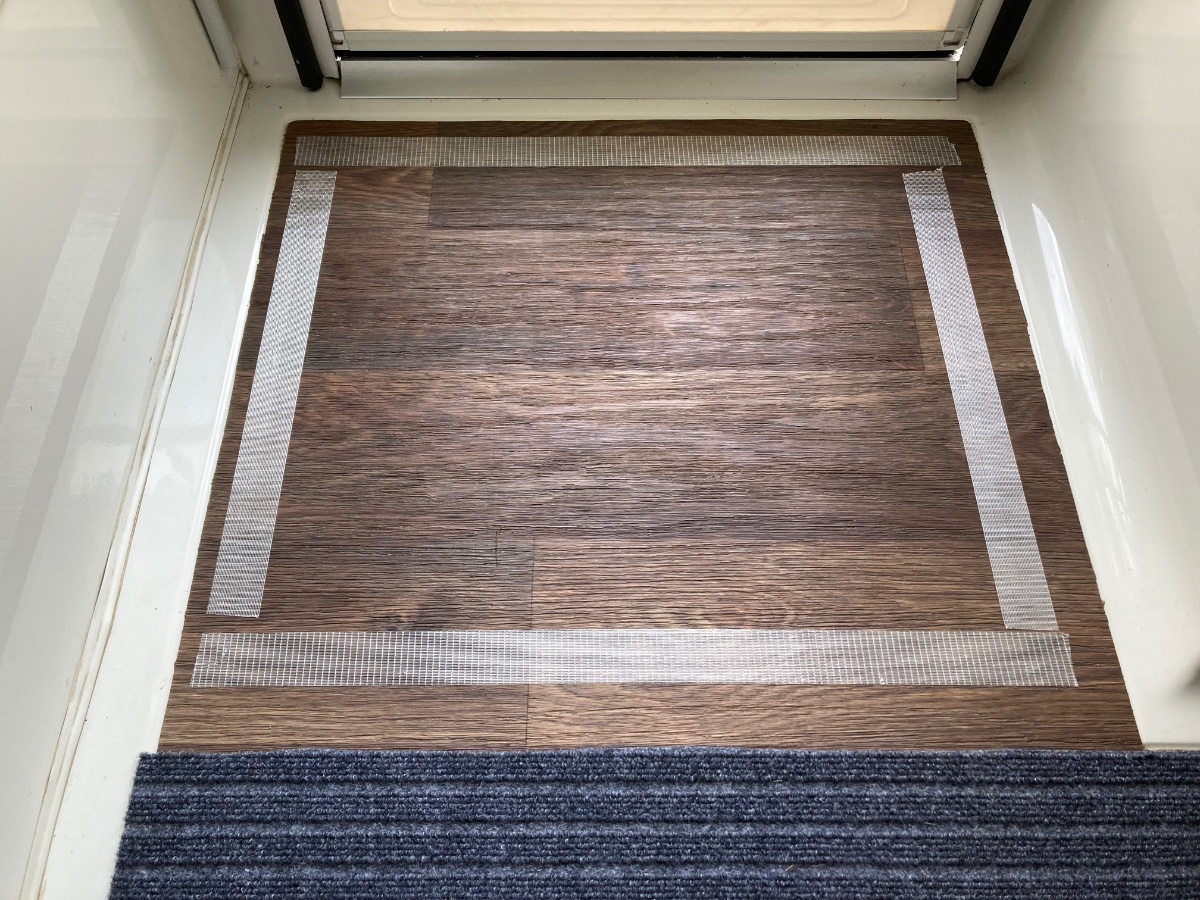
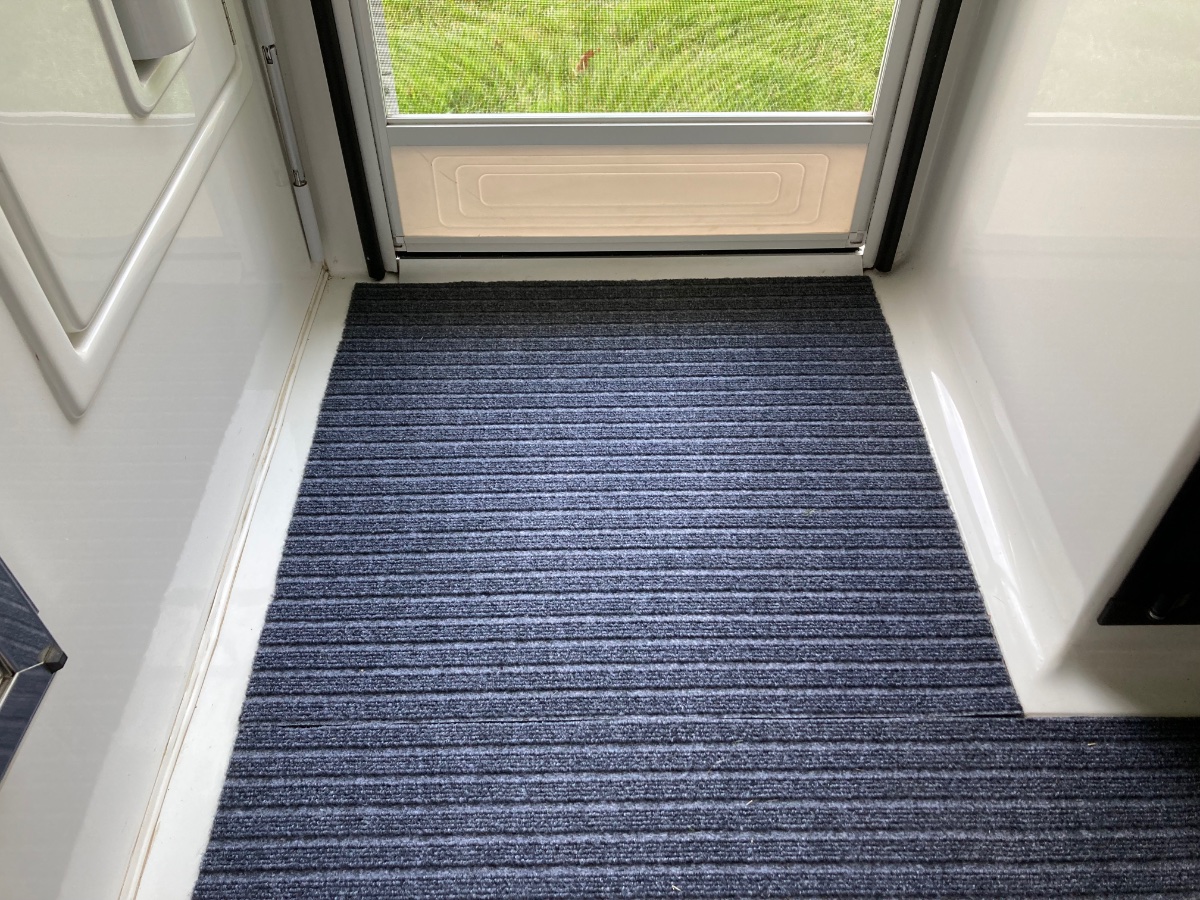
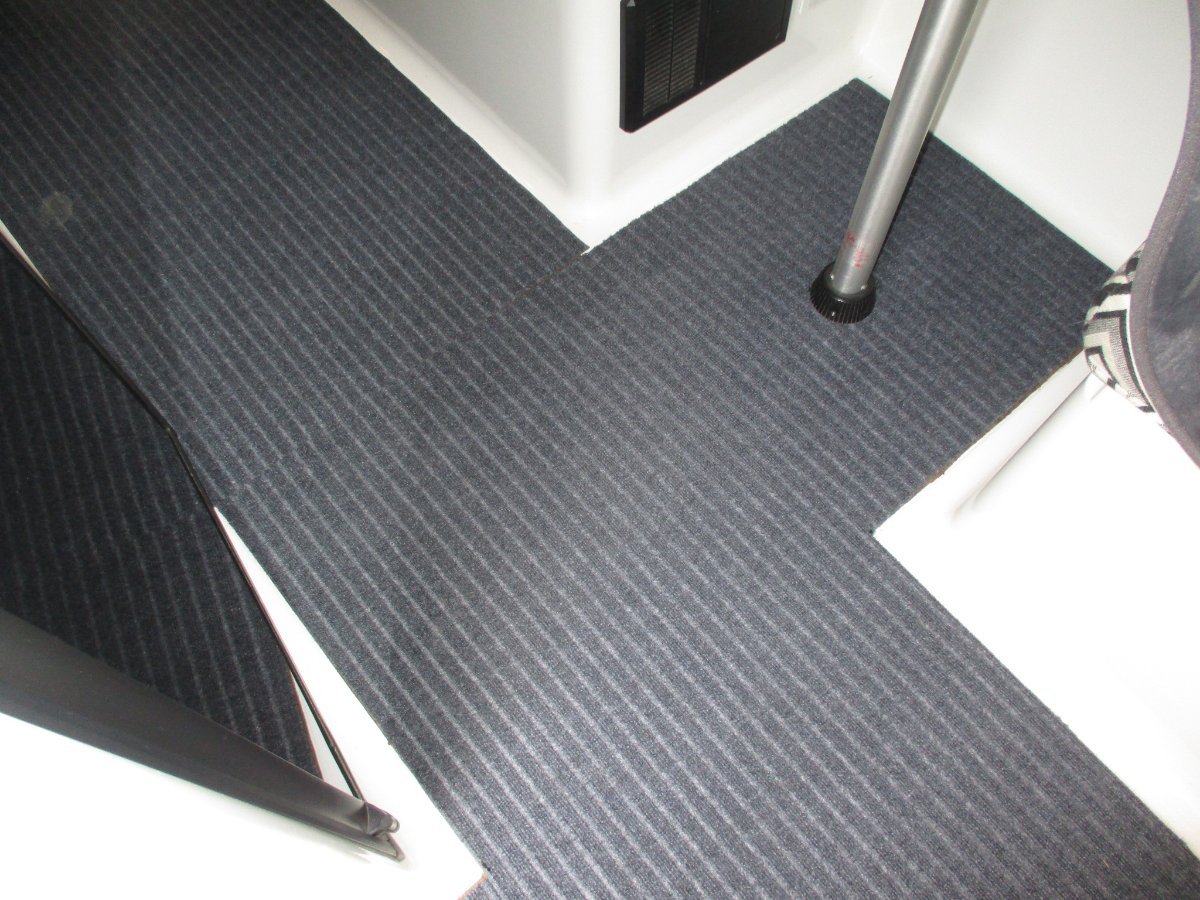
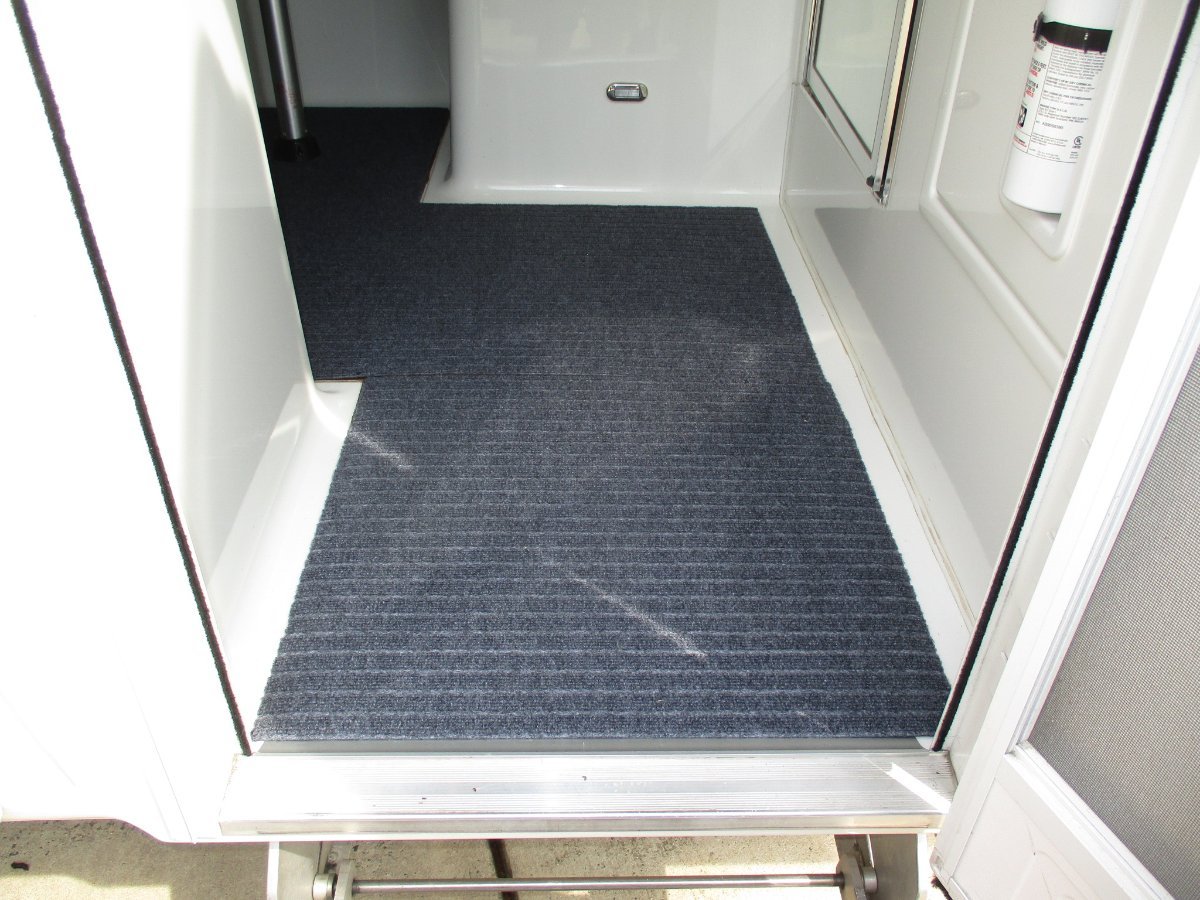
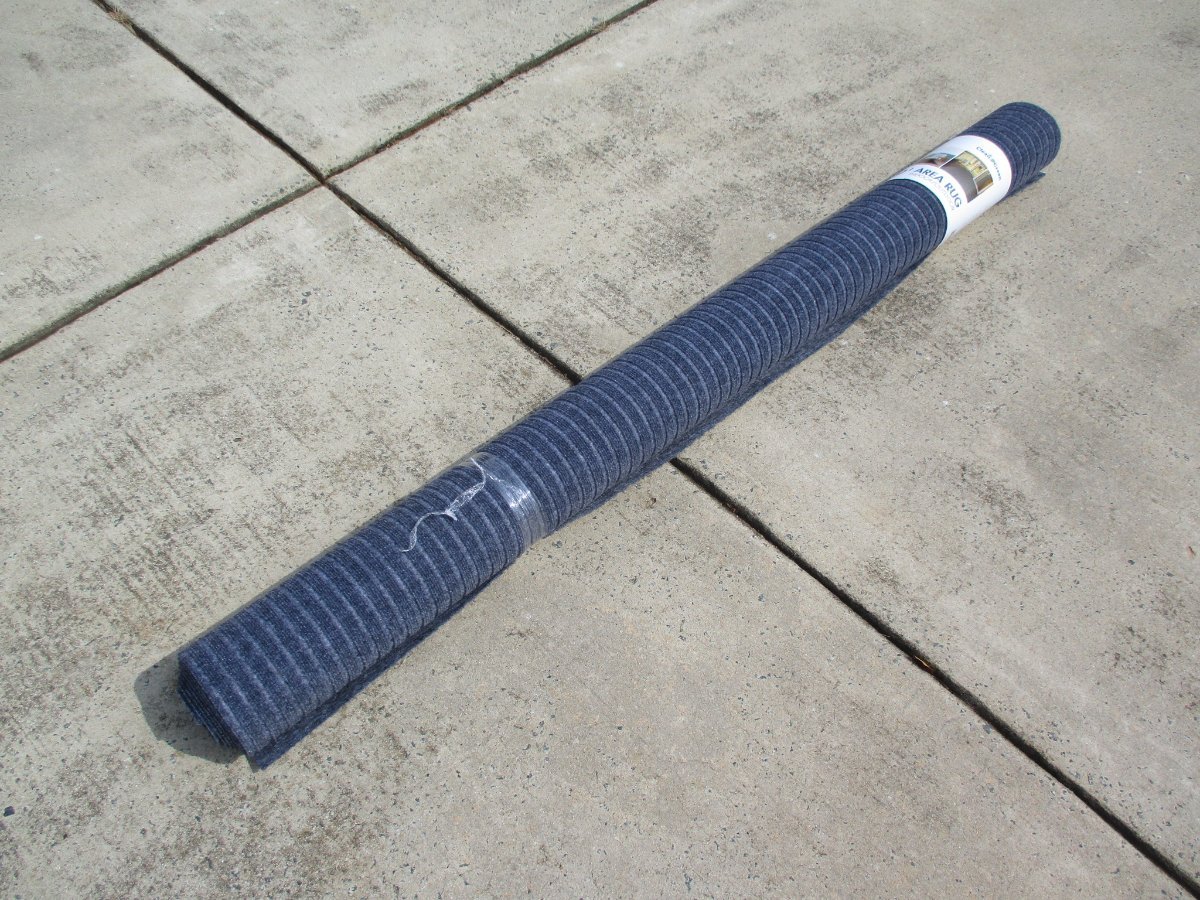
We really like having carpeting in Ollie, but the anti skid material did not keep the carpet in place very well. Decided to install carpet tape between the original floor and carpet. The tape works great securing the carpet and did not take long to install. We have an extra roll of carpet, for when we need to replace it, too.
4 points
-
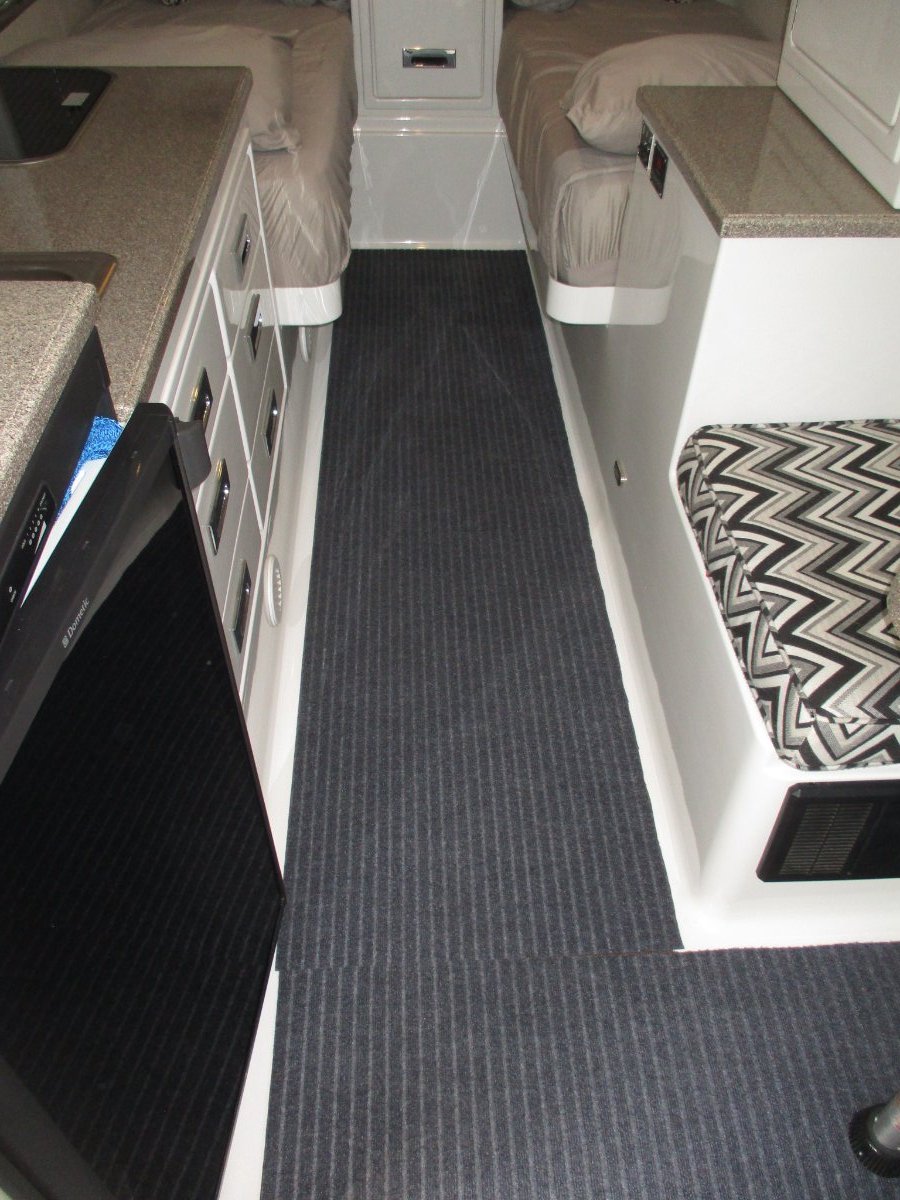
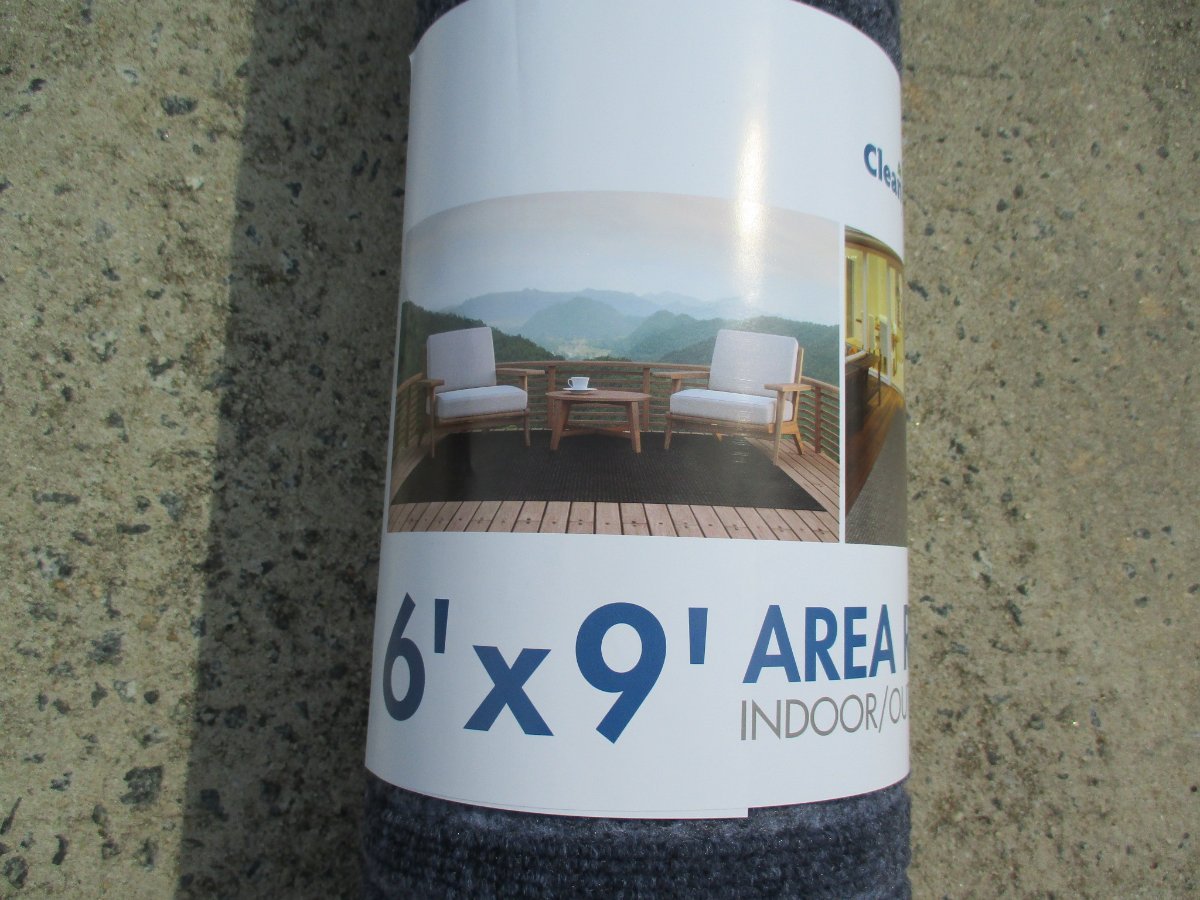
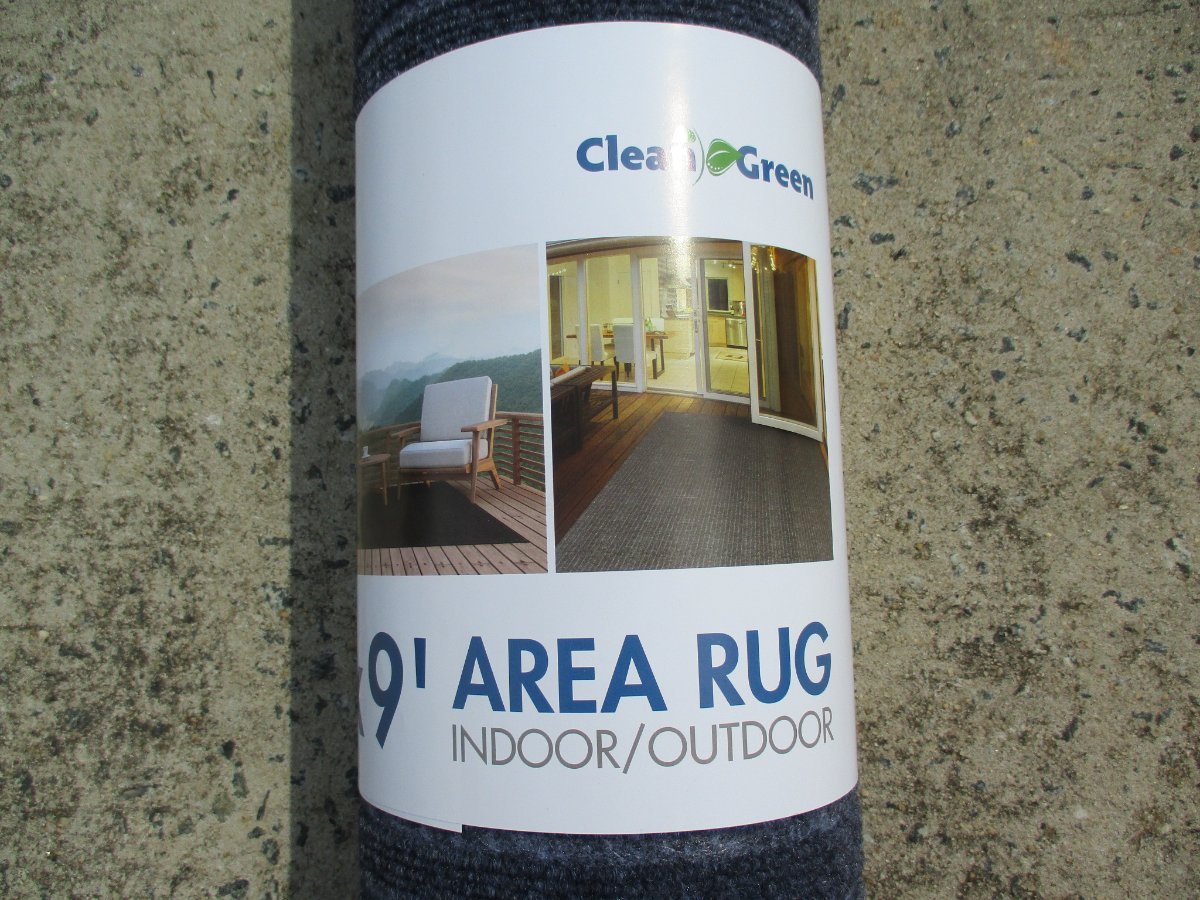
We purchased a lightweight 6X9 indoor/outdoor carpet to use at home for $19.99 at Costco, it's been on sale for as low as $16. Debbie wanted to try it in Ollie. We purchased another roll for Ollie and cut out three pieces for use over Ollie's Vinyl floor. Had use anti skid rug material under the carpet to keep from slipping. Will see how it works out!
3 points
-
FYI: We had a similar condition where there was 35-40psi at the spigot, the water pump would run when a sink valve was open (so we knew it wasn't air locked), but flow was weak (if any) from the toilet, showers, bath/kitchen sinks. We went around to each point of usage and cleaned out debris which had accumulated at the mesh screens - including the one at the rear of the toilet. The debris appeared to be a white substance possibly calcification from a water line on the downstream side of the water pump. Don't know for sure. Anyhow, after removing the blockages - we no longer have "low-flow sadness."3 points
-
Disconnect the hose from the outside (or at least shut off the water source), shut off the pump, get some towels and look under the curb side bed at the pump (where the valves are to change configuration for boondocking etc.) On the inlet side of the pump is a clear plastic cup-like structure that has a screen filter, unscrew the filter cap (clear plastic cup) and see if you have debris in the screen that need to be cleared. Put the towels down to catch the water that comes out when you unscrew the filter cover. Clean it and then put it back together, it doesn't need to be more than finger-tight. If that doesn't fix it then I'd call OTT in the morning. It may also be related to the back-flow valve which is on the inside of the line right after where you hook up the water hose (on the street side. If that's the issue than it should be under warranty and you'll want to open a service ticket.3 points
-
We spotted an EII with the name Miss Bertie on the Alcan Hiway 124 km south of the US /Tok border entry point. Hull 505 - Galway Girl3 points
-
Hoping someone here can help with this because the Oliver website appears dysfunctional. Tried repeatedly to login/register for the rewards program, but they system returns an invalid username or email address each time. Tried to reset password, same results. It gets worse. Then I tried to send an email to customer support, only to find out I had to check one of the items as a perspective customer. My hull # is 70, so I don't need brochures a tour, or anything else. Does anyone here know how to resolve this issue.? Thanks Rob2 points
-
There are one way check valves on each of the inlets (fresh tank fill inlet and city water inlet). That check valve on the city inlet may be bad, or it may be clogged from contaminants or calcium buildup. Unfortunately it’s only accessible by removing the floor in the basement storage area.
2 points
-
If you have been connecting to the City Water Connections at campgrounds that have hard water you may need to do a vinegar flush as john Davies mentioned to clear the water lines. FYI, I believe this is something that OTT does as part of their yearly maintance service.2 points
-
Am I the only one that noticed that I-40 does not go near Paducah? Or am I not supposed to mention things like that? 😉 BL2 points
-
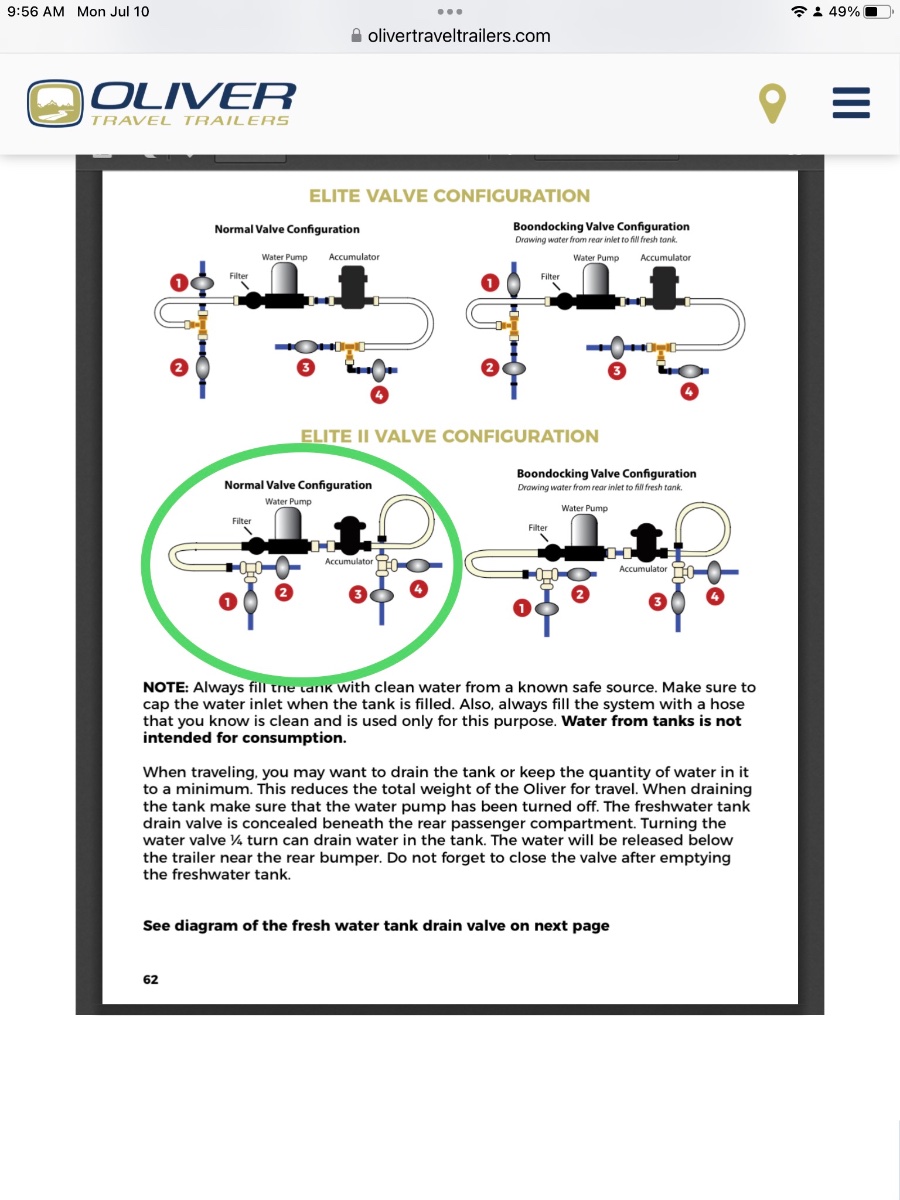
Are your water supply valves under the curbside bed in the correct positions? Do you have cold water at the outside shower while connected to the City water inlet? Mossey The following is from the OTT LEII owners manual.
2 points
-
Hi Rob! Sorry you are having trouble with it. The login for the website and forum are different. The Rewards Program has a specific registration process. You can find a link here to sign up for the Rewards Program : https://olivertraveltrailers.com/rewards-program/ or go direct at https://olivertraveltrailers.com/rewards-program/signup/. There a few videos we have posted here as well. Let me know if you are still having issues. Matt Duncan1 point
-
This is the rack I have and it works well for my needs. When researching for a rack, the Let's go aero was the only rack I could find which has 1 1/4" AND was rated for use on the back of. travel trailer (not just the back of a RV, which is a different rating). You will notice that the Lets go Aero rack is also the rack used in Oliver literature when shown hauling bikes. Good luckj with whatever you decide https://www.amazon.com/Lets-Go-Aero-BikeWing-2-V-Rack/dp/B09JGTYKDG/ref=sr_1_8?crid=1W9247BM44XEC&keywords=lets+go+aero+bike+rack&qid=1689030499&sprefix=lets+go+aero+bike+rack%2Caps%2C372&sr=8-8&ufe=app_do%3Aamzn1.fos.f5122f16-c3e8-4386-bf32-63e904010ad01 point
-
If that is working, I suggest, til you "get back to civilization,: that you simply work from the tank, as we do. Change up the incoming source to tank fill. Can't leave it running 24/7, or you'll have a huge mud puddle under the trailer. Fill the tank til overflow starts, and turn off water supply. Good luck.1 point
-
End of story... reprised the pump and have plenty of pressure at all outlets when using fresh water tank. City water still a trickle. OTT suggested getting a winterization hand pump and doing a vinegar flush thru city water inlet. This will have to wait until we get back to civilization (or find a hand pump to borrow). May try pouring vinegar into a hose hooked to city inlet then force it thru with city water pressure. We'll see. Thank all for suggestion!1 point
-
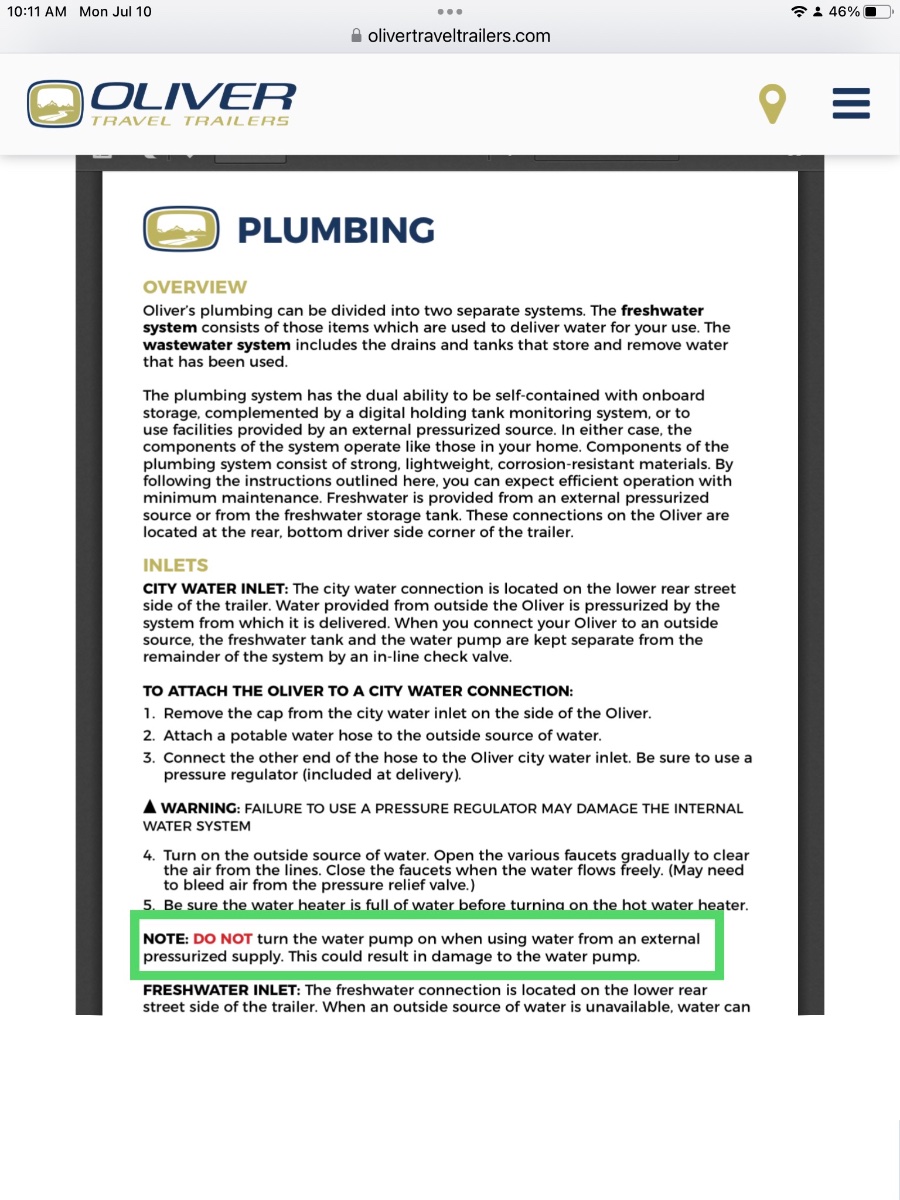
You should not have the pump turned on with city water connection. (See @mossemi post.) When we get airlock in the cabin cold springwater system, we turn only one cold faucet at a time. It starts slow, then goes on. Trickle eventually turns to a stream. It may fill your greywater, so be careful there. You can leave grey water valve open, not black, if on full hookups, connected to septic. If you've truly checked screens, and have no debris, airlock is the most likely culprit. Especially if you've always used softened water, heretofore.1 point
-
Pump primed as suggested. Now we have water from the fresh water holding tank but still no pressure when city water is connected?? Waiting g to hear from PTT1 point
-
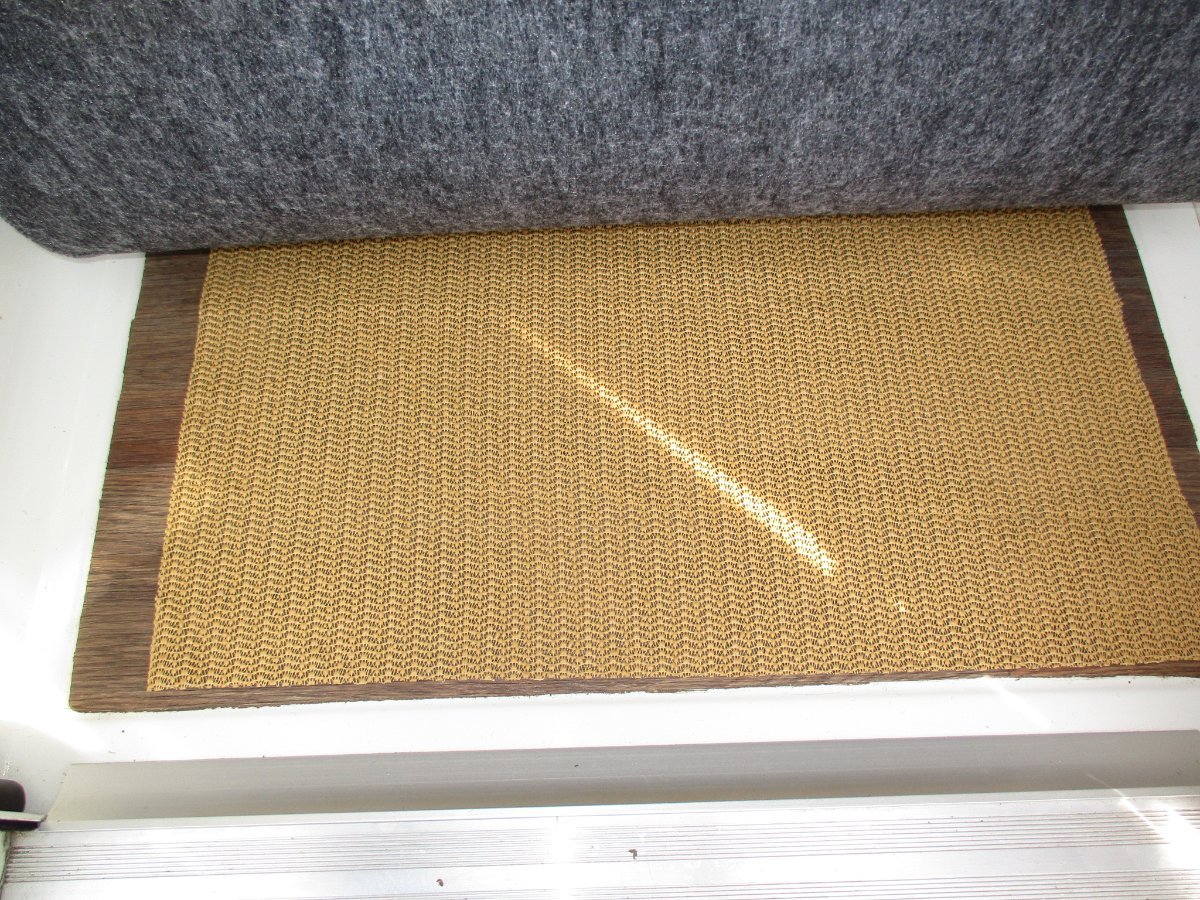
Thanks! We used to keep small rugs where you step off of the beds before installing carpet. We like how it feels to walk on carpet barefooted and stepping out of bed onto carpet, especially on cold mornings. 🙂 We still keep a rubber backed carpet mat at the door entrance over this carpet, for water and debris. Here's another idea how to keep carpet clean from another Ollie Couple that's not active on this forum: They said it's OK to post photos of their step modification using expanded metal where they place their shoes under the door before entering Ollie. If I did this mod, would install a horizontal piece of expanded metal without the piece bent vertically attached to the frame.1 point
-
Thanks will try to prime pump as you suggested. Not sure that will help the no flow on city water but the pump/fresh water tank needs to work too!1 point
-
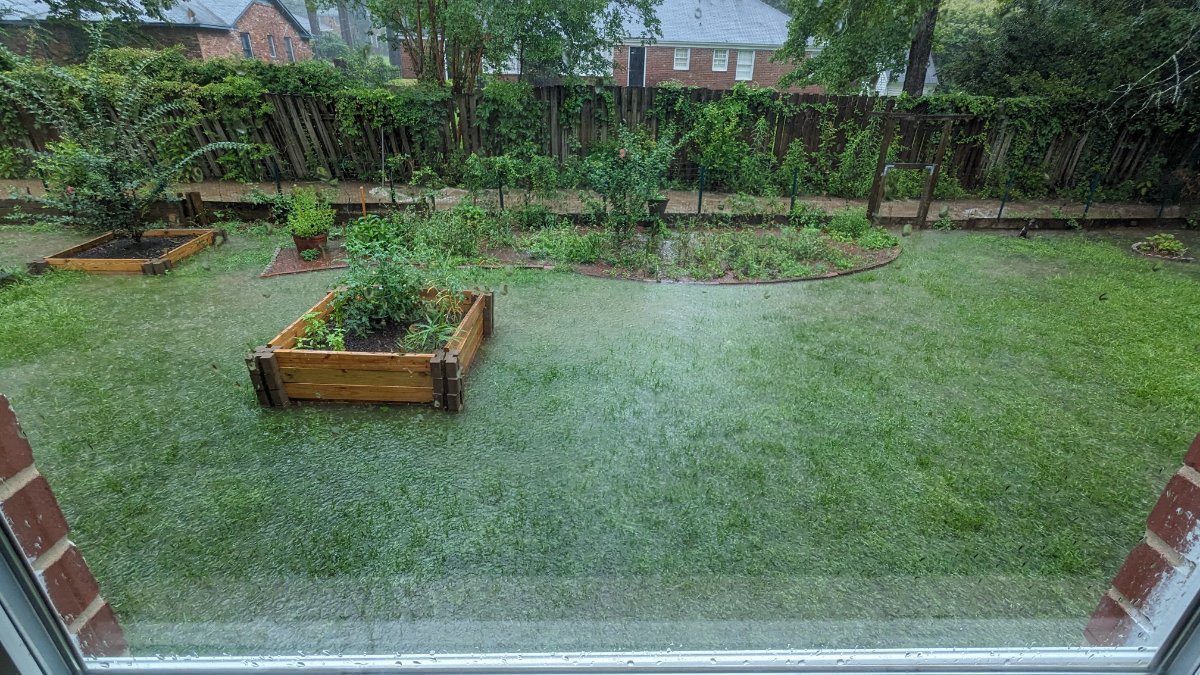
Wow! I will see how good of a job I did on resealing the door after today. It's absolutely and utterly pouring rain outside and looks like it will be for most of the day. This was a lot of rain. Another update to come.... 🌊 After this rain, I checked the camper, and not a drop. All good!
1 point
-
The new carpet looks fantastic. How does it feel underfoot? Just curious...1 point
-
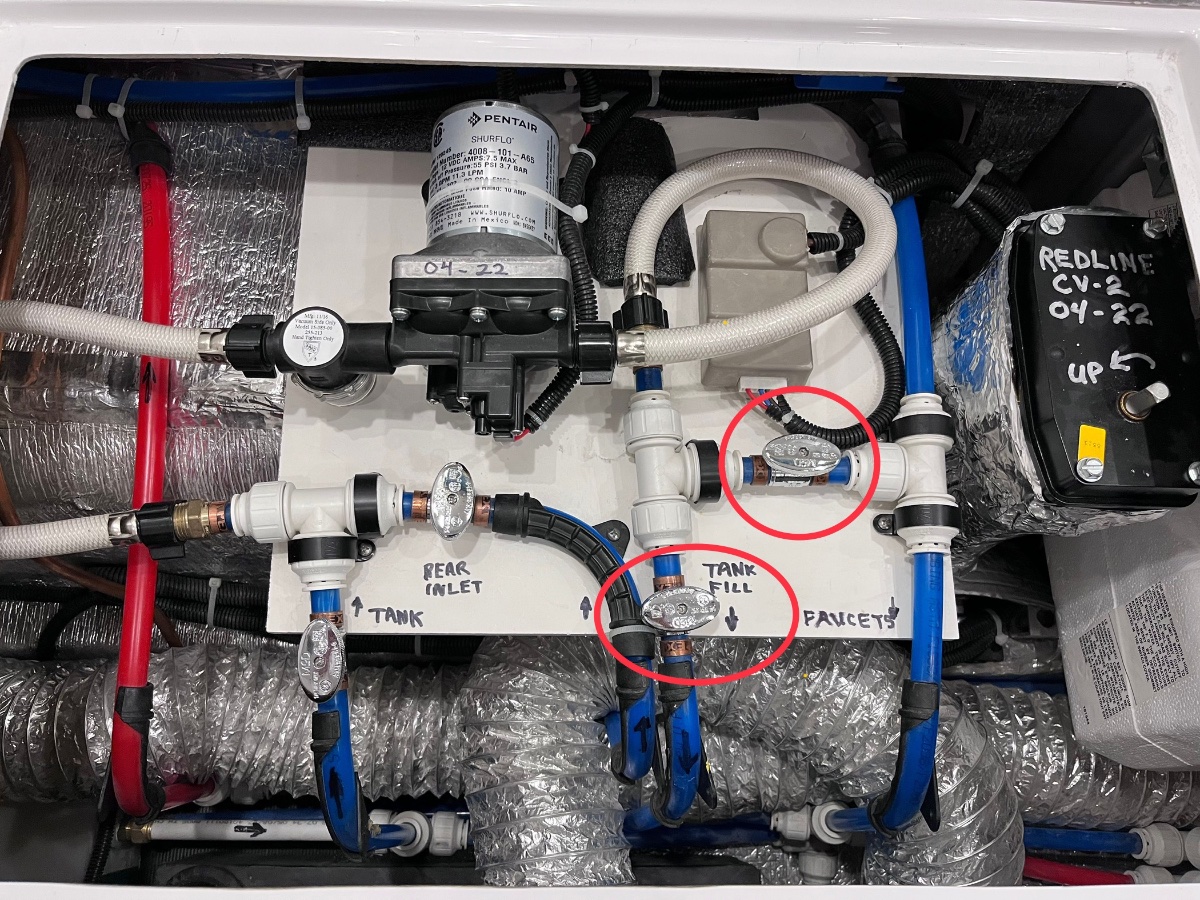
Is the water pump running all the time when turned on? If so it is airlocked. You need to get water into its inlet hose. The easy fast way is to close the faucet valve and open the tank fill valve. This is from Hull 218, your arrangement may look different. This creates an open loop path for the water - tank to pump to tank. It allows the system to bleed out any air by releasing the bubbles into the tank. If that doesn’t do the trick, remove the inlet hose at the tee fitting and manually pour in some water and reconnect it. If that doesn’t do it, your pump has failed. Because the Ollie tank is so long, and the water is literally sucked out close the rear, it often gets air in that hose when traveling with a partially full tank (as the water sloshes around). This may not be related to your problem, but you need to know how to fix the airlock if it doesn’t correct itself by opening the sink faucets. Changing the pump is simple but does require making two crimped wire connections. John Davies Spokane WA
1 point
-
Hello Ollie. Saw you at Grand Rivers, KY. We were camping not too far away at LBL. Stopped for a burger at Green Turtle Bay, but kinda wish we were having Conch fritters at Green Turtle Cay. Safe travels.
1 point
-
Thanks John and Art, Diane, & Magnus. I'm proud of our maiden voyage! Except that we had to leave a day earlier than planned due to my wife's allergic reaction to the burnt pine (this area has had major burns, 20 years ago and some more recent). The tall Ponderosa pines still standing in the area all had burnt bark 15-20 feet up their trunks, from years ago (see pic above). We were prepared, had a tank of back-up water and everything needed. No-way the Bigfoot 29SL Class-C we just sold would have made it up the path to our beautiful campsite! RV manufacturers have no business building a Class-C greater than 24' on the Ford E-450 chassis, and the gas guzzling Ford V10 would get up to a good 30 MPH up our steep Arizona mountain grades. We were also always over GVWR with added leaf springs and more suspension upgrades. For a short moment, after buying our Oliver TT, I thought our Lexus GX 4.7L truck could pull this. It did OK around town with the Anderson hitch, but is a half-ton truck really enough? Probably good if you travel flat lands at sea level, but NO not for up here. I sold an '03 Dodge RAM 2500 Cummins, that we had since new, just last year. Didn't think I needed the big truck anymore. Anyway, that one was needing repairs it was silver! So lucky us, just the week after we bought our Ollie this well-kept Ram was on our local Craigs in EC. The Cummins in '01 was not as strong as '03 and newer models have much more torque. But this older diesel is the perfect recipe for pulling an Olliver Elite II. Nothing like a diesel to pull up a mountain. In '05 we pulled a 26' race car trailer, packed with all of our household belongings, moving from VA to AZ, and we only slowed down on I-17 heading out of the Verde Valley in AZ. I thought, this is why semitrucks are always in the right lane with flashers on! Truck and trailed combined weight were over 21K lbs, a bit over the stated GCWR! On the way home, we weighed this truck & trailer. Happy to see total combined weight of 13,220 lbs, and GCVR (with trailer) for this Ram is 16K lbs. Went by our local dump station again a day later and truck weighed 7,220 (adjusted for weight of wife, dog, water used, etc.). This nets the Ollie at 6K lbs. So, my TV weighed in at 1580 under 8800 lb. GVWR and the Ollie 1,000 lbs. under. Of course, when we go for a longer outing, some more weight will be added. I like that we have a little more truck than we need.1 point
-
Don’t miss the Patti’s 1880’s Restaurant in Grand Rivers, KY just east of Paducah.1 point
-
I believe your bracket is like mine in that it is L shaped and does not have the added structural brace welded in the middle. I am hull 246, 2017. I am wondering if that matters. I know Oliver strengthened the brackets and I think the mounts in the fiberglass to handle the self supporting awning. Mine is the Girard with the fold out supports that connect to the lower trailer. If the dish is supported equally from the center of gravity, then it would be fine which I think it is. I just received mine a few days ago and it weighs 9.2 lbs. I do not see any cantilever issues but would like a second opinion. Wouldn't want it pulling away from the trailer over time. Thanks.1 point
-
Thanks for pointing that out! I assume that’s to prevent alternator charging. Mossey1 point
-
Not if you have a factory lithium package. They don't connect that 12v pin to the batteries. We used to carry a 7 pin socket wired that way for use in an emergency. If you had to leave your trailer on the side if the road at night because of a breakdown it would light the running lights while you were gone. (Should have incorporated a flasher unit, now that I think about it...)1 point
-
Now I have another test to run in the morning! Never stop learning when it comes to a new Oliver. Thanks for sharing Steve!1 point
-
@rich.dev, you are good! I didn't realize there were different key options for the various latches! Thank you!1 point
-
Some time ago, this was discussed in detail but alas, the forum search function is still not all that functional.... The belly band came off in our bathroom a few years back and I reattached it as described below with no further issue. Good prep/cleaning is vital for good adhesion. Depending on what cleaning products have been used by owners on their interior, there may be silicone and/or waxes present on the gelcoat. From the factory, there could be other contaminants. After removing the loose band, I cleaned the area with MEK and a white scotchbrite pad, then gave a final wipe with more MEK and a microfiber towel. There are lots of ways to go about cleaning, but it will require a solvent based cleaner like MEK or the 3M cleaner John Davies showed above, or something similar that leaves no residue, and thoroughly clean off any contaminants. For the tape, I used 3M Super Strength Molding Tape: https://www.amazon.com/Super-Strength-Molding-Tape-03614/dp/B002JOVUO0/ref=sr_1_1?crid=QB28U5VAKS9&keywords=3m+03614&qid=1687388031&sprefix=3m+03614%2Caps%2C165&sr=8-1 I did not remove the old tape, but did "clean" it with a few wipes of MEK. The tape is only .043" thick (1/32+) and I did not notice it made the band stick out or create a space between the hull and the back of the band. IIRC, the band is slightly concave in the back so that helps. The tape is 1/2" wide and I ran a strip along the top and bottom of the band (like it was done from the factory). Before sticking the band to the wall however, there is an important step not to be missed, and that is to first wipe down the contact area of the hull with 3M Adhesion Promoter: https://www.amazon.com/3M-Adhesion-Promoter-Sponge-Applicators/dp/B07MVK1PG6/ref=sr_1_2?crid=HCJKV1Q09VD1&keywords=3m+4298&qid=1687388387&sprefix=3m+4298%2Caps%2C203&sr=8-2 I used small blue tape pieces on the hull for reference marks so I could focus on attaching the band and not worry about it being straight. Try to compress the band a little going around the corners. Peel the backing off the tape as you go. Having a helper makes the process a lot easier. That was my process and it has worked well so far. Good luck! Dave1 point
-
I have the RV dish and the cable appears to be a normal Cat 5e. I used regular RJ45 connectors ordered from Amazon and they work without any problems.1 point
-
Share and Enjoy !Shares Traveling with an RV is a great way to explore the open road and see all that this beautiful country has to offer. But before you hit the highway, it’s important to make sure your motorhome is stocked with all of the essential items needed for your journey. From medical supplies to survival gear, having these items on hand can help you be prepared for any unexpected situations which could arise while you’re out on the open road. Medical Supplies Having medical supplies on hand is incredibly important, especially if you’re planning a long trip where access to hospitals and doctors may be limited. Be sure to include items such as prescription medications, bandages, antiseptic wipes, and any other items that you or someone in your party may need during an emergency. Additionally, it’s always a good idea to have some form of health insurance identification available in case of an unexpected medical situation while on the road. Survival Gear No matter how prepared you are, there’s always the chance of an unexpected situation occurring while on the road. That’s why it’s important to have some basic survival items in your RV, like a compass, whistle, and water-purification tablets. Additionally, if you plan to explore more remote parts of the country, it may be worth investing in a satellite phone and basic first-aid kit for extra security. Portable Water Filter Water is essential for any RV trip, so it’s important to have a portable water filter in your motorhome. This will help ensure that you and your family always have access to safe drinking water no matter where you are. Additionally, if you’re traveling in an area with limited resources, this can also be a great way to conserve water. Personal Care Items When you’re on the road, it can be easy to forget some of the personal care items which are essential for a safe and comfortable journey. Make sure you’ve got plenty of toiletries like toothbrushes, toothpaste, soap and shampoo as well as other grooming items such as razors and shaving cream. These may not seem like emergency items, but if a situation does occur and you end up on the road longer than expected, you'll be glad you had them stocked. Automotive Care Supplies No matter how well you plan, there’s always a chance that your RV may run into some mechanical issues while on the open road. To be prepared for any situation, make sure to keep an extra set of automotive supplies in your motorhome such as oil, coolant fluid, tires, and jumper cables. Additionally, it’s always a good idea to have an emergency roadside kit in case you end up stranded. Flashlight & Batteries Having a good flashlight inside your travel trailer is essential, especially if you’re traveling at night. Be sure to have some spare batteries in case the light suddenly goes out while using it. Additionally, it’s a good idea to bring extra lights that you can use for exploring in the dark. Having a few headlamps on hand is also a good idea in case you need to work on your trailer at night and need both hands to do so. First Aid Kit You never know when an accident may occur while out on the road, so it’s important to have a well-stocked first-aid kit in your RV. Items like bandages, gauze, antiseptic, and tweezers should all be included in your kit. Additionally, if anyone in your party has any allergies or chronic medical conditions, make sure you pack the necessary medications and equipment for those as well. Emergency Blanket & Extra Clothes Having an emergency blanket and extra clothes on hand can help significantly if you’re ever stuck in an unexpected situation. The blanket can provide extra warmth and comfort, while the extra clothes can help protect against any sudden changes in weather or temperature. Plus, if you're out on the road longer than you expected, having clean clothes to wear will make the experience much more enjoyable. Water & Non-Perishable Foods Having water and non-perishable food items is essential for long trips away from campgrounds and convenience stores. Make sure to stock up on items like energy bars, dried fruit, canned tuna and other protein-rich snacks that will offer you and your party the necessary sustenance while in an emergency situation. Fire Extinguisher It may seem unnecessary, but having a fire extinguisher nearby can be lifesaving if a sudden flame occurs in your RV. Make sure to check the expiration date on the extinguisher and replace it if necessary. This is also helpful if your campfire gets out of hand and you need to put it out quickly. The last thing you want is to start a forest fire, so having an extinguisher nearby is always a good idea. Tools & Necessary Fluids Having some basic tools like wrenches, screwdrivers, and a tire pressure gauge can help you in case of a sudden mechanical problem with your RV. Additionally, having essential fluid replacements for your vehicle on hand is also a good idea, as this can help keep your engine running in case of an emergency. Portable Generator A portable generator can be incredibly helpful if the power goes out suddenly at your campsite. Having a backup source of electricity available gives you peace of mind that you won’t be left in the dark if any unexpected issues arise. Physical Maps & Directions to the Nearest Hospitals When you're out camping, you'll often be in situations without cell service – which means you won't have access to Google Maps. To make sure you’re always prepared, it’s a good idea to store physical maps and directions to the nearest medical center in your RV. That way, if anybody needs medical attention while on the road, you know exactly where to go for help. Final Thoughts Having essential items in your RV is a must when out on the open road. From medical supplies, to emergency blankets and tools, stocking up on these items can help ensure that you and your family are safe in case of any unexpected situations while traveling. Additionally, having proper survival gear and non-perishable food items is always important for longer trips away from convenience stores and campgrounds. Having these items at all times will provide you and your family with the necessary safety and security while out on the open road. Share and Enjoy !Shares The post Emergency Essentials to Keep in Your RV appeared first on Oliver Travel Trailers. Read the Full Article1 point
-
Share and Enjoy !Shares If you’re ready to take your travel trailer to the next level, you’ve come to the right place! DIY upgrades can make your trailer feel like home and make your travels even more enjoyable. Upgrading a trailer can be a daunting task, but with a few simple projects, you can make a big impact on the look, feel, and functionality of your rig. Here are some ideas for simple DIY upgrades to your travel trailer that you can complete in a weekend or less. 1. Add Outdoor Lighting Outdoor lighting can make a huge difference in the overall look and feel of your trailer. Solar-powered landscape lights are a simple and affordable solution that can add a touch of elegance to the exterior of your trailer. You can also install motion sensor lights to improve the security of your trailer while you’re away. 2. Upgrade Your Bedding A comfortable bed is essential for any successful camping trip, so don’t skimp on your sleeping setup. Upgrade your bedding with a mattress topper, cozy blankets, and a set of new pillows. You can also add a few decorative touches like wall hangings and throw pillows to give your trailer a more homey feel. 3. Install a TV If you’re looking for a way to stay entertained on the road, consider installing a TV in your trailer. You can find a variety of sizes and styles, so you’re sure to find the perfect fit for your space. This upgrade is especially helpful for families with children, as it can provide hours of entertainment. 4. Upgrade Your Kitchen Cabinets If your kitchen cabinets are looking a bit dated, give them a makeover with a few simple upgrades. Start by replacing the cabinet hardware with something more modern and stylish. You can also paint the cabinets and add decorative embellishments to give them a fresh look. 5. Add a Shower Adding a shower to your trailer can make all the difference in your camping experience. You can find a variety of shower kits that are designed to fit in small spaces, so you don’t have to worry about sacrificing too much storage space. If you’re feeling really ambitious, you can even install a hot water heater to make your shower even more enjoyable. 6. Upgrade Your Curtains Curtains are a simple yet effective way to make your trailer look more stylish and inviting. You can find a variety of fabrics and styles to choose from, so take some time to pick out something that fits your style. This upgrade is also great if you’re looking to improve the privacy of your trailer. 7. Add Decorative Accents No matter how small your trailer is, you can still add a few decorative touches to give it a more homey feel. Consider adding a rug, wall art, and other small accents to make your trailer feel more inviting and cozy. 8. Replace Cabinet Hardware Another DIY upgrade that can be done on a travel trailer is replacing the cabinet hardware. This is a great way to give the trailer a more modern look without breaking the budget. Consider replacing the cabinet handles and knobs with more stylish options such as brass, chrome, or nickel. To get started, measure the size of the existing hardware and then look for replacements that will fit. Once the new hardware has been purchased, it is as simple as unscrewing the old hardware and replacing it with the new one. 9. Replace the Flooring An easy way to upgrade your travel trailer is to replace the flooring. You can use peel-and-stick tiles which come in a variety of colors and patterns, so you can customize your trailer to fit your style. You can also opt for a more durable vinyl or laminate flooring, which is easy to install and can even be waterproof. This type of flooring will give your travel trailer a more modern feel. Twin Bed Floor Plan Walkway 10. Upgrade the Exterior A fresh coat of paint can do wonders to update the look of your travel trailer. Consider painting colorful stripes, or adding unique decals or stickers to make your trailer stand out. You can also replace the old tires with new ones, or add awnings or window coverings to give your trailer a more personalized feel. Final Thoughts These are just a few ideas for simple DIY upgrades to your travel trailer. With a little bit of planning and a few tools, you can make a big impact on the look and feel of your rig without breaking the bank. Have fun and be creative with your upgrades, and you’re sure to create a trailer that you’ll love for years to come. Contact Oliver Travel Trailers for Your Trailer Needs Oliver Travel Trailers is the premier destination for those looking for a high-quality travel trailer. With a wide selection of models to choose from, there is sure to be one that fits your needs and budget. Oliver Travel Trailers are built to last, with high-grade materials and craftsmanship that stands the test of time. Our expert team of sales staff and service technicians are knowledgeable and always willing to go the extra mile to ensure that you have the best experience possible. In addition to our superior travel trailers, Oliver Travel Trailers also offers a variety of accessories and parts to enhance your experience. Whether you need a new awning, hitch, or custom interior, we have it all. We also provide excellent customer service, with friendly and knowledgeable staff who are always willing to answer any questions you may have. With our commitment to excellence and unbeatable prices, Oliver Travel Trailers is the perfect place to purchase your next travel trailer. Stop by today for more information! Share and Enjoy !Shares The post Ideas for Simple DIY Upgrades to Your Travel Trailer appeared first on Oliver Travel Trailers. Read the Full Article1 point
-
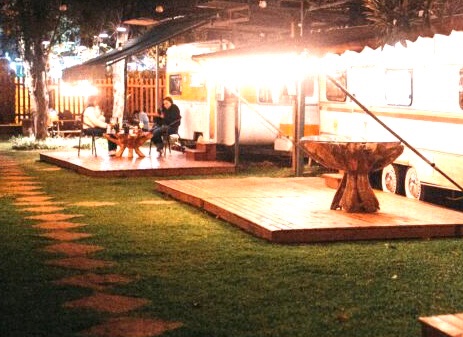
Maybe this is camping sites of the future, put your trailer inline front to rear and we will bring you your deck by forklift. trainman1 point
-
Obviously, not talking about an Oliver. These are posts I normally just fly through.1 point
-
Notice they trailers are nose to tail, so it is a pretty and artificial photo set. And no wear on the decks…. Maybe because they are just resting haphazardly on fresh cut grass and not real. Or is that AstroTurf? I did promise not to say anything negative, so this is as far as I go. I hope everyone is having a great weekend. John Davies spokane WA
1 point
-
Wow, wood decks, not concrete, or dirt. trainman1 point
-
We have been to Zion NP and it’s an amazing place! Now we want to go back with our Oliver in tow! Thanks for the reminder and write up! Patriot🇺🇸1 point
-
This looks like a great setup you have created. I have decided to follow you lead and do the same. I was wondering if you cut your cable and installed the RJ45 connector prior to fishing it from the attic down to the basement compartment and, if so, what length of cable did you cut it to? Or, if you routed the entire 75 ft. down between the shells and then cut the cable to suit and then installed the RJ45 connector? Either way, I am curious as to how much of a hassle you experienced fishing that cable down between the shells?1 point
-
Thanks for posting. My question is what type cable connects the TV from the router? And since you didn’t connect to the Furrion radio, are you able to play over the 4 speakers. Using Starlink are you able to stream from different channels same as a Roku or Apple or do you still need one of those devices? I have tried to connect my Apple TV to the HDMI port on the TV where the Furrion radio connects but the TV doesn’t read it. And there is only one rear HDMI on the Furrion. The newer replacement Furrion has an HDMI port on the front but I am unsure if it would work or not. I am looking into getting Starlink but still researching. Any answers much appreciated.1 point
-
John, I agree with all you’ve said but the world is filled with idiots and apparently there is one among the owner’s because that is exactly the reason that the engineering change was done.1 point
-
That looks like a great solution to me. But go ahead and follow your instinct; cut off the ears and grind them smooth. As it is now, it shouts TRAILER HITCH. See above comments about morons towing stuff behind their Ollie. You don’t want to tempt a future owner! I really like the Duplicolor ceramic caliper paint, it requires no primer and once cured, about a week) it is tough as nails. It goes on beautifully and flows out smoothly. John Davies Spokane WA1 point
-
Oliver can't fix STUPID. So why treat all of as if we are? I'm with you JD!1 point
-
That is a pretty harsh statement, but I happen to agree with you 100%. Stickers can easily be removed in a few minutes, Oliver should instead provide a proper heavy wall 2” receiver, and STAMP or LASER ETCH DEEPLY the weight and use limitations into the top surface of the receiver. Then let the user decide what to plug in there. An owner may say, “Oh, the label came off, I did not know!” It is pretty hard to say that with deep cut letters, you would literally have to grind them off….. Let the customer accept all liability for what gets plugged in…. just like this coupler. I personally think that the receiver part should be stainless steel, but at this point in the discussion, that is splitting hairs. As a side note, IMHO somebody stupid enough to tow a car or trailer behind an Ollie will just add an extra step down adapter anyway, regardless of the receiver hole size. Making an engineering change like this one based on one fantastically dangerous customer makes no sense to me at all. John Davies Spokane WA
1 point
-
This looks like a Catch-22. Oliver says to use an RV-approved bike rack. Our carbon-fiber bikes require wheel support, no hanging by the frame. But every RV-approved wheel support rack I've found has a 2" receiver bar. So, either I knock out the 1.25" liner in the Oliver hitch or I use a non-RV-approved rack. The good news is our bikes are very light so maybe the non-RV rack would be adequate? Cargo basket and riser hitch preclude bikes between truck and trailer. Truck bed is full. Don't want them in front, getting pummeled by wind and rocks.1 point
-
They still make Phil Wood grease? I'm still using a tube from my bike mechanic days from the mid-70s. 😉1 point
-
This information is great. Thanks ALL!!1 point
-
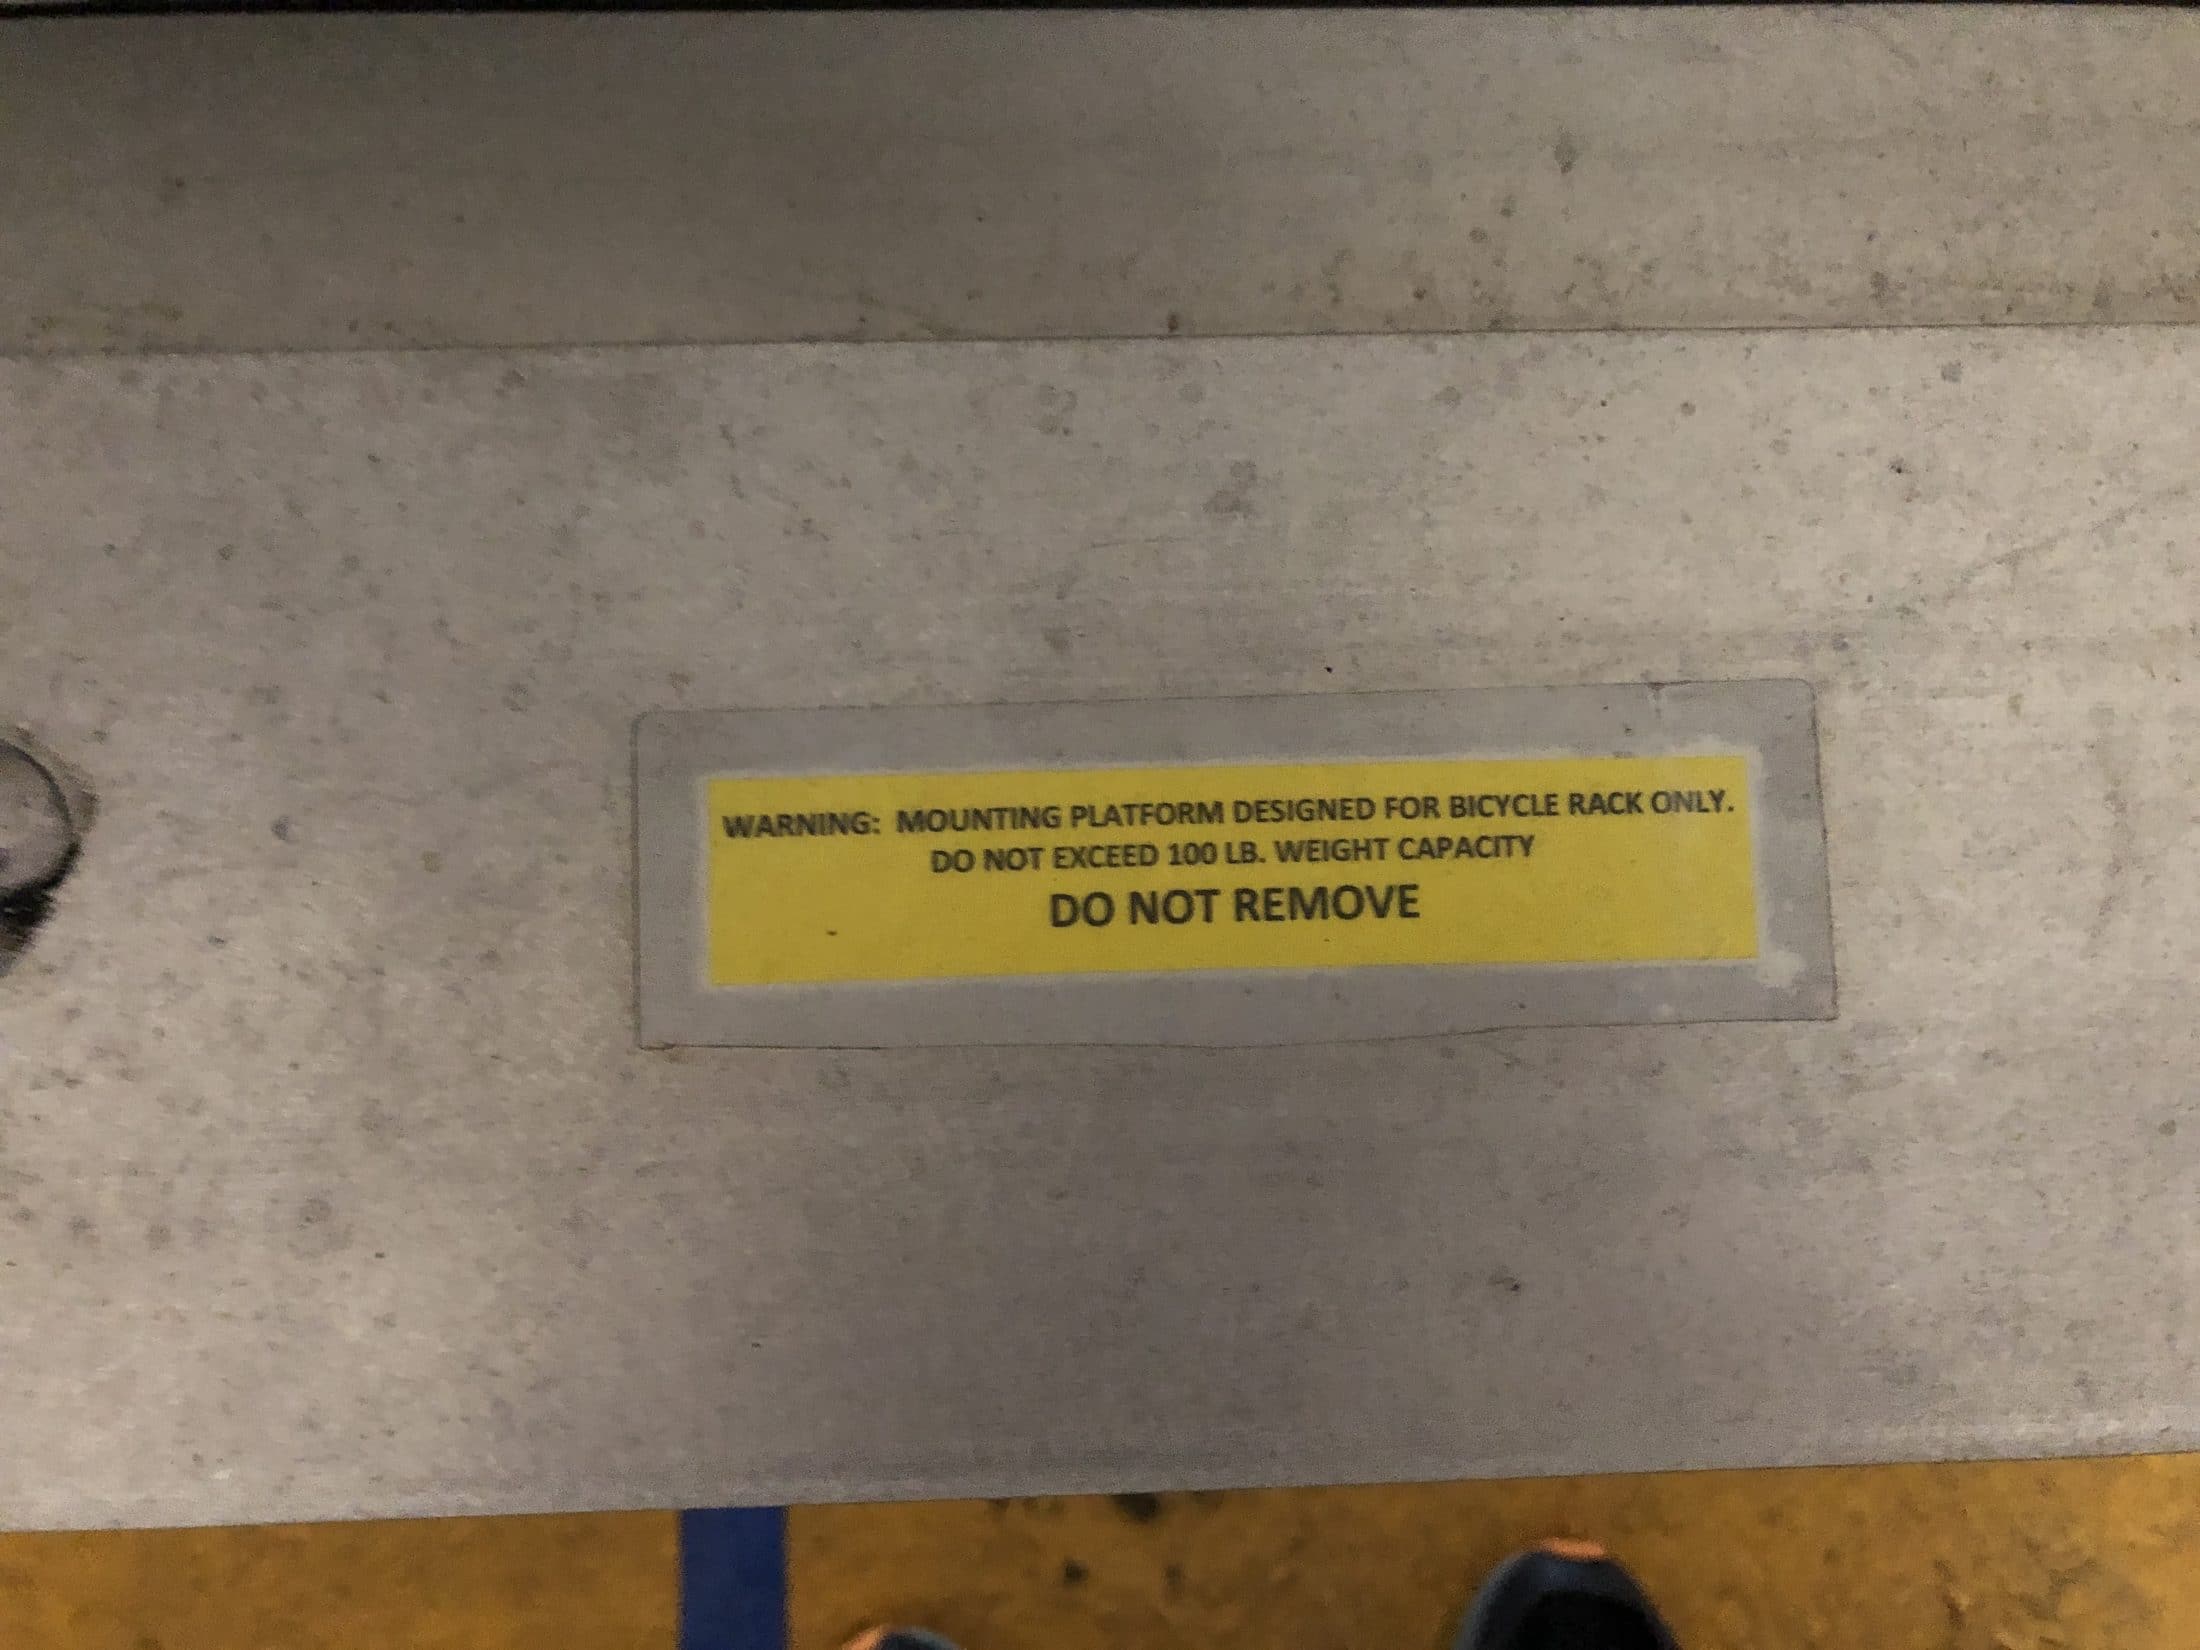
I have the Oliver Rear Bumper Bike Rack holder with the 2-inch receiver. They put a sticker on there stating a 100 lb weight limit.
1 point


-
Recent Achievements
-
")


")


")


